APNs
MDM/DDM communication relies upon Apple's APNs cloud service.
- Apple Push Notification Service
- APNs Certificate Creation & Renewal on macOS Computers (Keychain)
- APNs Certificate Creation & Renewal on macOS Computers (XCA)
- APNs Certificate Creation & Renewal on Windows Computers
Apple Push Notification Service
What
- Like to know a new message has been sent?
- Want to see how many messages are unread from the Home Screen, per App?
APNs is the Apple service FileWave uses to wake Apple devices for MDM/DDM check-ins. The device still contacts the FileWave server for the actual management commands; APNs only delivers the wake-up notification.
Push notifications allow apps to notify users with alerts, sounds, badges, or silent updates. Users control which notifications are visible or silenced in Settings.
Developers of apps that use APNs register their app with Apple and integrate the APNs token into their app server.
FileWave administrators generate the APNs token as part of the Apple MDM setup covered in the related certificate articles.
For APNs to work, the app and third-party server must trust Apple’s APNs service. Their trust stores must include the current Apple APNs root certificate.
APNs Certificate Update:
At times the Root Certificate used by APNs will require replacing, prior to expiry.
|
APNs Cert |
Service |
Up to Date |
From Date |
Expiry Date |
|
AAA Certificate Services root certificate |
Sandbox |
Jan 2025 |
- |
Dec 31 23:59:59 2028 GMT |
|
Production |
Feb 2025 |
- |
||
|
SHA-2 Root : USERTrust RSA Certification Authority certificate |
Sandbox |
- |
Jan 2025 |
Jan 18 23:59:59 2038 GMT
|
|
Production |
- |
Feb 2025 |
Apple will supply information when this occurs, ensuring developers of Apps and providers of 3rd party servers update their products.
FileWave Server already includes both of the above listed certificates within its Trust Store.
Third-party apps
Installing an app that requires APNs registers that app with APNs, and the device receives a unique device token for that app.
Messages pushed can include:
- Display Alert Message to User
- Apply Badge Icon to App’s Icon
- Play a Sound
- Deliver Notification Silently
Both Message and Unique Device Token are sent by the App’s Server when attempting to initiate a notification.
Notifications are relayed through Apple’s APNs service. When the device receives the notification, it acts according to the payload, such as displaying a message to the user.
In essence, the message payload therefore consists of:
- APS Dictionary: Message content
- Alert Keys: Assist notification processing, e.g. an identifier to a particular conversation of a messaging app.
- Device ID: Unique Device Token
The App should contain the current APNs Root Certificate within its Trust Store
MDM/DDM
MDM and DDM communication also rely on APNs, with a few important differences from user-facing app notifications:
- The act of enrolment is equivalent to installing the App, initiating the receipt of the Unique Device Token.
- The App in question is a binary, included in the Operating System by Apple: '/usr/libexec/mdmclient'.
- APS dictionary should not be included in the payload from an MDM server.
MDM APNs messages are only a request for the device to contact the MDM server. Commands are sent directly between the device and the MDM server after the device checks in.
Since Apple are the developers of the 'mdmclient', Apple manage its Trust Store. Apple’s list of supported Root Certificates per OS version are available from their KB:
https://support.apple.com/en-gb/103272
APNs Certificate Creation & Renewal on macOS Computers (Keychain)
Description
Apple Mobile Device Management (MDM) requires an Apple Push Notification service (APNs) certificate; renewable yearly.
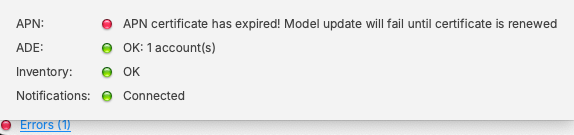
APNs Expiry
If APNs certificates are allowed to expire, all MDM communication will be lost, until renewed. Update Model will also fail until renewed.
The following guide provides the steps to create and renew an APNs certificate using macOS with Keychain app.
APNs Topic
An APNs certificate has a unique topic, in the form of a hexadecimal string, and belongs to the Apple ID used to create the certificate. When renewing, the topic must match to ensure devices continue to communicate with the server. As such, not only must the same Apple ID be used when renewing an APNs certificate, but the current certificate must also be selected for renewal.
Step-By-Step Guide
Creating the Certificate Signing Request (CSR)
-
Open Keychain Access, located in: Applications > Utilities > Keychain Access.app.
-
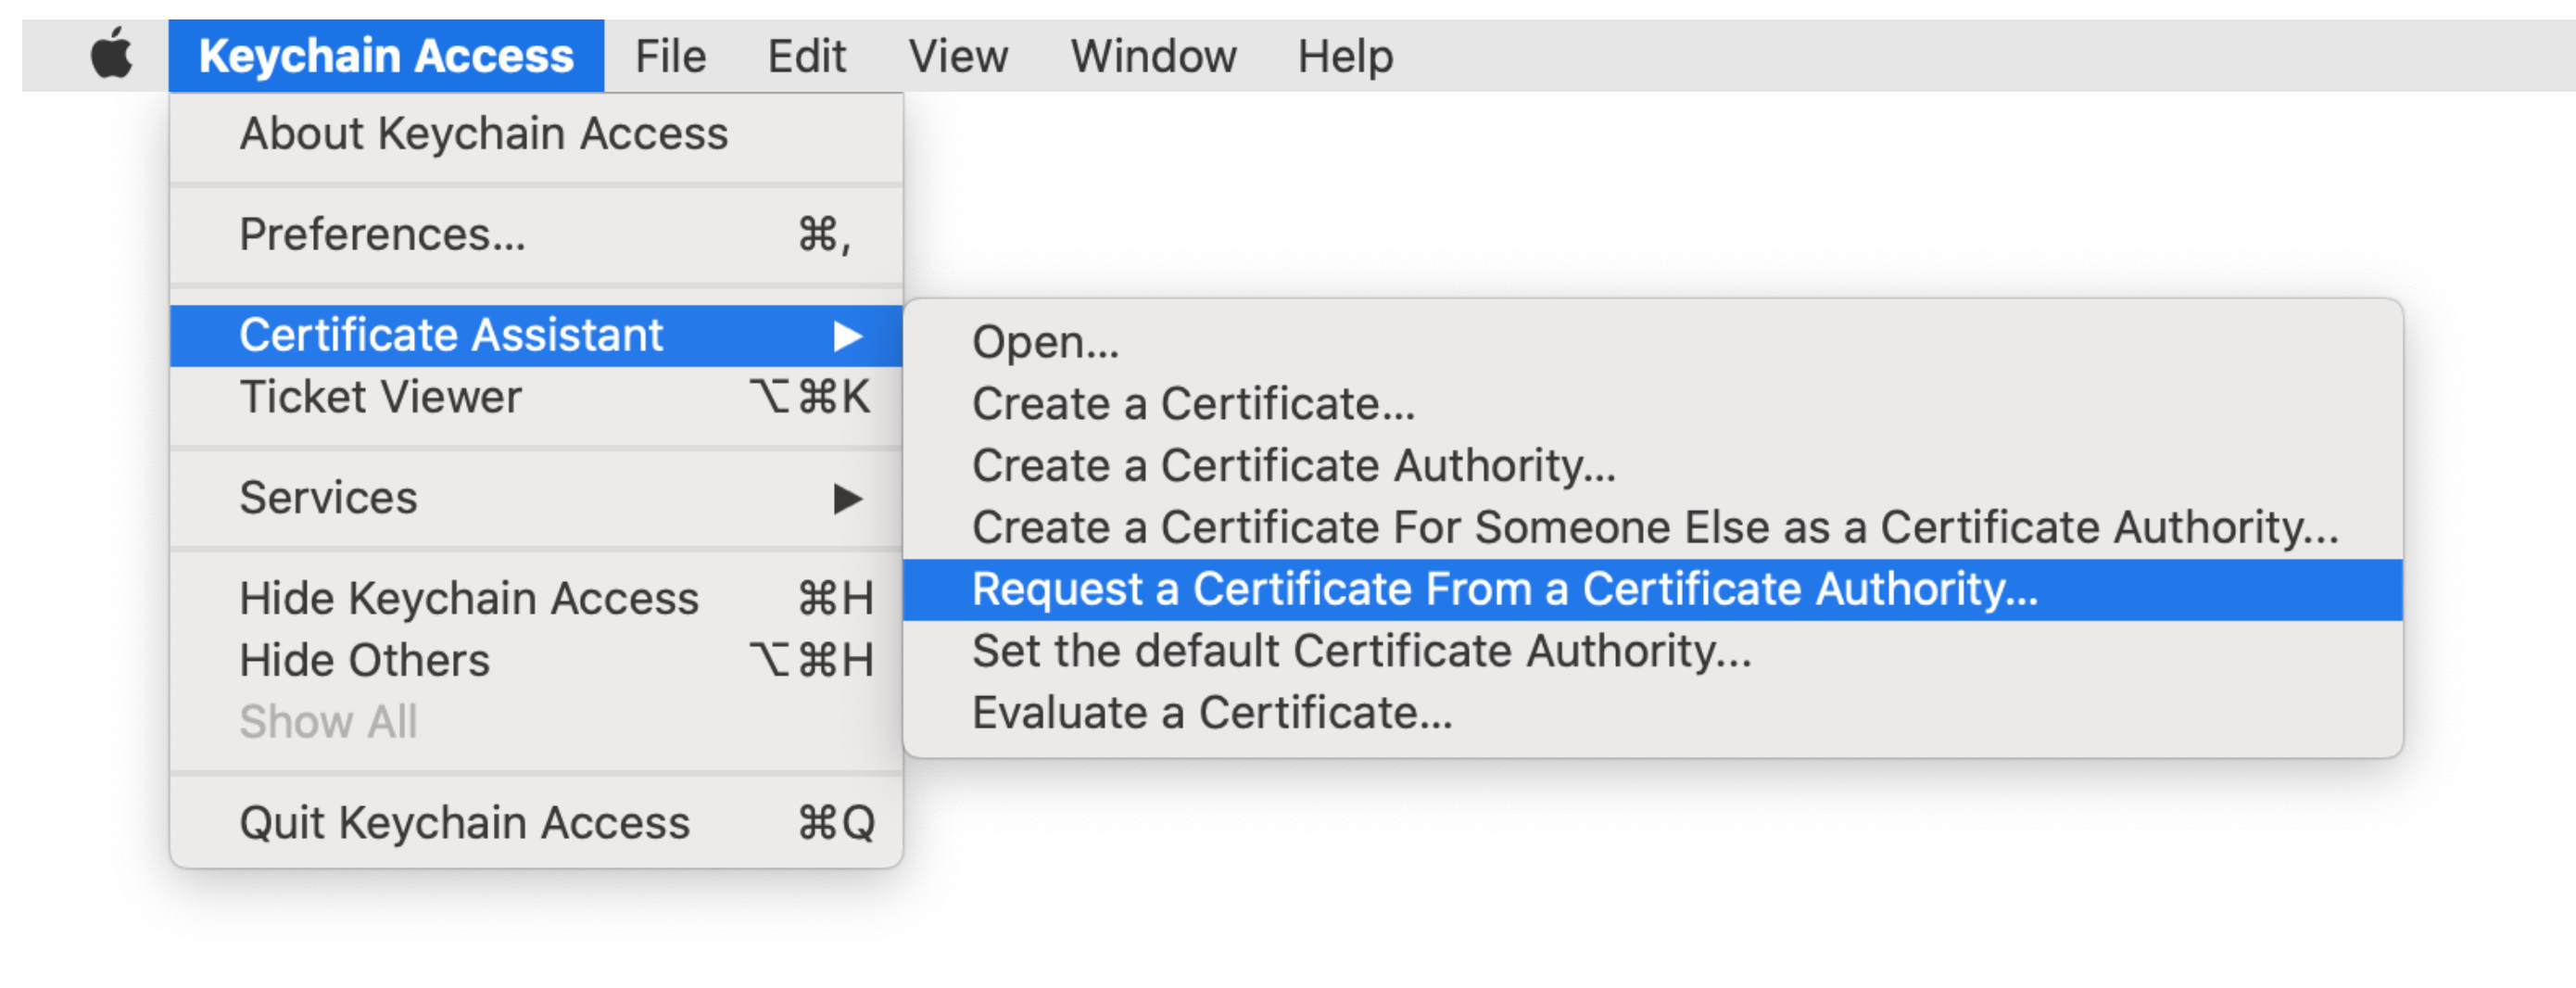
Create a CSR. Keychain Access > Certificate Assistant > Request a Certificate from a Certificate Authority...

-
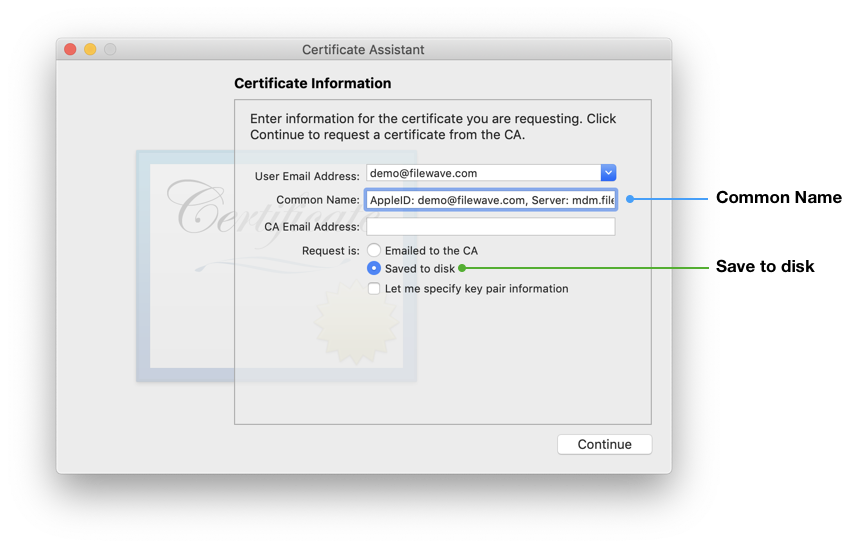
Enter the AppleID and Server name that you are going to be associating with this certificate in the "Common Name" field.
Common Name
Certificate Private Key names are visible in Keychain and the Common Name is used to set the Private Key name. Supplying the Apple ID and Server as the Common Name, ensures the Apple ID used to generate the certificate will be stored for future reference.
-
Select the radio button "Saved to disk" and click Continue.
-
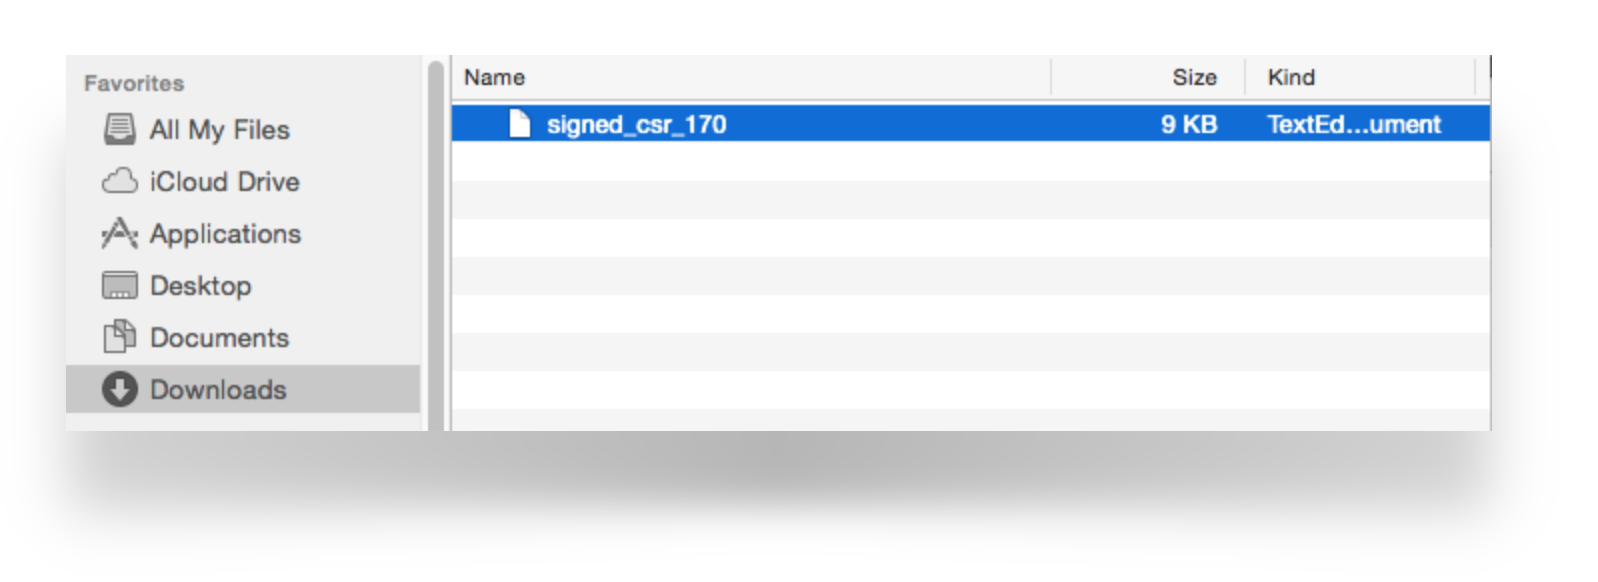
Save the CSR request, ready to upload to FileWave in the next section.
Certificate Storage
Consider creating a secure location to store the created certificates and sub divide them using the date or year, e.g folder named: 'MDM APNs certificates 2020'.
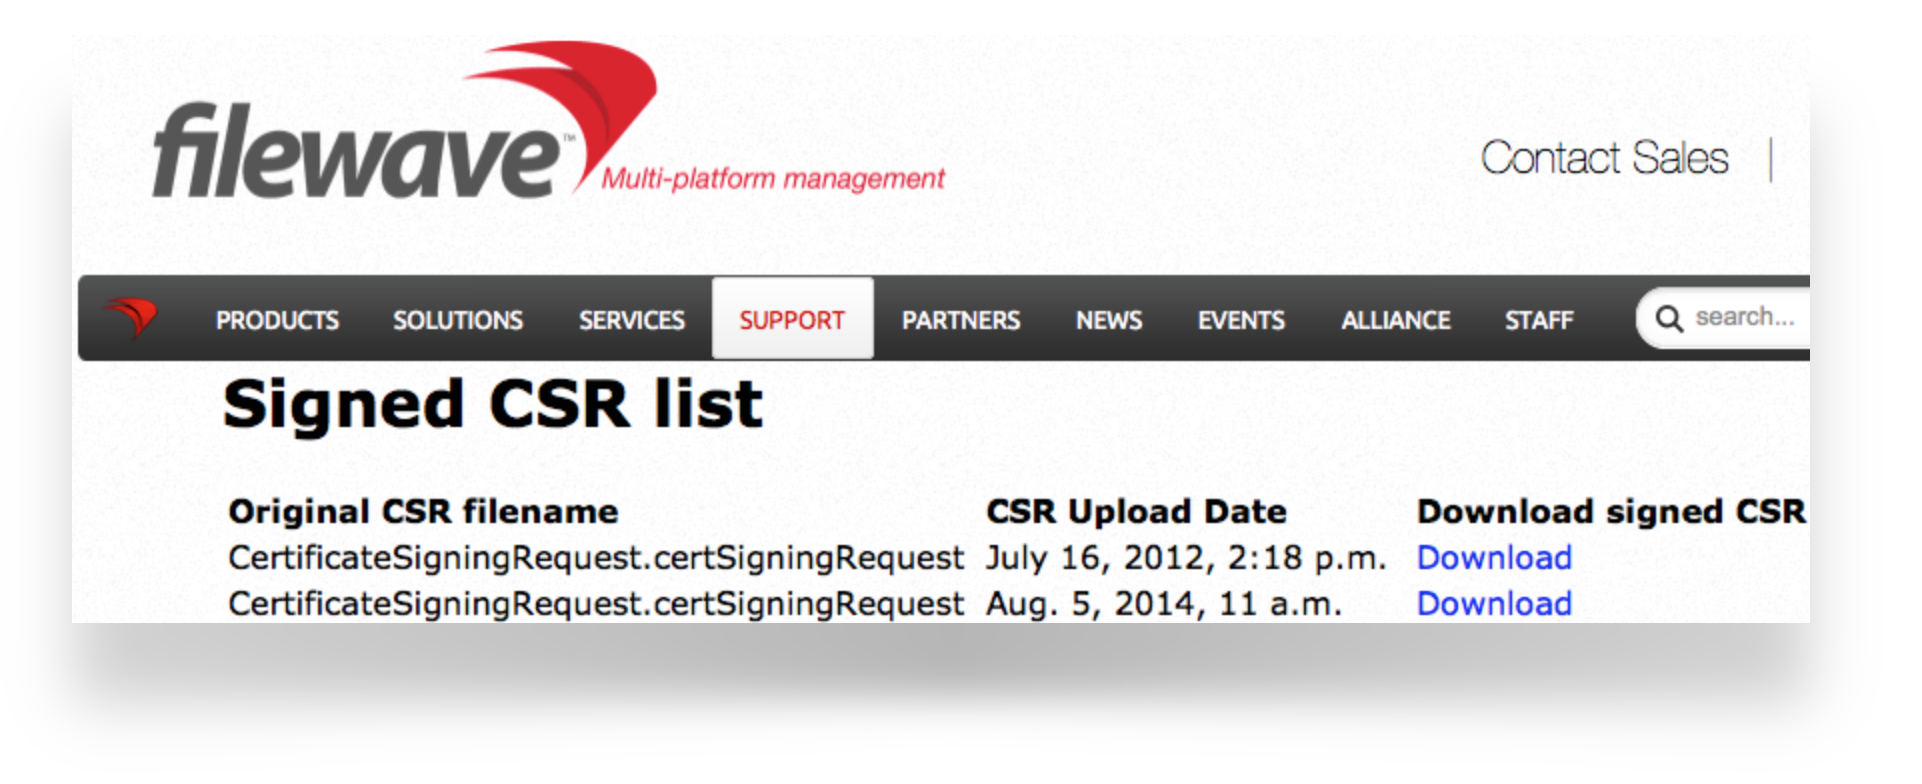
Sign the CSR
CSR requests must be signed before uploading to Apple. FileWave has a portal for this process, which requires an active FileWave account.
Upload the signed FileWave CSR to Apple
Creating a new Certificate
If you are renewing a certificate then jump to Renewing a Certificate
-
Navigate to: https://identity.apple.com/pushcert/ and log in with an Apple ID.
This Apple ID will own the certificate and is required for every renewal. Do not use a personal Apple ID, to avoid complications if that person where to leave the business or institution.
-
Click 'Create'.
-
'Accept' Apple's 'Terms of Use'.

Renewing a Certificate
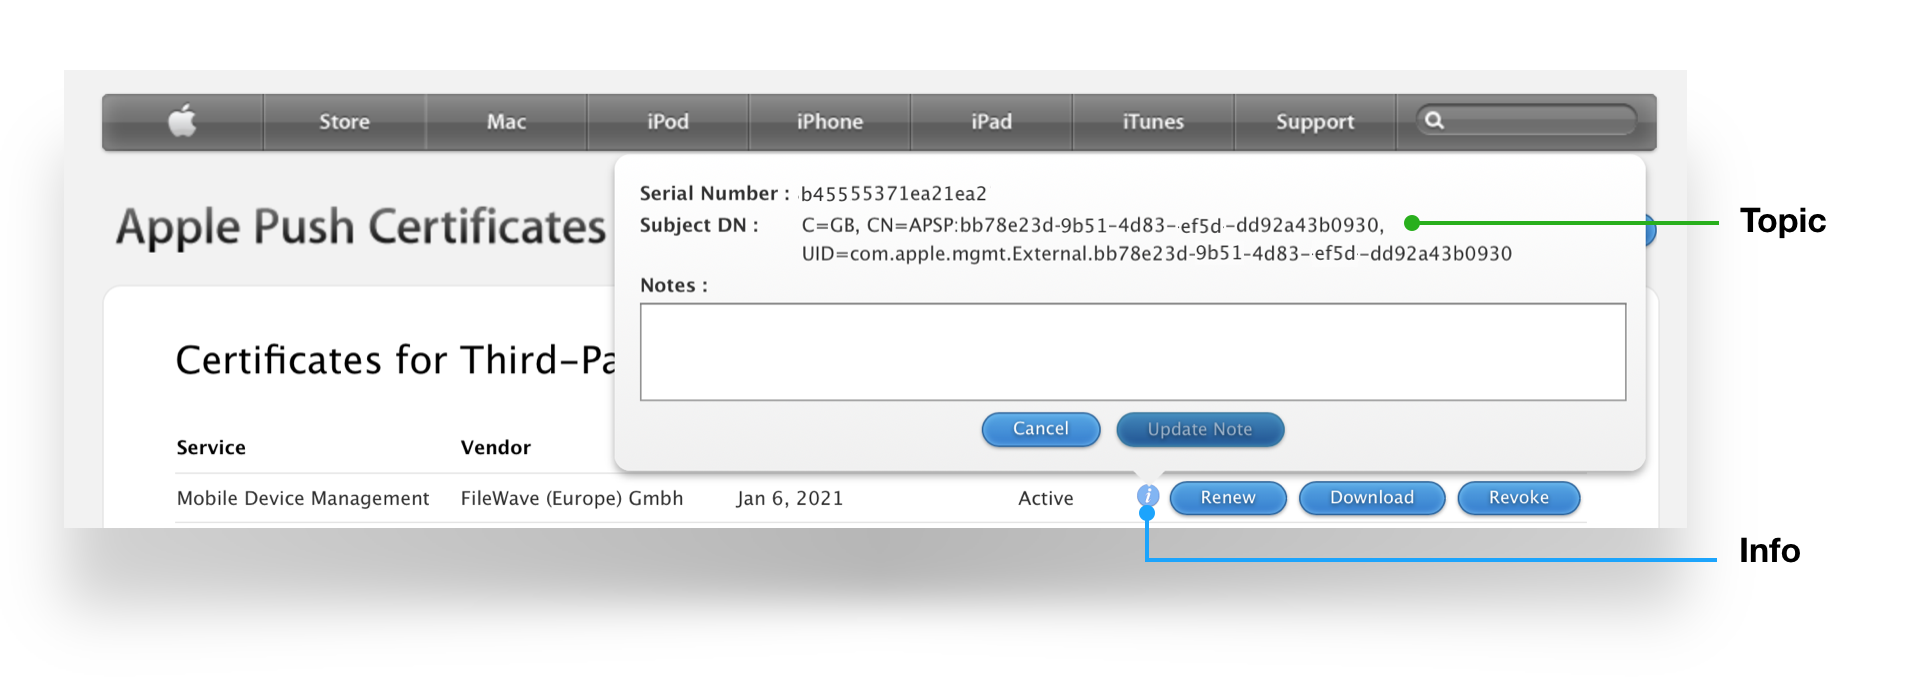
To confirm the certificate, compare the Subject DN (Topic) and current certificate.
Clicking the 'i' button will show the certificate details, including the Topic:

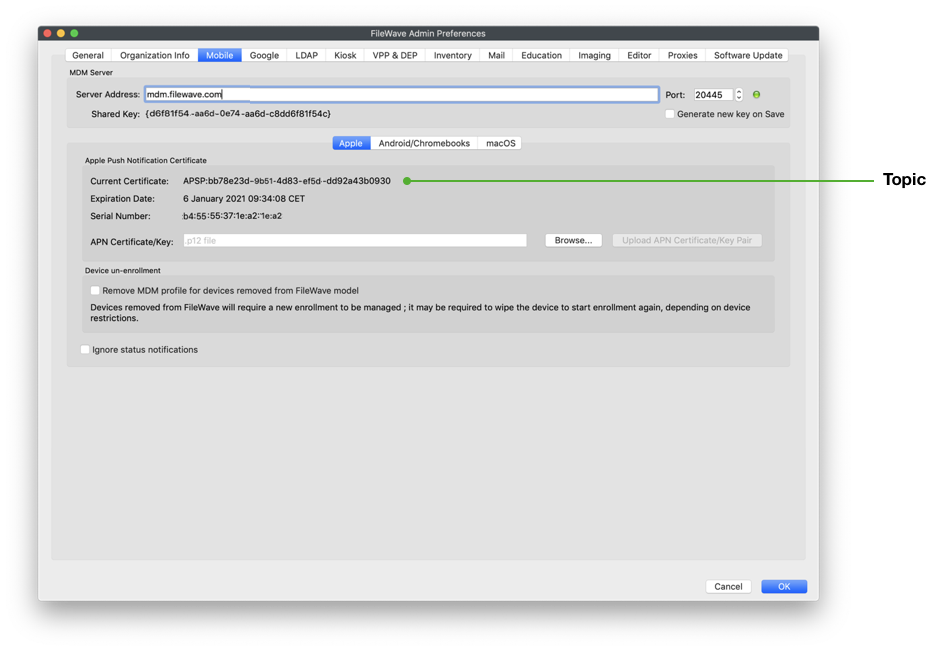
Ensure this matches with the 'Current Certificate' in FileWave Admin > Preferences > Mobile > Apple Push Notification Certificate:

If the 'Topics' do not match do not continue. If the correct certificate is not in the list on Apple's website, this is the wrong Apple ID. If this guide was followed in creating the original certificate, the previously used Apple ID will be viewable from the certificate "Private Key".
Click 'Choose File' and browse to the signed FileWave CSR from the previous section.
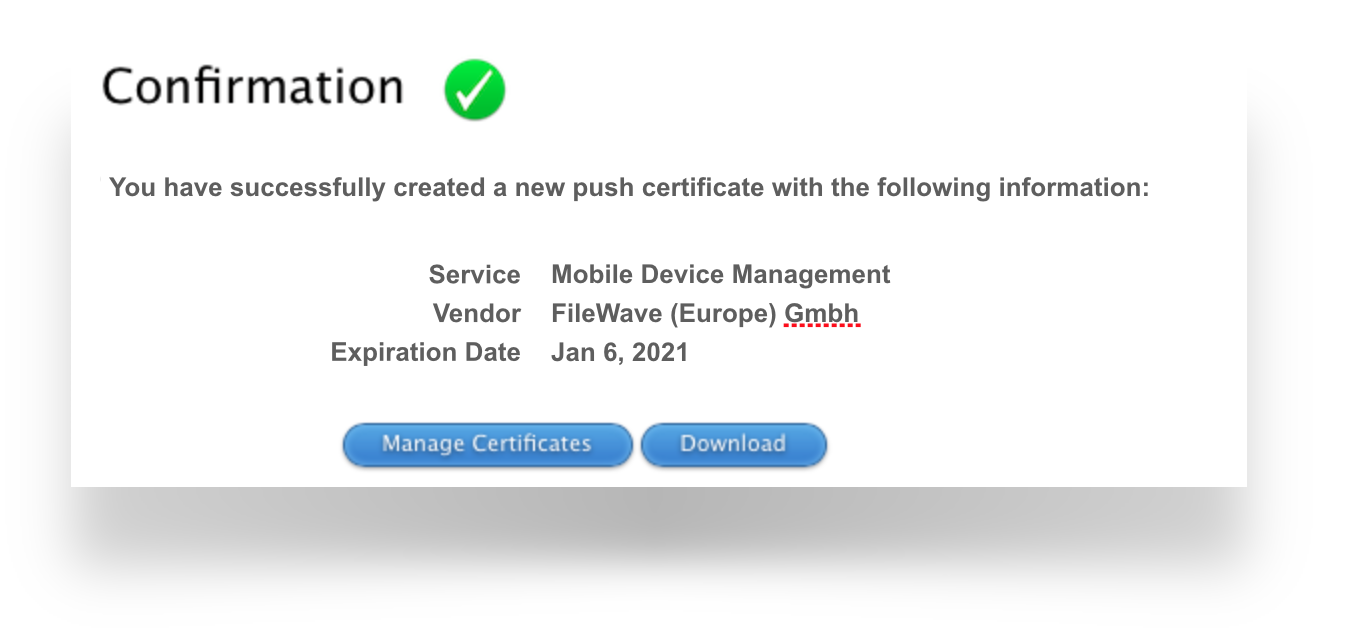
Click 'Upload' and Apple will return a 'Confirmation'.

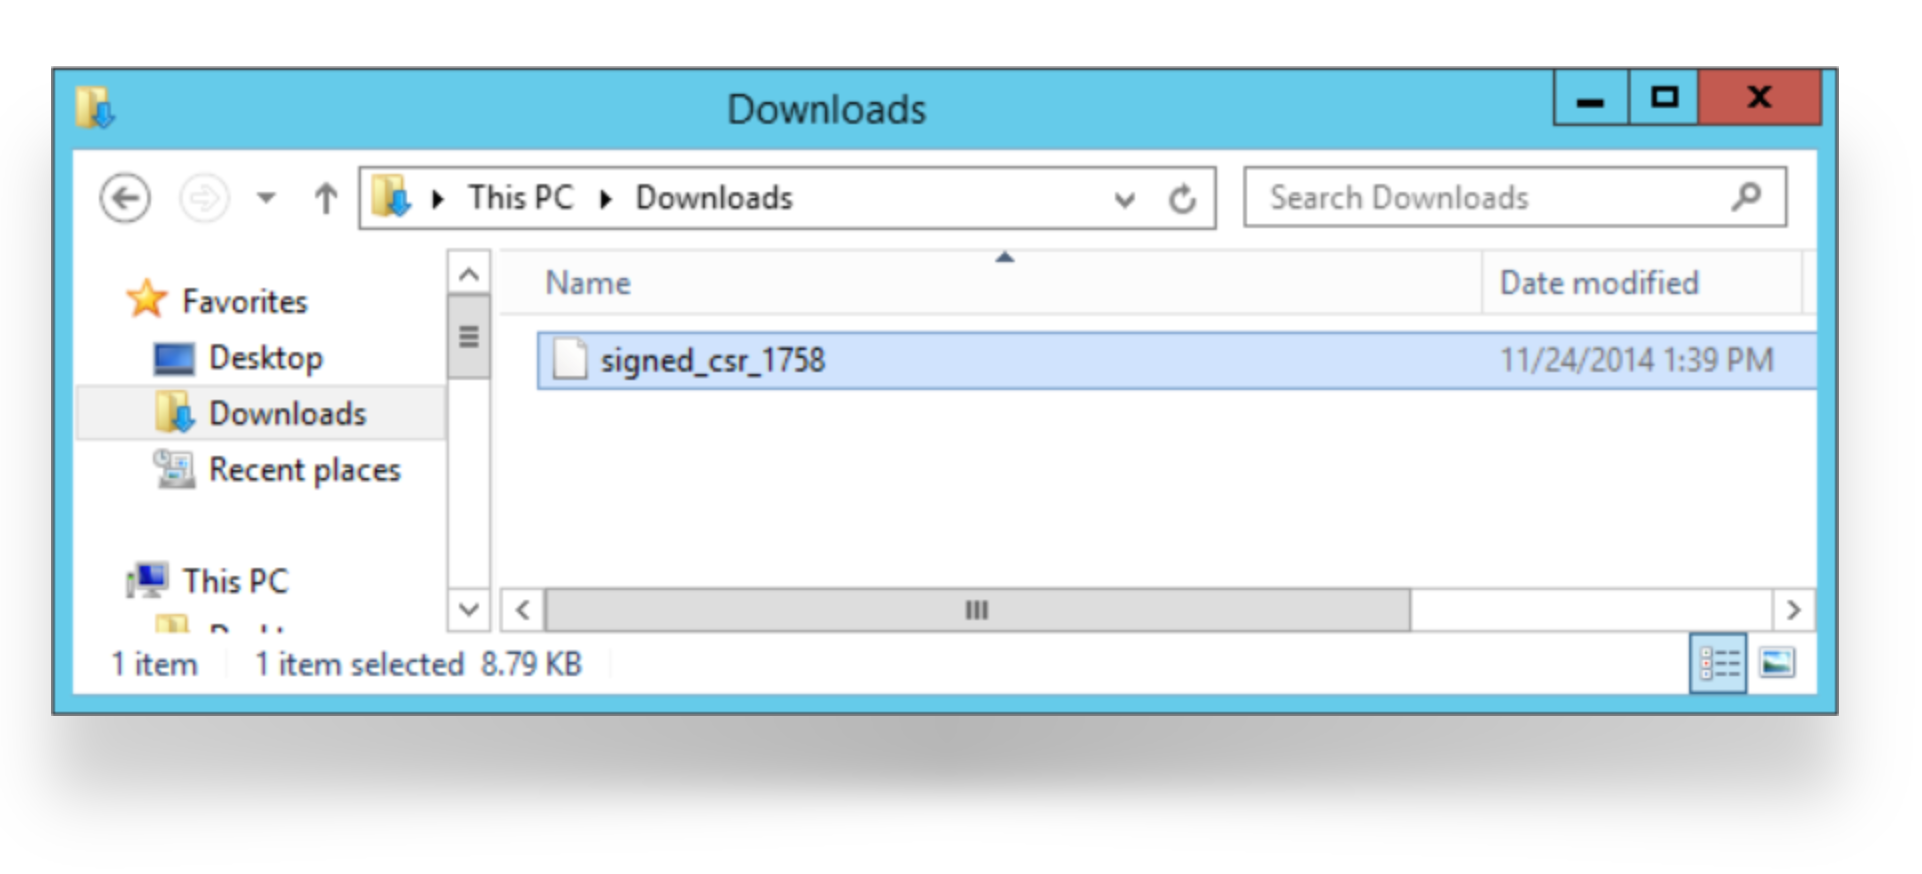
Click 'Download' and save the ".pem" file. Again consider where this certificate is stored.
Create a ".p12" from the Signed CSR
-
Open Keychain Access app, select login from the Keychains list and then choose 'My Certificates' tab.
Keychain
If imported into the System Keychain, the Private Key will not be accessible. If 'All Items' tab is selected, private keys will not be available! -
Drag the downloaded PEM file into the Keychain main window.
-
Locate the imported certificate. It will begin with "APSP:".
-
Click the disclosure triangle and select the expanded private key.
Common Name and Topic
The name of the Private Key will show the value defined as the "Common Name" from the creation of the CSR. Where recommendation was followed, this should list the Apple ID and Server name. Additionally the name of the Certificate is the same as the Topic.
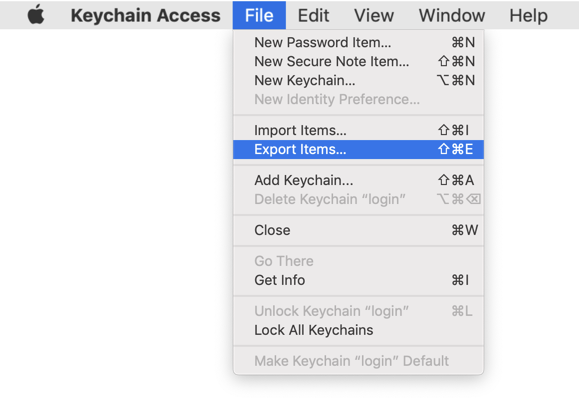
-
From the 'File' menu, choose 'Export Items...'.

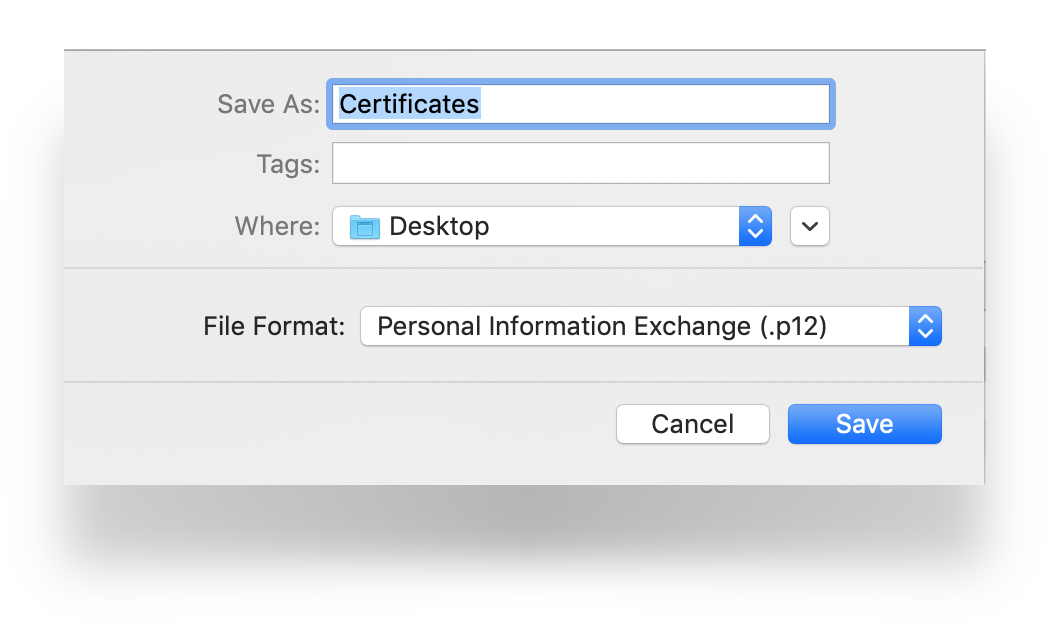
-
Export as a .p12 file. Again consider where this certificate is stored.
-
Click Save.

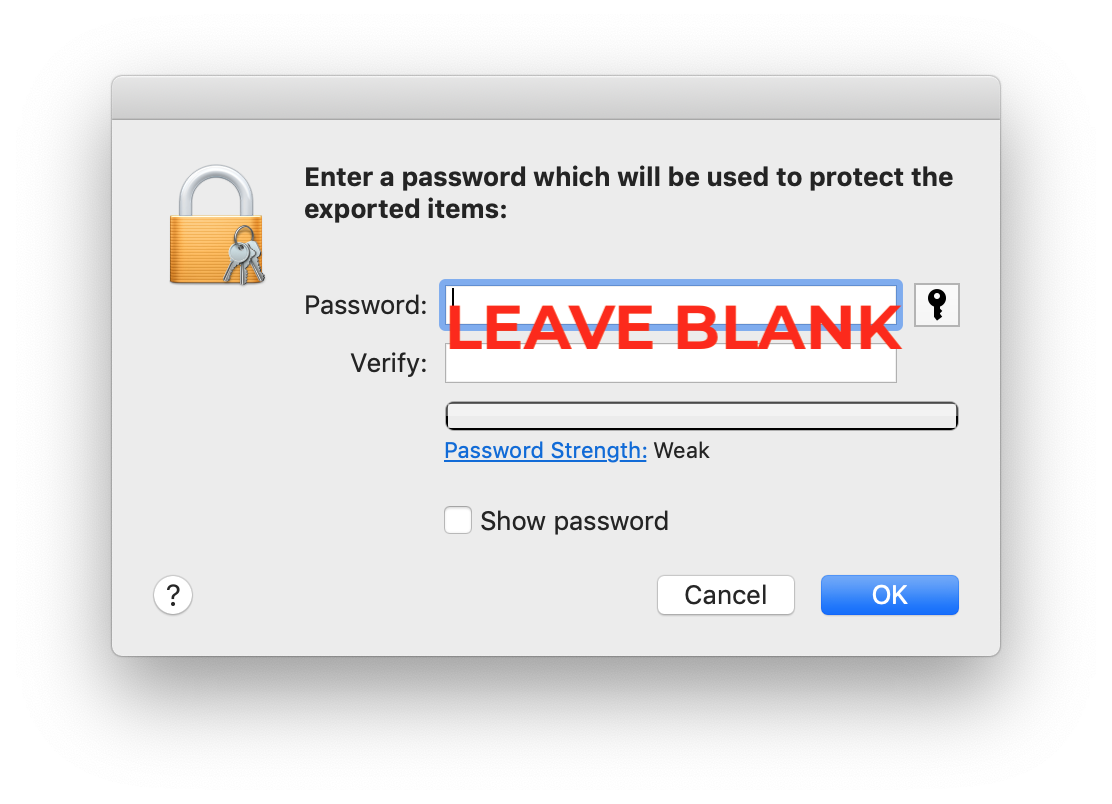
-
Leave the password blank.

-
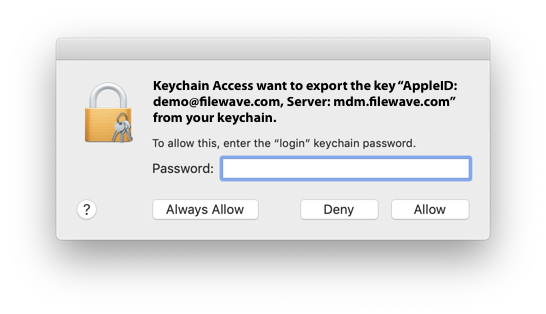
Enter your local admin account, when prompted, allowing Keychain to export.

Uploading the Certificate into FileWave
-
Launch the FileWave Admin and login to the FileWave server.
-
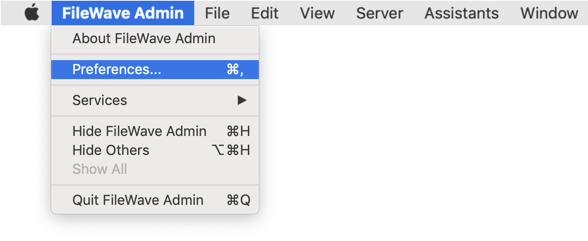
Open the FileWave Admin Preferences.

-
Select the 'Mobile' tab.
-
Click 'Browse' and navigate to the saved ".p12" APNs certificate.
-
Select the exported ".p12" certificate.
-
Click 'Upload APN Certificate/Key Pair'.

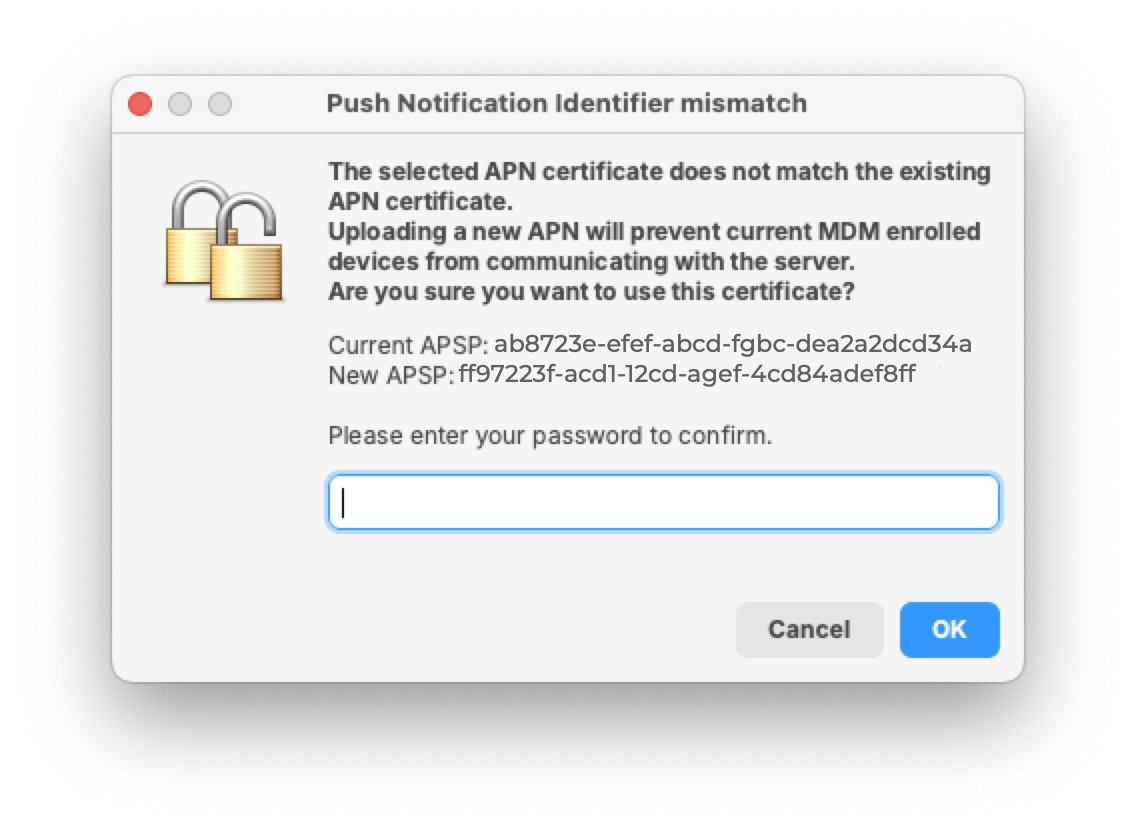
The topic should match the previous topic. FileWave Central should warn if the topics do not match before accepting the upload:

Click 'OK' to save and close the Preferences dialog.
That is it! FileWave may now manage Apple devices using Apple’s Push Notification Service.
APNs certificates require yearly renewals. Through FileWave Admin > Dashboard > Alert Settings, automated emails may configured. Consider adding 'APN for MDM'. Note this requires the Email preferences in Admin to be configured.
Contact Apple for help
If you forgot the email tied to your Apple Push Notiifcation you may reach out to Apple for assistant
Contact Apple for help with APN
Related articles
- APNs Certificate Creation & Renewal on macOS Computers (XCA)
- APNs Certificate Creation & Renewal on Windows
APNs Certificate Creation & Renewal on macOS Computers (XCA)
Description
Apple Mobile Device Management (MDM) requires an Apple Push Notification service (APNs) certificate; renewable yearly.
APNs Expiry
If APNs certificates are allowed to expire, all MDM communication will be lost, until renewed. Update Model will also fail until renewed.

This guide explains how to create the Apple Push Notification Service (APNS) certificate for FileWave using an online CSR generator and the XCA certificate management tool, instead of the Apple Keychain. The Apple Keychain often causes issues with private key handling on newer macOS versions, so this method provides a more reliable alternative. You may use any online CSR generator (for example ssl.com), it does not have to be ssl.com specifically.
APNs Topic
An APNs certificate has a unique topic, in the form of a hexadecimal string, and belongs to the Apple ID used to create the certificate. When renewing, the topic must match to ensure devices continue to communicate with the server. As such, not only must the same Apple ID be used when renewing an APNs certificate, but the current certificate must also be selected for renewal.
Step-By-Step Guide
Prerequisites
- Access to the Apple Push Certificates Portal ( https://identity.apple.com/pushcert/ ).
- A valid Apple Business/School Manager account or Apple ID.
- Access to the FileWave Central console.
- Installed XCA tool: https://github.com/chris2511/xca/releases
Step 1: Generate CSR (Certificate Signing Request)
- Open the CSR generator at ssl.com. ( https://www.ssl.com/online-csr-and-key-generator/ )
- Enter the required details:
- Common Name (CN): e.g. FileWave APNS
- Organization (O): your company or school name
- Organizational Unit (OU): optional, e.g. IT Department
- Country (C): two-letter ISO code (e.g. DE)
- Generate the CSR and download the files:
- CSR file (.csr)
- Private Key (.key)
⚠️ Keep the .key file safe – you will need it later in XCA.
Step 2: Sign the CSR with FileWave
Before the CSR can be uploaded to Apple, it must be signed by FileWave.
Step 3: Upload the signed FileWave CSR to Apple
If you are renewing a certificate then jump to Renewing a Certificate
Creating a new certificate
- Go to the Apple Push Certificates Portal: https://identity.apple.com/pushcert/.
- Sign in with an Apple ID (⚠️ do not use a personal Apple ID – use a generic business or institution Apple ID for long-term use).
- Click Create.
- Accept Apple’s Terms of Use.
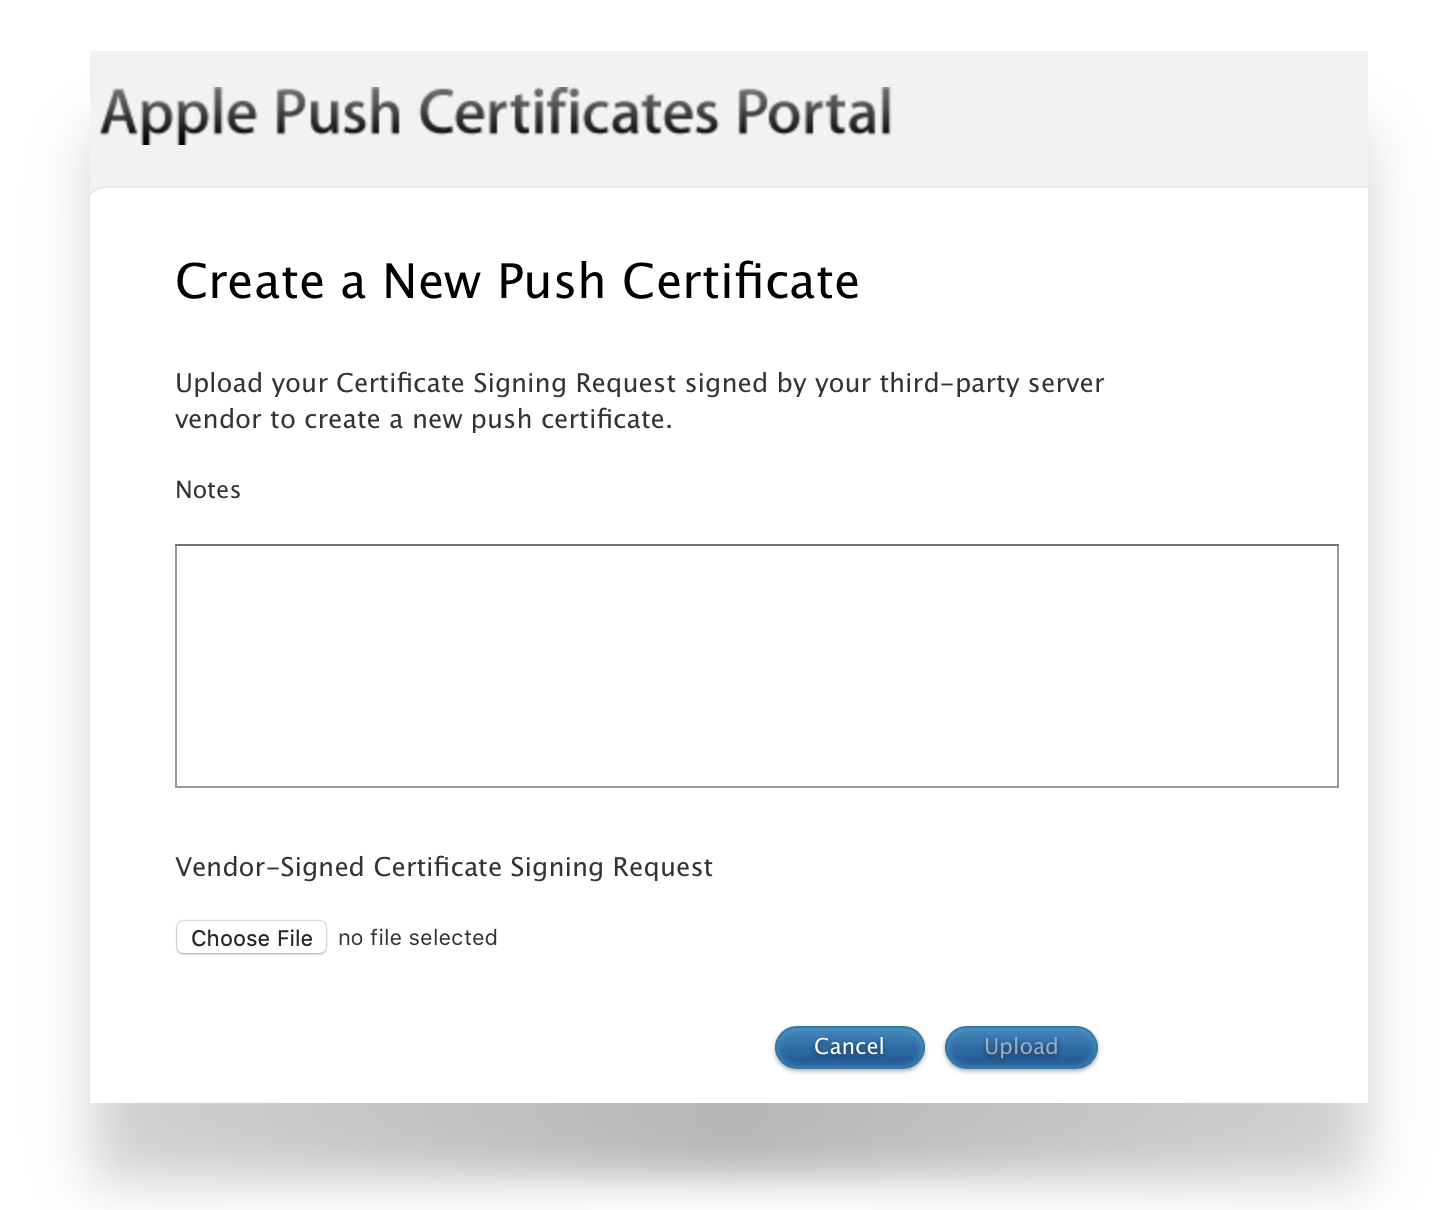
- Click Choose File and upload the signed FileWave CSR.
- Click Upload – Apple will confirm the request.
- Download the issued APNS certificate (.pem or .cer).

Renewing an existing certificate
- Go to https://identity.apple.com/pushcert/ and log in with the same Apple ID that owns the certificate.
- Locate the certificate to renew, confirm the Subject DN (Topic) matches the certificate in FileWave Admin.
- Click Renew.
- Upload the signed FileWave CSR.
- Download the renewed APNS certificate (.pem or .cer).
If the 'Topics' do not match do not continue. If the correct certificate is not in the list on Apple's website, this is the wrong Apple ID. If this guide was followed in creating the original certificate, the previously used Apple ID will be viewable from the certificate "Private Key".
To confirm the certificate, compare the Subject DN (Topic) and current certificate.
Clicking the 'i' button will show the certificate details, including the Topic:
Ensure this matches with the 'Current Certificate' in FileWave Admin > Preferences > Mobile > Apple Push Notification Certificate:
Step 4: Import and process the certificate in XCA
- First, download XCA for macOS: https://github.com/chris2511/xca/releases
- Install and start XCA.
- Go to Private Keys → Import and select the previously saved .key file from Step 1.
- Go to Certificates → Import and load the APNS certificate you downloaded from Apple (.cer/.pem).
- Link the certificate with the corresponding private key in XCA.
- Export the certificate as a PKCS #12 (.pfx) file – important: without a password.
- After export, rename the .pfx file to .p12 (FileWave requires the .p12 extension).
Step 5: Import the certificate into FileWave
- Open the FileWave Admin.
- Go to Preferences → Mobile.
- Import the .p12 file you exported from XCA by browsing to the file and then picking to Upload. The topic should match the previous topic. FileWave Central should warn if the topics do match before accepting the upload.


- Save the settings by clicking OK to close the preferences dialog and verify that devices are communicating.

Step 6: Verification
- Test whether new or existing MDM clients correctly connect to the APNS service.
- Check the logs in FileWave Admin to ensure there are no certificate errors.
APNs certificates require yearly renewals. Through FileWave Admin > Dashboard > Alert Settings, automated emails may configured. Consider adding 'APN for MDM'. Note this requires the Email preferences in Admin to be configured.
Contact Apple for help
If you forgot the email tied to your Apple Push Notiifcation you may reach out to Apple for assistant
Contact Apple for help with APN
Related articles
- APNs Certificate Creation & Renewal on macOS Computers (Keychain)
- APNs Certificate Creation & Renewal on Windows
APNs Certificate Creation & Renewal on Windows Computers
Description
Apple Mobile Device Management (MDM) requires an Apple Push Notification service (APNs) certificate; renewable yearly.
APNs Expiry
If APNs certificates are allowed to expire, all MDM communication will be lost, until renewed. Update Model will also fail until renewed.

This guide explains how to create the Apple Push Notification Service (APNS) certificate for FileWave on Windows computers using OpenSSL. You will generate a Certificate Signing Request (CSR), have it signed by FileWave, upload it to Apple, and then convert it to a format FileWave can import.
APNs Topic
An APNs certificate has a unique topic, in the form of a hexadecimal string, and belongs to the Apple ID used to create the certificate. When renewing, the topic must match to ensure devices continue to communicate with the server. As such, not only must the same Apple ID be used when renewing an APNs certificate, but the current certificate must also be selected for renewal.
Step-By-Step Guide
Prerequisites
- Access to the Apple Push Certificates Portal (https://identity.apple.com/pushcert/)
- A valid Apple Business/School Manager account or Apple ID
- Access to the FileWave Central console
- OpenSSL for Windows installed: https://slproweb.com/products/Win32OpenSSL.html
- Download the full version (not the light version, as it needs configuration files)
Administrator Access
All cmd.exe commands in this guide must be run with 'Run as Administrator'.
Step 1: Generate CSR (Certificate Signing Request)
- Open cmd.exe as an Administrator
- Create a CSR by entering the following command. This will create two files on the Desktop:
request.csrandprivateKey.key:
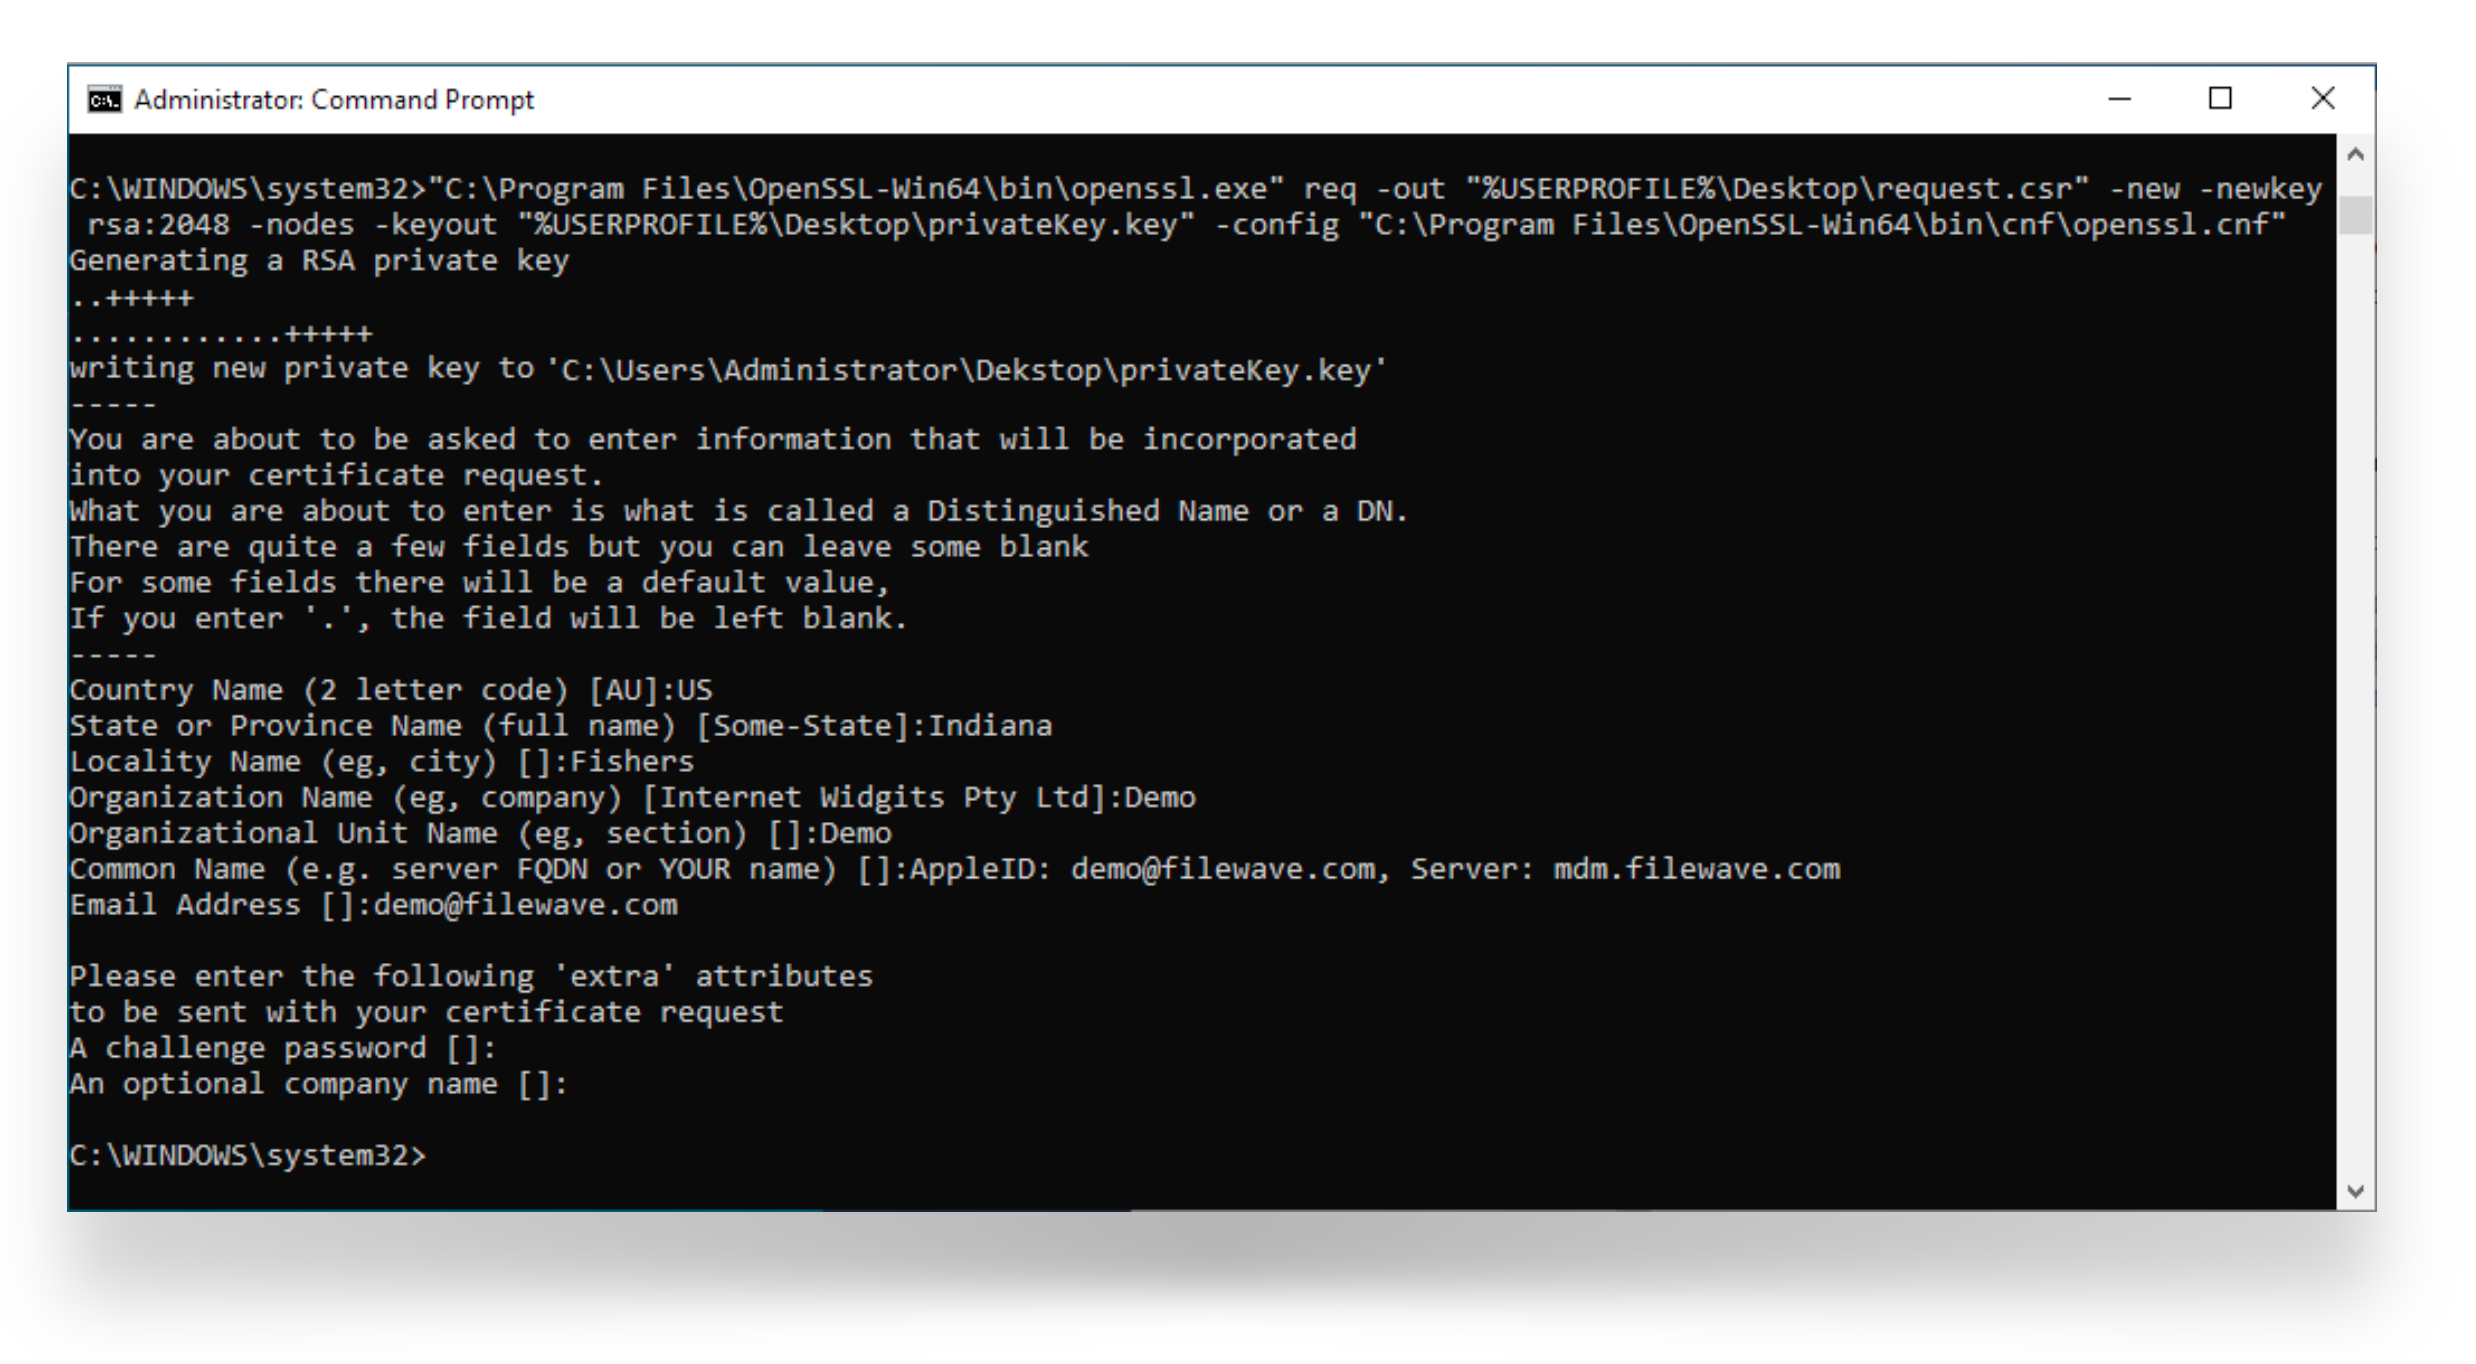
"C:\Program Files\OpenSSL-Win64\bin\openssl.exe" req -out "%USERPROFILE%\Desktop\request.csr" -new -newkey rsa:2048 -nodes -keyout "%USERPROFILE%\Desktop\privateKey.key" -config "C:\Program Files\OpenSSL-Win64\bin\cnf\openssl.cnf"
- When prompted, enter values for the certificate fields. For Common Name, use a descriptive name like your Apple ID and server name (e.g.,
company@example.com - FileWave Server). This helps you identify the certificate later.
Common Name and Private Key
The Common Name you enter will be stored in the Private Key name. Using your Apple ID and server name ensures you can identify which Apple ID created this certificate in the future—important when renewing.
Step 2: Sign the CSR with FileWave
Before the CSR can be uploaded to Apple, it must be signed by FileWave.

Step 3: Upload the signed FileWave CSR to Apple
If you are renewing a certificate, skip to Renewing an existing certificate below.
Creating a new certificate
- Go to the Apple Push Certificates Portal: https://identity.apple.com/pushcert/
- Sign in with an Apple ID (⚠️ do not use a personal Apple ID – use a generic business or institution Apple ID for long-term use)
- Click Create
- Accept Apple's Terms of Use
- Click Choose File and upload the signed FileWave CSR from Step 2
- Click Upload – Apple will confirm the request
- Download the issued APNS certificate (.pem or .cer) and store it securely
Renewing an existing certificate
- Go to https://identity.apple.com/pushcert/ and log in with the same Apple ID that owns the certificate
- Locate the certificate to renew and click the info (i) button to view certificate details, including the Topic

- Compare this Topic with the 'Current Certificate' in FileWave Admin > Preferences > Mobile > Apple Push Notification Certificate


Topic Mismatch
If the Topics do not match, do not continue. If the correct certificate is not in the list on Apple's website, you are using the wrong Apple ID. You can identify the correct Apple ID by reviewing the Private Key name from the original CSR (which should contain your Apple ID).
- Click Renew
- Upload the signed FileWave CSR from Step 2
- Click Upload – Apple will confirm the request

- Download the renewed APNS certificate (.pem or .cer) and store it securely

Step 4: Create a .p12 file from the Signed Certificate
- Open cmd.exe as an Administrator
- Create a
.p12file by entering the following command. Replace the file paths if necessary, and note thatMDM_FileWave.pemis an example – use your actual downloaded certificate filename:
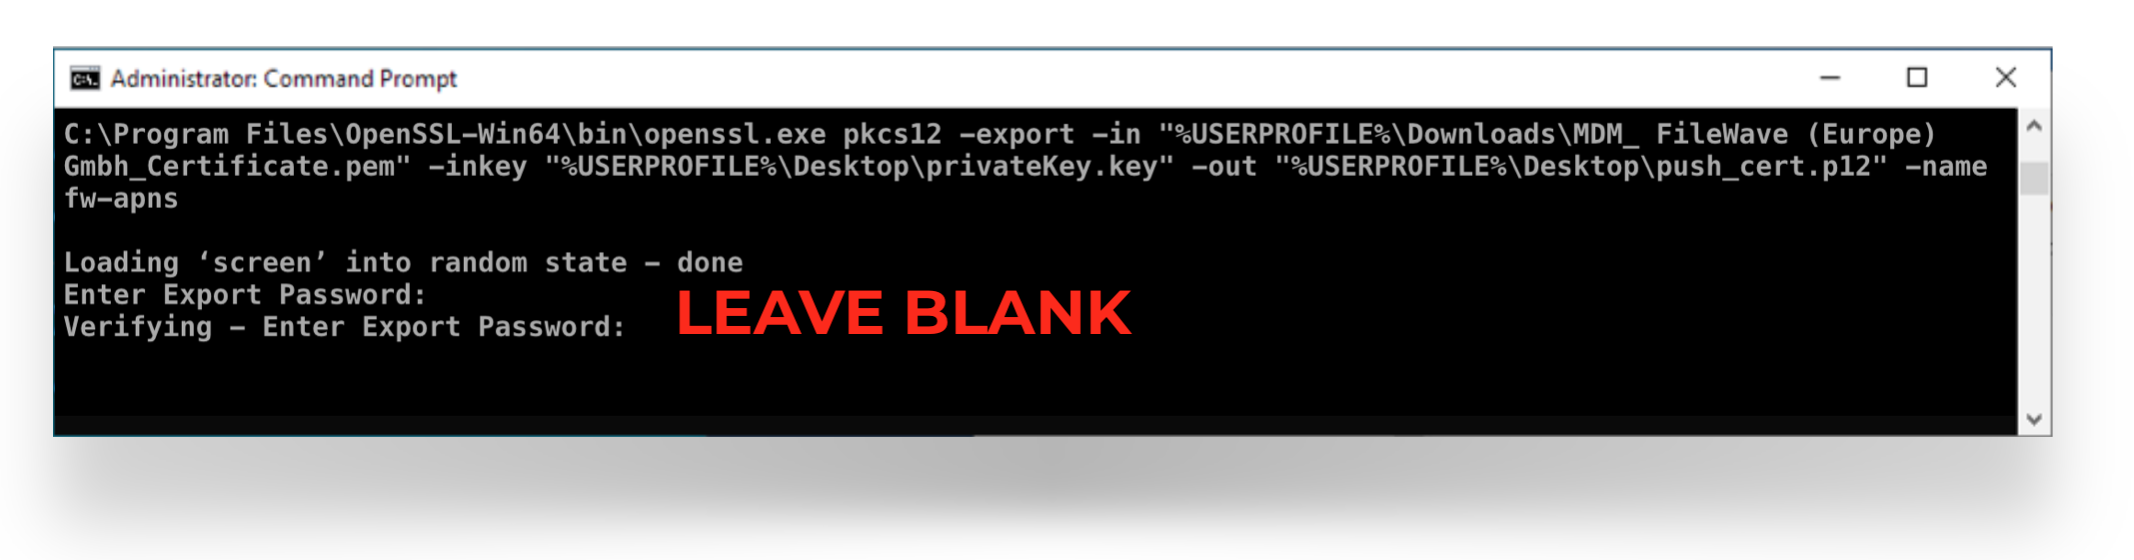
"C:\Program Files\OpenSSL-Win64\bin\openssl.exe" pkcs12 -export -in "%USERPROFILE%\Downloads\MDM_FileWave.pem" -inkey "%USERPROFILE%\Desktop\privateKey.key" -out "%USERPROFILE%\Desktop\push_cert.p12" -name fw-apns
- When prompted for the Export Password, leave it blank and press Enter

Path Issues
If the command errors when creating the .p12 file, replace the %USERPROFILE% variable with the full file path (e.g., C:\Users\YourUsername\).
- Verify the certificate was created correctly by running:
"C:\Program Files\OpenSSL-Win64\bin\openssl.exe" pkcs12 -info -in "%USERPROFILE%\Desktop\push_cert.p12"
This will display certificate details. Confirm that the Common Name matches the value you entered in Step 1, and that the Topic matches the value from Apple.
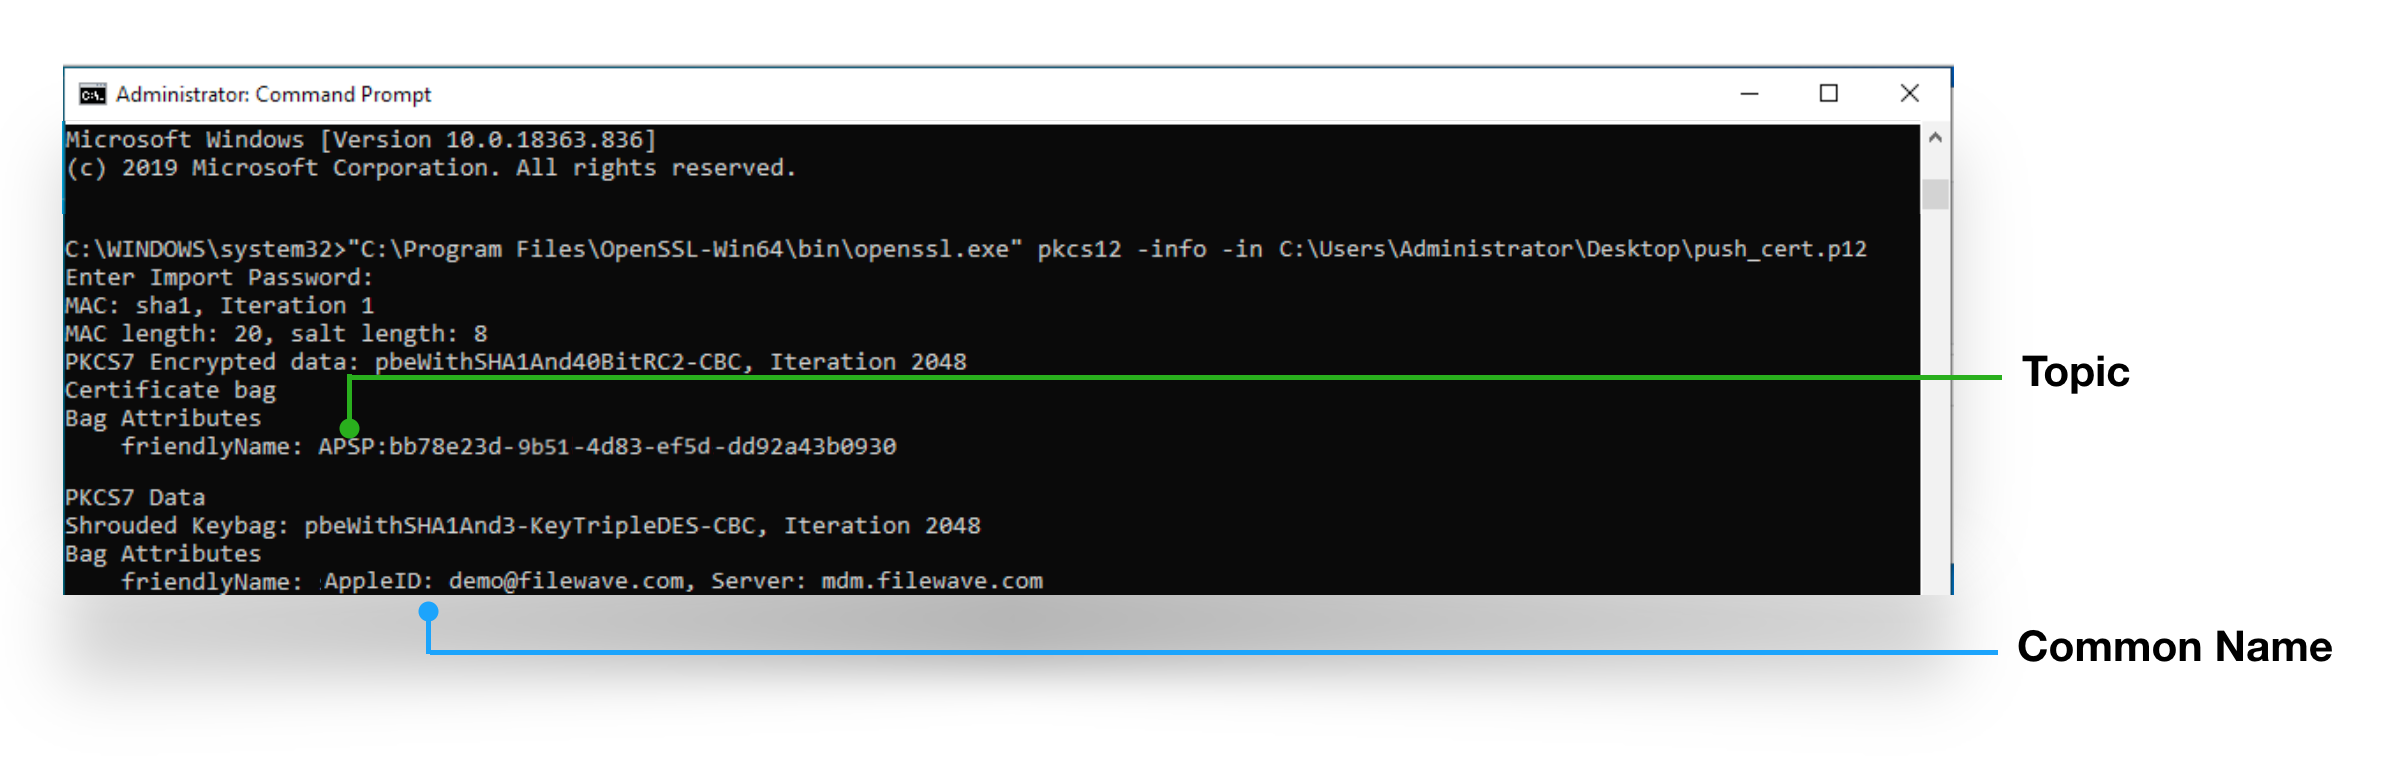
Common Name and Topic
The Private Key name will display the Common Name you entered when creating the CSR. The certificate name is the same as the Topic. Both should match the certificate you created or renewed at Apple.
Step 5: Upload the certificate into FileWave
- Launch FileWave Admin and log in to your FileWave server
- Open Preferences

- Select the Mobile tab
- Click Browse and navigate to the
push_cert.p12file you created in Step 4 - Select the file and click Upload APN Certificate/Key Pair

The topic should match the previous topic. FileWave Central should warn if the topics do match before accepting the upload:
Click OK to save and close the Preferences dialog.
FileWave may now manage Apple devices using Apple's Push Notification Service.
Step 6: Verification
- Test whether new or existing MDM clients correctly connect to the APNS service
- Check the logs in FileWave Admin to ensure there are no certificate errors
APNs certificates require yearly renewals. Through FileWave Admin > Dashboard > Alert Settings, you can configure automated email reminders. Consider enabling the 'APN for MDM' alert. Note: this requires Email preferences in Admin to be configured.
Contact Apple for help
If you forgot the email tied to your Apple Push Notification certificate, you may reach out to Apple for assistance:
Contact Apple for help with APN