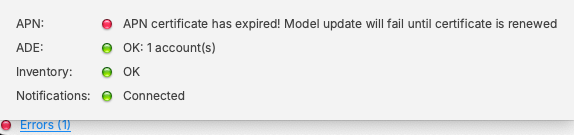
**APNs Expiry** If APNs certificates are allowed to expire, all MDM communication will be lost, until renewed. Update Model will also fail until renewed.
[](https://kb.filewave.com/uploads/images/gallery/2026-02/zeiTOyrwFm3LNsoH-image.png) This guide explains how to create the Apple Push Notification Service (APNS) certificate for FileWave on Windows computers using OpenSSL. You will generate a Certificate Signing Request (CSR), have it signed by FileWave, upload it to Apple, and then convert it to a format FileWave can import.**APNs Topic** An APNs certificate has a unique topic, in the form of a hexadecimal string, and belongs to the Apple ID used to create the certificate. When renewing, the topic must match to ensure devices continue to communicate with the server. As such, not only must the same Apple ID be used when renewing an APNs certificate, but the current certificate must also be selected for renewal.
## Step-By-Step Guide #### **Prerequisites** - Access to the **Apple Push Certificates Portal** ([https://identity.apple.com/pushcert/](https://identity.apple.com/pushcert/)) - A valid **Apple Business/School Manager account** or Apple ID - Access to the **FileWave Central** console - **OpenSSL for Windows** installed: [https://slproweb.com/products/Win32OpenSSL.html](https://slproweb.com/products/Win32OpenSSL.html) - Download the full version (not the light version, as it needs configuration files)**Administrator Access** All cmd.exe commands in this guide must be run with 'Run as Administrator'.
#### **Step 1: Generate CSR (Certificate Signing Request)** 1. Open **cmd.exe** as an Administrator 2. Create a CSR by entering the following command. This will create two files on the Desktop: `request.csr` and `privateKey.key`: ``` "C:\Program Files\OpenSSL-Win64\bin\openssl.exe" req -out "%USERPROFILE%\Desktop\request.csr" -new -newkey rsa:2048 -nodes -keyout "%USERPROFILE%\Desktop\privateKey.key" -config "C:\Program Files\OpenSSL-Win64\bin\cnf\openssl.cnf" ``` 3. When prompted, enter values for the certificate fields. For **Common Name**, use a descriptive name like your Apple ID and server name (e.g., `company@example.com - FileWave Server`). This helps you identify the certificate later.**Common Name and Private Key** The Common Name you enter will be stored in the Private Key name. Using your Apple ID and server name ensures you can identify which Apple ID created this certificate in the future—important when renewing.
[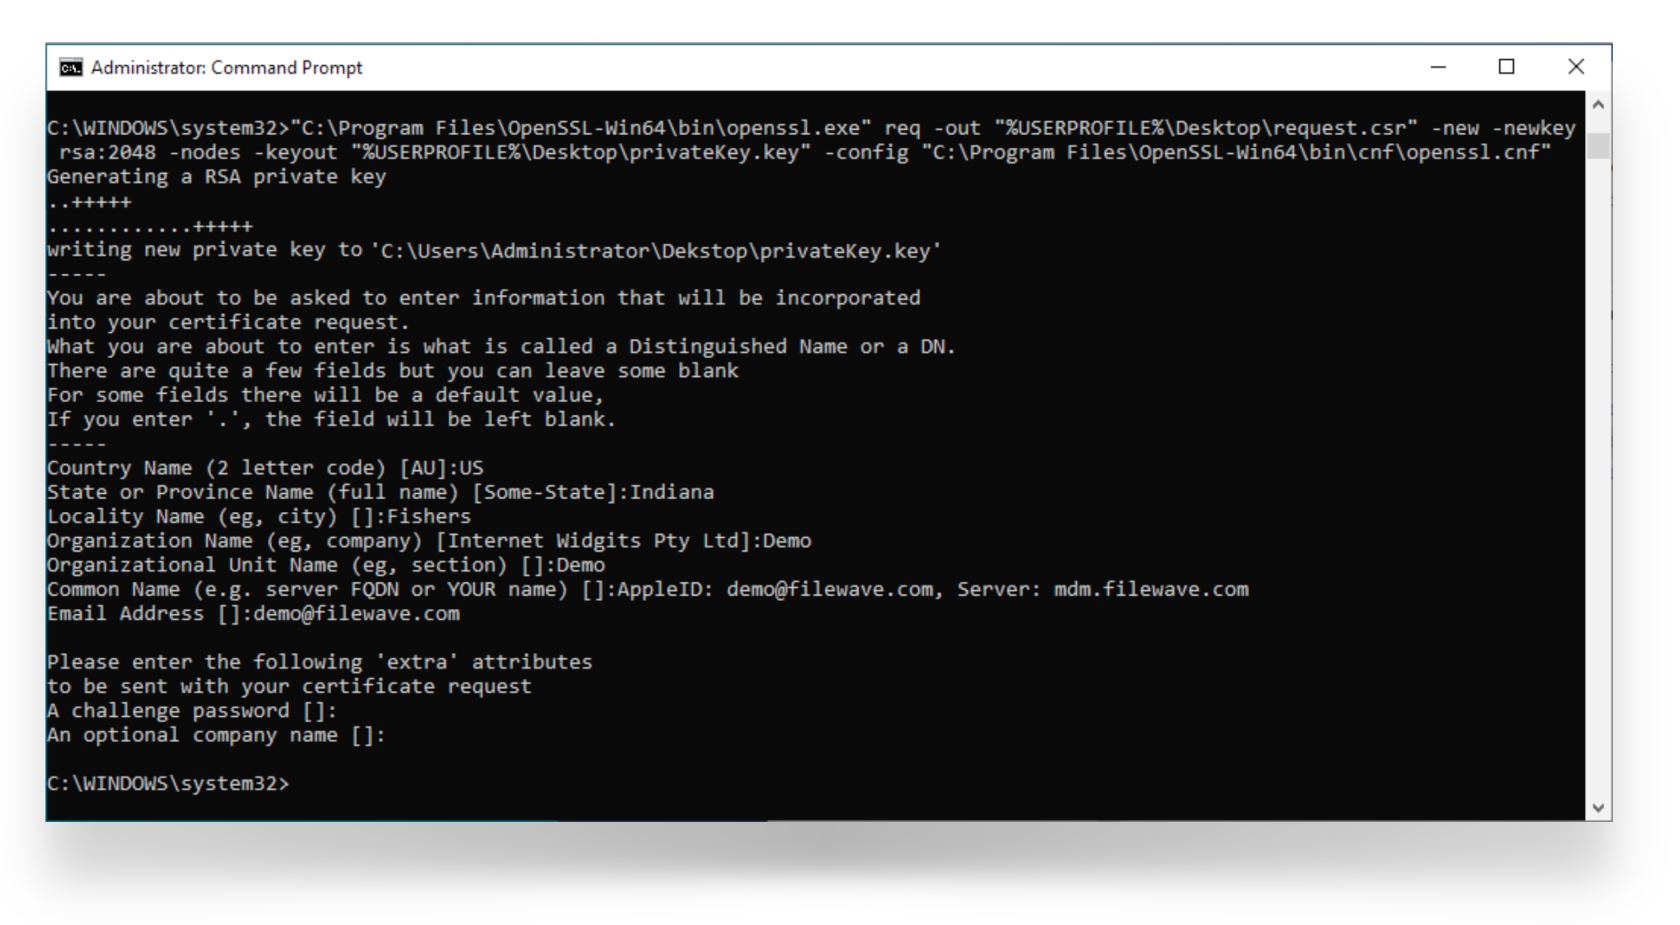](https://kb.filewave.com/uploads/images/gallery/2026-01/oOuKYCQKixxAANkB-1-windows-cmd-csr-creation.png) #### **Step 2: Sign the CSR with FileWave** Before the CSR can be uploaded to Apple, it must be signed by FileWave. 1. Navigate to [https://csr.filewave.com/](https://csr.filewave.com/) and log in with your FileWave account 2. Upload the `request.csr` file you created in Step 1 3. Under **Download signed CSR**, your uploaded CSR should now appear as signed 4. Download this newly signed CSR – this is the file you will upload to Apple in the next step 5. Store the file in a secure location [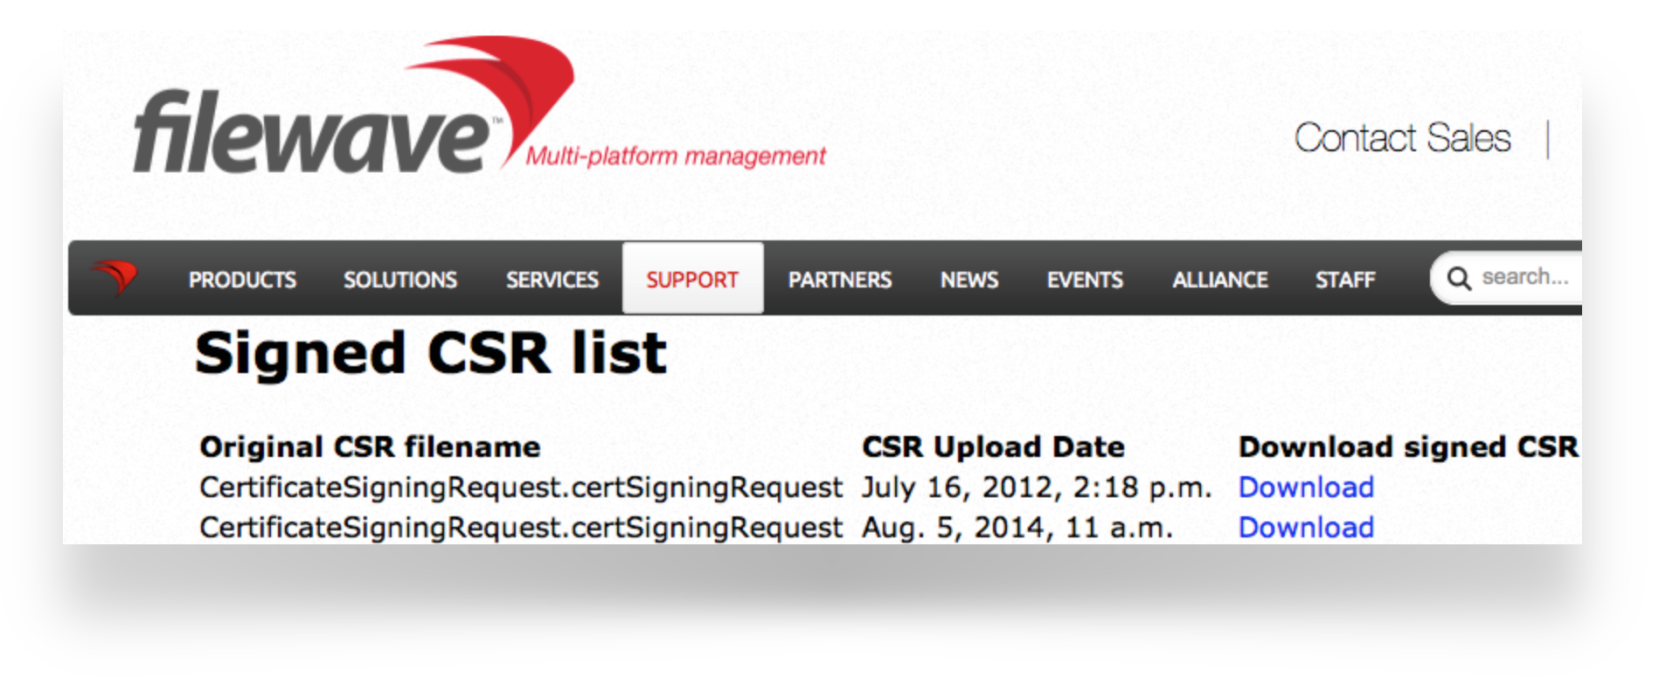](https://kb.filewave.com/uploads/images/gallery/2026-01/vDujlITxq2cGB7mV-csr-portal.png) #### **Step 3: Upload the signed FileWave CSR to Apple** If you are renewing a certificate, skip to **Renewing an existing certificate** below. ##### **Creating a new certificate** 1. Go to the **Apple Push Certificates Portal**: [https://identity.apple.com/pushcert/](https://identity.apple.com/pushcert/) 2. Sign in with an Apple ID (⚠️ do not use a personal Apple ID – use a generic business or institution Apple ID for long-term use) 3. Click **Create** 4. Accept Apple's **Terms of Use** 5. Click **Choose File** and upload the **signed FileWave CSR** from Step 2 6. Click **Upload** – Apple will confirm the request 7. Download the issued **APNS certificate (.pem or .cer)** and store it securely [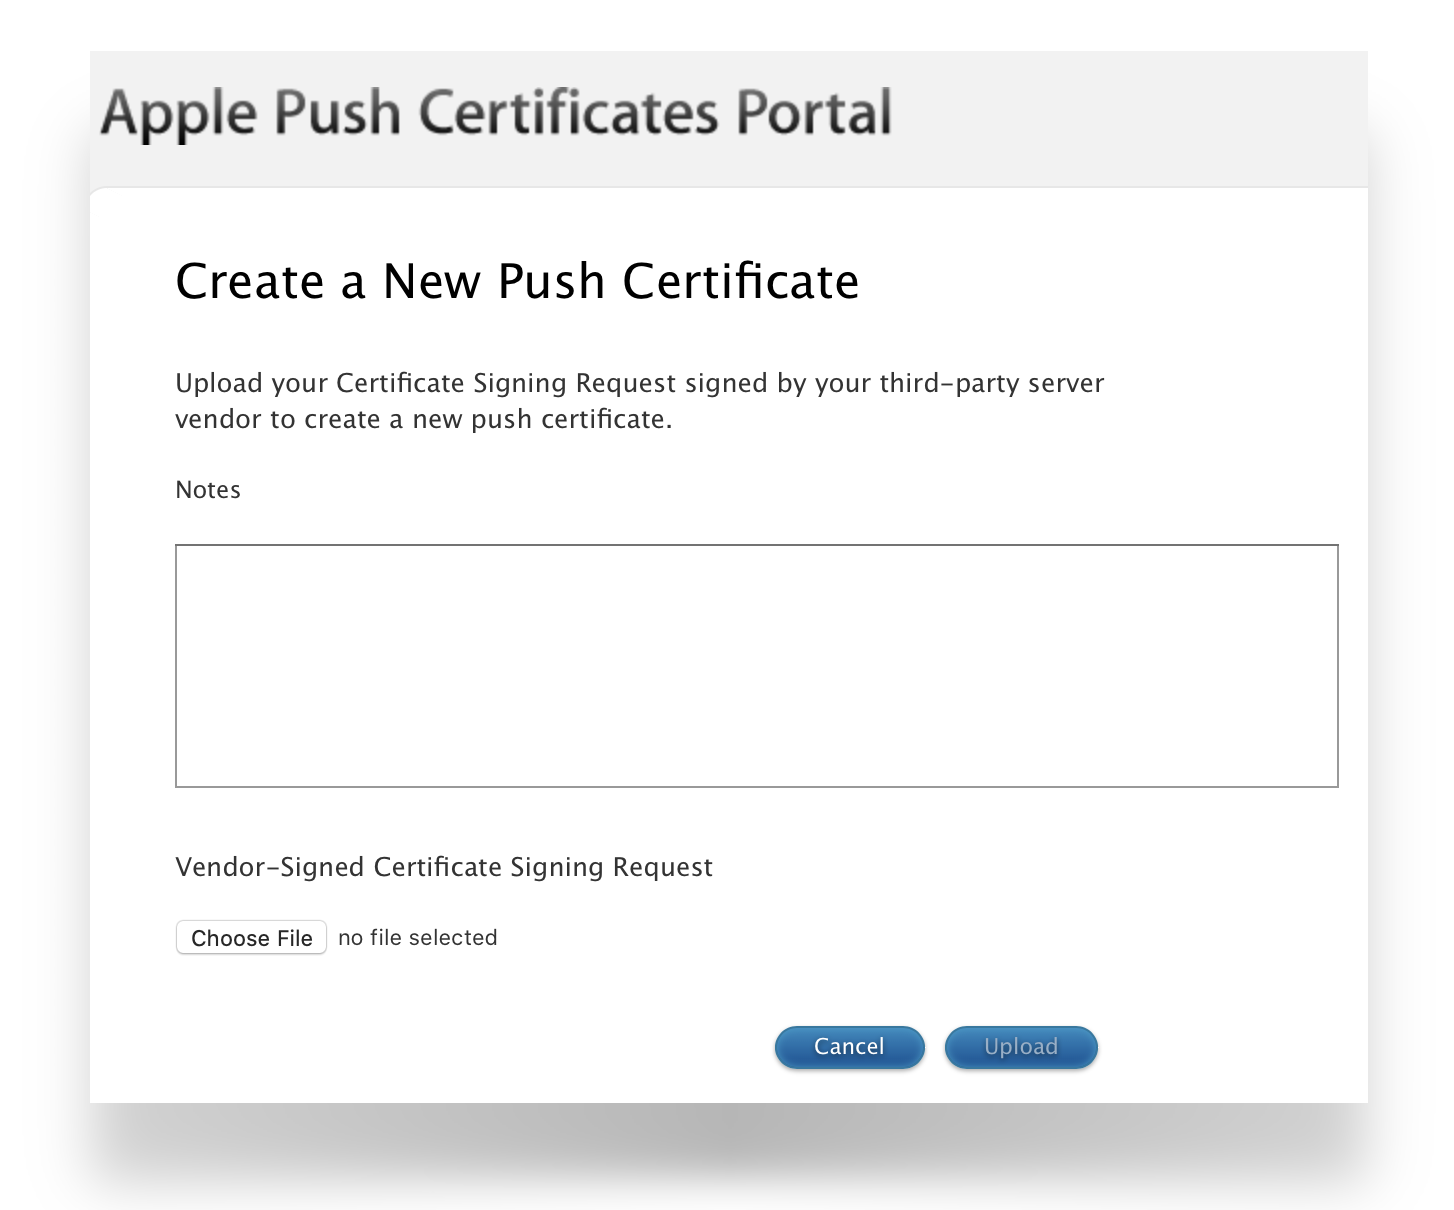](https://kb.filewave.com/uploads/images/gallery/2026-01/nH1NkLoy7Lx62m6w-create-push.png) ##### **Renewing an existing certificate** 1. Go to [https://identity.apple.com/pushcert/](https://identity.apple.com/pushcert/) and log in with the **same Apple ID** that owns the certificate 2. Locate the certificate to renew and click the **info (i)** button to view certificate details, including the **Topic** [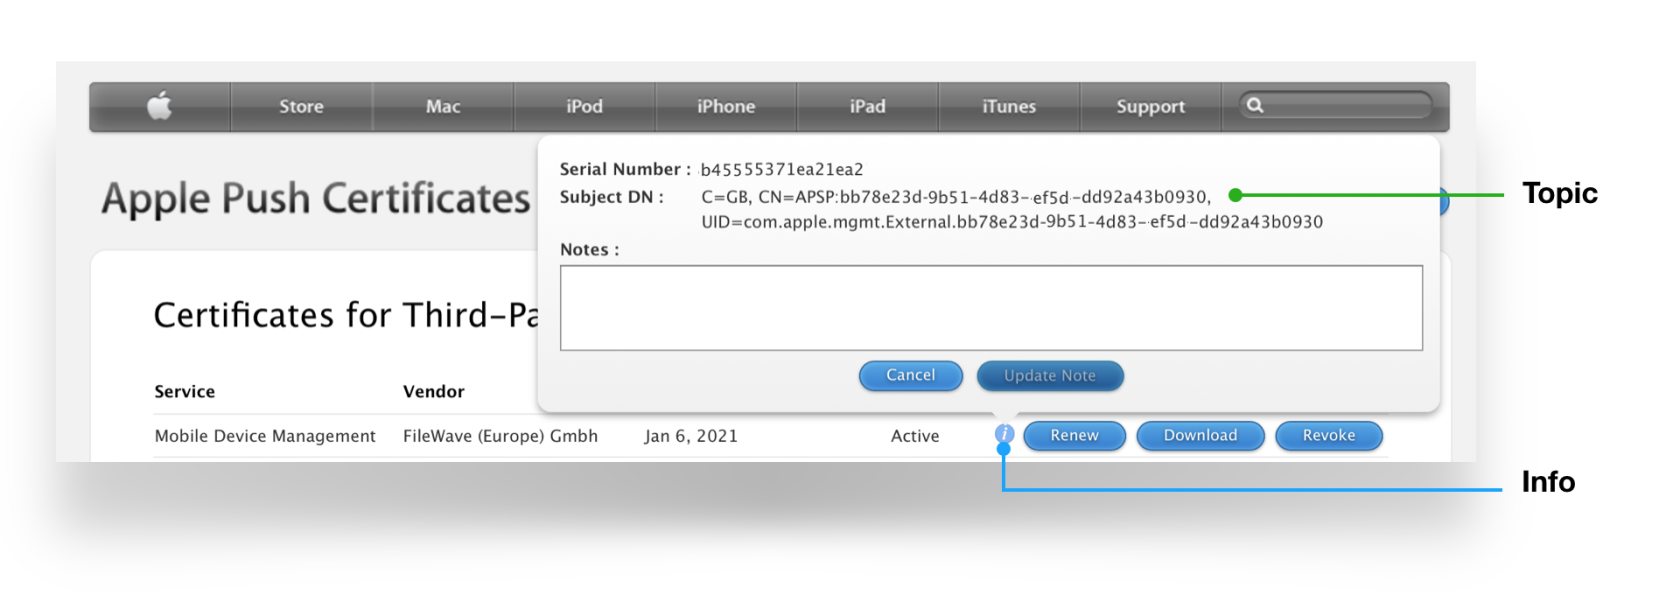](https://kb.filewave.com/uploads/images/gallery/2026-01/ah9EE6tNfUf5rEl8-apns-renewal-003.png) 3. Compare this Topic with the 'Current Certificate' in **FileWave Admin > Preferences > Mobile > Apple Push Notification Certificate** [](https://kb.filewave.com/uploads/images/gallery/2026-01/KLlcGQKeZcgUB00C-apns-renewal-001.png)**Topic Mismatch** If the Topics do not match, do not continue. If the correct certificate is not in the list on Apple's website, you are using the wrong Apple ID. You can identify the correct Apple ID by reviewing the Private Key name from the original CSR (which should contain your Apple ID).
4. Click **Renew** 5. Upload the **signed FileWave CSR** from Step 2 6. Click **Upload** – Apple will confirm the request [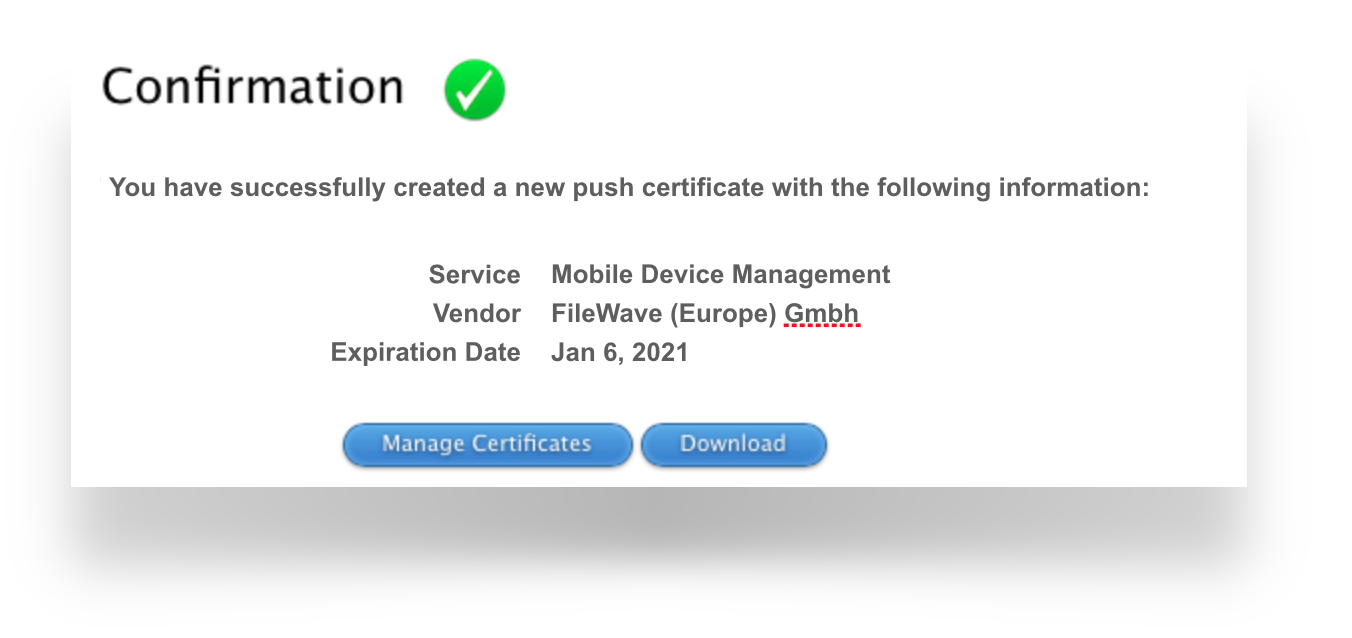](https://kb.filewave.com/uploads/images/gallery/2026-01/7PKkG4SXXfh7z5TH-apns-confirmation.png) 7. Download the renewed **APNS certificate (.pem or .cer)** and store it securely [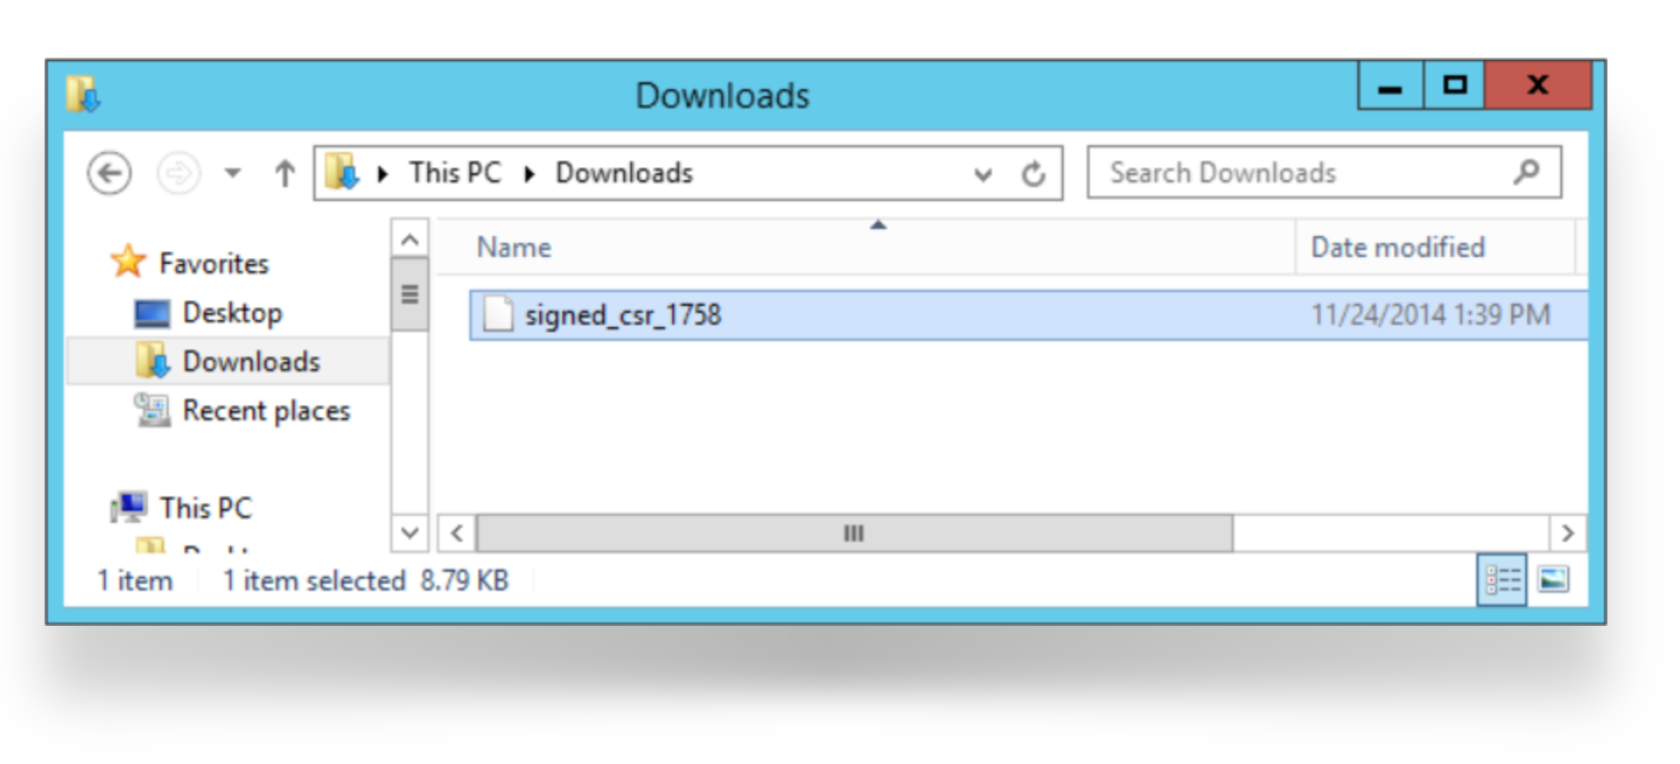](https://kb.filewave.com/uploads/images/gallery/2026-01/I1DsMZM5J61zQk2R-signed-csr-download.png) #### **Step 4: Create a .p12 file from the Signed Certificate** 1. Open **cmd.exe** as an Administrator 2. Create a `.p12` file by entering the following command. Replace the file paths if necessary, and note that `MDM_FileWave.pem` is an example – use your actual downloaded certificate filename: ``` "C:\Program Files\OpenSSL-Win64\bin\openssl.exe" pkcs12 -export -in "%USERPROFILE%\Downloads\MDM_FileWave.pem" -inkey "%USERPROFILE%\Desktop\privateKey.key" -out "%USERPROFILE%\Desktop\push_cert.p12" -name fw-apns ``` 3. When prompted for the **Export Password**, leave it blank and press Enter [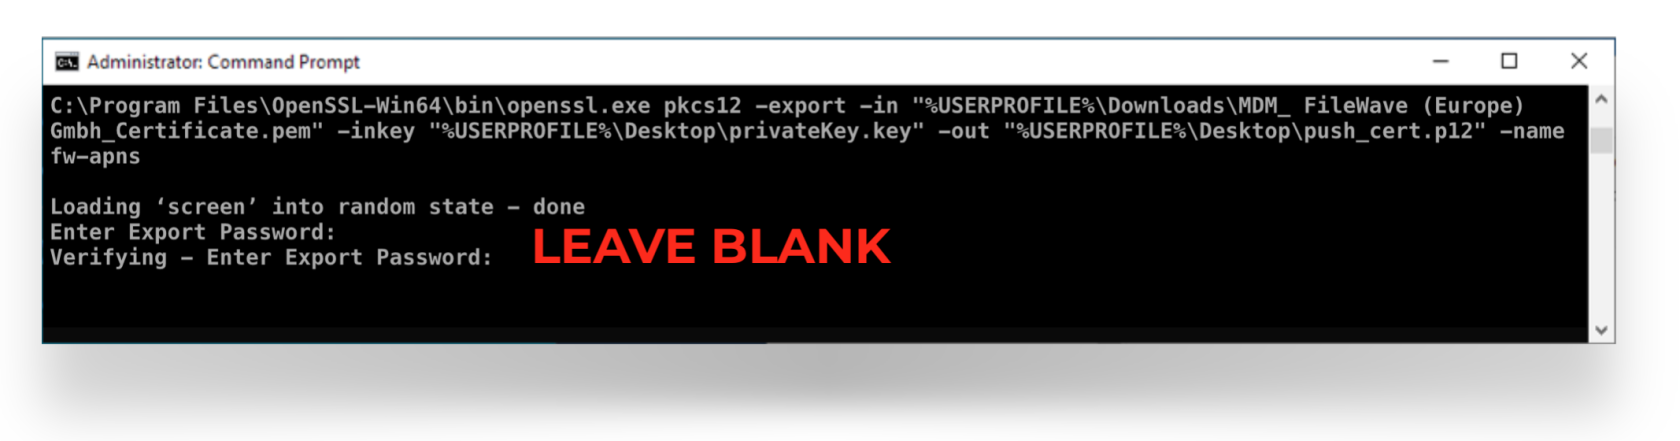](https://kb.filewave.com/uploads/images/gallery/2026-01/odCqISOpVBqlf5WV-cerate-p12.png)**Path Issues** If the command errors when creating the .p12 file, replace the %USERPROFILE% variable with the full file path (e.g., C:\\Users\\YourUsername\\).
4. Verify the certificate was created correctly by running: ``` "C:\Program Files\OpenSSL-Win64\bin\openssl.exe" pkcs12 -info -in "%USERPROFILE%\Desktop\push_cert.p12" ``` This will display certificate details. Confirm that the **Common Name** matches the value you entered in Step 1, and that the **Topic** matches the value from Apple. [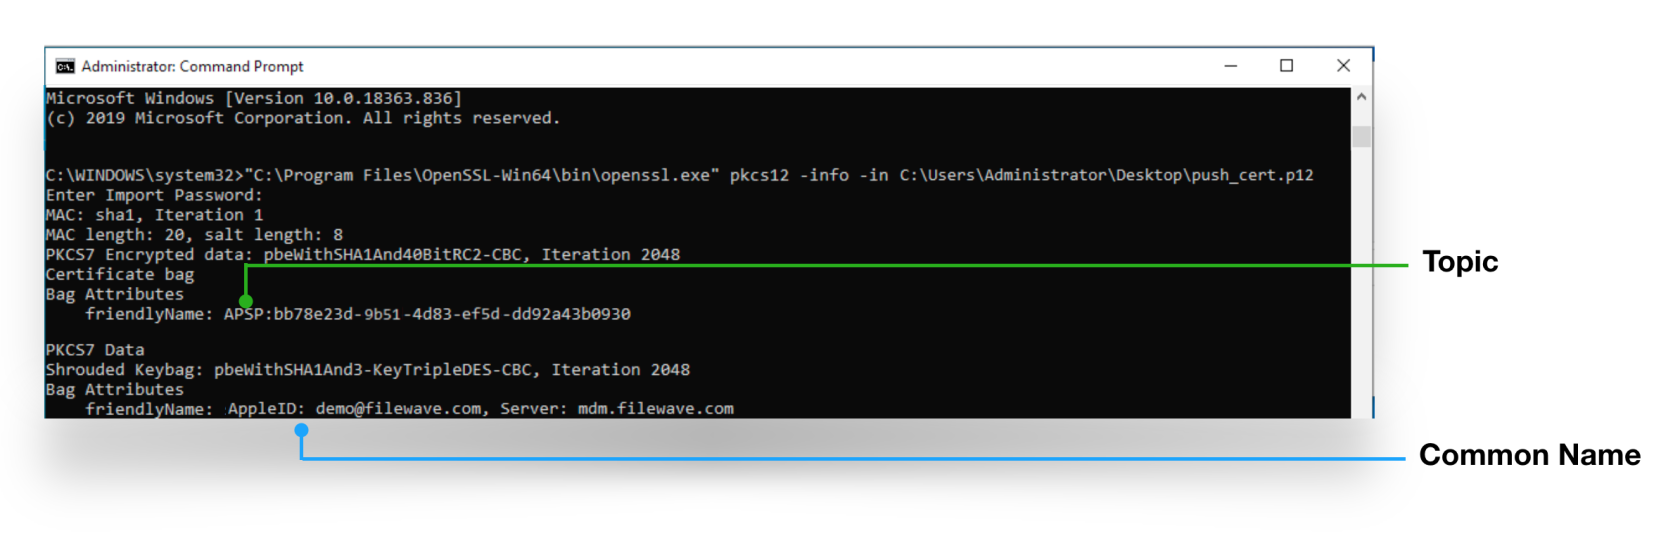](https://kb.filewave.com/uploads/images/gallery/2026-01/IPw6DYAGQJLo77Rd-openssl-private-key.png)**Common Name and Topic** The Private Key name will display the Common Name you entered when creating the CSR. The certificate name is the same as the Topic. Both should match the certificate you created or renewed at Apple.
#### **Step 5: Upload the certificate into FileWave** 1. Launch **FileWave Admin** and log in to your FileWave server 2. Open **Preferences** [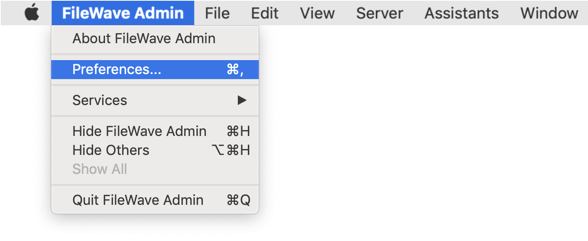](https://kb.filewave.com/uploads/images/gallery/2026-01/LxUUQK6q2z5nAL7v-filewave-admin-prefs.png) 3. Select the **Mobile** tab 4. Click **Browse** and navigate to the `push_cert.p12` file you created in Step 4 5. Select the file and click **Upload APN Certificate/Key Pair** [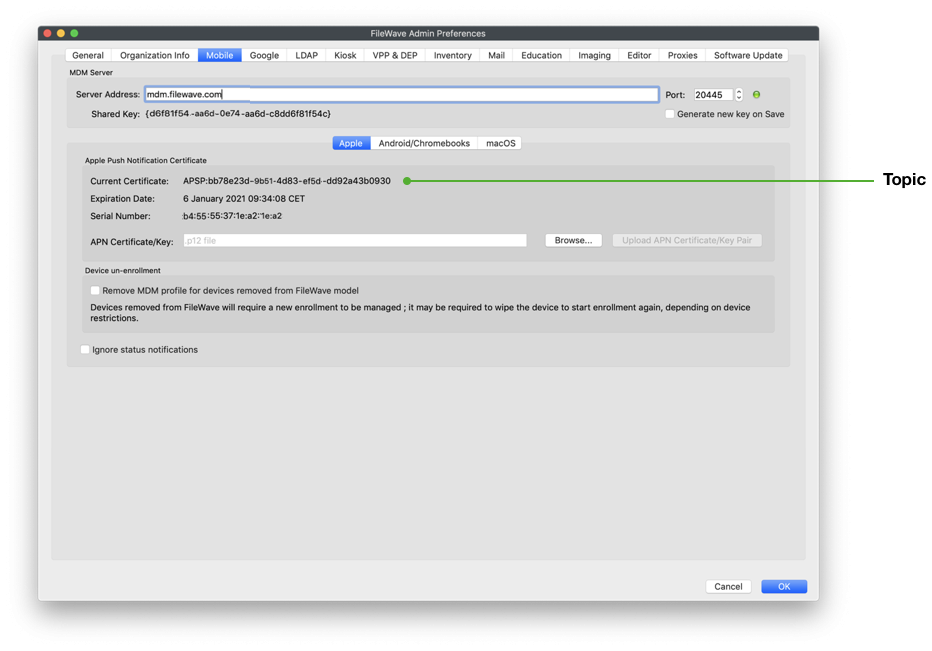](https://kb.filewave.com/uploads/images/gallery/2026-01/WNkas6lTSFZCruWH-apns-renewal-001.png) The topic should match the previous topic. FileWave Central should warn if the topics do match before accepting the upload: [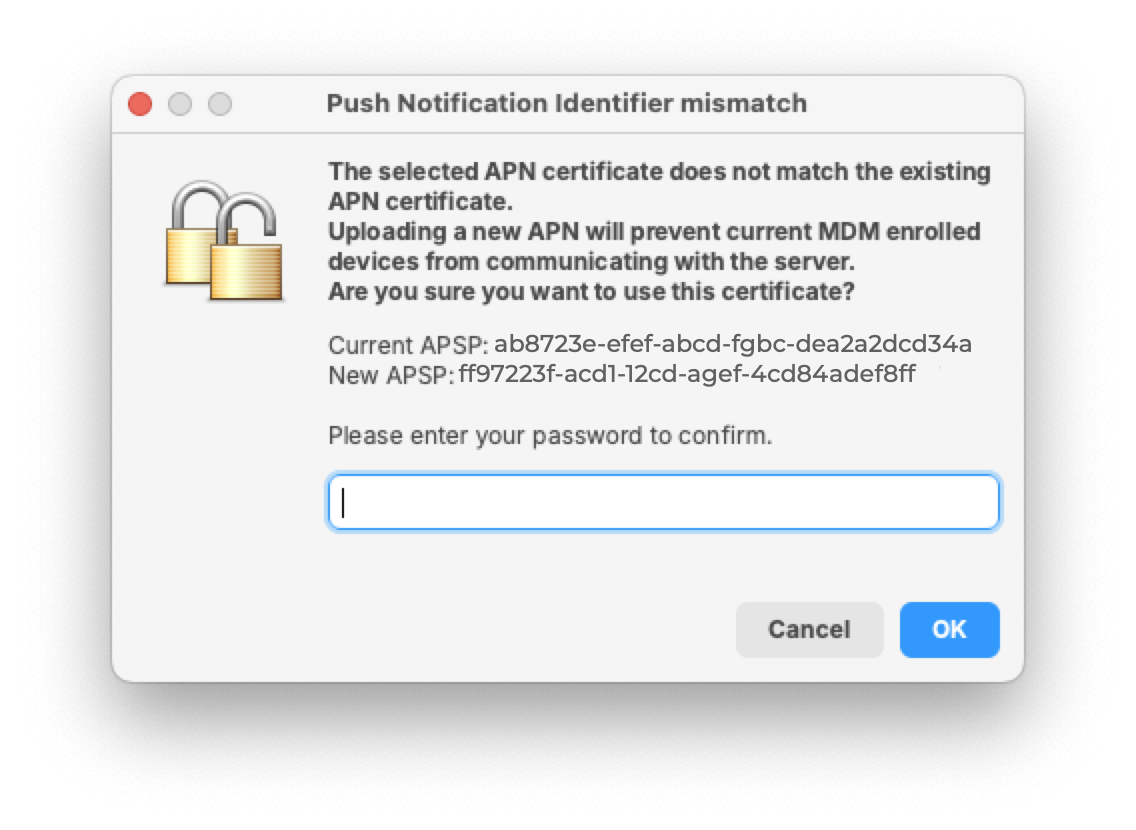](https://kb.filewave.com/uploads/images/gallery/2026-02/1Gee8BgJGxherpat-apns-mismatch-warning.png) Click **OK** to save and close the Preferences dialog. FileWave may now manage Apple devices using Apple's Push Notification Service. #### **Step 6: Verification** - Test whether new or existing MDM clients correctly connect to the APNS service - Check the logs in FileWave Admin to ensure there are no certificate errorsAPNs certificates require yearly renewals. Through **FileWave Admin > Dashboard > Alert Settings**, you can configure automated email reminders. Consider enabling the 'APN for MDM' alert. Note: this requires Email preferences in Admin to be configured.
## Contact Apple for help If you forgot the email tied to your Apple Push Notification certificate, you may reach out to Apple for assistance: [Contact Apple for help with APN](https://support.apple.com/en-us/118629) ## Related articles - [APNs Certificate Creation & Renewal on macOS Computers (XCA)](https://kb.filewave.com/books/certificates/page/apns-certificate-creation-renewal-on-macos-computers-xca) - [APNs Certificate Creation & Renewal on macOS Computers (Keychain)](https://kb.filewave.com/books/certificates/page/apns-certificate-creation-renewal-on-macos-computers-keychain)