# 3. Client Enrollment
Please follow each section that corresponds with the device types you want to enroll in FileWave.
You will notice that some device types, such as iOS and macOS, contain new information, while Windows and Chromebooks redirect to a previous section.
# Android Enrollment
## Enrolling Android devices to FileWave
If you haven't already, please consult the [Client Pre-Requisites > Android](https://kb.filewave.com/books/evaluation-guide/page/android-client-pre-requisites "Android") section to learn how to enroll Android EMM devices into FileWave.
There are several ways to enroll Android devices;
- [QR code](#bkmrk-qr-code-or-afw%23setup)
- [afw#setup](#bkmrk-qr-code-or-afw%23setup)
- [Bring Your Own Device](#bkmrk-android-byod-%28emm%29)
- [Zero Touch](https://kb.filewave.com/books/android/page/android-emm-zero-touch-enrollment "Android EMM Zero-Touch Enrollment")
Devices in Safe Mode may not be enrolled
### QR Code or afw#setup Enrollment
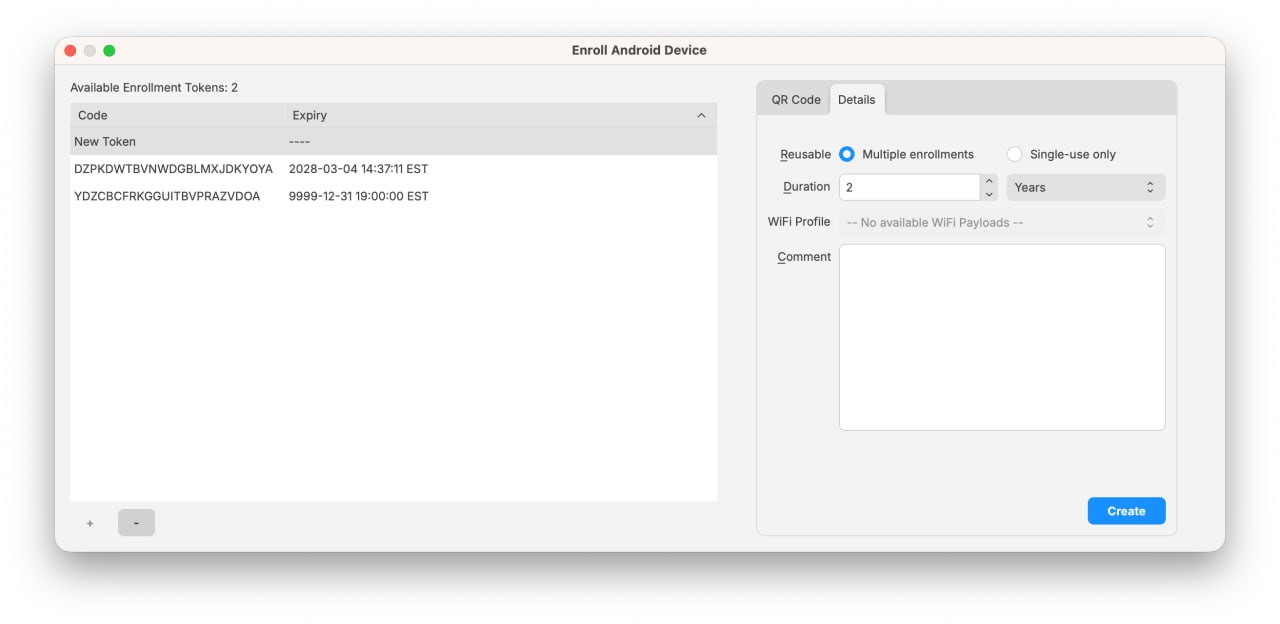
In FileWave Central, create an Android enrollment token from *Assistants > Enroll Android Device...*.
You can create multiple tokens. For normal evaluation work, select **Multiple enrollments** and use the **Duration** field to enter the number of years the token should remain valid. The dialog defaults to **2 Years**, and Android enrollment tokens are no longer limited to 30 days.
Make sure the device is fully wiped to factory settings and is not yet activated. Most modern Android versions can commence the process by either:
- Tapping the screen seven times (in the same spot)
or
- Entering **`afw#setup`** in place of a Google account.
1. Increased flexibility: Employees can use their personal devices for work, reducing the need for organizations to provide dedicated work devices.
2. Enhanced security: Corporate data is secured within the work profile, preventing unauthorized access and data leakage.
3. Improved privacy: Users maintain control over their personal data and apps, as the organization can only manage the work profile.
4. Simplified management: EMM administrators can easily manage and configure work profiles, apply policies, and distribute apps to enrolled devices.
Before starting BYOD enrollment, complete the Android EMM setup at the start of this article.
After going through the EMM setup, continue with the next steps.
1. Download Android device policy App ([https://play.google.com/store/apps/details?id=com.google.android.apps.work.clouddpc&hl=en\_US](https://play.google.com/store/apps/details?id=com.google.android.apps.work.clouddpc&hl=en_US))
2. From the App scan the Enrollment QR code
3. Add the devices to admin as normal
4. (Observe) you will have a "Play Store" app and a "Work Play Store"
**FileWave 16.4 and later:** macOS ADE profiles can manage Mac-to-Mac Migration Assistant behavior during Setup Assistant. See [ADE Profiles](https://kb.filewave.com/books/filewave-anywhere-help-menus/page/ade-profiles) for the migration controls and DDM boundary.
---
The first step to enrolling your Apple devices via ADE is to create an ADE Profile. The ADE Profile determines the initial settings applied during enrollment and applies across Apple platforms. Unless you need explicit separation of the initial enrollment settings, one ADE Profile can often cover all of your devices. This is partly possible because FileWave Custom Fields can be used to uniquely name devices.
1. Open FileWave Admin and navigate to *"Assistants > ADE Association Management".*
2. Click the "\[+\]" button on the right-hand side under *"Profiles".*
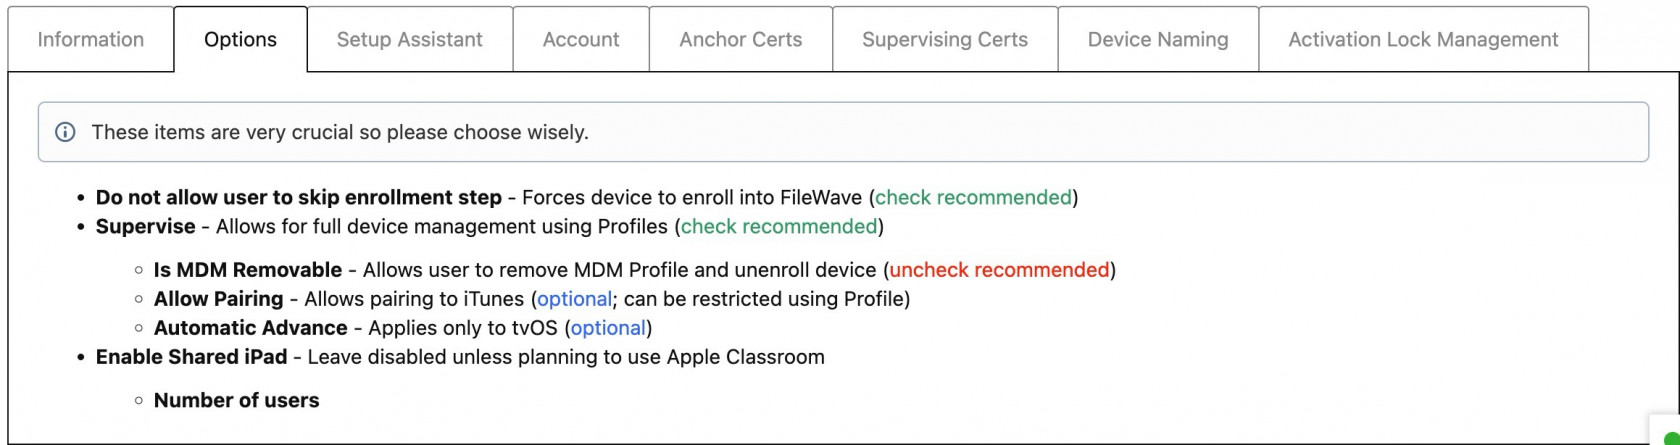
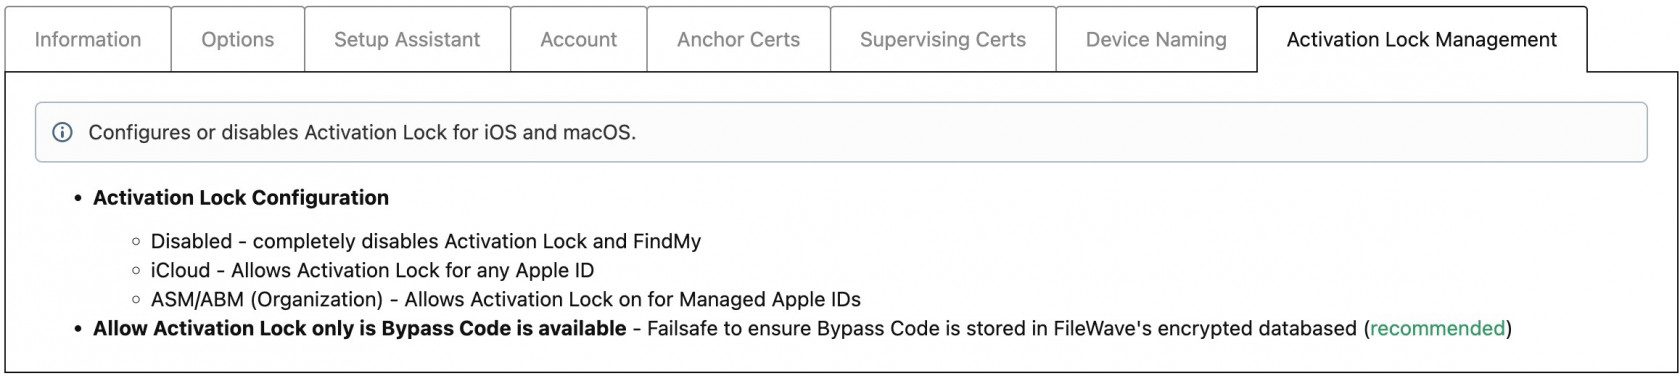
3. Fill out each tab according to your management preferences.
[](https://kb.filewave.com/uploads/images/gallery/2023-06/sFl2ZRbSSYHi3ykT-dep-enrollment-information.jpg)
[](https://kb.filewave.com/uploads/images/gallery/2023-06/omR3L6b4OLuT38gz-dep-enrollment-options.jpg)
[](https://kb.filewave.com/uploads/images/gallery/2023-06/K3KGtTsekeuYWOYq-dep-enrollment-setup-assistant.jpg)
[](https://kb.filewave.com/uploads/images/gallery/2023-06/3ouMciXqb3jeKZ0P-dep-enrollment-account.jpg)
[](https://kb.filewave.com/uploads/images/gallery/2023-06/sfvj3V5sH7TpXnwP-dep-enrollment-anchor-certs.jpg)
[](https://kb.filewave.com/uploads/images/gallery/2023-06/gA6XXdGxiqJ84CiK-dep-enrollment-supervising-certs.jpg)
[](https://kb.filewave.com/uploads/images/gallery/2023-06/5x09wU0aBoXjZrOl-dep-enrollment-device-naming.jpg)
[](https://kb.filewave.com/uploads/images/gallery/2023-06/V1MMRSMXNuszKYOW-dep-enrollment-activation-lock-management.jpg)
Starting in FileWave 16.3.x, ADE profiles also support `do_not_use_profile_from_backup`. As described in Apple's deployment guidance, this tells a restored device to ignore the ADE profile embedded in the backup and fetch the current ADE assignment from Apple Business Manager or Apple School Manager instead, so the correct ADE configuration can be applied after restore.
FileWave 16.3.x also adds the **Age Based Safety Settings** skip key in ADE profiles and Setup Assistant. Apple's documentation is not yet fully consistent on whether this fully replaces `AdditionalPrivacySettings`, so FileWave keeps support for both keys for now.
The screenshots above show the general ADE profile tabs, but they are not a complete inventory of every current field. Newer ADE options added in later FileWave releases may not be visible in those older screenshots.
## **Assigning ADE Profiles**
---
Assigning ADE Profiles is very easy within FileWave, especially if you only have one ADE Profile since you can set a Default ADE Profile. With a Default ADE Profile configured, anytime you assign a new device to the FileWave MDM Server from within Apple School Manager or Apple Business Manager, the ADE Profile will automatically apply and the device will be ready for ADE enrollment. However, if you have multiple ADE Profiles, FileWave will also enable you to create Rule-based ADE Profile assignments or you can always just drag-n-drop a ADE Profile onto a single device or multiple devices onto a ADE Profile.
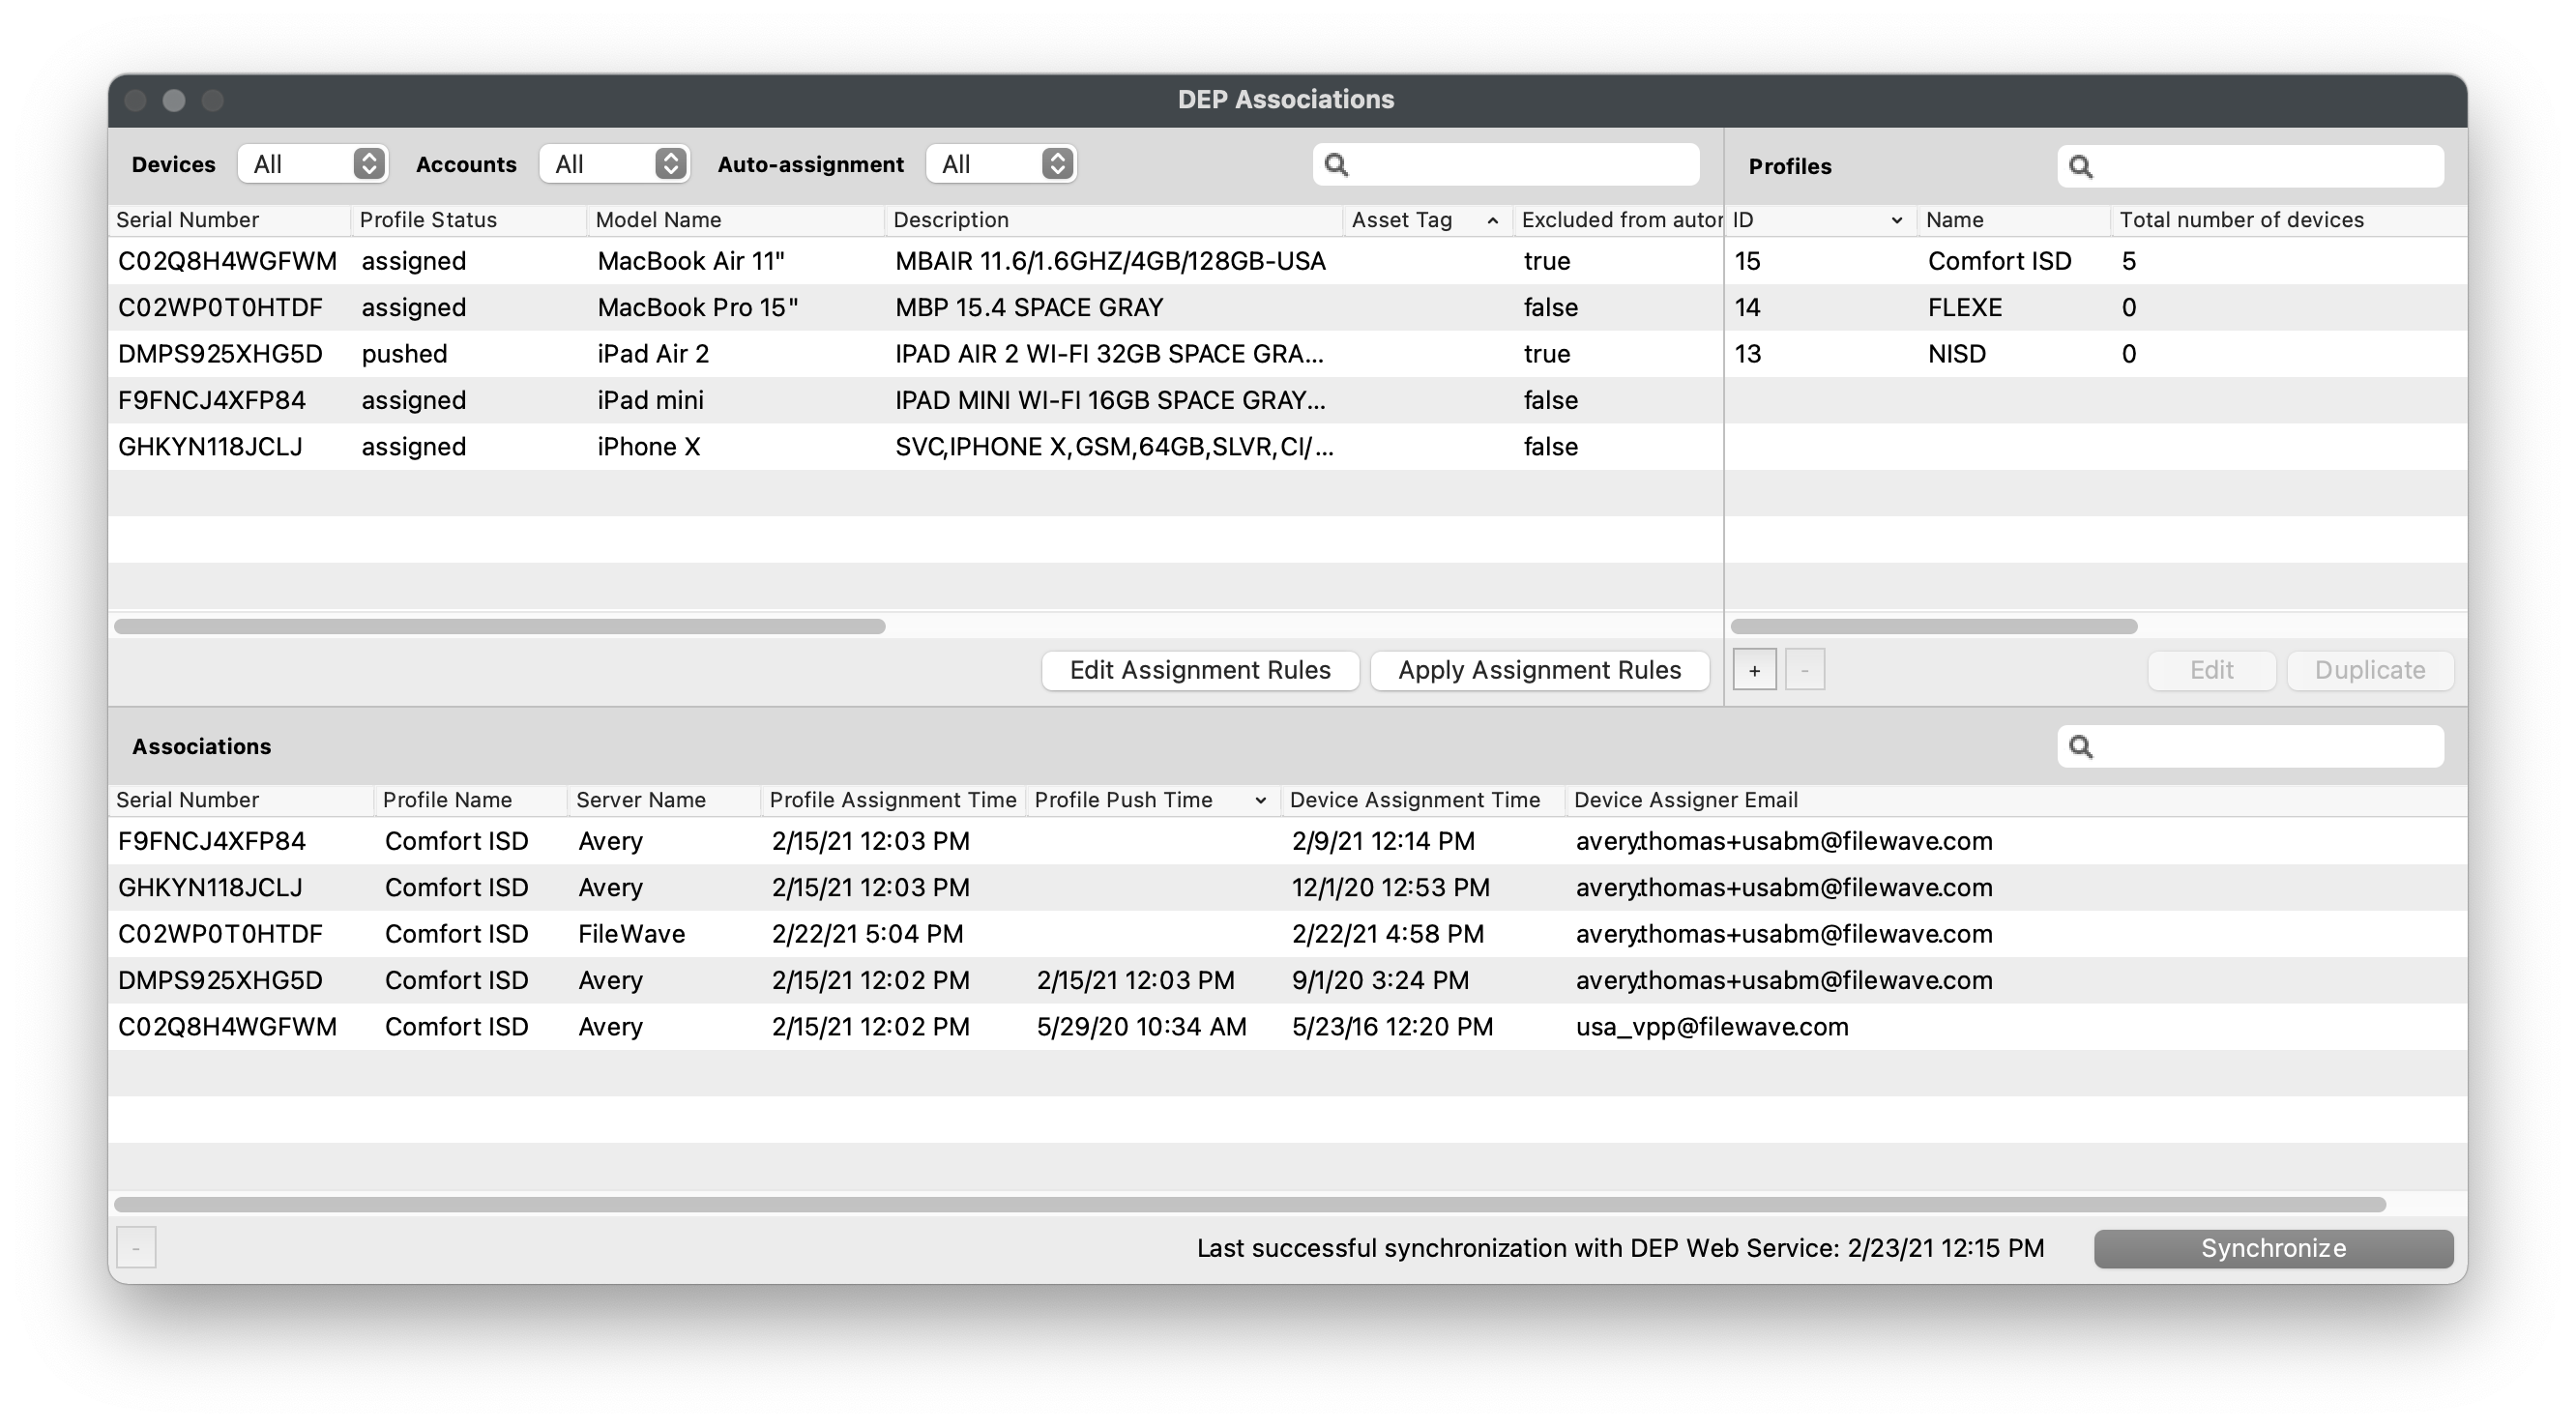
The *"Profile Status"* field in the *"Devices"* pane tells you the current status of the ADE profile on the client device.
- Empty - no ADE Profile assigned
- Assigned - ADE Profile has been assigned but ADE enrollment has not occurred
- Pushed - Setup Assistant setting has run and settings have been enforced on client device
- Removed - ADE profile has been unassigned from device, will be changed to "Empty" after ADE sync
### **Setting Default ADE Profile**
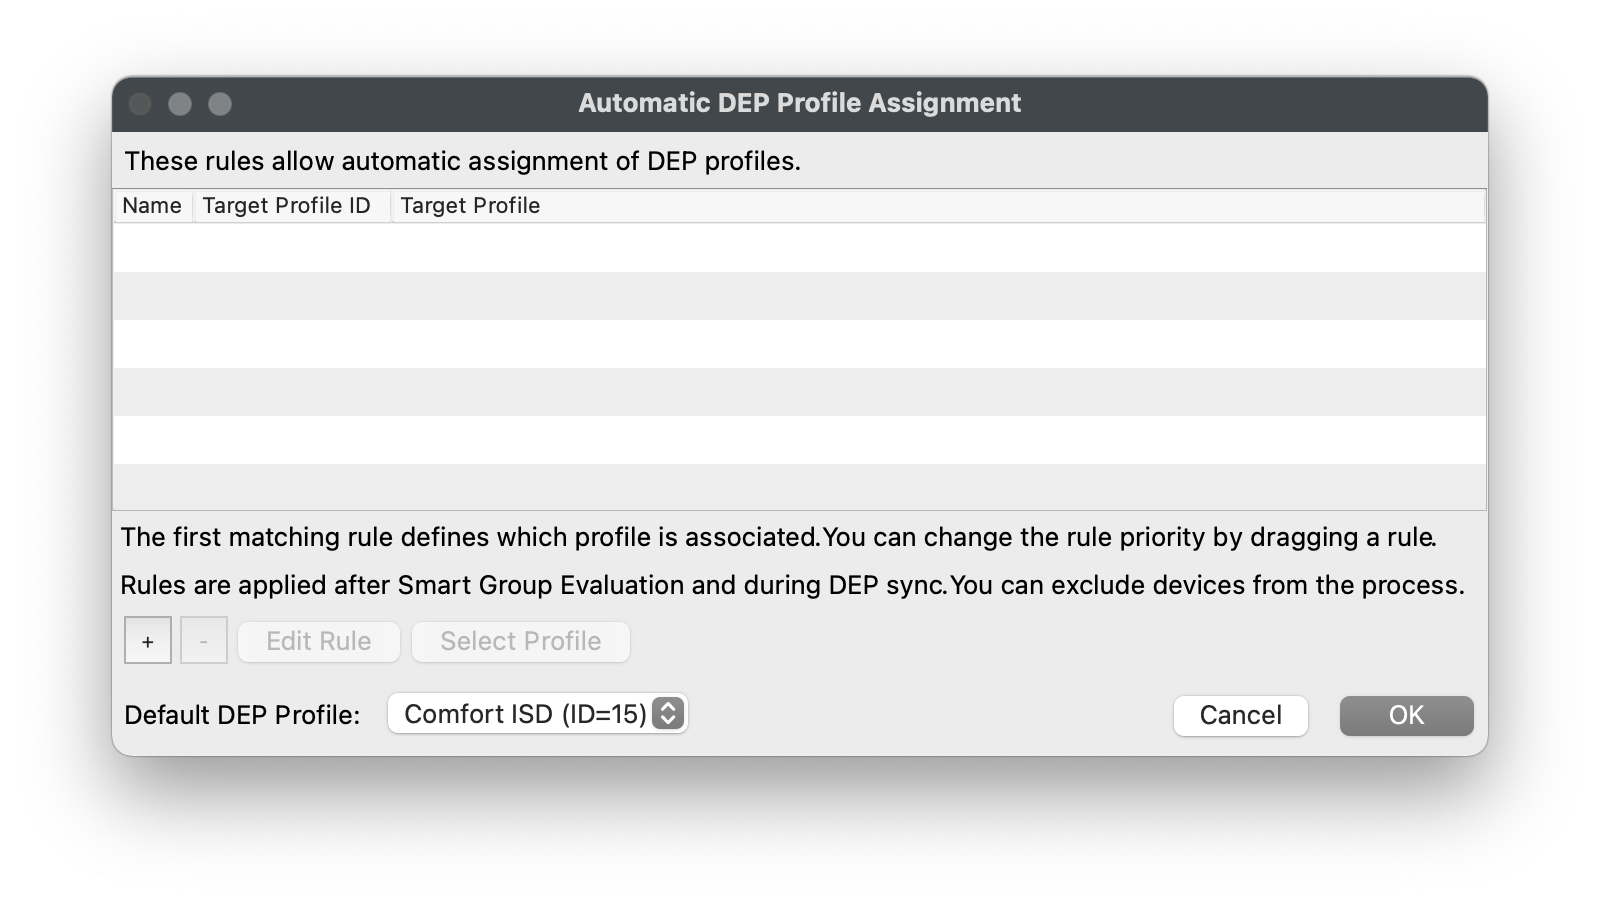
1. Open FileWave Admin and navigate to *"Assistants > ADE Association Management".*
2. Click *"Edit Assignment Rules".*
3. Select your recently created ADE Profile from the *"Default ADE Profile"* dropdown menu.
4. Click *"OK".*
5. Click *"Apply Assignment Rules"* to save the changes.
6. Hold the Option or Alt key on your keyboard and click *"Synchronize (full sync)"* button in lower right-hand corner
7. You should now see that all of your devices have been *"Assigned"* to your ADE Profile.
### **Rule-based ADE Profile Assignment**
1. Open FileWave Admin and navigate to *"Assistants > ADE Association Management".*
2. Click *"Edit Assignment Rules".*
3. Click "\[+\]".
4. Select the ADE Profile you'd like to assign based on rules.
5. Drag-n-drop the Inventory data point the devices must meet to be assigned to the ADE Profile into the *"Criteria"* section.
6. Verify the criteria is correct by viewing the returned devices in the *"Fields"* section.
7. *"Save"* the query and *"OK"* to save rule definition.
8. Click *"Apply Assignment Rules"* to save the changes.
9. Hold the Option or Alt key on your keyboard and click *"Synchronize (full sync)"* button in lower right-hand corner.
10. You should now see that your selected devices have been *"Assigned"* to your ADE Profile.
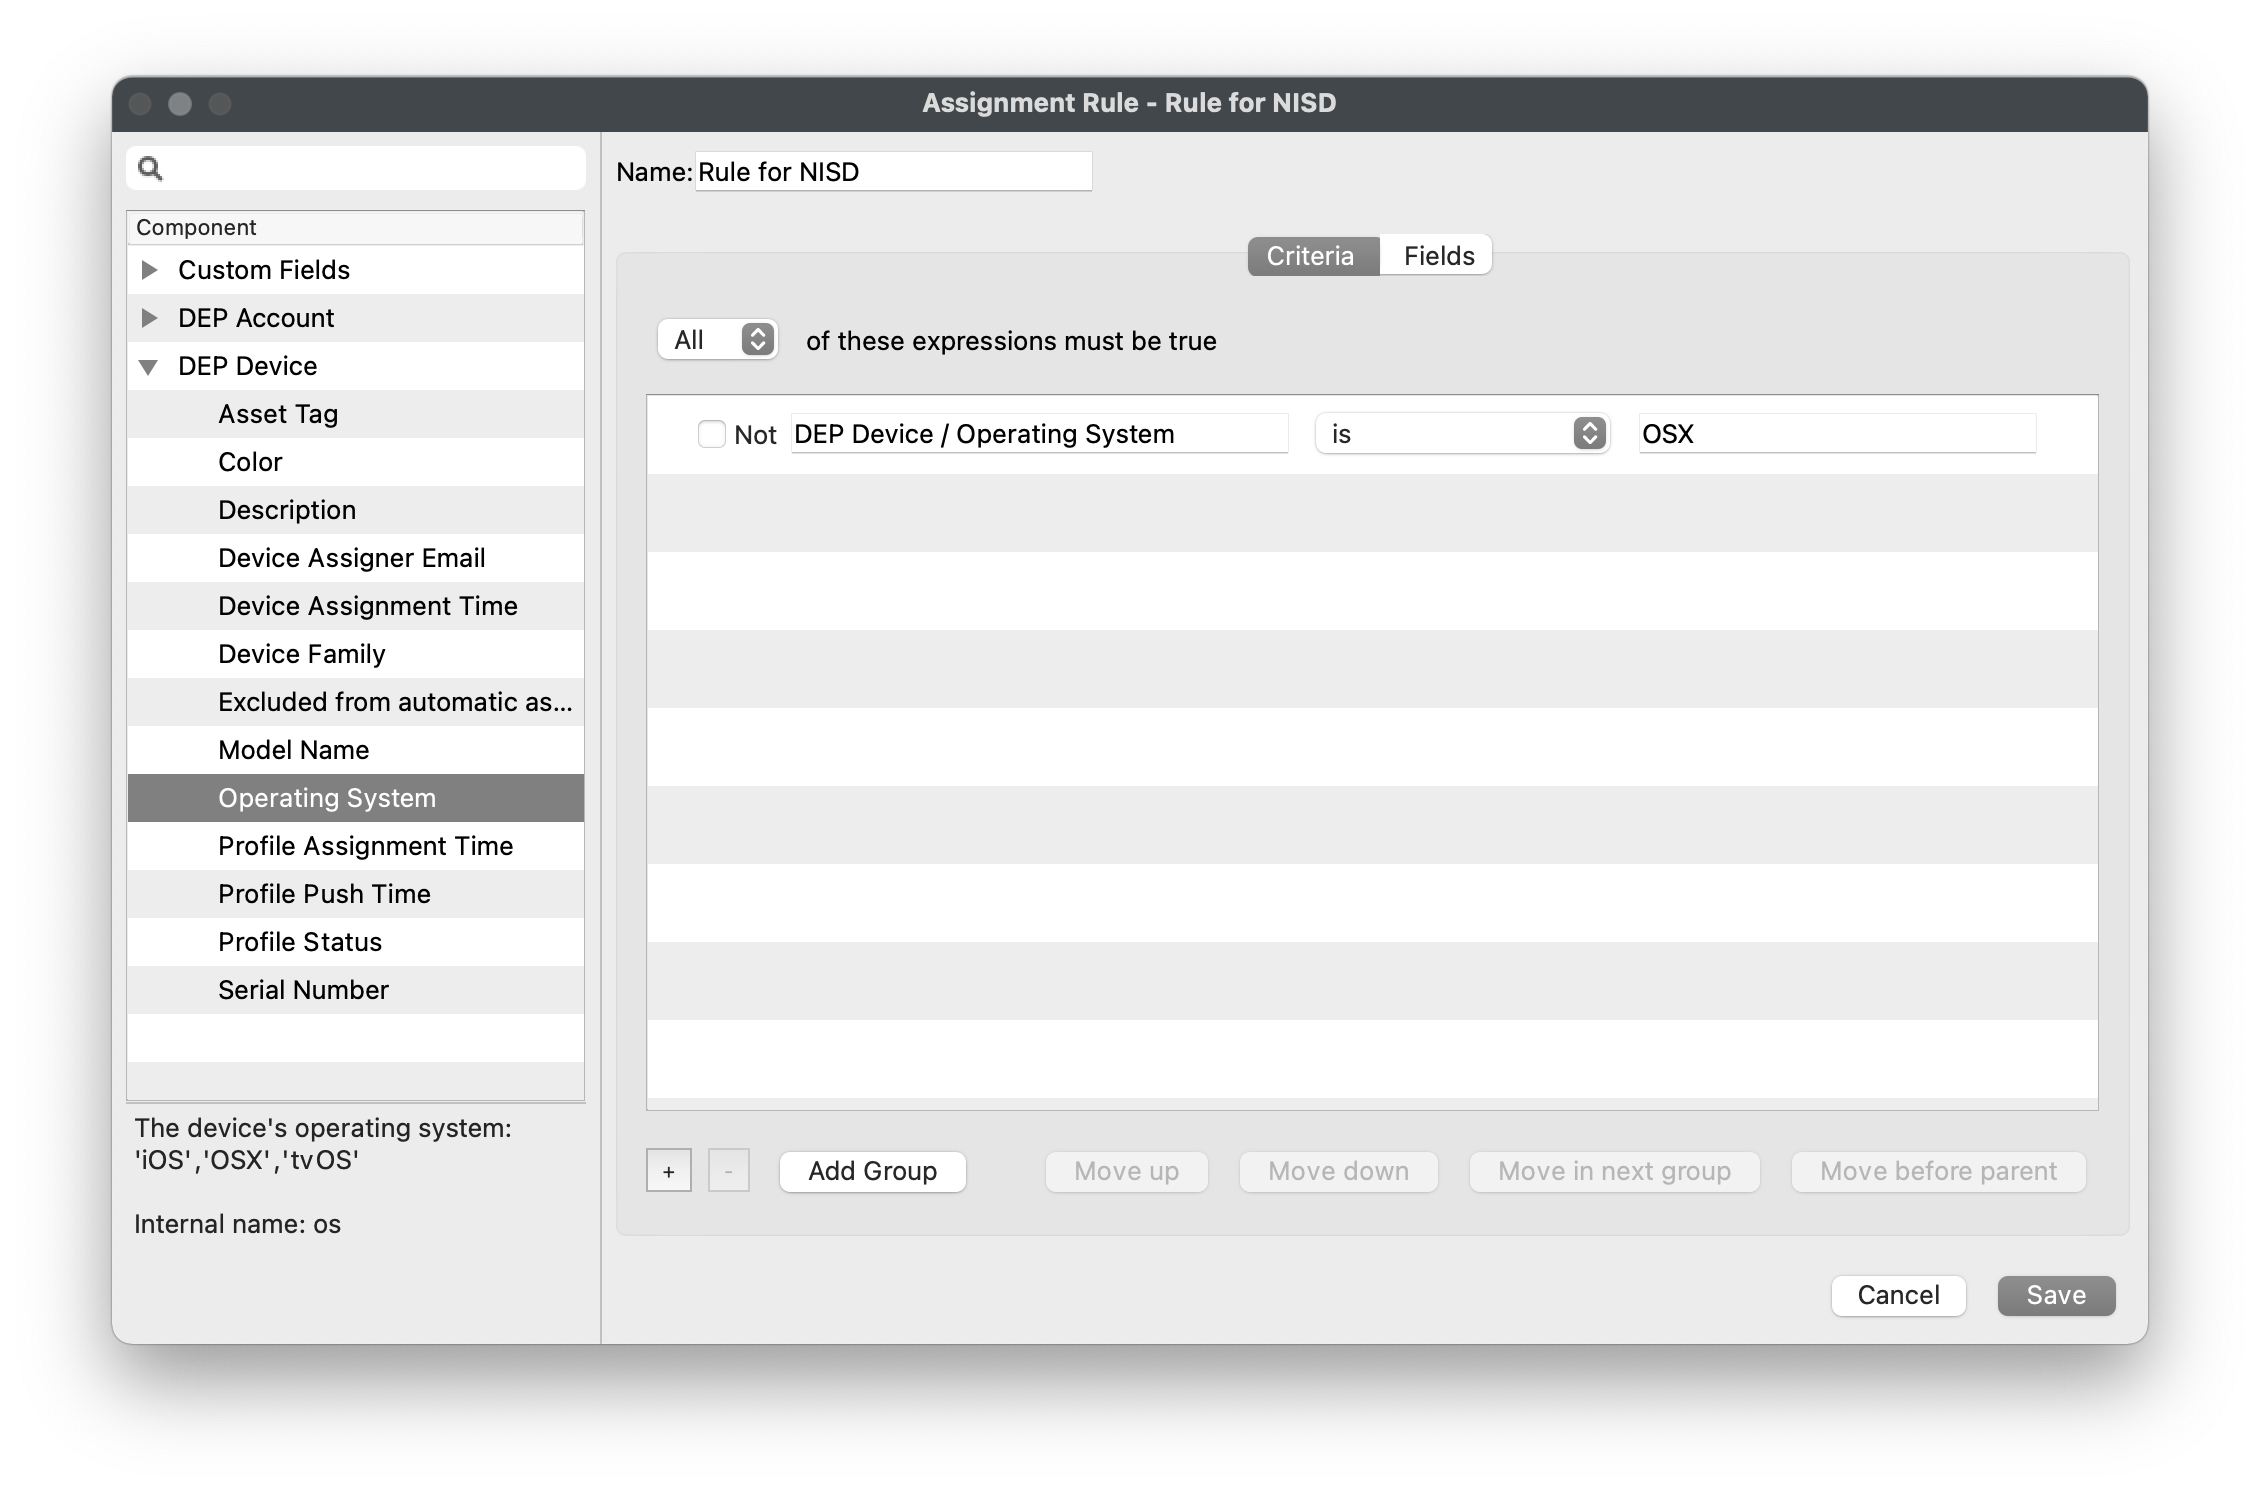
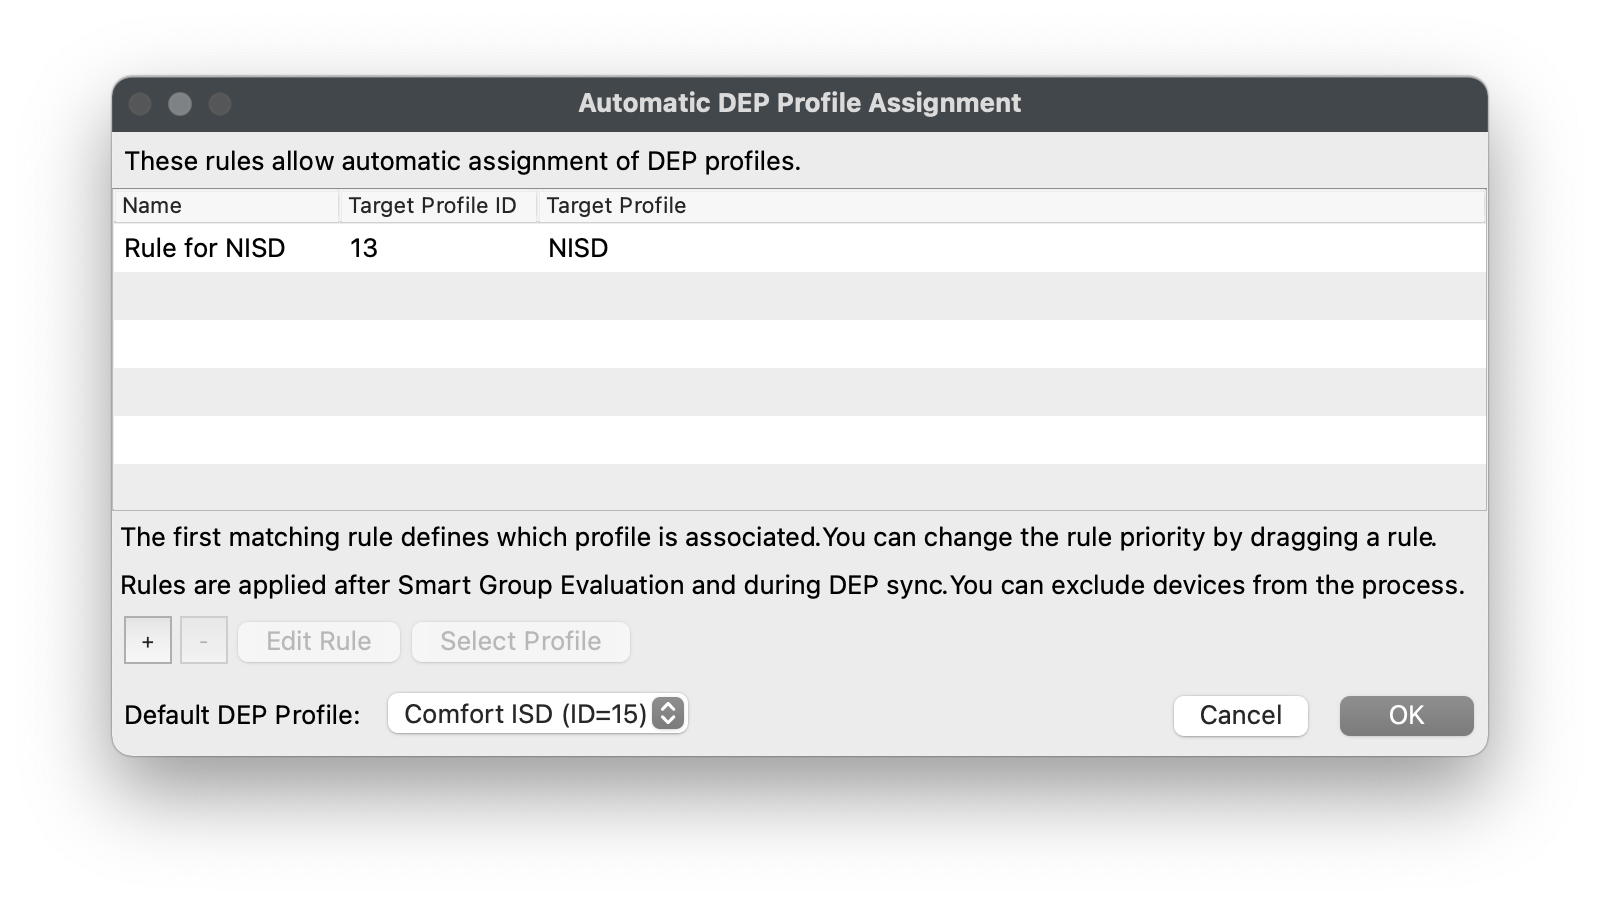
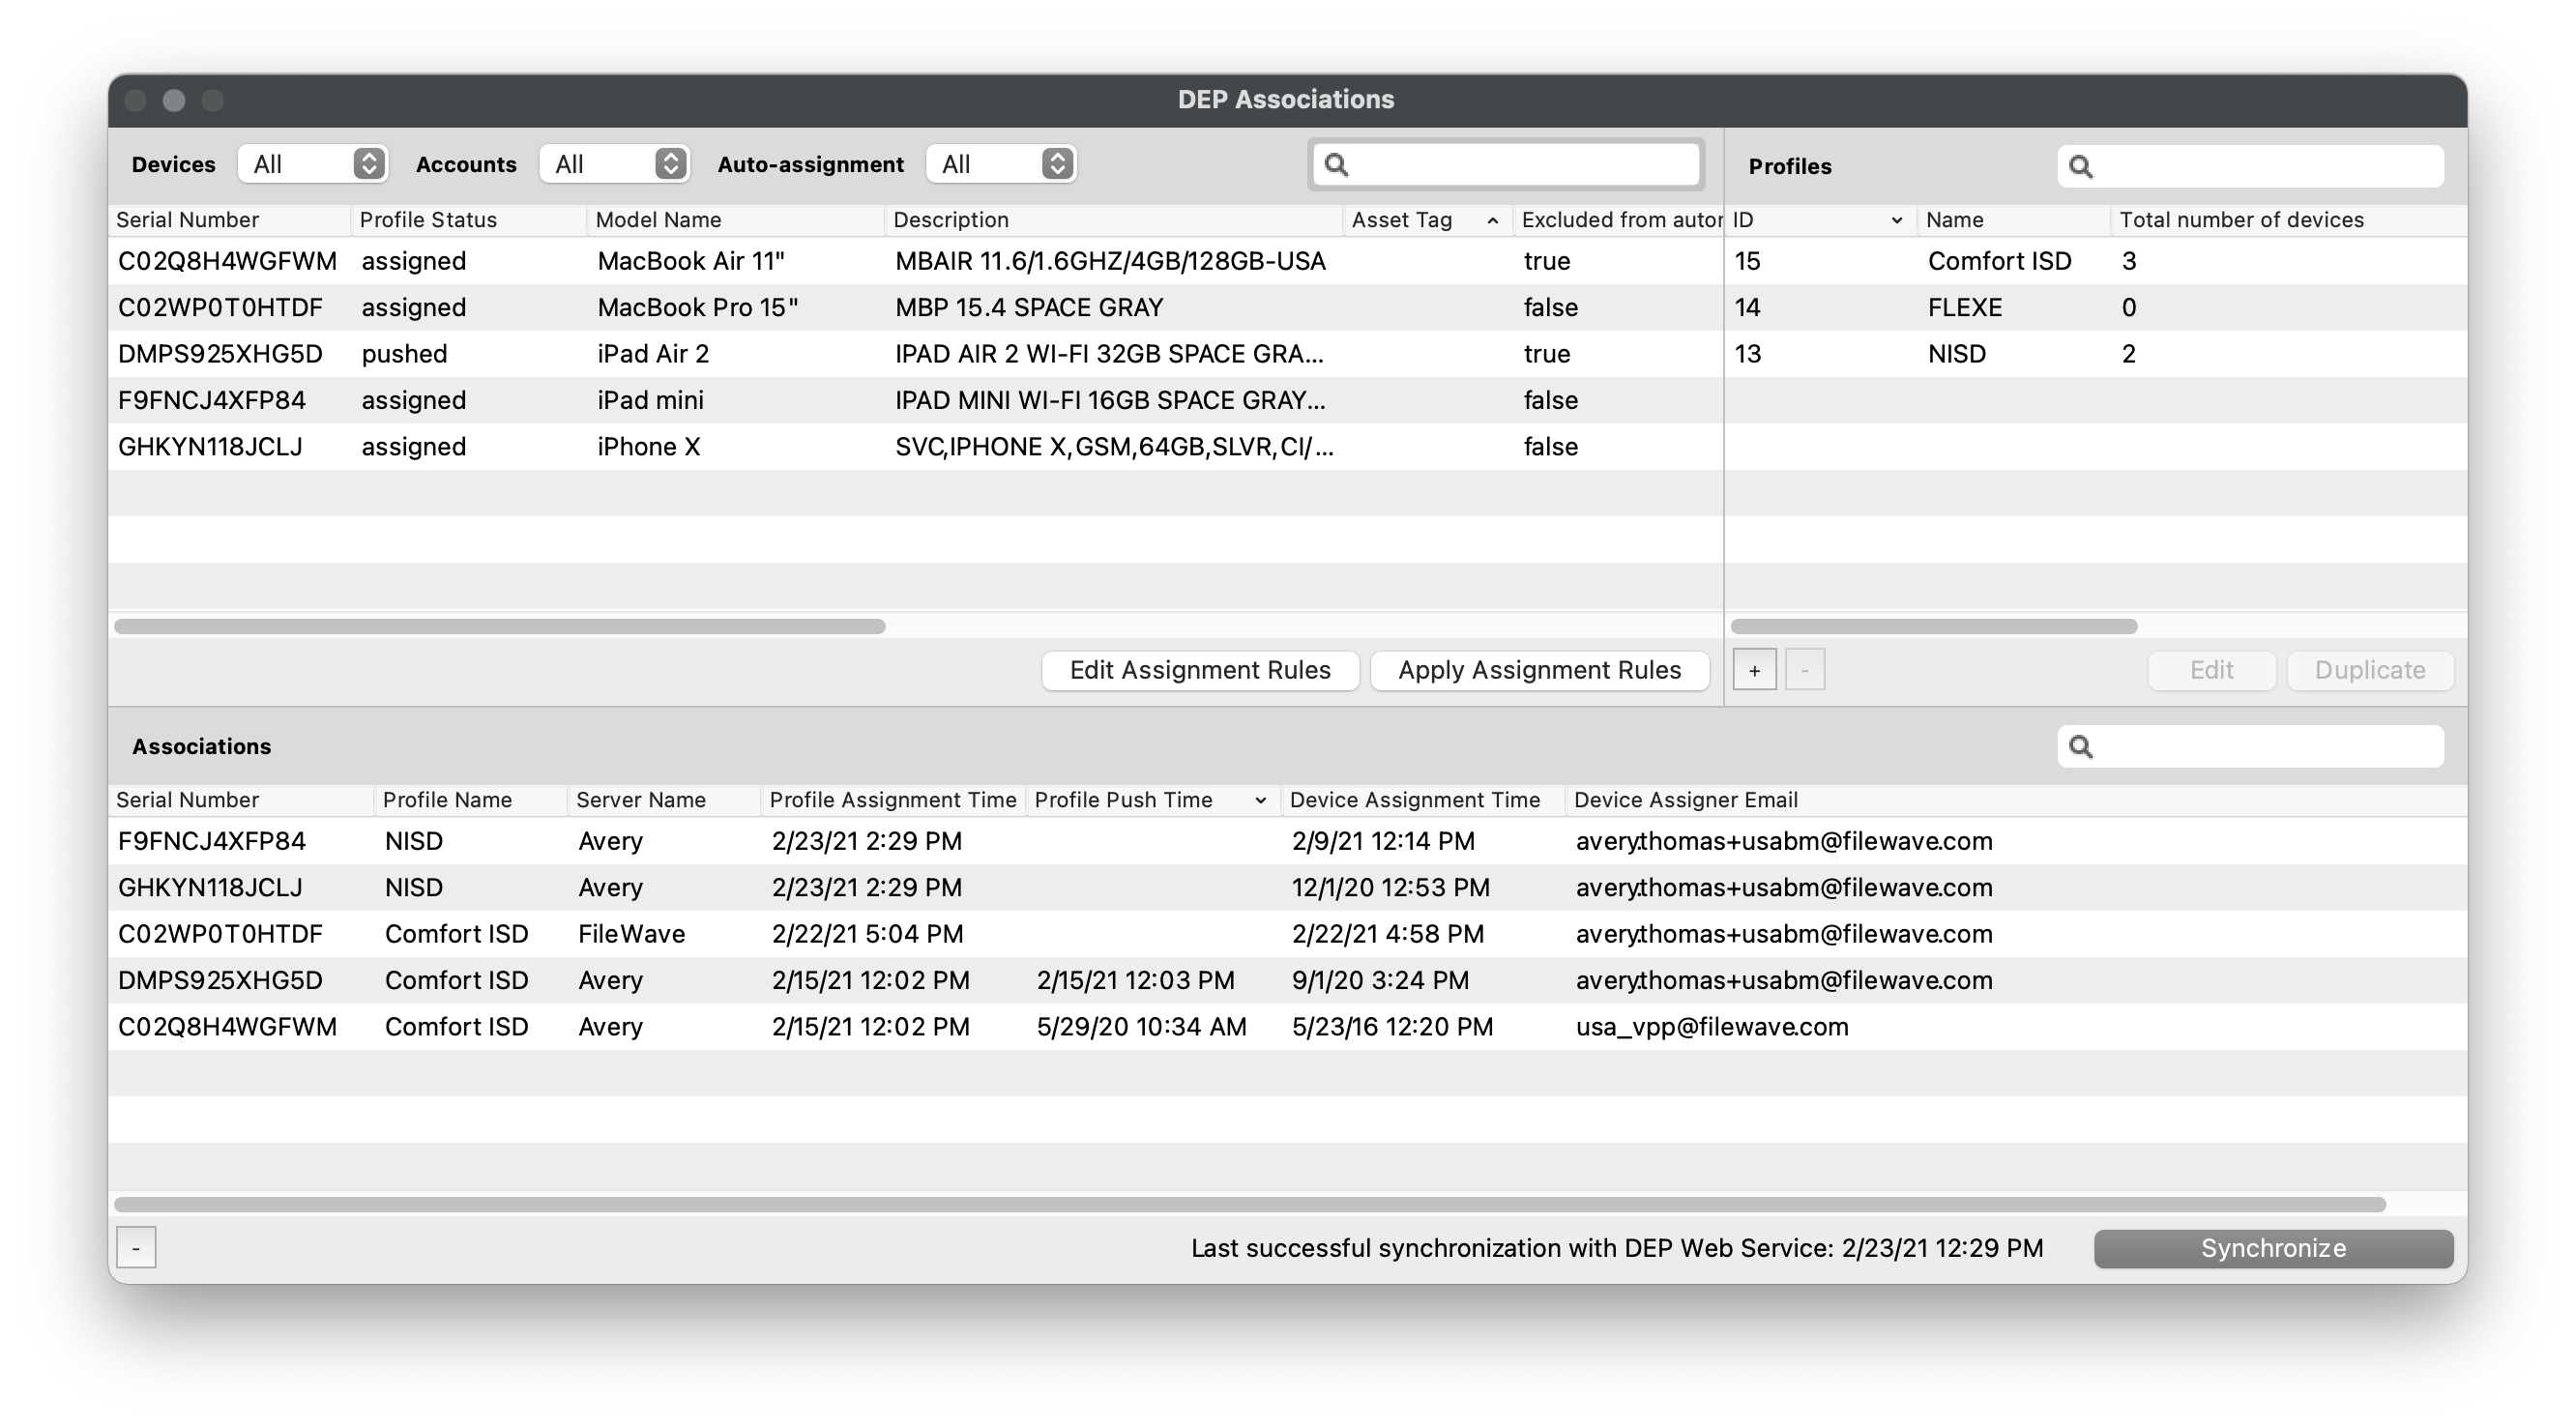
As noted in the Screenshot, the first matching rule (top to bottom) will be honoured; automated rules will override a Default Profile. Hence, Default Profile, if set, is considered the fallback if no rules are met.
### **Manually assign ADE Profile**
1. Open FileWave Admin and navigate to *"Assistants > ADE Association Management".*
2. Select one or more devices from left pane and drag-n-drop onto a ADE Profile.
- or...
3. Select one ADE Profile from the right pane and drag-n-drop it onto one device.
## **Generate custom FileWave Client for macOS ADE enrollments**
---
During a ADE enrollment, your macOS devices will automatically download and install the FileWave Client. Before enrolling a macOS device via ADE we must first upload a customized FileWave Client PKG to the FileWave Server.
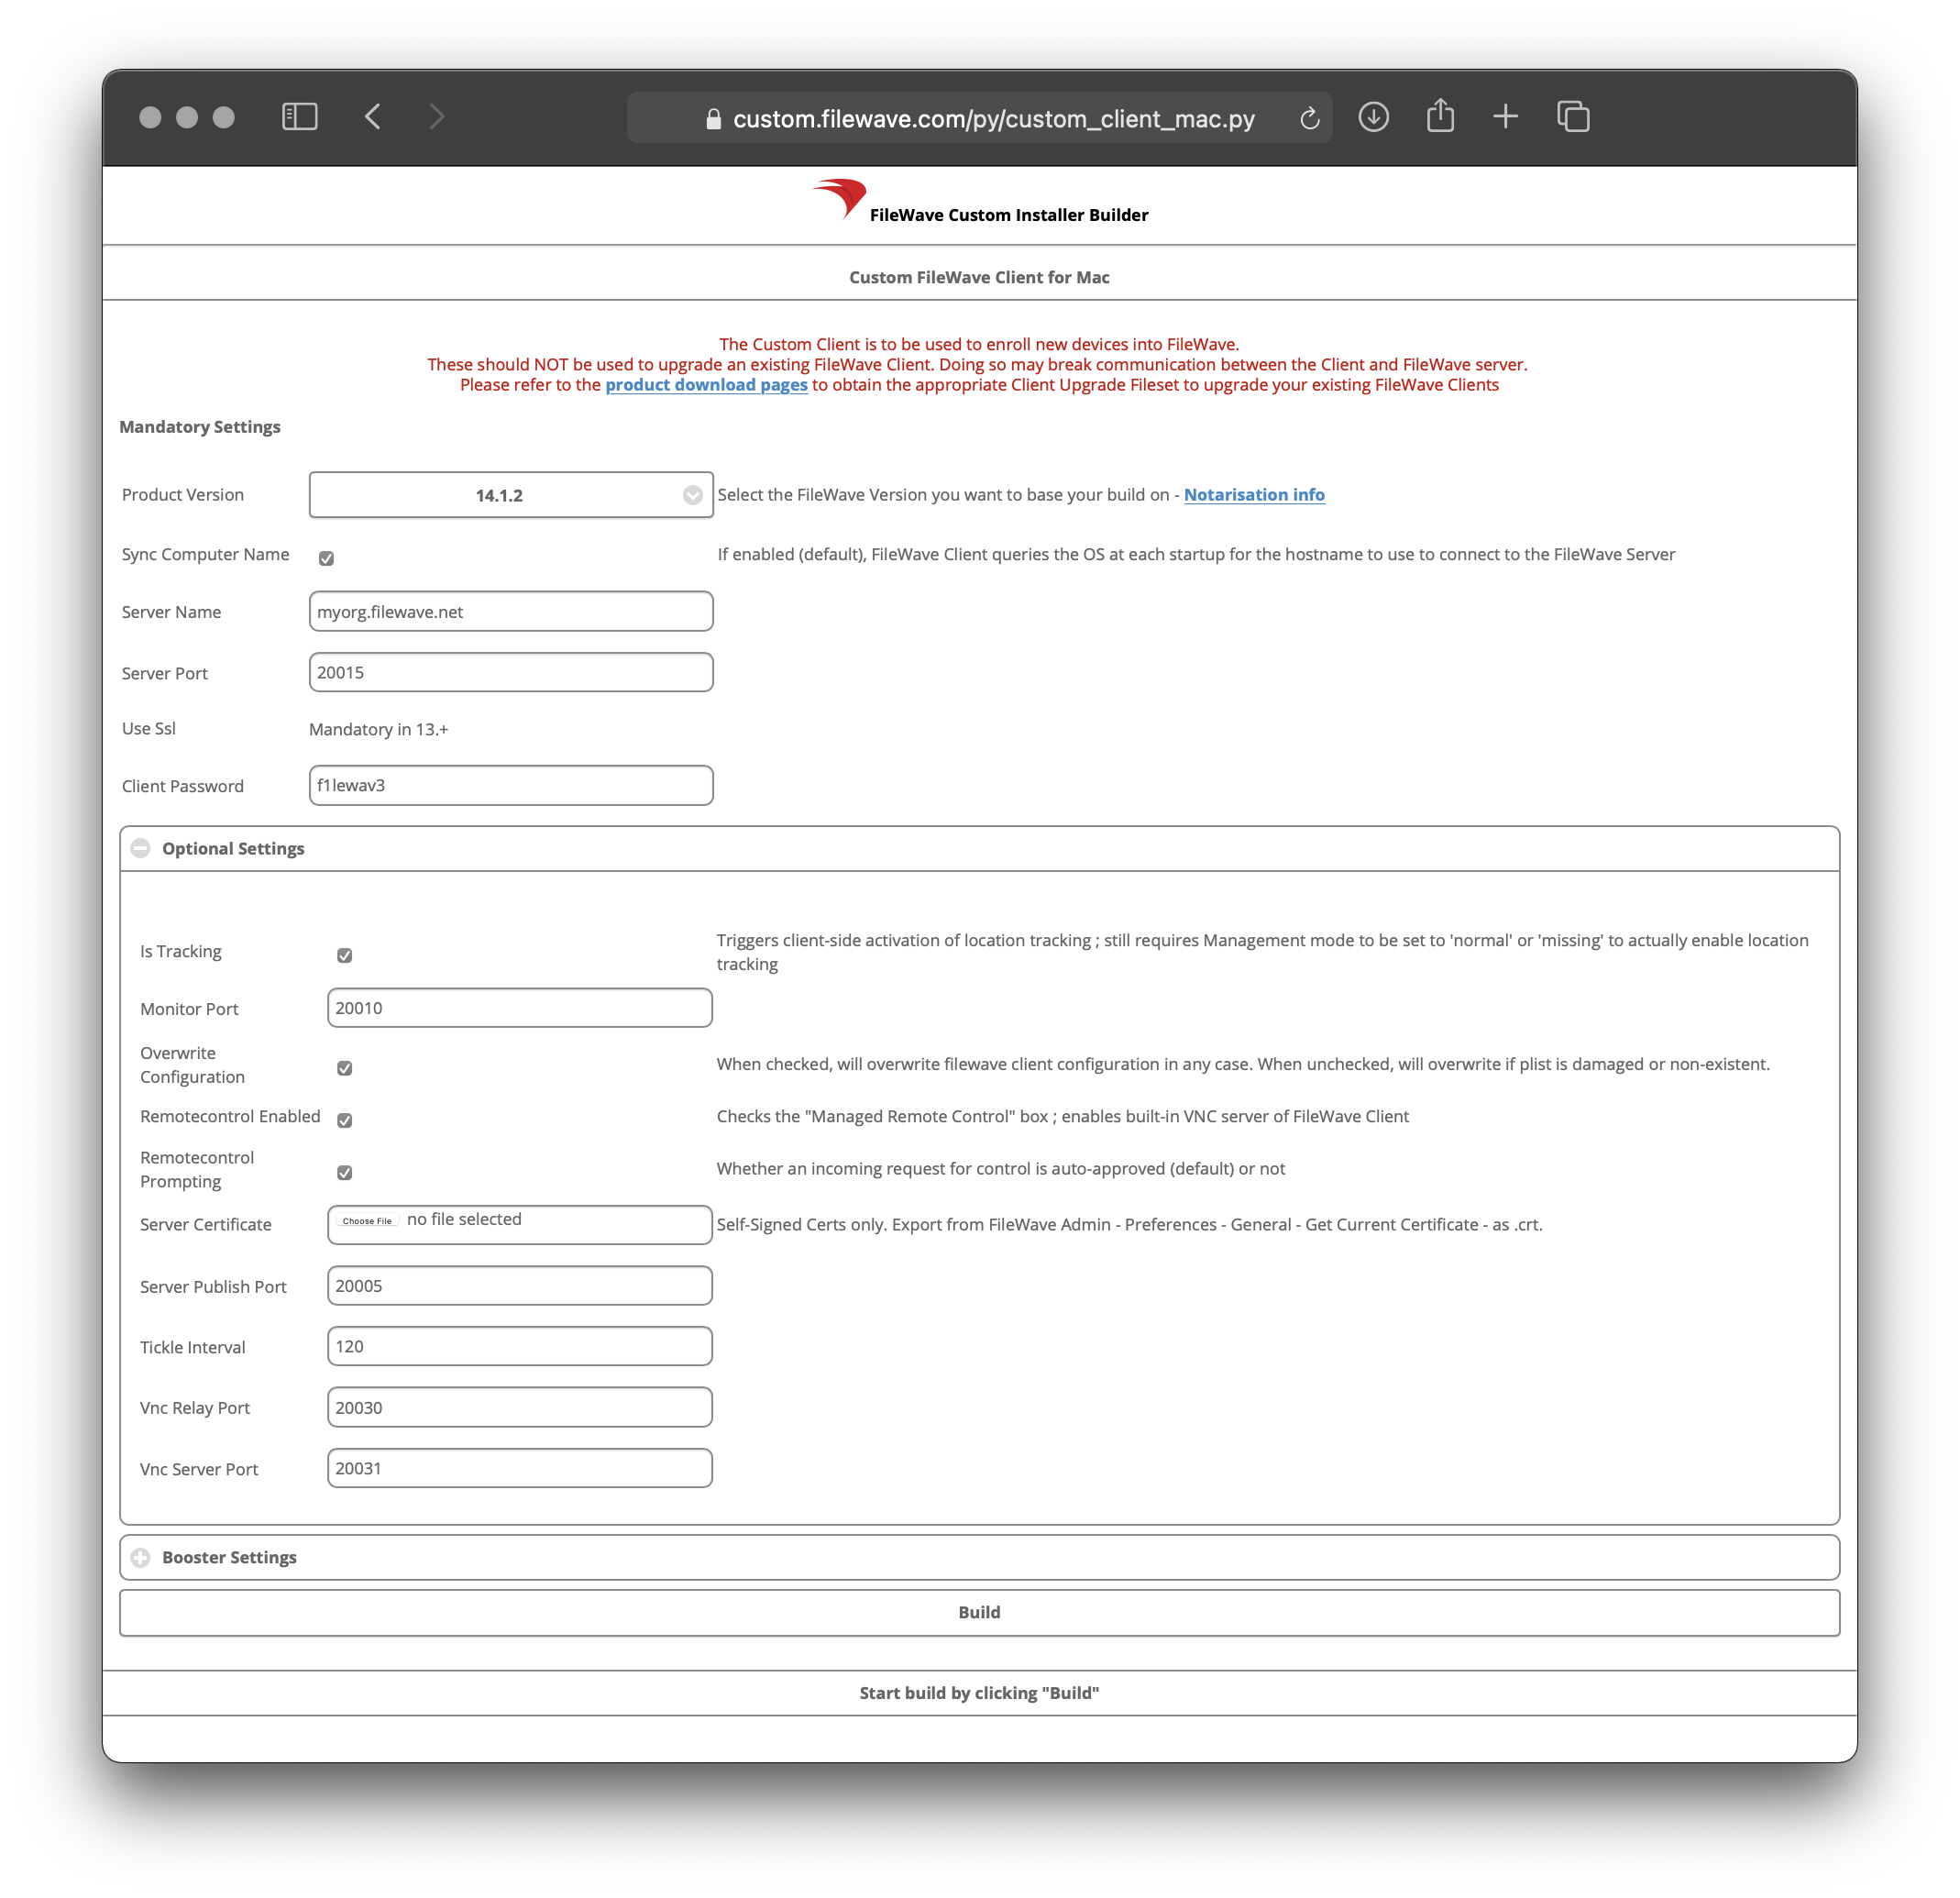
### **Generate a custom FileWave Client PKG**
1. Visit [FileWave Custom Installer Builder](https://custom.filewave.com/py/custom_client_mac.py)
2. Change the following settings to match your FileWave Server.
3. Click *"Build"* and wait for automatic download of ZIP.
4. Extract ZIP.
- **Mandatory Settings**
- Product Version = Your FileWave Server Version
- Sync Computer Name = macOS Hostname will be FileWave Client Name (recommended)
- Server Name = Fully Qualified Domain Name of your FileWave Server
- Server Port = 20015 (do not modify this as it will automatically go to the proper SSL port if you put in 20015)
- Client Password = Password used to change individual Client Preferences and to start screen-sharing session
- **Optional Settings**
- Is Tracking = Is Location Tracking Enabled for macOS Clients
- Monitor Port = Port used for FileWave Client Monitor (do not modify)
- Overwrite Configuration = Overwrite any existing FileWave Client configuration with settings entered here (recommended)
- Remotecontrol Enabled = Screen-sharing enabled for Windows Clients
- Remotecontrol Prompting = Whether or not to Prompt the end-user before starting screen-sharing session
- Server Certificate = Only upload certificate is using a Self-Signed Certificate; not required for CA-signed certificate
- Server Publish Port = 20005 (do not modify)
- Tickle Interval = Idle time for Windows Clients before checking for new Model Update (do not modify)
- Vnc Relay Port = 20030 (do not modify)
- Vnc Server Port = 20031 (do not modify)
- **Booster Settings**
- Do not configure unless instructed by FileWave SE
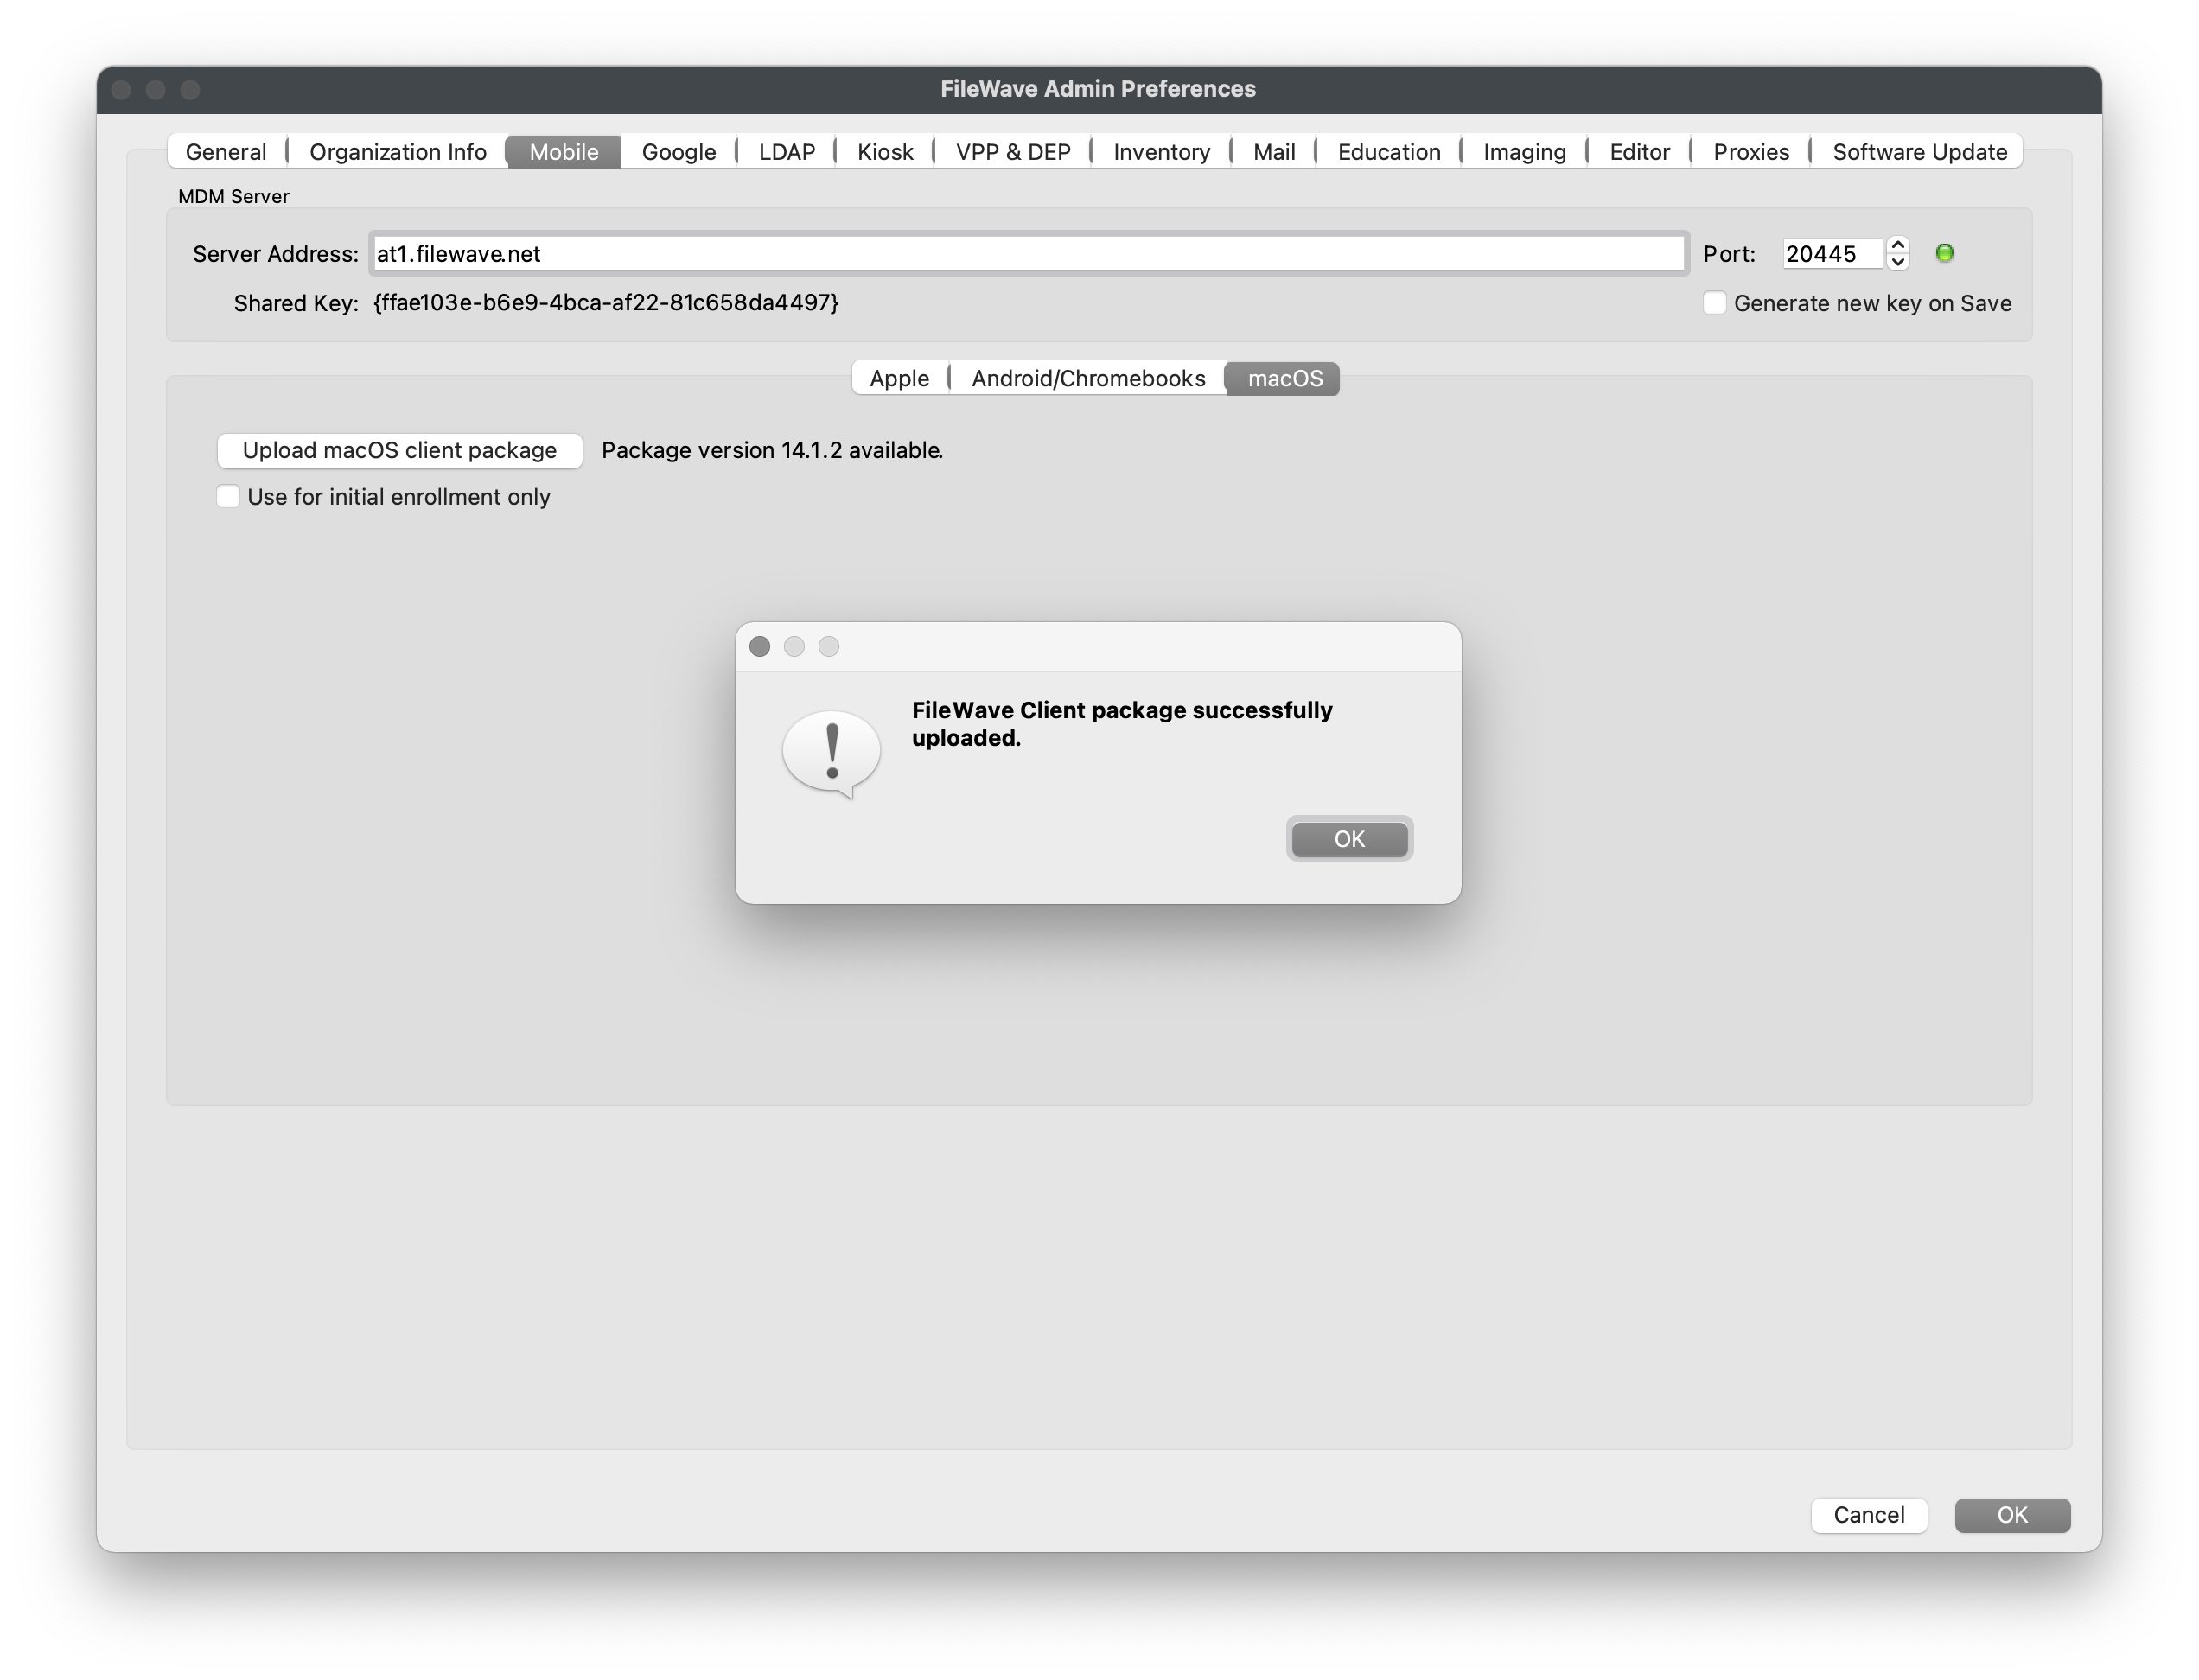
### **Upload custom FileWave Client PKG to FileWave**
1. Navigate to *"FileWave Admin > Preferences > Mobile > macOS"*.
2. Click *"Upload macOS client package"* and authenticate.
3. Select the extracted *"FileWaveClient\_XX.X.XX-FQDN-XX-XXX-XXXX.pkg"* from previous section.
4. Wait for the upload confirmation prompt.
5. Optionally, enable *"Use for initial enrollment only"*.
- If this box is unchecked, FileWave will deploy any new FileWave Client version uploaded to all MDM enrolled macOS devices.
6. Click *"OK"* to save the Preferences.
## **Enrolling Apple devices via ADE**
---
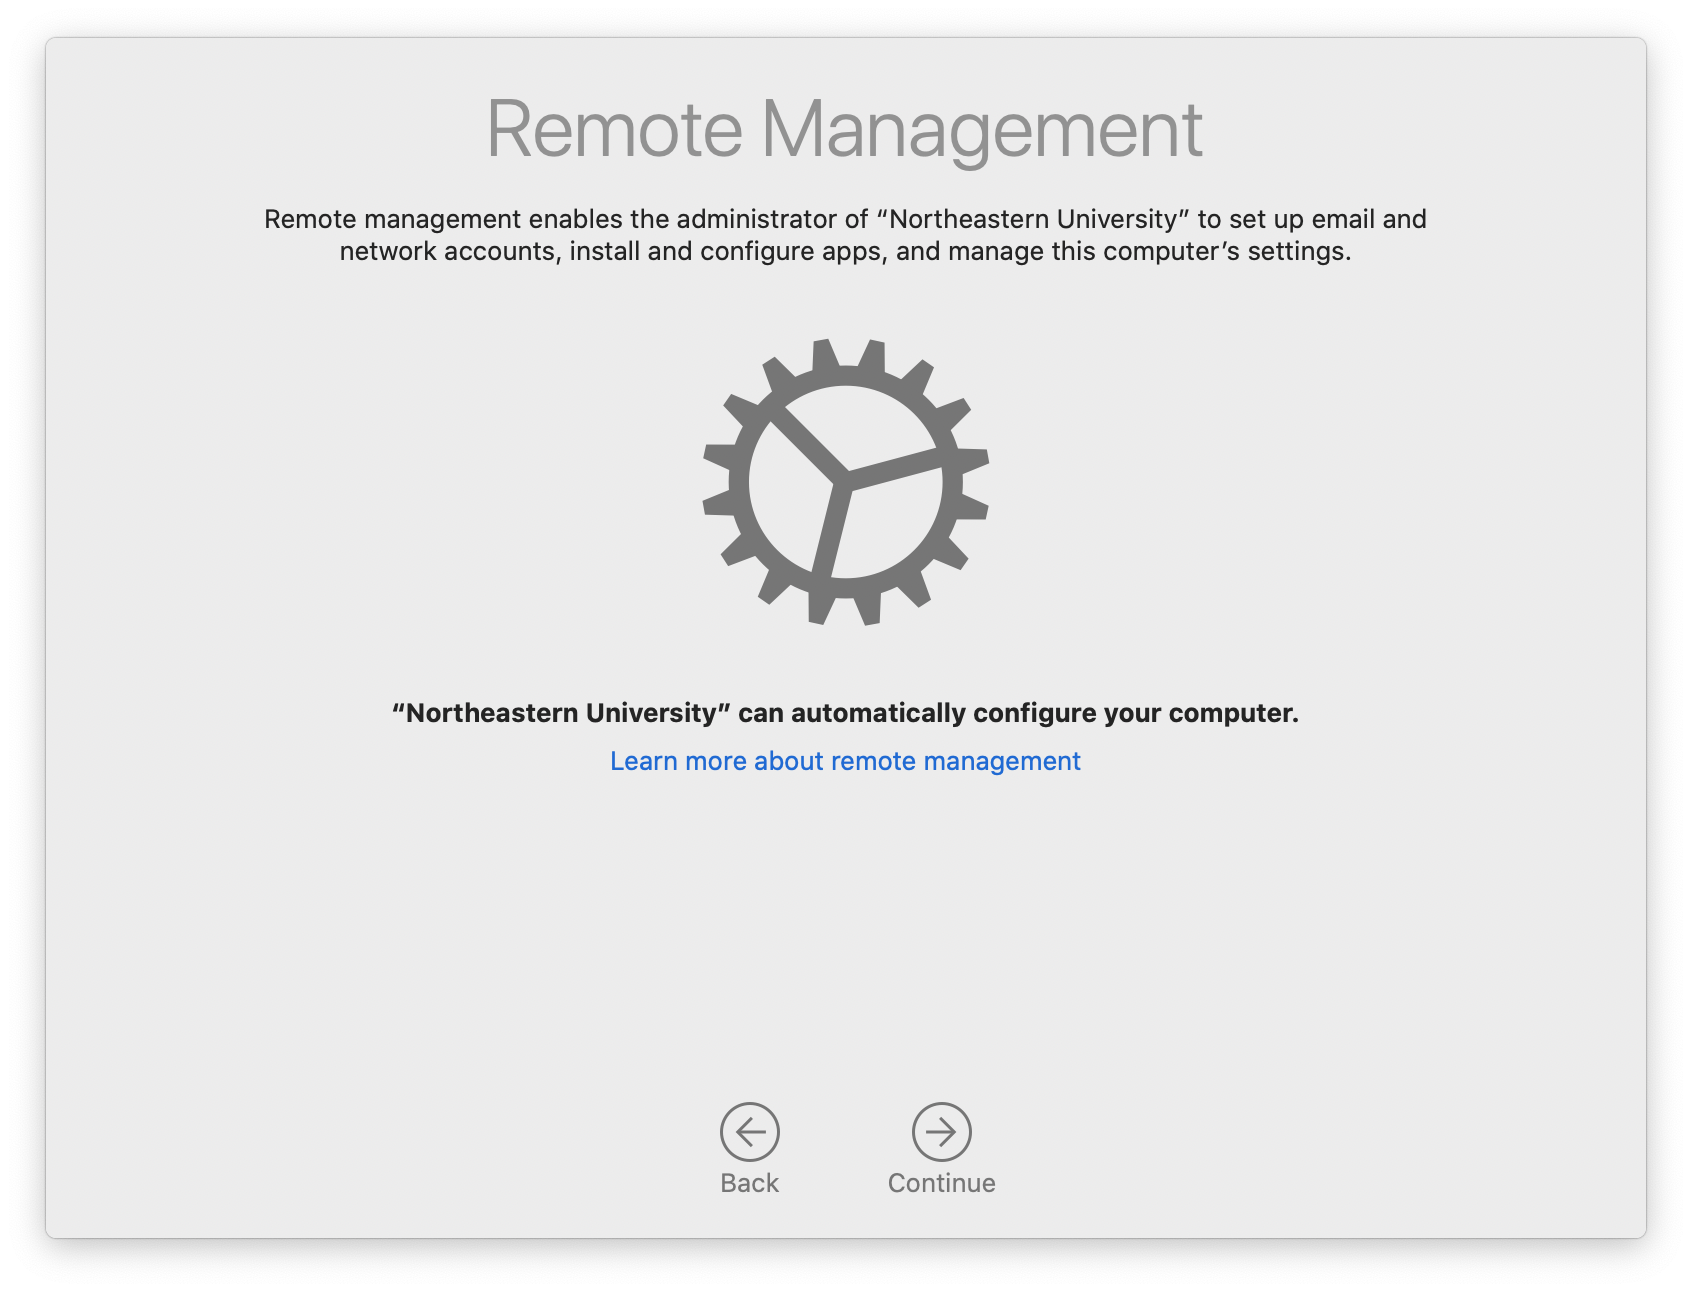
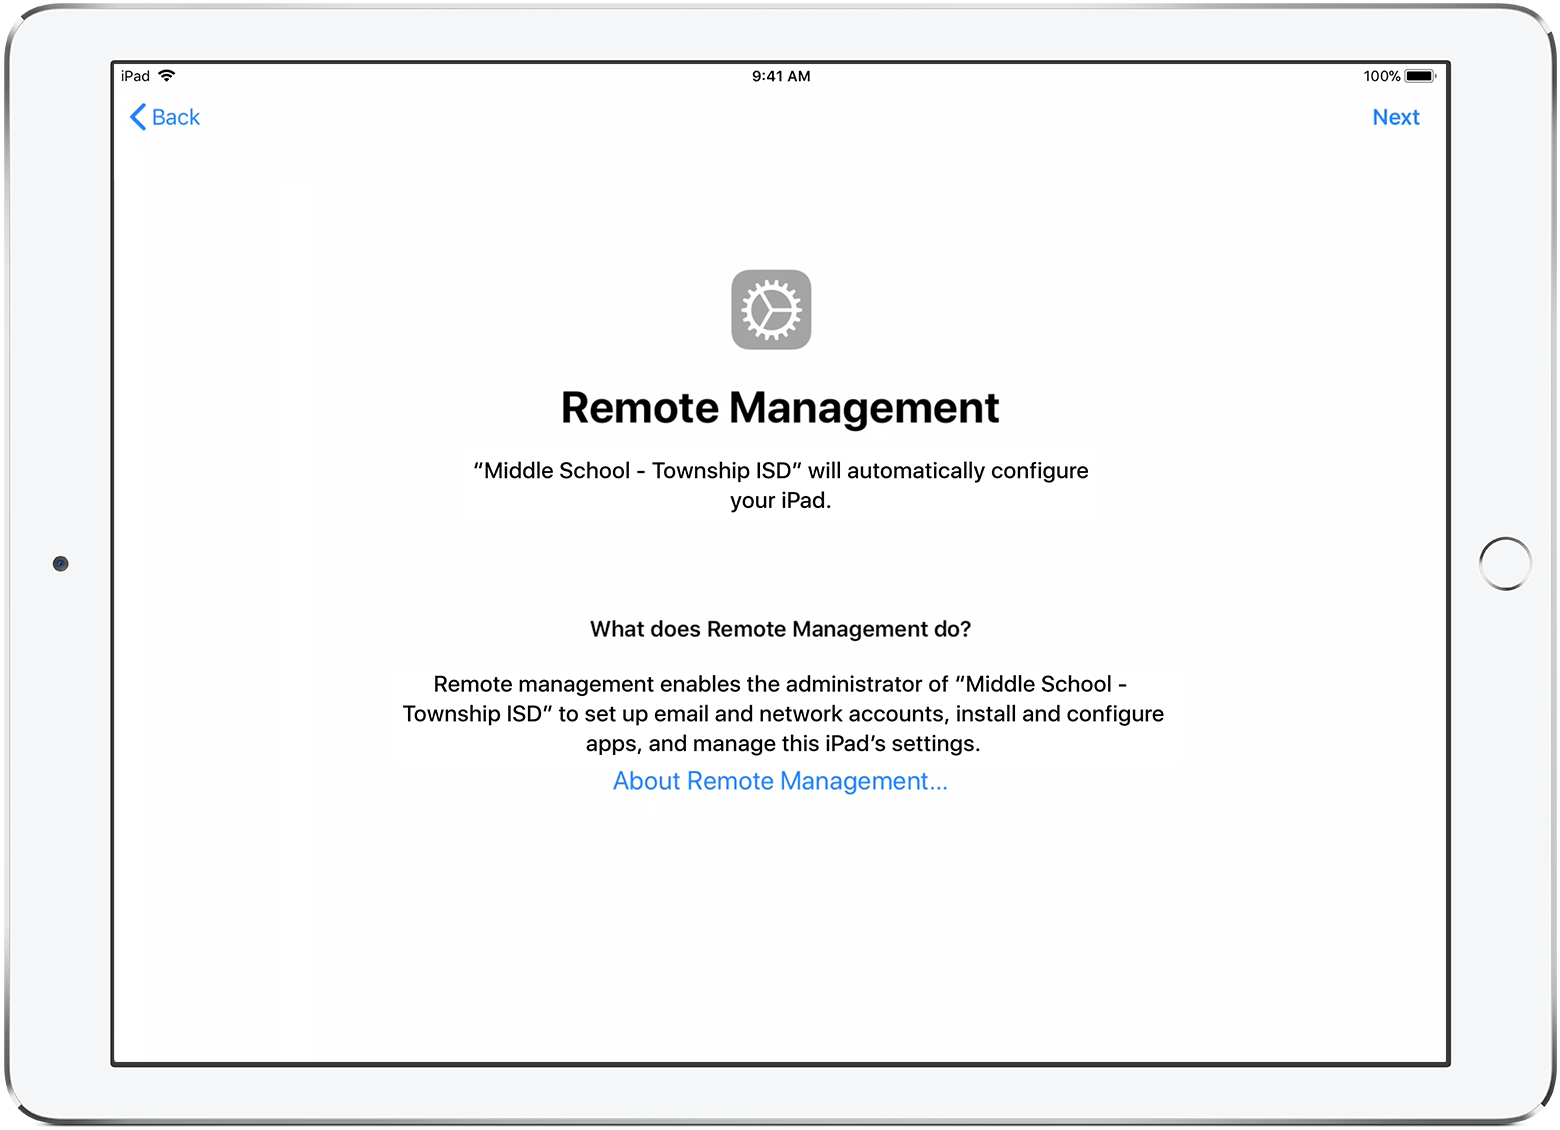
Now that your devices have been *"Assigned"* to a ADE Profile, they can either be Factory Reset if already configured or taken fresh out of the box from Apple and they will automatically enroll into FileWave.
If getting authentication required during enrollment, please review [this](https://kb.filewave.com/books/evaluation-guide/page/filewave-central-preferences "FileWave Central Preferences") section to learn how to disable ADE enrollment authentication**.**
| **macOS**
| **iPadOS**
|
## Finalizing adding of clients
FileWave Clients communicating to the FileWave server will not be able to connect until you add them to the model. We will now allow our new client to join the FileWave server.
[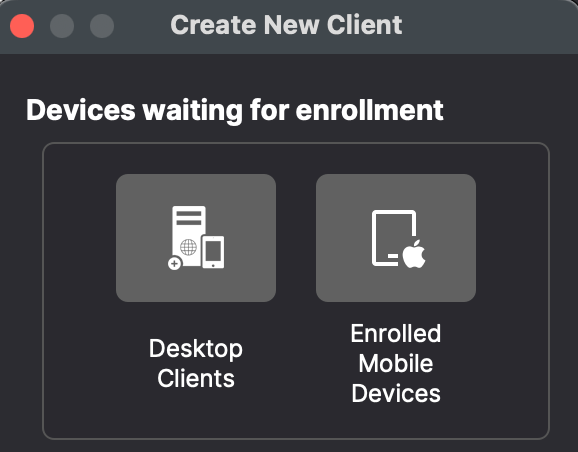](https://kb.filewave.com/uploads/images/gallery/2024-04/HJuqYZeFYrbIstav-image.png)
1. Open FileWave Central.
2. Click on the “New Client” button in the tool bar
3. Select **Desktop Clients** for macOS computers or **Enrolled Mobile Devices** for iPhone, iPad, and Apple Vision Pro.
4. Select your new client from the list presented.
5. Click the “Add Clients” button in the lower right.
You can also decide to automatically add new clients to skip the step of adding devices. This is discussed here: [Conflict Resolution](https://kb.filewave.com/books/filewave-central-anywhere/chapter/conflict-resolution "Conflict Resolution")
## Making Changes to the Model
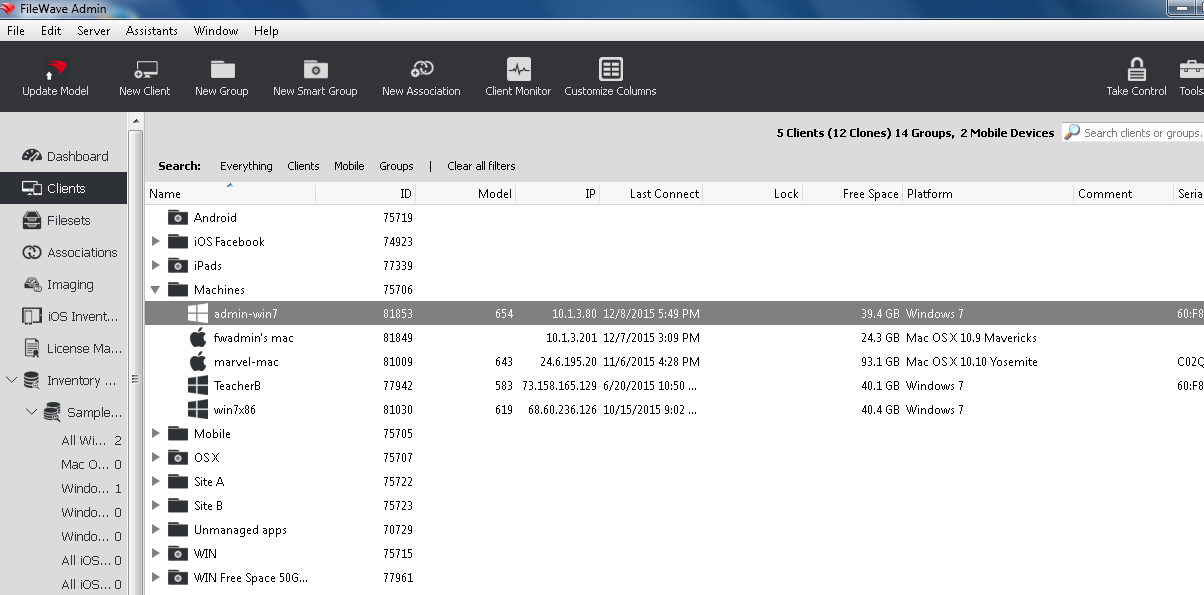
Remember that you will need to update the model anytime that you want to apply changes you have made. You can update the model after a single change or multiple changes (adding multiple clients, creating groups, etc.)
Congratulations! Your FileWave environment is now up and running! From here you can continue to add clients, build and deploy Filesets!
# Apple Manual Enrollment
## Not able to use DEP?
---
Apple's Device Enrollment Program is great but you may find that all or some of your devices aren't showing in [Apple School Manager](https://school.apple.com) or [Apple Business Manager](https://business.apple.com). Devices are usually excluded because they were not purchased directly from Apple or an Authorized Reseller. iOS device capable of running iOS 11+ can be manually added to your ASM/ABM account but unfortunately this not yet an option for macOS. This section covers several manual enrollment methods and why you might need to leverage them.
## Add iOS devices to ASM/ABM using Apple Configurator 2
---
If you have an iOS 11+ or tvOS 11+ device that was not originally purchased from Apple or an Apple Authorized Reseller, you can manually add the device to ASM/ABM using Apple Configurator 2. Please first review Apple's documentation [here](https://support.apple.com/en-am/guide/apple-configurator-2/cad99bc2a859/mac) followed by FileWave Knowledge Base article [here](https://kb.filewave.com/books/apple-school-business-manager/page/adding-non-macos-devices-to-businessapplecom-abm-and-apple-school-manager-asm-using-apple-configurator-25 "Adding macOS devices to Apple Business or School Manager using Apple Configurator 2") for more FileWave-specific processes. Once the device has been added to ASM/ABM you can take advantage of DEP for any future enrollments of this device.
## MDM-enroll Apple devices using URL Enrollment
---
If ADE is unavailable, you can MDM-enroll an iPhone, iPad, [Apple Vision Pro](https://kb.filewave.com/books/apple-general-info/page/managing-apple-vision-pro-and-visionos), or Mac using FileWave URL Enrollment. This method allows an end user to enroll a previously configured device without a factory reset. The user may be able to remove the MDM profile and unenroll the device. On macOS, the user also needs administrator privileges to install the MDM profile.
If getting authentication required during enrollment, please review [this](https://kb.filewave.com/books/evaluation-guide/page/filewave-central-preferences "FileWave Central Preferences") section to learn how to disable URL enrollment authentication.
### macOS URL Enrollment
1. 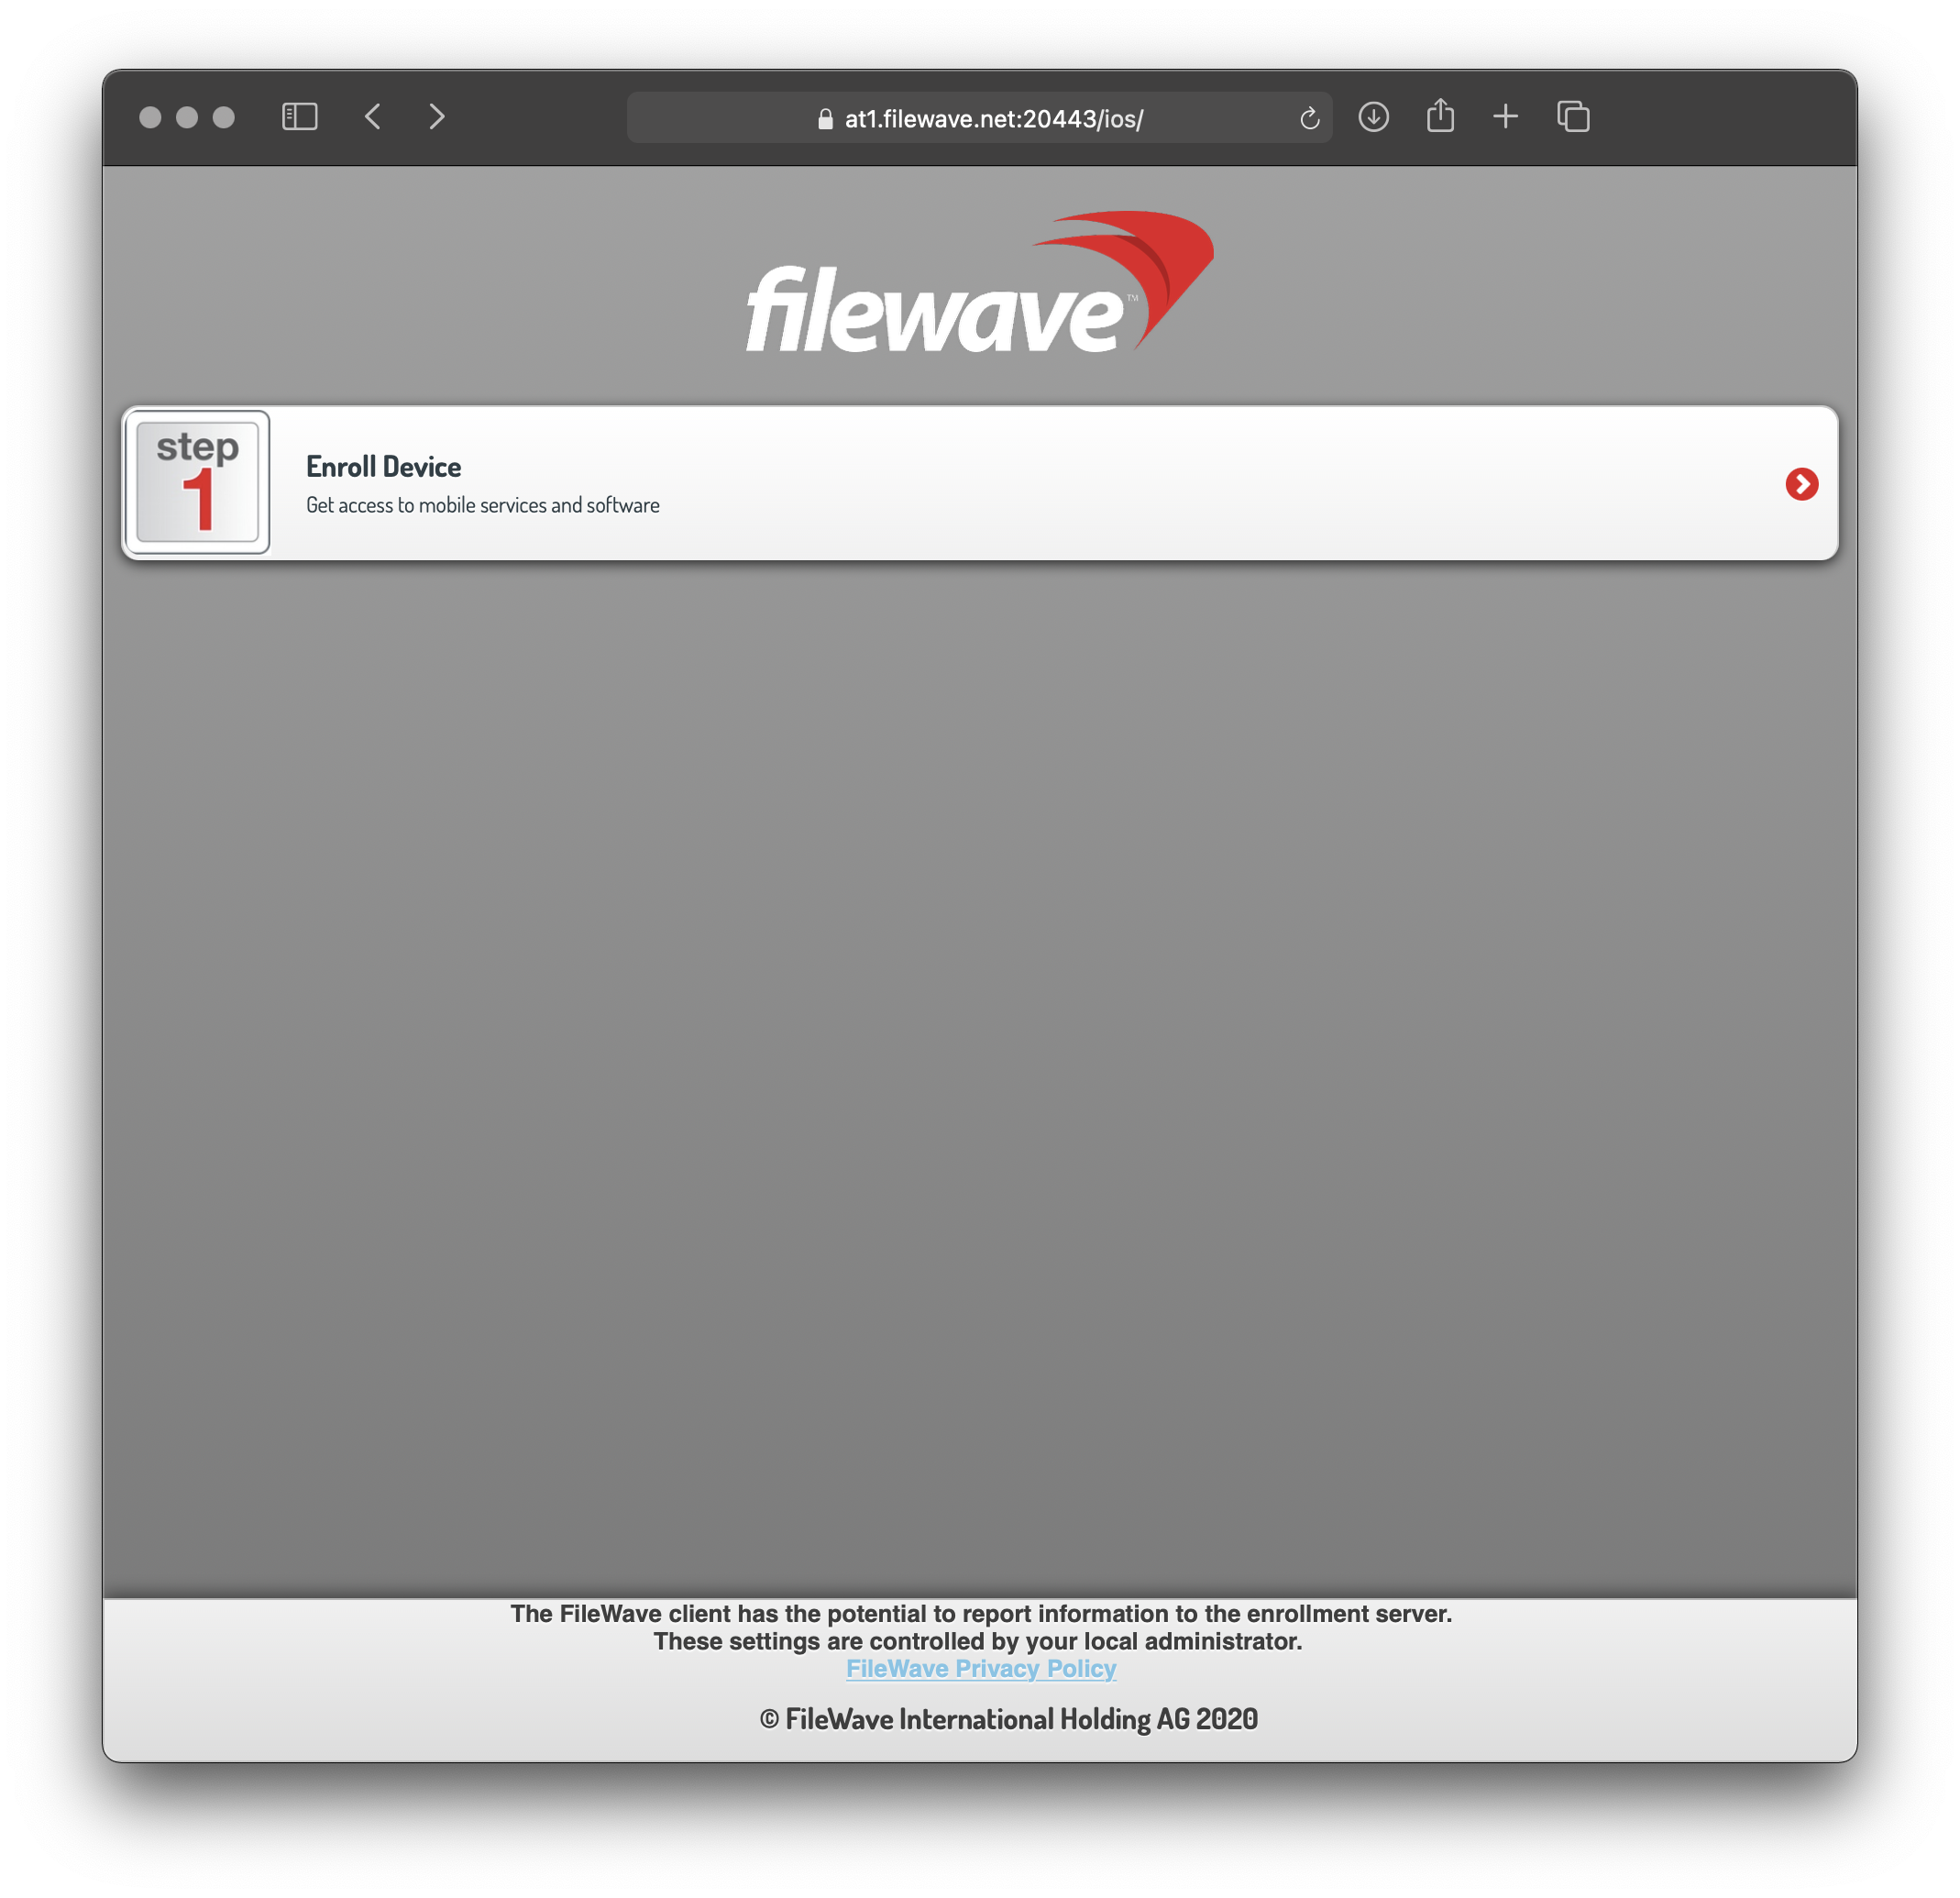Navigate to *"https://yourfilewaveserver.domain.com:20443"* using web browser of choice.
2. Click the large *"Enroll Device"* button to download the MDM Enrollment Profile.
- If using a self-signed certificate, you will see an additional step to download certificate.
- If enrollment authentication is enabled, please authenticate.
3. Located the downloaded MDM Enrollment Profile *"enroll.mobileconfig"*.
4. Double-click on the *"enroll.mobileconfig"* file.
5. Open *"System Preferences > Profiles"* from your macOS menubar.
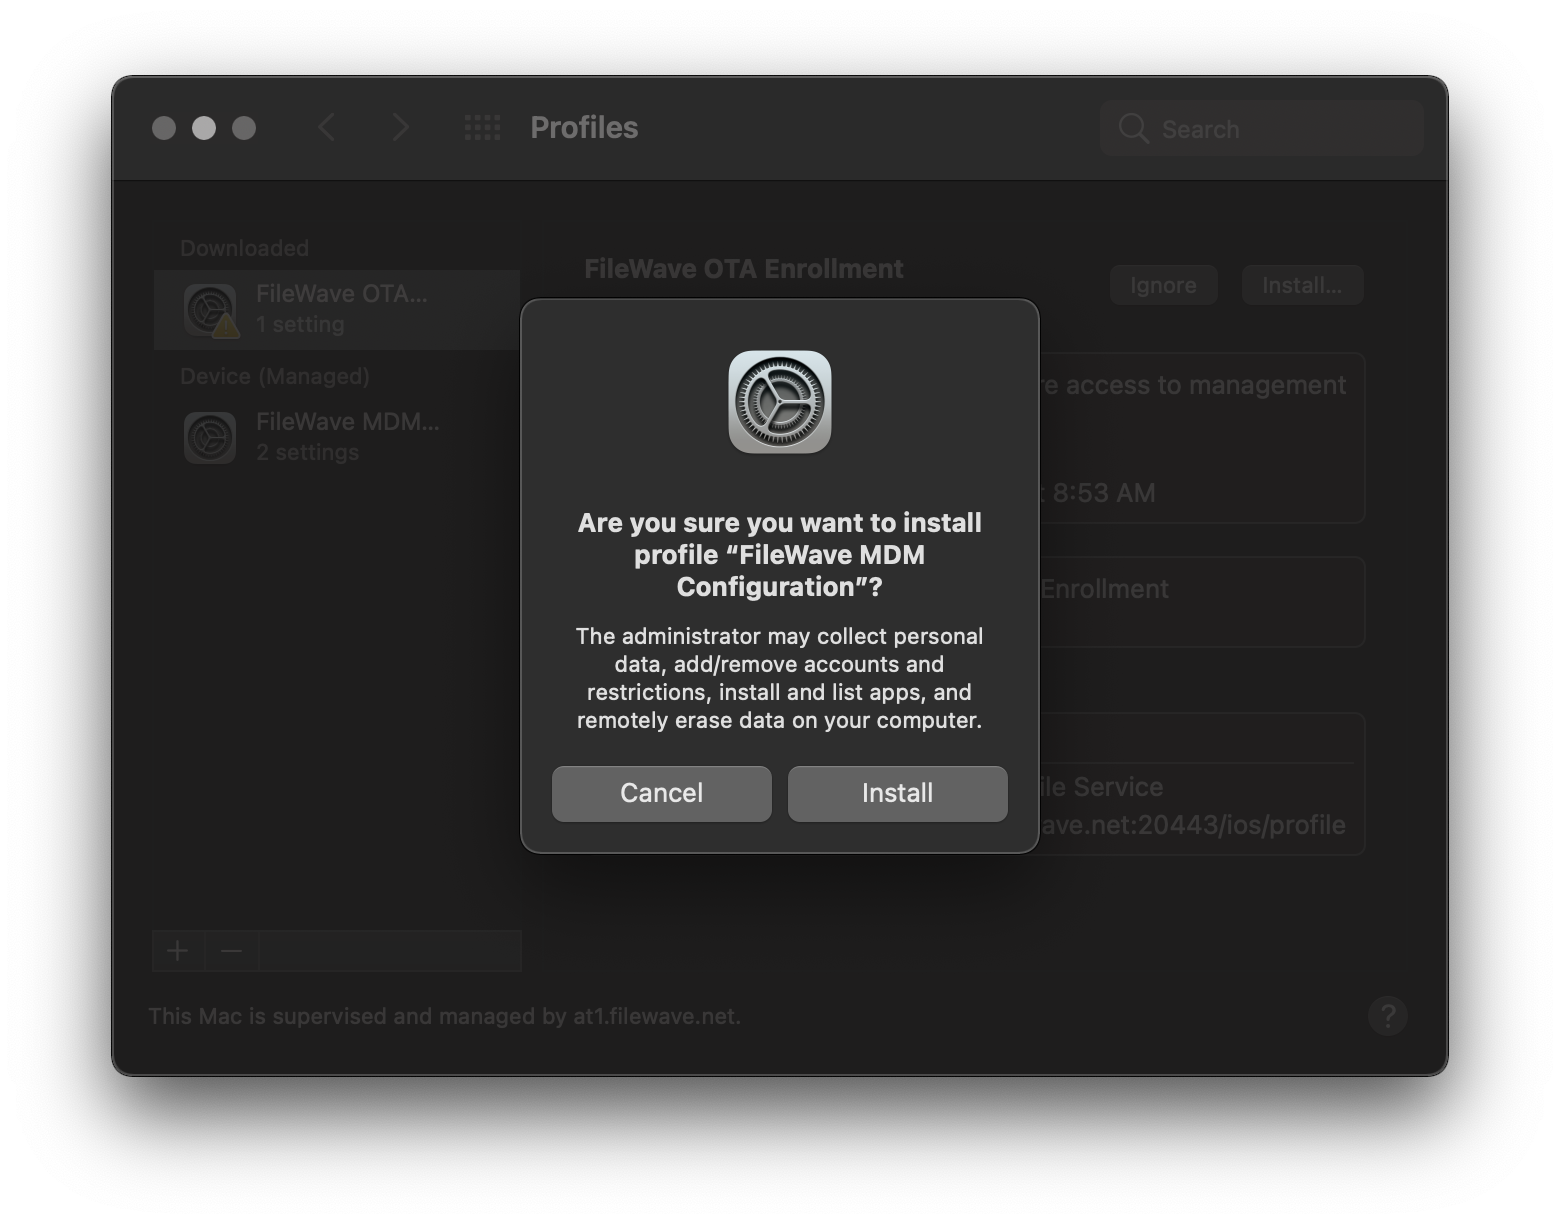
6. Click *"Install"* next to the "FileWave OTA Enrollment" Profile.
7. Click *"Install"* again at the next prompt and authenticate using your macOS Administrator credentials.
8. The MDM Enrollment Profile is now installed and the FileWave Client will be installed automatically.
- If you have not imported your custom macOS FileWave Client, please review the [Generate custom FileWave Client for macOS DEP enrollments](https://kb.filewave.com/books/evaluation-guide/page/apple-ade-enrollment "Apple DEP Enrollment") section.
### Apple mobile URL Enrollment: iPhone, iPad, and Vision Pro
Use the same FileWave enrollment URL and MDM-profile approval flow on Apple Vision Pro. The exact on-device labels follow the installed visionOS version.
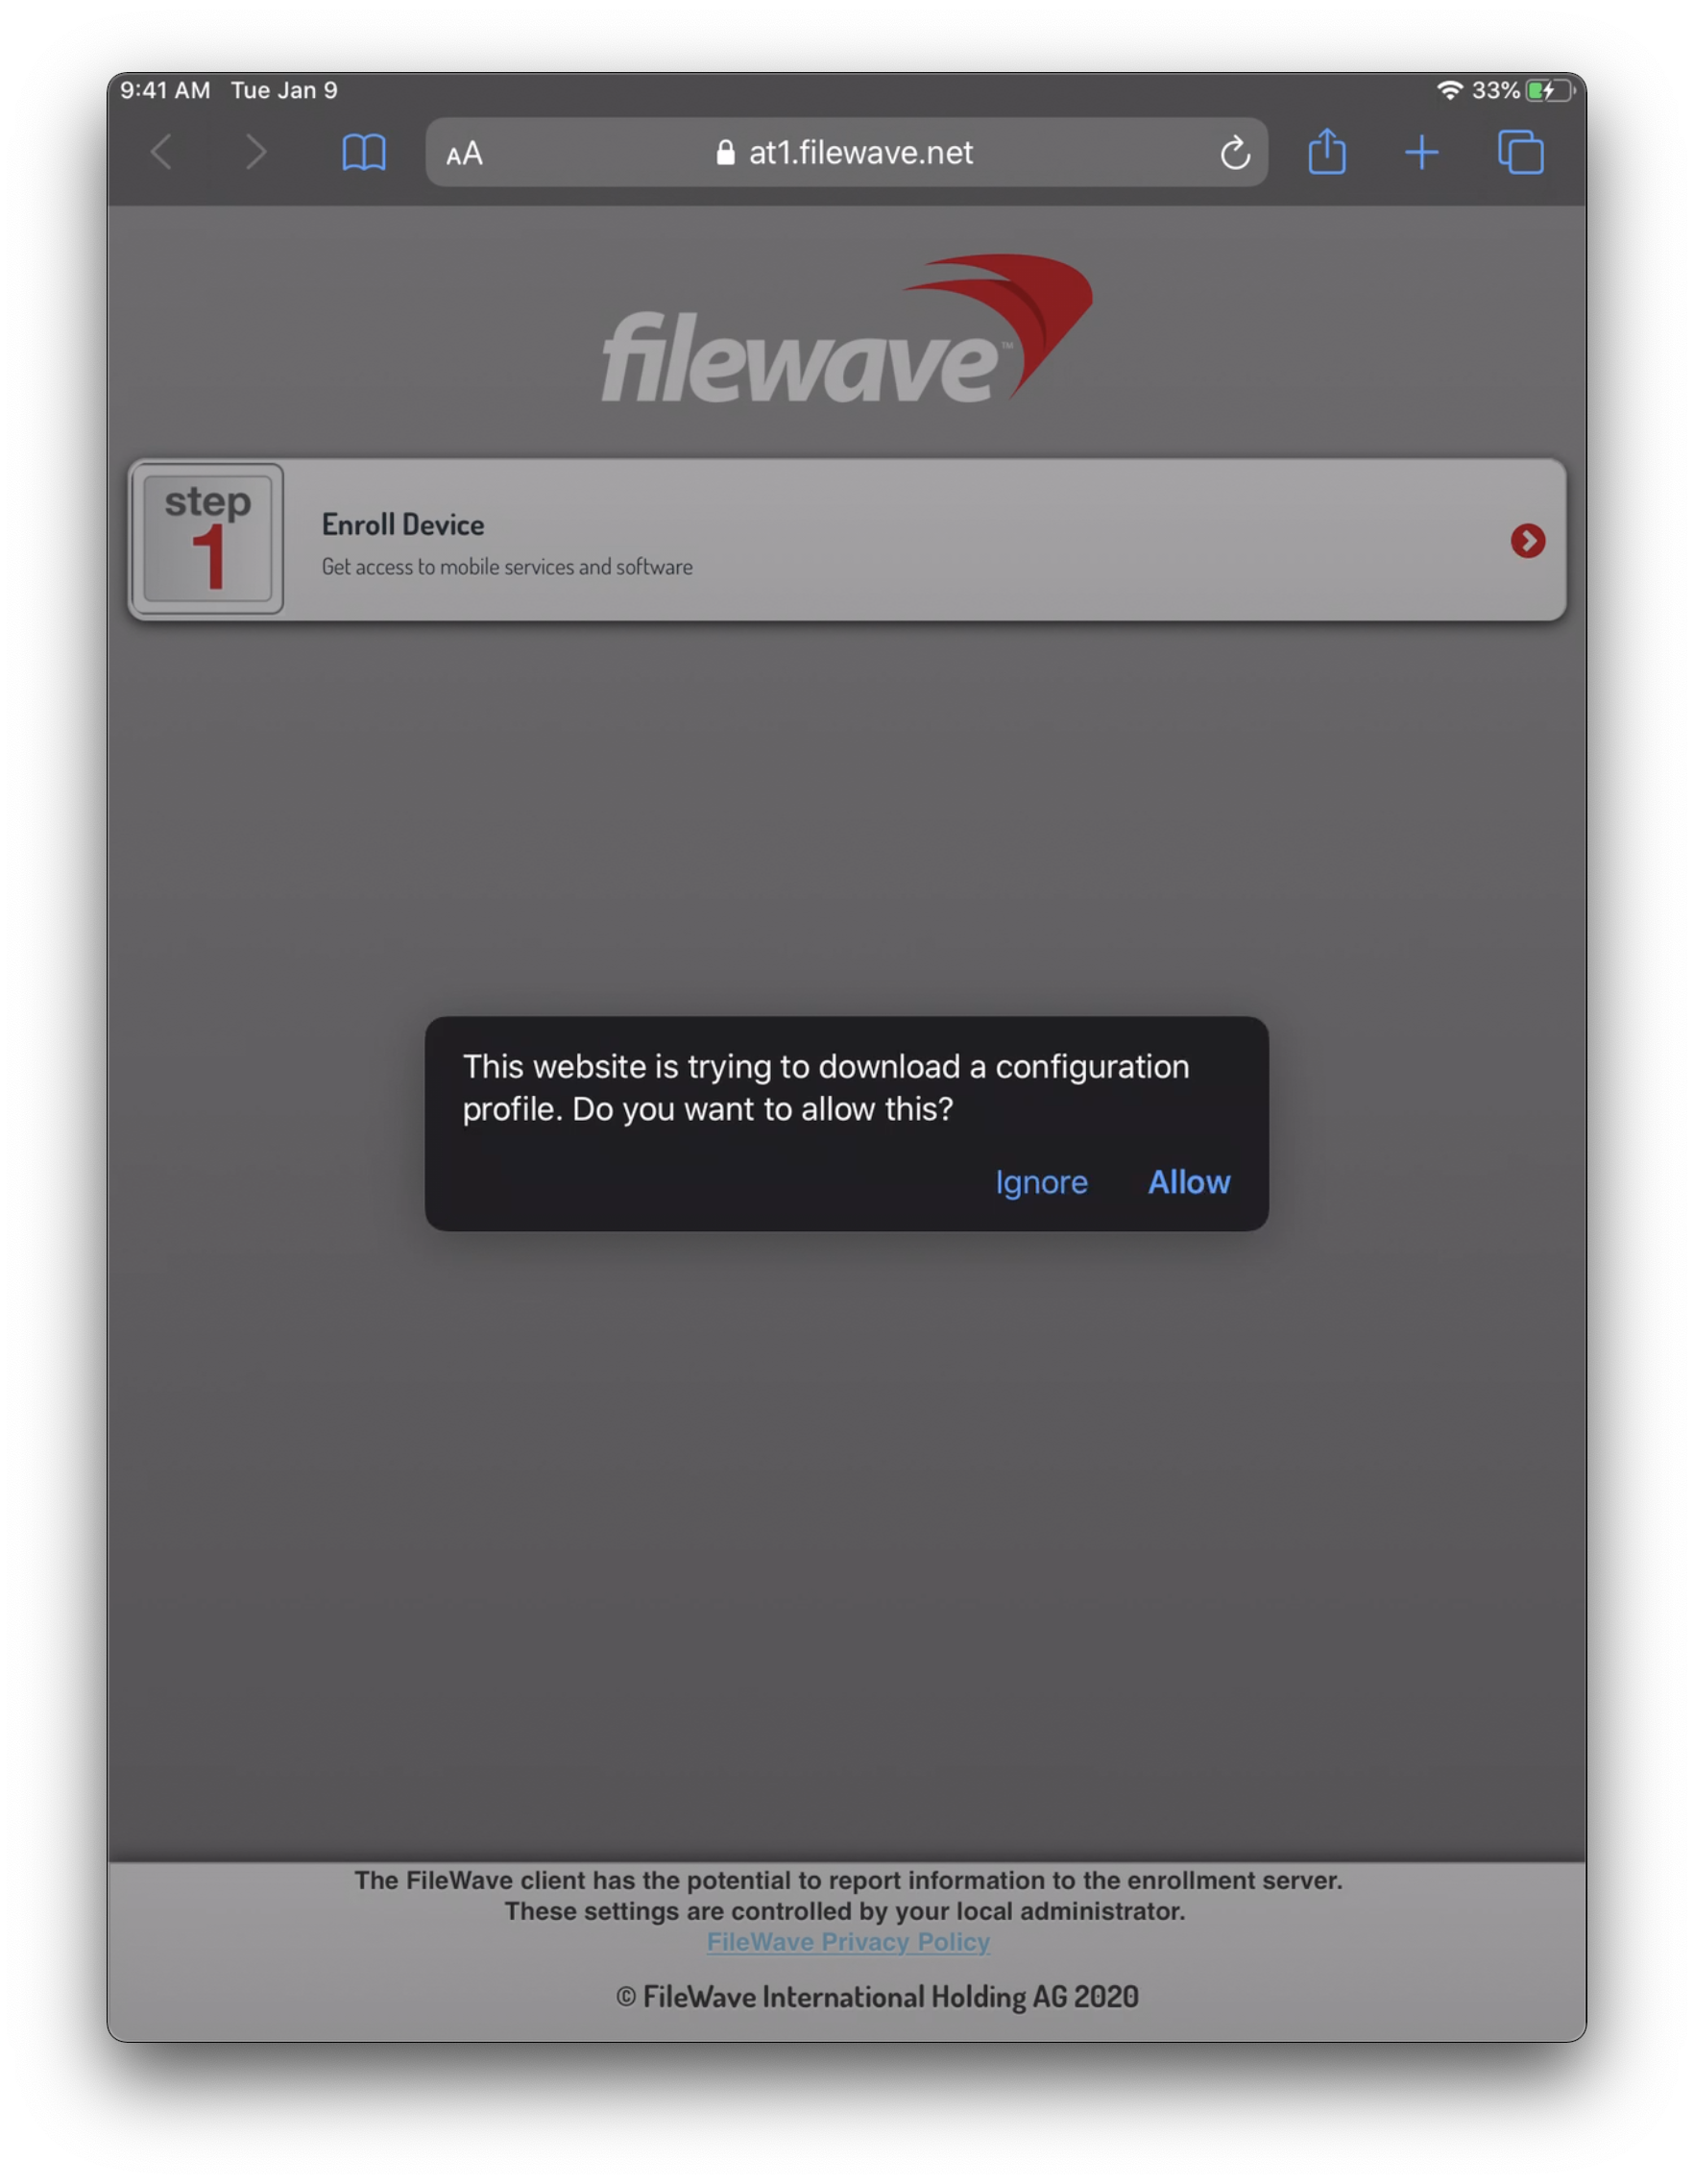
1. Navigate to *"https://yourfilewaveserver.domain.com:20443"* using iOS Safari.
2. Click the large *"Enroll Device"* button to download the MDM Enrollment Profile.
- If using a self-signed certificate, you will see an additional step to download certificate and [manually trust](https://support.apple.com/en-us/HT204477).
- If enrollment authentication is enabled, please authenticate.
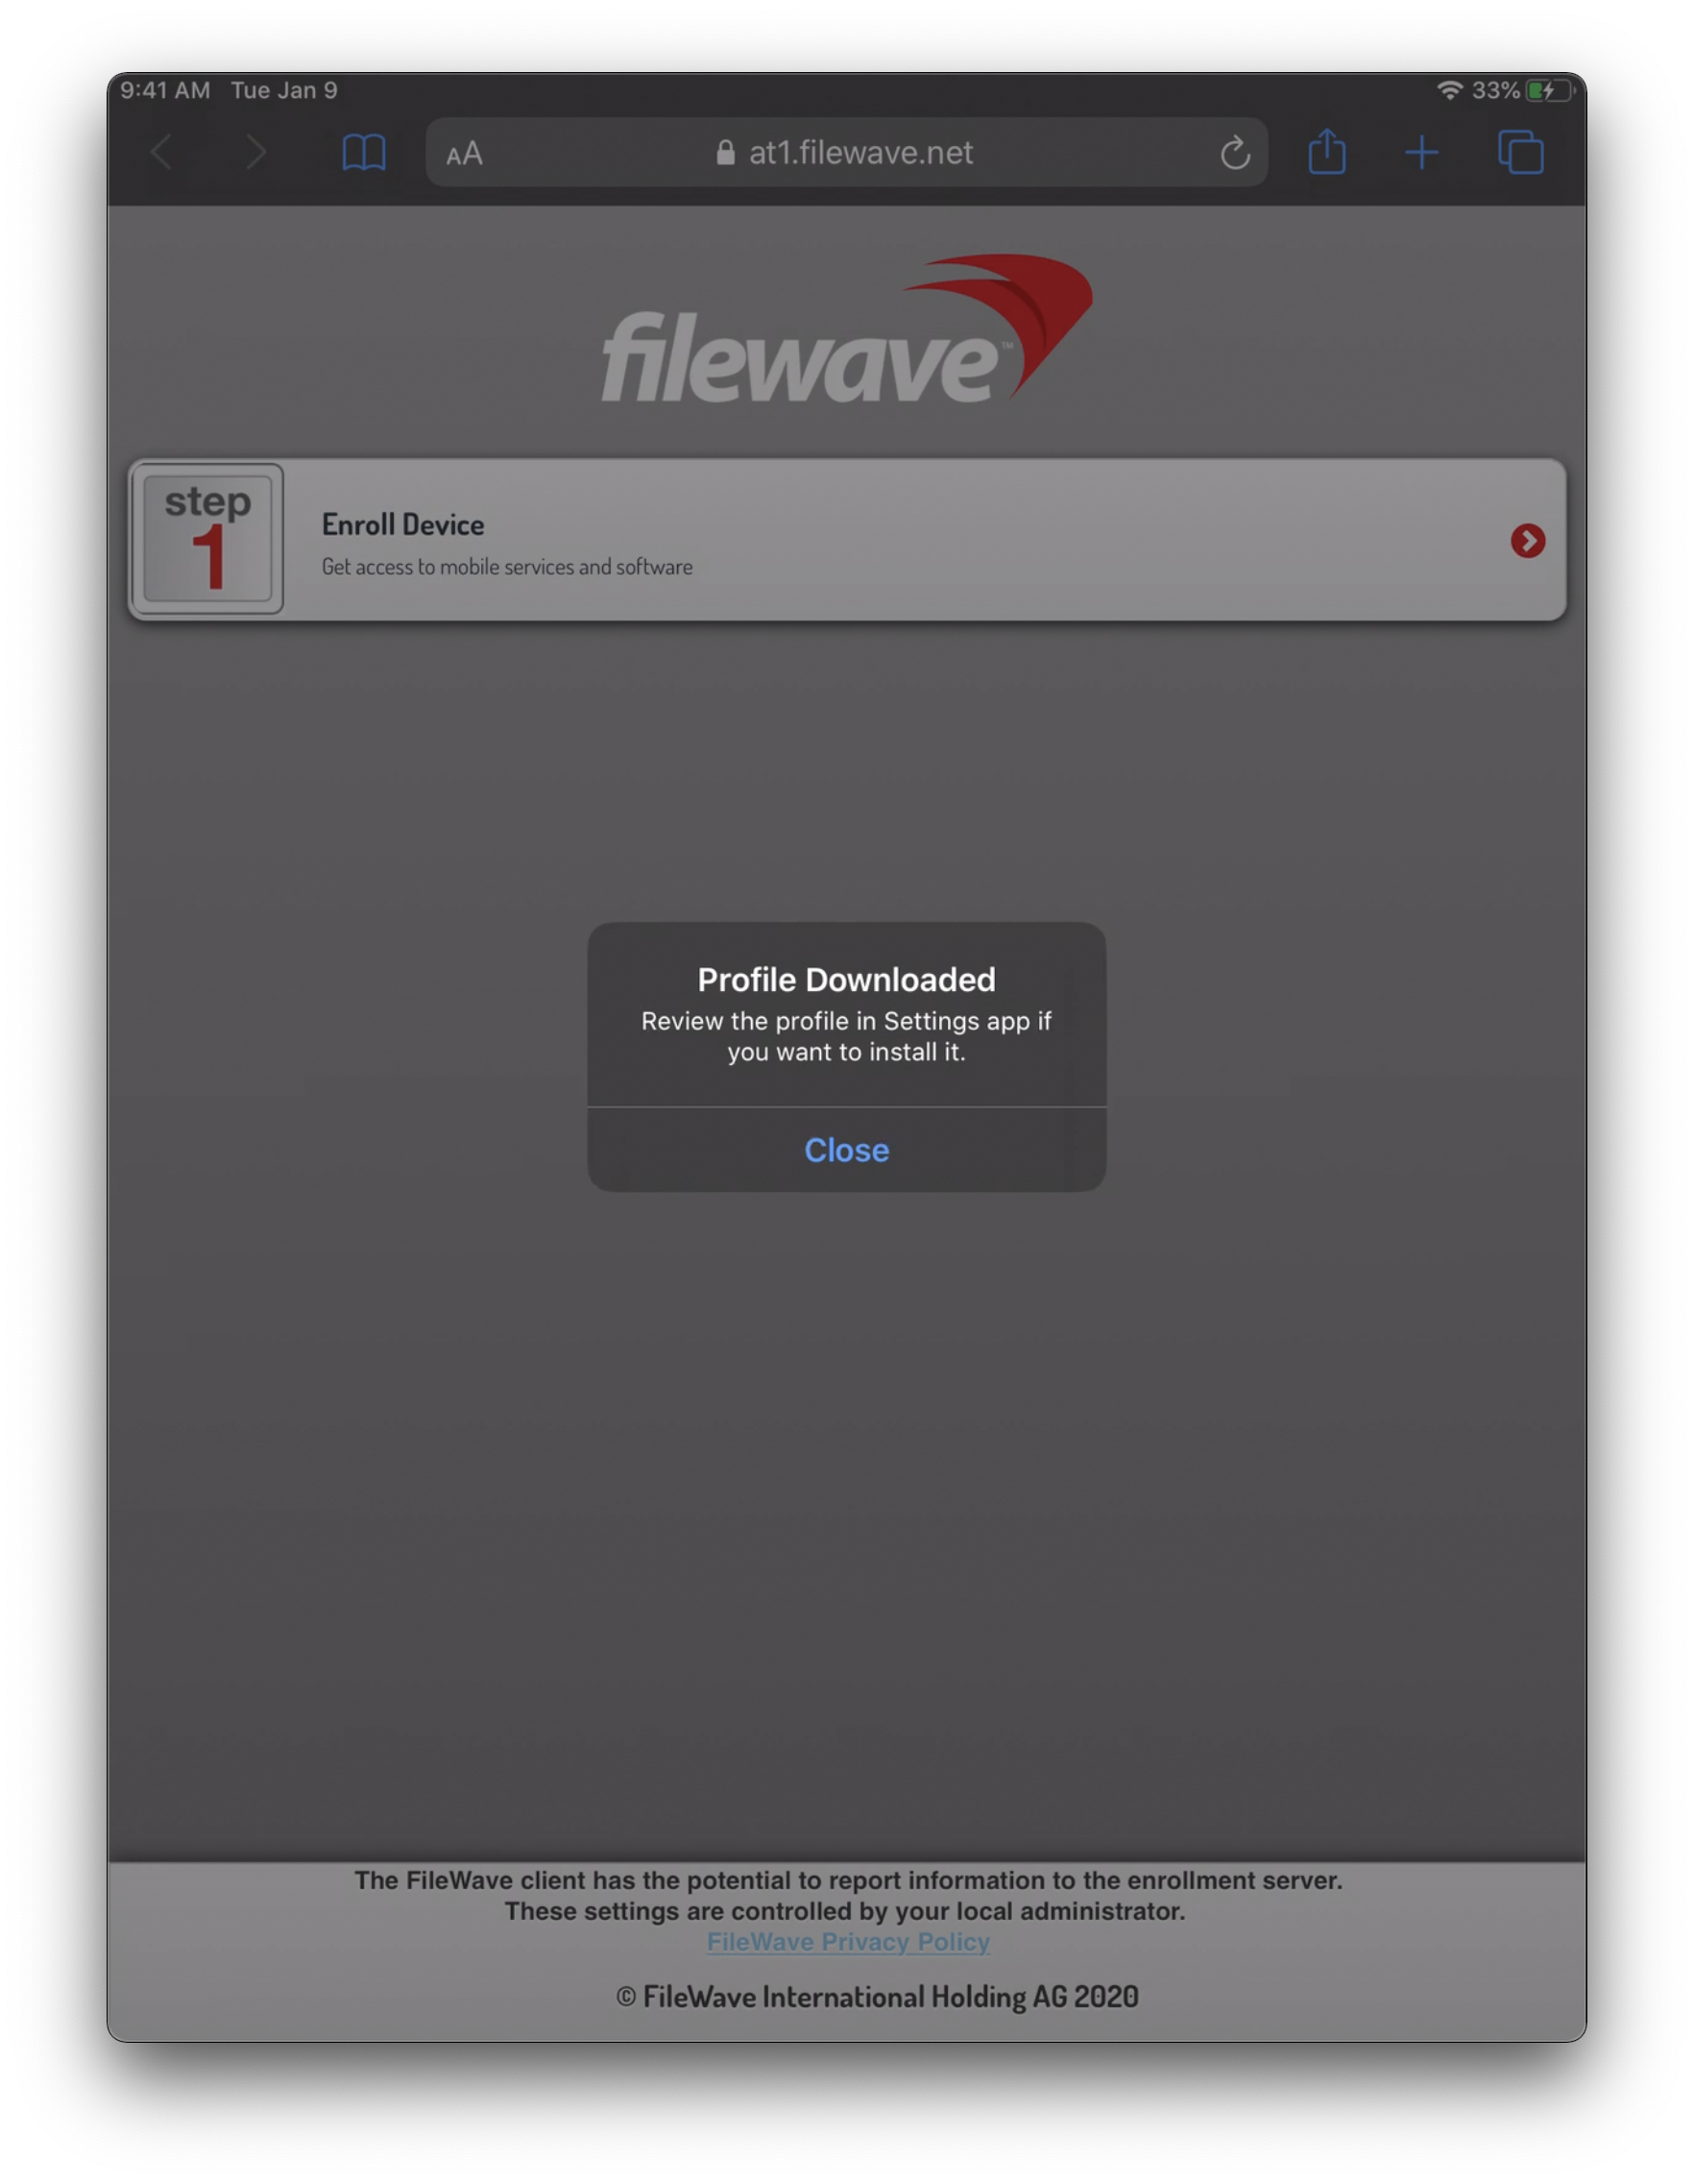
3. *"Allow"* the Profile download, acknowledge the *"Profile Downloaded"* prompt, and navigate to *"Settings"*.
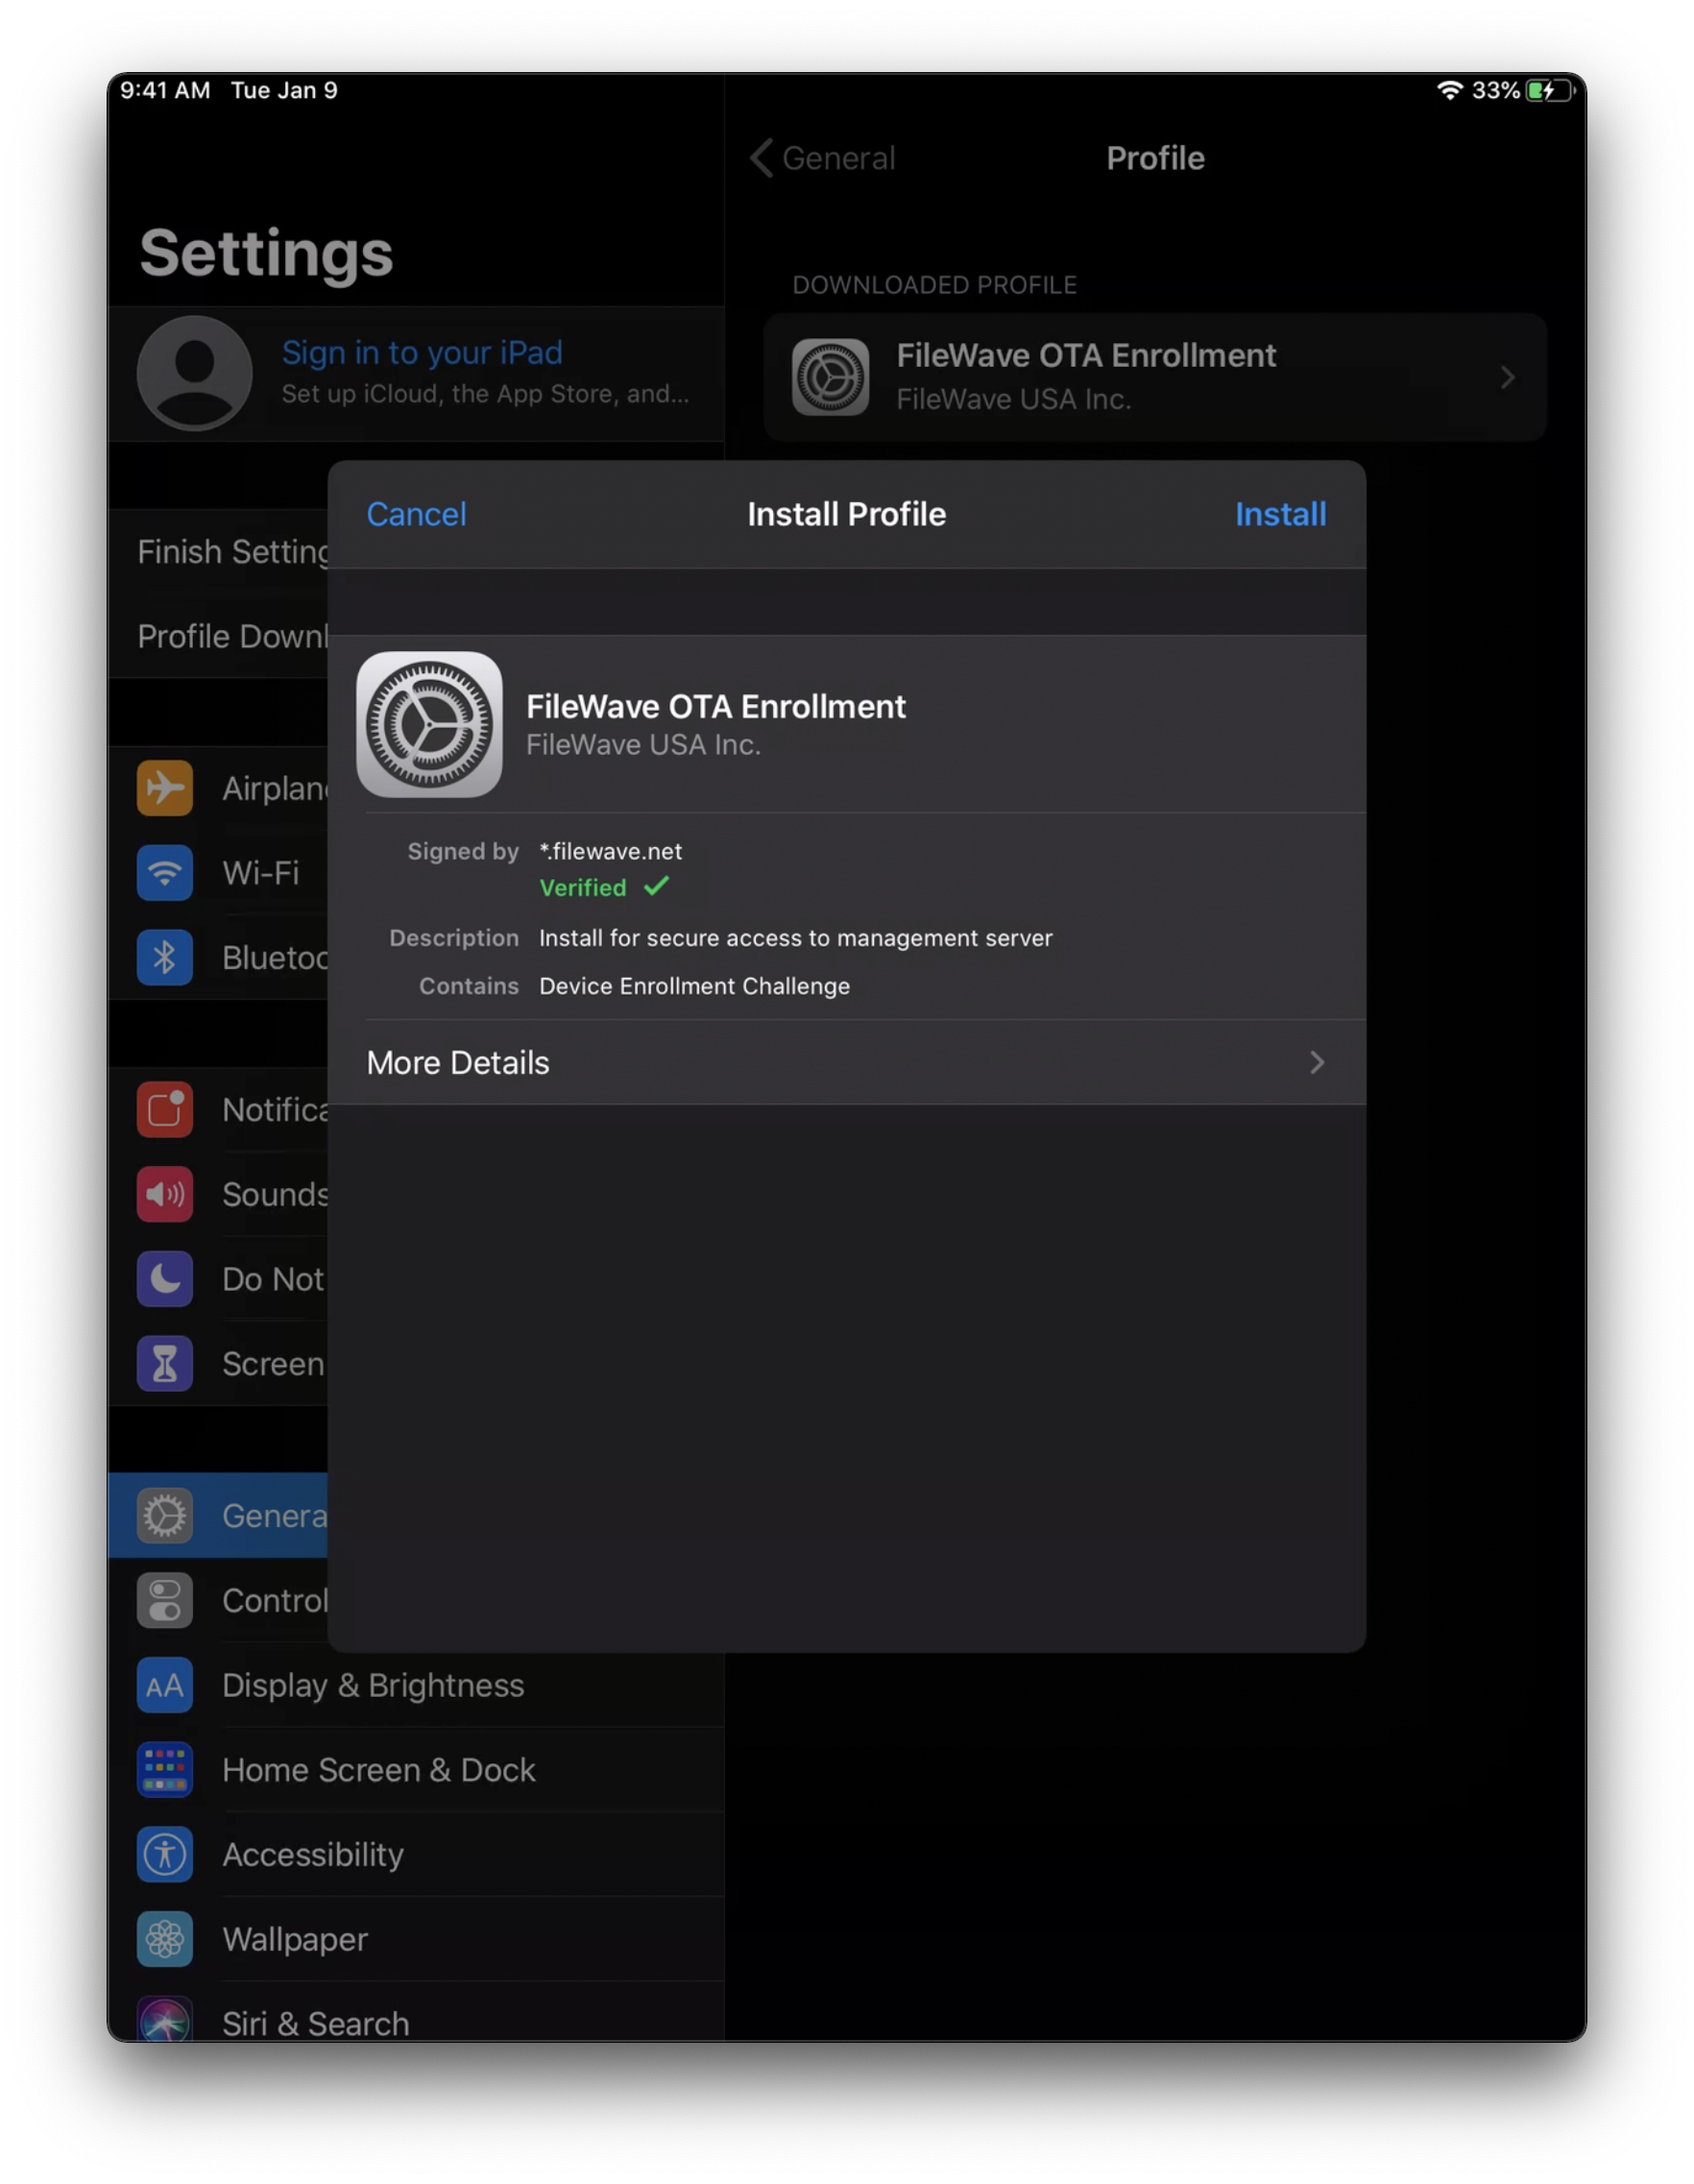
4. Click the *"Profile Downloaded"* item from the *"Settings"* and click *"Install"*.
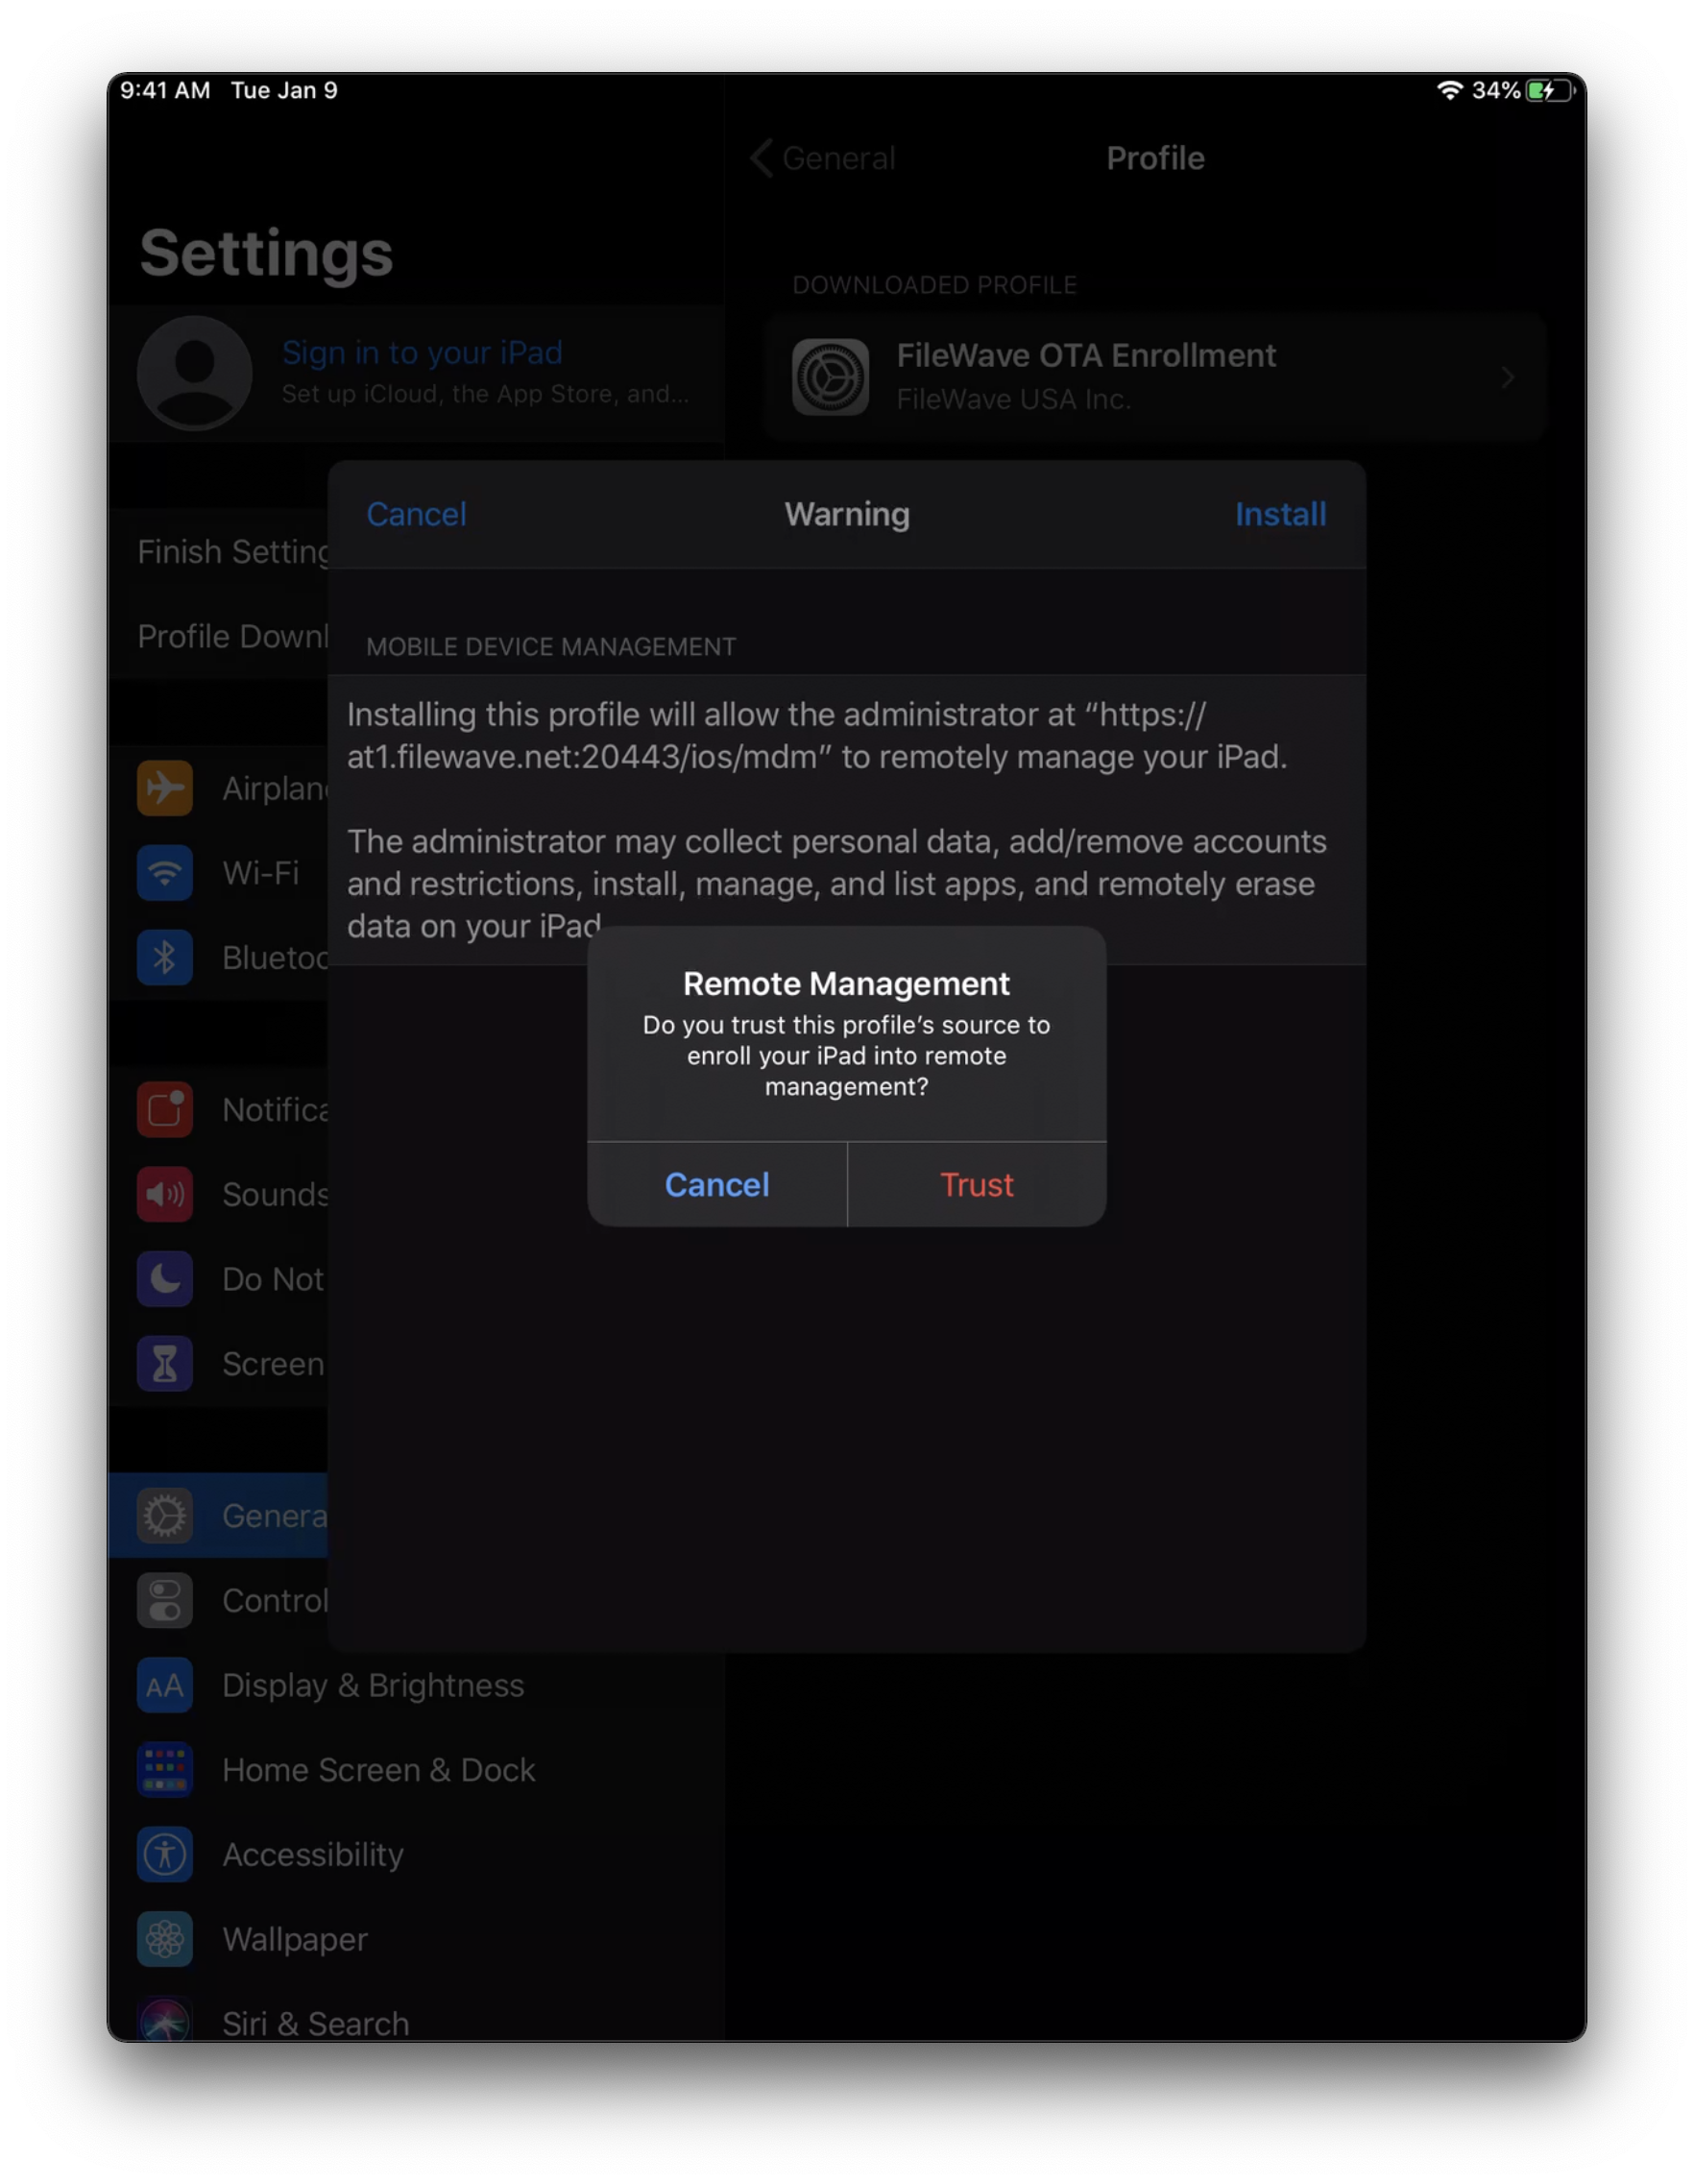
5. Click *"Install"* again and *"Trust"* the *"Remote Management"* prompt.
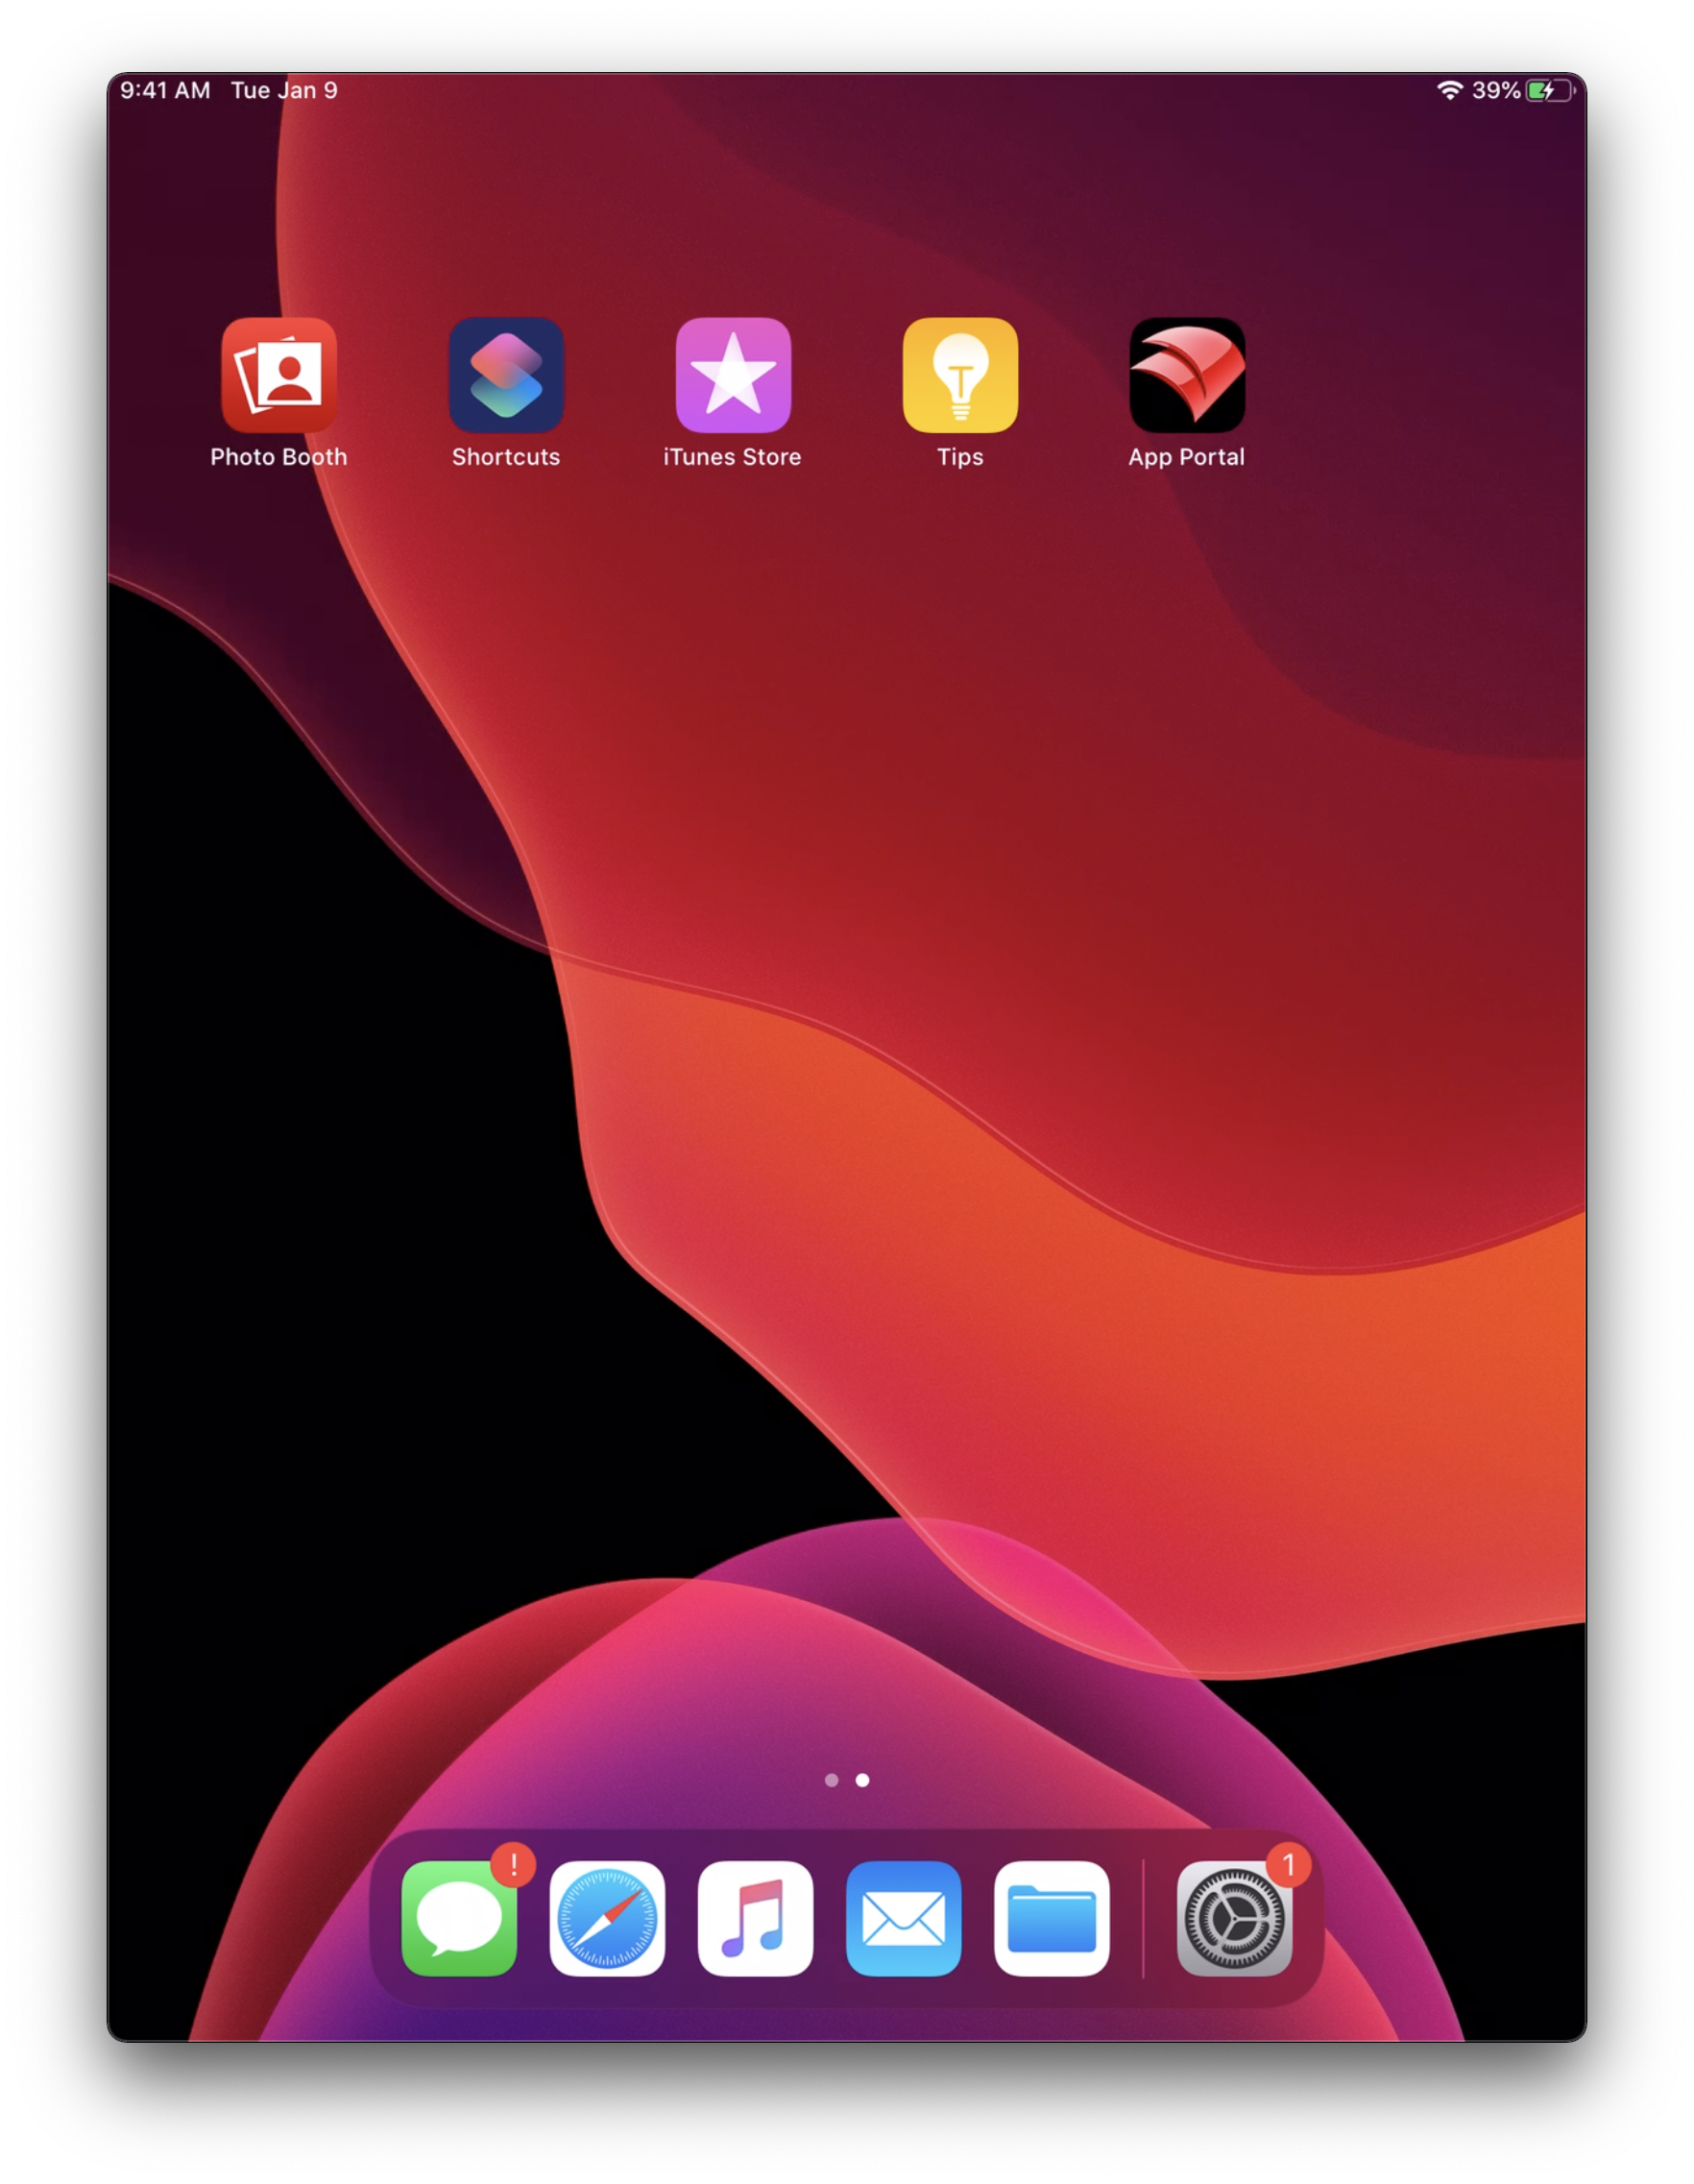
6. Your iOS device is now MDM enrolled and you should see the "FileWave App Portal" on the Home Screen.
| 
| 
| 
|
| 
|  |
## iOS User Enrollment (BYOD)
---
Starting with iOS 13, FileWave allows your end-users to enroll using User Enrollment. This is a new form of BYOD enrollment that allows your organization to deploy VPP applications to the devices while keeping other end-user data private from the MDM. This method also required the use of Managed Apple IDs configured in either Apple School Manager or Apple Business Manager.
For more in-depth information and setup of iOS User Enrollment, please consult the following FileWave Knowledge Base article [iOS BYOD User Enrollment](https://kb.filewave.com/books/ios-ipados/chapter/iosipados-byod-user-enrollment "iOS BYOD User Enrollment"). This article contains a video walk though of the enrollment process along with the [limitations](https://kb.filewave.com/books/ios-ipados/page/managing-byod-user-enrollment "Managing BYOD User Enrollment") of iOS User Enrollment.
## Enroll non-MDM macOS Client
---
Enrolling a macOS device outside of the MDM is possible although it is unrecommended. To enroll a non-MDM macOS device into FileWave, you will need to simply install the FileWave Client PKG using a macOS Administrator account.
| Features unavailable with non-MDM macOS enrollment
- VPP content deployment
- Profile Deployment (macOS Big Sur [unsupported](https://kb.filewave.com/display/KB/Profile+installation+on+macOS+Big+Sur))
- Profile Restrictions (Security and Privacy)
- FileVault Disk Encryption with Key Escrow
- Remote Shutdown/Reboot
- Lock Device
- Activation Lock Bypass
- Firmware Password Management
- Software Updates via MDM (macOS Big Sur)
| Features available with non-MDM macOS enrollment
- Location Tracking
- Fileset Deployment (PKG, .app, scripts)
- Limited Profile Restrictions
- Observe Client
- Remote Wipe
- Inventory w/ Custom Fields
- Legacy Software Updates
|
### Generate a custom FileWave Client PKG
1. 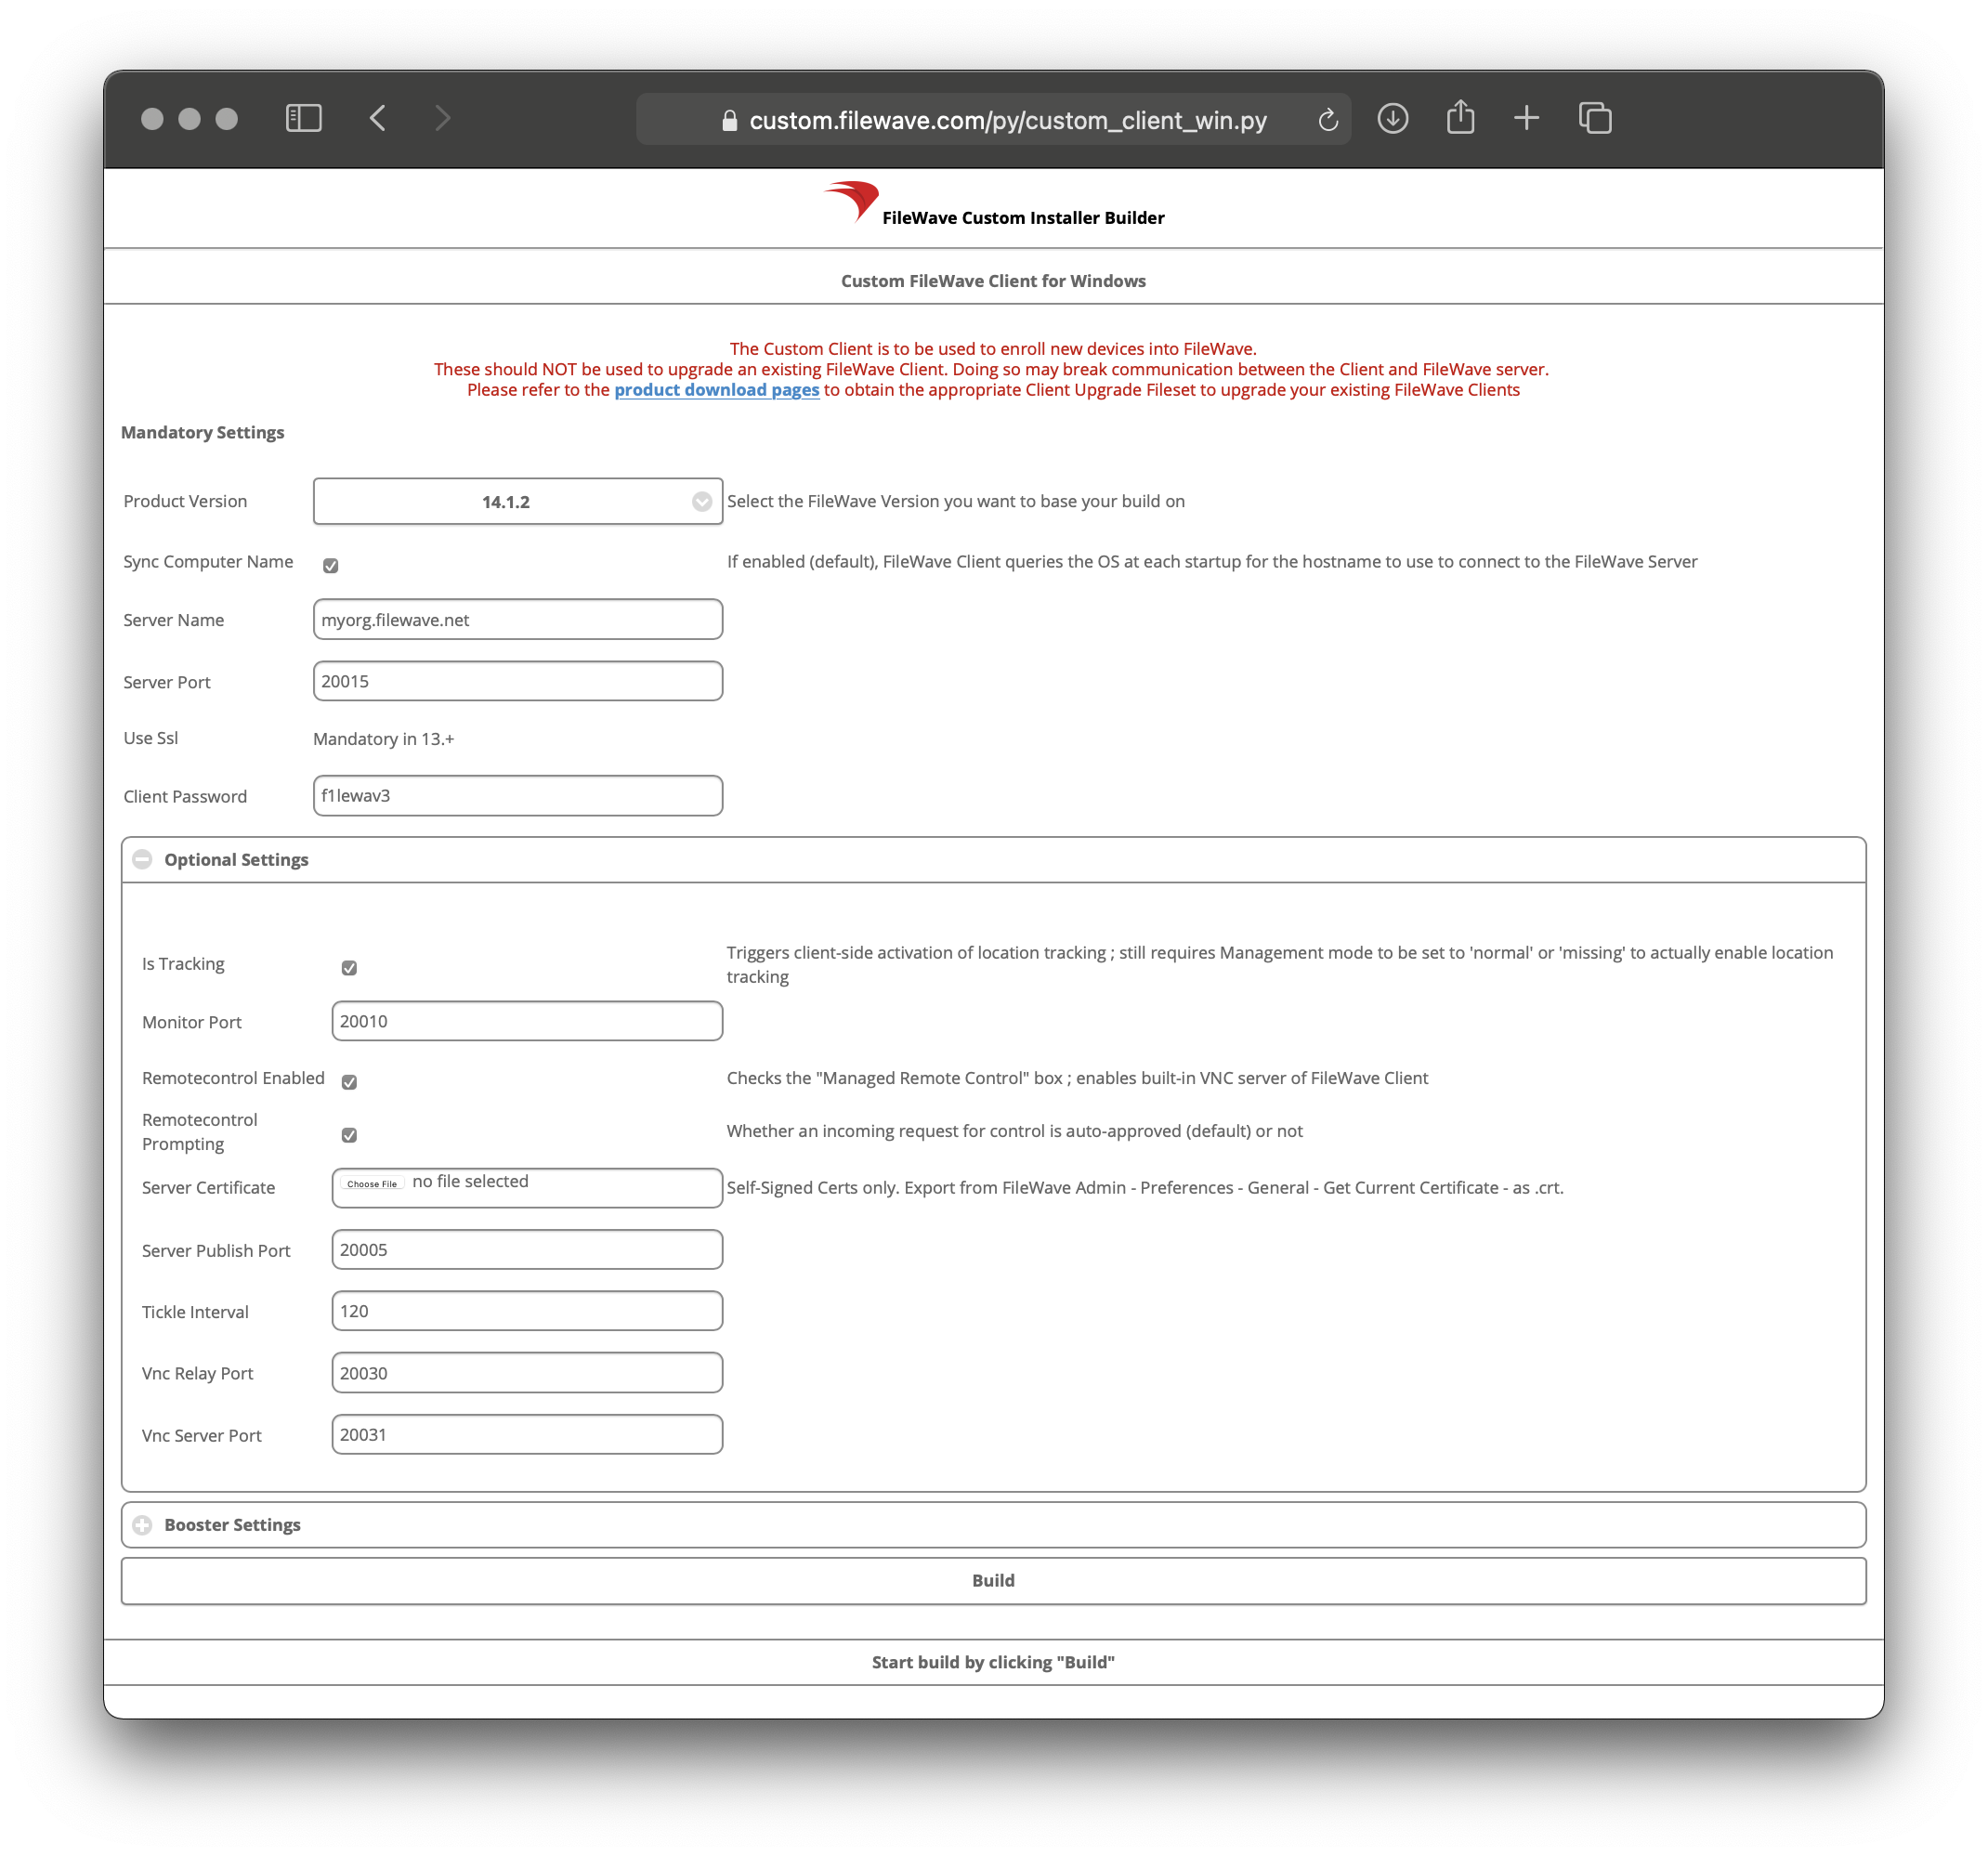Open the [FileWave Customer Installer Builder](https://custom.filewave.com/py/custom_client_mac.py) for macOS.
2. Fill out the settings accordingly.
3. Click the *"Build"* button and wait for the automatic download.
4. Extract ZIP and install the customized FileWave Client PKG.
| **Mandatory Settings** |
| **Product Version** = Your FileWave Server Version |
| **Sync Computer Name** = macOS Hostname will be FileWave Client Name (recommended) |
| **Server Name** = Fully Qualified Domain Name of your FileWave Server |
| **Server Port** = 20015 (do not modify) |
| **Client Password** = Password used to change individual Client Preferences |
Note: The default port setting for Server Port above is 20015. However, SSL is now required, and the system will automatically use port 20017 instead when 20015 is entered. Do not manually set the port to 20017. Always enter 20015, and the system will handle the SSL port change for you.
| **Optional Settings** |
| **Is Tracking** = Is Location Tracking Enabled for macOS Clients |
| **Monitor Port** = Port used for FileWave Client Monitor (do not modify) |
| **Overwrite Configuration** = Overwrite any existing FileWave Client configuration with settings entered here (recommended) |
| **Remotecontrol Enabled** = Screen-sharing enabled for macOS Clients |
| **Remotecontrol Prompting** = Whether or not to Prompt the end-user before starting screen-sharing session |
| **Server Certificate** = Only upload certificate is using a Self-Signed Certificate; not required for CA-signed certificate |
| **Server Publish Port** = 20005 (do not modify) |
| **Tickle Interval** = Idle time for macOS Clients before checking for new Model Update (do not modify) |
| **Vnc Relay Port** = 20030 (do not modify) |
| **Vnc Server Port** = 20031 (do not modify) |
| **Booster Settings** |
| Initially you may want to make an installer that does not include Boosters. Read more about them here: [Boosters](https://kb.filewave.com/books/boosters "Boosters") |
## Finalizing adding of clients
FileWave Clients communicating to the FileWave server will not be able to connect until you add them to the model. We will now allow our new client to join the FileWave server.
[](https://kb.filewave.com/uploads/images/gallery/2024-04/HJuqYZeFYrbIstav-image.png)
1. Open FileWave Central.
2. Click on the “New Client” button in the tool bar
3. Select **Desktop Clients** for macOS computers or **Enrolled Mobile Devices** for iPhone, iPad, and Apple Vision Pro.
4. Select your new client from the list presented.
5. Click the “Add Clients” button in the lower right.
You can also decide to automatically add new clients to skip the step of adding devices. This is discussed here: [Conflict Resolution](https://kb.filewave.com/books/filewave-central-anywhere/chapter/conflict-resolution "Conflict Resolution")
## Making Changes to the Model
Remember that you will need to update the model anytime that you want to apply changes you have made. You can update the model after a single change or multiple changes (adding multiple clients, creating groups, etc.)
Congratulations! Your FileWave environment is now up and running! From here you can continue to add clients, build and deploy Filesets!

# Using LDAP to enroll macOS/iOS/Android devices
Use this document if you are trying to point your enrollment of device to directory services (Active Directory, Open Directory, eDirectory or OpenLDAP). This is used for Android Device and well as iOS devices or macOS devices enrolling OTA (over the air) as well as Apple's DEP (Device Enrollment Program) enrollment for both iOS and macOS devices.
---
This process consists of:
1- Backing up the current config
2- Editing a new config file to properly read the LDAP structure
3- Restarting the Apache Process so it reads the new config file
## Getting the files ready
Open a Terminal Window or use SSH to get into the computer running FileWave Server
Gain root credentials
```
sudo -s
```
Enter your login password
Navigate to the FileWave Apache configurations folder
| OS X / Linux: |
| `cd /usr/local/filewave/apache/conf/` |
Backup your current mdm\_auth.conf by making a copy
```
cp mdm_auth.conf mdm_auth.conf.bac
```
Make a copy of the LDAP example and rename it
```
cp mdm_auth.conf.example_ldap_auth mdm_auth.conf
```
# Making the changes
Open it up using your preferred text editor (nano mdm\_auth.conf or vi mdm\_auth.conf).
it will look like this:
```
# This is an example of ldap based user auth
AuthType Basic
AuthBasicProvider ldap
AuthName "Enroll IOS Device"
AuthLDAPURL "ldap://10.1.10.25:389/cn=Users,dc=saturn,dc=filewave,dc=us?uid"
Require valid-user
# If you need to bind to the ldap server, use these lines
# AuthLDAPBindDN "cn=Admin,o=myorg"
# AuthLDAPBindPassword "secret1"
LDAPReferrals Off
# This is an example of ldap based user auth
AuthType Basic
AuthBasicProvider ldap
AuthName "Enroll IOS Device"
AuthLDAPURL "ldap://10.1.10.25:389/cn=Users,dc=saturn,dc=filewave,dc=us?uid"
Require valid-user
ErrorDocument 401 "Enrollment credentials are needed."
# If you need to bind to the ldap server, use these lines
# AuthLDAPBindDN "cn=Admin,o=myorg"
# AuthLDAPBindPassword "secret1"
LDAPReferrals Off
# This is an example of ldap based user auth
AuthType Basic
AuthBasicProvider ldap
AuthName "Enroll Android Device"
AuthLDAPURL "ldap://10.1.10.25:389/cn=Users,dc=saturn,dc=filewave,dc=us?uid"
Require valid-user
# If you need to bind to the ldap server, use these lines
# AuthLDAPBindDN "cn=Admin,o=myorg"
# AuthLDAPBindPassword "secret1"
LDAPReferrals Off
# This is an example of ldap based user auth
AuthType Basic
AuthBasicProvider lda4
AuthName "Google Cloud Messaging configuration"
AuthLDAPURL "ldap://10.1.10.25:389/cn=Users,dc=saturn,dc=filewave,dc=us?uid"
Require valid-user
# If you need to bind to the ldap server, use these lines
# AuthLDAPBindDN "cn=Admin,o=myorg"
# AuthLDAPBindPassword "secret1"
LDAPReferrals Off
```
The different sections correspond with the different enrollment URLs.
For example, if my servers hostname was [server.filewave.com](http://server.filewave.com):
**mdm\_auth.conf**
| URL | Use |
| [https://server.filewave.com:20443/ios/enroll](https://server.filewave.com:20443/ios/enroll) | Over the air enrollment portal |
| [https://server.filewave.com:20443/ios/dep\_enrollment\_profile](https://server.filewave.com:20443/ios/dep_enrollment_profile) | URL iOS or macOS Devices request when a DEP device is enrolling. This URL is not accessible from a normal browser. |
| [https://server.filewave.com:20443/android/enroll](https://server.filewave.com:20443/android/enroll) | Downloading the APK FileWave Client |
| [https://server.filewave.com:20443/android/project\_number](https://server.filewave.com:20443/android/project_number) | Used by the FileWave Android client to talk to server |
## Open Directory & eDirectory
OD (by default) does not require a user to authenticate to read the structure.
You will not need to uncomment the bind options.
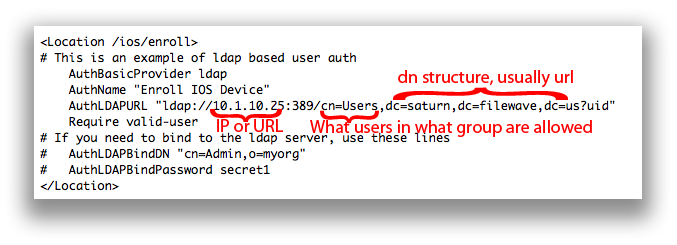
AuthName - The title of the login window
AuthLDAPURL - Where and what groups are allowed to login and there for enroll. The example above would allow anyone in the 'Users' group to enroll a device.
Make the appropriate changes and then save the .conf
## Active Directory
AD (by default) requires you bind to the directory to read. Many people create a read-only directory account.
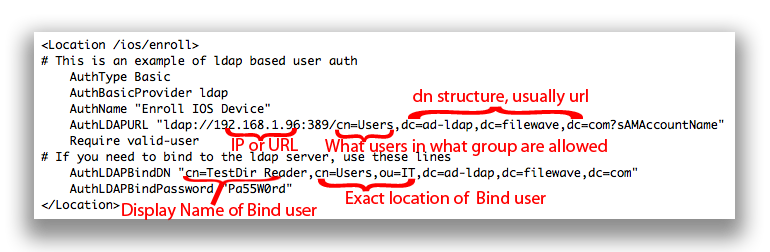
AuthName - The title of the login window
AuthLDAPURL - Where and what groups are allowed to login and there for enroll. The example above would allow anyone in the 'Users' group to enroll a device.
AuthLDAPBindDN - From specific to most general. Username, what group that is in, what group (or organizational unit) that group is in, and the server. The example above would allow the user 'TestDir Reader' who is in the group 'User' who is in the Org Unit 'IT' on the Active Directory server of [ad-ldap.filewave.com](http://ad-ldap.filewave.com) to bind.
AuthLDAPBindPassword - Password for user account being used to bind to AD.
Make the appropriate changes and then save the .conf
## Restarting Apache
Once saved, restart the FileWave Apache process/service
| OS X / Linux: |
| `/usr/local/filewave/apache/bin/apachectl graceful` |
Now when a device attempts to enroll (by pressing the Enroll Device option on the site). They will be prompted to enter their username and password from the directory server.
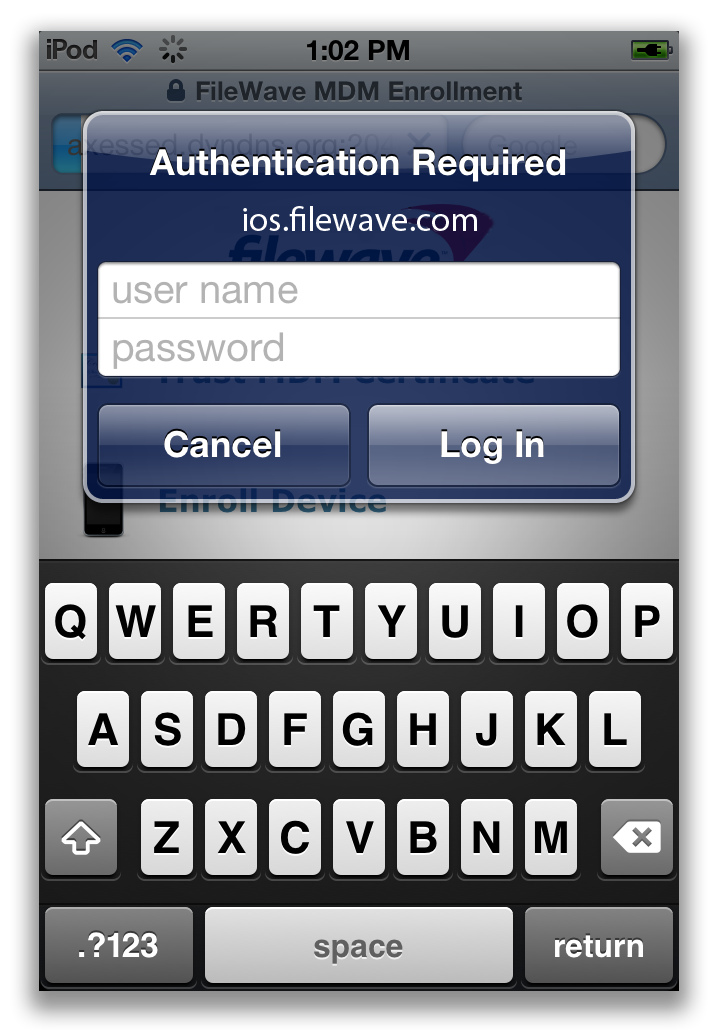
## Using several authentication sources for the same enrollment type
When we want to use several authentication sources (not nested locations) , we need to use AuthnProviderAlias sections to define those sources. The same format for binding to a single source ( see above ) apply for configuring each AuthnProviderAlias section , as in the following example
At the start of the file we define an alias by using:
```
AuthLDAPBindDN ""
AuthLDAPBindPassword ""
AuthLDAPURL ""
```
Then below that you specify the location and call for the alias
```
AuthBasicProvider ALIAS_NAME0 ALIAS_NAME1 ALIAS_NAME2
AuthType Basic
AuthName "Enroll IOS Device"
Require valid-user
```
A final MDM\_auth.conf would look something like this:
```
AuthLDAPBindDN "cn=BindUserName,dc=filewave,dc=net"
AuthLDAPBindPassword "YourBindPassword"
AuthLDAPURL "ldap://ldap.filewave.net:389/OU=student,dc=filewave,dc=net?sAMAccountName"
AuthLDAPBindDN "cn=BindUserName,dc=filewave,dc=net"
AuthLDAPBindPassword "YourBindPassword"
AuthLDAPURL "ldap://ldap.filewave.net:389/OU=staff,dc=filewave,dc=net?sAMAccountName"
AuthBasicProvider Faculty Student
AuthType Basic
AuthName "Enroll IOS Device"
Require valid-user
```
---
## Troubleshooting tips
Take a look at the log files for apache:
| OS X / Linux: |
`
/usr/local/filewave/apache/logs/error_log
` |
Below are some sample errors and what they typically mean.
NOT Bound:
```
[Thu Feb 09 22:10:19 2012] [error] [client 192.168.1.109] user diradmin: authentication failure for "/ios/enroll": Password Mismatch, referer: https://192.168.1.95:20443/ios/
```
Bound but user entered info wrong OR ldap url pointed to wrong group:
```
[Thu Feb 09 22:29:16 2012] [error] [client 192.168.1.109] user diradmin: authentication failure for "/ios/enroll": Password Mismatch
```
Bound w/ Bad User
```
[Thu Feb 09 22:29:00 2012] [error] [client 192.168.1.109] user lkajshdg not found: /ios/enroll
```
Could be Bound or not but not filtering by the correct ?uid ?sAMAccountName at end of URL (?UID is an OD or eDir, AD is typically ?sAMAccountName)
```
[Thu Feb 09 22:17:31 2012] [error] [client 192.168.1.109] user admin not found: /ios/enroll, referer: https://192.168.1.95:20443/ios/
```
Something wrong in the mdm\_auth.conf file. Like AuthzLDAPAuthoritative isn't off or shoudn't be there.
```
apache require directives present and no authoritative handler
```
### Recursive issues
Does it appear that your server only looks at the one group/unit pointed to and not sub-groups? try adding ?sub at the end of your AuthLDAPURL lines:
```
AuthLDAPURL "ldap://ldap.filewave.net:389/OU=student,dc=filewave,dc=net?sAMAccountName?sub"
```
Always feel free to contact support for further assistance.
# Chromebook Enrollment
## **How to enroll Chromebooks into FileWave**
---
Before enrolling Chromebooks, review [Platform Integrations > Chromebooks](https://kb.filewave.com/books/evaluation-guide/page/chromebook-client-pre-requisites "Chromebooks") to confirm Google Admin Console is syncing with FileWave. After that sync completes, provisioned Chromebooks appear in FileWave Central without a separate FileWave enrollment step.
### Provisioning Chromebooks
Provisioning the Chromebook itself is a short device-side workflow once the Google integration is configured.
Do not log into the Chromebook before enrollment. If a user signs in first, reset the device and start the enrollment process again.
You need a configured Google enrollment user to enroll the device.
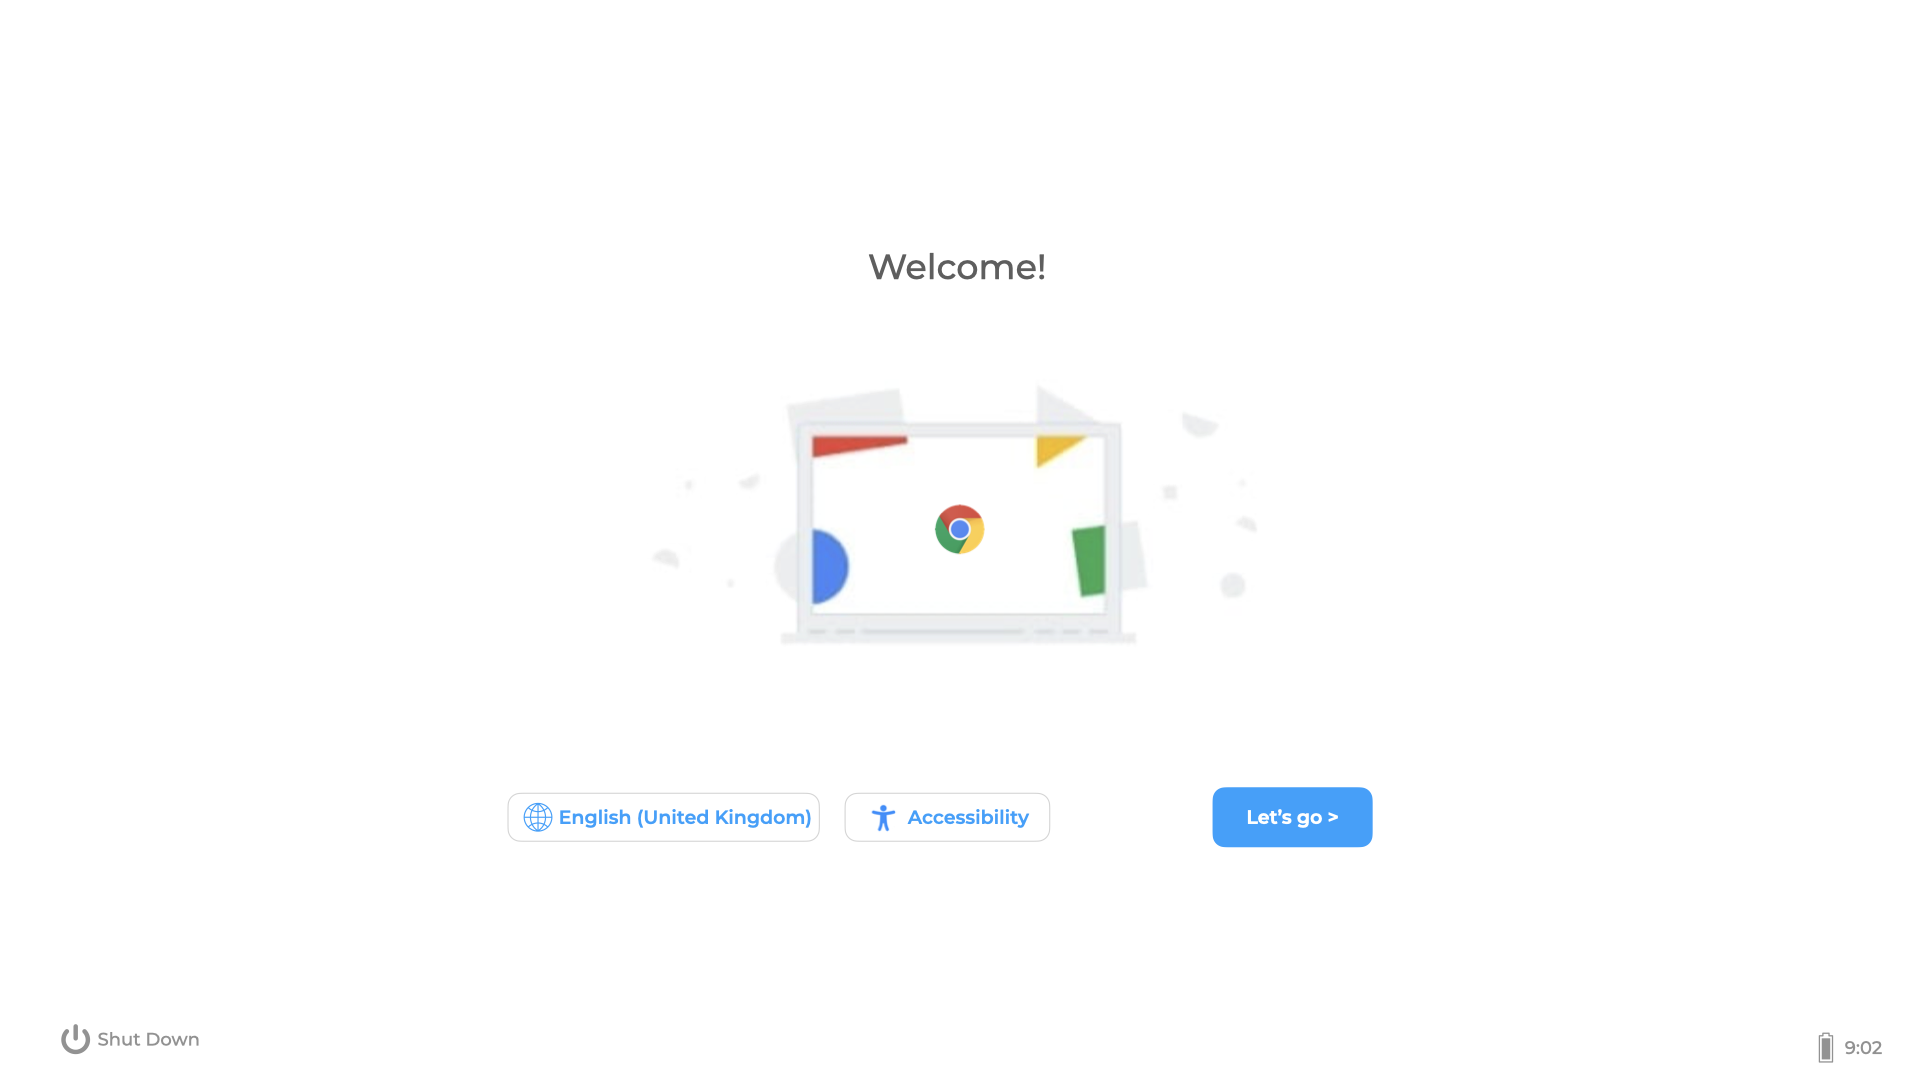
On power up, the device should present the Welcome page:
[](https://kb.filewave.com/uploads/images/gallery/2023-07/AHeJwW9ThqeA0GHO-chromebook-welcome.png)
Click **Let's go**, then select a Wi-Fi network.
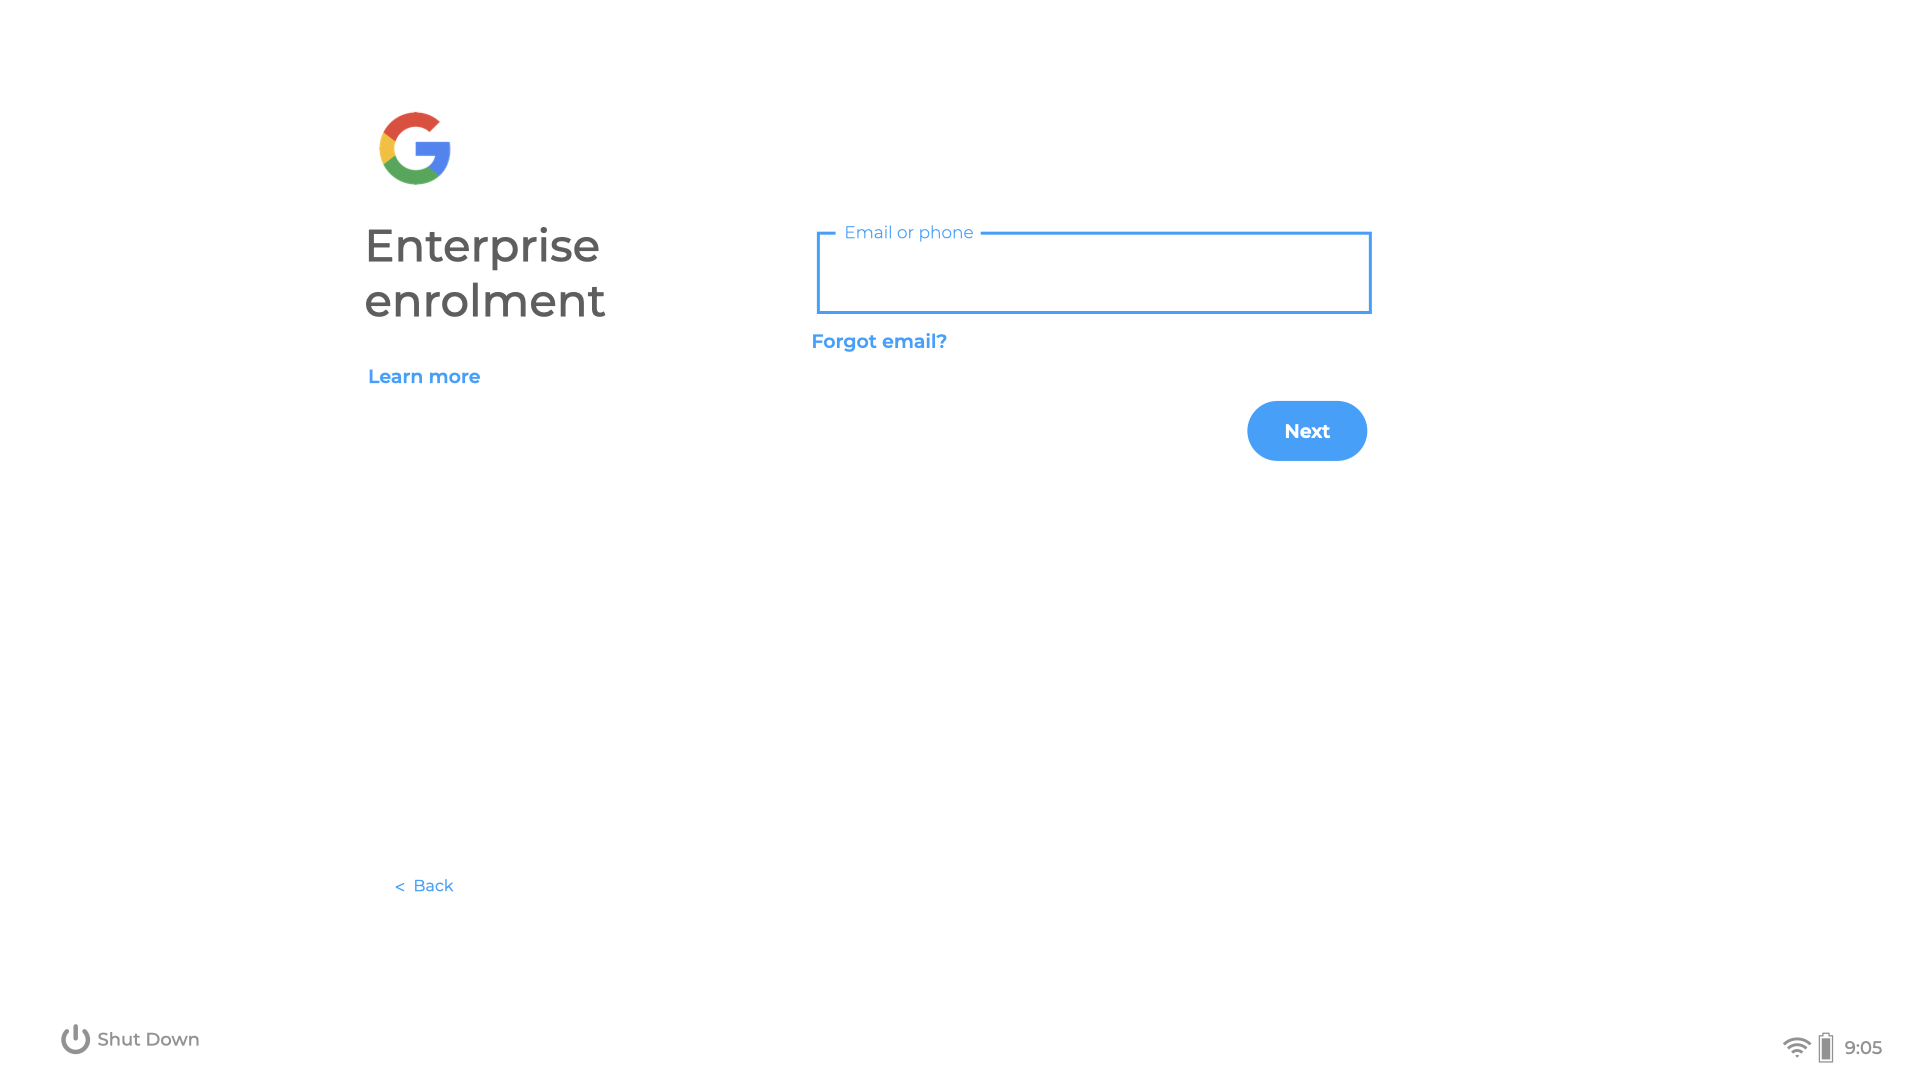
After the device joins a network, it may show an Enterprise Enrollment page:
[](https://kb.filewave.com/uploads/images/gallery/2023-07/Fcui3DRN8CcZMz92-chromebook-enrolment-page.png)
If it does not, press **Ctrl+Alt+E** to enroll the device. Enter the Google enrollment username and password.
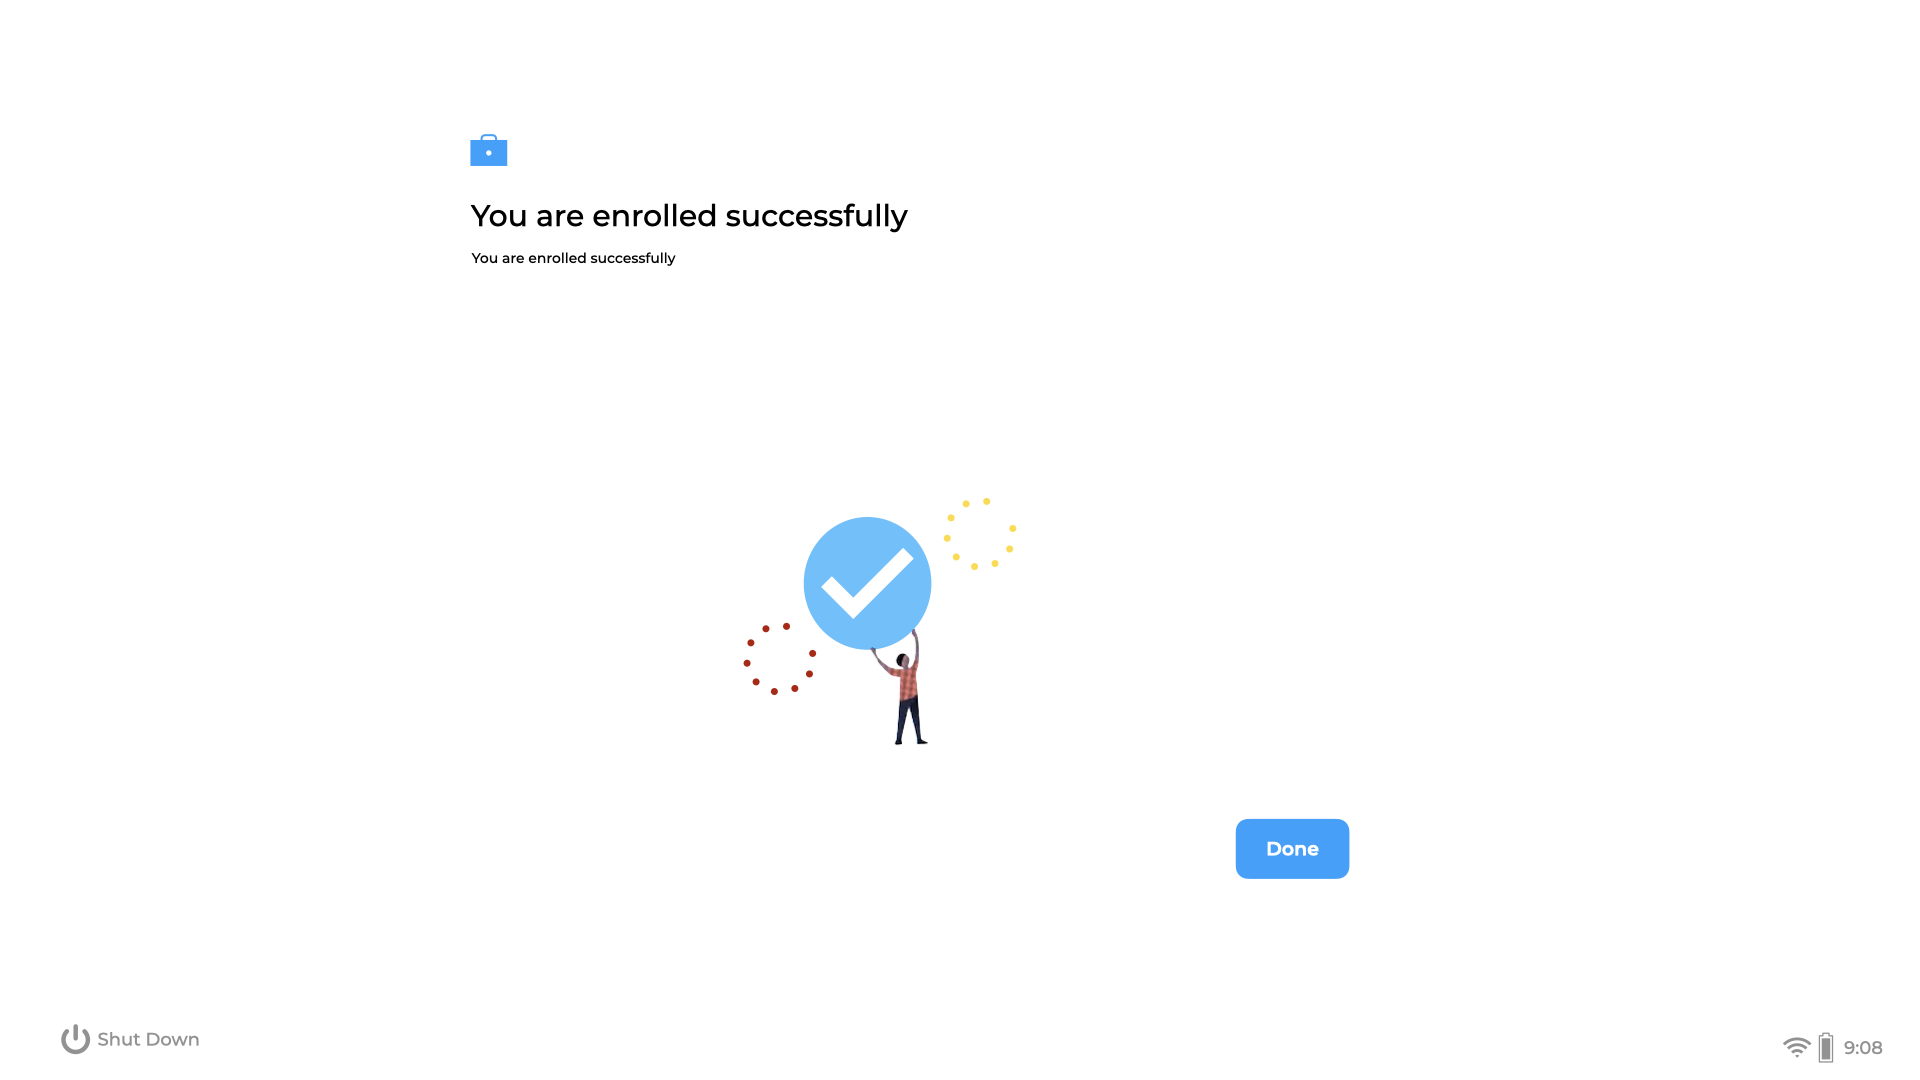
The device shows a progress bar while enrollment is running. When enrollment completes, a success page should appear:
[](https://kb.filewave.com/uploads/images/gallery/2023-07/7EhfE9BHhH5PHnOJ-chromebook-enrolled.png)
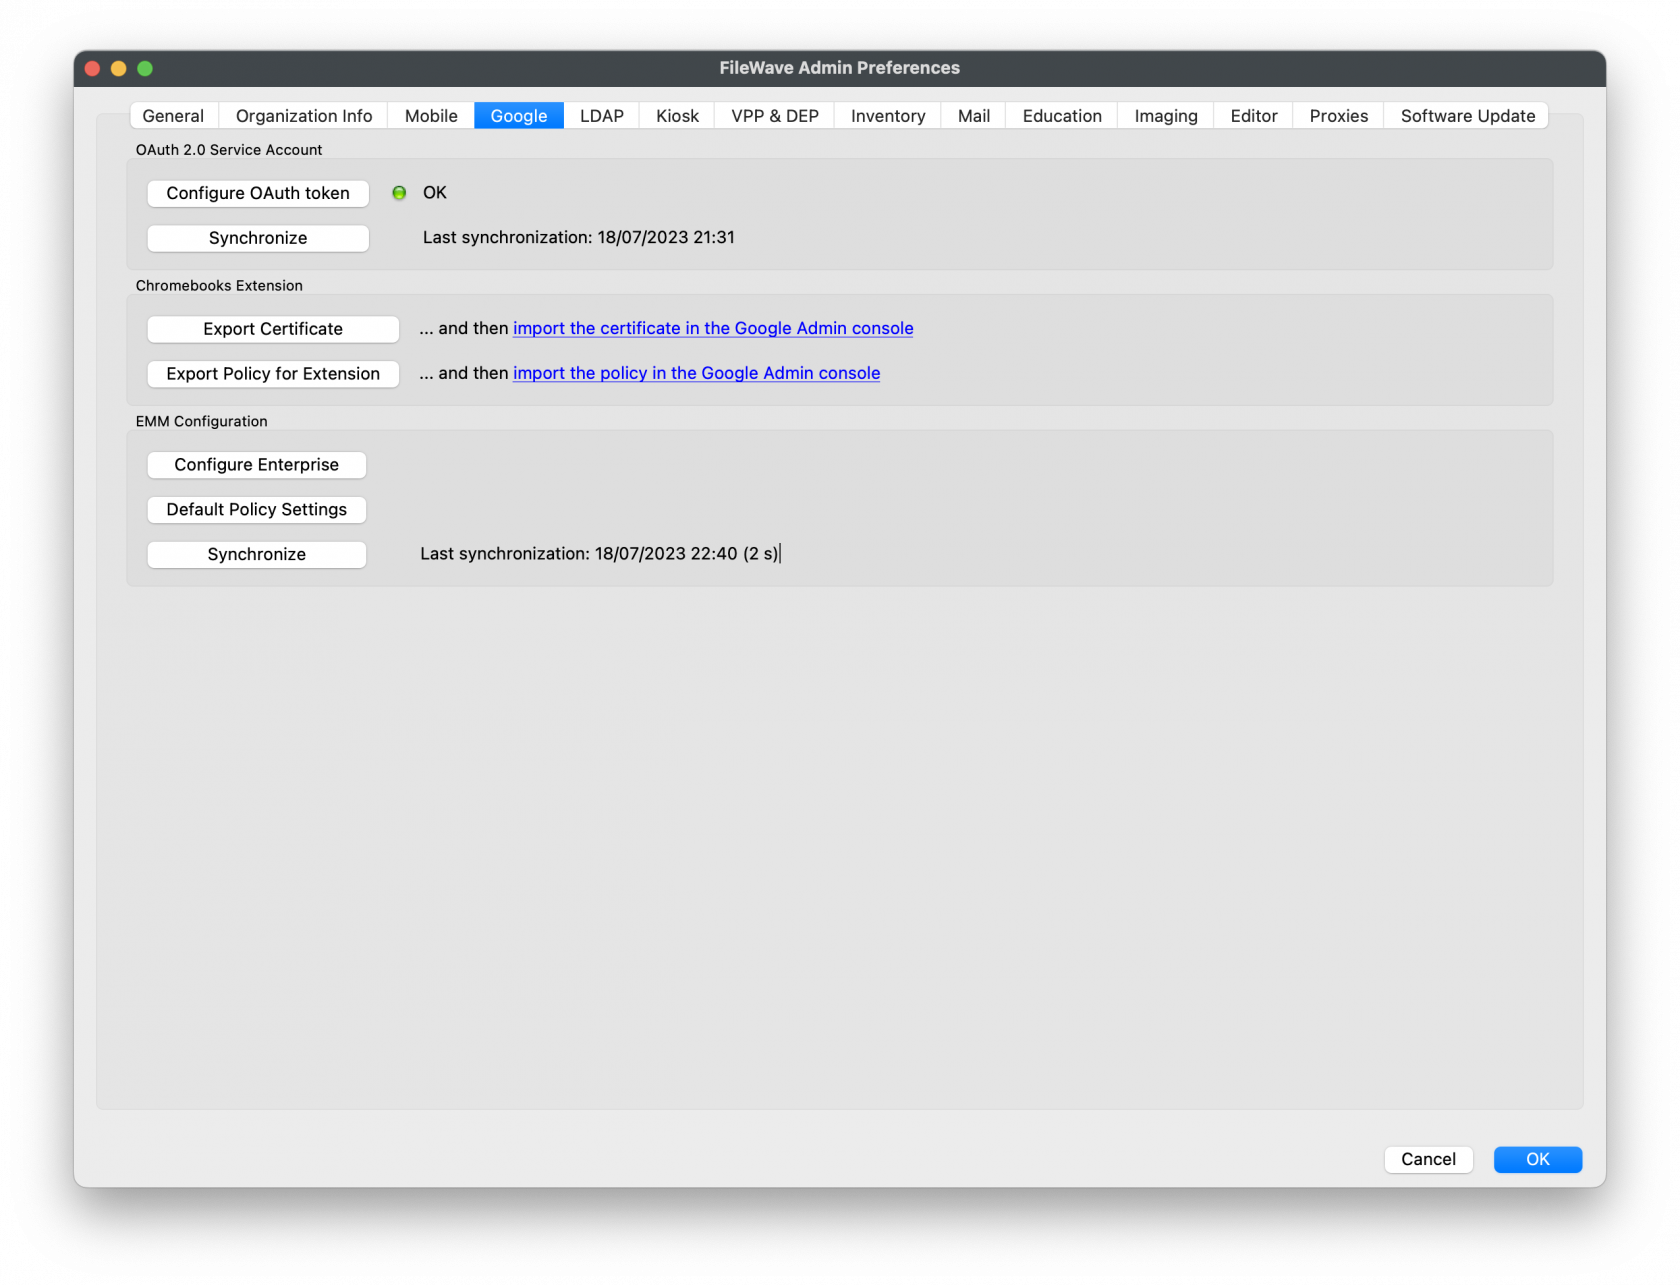
At this point, the device should show in Google Admin Console as provisioned. After the next FileWave Google OAuth synchronization, the device should appear in the FileWave Client view.
You can trigger synchronization manually from FileWave Central preferences:
[](https://kb.filewave.com/uploads/images/gallery/2023-07/pEiJ0878rYk7Vu26-image.png)
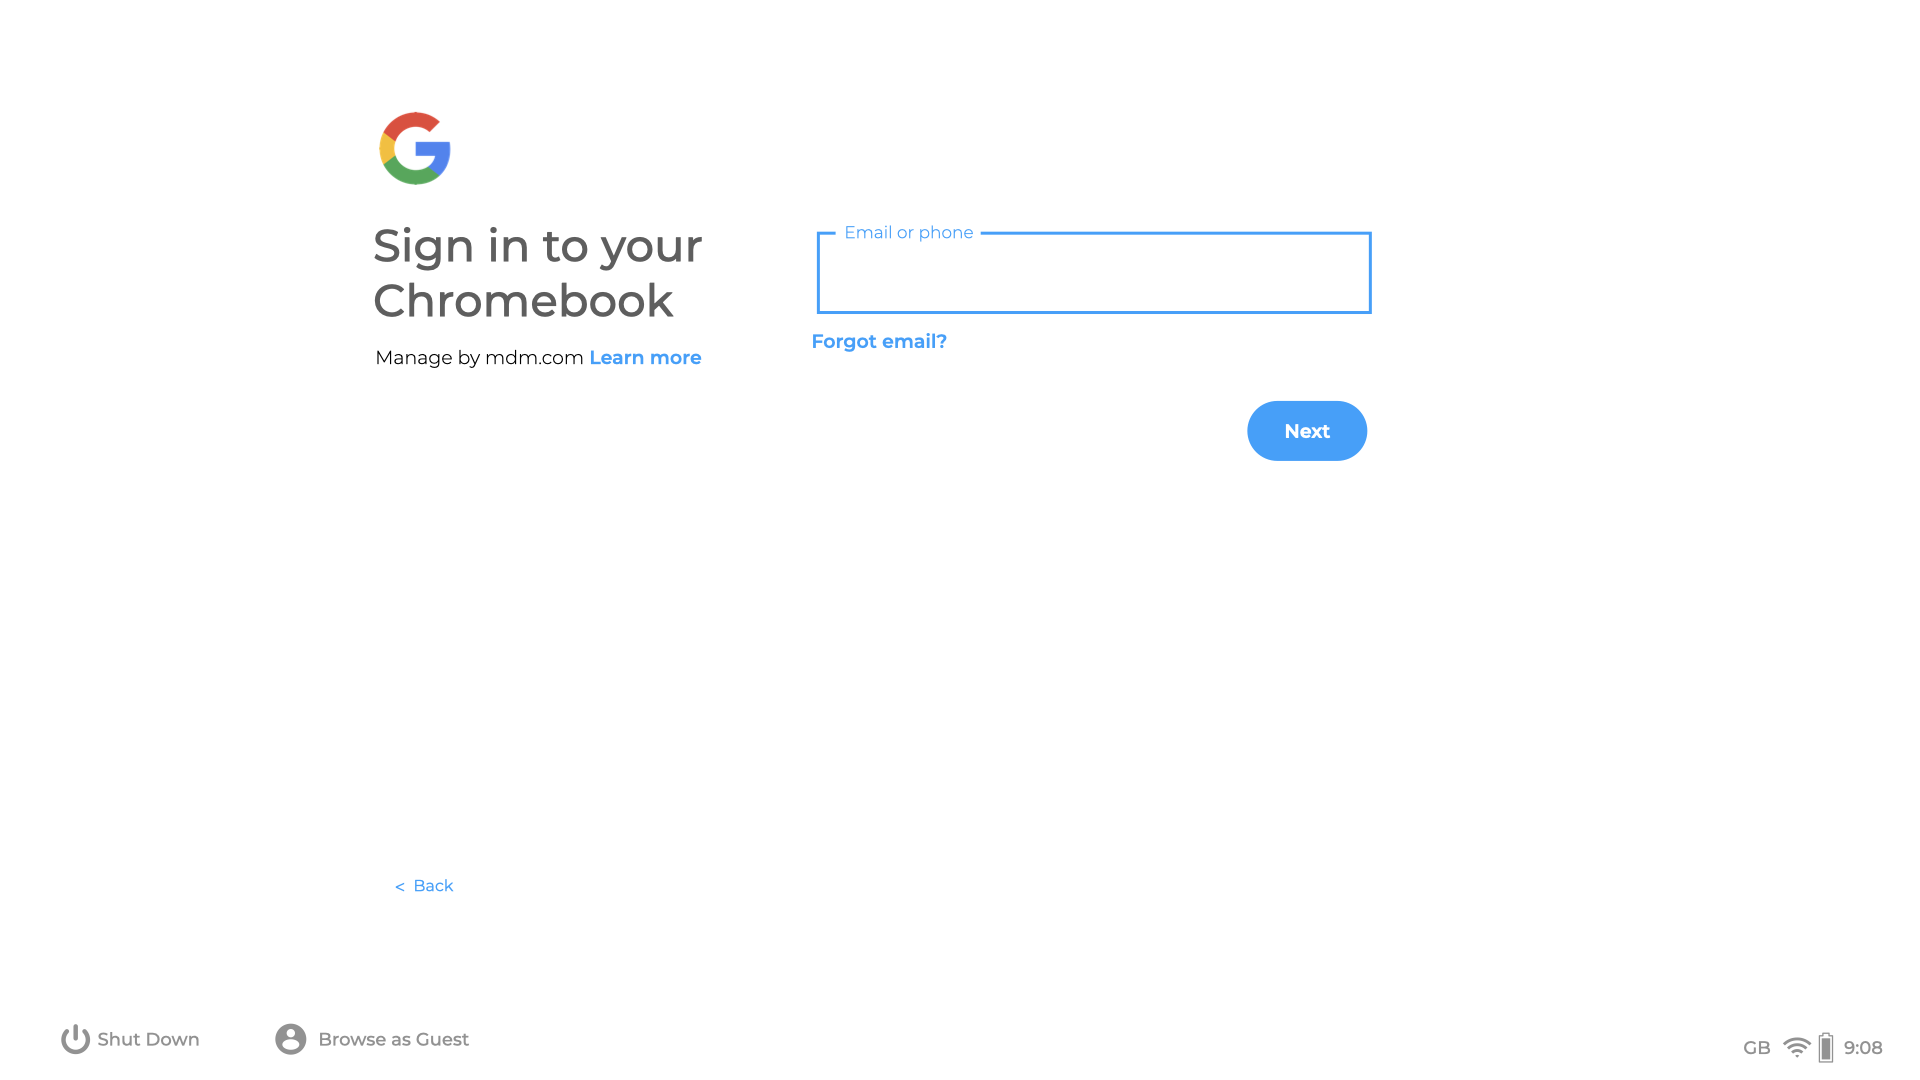
Clicking **Done** on the device should present the login page to the user:
[](https://kb.filewave.com/uploads/images/gallery/2023-07/IGmCZ6YtQ6KxzMeG-chromebook-login.png)
# Windows Enrollment
## How to enroll Windows Clients into FileWave
---
If you haven't already, review the [Platform Integrations > Windows](https://kb.filewave.com/books/evaluation-guide/page/windows-client-pre-requisites "Windows") section for guidance on installing the Windows FileWave Client. If your organization uses Microsoft Entra ID and users sign in to Windows with Entra ID credentials, consider enrolling Windows devices through Microsoft Entra ID instead. That path also enables Windows MDM management in FileWave. Learn more in the [Windows MDM](https://kb.filewave.com/books/microsoft-windows-mdm "Windows MDM") article.
After a Windows desktop client checks in, it waits for approval before it can receive associations. Add it to the model from FileWave Central.
[](https://kb.filewave.com/uploads/images/gallery/2024-04/HJuqYZeFYrbIstav-image.png)
1. Open FileWave Central.
2. Click the “New Client” button in the toolbar.
3. Select “Desktop Clients”. The “Enrolled Mobile Devices” option is for MDM-enrolled devices, not a standard Windows desktop client.
4. Select the new Windows client from the list.
5. Optionally choose the group for the new client, then click “Add Clients”.
You can also configure FileWave to add new clients automatically and skip the manual approval step. This is covered in [Conflict Resolution](https://kb.filewave.com/books/filewave-central-anywhere/chapter/conflict-resolution "Conflict Resolution").
## Making Changes to the Model
Update the model whenever you want FileWave to apply model changes. You can update after one change or after a batch of changes, such as adding clients, creating groups, or assigning Filesets.
Your FileWave environment can now manage the Windows client. From here, continue adding clients, organizing groups, and deploying Filesets.
