# Evaluation Guide
Welcome and thank you for choosing FileWave, the all-inclusive device management solution for Windows, macOS, iOS, tvOS, Android, and ChromeOS!
# Eval Guide Introduction
## Welcome
Welcome and thank you for choosing FileWave, the all-inclusive device management solution for Windows, macOS, iOS, iPadOS, visionOS, tvOS, Android, and ChromeOS!
To help you get started with your evaluation of FileWave's all-inclusive feature set we have created this FileWave Evaluation Guide to outline the initial steps, including the FileWave Server installation, Client enrollment, and some of the basic workflows possible within FileWave's unified management console. Although very comprehensive, this guide is not designed to contain all details regarding FileWave's technical specifications. For more in-depth information, please refer to our [FileWave Knowledge Base](https://kb.filewave.com).
During your evaluation of FileWave, we highly encourage you to work closely with your dedicated FileWave Systems Engineer while referencing this guide between scheduled calls or email correspondence to retain FileWave's workflows and best practices best. We also offer self-paced video training content via our [FileWave Foundry](https://foundry.filewave.com/) 100-level courses that correspond with the content of this guide.
As you will quickly see, FileWave offers many features, so we've compiled our [FileWave IT Checklist](https://kb.filewave.com/attachments/4). We recommend that you also create a checklist of items that are required by your organization so that you and your team have a clear vision of a successful evaluation. If you're willing to share your checklist, your FileWave SE will be able to tailor your evaluation and make the best use of your organization's time and resources.
##### **Sample checklist for computers**
- Support users on-premise and while at home via Internet
- Deploy mandatory software and maintenance scripts
- Let users install optional apps and maintenance items on-demand via self-service
- Patch OS
- Provide remote screen-sharing assistance
- Track and possibly protect data on laptops, regardless of location
- View last known location
- Remote wipe devices
##### **Sample checklist for mobile devices**
- Support users on-premise and while at home via Internet
- Deploy mobile apps silently
- Configure and secure device, ensuring that that it remains under management at all times
- Deploy media
- Enable teachers via a classroom app
- Track and possibly protect data on mobile devices regardless of location
- View last known location
- Remote wipe devices
It's a good idea to plan for and set aside time to consistently evaluate and test FileWave, even if it's only an hour or two every other day. Pick a time when you are least likely to be busy or interrupted. We realize that most customers are busy and testing FileWave is most likely not a normal part of your everyday job. Repeated consistent use of the product will help you get used to the UI and remember how to accomplish tasks.
If you have any questions or problems with the material presented during your evaluation or need assistance with an advanced feature not discussed here, please reach out to your assigned FileWave SE for assistance. During your evaluation, please contact your SE for any support issues or questions. Please do NOT contact FileWave Technical Support directly. If your SE is not able to resolve the issue, they will open a support case with FileWave Support on your behalf. FileWave Community Edition users should consult Discord for advice: [FileWave Discord Server](https://kb.filewave.com/books/community-engagement/page/filewave-discord-server "FileWave Discord Server")
Thanks again for choosing to evaluate FileWave, and please do not hesitate to reach out!
## FileWave Systems Engineers
[Default TCP and UDP Port Usage](https://kb.filewave.com/books/filewave-general-info/page/default-tcp-and-udp-port-usage "Default TCP and UDP Port Usage")
# 1. Installation and Setup
Please follow this "Installation and Setup" guide step by step to determine how FileWave will fit into your existing environment.
# FileWave Server Setup
## What server type is best for me?
---
The first step to begin your FileWave Evaluation is to determine your FileWave Server hosting preference. FileWave offers both a Cloud-Hosted server and an on-premise virtualized server appliance for either Hyper-V or VMWare.
## Cloud-Hosted Server
---
If you desire a [FileWave Cloud-Hosted server](https://kb.filewave.com/books/community-engagement/page/cloud-hosting-product-information "Cloud Hosting Product Information") and have not already received the login information, please request a Cloud-Hosted server from your dedicated FileWave SE, and they will provide you with the server's address, username, and password. The FileWave Cloud-Hosted Server will be a "production" server so that any progress you make during the evaluation will persist if you choose to purchase FileWave.
Please note that choosing a Cloud-Hosted Server may have an additional cost, depending on the licensing structure selected at the time of your purchase. Also, to better manage the cost incurred by FileWave during your evaluation, your FileWave SE will discuss your organization's timeline to determine the best possible start date and expiration date for your evaluation. Thank you in advance for your understanding in regards to these matters.
#### Pros of FileWave's Cloud-Hosted Server
- Near instant availability with limited setup time required
- Managed public FQDN and SSL certificate
- Ability to manage devices on any network with an internet connection
- Free "hands-off" upgrades of FileWave
- Guaranteed server uptime
- Automated Backups
- Low maintenance
## On-Premise Server
---
If you desire to host the FileWave Server on-premise by installing on a macOS machine or virtualizing our pre-built appliance in Hyper-V or VMWare, please continue to read the following section.
#### Requirements
Most steps required for an on-premise server will be in regards to your local network's infrastructure, including virtual environment, DNS, and Firewall/Content Filter. If you do not have direct access to these systems, please coordinate with your Network Administrator or other qualified personnel before proceeding.
Before importing the FileWave Server virtual appliance, we recommend setting aside a static IP and DNS name for it. This will make it easier to move the server to another IP in the future and possible to manage off-premise devices over the Internet. Although technically possible, it is highly unrecommended to only use an IP address to reference the FileWave Server, so please configure a valid and potentially publicly-resolvable fully qualified domain name (FQDN) for the FileWave Server.
Note that the FQDN selected must be resolvable on all network segments from which you plan to manage the client devices. If you want to manage devices both on and off your network, then the same FQDN must be resolvable both on and off your network. Inside your LAN, this FQDN will resolve to the internal IP address of your FileWave server. Externally, that same FQDN will resolve to the public IP address of the internet router in front of the FileWave Server. Mobile devices such as iPhone, iPad, and Apple Vision Pro can leave the local network, so they must be able to reach the FileWave Server whenever they are off-network.
#### Off-Premise device management via the Internet
A static IP allows you to easily forward the ports used by the FileWave server to its internal IP on your LAN, ensuring that requests from client devices are still able to reach it even when they are off-network. The following ports must be forwarded to the FileWave Server. Some of the ports, such as 20016, are optional if the IT staff will only be accessing the FileWave Admin while on the LAN.
A full listing of FileWave ports and port diagrams is available [here](https://kb.filewave.com/books/filewave-general-info/page/default-tcp-and-udp-port-usage "Default TCP and UDP Port Usage").
## FileWave Server Installation
---
The FileWave Server can be installed onto any macOS 15+ machine with minimum specs of **16GB RAM / 8 CPU,** or virtualized in either Hyper-V or VMWare using our pre-built virtual appliance based on Debian. If virtualization is available, we highly recommend using our pre-built server appliance versus a macOS machine because of the flexibility to extend allotted server resources. When choosing a virtualization platform for your FileWave Server virtual appliance, we recommend a server platform such as vSphere or Hyper-V over a client platform like VMware Workstation/Fusion or VirtualBox. A VM server platform does not require that you be logged into a user session for the VM to be running. Also, in the event that the physical system hosting the VM server restarts, the VMs hosted on it can also be configured to start up automatically.
##### Software Downloads
All software downloads outlined in the following steps can be found [here](https://kb.filewave.com/books/downloads "Downloads"). Please always select the latest version of FileWave unless instructed otherwise by your FileWave SE.
##### Importing the Server Virtual Appliance
You can find instructions on how to import our appliances into many different virtual environments here: [FileWave Virtual Appliances](https://kb.filewave.com/books/filewave-virtual-appliances)
## Configuring the Linux Appliance Network Settings
---
Once you are done importing the FileWave Server Linux appliance, please power it on and configure the network settings using one of the guides below. Once the network settings have been configured, please create an internal DNS A-Record to set a fully qualified domain name (FQDN) for your FileWave Server that points to the Static IP Address configured below. If you plan on managing devices off-network, please ensure the FQDN is resolvable via the Internet and that you have the ability to obtain an SSL certificate that can protect your FQDN.
You will find two sections below, *Command Line* and *Webmin GUI*. Please select only one of the two sections based on your preference to configure the settings.
Please disregard this section if using a macOS FileWave Server as you will configure macOS System Preference to configure Static IP address.
#### Debian Command Line
Debian Command Line Networking
Access FileWave Server's Command Line Interface (CLI) via direct console access or SSH using the "**fwadmin**" user and password "**filewave"** and you will be prompted to change the password. (For FileWave prior to 15.5.0 the user was root.)
**SSH into FileWave Server**
```
ssh fwadmin@192.168.1.85
```
Change the FileWave Server's password when prompted and take note of it in a secure location. You will not see password being typed, press *Enter* when finished.
The following guide is tailored for Debian servers using the interfaces file, but you could also use Webmin (below) on your server assuming the server comes online initially with DHCP.
1. **Locate Network Interface**:
First, identify the network interface you wish to configure. You can list all network interfaces using:
```shell
networkctl list
```
[](https://kb.filewave.com/uploads/images/gallery/2024-01/1mWKjVXFvMUjRTH7-image.png)
2. **Edit the /etc/network/interfaces file:** Using 'nano', edit the interfaces file to set the network configurations.
```
nano /etc/network/interfaces
```
Your default interfaces file should look something like this (your interface name may be different):
```
# The loopback network interface
auto lo eth0
iface lo inet loopback
# The primary network interface
iface eth0 inet dhcp
```
Change the file to look like this, using your network preferences (note 'dhcp' has been changed to 'static' in line 6)
```
# The loopback network interface
auto lo eth0
iface lo inet loopback
# The primary network interface
iface eth0 inet static
address 192.168.10.33
netmask 255.255.255.0
broadcast 192.168.10.255
dns-nameservers 192.168.10.254 192.168.10.255
```
3. **Verify Resolv.conf, hosts and hostname files:** Verify that these files in /etc/ are configured correctly for your network and server.
/etc/resolv.conf: This file should list your DNS servers
/etc/hosts: This file should point your FQDN to localhost (127.0.0.1)
/etc/hostname: Specifies the hostname for your server. This is **filewave** by default.
4. **Restart/Check Network Status:** ```
systemctl restart networking.service
systemctl status networking.service
```
5. **Verify IP:** ```
ip a
```
## Webmin GUI
For Webmin on Debian know that you will need to go to Webmin -> Webmin Configuration -> Operating System and Environment and make sure it's set to Debian 12.4 (Or whatever version we are at when you set up your system. You can see this with `cat /etc/debian_version` on the server.
1. At the login screen note the URL to remotely manage the server, ex: https://myorg.filwave.net:10000
- If there is no IP address specified because DHCP is not available on the subnet for your FileWave Linux Appliance, login with the username "**fwadmin**" with password "**filewave**" and in prior versions of FileWave it was username "root" with the same password.
- CentOS (Deprecated): Run "nmtui" at the command prompt to launch the Network Manager Text UI so you can configure the networking for the FileWave VM appliance. You'll need to reload the IP stack with "service network restart".
- Debian: Please see our KB on network configuration: [Networking - Assign static IP Address for a FileWave Appliance](https://kb.filewave.com/books/filewave-general-info/page/networking-assign-static-ip-address-for-a-filewave-appliance)
- Skip the network configuration steps later in the Webmin.
3. Browse to this URL and log in with username "**fwadmin**" and password "**filewave**". We will change this password later.
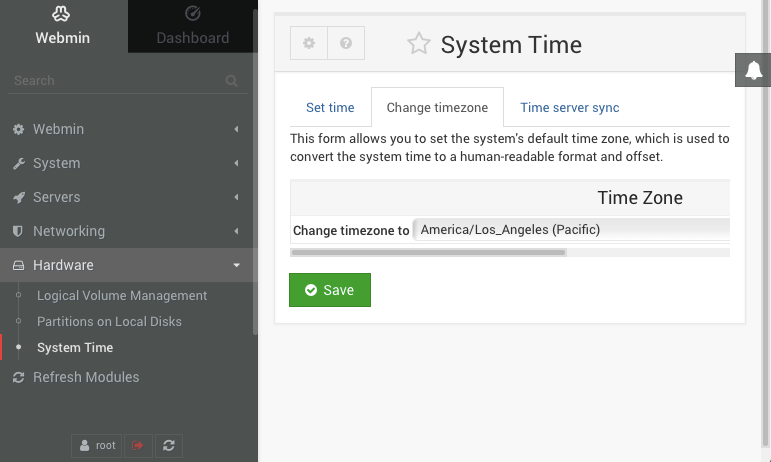
4. Browse to *Hardware > System Time* on the left, pick the *Change timezone* tab on the right, pick your time zone and click *Save*. North American time zones all start with "America".
5. Go to *System > Change Passwords* on the left and select the "root" account on the right from the list of usernames. Enter a new root password, confirm it, and click *Change*. Note that this will change the default password for the root account used to log into the server from "filewave" to whatever you choose so enter a secure password that is easy for you to remember.
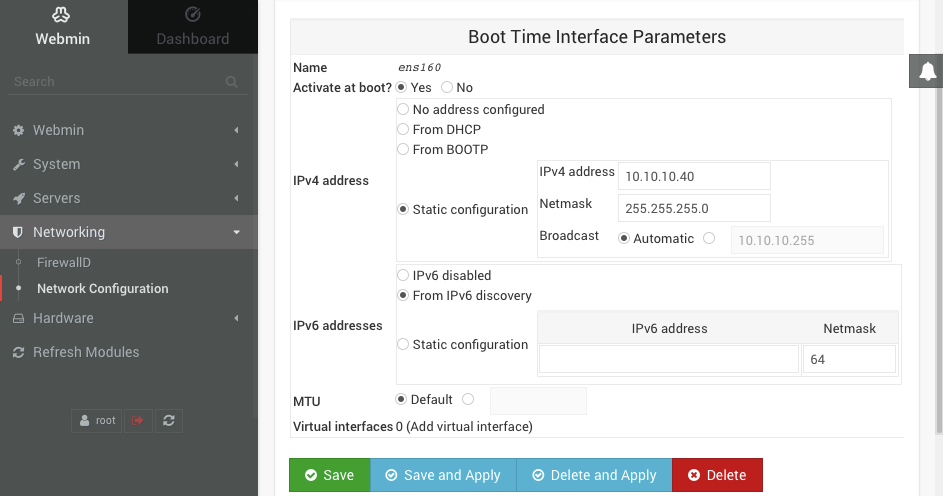
6. Choose *Networking > Network Configuration* on the left, and *Network Interfaces* on the right. Click the blue link labeled "ens160" or "ens32" for the Ethernet adapter. Change the *IPv4 address* settings to "Static configuration", enter a static IP, enter a subnet mask, and click *Save* at the bottom to continue configuring the DNS and routing.
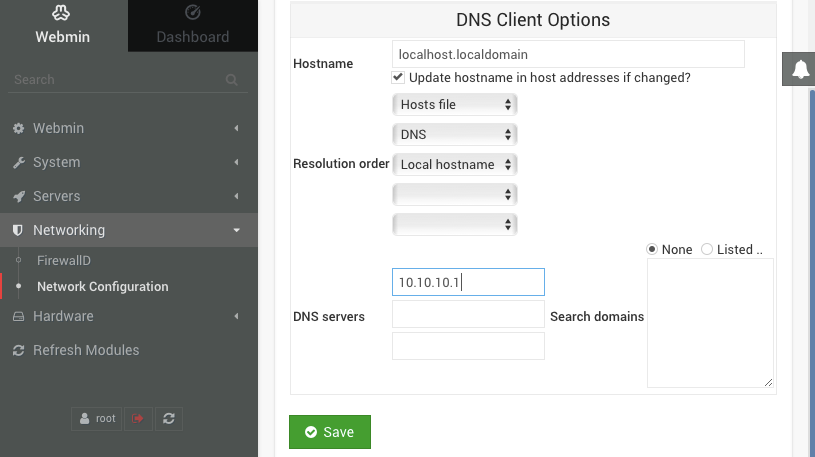
7. You will no longer be able to access the Webmin UI for the FileWave servers via its old DHCP IP address. Change the address in your browser's address bar to use the new static IP address for the FileWave server that you configured in the previous step. Browse to *Networking > Network Configuration* on the left, and *Hostname and DNS Client* on the right. Enter the IP address for your DNS server and click *Save*.
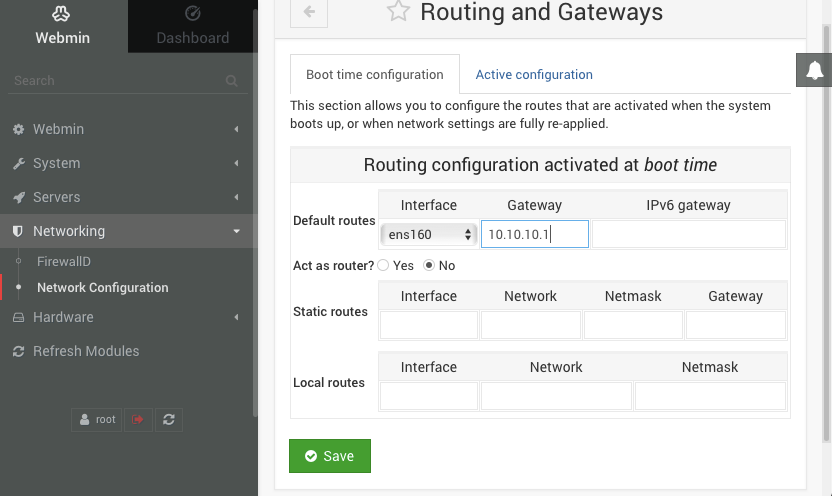
8. Select *Networking > Network Configuration* on the left, and *Routing and Gateways* on the right. Pick "ens160" or "ens32" from the *Default routes* pull-down, enter the default gateway address for the subnet the FileWave server is hosted on, and click *Save*.
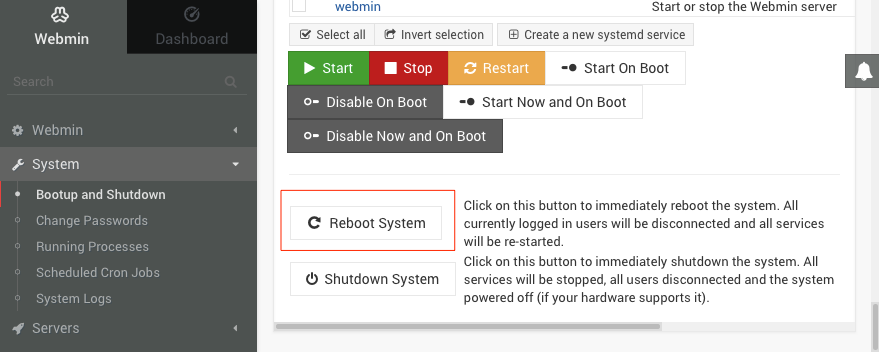
9. Go to System > Bootup and Shutdown\_ on the left, scroll to the bottom on the right, and click the *Reboot System* button. When asked to confirm if you want to reboot the system with "shutdown -r now" click the *Reboot System* button again.

# FileWave Central Setup
## **Let's log in!**
---
Now that you have the FileWave Server up and running, it is time to connect using FileWave Central. FileWave Central is a native application capable of running on macOS or Windows and is currently considered to be the "daily driver". Starting with FileWave 14, you can now access the FileWave interface via a web browser to accomplish any Inventory, Location Tracking, or Deployment needs (Fileset creation not yet supported).
## **Download and Install the FileWave Admin**
---
1. Visit FileWave's Software Downloads page [here](https://kb.filewave.com/books/downloads "Downloads").
2. Click on the version of your FileWave Server.
3. Scroll down to either *"macOS Downloads"* or *"Windows Downloads"*, under *"Upgrading Your* *Environment"*.
4. Download either the *"macOS Admin"* or *"Windows Admin"*, respectively.
5. Run the FileWave Admin PKG or FileWave Admin MSI and accept the licensing agreement to install.
## **Log into FileWave Admin**
---
#### **[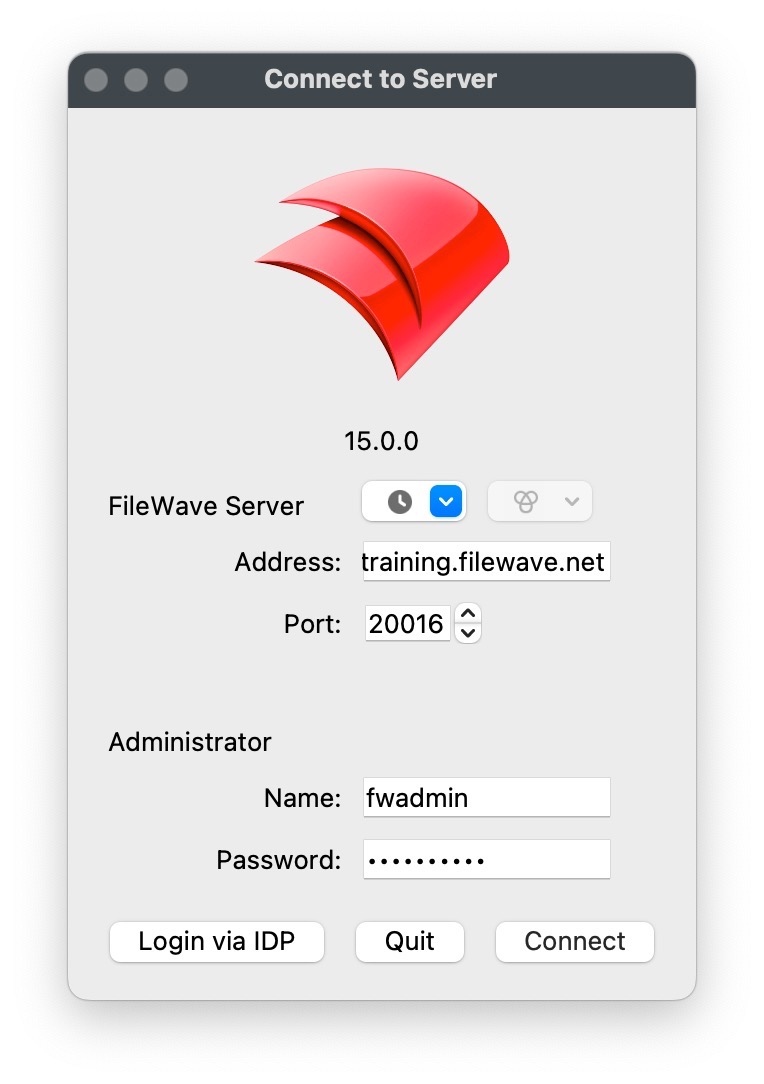](https://kb.filewave.com/uploads/images/gallery/2023-06/EtXnuI858qWuJRDT-connect-to-server.jpg)Open the FileWave Admin**
- Windows: "*Start Menu>FileWave>Admin"*
- macOS: "*/Applications/FileWave/FileWave Admin.app"*
- *"Applications/FileWave/FileWave Admin (root).app"* is only required for Fileset Magic.
#### **Enter the Server Address, Username, and Password and then "Connect"**
- Do not include "https://" in "*Address*" field
- Do not change the *"Port"* from *"20016"*
#### **Credentials**
- Hosted Servers: *Address*, *Username*, and *Password* will be provided by your FileWave Sales Engineer.
- On-Premise Server: Username: "**fwadmin**" Password: "**filewave**"
## **How to Save and Commit changes**
---
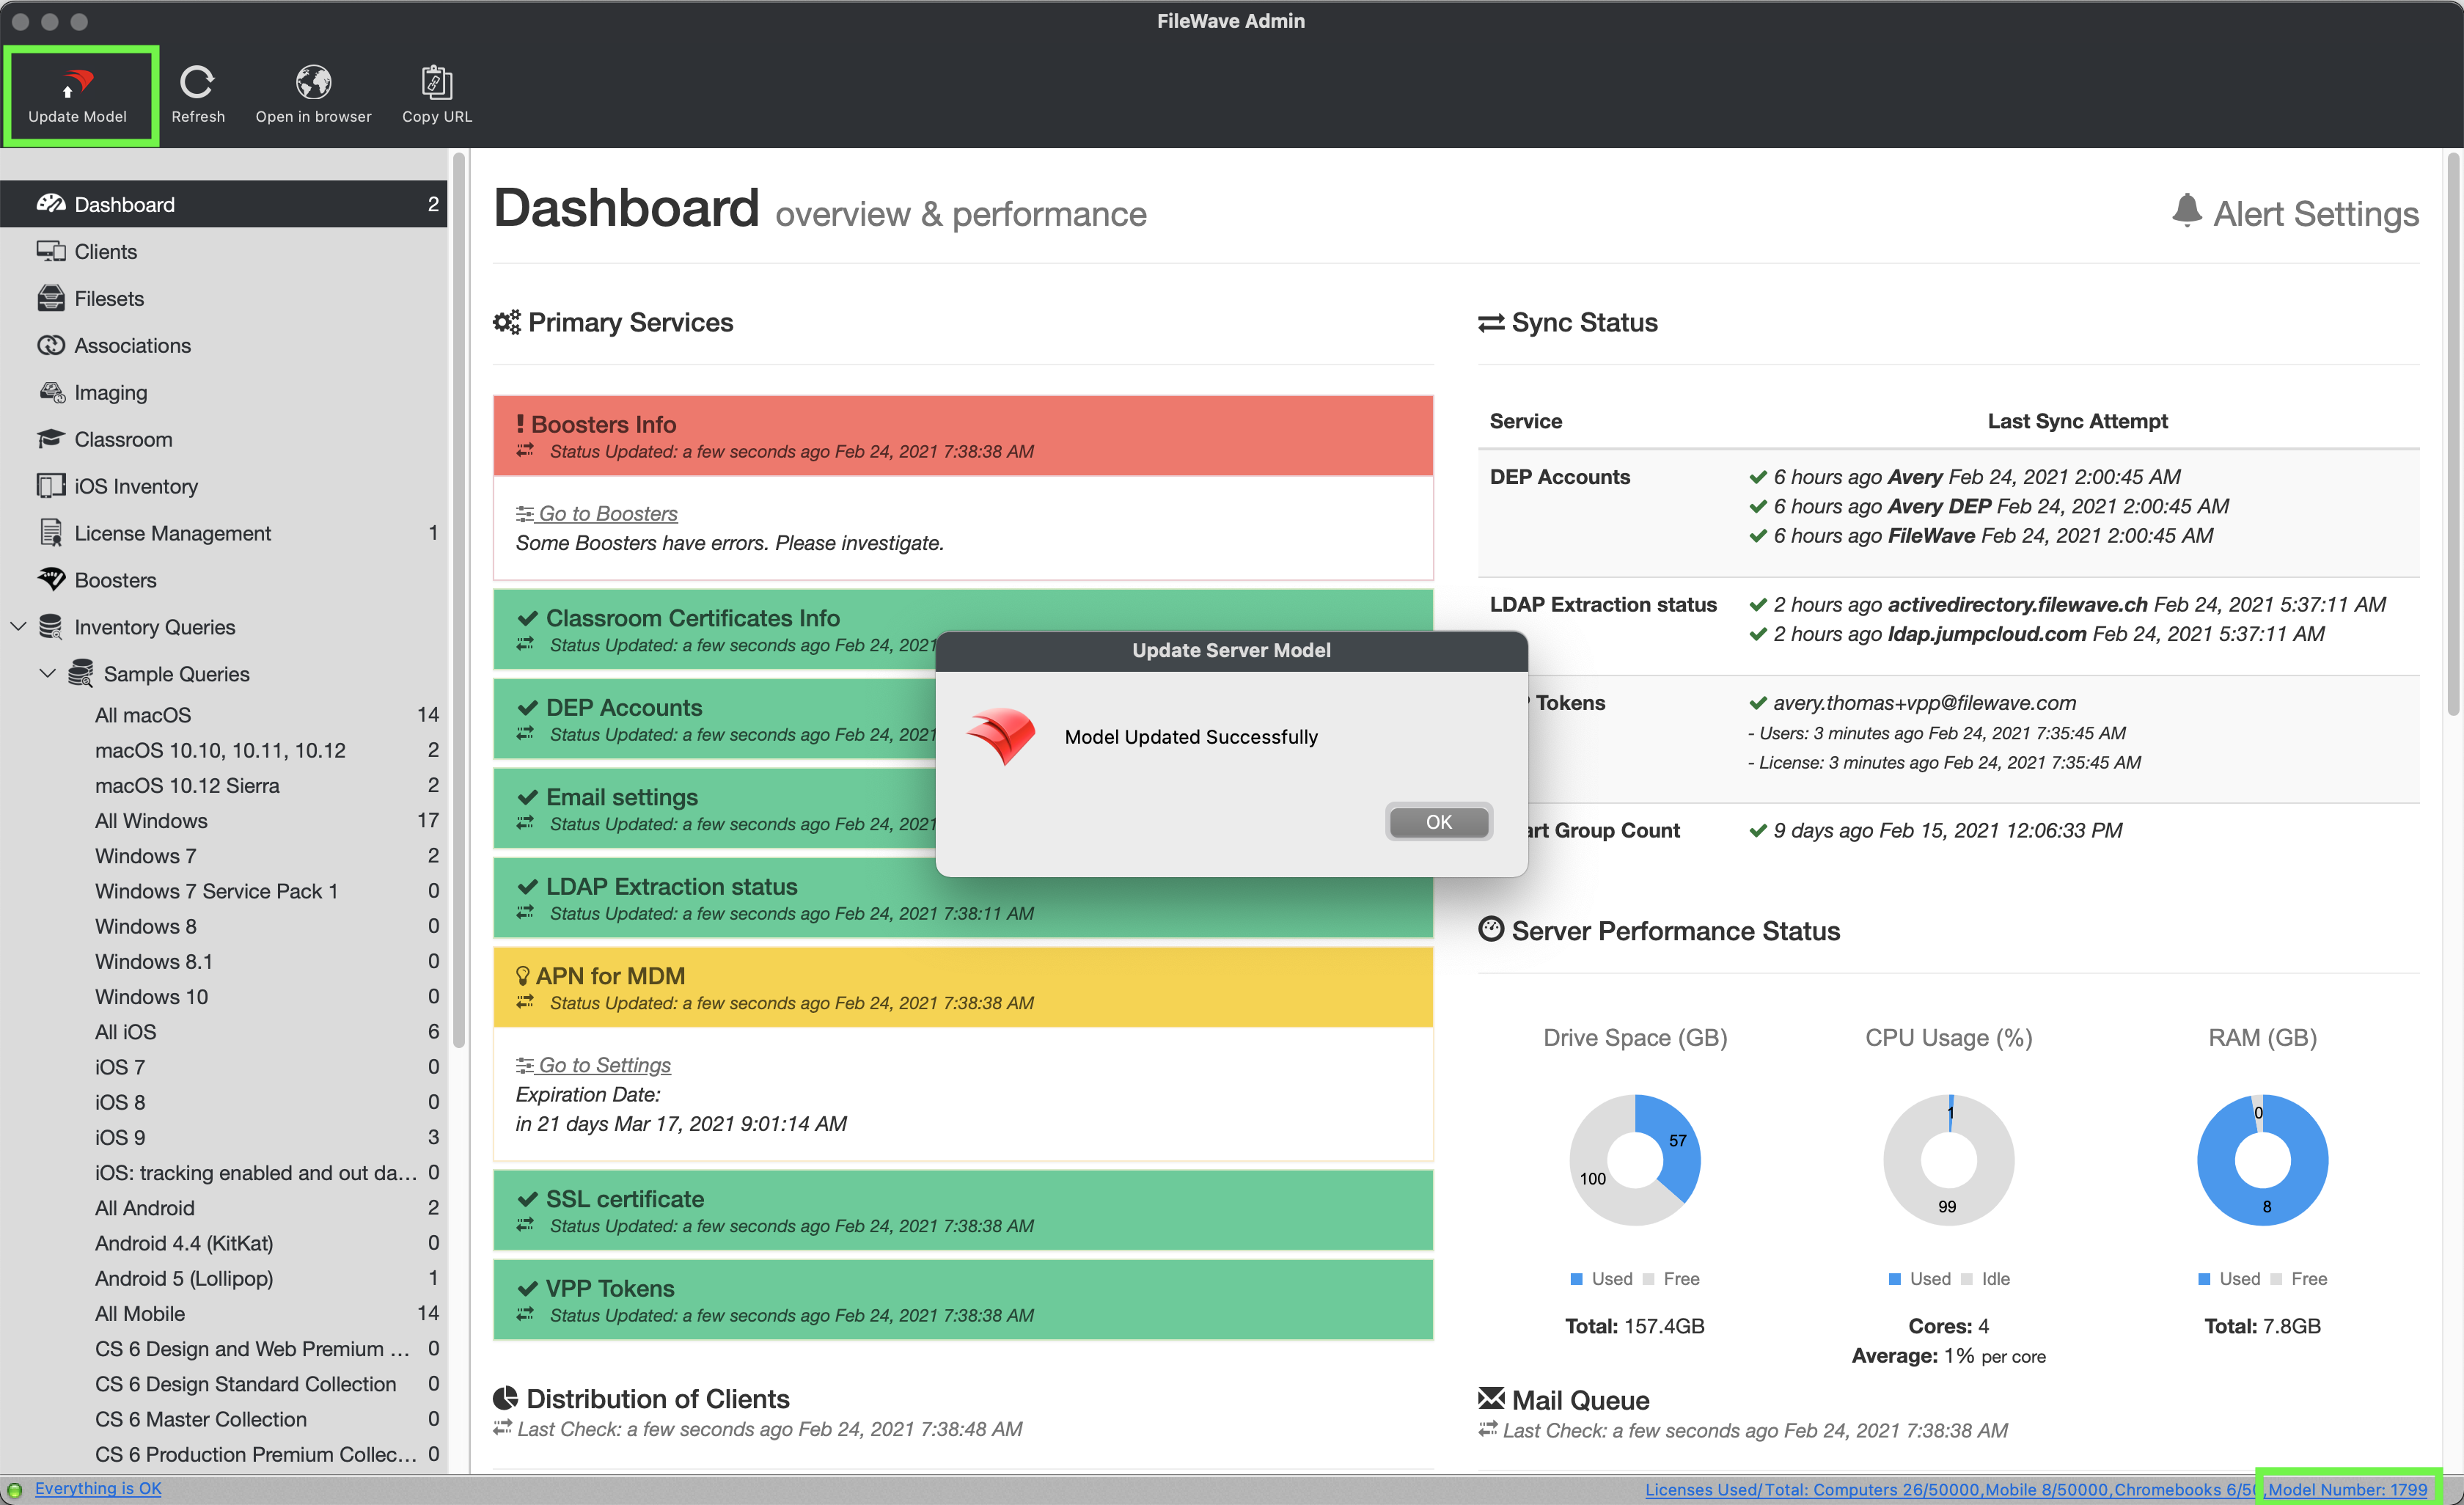
As you will see, the FileWave Admin interface is simply laid out and intuitive however, one thing that may be unfamiliar is the concept of *"Update Model".* The *"Update Model"* button is essentially the FileWave *"Save"* button. For example, when you associate a software package to a Client device, FileWave will not apply that change in real-time but yet wait until you *"Update Model"* to commit the changes to the device. This gives you a window of opportunity to correct any accidental associations, deletions, or any other unwanted modifications.
After *"Update Model"* you will notice the *"Model Number"* will increment by one in the lower right-hand side of the FileWave Admin. Your Clients will check in periodically (Tickle Interval; 120 seconds) to see if there is a new Model version available. If there is a new Model available, the Client will download a new user-manifest and apply any changes that have been made for that Client. If there are no new changes for the Client or new Model, the Client will continue to idle for another 120 seconds.
# FileWave Central Preferences
## What
FileWave Central Preferences contains server-wide configuration, platform integrations, content-delivery defaults, inventory behavior, and settings that apply only to the local Central installation. Use this overview to find the correct area, then follow the linked workflow article for settings that need detailed preparation.
**FileWave 16.4 navigation:** This page reflects the Preferences categories and locations in FileWave Central 16.4. Earlier releases may place some settings elsewhere. In particular, automatic Booster-upgrade timing is under **Preferences > General** in 16.3.x and **Preferences > Upgrades** in 16.4.0 and later.
## Open Preferences
Open **Preferences** from FileWave Central. The categories appear as tabs across the top of the window. Use the left and right arrows when the window is not wide enough to display every tab.
[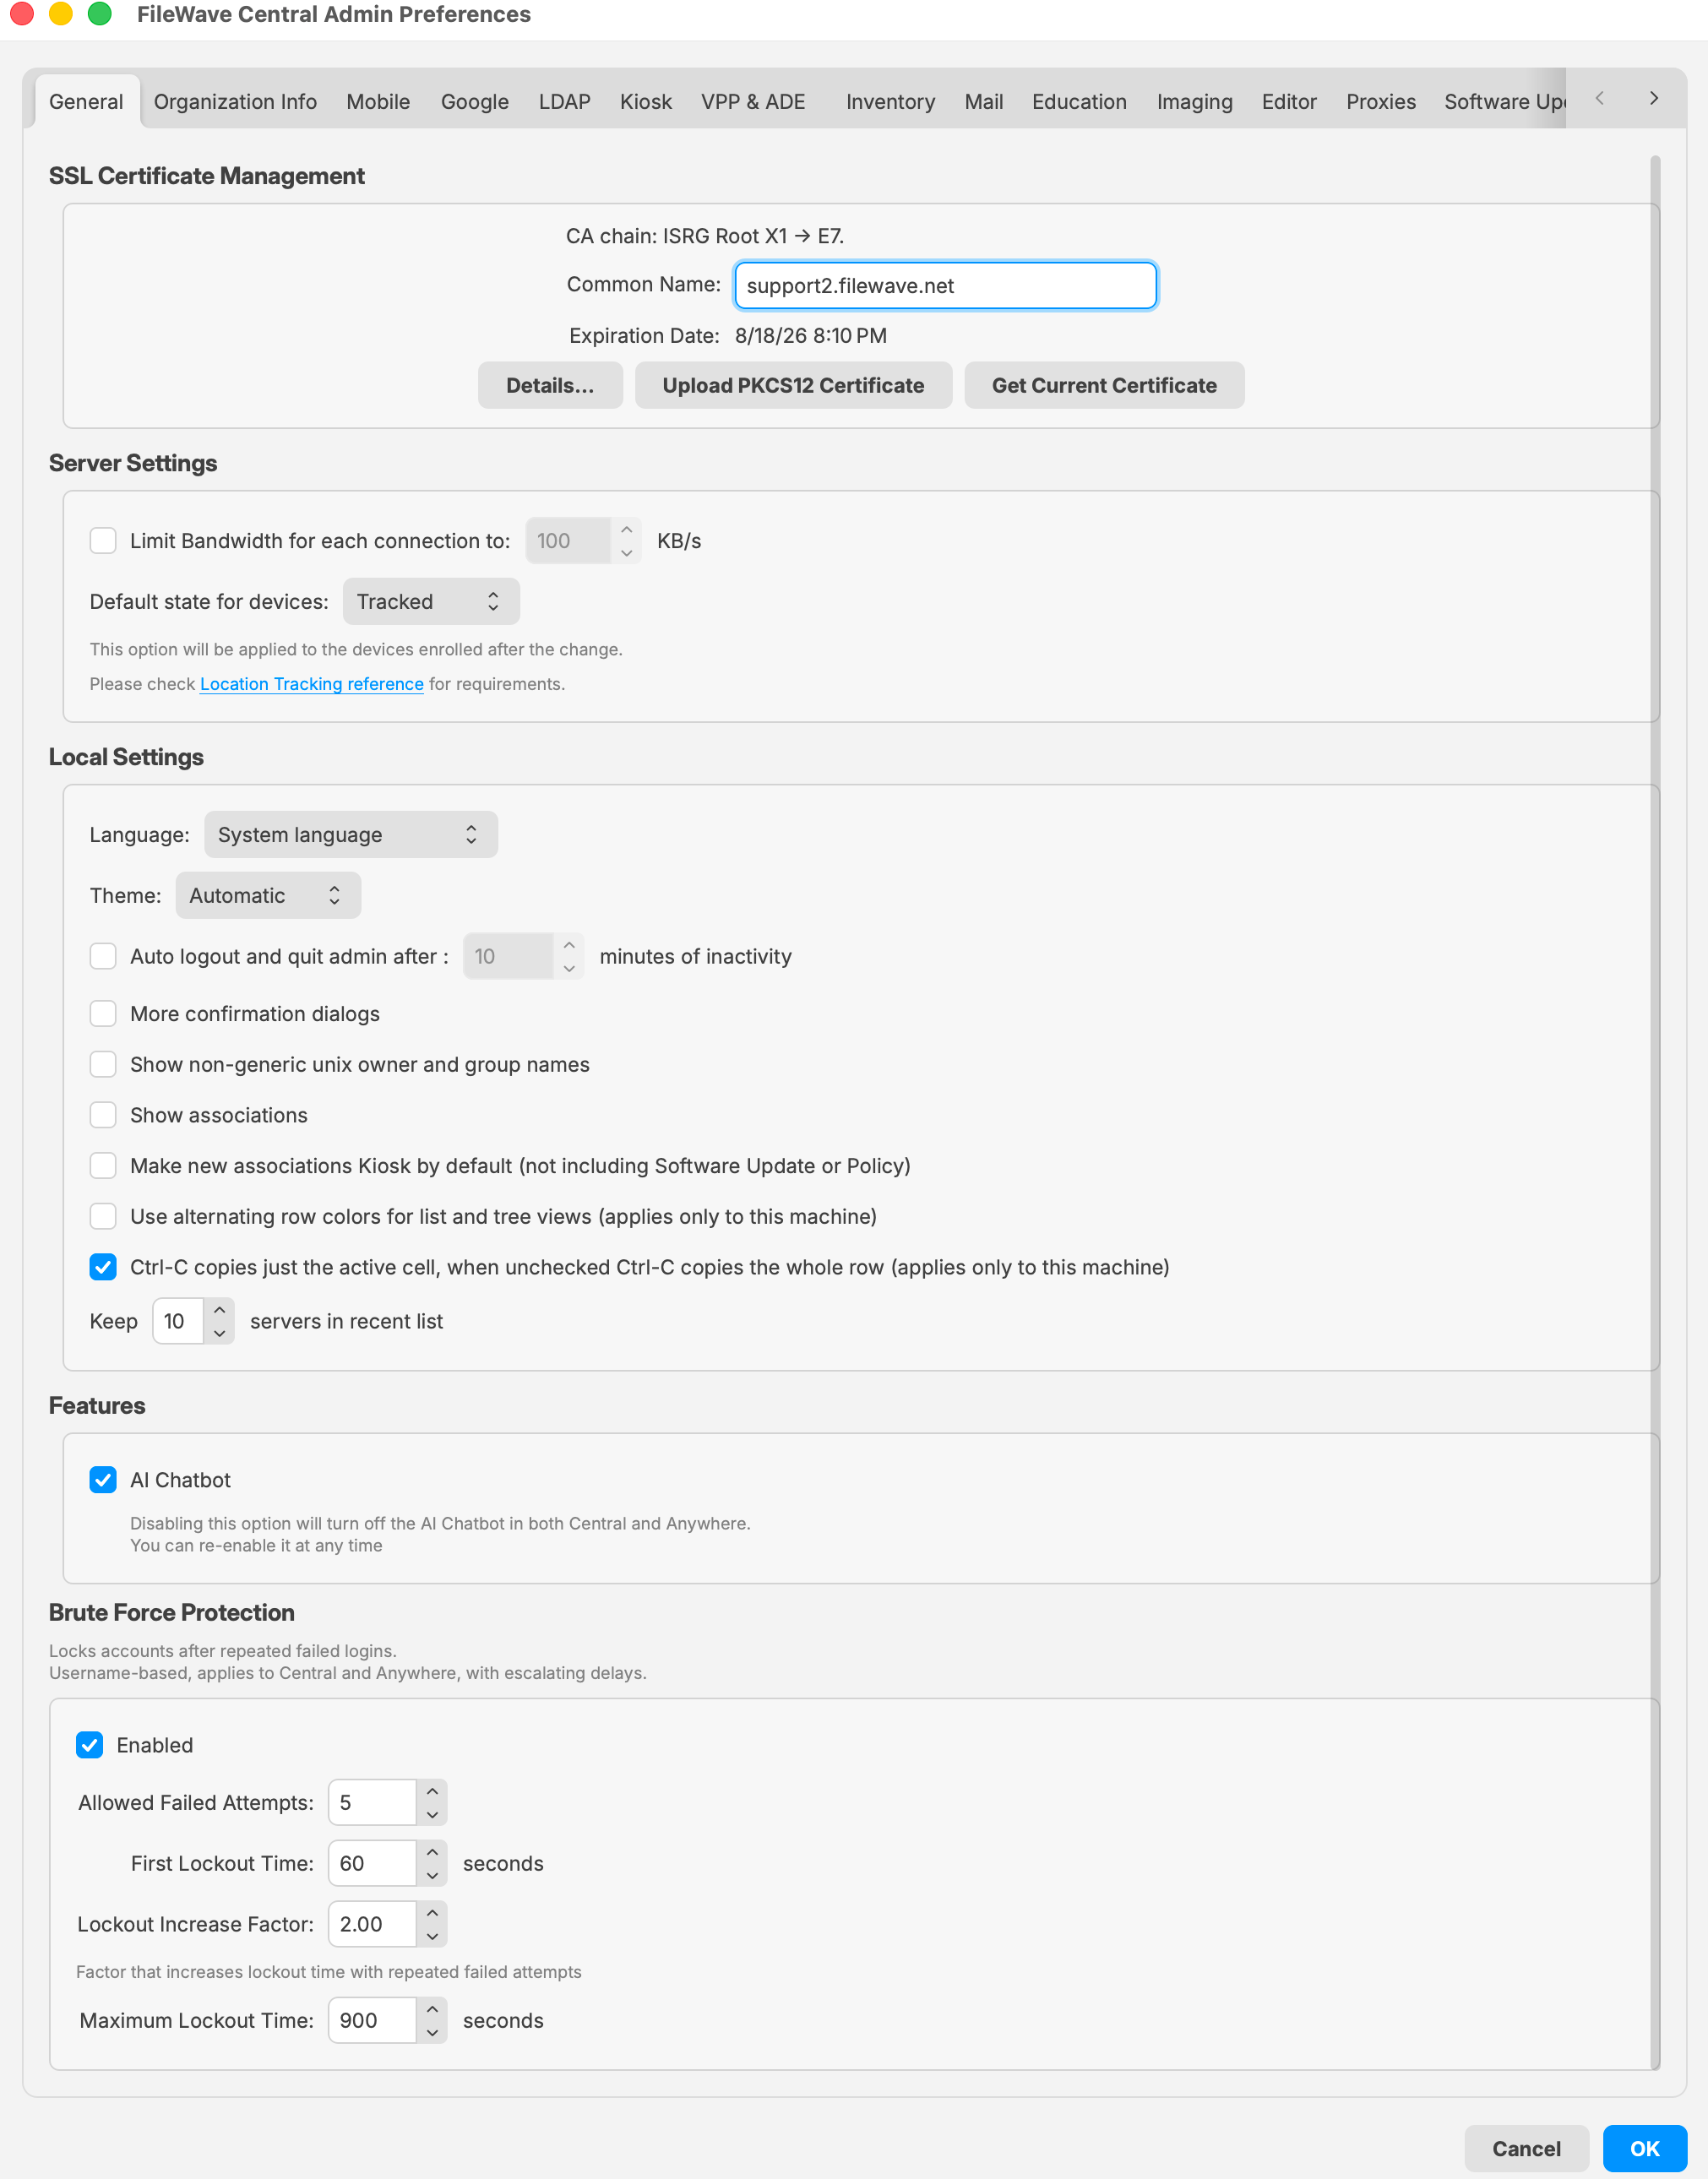](https://kb.filewave.com/uploads/images/gallery/2026-07/aAeJx84R9hePwawQ-filewave-central-16-4-general-preferences.png)
*FileWave Central 16.4 General Preferences provides the current category navigation and server, security, certificate, and local Central settings.*
An administrator needs the applicable permission before opening or changing a protected area. Sensitive operations can also require the currently signed-in administrator to authenticate again. Use named administrator accounts and least-privilege permissions for daily work instead of sharing the `fwadmin` account.
See [Managing FileWave Administrators](https://kb.filewave.com/books/filewave-central-anywhere/page/managing-filewave-administrators) for account and permission management.
## Evaluation and initial-configuration priorities
1. **General:** Review the active SSL certificate, server-wide defaults, local Central behavior, and brute-force protection.
2. **Organization Info:** Enter the organization information that should be associated with managed-device records.
3. **Mobile:** Verify the MDM server address, APNs configuration, and Apple mobile-management prerequisites. FileWave 16.4 also builds and stores macOS and Windows enrollment packages here.
4. **Platform integrations:** Configure only the services in scope for the evaluation—such as Google, LDAP, VPP & ADE, Education, or Imaging—and validate each integration before expanding enrollment.
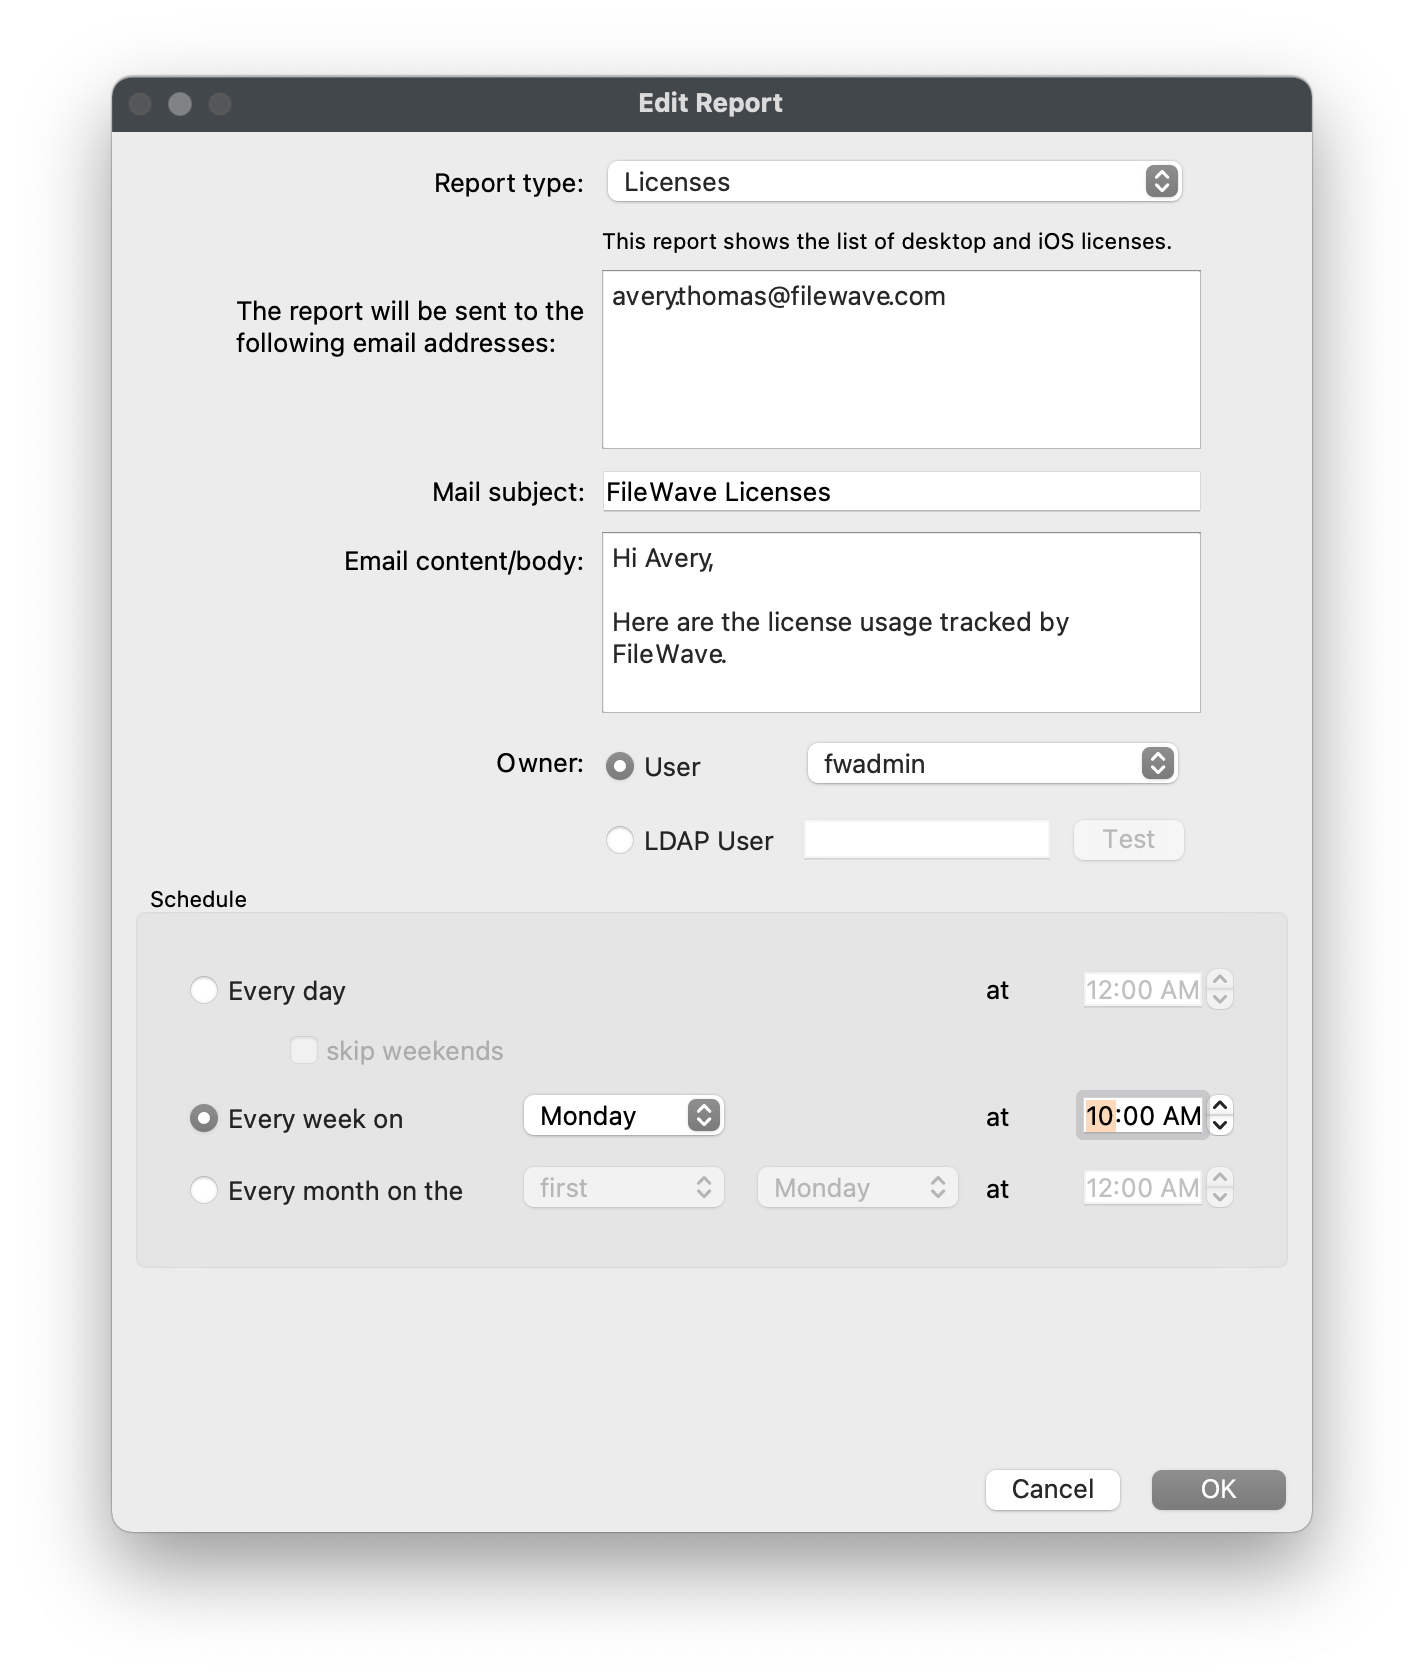
5. **Inventory and Mail:** Confirm reporting cadence and notification delivery without making intervals more aggressive than the evaluation requires.
6. **Upgrades:** Review client-upgrade concurrency, failure thresholds, reporting cadence, and the automatic Booster-upgrade delay before using integrated upgrades.
## FileWave Central 16.4 Preferences map
Category
Use it for
**General**
SSL certificate management, server defaults, device tracking default, local Central behavior—including the recent-server list—optional AI Chatbot access, and brute-force protection.
**Organization Info**
Organization metadata associated with the FileWave environment and managed-device information.
**Mobile**
MDM server connectivity, Apple push configuration, mobile-management settings, and FileWave 16.4 macOS/Windows enrollment-package builds.
**Google**
Google and Android EMM integration and its organization-wide configuration.
Kiosk categories and organization of self-service content.
**VPP & ADE**
Apps and Books tokens, Automated Device Enrollment services, Apple School or Business Manager API accounts, synchronization, and advanced Apple service settings.
**Inventory**
Apple MDM inventory polling, Smart Group refresh timing, LDAP Custom Field cleanup behavior, and IDP Custom Field synchronization.
**Mail**
Outgoing email configuration used by FileWave notifications and tests.
**Education**
Education-specific integrations and classroom-related server configuration.
**Imaging**
Imaging Virtual Server registration, status, and FileWave 16.4-managed IVS upgrades.
**Editor**
Preferences that control supported content-editor behavior in FileWave Central.
**Proxies**
Proxy settings used when FileWave services must reach external resources through an intermediary.
**Software Updates**
Server-level Software Update behavior used by the Software Updates workflow.
### Configure the recent-server list
FileWave Central 16.4 adds **Keep *n* servers in recent list** under **Preferences > General**. Set the number of recently used FileWave Servers that Central should retain for the login window.
- Increase the value when the same administrator regularly connects to several FileWave environments.
- Use a smaller value on shared administration Macs or where old environment names should not remain in the login history.
- This setting changes the recent list in FileWave Central; it does not add, remove, rename, or reconfigure a FileWave Server.
## Enrollment authentication during setup
For most evaluations—and for many organization-owned devices using Automated Device Enrollment—FileWave recommends leaving generic URL/ADE enrollment authentication disabled unless the organization has a deliberate enrollment-identity requirement. Requiring a shared username and password can interrupt zero-touch enrollment after a wipe or reassignment. When user identity is required, configure LDAP or an identity-provider enrollment workflow instead of distributing generic credentials.
### FileWave-hosted Servers
The SSH and `mdm_auth.conf` steps below do **not** apply to FileWave-hosted Servers. Hosted environments are normally provisioned without generic enrollment authentication unless another configuration was requested. Contact FileWave Support or the assigned FileWave representative when that server-side behavior needs to be confirmed or changed.
### On-premises FileWave Appliances
On new Debian-based FileWave Appliances, sign in through the console or SSH as `fwadmin`. The initial password is `filewave`, and the Appliance requires it to be changed on first login. Direct root login is disabled on new Appliances beginning with FileWave 15.5; use `sudo` for administrative commands. See [Setting the Password on First Login to FileWave Appliances](https://kb.filewave.com/books/filewave-general-info/page/setting-the-password-on-first-login-to-filewave-appliances-155).
To disable generic enrollment authentication on an on-premises Appliance:
1. Connect from a trusted network or use the Appliance console:```shell
ssh fwadmin@filewave-server.example.org
```
2. Back up the current authentication configuration:```shell
sudo cp /usr/local/filewave/apache/conf/mdm_auth.conf /usr/local/filewave/apache/conf/mdm_auth.conf.backup
```
3. Edit the active configuration:```shell
sudo nano /usr/local/filewave/apache/conf/mdm_auth.conf
```
4. Comment out the complete active `` blocks—including each opening and closing tag—that require generic credentials for enrollment. Preserve any unrelated configuration.
5. Save the file and reload Apache gracefully:```shell
sudo /usr/local/filewave/apache/bin/apachectl graceful
```
6. Test the FileWave enrollment URL from a non-production device. Confirm that the enrollment profile downloads without a generic credential prompt and that the device still completes MDM enrollment.
**Keep the backup until enrollment is verified.** If the result is not correct, restore the backup and reload Apache. Limit SSH access to trusted networks and change the Appliance’s initial password immediately.
## Change Preferences safely
- Record the current value before changing a server-wide setting.
- Change one integration or operational behavior at a time and test it before continuing.
- Do not replace certificates, shared keys, service tokens, package settings, or enrollment authentication casually; those changes can affect existing devices and integrations.
- Keep credentials, private keys, tenant identifiers, tokens, server hostnames, and certificate details out of screenshots and support notes unless the destination is approved for that data.
- Use the focused workflow articles below instead of treating this overview as the procedure for every Preferences category.
## Related content
- [Managing FileWave Administrators](https://kb.filewave.com/books/filewave-central-anywhere/page/managing-filewave-administrators)
- [Setting the Password on First Login to FileWave Appliances](https://kb.filewave.com/books/filewave-general-info/page/setting-the-password-on-first-login-to-filewave-appliances-155)
- [LDAP Preferences](https://kb.filewave.com/books/filewave-central-anywhere/page/ldap-preferences)
- [VPP and ADE Preferences](https://kb.filewave.com/books/filewave-central-anywhere/page/vpp-and-ade-preferences)
- [Configuring Inventory Preferences](https://kb.filewave.com/books/filewave-central-anywhere/page/configuring-inventory-preferences)
- [Configuring FileWave Server Mail Preferences](https://kb.filewave.com/books/filewave-central-anywhere/page/configuring-filewave-server-mail-preferences)
- [Android EMM Default Policy and Compliance Scope](https://kb.filewave.com/books/android/page/android-emm-default-policy-and-compliance-scope)
- [Upgrading FileWave Clients](https://kb.filewave.com/books/filewave-client/page/upgrading-filewave-clients)
- [Reporting and Monitoring the Booster Upgrade Process](https://kb.filewave.com/books/boosters/page/reporting-monitoring-booster-upgrade-process)
- [FileWave Network Imaging / IVS Overview](https://kb.filewave.com/books/network-imaging-ivs/page/filewave-network-imaging-ivs-overview)
- [OS Software Updates Automation Rules](https://kb.filewave.com/books/filewave-central-anywhere/page/os-software-updates-automation-rules)
# Client Group Structure
## **You get a group and you get a group, everybody gets a group!**
---
Staying organized in life is important and it's no different within FileWave. This section will outline some workflows and best practices when it comes to grouping and organizing your Client devices. Leveraging FileWave Smart Groups, LDAP-based Smart Groups, and Clones, FileWave allows you to organize you devices no matter how advanced your Org structure is.
## **Creating a basic structure for automatic device enrollment**
---
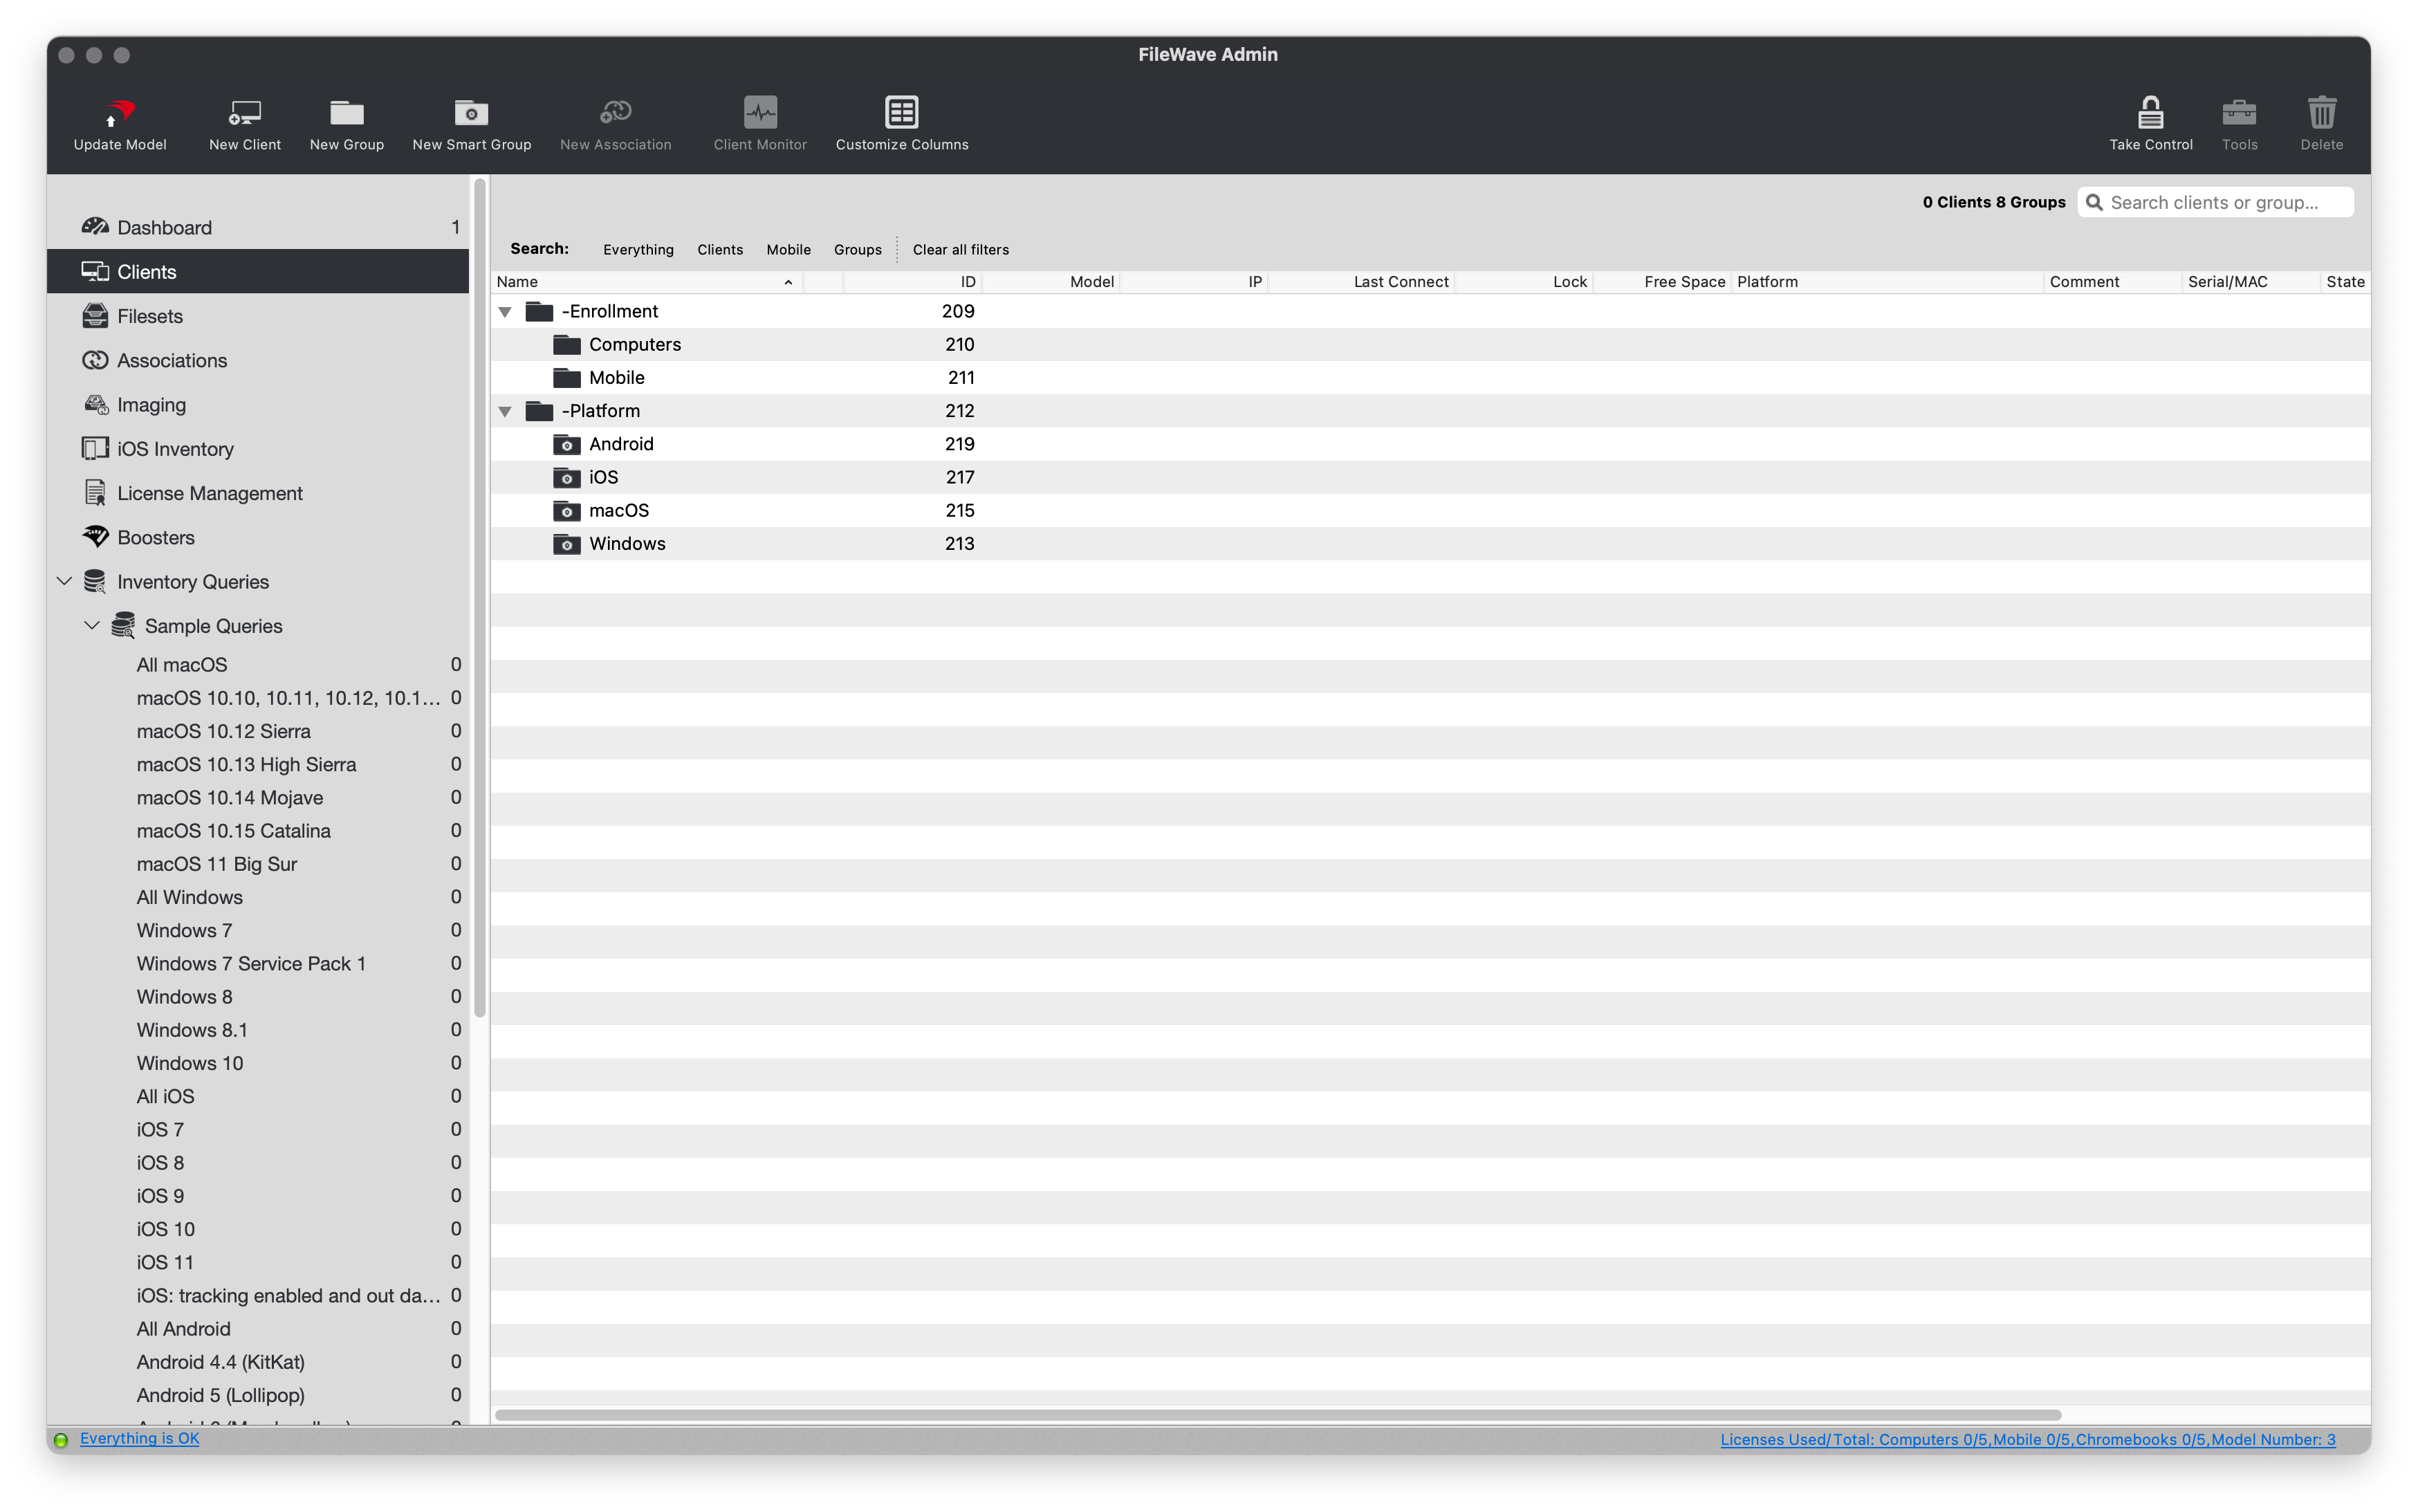
The first two groups we will create are to enable automatic device enrollment for both Client (Windows, macOS) and Mobile (iOS, tvOS, Android) devices. This *"-Enrollment"* group will contain all of the original device records within FileWave, therefore it is recommended to treat this group as a "safe zone". We will create other group structures to associate software and settings to your devices based on more granular criteria.
### **Create a New Group**
1. Open FileWave Admin and navigate to *"Clients"* from the left pane.
2. Click *"New Group"* from the black menubar.
3. Name the first group as *"-Enrollment"*.
- We use a "-" so that the group floats to the top when sorted alphabetically.
We will now repeat this process to create a *"Computers"* group a *"Mobile"* group within the *"**-**Enrollment"* group. If you accidentally create a New Group outside of its intended group structure, simply drag-n-drop the group to its desired location.
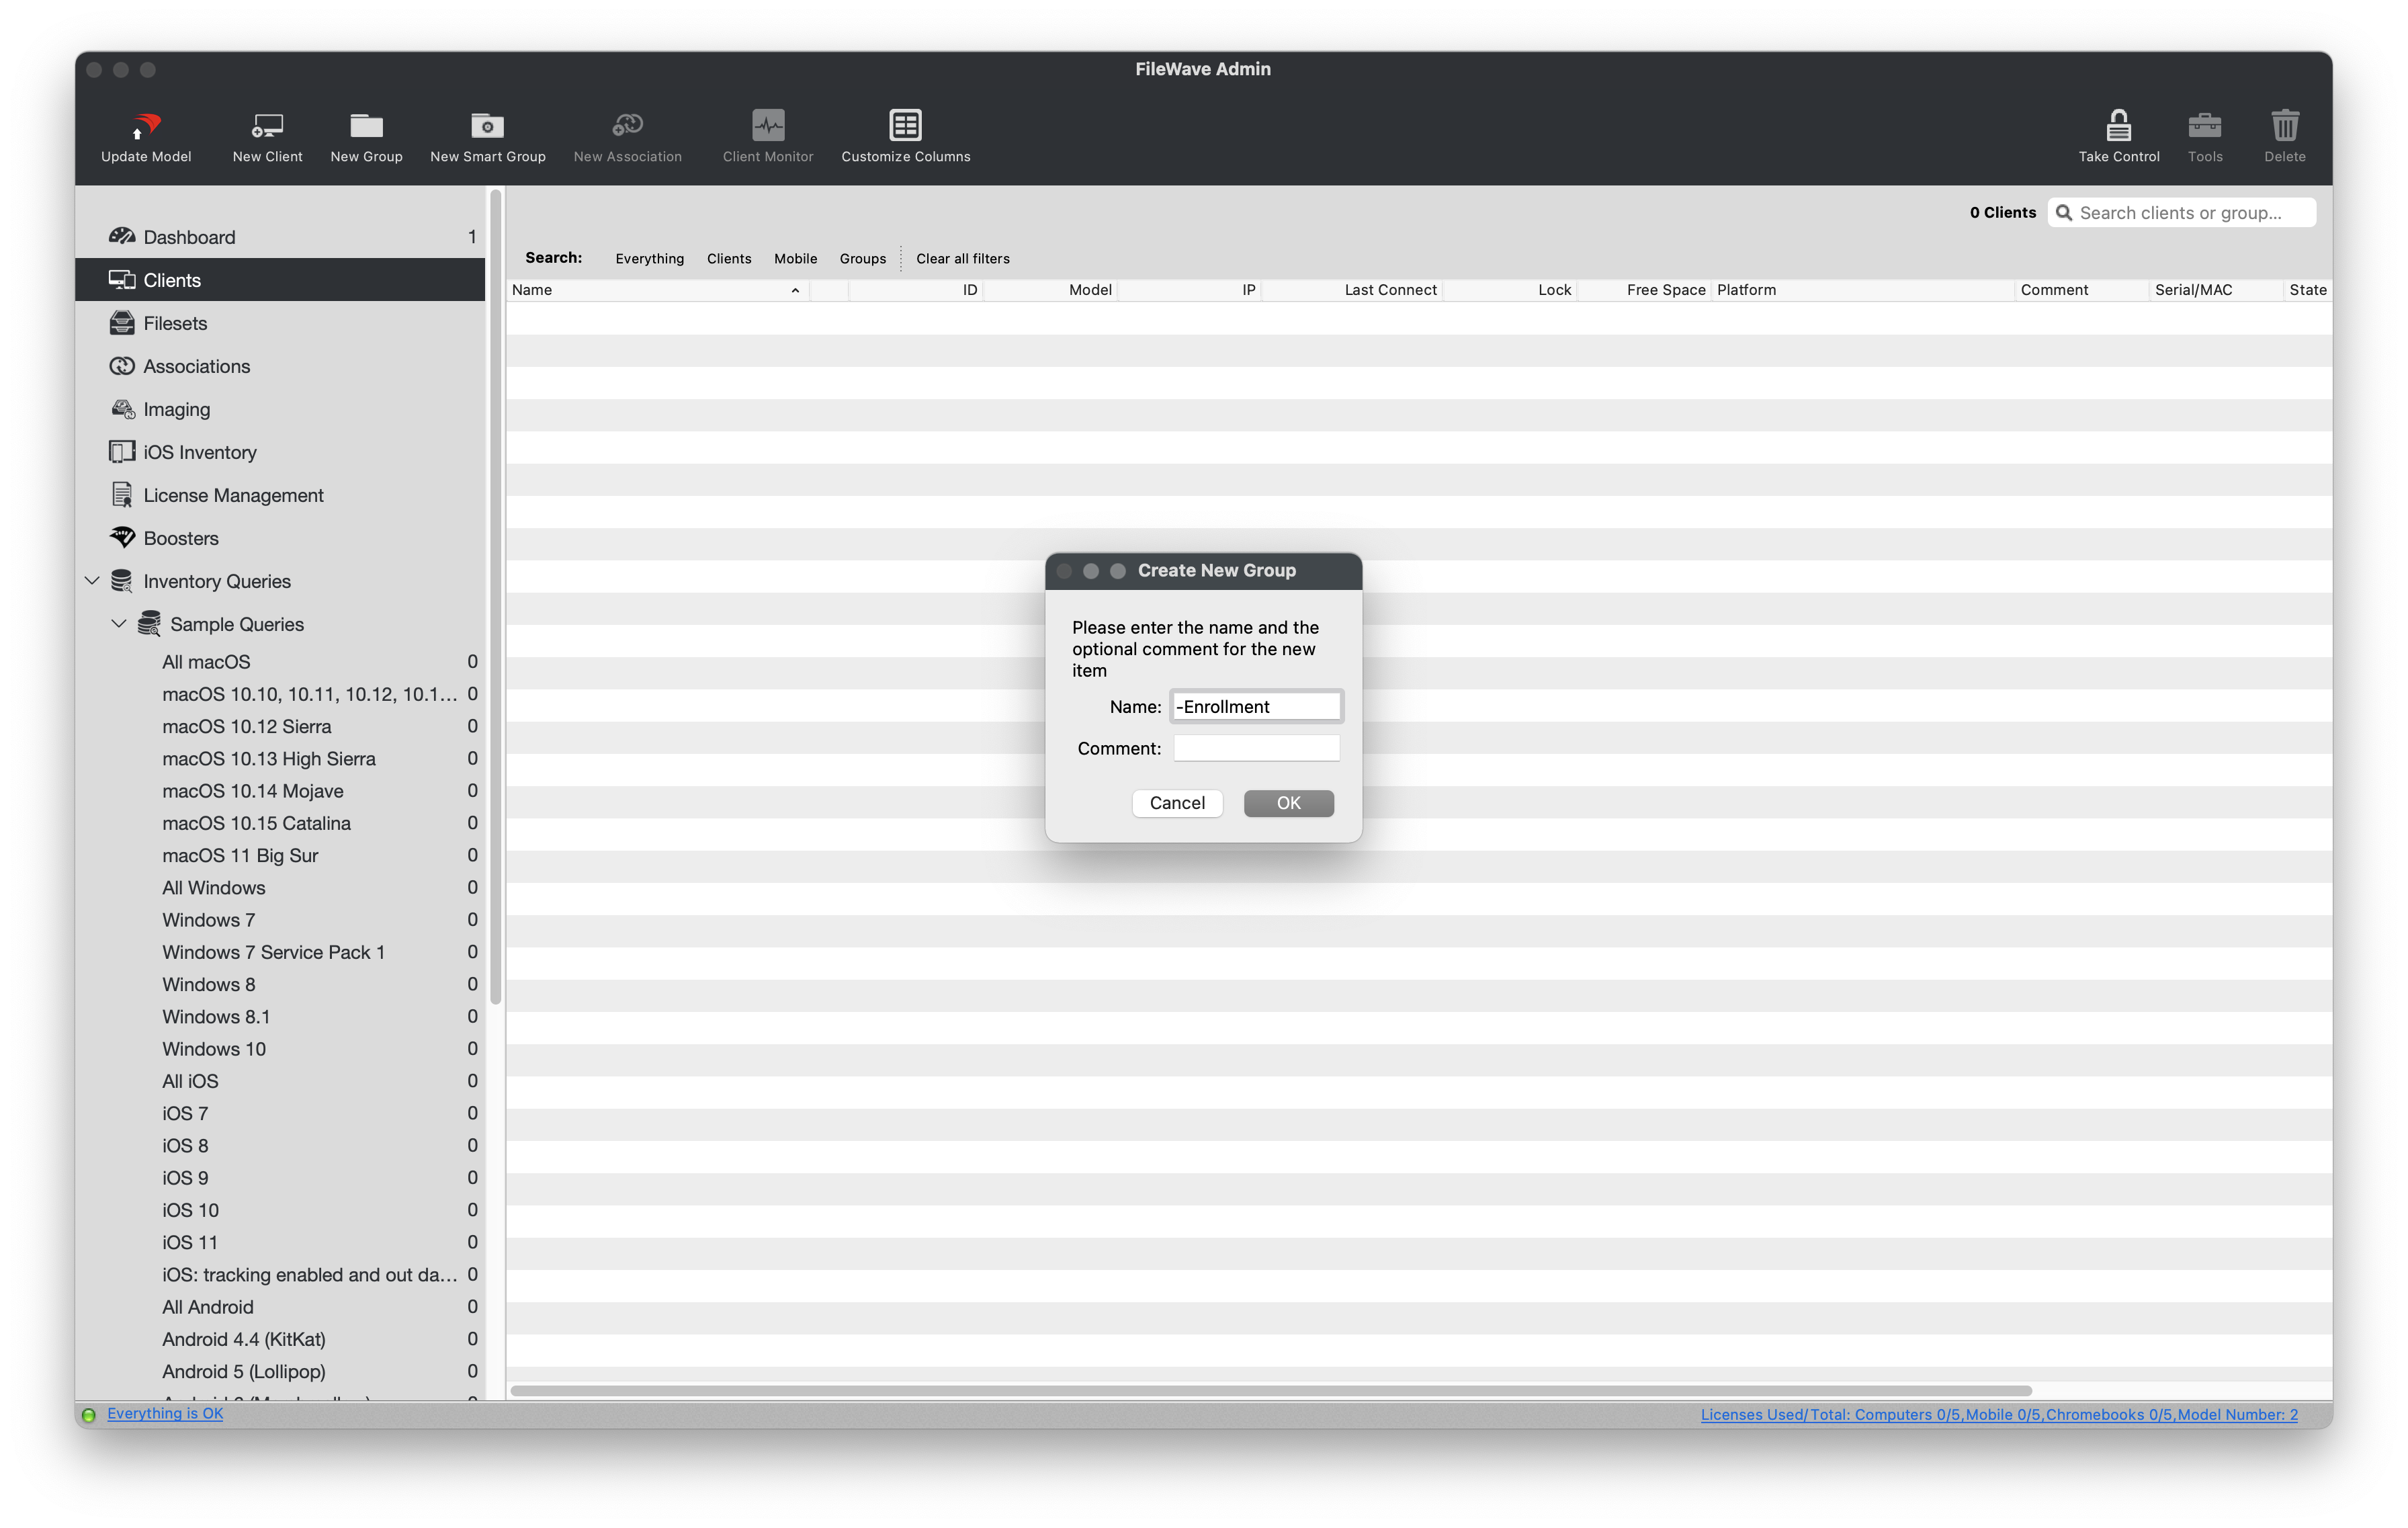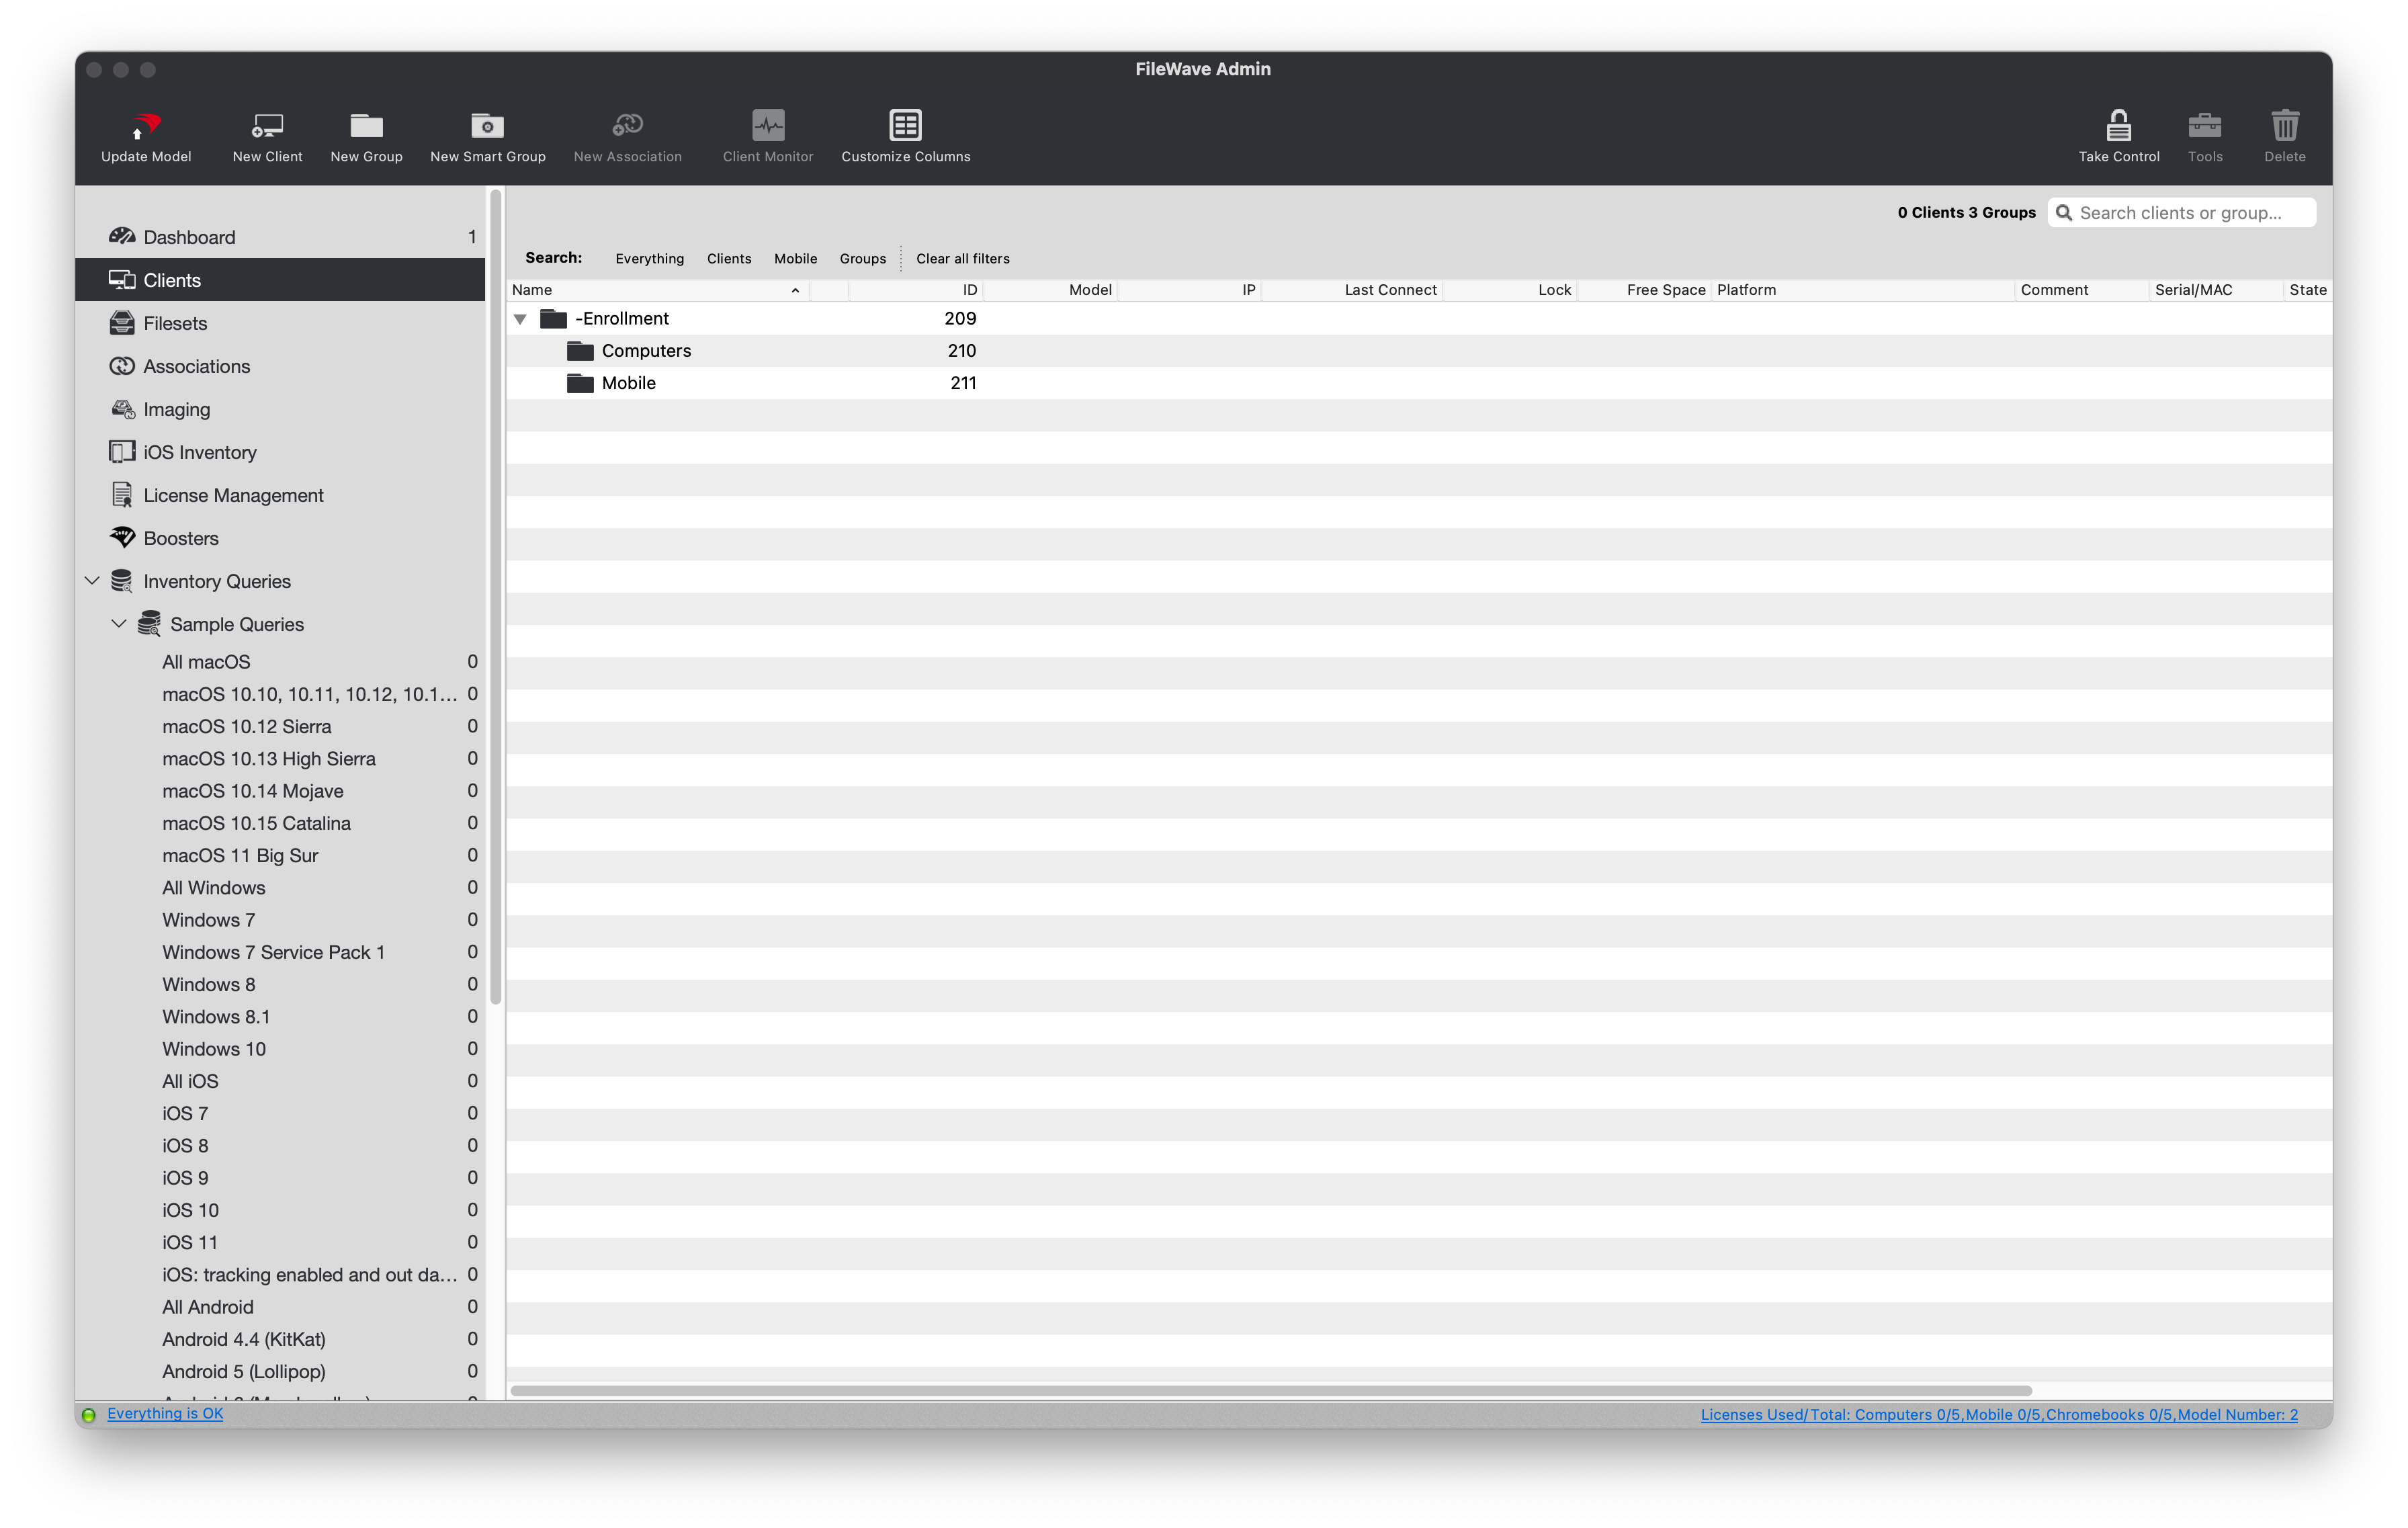
[](https://kb.filewave.com/uploads/images/gallery/2024-04/HJuqYZeFYrbIstav-image.png)
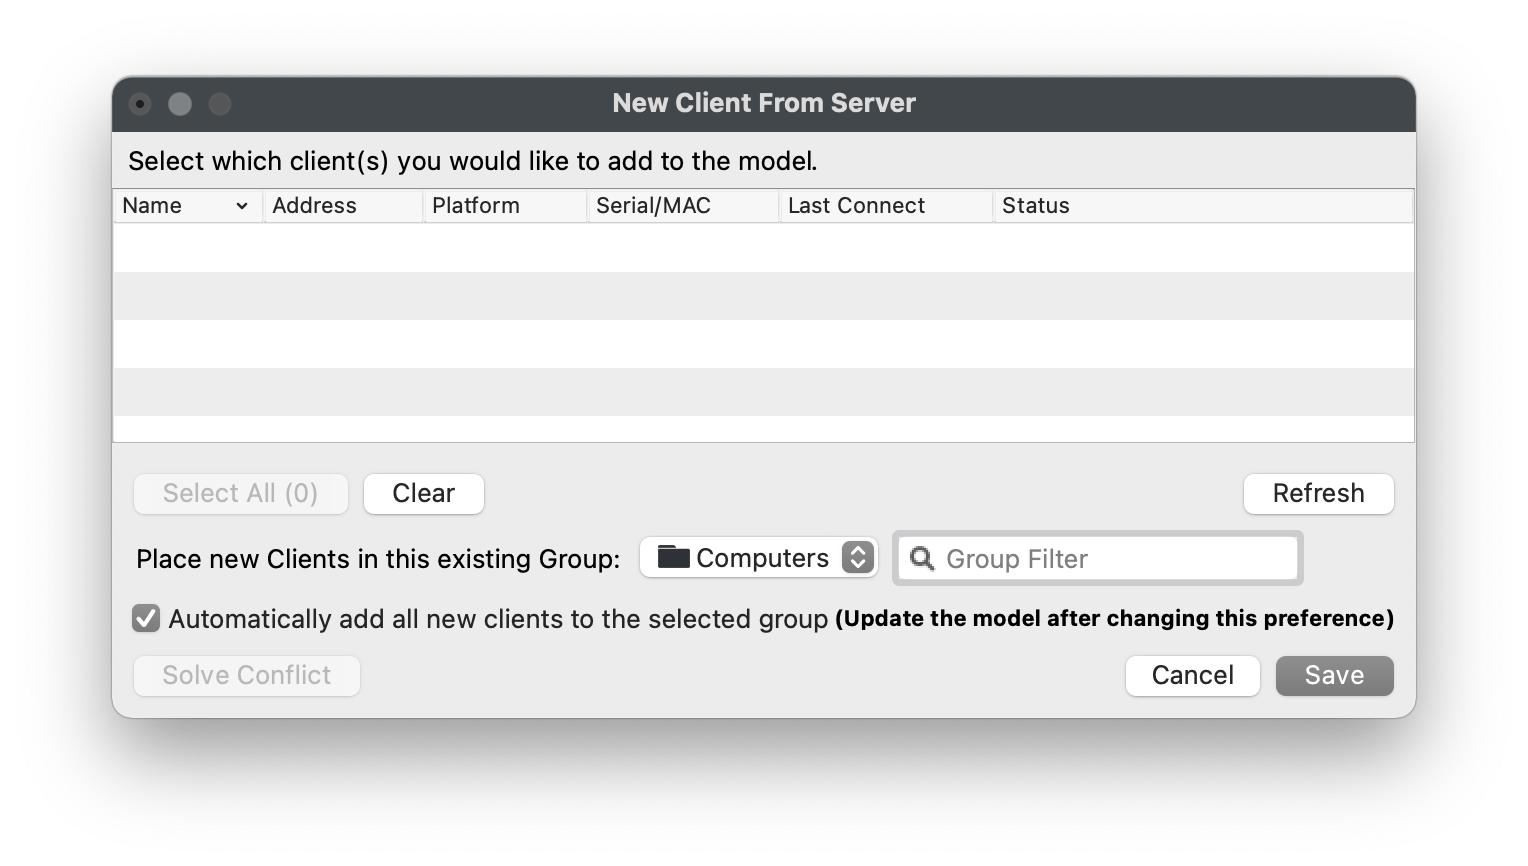
### **Enable automatic device enrollment**
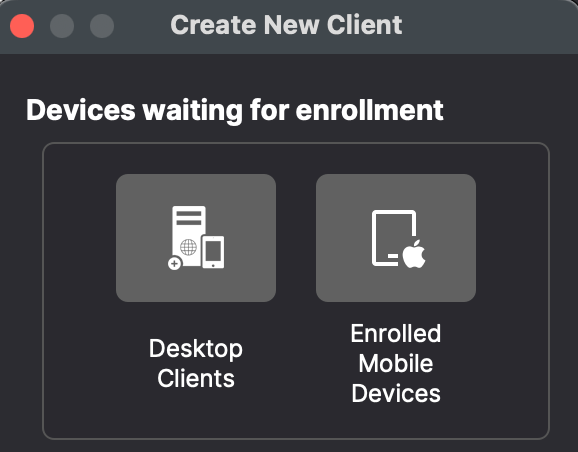
By default, new devices will come into a "waiting area" so that you can manually add them to FileWave. We are going to make this process more efficient by enabling automatic device enrollment.
1. Select the *"Computers"* group from the previous section.
2. Click *"New Client"* from the black menubar.
3. Select *"Desktop Clients"* from the *"Devices waiting for enrollment"* section.
4. Check the box for *"Automatically add all new clients to select group"* unless you always want to approve new clients. This is discussed in more detail in [Conflict Resolution](https://kb.filewave.com/books/filewave-central-anywhere/chapter/conflict-resolution "Conflict Resolution").
5. Click *"Save"*.
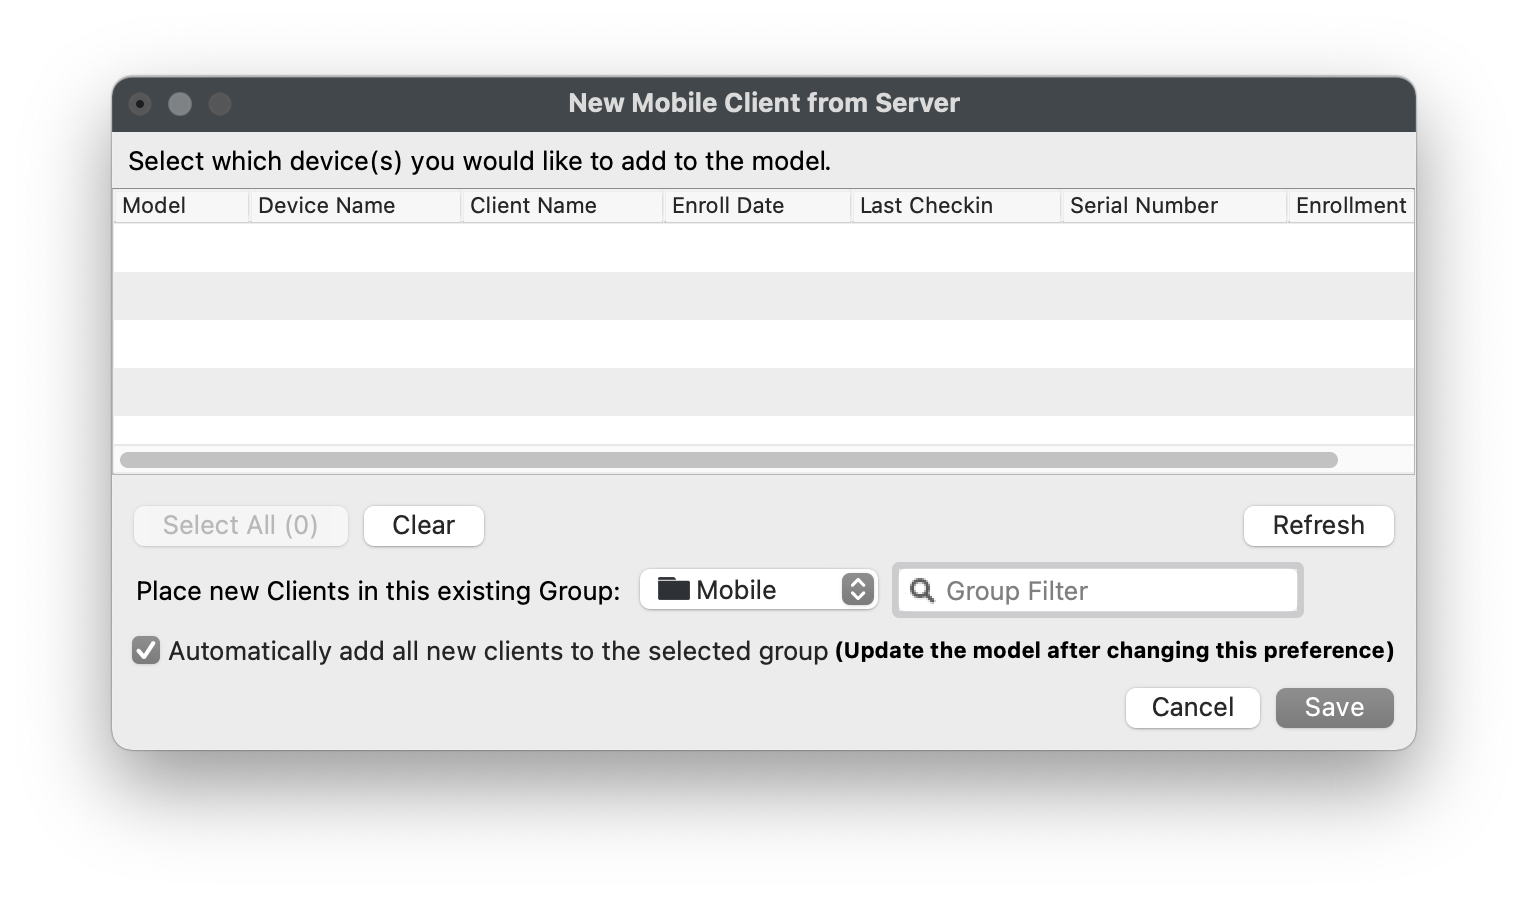
We will now repeat this process for the *"Mobile"* group by selecting *"Enrolled Mobile Devices"* from the *"Devices waiting for enrollment"* section.
And finally, as stated in the New Client window, we must ***"Update Model"*** to save our changes and finalized automatic device enrollment.
## **Creating Smart Groups**
---
A Smart Group is a group that automatically "clones" devices based on a set of Inventory data points. These data points include hardware information, software information, LDAP information, and unique Custom Fields. If a device meets the specified criteria, it will be automatically "cloned" or duplicated into the Smart Group, and if it no longer meets the criteria it will be removed from the Smart Group. This allows for very dynamic associations to software and settings. For example, deploy Adobe Creative Suite to all macOS devices that have a custom *"Department"* field set to *"Media"*.
For demonstration purposes we will create several Smart Groups based on the device's Operating System Platform. These Smart Groups can be used in production when establishing a baseline software group for each specific OS type.
### **Create "Platform" Smart Groups**
1. Open FileWave Admin and navigate to *"Clients"* from the left pane.
2. Create a standard Group named *"-Platform"* following the steps above.
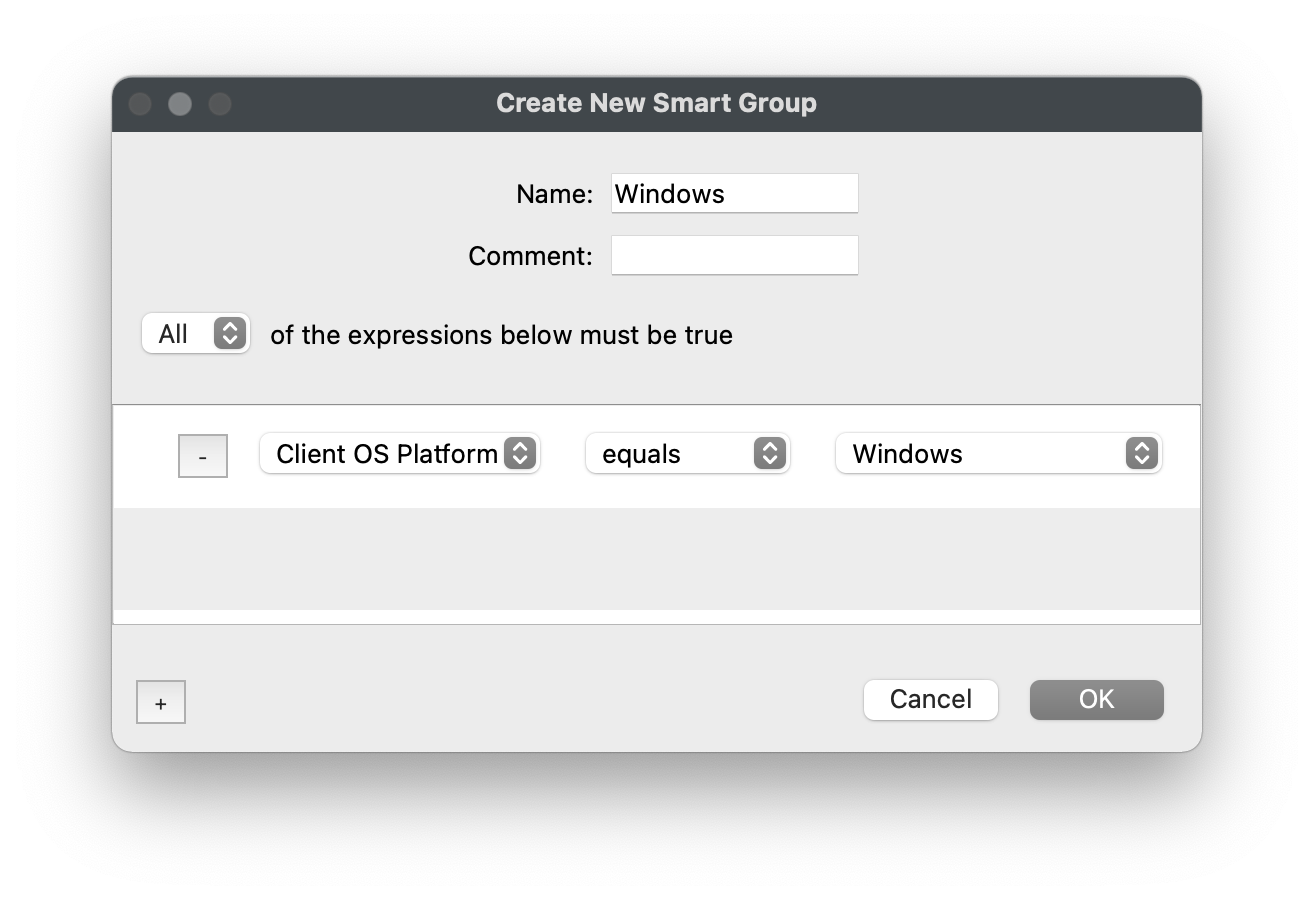
3. Select the *"-Platform"* group and click *"New Smart Group"* from the black menubar.
4. Name the Smart Group based on the Operating System. We will first start with *"Windows"*.
5. Click the "\[+\]" button in the lower left-hand corner.
6. Select *"Client OS Platform"* from the dropdown menu on the left.
7. Select *"Windows"* from the dropdown menu on the right.
8. Click *"OK"* to save the changes.
We will repeat these steps for:
- **macOS -** Client OS Platform \[*equals*\] macOS
- **iOS -** iOS Device Type \[*equals*\] Any iOS Device
### **Creating more advanced Smart Groups**
We will now create a slightly more advanced Smart Group that leverages FileWave's more robust Inventory Query Builder. The Inventory Query Builder will give us access to over 1000 data points that FileWave natively collects from the different device types along with any Custom Fields you have imported.
The next steps will outline how to use the Inventory Query Builder to round out our *"-Platform"* group by targeting Android devices.
1.  Open FileWave Admin and navigate to *"Clients"* from the left pane.
2. Select the *"-Platform"* group and click *"New Smart Group"* from the black menubar.
3. Name the Smart Group based on the Operating System, in this case "Android".
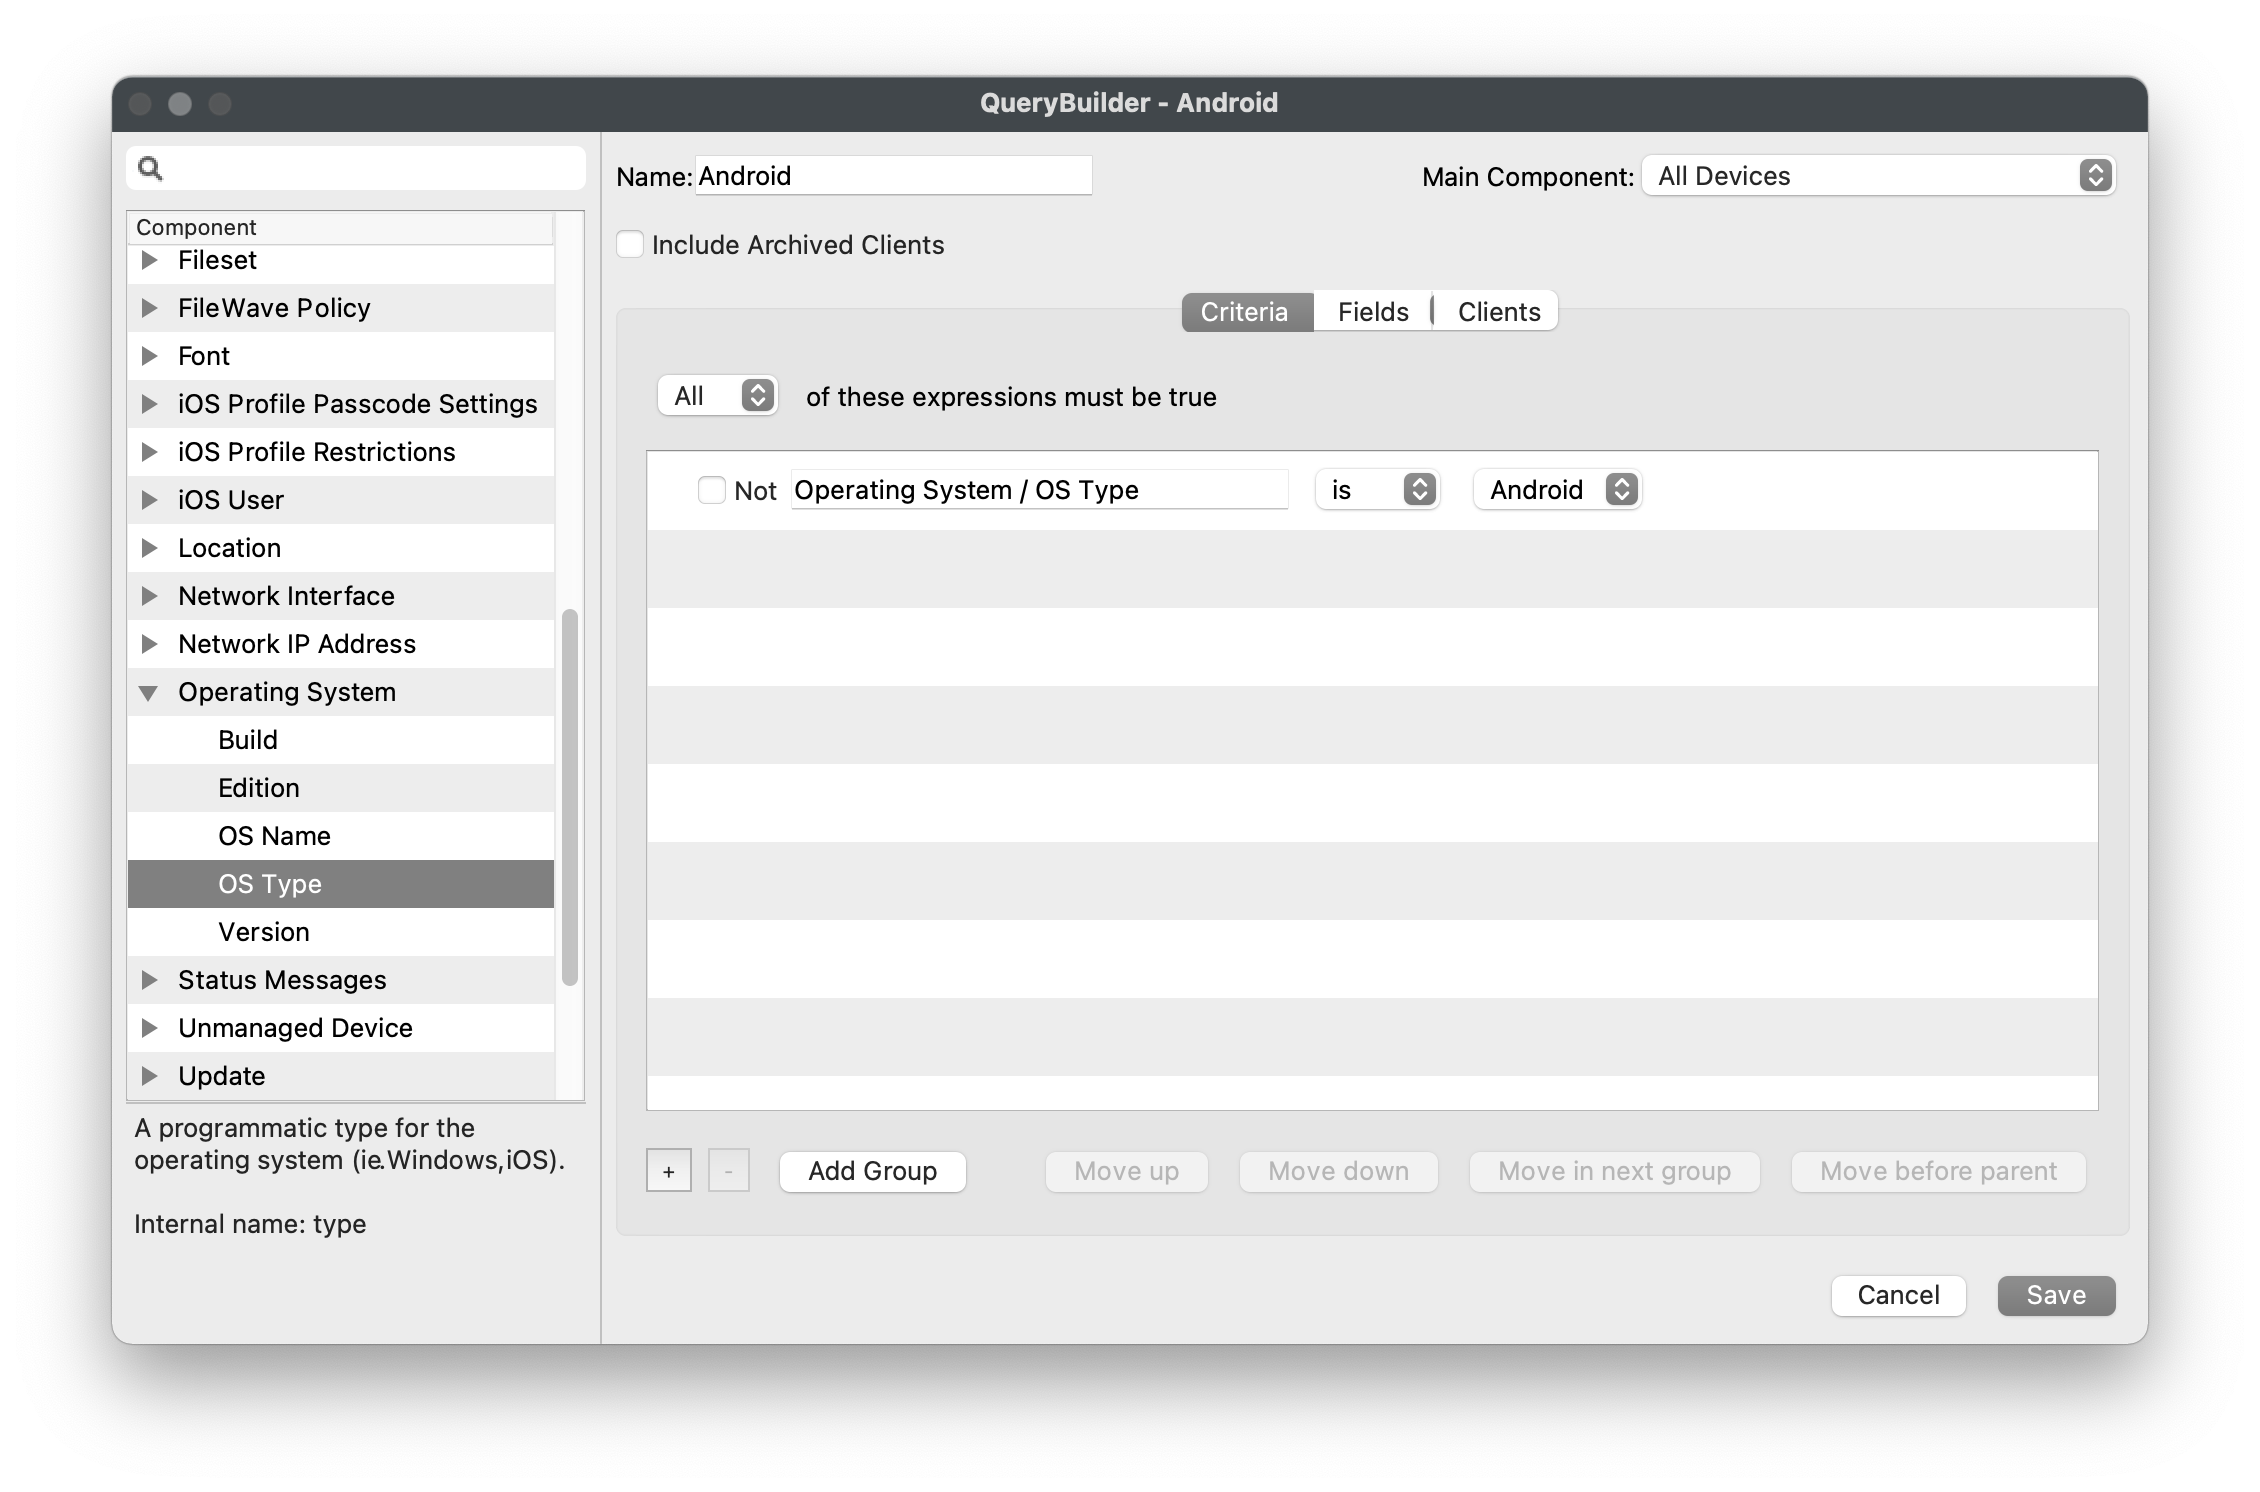
4. Click the "\[+\]" button in the lower left-hand corner.
5. Select *"Inventory Query"* from the dropdown menu on the left.
6. Click the "\[...\]" button to the right.
7. Find the criteria that will be targeted using "Search" or by opening each sub-group, in this case *"Operating System > OS Type"*.
8. Drag-n-Drop the desired criteria from the left pane into the right-hand side *"Criteria"* pane.
9. Verify that the expect results are returned in the right-hand side *"Clients"* pane.
10. *"Save"* the Inventory Query and *"OK"* the Smart Group window.
### **Finishing up**
Now that you have defined your Platform-based Smart Groups, any time a new device enrolls it will be automatically "cloned" into its respective Smart Group. It is recommended that you target these Smart Groups when deploying content to an OS type rather than targeting devices within the "-Enrollment" groups. Please note that Chromebook devices will adhere to their own group structure and will not belong to any other typical FileWave groups.
And as always, please ***"Update Model"*** to save your group modifications.
## **Cloning devices**
---
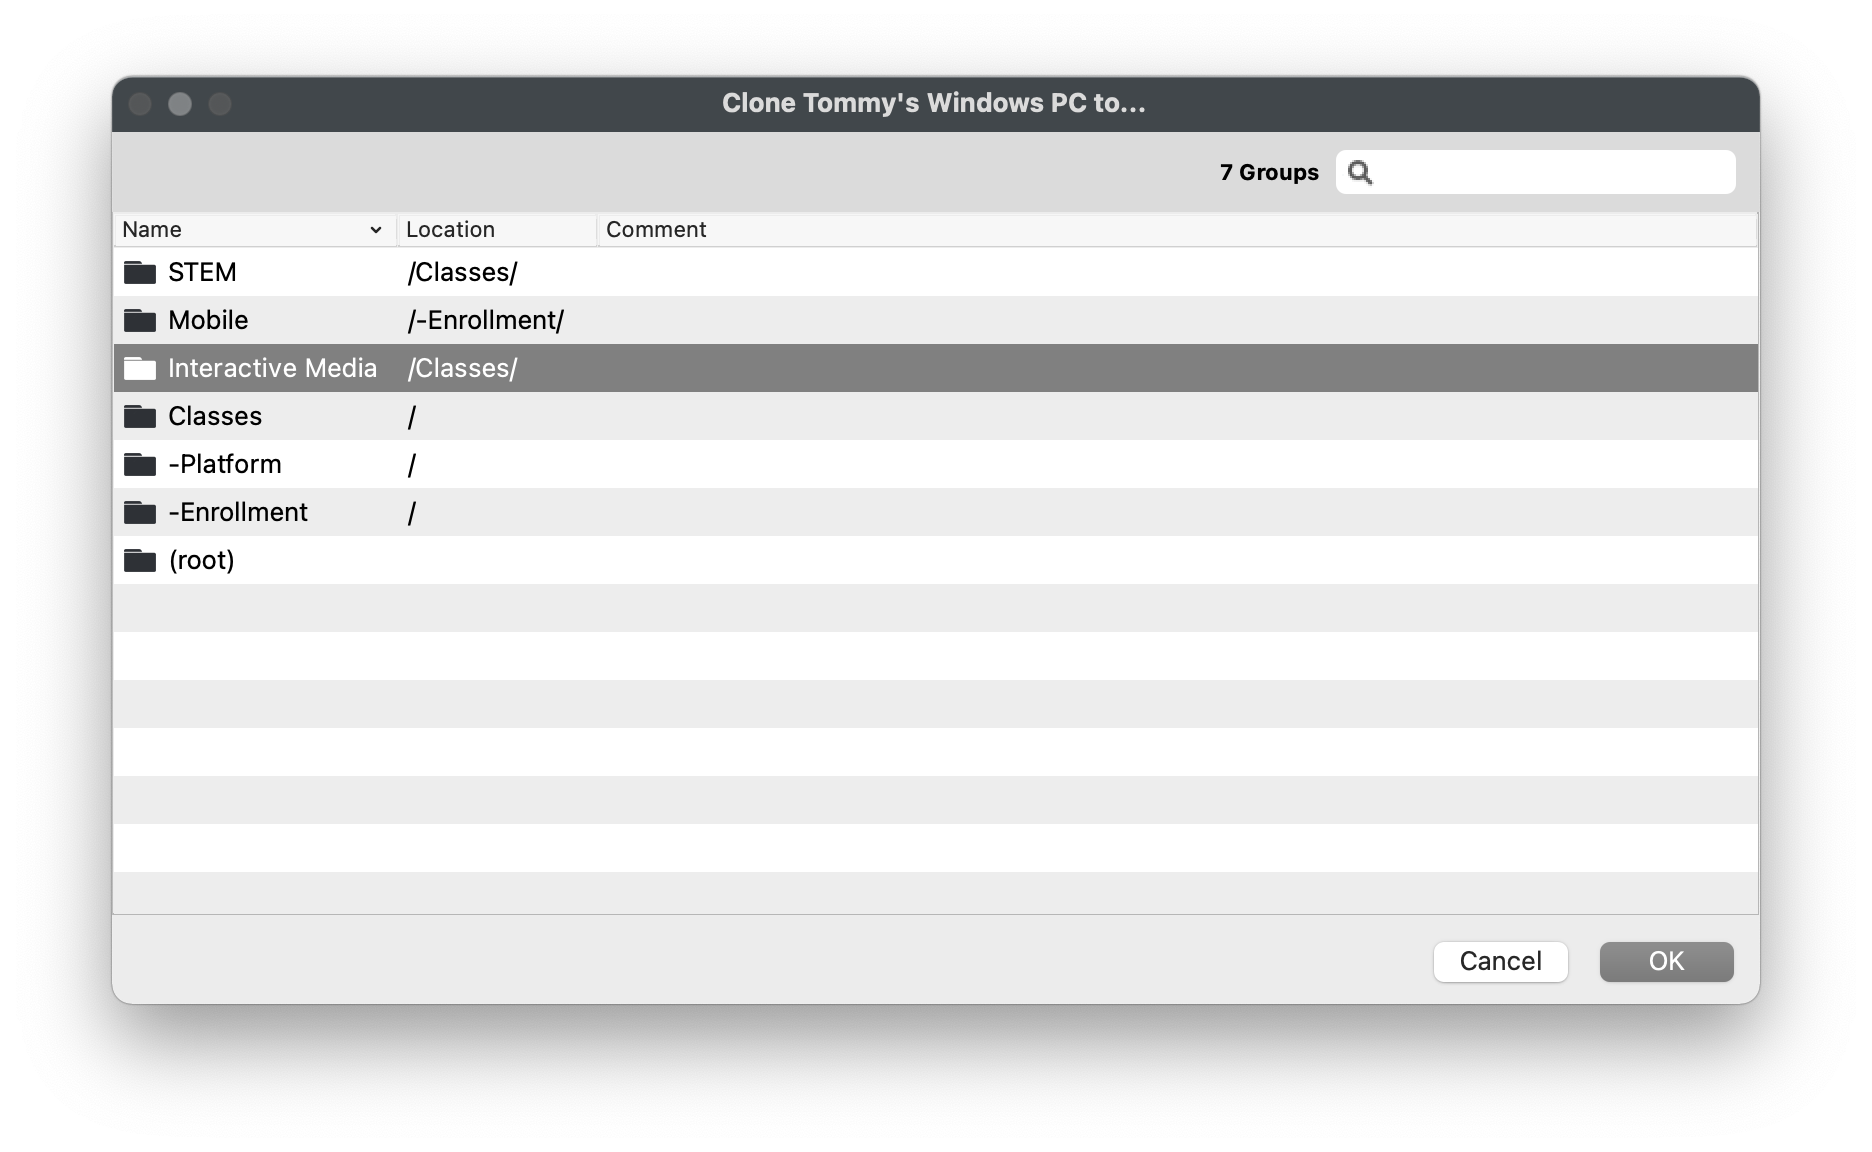
If you find yourself needing to group devices that don't have any unique attributes that you can target in a Smart Group, you can simply "clone" the devices into any group you'd like. This allows you to still have flexibility with content associations while not jeopardizing the original Client record in the *"-Enrollment"* group. You can delete or move a clone of a device without affecting the original Client record or any other clones of that same device. For example, Tommy participates in both *"Interactive Media"* and *"STEM"* classes during first semester but in second semester he only participates in *"Interactive Media"*. Since Tommy's device no longer needs the *"STEM"* software, we can delete his cloned device from the *"STEM"* Client group without affecting his *"Interactive Media"* content associations.
### **Creating a clone**
1. Right-click on any device or device clone and select *"Create Clone"*.
2. Select the Client group where you want the clone to be created.
3. You will now see a new clone indicated by italics font and an upwards facing arrow on the Client's icon.
# Software Group Structure
## You get a group and you get a group, everybody gets a group!
---
Again, really? Yep. We recommend that you stay just as organized with your Software (Fileset) groups as you do with your Client groups. This will enable you to do "Group to Group" associations, allowing for even more dynamic and automated deployments. For example, if we have an *"Interactive Media"* Client group and an *"Interactive Media"* Software group, we can associate them at the group level so any time a new piece of software gets added to the Software group it will be deployed to all devices in the Client group... and vice versa, a new Client gets added to the Client group and it will receive all software in the Software group, all without having to make a new Association.
## Creating Software (Fileset) Groups
---
Your group structure will great depend on your organization's structure but a good place to start is by sorting out your software by the intended Operating System.
### New Fileset Group
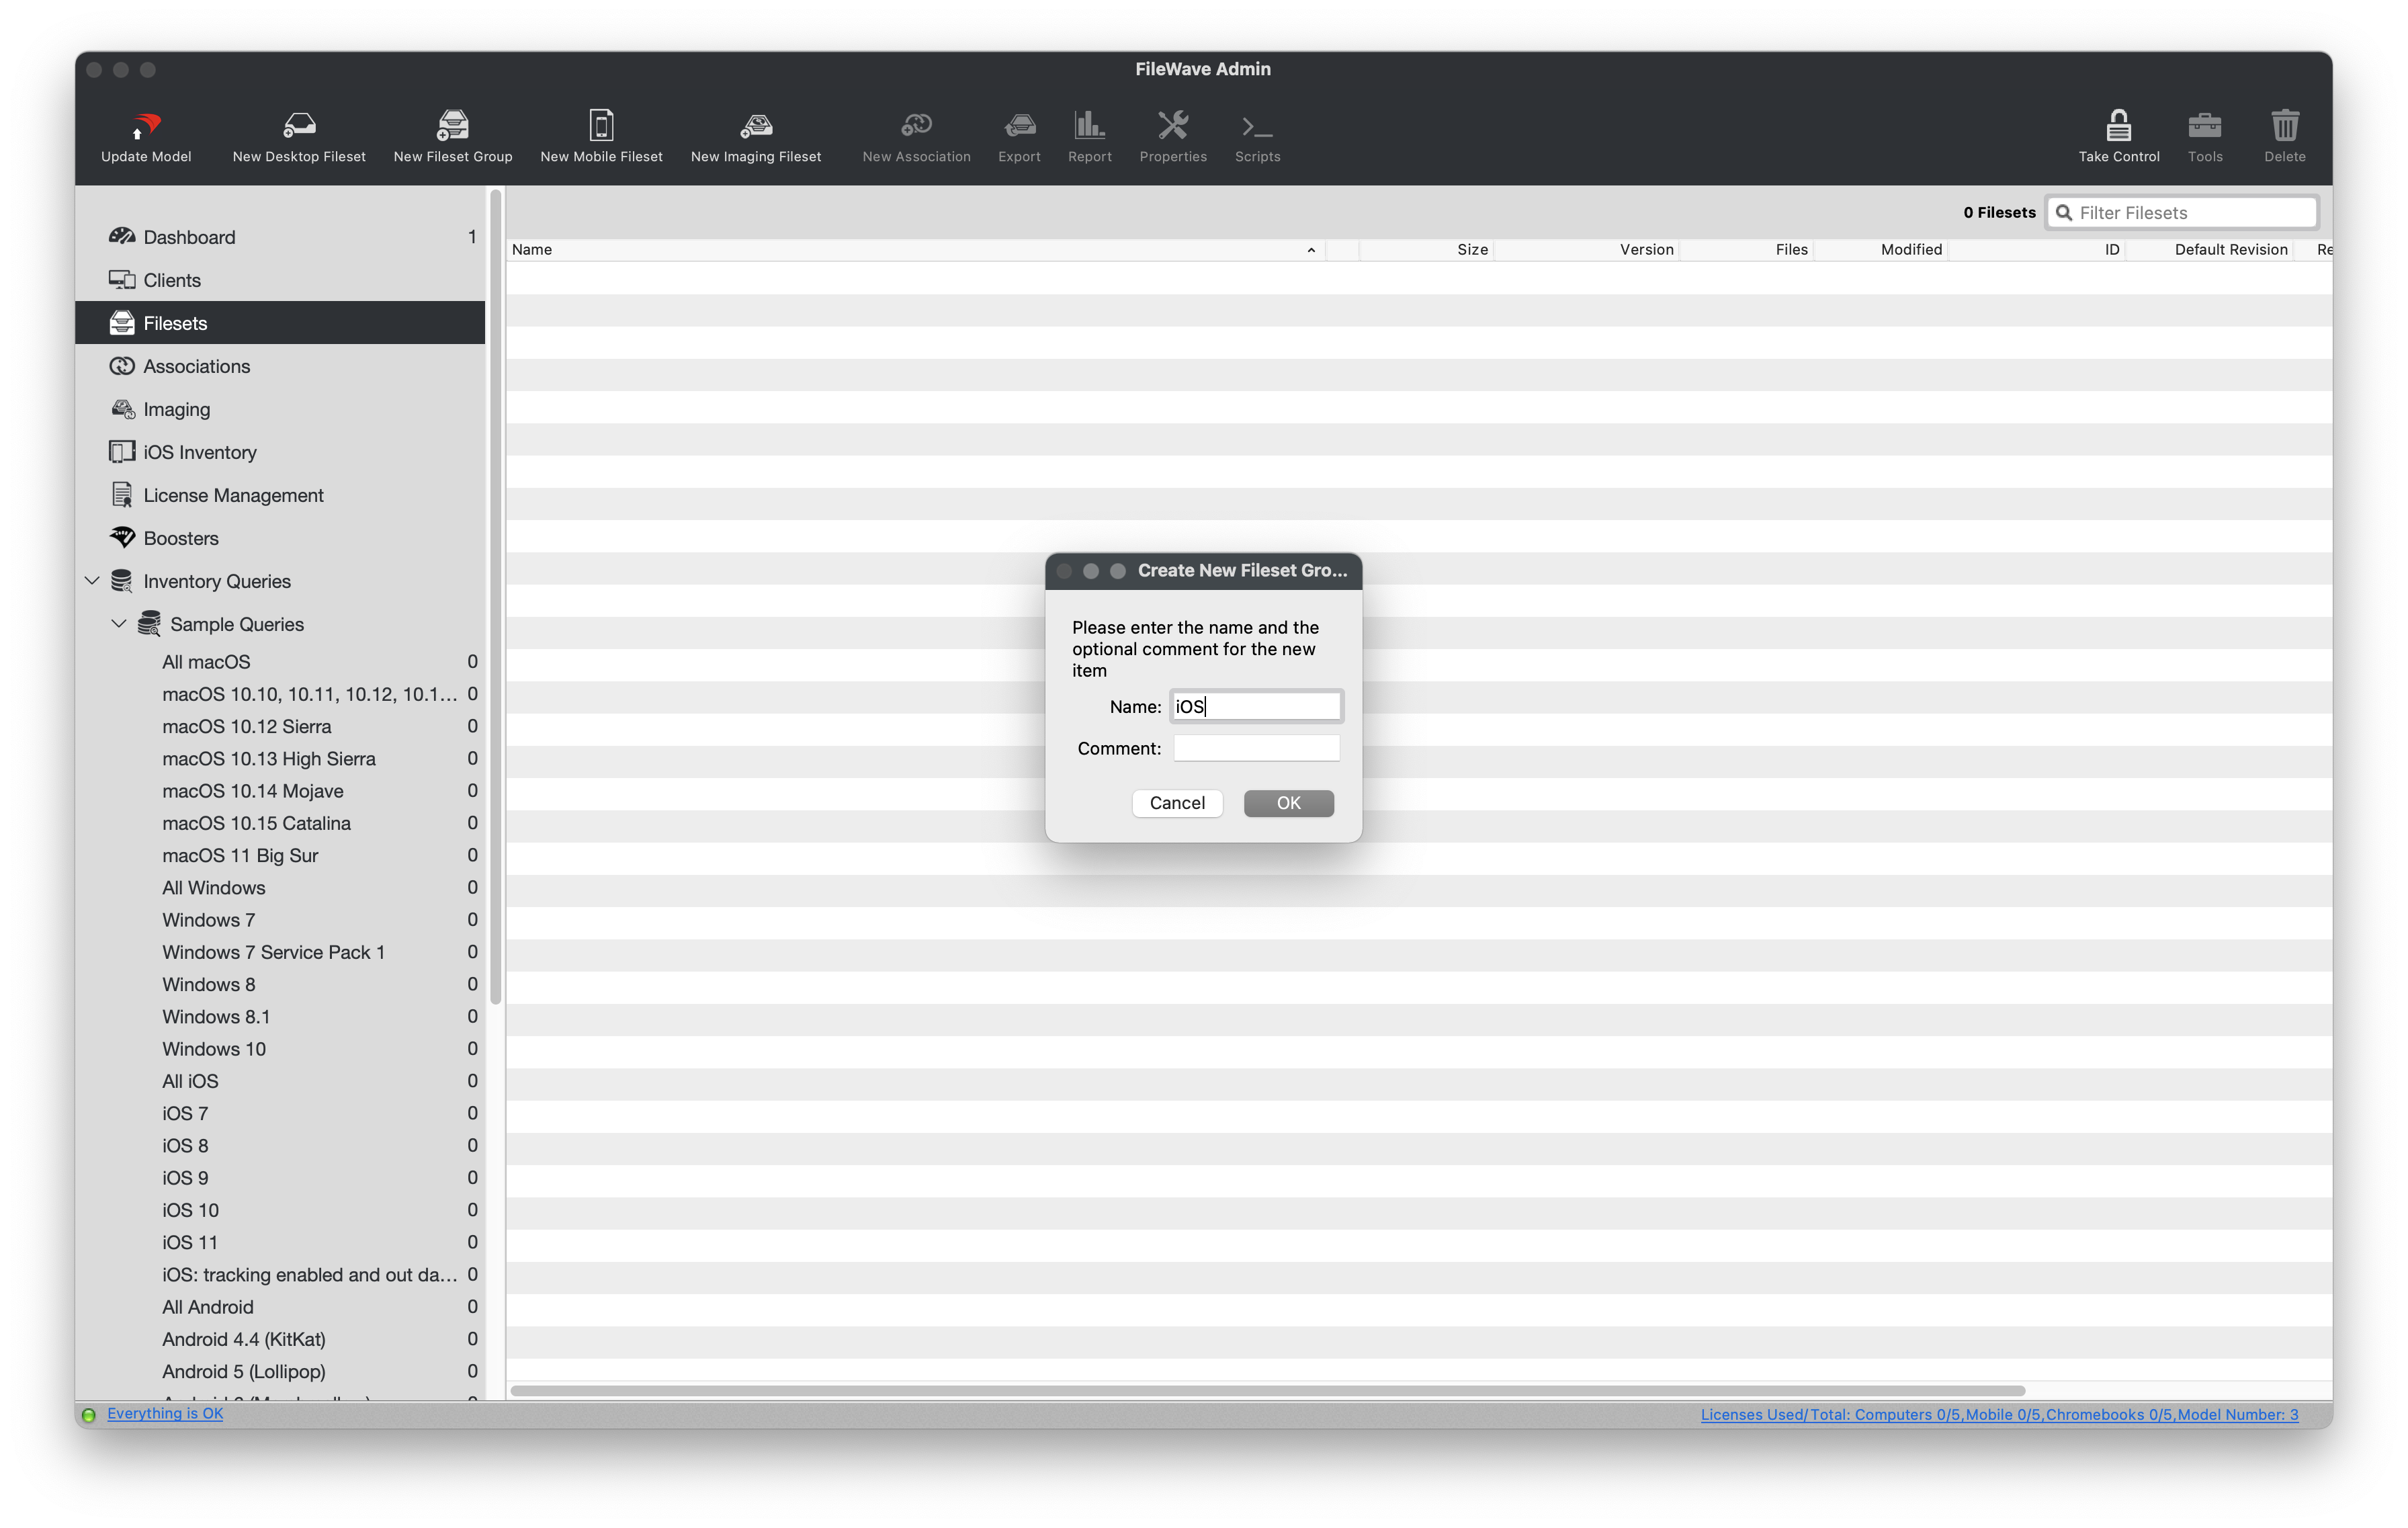
1. Open FileWave Admin and navigate to *"Filesets"*.
2. Click *"New Fileset Group"* from the black menubar and name accordingly, in this case *"iOS"*.
3. That's it! You can now create additional sub-groups if desired.
- FileWave honors the "parent/child" relationship when associating content.
## Configuring automatic VPP Fileset imports
---
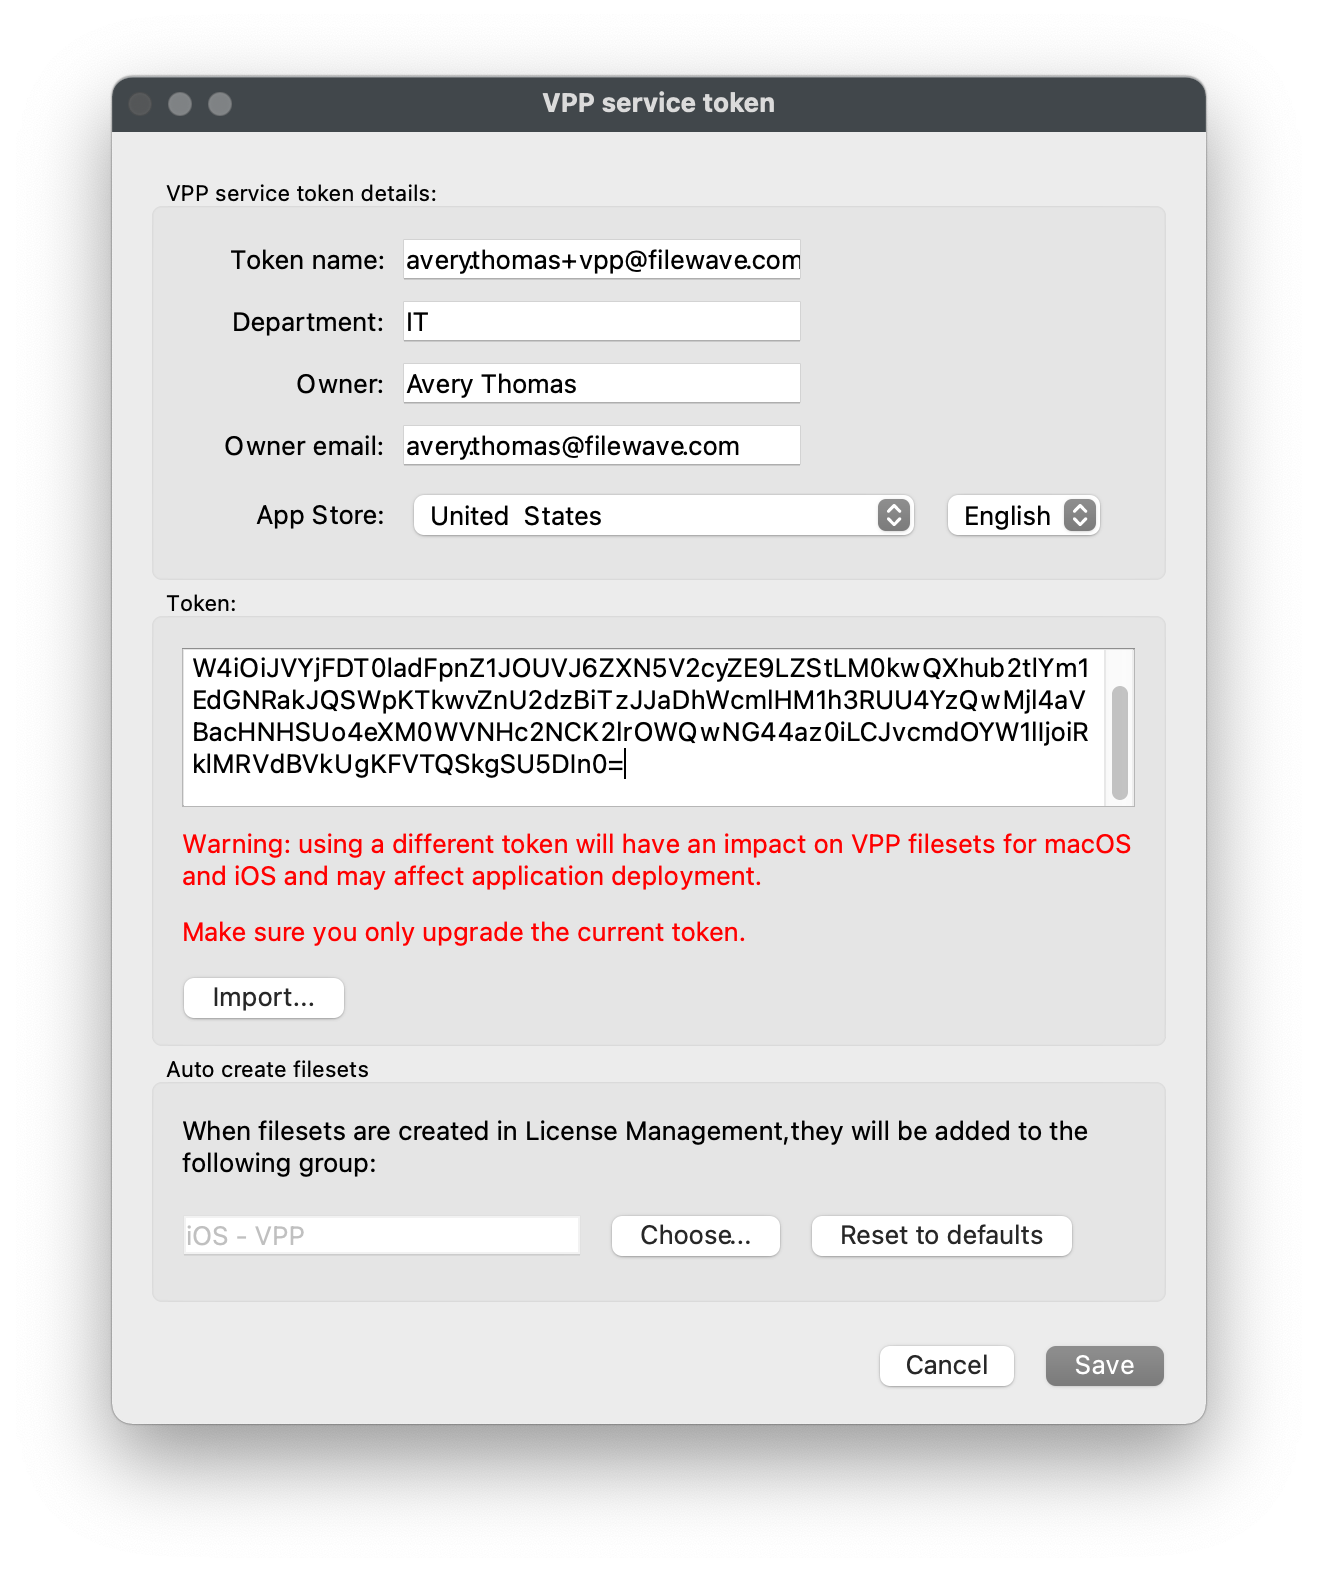
This section is intended for those going to sync with Apple's Volume Purchase Program as described in this future [section](https://kb.filewave.com/books/evaluation-guide/page/apple-client-pre-requisites "Apple"). When syncing VPP licenses into FileWave, you can specify which group each VPP Token's Fileset will be created within. This is very helpful especially if you have multiple VPP Tokens designated for different departments and/or sites.
### Auto create VPP Filesets
1. Ensure that you have the target group created prior, we will be using the *"iOS - VPP"* group.
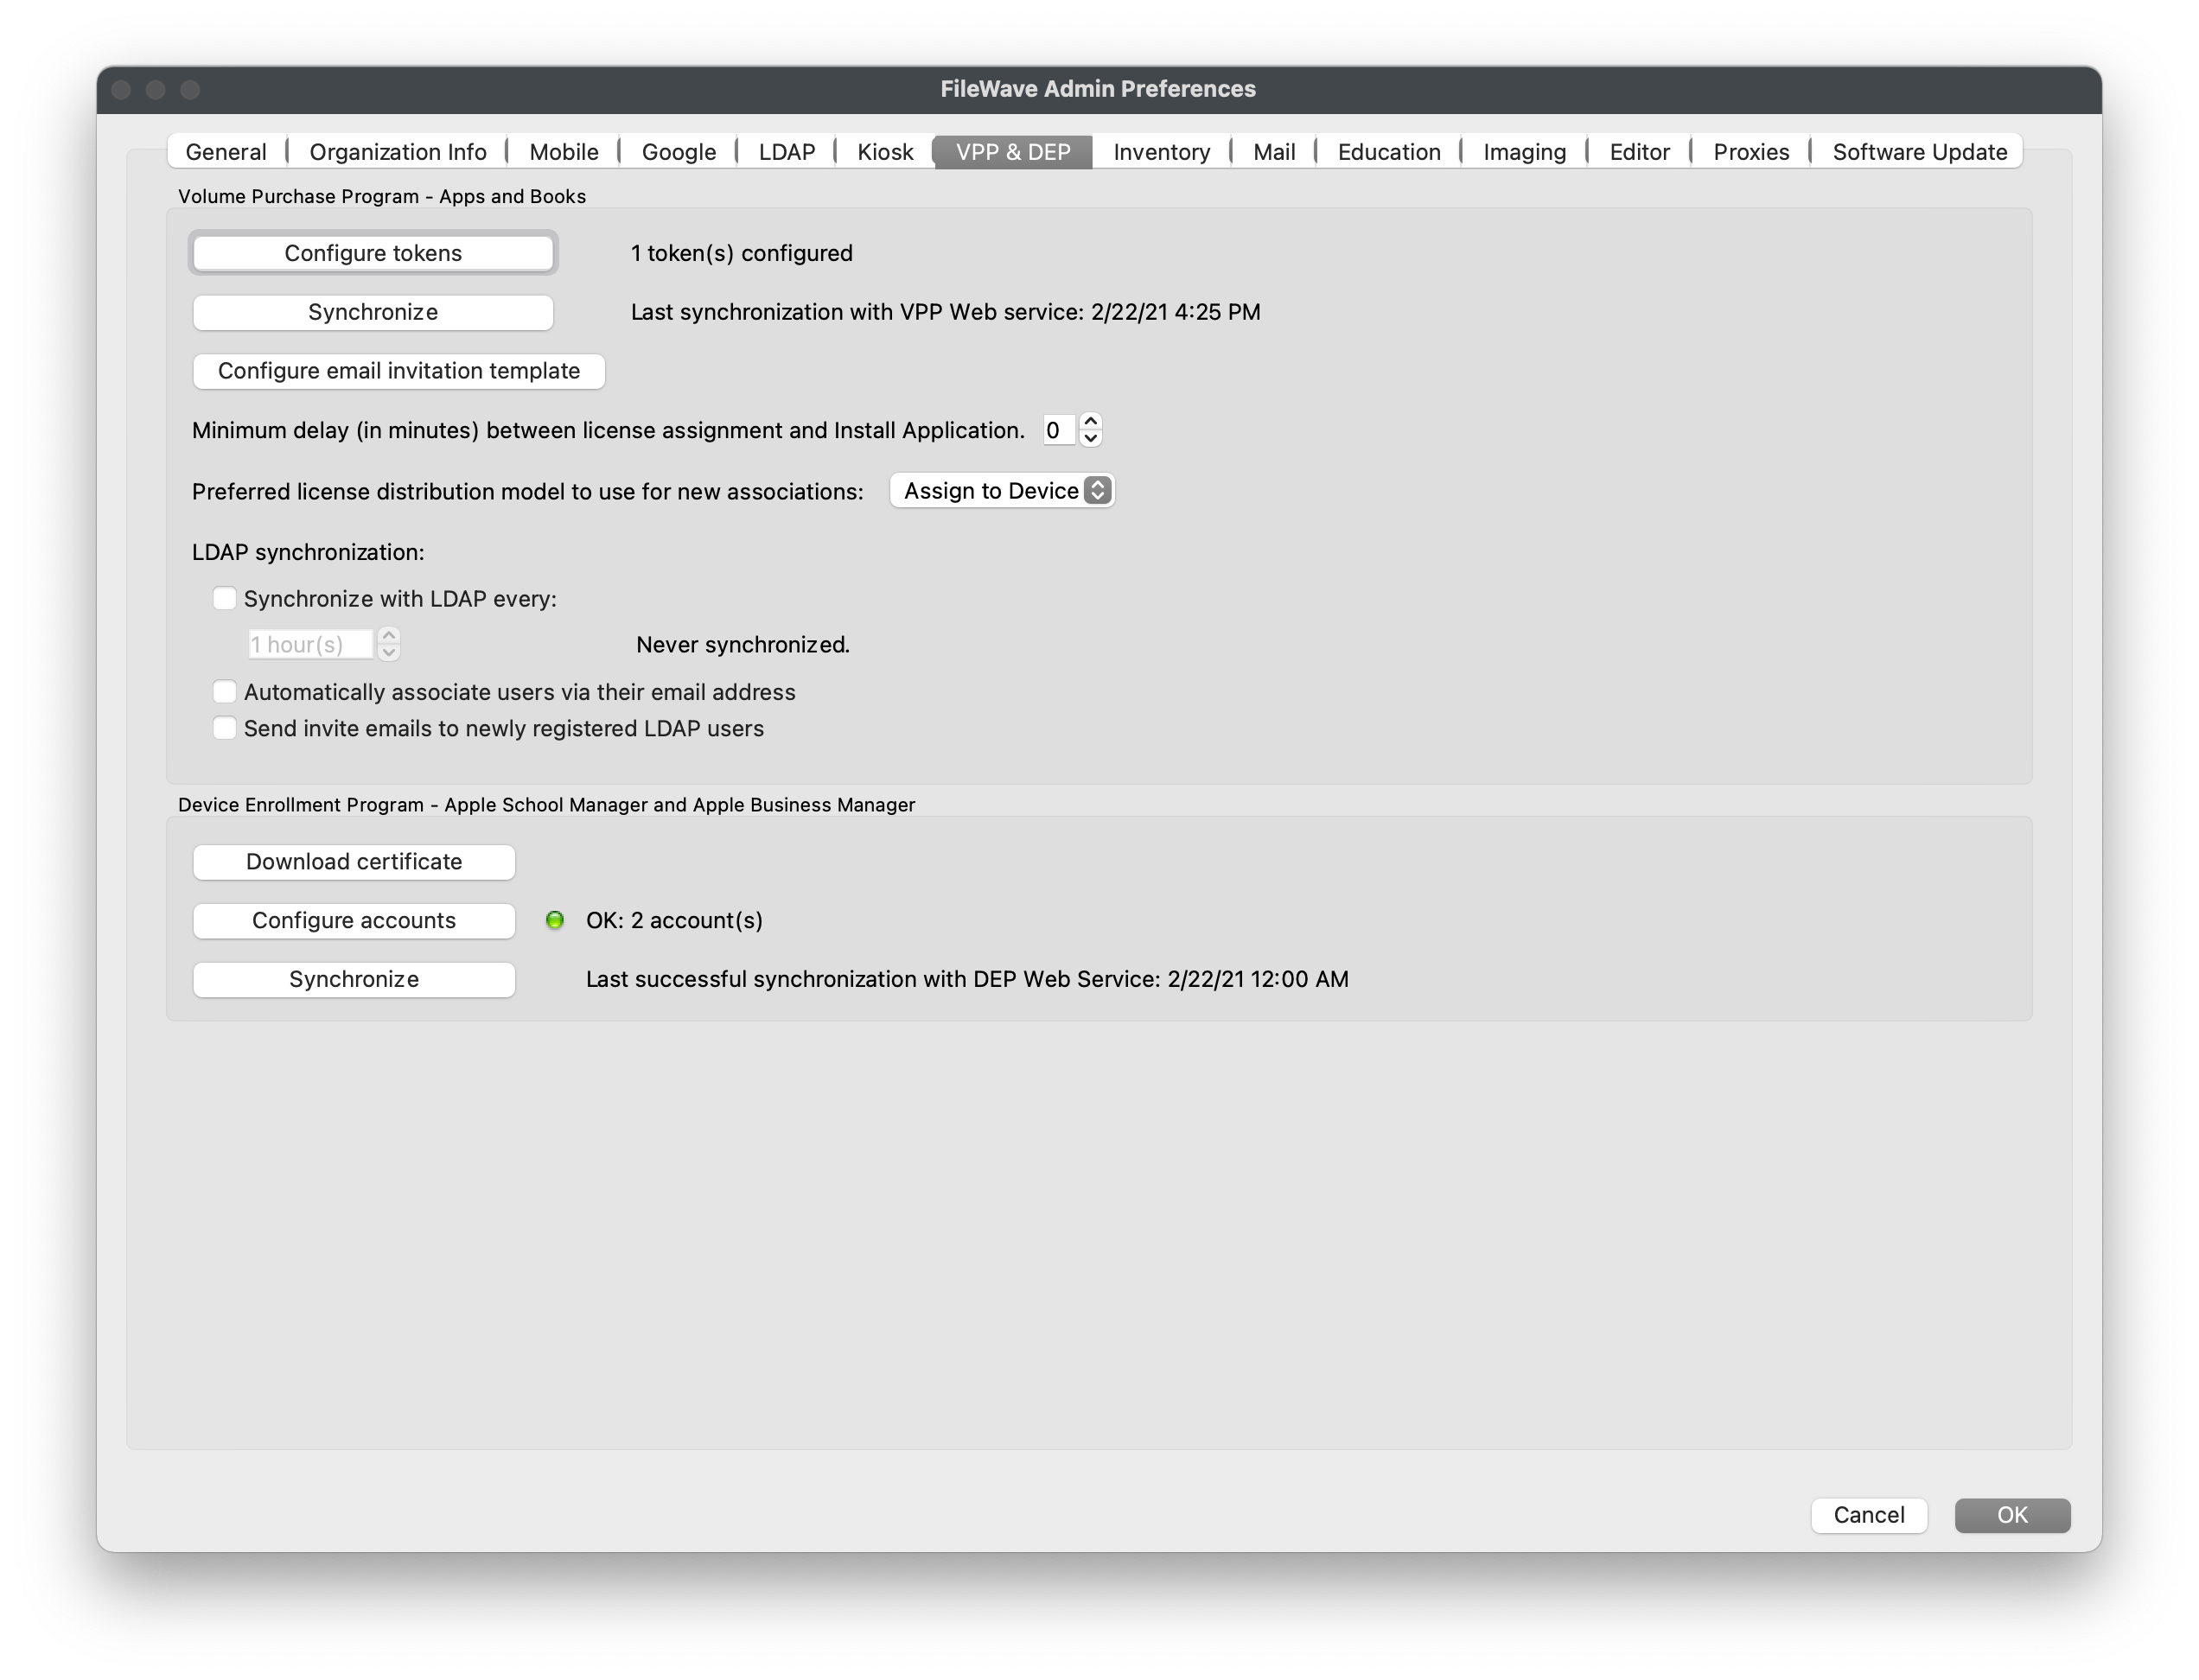
2. Open *"FileWave Admin > Preferences > VPP & DEP"*, click *"Configure tokens"* from the *"Volume Purchase Program"* section, and authenticate.
3. Double-click your existing VPP Token.
4. Click *"Choose"* from the *"Auto create filesets"* section and select your desired Fileset group, in this case *"iOS - VPP"*.
5. Click "Save" on the *"VPP service token"* window, *"Close"* and *"OK"* the other Preferences windows.
6. Repeat these steps for any other VPP Tokens.
# 2. Client Pre-Requisites
Please review all steps in the sections that correspond with each device type you would like to manage in FileWave.
# Android Client Pre-Requisites
## Obtaining JSON File
Android EMM (Enterprise Mobility Management) is built into FileWave as of version 13.1. This feature requires activation. Activation may be generated by opening a [Technical Support](https://kb.filewave.com/books/community-engagement/page/customer-technical-support "Customer Technical Support") case and support will get you the JSON file.
### Setup
#### Requirements
- Server and Admin running FileWave Version 13.1.0 +
- Android 8 or newer Device(s) as of FileWave 15.3.0 (Requirements may change, confirm with latest release notes)
- Generated JSON key (see above)
- Network Port 443 inbound and outbound between FileWave server and Google (See [Default TCP and UDP Port Usage](https://kb.filewave.com/books/filewave-general-info/page/default-tcp-and-udp-port-usage "Default TCP and UDP Port Usage") for full list and topology)
- A **standard Google** account or **G-Suite** account
- Perform the changes in FileWave as the fwadmin user specifically because some steps will not be able to be accomplished without doing so
**A Google account may only be registered to a single EMM instance:**
Unlike standard Google or **Gmail** accounts, a **G Suite** administrator manages all accounts associated with each of these editions. **G Suite** provides access to a core set of apps that include **Gmail**, Calendar, Drive, Docs, Sheets, Slides, Forms, Google+, Hangouts Meet, Hangouts Chat, Sites, and Groups.
You are not required to setup Google Cloud Messaging (GCM/Firebase) for Android EMM to work. Any references to it are for Chromebooks.
### Configure Service Account
Open FileWave Admin 'Preferences' > 'Google' tab and click 'Configure Enterprise' under the EMM Configuration section. If the Google tab is not yet apparent, the FileWave server service will require a restart after requesting the JSON.
1. Proceed by selecting the 'Choose File' button in the 'Set Up an Android Management Enterprise' window
2. Select service account file, then press 'Upload'
3. When requested, enter a display name for your enterprise and 'Sign Up'. This is merely an internal identifier but will be visible on devices.
4. Press 'Click here' link to finalize the setup. The link opens a browser, navigating to Google Play website. Finalize enterprise creation using the chosen Google account.
5. On registration completion, the browser should redirect to the FileWave server website informing success. 'Enterprise "\[display name\]" successfully created.'
The FileWave Admin should now display the successfully configured Android EMM account:

## Enrolling Android Devices
You are now set to enroll Android devices as described here: [Android Enrollment](https://kb.filewave.com/books/evaluation-guide/page/android-enrollment "Android Enrollment")
# Apple Client Pre-Requisites
Now that we have the FileWave basics taken care of, let us start integrating the Apple services into FileWave. This section covers creating an APNs certificate and synchronizing FileWave with Apple Automated Device Enrollment (ADE) and Apps and Books.
## Apple Push Notification Service (APNS) Certificate
---
The Apple Push Notification service certificate, or APNs certificate, allows FileWave to send push notifications to managed Apple devices, including macOS, iOS, iPadOS, visionOS, and tvOS. This step is critical for Apple device management in FileWave.
To create and upload an APNS certificate follow the instructions at one of the following links depending on your platform [macOS](https://kb.filewave.com/books/certificates/page/apns-certificate-creation-renewal-on-macos-computers-keychain "APNs Certificate Creation & Renewal on macOS Computers") or [Windows](https://kb.filewave.com/books/certificates/page/apns-certificate-creation-renewal-on-windows-computers "APNs Certificate Creation & Renewal on Windows Computers"). If you have a macOS machine available, the process is usually found to be easier on the Mac versus a Windows machine since macOS includes the built-in Keychain Assistant.
Since the APNS certificate must be renewed annually, we recommend you create calendar reminders 45, 30, and 15 days before the expiration. The FileWave Admin's Dashboard can also be configured to give you an alert of expiration via email.
When renewing your APNS certificate, be sure to use the same Apple ID that was used to originally create it. Creating a new certificate, or creating a certificate with a different Apple ID, rather than renewing the existing one used by FileWave, will break MDM communication with your mobile devices and require un-enrollment and re-enrollment. Take the following precaution to prevent this.
- Click the "*Info"* icon for your APNS certificate in your Apple Push Certificates Portal account and enter the DNS name for your server in the *Notes* field. This lets you know which server it is intended for.
- Verify that the topic for the APNS certificate you’re trying to renew matches the topic listed in the *"Mobile"* tab of the FileWave preferences. If they don’t match then you’re renewing the wrong APNS certificate and you run the risk of preventing Apple device management.
## Apple Automated Device Enrollment (ADE)
---
After importing the APNs certificate, use Apple Automated Device Enrollment to automate enrollment for supported macOS, iOS, iPadOS, visionOS, and tvOS devices.
### Add new MDM Server to Apple
1. Log into [Apple School Manager](https://school.apple.com) (ASM) or [Apple Business Manager](https://business.apple.com) (ABM) using your organization's Administrator account.
2. Navigate to *"Settings"* in the lower left-hand corner.
3. Select *"Device Management Settings"* from the middle pane.
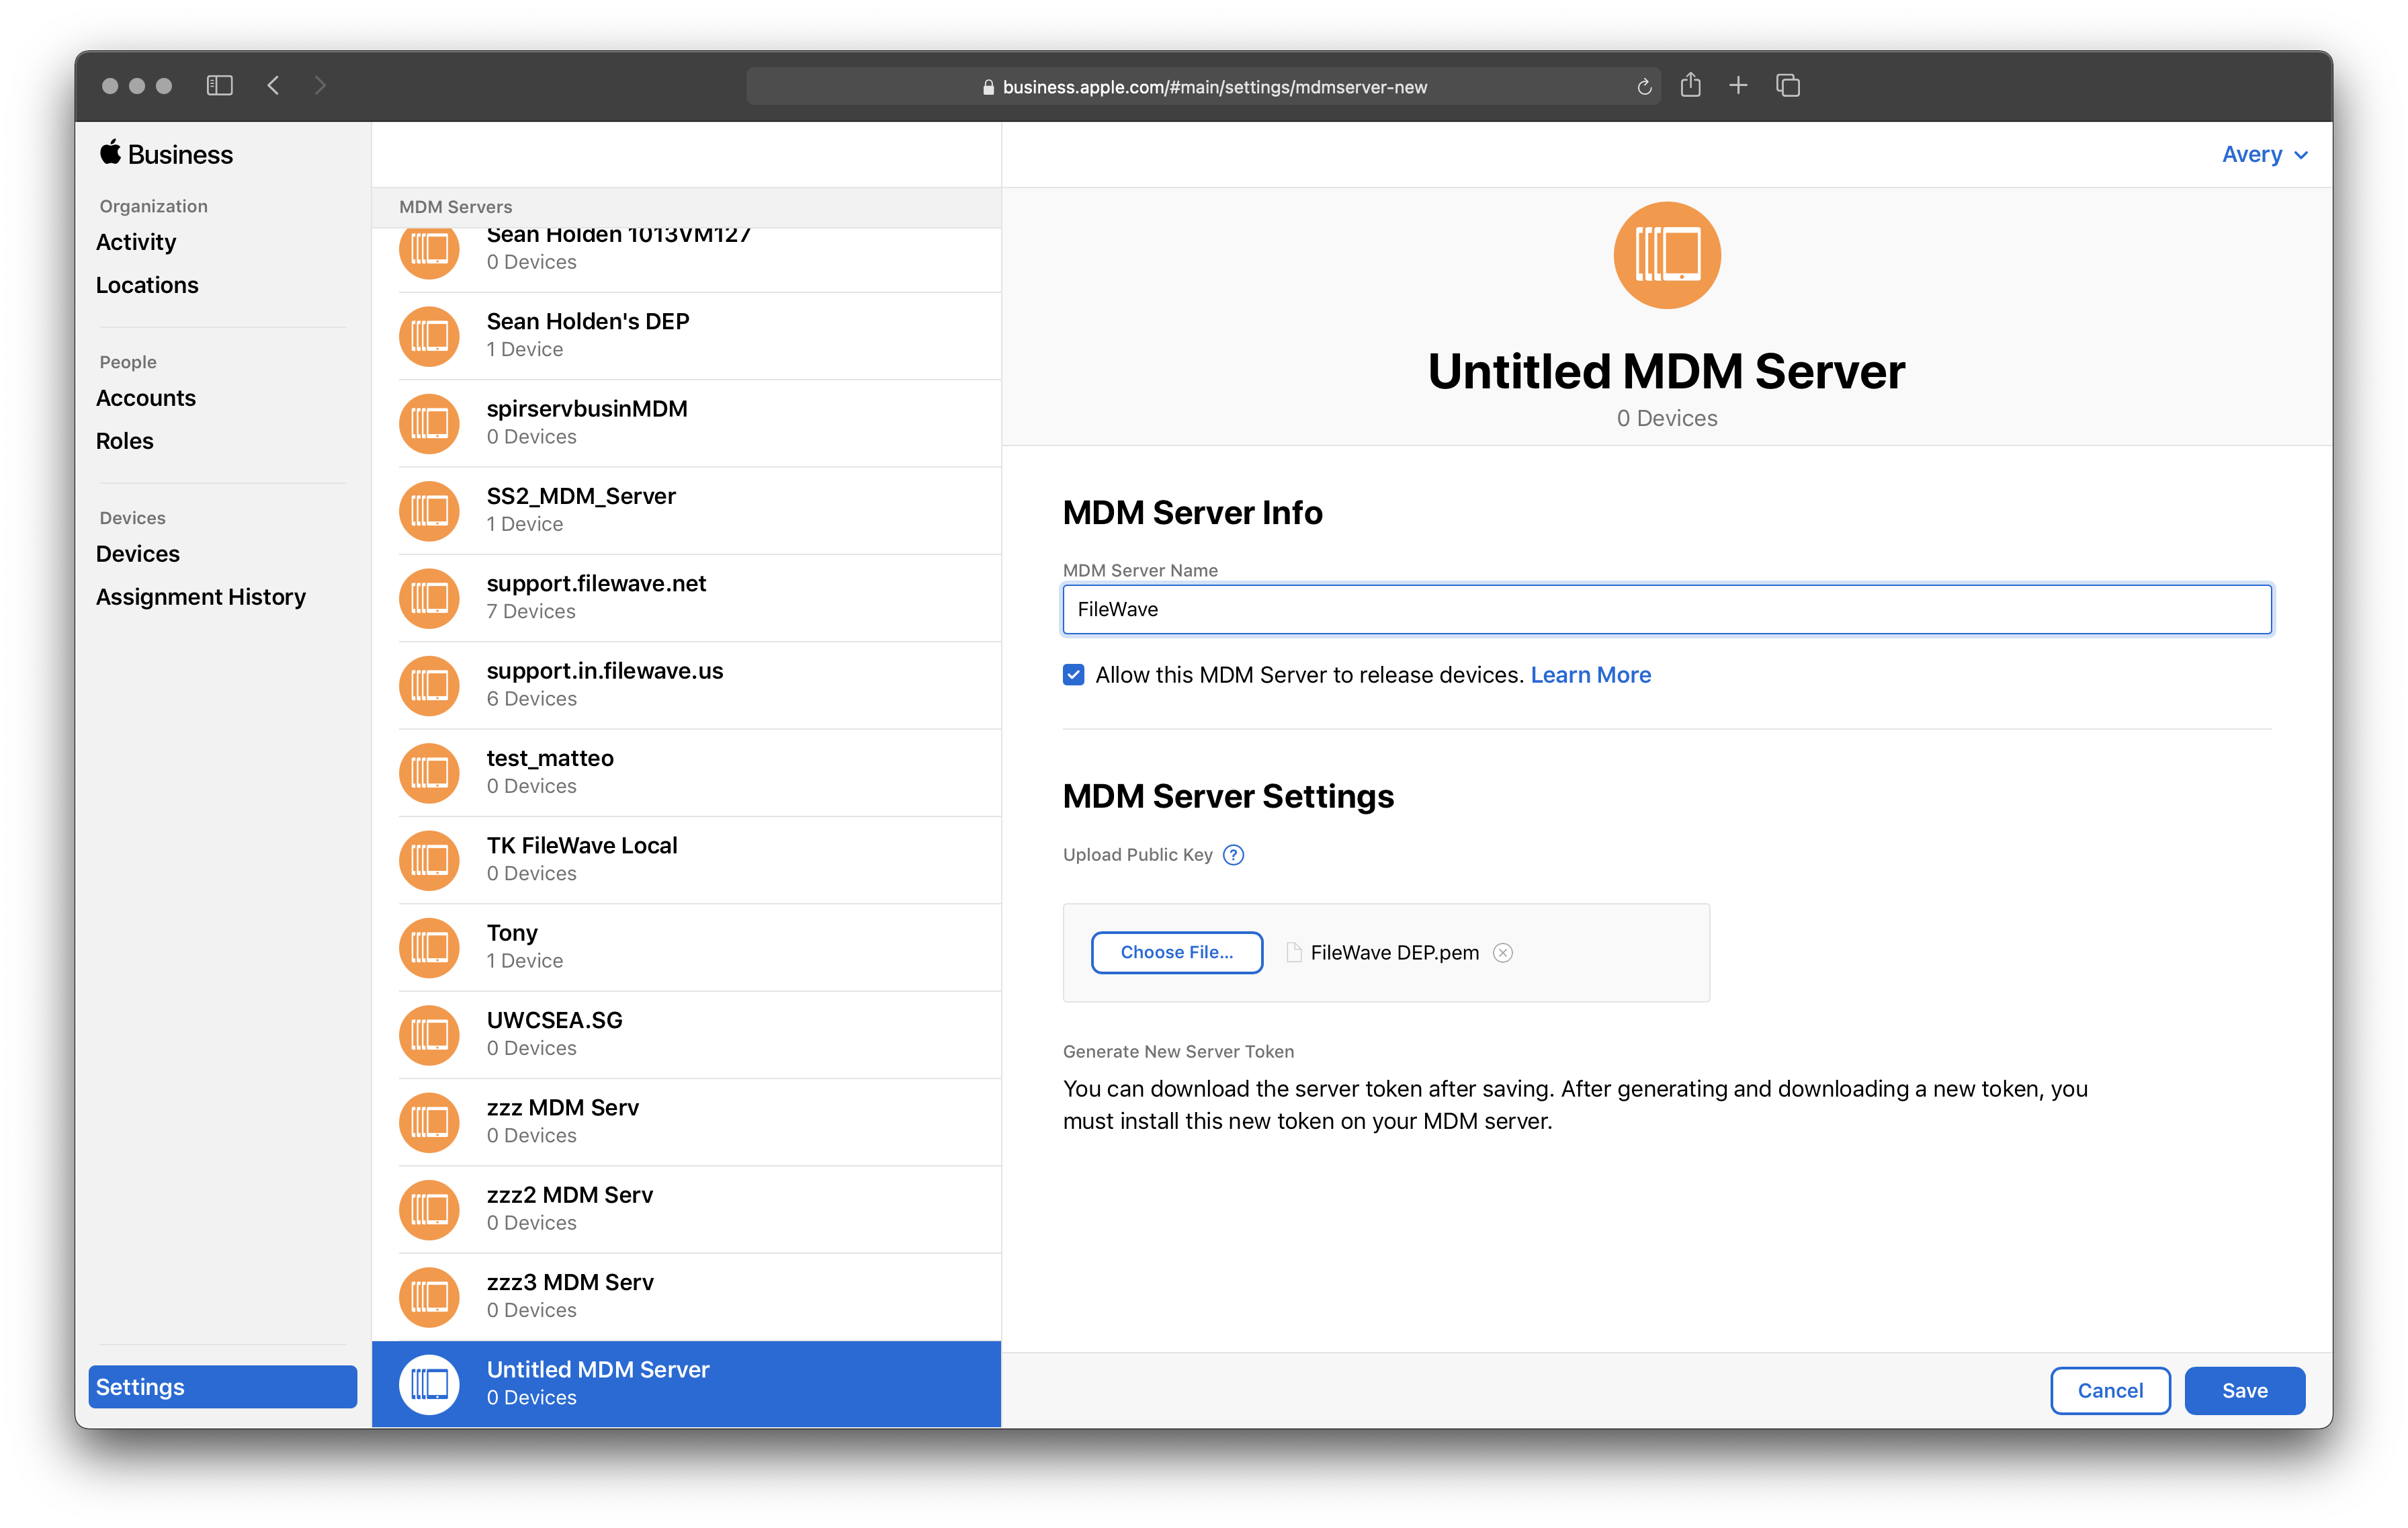
4. Click *"Add MDM Server"* from the right pane.
5. Change the *"MDM Server Name"* to *"FileWave"* or something distinguishable.
6. Navigate to *"FileWave Admin > Preferences > VPP & ADE"*, click *"Download Certificate"* from the bottom *"Device Enrollment Program"* section, and authenticate.
7. Navigate back to ASM/ABM and *"Choose File"* to select the recently downloaded *"FileWave ADE.pem".*
8. Click *"Save"*.
### **Sync Apple ADE within FileWave**
1. After creating new MDM Server, select the new server from the list.
2. Click *"Download Token"* and accept the warning message.
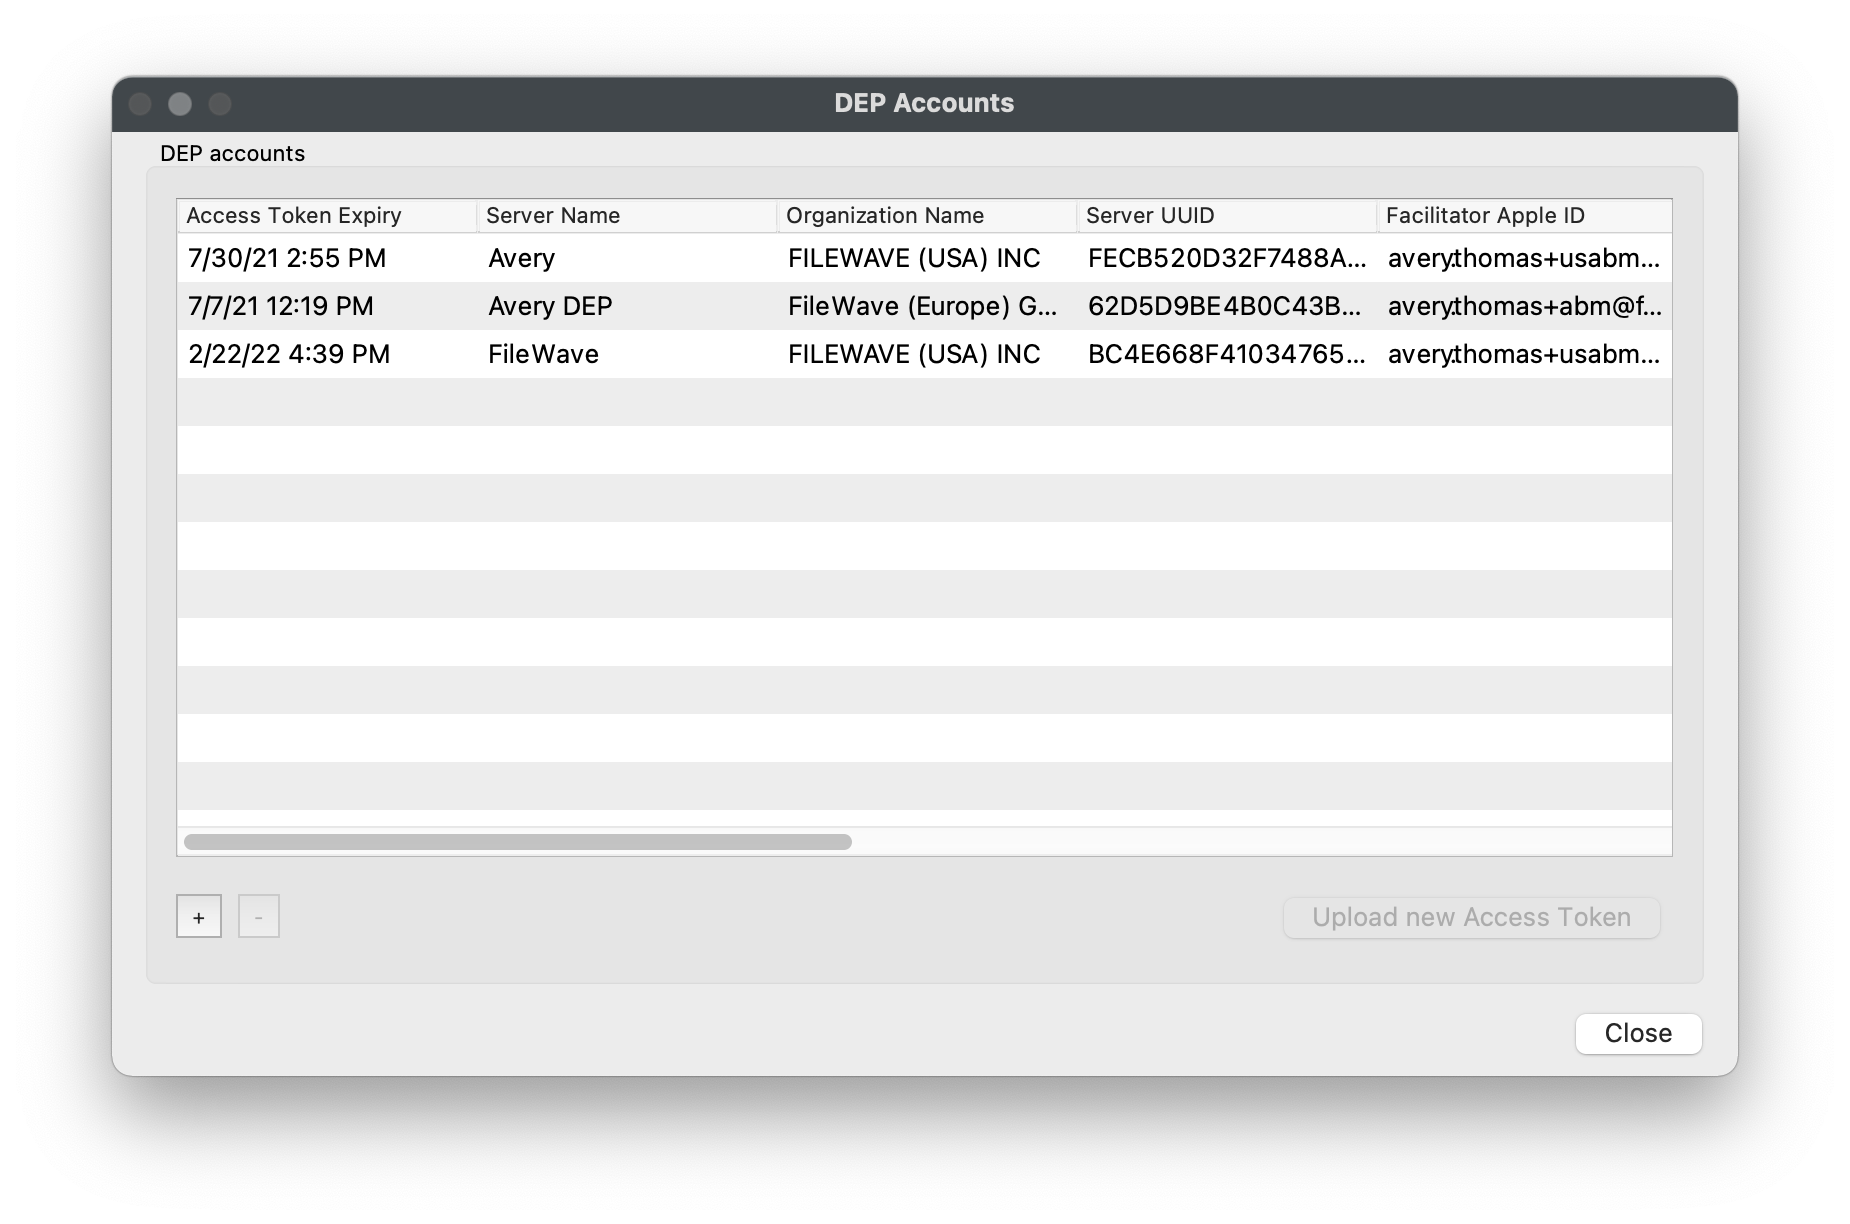
3. Navigate to *"FileWave Admin > Preferences > VPP & ADE"*, click *"Configure accounts"* from the bottom *"Device Enrollment Program"* section, and authenticate.
4. Click the "\[+\]" button in the lower left-hand corner and select the recently downloaded "FileWave\_Token\_XXXX-XX-XXTXX-XX-XXZ\_smime.p7m" token file.
5. If data is populated in all of the columns of the *"ADE Accounts"* window, the token import was successful.
### Assign devices from ASM/ABM to FileWave MDM Server
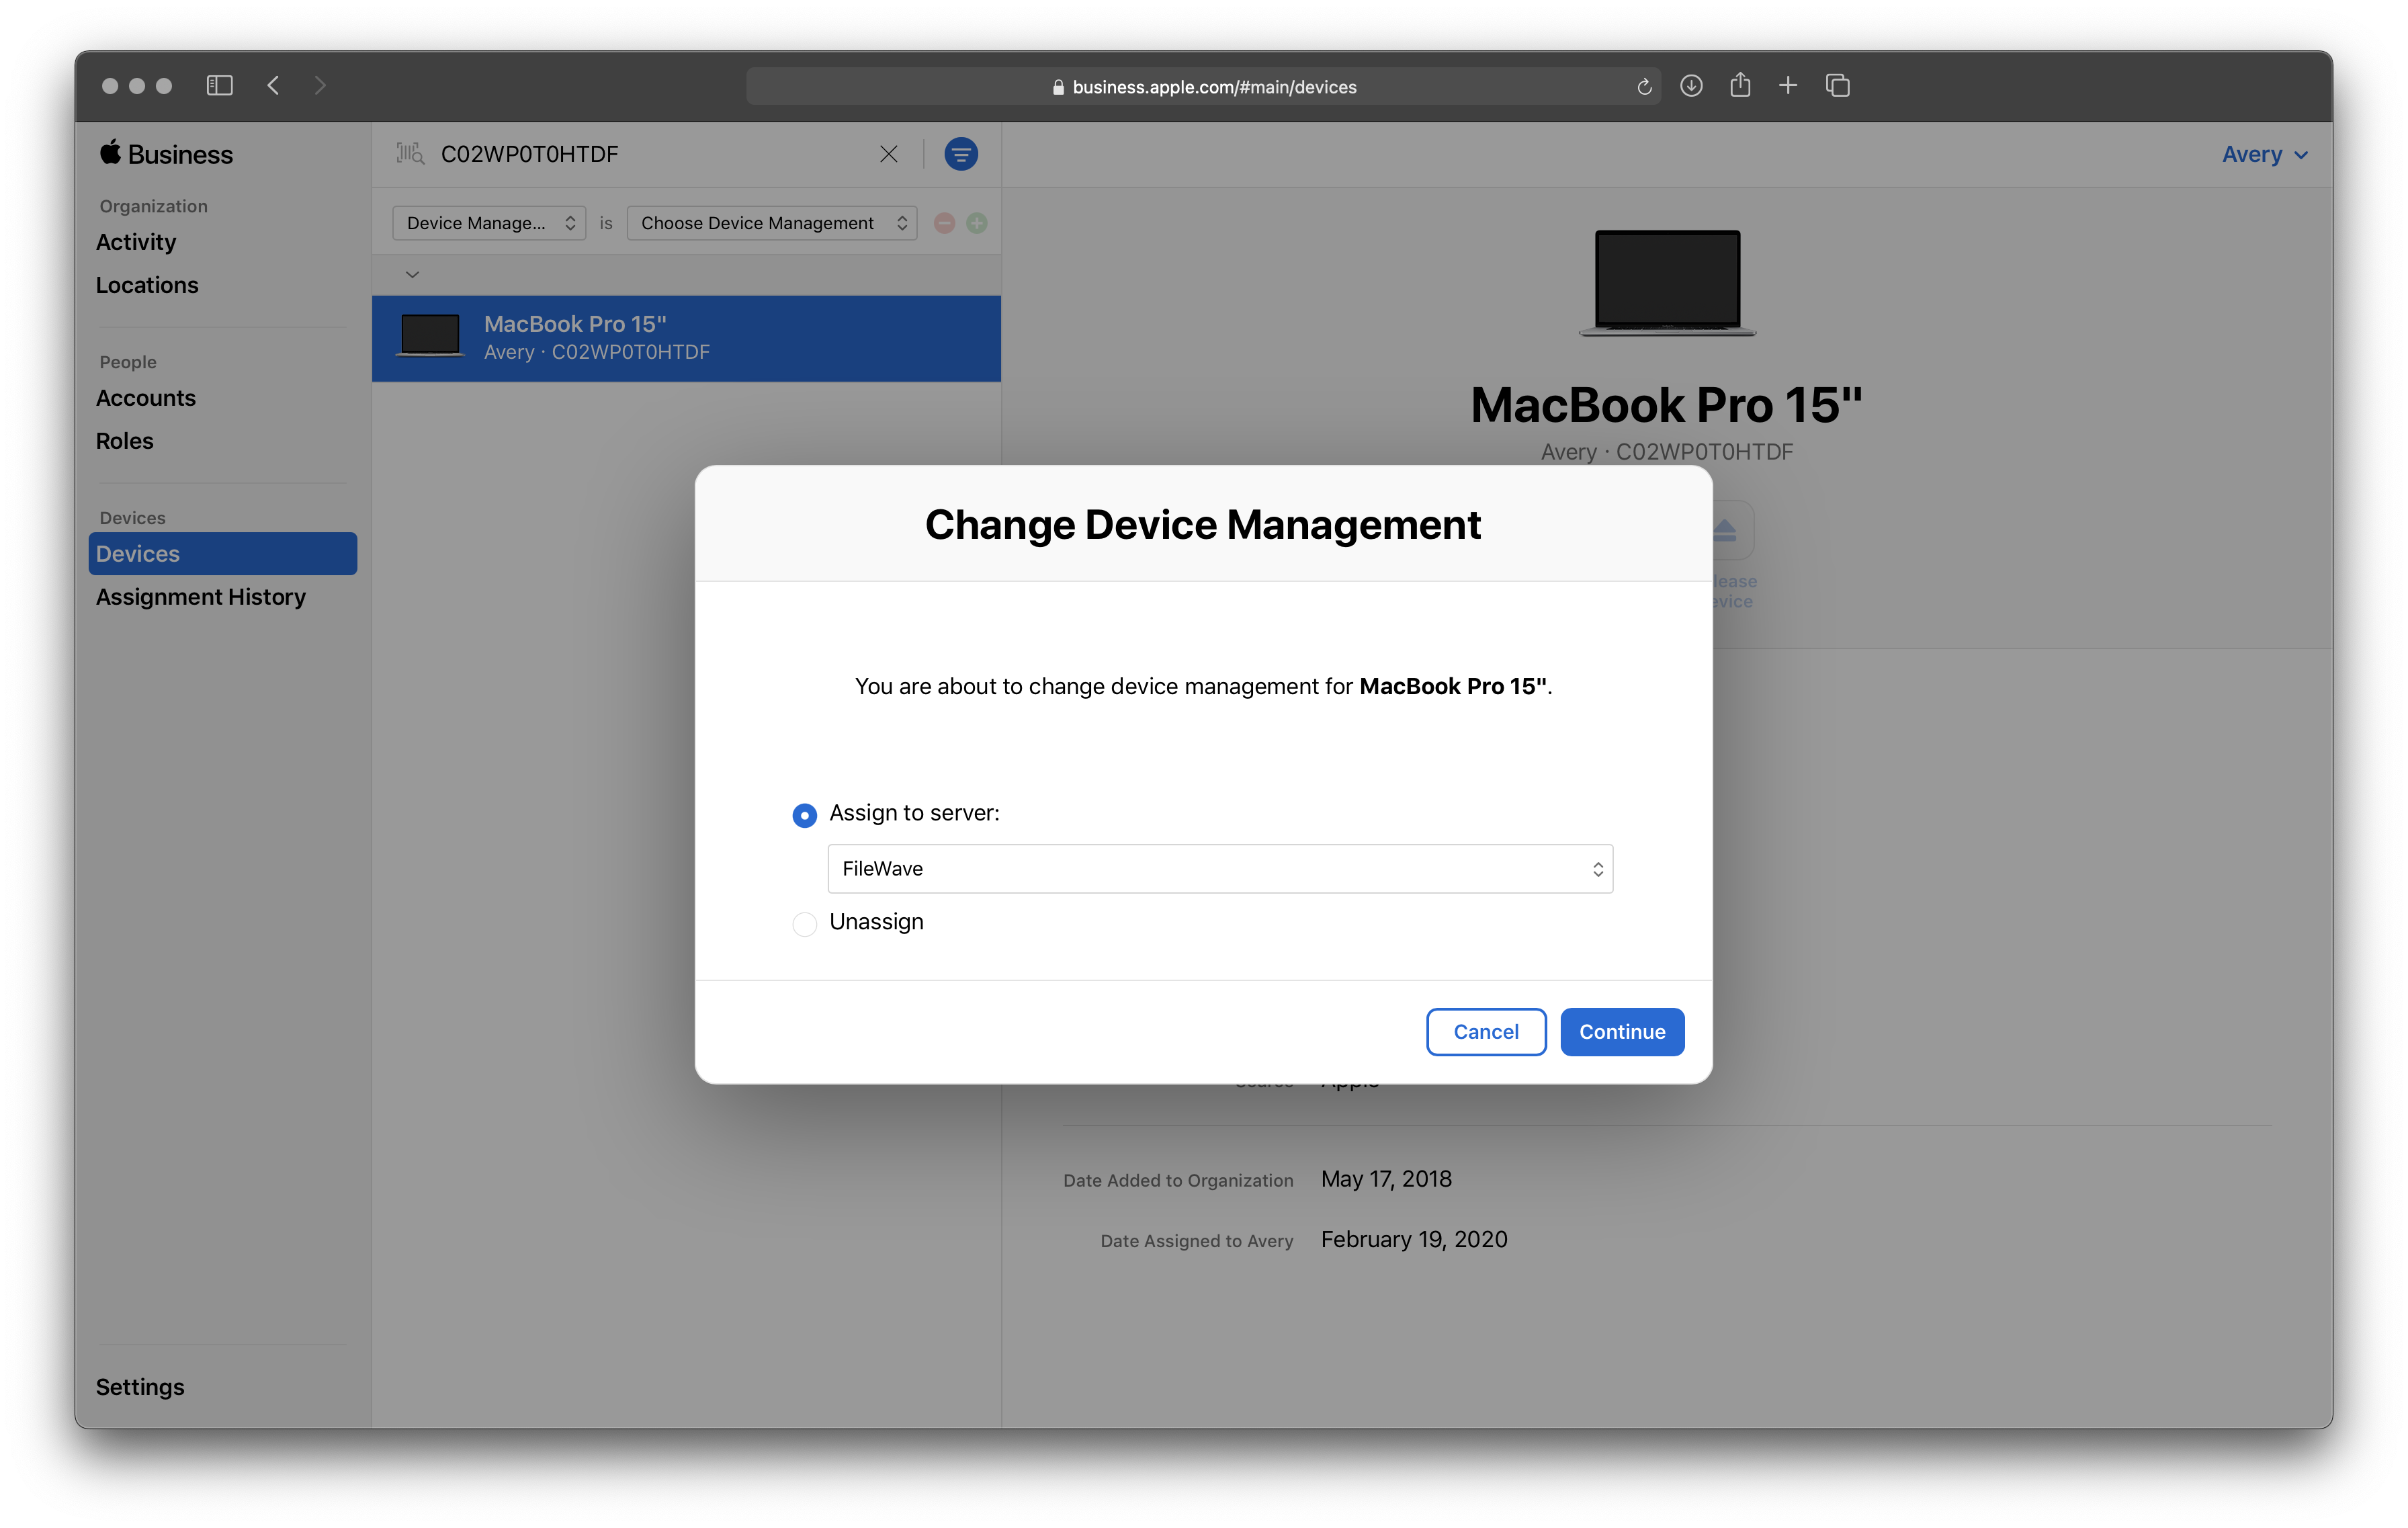
1. Select *"Devices"* from the left-hand pane within ASM/ABM.
2. Search for devices by Serial Number (comma separated) or use the Filter icon to choose all *"Unassigned"* devices.
3. With the device(s) selected, click *"Edit Device Management"* and select the newly created FileWave MDM Server.
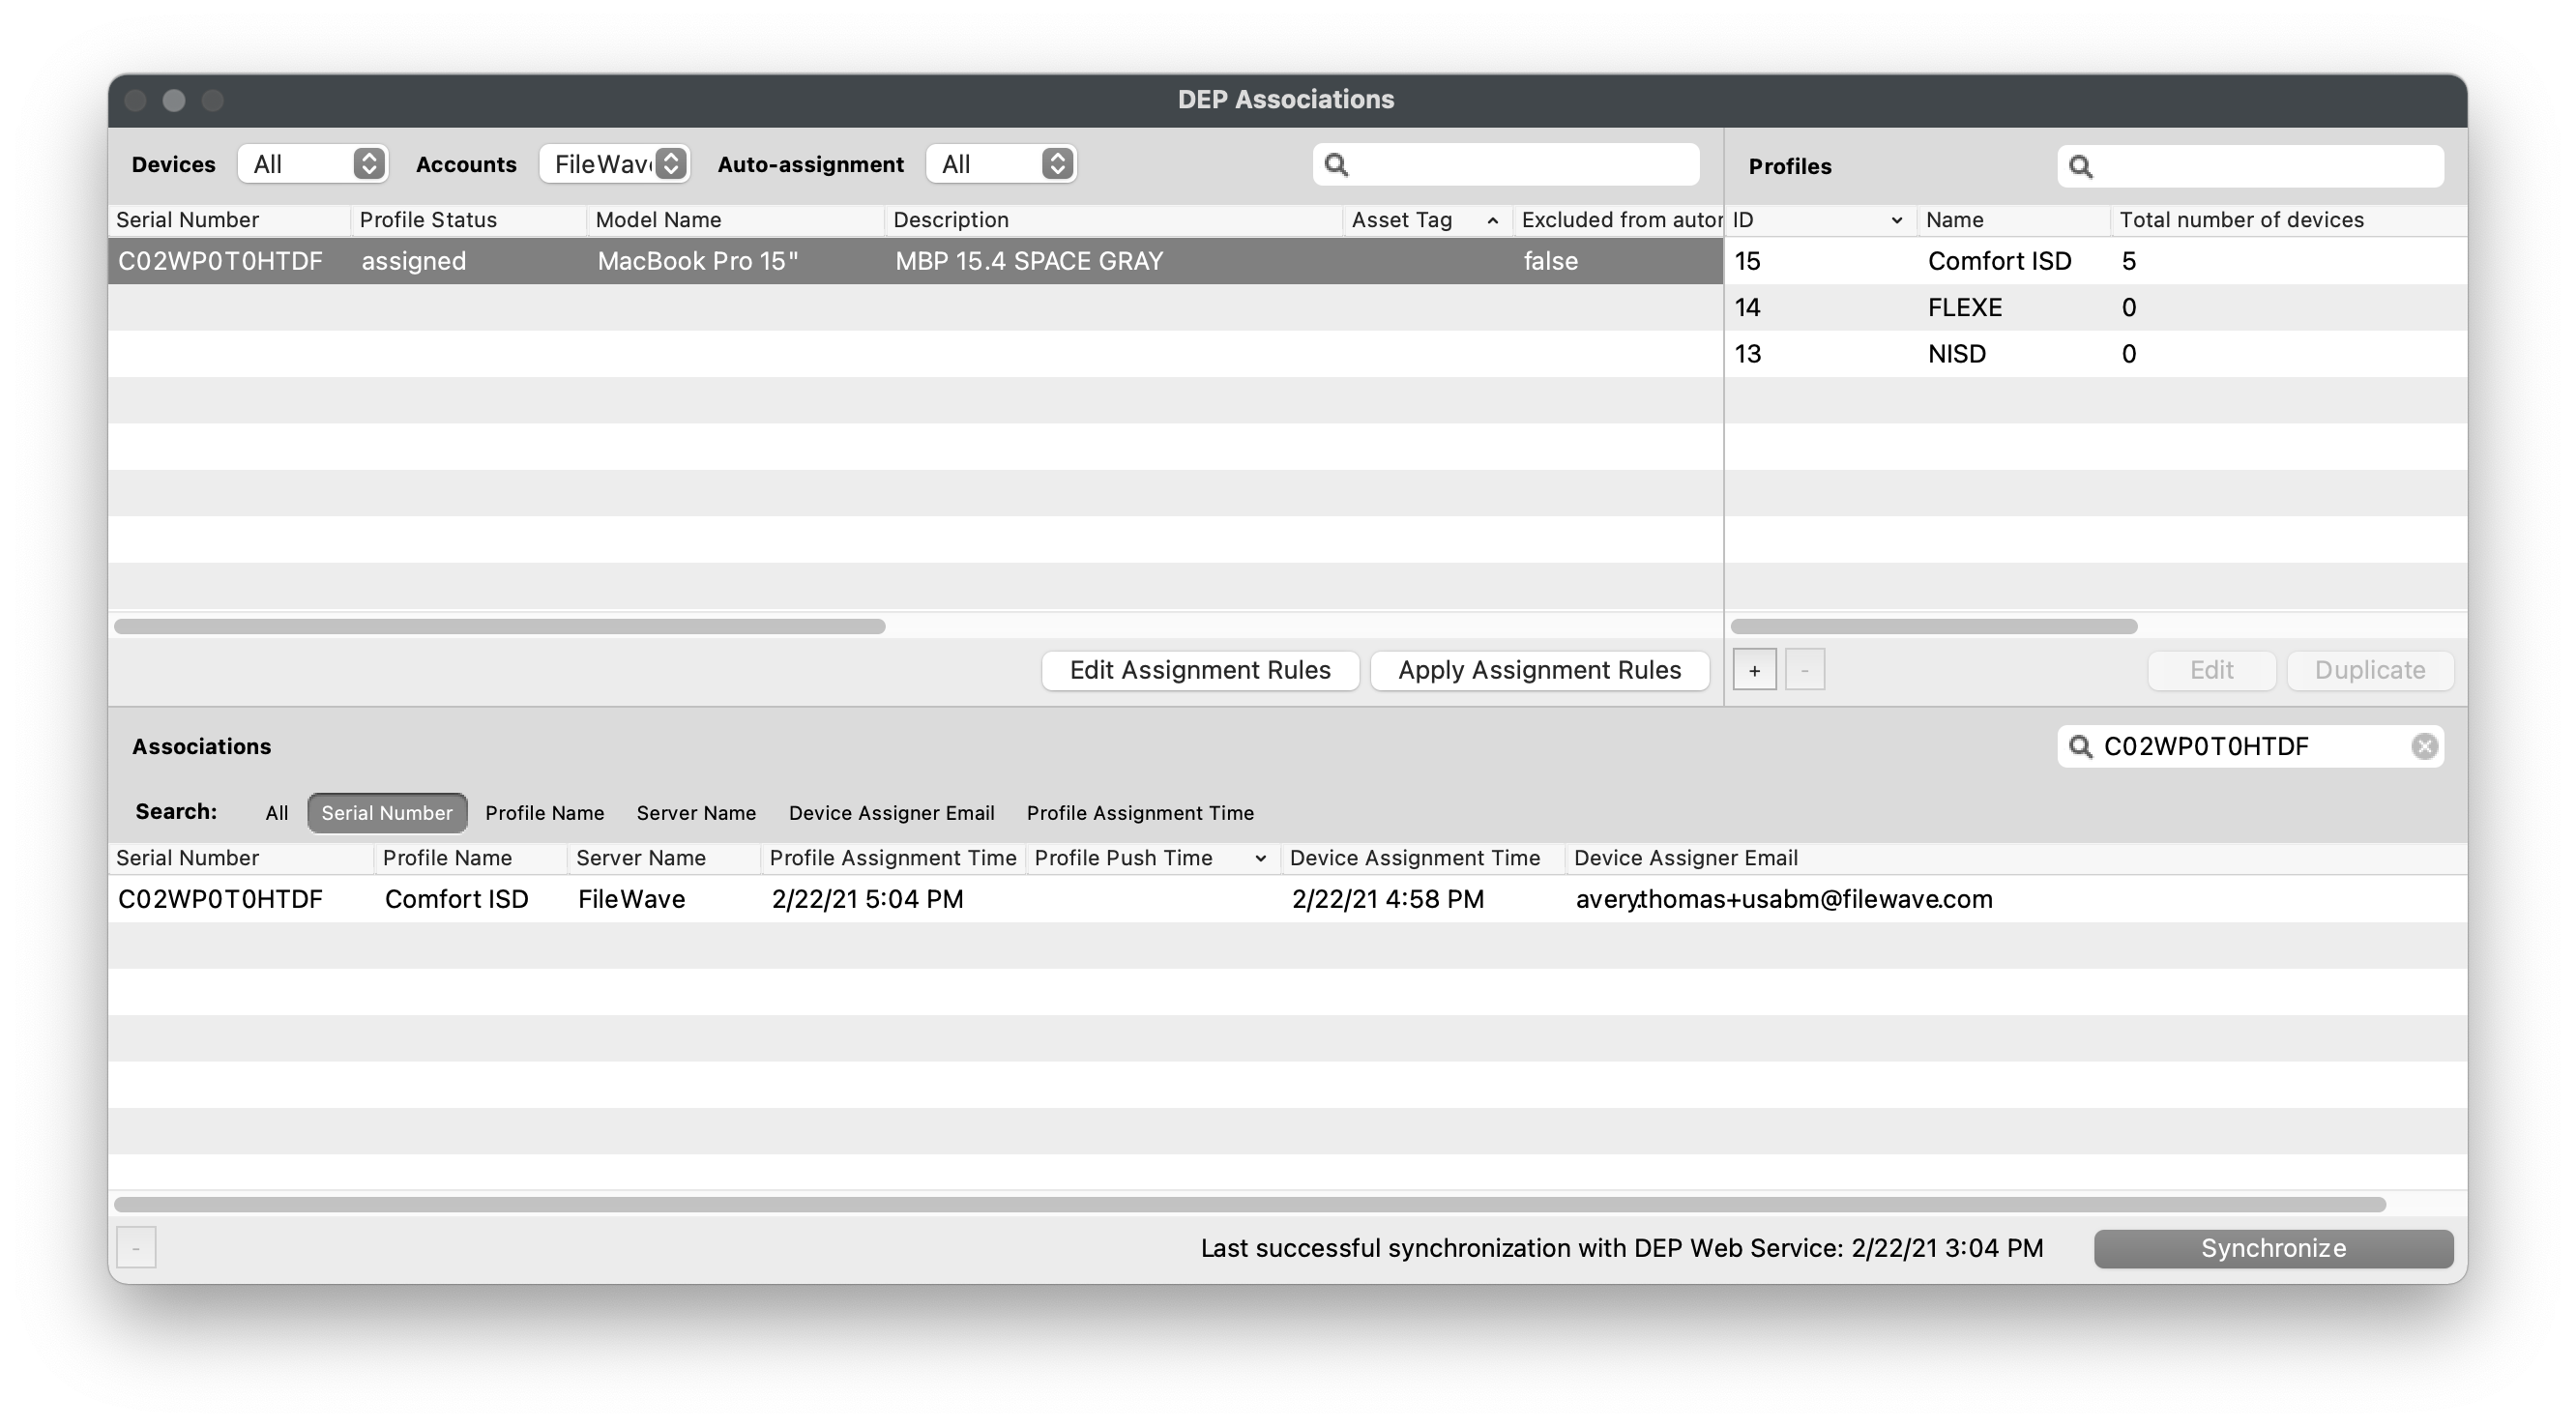
4. Navigate to *"FileWave Admin > Assistants > ADE Association Management"*
5. Hold down the Option or Alt key on your keyboard and click the *"Synchronize (full sync)"* button in the lower right-hand corner.
6. You should now see all devices assigned in Step 3 within FileWave's ADE Associations window.
### Create ADE Profile and enroll Apple Devices
- These workflows will be covered in the [ADE Enrollment](https://kb.filewave.com/books/evaluation-guide/page/apple-ade-enrollment "Apple ADE Enrollment") section.
## Apple Volume Purchase Program (VPP)
---
The Apple Volume Purchase Program (VPP) is integrated into Apple School Manager and Apple Business Manager and allows you to purchase and deploy applications from the App Store. When purchasing (free or paid) VPP licenses you will need to assign the licenses to a "Location" within ASM/ABM and each "Location" within ASM/ABM corresponds with a VPP Token. You will import each VPP Token into FileWave to sync the licenses assigned to the particular "Location".
If you are just starting out with ASM/ABM, you'll most likely just have one "Location" and therefore one VPP Token. If you are currently using a VPP Token in another MDM it is recommended to create a new "Location" for the evaluation of FileWave. This is recommended because importing a VPP Token that is used in another MDM will result in the automatic revoking of any deployed VPP licenses from that MDM. If you are not concerned with the licenses being revoked, please feel free to continue to import the existing VPP Token.
This section will not cover creating a new "Location" in ASM/ABM but more information can be found [here](https://support.apple.com/en-am/guide/apple-school-manager/tesfdbe2cb0d/web) from Apple School Manager User Guide or found [here](https://support.apple.com/en-am/guide/apple-business-manager/tesfdbe2cb0d/web) from Apple Business Manager User Guide.
### Download VPP Token from ASM/ABM
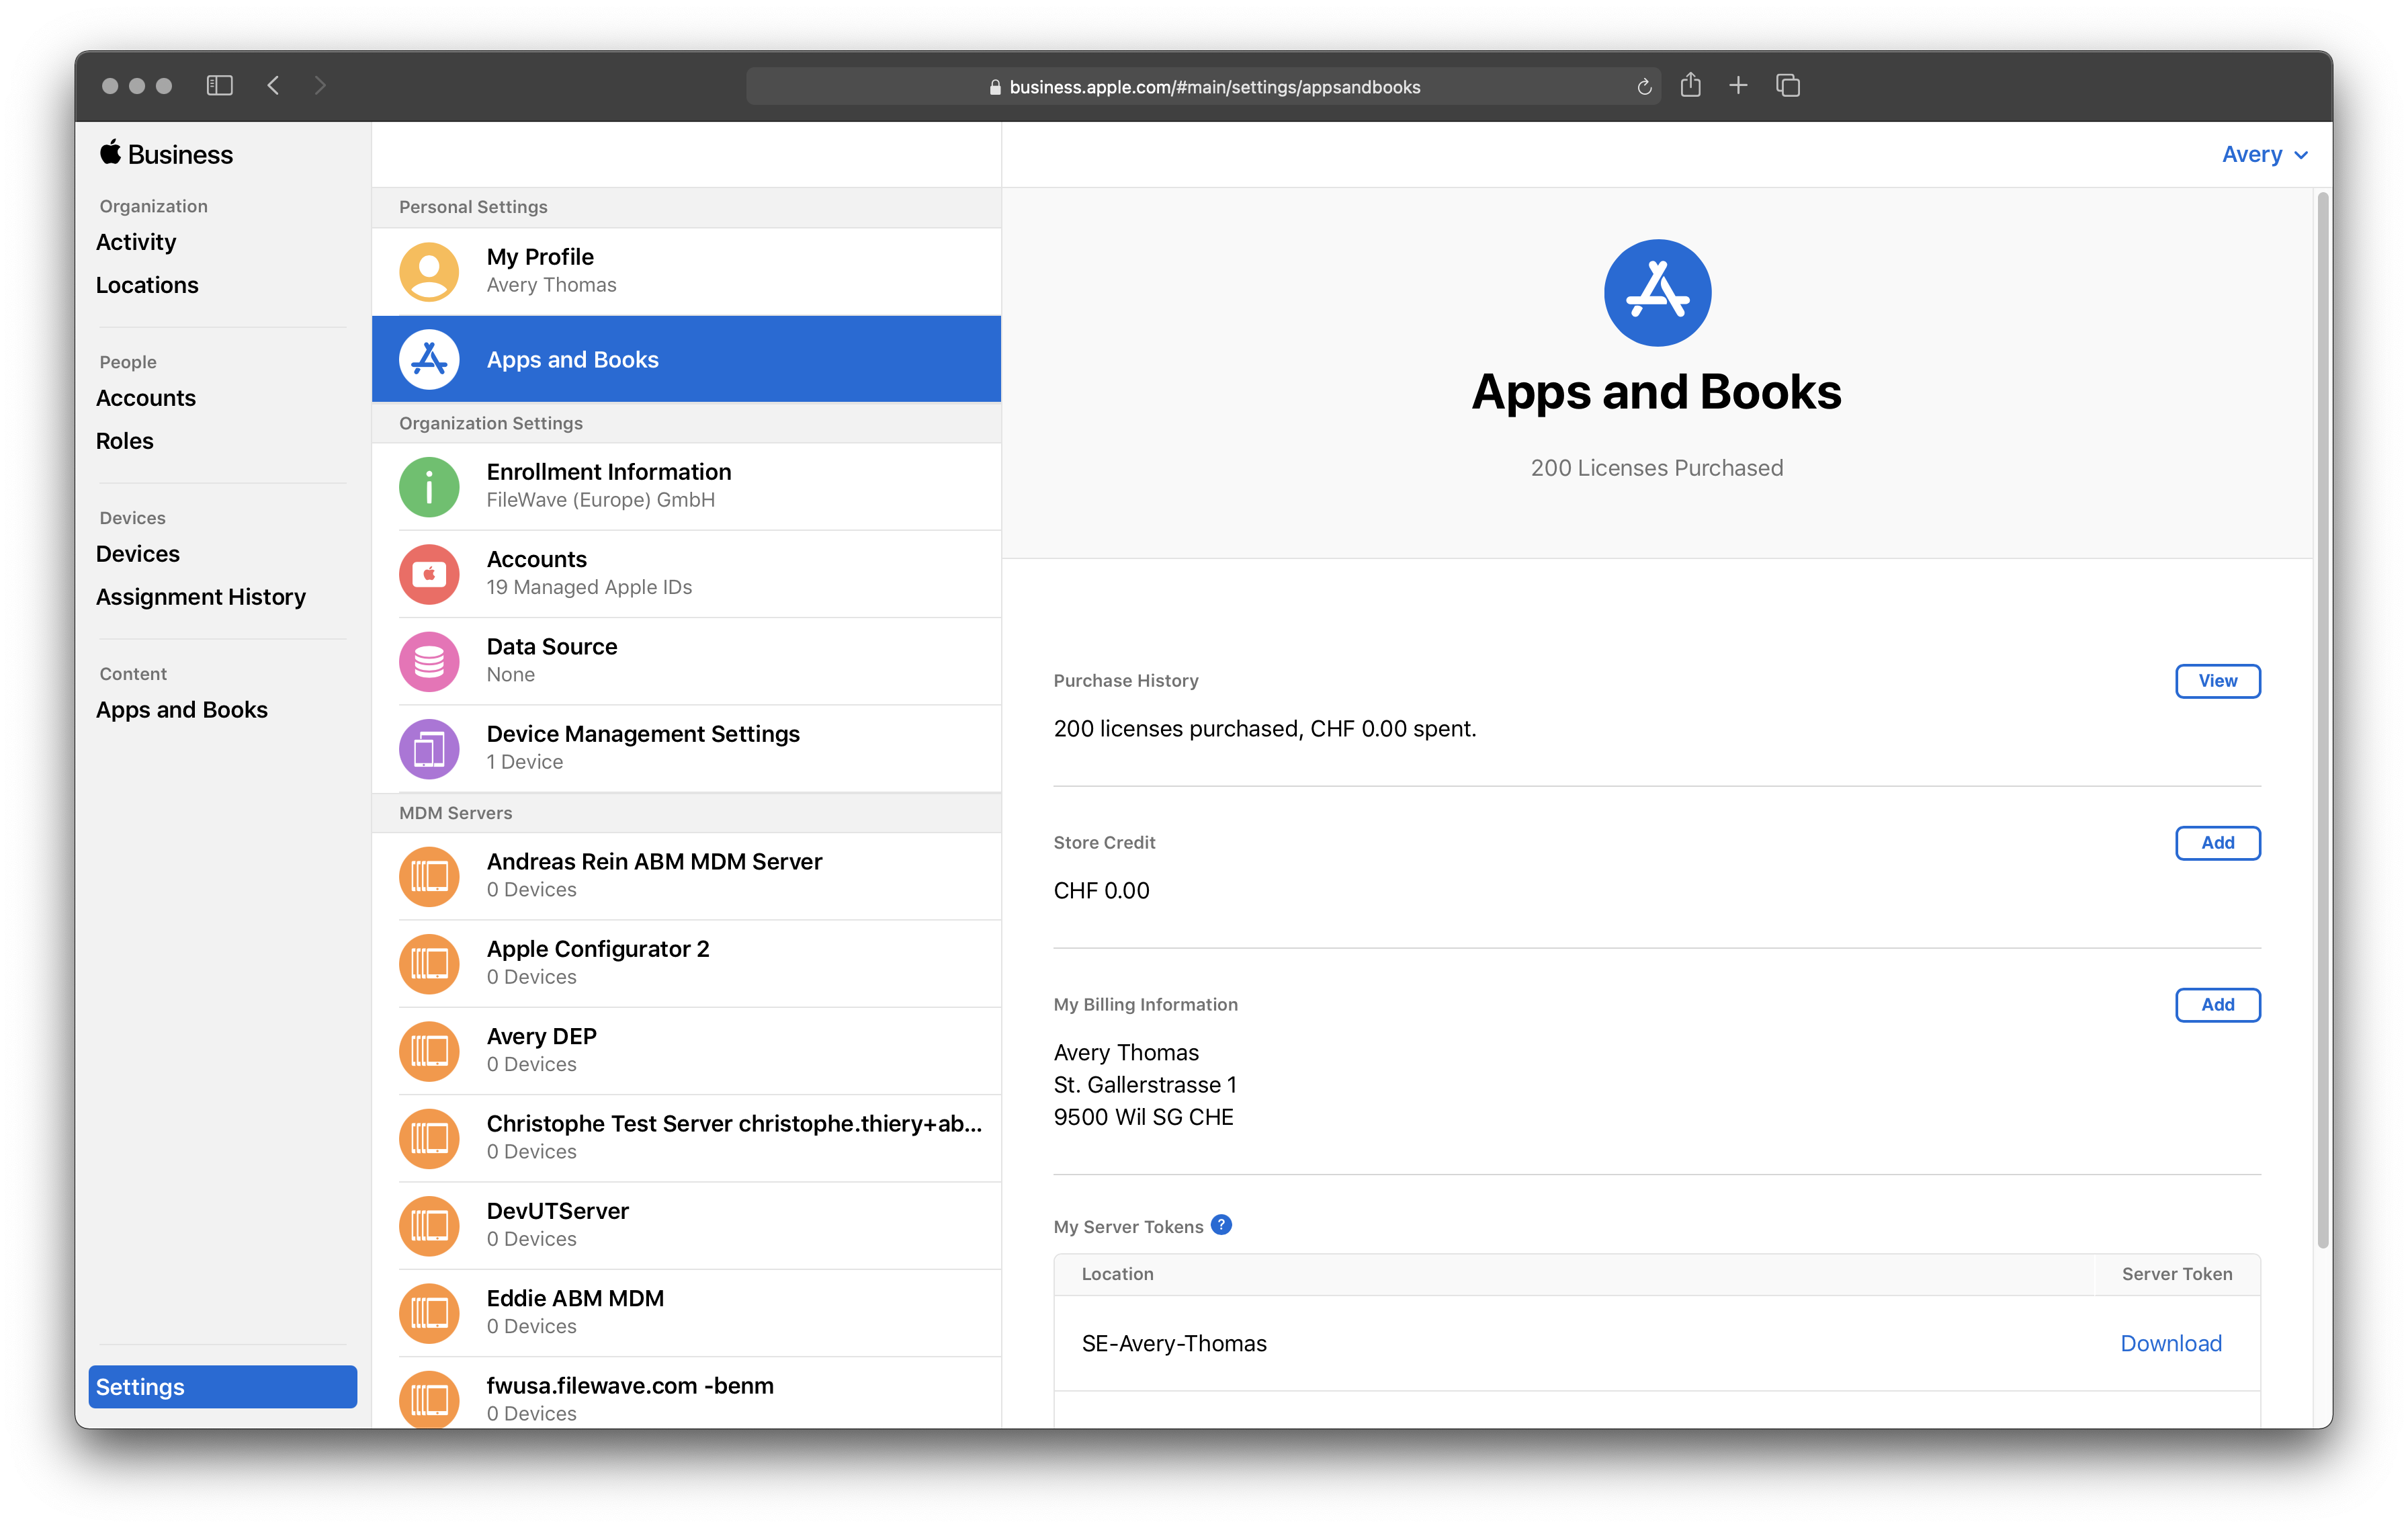
1. Log into [Apple School Manager](https://school.apple.com) (ASM) or [Apple Business Manager](https://business.apple.com) (ABM) using your organization's Administrator account.
2. Navigate to *"Preferences"* in the lower left-hand corner.
3. Select *"Payments and Billing"* from the middle pane.
4. Find the desired *"Location"* name from the *"My Server Tokens"* section.
5. Click *"Download"*.
### Import VPP Token into FileWave Admin
1. Navigate to *"FileWave Admin > Preferences > VPP & ADE",* click *"Configure tokens"* from the top *"Volume Purchase Program"* section, and authenticate.
2. Click the "\[+\]" button and name the Token. This name is only used to distinguish the VPP Tokens within FileWave.
3. Optionally, fill out the *"Department"*, *"Owner"*, and *"Owner Email"* fields.
4. Click *"Import"* button and select the recently download VPP Token *"sToken\_for\_XXXX.vpptoken"*.
5. The VPP Token should now be visible in the *"Edit Apps and Books server tokens"* window and ready for use.
### VPP Token Permission
If you do not see the added VPP Token this is because your FileWave Admin account has not been granted permission to the VPP Token. Please consult the *"*[*Allow new users to access existing VPP Tokens*](https://kb.filewave.com/books/evaluation-guide/page/filewave-central-preferences "FileWave Central Preferences")*"* section to grant permission to the VPP Token.
If you receive a message about the VPP Token being owned by another VPP tool, please inform your FileWave SE and they can assist in taking ownership of the VPP Token. Taking ownership of the VPP Token will result in the revoking of any previously deployed VPP licenses from another MDM so please proceed with caution. If you want to avoid licenses being revoked, please create a new "Location" within ASM/ABM and purchase new license or assign existing license to the new "Location".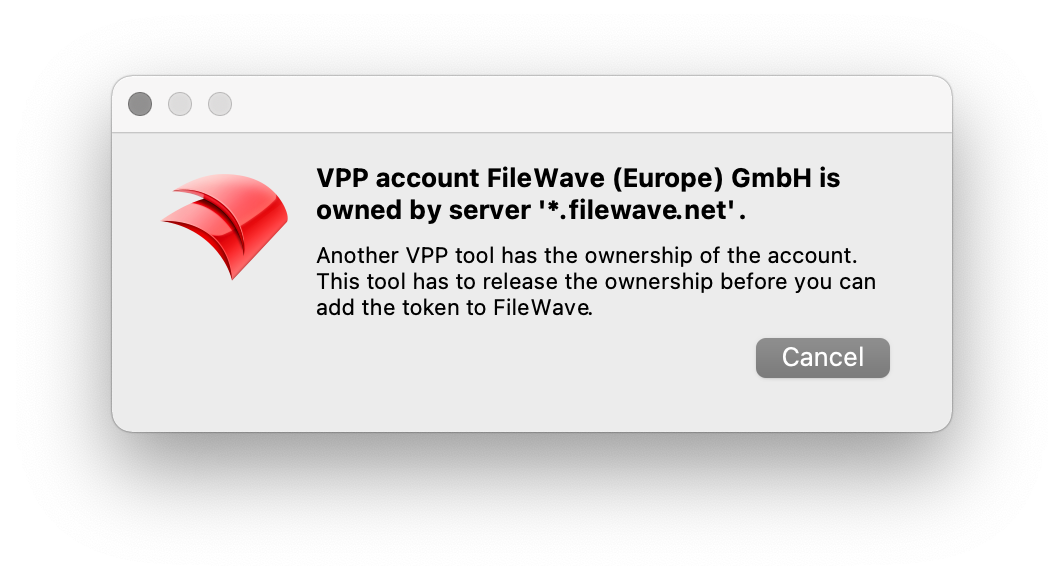
## Purchase VPP Licenses from ASM/ABM
---
Please consult [Apple School Manager User Guide](https://support.apple.com/en-am/guide/apple-school-manager/asmc21817890/web) or [Apple Business Manager User Guide](https://support.apple.com/hr-hr/guide/apple-business-manager/asmc21817890/web) for more in-depth information regarding purchasing Apps and Books.
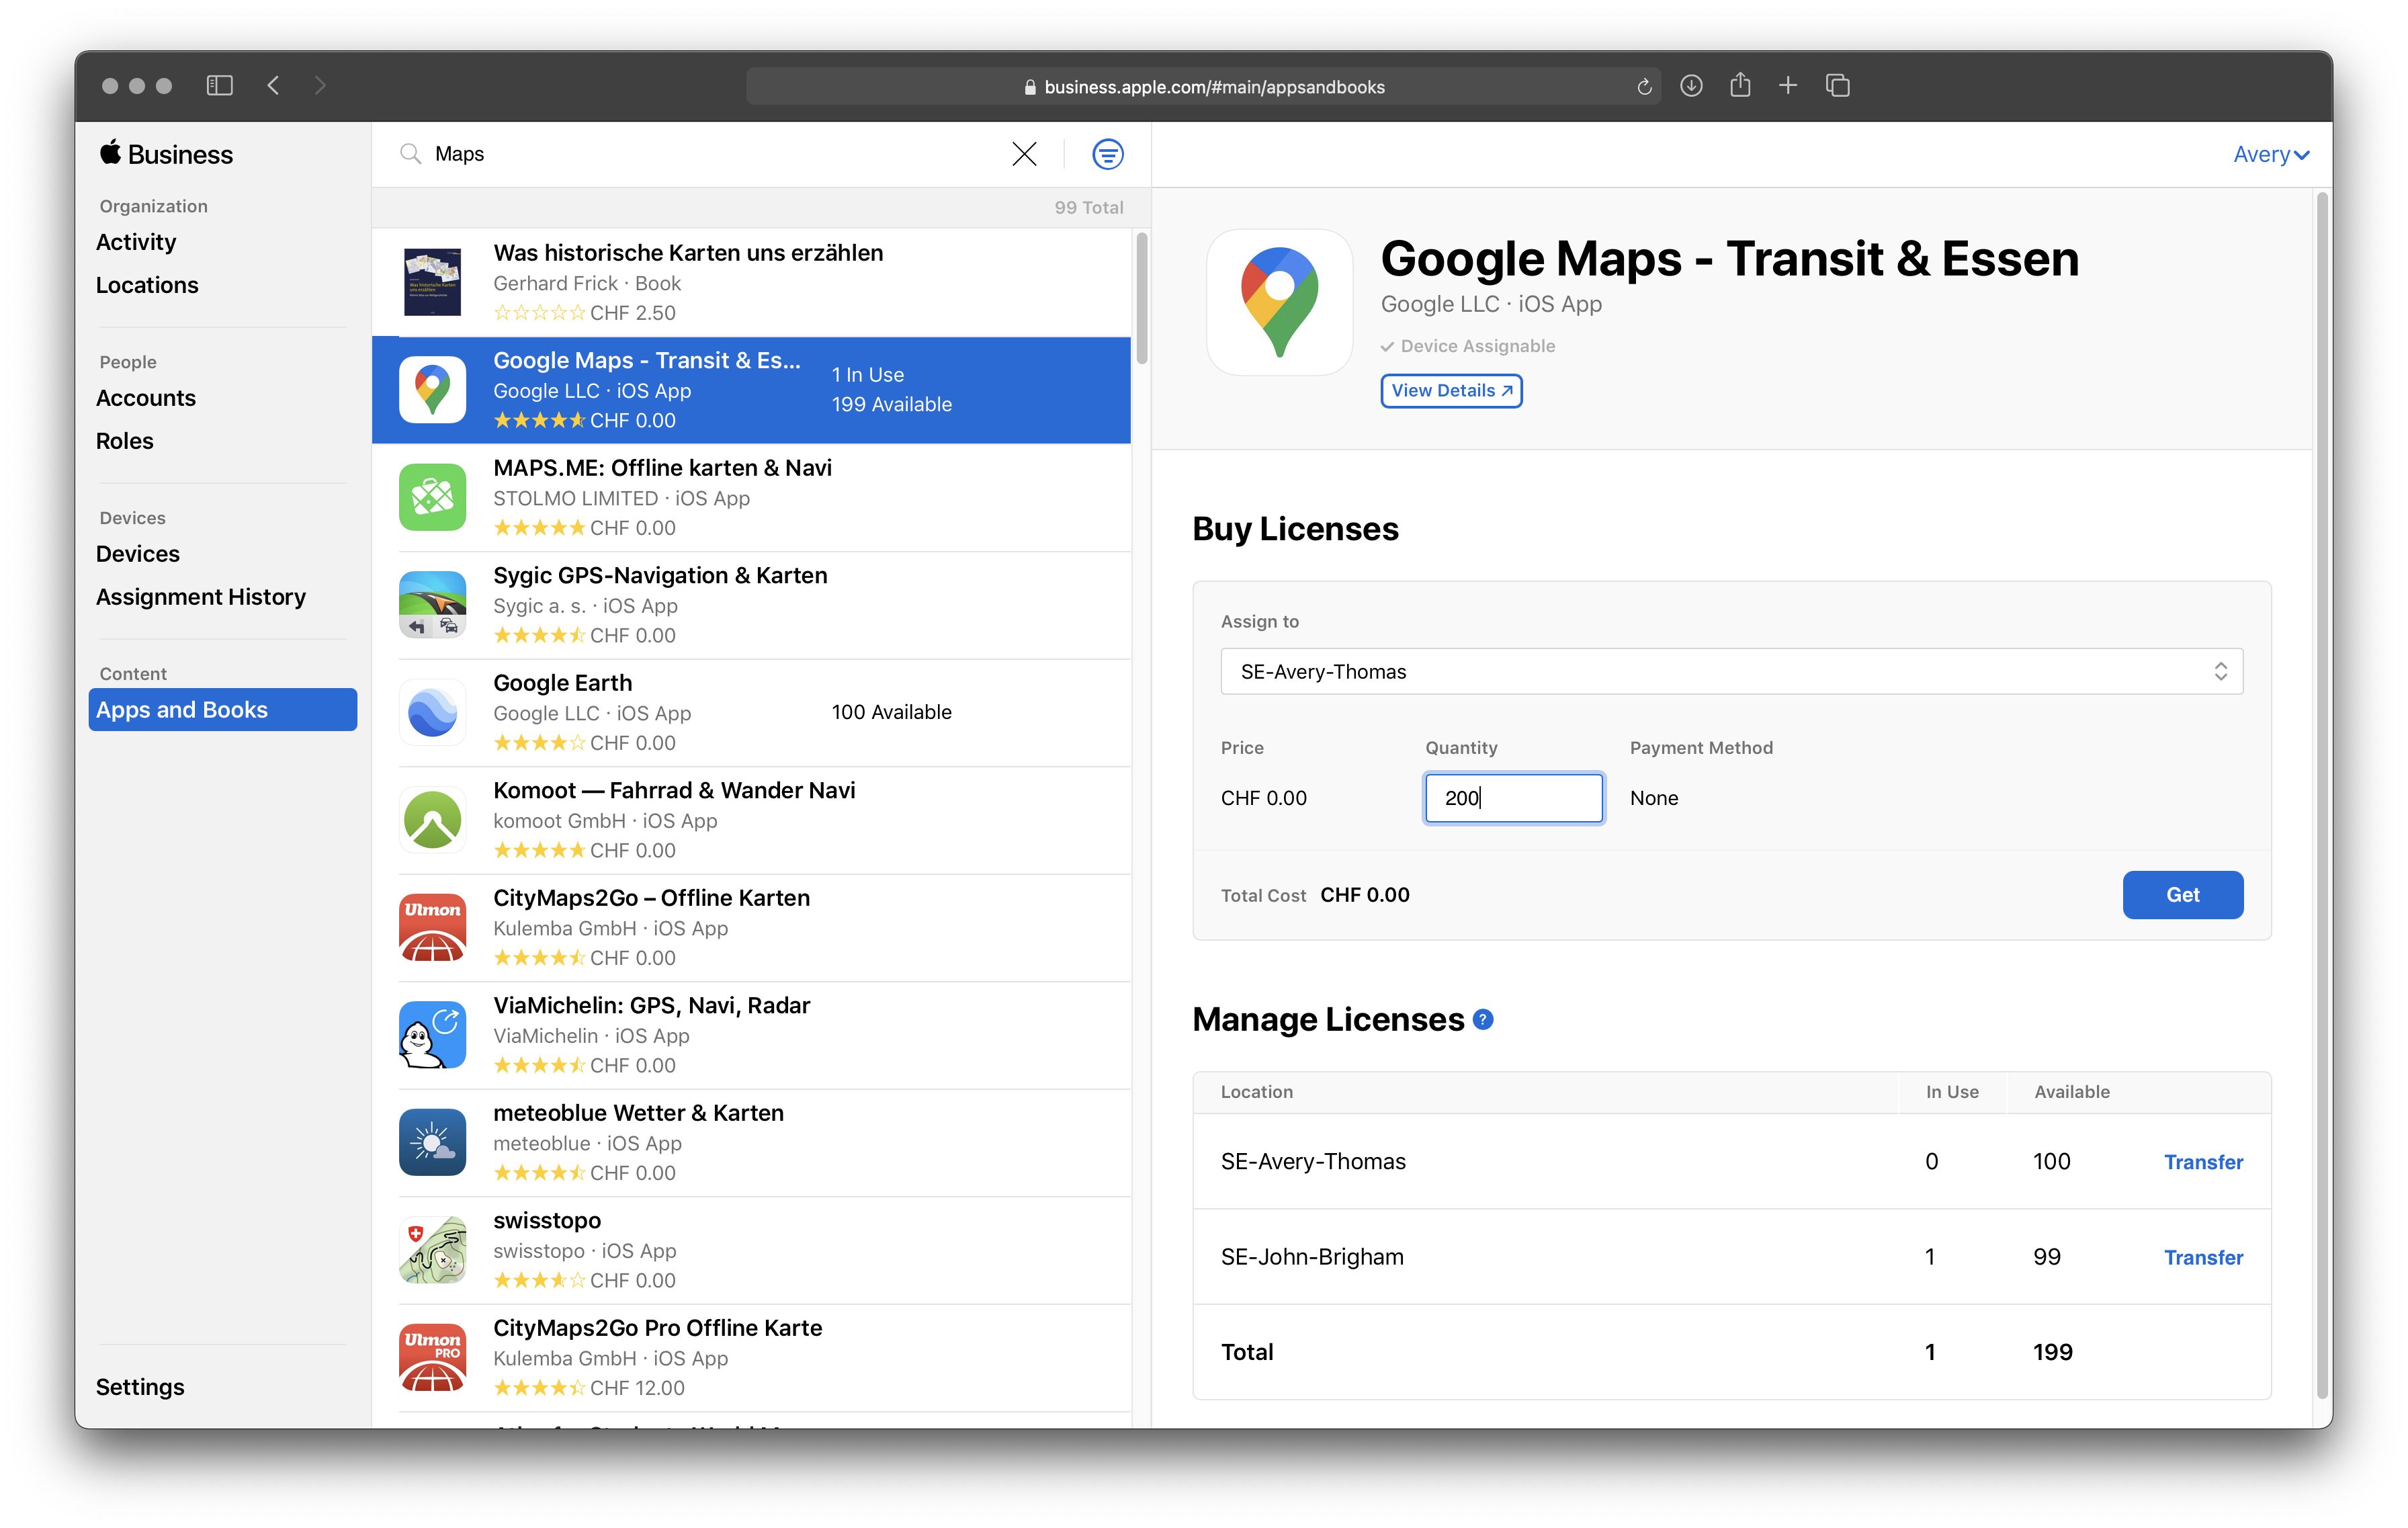
1. Log into [Apple School Manager](https://school.apple.com) (ASM) or [Apple Business Manager](https://business.apple.com) (ABM) using your organization's Administrator or Content Manager account.
2. Select *"Apps and Books"* from the left pane.
3. Search for the application name you wish to purchase and verify its intended platform (iOS App vs. macOS App).
4. Select the desired "Location" from the *"Assign to"* drop-down menu.
5. Specify the quantity of licenses you'd like to purchase.
1. Please enter a reasonable amount of licenses to cover your future device population but not too many (100,000+) as it may slow down the VPP sync process.
6. Click *"Get"* button to complete your purchase.
7. Licenses will usually be available within 5 minutes of purchase and you will be emailed by Apple when your licenses are available.
## Sync VPP Licenses into FileWave
---
Now that we have at least one VPP Token imported into FileWave and licenses purchased, we can sync VPP within FileWave and automatically create Filesets for each VPP application.
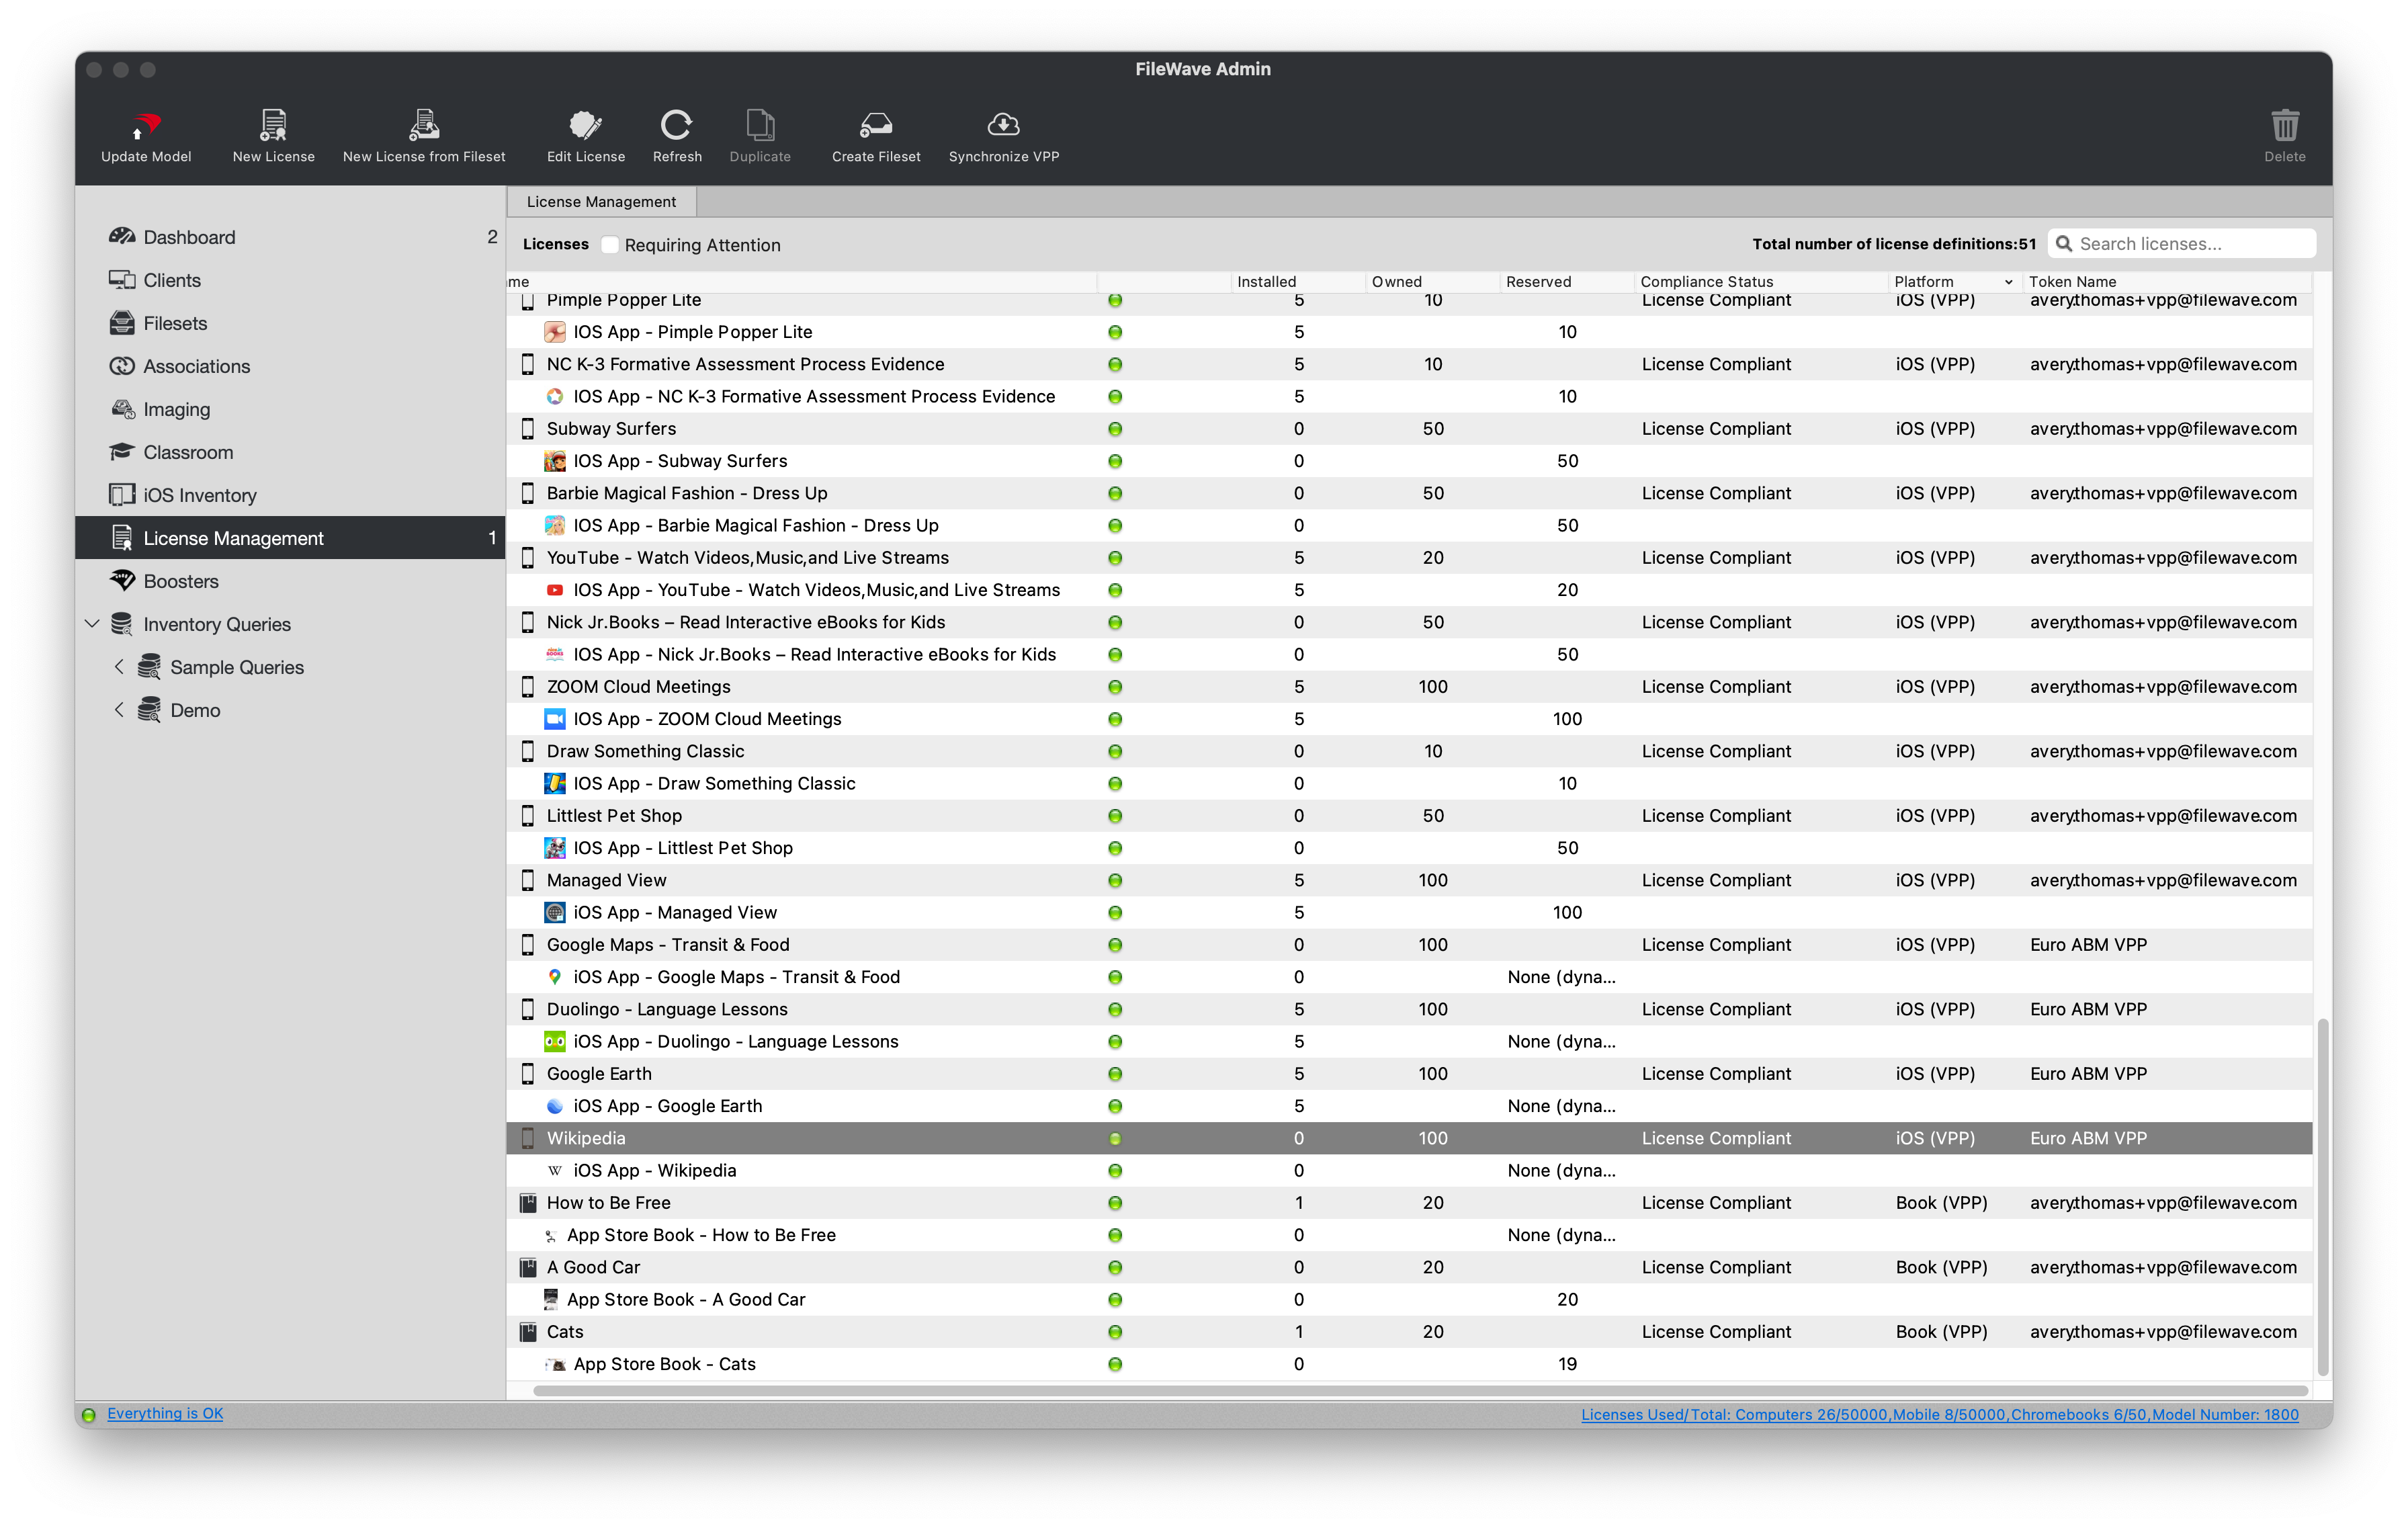
1. Open FileWave Admin and navigate to *"License Management"* from the left pane.
2. Click the *"Synchronize VPP"* button in the black menu bar.
- FileWave syncs with VPP automatically every 5 minutes but this will force a VPP synchronization and "Refreshes" the view.
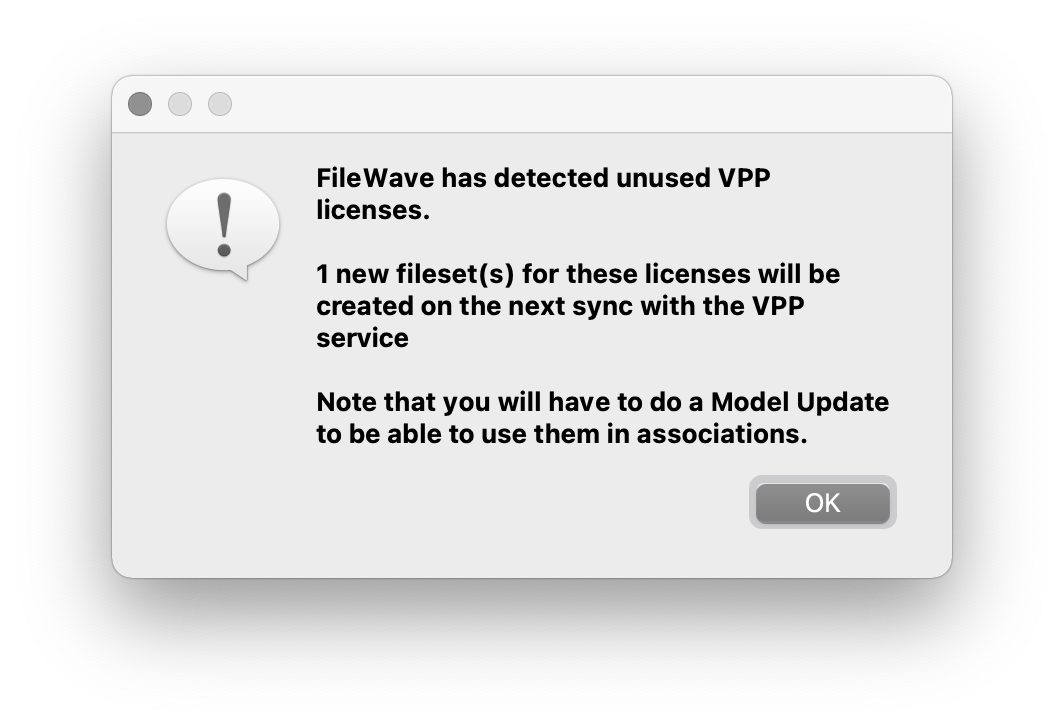
3. You should receive a pop up message asking if you'd like to automatically create Filesets for your VPP applications. Click *"OK"*.
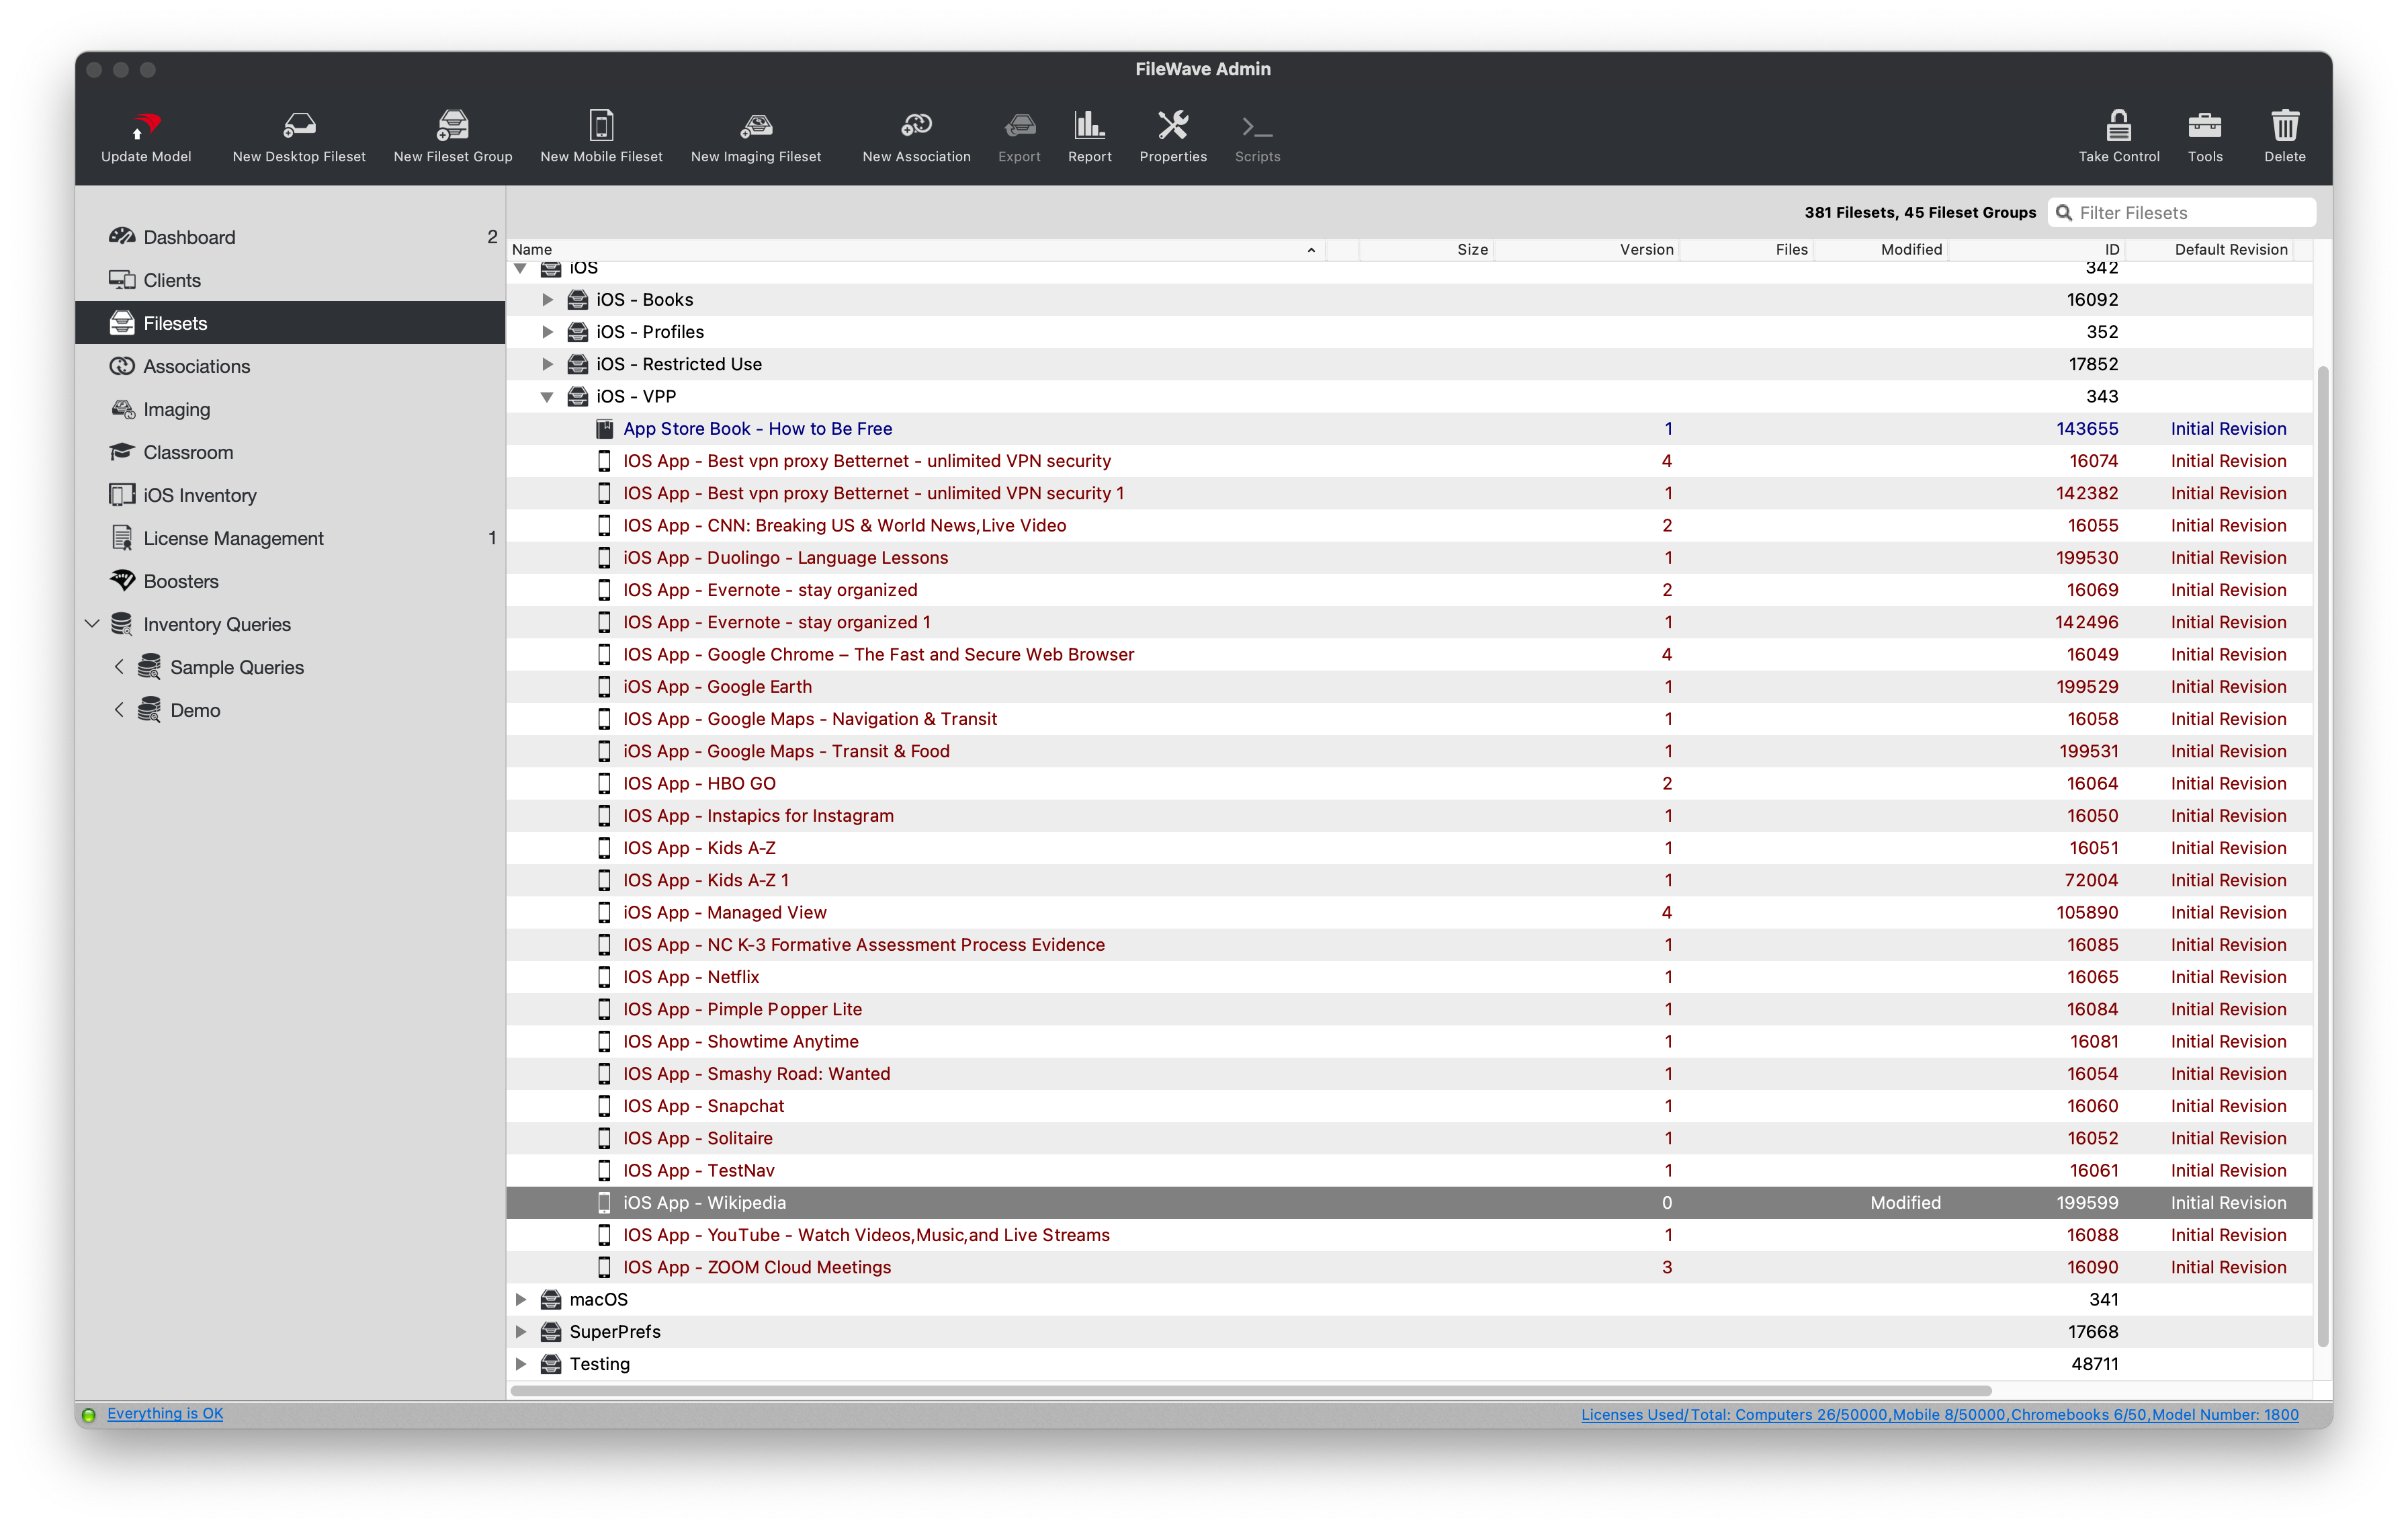
4. You should now see the VPP License information in the *"License Management"* section and a new Fileset in the *"Filesets"* section.
- If you'd like to change where the VPP Filesets are imported to, please refer to this [section](https://kb.filewave.com/books/evaluation-guide/page/software-group-structure "Software Group Structure") of *"Software Group Structure"*.
## Enrollment Credentials
If you choose, you can prompt the user to authenticate the enrollment with a generic account name and password or with your AD/Okta/Google Credentials. You can also turn off authentication completely if you want a more streamlined process.
- Okta Credentials:[IdP Setup: Okta](https://kb.filewave.com/books/identity-provider-idp-integration/page/idp-setup-okta "IdP Setup: Okta")
- Google Credentials:[IdP Setup: Google](https://kb.filewave.com/books/identity-provider-idp-integration/page/idp-setup-google "IdP Setup: Google")
- Microsoft Entra AD: [IdP Setup: Microsoft Entra ID](https://kb.filewave.com/books/identity-provider-idp-integration/page/idp-setup-microsoft-entra-id-azure "IdP Setup: Microsoft Entra ID")
- LDAP Credentials: [Using LDAP to enroll macOS/iOS/Android devices](https://kb.filewave.com/books/evaluation-guide/page/using-ldap-to-enroll-macosiosandroid-devices "Using LDAP to enroll macOS/iOS/Android devices")
Generic Username/Password:
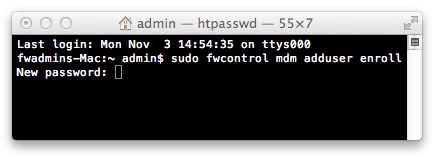
1. From the server type one of the following, depending on your enrollment strategy:
Manual Enrollment(OTA)
```
sudo fwcontrol mdm adduser [name]
```
Automated Device Enrollment (ADE):
```
sudo fwcontrol mdm adddepuser [name]
```
Where **\[name\]** is the name of the account
2. Enter your server’s root password
3. Enter a password for this account
### No Authentication:
1. From the server type the following:
```
cp /usr/local/filewave/apache/conf/mdm_auth.conf.example_no_auth /usr/local/filewave/apache/conf/mdm_auth.conf
```
2. When asked to overwrite the original, enter 'y' for yes
3. Restart the apache service to put the new configuration into place
```
/usr/local/filewave/apache/bin/apachectl graceful
```
# Chromebook Client Pre-Requisites
Before beginning the setup of the Chromebooks, we must first provide you with a temporary Activation Code to license the amount Chromebooks you currently have under management in Google Admin Console. Please email the total number of "Provisioned" Chromebooks to your FileWave Account Executive or FileWave Systems Engineer, and we will send the Activation Code to you as soon as possible.
If you are unsure whether or not you are able to use Chromebooks with FileWave, please click to see the resources below.
List of countries where Chrome OS Management licenses are sold directly by Google to end customers:
Go to [https://eduproducts.withgoogle.com/](https://eduproducts.withgoogle.com/) , click 'contact sales', and then look at the drop-down menu 'Country' - if the country is in the list, it's supported.
Even if the country is not listed under the link above, a local google partner might be able to help :
[https://www.google.com/a/partnersearch](https://www.google.com/a/partnersearch)
## Chromebook features
---
- Location Tracking
- Disable / Deprovision device
- Historical user login activity
- FileWave and Google Custom Fields
- Google OU creation, renaming, and move device
- Full hardware and software (extensions) Inventory reporting
- Powerwash & Wipe Users
- Reboot
## Setup
### Required Items
- Google Domain
- Admin rights within the Google Domain
- At least one Chromebook
- Chromebooks Enterprise enrolled
- Pre-existing Google Organizational Unit structure (RECOMMENDED)
- Running FileWave Server
- Enough FileWave Chromebook licenses to cover every Chromebook in the Google OU
- FileWave Server must use a root trusted SSL certificate and not a self-signed one
### Google Cloud Messaging / Firebase Setup
First, you’ll need to configure Google Cloud Messaging (GCM/Firebase) so that FileWave can send push notifications to your Chromebook devices. The following steps will help you get your FileWave server setup with Google Cloud Messaging which is required for Android and Chromebook support.
1. Go to [console.firebase.google.com](http://console.firebase.google.com/) in your web browser
2. Sign into your Google Account
3. Accept the user agreement (if necessary)
4. Select "Get started with a Firebase Project"
[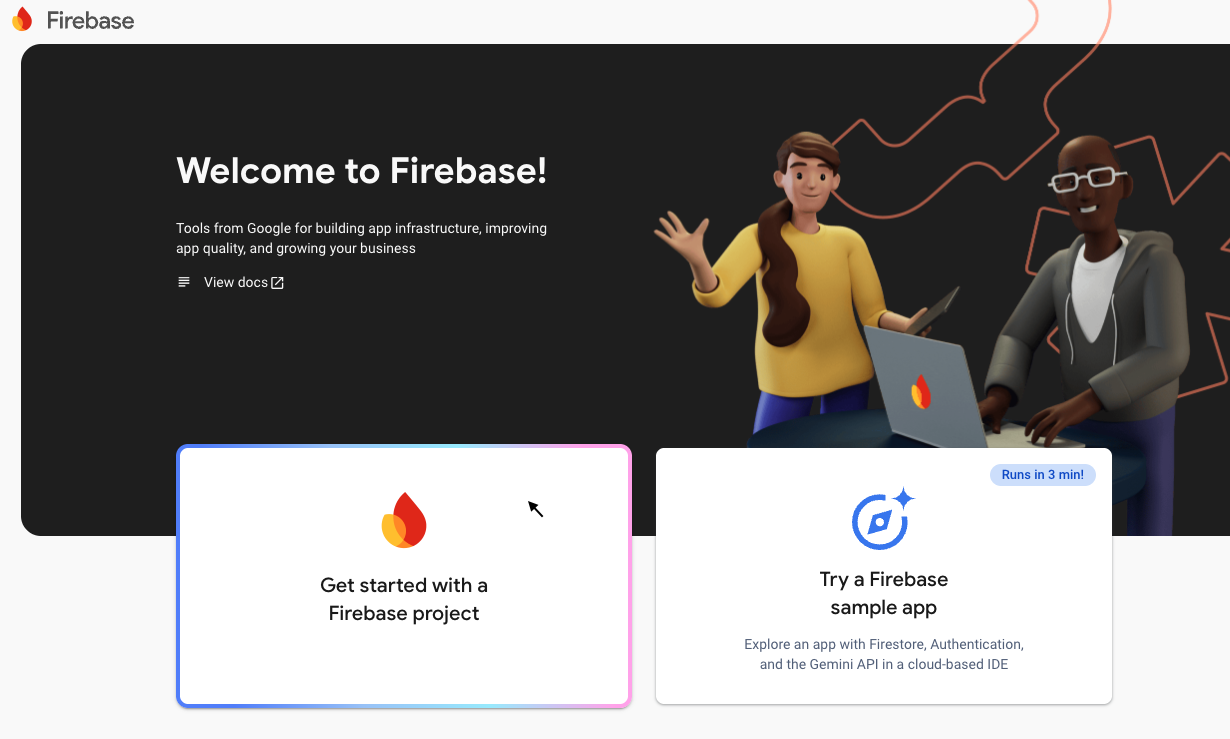](https://kb.filewave.com/uploads/images/gallery/2024-12/B3By3fl8dZsCcQ5c-screenshot-2024-12-18-at-1-35-23-pm.png)
Enter name for the project and Agree to Terms – then click Create Project. Note below the fwx.io is the organization. Make sure the right organization is there or click on it and you can select the organization. Some types of accounts may not offer to let you pick an organization.
[](https://kb.filewave.com/uploads/images/gallery/2024-05/v9vEe8fNjpx4dtAE-image.png)
Choose to Disable Google Analytics for this project and then let it create the project.
Once the project creation has been completed, select Continue and you'll be on to the next steps.
---
### Configuring Google Chromebooks to Sync with FileWave
The following processes and steps will walk you through setting up your FileWave server to manage Chromebooks. Current functionality will allow you to pull/query inventory data and utilize our location tracking feature in FileWave.
#### Enable Access to APIs
1. Go to the below address to start the process:
[https://console.developers.google.com/flows/enableapi?apiid=admin,calendar,classroom,drive,driveactivity.googleapis.com,gmail,groupssettings,licensing,plus,contacts,firebase.googleapis.com,fcm.googleapis.com](https://console.developers.google.com/flows/enableapi?apiid=admin,calendar,classroom,drive,driveactivity.googleapis.com,gmail,groupssettings,licensing,plus,contacts,firebase.googleapis.com,fcm.googleapis.com)
**If you just completed the** [Google Cloud Messaging / Firebase Setup](#bkmrk-google-cloud-messagi)**, the project will already be selected and will use the project created during the GCM setup (this MUST be set up to continue). If it's not automatically selected, select the drop-down at the top of the screen and choose the correct project. You can also create a new one if you'd like. My Project is called 'FileWave Chromebooks'.**
2. **Confirm** the Project and **Enable** the APIs for the project
1. Now a service account has to be created, click the hamburger icon in the top left corner and select **Credentials** under **APIs & Services**
2. Select **Create Credentials > Service Account**
3. Give the Service Account a name. I use the same name as my project but you may name it whatever you want
4. Select **'Create and Continue'**
5. Grant this service account **OWNER** privileges under **Basic**
6. Click **'Continue'**
7. Skip the next section by selecting **'Done'**
8. On the next screen, **c**lick '**Manage Service Accounts'**
9. Click the menu on the right side of the Service Account you just created and then click **Manage keys**
10. Select **'ADD KEY'**, then **'Create New Key'** and download the JSON file
**Save this JSON file. We'll use it later.**
#### Adding a Delegated User
1. Select **Manage service accounts** by the **Service Accounts** section
2. Check the checkbox to the left of your service account
3. Select the menu at the top right of the window, then click **MANAGE ACCESS** at the top of the page
4. Then click **ADD** **PRINCIPAL** on the dialog that appears
5. Add the Google User (make sure this user has the permissions stated above) and give it the **Service Account User** and **Service Account Token Creator** roles
6. **SAVE**
#### OAuth Client ID & Authorizing API Scopes
1. In the same Service Accounts window (**IAM & Admin > Service Accounts)**, click on the Action menu next to your Service Account and select '**Manage Details**'
3. Select '**Advanced Settings**' to expand
4. Copy **Client ID** under **Domain-wide Delegation**, we'll use it in the next section.
1. Open another tab or browser and navigate to Google Admin, [admin.google.com](https://admin.google.com)
2. In the main menu, select **Security > Access and data control**
3. Select **API Controls**
4. Click **Manage Domain Wide Delegation**
5. Select **Add New**
6. Paste the copied **Client ID** from the previous step in this section into the **Client Name** field
7. Copy and paste the following into the **One or More API Scopes** field all at once then hit **Authorize**
```
https://www.googleapis.com/auth/admin.directory.device.chromeos,
https://www.googleapis.com/auth/admin.directory.customer,
https://www.googleapis.com/auth/admin.directory.orgunit
```
#### Sync Google with FileWave
1. Be sure you have already set up [Google Cloud Messaging / Firebase Setup](#bkmrk-google-cloud-messagi)
2. Open your **FileWave Admin Preferences** and select the **Google Tab**
3. Once there, click the **Configure OAuth token** button at the top, you will be prompted for your credentials
4. After authenticating simply type in the Google Account you associated with the service account
5. The last step will be to import the .json file you saved at the beginning of this document
6. After you press **OK** FileWave will sync automatically with Google
Now if you go into the Clients section in FileWave you will see a Chromebooks group with the same structure and devices you have in your Google Admin. This may take some time.
#### Deploying FileWave Inventory Extension to Chromebooks
1\. In **FileWave Admin** open **Preferences**
2\. Go to the **Google/Chromebooks** tab
3\. Click **Export Policy for Extension** and save the file
4\. Open [admin.google.com](http://admin.google.com/)
5\. On the left sidebar, Click **Devices > Chrome > Apps & Extensions,** then select the **Users & browsers** tab.
6\. On the left sidebar, select the OU you want to assign the extensions too
7\. Click the yellow Plus Sign **'+'** on the bottom right of the page and then the icon that looks like a grid of squares, **Add Chrome app or extension by ID**
8\. You can add the Apps/Extensions using the following extension ID: **ldhgnmkjehdokljjhcpkbhcmhoficdio**
9\. Click **Save**
10\. Scroll down to '**Policy for extensions'**
11\. Upload the JSON you downloaded in step 3 of this section\*\*
12\. **Save** your changes above
13\. At this point, you will want to consider the Installation policy for the FileWave extensions. You will either want to **Force install** or to **Force install + pin to the browser toolbar** to ensure the extensions are active. If you have several Organizational Units you may want to consider if you are going to set this at the domain level and if all the OUs will inherit the setting.
It is important that the OUs that you enable this on either be all of them or at a minimum you need to enable it for both the User and Device OUs that you will be using with FileWave.
#### Changing check-in frequency
If you want to change the frequency of check-in, you can modify the following attribute in the JSON to reflect check-in frequency (in minutes). The default is 1440, or once per day.
```
"UpdateIntervalInMinutes": {
"Value": 1440
}
```
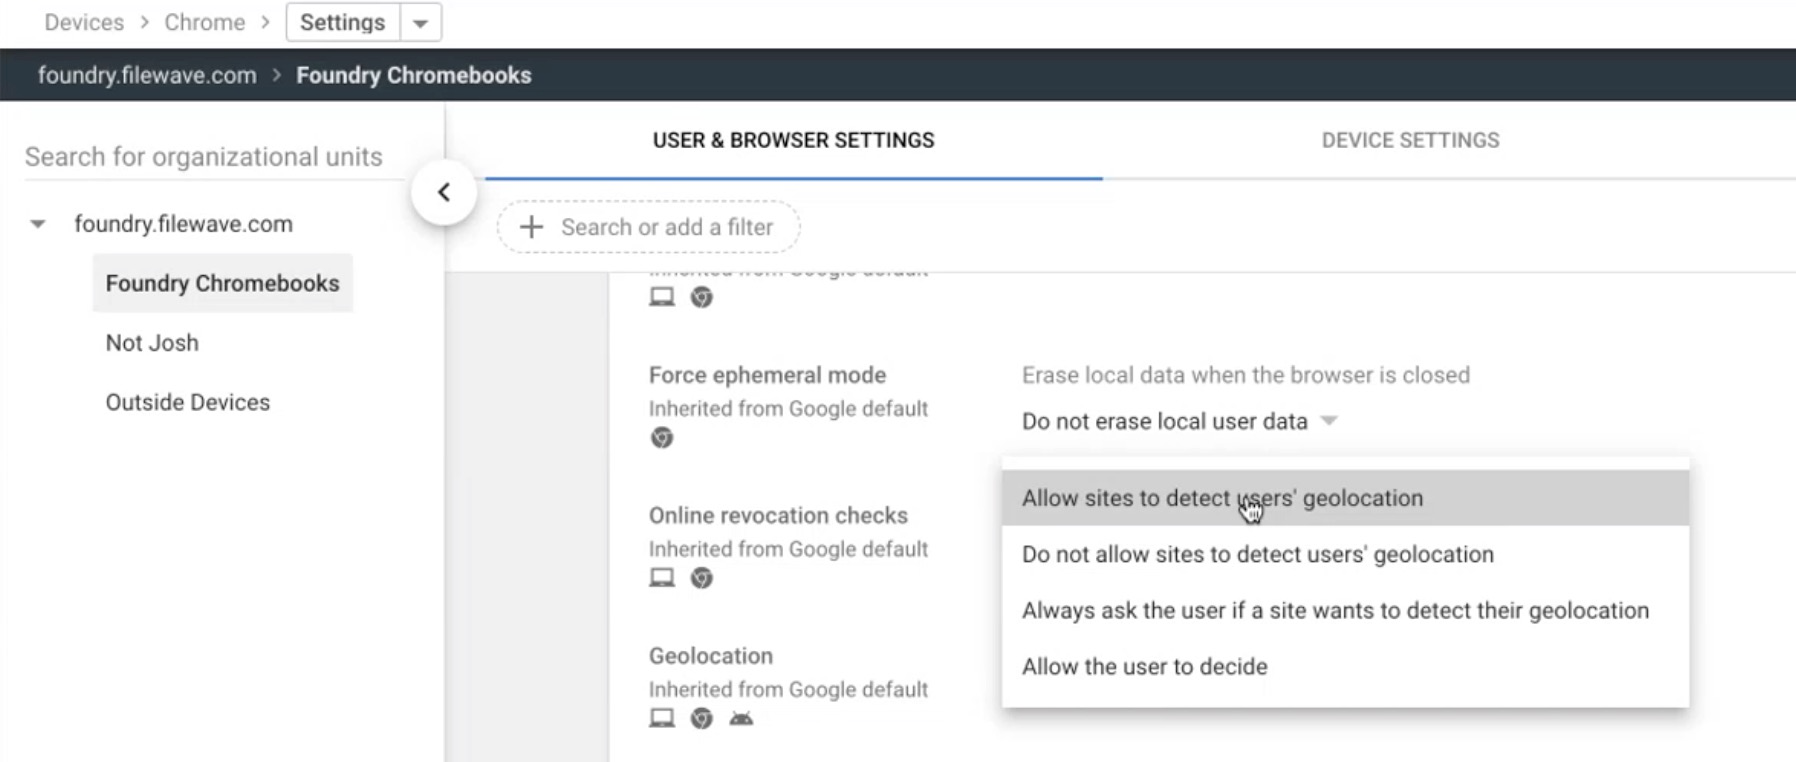
#### Location Tracking Permissions
If you're wanting to use Location Tracking, you will need to "Allow sites to detect Users' geolocation" in Google Admin. You will find this option in **Devices** > **Chrome** > **Settings**, on the page that loads it will be under **Security** > **Geolocation**. For this setting, you want to ensure that you set it at the level in the organization that it should apply. In the image below we only enabled it for **Foundry Chromebooks** but did not set it for all. If you would like to enable Geolocation for all devices then make sure you set it at the domain level and also make sure that none of your OUs are set to ignore the inheritance of this setting. Simply check the setting on each OU and you will see what it is set to.
Just like with the Extensions, it is **important** that the OUs that you enable this on either be all of them or, at a minimum, you need to enable it for both the User and Device OUs that you will be using with FileWave.
Congratulations, you can now manage your Chromebooks with FileWave!
### Troubleshooting
If for any reason you experience issues seeing your ChromeOS devices in FileWave or issues with reporting then see the notes in our [Chrome Troubleshooting Guide](https://kb.filewave.com/books/chromeos/page/chrome-troubleshooting-guide "Chrome Troubleshooting Guide")
# Windows Client Pre-Requisites
All you need to do to enroll a Windows Client is to deploy a customized FileWave Client MSI to your machines. We typically recommend using an existing tool capable of deploying a MSI such as Group Policy. This customized MSI can also be "baked" into a Windows image that can be deployed via FileWave's Imaging Virtual Server (IVS) so that freshly imaged Windows machines will automatically enroll into FileWave. Lastly, the FileWave Client MSI can be manually distributed and installed on any Windows machine that has local Administrator privileges.
If your organization uses Microsoft Entra ID and your users authenticate using Microsoft Entra ID credentials into their Windows machines, please consider enrolling your Windows machines into FileWave via Microsoft Entra ID. This will also allow for Windows MDM management within FileWave. Learn more on our [Windows MDM](https://kb.filewave.com/books/microsoft-windows-mdm "Microsoft Windows MDM") article.

### Generating a custom FileWave Client MSI
1. Open the [FileWave Customer Installer Builder](https://custom.filewave.com/py/custom_client_win.py) for Windows.
2. Fill out the settings accordingly.
3. Click the *"Build"* button and wait for the automatic download.
4. Extract ZIP and install the customized FileWave Client MSI.
**Mandatory Settings**
**Product Version =** Your FileWave Server Version
**Sync Computer Name =** Windows Hostname will be FileWave Client Name (recommended)
**Server Name =** Fully Qualified Domain Name of your FileWave Server (required)
**Server Port =** 20015 (do not modify)
**Client Password =** Password used to modify client preferences remotely (not used in FW 16.0+)
Note: The default Server Port setting above is 20015. However, SSL is now required, and the system will automatically use port 20017 instead when 20015 is entered. Do not manually set the port to 20017. Always enter 20015, and the system will handle the SSL port change for you.
**Optional Settings**
**Is Tracking =** Is Location Tracking Enabled for Windows Clients
**Monitor Port =** Port used for FileWave Client Monitor - 20010 (do not modify but also this port is no longer used as of FileWave 16.0.0)
**Remotecontrol Enabled =** Screen-sharing enabled for Windows Clients
**Remotecontrol Prompting =** Whether or not to Prompt the end-user before starting screen-sharing session
**Server Certificate =** Self-Signed Certificate only; not required for CA-signed certificate
**Server Publish Port =** 20005 (do not modify)
**Tickle Interval =** Idle time for Windows Clients before checking for new Model Update (do not modify)
**Vnc Relay Port =** 20030 (do not modify)
**Vnc Server Port =** 20031 (do not modify)
**Booster Settings**
Initially you may want to make an installer that does not include Boosters. Read more about them here: [Boosters](https://kb.filewave.com/books/boosters "Boosters")
### Deploying the FileWave Client with Group Policy (Startup Script)
If you have no other way to easily deploy the FileWave Client to Windows sytems, but they are all tied to an Active Directory then leveraging Group Policy (GPO) can allow you to rapidly deploy the client with very little effort.
**Customize the Script**
- Save the script shown below and save it to **Deploy‑FileWave.ps1** on your desktop.
- You will want to make sure you edit it to point at the correct server location for the MSI installer that you created from [https://custom.filewave.com](https://custom.filewave.com) to use for the install and make sure that the computer has permission to access the file.
- Open **\\<your‑domain>\\SYSVOL\\<your‑domain>\\Policies\\{YourGPO\_GUID}\\Machine\\Scripts\\Startup** in File Explorer (or use the GPMC “Show Files…” button on the Startup Scripts pane) to put the script in your domain.
- The machine’s computer account (DOMAIN\\COMPUTER$) must have **read** permission on \\\\server\\share\\FileWaveCustom.msi. If it doesn’t, the copy step will fail—so be sure your share ACLs allow Domain Computers or the specific computer objects.
- The script copies the MSI to **C:\\ProgramData\\FileWave\\MSICache** and installs from that local copy. This gives Windows Installer a durable local source instead of depending on the original UNC path after startup. Do not manually place files in **C:\\Windows\\Installer**; Windows manages that cache.
**Create FileWave Client Group Policy**
- Open Group Policy Management in the Active Directory.
-
Create a GPO and navigate to Computer Configuration >> Policies >> Windows Settings >> Scripts (Startup/Shutdown) >> Startup
- Double‑click **Startup**, then click the **PowerShell Scripts** tab.
- Click **Add…**, then **Browse…** and pick **Deploy‑FileWave.ps1** from the Startup folder.
- Click **OK** to close out all dialogs and link the GPO where you need it. (Please test against 1 machine first)
**Enable "Turn on Script Execution" Policy (This policy can be combined into above GPO)**
-
Open Group Policy Management in the Active Directory
-
Navigate to Computer Configuration >> Policies >> Administrative Templates >> Windows Components/Windows PowerShell >> Turn on Script Execution: Set to Enabled and click OK.
**ADDITIONAL INFORMATION**
The script checks whether the FileWave Client process (**fwcld**) is running. If it is not running, the script refreshes the MSI in **C:\\ProgramData\\FileWave\\MSICache**, installs from that local copy, and writes logs to **C:\\temp\\Deploy‑FileWave.log** and **C:\\temp\\FileWaveInstall.log**. If Windows Installer returns **3010**, the install completed and Windows is reporting that a restart is required.
**Deploy‑FileWave.ps1 script:**
```powershell
<#
.SYNOPSIS
Deploys the FileWave agent via a Group Policy startup script, always logging output.
.DESCRIPTION
Checks whether the FileWave process is running. If not, copies the MSI from the network share
to a persistent local directory and installs it from that local cache. All verbose, warning,
and error output is logged to C:\temp\Deploy-FileWave.log, trimmed to the last 100 KB at each run.
.NOTES
- Verbose output is forced by setting $VerbosePreference = 'Continue'.
- Update $installerSharePath to point to your customized FileWave Client MSI.
#>
# Force verbose output so all Write-Verbose messages appear in transcript
$VerbosePreference = 'Continue'
# Define directories and log files
$logDir = 'C:\temp'
$logFile = Join-Path -Path $logDir -ChildPath 'Deploy-FileWave.log'
$maxBytes = 100KB
# Persistent MSI cache location
$cacheDir = 'C:\ProgramData\FileWave\MSICache'
$msiName = 'FileWaveCustom.msi'
$installerLocalPath = Join-Path -Path $cacheDir -ChildPath $msiName
$installerSharePath = '\\server\share\FileWaveCustom.msi' # Update to your actual UNC path
# Ensure the log directory exists
if (-not (Test-Path -Path $logDir)) {
try {
New-Item -Path $logDir -ItemType Directory -Force | Out-Null
} catch {
Write-Error "Failed to create log directory '$logDir': $_"
Exit 1
}
}
# Trim existing log to last 100 KB
if (Test-Path -Path $logFile) {
try {
$fs = [System.IO.File]::Open($logFile, 'Open', 'ReadWrite')
if ($fs.Length -gt $maxBytes) {
$buffer = New-Object byte[] $maxBytes
$fs.Seek(-$maxBytes, 'End') | Out-Null
$fs.Read($buffer, 0, $maxBytes) | Out-Null
$fs.SetLength(0)
$fs.Write($buffer, 0, $maxBytes)
}
$fs.Close()
} catch {
Write-Warning "Failed to trim log file: $_"
}
}
# Start transcript logging
Start-Transcript -Path $logFile -Append
Write-Verbose "Transcript started at '$logFile'."
# Check if FileWave agent is already running
$ProcessName = 'fwcld'
Write-Verbose "Checking for process '$ProcessName'..."
try {
Get-Process -Name $ProcessName -ErrorAction Stop | Out-Null
Write-Verbose "Process '$ProcessName' is currently running."
$isRunning = $true
} catch {
Write-Verbose "Process '$ProcessName' not found. Proceeding with installation."
$isRunning = $false
}
if (-not $isRunning) {
Write-Verbose "Deploying FileWave agent..."
# Ensure the MSI cache directory exists
if (-not (Test-Path -Path $cacheDir)) {
try {
New-Item -Path $cacheDir -ItemType Directory -Force | Out-Null
Write-Verbose "Created MSI cache directory: $cacheDir"
} catch {
Write-Error "Failed to create MSI cache directory '$cacheDir': $_"
Stop-Transcript
Exit 1
}
}
# Refresh the local MSI cache from the network share on each install attempt
if (-not (Test-Path -Path $installerSharePath)) {
Write-Error "Installer was not found at '$installerSharePath'. Check the UNC path and share permissions for the computer account."
Stop-Transcript
Exit 1
}
Write-Verbose "Copying MSI from '$installerSharePath' to '$installerLocalPath'..."
try {
Copy-Item -Path $installerSharePath -Destination $installerLocalPath -Force
Write-Verbose "Successfully refreshed local MSI cache."
} catch {
Write-Error "Failed to copy installer: $_"
Stop-Transcript
Exit 1
}
# Install MSI silently and log output
$installLog = Join-Path -Path $logDir -ChildPath 'FileWaveInstall.log'
$msiArgs = @('/i', $installerLocalPath, '/qn', '/norestart', '/l*vx', $installLog)
Write-Verbose "Starting MSI installation from '$installerLocalPath'. Log: '$installLog'."
$process = Start-Process -FilePath 'msiexec.exe' -ArgumentList $msiArgs -Wait -PassThru
switch ($process.ExitCode) {
0 {
Write-Verbose "Installation completed successfully (exit code 0). Log: '$installLog'."
}
3010 {
Write-Warning "Installation completed and Windows reports that a restart is required (exit code 3010). Log: '$installLog'."
}
default {
Write-Error "MSI installation failed (exit code $($process.ExitCode)). See '$installLog'."
Stop-Transcript
Exit $process.ExitCode
}
}
Write-Verbose 'FileWave installation process finished.'
} else {
Write-Verbose "Skipping deployment; '$ProcessName' already running."
}
# Stop transcript logging
Stop-Transcript
Exit 0
```
# 3. Client Enrollment
Please follow each section that corresponds with the device types you want to enroll in FileWave.
You will notice that some device types, such as iOS and macOS, contain new information, while Windows and Chromebooks redirect to a previous section.
# Android Enrollment
## Enrolling Android devices to FileWave
If you haven't already, please consult the [Client Pre-Requisites > Android](https://kb.filewave.com/books/evaluation-guide/page/android-client-pre-requisites "Android") section to learn how to enroll Android EMM devices into FileWave.
There are several ways to enroll Android devices;
- [QR code](#bkmrk-qr-code-or-afw%23setup)
- [afw#setup](#bkmrk-qr-code-or-afw%23setup)
- [Bring Your Own Device](#bkmrk-android-byod-%28emm%29)
- [Zero Touch](https://kb.filewave.com/books/android/page/android-emm-zero-touch-enrollment "Android EMM Zero-Touch Enrollment")
Devices in Safe Mode may not be enrolled
### QR Code or afw#setup Enrollment
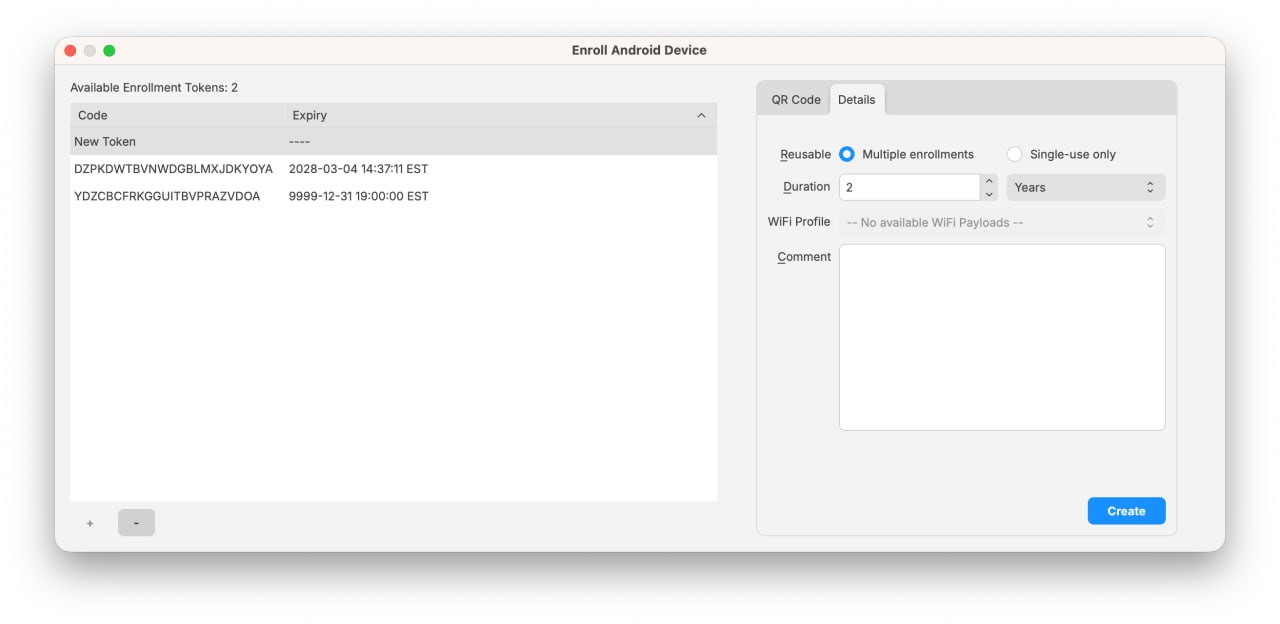
In FileWave Central, create an Android enrollment token from *Assistants > Enroll Android Device...*.
You can create multiple tokens. For normal evaluation work, select **Multiple enrollments** and use the **Duration** field to enter the number of years the token should remain valid. The dialog defaults to **2 Years**, and Android enrollment tokens are no longer limited to 30 days.
Make sure the device is fully wiped to factory settings and is not yet activated. Most modern Android versions can commence the process by either:
- Tapping the screen seven times (in the same spot)
or
- Entering **`afw#setup`** in place of a Google account.
Enter the Wi-Fi code and scan the QR code. A few minutes later, accept the prompt to Install Work Apps. This will install the FileWave Client.
On completion a summary will appear. Click Setup.
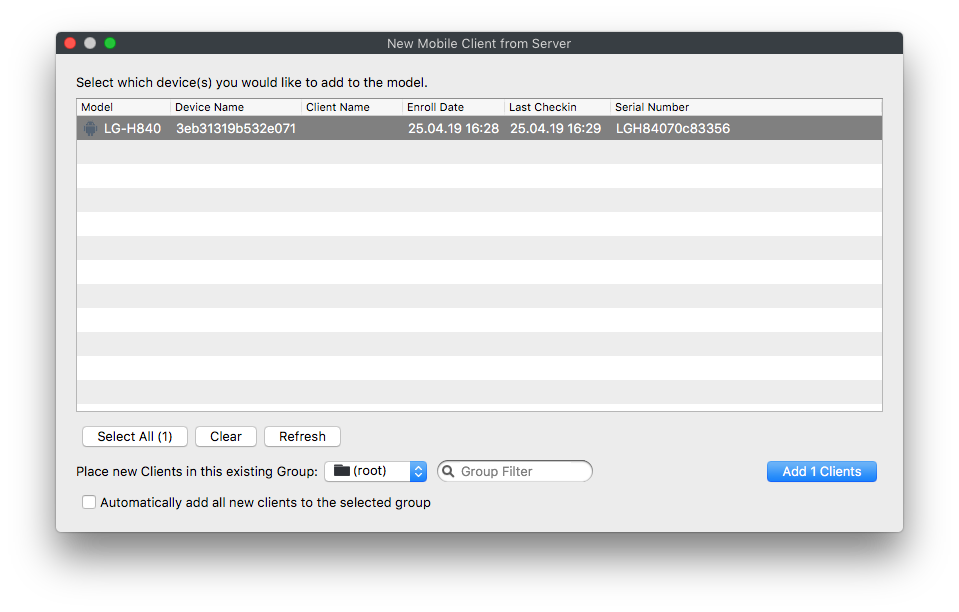
Where auto enrolment is configured in the New Client > Enrolled Mobile Devices, the device should appear within a few minutes. Otherwise use the New Client window to accept the device and then Update Model.
### Android BYOD (EMM)
Android BYOD (Bring Your Own Device) Enrollment, also known as Android Enterprise Work Profile, is a method of enrolling personal Android devices in an Enterprise Mobility Management (EMM) system. This allows organizations to manage and secure corporate data and apps on employees' personal devices, while maintaining user privacy and keeping personal data separate from work data.
In this enrollment method, a work profile is created on the user's personal device, which acts as a separate container for work-related apps and data. This ensures that the organization can only manage and access the work profile, without interfering with the user's personal data and apps.
Android BYOD Enrollment offers several benefits, such as:
1. Increased flexibility: Employees can use their personal devices for work, reducing the need for organizations to provide dedicated work devices.
2. Enhanced security: Corporate data is secured within the work profile, preventing unauthorized access and data leakage.
3. Improved privacy: Users maintain control over their personal data and apps, as the organization can only manage the work profile.
4. Simplified management: EMM administrators can easily manage and configure work profiles, apply policies, and distribute apps to enrolled devices.
To implement Android BYOD Enrollment, organizations need an EMM solution that supports Android Enterprise, such as FileWave. The EMM solution will guide users through the enrollment process and help administrators manage and configure work profiles on enrolled devices.
#### Getting Started with BYOD (EMM)
Before starting BYOD enrollment, complete the Android EMM setup at the start of this article.
After going through the EMM setup, continue with the next steps.
1. Download Android device policy App ([https://play.google.com/store/apps/details?id=com.google.android.apps.work.clouddpc&hl=en\_US](https://play.google.com/store/apps/details?id=com.google.android.apps.work.clouddpc&hl=en_US))
2. From the App scan the Enrollment QR code
3. Add the devices to admin as normal
4. (Observe) you will have a "Play Store" app and a "Work Play Store"
The devices will have the same icon in admin.
If the Inventory field "Is User-Owned" is True, the device is a BYOD.
Add this field as a column in the client view when you need to distinguish fully managed Android devices from BYOD/work-profile devices.

### Enrollment Workflow (EMM)
If you have a Google Policy Fileset with Wi-Fi or other network information, select it when you generate the QR code. FileWave includes that network configuration in the enrollment QR code, which makes first-time setup easier on wiped devices.
The QR code that is generated contains the WiFi password in plain text.
DO NOT leave the QR code just sitting around.
## Android EMM Location Tracking
Android EMM devices need to install a FileWave "companion" application onto the device that will send us location data. Reference [Force Location for EMM Android Devices](https://kb.filewave.com/books/android/page/force-location-for-emm-android-devices "Force Location for EMM Android Devices") for details.
# Apple ADE Enrollment
## **Benefits of ADE Enrollment**
---
iOS, iPadOS, [visionOS](https://kb.filewave.com/books/apple-general-info/page/managing-apple-vision-pro-and-visionos), tvOS, and macOS can use Apple Automated Device Enrollment (ADE). ADE applies the assigned setup configuration during activation, enrolls the device with FileWave after a reset, and can prevent the user from removing the MDM profile when Apple supports enforced management for that platform and enrollment.
If you have not already created your Apple Push Notification Service Certificate (APNS) or configured ADE to sync with FileWave, please review the [Platform Integrations > Apple Integration](https://kb.filewave.com/books/evaluation-guide/page/apple-client-pre-requisites "Apple Integration") section before continuing.
## **Creating ADE Profiles**
**FileWave 16.4 and later:** macOS ADE profiles can manage Mac-to-Mac Migration Assistant behavior during Setup Assistant. See [ADE Profiles](https://kb.filewave.com/books/filewave-anywhere-help-menus/page/ade-profiles) for the migration controls and DDM boundary.
---
The first step to enrolling your Apple devices via ADE is to create an ADE Profile. The ADE Profile determines the initial settings applied during enrollment and applies across Apple platforms. Unless you need explicit separation of the initial enrollment settings, one ADE Profile can often cover all of your devices. This is partly possible because FileWave Custom Fields can be used to uniquely name devices.
1. Open FileWave Admin and navigate to *"Assistants > ADE Association Management".*
2. Click the "\[+\]" button on the right-hand side under *"Profiles".*
3. Fill out each tab according to your management preferences.
[](https://kb.filewave.com/uploads/images/gallery/2023-06/sFl2ZRbSSYHi3ykT-dep-enrollment-information.jpg)
[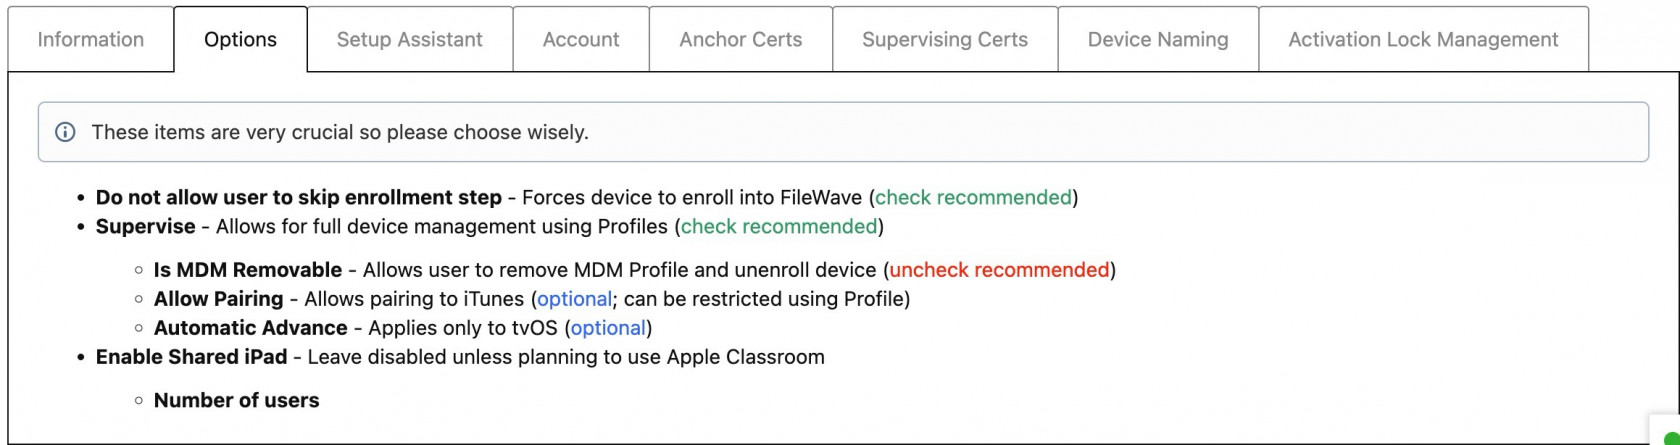](https://kb.filewave.com/uploads/images/gallery/2023-06/omR3L6b4OLuT38gz-dep-enrollment-options.jpg)
[](https://kb.filewave.com/uploads/images/gallery/2023-06/K3KGtTsekeuYWOYq-dep-enrollment-setup-assistant.jpg)
[](https://kb.filewave.com/uploads/images/gallery/2023-06/3ouMciXqb3jeKZ0P-dep-enrollment-account.jpg)
[](https://kb.filewave.com/uploads/images/gallery/2023-06/sfvj3V5sH7TpXnwP-dep-enrollment-anchor-certs.jpg)
[](https://kb.filewave.com/uploads/images/gallery/2023-06/gA6XXdGxiqJ84CiK-dep-enrollment-supervising-certs.jpg)
[](https://kb.filewave.com/uploads/images/gallery/2023-06/5x09wU0aBoXjZrOl-dep-enrollment-device-naming.jpg)
[](https://kb.filewave.com/uploads/images/gallery/2023-06/V1MMRSMXNuszKYOW-dep-enrollment-activation-lock-management.jpg)
Starting in FileWave 16.3.x, ADE profiles also support `do_not_use_profile_from_backup`. As described in Apple's deployment guidance, this tells a restored device to ignore the ADE profile embedded in the backup and fetch the current ADE assignment from Apple Business Manager or Apple School Manager instead, so the correct ADE configuration can be applied after restore.
FileWave 16.3.x also adds the **Age Based Safety Settings** skip key in ADE profiles and Setup Assistant. Apple's documentation is not yet fully consistent on whether this fully replaces `AdditionalPrivacySettings`, so FileWave keeps support for both keys for now.
The screenshots above show the general ADE profile tabs, but they are not a complete inventory of every current field. Newer ADE options added in later FileWave releases may not be visible in those older screenshots.
## **Assigning ADE Profiles**
---
Assigning ADE Profiles is very easy within FileWave, especially if you only have one ADE Profile since you can set a Default ADE Profile. With a Default ADE Profile configured, anytime you assign a new device to the FileWave MDM Server from within Apple School Manager or Apple Business Manager, the ADE Profile will automatically apply and the device will be ready for ADE enrollment. However, if you have multiple ADE Profiles, FileWave will also enable you to create Rule-based ADE Profile assignments or you can always just drag-n-drop a ADE Profile onto a single device or multiple devices onto a ADE Profile.
The *"Profile Status"* field in the *"Devices"* pane tells you the current status of the ADE profile on the client device.
- Empty - no ADE Profile assigned
- Assigned - ADE Profile has been assigned but ADE enrollment has not occurred
- Pushed - Setup Assistant setting has run and settings have been enforced on client device
- Removed - ADE profile has been unassigned from device, will be changed to "Empty" after ADE sync
### **Setting Default ADE Profile**
1. Open FileWave Admin and navigate to *"Assistants > ADE Association Management".*
2. Click *"Edit Assignment Rules".*
3. Select your recently created ADE Profile from the *"Default ADE Profile"* dropdown menu.
4. Click *"OK".*
5. Click *"Apply Assignment Rules"* to save the changes.
6. Hold the Option or Alt key on your keyboard and click *"Synchronize (full sync)"* button in lower right-hand corner
7. You should now see that all of your devices have been *"Assigned"* to your ADE Profile.
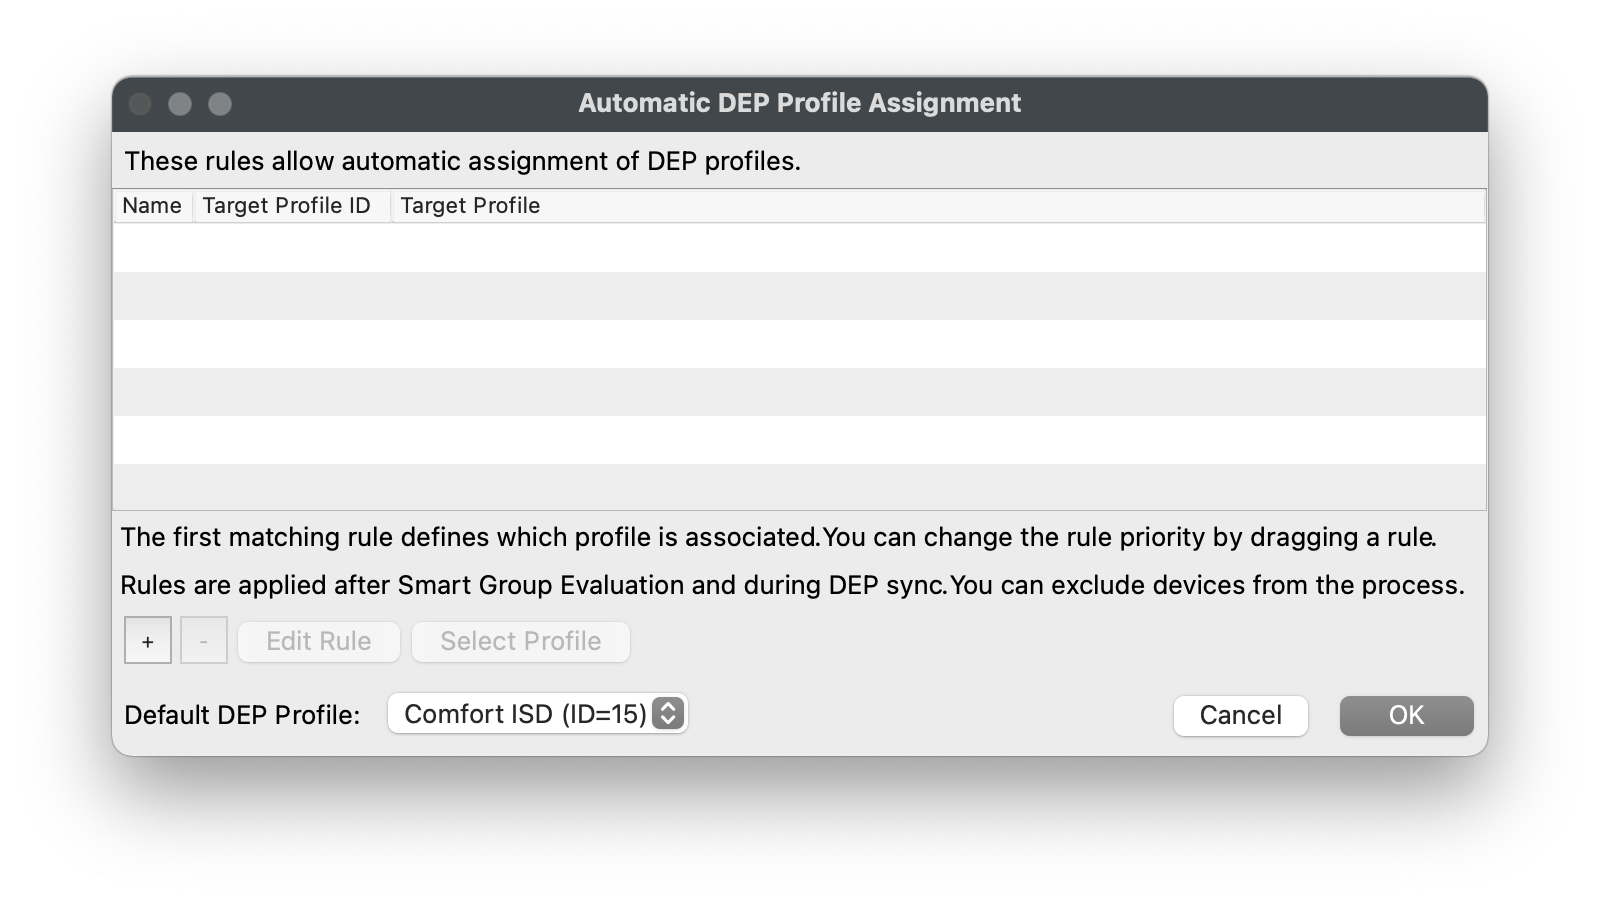
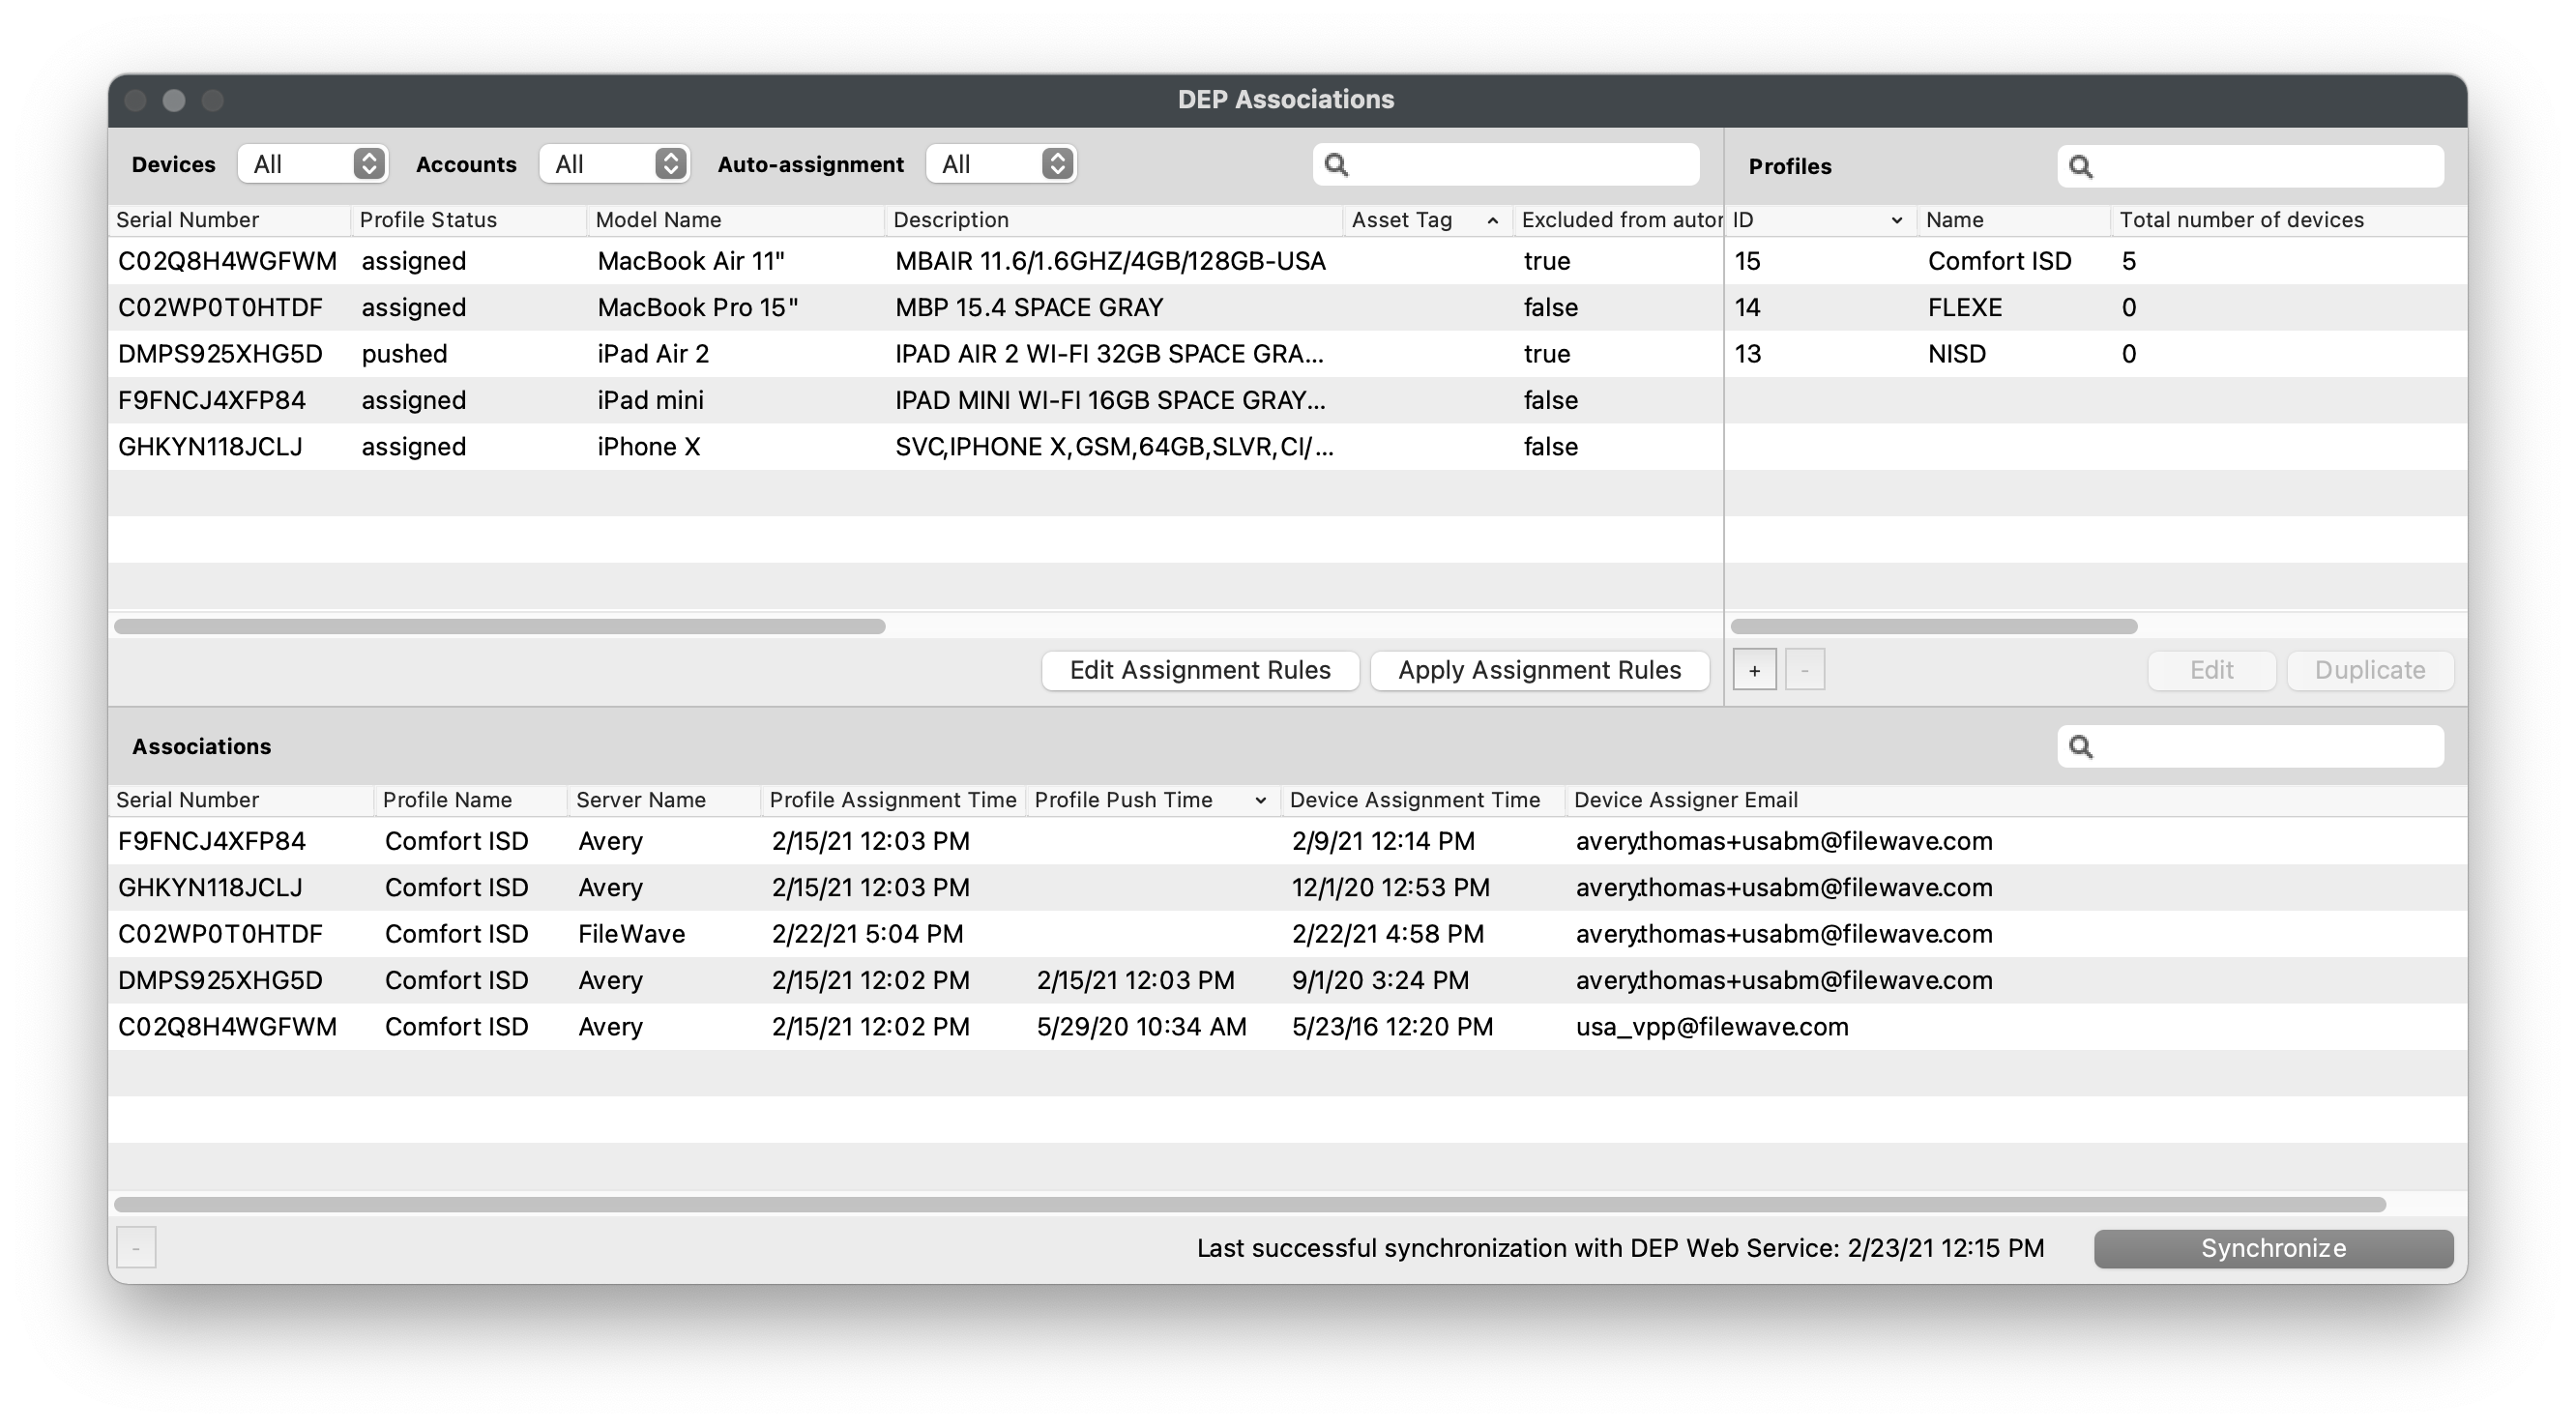
### **Rule-based ADE Profile Assignment**
1. Open FileWave Admin and navigate to *"Assistants > ADE Association Management".*
2. Click *"Edit Assignment Rules".*
3. Click "\[+\]".
4. Select the ADE Profile you'd like to assign based on rules.
5. Drag-n-drop the Inventory data point the devices must meet to be assigned to the ADE Profile into the *"Criteria"* section.
6. Verify the criteria is correct by viewing the returned devices in the *"Fields"* section.
7. *"Save"* the query and *"OK"* to save rule definition.
8. Click *"Apply Assignment Rules"* to save the changes.
9. Hold the Option or Alt key on your keyboard and click *"Synchronize (full sync)"* button in lower right-hand corner.
10. You should now see that your selected devices have been *"Assigned"* to your ADE Profile.
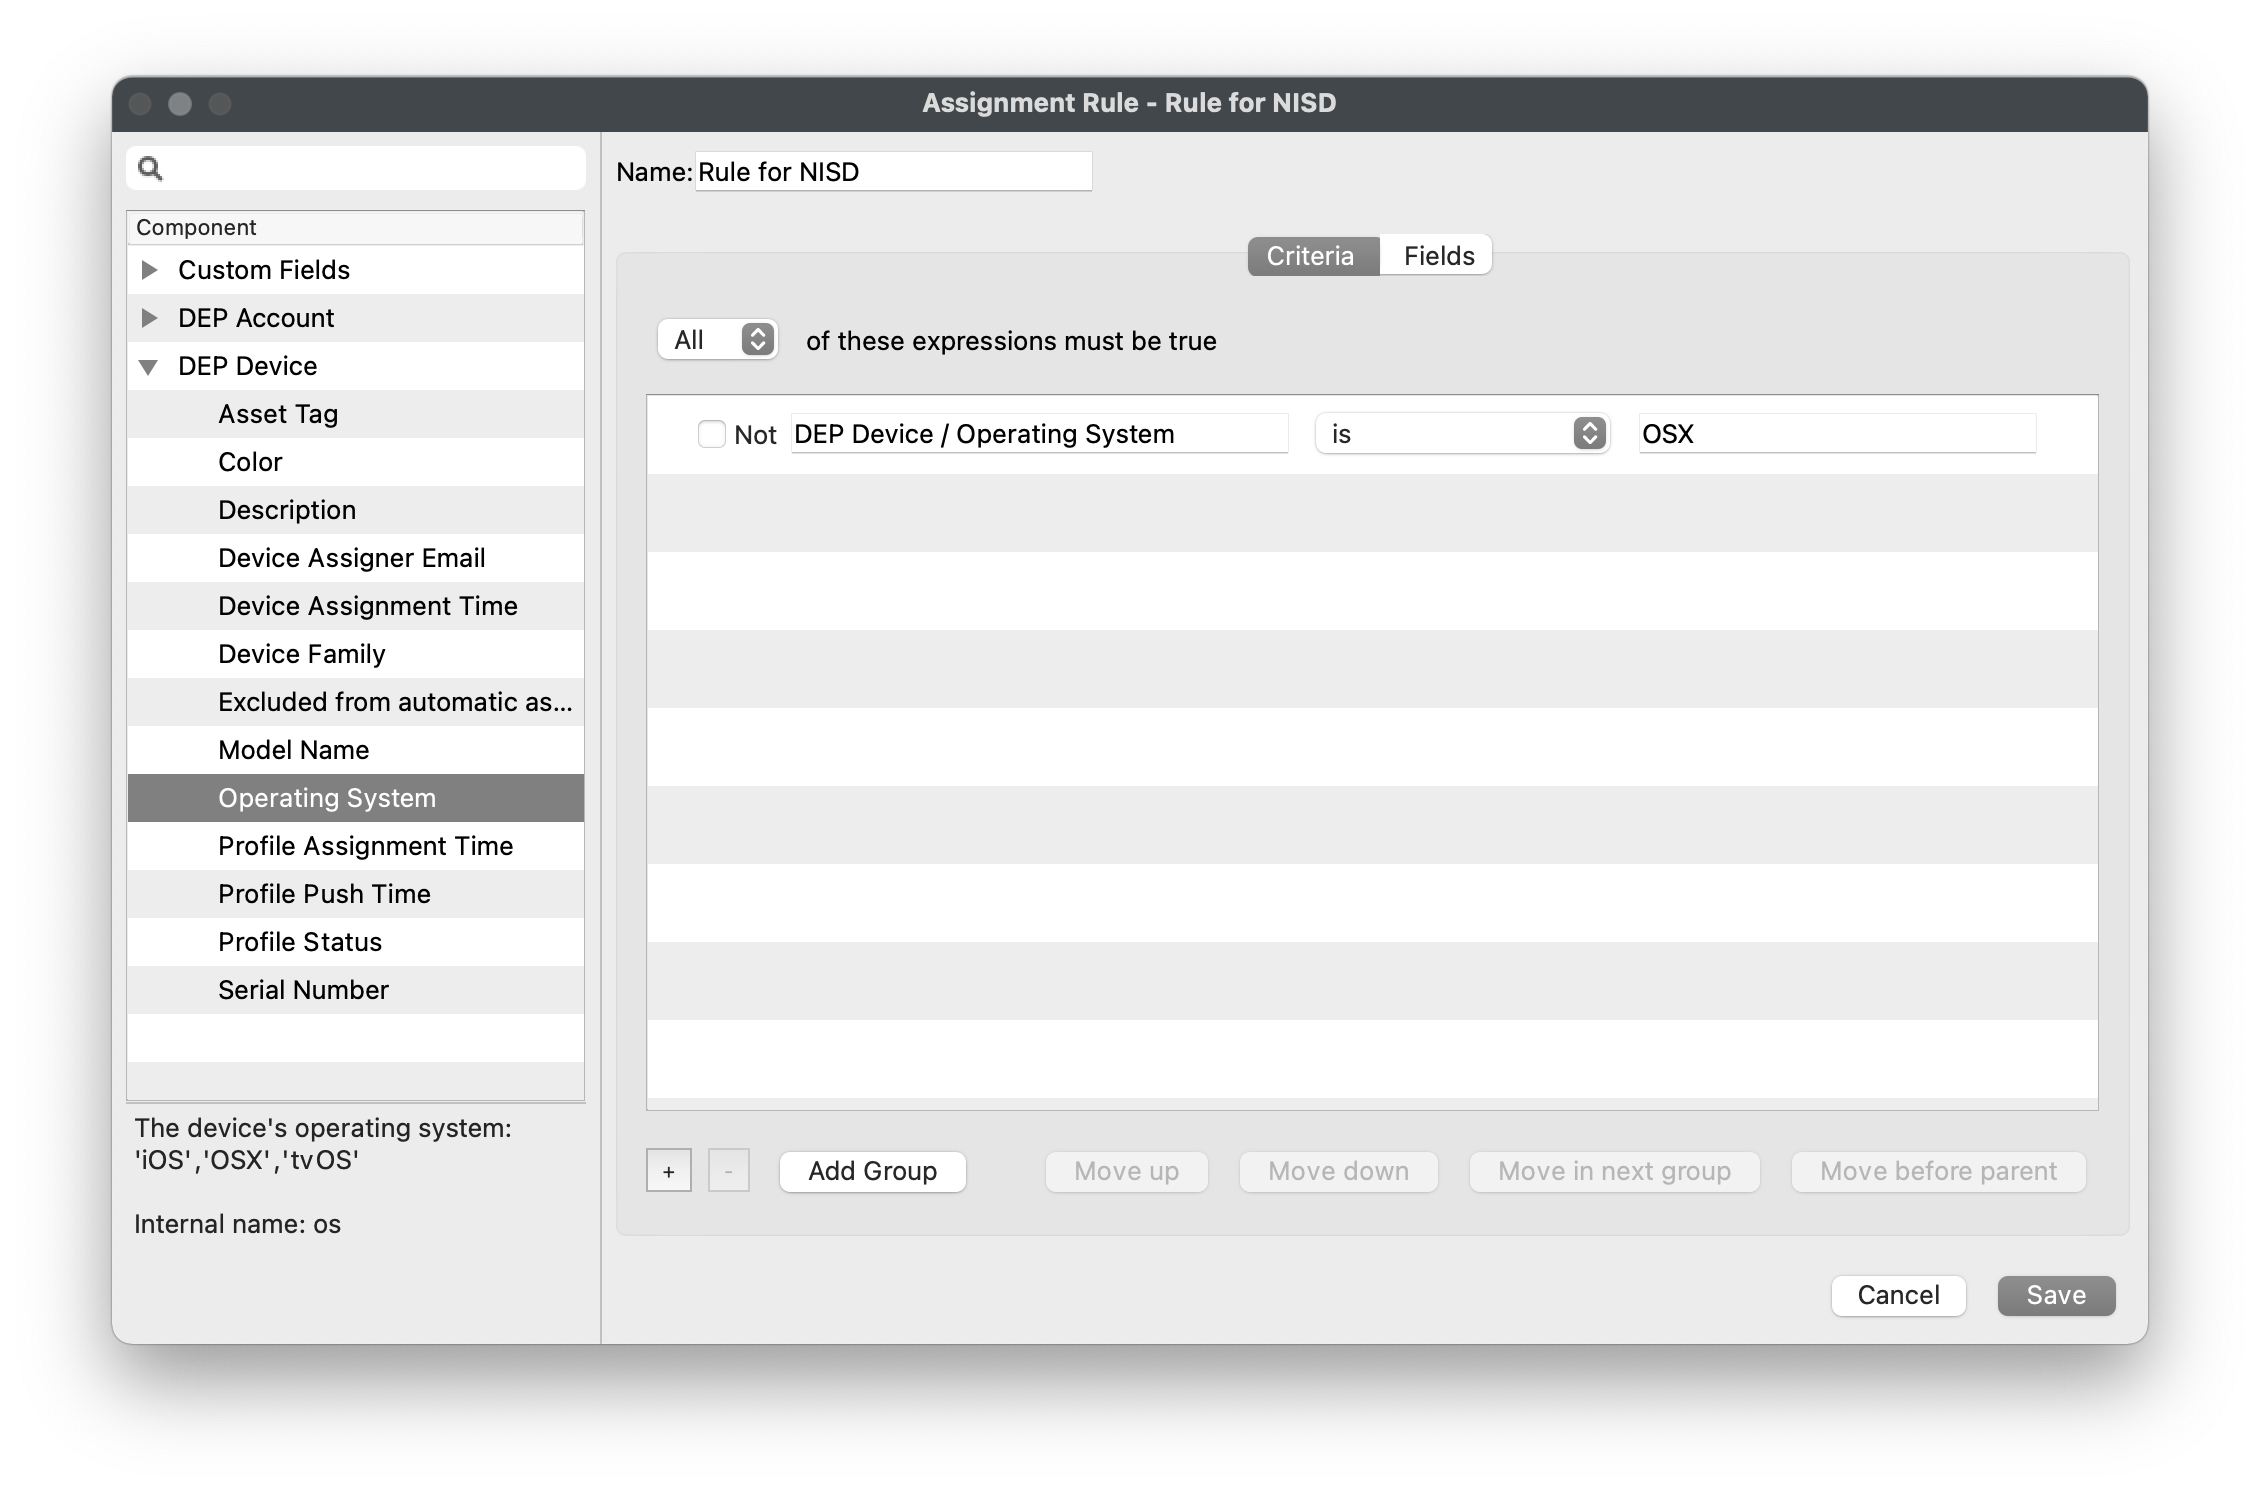
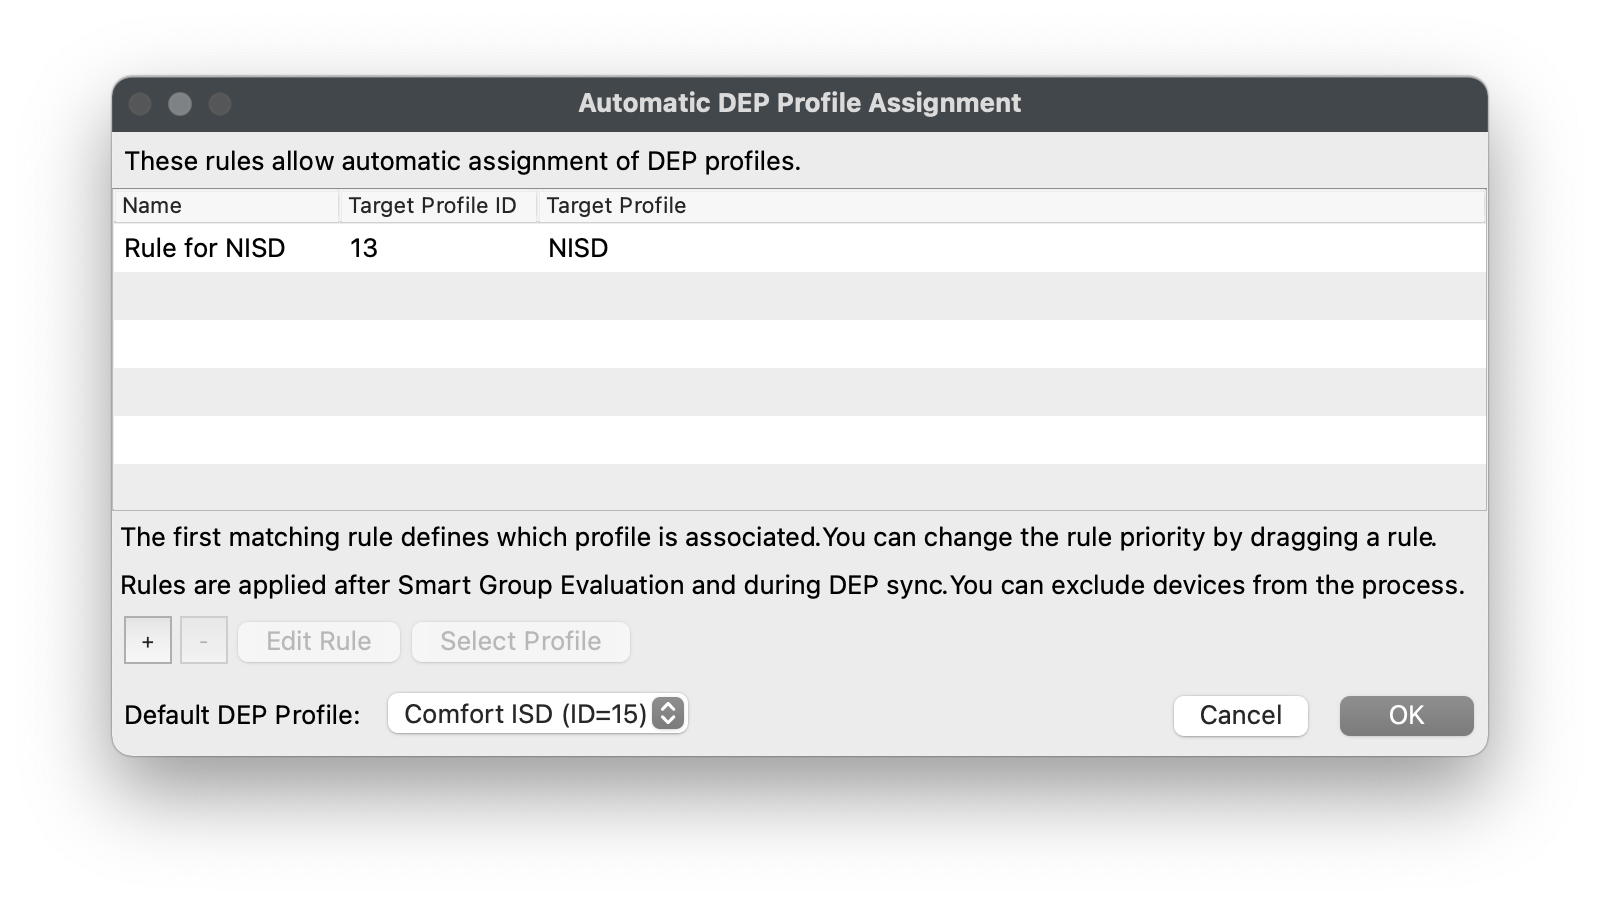

As noted in the Screenshot, the first matching rule (top to bottom) will be honoured; automated rules will override a Default Profile. Hence, Default Profile, if set, is considered the fallback if no rules are met.
### **Manually assign ADE Profile**
1. Open FileWave Admin and navigate to *"Assistants > ADE Association Management".*
2. Select one or more devices from left pane and drag-n-drop onto a ADE Profile.
- or...
3. Select one ADE Profile from the right pane and drag-n-drop it onto one device.
## **Generate custom FileWave Client for macOS ADE enrollments**
---
During a ADE enrollment, your macOS devices will automatically download and install the FileWave Client. Before enrolling a macOS device via ADE we must first upload a customized FileWave Client PKG to the FileWave Server.
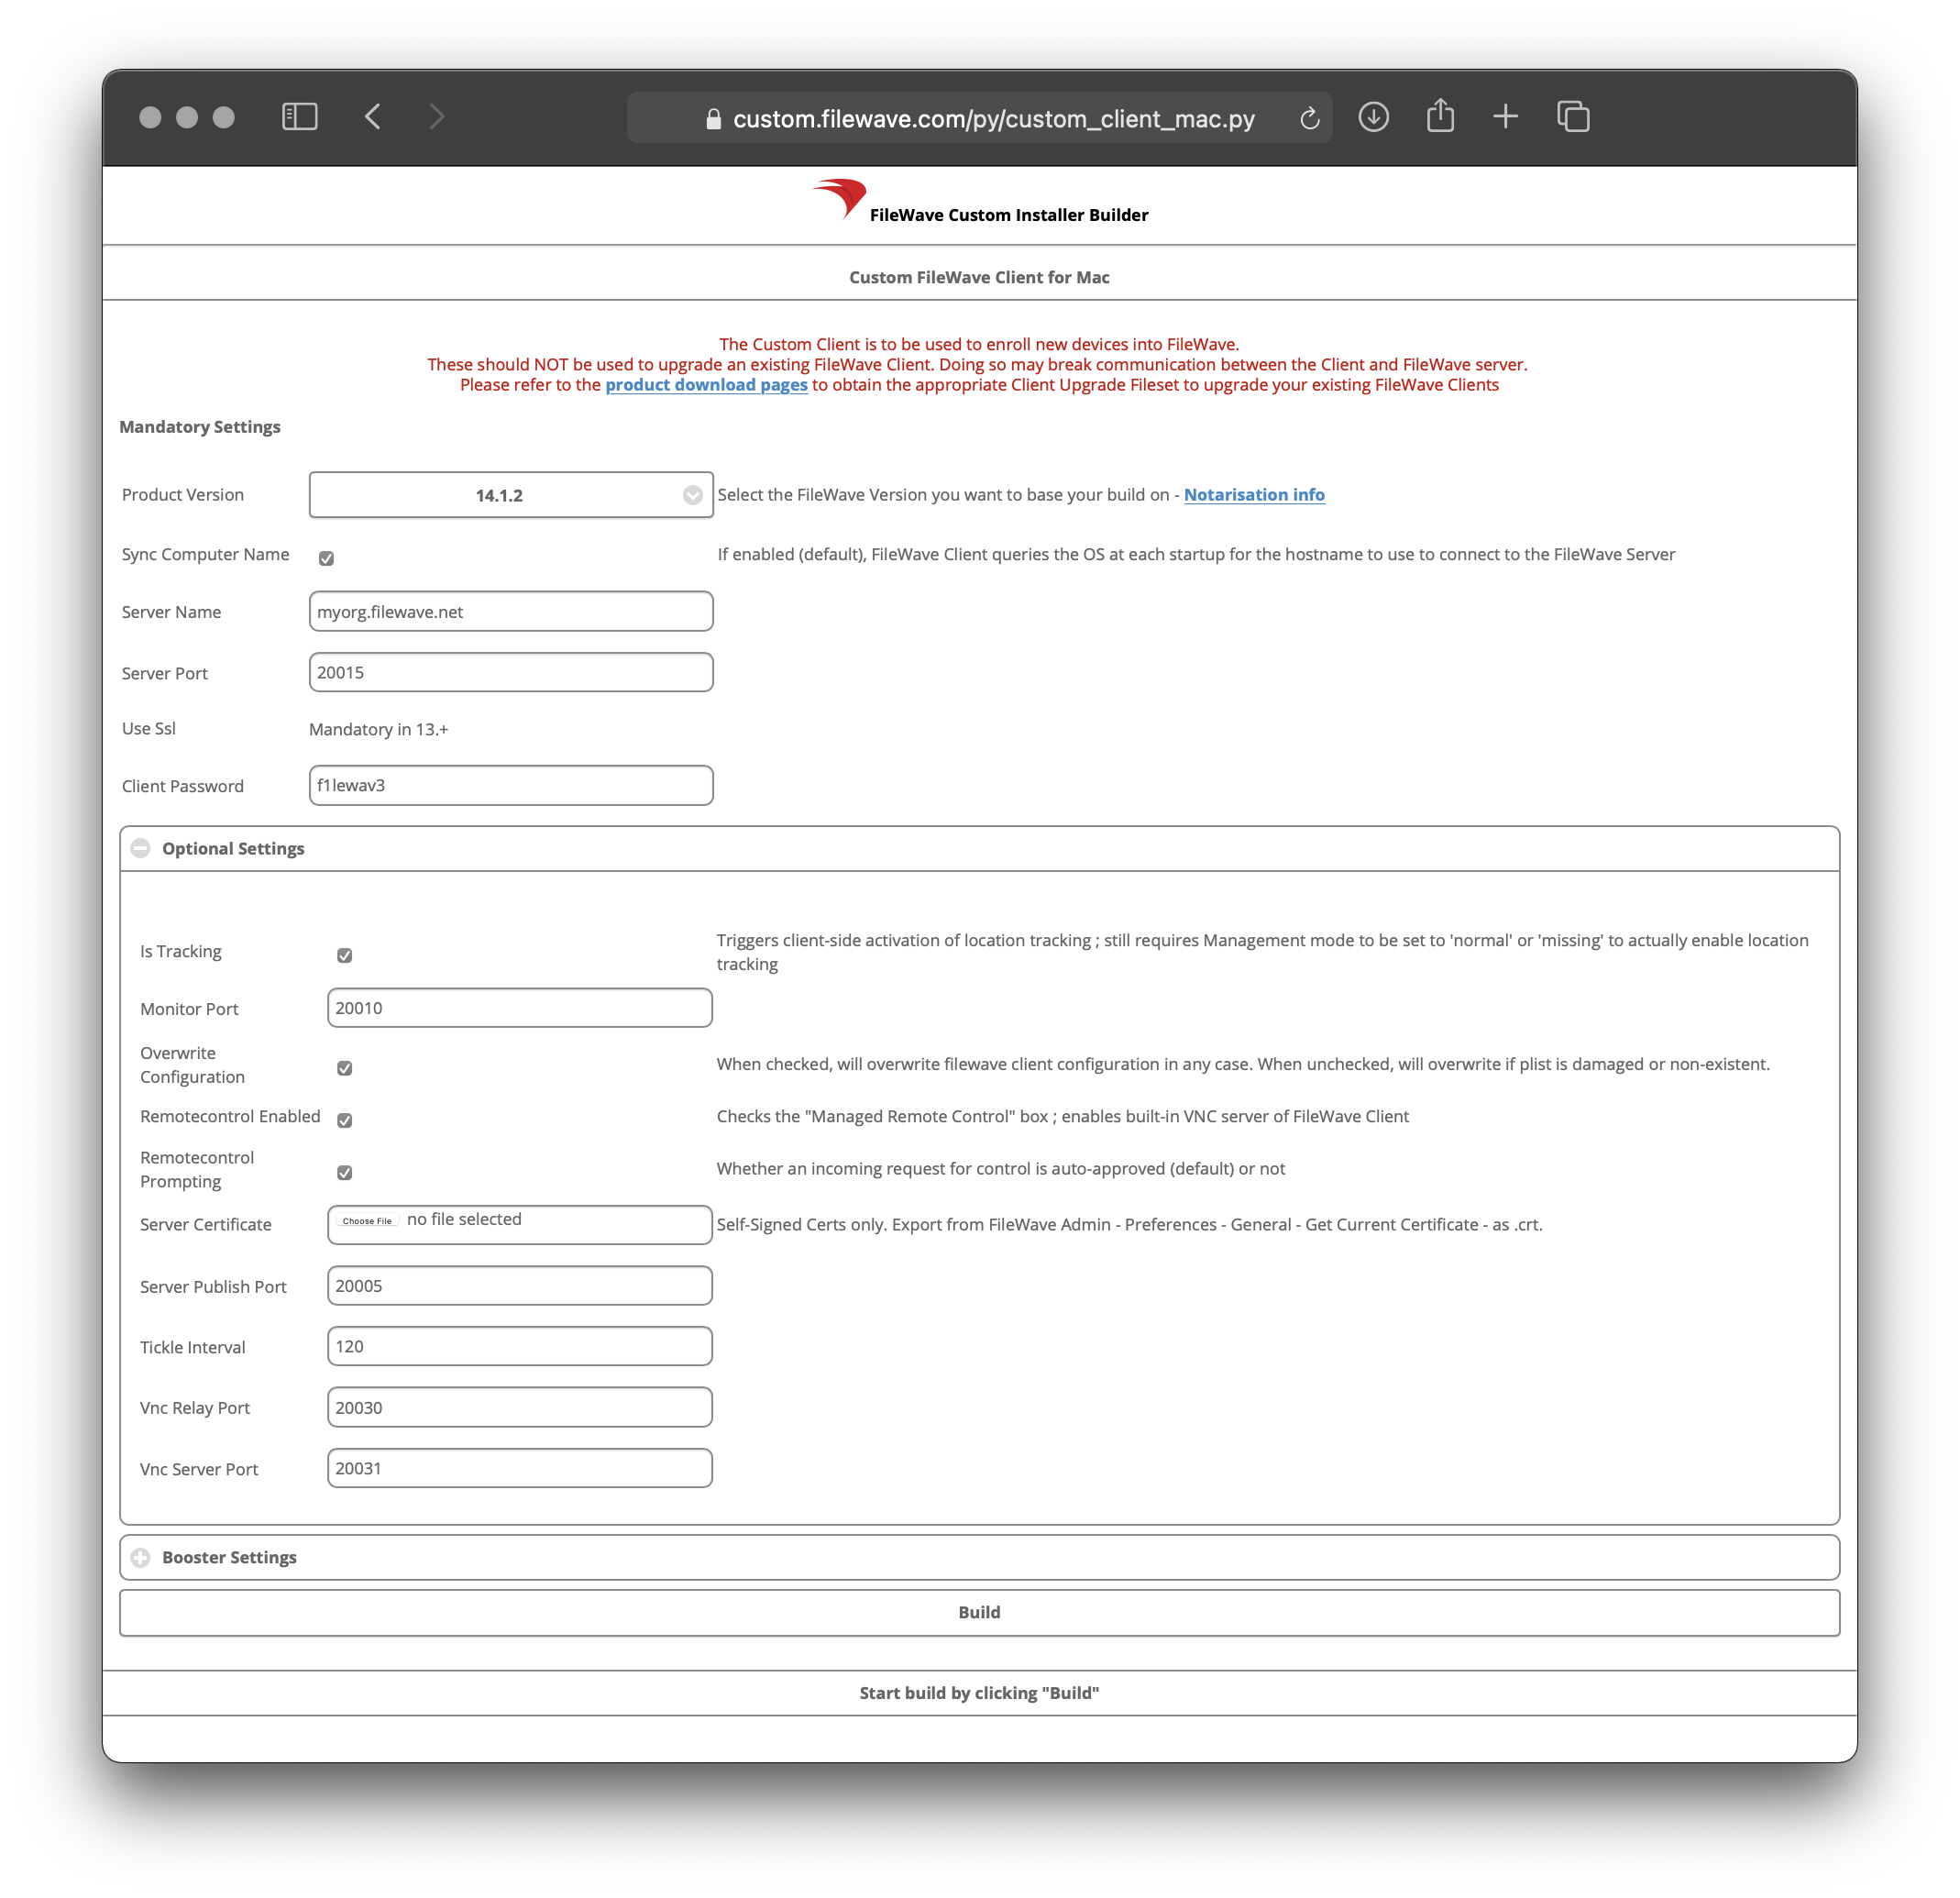
### **Generate a custom FileWave Client PKG**
1. Visit [FileWave Custom Installer Builder](https://custom.filewave.com/py/custom_client_mac.py)
2. Change the following settings to match your FileWave Server.
3. Click *"Build"* and wait for automatic download of ZIP.
4. Extract ZIP.
- **Mandatory Settings**
- Product Version = Your FileWave Server Version
- Sync Computer Name = macOS Hostname will be FileWave Client Name (recommended)
- Server Name = Fully Qualified Domain Name of your FileWave Server
- Server Port = 20015 (do not modify this as it will automatically go to the proper SSL port if you put in 20015)
- Client Password = Password used to change individual Client Preferences and to start screen-sharing session
- **Optional Settings**
- Is Tracking = Is Location Tracking Enabled for macOS Clients
- Monitor Port = Port used for FileWave Client Monitor (do not modify)
- Overwrite Configuration = Overwrite any existing FileWave Client configuration with settings entered here (recommended)
- Remotecontrol Enabled = Screen-sharing enabled for Windows Clients
- Remotecontrol Prompting = Whether or not to Prompt the end-user before starting screen-sharing session
- Server Certificate = Only upload certificate is using a Self-Signed Certificate; not required for CA-signed certificate
- Server Publish Port = 20005 (do not modify)
- Tickle Interval = Idle time for Windows Clients before checking for new Model Update (do not modify)
- Vnc Relay Port = 20030 (do not modify)
- Vnc Server Port = 20031 (do not modify)
- **Booster Settings**
- Do not configure unless instructed by FileWave SE
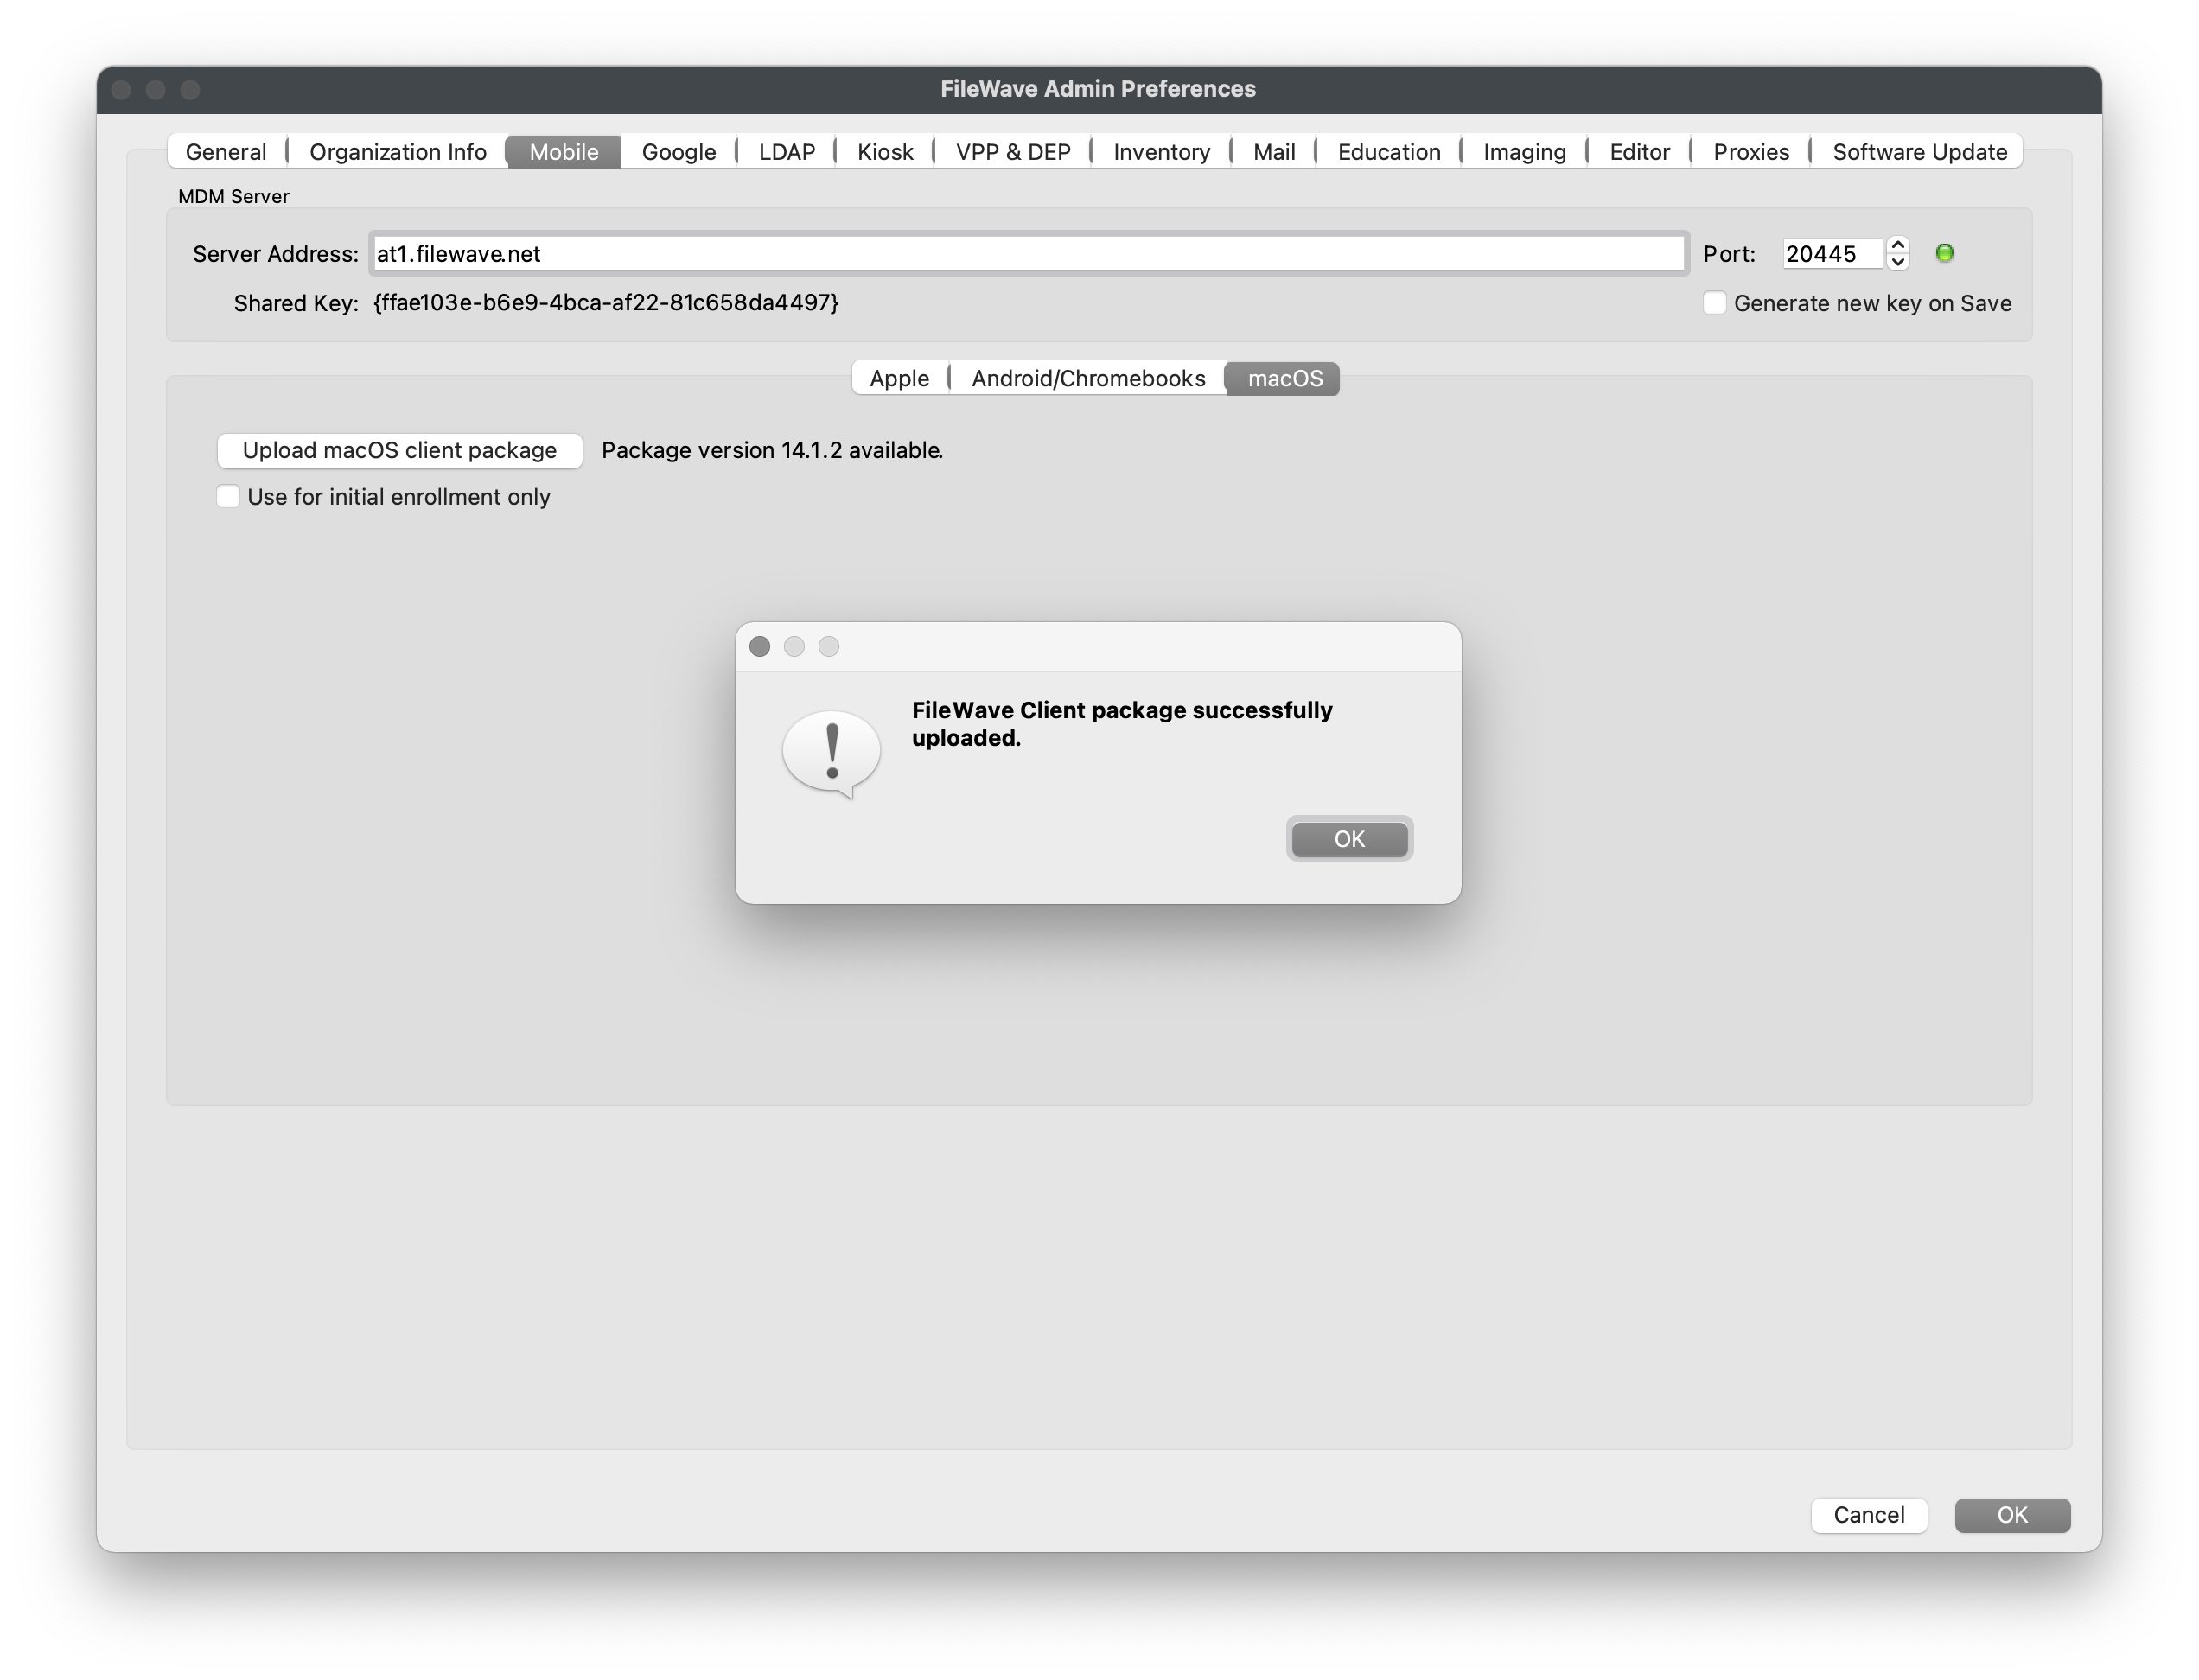
### **Upload custom FileWave Client PKG to FileWave**
1. Navigate to *"FileWave Admin > Preferences > Mobile > macOS"*.
2. Click *"Upload macOS client package"* and authenticate.
3. Select the extracted *"FileWaveClient\_XX.X.XX-FQDN-XX-XXX-XXXX.pkg"* from previous section.
4. Wait for the upload confirmation prompt.
5. Optionally, enable *"Use for initial enrollment only"*.
- If this box is unchecked, FileWave will deploy any new FileWave Client version uploaded to all MDM enrolled macOS devices.
6. Click *"OK"* to save the Preferences.
## **Enrolling Apple devices via ADE**
---
Now that your devices have been *"Assigned"* to a ADE Profile, they can either be Factory Reset if already configured or taken fresh out of the box from Apple and they will automatically enroll into FileWave.
If getting authentication required during enrollment, please review [this](https://kb.filewave.com/books/evaluation-guide/page/filewave-central-preferences "FileWave Central Preferences") section to learn how to disable ADE enrollment authentication**.**
## Finalizing adding of clients
FileWave Clients communicating to the FileWave server will not be able to connect until you add them to the model. We will now allow our new client to join the FileWave server.
[](https://kb.filewave.com/uploads/images/gallery/2024-04/HJuqYZeFYrbIstav-image.png)
1. Open FileWave Central.
2. Click on the “New Client” button in the tool bar
3. Select **Desktop Clients** for macOS computers or **Enrolled Mobile Devices** for iPhone, iPad, and Apple Vision Pro.
4. Select your new client from the list presented.
5. Click the “Add Clients” button in the lower right.
[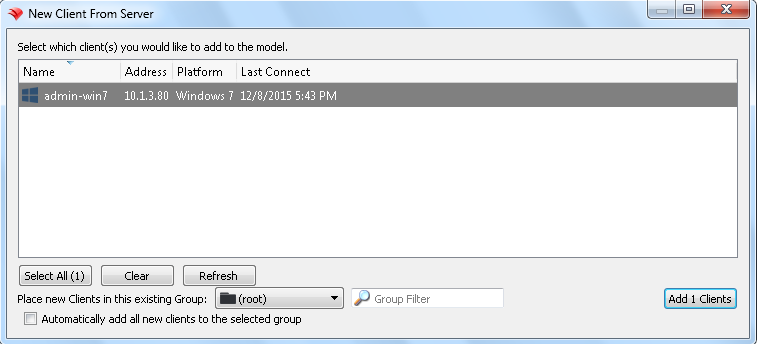](https://kb.filewave.com/uploads/images/gallery/2024-04/YprIA7FAYwipM6Rj-image.png)
Once you have selected “Add Clients”, you will be taken to the Clients view in FileWave Admin. By adding a client to the server, we have made changes to the model. In order for those changes to take effect, we need to perform a model update.
You can also decide to automatically add new clients to skip the step of adding devices. This is discussed here: [Conflict Resolution](https://kb.filewave.com/books/filewave-central-anywhere/chapter/conflict-resolution "Conflict Resolution")
## Making Changes to the Model
Remember that you will need to update the model anytime that you want to apply changes you have made. You can update the model after a single change or multiple changes (adding multiple clients, creating groups, etc.)
Congratulations! Your FileWave environment is now up and running! From here you can continue to add clients, build and deploy Filesets!
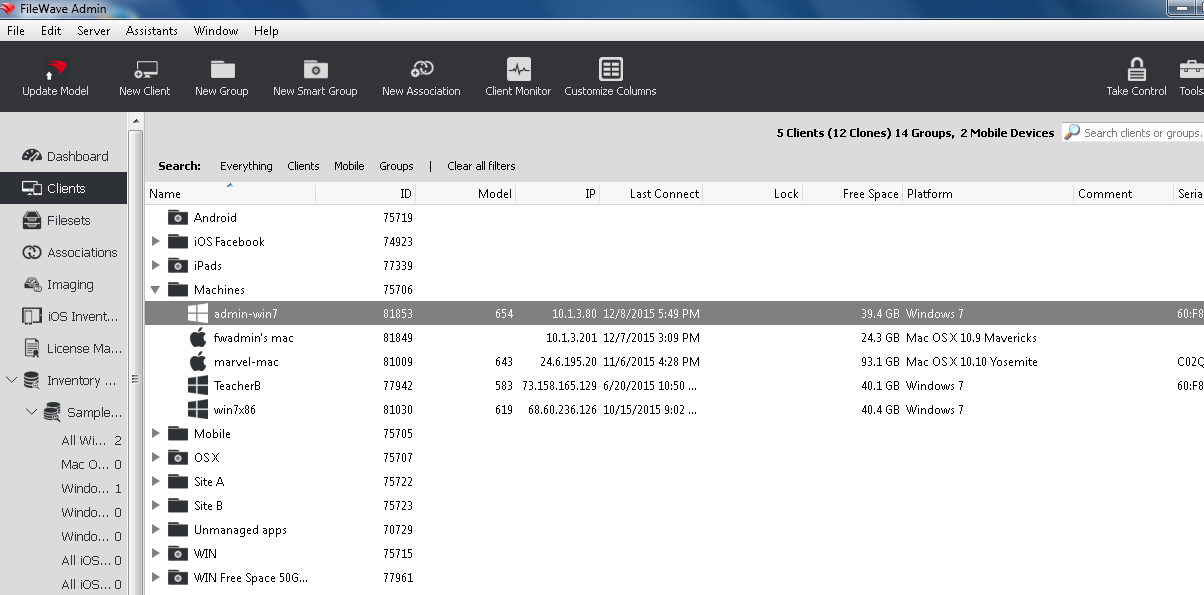
# Apple Manual Enrollment
## Not able to use DEP?
---
Apple's Device Enrollment Program is great but you may find that all or some of your devices aren't showing in [Apple School Manager](https://school.apple.com) or [Apple Business Manager](https://business.apple.com). Devices are usually excluded because they were not purchased directly from Apple or an Authorized Reseller. iOS device capable of running iOS 11+ can be manually added to your ASM/ABM account but unfortunately this not yet an option for macOS. This section covers several manual enrollment methods and why you might need to leverage them.
## Add iOS devices to ASM/ABM using Apple Configurator 2
---
If you have an iOS 11+ or tvOS 11+ device that was not originally purchased from Apple or an Apple Authorized Reseller, you can manually add the device to ASM/ABM using Apple Configurator 2. Please first review Apple's documentation [here](https://support.apple.com/en-am/guide/apple-configurator-2/cad99bc2a859/mac) followed by FileWave Knowledge Base article [here](https://kb.filewave.com/books/apple-school-business-manager/page/adding-non-macos-devices-to-businessapplecom-abm-and-apple-school-manager-asm-using-apple-configurator-25 "Adding macOS devices to Apple Business or School Manager using Apple Configurator 2") for more FileWave-specific processes. Once the device has been added to ASM/ABM you can take advantage of DEP for any future enrollments of this device.
## MDM-enroll Apple devices using URL Enrollment
---
If ADE is unavailable, you can MDM-enroll an iPhone, iPad, [Apple Vision Pro](https://kb.filewave.com/books/apple-general-info/page/managing-apple-vision-pro-and-visionos), or Mac using FileWave URL Enrollment. This method allows an end user to enroll a previously configured device without a factory reset. The user may be able to remove the MDM profile and unenroll the device. On macOS, the user also needs administrator privileges to install the MDM profile.
If getting authentication required during enrollment, please review [this](https://kb.filewave.com/books/evaluation-guide/page/filewave-central-preferences "FileWave Central Preferences") section to learn how to disable URL enrollment authentication.
### macOS URL Enrollment
1. 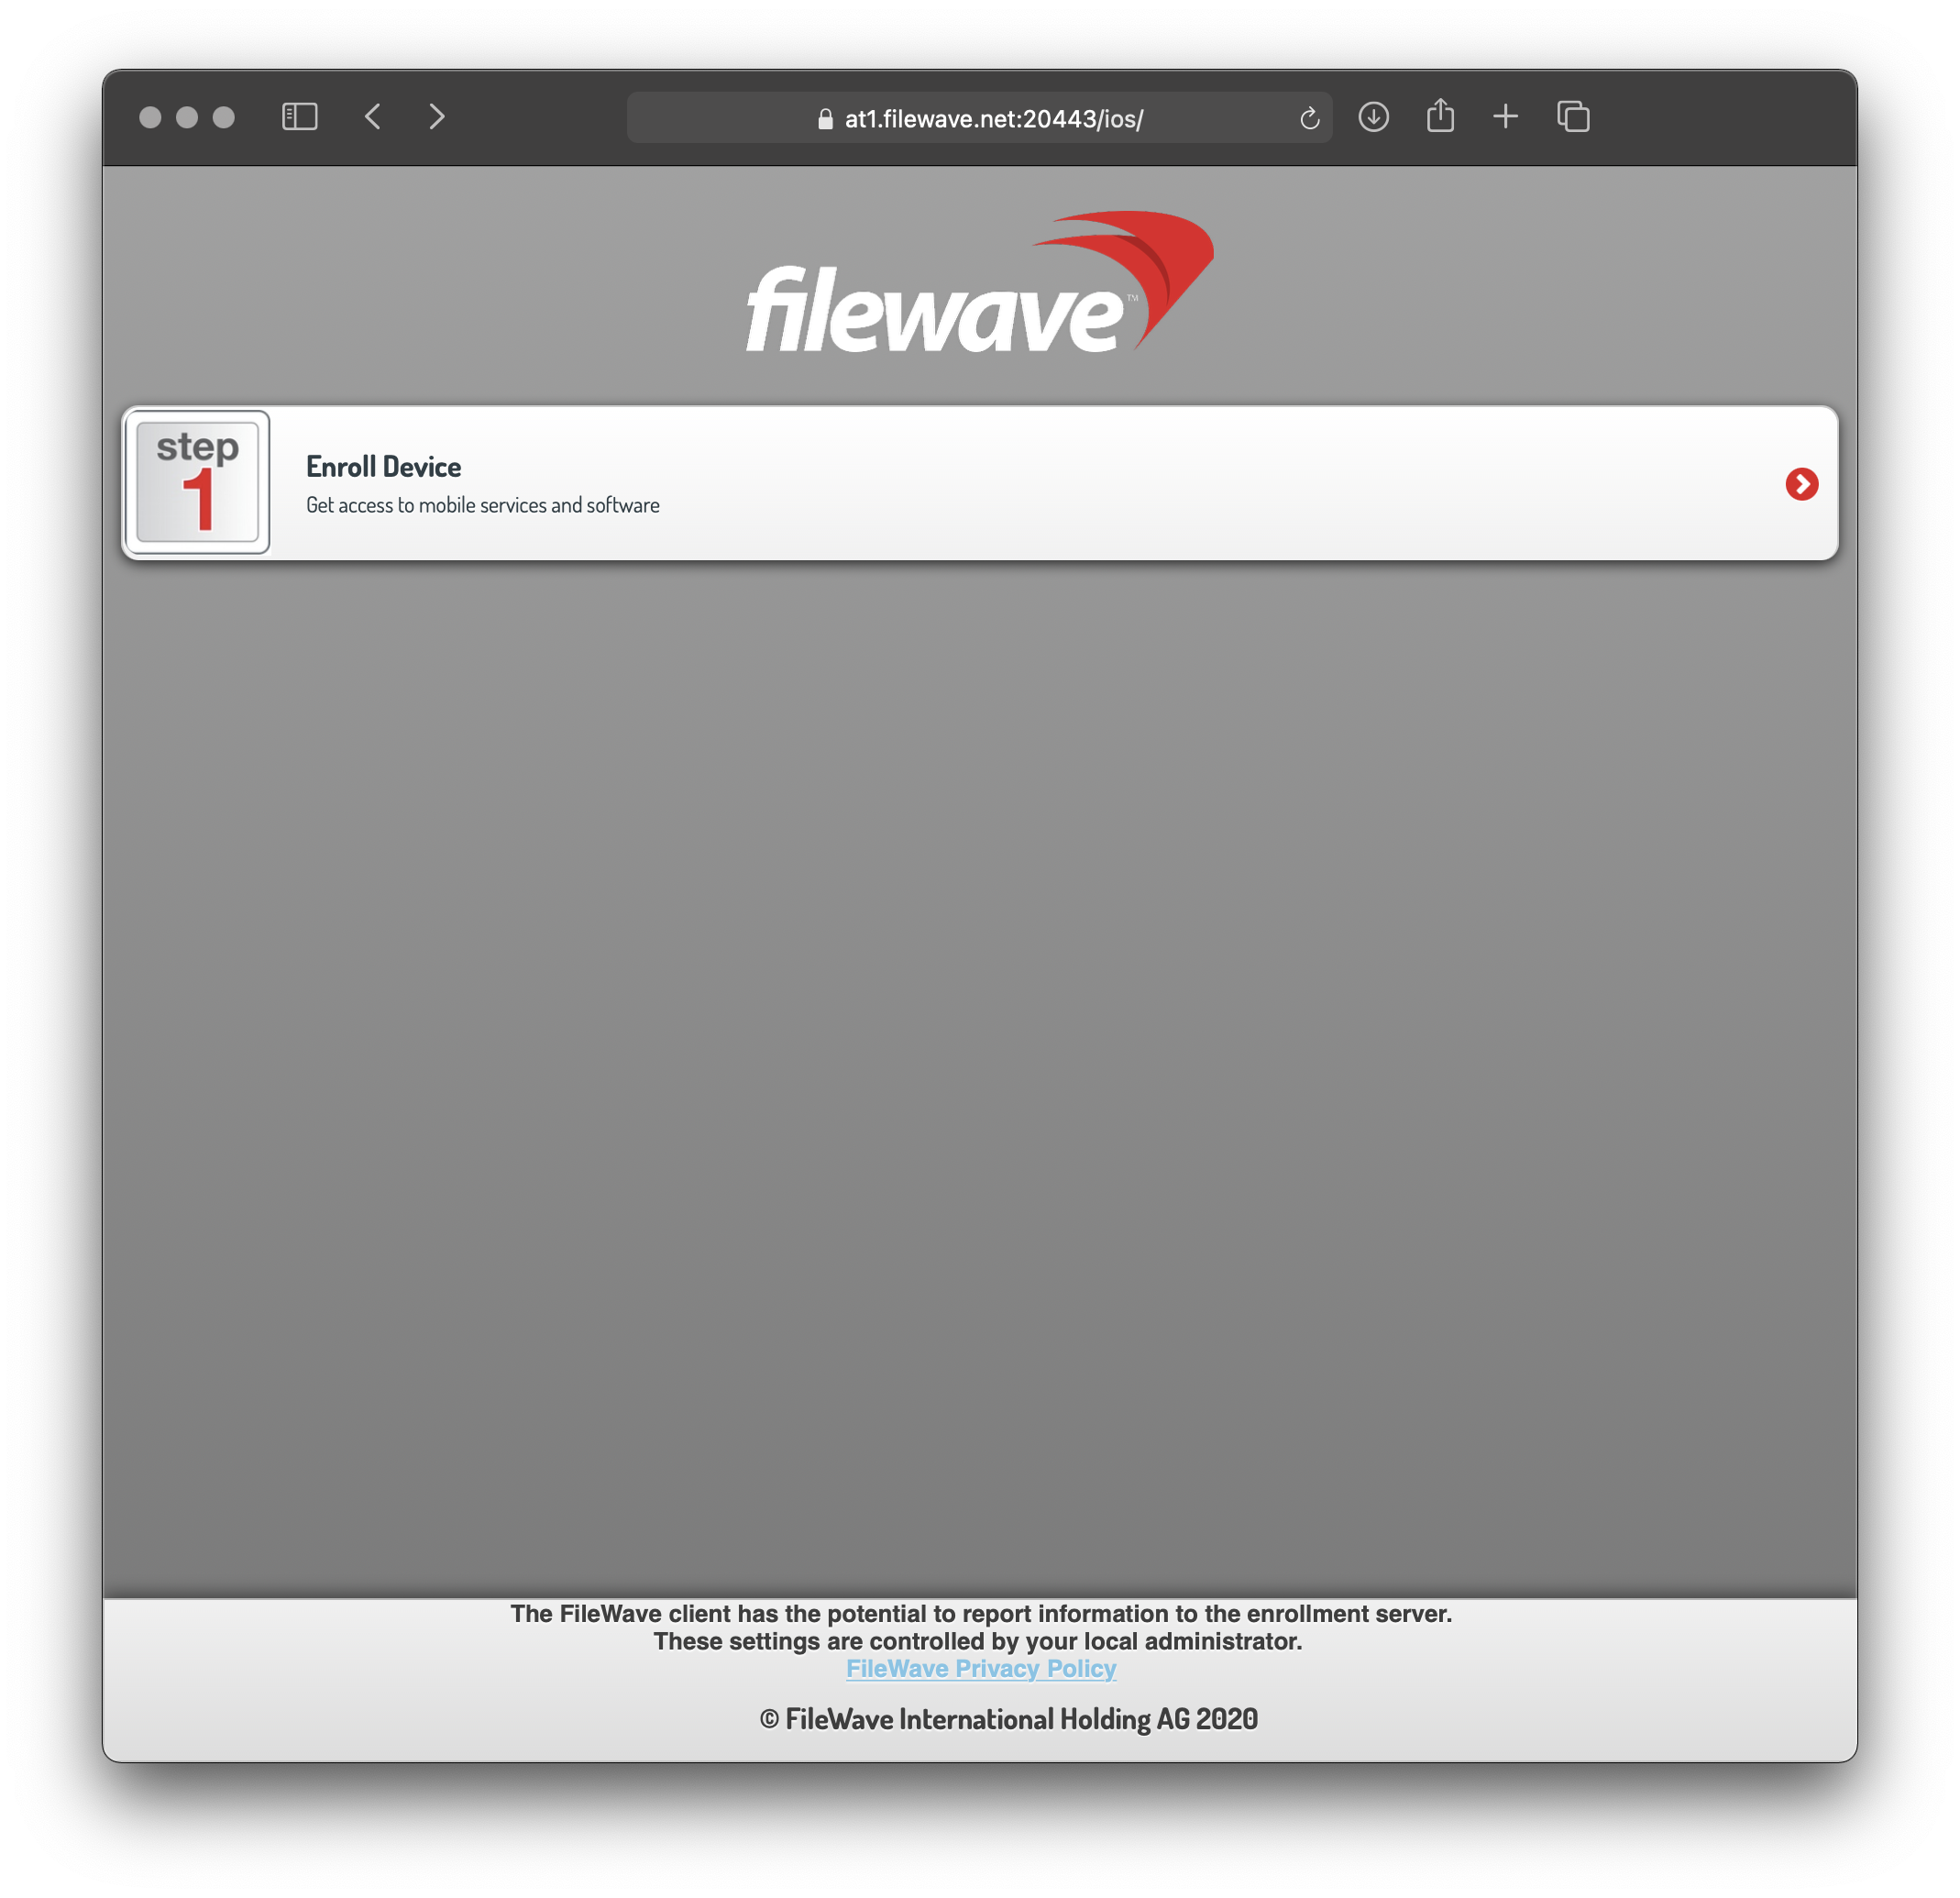Navigate to *"https://yourfilewaveserver.domain.com:20443"* using web browser of choice.
2. Click the large *"Enroll Device"* button to download the MDM Enrollment Profile.
- If using a self-signed certificate, you will see an additional step to download certificate.
- If enrollment authentication is enabled, please authenticate.
3. Located the downloaded MDM Enrollment Profile *"enroll.mobileconfig"*.
4. Double-click on the *"enroll.mobileconfig"* file.
5. Open *"System Preferences > Profiles"* from your macOS menubar.
6. Click *"Install"* next to the "FileWave OTA Enrollment" Profile.
7. Click *"Install"* again at the next prompt and authenticate using your macOS Administrator credentials.
8. The MDM Enrollment Profile is now installed and the FileWave Client will be installed automatically.
- If you have not imported your custom macOS FileWave Client, please review the [Generate custom FileWave Client for macOS DEP enrollments](https://kb.filewave.com/books/evaluation-guide/page/apple-ade-enrollment "Apple DEP Enrollment") section.
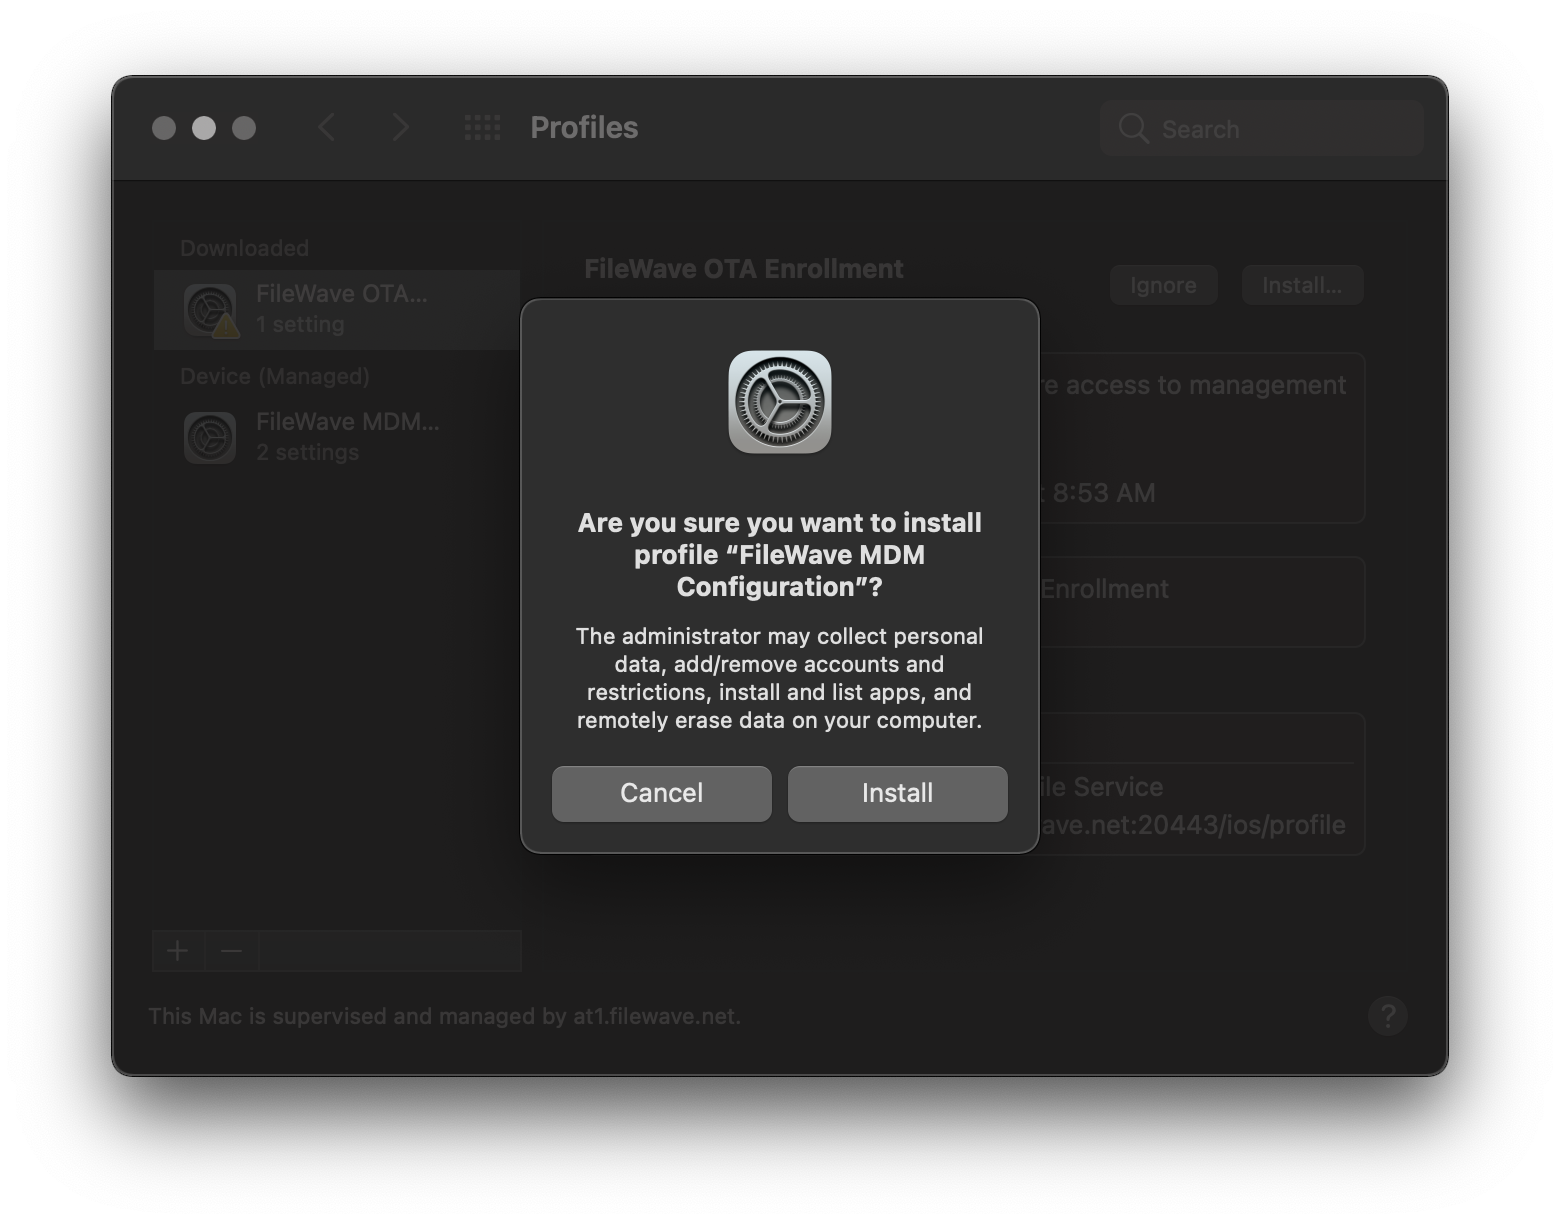
### Apple mobile URL Enrollment: iPhone, iPad, and Vision Pro
Use the same FileWave enrollment URL and MDM-profile approval flow on Apple Vision Pro. The exact on-device labels follow the installed visionOS version.
1. Navigate to *"https://yourfilewaveserver.domain.com:20443"* using iOS Safari.
2. Click the large *"Enroll Device"* button to download the MDM Enrollment Profile.
- If using a self-signed certificate, you will see an additional step to download certificate and [manually trust](https://support.apple.com/en-us/HT204477).
- If enrollment authentication is enabled, please authenticate.
3. *"Allow"* the Profile download, acknowledge the *"Profile Downloaded"* prompt, and navigate to *"Settings"*.
4. Click the *"Profile Downloaded"* item from the *"Settings"* and click *"Install"*.
5. Click *"Install"* again and *"Trust"* the *"Remote Management"* prompt.
6. Your iOS device is now MDM enrolled and you should see the "FileWave App Portal" on the Home Screen.
## iOS User Enrollment (BYOD)
---
Starting with iOS 13, FileWave allows your end-users to enroll using User Enrollment. This is a new form of BYOD enrollment that allows your organization to deploy VPP applications to the devices while keeping other end-user data private from the MDM. This method also required the use of Managed Apple IDs configured in either Apple School Manager or Apple Business Manager.
For more in-depth information and setup of iOS User Enrollment, please consult the following FileWave Knowledge Base article [iOS BYOD User Enrollment](https://kb.filewave.com/books/ios-ipados/chapter/iosipados-byod-user-enrollment "iOS BYOD User Enrollment"). This article contains a video walk though of the enrollment process along with the [limitations](https://kb.filewave.com/books/ios-ipados/page/managing-byod-user-enrollment "Managing BYOD User Enrollment") of iOS User Enrollment.
## Enroll non-MDM macOS Client
---
Enrolling a macOS device outside of the MDM is possible although it is unrecommended. To enroll a non-MDM macOS device into FileWave, you will need to simply install the FileWave Client PKG using a macOS Administrator account.
Features unavailable with non-MDM macOS enrollment
- VPP content deployment
- Profile Deployment (macOS Big Sur [unsupported](https://kb.filewave.com/display/KB/Profile+installation+on+macOS+Big+Sur))
- Profile Restrictions (Security and Privacy)
- FileVault Disk Encryption with Key Escrow
- Remote Shutdown/Reboot
- Lock Device
- Activation Lock Bypass
- Firmware Password Management
- Software Updates via MDM (macOS Big Sur)
### Generate a custom FileWave Client PKG
1. Open the [FileWave Customer Installer Builder](https://custom.filewave.com/py/custom_client_mac.py) for macOS.
2. Fill out the settings accordingly.
3. Click the *"Build"* button and wait for the automatic download.
4. Extract ZIP and install the customized FileWave Client PKG.
**Mandatory Settings**
**Product Version** = Your FileWave Server Version
**Sync Computer Name** = macOS Hostname will be FileWave Client Name (recommended)
**Server Name** = Fully Qualified Domain Name of your FileWave Server
**Server Port** = 20015 (do not modify)
**Client Password** = Password used to change individual Client Preferences
Note: The default port setting for Server Port above is 20015. However, SSL is now required, and the system will automatically use port 20017 instead when 20015 is entered. Do not manually set the port to 20017. Always enter 20015, and the system will handle the SSL port change for you.
**Optional Settings**
**Is Tracking** = Is Location Tracking Enabled for macOS Clients
**Monitor Port** = Port used for FileWave Client Monitor (do not modify)
**Overwrite Configuration** = Overwrite any existing FileWave Client configuration with settings entered here (recommended)
**Remotecontrol Enabled** = Screen-sharing enabled for macOS Clients
**Remotecontrol Prompting** = Whether or not to Prompt the end-user before starting screen-sharing session
**Server Certificate** = Only upload certificate is using a Self-Signed Certificate; not required for CA-signed certificate
**Server Publish Port** = 20005 (do not modify)
**Tickle Interval** = Idle time for macOS Clients before checking for new Model Update (do not modify)
**Vnc Relay Port** = 20030 (do not modify)
**Vnc Server Port** = 20031 (do not modify)
**Booster Settings**
Initially you may want to make an installer that does not include Boosters. Read more about them here: [Boosters](https://kb.filewave.com/books/boosters "Boosters")
## Finalizing adding of clients
FileWave Clients communicating to the FileWave server will not be able to connect until you add them to the model. We will now allow our new client to join the FileWave server.
[](https://kb.filewave.com/uploads/images/gallery/2024-04/HJuqYZeFYrbIstav-image.png)
1. Open FileWave Central.
2. Click on the “New Client” button in the tool bar
3. Select **Desktop Clients** for macOS computers or **Enrolled Mobile Devices** for iPhone, iPad, and Apple Vision Pro.
4. Select your new client from the list presented.
5. Click the “Add Clients” button in the lower right.
[](https://kb.filewave.com/uploads/images/gallery/2024-04/YprIA7FAYwipM6Rj-image.png)
Once you have selected “Add Clients”, you will be taken to the Clients view in FileWave Admin. By adding a client to the server, we have made changes to the model. In order for those changes to take effect, we need to perform a model update.
You can also decide to automatically add new clients to skip the step of adding devices. This is discussed here: [Conflict Resolution](https://kb.filewave.com/books/filewave-central-anywhere/chapter/conflict-resolution "Conflict Resolution")
## Making Changes to the Model
Remember that you will need to update the model anytime that you want to apply changes you have made. You can update the model after a single change or multiple changes (adding multiple clients, creating groups, etc.)
Congratulations! Your FileWave environment is now up and running! From here you can continue to add clients, build and deploy Filesets!

# Using LDAP to enroll macOS/iOS/Android devices
Use this document if you are trying to point your enrollment of device to directory services (Active Directory, Open Directory, eDirectory or OpenLDAP). This is used for Android Device and well as iOS devices or macOS devices enrolling OTA (over the air) as well as Apple's DEP (Device Enrollment Program) enrollment for both iOS and macOS devices.
---
This process consists of:
1- Backing up the current config
2- Editing a new config file to properly read the LDAP structure
3- Restarting the Apache Process so it reads the new config file
## Getting the files ready
Open a Terminal Window or use SSH to get into the computer running FileWave Server
Gain root credentials
```
sudo -s
```
Enter your login password
Navigate to the FileWave Apache configurations folder
OS X / Linux:
`cd /usr/local/filewave/apache/conf/`
Backup your current mdm\_auth.conf by making a copy
```
cp mdm_auth.conf mdm_auth.conf.bac
```
Make a copy of the LDAP example and rename it
```
cp mdm_auth.conf.example_ldap_auth mdm_auth.conf
```
# Making the changes
Open it up using your preferred text editor (nano mdm\_auth.conf or vi mdm\_auth.conf).
it will look like this:
```
# This is an example of ldap based user auth
AuthType Basic
AuthBasicProvider ldap
AuthName "Enroll IOS Device"
AuthLDAPURL "ldap://10.1.10.25:389/cn=Users,dc=saturn,dc=filewave,dc=us?uid"
Require valid-user
# If you need to bind to the ldap server, use these lines
# AuthLDAPBindDN "cn=Admin,o=myorg"
# AuthLDAPBindPassword "secret1"
LDAPReferrals Off
# This is an example of ldap based user auth
AuthType Basic
AuthBasicProvider ldap
AuthName "Enroll IOS Device"
AuthLDAPURL "ldap://10.1.10.25:389/cn=Users,dc=saturn,dc=filewave,dc=us?uid"
Require valid-user
ErrorDocument 401 "Enrollment credentials are needed."
# If you need to bind to the ldap server, use these lines
# AuthLDAPBindDN "cn=Admin,o=myorg"
# AuthLDAPBindPassword "secret1"
LDAPReferrals Off
# This is an example of ldap based user auth
AuthType Basic
AuthBasicProvider ldap
AuthName "Enroll Android Device"
AuthLDAPURL "ldap://10.1.10.25:389/cn=Users,dc=saturn,dc=filewave,dc=us?uid"
Require valid-user
# If you need to bind to the ldap server, use these lines
# AuthLDAPBindDN "cn=Admin,o=myorg"
# AuthLDAPBindPassword "secret1"
LDAPReferrals Off
# This is an example of ldap based user auth
AuthType Basic
AuthBasicProvider lda4
AuthName "Google Cloud Messaging configuration"
AuthLDAPURL "ldap://10.1.10.25:389/cn=Users,dc=saturn,dc=filewave,dc=us?uid"
Require valid-user
# If you need to bind to the ldap server, use these lines
# AuthLDAPBindDN "cn=Admin,o=myorg"
# AuthLDAPBindPassword "secret1"
LDAPReferrals Off
```
The different sections correspond with the different enrollment URLs.
For example, if my servers hostname was [server.filewave.com](http://server.filewave.com):
**mdm\_auth.conf**
Used by the FileWave Android client to talk to server
## Open Directory & eDirectory
OD (by default) does not require a user to authenticate to read the structure.
You will not need to uncomment the bind options.
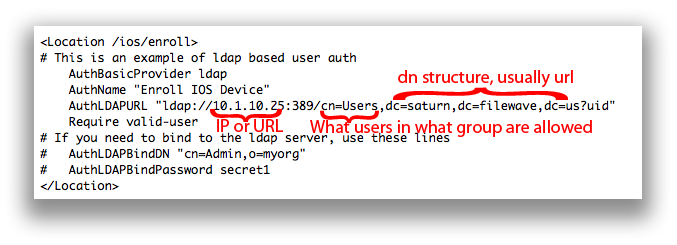
AuthName - The title of the login window
AuthLDAPURL - Where and what groups are allowed to login and there for enroll. The example above would allow anyone in the 'Users' group to enroll a device.
Make the appropriate changes and then save the .conf
## Active Directory
AD (by default) requires you bind to the directory to read. Many people create a read-only directory account.
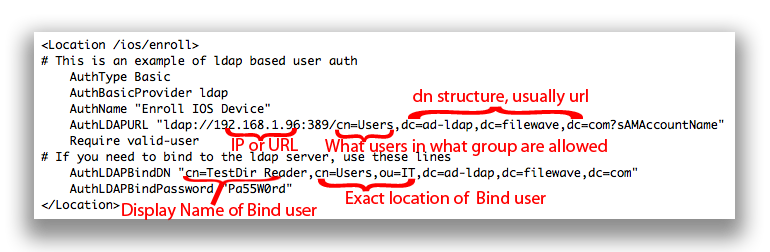
AuthName - The title of the login window
AuthLDAPURL - Where and what groups are allowed to login and there for enroll. The example above would allow anyone in the 'Users' group to enroll a device.
AuthLDAPBindDN - From specific to most general. Username, what group that is in, what group (or organizational unit) that group is in, and the server. The example above would allow the user 'TestDir Reader' who is in the group 'User' who is in the Org Unit 'IT' on the Active Directory server of [ad-ldap.filewave.com](http://ad-ldap.filewave.com) to bind.
AuthLDAPBindPassword - Password for user account being used to bind to AD.
Make the appropriate changes and then save the .conf
## Restarting Apache
Once saved, restart the FileWave Apache process/service
Now when a device attempts to enroll (by pressing the Enroll Device option on the site). They will be prompted to enter their username and password from the directory server.
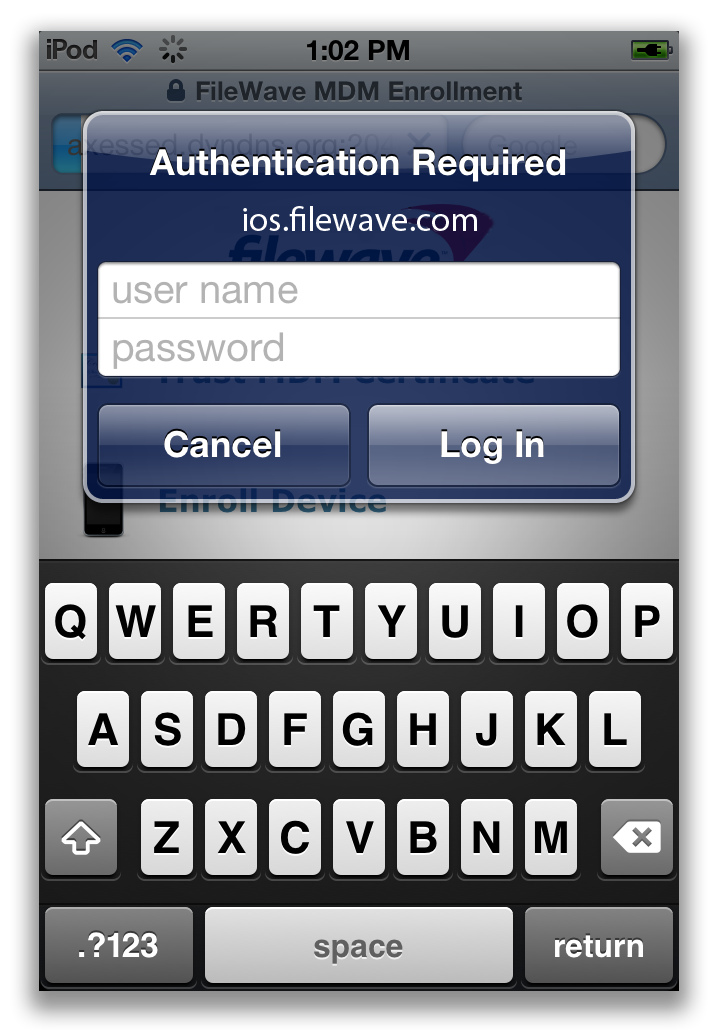
## Using several authentication sources for the same enrollment type
When we want to use several authentication sources (not nested locations) , we need to use AuthnProviderAlias sections to define those sources. The same format for binding to a single source ( see above ) apply for configuring each AuthnProviderAlias section , as in the following example
At the start of the file we define an alias by using:
```
AuthLDAPBindDN ""
AuthLDAPBindPassword ""
AuthLDAPURL ""
```
Then below that you specify the location and call for the alias
```
AuthBasicProvider ALIAS_NAME0 ALIAS_NAME1 ALIAS_NAME2
AuthType Basic
AuthName "Enroll IOS Device"
Require valid-user
```
A final MDM\_auth.conf would look something like this:
```
AuthLDAPBindDN "cn=BindUserName,dc=filewave,dc=net"
AuthLDAPBindPassword "YourBindPassword"
AuthLDAPURL "ldap://ldap.filewave.net:389/OU=student,dc=filewave,dc=net?sAMAccountName"
AuthLDAPBindDN "cn=BindUserName,dc=filewave,dc=net"
AuthLDAPBindPassword "YourBindPassword"
AuthLDAPURL "ldap://ldap.filewave.net:389/OU=staff,dc=filewave,dc=net?sAMAccountName"
AuthBasicProvider Faculty Student
AuthType Basic
AuthName "Enroll IOS Device"
Require valid-user
```
---
## Troubleshooting tips
Take a look at the log files for apache:
OS X / Linux:
` /usr/local/filewave/apache/logs/error_log
`
Below are some sample errors and what they typically mean.
NOT Bound:
```
[Thu Feb 09 22:10:19 2012] [error] [client 192.168.1.109] user diradmin: authentication failure for "/ios/enroll": Password Mismatch, referer: https://192.168.1.95:20443/ios/
```
Bound but user entered info wrong OR ldap url pointed to wrong group:
```
[Thu Feb 09 22:29:16 2012] [error] [client 192.168.1.109] user diradmin: authentication failure for "/ios/enroll": Password Mismatch
```
Bound w/ Bad User
```
[Thu Feb 09 22:29:00 2012] [error] [client 192.168.1.109] user lkajshdg not found: /ios/enroll
```
Could be Bound or not but not filtering by the correct ?uid ?sAMAccountName at end of URL (?UID is an OD or eDir, AD is typically ?sAMAccountName)
```
[Thu Feb 09 22:17:31 2012] [error] [client 192.168.1.109] user admin not found: /ios/enroll, referer: https://192.168.1.95:20443/ios/
```
Something wrong in the mdm\_auth.conf file. Like AuthzLDAPAuthoritative isn't off or shoudn't be there.
```
apache require directives present and no authoritative handler
```
### Recursive issues
Does it appear that your server only looks at the one group/unit pointed to and not sub-groups? try adding ?sub at the end of your AuthLDAPURL lines:
```
AuthLDAPURL "ldap://ldap.filewave.net:389/OU=student,dc=filewave,dc=net?sAMAccountName?sub"
```
Always feel free to contact support for further assistance.
# Chromebook Enrollment
## **How to enroll Chromebooks into FileWave**
---
Before enrolling Chromebooks, review [Platform Integrations > Chromebooks](https://kb.filewave.com/books/evaluation-guide/page/chromebook-client-pre-requisites "Chromebooks") to confirm Google Admin Console is syncing with FileWave. After that sync completes, provisioned Chromebooks appear in FileWave Central without a separate FileWave enrollment step.
### Provisioning Chromebooks
Provisioning the Chromebook itself is a short device-side workflow once the Google integration is configured.
Do not log into the Chromebook before enrollment. If a user signs in first, reset the device and start the enrollment process again.
You need a configured Google enrollment user to enroll the device.
On power up, the device should present the Welcome page:
[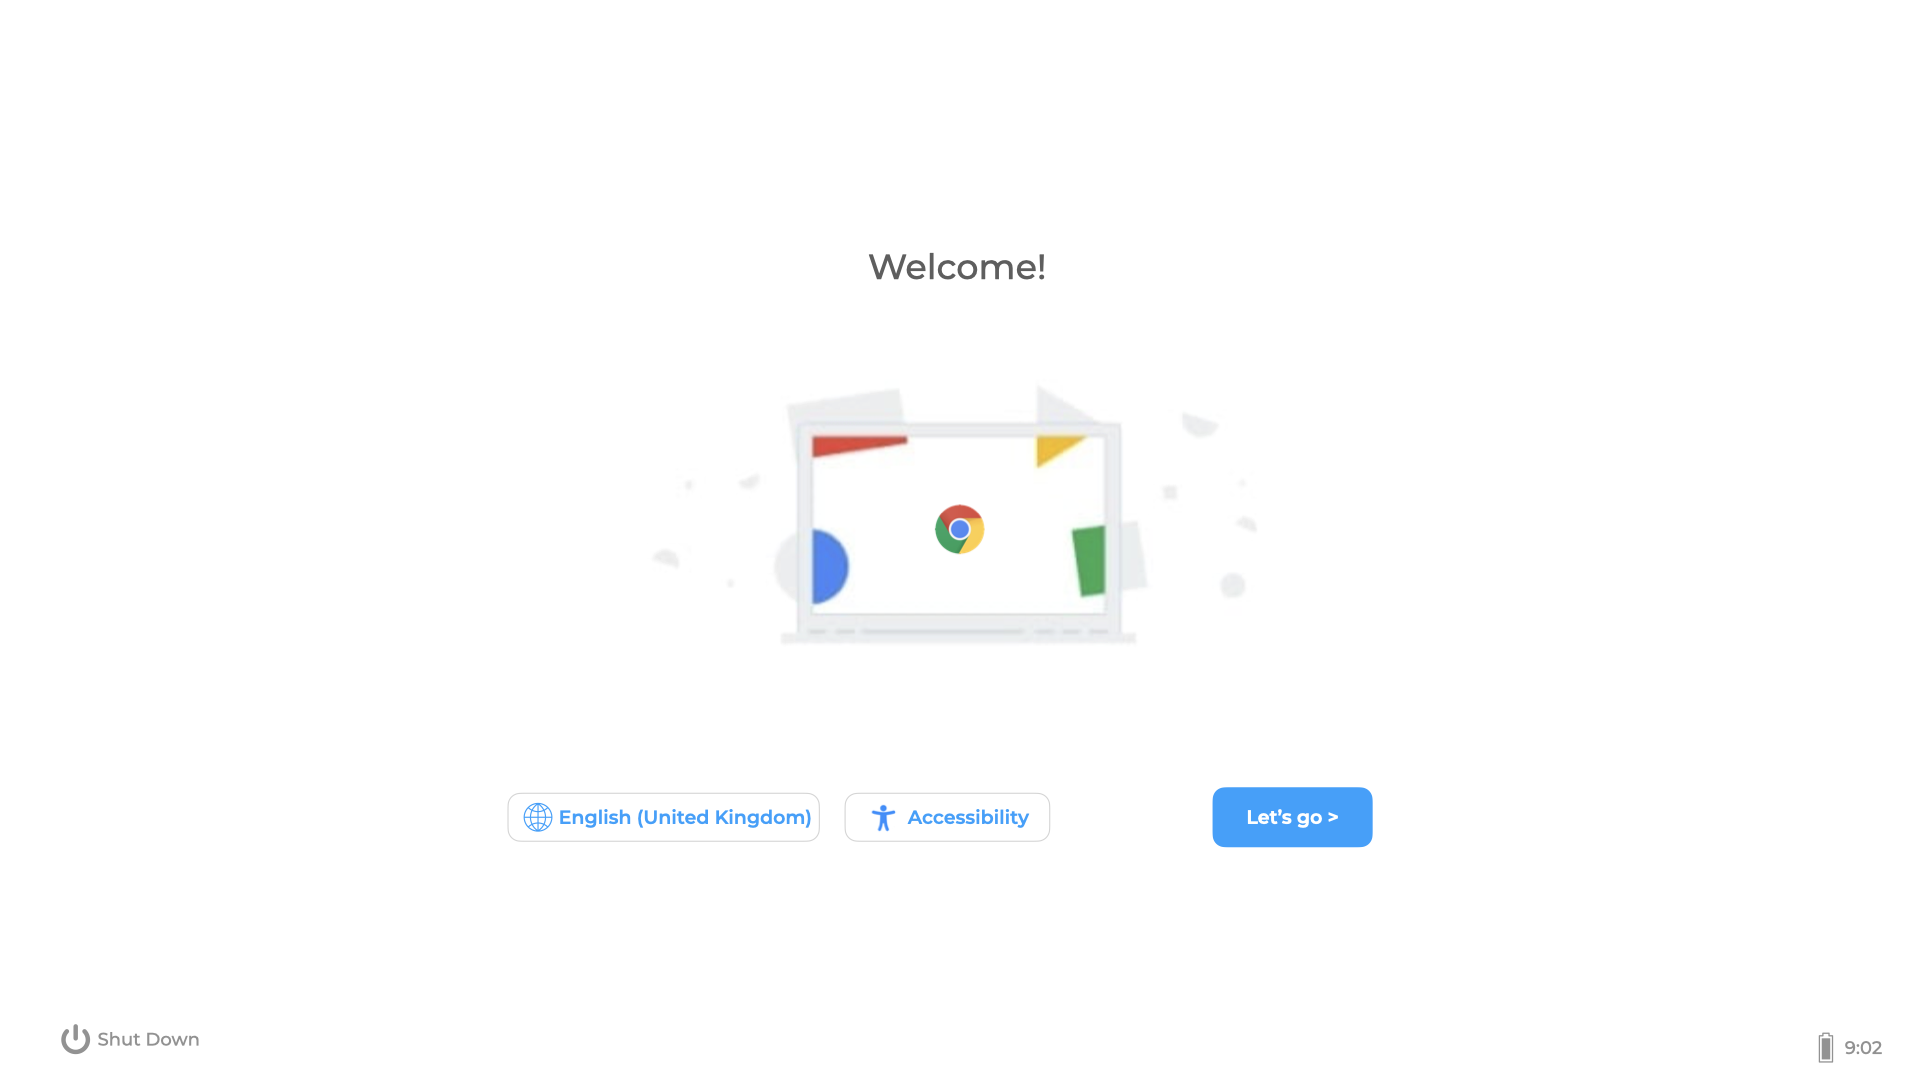](https://kb.filewave.com/uploads/images/gallery/2023-07/AHeJwW9ThqeA0GHO-chromebook-welcome.png)
Click **Let's go**, then select a Wi-Fi network.
After the device joins a network, it may show an Enterprise Enrollment page:
[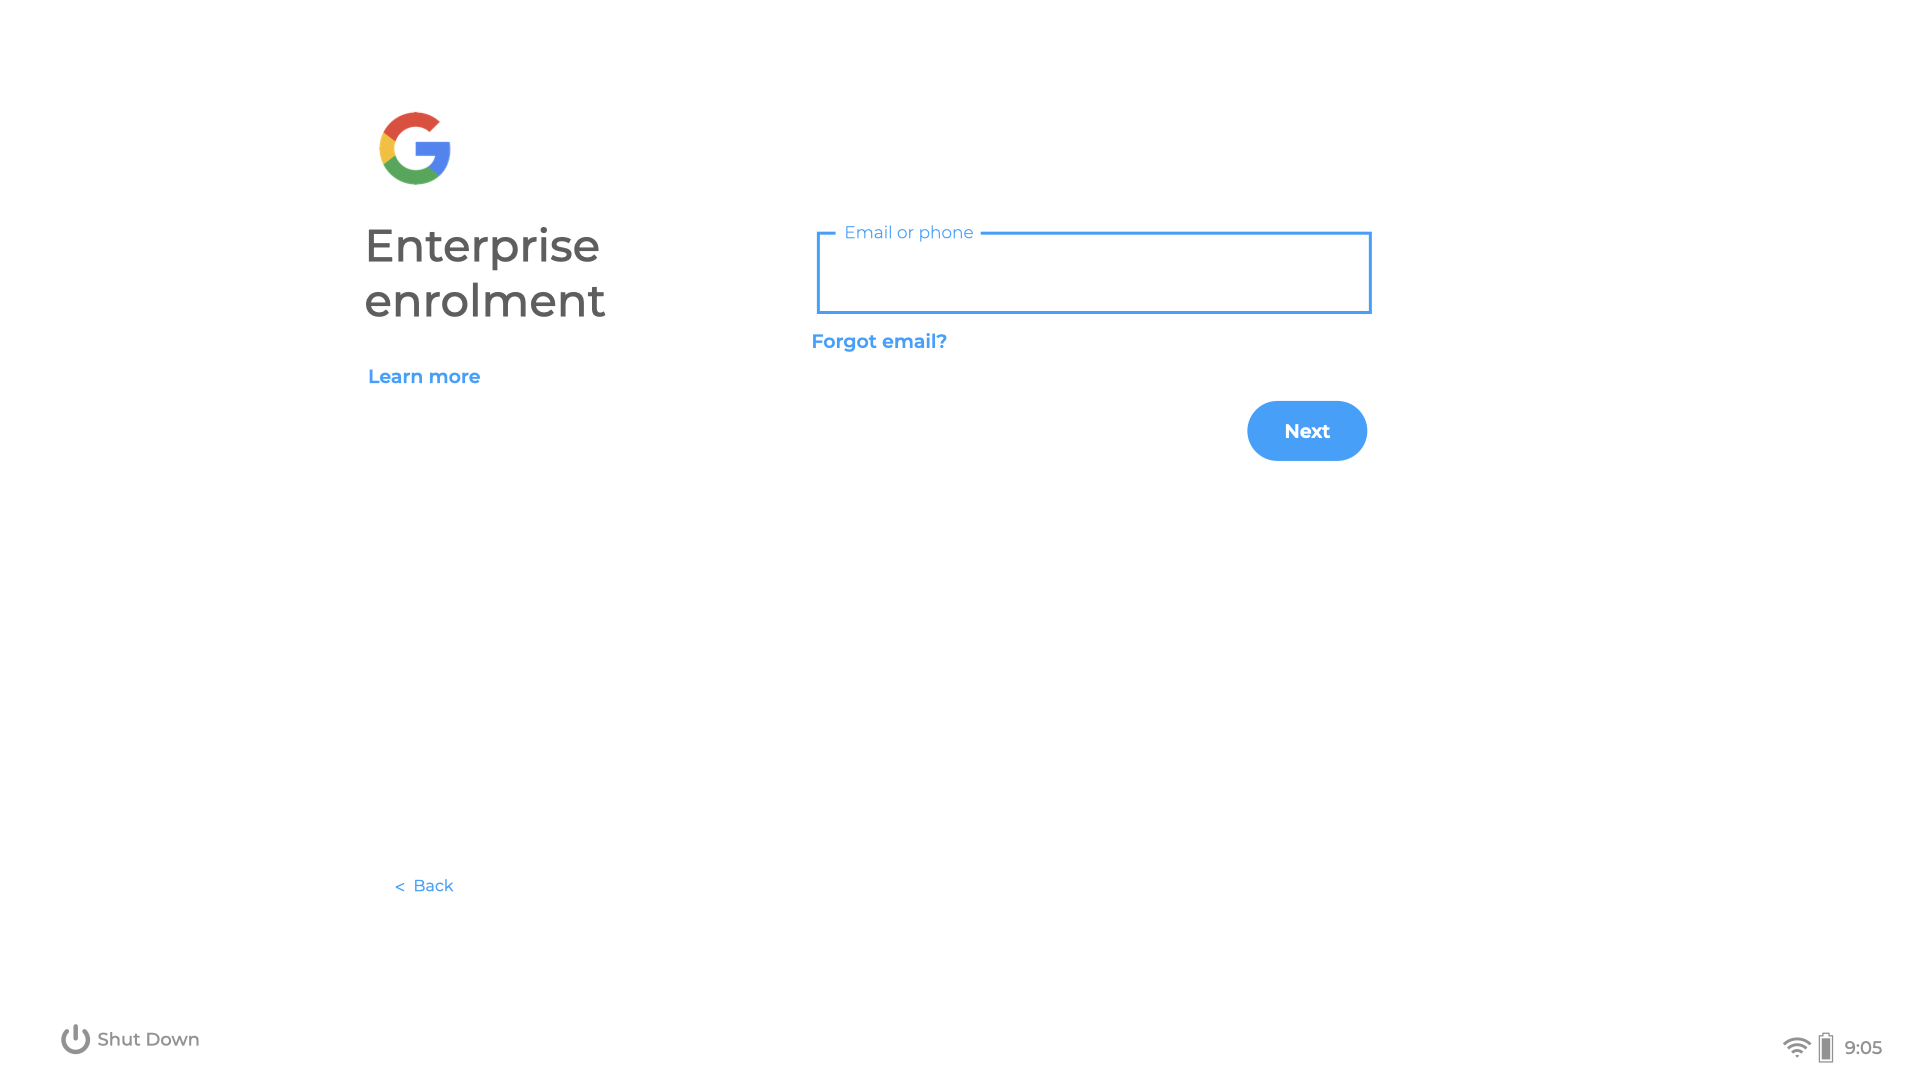](https://kb.filewave.com/uploads/images/gallery/2023-07/Fcui3DRN8CcZMz92-chromebook-enrolment-page.png)
If it does not, press **Ctrl+Alt+E** to enroll the device. Enter the Google enrollment username and password.
The device shows a progress bar while enrollment is running. When enrollment completes, a success page should appear:
[](https://kb.filewave.com/uploads/images/gallery/2023-07/7EhfE9BHhH5PHnOJ-chromebook-enrolled.png)
At this point, the device should show in Google Admin Console as provisioned. After the next FileWave Google OAuth synchronization, the device should appear in the FileWave Client view.
You can trigger synchronization manually from FileWave Central preferences:
[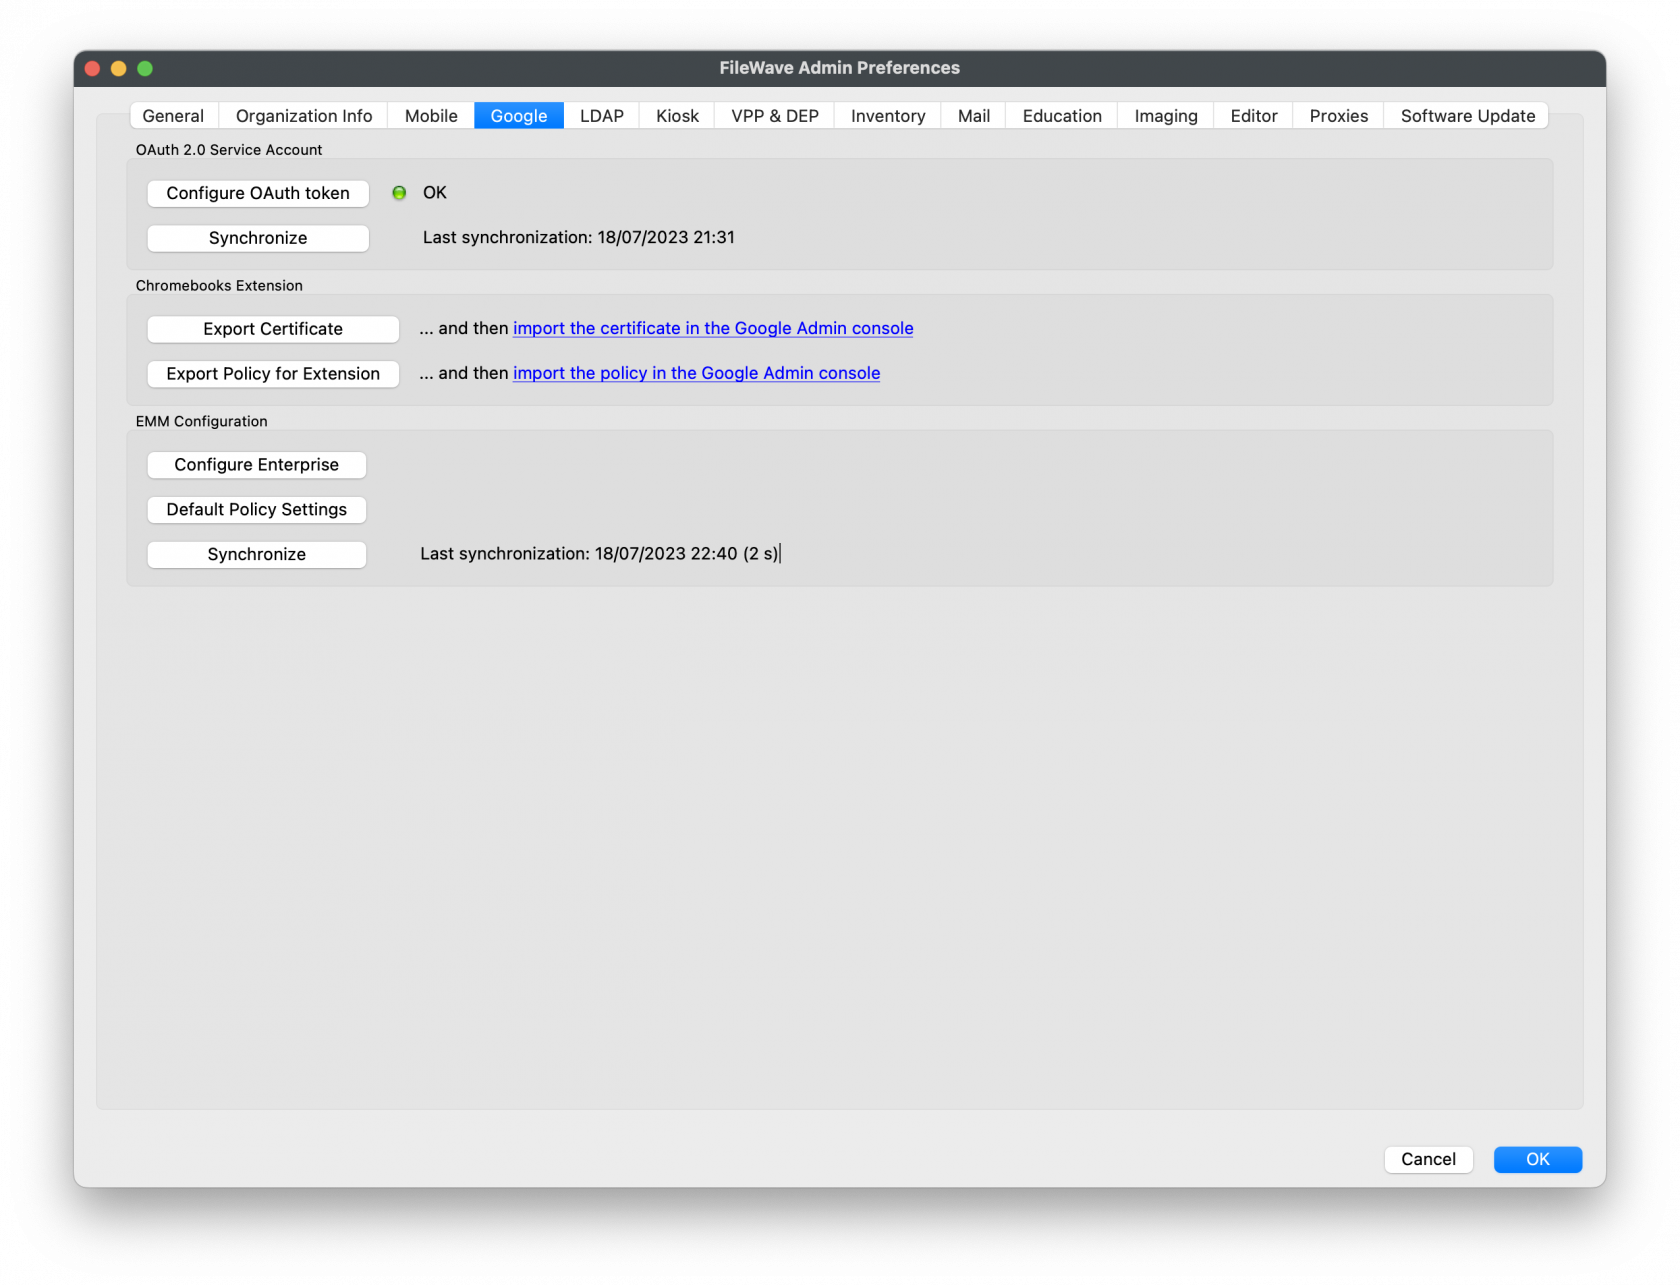](https://kb.filewave.com/uploads/images/gallery/2023-07/pEiJ0878rYk7Vu26-image.png)
Clicking **Done** on the device should present the login page to the user:
[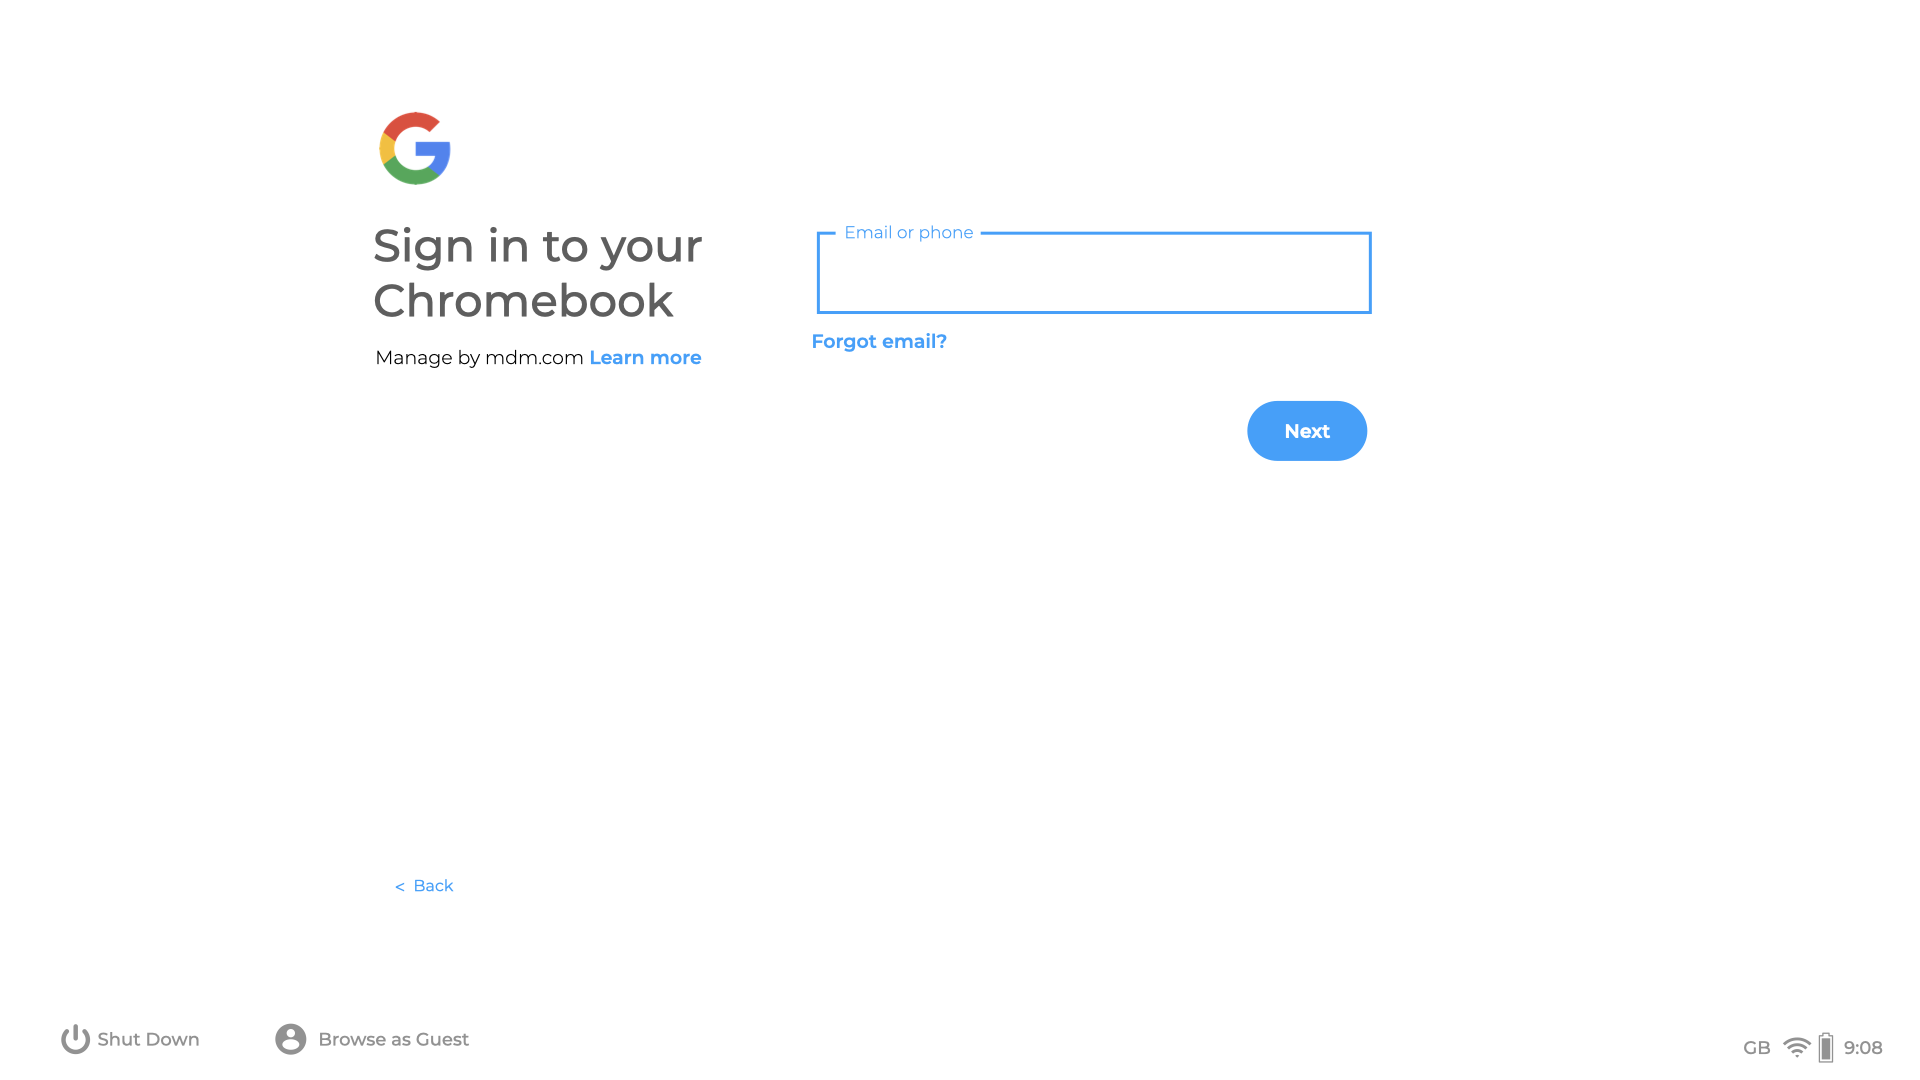](https://kb.filewave.com/uploads/images/gallery/2023-07/IGmCZ6YtQ6KxzMeG-chromebook-login.png)
# Windows Enrollment
## How to enroll Windows Clients into FileWave
---
If you haven't already, review the [Platform Integrations > Windows](https://kb.filewave.com/books/evaluation-guide/page/windows-client-pre-requisites "Windows") section for guidance on installing the Windows FileWave Client. If your organization uses Microsoft Entra ID and users sign in to Windows with Entra ID credentials, consider enrolling Windows devices through Microsoft Entra ID instead. That path also enables Windows MDM management in FileWave. Learn more in the [Windows MDM](https://kb.filewave.com/books/microsoft-windows-mdm "Windows MDM") article.
After a Windows desktop client checks in, it waits for approval before it can receive associations. Add it to the model from FileWave Central.
[](https://kb.filewave.com/uploads/images/gallery/2024-04/HJuqYZeFYrbIstav-image.png)
1. Open FileWave Central.
2. Click the “New Client” button in the toolbar.
3. Select “Desktop Clients”. The “Enrolled Mobile Devices” option is for MDM-enrolled devices, not a standard Windows desktop client.
4. Select the new Windows client from the list.
5. Optionally choose the group for the new client, then click “Add Clients”.
[](https://kb.filewave.com/uploads/images/gallery/2024-04/YprIA7FAYwipM6Rj-image.png)
After you click “Add Clients”, FileWave Central opens the Clients view. Adding a client changes the model, so run a model update before expecting the Windows client to receive Filesets or settings.
You can also configure FileWave to add new clients automatically and skip the manual approval step. This is covered in [Conflict Resolution](https://kb.filewave.com/books/filewave-central-anywhere/chapter/conflict-resolution "Conflict Resolution").
## Making Changes to the Model
Update the model whenever you want FileWave to apply model changes. You can update after one change or after a batch of changes, such as adding clients, creating groups, or assigning Filesets.
Your FileWave environment can now manage the Windows client. From here, continue adding clients, organizing groups, and deploying Filesets.

# 4. Fileset Creation and Deployment
Please review the sub-sections in this "Fileset Creation and Deployment" guide for your managed OS platforms. Once you have you have at least one Fileset created, please review the guide on how to Associate your Filesets.
# Fileset Creation and Deployment
## **Section Details**
---
Use the platform sections below to create the Filesets or profiles you need. After you have at least one Fileset, use this page to associate it with devices or groups.
- [Windows Software](https://kb.filewave.com/books/evaluation-guide/page/windows-software "Windows Software")
- [iOS Software and Profiles](https://kb.filewave.com/books/evaluation-guide/page/ios-software-and-profiles "iOS Software and Profiles")
- [macOS Software and Profiles](https://kb.filewave.com/books/evaluation-guide/page/macos-software-and-profiles "macOS Software and Profiles")
- [Android Software and Policies](https://kb.filewave.com/books/evaluation-guide/page/android-software-and-policies "Android Software and Policies")
- [Windows Imaging Setup](https://kb.filewave.com/books/evaluation-guide/page/windows-imaging-setup "Windows Imaging Setup")
- [Capture Master Image](https://kb.filewave.com/books/evaluation-guide/page/windows-imaging-capture-image "Windows Imaging - Capture Master Image")
- [Deploy Image](https://kb.filewave.com/books/evaluation-guide/page/deploy-a-windows-image-with-filewave-ivs "Windows Imaging - Deploy Windows Image")
- [OS Software Updates](https://kb.filewave.com/books/evaluation-guide/page/os-software-updates "OS Software Updates")
**FileWave 16.4 and later:** If Central reports an upload-validation problem while creating or editing a Fileset, do not associate or deploy it yet. Review [Advanced Fileset Editing](https://kb.filewave.com/books/filesets-payloads/page/advanced-fileset-editing-contents-properties-settings-and-dependencies), correct the incomplete upload, and verify the Fileset contents first.
## **Associate Filesets to Clients**
---
After a Fileset exists, associate it with client devices or groups. A standard association installs in the background, a Kiosk association makes the item available on demand, and scheduled association options let you control download, activation, inactivation, deletion, and reboot timing. This section covers the common association workflow in FileWave Central. You can also create associations from the **Clients** or **Filesets** views when that is faster for your workflow.
### **Associate Fileset using drag-and-drop**
1. Open FileWave Central and navigate to **Associations**.
2. Find and select an individual device or client group from the left pane.
- This example uses the macOS device named *"Avery Thomas"*.
3. Find and select an individual Fileset or Fileset group from the right pane.
- This example uses the macOS Fileset named *"macOS - Google Chrome".*
4. Drag the *"macOS - Google Chrome"* Fileset from the right pane onto the *"Avery Thomas"* macOS device.
- You can associate Filesets one-to-one, one-to-many, or many-to-one.
5. A new **Standard** association appears in the bottom pane.
- **Standard** associations are the default and install in the background without user interaction.
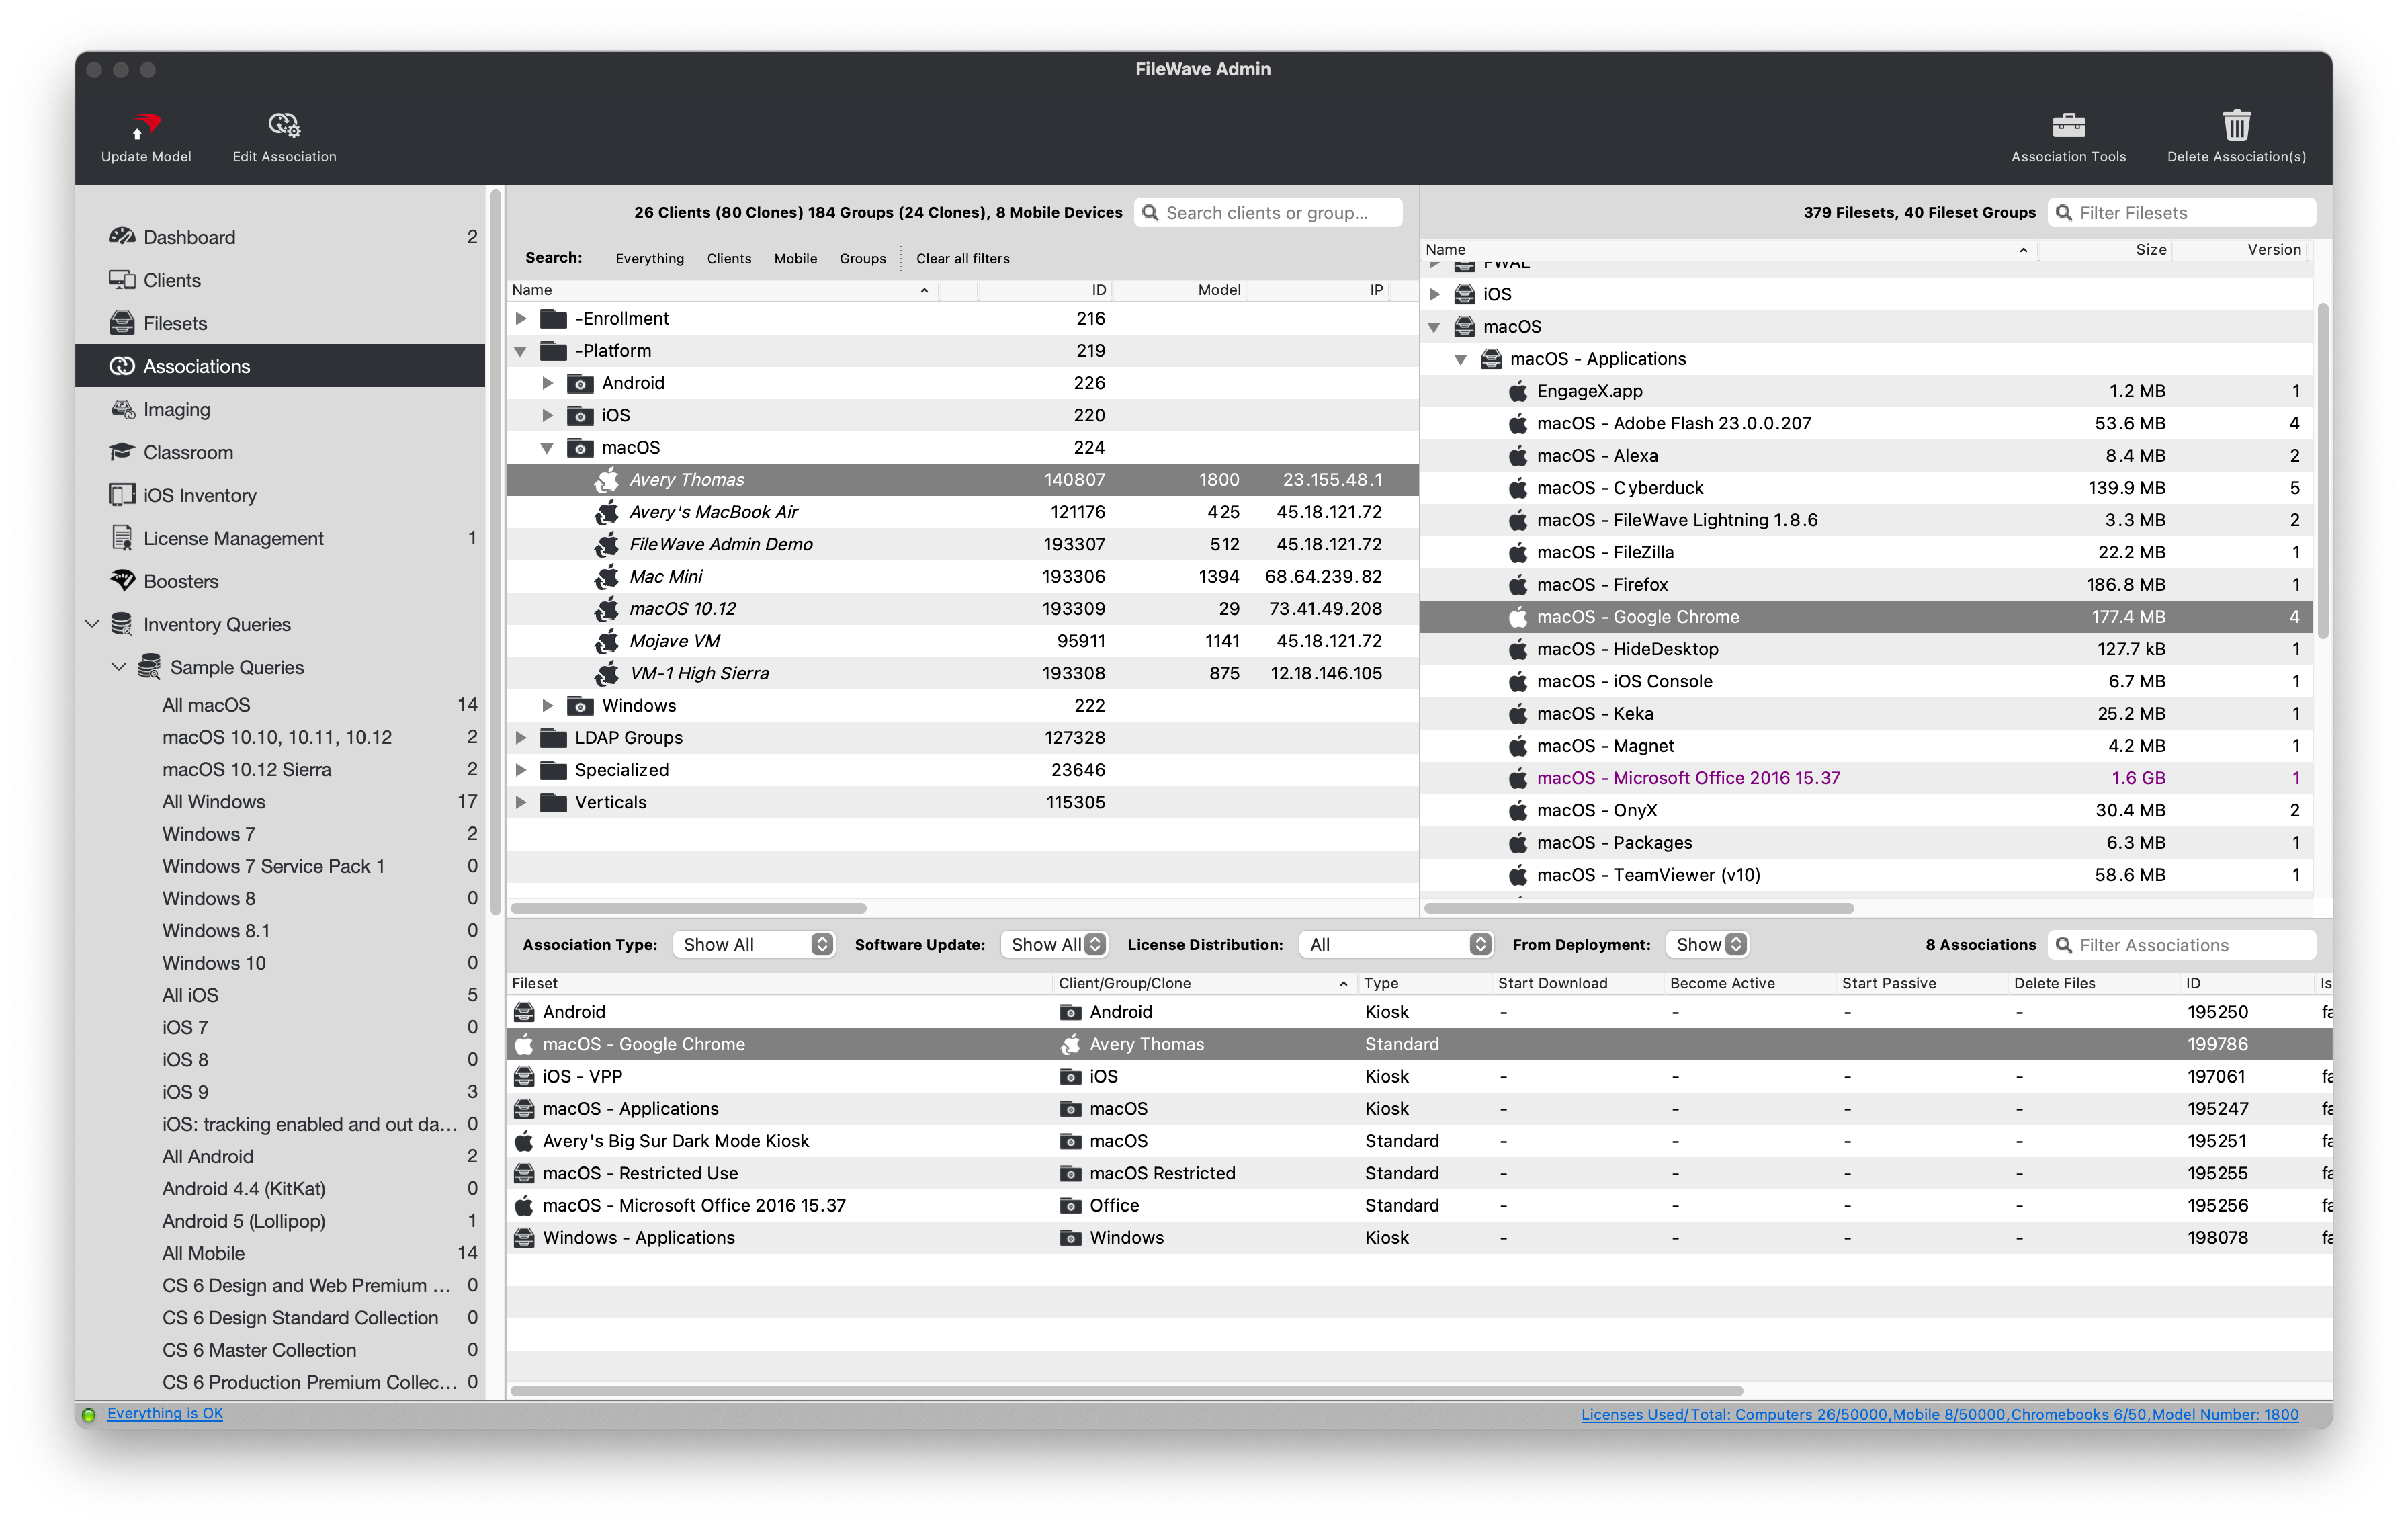
### **Deploy Fileset in the Kiosk**
A **Standard** association installs in the background. To make the Fileset optional for the end user, change the association type to **Kiosk**. FileWave Kiosk is available on macOS, Windows, and iOS (App Portal), and can be [customized](https://kb.filewave.com/books/kiosk "Kiosk") to match your organization's look and feel.
1. Open FileWave Central and navigate to **Associations**.
2. Double-click an existing association from the bottom pane.
3. Check **Kiosk Association**.
4. Click **OK** to save the change.
5. Run **Update Model** to commit the association change to devices.
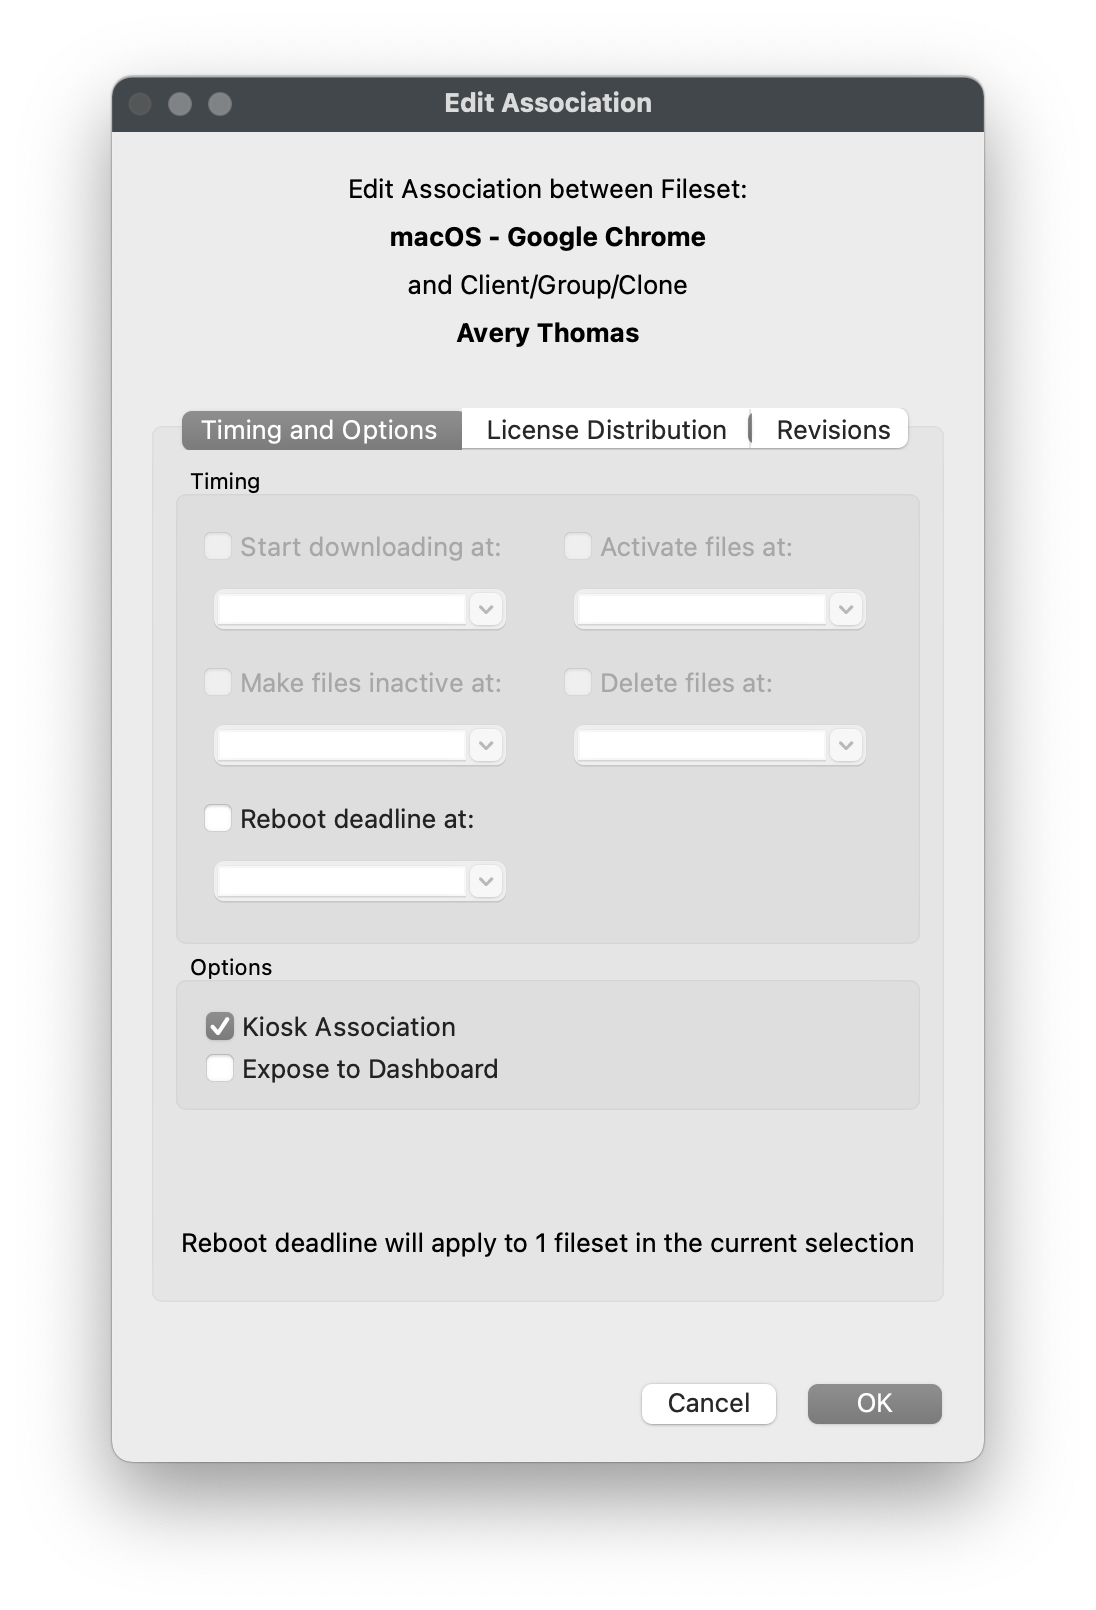
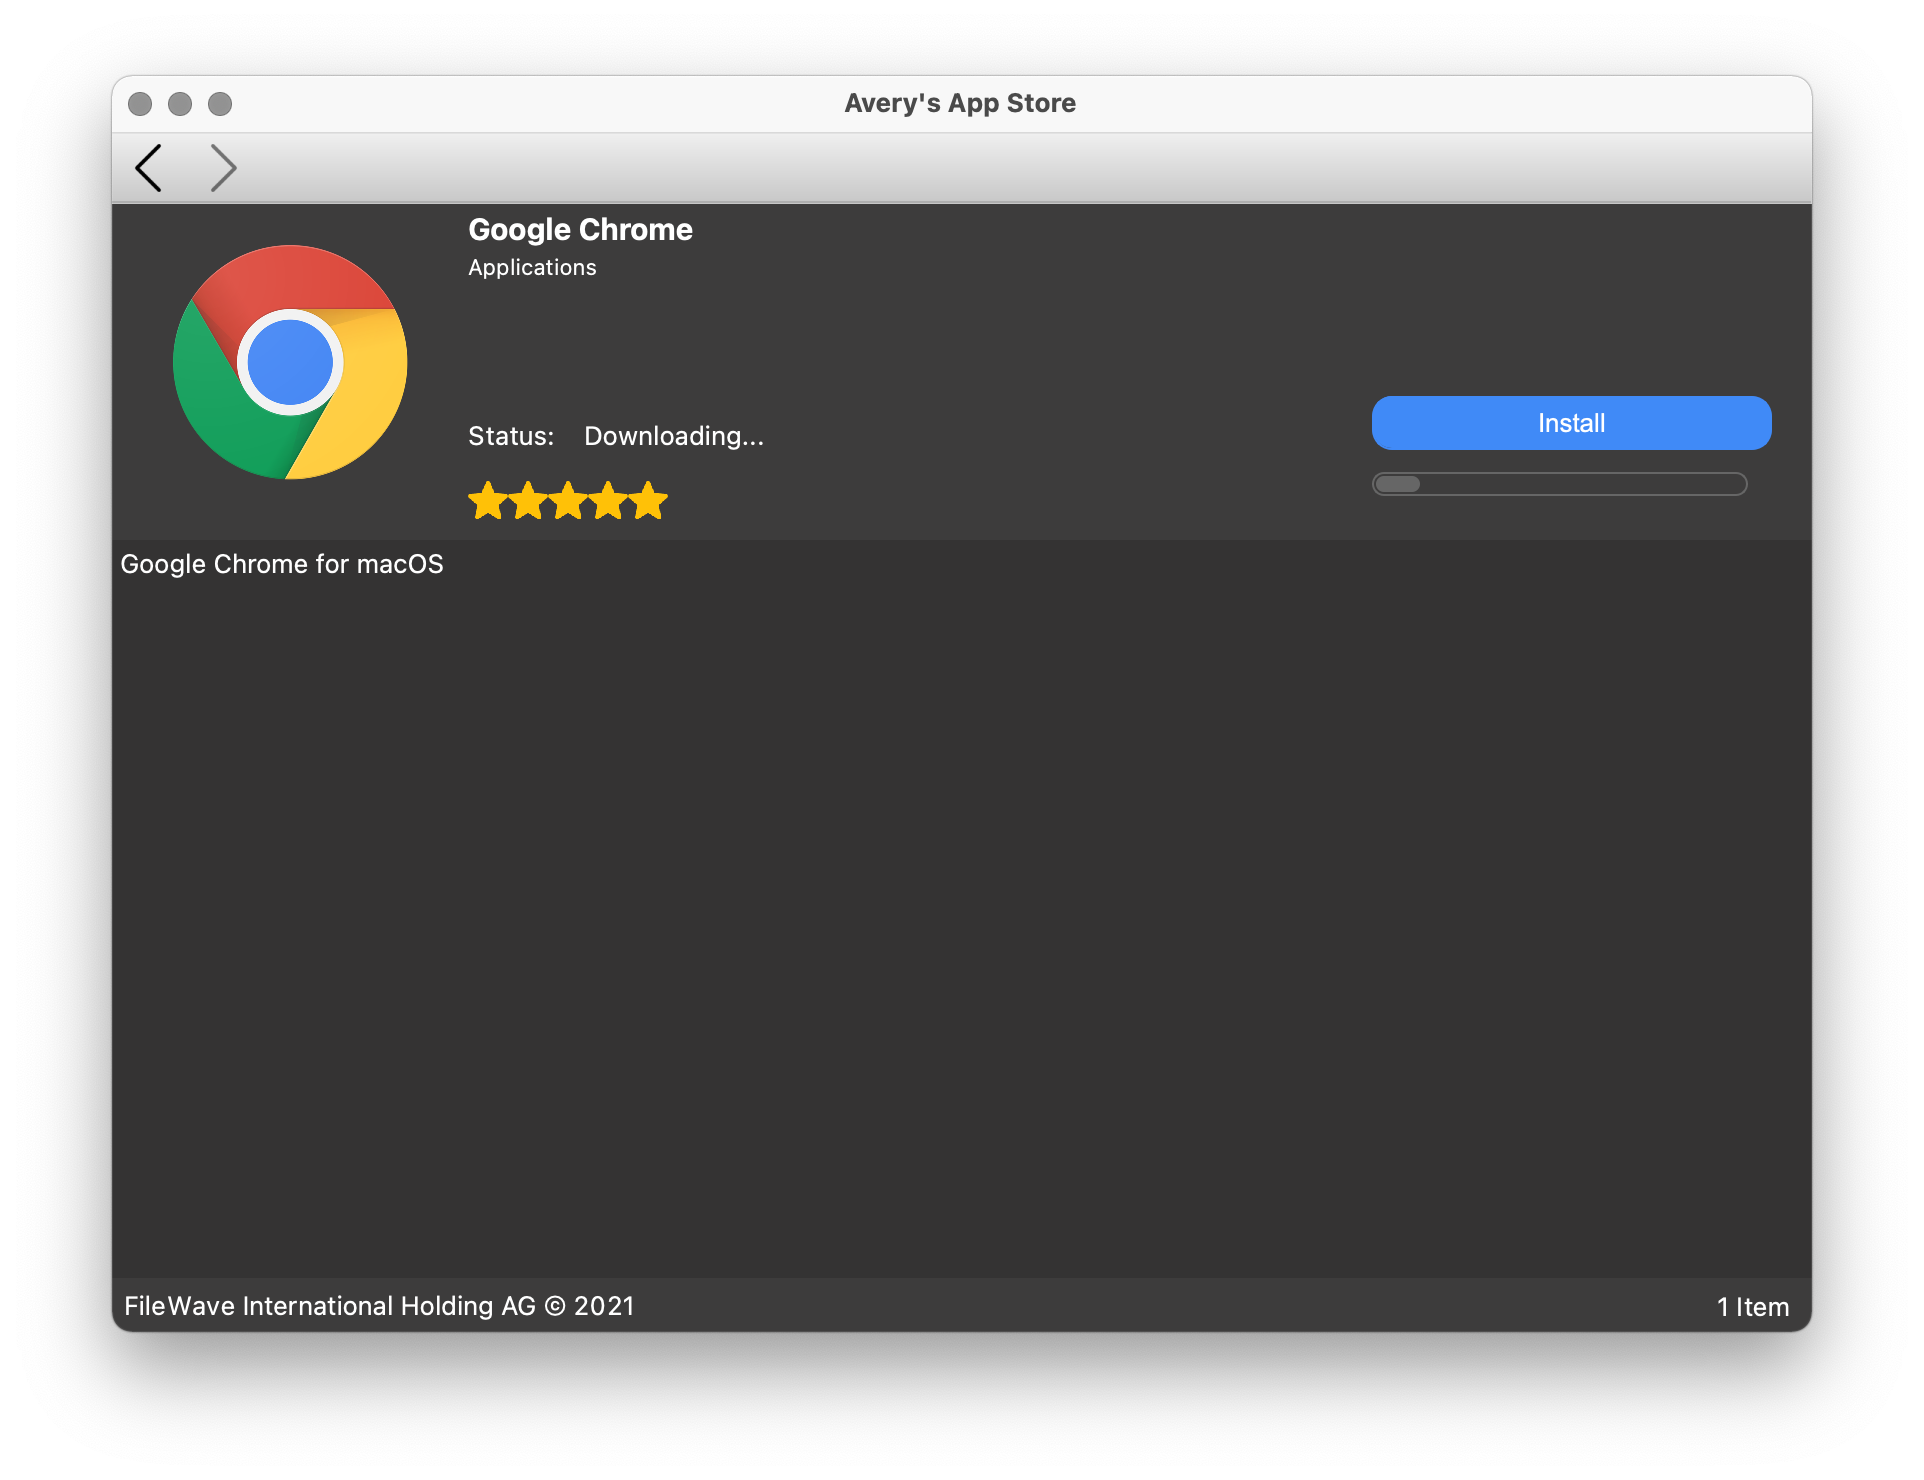
### **Schedule Fileset deployment**
Use association scheduling when a Fileset or group of Filesets needs a specific deployment window. Kiosk associations cannot be scheduled except for the **Reboot deadline at** option.
1. Open FileWave Central and navigate to **Associations**.
2. Double-click an existing association from the bottom pane.
3. Specify a date and time for any needed scheduled events.
- ***Start Downloading at:*** Downloads Fileset files, including installers, to a temporary location.
- ***Activate files at:*** Moves Fileset files to their final location and runs installers or activation scripts.
- ***Make files inactive at:*** Moves Fileset files from their final location back to a temporary location.
- ***Delete files at:*** Deletes the Fileset files from the device.
- ***Reboot deadline at:*** Forces a reboot of the client device. The Fileset must have **Requires Reboot** enabled in Fileset Properties.
4. Click **OK** to save the changes.
5. Run **Update Model** to commit the association changes to devices.
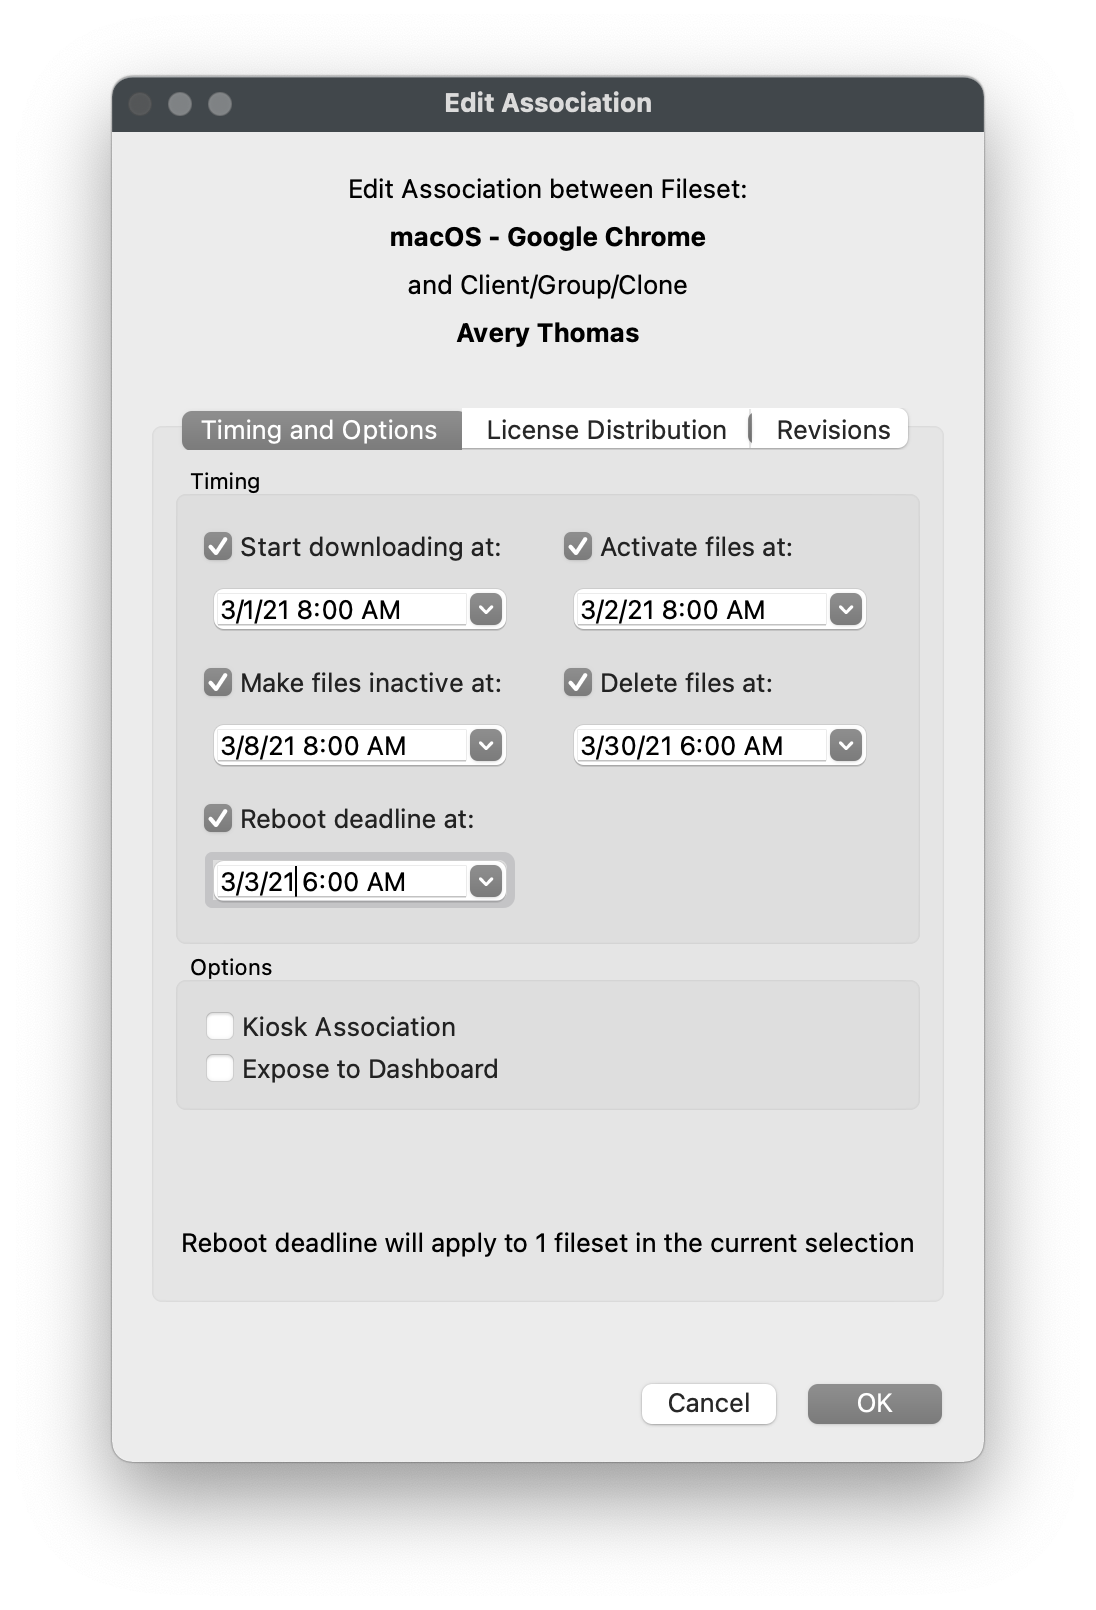
# Windows Software
## **Windows Filesets**
---
FileWave allows you to deploy any file, native installer, or script to a Windows machine. FileWave has no file-type or file-size restrictions and all scripts and installers will be launched with elevated privileges by default.
After creating a Fileset, please make sure to review the [Fileset Creation and Deployment](https://kb.filewave.com/books/evaluation-guide/page/fileset-creation-and-deployment "Fileset Creation and Deployment") page to learn how to associate and deploy your new Filesets.
## **Create an MSI Fileset**
---
Deploying an MSI is very easy in FileWave and also supports native MSI behavior for the uninstallation process. If you're looking to deploy a piece of Windows software very quickly, an MSI Fileset is the recommended way to go. However, since a MSI is a native installer, FileWave's Self-Healing is not supported.
1. Open FileWave Admin and navigate to *"Filesets"*.
2. Drag-n-drop your desired MSI directly into the *"Filesets"* view.
- Or...
3. Select *"New Desktop Fileset"* from the black menubar.
4. Click *"MSI / PKG"* and select your desired MSI.
5. You should now see your MSI Fileset in the *"Filesets"* view.
- The Fileset will display in red text while it is being uploaded to the FileWave Server. Upload progress can be viewed from the bottom bar of the FileWave Admin.
- The Fileset will be labeled as *"Modified"* indicating the it has not yet been saved.
6. *"Update Model"* if you'd like to save the changes.
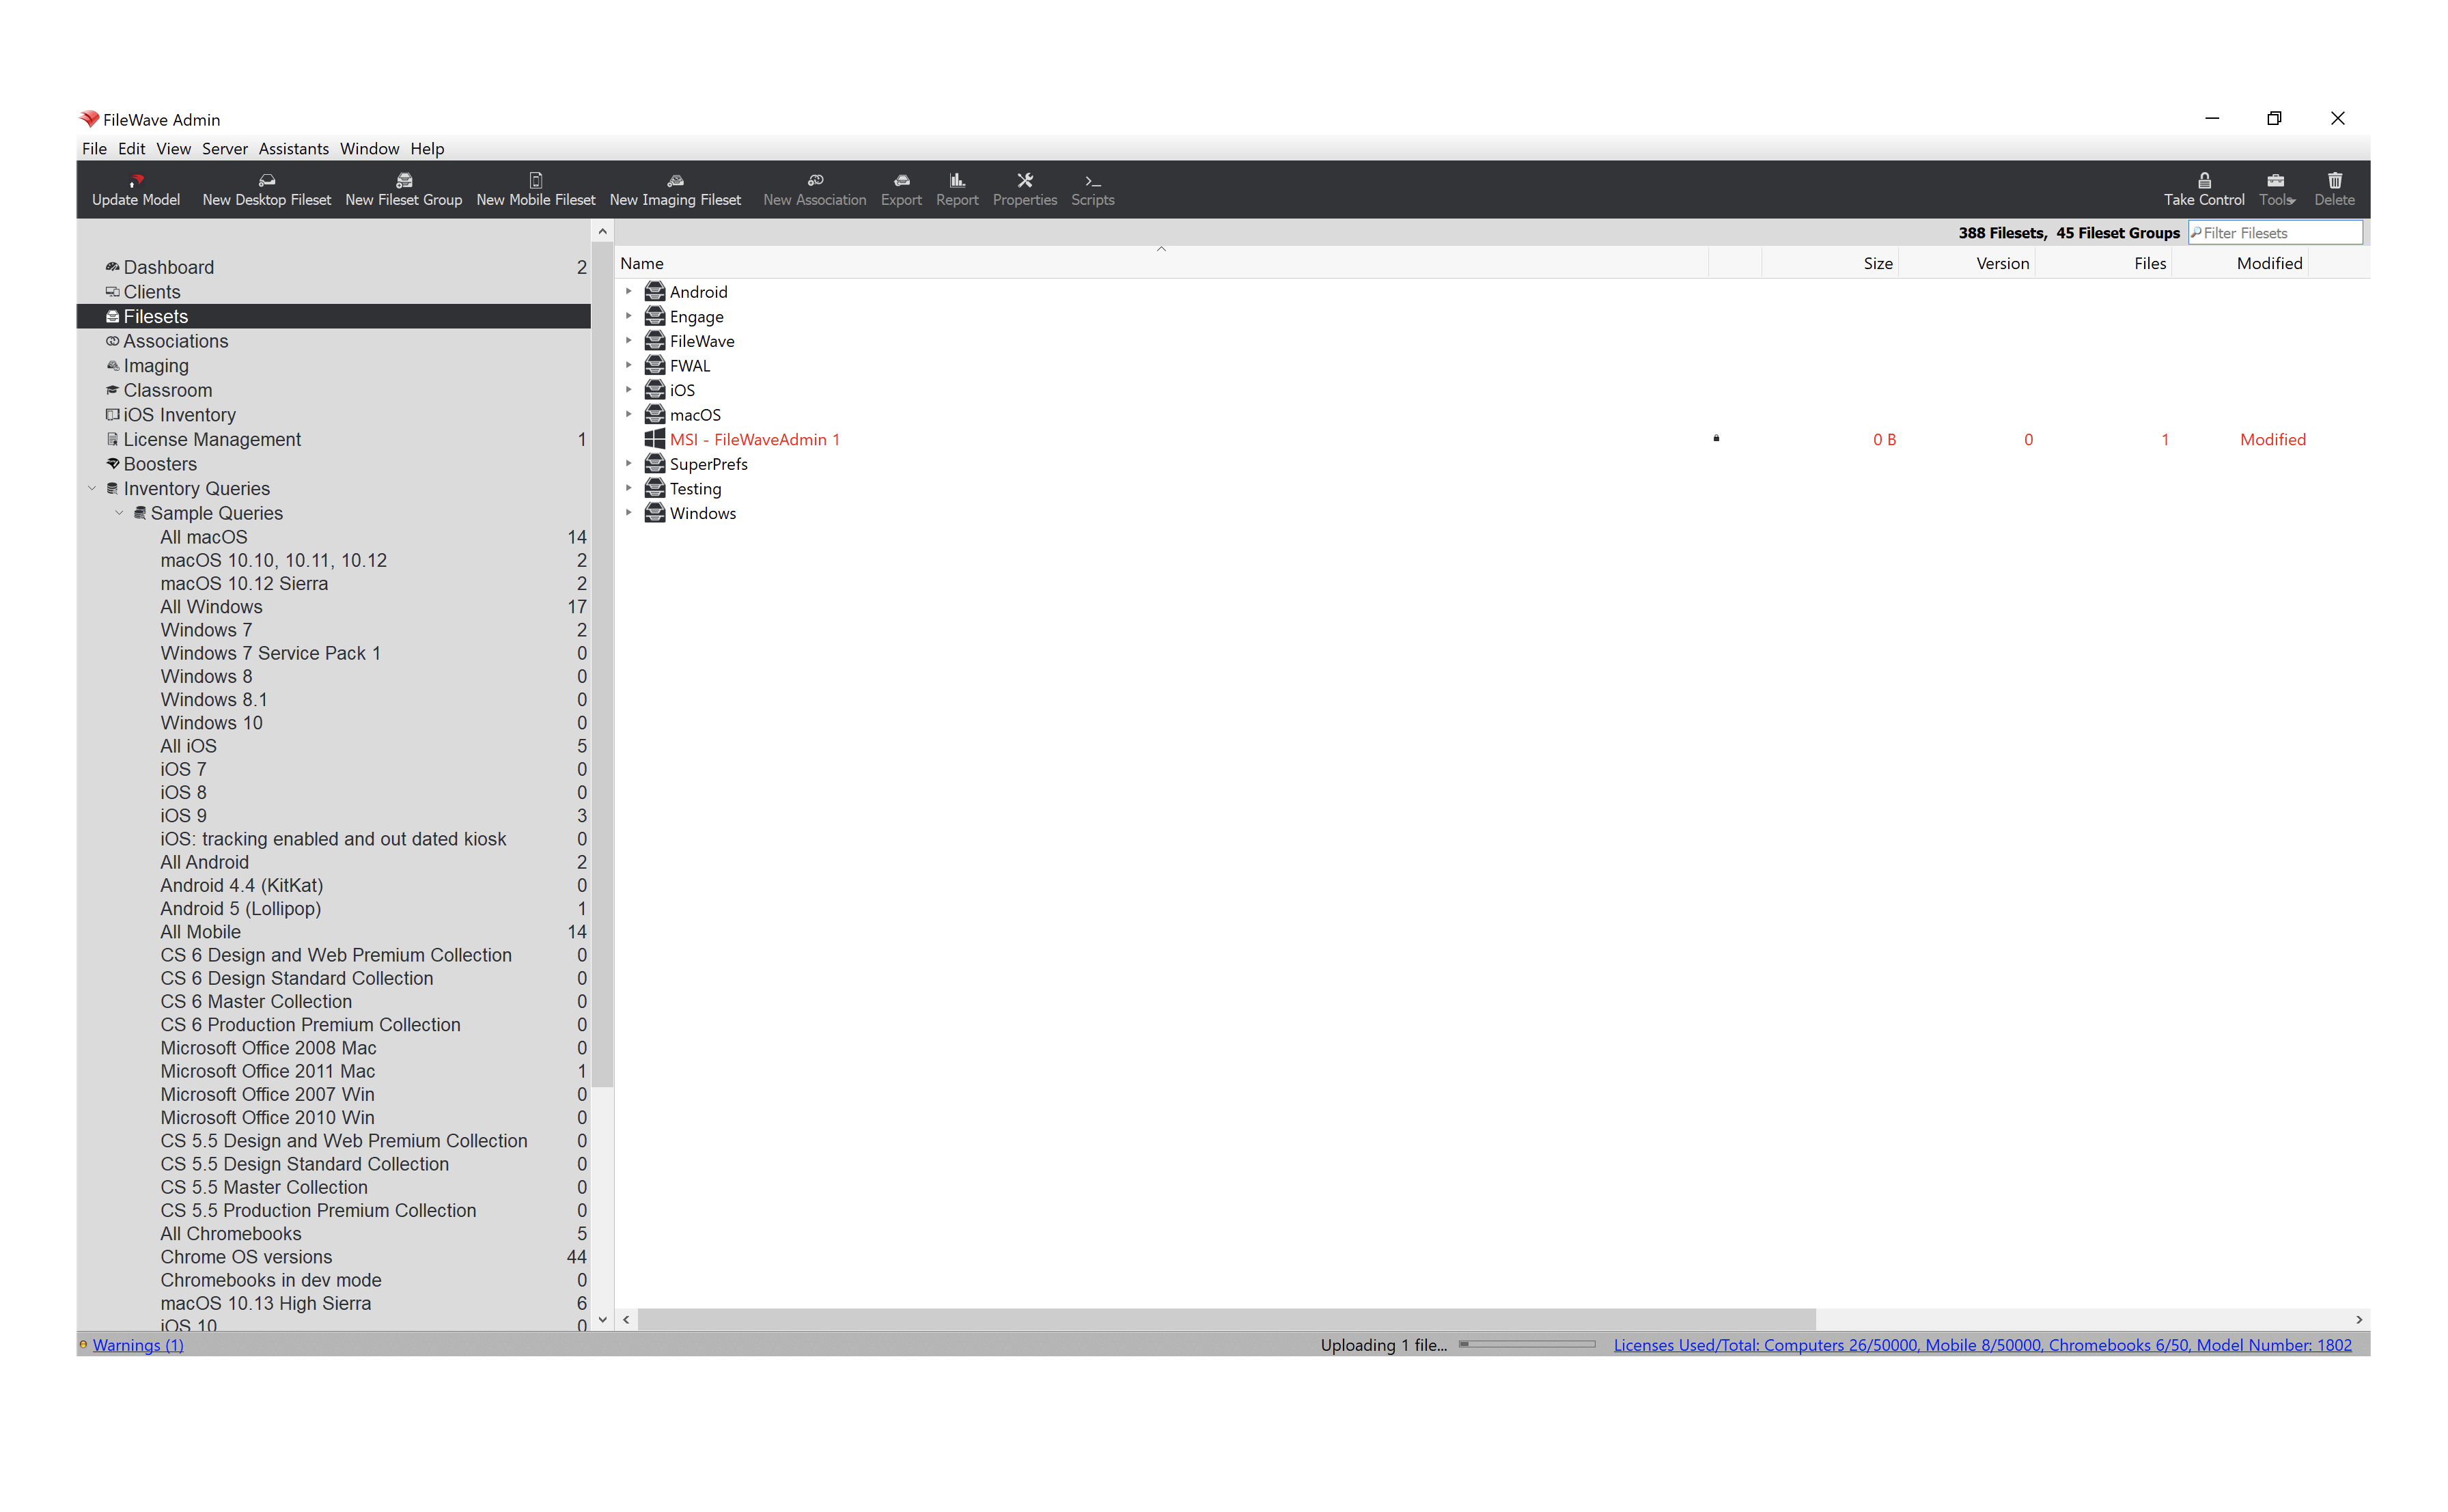
## **Create an EXE Fileset**
---
Creating an EXE Fileset is also very easy but does require a slightly different workflow to accommodate an EXE's support for Launch Arguments. If a software package offers both an MSI and EXE, the MSI installer is recommended. If you find that the EXE does not allow for provisioning/customization using Launch Arguments, please consider leveraging the Fileset Magic workflow outlined below. Please note that Self-Healing does not apply to EXE Filesets.
1. Open FileWave Admin and navigate to *"Filesets"*.
2. Select *"New Desktop Fileset"* from the black menubar.
3. Click *"Empty"* and name the Fileset accordingly.
4. Double-click on the new Fileset to open the *"Fileset Contents"*.
5. Uncheck *"Hide unused folders"* if enabled.
6. Navigate to *"ProgramData"* and click *"New Folder"* from the menubar.
7. Name the new folder "*fwEXE"*.
- The location and name of the folder can be whatever you'd like, however it is recommended to deploy EXEs to a "discreet" location on the machine's hard drive.
8. Drag-n-drop the desired EXE into the *"fwEXE"* folder.
9. Select the EXE and click *"Get Info"* from the menubar.
10. Navigate to the *"Executable"* tab.
11. Check the *"Execute once when activated"* box and the *"Non-interactive (background)"* box. Then click the "*Wait for executable to finish*" and set it to 15 minutes.
12. Optionally, click the "\[+\]" button to add any Launch Arguments to the EXE's installation.
13. Click *"Apply"* to save your changes and Close the *"Get Info"* window.
14. Close the *"Fileset Contents"* window.
15. You should now see your EXE Fileset in the *"Filesets"* view.
\\* The Fileset will be labeled as *"Modified"* indicating the it has not yet been saved.
16. *"Update Model"* if you'd like to save the changes.
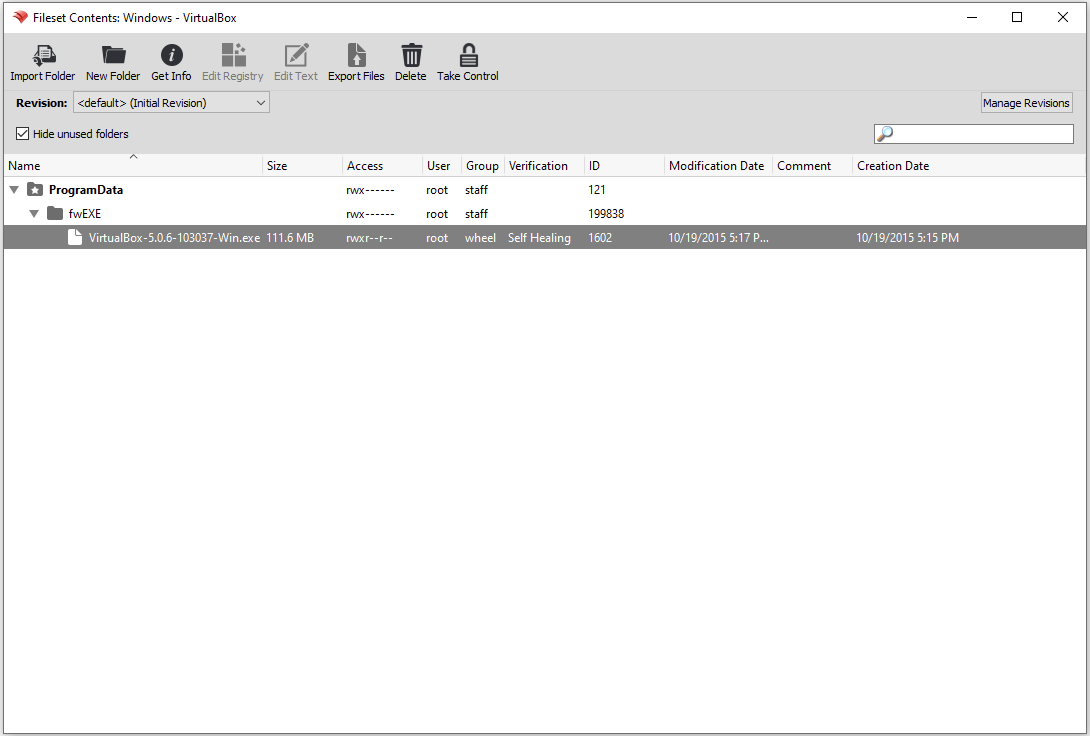
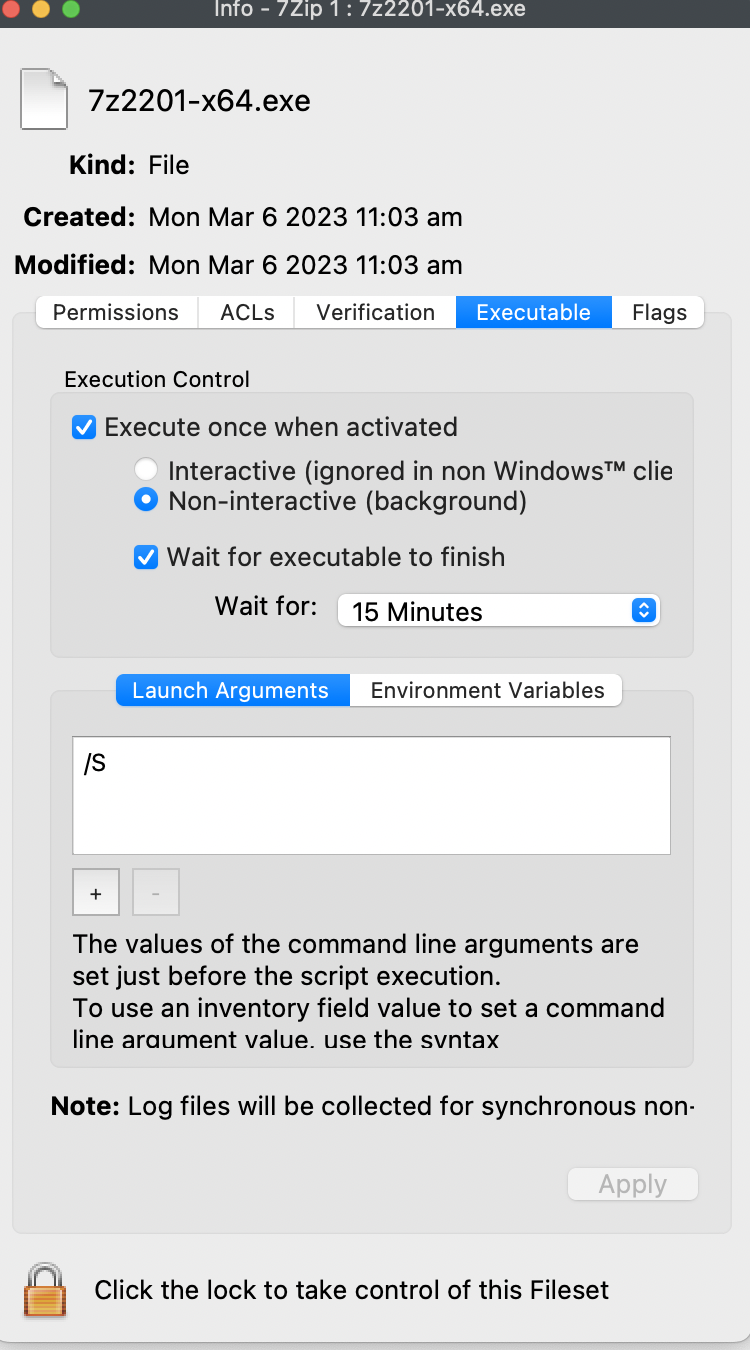
## **Deploy a file or folder with Self-Healing**
---
One of the main things that separates FileWave from the other solutions on the market is FileWave's ability to deploy any file directly to the Client's local filesystem and enable true Self-Healing. When you deploy a file with Self-Healing enabled, FileWave will automatically re-download the original file whenever the file is modified or deleted on the Client machine, however we can tweak this behavior per file to account for all deployment situations using the three *"Verification"* options.
### **Verification options**

FileWave's *"Verification"* options allow you to granularly specify how each file in a Fileset deployment will behave. You can also set the *"Verification"* settings from a Fileset's Properties that will apply to all files within a given Fileset.
- **Self-Healing** = Re-downloads file if modified or deleted upon device reboot, 24 hours (default), or manual "Verify". Removes files if Fileset disassociated.
- **Download If Missing** = Re-downloads file if deleted upon device reboot, 24 hours (default), or manual "Verify". Removes files if Fileset disassociated.
- **Ignore at Verify (Left Behind)** = Does not monitor file modification or re-download. Leaves files intact if Fileset disassociated.
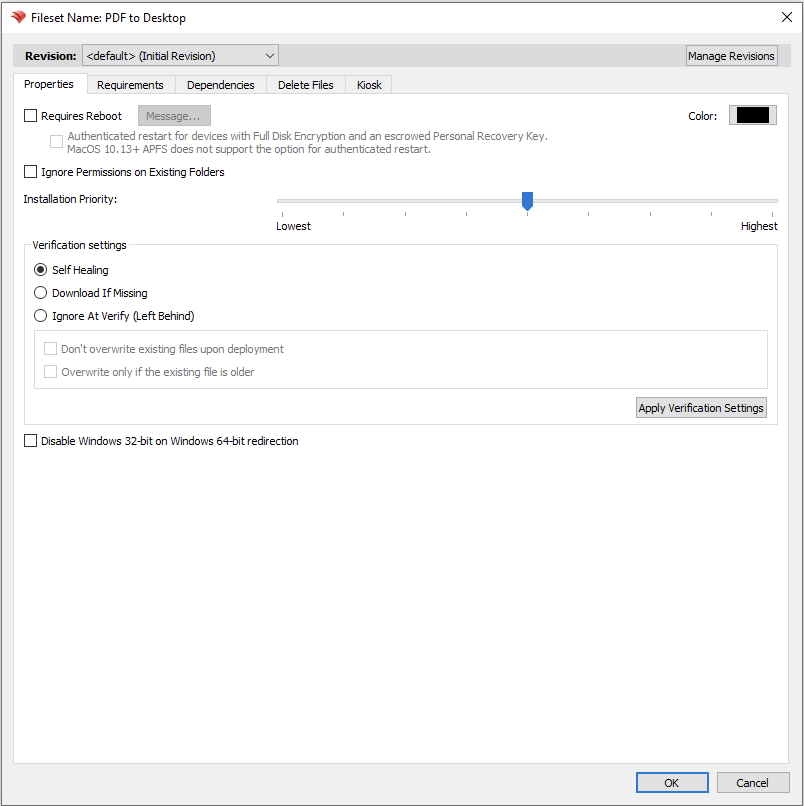
### **Deploy PDF to every user's Desktop**
1. Open FileWave Admin and navigate to *"Filesets"*.
2. Select *"New Desktop Fileset"* from the black menubar.
3. Click *"Empty"* and name the Fileset accordingly.
4. Double-click on the new Fileset to open the *"Fileset Contents"*.
5. Uncheck *"Hide unused folders"* if enabled.
6. Navigate to *"Users > All Users > Desktop"*.
7. Drag-n-drop PDF file into the *"Desktop"* folder.
8. Select the PDF and click *"Get Info"* from the menubar.
9. Navigate to the *"Verification"* tab and select your desired Verification preference.
10. Click *"Apply"* to save changes and Close the *"Get Info"* window and Fileset Contents window.
11. You should now see your PDF Fileset in the *"Filesets"* view.
\\* The Fileset will be labeled as *"Modified"* indicating the it has not yet been saved.
12. *"Update Model"* if you'd like to save the changes.
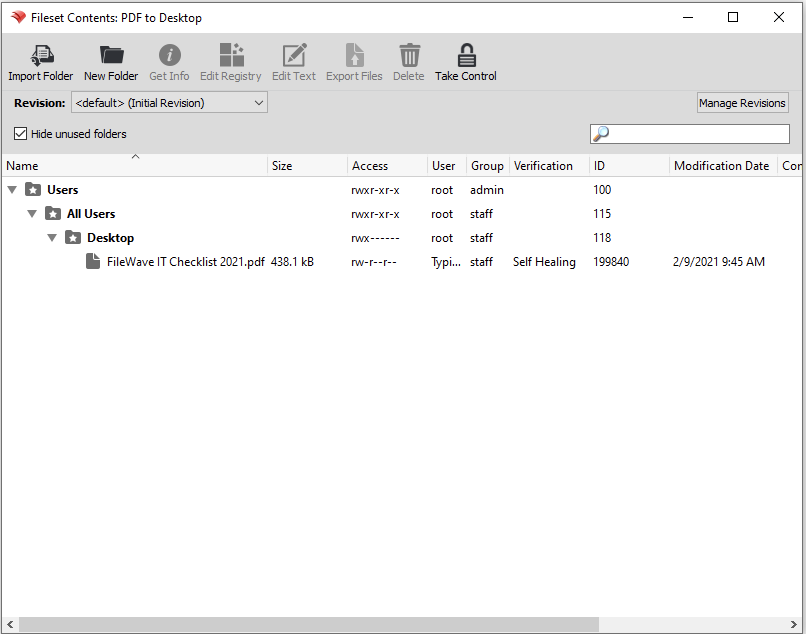
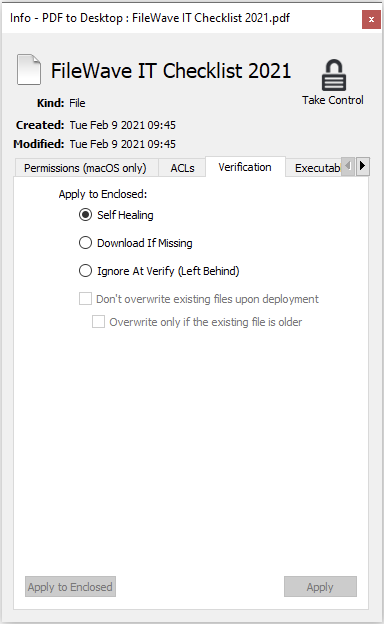
##
## **Capture customized software installations using Fileset Magic**
---
You might discover that a software's installer does not allow for the software to be provisioned or customized to meet your organization's needs. This is where Fileset Magic plays a huge role. Fileset Magic allows you to capture a customized software installation at the file-level and deploy it with Self-Healing enabled by leveraging a series of Snapshots taken from a "build" machine. The customizations may include software preferences, licensing, updates, and shortcuts.
While using Fileset Magic, please do your best to limit background activities to prevent unnecessary changes from being capture.
1. Open FileWave Admin and navigate to *"Assistants > Fileset Magic"*.
2. Select *"Create Snapshot"*.
3. Select the *"Scan Volume"*.
4. Select the *"Scan Type"*.
- Use *"Entire Disk"* if you are unsure of where the application installs to.
- Use *"Program Files, Program Data and Users"* for most common installations.
5. Wait for the File and Registry scan to complete.
6. Install your desired software without proceeding in Fileset Magic.
- Open, update, license, and customize your software.
7. Click *"Continue"* to proceed in the Fileset Magic window.
8. Wait for Fileset Magic to scan the select volume and compare File and Registry changes.
9. View the File differences and select only what is necessary for the newly installed application.
- There may be background Windows activity that is captured. Do your best to exclude this content.
10. View the Registry differences and select only what is necessary for the newly installed application.
- There may be background Windows activity that is captured. Do your best to exclude this content.
11. Choose either to Save or Export the Fileset.
12. Wait for the Fileset to be uploaded to the FileWave Server.
13. Verify your Fileset Contents within the FileWave Admin.
**10**
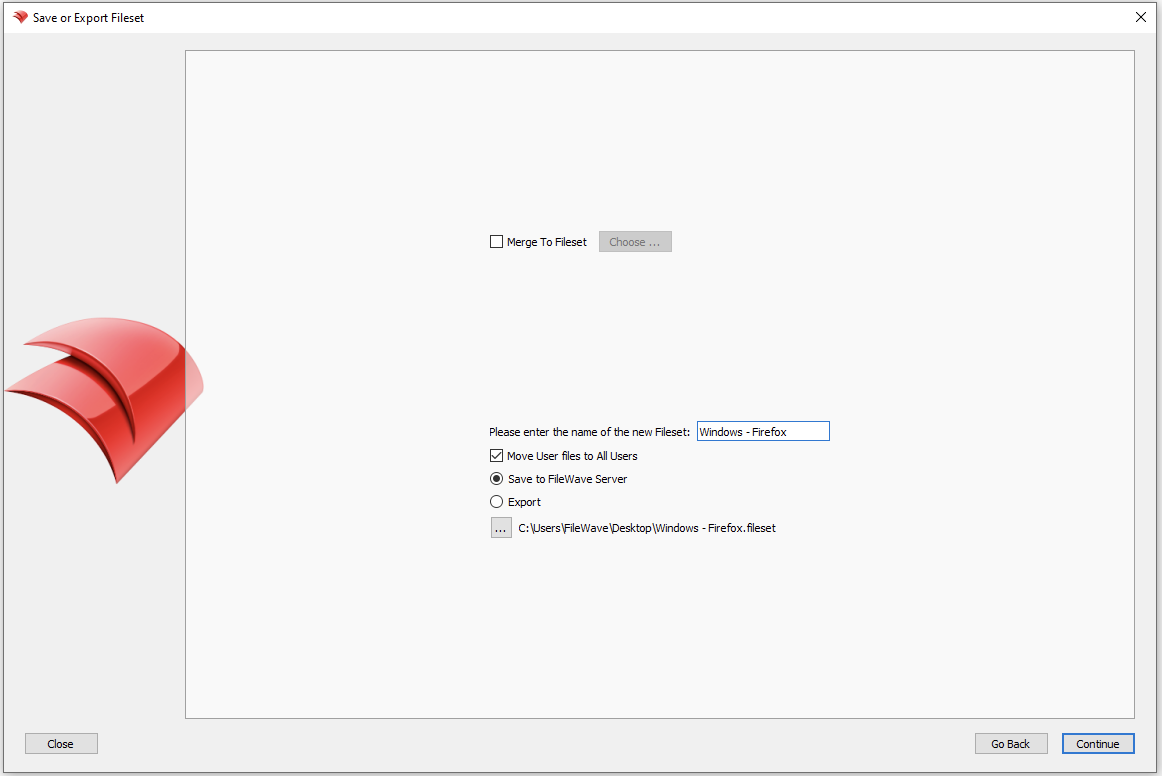
## **Windows Driver Filesets**
---
A Windows Driver Fileset is used only during the Windows Imaging process. This type of Fileset accepts .CAB and .INF driver files. These files will be automatically injected into the *"C:\\Windows\\system32\\drivers\\"* folder during the imaging process and before Windows boots up to start the Out of Box Experience hardware scan.
1. Open FileWave Admin and navigate to *"Filesets"*.
2. Select *"New Imaging Fileset"* from the black menubar.
3. Click the *"Windows Drivers"* button\_.\_
4. Select a folder containing .CAB or .INF files.
5. Your Windows Driver Fileset can now be Associated to a Windows Image deployment.
# iOS Software and Profiles
## **iOS Filesets**
---
FileWave can deploy supported profiles, Apps and Books applications, custom applications, books, and documents to iPhone and iPad using Filesets.
[Apple Vision Pro](https://kb.filewave.com/books/apple-general-info/page/managing-apple-vision-pro-and-visionos) uses the same FileWave mobile profile, application, Fileset, and Deployment workflows. Before deploying, confirm that the payload, setting, application, or content type is supported by the target visionOS version.
After creating a Fileset, please make sure to review the [Fileset Creation and Deployment](https://kb.filewave.com/books/evaluation-guide/page/fileset-creation-and-deployment "Fileset Creation and Deployment") page to learn how to associate and deploy your new Filesets.
## **Manage iOS settings using Profiles**
---
FileWave being a full-blown MDM for iOS allows you to modify majority of iOS Preferences using Profiles. It is recommended to configure each Profile Payload in its own Profile Fileset (most notably the *"Network"* payload), however once you are confident is a Profile's configuration, you can combine multiple Profile Payloads into one Profile Fileset. You can also create [Parameterized Profiles](https://kb.filewave.com/books/profiles-apple/page/using-parameters-in-apple-iosmacos-profiles "Using variables in Apple iOS/macOS Profiles") to automatically inject inventory data into the Profile fields using the "%custom\_field%" format.
1. Open FileWave Admin and navigate to *"Filesets"*.
2. Click *"New Mobile Fileset"* from the black menubar and select *"Profile"*.
3. Name the Profile from within the *"General"* section and review other settings.
4. Select your desired Profile Payload and verify it is compatible with your intended operating system.
- Every Profile Payload is broken out into each supported platform indicated by the header of section.
5. *"Configure"* the Profile Payload with any required fields.
6. *"Save"* changes.
7. You should now see your Profile Fileset in the *"Filesets"* view so it's ready for Association and deployment.
- The Fileset will be labeled as *"Modified"* indicating the it has not yet been saved and committed.
8. *"Update Model"* if you'd like to save the changes.


## **Deploy VPP Filesets to iOS**
---
FileWave can deploy applications from the Apple App Store by leveraging Apple's Volume Purchase Program. Since you simply associate VPP Filesets like any other Filesets, this section will cover some of the more granular settings associated with VPP Filesets.
If you have not already, please review this section on the guide to learn more about how to sync [VPP](https://kb.filewave.com/books/evaluation-guide/page/apple-client-pre-requisites "Apple Integration") into FileWave and create VPP application Filesets.
### **Reserve VPP Licenses for Fileset**
FileWave allows you to duplicate a VPP Fileset, even if you just have one VPP Token where the licenses are coming from. This will allow you to split up the licenses for each VPP Fileset for one given VPP application so that you can group your software more dynamically. For example, you purchase 100 licenses of Duolingo from one VPP Token and need to deploy 50 licenses to 1st grade and 50 licenses to 2nd grade, each from their respective group.
1. Open FileWave Admin and navigate to *"Filesets"*.
2. Duplicate your desired VPP Fileset.
3. Double-click on one instance of the VPP Fileset.
4. Check the box for *"Reserve a maximum of"* and fill out the maximum licenses available for that instance of the VPP Fileset.
5. Repeat Step 3 & 4 for the other instance of the VPP Fileset, otherwise the other instance will automatically consume the remainder of the VPP licenses.
6. You may now move the VPP Fileset into their appropriate groups and Associate to devices/device groups.
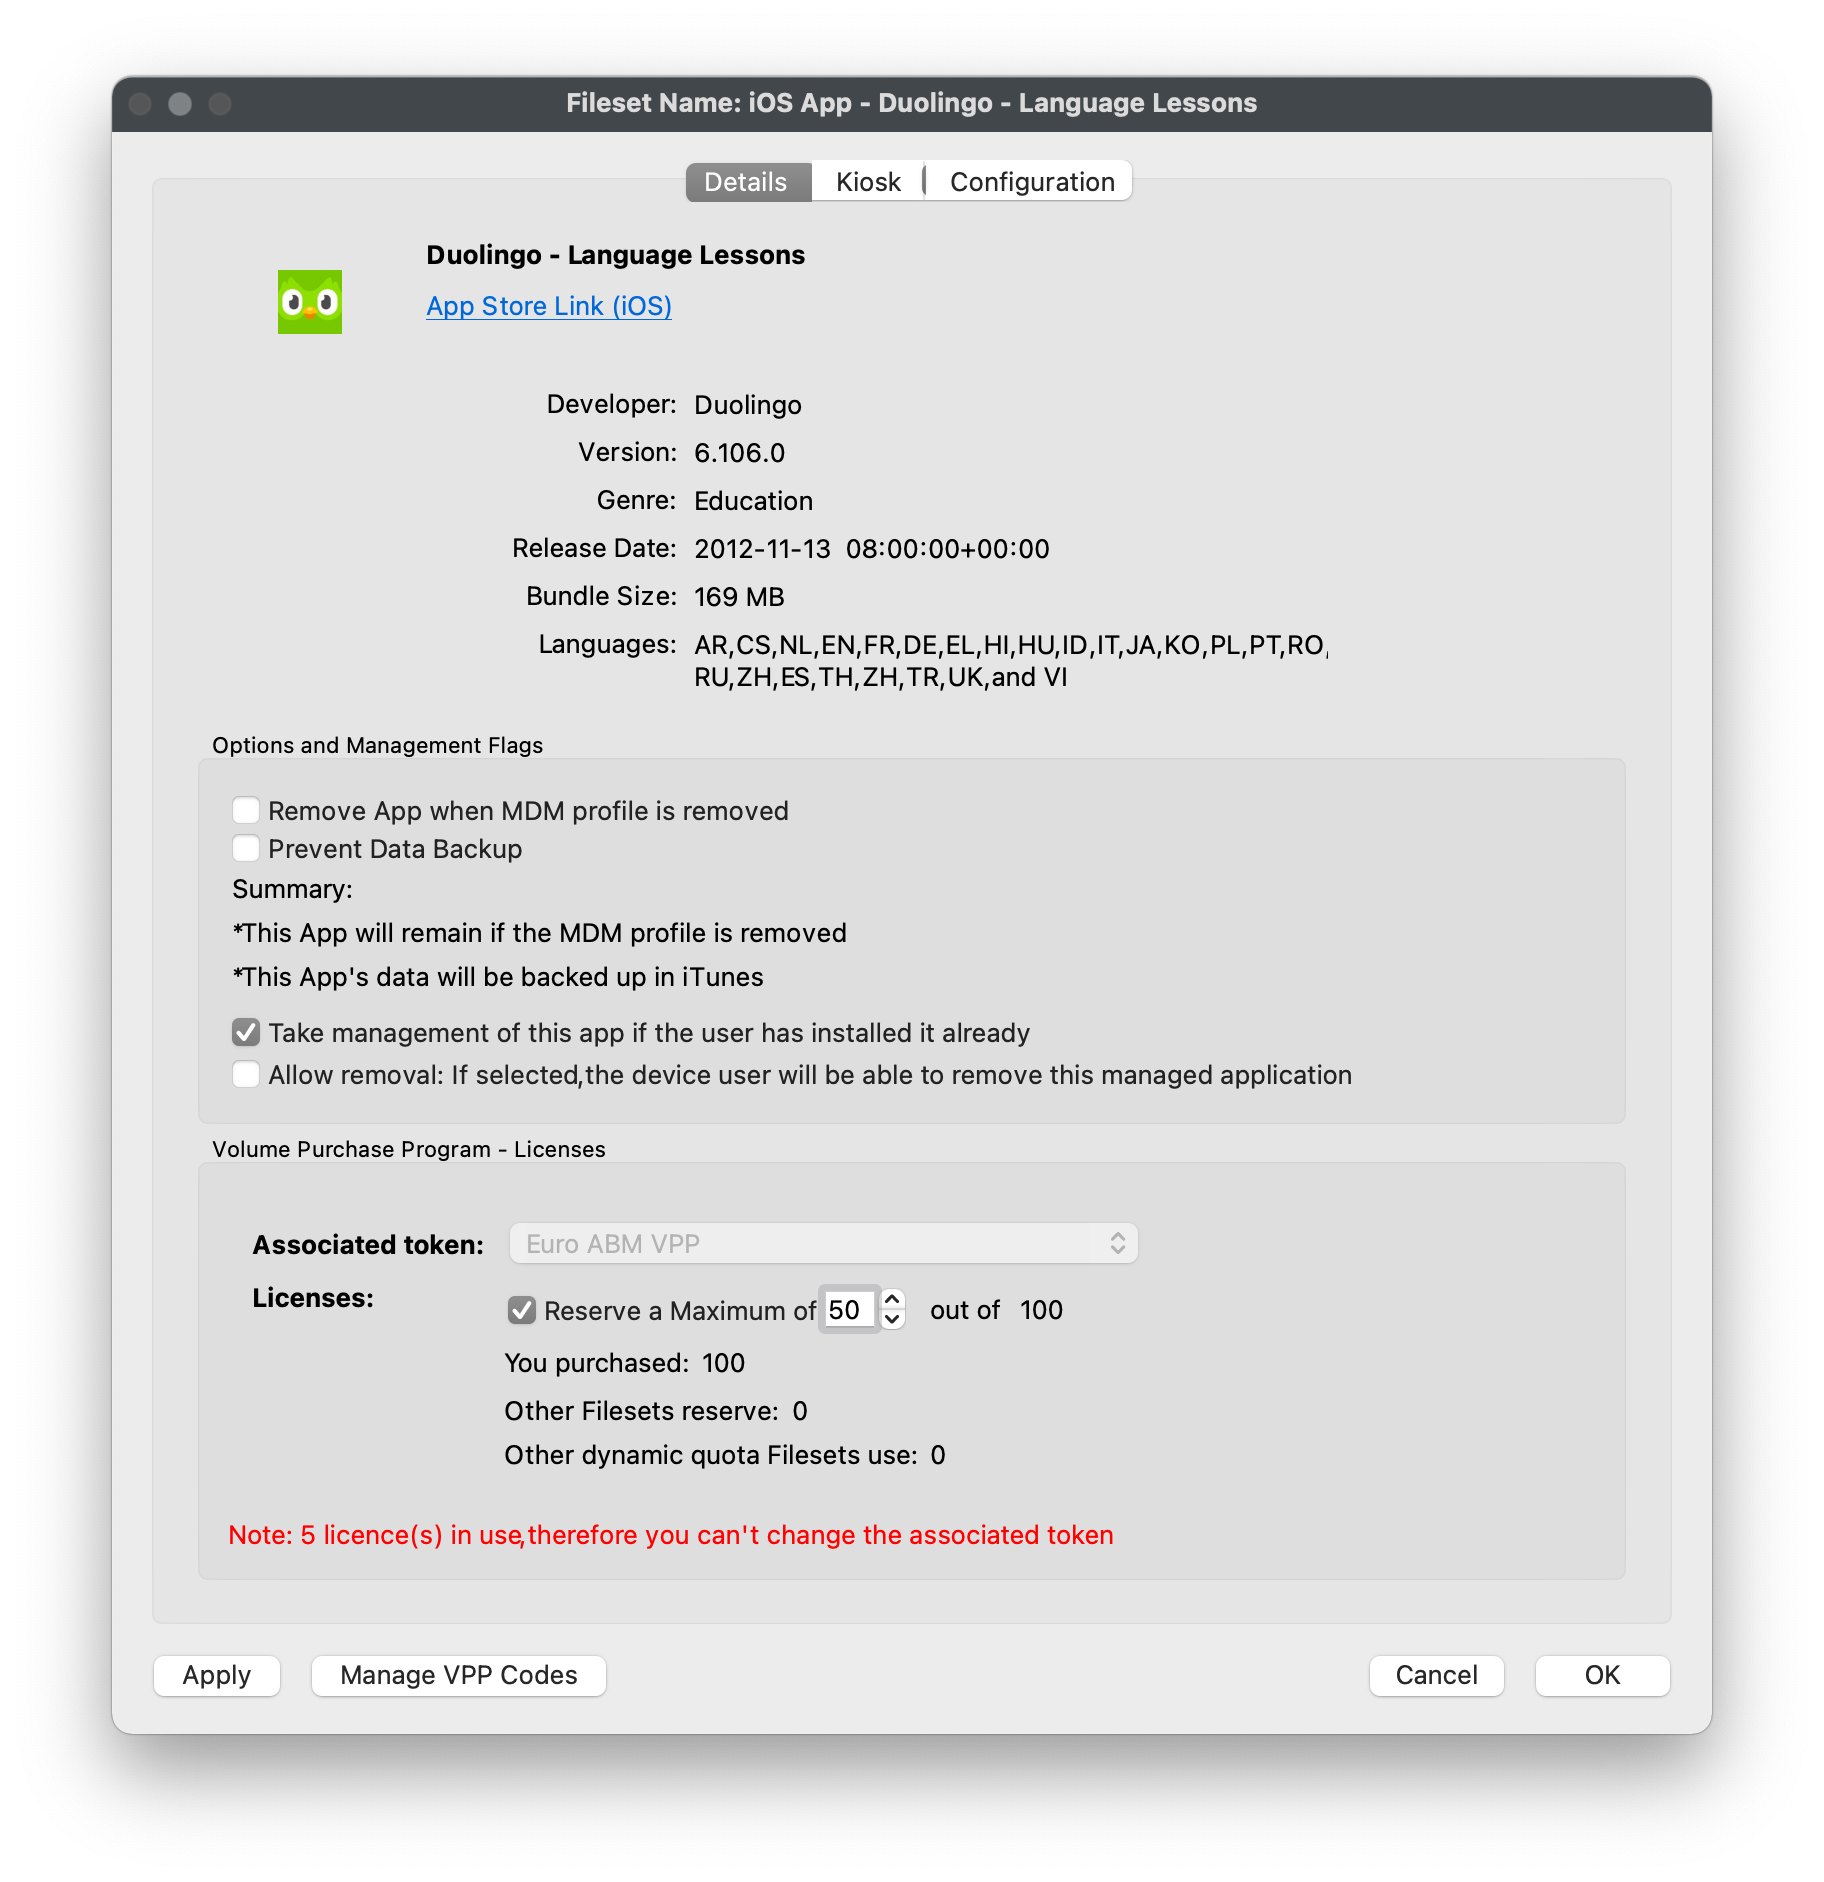
### **iOS App Configuration**
FileWave support iOS App Configuration or "App Config" to allow you to customize and provision a VPP application either before or after its initial deployment. These configuration settings are entirely determined by the Application Developer. More information and examples of App Configs can be found [here](https://www.appconfig.org/ios/).
1. Open FileWave Admin and navigate to *"Filesets"*.
2. Duplicate your desired VPP Fileset.
3. Double-click on one instance of the VPP Fileset.
4. Navigate to the *"Configuration"* tab.
5. Add keys manually or import XML file provided by Application Developer.
- [Zoom App Config](https://support.zoom.us/hc/en-us/articles/360022302612-Using-MDM-to-configure-Zoom-on-iOS)
6. Click *"OK"* to save the changes.
7. The changes will either be available during initial deployment or configure the application after initial deployment.
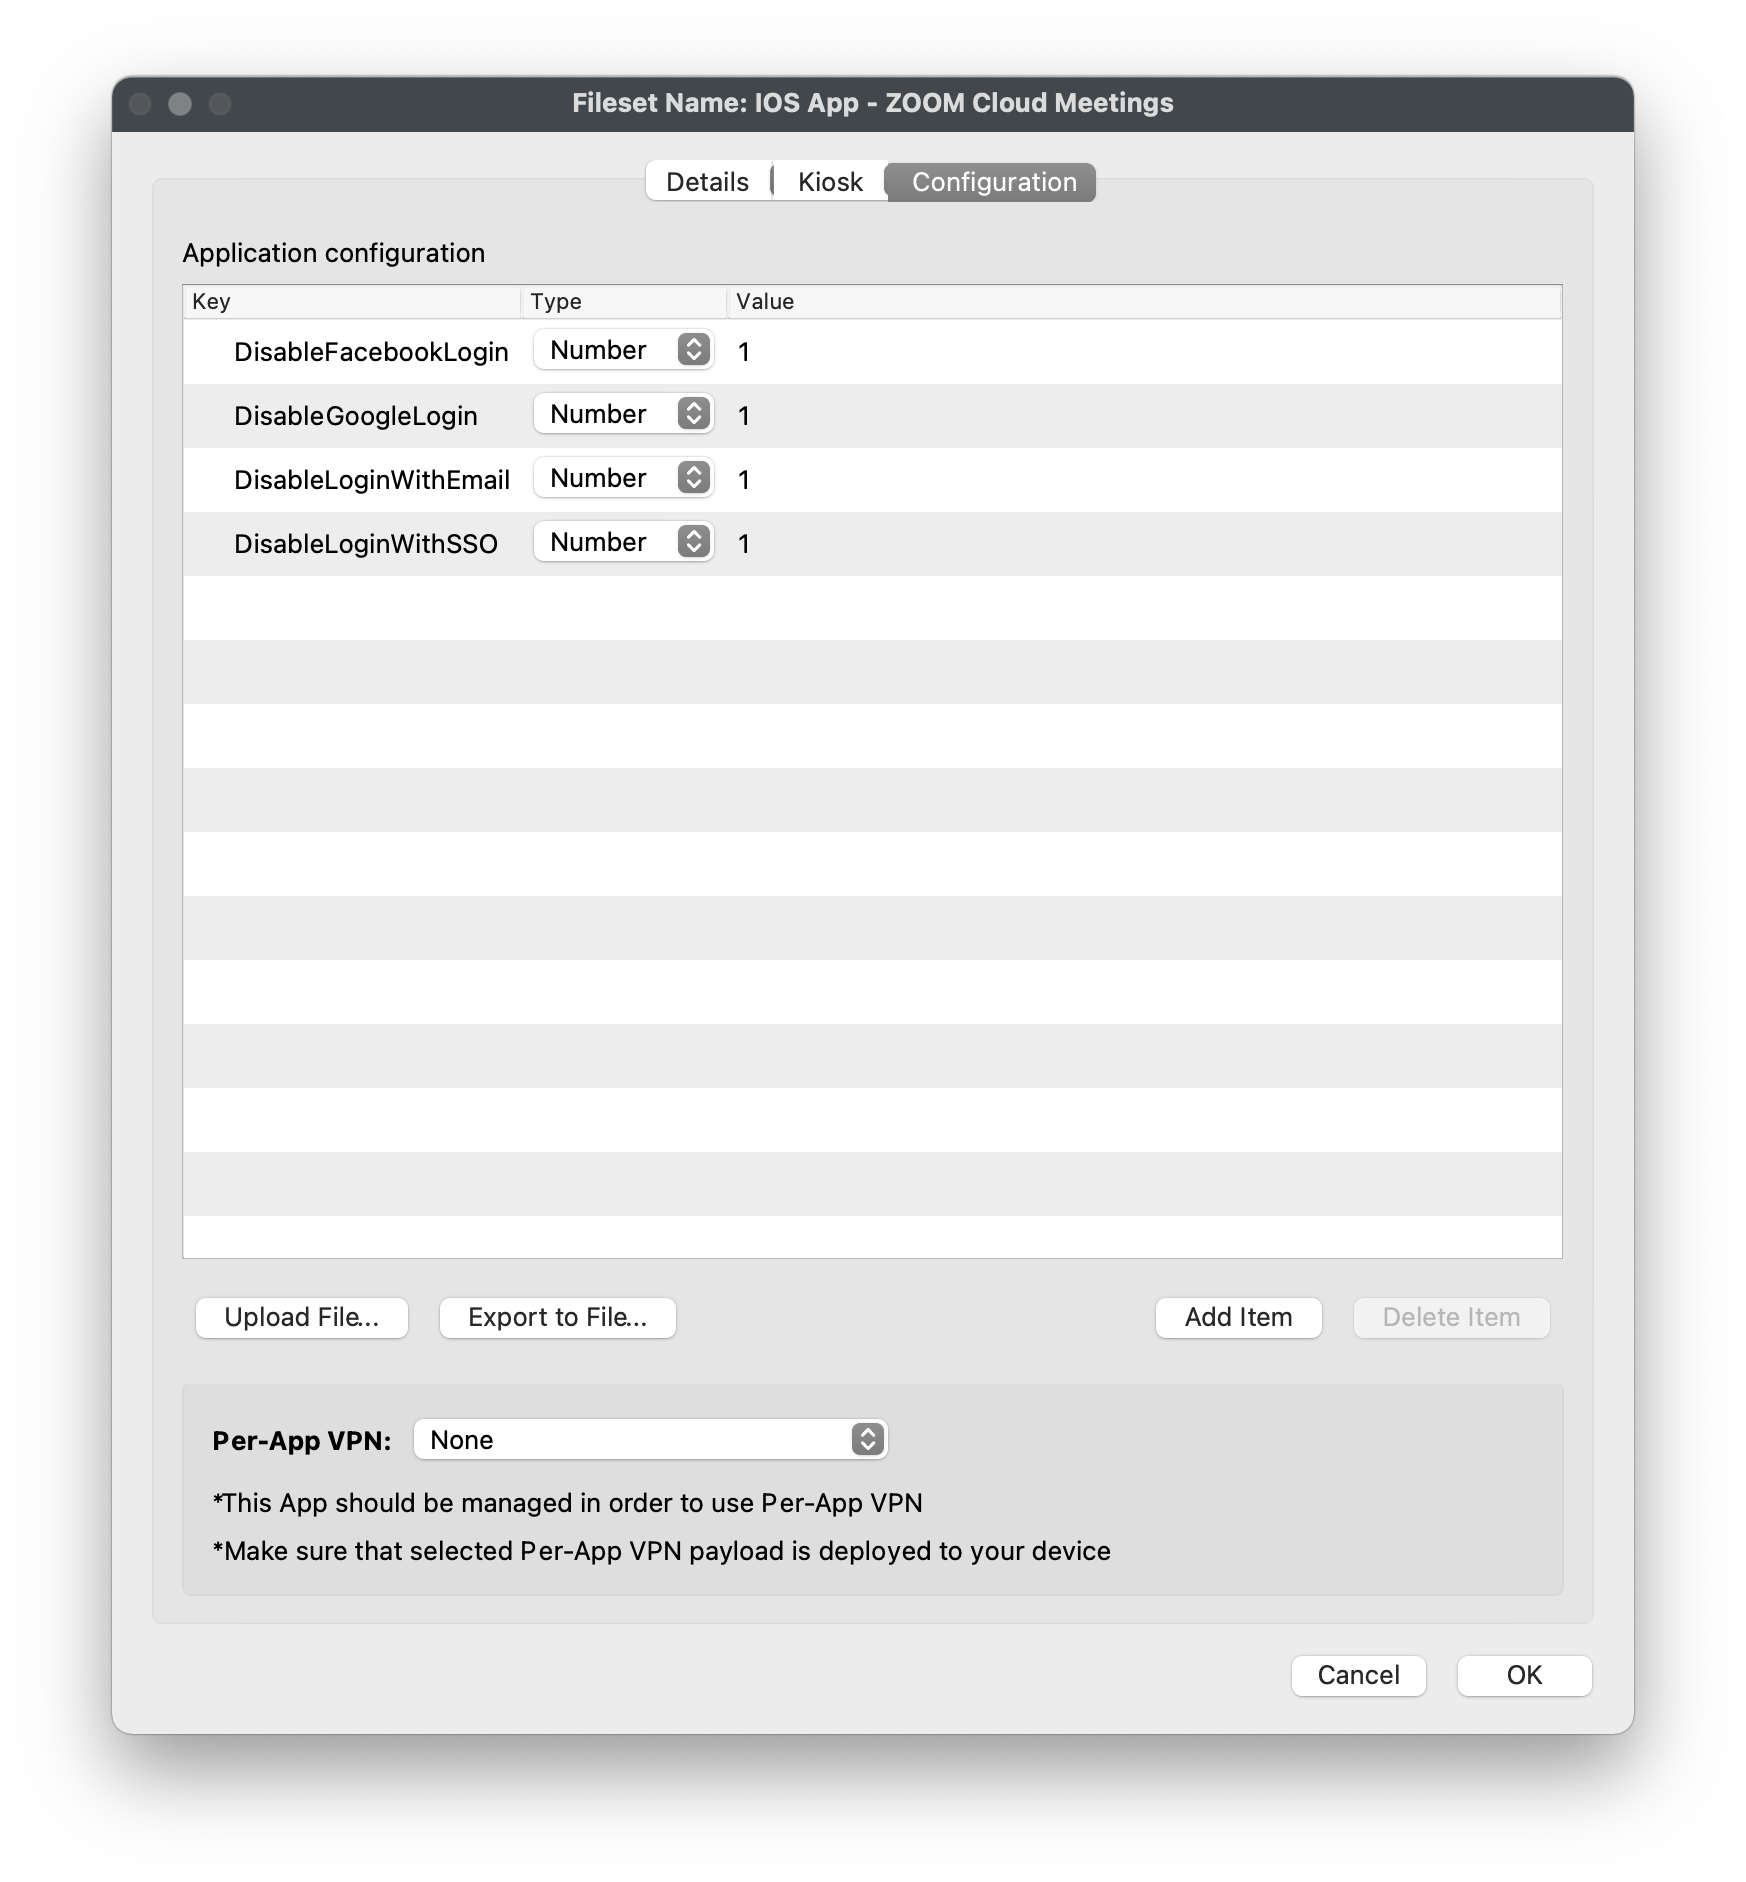
## **Deploy IPA to iOS devices**
---
FileWave can deploy "in-house" applications or IPA files to your iOS devices. These are typically applications that are not available in the App Store or customized versions of an application. The best example of this is the FileWave App Portal as we need to deploy this IPA in order to collect Location Information from the iOS devices and report it back to the FileWave Server.
1. Open FileWave Admin and navigate to *"Filesets"*.
2. Click *"New Mobile Fileset"* from the black menubar.
3. Click *"Enterprise"* from the *"iOS"* section.
4. Make sure *"Import a local file"* is selected, click *"Browse"*, and choose your IPA.
5. Name the Fileset, click *"Import"*, and wait for upload to complete.
6. Click *"Done"*.
7. Your IPA Fileset is now ready Association and deployment.
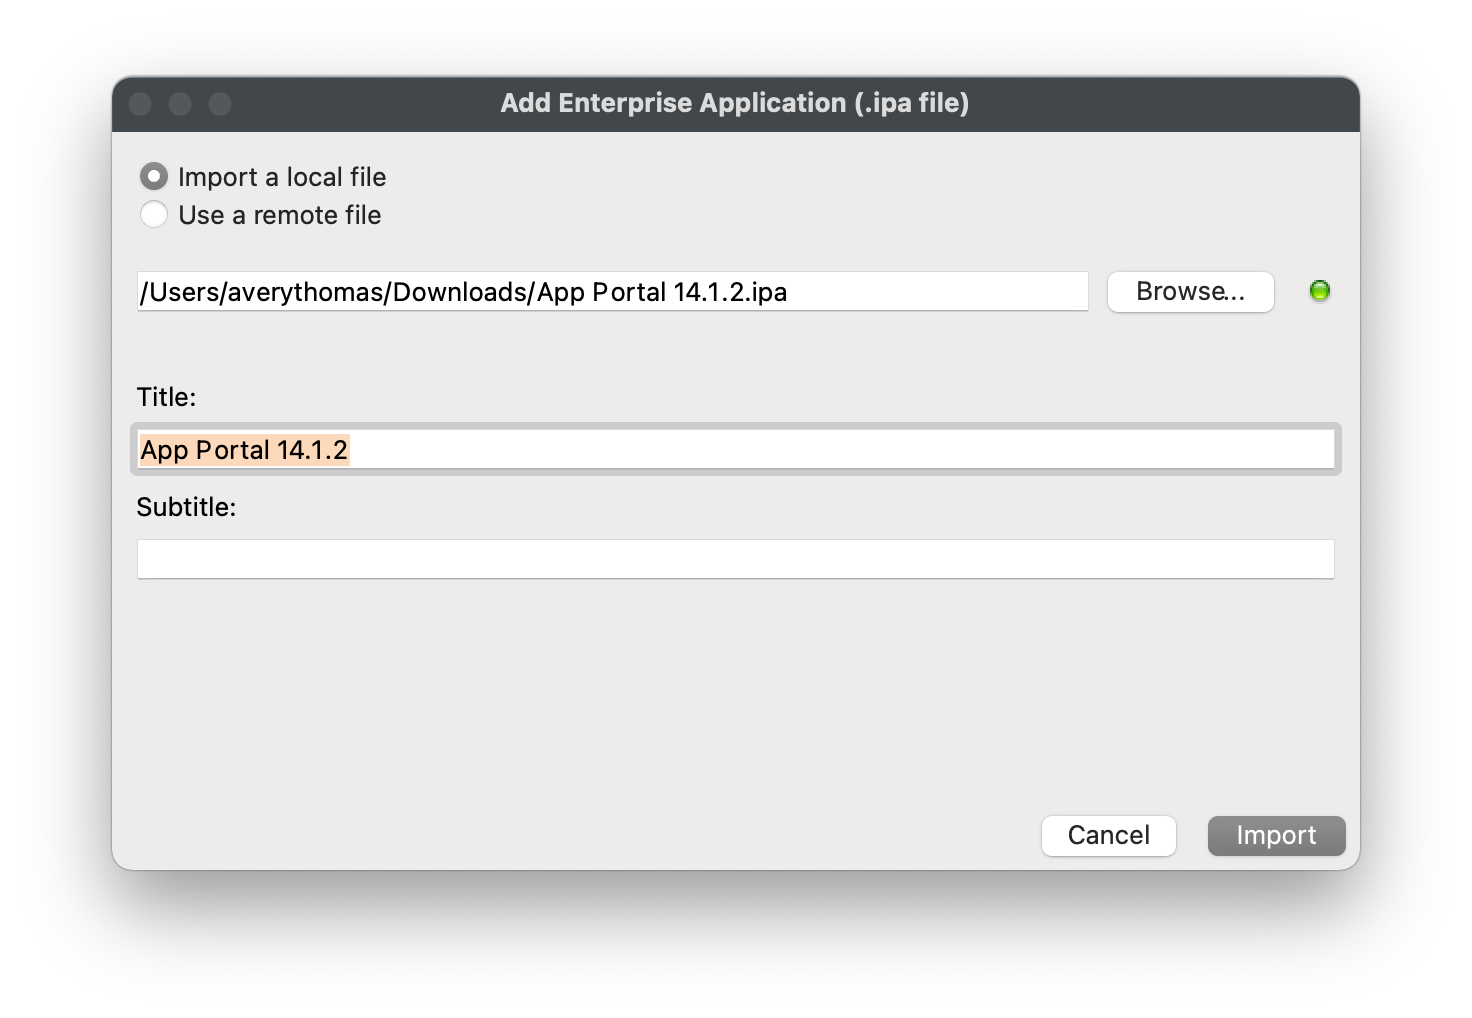
## **Deploy documents to iOS (PDF, ePub, iBook)**
---
FileWave allows you to deploy PDF, ePub, or iBook content to iOS 8+ devices. These documents will be accessible via the iOS "Books" application.
1. Open FileWave Admin and navigate to *"Filesets"*.
2. Click *"New Mobile Fileset"* from the black menubar.
3. Click *"Document (iOS 8+)"* from the *"iOS"* section.
4. Make sure *"Import a local file"* is selected, click *"Browse"*, and choose your .pdf, .epub, or .ibooks file.
5. Name the Fileset, click *"Import"*, and wait for upload to complete.
6. Click *"Done"*.
7. Your iOS Document Fileset is now ready Association and deployment.
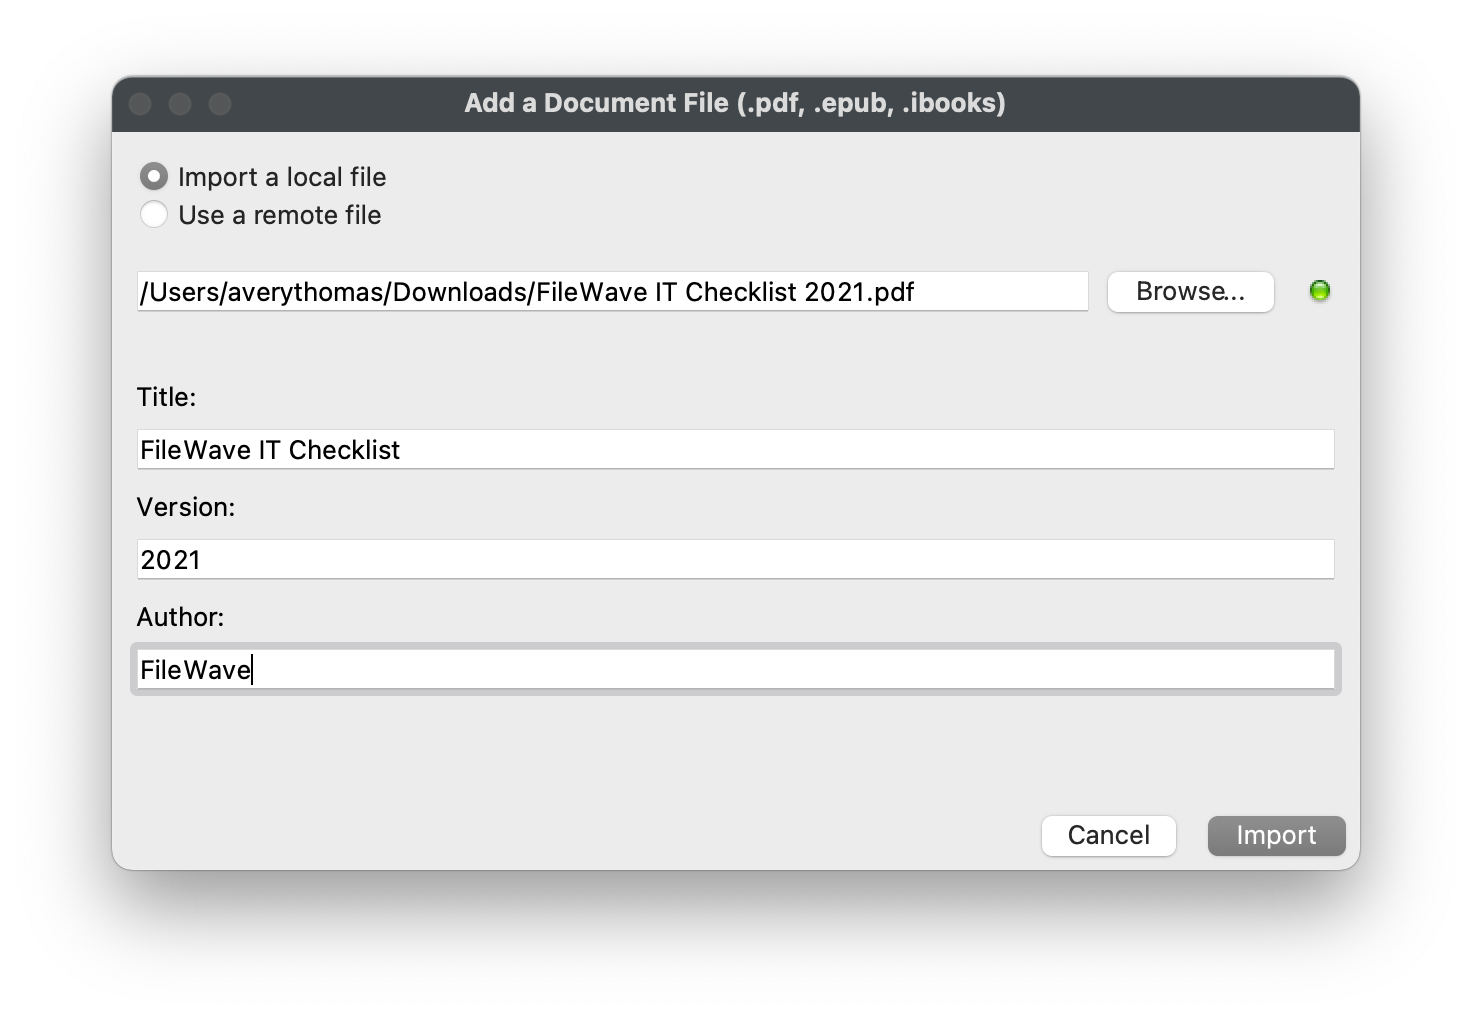
# macOS Software and Profiles
## **macOS Filesets**
---
FileWave allows you to deploy any file, native installer, scripts, or Profiles to a macOS machine. FileWave has no file-type or file-size restrictions and all scripts and installers will be launched with elevated privileges by default.
After creating a Fileset, please make sure to review the [Fileset Creation and Deployment](https://kb.filewave.com/books/evaluation-guide/page/fileset-creation-and-deployment "Fileset Creation and Deployment") page to learn how to associate and deploy your new Filesets.
## **Manage macOS settings using Profiles**
---
FileWave being a full-blown MDM for macOS allows you to modify majority of macOS Preferences using Profiles. It is recommended to configure each Profile Payload in its own Profile Fileset (most notably the *"Network"* payload), however once you are confident is a Profile's configuration, you can combine multiple Profile Payloads into one Profile Fileset. You can also create [Parameterized Profiles](https://kb.filewave.com/books/profiles-apple/page/using-parameters-in-apple-iosmacos-profiles "Using variables in Apple iOS/macOS Profiles") to automatically inject inventory data into the Profile fields using the *"%custom\_field%"* format.
1. Open FileWave Admin and navigate to *"Filesets"*.
2. Click *"New Desktop Fileset"* from the black menubar and select *"Profile"*.
3. Name the Profile from within the "General" section and review other settings.
4. Select your desired Profile Payload and verify it is compatible with your intended operating system.
- Every Profile Payload is broken out into each supported platform indicated by the header of section.
5. *"Configure"* the Profile Payload with any required fields.
6. *"Save"* changes.
7. You should now see your Profile Fileset in the *"Filesets"* view.
- The Fileset will be labeled as *"Modified"* indicating the it has not yet been saved and committed.
8. *"Update Model"* if you'd like to save the changes.
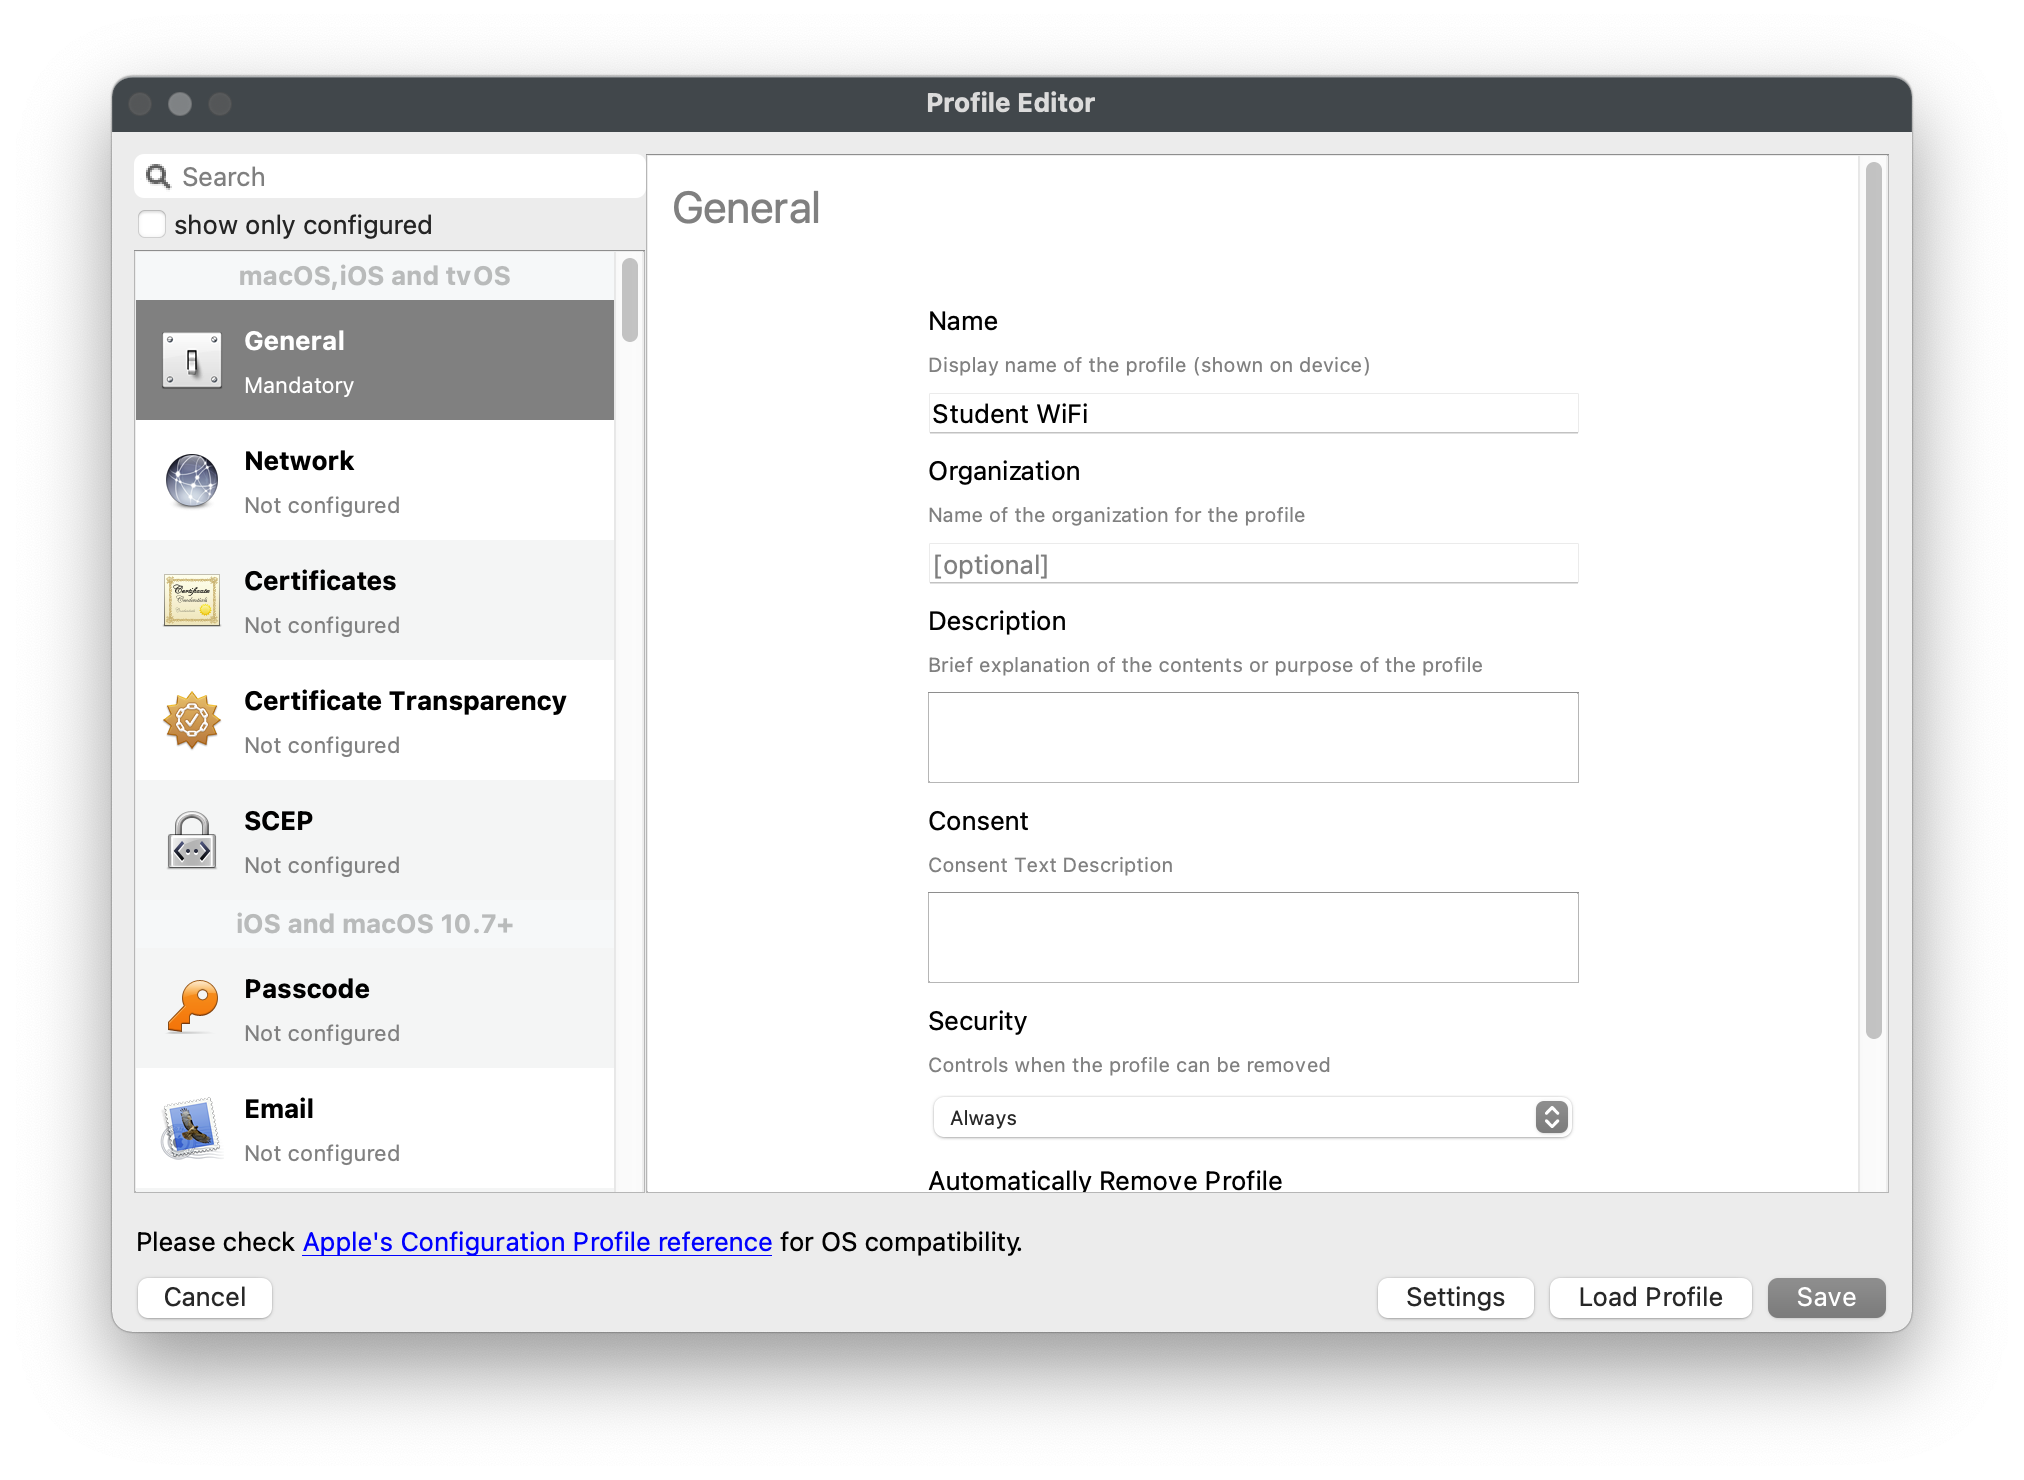
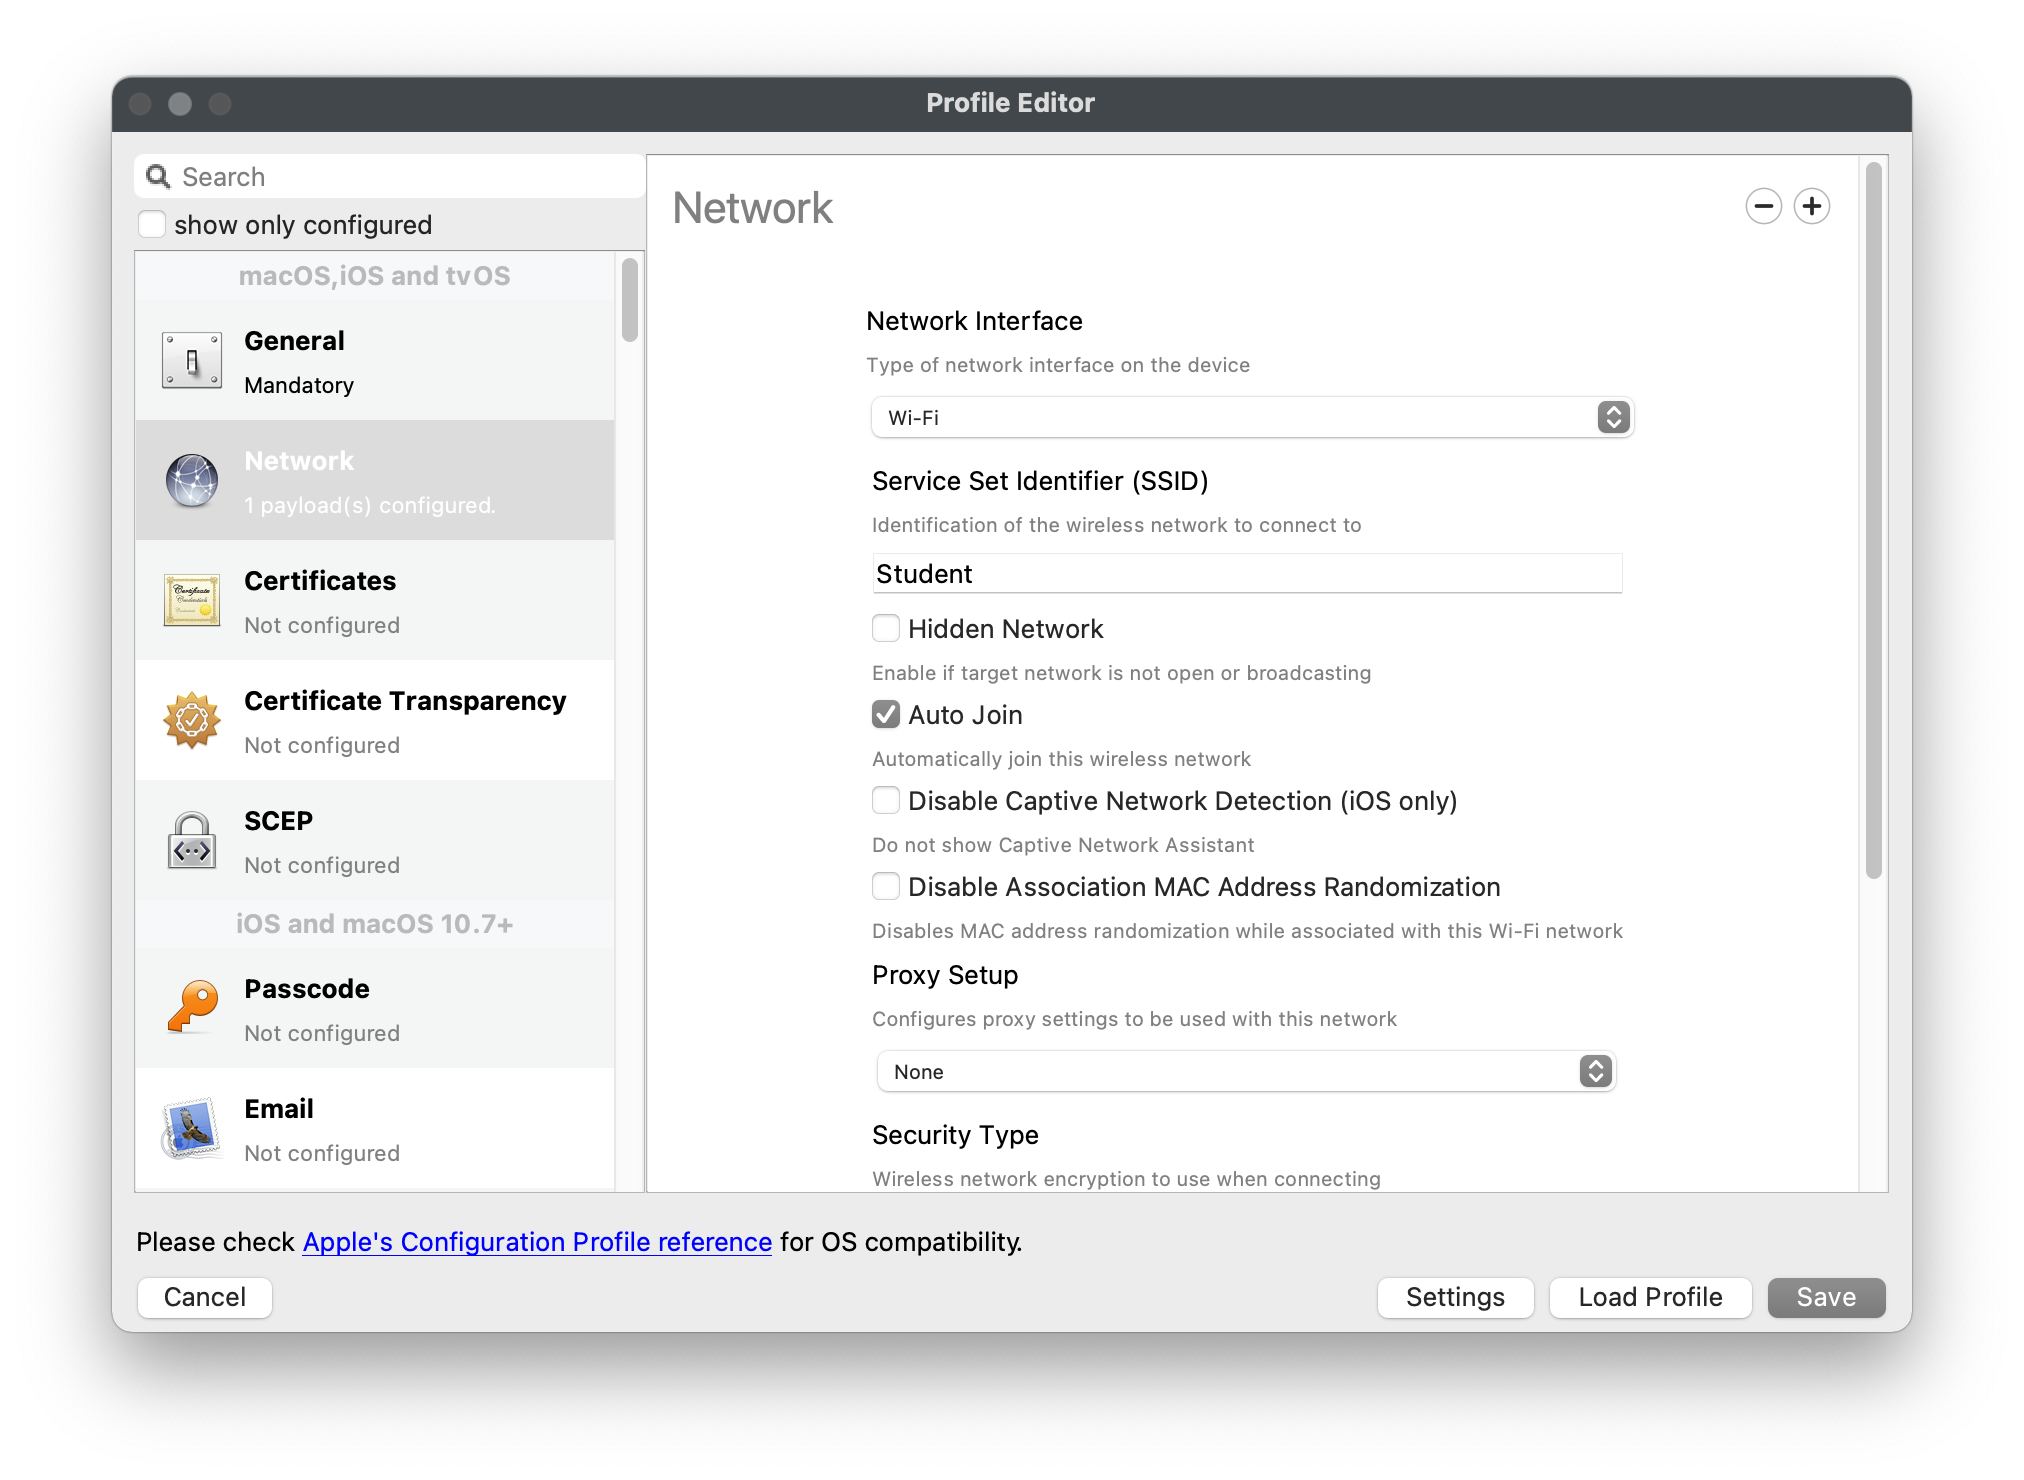
## **Create a PKG Fileset**
---
Deploying a PKG is very easy in FileWave. If you're looking to deploy a piece of macOS software that's not available in the App Store, a PKG Fileset is the recommended way to go. However, since a PKG is a native installer, FileWave's Self-Healing is not supported.
1. Open FileWave Admin and navigate to *"Filesets"*.
2. Drag-n-drop your desired PKG directly into the *"Filesets"* view.
- Or...
3. Select *"New Desktop Fileset"* from the black menubar.
4. Click *"MSI / PKG"* and select your desired PKG.
5. You should now see your PKG Fileset in the *"Filesets"* view.
- The Fileset will display in red text while it is being uploaded to the FileWave Server. Upload progress can be viewed from the bottom bar of the FileWave Admin.
- The Fileset will be labeled as *"Modified"* indicating the it has not yet been saved.
6. *"Update Model"* if you'd like to save the changes.
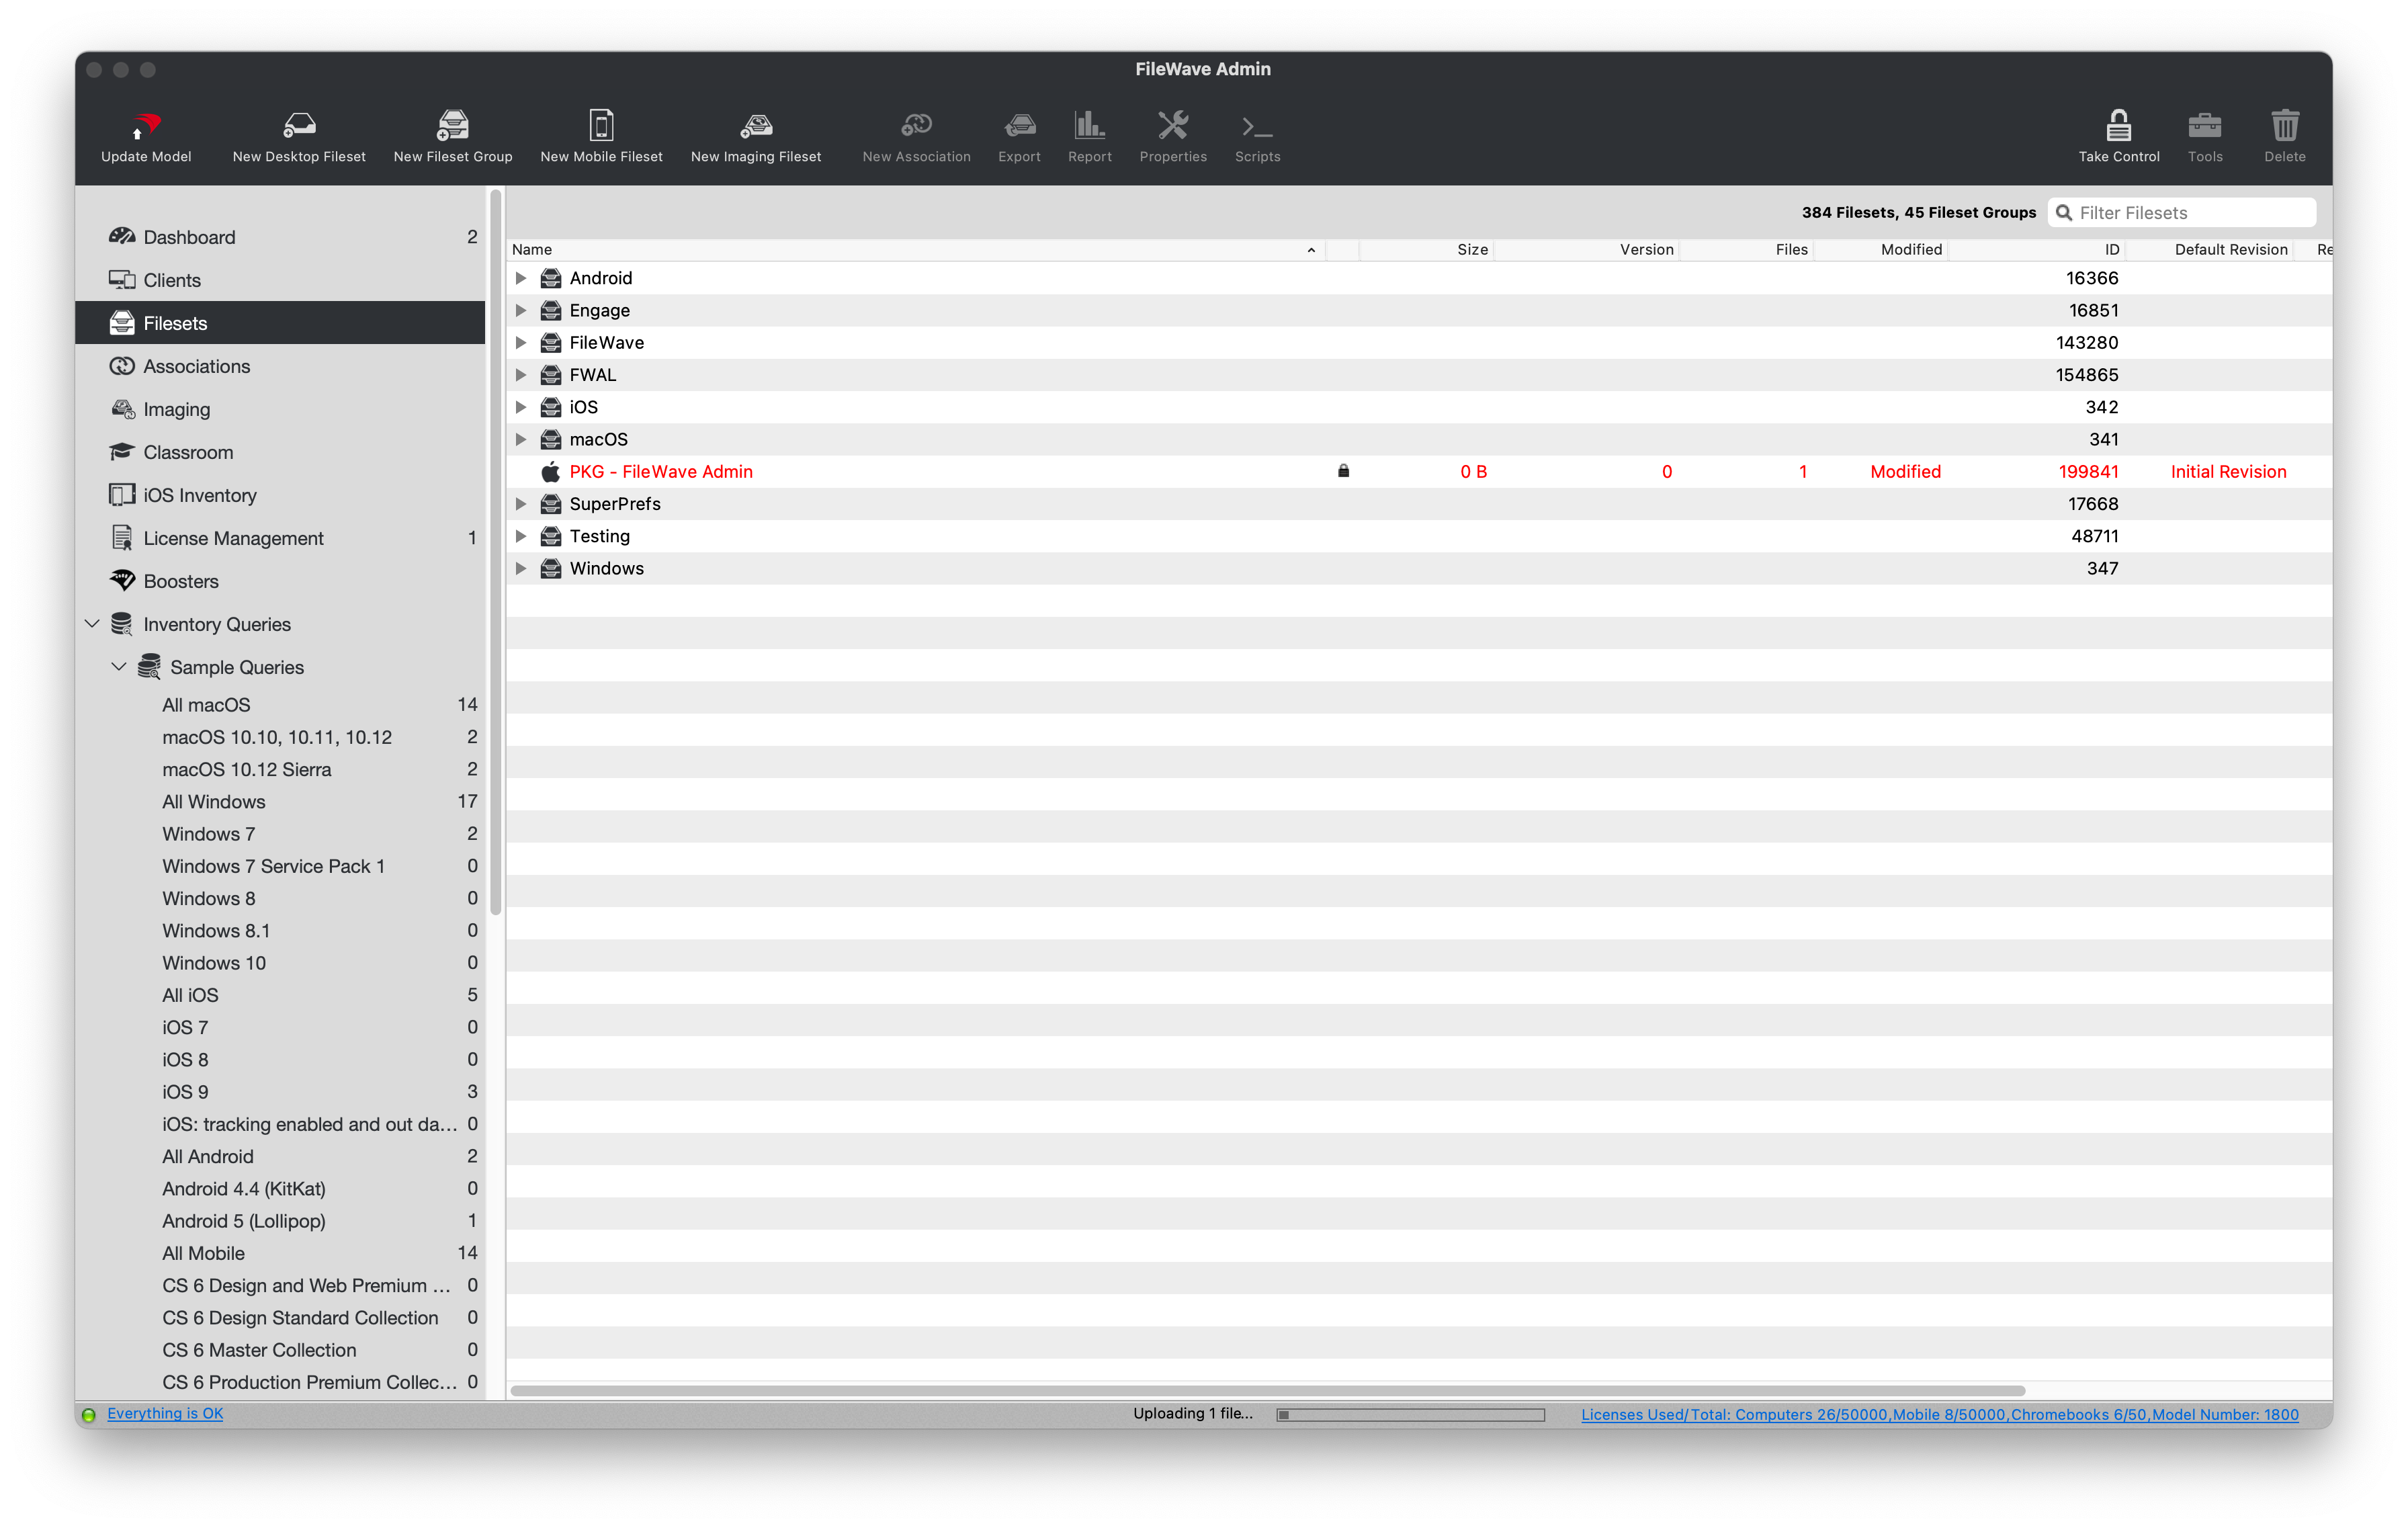
## **Deploy VPP Filesets to macOS**
---
FileWave can deploy applications from the Apple App Store by leveraging Apple's Volume Purchase Program. Since you simply associate VPP Filesets like any other Filesets, this section will cover some of the more granular settings associated with VPP Filesets.
If you have not already, please review this section on the guide to learn more about how to sync [VPP](https://kb.filewave.com/books/evaluation-guide/page/apple-client-pre-requisites "Apple Integration") into FileWave and create VPP application Filesets.
### **Reserve VPP Licenses for Fileset**
FileWave allows you to duplicate a VPP Fileset, even if you just have one VPP Token where the licenses are coming from. This will allow you to split up the licenses for each VPP Fileset for one given VPP application so that you can group your software more dynamically. For example, you purchase 10 licenses of Slack from one VPP Token and need to deploy 5 licenses to Development and 5 licenses to QA, each from their respective group.
1. Open FileWave Admin and navigate to *"Filesets"*.
2. Duplicate your desired VPP Fileset.
3. Double-click on one instance of the VPP Fileset.
4. Check the box for *"Reserve a maximum of"* and fill out the maximum licenses available for that instance of the VPP Fileset.
5. Repeat Step 3 & 4 for the other instance of the VPP Fileset, otherwise the other instance will automatically consume the remainder of the VPP licenses.
6. You may now move the VPP Fileset into their appropriate groups and Associate to devices/device groups.
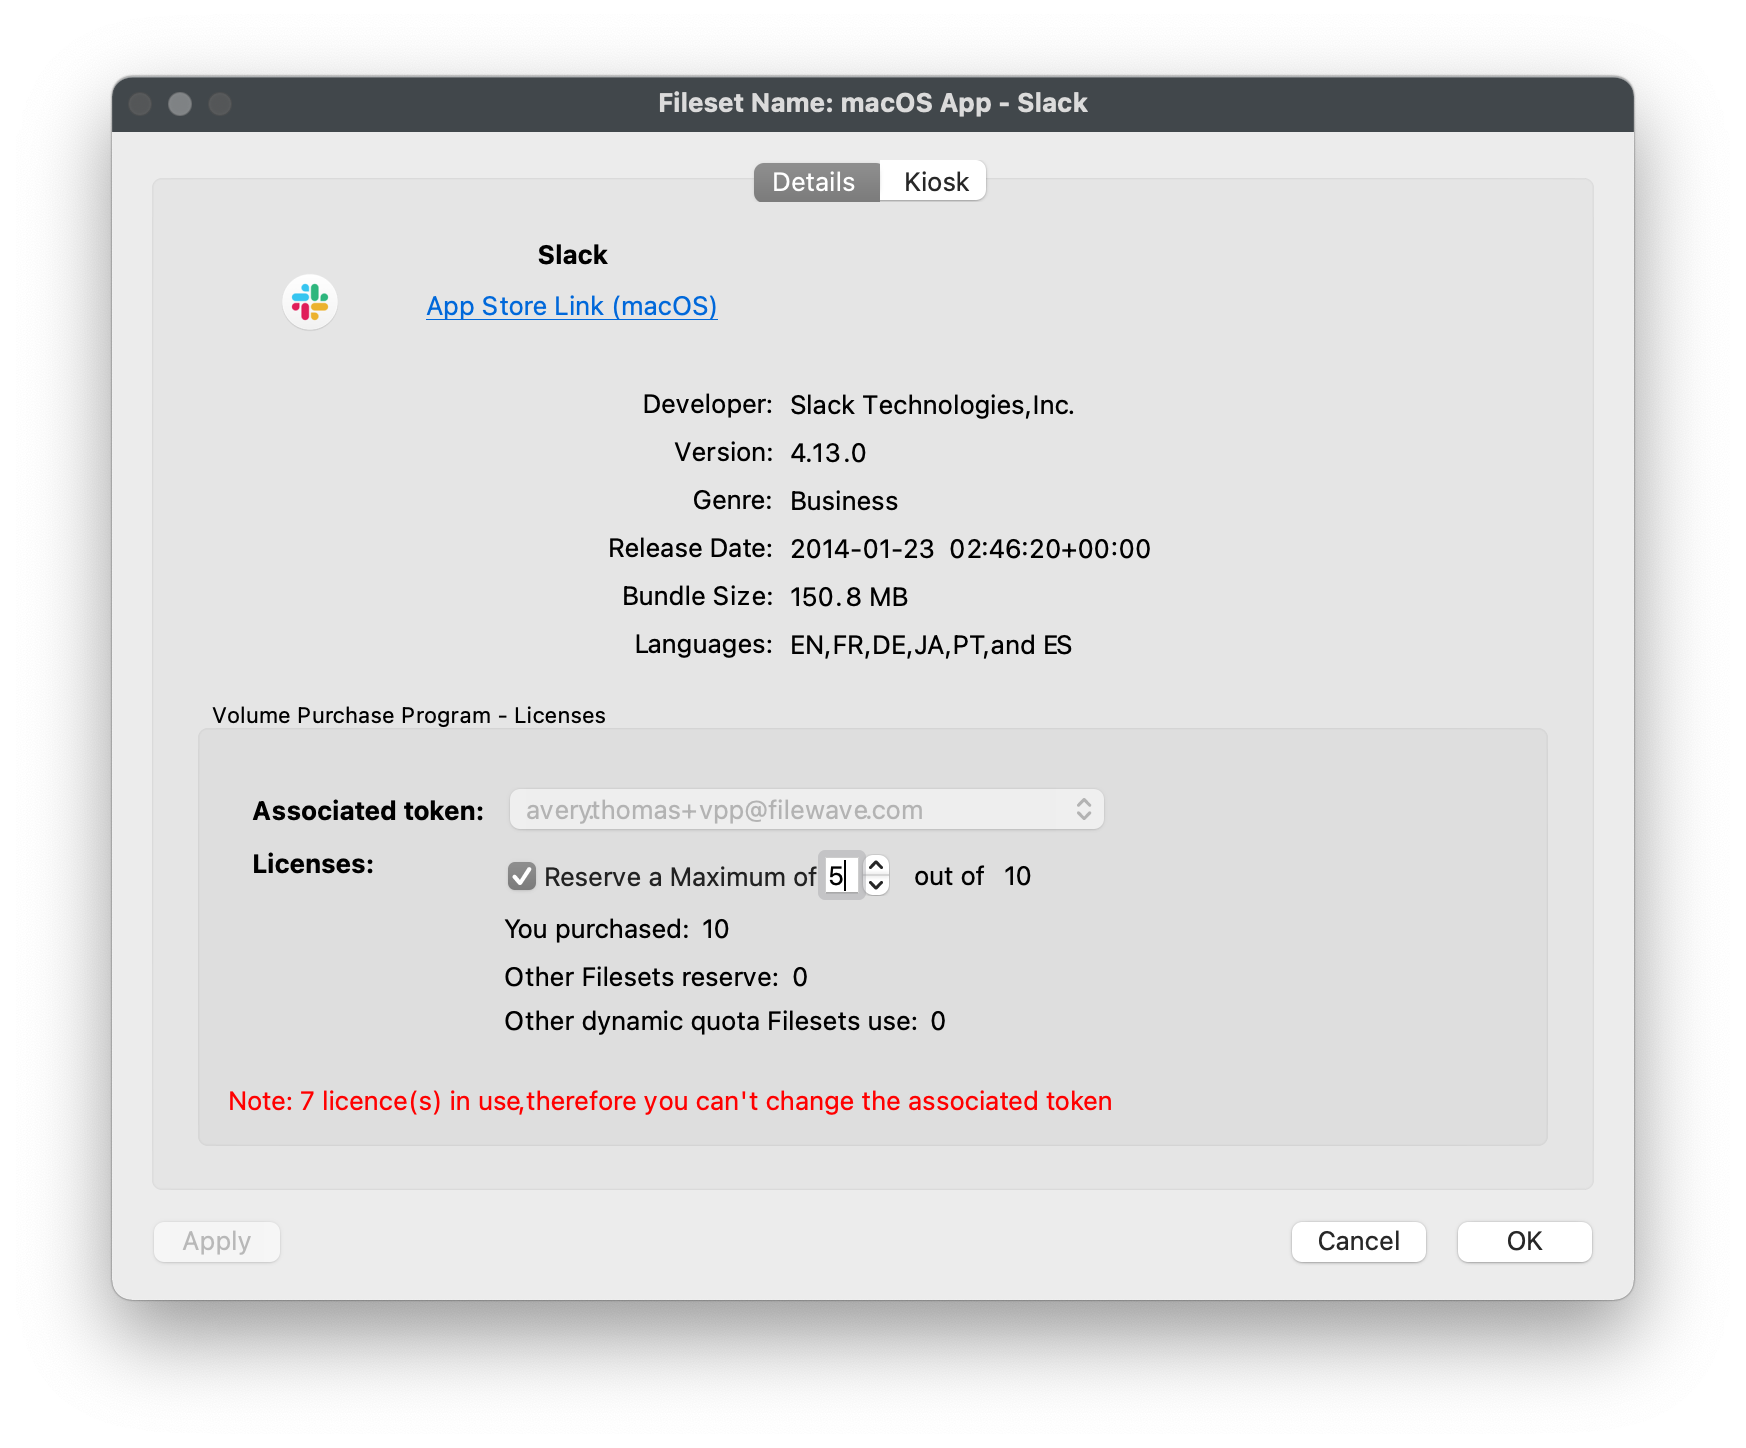
## **Deploy a file or folder with Self-Healing**
---
One of the main things that separates FileWave from the other solutions on the market is FileWave's ability to deploy any file directly to the Client's local filesystem and enable true Self-Healing. When you deploy a file with Self-Healing enabled, FileWave will automatically re-download the original file whenever the file is modified or deleted on the Client machine, however we can tweak this behavior per file to account for all deployment situations using the three *"Verification"* options.
### **Verification options**
FileWave's *"Verification"* options allow you to granularly specify how each file in a Fileset deployment will behave. You can also set the *"Verification"* settings from a Fileset's Properties that will apply to all files within a given Fileset.
- **Self-Healing** = Re-downloads file if modified or deleted upon device reboot, 24 hours (default), or manual "Verify". Removes files if Fileset disassociated.
- **Download If Missing** = Re-downloads file if deleted upon device reboot, 24 hours (default), or manual "Verify". Removes files if Fileset disassociated.
- **Ignore at Verify (Left Behind)** = Does not monitor file modification or re-download. Leaves files intact if Fileset disassociated.
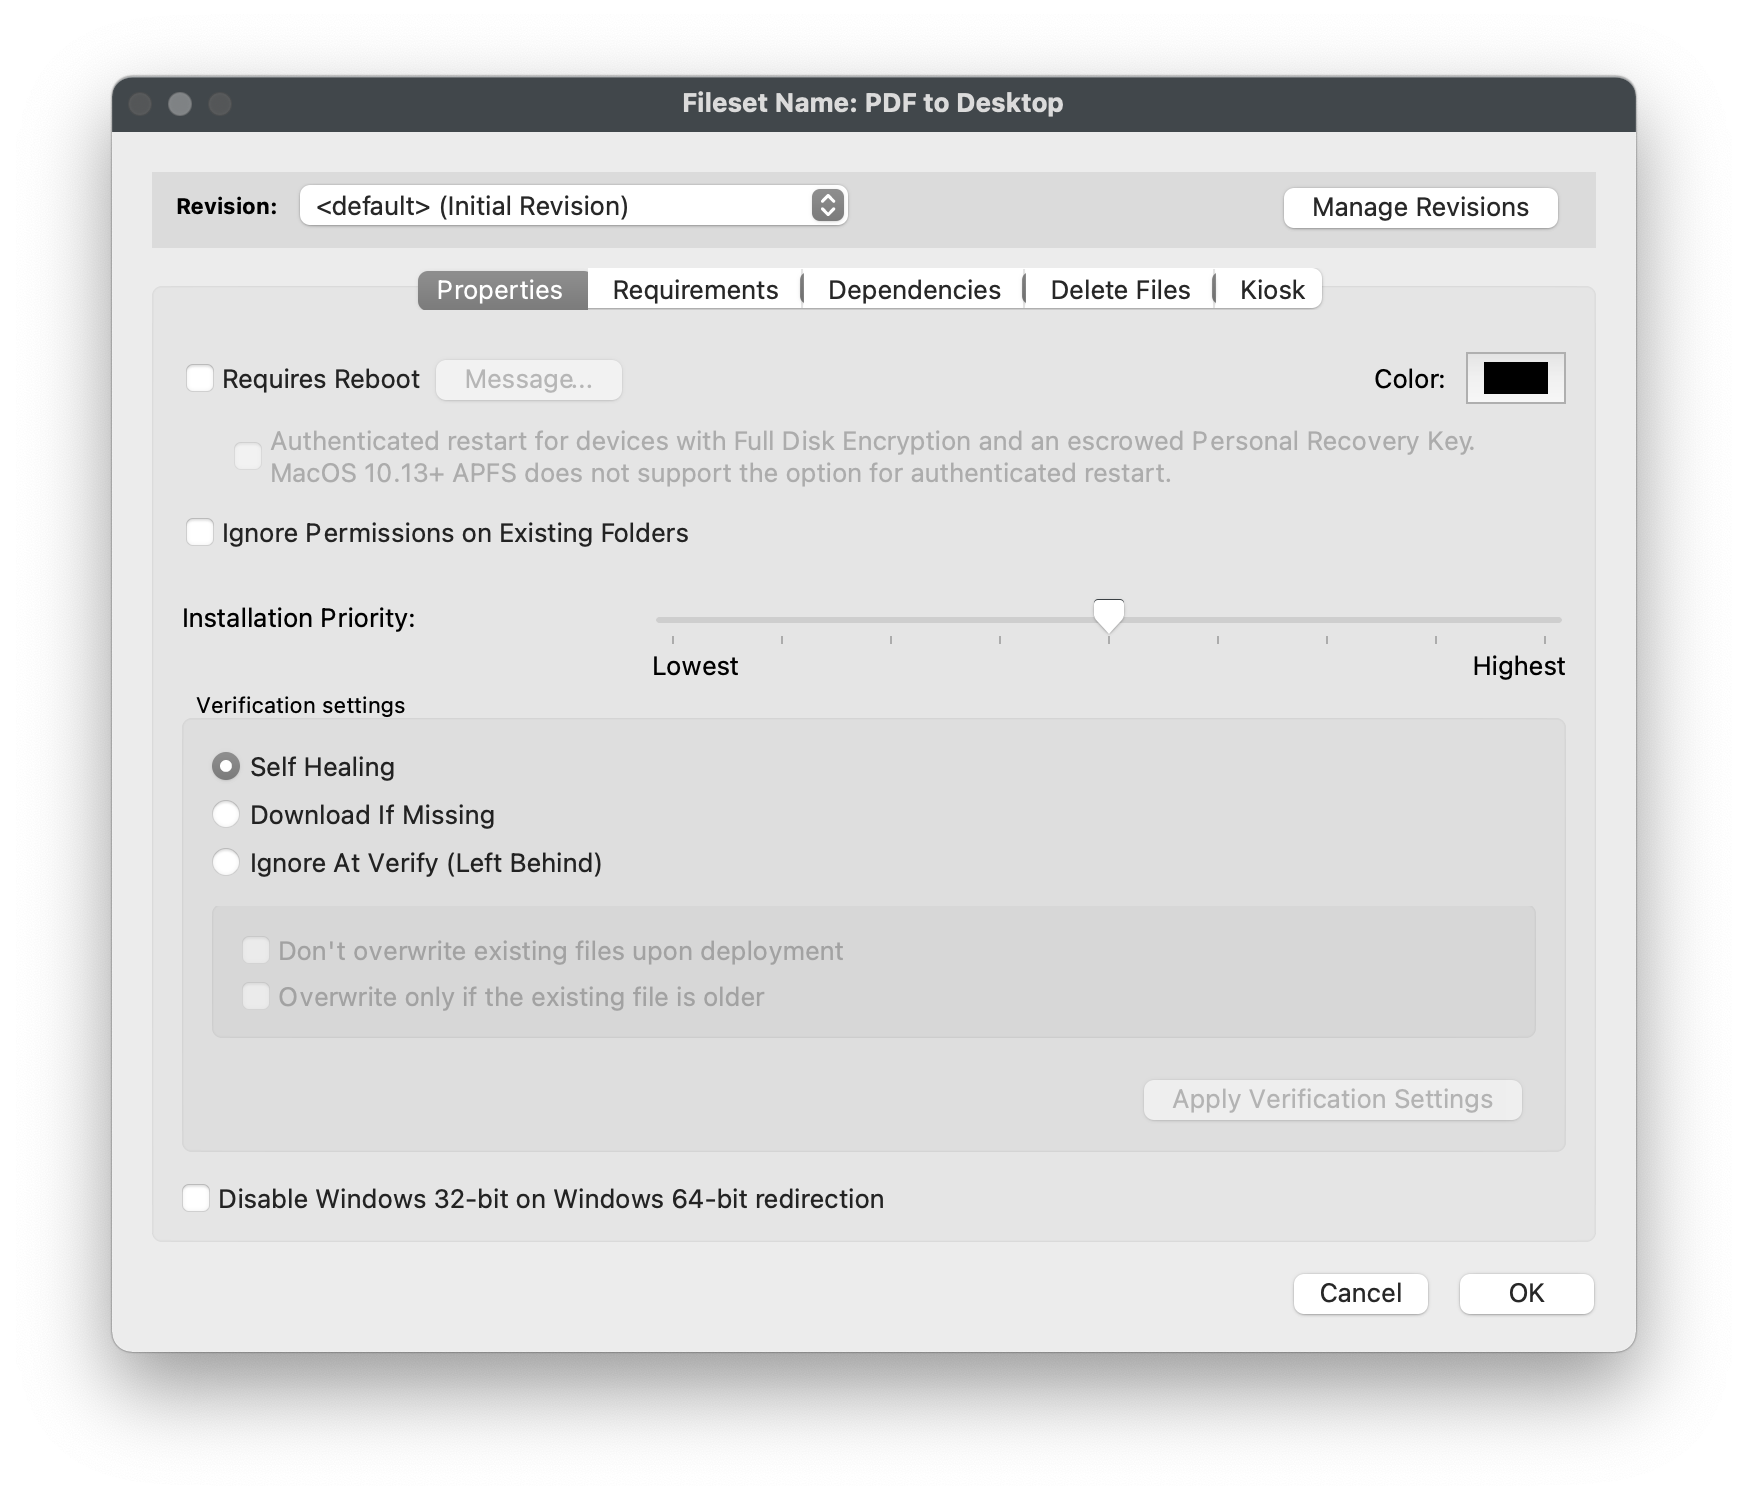

### **Deploy PDF to every user's Desktop**
1. Open FileWave Admin and navigate to *"Filesets"*.
2. Select *"New Desktop Fileset"* from the black menubar.
3. Click *"Empty"* and name the Fileset accordingly.
4. Double-click on the new Fileset to open the *"Fileset Contents"*.
5. Uncheck *"Hide unused folders"* if enabled.
6. Navigate to *"Users > All Users > Desktop"*.
7. Drag-n-drop PDF file into the *"Desktop"* folder.
8. Select the PDF and click *"Get Info"* from the menubar.
9. Navigate to the *"Verification"* tab and select your desired Verification preference.
10. Click *"Apply"* to save changes and Close the *"Get Info"* window and Fileset Contents window.
11. You should now see your PDF Fileset in the *"Filesets"* view.
\\* The Fileset will be labeled as *"Modified"* indicating the it has not yet been saved.
12. *"Update Model"* if you'd like to save the changes.
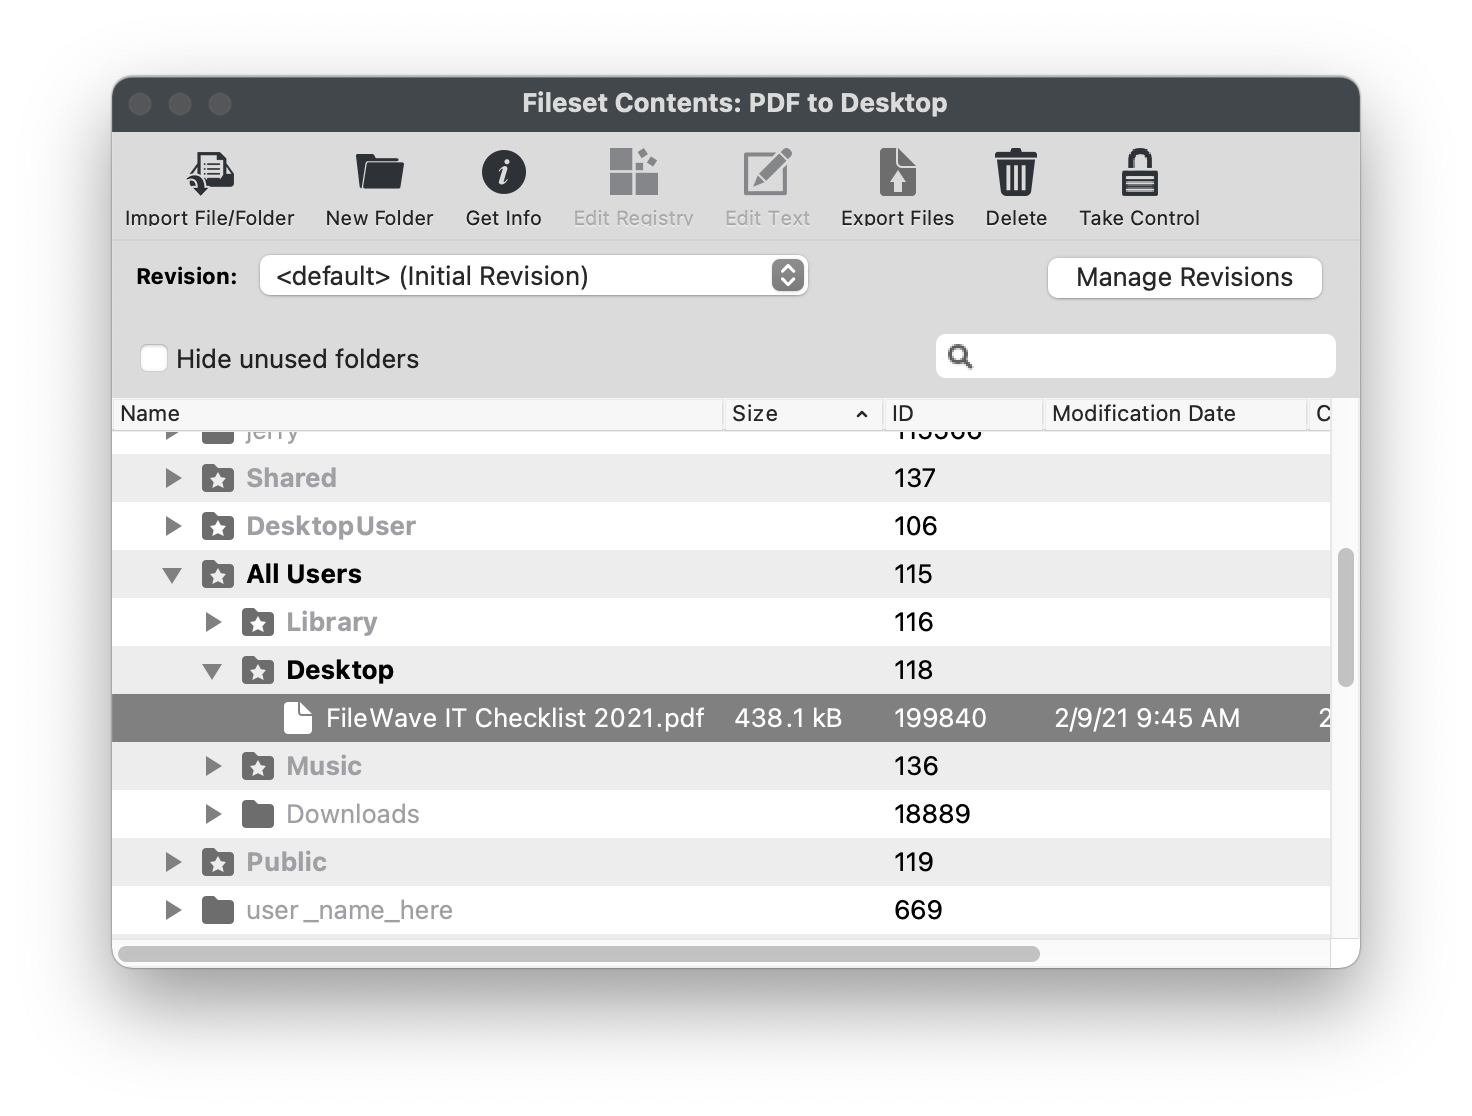
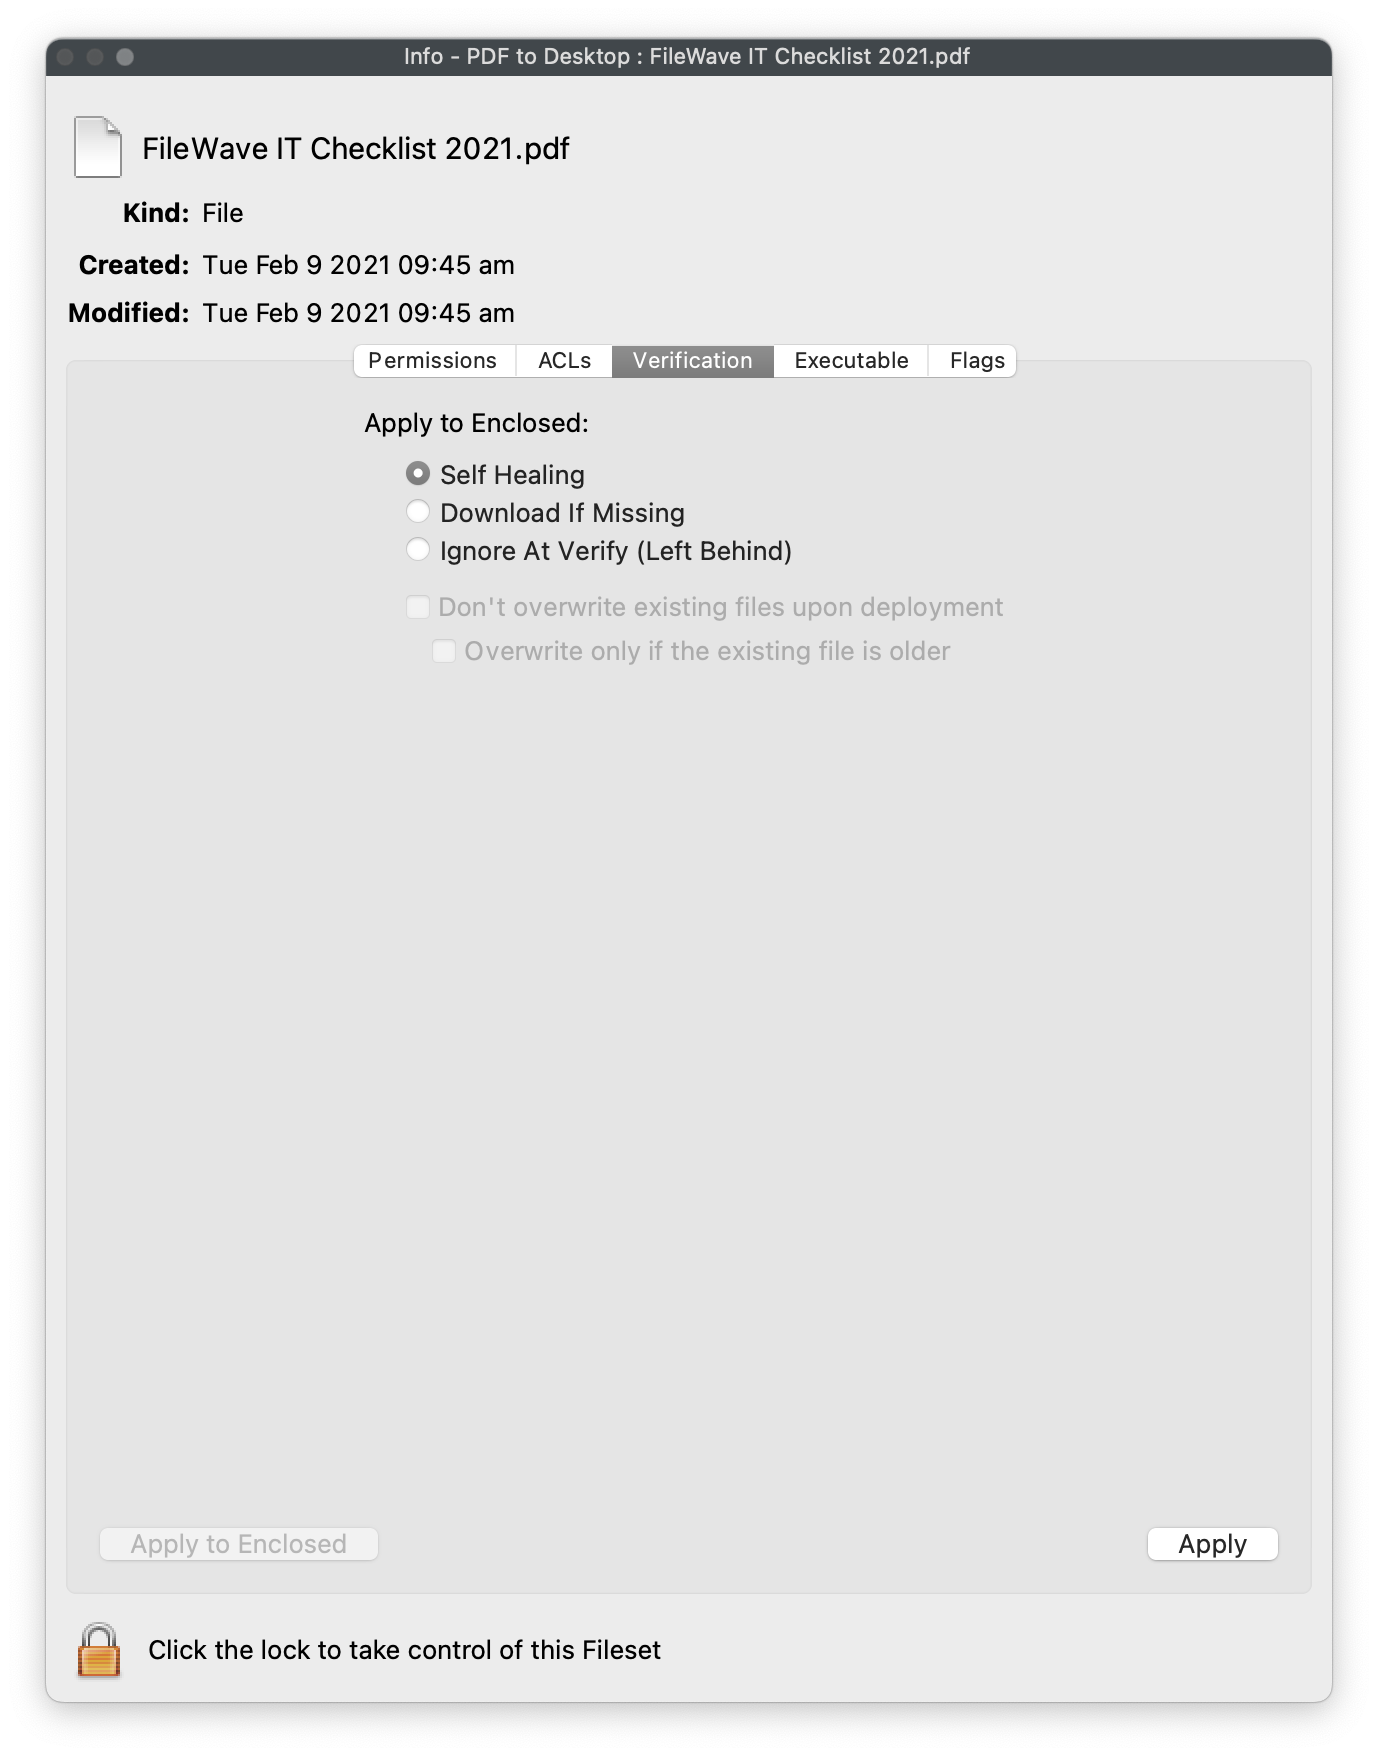
### **Deploy .app to macOS Applications folder**
Since FileWave can deploy content at the file-level, we can also deploy an entire macOS ".app" directly to the macOS Applications folder and enable Self-Healing. This method is useful if you don't have the original PKG or the software is distributed within a DMG containing just the ".app".
1. Open FileWave Admin and navigate to *"Filesets"*.
2. Select *"New Desktop Fileset"* from the black menubar.
3. Click *"App / Folder"* and select your desired ".app".
4. Double-click the Fileset and verify the ".app" is in the *"Applications"* folder.
- FileWave is context aware and will automatically add ".app" to *"Applications"* folder if it was originally in the *"Applications"* folder on the Admin machine.
- ".app" coming from any other location that *"Applications"* will have to be dragged into the *"Applications"* folder within the Fileset (ex: from DMG).
5. Optionally, right-click the Fileset and click *"Properties",* choose your desired Verification preference, and *"OK"* to save changes.
- You may consider using *"Download If Missing"* if the software is set to automatically update (ex: Chrome) to prevent software and FileWave from conflicting.
6. You should now see your ".app" Fileset in the *"Filesets"* view.
- The Fileset will be labeled as *"Modified"* indicating the it has not yet been saved.
7. *"Update Model"* if you'd like to save the changes.
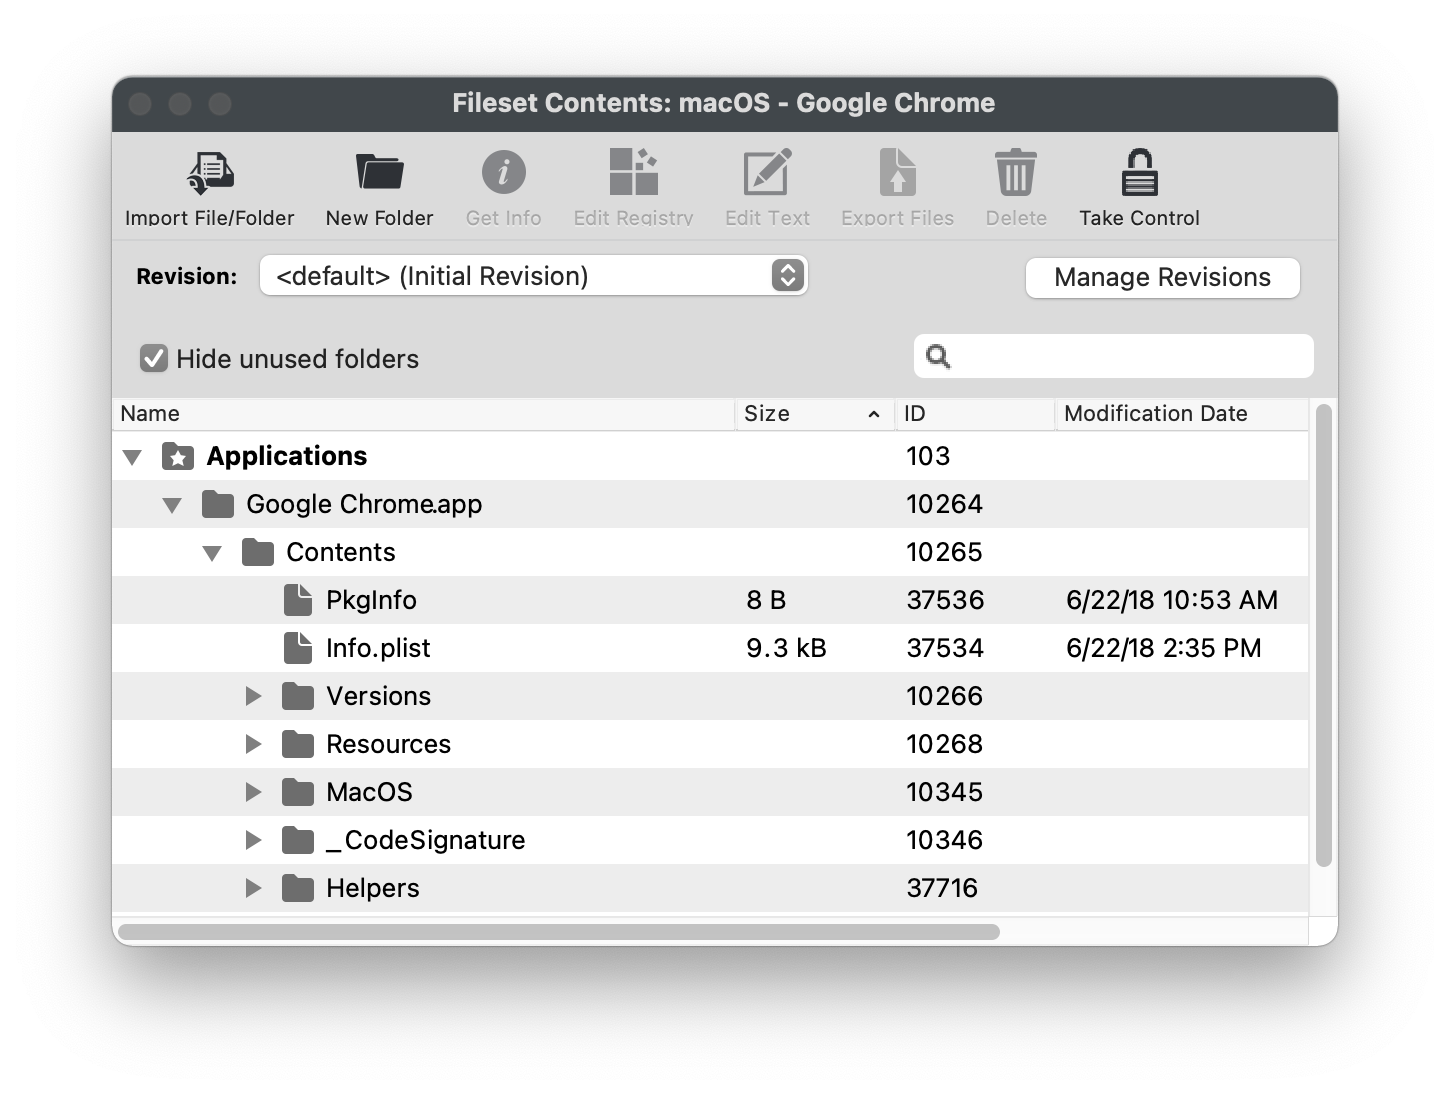
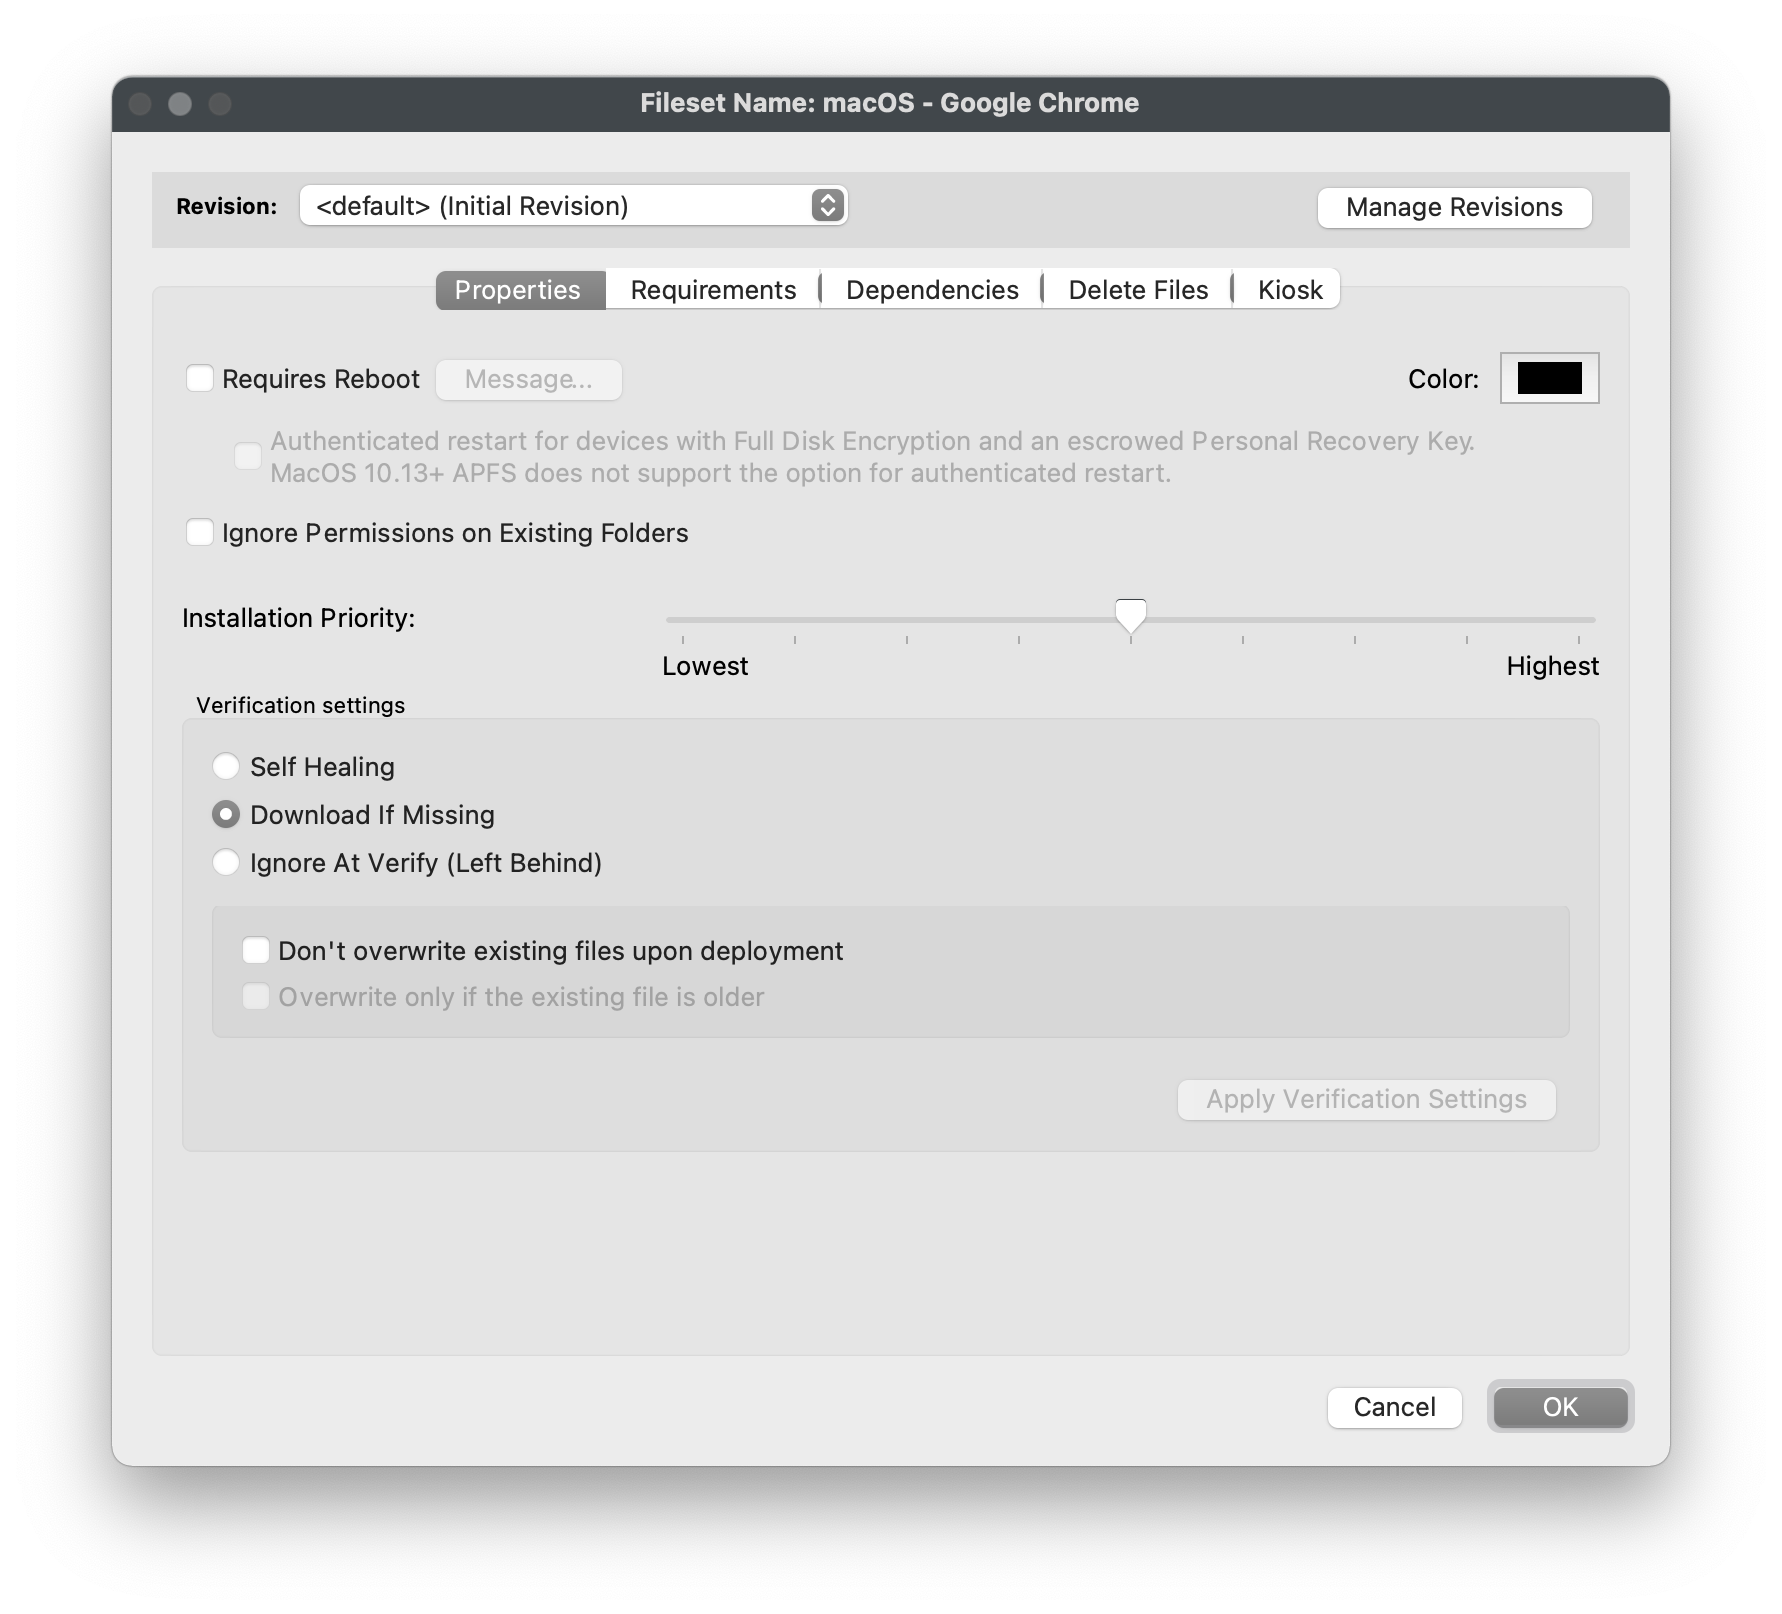
## **Capture customized software installations using Fileset Magic**
---
You might discover that a software's installer does not allow for the software to be provisioned or customized to meet your organization's needs. This is where Fileset Magic plays a huge role. Fileset Magic allows you to capture a customized software installation at the file-level and deploy it with Self-Healing enabled by leveraging a series of Snapshots taken from a "build" machine. The customizations may include software preferences, licensing, updates, and shortcuts.
While using Fileset Magic, please do your best to limit background activities to prevent unnecessary changes from being capture.
1. Open *"Applications>FileWave>FileWave Admin (root).app"* and navigate to *"Assistants > Fileset Magic"*.
2. Select *"Create Snapshot"*.
3. Select the *"Scan Volume"*.
4. Select the *"Scan Type"*.
5. Wait for the File scan to complete.
6. Install your desired software without proceeding in Fileset Magic.
- Open, update, license, and customize your software.
7. Click *"Continue"* to proceed in the Fileset Magic window.
8. Select the disk volume where the snapshot was taken.
9. Wait for Fileset Magic to scan the select volume and compare File changes.
10. View the File differences and select only what is necessary for the newly installed application.
- There may be background Windows activity that is captured. Do your best to exclude this content.
11. Choose either to Save or Export the Fileset.
12. Wait for the Fileset to be uploaded to the FileWave Server.
13. Verify your Fileset Contents within the FileWave Admin.
**10**
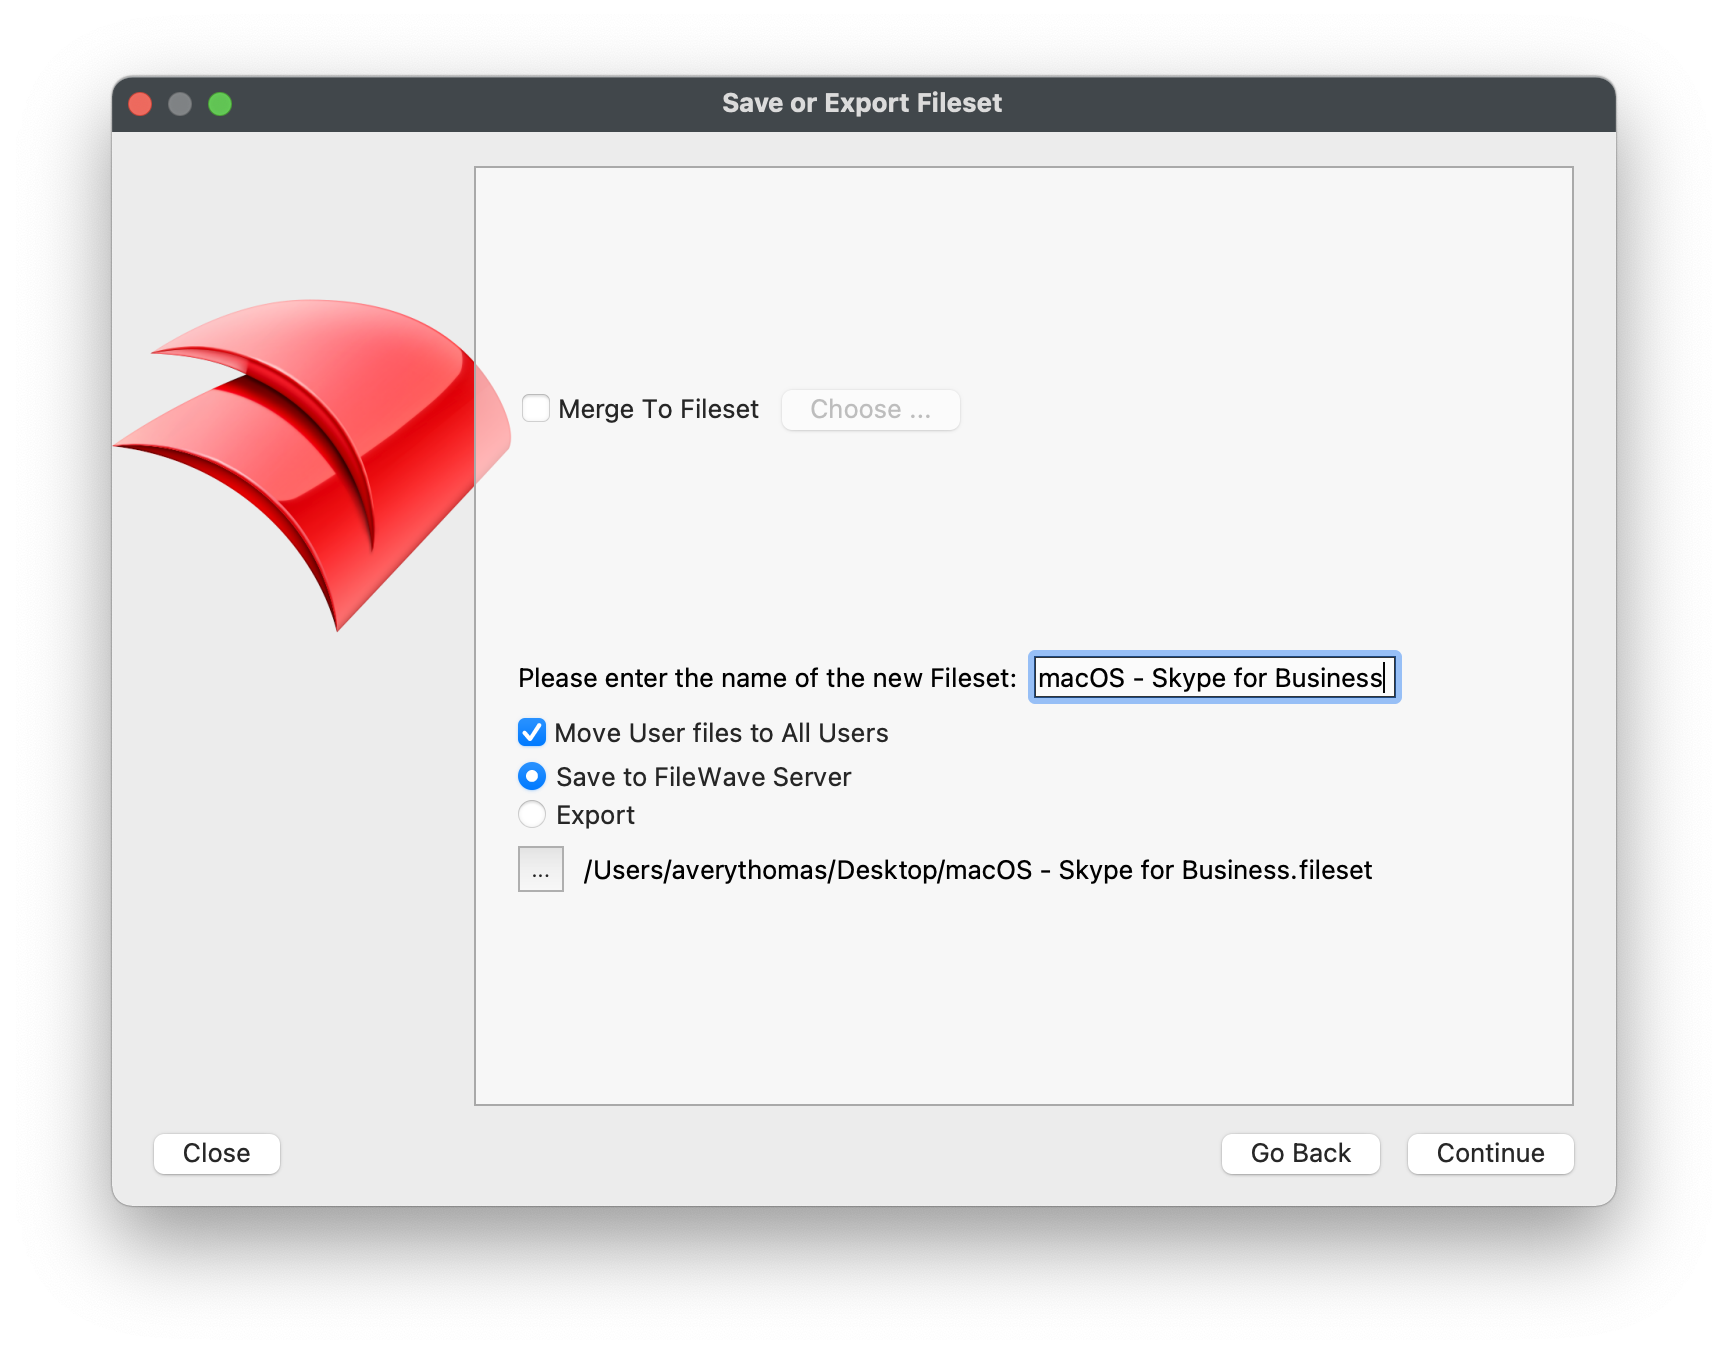
# Android Software and Policies
## **Android Filesets**
---
- [Deploying Google Play Apps](https://kb.filewave.com/books/android/page/deploying-google-play-apps "Deploying Google Play Apps")
- [Deploying Google Play Web Apps](https://kb.filewave.com/books/android/page/deploying-google-play-web-apps "Deploying Google Play Web Apps")
## **Android Policies**
---
- [Android EMM Policies and Permissions](https://kb.filewave.com/books/android/page/android-emm-policies-and-permissions "Android EMM Policies and Permissions")
# Windows Imaging - Setup
## FileWave Imaging Virtual Server (IVS)
---
FileWave's ability to image is done by leveraging an on-premise server that we refer to as the "IVS". This server must be virtualized in either Hyper-V or VMWare environments. The IVS uses PXE Boot to network boot your Windows machines using either Legacy BIOS or UEFI, captures the entire disk contents, and uploads the image to the FileWave Server for permanent storage. We recommend capturing a "thin" image to reduce the time spent deploying the image and also because FileWave can be used to deploy any software and/or driver to the machine after the imaging process has completed.
## Import IVS into virtual environment
---
1. Download the latest version of the [FileWave IVS](https://kb.filewave.com/books/downloads "Downloads") that matches your FileWave Server version and virtual environment.
2. Import the virtual appliance into either Hyper-V or VMWare following the same steps listed in [1. FileWave Server Setup](https://kb.filewave.com/books/evaluation-guide/page/filewave-server-setup "FileWave Server Setup").
## Configure IVS network settings
---
1. Access the FileWave IVS console via virtual environment.
2. Log into the FileWave console with the username "**root**" and the password "**filewave**".
3. Verify and take note of the current network settings obtained via DHCP using the commands below.
**IP address and netmask**
```
ifconfig
```
**Gateway / Router**
```
ip r
```
**DNS Servers**
```
less /etc/resolv.conf
```
4. Set a Static IP address for the FileWave IVS using the command below.
**Set static IP address**
```
imaging-control networksetup static
```
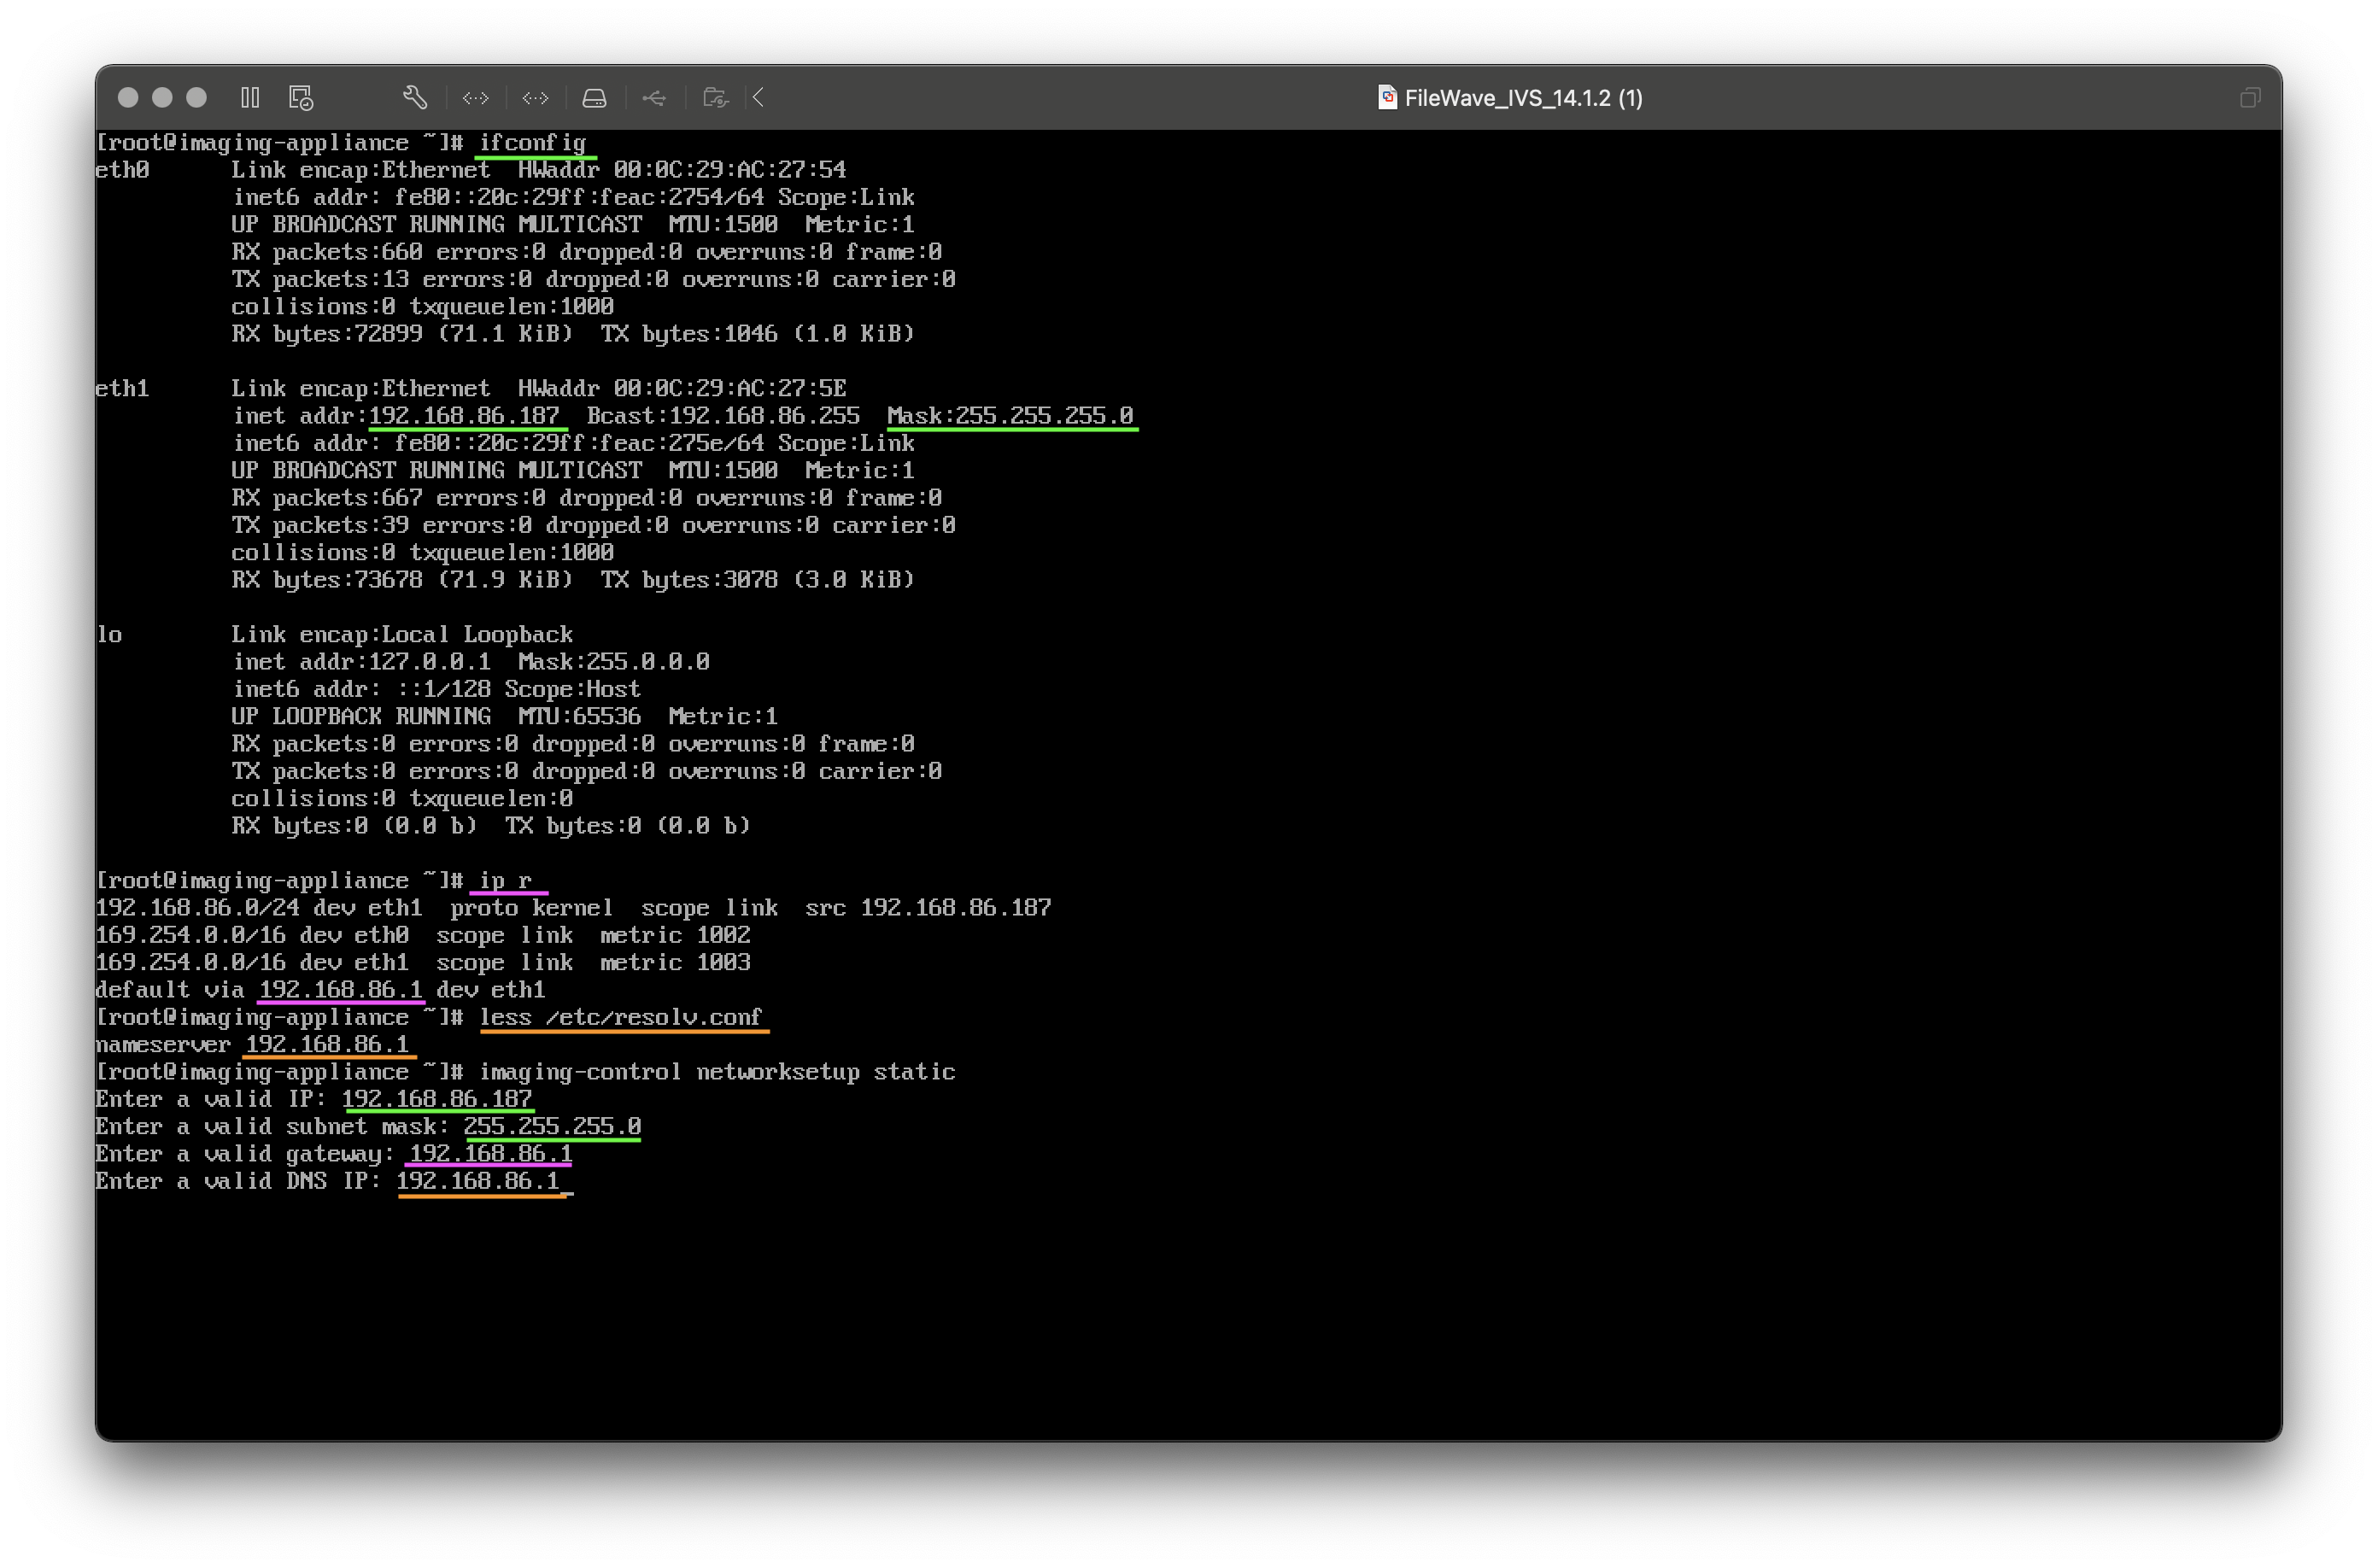
## Add IVS to FileWave Admin
If your FileWave Server is Hosted by FileWave rather than being On-Premise you will need to follow this: [FileWave Hosted Servers and IVS Setup](https://kb.filewave.com/books/network-imaging-ivs/page/filewave-hosted-servers-and-ivs-setup "FileWave Hosted Servers and IVS Setup")
1. Open FileWave Admin and navigate to *"Preferences > Imaging"*.
2. Click the "\[+\]" button to add a new FileWave IVS.
3. Enter the IP Address of the FileWave IVs and confirm the light turns green.
- Leave the port as "20444".
4. Verify that the *"Generate new key on Save"* box is checked.
5. Click *"OK"* on the *"Add Imaging Server"* window.
6. Verify that the *"FileWave certificate was successfully uploaded to the IVS"* pop-up appears.
7. Verify that the *"FileWave Server Address"* is correct within the *"FileWave Imaging Appliance Preferences"* window.
- Leave the port as "20015". **Note:** The default port setting is 20015. However, SSL is now required, and the system will automatically use port 20017 instead when 20015 is entered. Do not manually set the port to 20017. Always enter 20015, and the system will handle the SSL port change for you.
8. Click *"OK"* within the *"FileWave Imaging Appliance Preferences"* window.
9. Click *"OK"* within the FileWave Admin Preferences to save changes and generate shared key.
10. Open the FileWave Admin Preferences again and navigate to *"Imaging"*.
11. Click the right-most button for either *"Enroll Imaging Server"* or *"Create client-side Certificate"*.
12. Wait for the *"Imaging Server enrolled successfully"* pop-up message.
13. Click *"OK"* within the FileWave Admin Preferences to save changes.
14. The IVS will not fully check-in until at least one Imaging Association has been made.
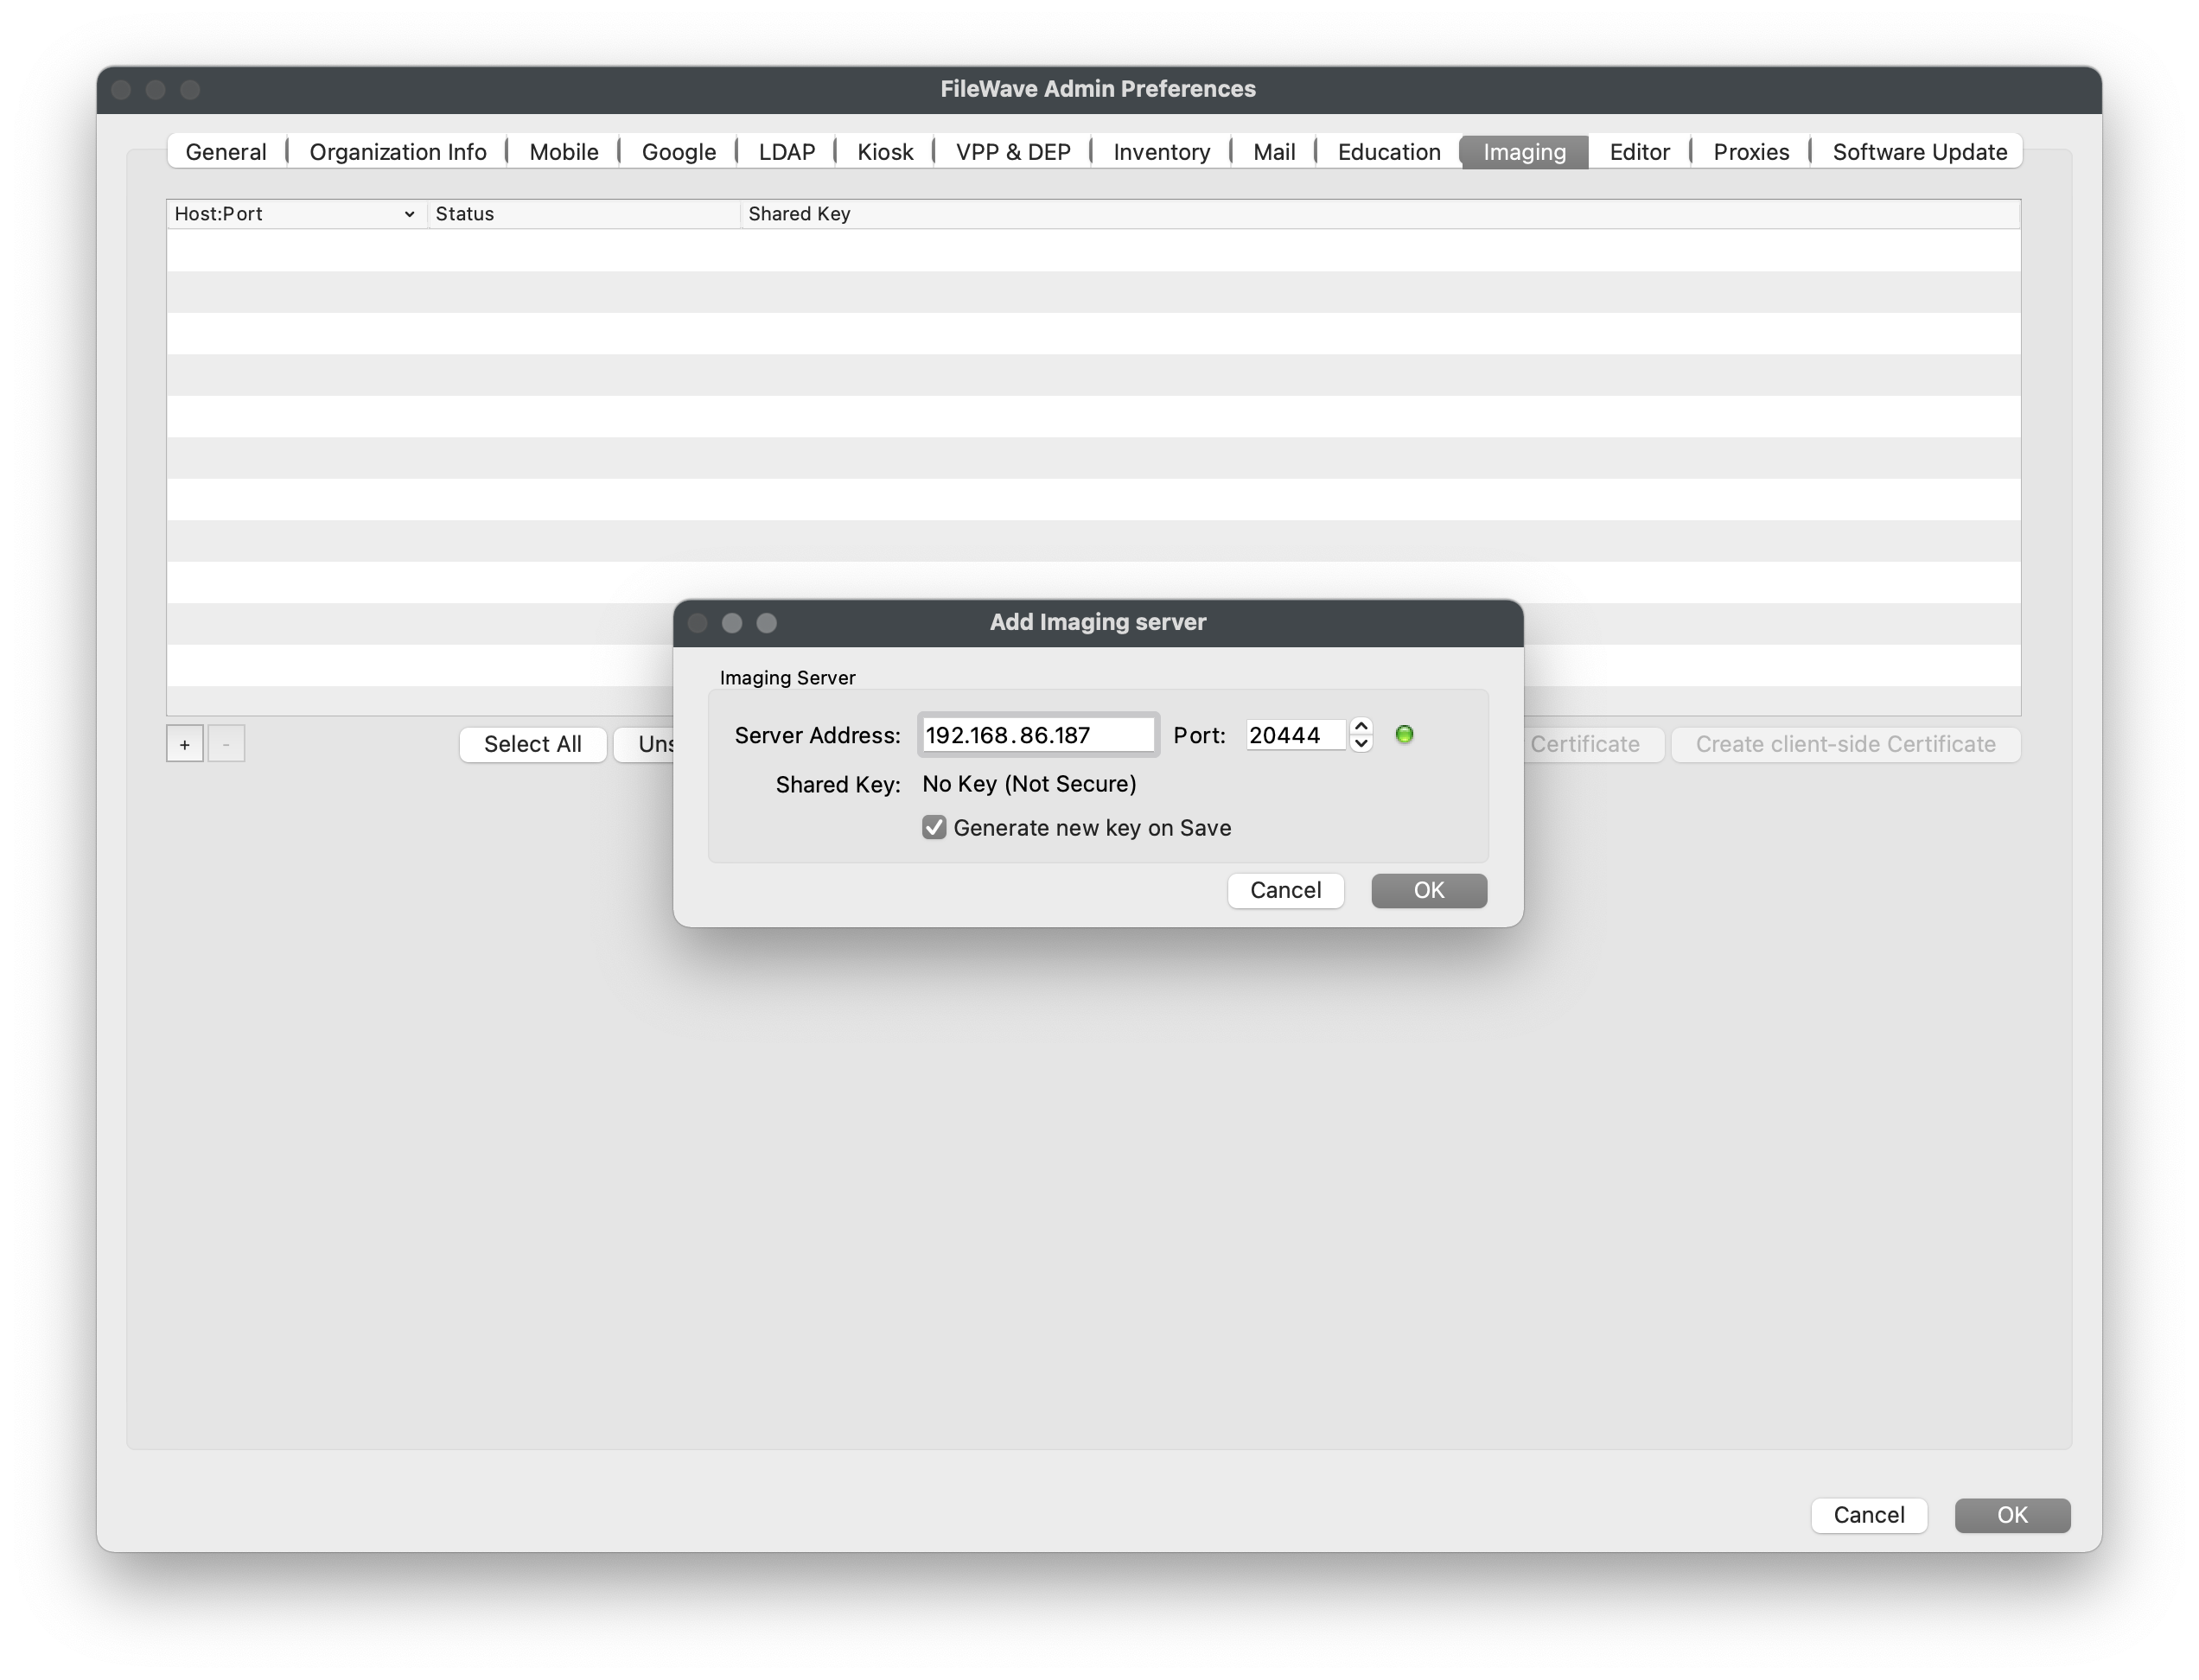
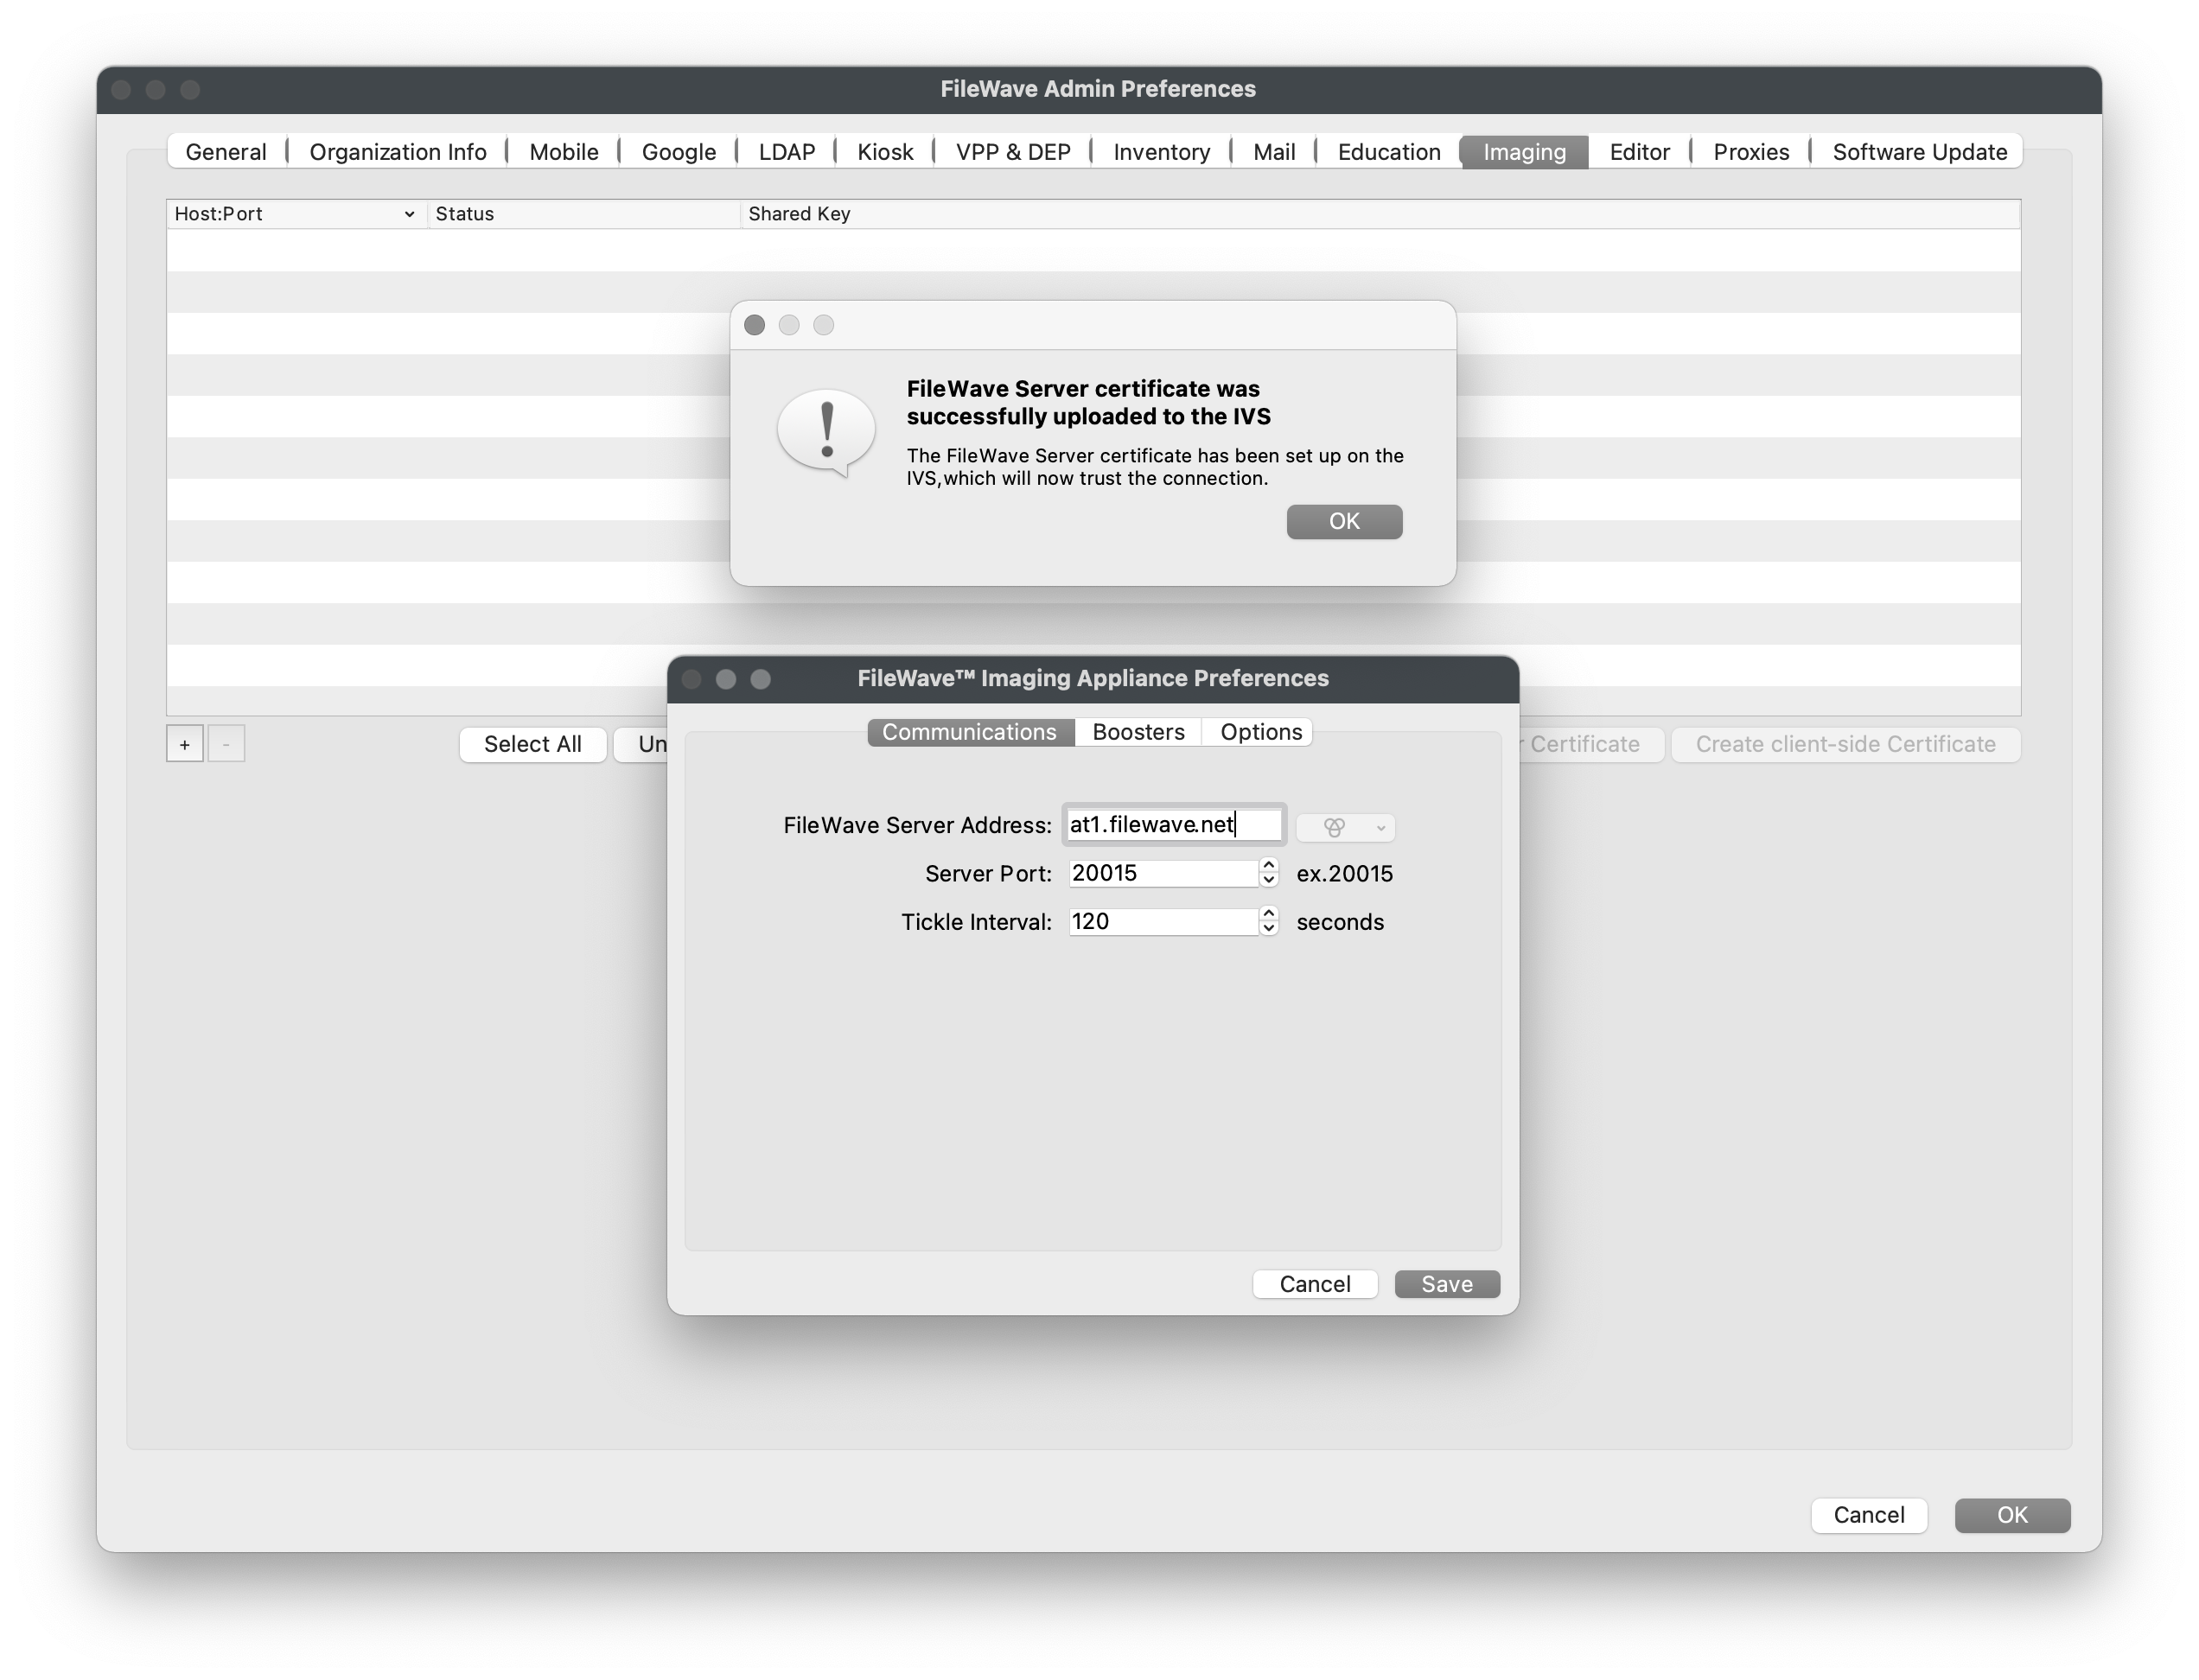
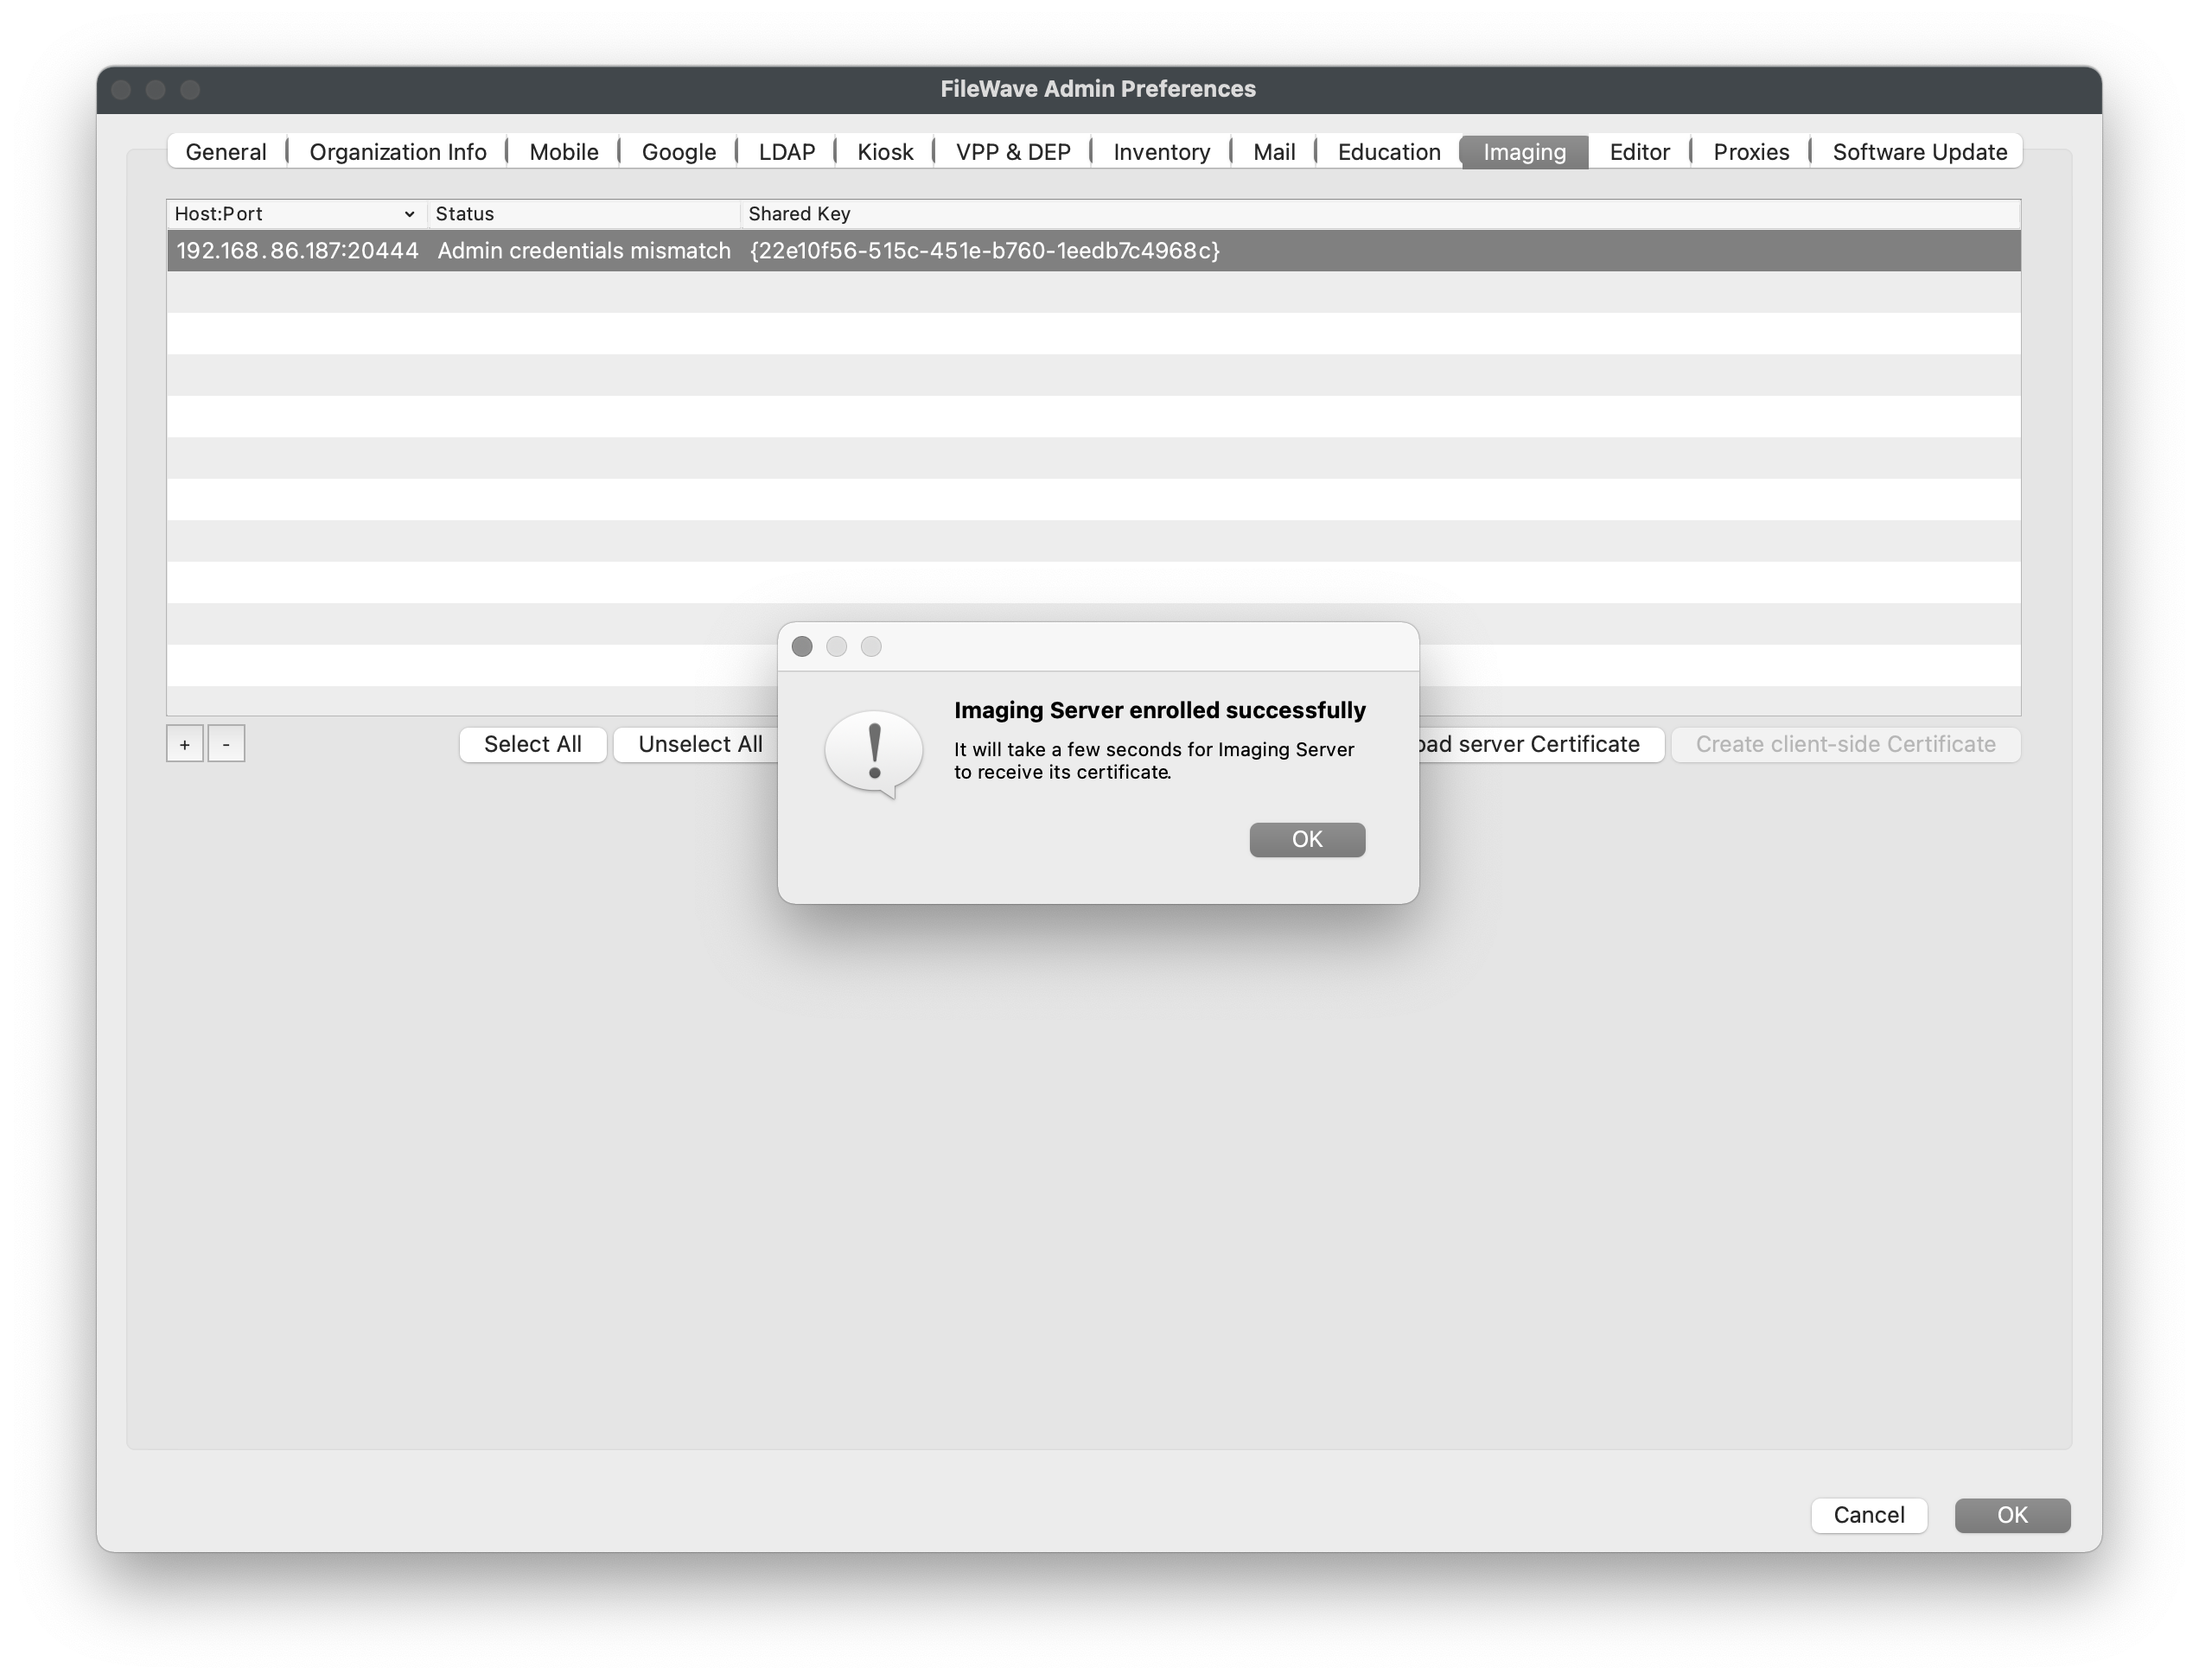
# Windows Imaging - Capture Image
## **One image to rule them all**
---
Well, at least that's the plan. Since FileWave recommends using a thin image that has been Sysprep'd with "/generalize" and "/oobe", your Master Image will not be specific to any make/model of computer and will go through the default Windows Out of Box Experience to scan for any hardware. This will allow you to deploy one image to all of your Windows machines and deploy device specific drivers and software after the imaging process has completed. The only reason you'd possibly have multiple images is to account for differences in your machine's BIOS (Legacy vs. UEFI) or architecture (32bit vs. 64bit).
## **Preparing your build machine**
---
The first step is to prepare the machine you plan to capture the Master Image from. This can be a physical machine or a virtual machine, however most prefer to use a virtual machine as they can install Windows much quicker via ISO and more easily put the VM on the same VLAN as the IVS. Putting the machine on the same VLAN/subnet is crucial as by default, the IVS only listens to DHCP traffic on the subnet it resides on. After ensuring the essential imaging traffic is OK on the same subnet, we can later configure the IVS to listen to multiple subnets by leveraging [IP Helpers](https://www.dummies.com/programming/networking/cisco/ip-helper-address-utilization/). This section will cover creating a virtual machine but the same steps will apply to a physical machine.
1. Create a blank virtual machine within your virtual environment.
2. Configure your VM's BIOS to match your environment's most used BIOS, Legacy or UEFI (with Secure Boot disabled).
3. Configure the VM's network interface to be on the same VLAN/subnet as the FileWave IVS.
4. Configure the VM's hard disk to be as small as your smallest drive in your environment. 40GB is a good baseline.
5. Download and attach the [Windows 10 ISO](https://www.microsoft.com/en-us/software-download/windows10ISO) or [Windows 11 ISO](https://www.microsoft.com/en-us/software-download/windows11) to your VM's optical drive.
- If you are attempting to download from a Windows machine you will be redirected to another page and not have access to the ISO.
- Use this [guide](https://www.howtogeek.com/427223/how-to-download-a-windows-10-iso-without-the-media-creation-tool/) to change how your browser identifies to access the ISO.
6. Boot your VM to the DVD/optical drive and install Windows 10/11 with default disk partition settings.
7. Create an Offline (non-Microsoft) Administrator user account.
- This account will persist after Sysprep so name and set password accordingly.
8. Once at the Desktop, open Powershell as Administrator.
9. Copy and paste the following Powershell commands into the Powershell window and press Enter.
- These commands will remove the built-in Windows Apps that have been known to prevent Sysprep from completing successfully.
- These commands are sourced from [Experts Exchange - Windows 10 Sysprep Guide](https://www.experts-exchange.com/articles/21679/Windows-10-Sysprep-Guide.html).
- If copy/paste into VM is not working, please consider opening this page directly within VM.
**Remove built-in Windows Apps**
```powershell
Get-AppxPackage *3dbuilder* | Remove-AppxPackage
Get-AppxPackage *windowsalarms* | Remove-AppxPackage
Get-AppxPackage *Appconnector* | Remove-AppxPackage
Get-AppxPackage *windowscalculator* | Remove-AppxPackage
Get-AppxPackage *windowscommunicationsapps* | Remove-AppxPackage
Get-AppxPackage *windowscamera* | Remove-AppxPackage
Get-AppxPackage *CandyCrushSaga* | Remove-AppxPackage
Get-AppxPackage *officehub* | Remove-AppxPackage
Get-AppxPackage *skypeapp* | Remove-AppxPackage
Get-AppxPackage *getstarted* | Remove-AppxPackage
Get-AppxPackage *zunemusic* | Remove-AppxPackage
Get-AppxPackage *windowsmaps* | Remove-AppxPackage
Get-AppxPackage *Messaging* | Remove-AppxPackage
Get-AppxPackage *solitairecollection* | Remove-AppxPackage
Get-AppxPackage *ConnectivityStore* | Remove-AppxPackage
Get-AppxPackage *bingfinance* | Remove-AppxPackage
Get-AppxPackage *zunevideo* | Remove-AppxPackage
Get-AppxPackage *bingnews* | Remove-AppxPackage
Get-AppxPackage *onenote* | Remove-AppxPackage
Get-AppxPackage *people* | Remove-AppxPackage
Get-AppxPackage *CommsPhone* | Remove-AppxPackage
Get-AppxPackage *windowsphone* | Remove-AppxPackage
Get-AppxPackage *photos* | Remove-AppxPackage
Get-AppxPackage *WindowsScan* | Remove-AppxPackage
Get-AppxPackage *bingsports* | Remove-AppxPackage
Get-AppxPackage *windowsstore* | Remove-AppxPackage
Get-AppxPackage *Office.Sway* | Remove-AppxPackage
Get-AppxPackage *Twitter* | Remove-AppxPackage
Get-AppxPackage *soundrecorder* | Remove-AppxPackage
Get-AppxPackage *bingweather* | Remove-AppxPackage
Get-AppxPackage *xboxapp* | Remove-AppxPackage
Get-AppxPackage *XboxOneSmartGlass* | Remove-AppxPackage
```
10. Press Enter once more to ensure the last command is executed.
11. Close the Powershell window.
12. Generate and install your [Custom FileWave Client MSI](https://custom.filewave.com/py/custom_client_win.py). \* More instructions on how to do so can be found in the [Windows](https://kb.filewave.com/books/evaluation-guide/page/windows-client-pre-requisites "Windows") setup section. \* This can be done directly from the VM if file transfer is difficult.
13. Generate and download a Sysprep unattended answer file via [Answer File Generator](https://windowsunattendedfilegenerator.aeternumtechnology.com/). \* *"Computer Name"* can be any generic placeholder. \* *"Product Key"* is not required for remote Windows activations. \* *"Domain Join"* is optional, FileWave can join machines to Active Directory after the imaging process. \* This can be done directly from the VM if file transfer is difficult. An alternative tool that has some nice options is [https://schneegans.de/windows/unattend-generator/](https://schneegans.de/windows/unattend-generator/)
14. After the *"unattend.xml"* file is downloaded, move the file to *"C:\\Windows\\"*.
15. Run the Check Disk command before your Sysprep the image. This will ensure the disk is cleared of any errors. The below commands are run in Command Prompt run as administrator.
```
chkdsk /R
shutdown -r -t 0
```
16. Open Command Prompt as Administrator and run the following commands to Sysprep and shutdown your machine.
```
cd Sysprep
sysprep.exe /generalize /oobe /shutdown /unattend:C:\Windows\unattend.xml
```
17. Your machine will shutdown automatically, do not boot until instructed in future section.
## **Create a placeholder for Master Image association**
---
To capture an image from our build machine we must add the Client machine as a Placeholder within FileWave using its desired Windows Hostname and its Ethernet MAC address.
1. Open FileWave Admin and navigate to *"Clients".*
2. If your build machine checked into FileWave during the preparation stage, please delete the Client from FileWave and *"Update Model"*.
3. Click *"New Client"* button from black menubar and select *"Enter Name"* from the *"Desktop device placeholders"* section.
4. Enter in a generic name for the placeholder and optionally add a *"Comment"*.
5. Reference your VM's settings and obtain the Ethernet MAC address used by the VM.
6. Click *"OK"* to finish adding the Placeholder.
7. Navigate to *"Imaging"*.
8. Drag-n-drop the *"Master Image"* item from the right-hand pane to the newly added Placeholder.
9. *"Update Model"* to save changes.
10. Navigate to *"Preferences > Imaging"*, select your FileWave IVS, and click *"Monitor"*.
11. Wait for at least 5 minutes and verify that the FileWave IVS is getting the latest Model. \* The current Server Model Number can be found in the lower-right hand corner of the FileWave Admin.
12. Once the FileWave IVS is fully checking in and getting the latest Model, proceed to capturing the Master Image.
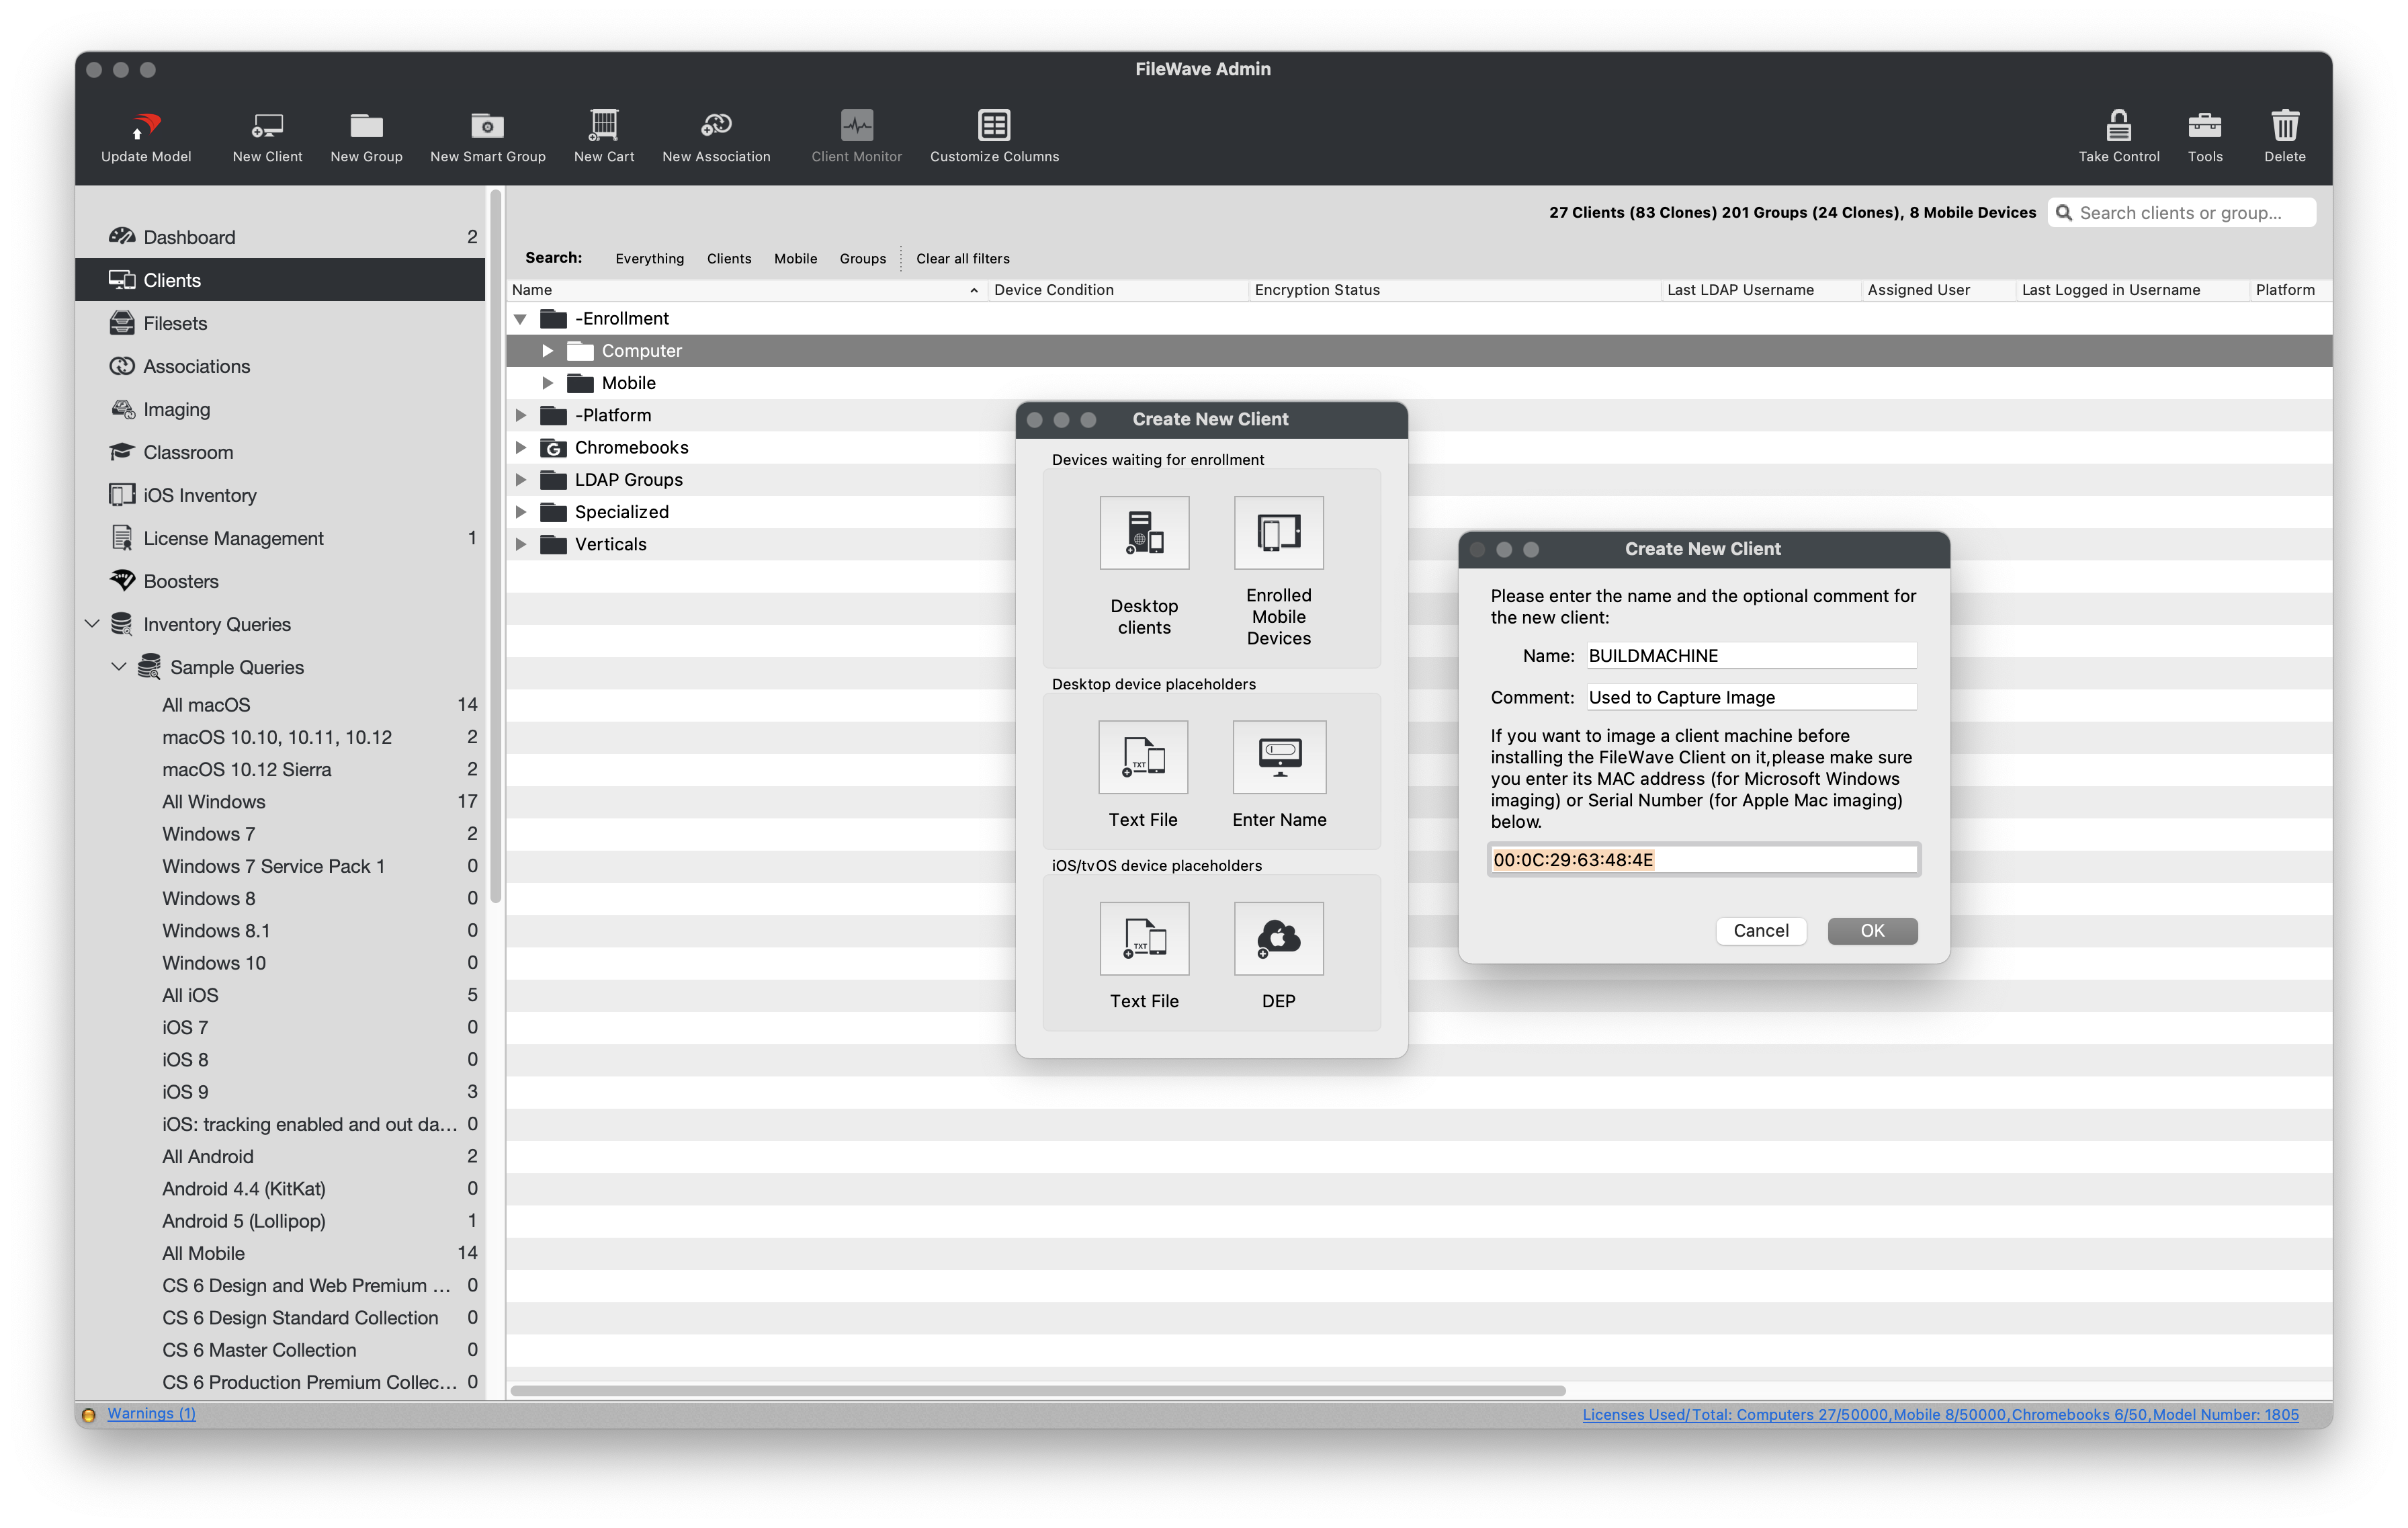

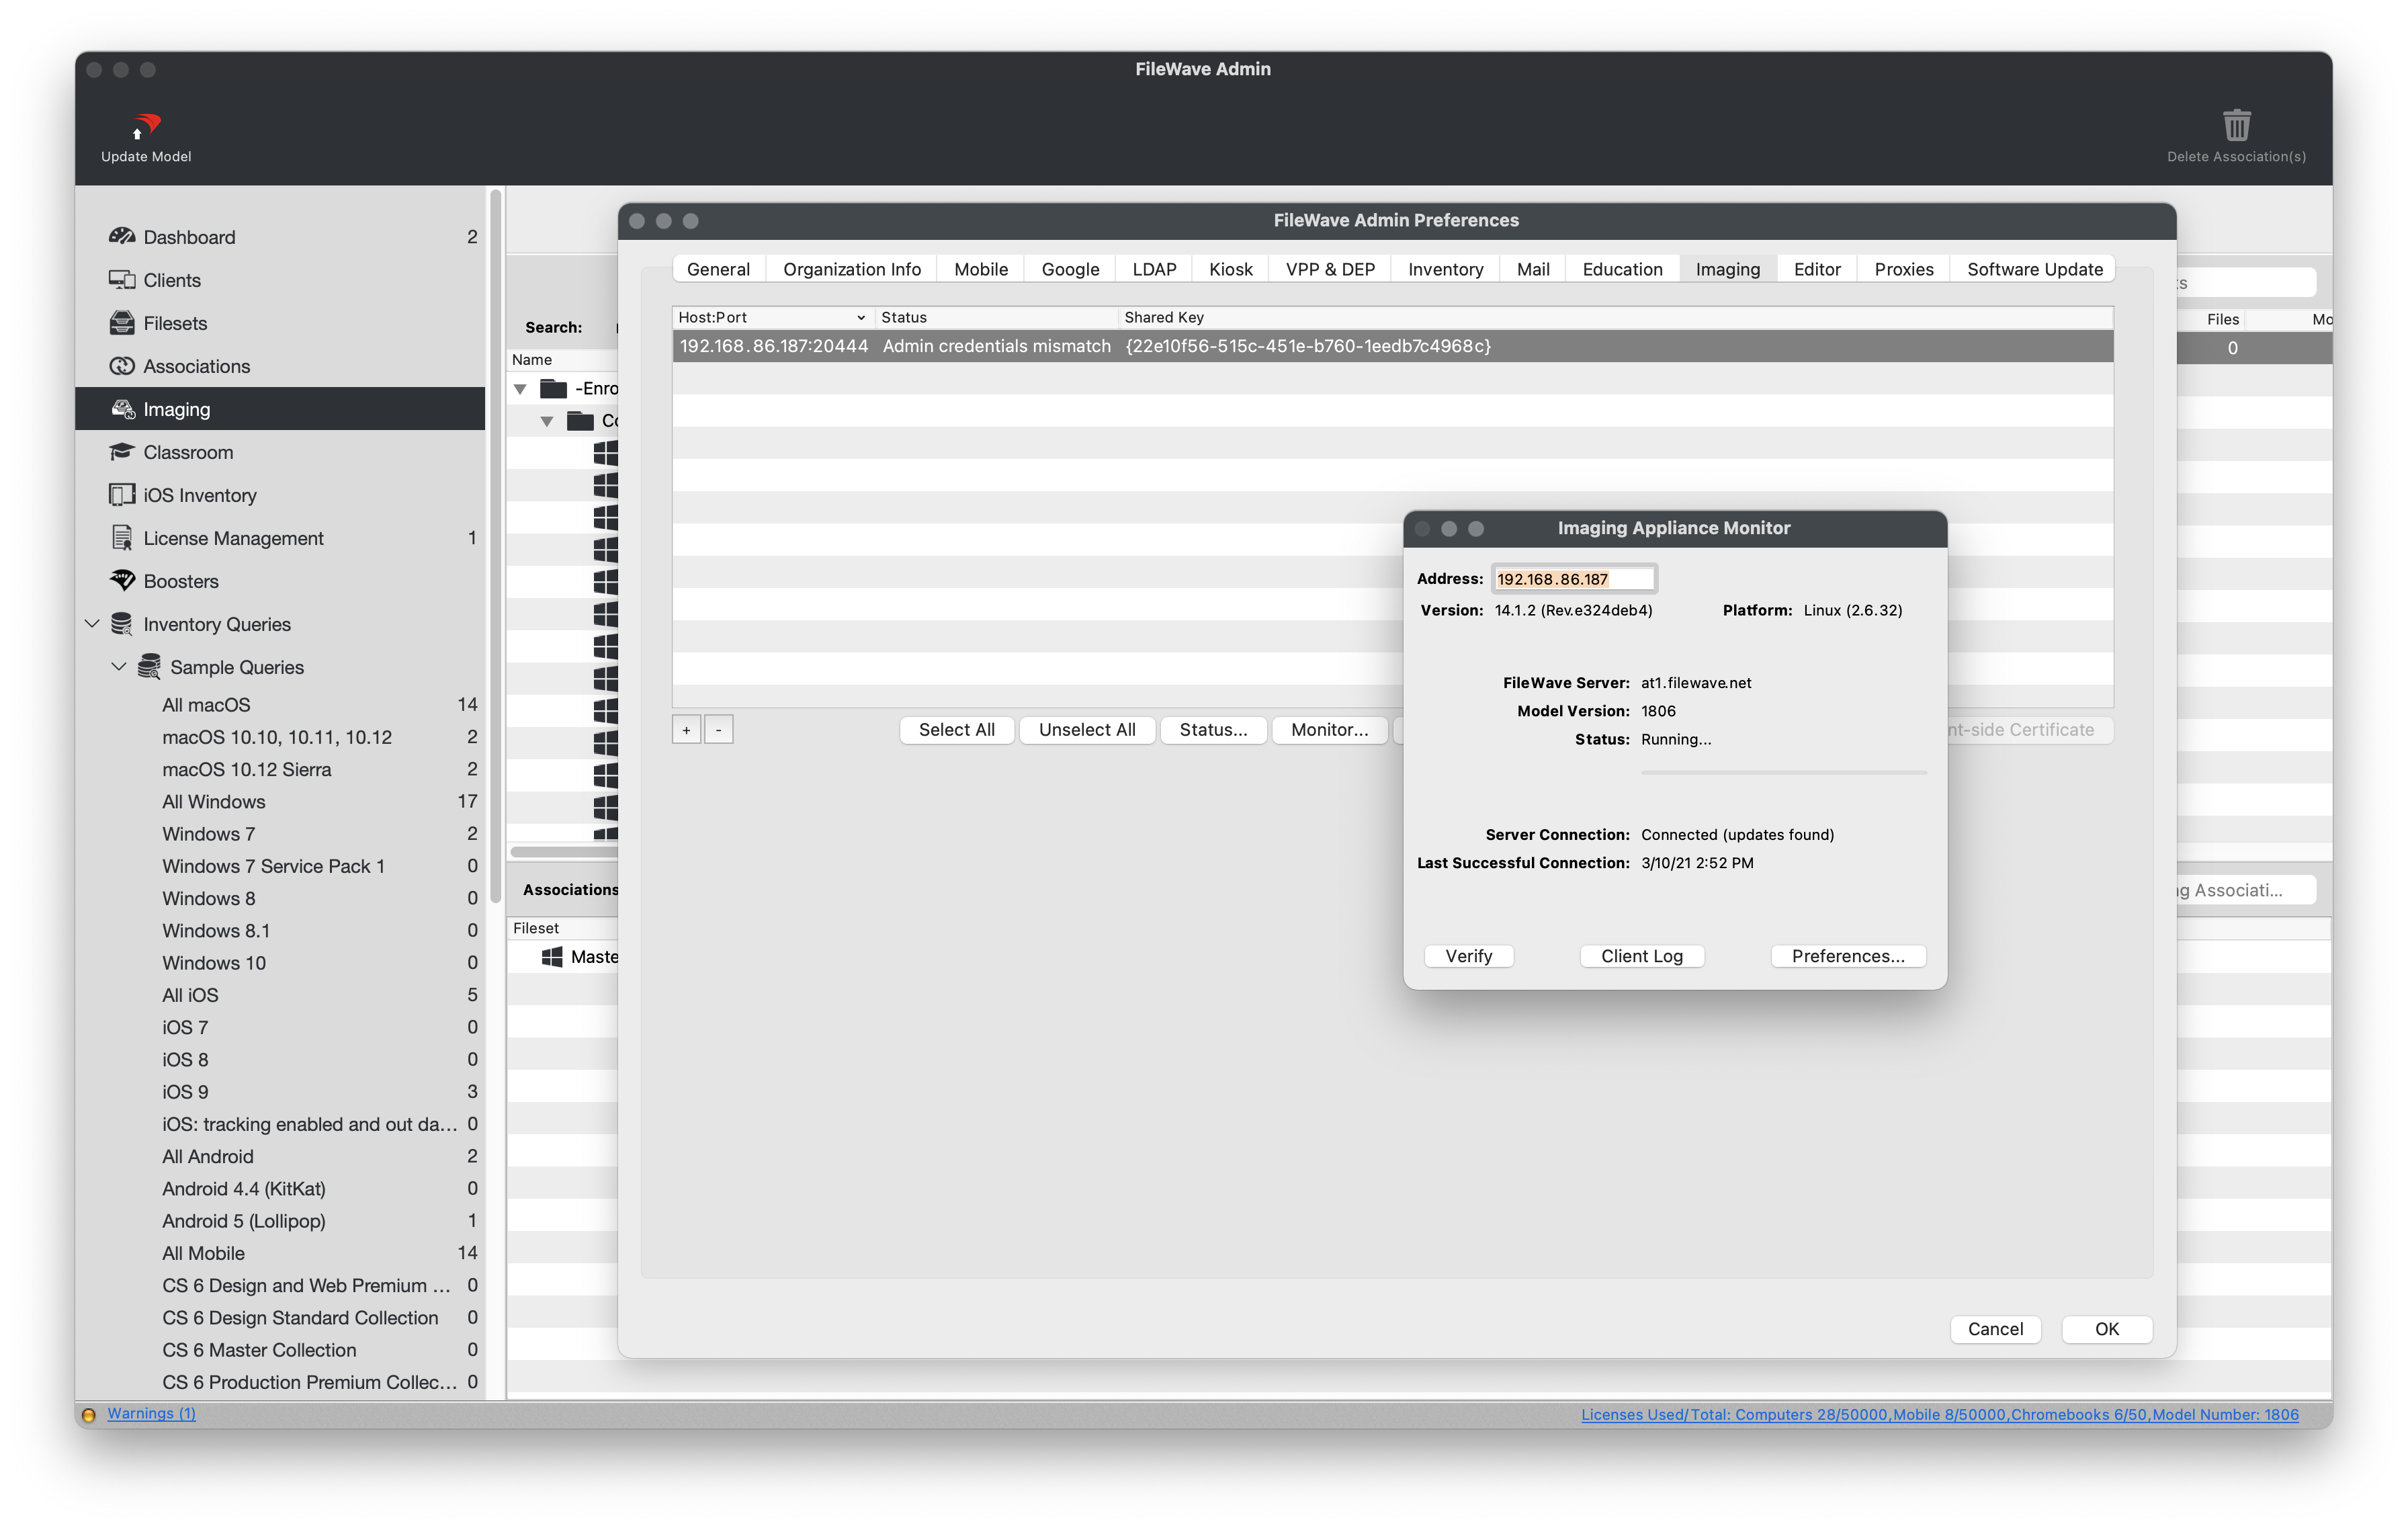
## **Capture Master Image**
---
Now that the FileWave is aware of the Master Image association, it is time to PXE Boot your build machine and capture your image.
1. Verify that your build machine is set to Network Boot and is on the same subnet as the FileWave IVS.
2. PXE boot you build machine.
- If using Legacy BIOS, you will see progress text as the PXELinux environment is loading.
- If using UEFI, please be patient as no boot progress will be shown, only a black screen.
3. After successful PXE, name your Windows image.
- It is recommended to include the Windows build version, architecture, and BIOS type in the image name.
- Ex: *Windows10\_20H2\_x64\_UEFI*
4. You should now see a blue screen showing progress as it captures each partition and uploads it to the FileWave IVS.
5. After the capture, you will see a black screen with white text.
6. Please be patient as the Master Image is being uploaded to the FileWave Server for permanent storage.
7. *"Press any key to continue"* and shutdown the build machine.
8. You should see your newly captured image in the FileWave Admin.
- If you do not see the image, please contact your FileWave SE and do not attempt to recapture image or boot the build machine.
## Troubleshooting
If you receive the error “Filenames are invalid for imaging” when associating a placeholder with your Master Image, the issue is typically related to the placeholder’s name.
**To resolve this:**
- Rename the placeholder to remove special characters, symbols, and spaces.
- Ensure the placeholder’s client name is 15 characters or fewer, as Windows imaging enforces this limit.
After renaming, try the association again.
## Post Imaging Content
If you run into an issue regarding BitLocker activation, please refer to:
- [BitLocker Activation Issues on Windows 11 Post-Imaging](https://kb.filewave.com/books/network-imaging-ivs/page/troubleshooting-bitlocker-activation-issues-on-windows-11-post-imaging)
# Deploy a Windows Image with FileWave IVS
## **Start the deployment**
---
After capturing the master image, associate it with target devices, confirm that the IVS has downloaded it, and PXE boot a representative device before wider deployment.
## **Associate an image with devices**
---
Associate the image with an enrolled FileWave Client or with a bare-metal device represented by a placeholder. For a placeholder workflow, complete steps 1–6 in [Windows Imaging - Capture Image](https://kb.filewave.com/books/evaluation-guide/page/windows-imaging-capture-image "Windows Imaging - Capture Image") first.
1. Open FileWave Central and navigate to *"Imaging"*.
2. Drag the new image to an individual device or a device group.
3. Confirm the imaging associations.
4. You should now see your new image association in the bottom pane of the *"Imaging"* tab.
- Optionally, drag a [Windows Driver Fileset](https://kb.filewave.com/books/evaluation-guide/page/windows-software "Windows Software") onto the association.
5. Select **Update Model** to save the associations.
6. Your image will now be downloaded to the FileWave IVS.
7. In **Preferences > Imaging**, select the IVS and choose **Monitor** to verify that it received the current Model.
- You should see the image download progress from the FileWave Server to the FileWave IVS.
- The image remains on the IVS while at least one association references it.
8. Once the image has completed downloading, proceed to PXE Booting your Windows machines.
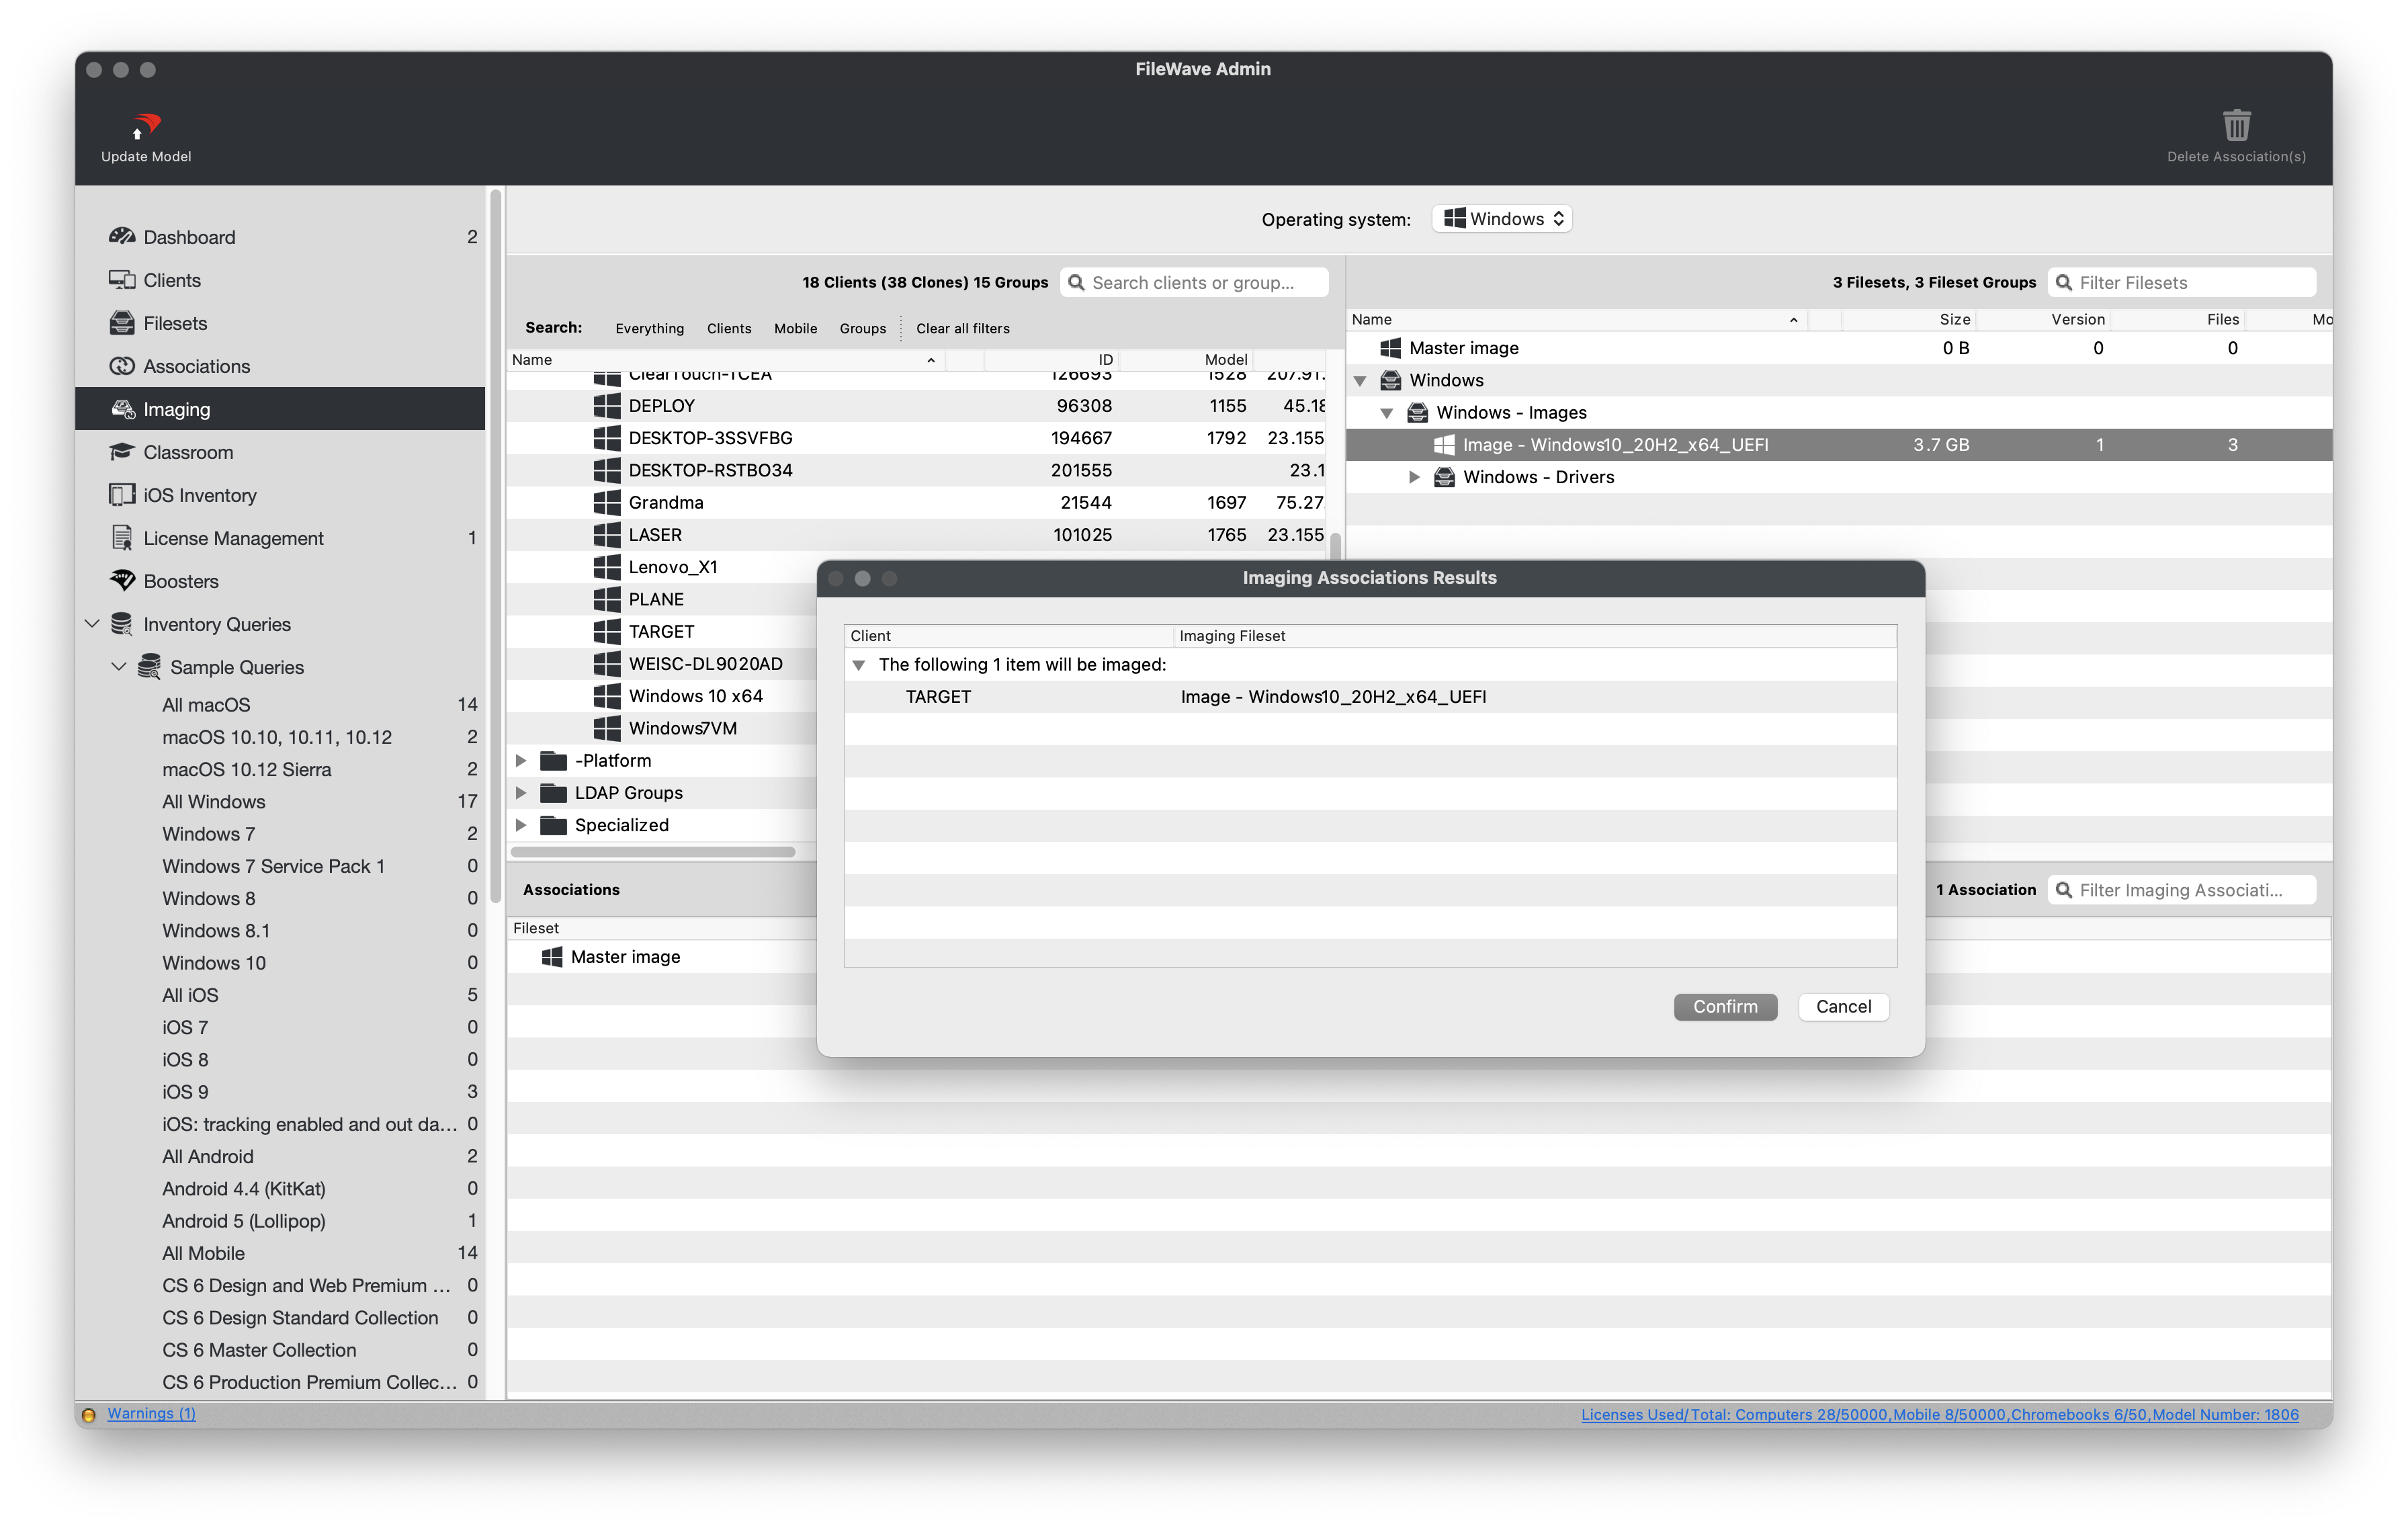
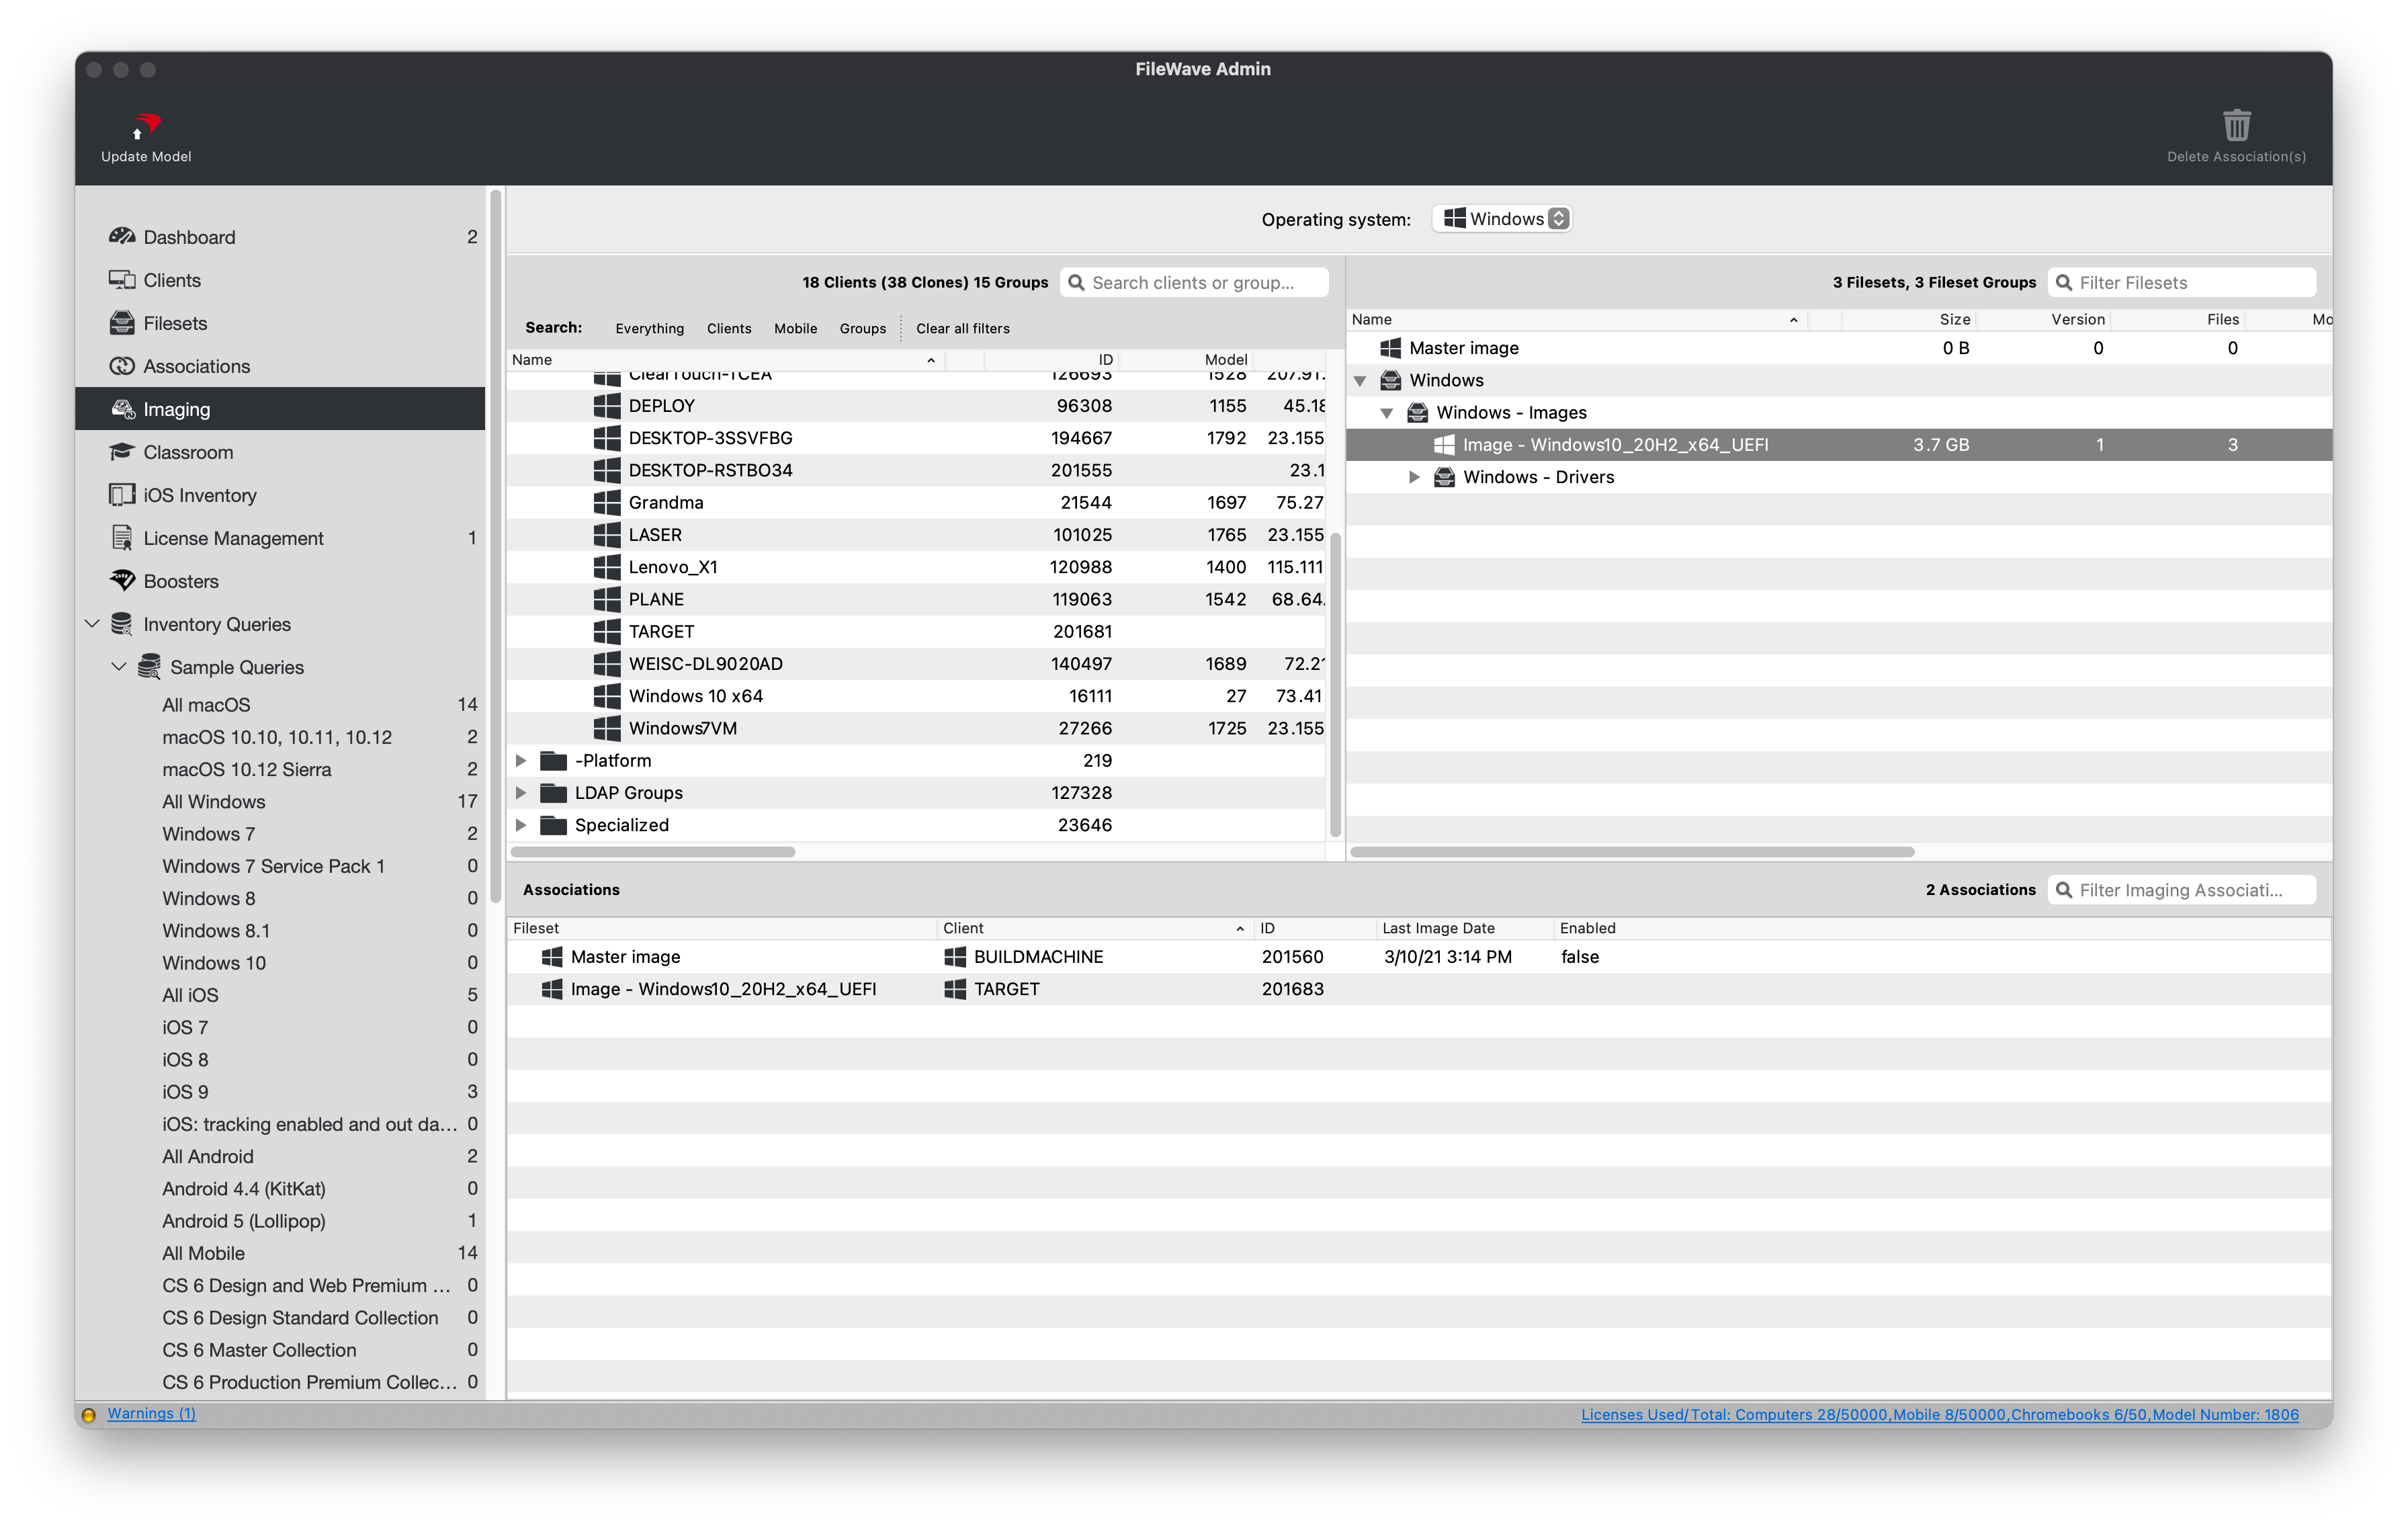
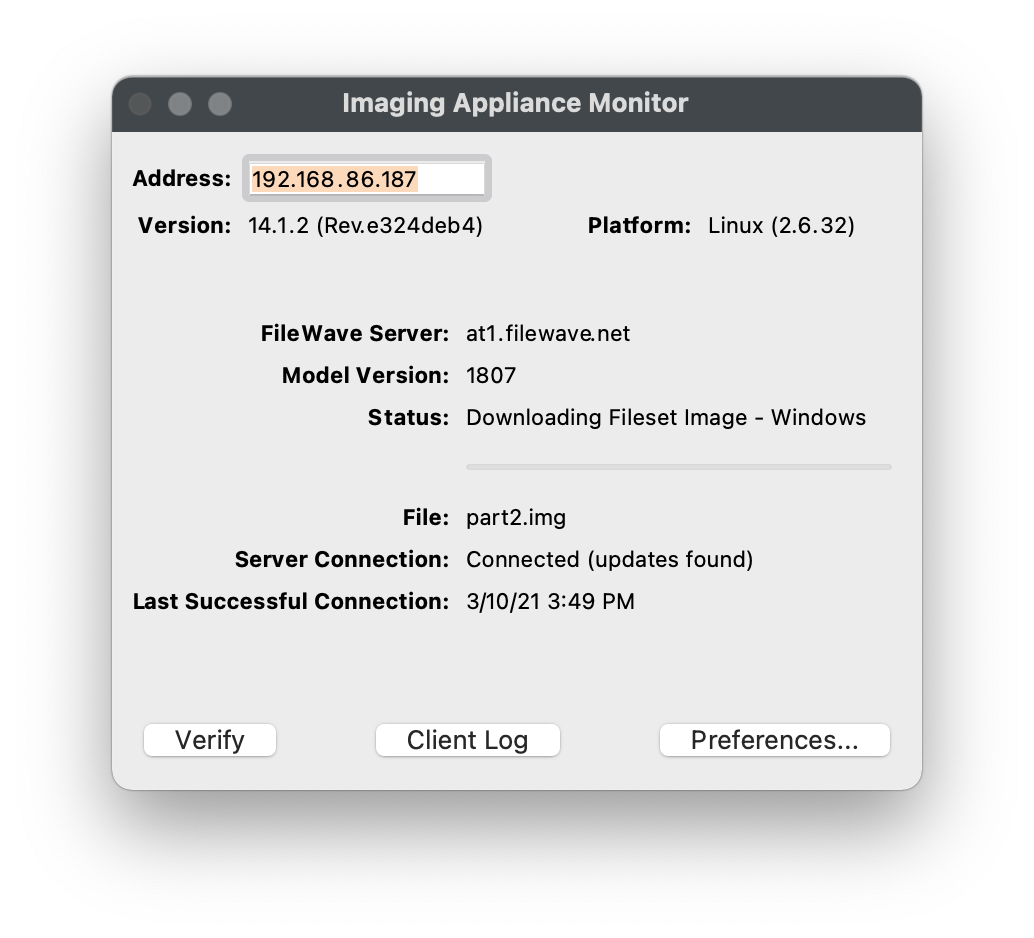
## **PXE boot the target devices**
---
1. Verify that your target machine is set to Network Boot and is on the same subnet as the FileWave IVS.
2. PXE boot your target machine.
- If using Legacy BIOS, you will see progress text as the PXELinux environment is loading.
- With UEFI, the device may show a black screen without progress text while the environment loads.
3. You should now see a blue screen showing progress as it restores each partition from the FileWave IVS.
4. After the restore, you will see a black screen with white text.
5. The device should restart into Windows and begin the Out-of-Box Experience defined by the unattended answer file.
- If you get a message similar to *"no boot media found"* after reboot, please reboot again and ensure the machine is not set to Network/PXE boot.
6. Since the Master Image contained the FileWave Client, it should start communicating with FileWave immediately.
## **Resolve Client conflicts**
---
A reimaged device may check in with an identity that conflicts with its previous Client record. Resolve the conflict carefully so the intended associations and inventory history stay with the managed device.
1. Open FileWave Central and navigate to *"Clients"*.
2. Select *"New Client"* from the black menubar.
3. Select *"Desktop Clients"* from the *"Devices waiting for enrollment section"*.
4. Locate and select the Client that is reporting a conflict and click the *"Solve Conflict"* button.
5. Select the option that matches the device state.
- **Remove the new client**
- Select this option if you want to refuse the client for now. You can fix the device identifier and re-enroll it later
- **Remove the old client and enroll the new client**
- Select this option if the old entry is obsolete and can be safely removed; all clones will be removed
- **Replace the old client with the new client (recommended)**
- Select this option if you want the new client to replace the existing entry (this will take over the old record with all clones, associations, etc.)
6. Confirm that the newly imaged Windows Client checks in and downloads Filesets associated with the retained Client record.
# OS Software Updates
## Stay Patched with FileWave
---
Keeping your Windows, macOS, iOS, and tvOS device's operating systems updated is one of the most important steps to ensuring device security. FileWave sync with the default Microsoft and Apple Software Update catalogs allowing you to bring in all updates, test them, and then automatically deploy the requested Software Updates to machines.
## Automatic Software Update deployment
---
Using FileWave to automatically deploy Software Updates to requesting machines is the easiest and recommended method of deploying updates to your various devices. After *"Approving"* a Software Update, FileWave will determine if the update is eligible for your devices and automatically deploy it on your behalf.
First it is important that your account has permissions to perform these actions. In Assistants -> Manage Administrators as shown in the below image notice if you have Manage Updates and Configure Automation Rules enabled.
[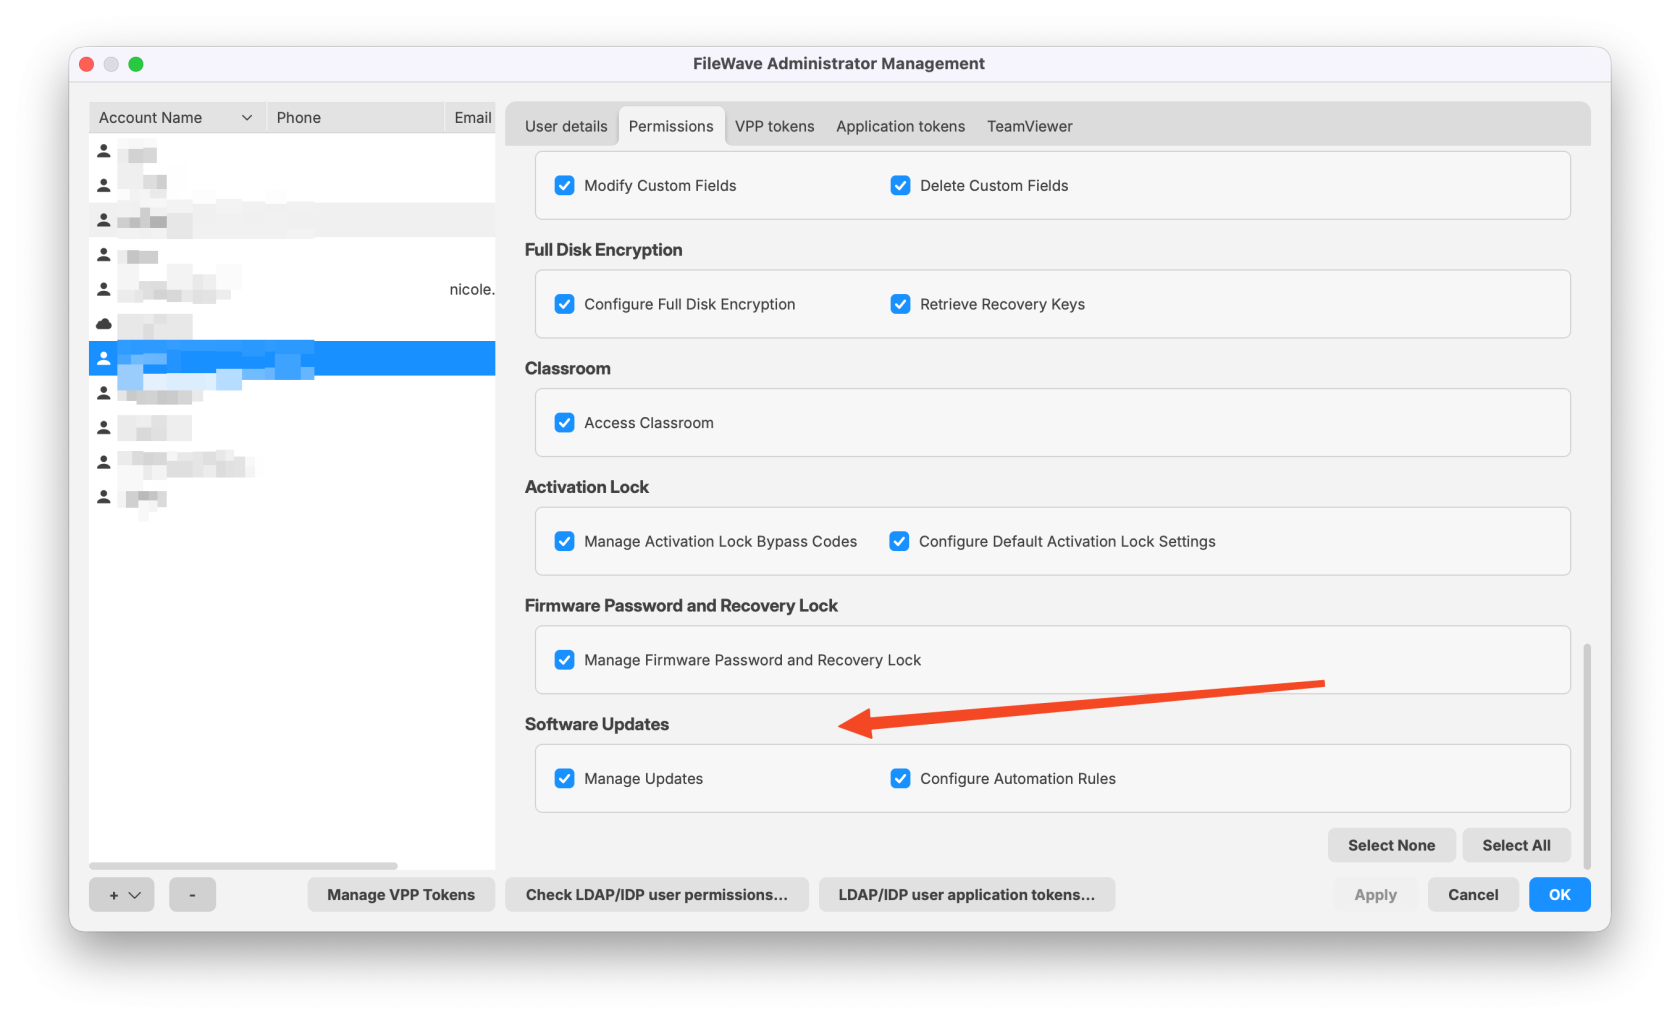](https://kb.filewave.com/uploads/images/gallery/2025-10/N57OIXC2JKCYLJdV-google-chrome-2025-10-02-11-47-17.png)
Now you can;
- Open FileWave Central and navigate to *"Software Updates" on the left*.
- Select the desired Operating System from the drop-down menu. As you can see in the below image, **Windows** is selected. Also notice that **Requested Only** is checked so as to limit the view to only updates devices believe that they need. Note also that **No fileset** is selected which further limits what is being shown so that my list of actionable updates is very short.
- Now you can select one or all of the updates and right-click to pick **Create Filesets...** and then pick where you want these updates to appear as far as what Fileset Group they are stored in. It makes a lot of sense to have a Fileset Group in the Filesets area specifically for Windows and then another for Apple updates.
- If you would like the updates to automatically deploy when created then just create a Deployment that assigns the Fileset Group to a Smart Group like **All macOS** or **All iOS** or **All tvOS** or **All Windows** so that as soon as you create them they are assigned. If you would like to do testing first then you could create the patches in a Fileset Group that is for testing and then later move them to the production Fileset Group.
Note that you want to avoid assigning Windows OS updates to pre-16.0.0 clients because they will not function correctly. You can simply add a criteria to your **All Windows** SmartGroup to check if the "FileWave Client Version" begins with "16." and that would protect you until you can work to upgrade all of your devices.
Also note that Windows OS updates from before FileWave 16 should be purged from your server to free up disk space, and because they will not function correctly. This transition from the old format to this new format should be a one-time exercise to remove the old style of Windows OS updates and ensure your clients are upgraded to FileWave 16.0 or higher.
- *"Update Model"* to save the changes.
[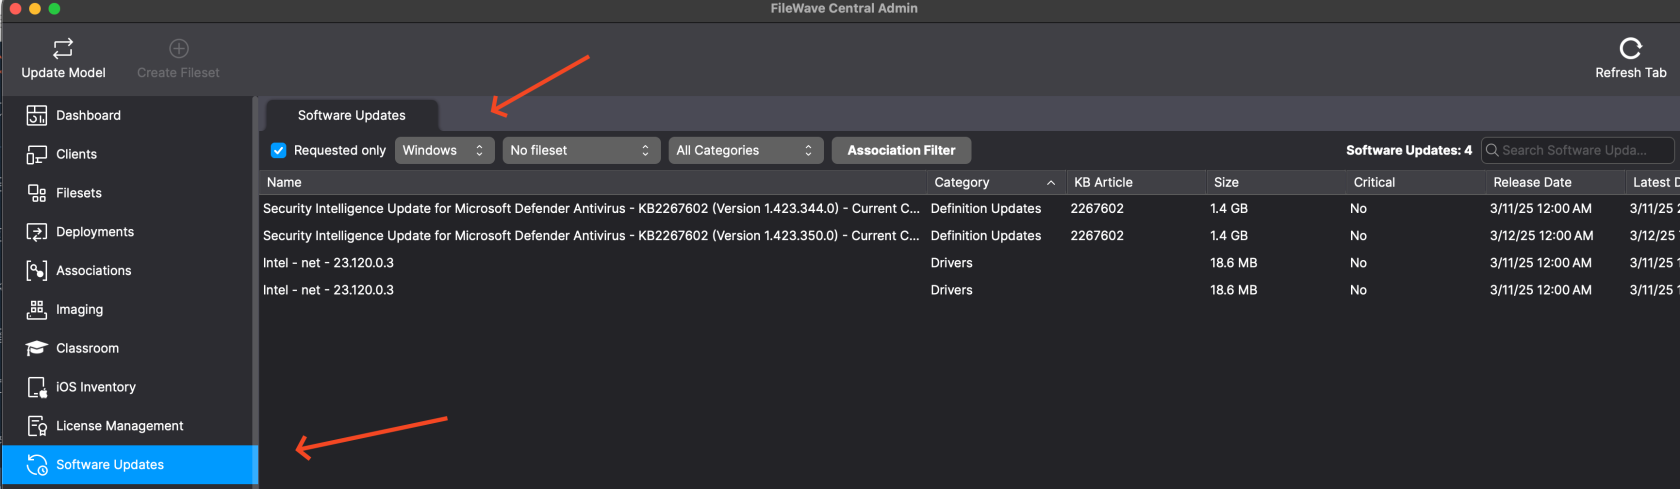](https://kb.filewave.com/uploads/images/gallery/2025-03/htHtCDhZeibohktt-image.png)
It should be noted that you don't have to make everything so clean as to seperate out the patches by platform. There was another enhancement in FileWave 16.0 where even if a patch was assigned to a device it would be skipped if it didn't apply. You can see this below as the "Ignore non applicable Software Update Filesets" checkbox. When checked you will only see the updates that were applicable. Deselecting it will show the patches that didn't apply but have a Deployment that assigned them.
[](https://kb.filewave.com/uploads/images/gallery/2025-03/gFs2I2U5poSYiMLu-image.png)
## Manually deploy Software Updates with Scheduling
---
FileWave can also deploy Software Updates just like any other Fileset and allow you to schedule the deployment of the Software Update Fileset.
1. Open FileWave Central and navigate to Deployments on the left hand side of the window.
2. Create a new Deployment that contains your Windows or Apple patches and for the target use a Smart Group that is your Windows or Apple devices. You may have already done this earlier, and if you have this already then you can just edit that Deployment.
3. In the Properties for the Deployment you will see on the Options tab that you can decide when to Activate (Install) the patches. You can also set a Reboot deadline. If you re-use this Deployment for monthly patches then know that you'll need to keep changing these dates or else new patches will immediately be past their deadline after enough time passes.
4. *"Update Model"* to save the changes.
[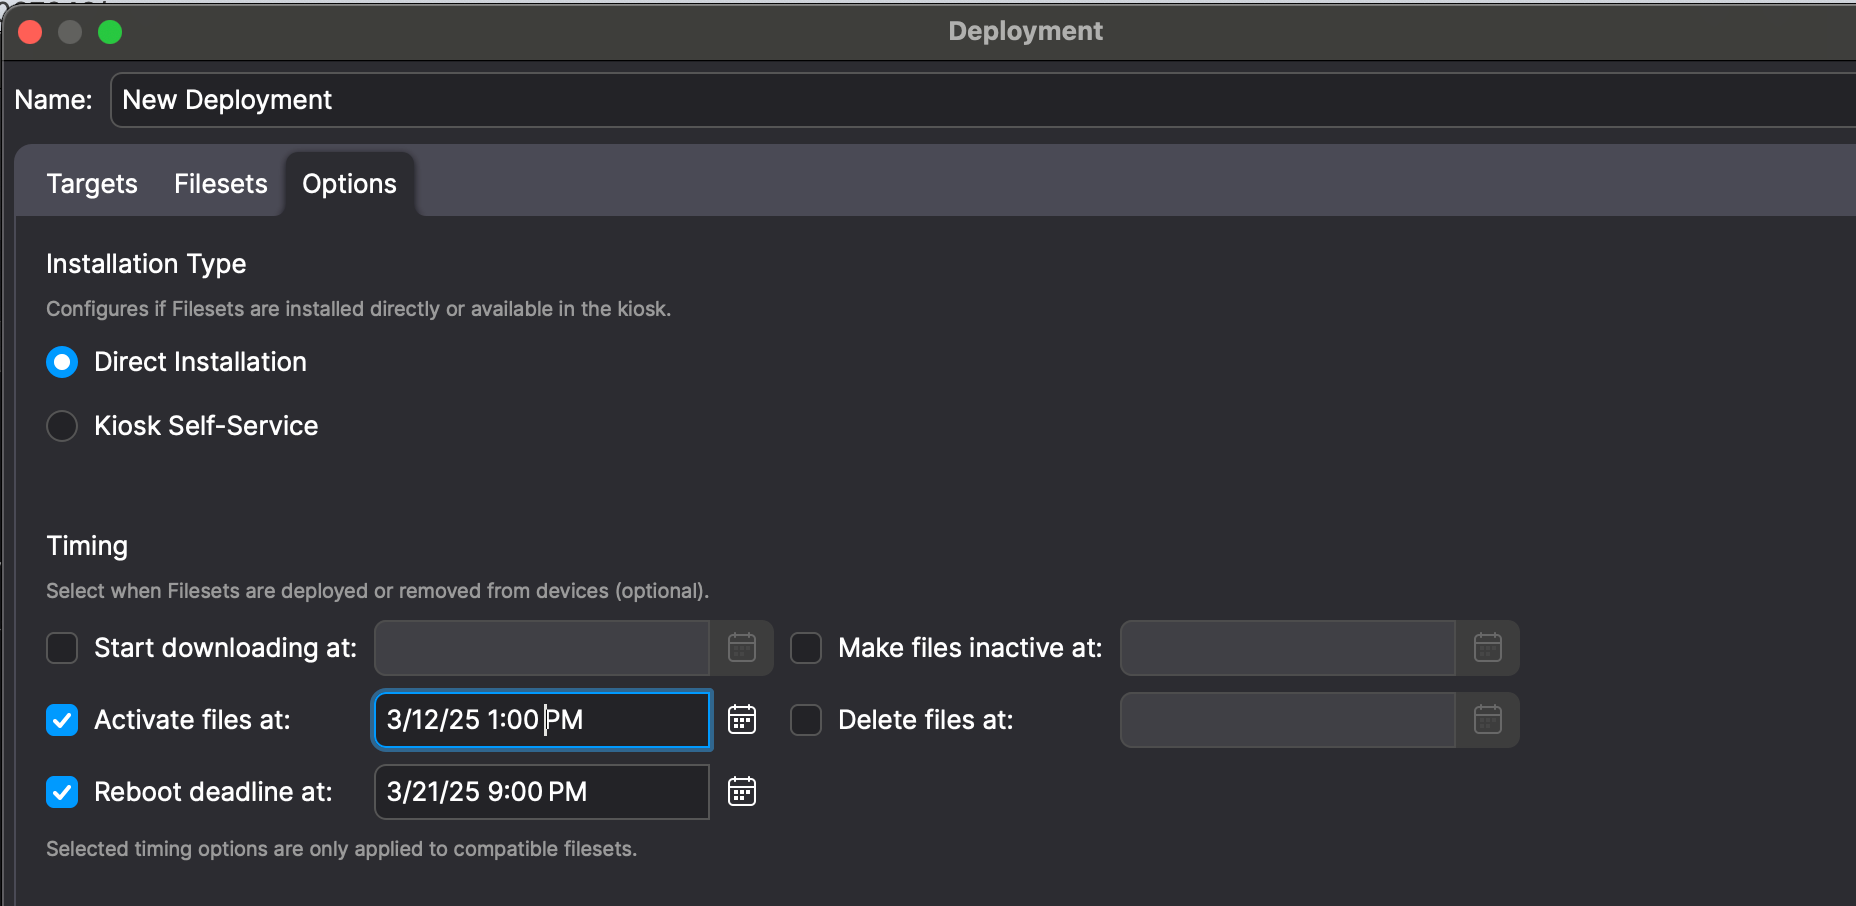](https://kb.filewave.com/uploads/images/gallery/2025-03/UNp4p9V1b7eC0ioi-image.png)
## Windows BIOS/UEFI Firmware and Driver Updates
The latest Windows Software Update filesets now include BIOS/UEFI firmware updates from certain OEM vendors (e.g., Dell, HP, Lenovo). While these updates may appear alongside OS patches, please be careful when deploying.
The latest Windows Software Update filesets now also includes **third-party driver updates**, such as those for **monitors, audio devices, and peripheral hardware**. While these updates can improve compatibility and stability, they often have the following impact:
- Many of these drivers **require a reboot** to complete installation.
- Automatic deployment may result in **unexpected restarts**, potentially disrupting end-user workflows.
To maintain a smooth user experience and prevent unplanned reboots, you may want to deploy driver updates via **Self-Service Kiosk** instead of automatic enforcement.
## Next Steps
Now that you have the basics you may want to dig deeper and read the [Best Practice Guide: Software Update Deployment (16.0+)](https://kb.filewave.com/books/top-tips/page/best-practice-guide-software-update-deployment-160 "Best Practice Guide: Software Update Deployment (16.0+)") to implement more processes to make your patching effective and efficient.
## Related Content
- [Best Practice Guide: Software Update Deployment (16.0+)](https://kb.filewave.com/books/top-tips/page/best-practice-guide-software-update-deployment-160 "Best Practice Guide: Software Update Deployment (16.0+)")
# 5. Inventory Reporting
Please follow the steps outlined in this section to learn more about FileWave's robust Inventory Reporting capabilities.
# Location Tracking
## Dude, where's my device?
---
Ever needed to locate a device but don't even know where to start? Well that will not be a concern with anymore since FileWave offers Location Tracking for every supported platform. This section will outline the requirements and process of getting Location information from the various devices. FileWave will leverage the device's built-in Location Services to determine the most accurate Location information. This data may be based on the wireless access point, cellular, or GPS radios.
### Enable Location Tracking within the FileWave Admin
1. Open FileWave Admin and navigate to *"Clients".*
2. Select one or multiple devices, right-click, and go to *"Client State"*.
3. Change the *"Client State"* to *"Tracked".*
4. *"Update Model"* to save the changes.
5. If Location Services are enabled at the OS level and enabled at the FileWave Client level, you should see a *"Position Map"* tab for each Client.
As of FileWave 15.0 you can also go to Settings in FileWave Central and set the default tracking state to Tracked if you would like that to be the default state.
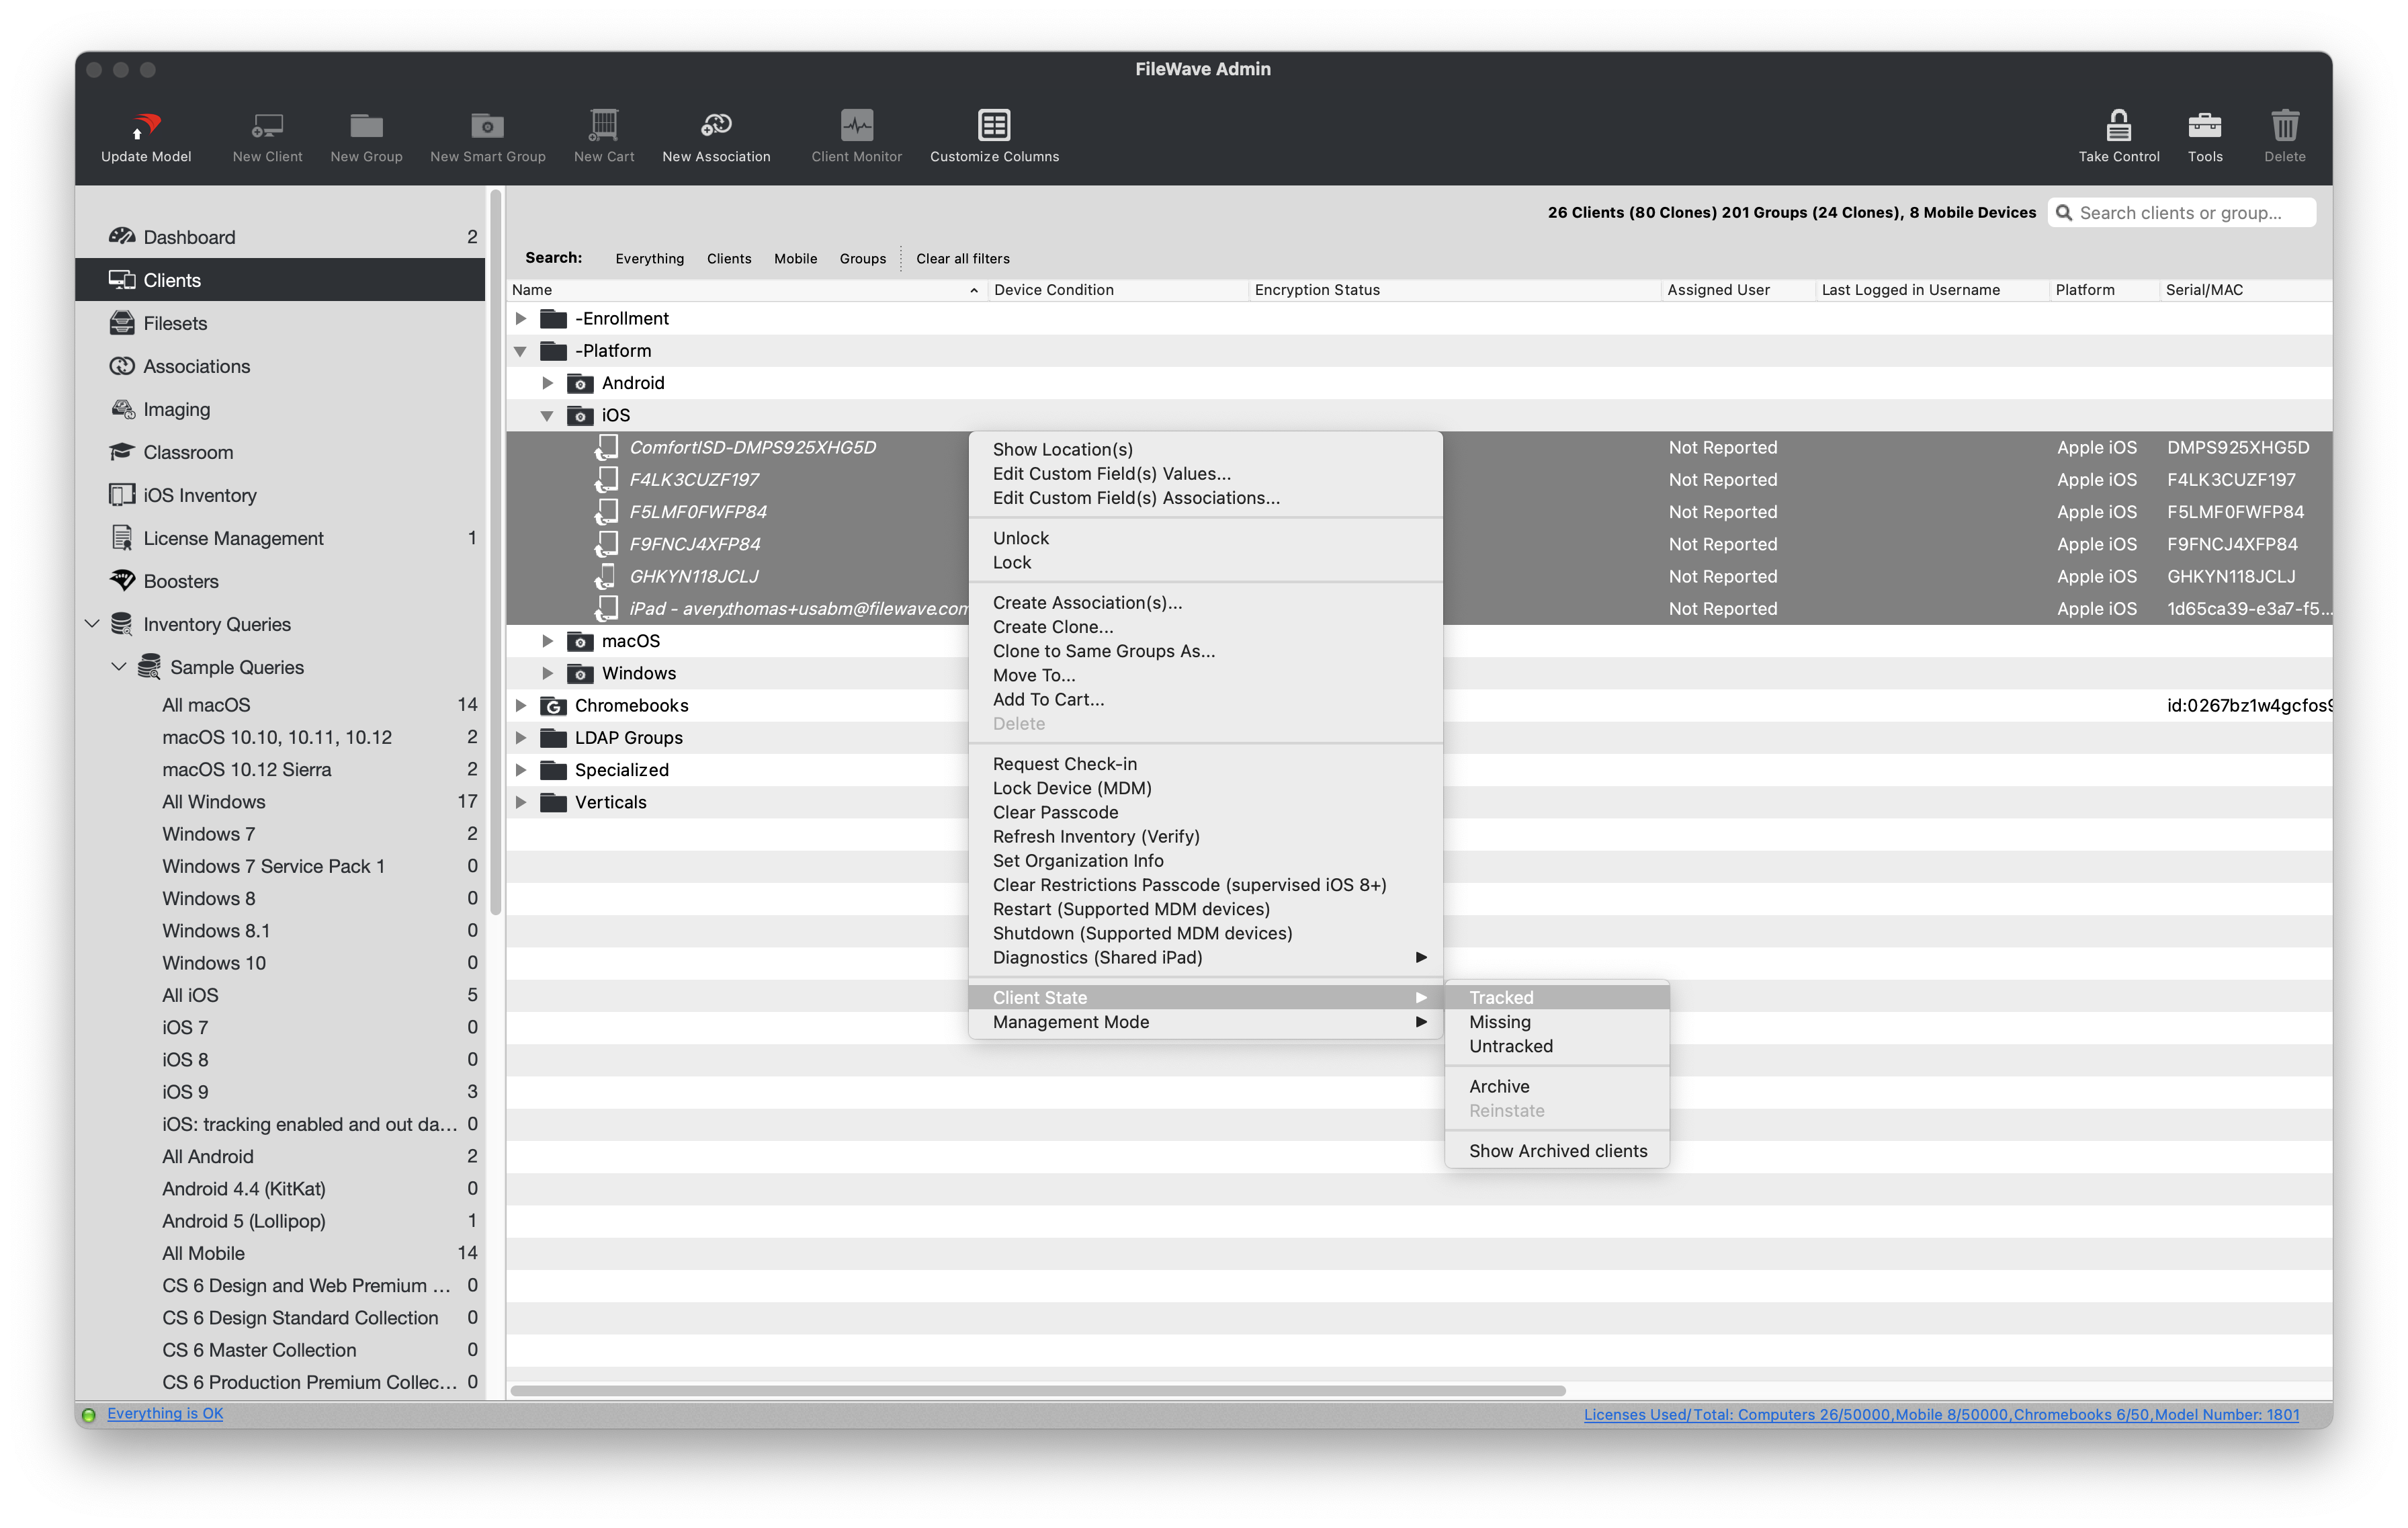
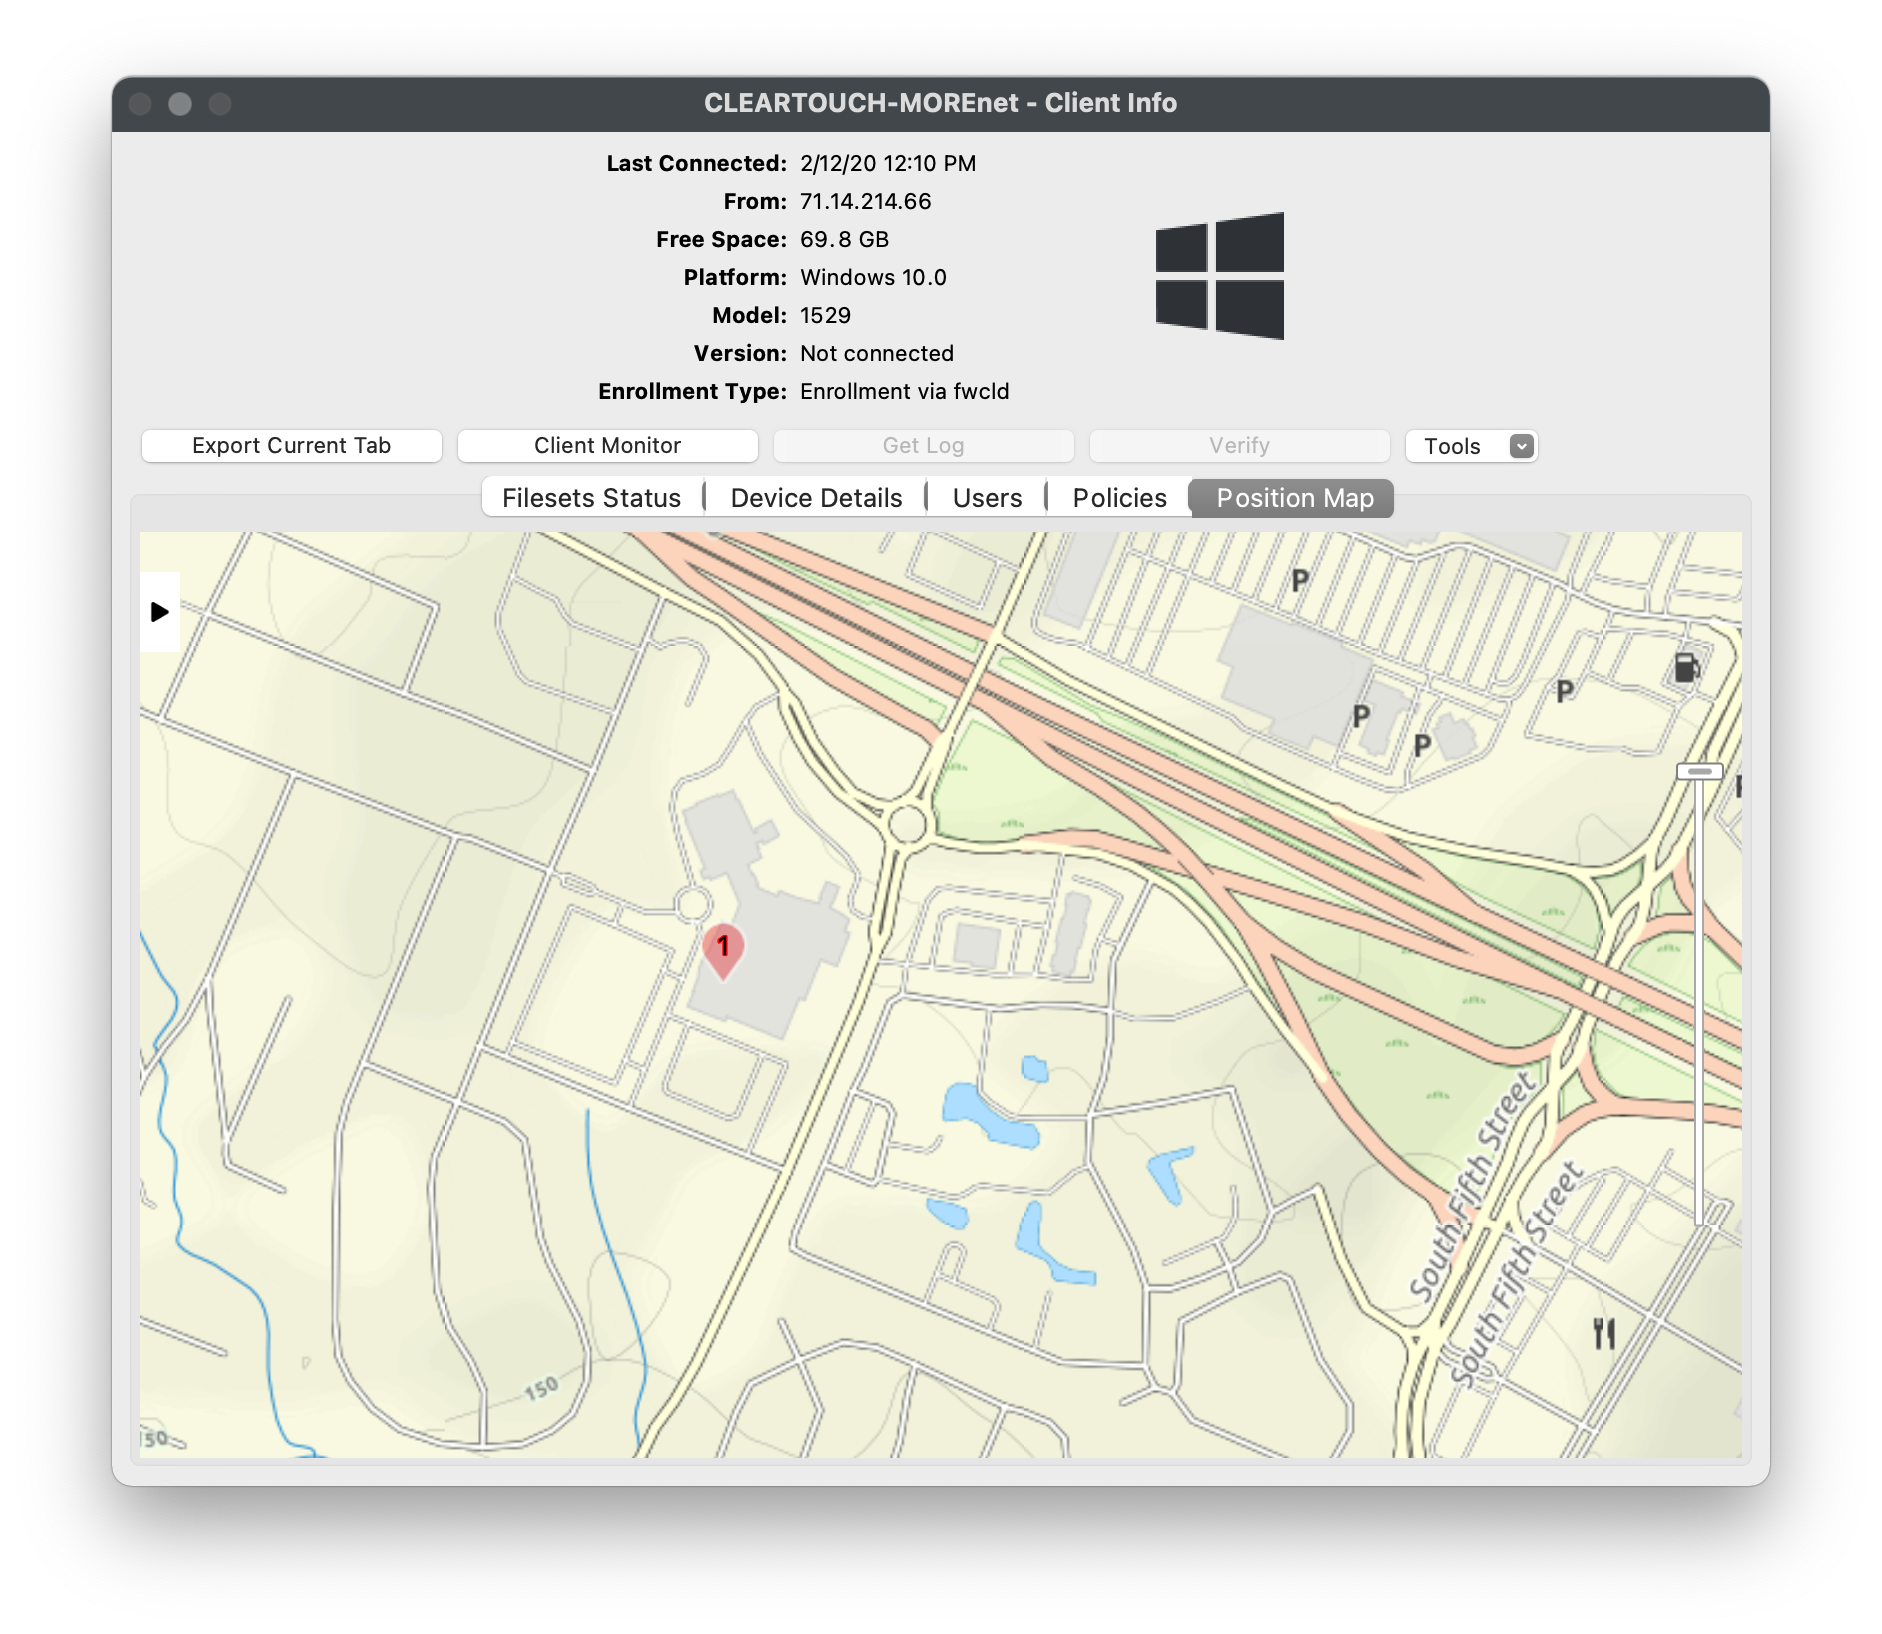
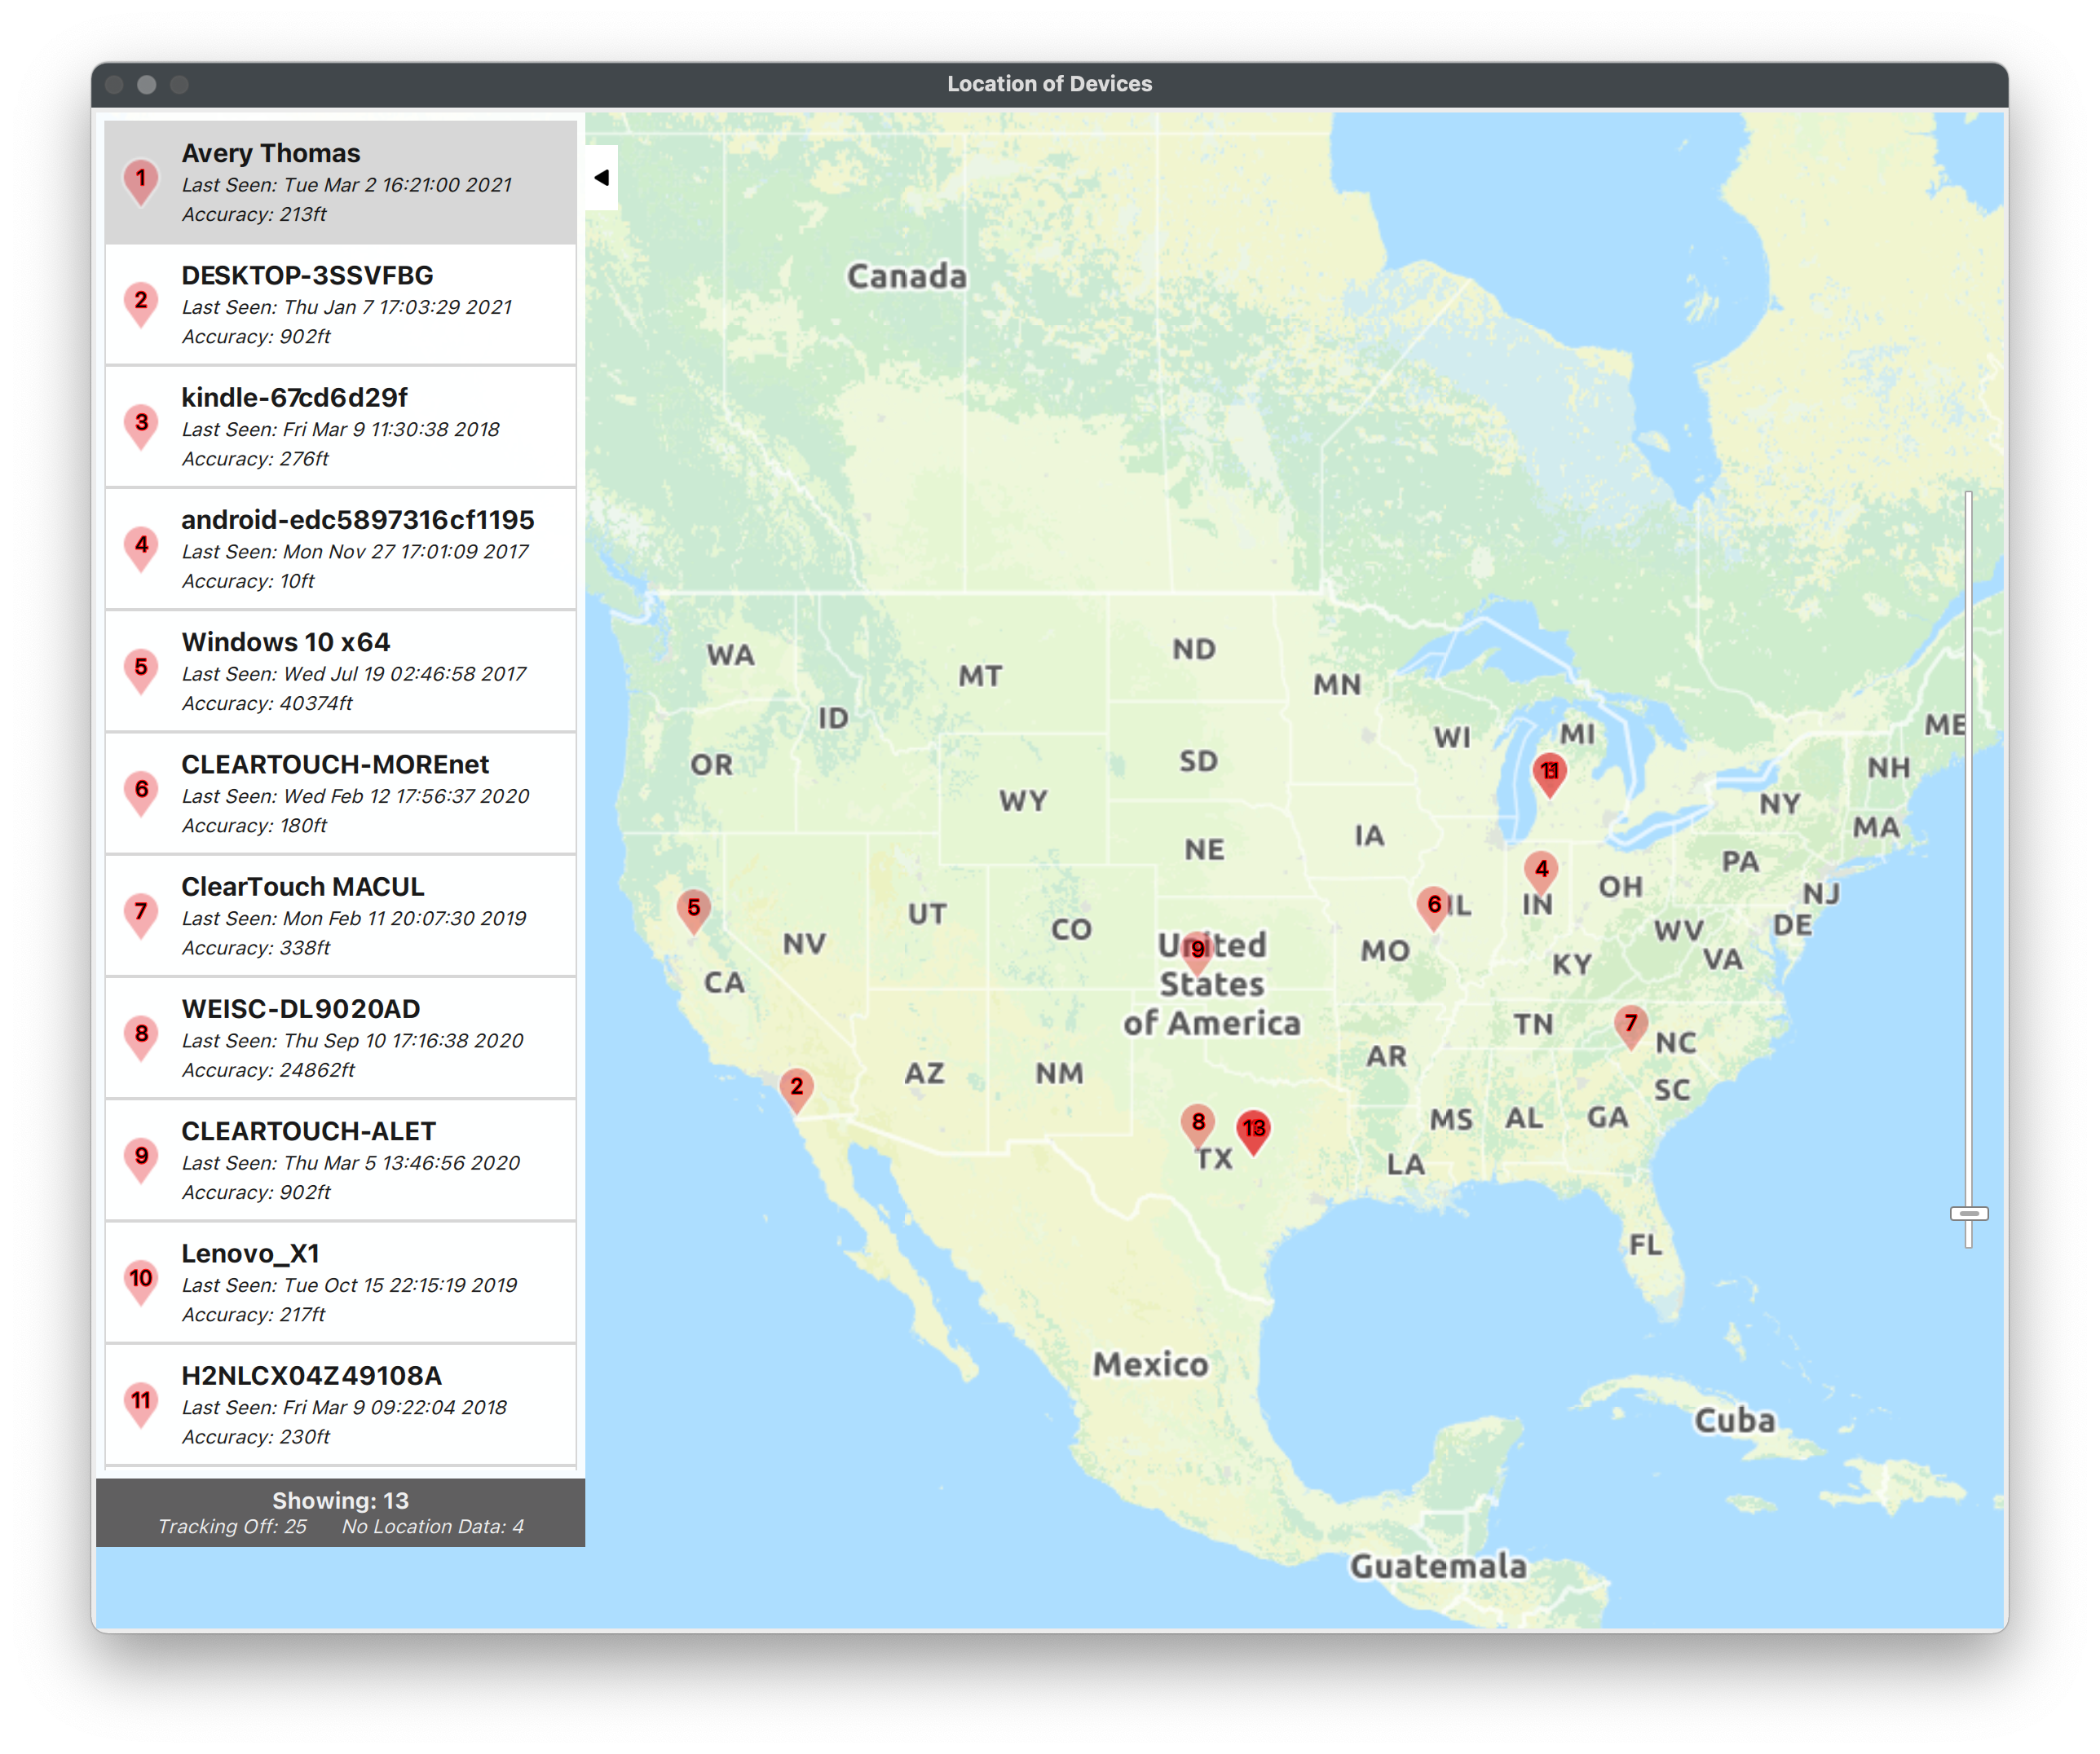
### Show multiple devices on one Location map
1. Open FileWave Admin and navigate to *"Clients"*.
2. Select one or multiple devices, right-click, and go to *"Show Location(s)".*
## Chromebook Location Tracking
---
Chromebook Location Tracking is facilitated by the FileWave Inventory Chrome extension. Please review the guide provided in this [section](https://kb.filewave.com/books/evaluation-guide/page/chromebook-client-pre-requisites "Chromebooks") to learn more about deploying the FileWave Inventory extension. The Location information sync interval is configured by the Chrome extension policy JSON and is set to get Location information every 15 minutes by default.
### iOS Location Tracking
---
iOS Location Tracking is facilitated by the IPA version of the FileWave App Portal. Please review the guide provided in this [section](https://kb.filewave.com/books/evaluation-guide/page/ios-software-and-profiles "iOS Software and Profiles") to learn how to deploy the IPA FileWave App Portal. Once the IPA FileWave App Portal is installed and opened for the first time, the end-user should see a pop-up notification to Allow the use of Location Services. Once Allowed, the FileWave App Portal will collect and report Location Information every 15 minutes. The iOS MDM API does not allow for the automated approval of Location Services and the end-user has control of the Location Services at any given time. If an iOS device is lost or stolen, please enable Missing Mode via *"right-click > Client State > Missing"* and *"Update Model"*. Missing Mode will Lock the device and collect Location Information as frequently as possible and is not dependent on the Location Services setting.
### macOS Location Tracking
---
macOS Location Tracking is facilitated by the native FileWave Client PKG. Please ensure that Location Tracking is enabled when generating your customized FileWave Client PKG. Once Location Tracking is enabled, the end-user will see a prompt to Allow the use of macOS Location Services. The macOS MDM API does not allow for the automated approval of Location Services and the end-user has control of the Location Services at any given time. By default, Location information will be collected and reported to FileWave every 15 minutes.
### Windows Location Tracking
---
Windows Location Tracking is facilitated by the native FileWave Client MSI. Please ensure that Location Tracking is enabled when generating your customized FileWave Client MSI. The end-user will not have to Allow the use of Location Services on Windows, however the Location Services must be enabled at the OS level. By default, Location information will be collected and reported to FileWave every 15 minutes.
## Related Content
- [Location Tracking Setup](https://kb.filewave.com/books/filewave-client/page/location-tracking-setup "Location Tracking Setup")
# Custom Fields
## **Extend Inventory even more? Check.**
---
Custom Fields let you add organization-specific inventory data to FileWave devices. You can enter values manually, import them from CSV, or populate them with client scripts on macOS and Windows. Those values can then appear in Inventory Reports, Smart Groups, and API results.
## **Create a Custom Field**
---
This section will outline how to create the most commonly used Custom Field types in FileWave.
Create Custom Fields in FileWave Central by opening *Assistants > Custom Fields > Edit Custom Fields*.
### **Static Custom Field**
This section will cover creating a "static" Custom Field that can either be manually modified or imported via CSV. This example will create a *"Building Code"* Custom Field but other examples may include unique Asset Tag, Assigned Cart, or Department.
1. Open FileWave Central and navigate to *"Assistants > Custom Fields > Edit Custom Fields".*
2. Click the "\[+\]" button in the lower left-hand corner.
3. Name the Custom Field accordingly and take note of the automatically generated *"Internal Name"*.
- Custom Fields appear in *Device Details* and are sorted alphabetically, so choose names that will be easy to scan later.
- The "Internal Name" will be used as the variable name throughout FileWave. (ex: *%building\_code%*).
4. Optionally, enter a *"Description"* for the Custom Field so other team members know what the field is designed for.
5. Change the *"Provided By"* drop-down menu to *"Administrator"*.
- *Administrator* means a FileWave administrator provides the Custom Field value.
6. Optionally, check the *"Assigned to all devices"* box.
- This is the recommended option for Custom Fields that can apply to all devices, even if not utilized immediately.
- If not *"Assigned to all devices"*, please review the section below to learn how to manually assign Custom Fields to devices.
7. Change the *"Data Type"* to *"String"*.
- *String* is the default and works for most situations.
8. Optionally, check the *"Restrict allowed values"* box.
- With the *"Restrict allowed values"* box checked, it will require you to input allowed values for the Custom Field.
- This will change the input method from a "free type" field to a drop-down menu of allowed values.
9. Check the *"Use default value"* box and enter in a placeholder value.
- This is recommended to prevent blank Custom Fields, especially those used for Device Naming or other variable substitution.
10. Click *"Save"*.
### **Script-based Custom Field**
A script-based Custom Field runs a script periodically on macOS and Windows clients, then returns the script output to the Custom Field. Use this when FileWave inventory does not already collect the exact value you need, such as FileVault or BitLocker state, detected antivirus threats, registry values, or plist values.
1. 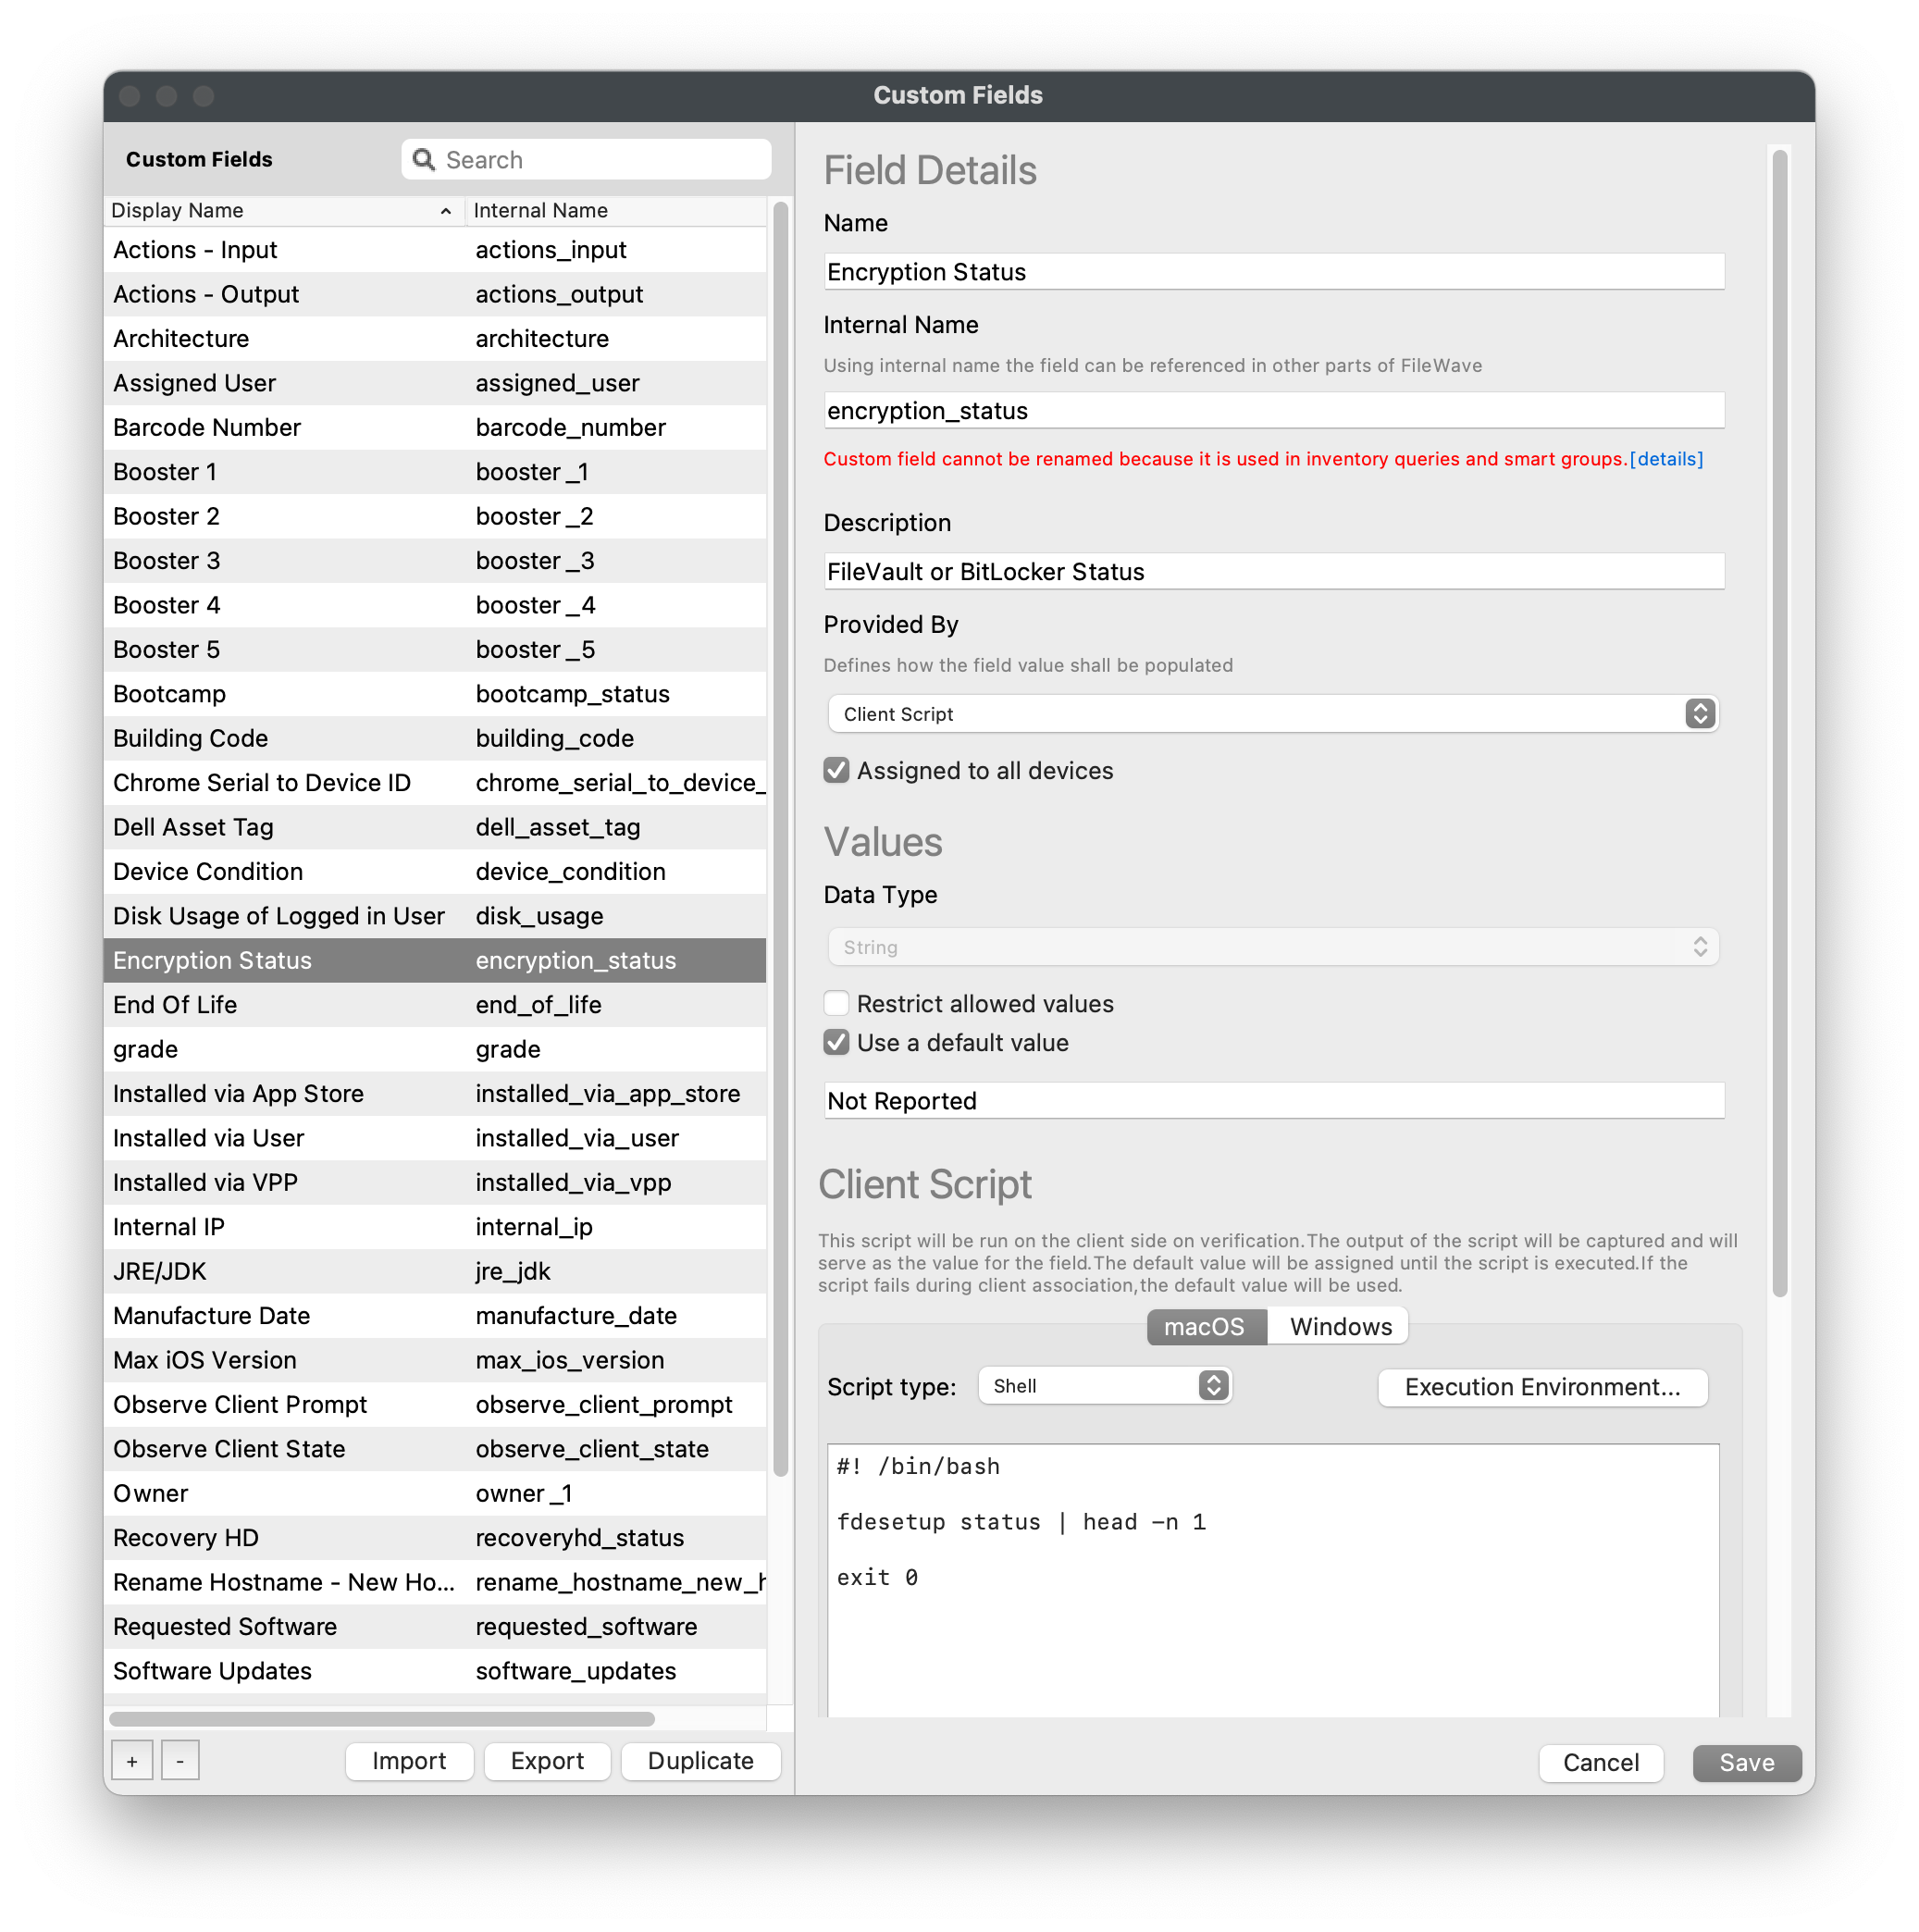Open FileWave Central and navigate to *"Assistants > Custom Fields > Edit Custom Fields".*
2. Click the "\[+\]" button in the lower left-hand corner.
3. Name the Custom Field accordingly and take note of the automatically generated *"Internal Name"*.
- Custom Fields appear in *Device Details* and are sorted alphabetically, so choose names that will be easy to scan later.
- The "Internal Name" will be used as the variable name throughout FileWave. (ex: *%encryption\_status%*).
4. Optionally, enter a *"Description"* for the Custom Field so other team members know what the field is designed for.
5. Change the *"Provided By"* drop-down menu to *"Client Script"*.
- *Client Script* runs a script periodically and returns the script output to the Custom Field.
- Scripts run as the `root` user on macOS or as the `SYSTEM` account on Windows.
6. Optionally, check the *"Assigned to all devices"* box.
- This is the recommended option for Custom Fields that can apply to all devices, even if not utilized immediately.
- If not *"Assigned to all devices"*, please review the section below to learn how to manually assign Custom Fields to devices.
7. Change the *"Data Type"* to *"String"*.
- *String* is the default and works for most situations.
8. 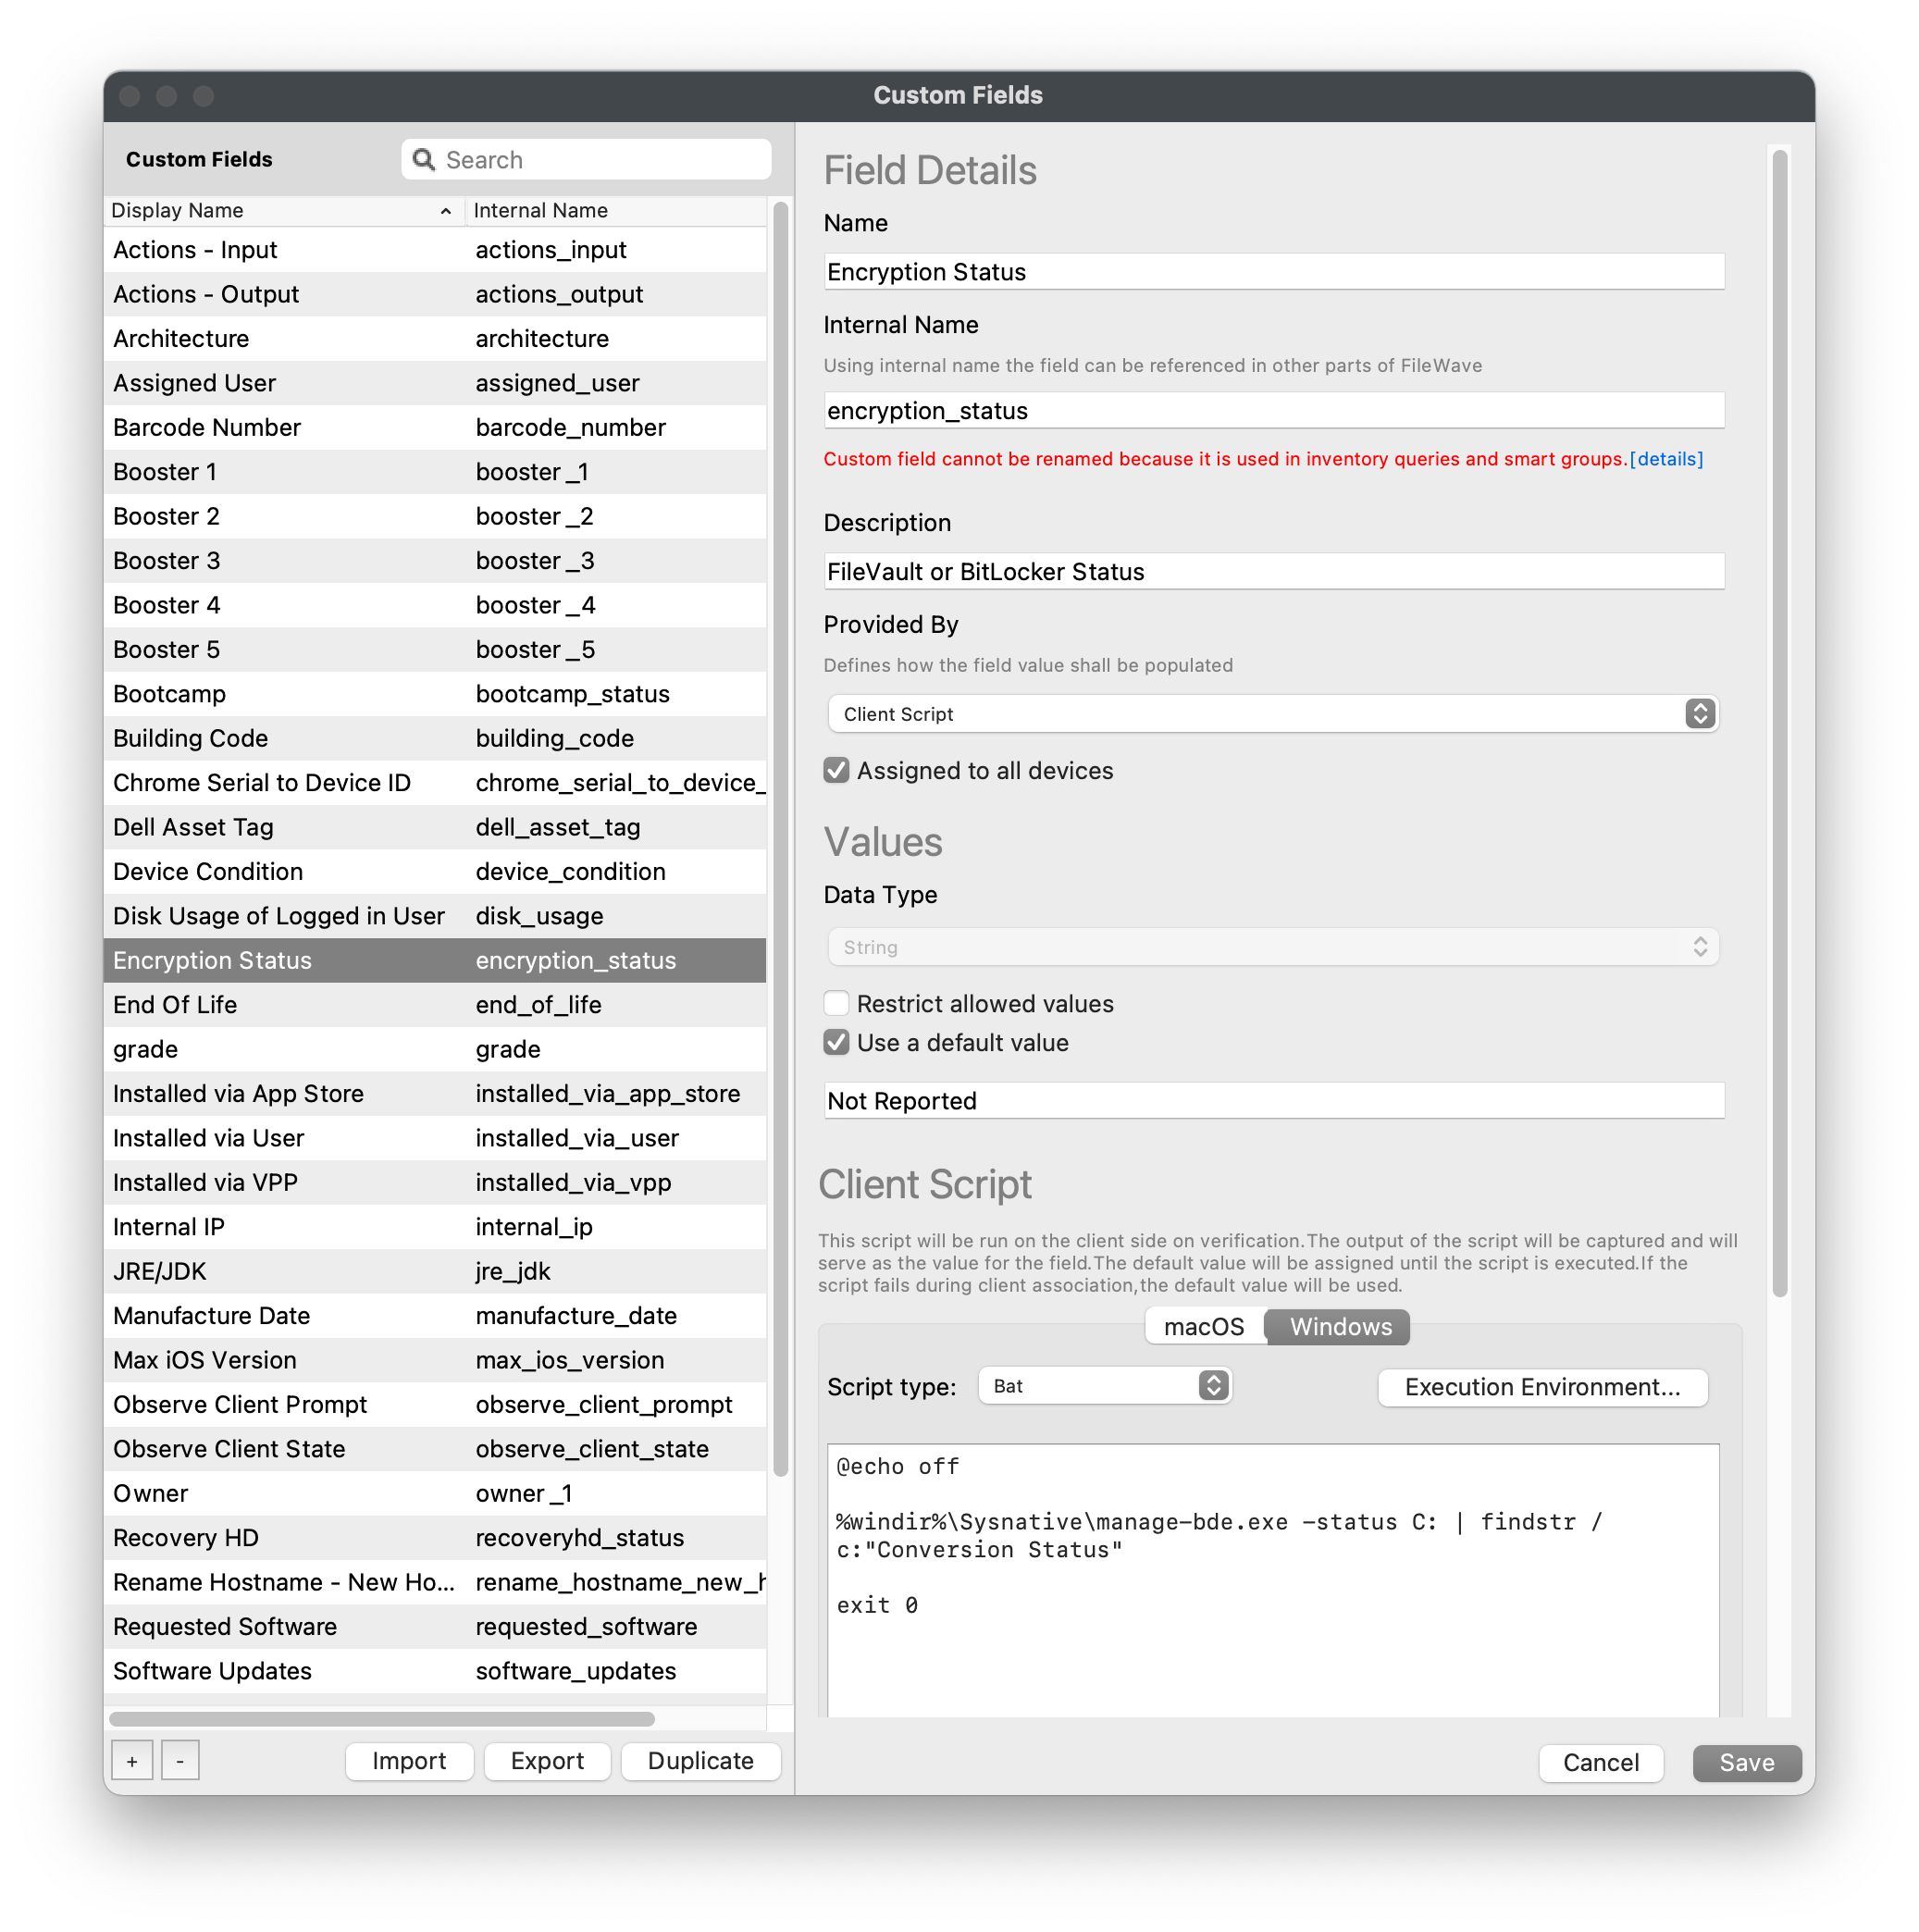Optionally, check the *"Restrict allowed values"* box.
- With the *"Restrict allowed values"* box checked, it will require you to input allowed values for the Custom Field.
- This will change the input method from a "free type" field to a drop-down menu of allowed values.
- This is not recommended for script-based Custom Fields unless you can guarantee the output of the script will be consistent.
9. Check the *"Use default value"* box and enter in a placeholder value.
- This is recommended to prevent blank Custom Fields, especially those used for Device Naming or other variable substitution.
10. Verify the correct scripting language and enter script for *"macOS"*.
11. Verify the correct scripting language and enter script for *"Windows"*.
12. Optionally, check *Use output only when script exits with code 0*. This depends on the script, but most successful scripts exit with code 0.
13. Optionally, check *Replace line feed characters with space* to convert multi-line output into a single-line Custom Field value.
14. Click *"Save"*.
## **Manually assign Custom Fields to devices**
---
If you did not check the box "*Assigned to all devices"* when creating your Custom Field, you will need to manually assign the Custom Field to devices or device groups. In this example, we will assign the *"Manufacture Date"* Custom Field to the *"iOS"* Smart Group. Please note that new devices added to the *"iOS"* Smart Group will not automatically be assigned to the Custom Field and you may have to repeat this process to include new devices.
1. Open FileWave Central and navigate to *"Clients"*.
2. Right-click on an individual device, multiple devices, or device group.
3. Select *"Edit Custom Field(s) Associations"* from the right-click menu.
4. Check the boxes for any Custom Fields you'd like to assign to the devices.
5. Click *"Save"*.
6. You should now see the Custom Field listed in the device's *"Device Details"*.
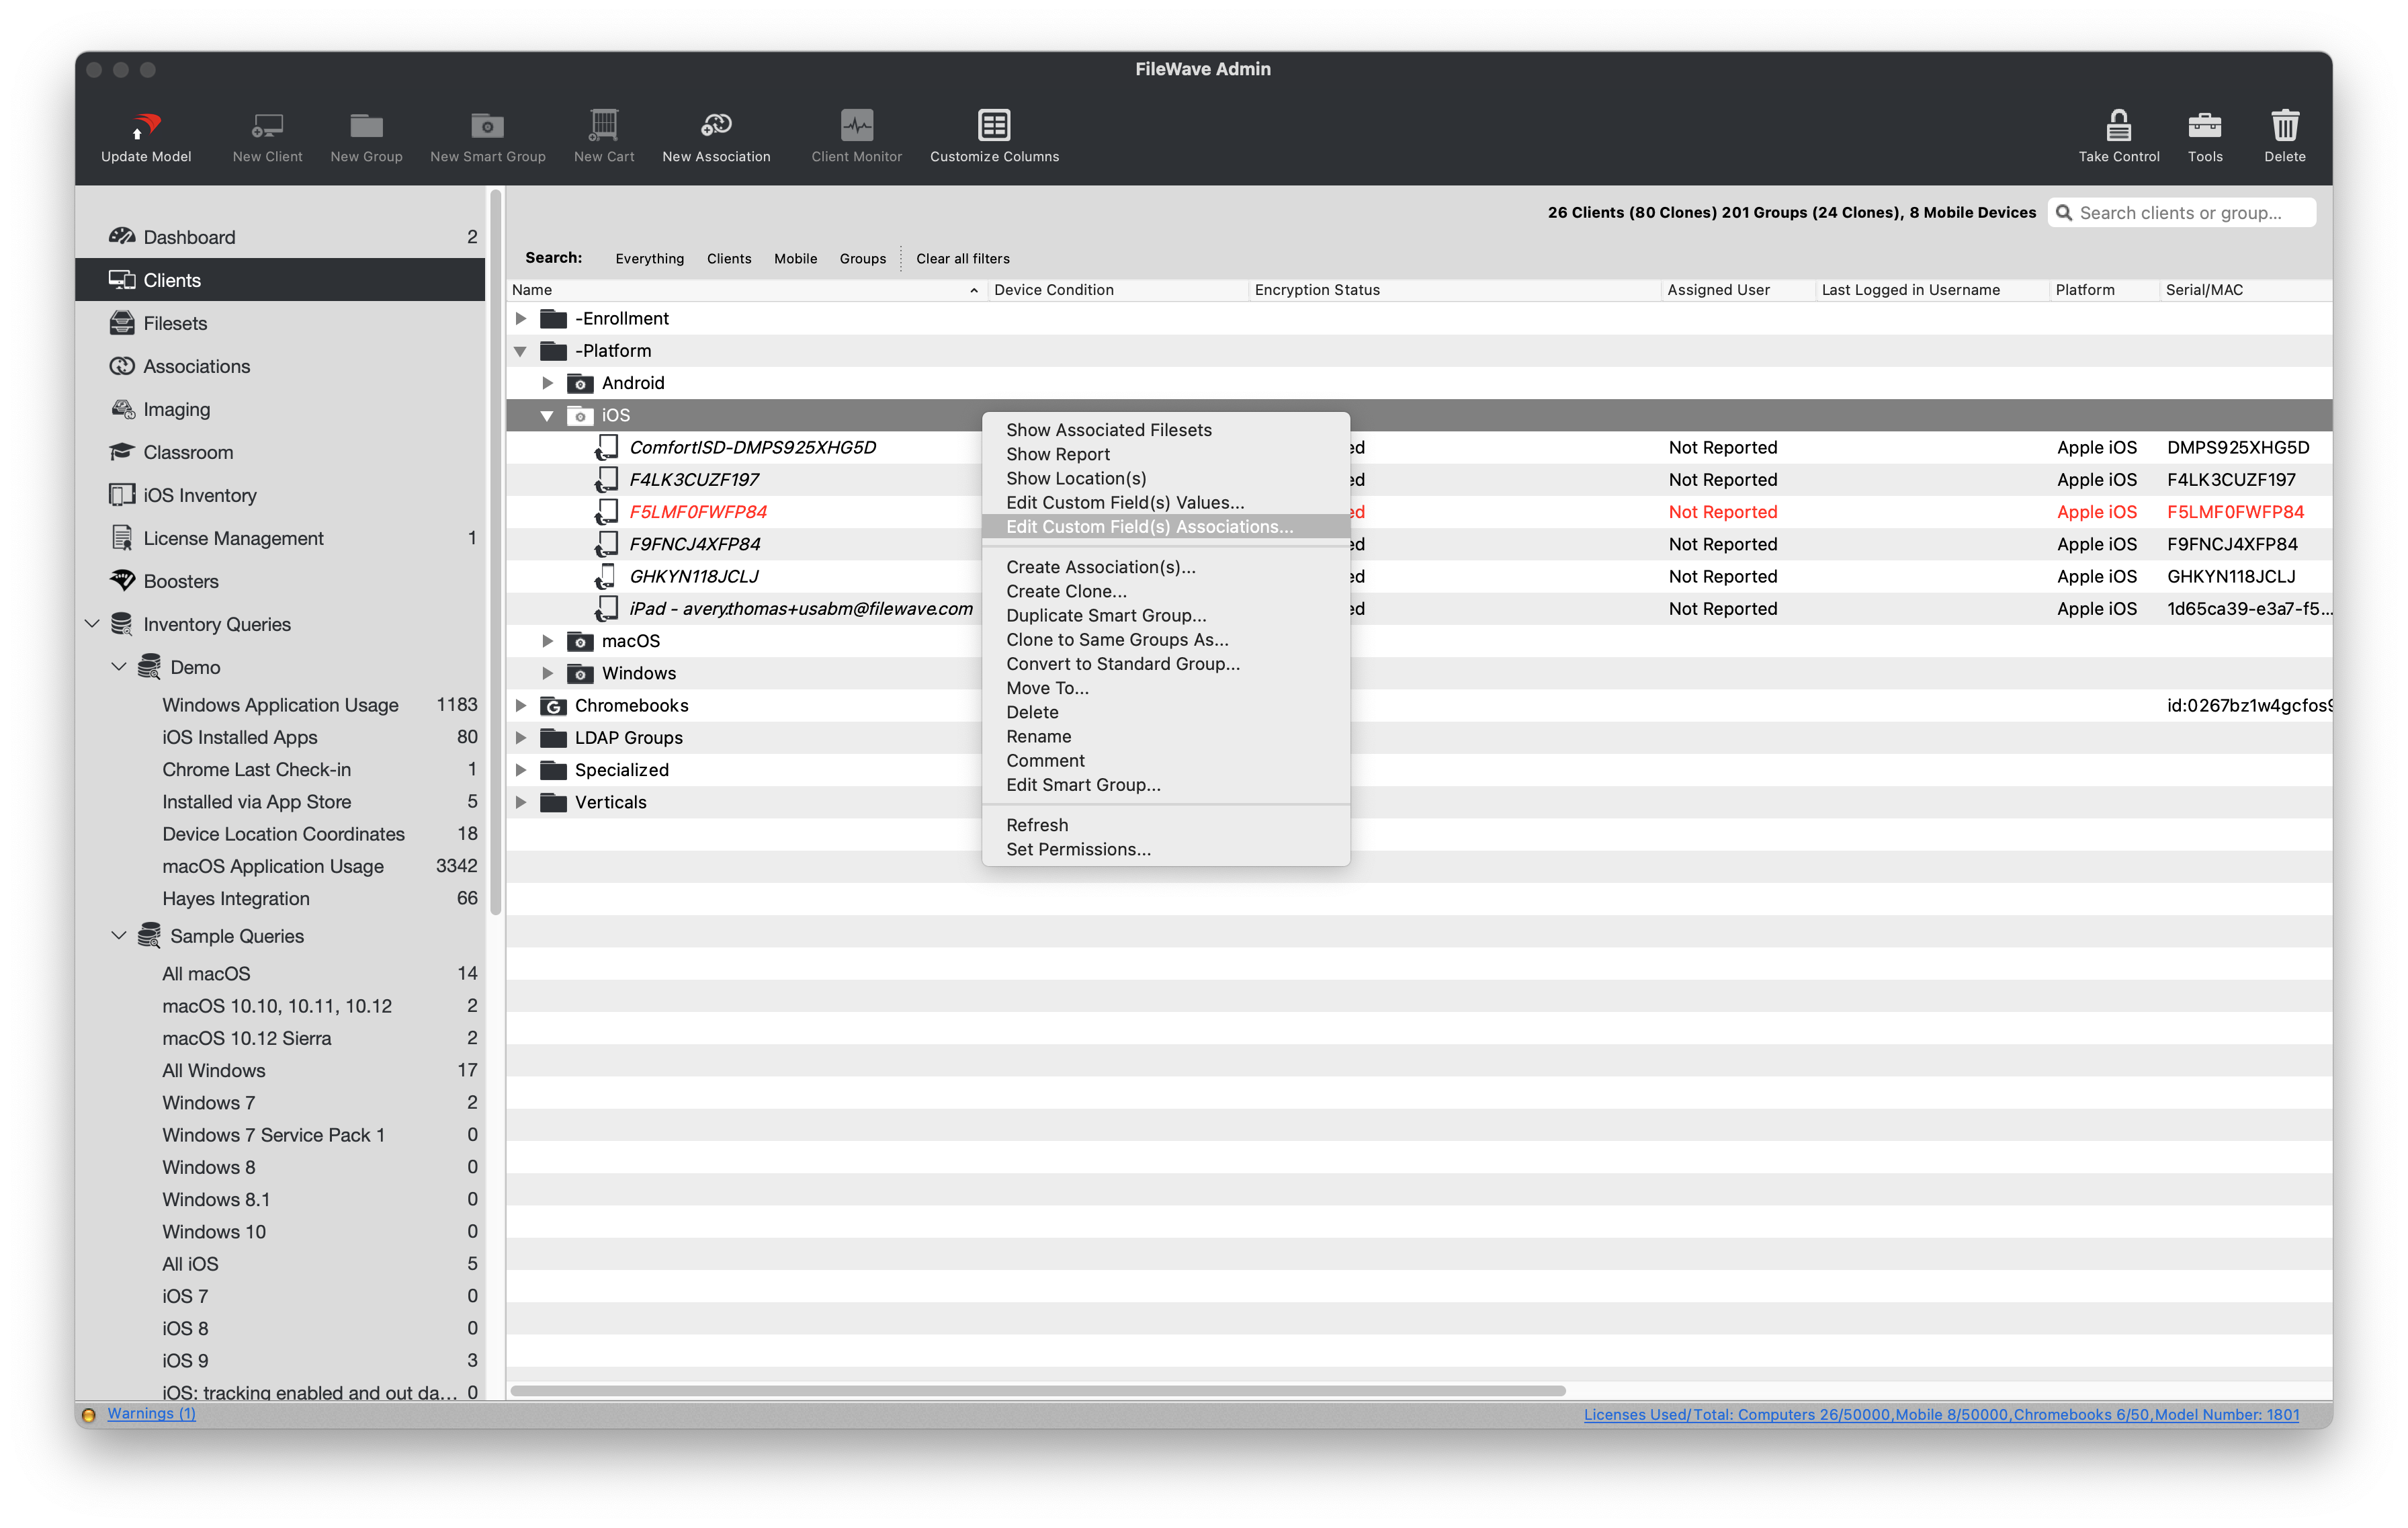

## **Manually edit Custom Field values**
---
If a Custom Field is not populated by CSV import or client script, you can edit the value manually. This example changes a device's *Device Condition* Custom Field from a restricted list of allowed values.
1. Open FileWave Central and navigate to *"Clients"*.
2. Right-click on an individual device, multiple devices, or device group.
3. Select *"Edit Custom Field(s) Values"* from the right-click menu.
4. Slow double-click the *"Field Value"* column or select option from drop-down menu for any Custom Fields you'd like to modify.
5. Click *"Save"*.
6. You should now see the Custom Field modification in the device's *"Device Details"*.
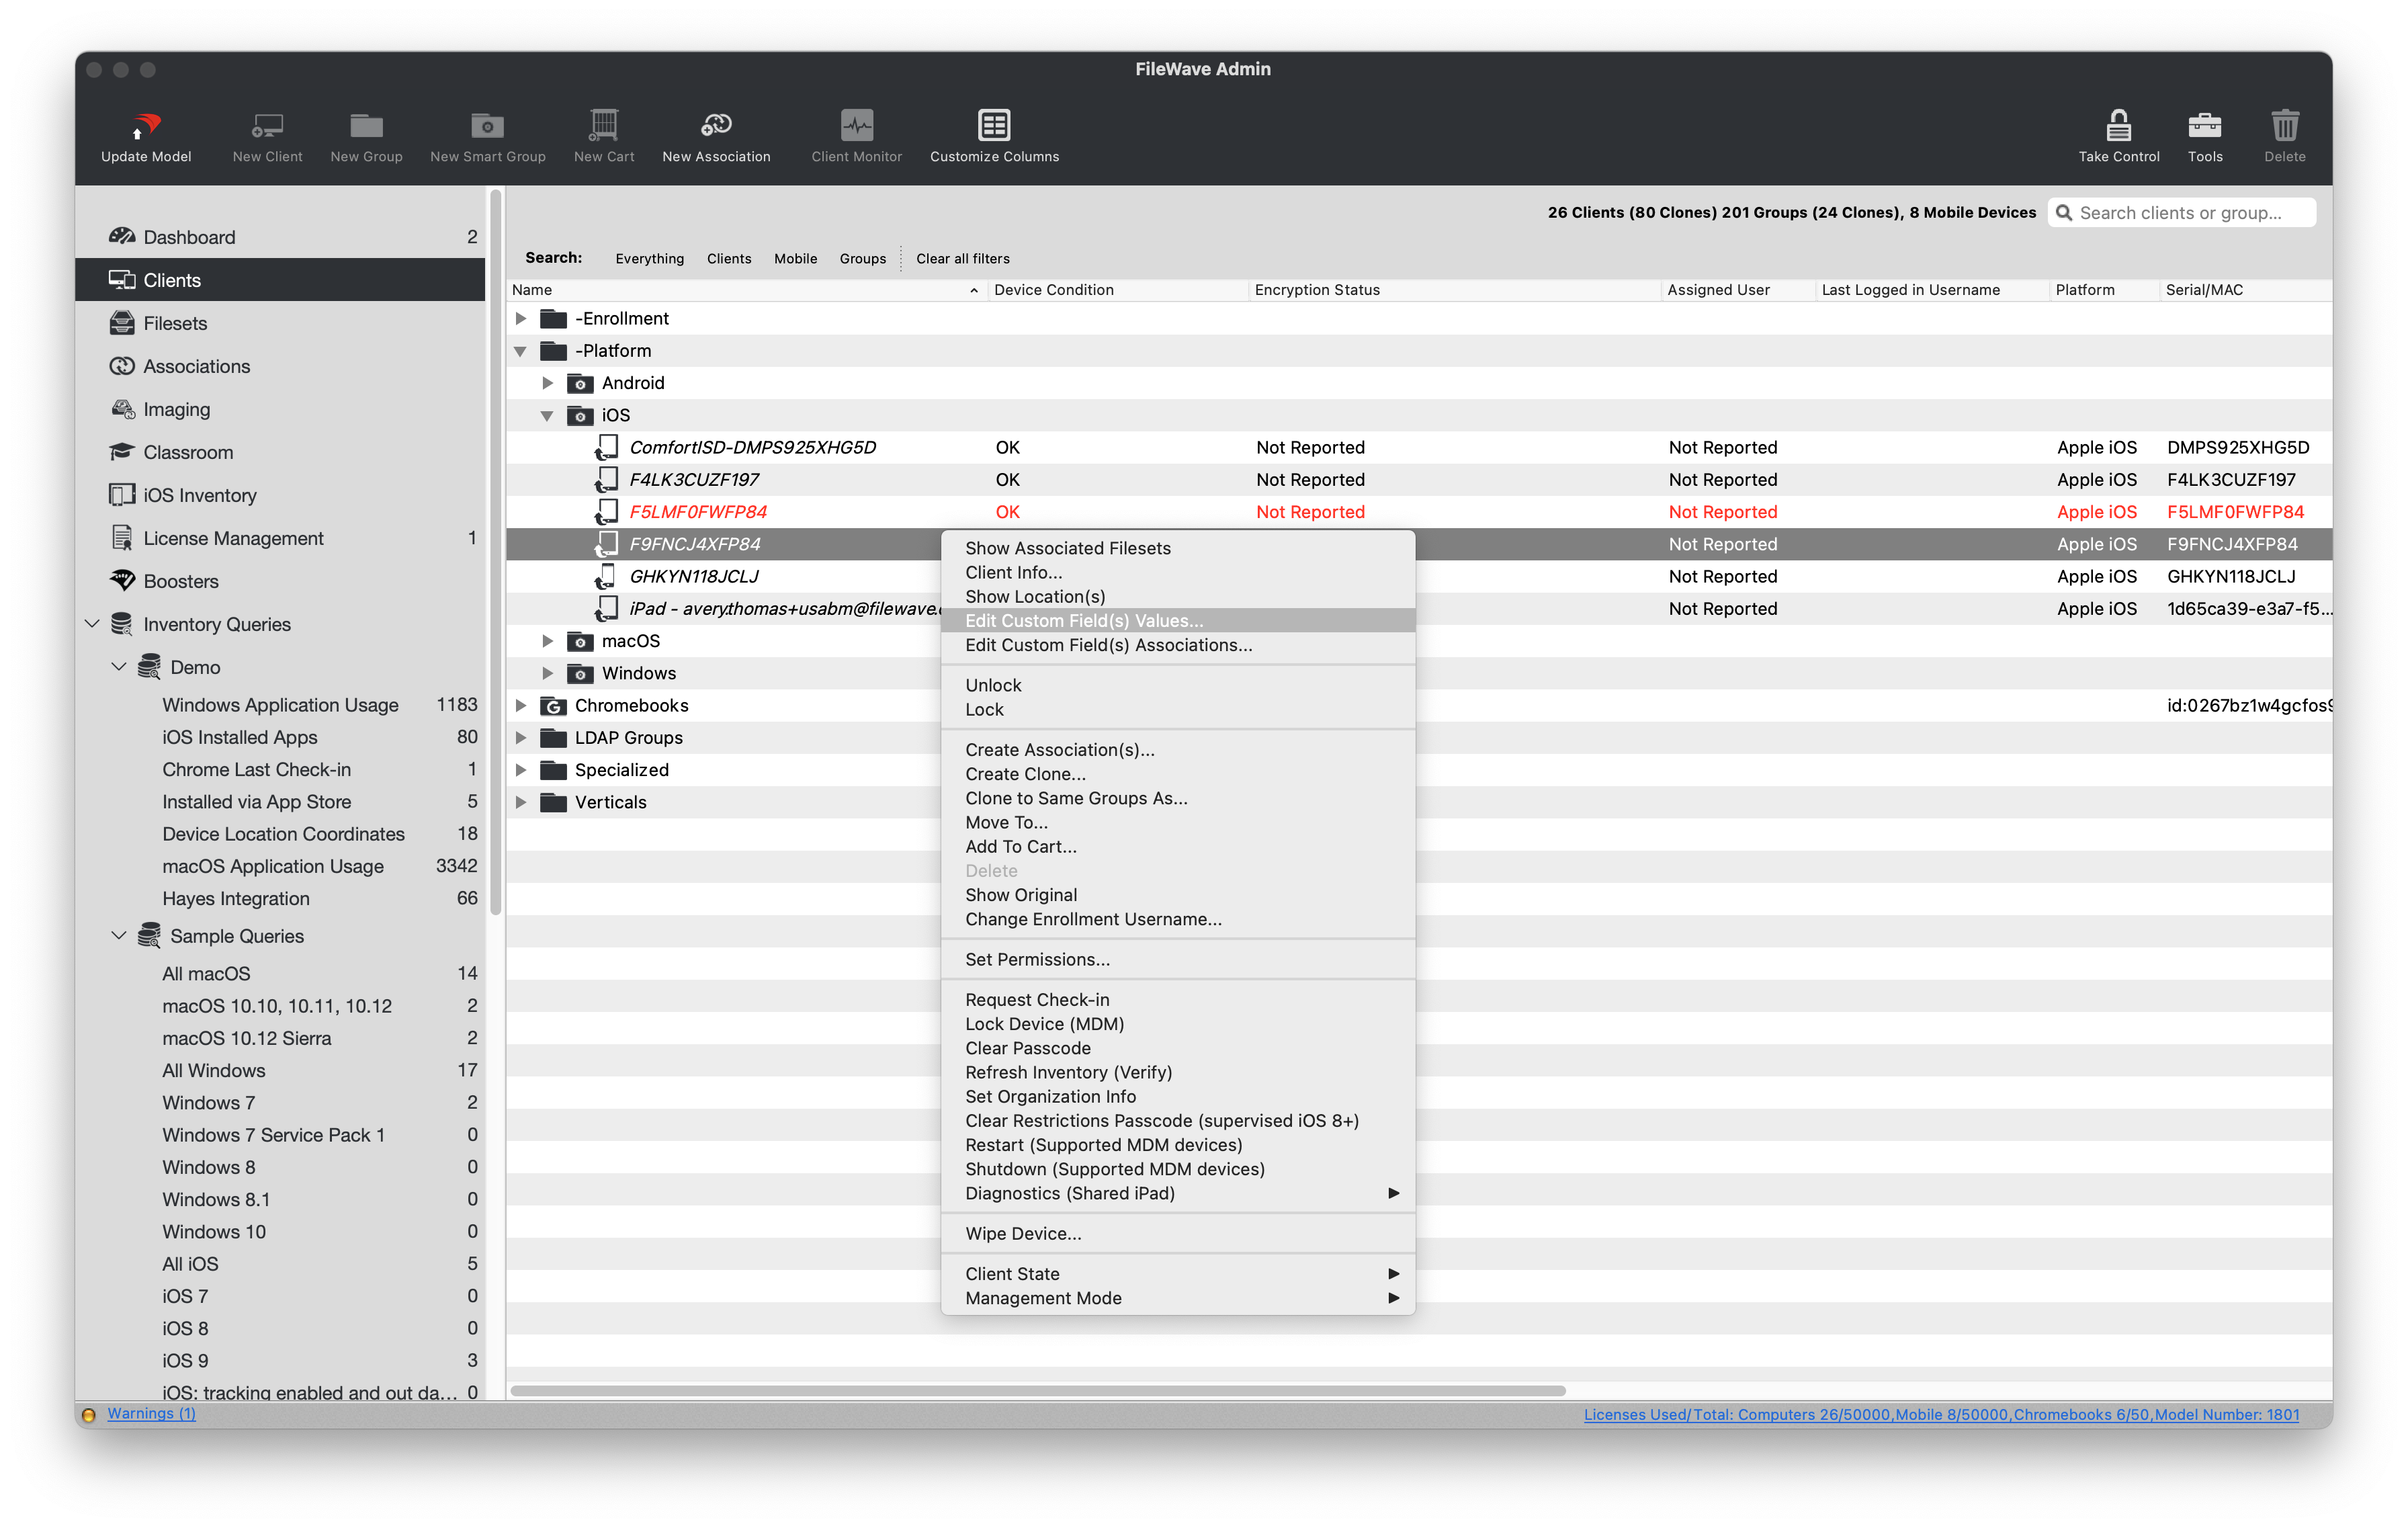
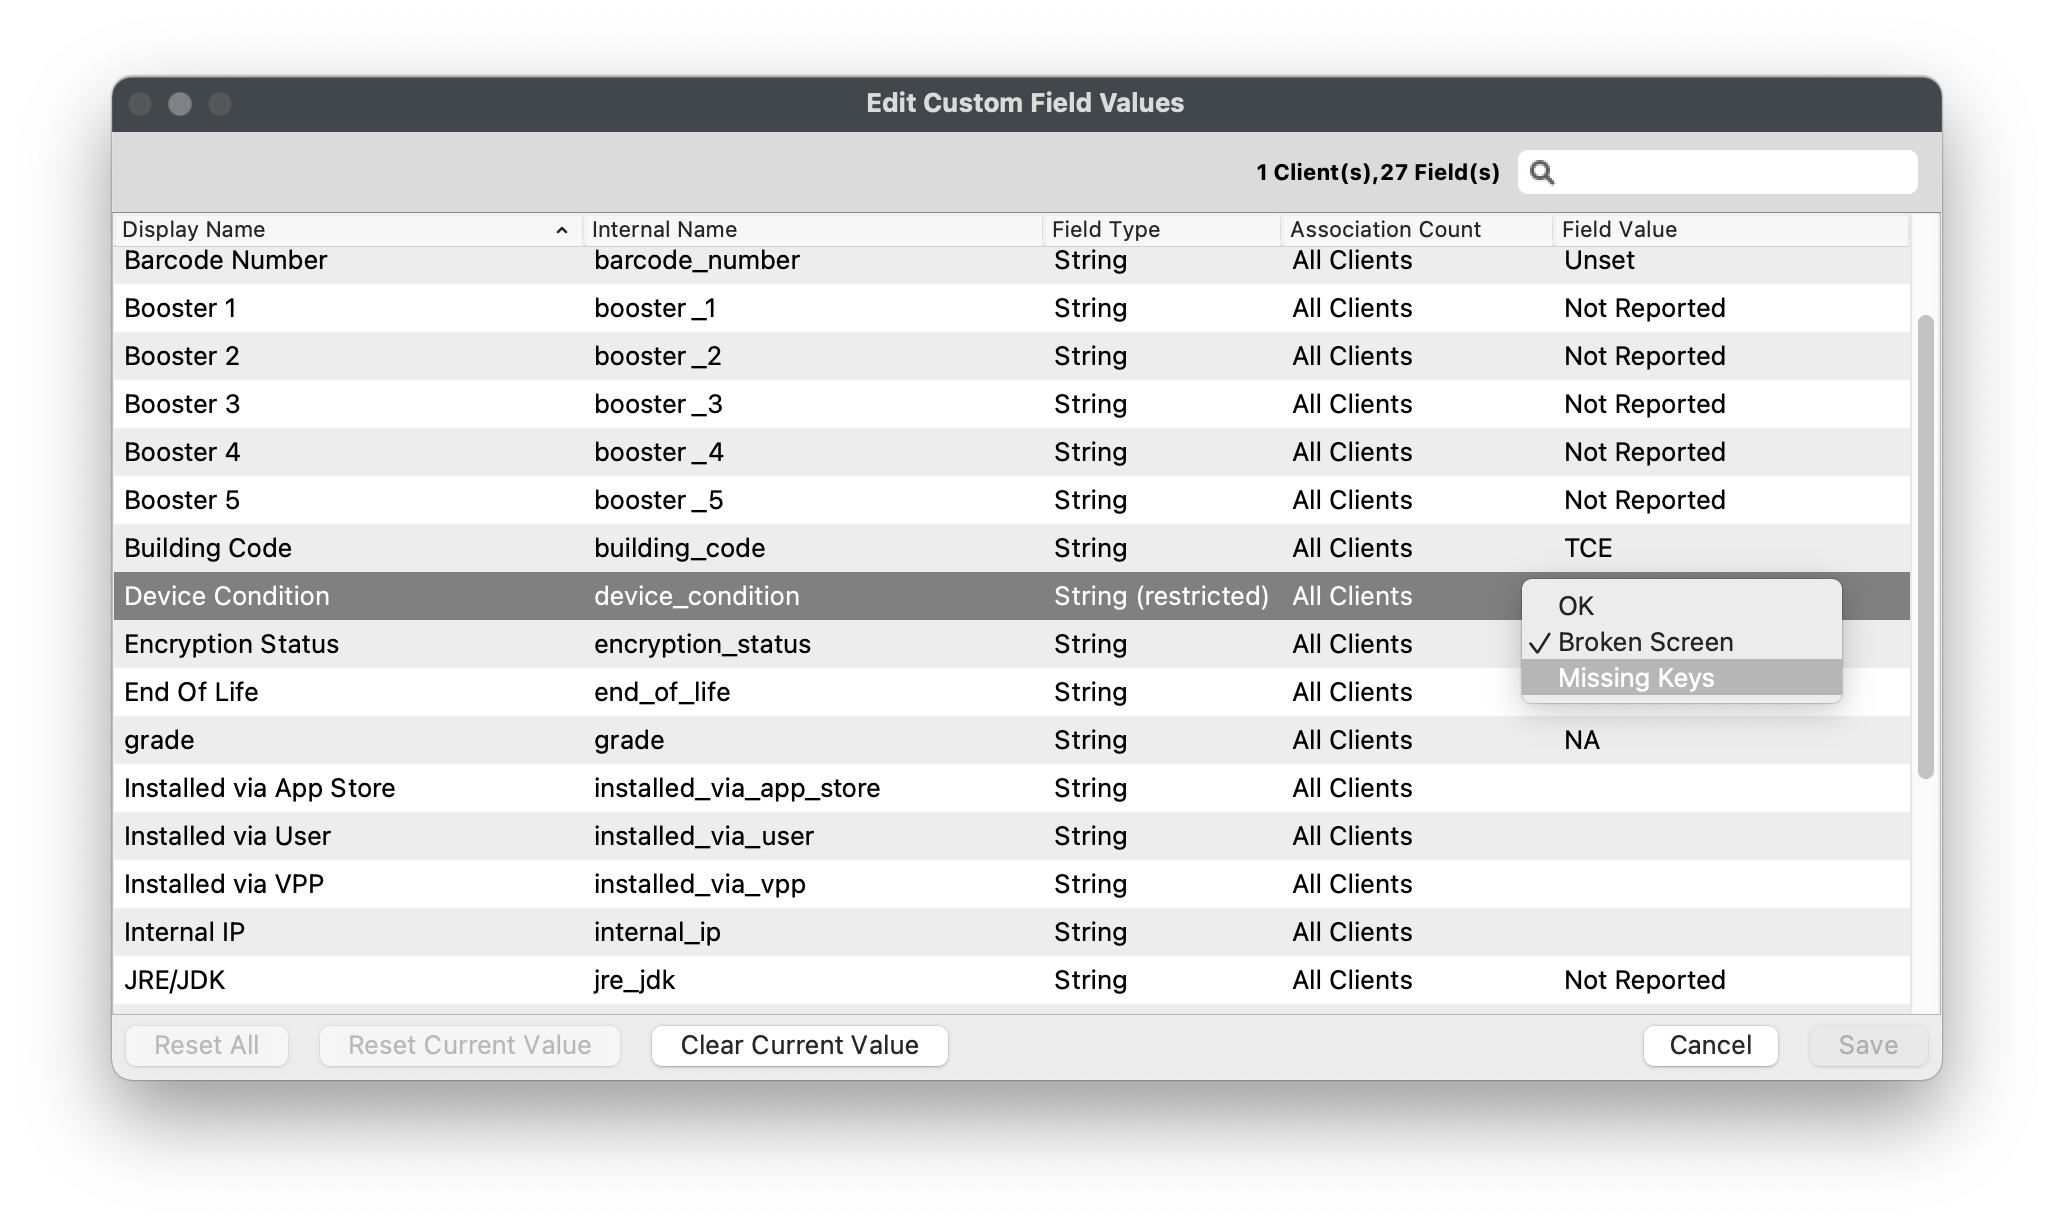
## **Import Custom Fields via CSV**
---
For bulk Custom Field updates or first-time imports, use a CSV template. One CSV file can import values for one or more Custom Fields.
1. 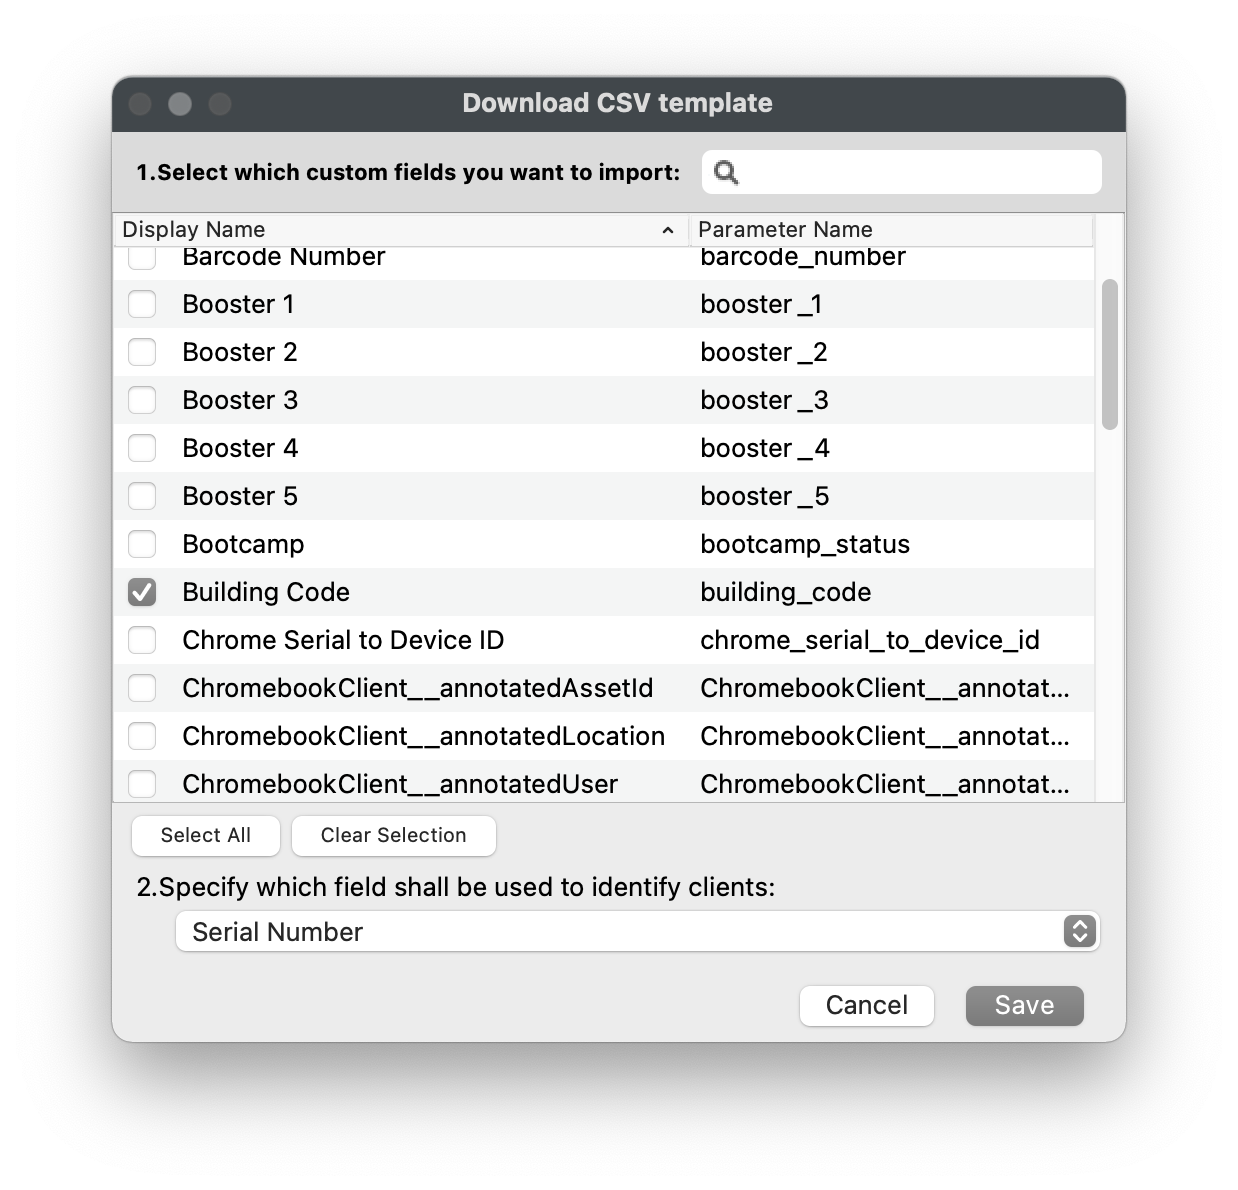Open FileWave Central and navigate to *"Assistants > Custom Fields > Import CSV".*
2. Click *"Download Template".*
3. Select all of the Custom Fields you'd like to import via CSV.
4. Select the unique identifier from the drop-down menu.
- *"Serial Number"* is recommended for iOS, macOS, and Chromebooks.
- *"Client Name"* is recommended for Windows as it will reflect the Windows hostname.
5. Click *"Save"* to download the CSV template.
6. Open the CSV template in your editor of choice (ex: Excel).
7. Leave the "header" line intact, remove the comments, and add your values.
- The CSV template will default to using semicolons ";" as the delimiter.
- You can change to a comma "," delimiter by replacing all ";" with ",".
- If using Excel, split each value into a column with no delimiter and *"Save as > CSV".*
8. Click *Browse* in the *Import custom fields CSV* window and select your CSV template.
9. Verify the changes and that all entries are visible.
10. Click *"Import"*.
11. You should now see the Custom Field modification in the device's *"Device Details"*.
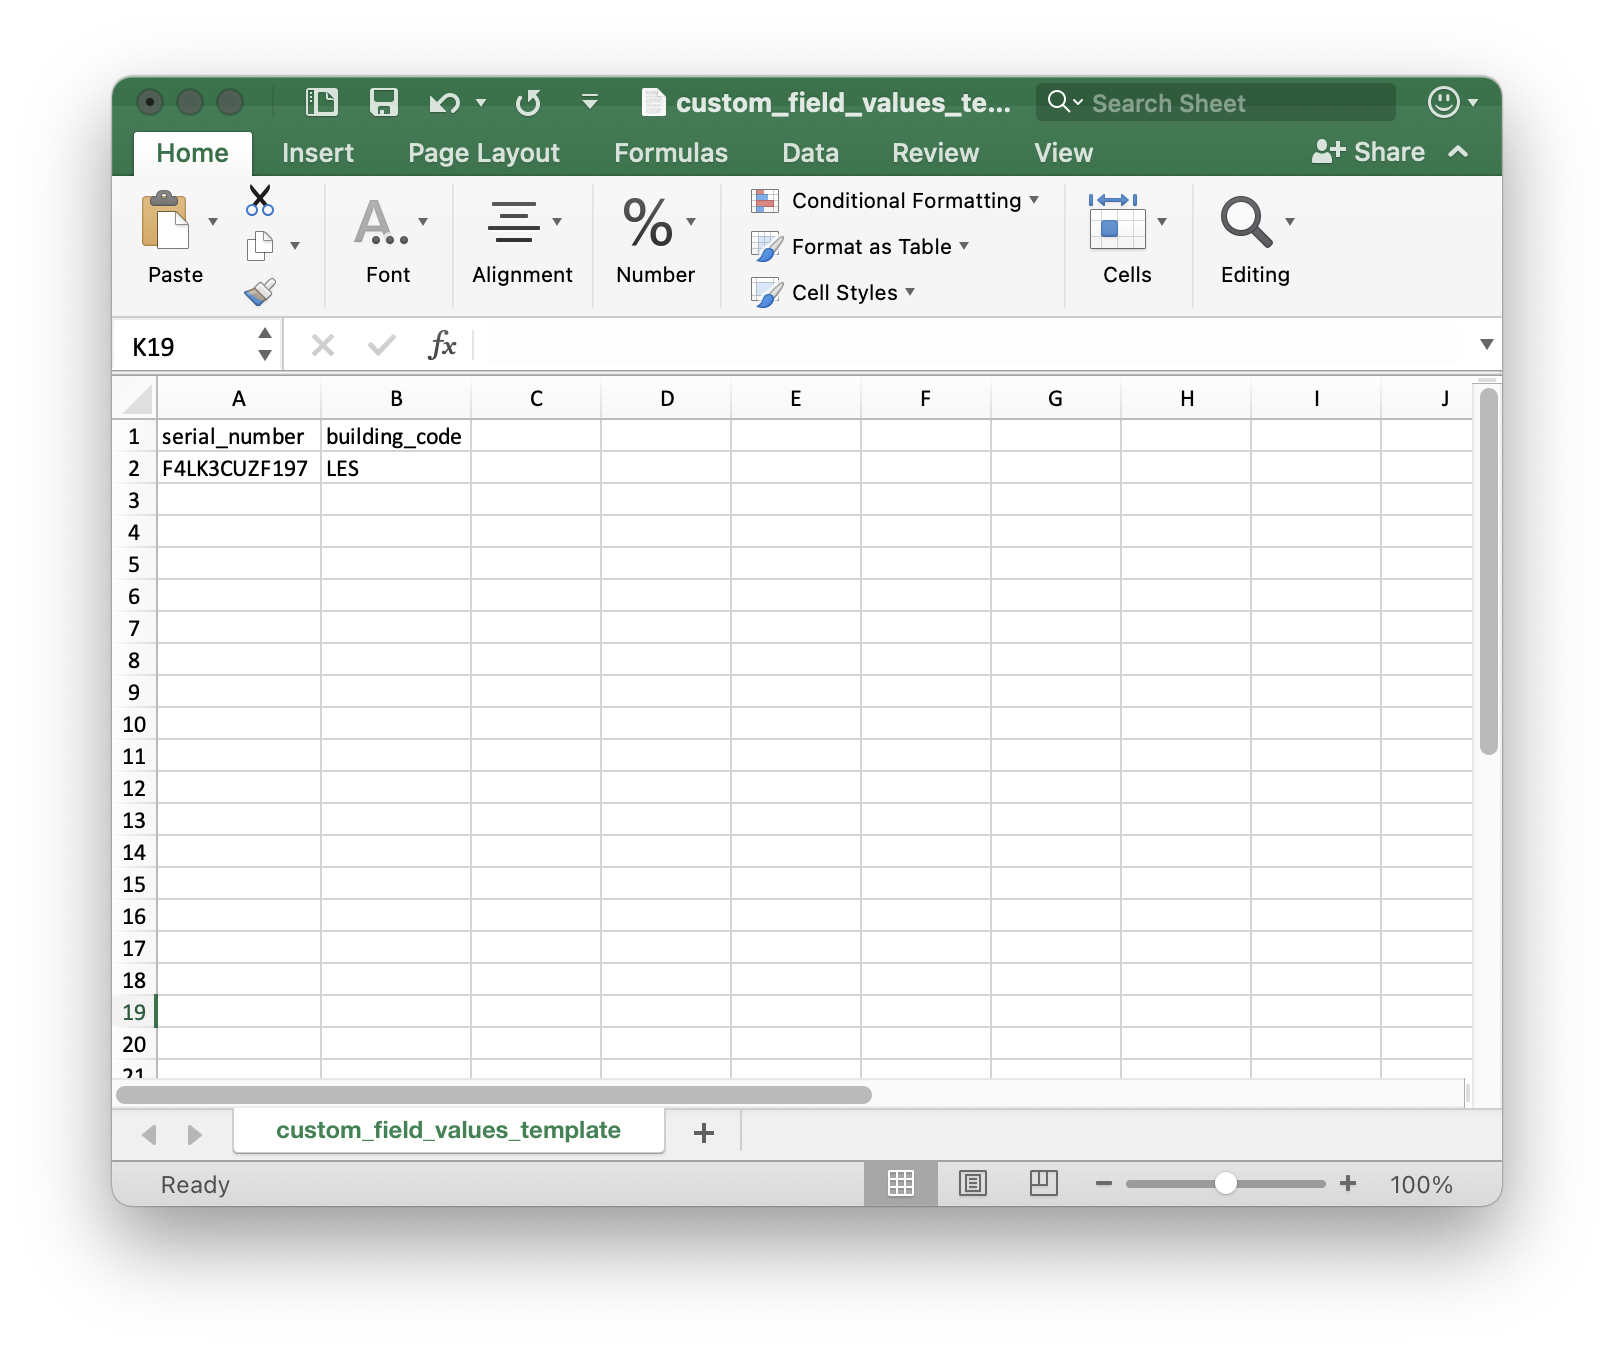
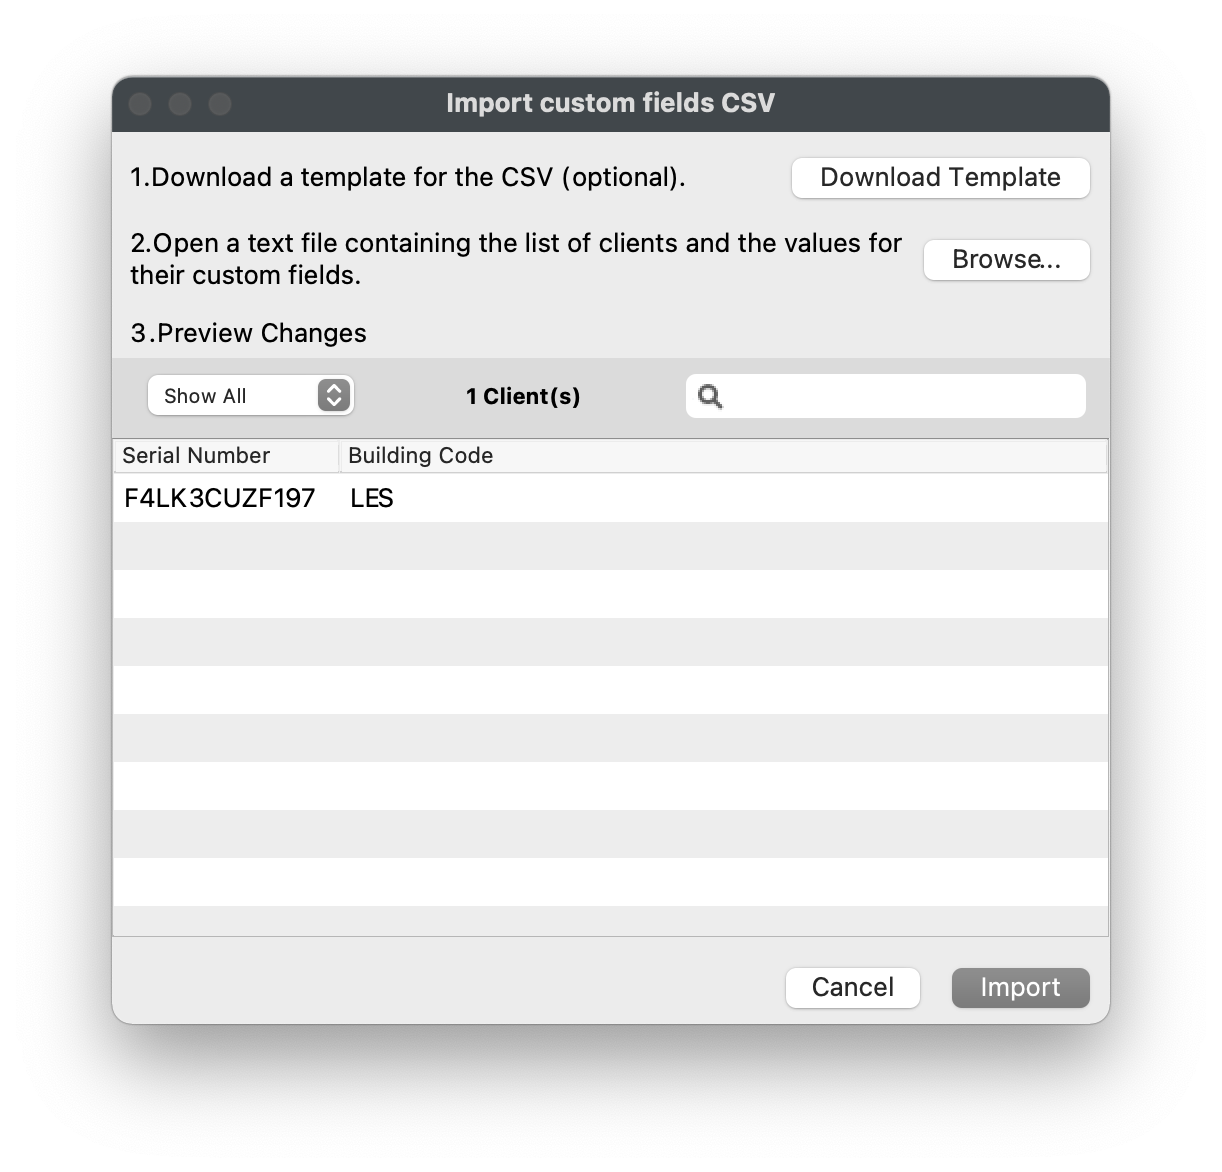
### **Troubleshooting**
If you are receiving an error such as:
`Error while processing CSV data: Error transferring https://yourserver.filewave.net:20445/inv/api/v1/custom_field/upload/?mode=dry-run - server replied: Bad Request: Unknown key field 'serial_number' in CSV`
It is likely that the file was saved in a Windows application like Excel or text editor and included a BOM (Byte Order Mark) at the very start of the file. You should be able to re-open your .csv in your favorite text editor and save a copy as plain UTF-8 instead of 'UTF-8 with BOM'.
# License Management
## **Compliance, Usage, and Tracking**
---
License Management helps you track how many software or font licenses you own, how many are in use, and where they are being consumed. FileWave can track Apple VPP licenses from Apple School Manager or Apple Business Manager, and it can track non-VPP application or font licenses by using Inventory criteria or an existing Fileset.
## **VPP License Tracking**
---
FileWave syncs with VPP every 5 minutes to bring in the latest purchases from Apple School Manager or Apple Business Manager. The License Management view shows owned licenses, licenses in use, license compliance, and the VPP token that supplied the licenses.
### **Setting a Compliance Warning**
FileWave can notify you by email when a VPP license quantity is running low by using [Scheduled Reports](https://kb.filewave.com/books/filewave-central-anywhere/page/generating-scheduled-reports "Generating scheduled reports"). Use the license warning threshold to decide when that status should appear.
1. Open FileWave Central and navigate to *"License Management"*.
2. Select a VPP License.
3. Click *"Edit License"* from the black menu bar.
4. Change the *"Warning when:"* field to set your License Warning threshold.
5. Click *"Save"*.
6. If the available license count falls below your threshold, FileWave shows the License Compliance status *"Warning License Watermark"*.
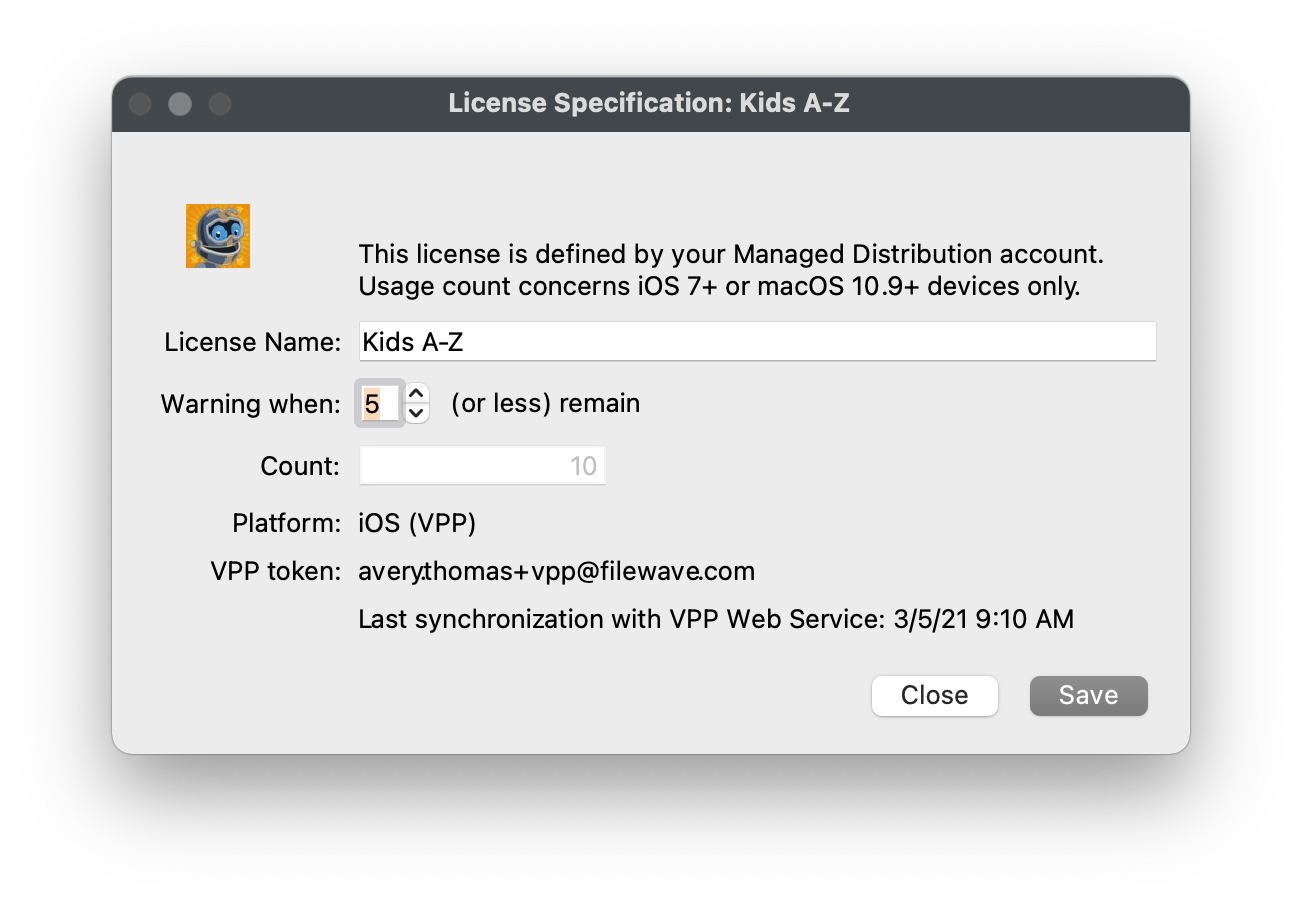
### **Viewing where licenses are consumed**
Use the license detail view to see where VPP licenses are being consumed. A license is consumed when a VPP Fileset is deployed to a device through a Kiosk or Standard association. VPP "Managed Distribution" licenses can be revoked and redistributed. This view shows the device serial number for VPP "Device Assignment" or the end user's VPP User account for VPP "User Assignment".
1. Open FileWave Central and navigate to *"License Management"*.
2. Double-click a VPP License.
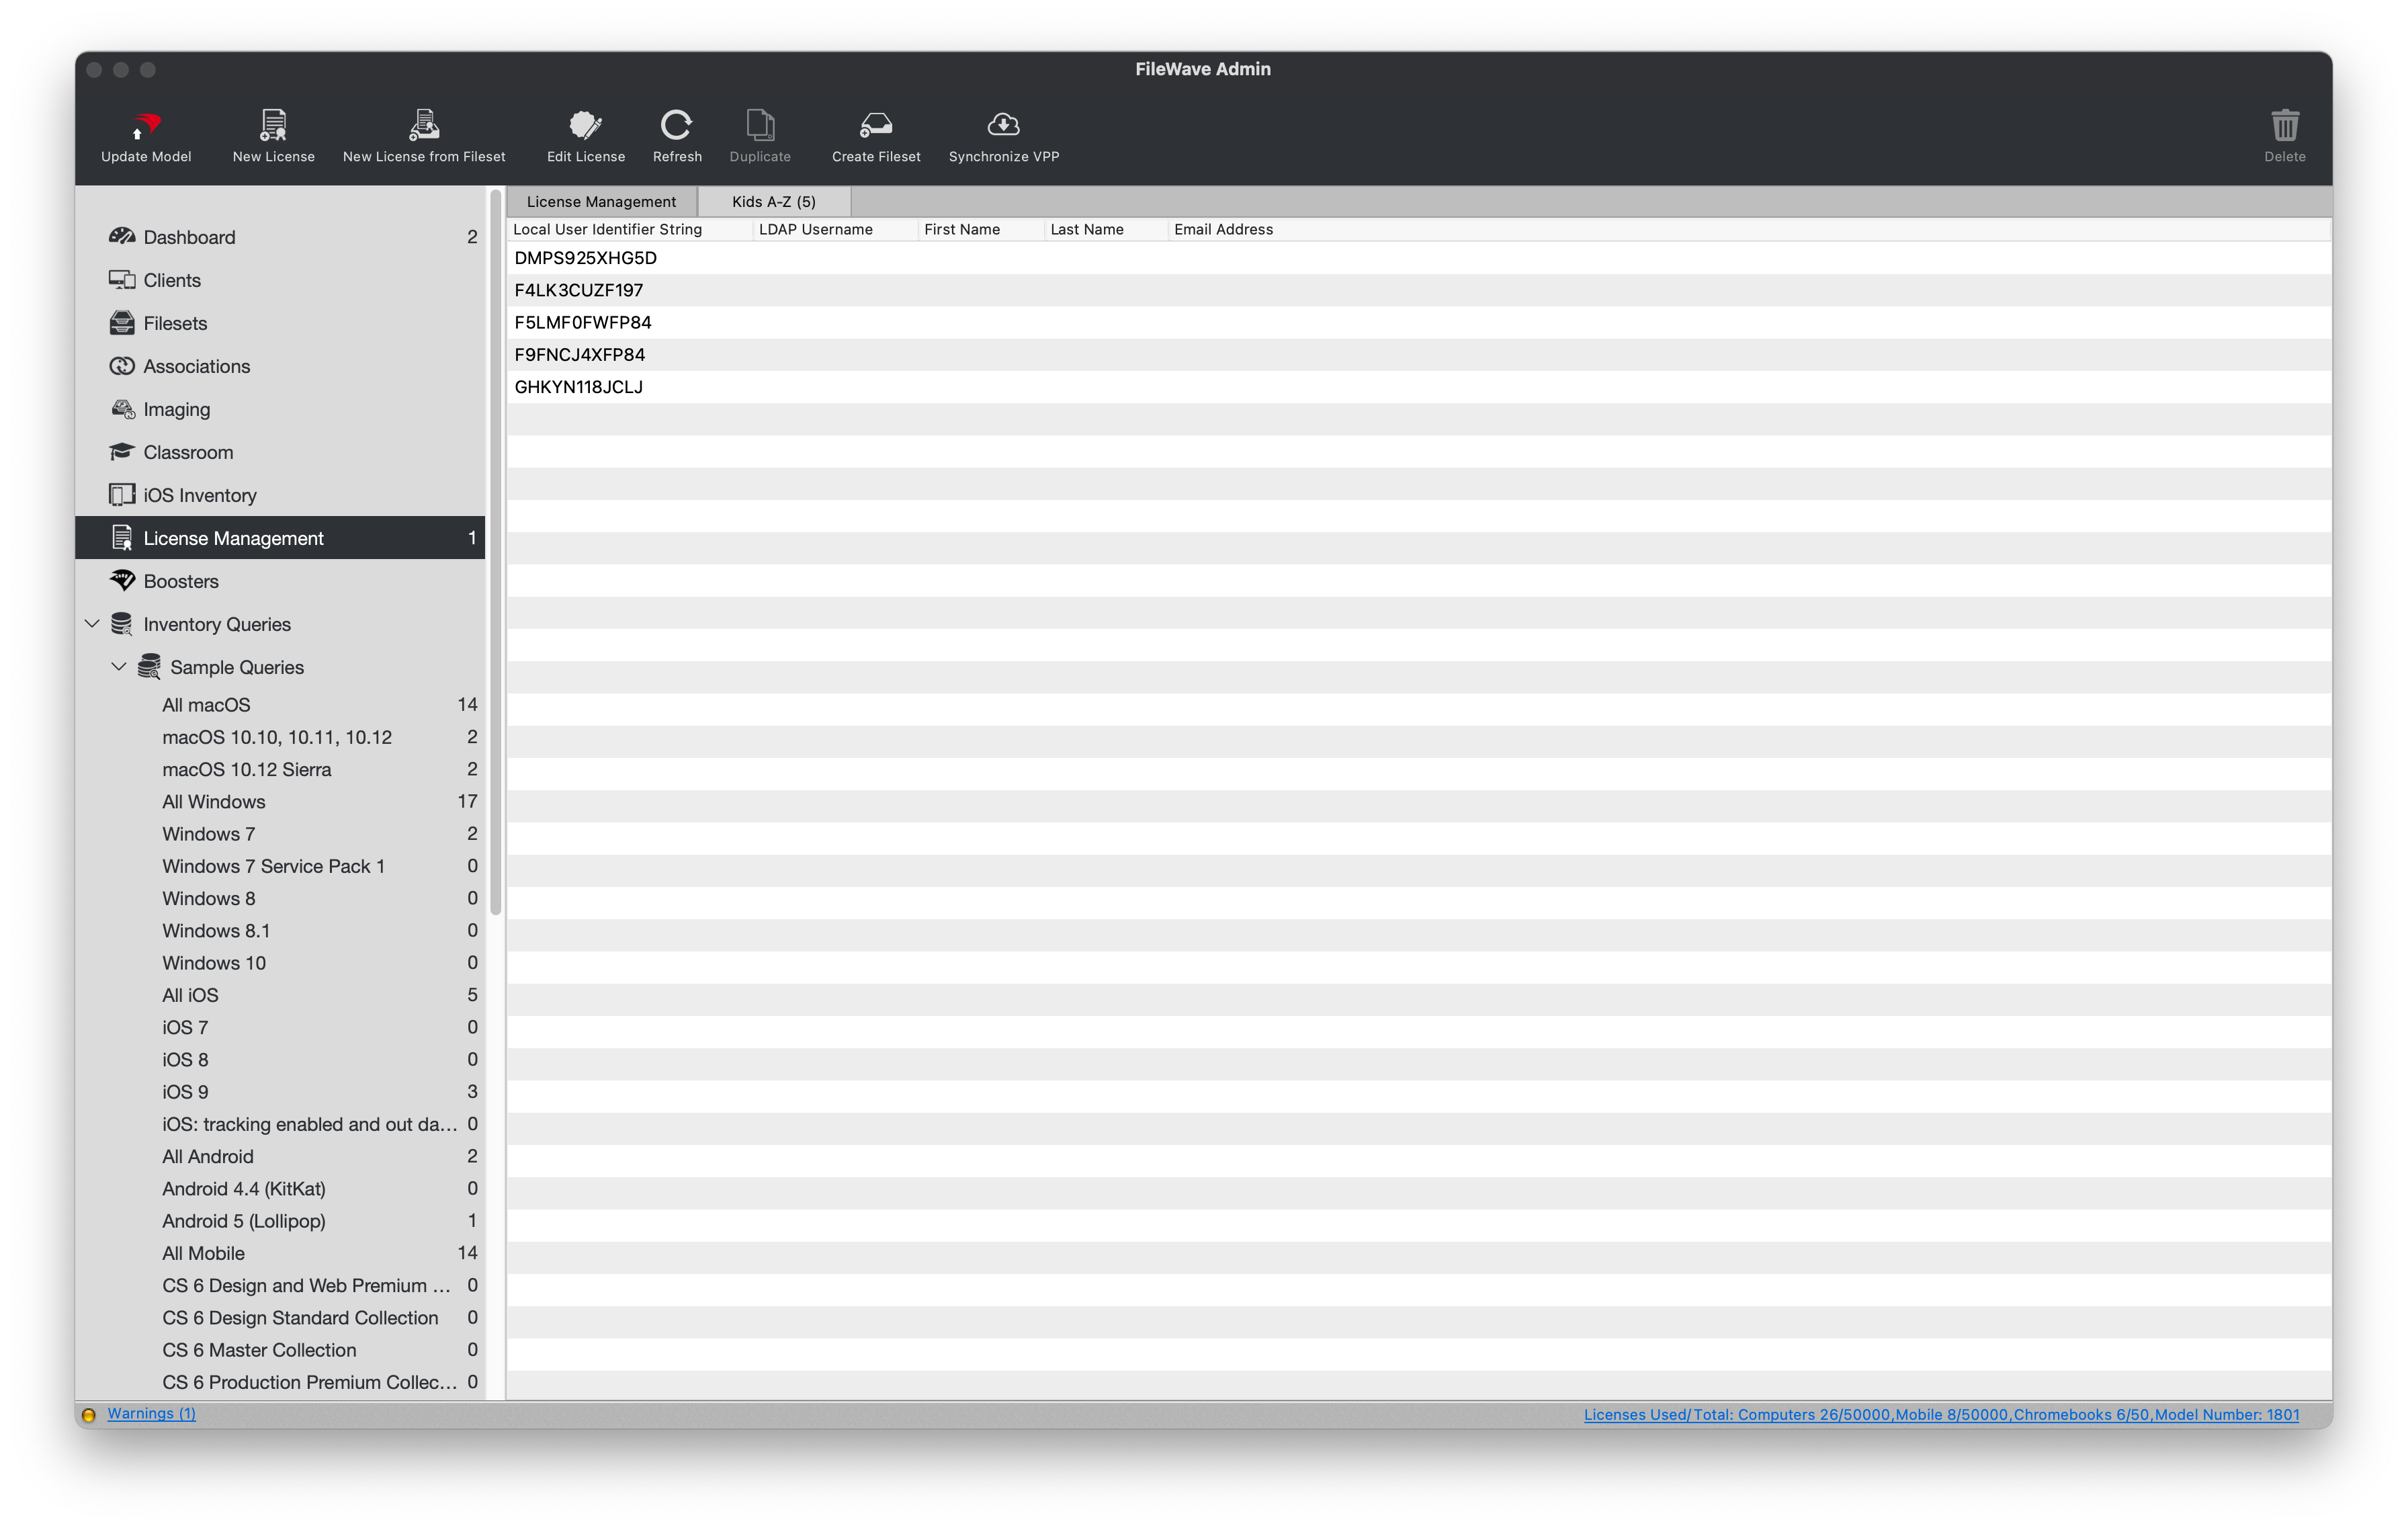
## **Non-VPP License Tracking**
---
FileWave can also track license information for applications or fonts deployed to Windows, macOS, Android, and ChromeOS. You can define a new license from Inventory criteria or track deployments from an existing Fileset. You can also email license reports to selected recipients with [Scheduled Reports](https://kb.filewave.com/books/filewave-central-anywhere/page/generating-scheduled-reports "Generating scheduled reports").
### **Creating a new License definition**
Use this method for applications or fonts that were not deployed by FileWave.
1. Open FileWave Central and navigate to *"License Management"*.
2. Click *"New License"* from the black menu bar.
3. Name the License, select Application or Font, choose the Warning threshold, and select the platforms you want to track.
4. Click the "\[+\]" to add new criteria to define the license.
1. The criteria are in the context of either Application or Font.
5. Enter the *"Qualifier"* (for example, Firefox).
6. Click the *"Purchase Orders"* button.
7. Click the "\[+\]" to add a new Purchase Order entry.
8. Enter a *"PO Number"* and *"License Count".*
9. Optionally, fill out the rest of the Purchase Order fields.
10. Click *"Save"*.
11. You should now see your new License definition.
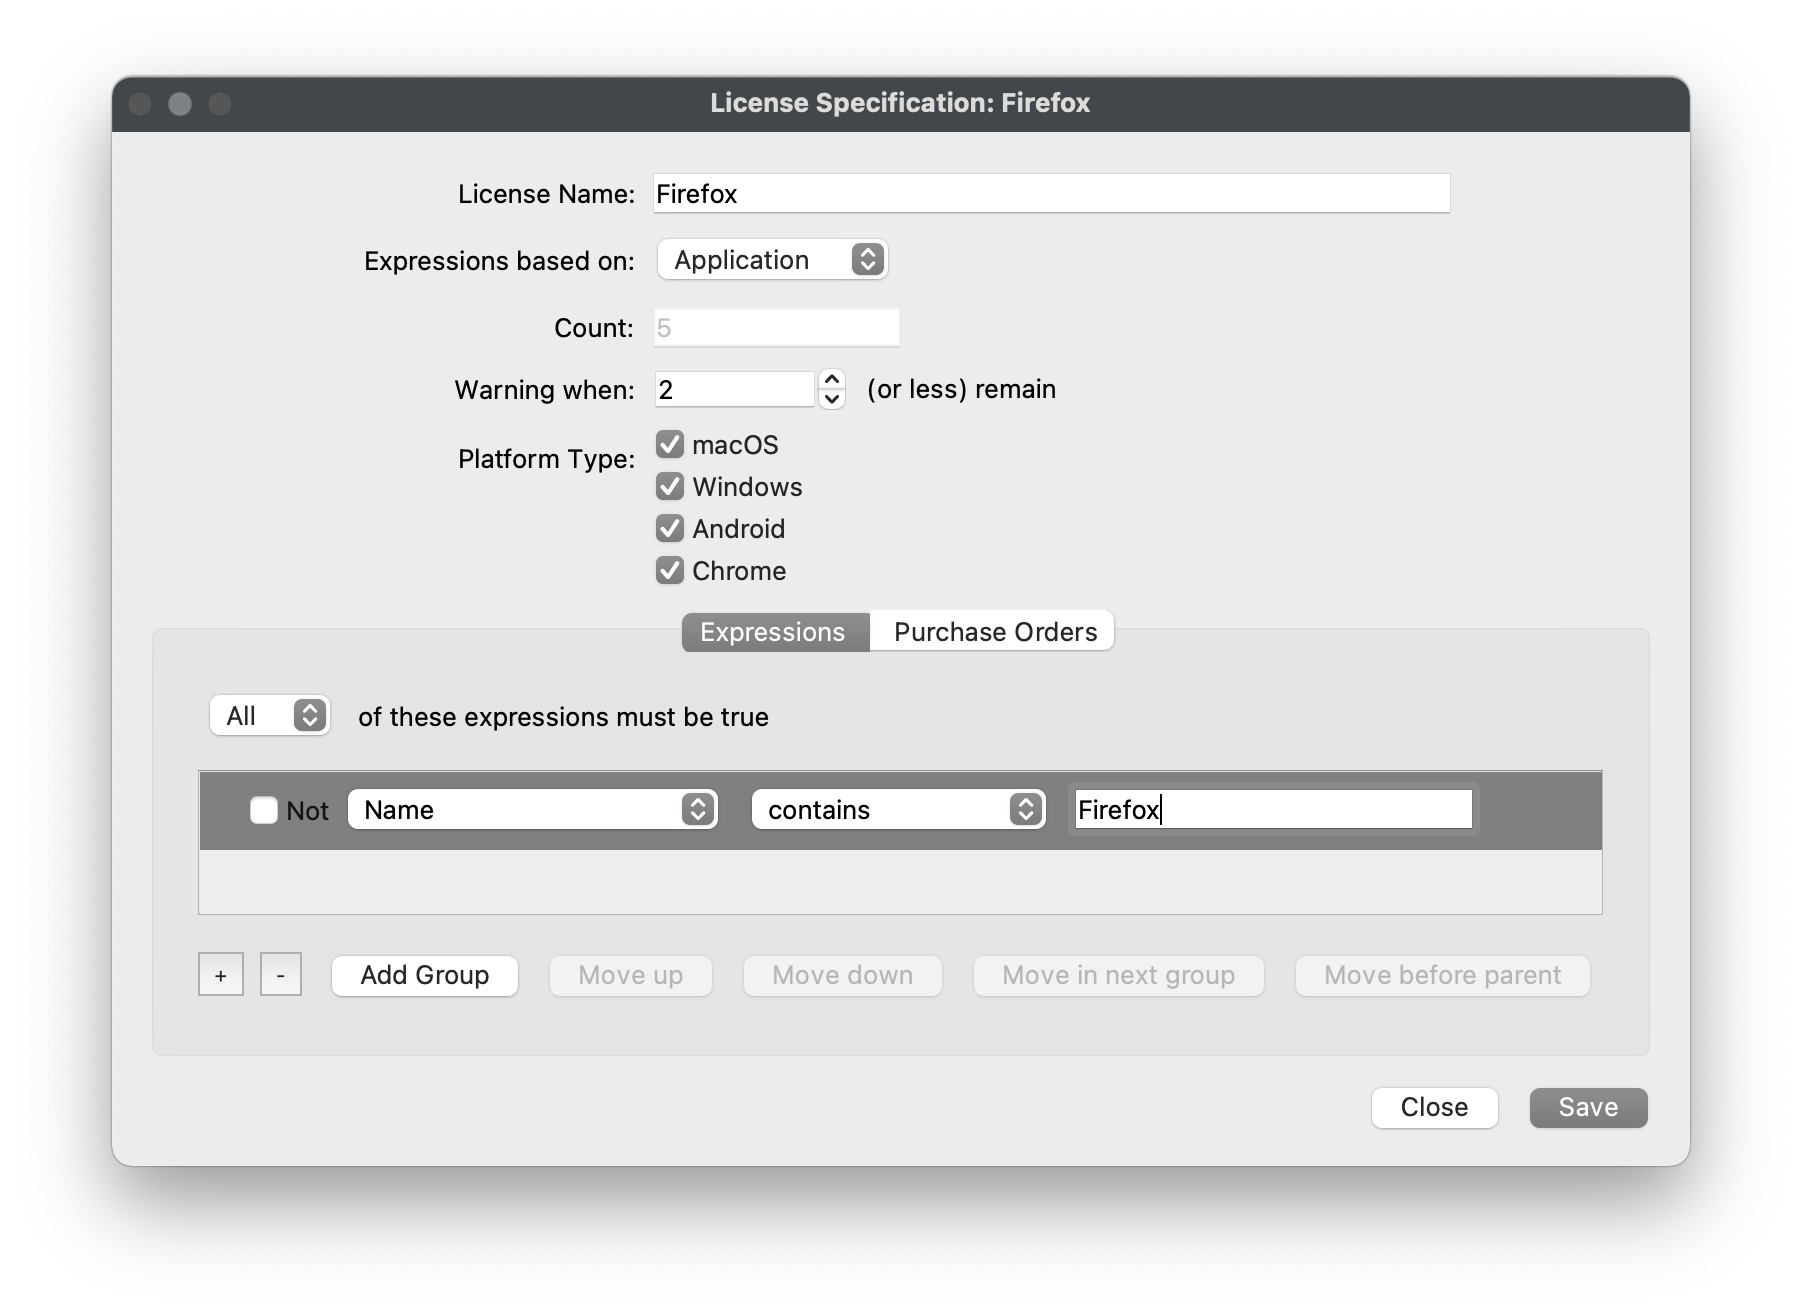
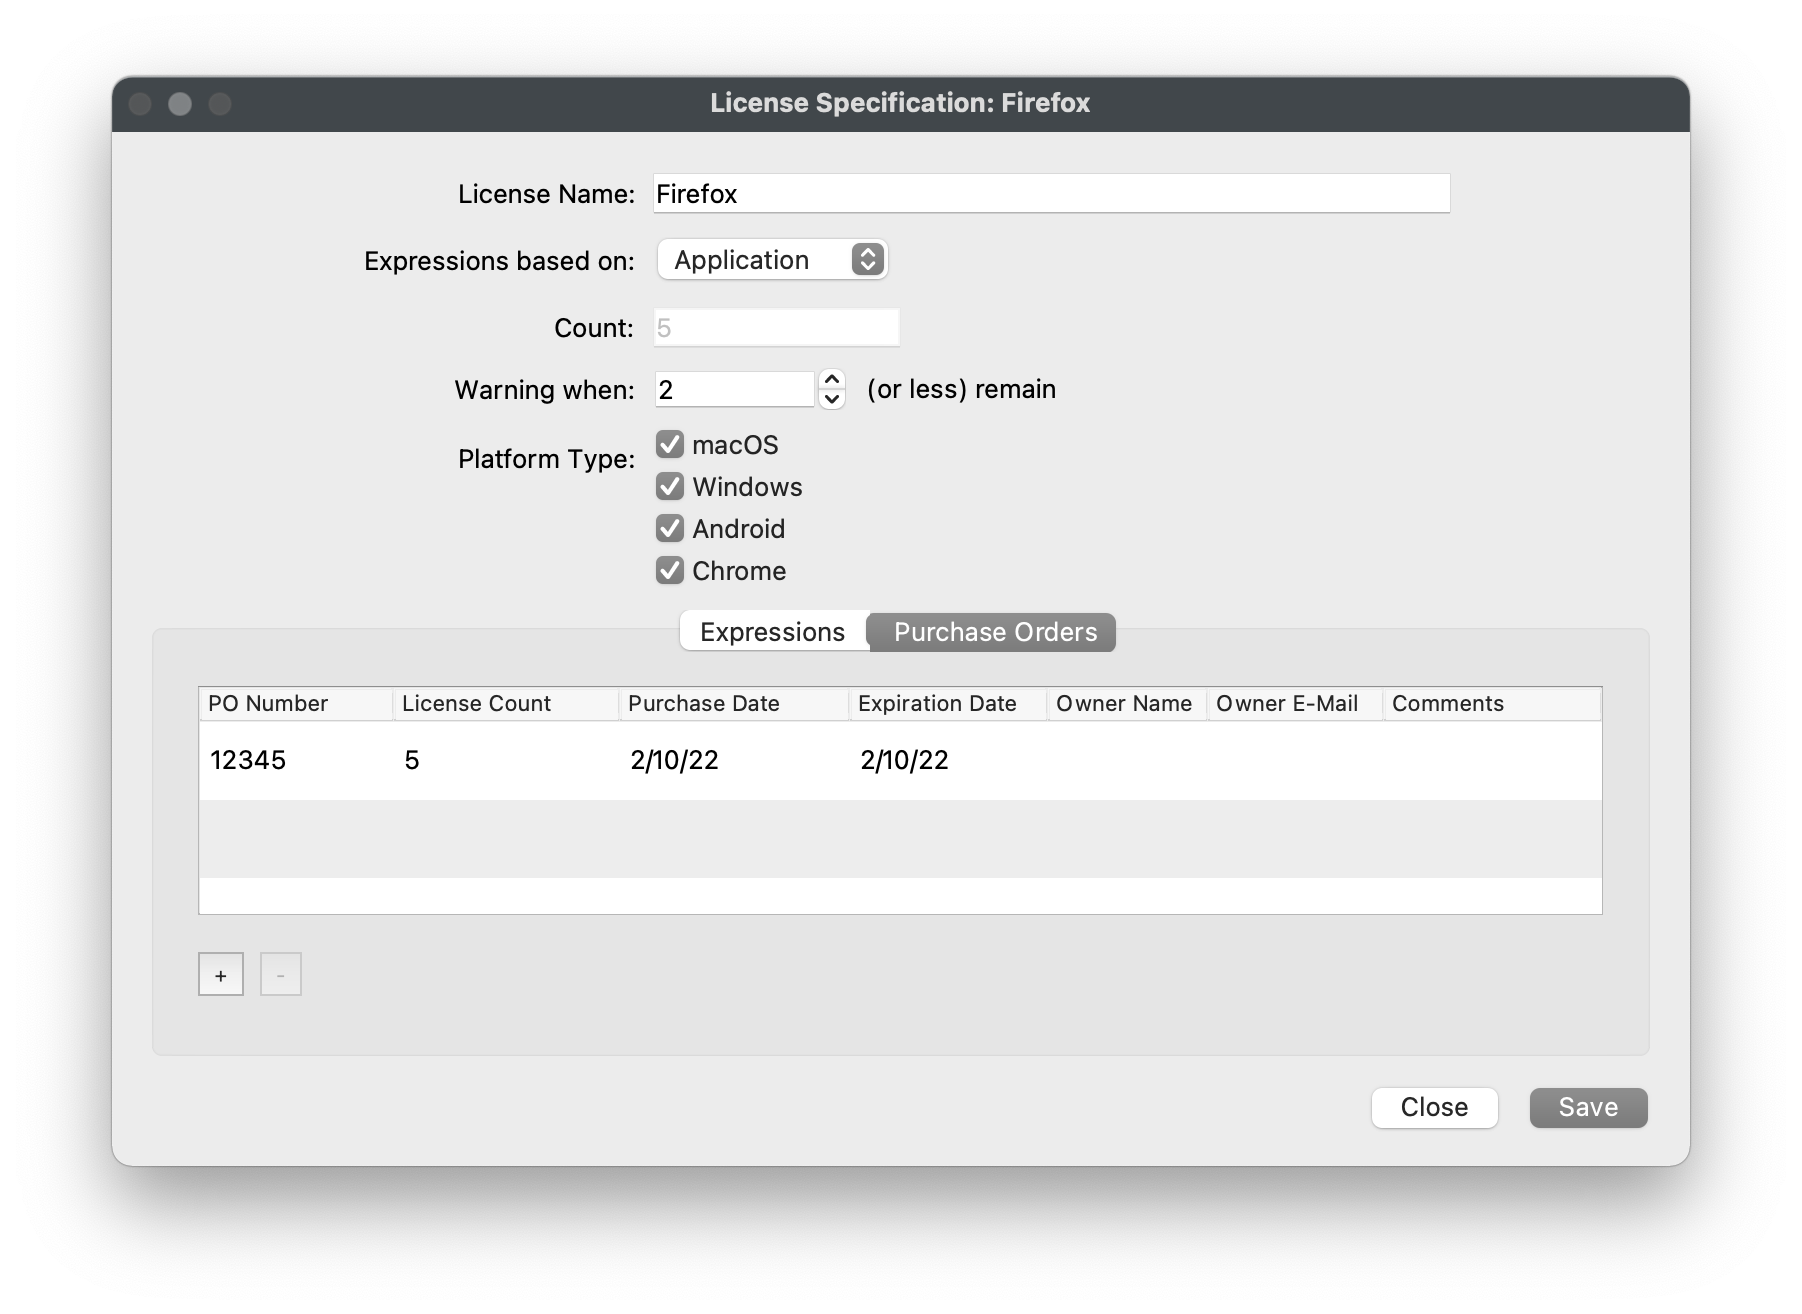
### **Track Fileset Usage**
This method uses FileWave's *"Fileset Status"* to track deployments made through FileWave.
1. Open FileWave Central and navigate to *"License Management"*.
2. Click *"New License from Fileset"* from the black menu bar.
3. Name the License, choose the Warning threshold, and select the Fileset you want to track.
4. Click the "\[+\]" to add a new Purchase Order entry.
5. Enter a *"PO Number"* and *"License Count".*
6. Optionally, fill out the rest of the Purchase Order fields.
7. Click *"Save"*.
8. You should now see your new License definition.
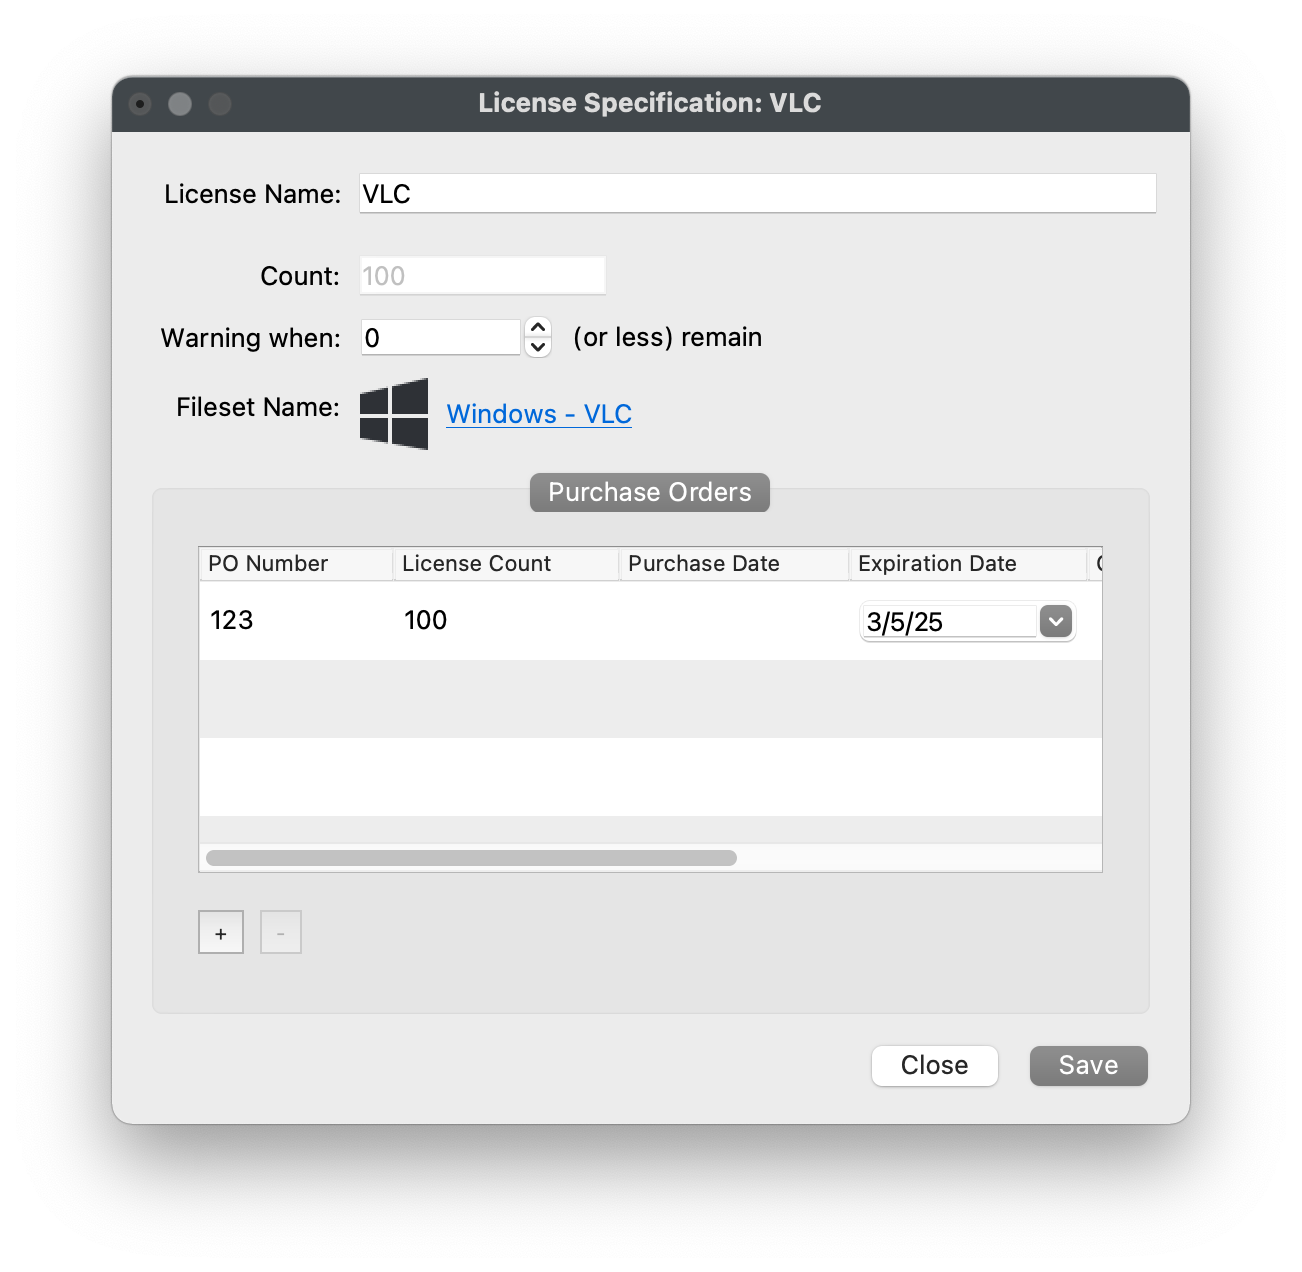
### **Viewing where licenses are consumed**
1. Open FileWave Central and navigate to *"License Management"*.
2. Double-click a License.
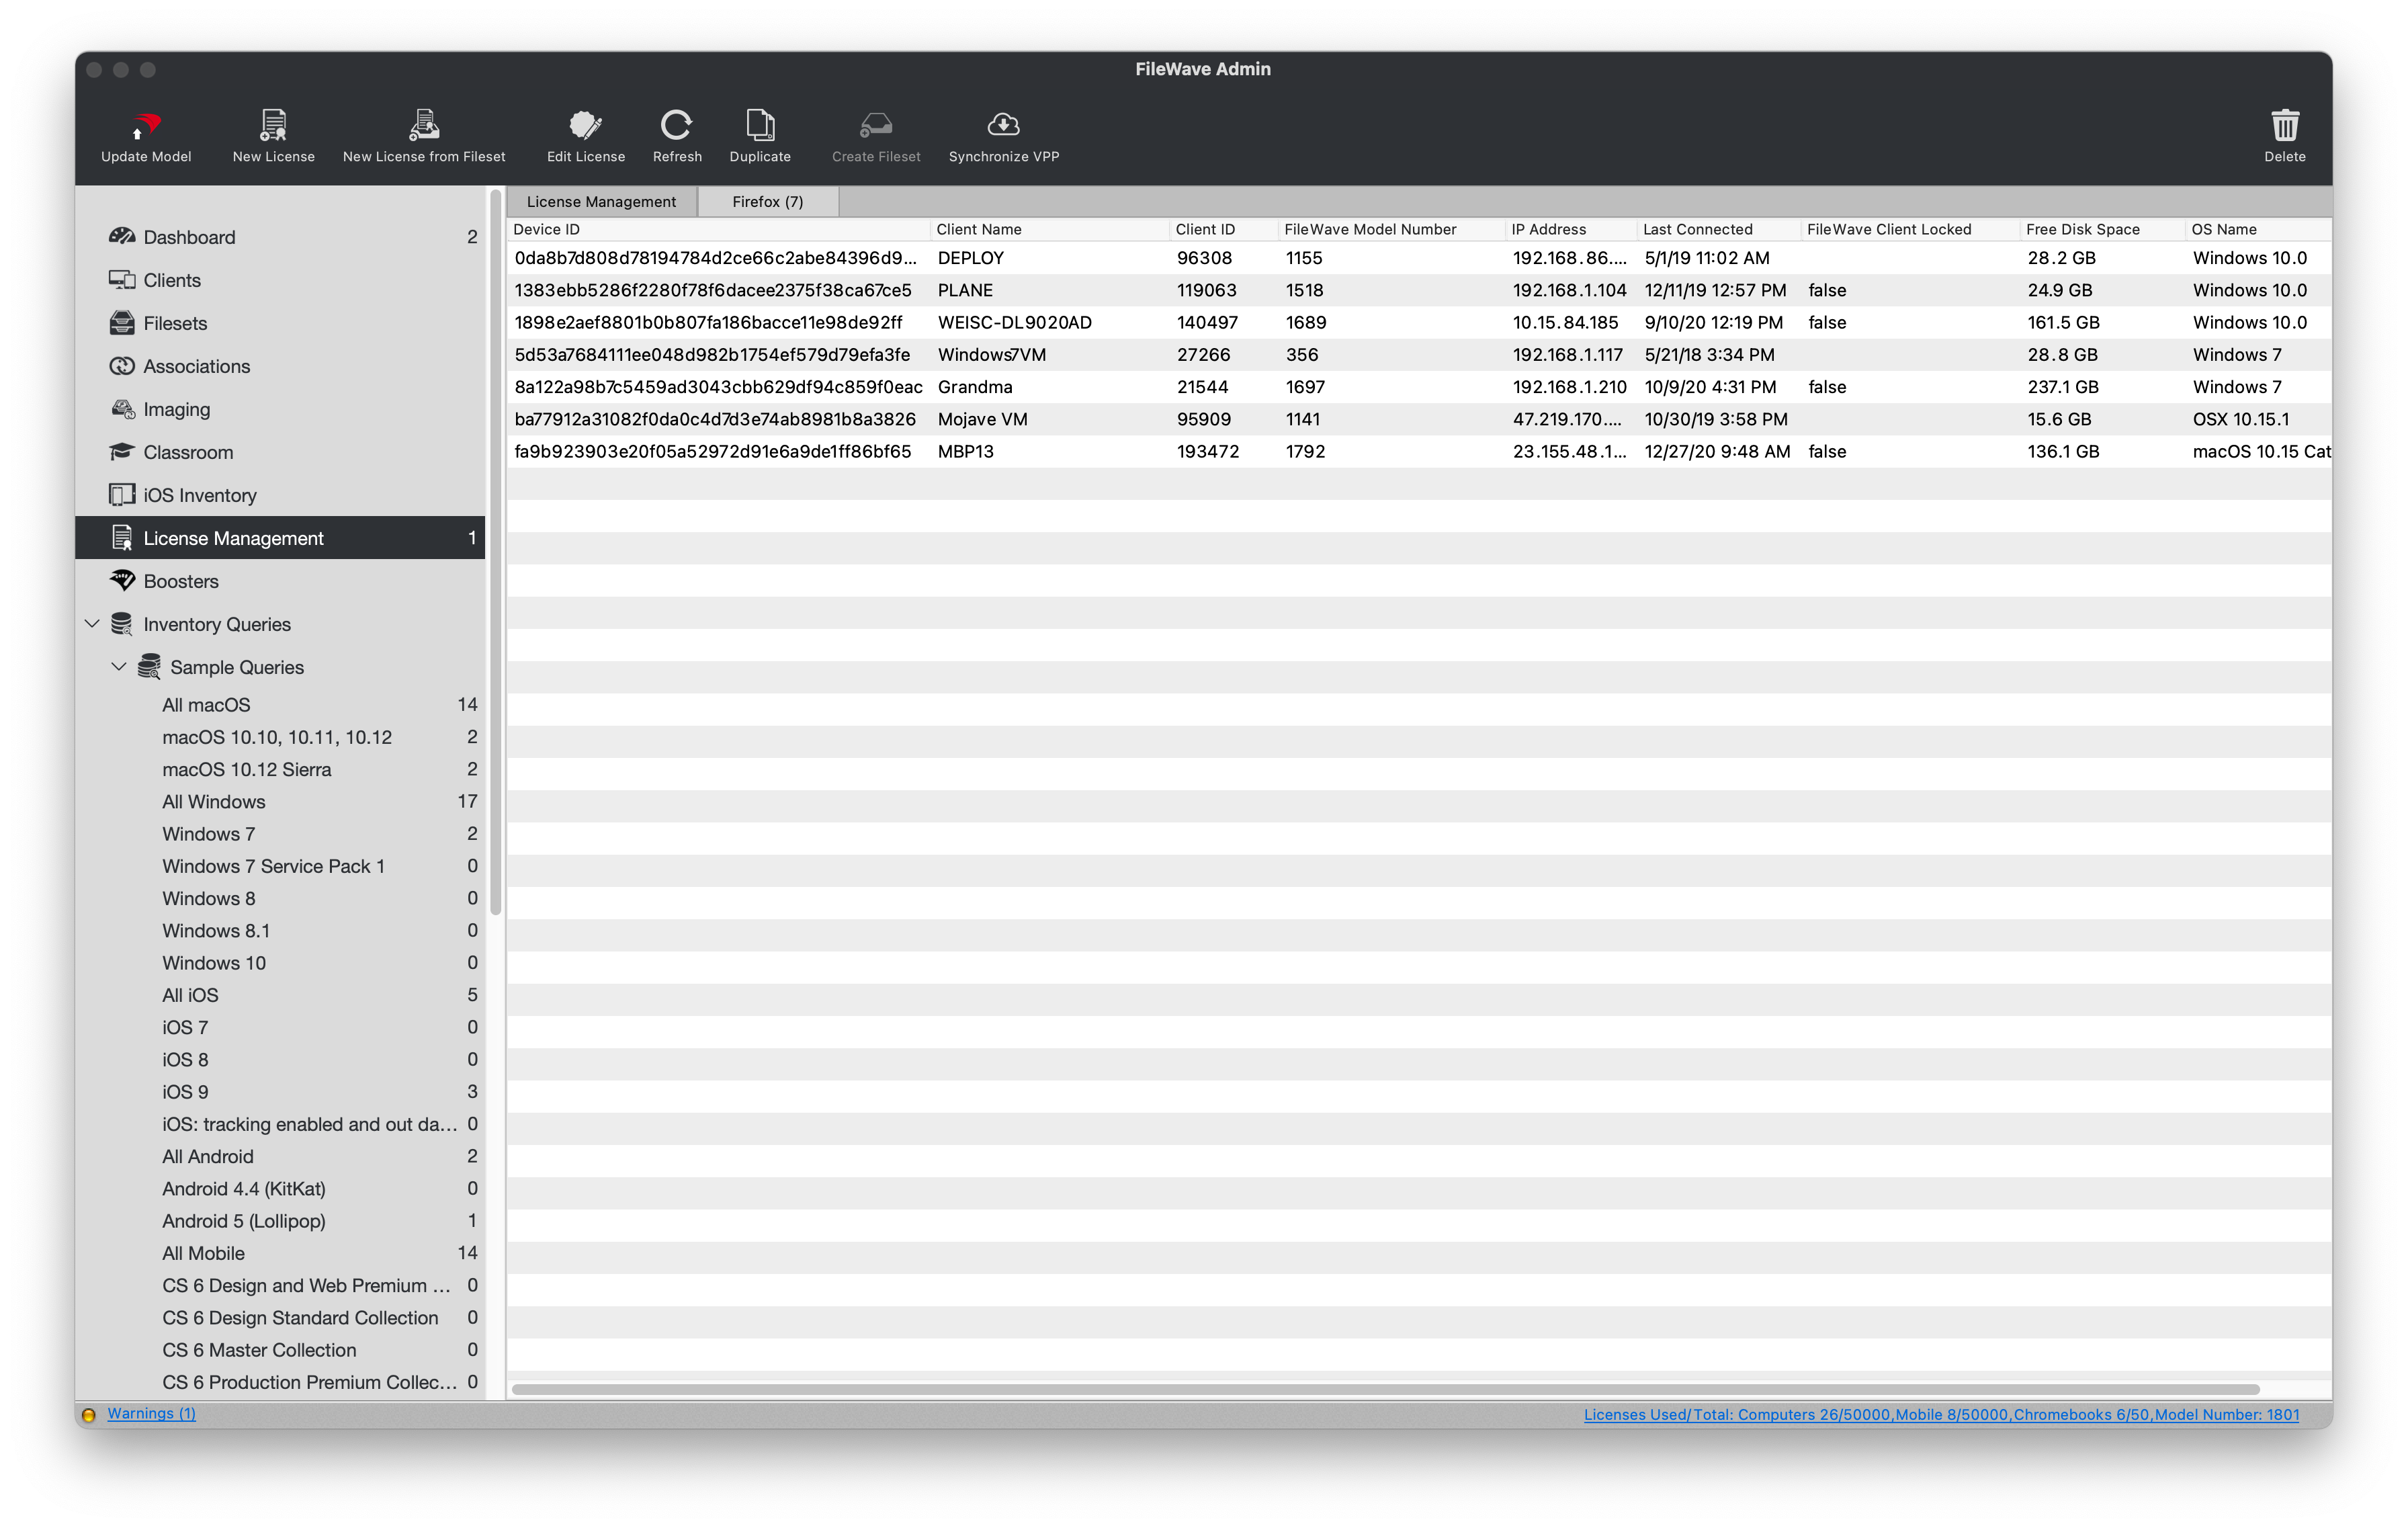
# Inventory Reports
## **Your information. Your way.**
---
Inventory Reports help you choose exactly which device data to return, then save that view for refresh planning, Smart Groups, troubleshooting, or scheduled email delivery.
**Quick answer:** In current FileWave versions, this feature is **Reports**. Older Central screens and screenshots may still say **Queries** or **QueryBuilder**; those labels refer to the same saved inventory report workflow.
## **Create an Inventory Report (formerly Query)**
---
Creating an Inventory Report is the first step toward tracking device data, scheduling emailed reports, or using report criteria to build a Smart Group. The examples below show one report for devices with less than 8 GB of RAM and another report for iOS and Chrome devices with a specific Building Code custom field.
### **New Report**
1. Open FileWave Central and go to *"Reports"*.
2. Click *"New Report"* from the menu bar.
3. Name the report and begin dragging inventory data points into the *"Criteria"* pane.
### **Less than 8GB of RAM**
1. Drag *"All Devices > Client Name"* into the *"Criteria"* pane.
2. Set *"All Devices > Client Name"* qualifier to *"is not null"*.
- This starts broad so the report includes all devices before the next filters narrow the results.
3. Drag *"All Devices > RAM Size"* into the *"Criteria"* pane.
4. Set *"All Devices > RAM Size"* qualifier to *"is less than"* : *"8.00 gigabytes"*.
5. Click the *"Fields"* tab.
6. Add the fields you want the Inventory Report to return.
- Client Name
- RAM Size
- IP Address
- Device Manufacture
- Device Product Name
- OS Name
- Total Disk Space
- CPU Type / Speed / Count
7. Click *"Save".*
8. You should now see your new Inventory Report.
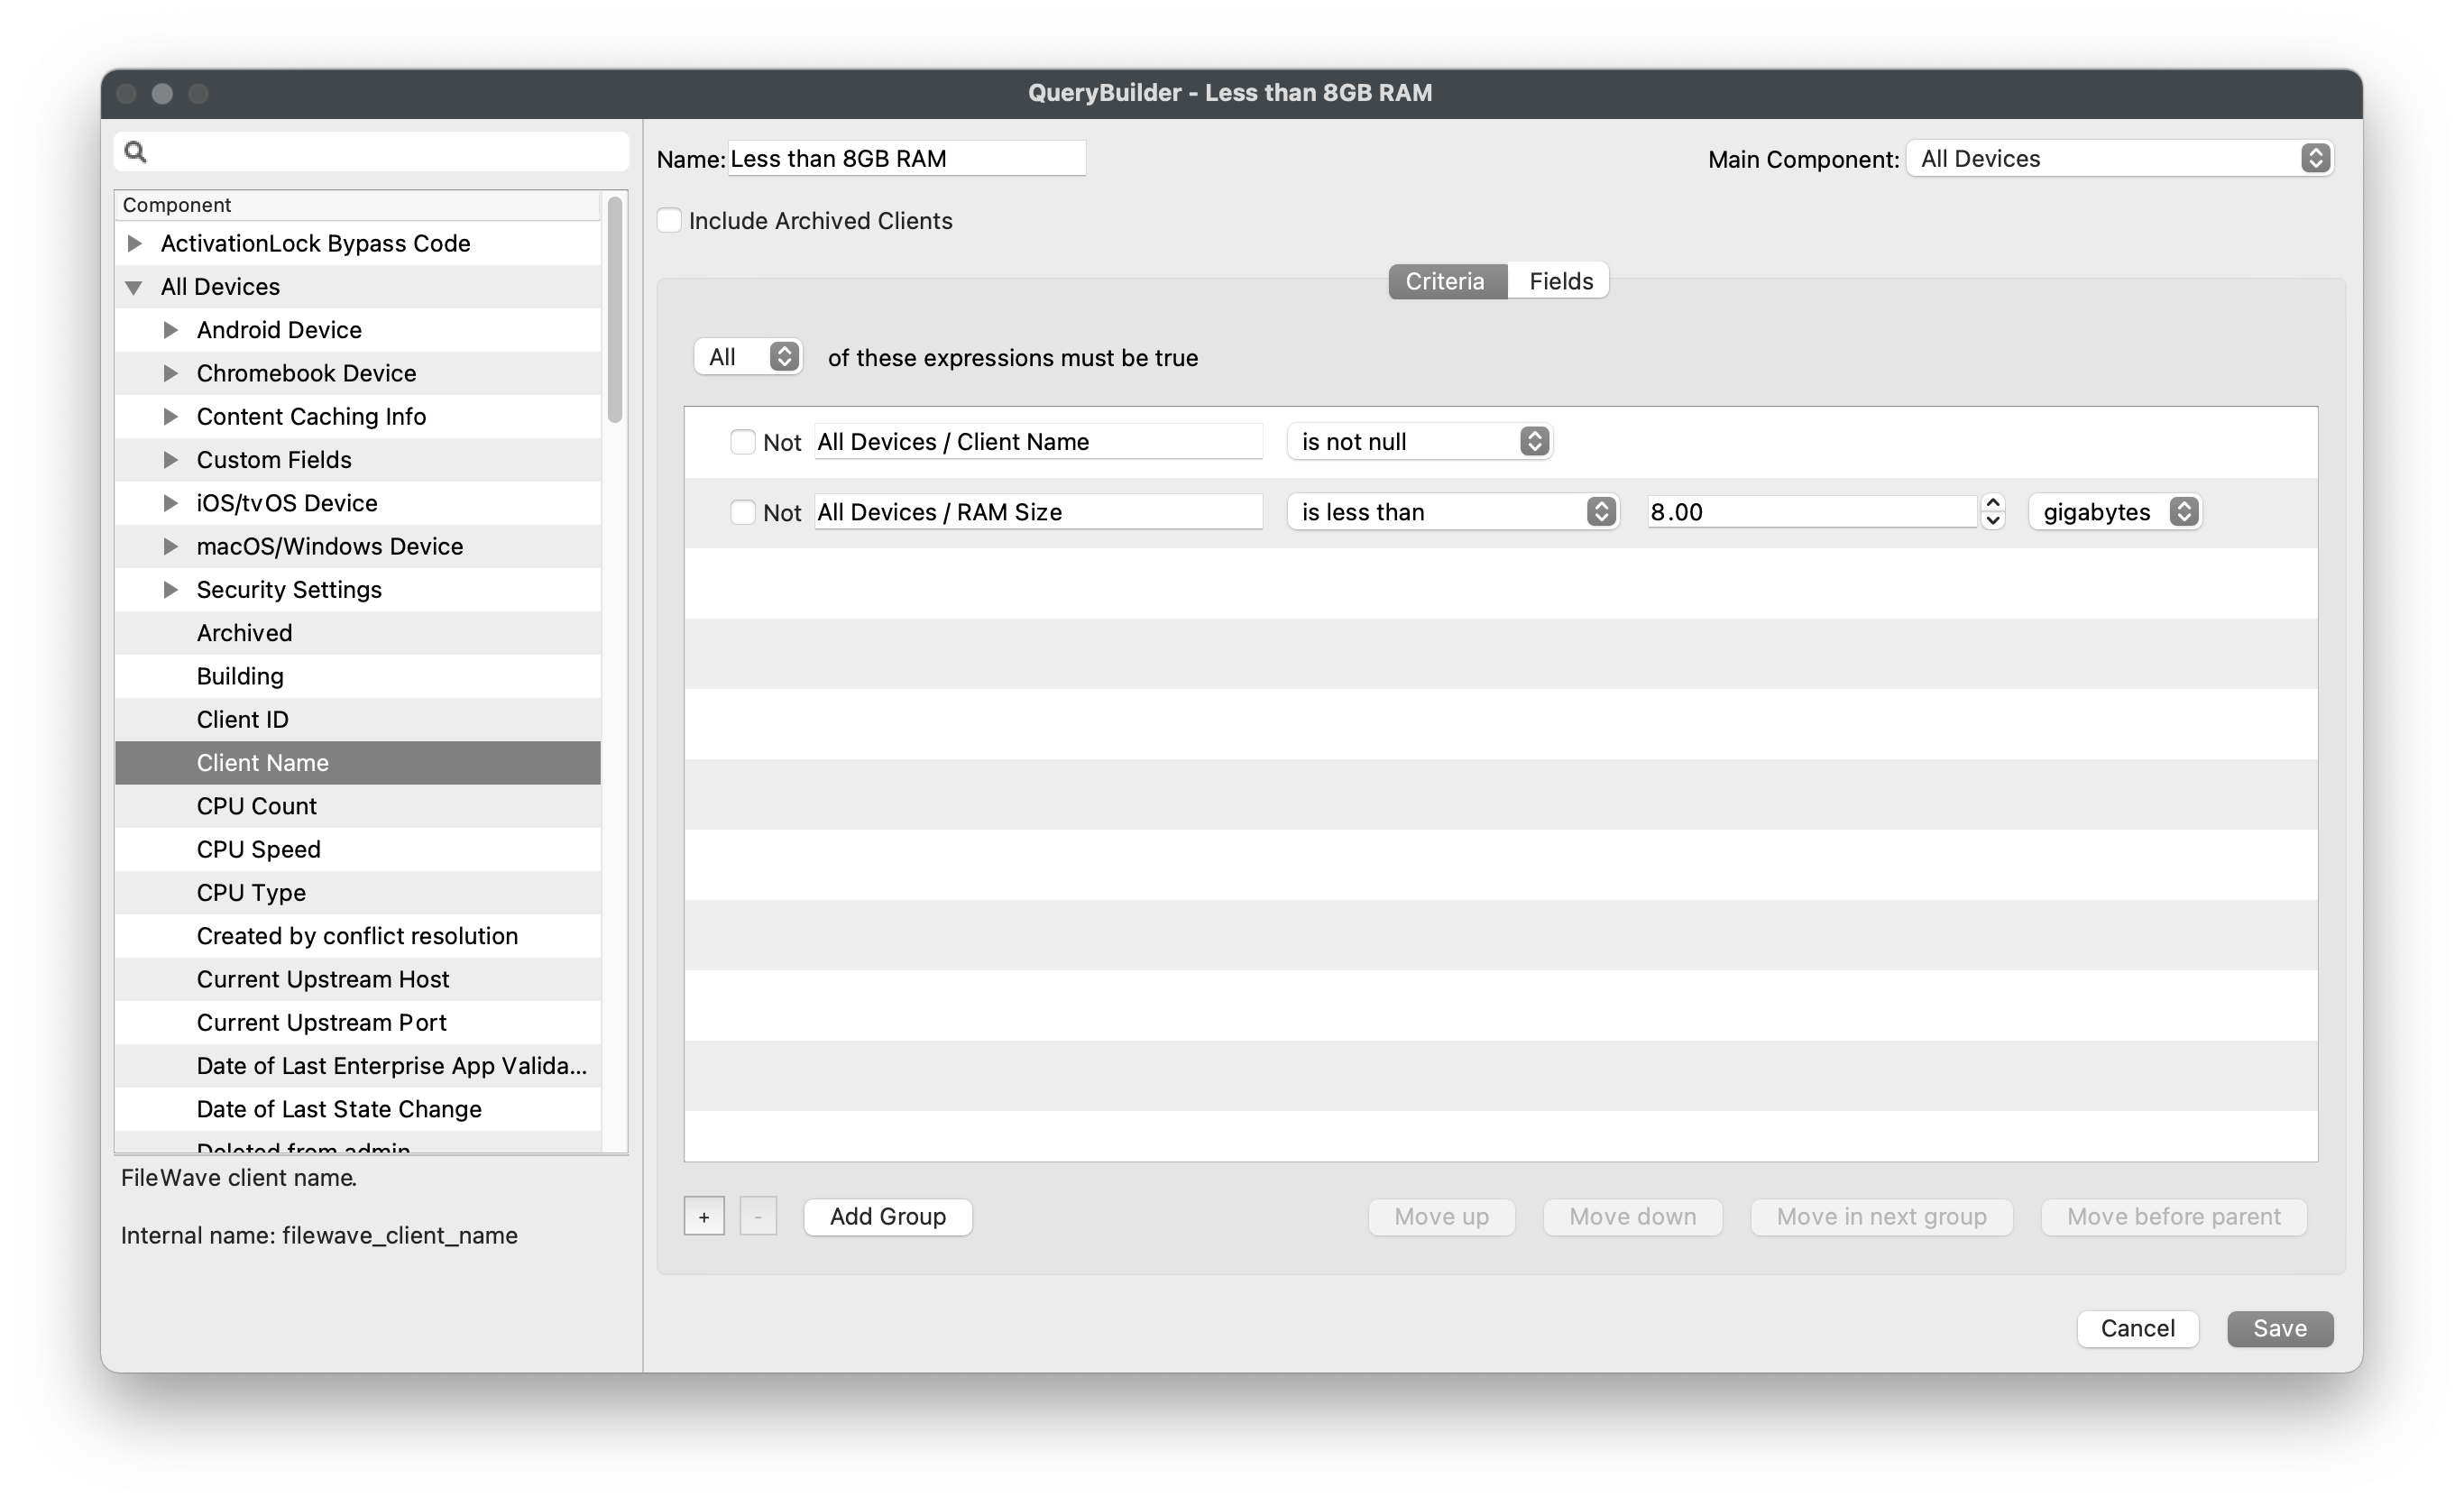
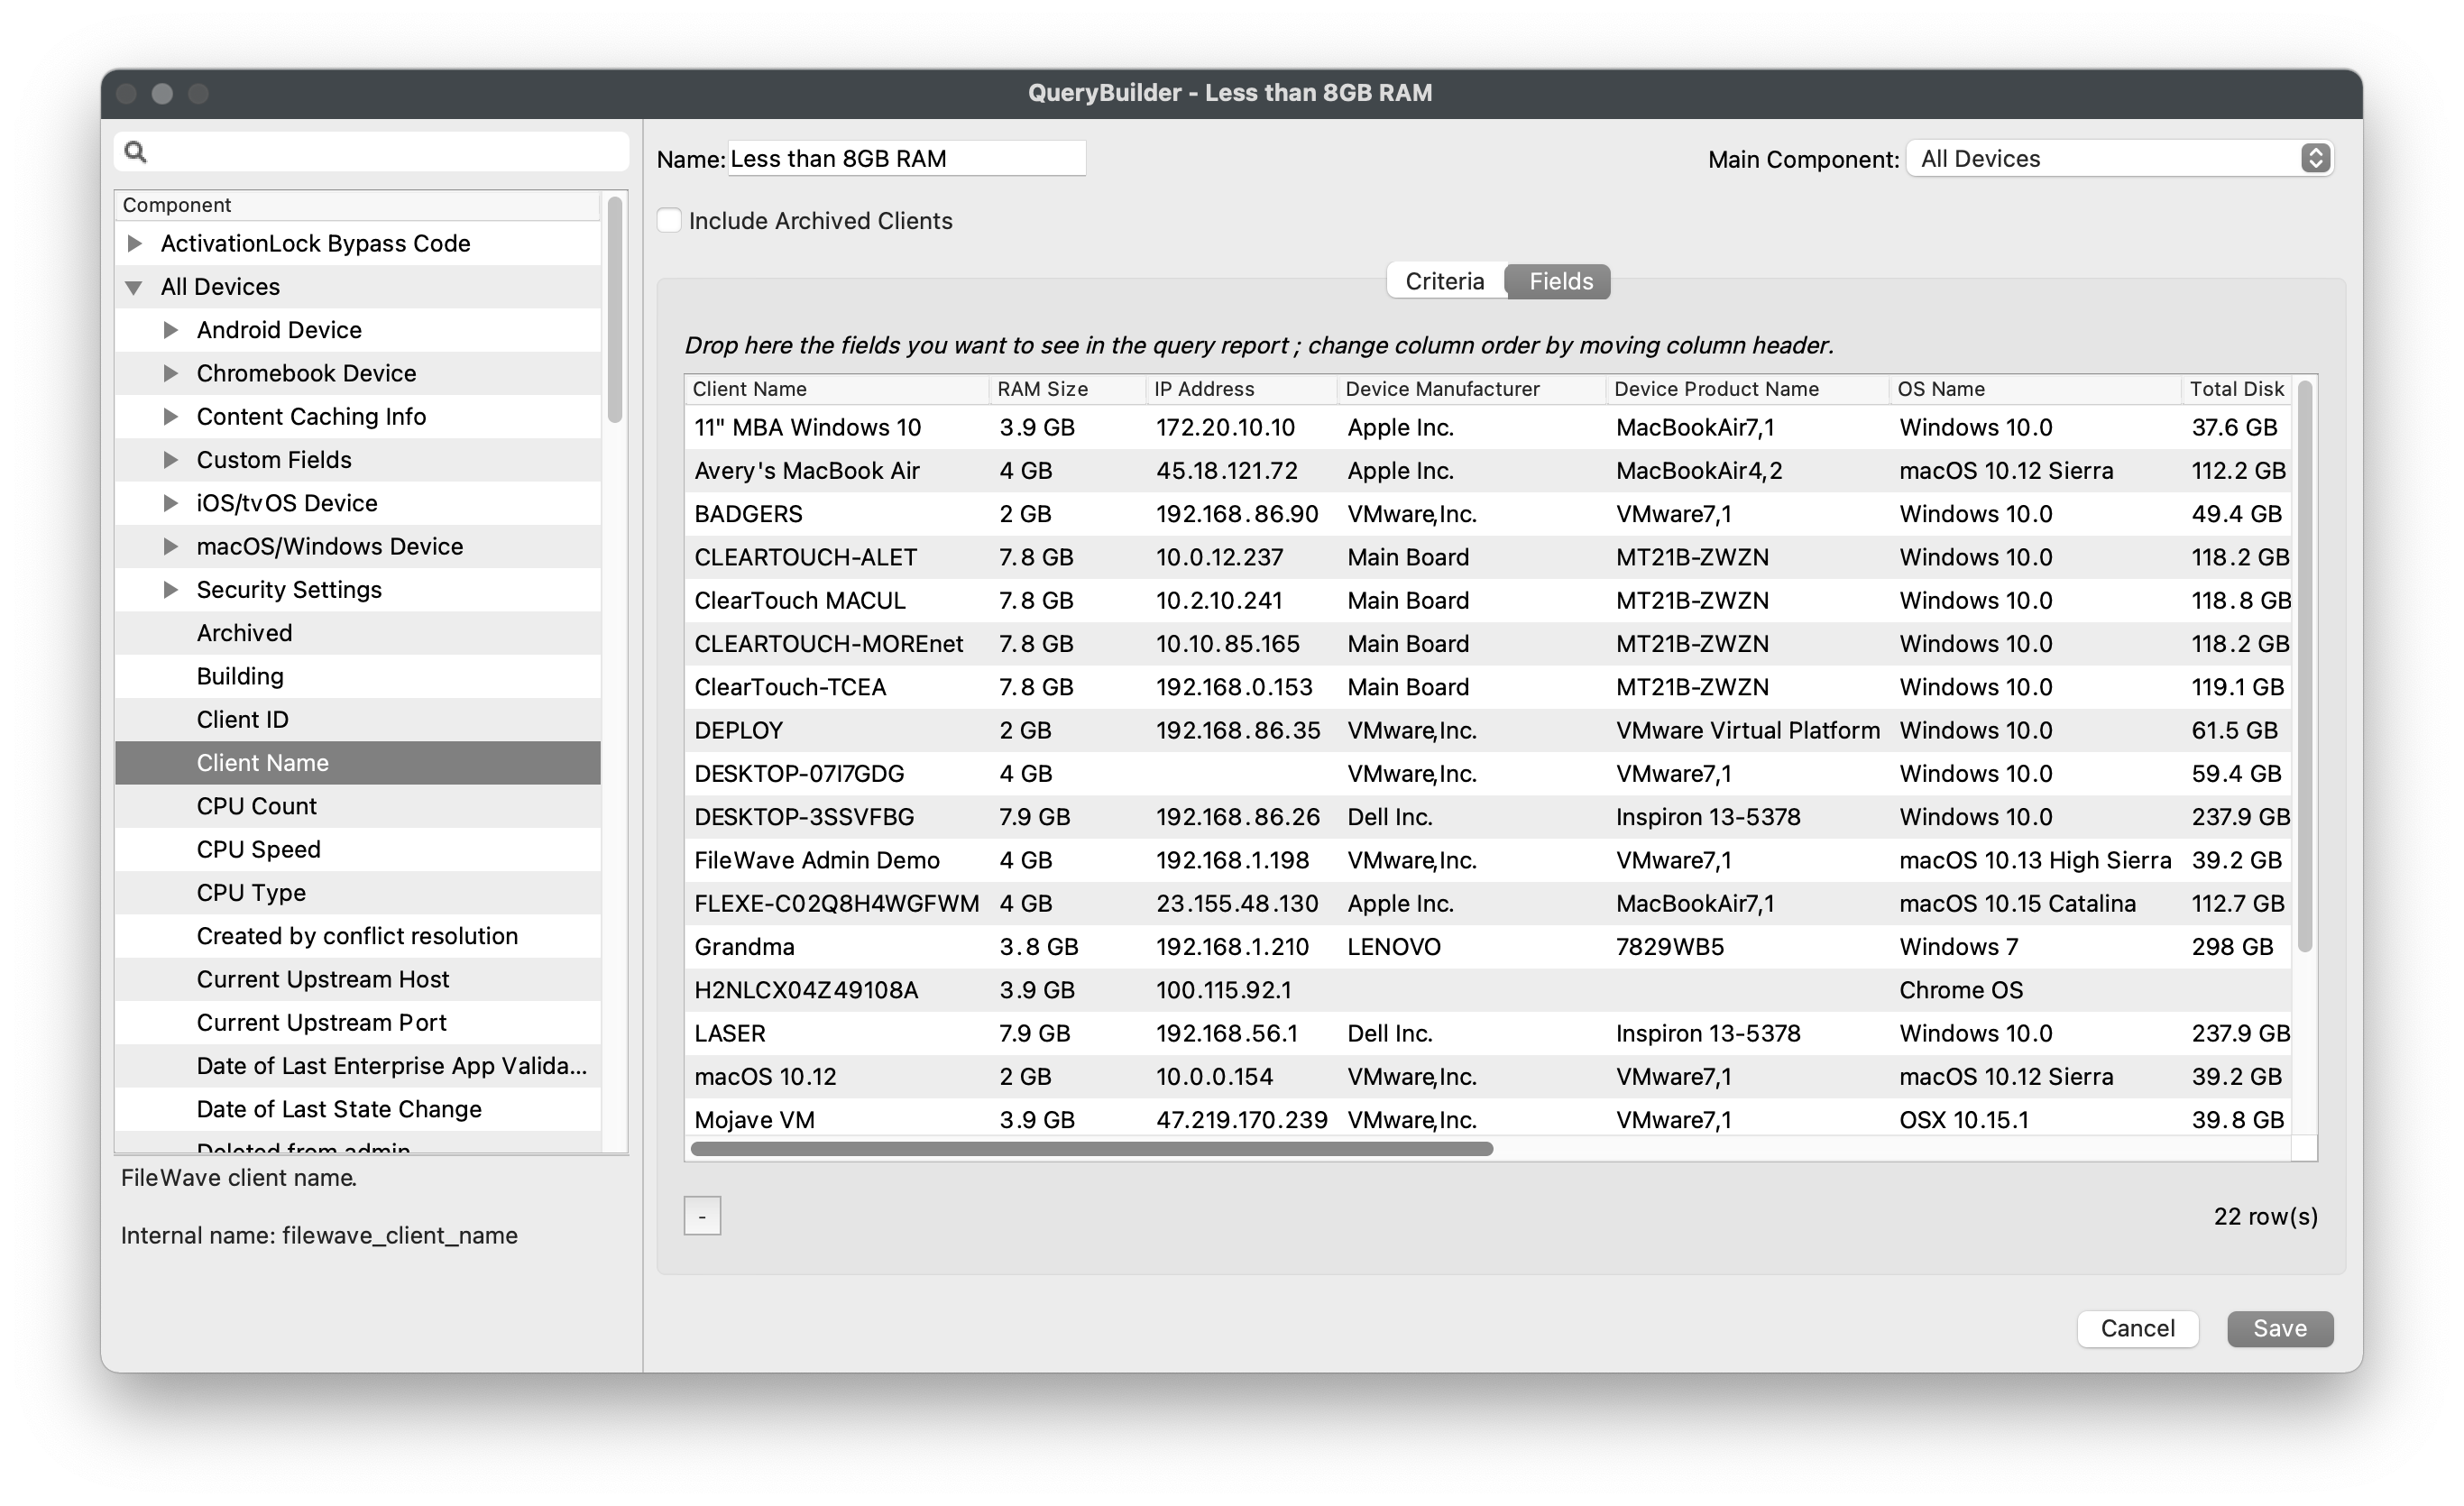
### **Building Code**
1. Drag *"All Devices > Client Name"* into the *"Criteria"* pane.
2. Set *"All Devices > Client Name"* qualifier to *"is not null"*.
- This starts broad so the report includes all devices before the next filters narrow the results.
3. Drag *"All Devices > Custom Fields > Building Code"* into the *"Criteria"* pane.
4. Set *"All Devices > Custom Fields > Building Code"* qualifier to *"is"* : *"TCE"*.
5. Add a new inventory sub-group via the *"Add Group"* button.
6. Drag *"Operating System > OS Type"* into the new sub-group.
7. Set *"Operating System > OS Type"* qualifier to *"is"* : *"iOS"*.
8. Drag *"Operating System > OS Type"* into the new sub-group.
9. Set *"Operating System > OS Type"* qualifier to *"is"* : *"Chrome"*.
10. Change the sub-group's logic to *"One or more of these expressions must be true"*. A device can be iOS or Chrome, but not both at the same time.
11. Click the *"Fields"* tab.
12. Add the fields you want the Inventory Report to return, such as Device Name, OS Type, and Building Code.
13. Click *"Save".*
14. You should now see your new Inventory Report.
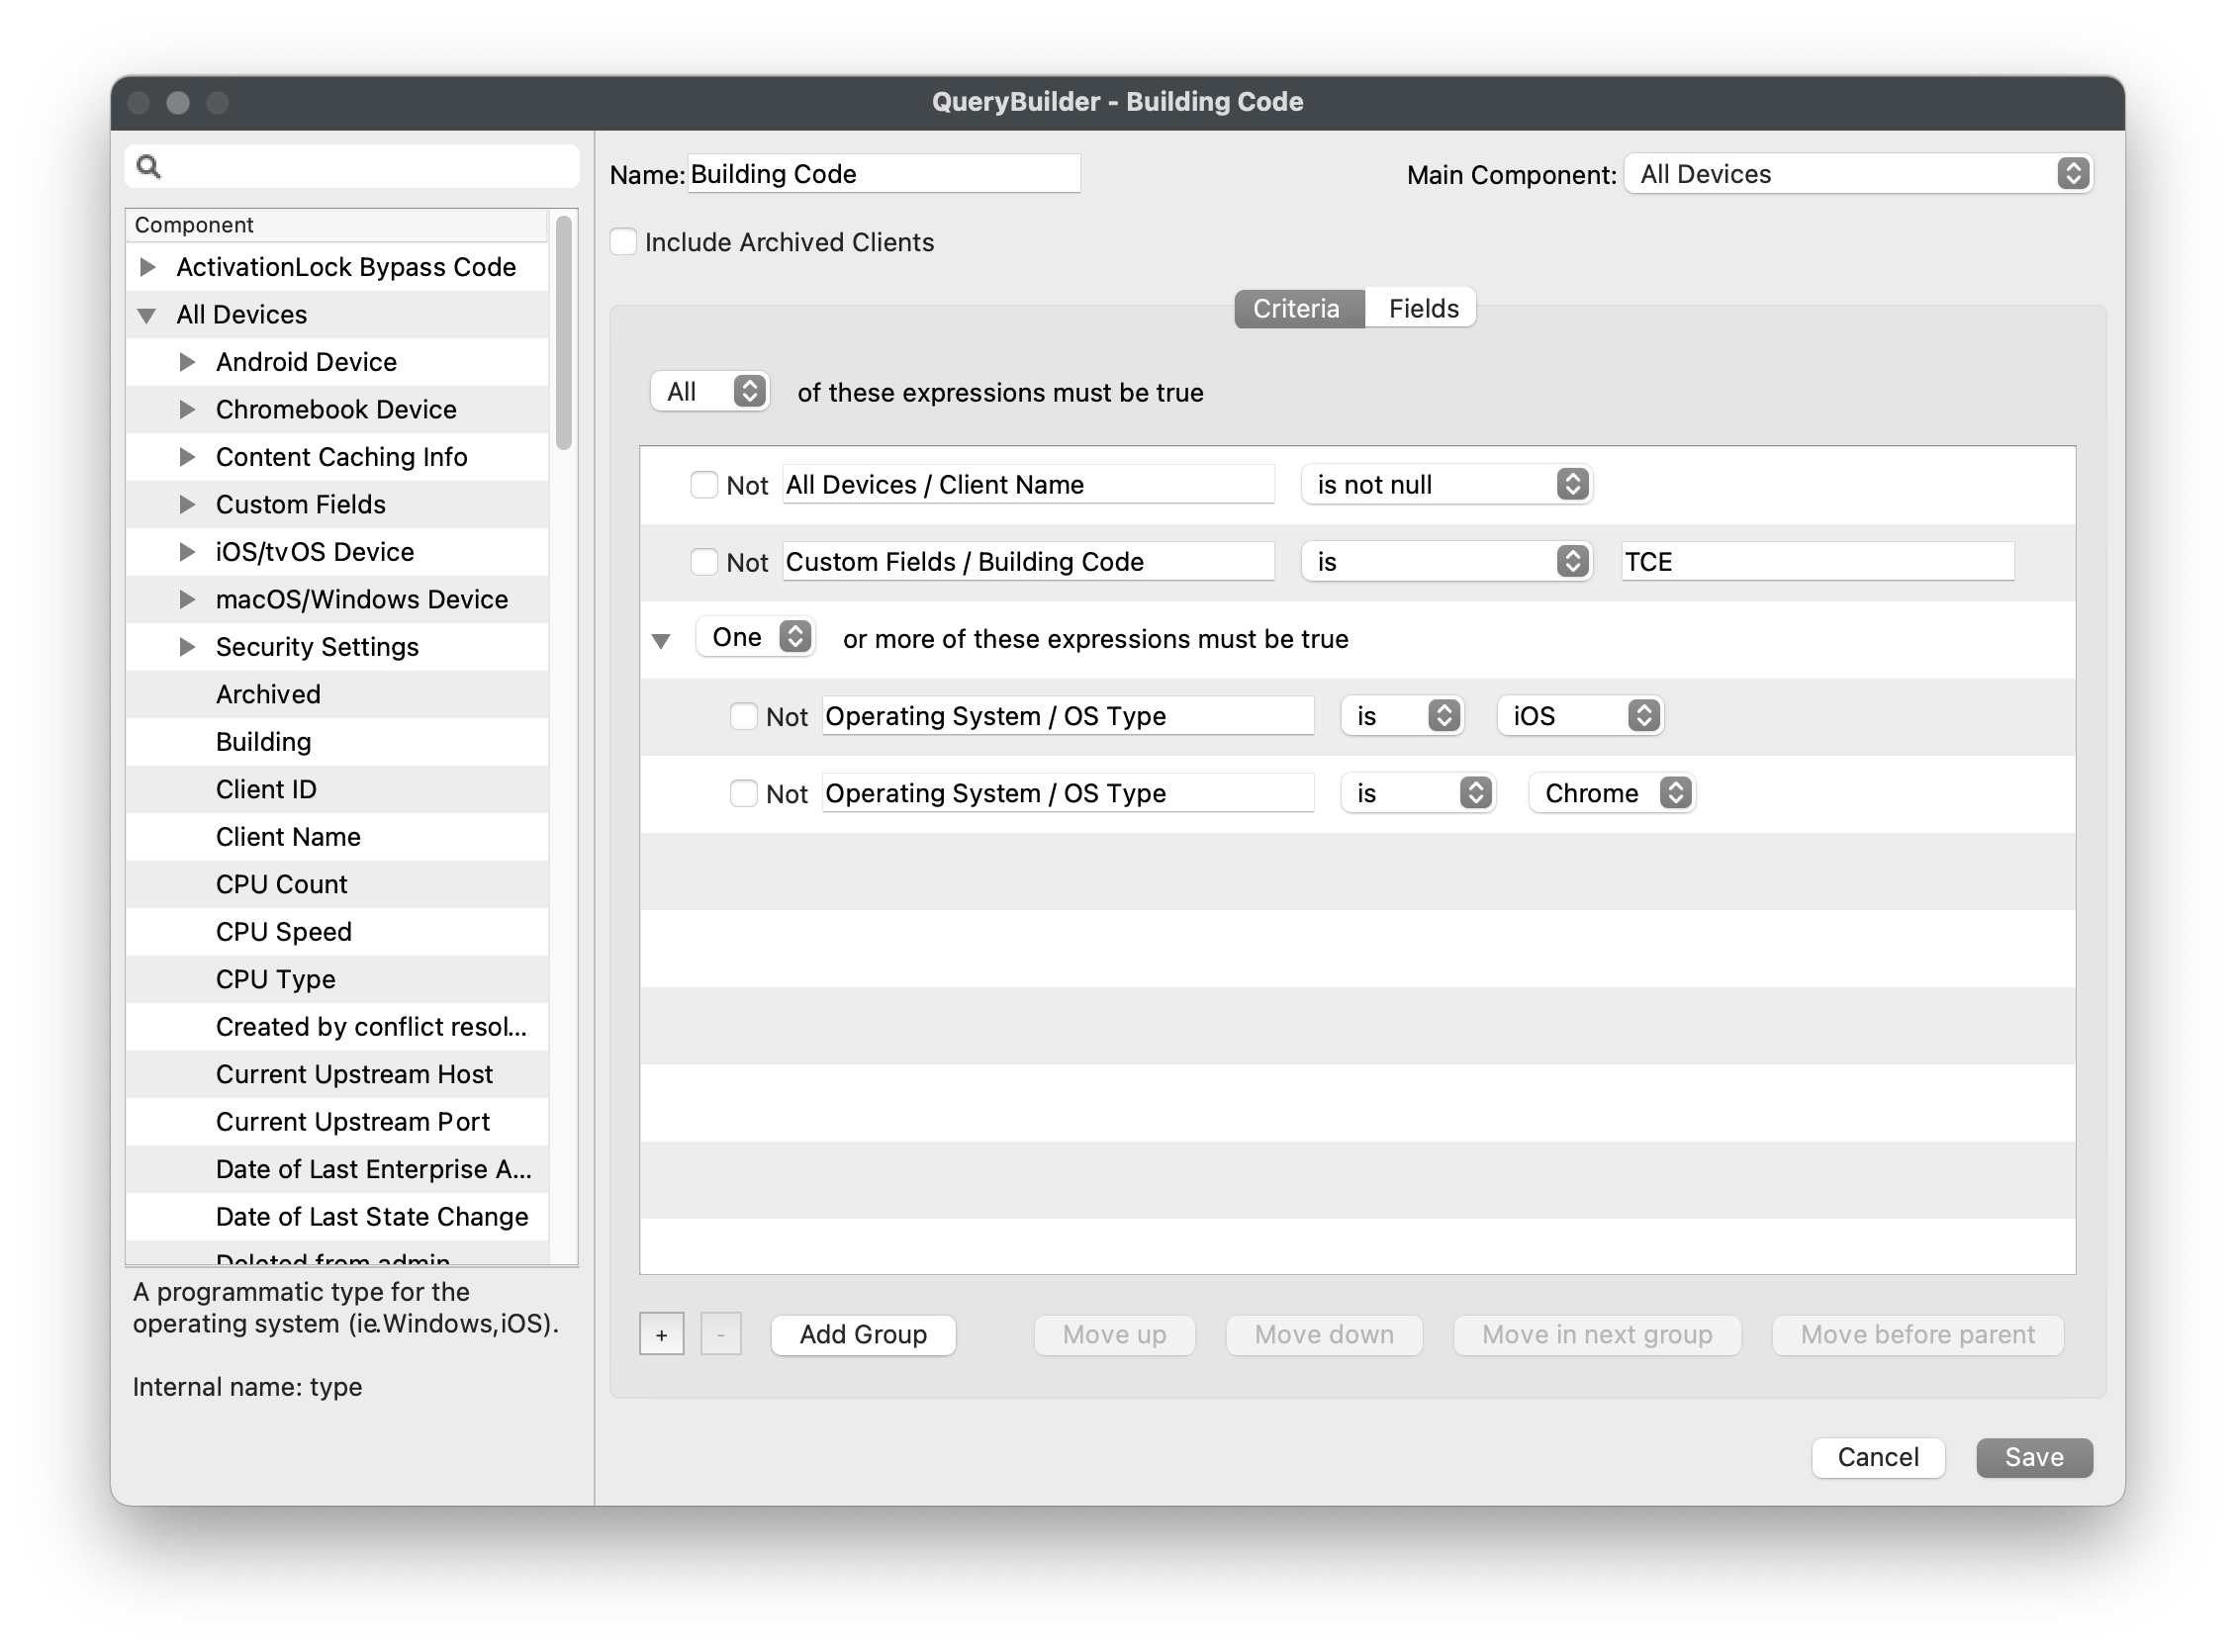
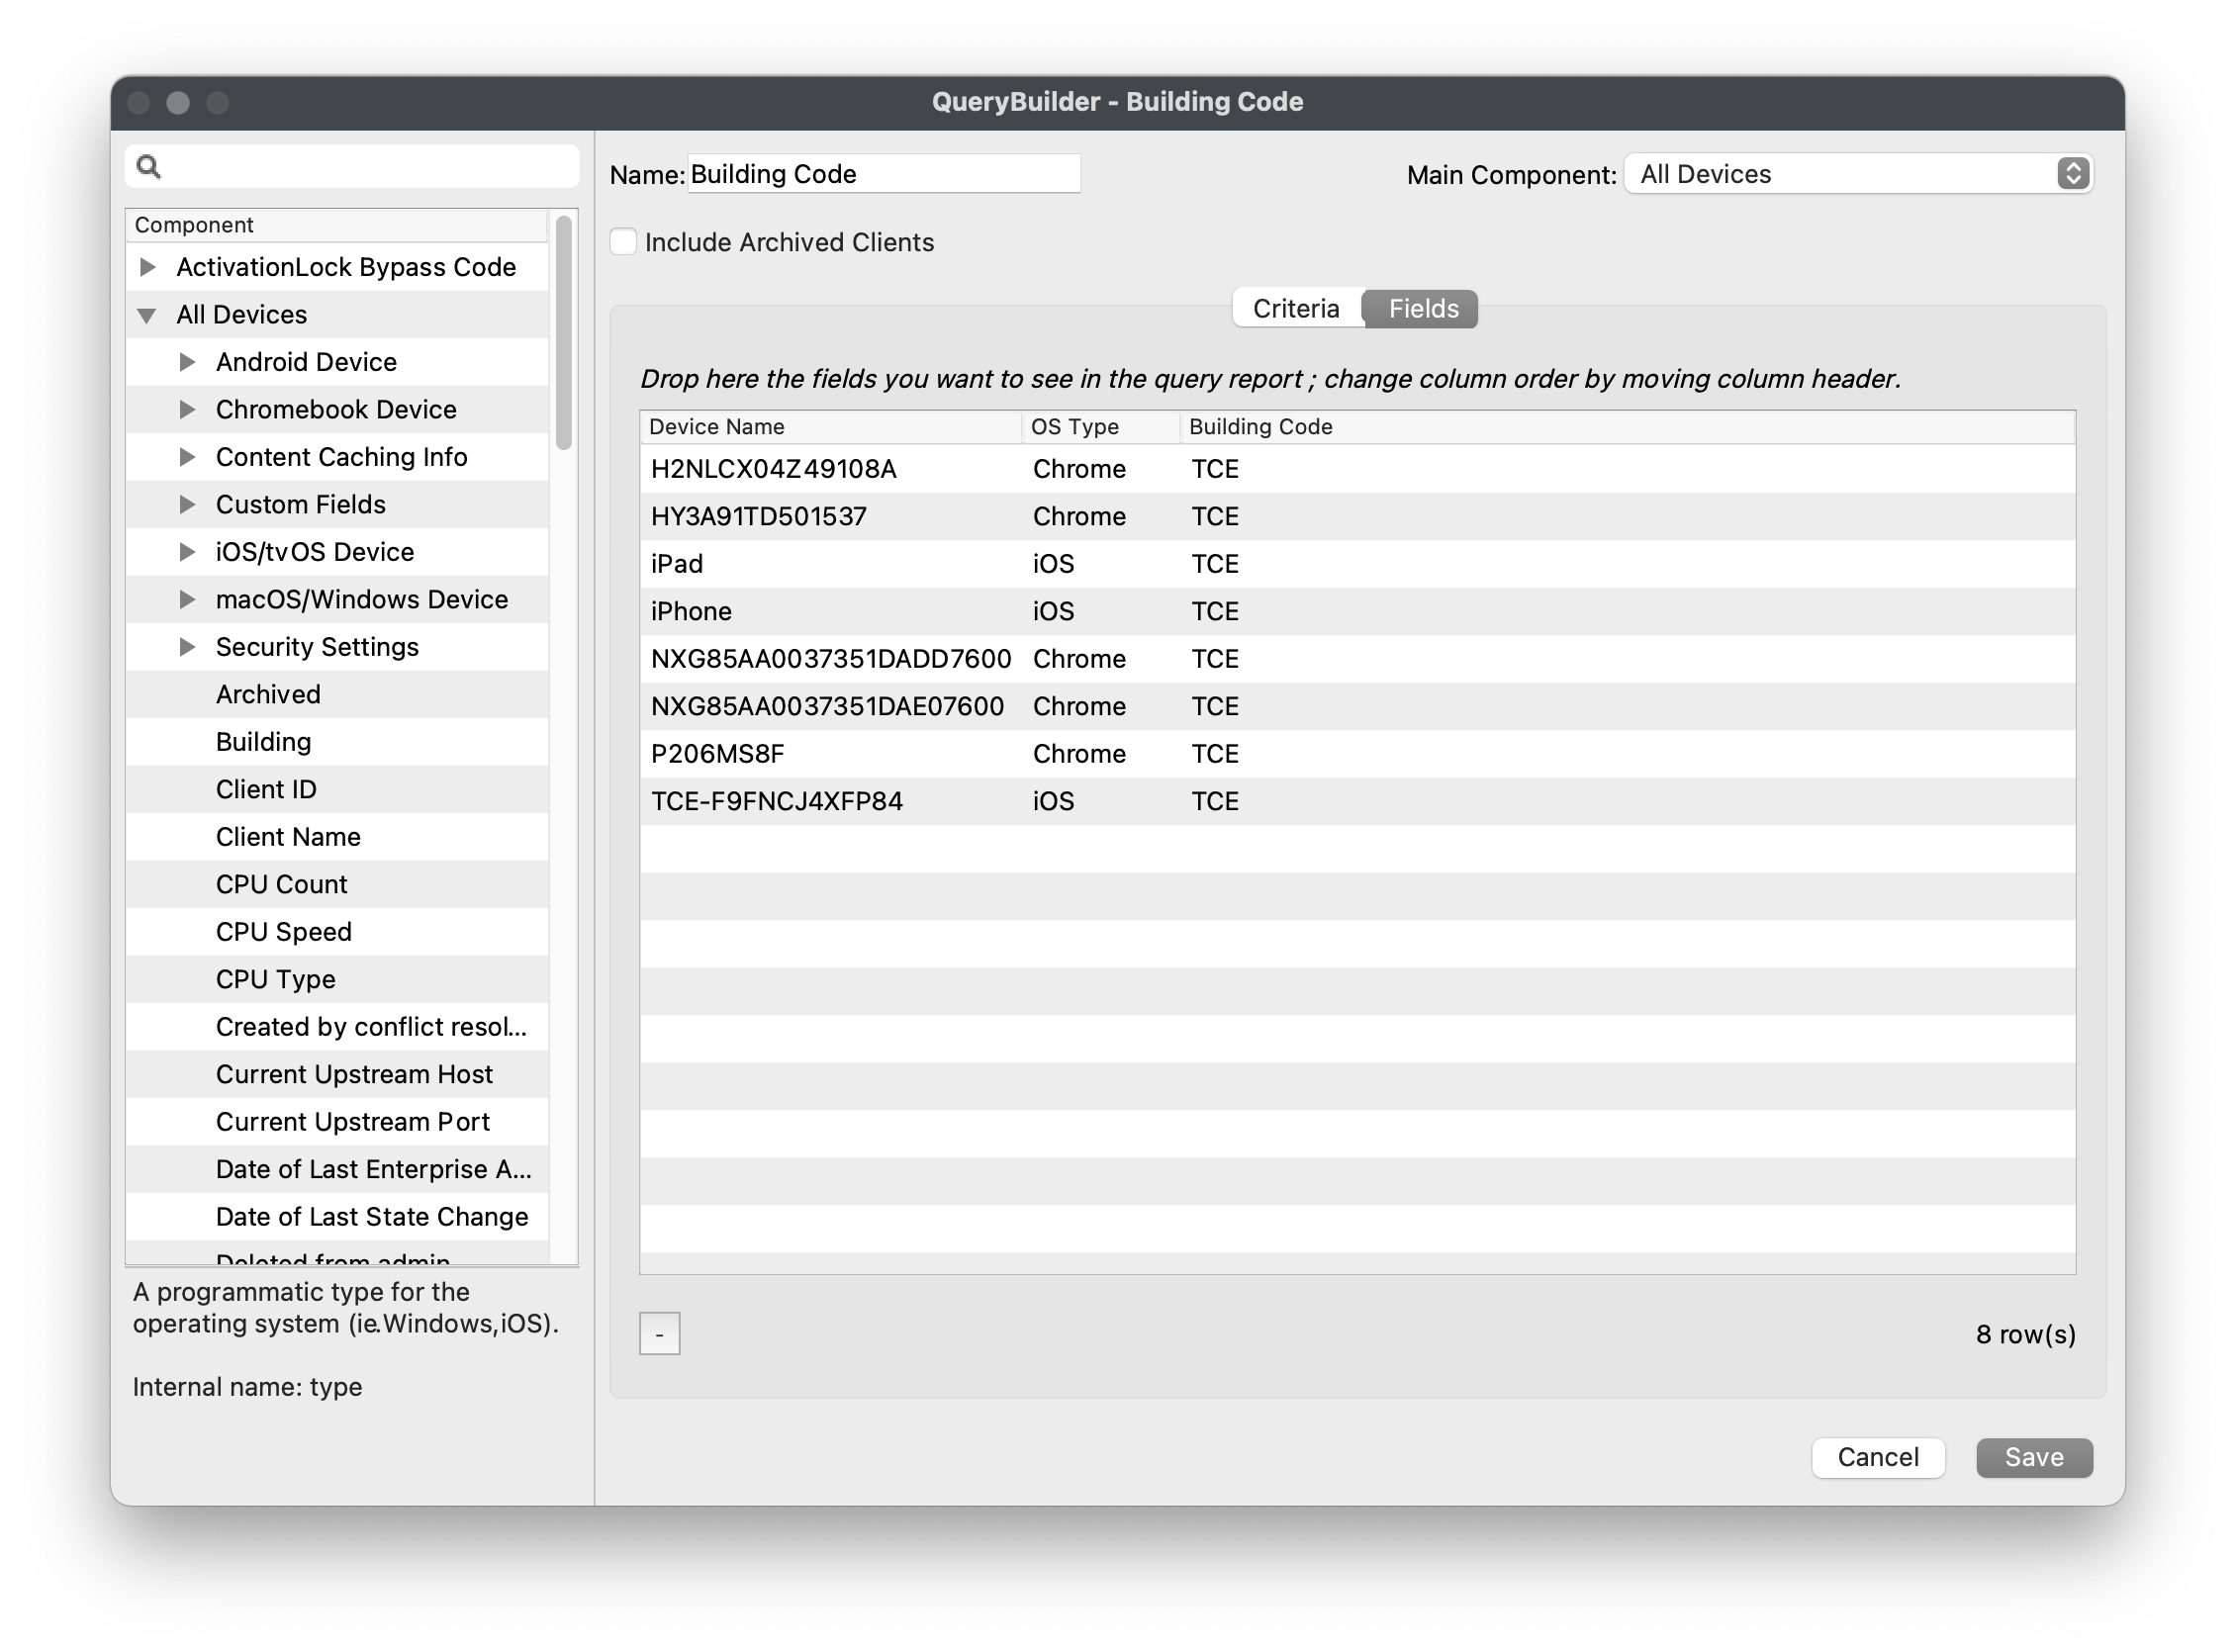
## **Application Architecture Reporting in FileWave 16.4**
---
FileWave 16.4 adds application architecture to macOS and Windows inventory records. Use it to find software that needs compatibility review before an operating-system or hardware transition.
Platform
Reported architecture values
Typical use
**macOS**
Intel, Apple Silicon, Universal, iOS app
Find Intel-only applications, confirm native Apple silicon coverage, and separate iOS apps installed on Macs.
**Windows**
32-bit (x86), 64-bit (x86-64)
Inventory remaining 32-bit applications and plan compatibility testing or modernization.
### Create an application architecture report
1. Open **FileWave Central > Reports** and create a new Inventory Report.
2. Use the application inventory component as the report’s main component so each installed application instance can appear as a result.
3. Add application fields such as name, version, path, and architecture.
4. Add device context such as Client Name, OS Name or OS Type, and CPU Type so each application result can be tied to the correct endpoint.
5. Add architecture criteria when you need a focused list. For example, filter macOS applications for **Intel** or Windows applications for **32-bit (x86)**.
6. Save the report. Export it, schedule it, or use its criteria to create a Smart Group when follow-up work should be targeted through FileWave.
### Recommended report patterns
Goal
Criteria
Useful returned fields
Find Intel-only Mac applications
Platform is macOS; application architecture is Intel
Client Name, Application Name, Version, Path, Architecture, OS Version, CPU Type
Confirm native Apple silicon availability
Platform is macOS; architecture is Apple Silicon or Universal
Application Name, Version, Architecture, Client Name
Find iOS apps installed on Macs
Platform is macOS; application architecture is iOS app
Application Name, Version, Client Name, OS Version
Find 32-bit Windows applications
Platform is Windows; application architecture is 32-bit (x86)
Application Name, Version, Path, Client Name, OS Version
**Architecture is a compatibility signal, not proof of active use or business impact.** Confirm application ownership and usage before removing software or blocking an operating-system upgrade. A Universal app can also depend on an Intel-only plug-in or extension, so investigate critical workflows rather than treating the top-level application value as the whole dependency chain.
For Apple transition planning, see [Apple EOL Advisory: Intel-Based Apps and Rosetta Dependencies on Apple Silicon](https://kb.filewave.com/books/end-of-life-statements/page/apple-eol-advisory-intel-based-apps-and-rosetta-dependencies-on-apple-silicon).
## **Scheduled Reporting**
---
After you have saved Inventory Reports, you can schedule automatic email delivery. Before scheduling reports, configure the **Email** preferences in FileWave Central.
### **Inventory Report Scheduled Reporting**
1. Open FileWave Central and go to *"Assistants > Scheduled Reports"*.
2. Click the *"\[+\]"* button to add a scheduled report.
3. Change the *"Report type"* to *"Query"*.
4. Enter the target email addresses with each new address on a new line.
5. Fill out the Mail Subject and Body.
6. Optionally, select a different *"Owner"* of the report for logging purposes.
7. Schedule your automated report.
8. Select the report using the *"select a query"* link. Older dialogs may still use the word Query here.
9. Click "*OK*" to save the changes.
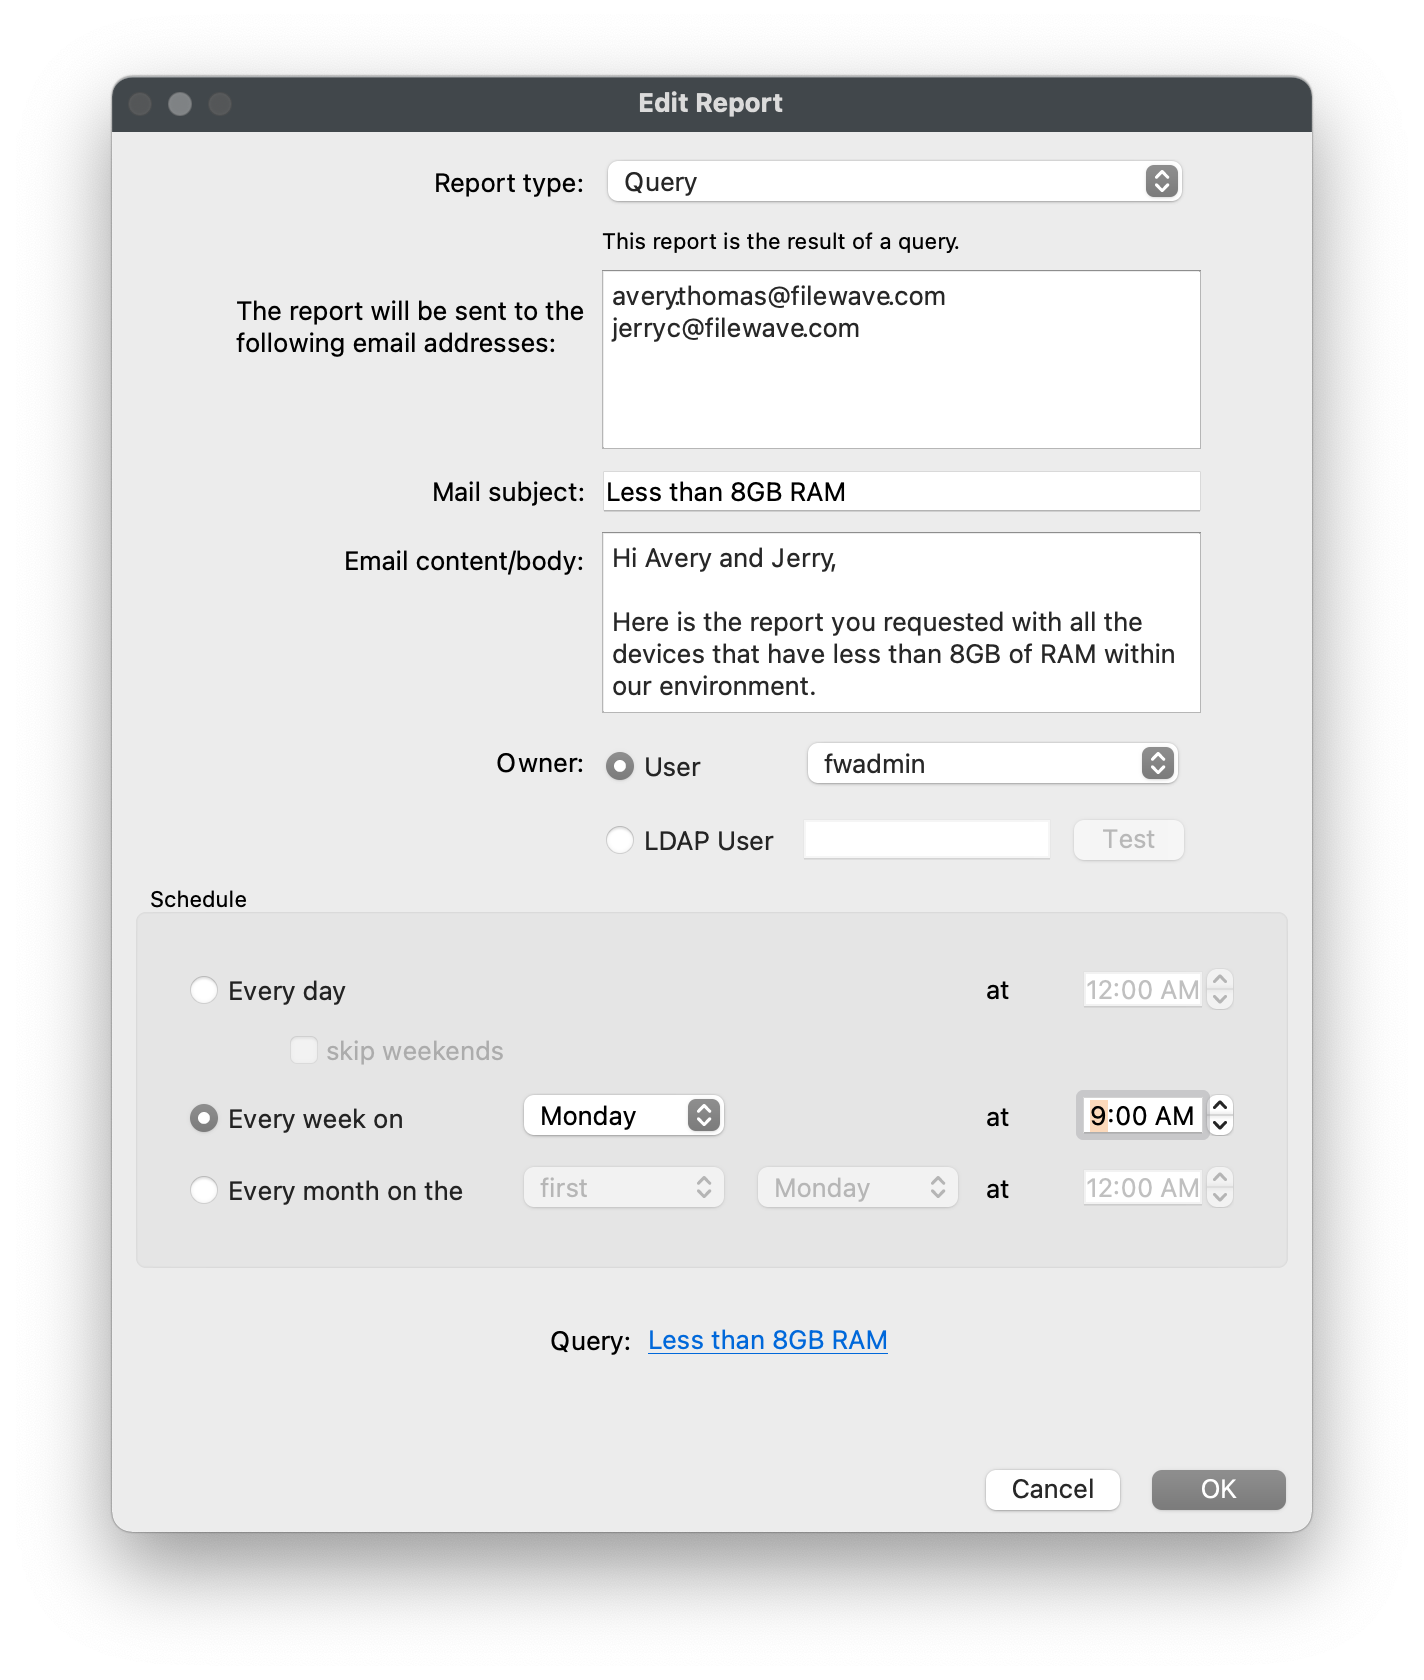
### **License Scheduled Reporting**
FileWave can also send a report containing a list of all licenses that display within *"License Management"* via Scheduled Reports.
1. Open FileWave Central and go to *"Assistants > Scheduled Reports"*.
2. Click the *"\[+\]"* button to add a scheduled report.
3. Verify the *"Report type"* is set to *"License"*.
4. Enter the target email addresses with each new address on a new line.
5. Fill out the Mail Subject and Body.
6. Optionally, select a different *"Owner"* of the report for logging purposes.
7. Schedule your automated report.
8. Click "*OK*" to save the changes.