# FileWave Client

# Enrolling Devices

Articles about the process to enroll devices in to FileWave.

# Desktop / Laptop Client Install and Configure

Use this article to install the FileWave Client on macOS or Windows, or to build a custom installer for larger deployments.

## Operating Systems Supported

- macOS
- Windows 10 &amp; 11

For exact supported versions, check [Downloads](https://kb.filewave.com/books/downloads "Downloads") for the release you are deploying.

## Downloading the FileWave client installer

The FileWave Client installer is available as part of the FileWave bundle for the specific operating system. The most current version, as well as selected older versions, of the installer are located on the FileWave KB in [Downloads](https://kb.filewave.com/books/downloads "Downloads"). For the computers mentioned under *Legacy Support,* you will need to install the most recent client supported on your OS.

![6cXnwsoneSE8fqKC-embedded-image-schz8fiq.png](https://kb.filewave.com/uploads/images/gallery/2023-07/6cXnwsoneSE8fqKC-embedded-image-schz8fiq.png)

  
You should download all installers you will need for your deployment at the same time. They can be stored on a file server, or on a flash drive in Windows format for cross-platform compatibility (macOS systems can read Windows-formatted drives without additional drivers).

<p class="callout danger">Note: The installer instructions for the Linux server and Booster are also located on the same page of the web site. Server installation instructions are covered in [FileWave Server Installation](https://kb.filewave.com/books/filewave-server/chapter/filewave-server-installation-upgrade "FileWave Server Installation"). There is no Linux client.</p>

## Installing the FileWave client

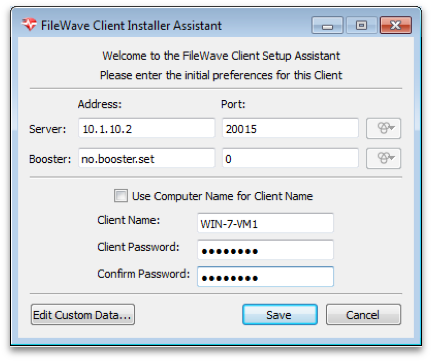
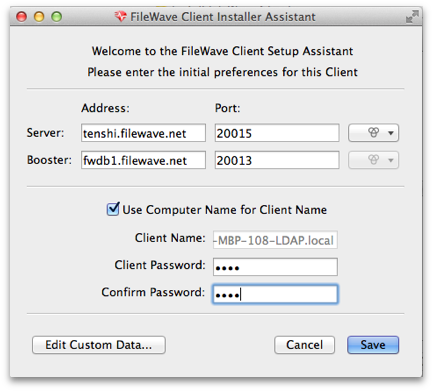
Client installers for both macOS and Windows use the same general dialogs. You will need to read and accept the license agreement, and you will be presented with a dialog window asking you for specific information to connect your client. Note: on some Windows computers, the FileWave Client Installer Assistant window is positioned directly behind the installer window, which you need to move to get to the Installer Assistant to complete the installation.  
![ZXCRR6cMW3QI2kCa-embedded-image-vbevttub.png](https://kb.filewave.com/uploads/images/gallery/2023-07/ZXCRR6cMW3QI2kCa-embedded-image-vbevttub.png) ![9wNBHUlmQuWSowib-embedded-image-vkxjdoii.png](https://kb.filewave.com/uploads/images/gallery/2023-07/9wNBHUlmQuWSowib-embedded-image-vkxjdoii.png)

## Installation Settings

- ***Server address / port*** - Enter the IP address or FQDN of your FileWave server. Enter the TCP port number for the client to communicate with the server (default is 20015)
- ***Booster address / port*** - If your client is going to get its Filesets from a Booster, enter the IP address or FQDN of the FileWave Booster. Enter the TCP port number for the client to communicate with the Booster (20013)

Note: More on working with FileWave Boosters in [Boosters](https://kb.filewave.com/books/boosters "Boosters").

- ***Use Computer Name for Client Name*** - this box allows you to use the device's computer name as its FileWave client name.
- ***Client Name*** - enter a valid name based on any criteria you have for your deployment. It is recommended that you do not use special characters in the client name. Dashes, underscores, and slashes are ok.
- ***Client Password / Confirm****…* - enter a password used by FileWave administrative connections to the client. This does not need to be a local administrator password for that device. **Note: You must provide a password in order for the Remote Control/VNC relay to function.**

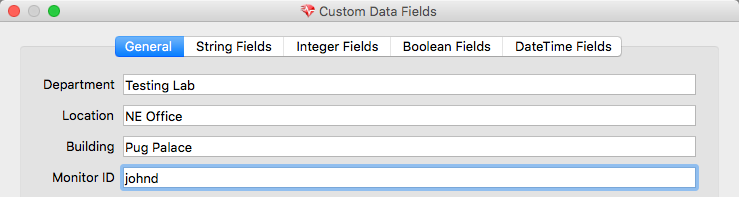
## Edit Custom Data…
![PKYcLSLj3P818vgO-embedded-image-yttbernd.png](https://kb.filewave.com/uploads/images/gallery/2023-07/PKYcLSLj3P818vgO-embedded-image-yttbernd.png)

  
The custom fields consist of a series of optional Inventory data fields that can be used to provide more detailed information on any Client. This information cannot be set in the automated installer, and must be applied manually. The information provided will be displayed as part of **Client Info** in the **Clients** pane of FileWave Central by right-clicking any client and selecting **Client Info…**, and it can also appear in **Inventory Reports (formerly Queries)**.
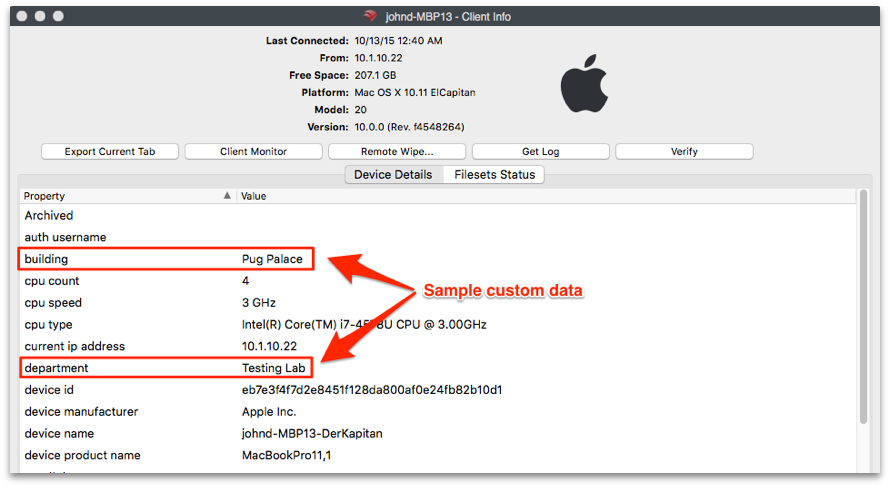
![act1Zxbnq9VgHn4a-embedded-image-rlek0hbw.png](https://kb.filewave.com/uploads/images/gallery/2023-07/act1Zxbnq9VgHn4a-embedded-image-rlek0hbw.png)

## Automating installation with a custom client installer

Manual installation works for small deployments. For larger rollouts, build a customized client installer with the connection settings already filled in:

For macOS: [https://custom.filewave.com/py/custom\_client\_mac.py](https://custom.filewave.com/py/custom_client_mac.py)  
For Windows: [https://custom.filewave.com/py/custom\_client\_win.py](https://custom.filewave.com/py/custom_client_win.py)

<p class="callout danger">The customized macOS client is required for MDM/ADE support and must be uploaded in FileWave Central under Mobile preferences.  
</p>

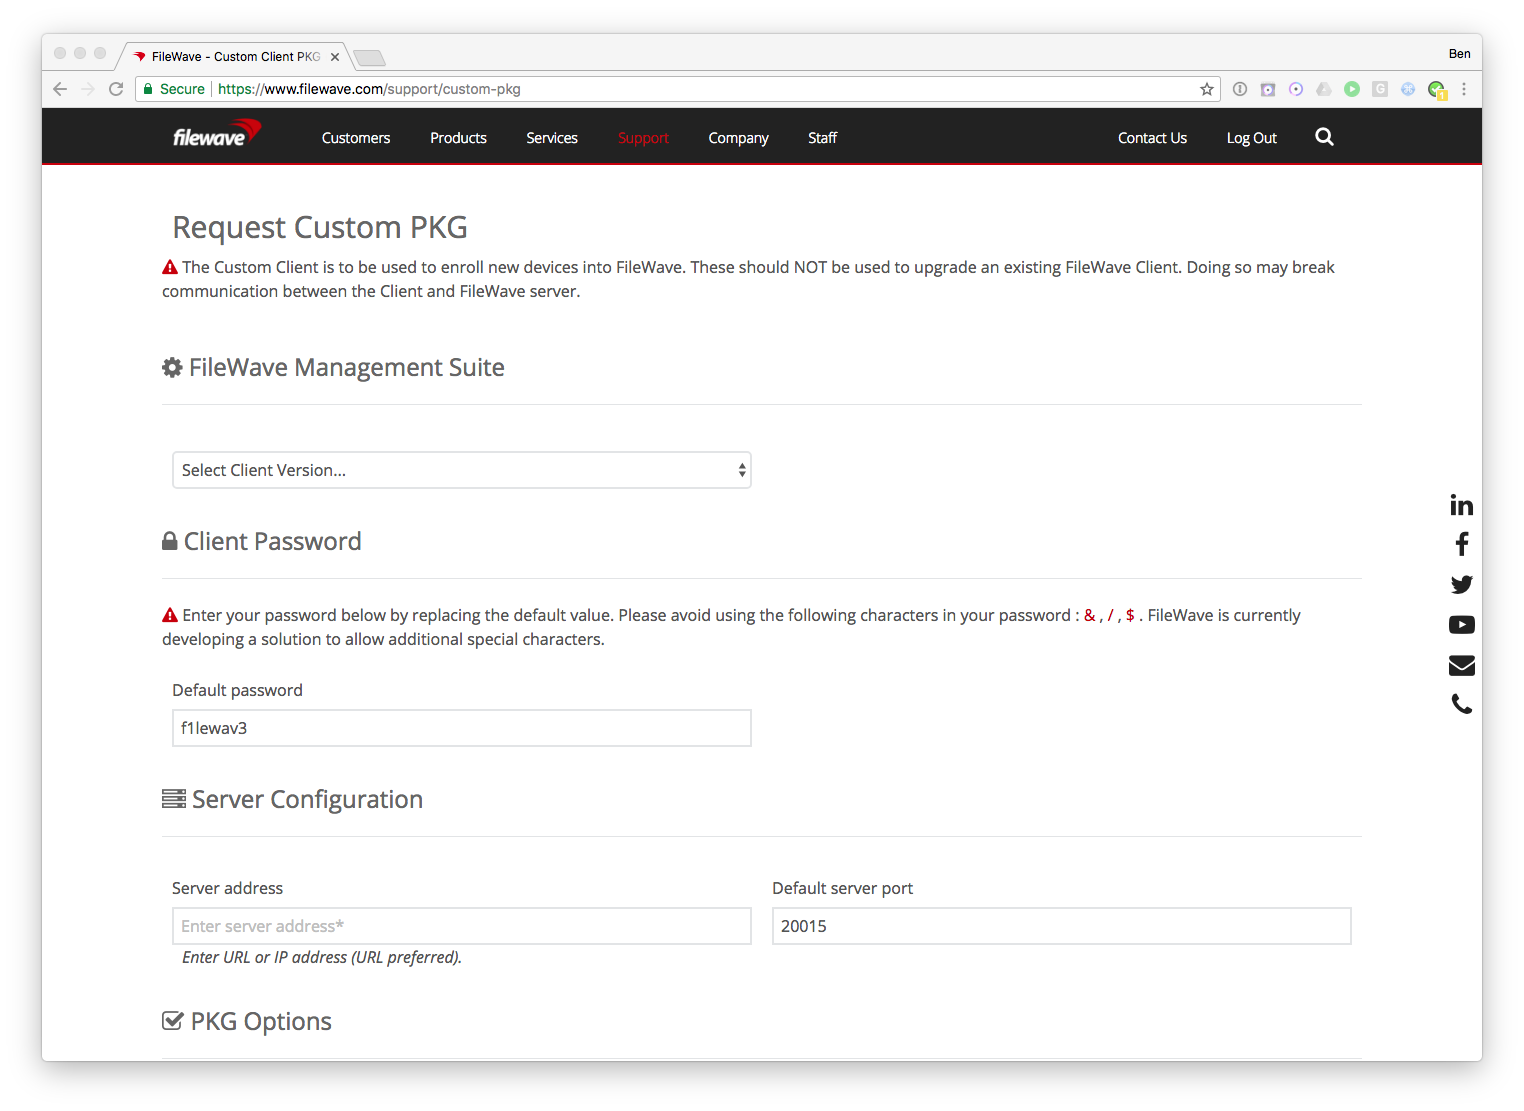
The form is shown on the next page.

![AFEWEXvCW89cpPkL-embedded-image-sia0f1hy.png](https://kb.filewave.com/uploads/images/gallery/2023-07/AFEWEXvCW89cpPkL-embedded-image-sia0f1hy.png)

  
Many fields are required.

<p class="callout info">Note: The default port setting is 20015. However, SSL is now required, and the system will automatically use port 20017 instead when 20015 is entered. **Do not manually set the port to 20017**. Always enter 20015, and the system will handle the SSL port change for you.</p>

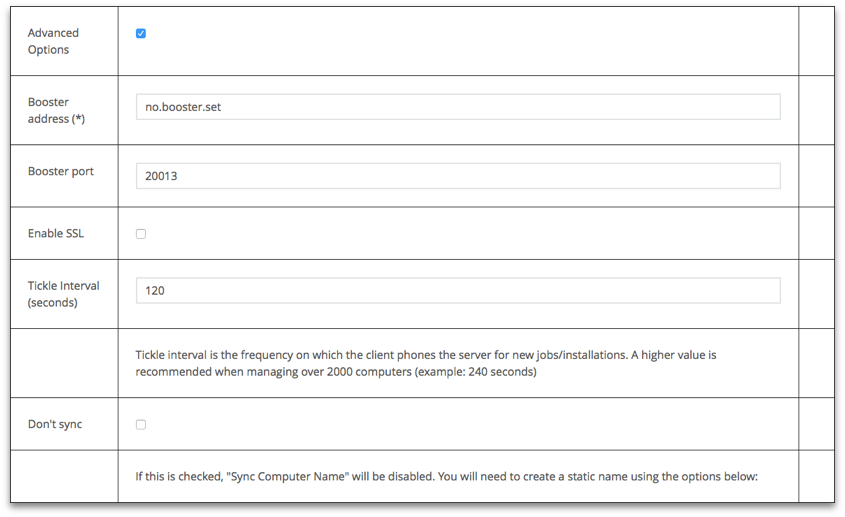
## Advanced Options

![RIDmp6EsXVDTfJwY-embedded-image-htshdbir.png](https://kb.filewave.com/uploads/images/gallery/2023-07/RIDmp6EsXVDTfJwY-embedded-image-htshdbir.png)

  
The custom installer does not ask the user for any device specific information, and can be distributed through several means:

- Apple's Automated Device Enrollment (ADE) uses the custom installer to enroll institutionally purchased devices automatically with your FileWave Server.
- Add the custom installer to an image set when doing direct or network mass imaging.
- Use a remote installation tool, such as Apple Remote Desktop, to distribute the custom installer to large numbers of existing devices.
- Use a 3rd party imaging tool, such as DeployStudio, to build a custom client set.

<p class="callout success">Note: FileWave provides "recipes" of possible deployment workflows for the custom installer in the KB.</p>

# Enrolling Computer Clients into FileWave

Click the **New Client** toolbar icon to open the **Create New Client** window. Click **Desktop clients** to open **New Client From Server**, where computer clients appear after the FileWave Client on the device checks in with the FileWave Server specified in the client settings. Those settings are either entered manually during client installation or included when a custom client installer is built from the FileWave Support webpage.
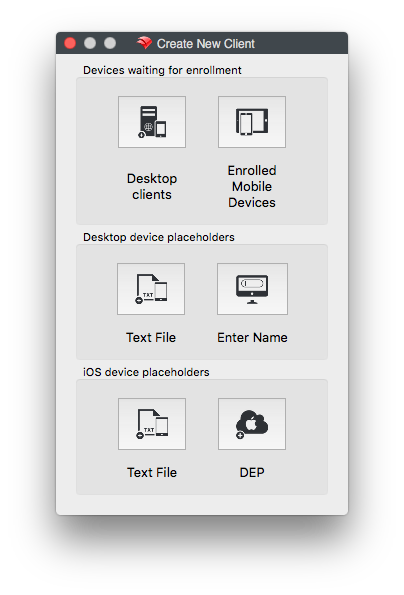
![ZRO2NyfoQbPpyJQJ-embedded-image-qrjogsn7.png](https://kb.filewave.com/uploads/images/gallery/2023-07/ZRO2NyfoQbPpyJQJ-embedded-image-qrjogsn7.png)

<table id="bkmrk-for-text-file-see-4." style="width:79.0123%;"><tbody><tr><td style="width:100%;"><p class="callout info">For Text File see [Importing Computer Clients from a File](https://kb.filewave.com/books/filewave-client/page/importing-computer-clients-from-a-file "Importing Computer Clients from a File")</p>

</td></tr></tbody></table>

![XYRiQ46njGinEhEs-embedded-image-ieefrxr8.png](https://kb.filewave.com/uploads/images/gallery/2023-07/XYRiQ46njGinEhEs-embedded-image-ieefrxr8.png)

<table id="bkmrk-column-name-notes-na"><tbody><tr style="background-color:rgb(251,238,184);"><td>Column Name

</td><td>Notes

</td></tr><tr><td>Name

</td><td>The Client Name the computer is attempting to connect with (see Sync Computer Name)

</td></tr><tr><td>Address

</td><td>The IP address the client is connecting from. This may be the device's internal address or a NAT address if the computer is connecting from the internet.

</td></tr><tr><td>Platform

</td><td>The OS of the client; macOS or Windows

</td></tr><tr><td>Last Connect

</td><td>The last time the FileWave Client attempted to check in with the server. The default check-in interval is every 2 minutes.

</td></tr><tr><td>Status

</td><td>You will see one of three options:

- **New Client** - A new device with a valid certificate.
- **Invalid Certificate** - The device has no certificate, has a pre-13.1 client certificate, or has an invalid or damaged certificate.
- **Valid Certificate but a new Enrollment happened** - The certificate is valid, but the client's identity has changed.

All three status states can be approved by selecting and adding the client.

<table><tbody><tr><td>See: [What is Compatibility Mode?](https://kb.filewave.com/books/filewave-general-info/page/what-is-compatibility-mode "What is Compatibility Mode?")

</td></tr></tbody></table>

</td></tr></tbody></table>

  
You can assign clients to a group during enrollment or leave them in the **root** group. You can also place clones of those clients into other groups later.

To pre-assign new clients to a specific group, select ***Automatically add all new clients to the selected Group***. If you are enrolling clients in batches, you can change this selection between batches.

## Related Content

- [Conflict Resolution](https://kb.filewave.com/books/filewave-central-anywhere/chapter/conflict-resolution "Conflict Resolution")
- [Enrolling Mobile Devices](https://kb.filewave.com/books/filewave-client/page/enrolling-mobile-devices-into-filewave "Enrolling Mobile Devices")

# Mass Deploy Windows FileWave Client

## Summary

One of the most irritating bumps in the road towards the administrative freedom of FileWave is installing the FileWave Client on your computers for the first time. Now that we've started using MSI-based installers, you can easily deploy the FileWave WinClient via a domain server or log-on script. This post provides materials to aid in WinClient Mass Deployment.

You can follow this method or possibly a more simple method is outlined here [Deploying FileWave Client with Group Policy (GPO)](https://kb.filewave.com/link/96#bkmrk-deploying-the-filewa) from the eval guide.

Download the latest Windows FileWave Client (it's an exe in version 5.7 and up ) and WinClient Prefs Writer (link at bottom). To convert the exe into an msi installer check the conversion script

##### **<span style="color: rgb(53, 152, 219);">[generatefwwinclientmsi.vbs.zip](https://kb.filewave.com/attachments/108)</span>** This is an example on how you would run it:  
cscript C:\\path\\generatefwwinclientmsi.vbs C:\\path\\FileWaveClient.exe

Edit the preferences *script* to include your settings. I have put in example settings -- you must put your own in and then save the file.

**Before:**

<table id="bkmrk-%C2%A0-code%3A-set-serverna"><thead><tr><th> </th></tr></thead><tbody><tr><td>**Code:**</td></tr><tr><td>set serverName=no.server.set   
set serverAddress="no.server.address"   
set clientPassword="filewave"   
  
set booster1="no.booster.set"   
set booster1Port="0"   
  
:::   
  
set clientName=""</td></tr></tbody></table>

**After:**

<table id="bkmrk-%C2%A0-code%3A-set-serverad"><tbody><tr style="background-color: rgb(251, 238, 184);"><td>**Code:**</td></tr><tr><td>set serverAddress="[fwserver.filewave.us](http://fwserver.filewave.us)"   
set clientPassword="jelly"   
  
set booster1IP="[fwbooster.filewave.us](http://fwbooster.filewave.us)"   
set booster1Port="20013"   
  
:::   
  
set clientName=""</td></tr></tbody></table>

Once the script is edited, these are both ready to execute on a computer, either by log-on script or some remote activation. Make sure that the MSI installs before the preferences script runs.

If you install the Client via the command line, add the "/quiet" argument to execute a silent installation. For a comprehensive list of the available arguments for MSI's, run the MSI using the "/?" argument.

<table id="bkmrk-%C2%A0-%C2%A0-fwclientprefswri"><thead><tr><th> </th><th> </th></tr></thead><tbody><tr><td>##### <span style="color: rgb(53, 152, 219);">[FWClientPrefsWriter.zip](https://kb.filewave.com/attachments/109)</span>

</td><td>668 B</td></tr></tbody></table>

# Apple Notarisation and Custom PKG Installers

## Description

Apple has introduced notarisation as a requirement for installation of PKGs on macOS with macOS version 10.15. Notarisation status can be determined in two ways :

- Offline: cryptographically verifying a ticket stapled to the PKG at installer creation time
- Online: contacting apples servers to verify an app / installer has been notarised

## Information

Custom installers for FileWave Client and Booster will be notarised starting from Version 13.2.2 and upwards, however, the notarisation ticket will not be stapled onto the PKG you download from [https://custom.filewave.com](https://custom.filewave.com) at the current time, requiring 'Online' confirmation.

Provided your macOS machines can reach the required servers outlined in [https://support.apple.com/en-us/HT210060](https://support.apple.com/en-us/HT210060) , you can expect everything to work as normal after 10-15 minutes of downloading the custom PKG.

<table id="bkmrk-hosts-ports-protocol" style="width:89.6296%;"><tbody><tr style="background-color:rgb(251,238,184);"><td style="width:22.1441%;">Hosts</td><td style="width:8.78735%;">Ports</td><td style="width:12.3023%;">Protocol</td><td style="width:16.1687%;">OS</td><td style="width:18.9807%;">Description</td><td style="width:21.6169%;">Supports proxies</td></tr><tr><td style="width:22.1441%;">17.248.128.0/18</td><td style="width:8.78735%;">443</td><td style="width:12.3023%;">TCP</td><td style="width:16.1687%;">macOS only</td><td style="width:18.9807%;">Ticket delivery</td><td style="width:21.6169%;">—</td></tr><tr><td style="width:22.1441%;">17.250.64.0/18</td><td style="width:8.78735%;">443</td><td style="width:12.3023%;">TCP</td><td style="width:16.1687%;">macOS only</td><td style="width:18.9807%;">Ticket delivery</td><td style="width:21.6169%;">—</td></tr><tr><td style="width:22.1441%;">17.248.192.0/19</td><td style="width:8.78735%;">443</td><td style="width:12.3023%;">TCP</td><td style="width:16.1687%;">macOS only</td><td style="width:18.9807%;">Ticket delivery</td><td style="width:21.6169%;">—</td></tr></tbody></table>

<p class="callout info">**Custom PKG Version 13.2.2**  
Version 13.2.2 Custom PKGs created prior to 4th March 2020 will not be notarised and will require re-creating if notarisation is required</p>

<p class="callout info">Starting in FileWave 16.3, current FileWave binaries and applications are signed as **FileWave (USA), Inc.** (`UWMR88SA8G`) instead of **FileWave (Europe) Gmbh** (`83S2TRZ3CS`). The `spctl` examples below use an older FileWave Client 13.2.2 package, so they still show the previous signing identity. On current 16.3.x builds, expect the signer name and team identifier to reflect the newer FileWave (USA), Inc. identity.</p>

## Confirmation

The PKG may be tested for notarisation. On macOS 10.15.x you may observe the following:

Before notarisation has been completed by Apple:

##### **Unnotarised**

```bash
% spctl -a -vvv -t install FileWaveClient_13.2.2-fw.filewave.com-20-Feb-2020.pkg
FileWaveClient_13.2.2-fw.filewave.com-20-Feb-2020.pkg: rejected
source=Unnotarized Developer ID
origin=Developer ID Installer: FileWave (Europe) Gmbh (83S2TRZ3CS)

```

After notarisation has been completed by Apple:

##### **Notarised**

```bash
% spctl -a -vvv -t install FileWaveClient_13.2.2-fw.filewave.com-20-Feb-2020.pkg
FileWaveClient_13.2.2-fw.filewave.com-20-Feb-2020.pkg: accepted
source=Notarized Developer ID
origin=Developer ID Installer: FileWave (Europe) Gmbh (83S2TRZ3CS)

```

# Apple MDM Enrolment Methods

## Description

<table border="1" id="bkmrk-enrolling-apple-devi" style="border-collapse: collapse; width: 100%; border-width: 0px; border-style: none;"><colgroup><col style="width: 89.642857%;"></col><col style="width: 10.357143%;"></col></colgroup><tbody><tr><td style="border-width: 0px;">Enrolling Apple devices involves the installation of an MDM Enrolment Profile.

Installation may be initiated by either the user or the device. This same distinction also applies to the linking of the enrolment.

</td><td style="border-width: 0px;">[![image.png](https://kb.filewave.com/uploads/images/gallery/2024-09/scaled-1680-/5OqlXf681tYfdH5E-image.png)](https://kb.filewave.com/uploads/images/gallery/2024-09/5OqlXf681tYfdH5E-image.png)

</td></tr></tbody></table>

### Initiating Enrolment

This refers to the driving force of enrolment.

Consider Automated Device Enrolment (ADE), delivering the Profile before authentication (if configured). This is an example of profile-based enrolment.

Account-driven enrolment relies on the authentication of a user in advance.

### User vs Device Enrolment

Automated Device Enrolment links enrolment with the identity of the device; providing the maximum management options available. The extreme opposite is Bring Your Own Device (BYOD) enrolment. This is an example of the user's identity linking enrolment and provides the minimum amount of control.

User enrolment cryptographically separates organisational data from user data and limits many features of MDM. Further details explained in Apple's KB:

[User Enrolment and MDM](https://support.apple.com/en-gb/guide/deployment/dep23db2037d/1/web/1.0)

### Overview

Therefore, the key methods of enrolment can be categorised as:

- profile-based device enrolment
- account-driven device enrolment
- profile-based user enrolment
- account-driven user enrolment

### Enrolment Methods

#### Automated Device Enrolment

On startup, the device reaches out to Apple and, where associated, the Enrolment Profile is delivered to the device and installed. The user is then prompted for authentication (if not configured for no authentication).

#### OTA Enrolment

This enrolment type potentially has two offerings:

- User authenticates to download the Enrolment Profile and then instals the Profile manually.
- An Enrolment Profile is provided to the user, for example by email, and the user manually instals the Profile.

#### BYOD

BYOD also could be described with two possible options:

- Enrolment Profile is downloaded and then the user authenticates (deprecated, see below note)
- User authenticates in Settings and then approves the subsequently downloaded Profile.

#### Deprecation

<p class="callout warning">Although definitions exist for all enrolment methods above, as of iOS18 and macOS15 Apple will no longer support profile-based user enrolment. This impacts the first described BYOD enrolment method, meaning BYOD with personal devices must action account-driven user enrolment.</p>

### Account-Driven User Enrolment

Although these are personal devices, this enrolment method requires the user to add credentials into Settings which must be a Managed Apple ID. Federated Authentication links a supported IdP with Apple, matching Managed Apples IDs with IdP usernames and passwords.

[Federated Authentication](https://support.apple.com/en-gb/guide/apple-business-manager/axmb19317543/web)

<p class="callout info">Initial support for Account-driven user enrolment is currently targeted for FileWave 15.5. Confirmation of inclusion should be available closer to release.</p>

## Related Content

- [Account-Driven User Enrolment for i(Pad)OS](https://kb.filewave.com/books/ios-ipados/page/account-driven-user-enrollment-for-iosipados-byod-devices-v150)
- [Apple Automated Device Enrolment](https://kb.filewave.com/books/apple-school-business-manager/chapter/automated-device-enrollment-ade)
- [Apple Manual Enrolment](https://kb.filewave.com/books/evaluation-guide/page/apple-manual-enrollment)

# User Approved MDM Enrollment (macOS)

## Description

Apple has introduced a new concept with macOS High Sierra, User Approved MDM Enrolment. This will only affect the management of settings that Apple deemed to be considered ‘security-sensitive. All other non-sensitive settings will continue to work, as previously, without User Approved Enrolment. This does not affect devices enrolled through DEP.

There are two aspects to this.

- User Approved MDM Enrolment
- Configuration Profile payloads that will require User Approved MDM Enrolment.

The first payload Apple has announced that will use these features is the Kernel Extensions payload.

[**https://support.apple.com/en-us/HT208019**](https://support.apple.com/en-us/HT208019)

Unlike other payloads, any ‘security-sensitive’ payload will be deliverable only by MDM and will rely on the MDM enrolment being User Approved.

## User Approved MDM Enrolment

Currently, User Approved MDM Enrolment relies on the device being enrolled; the method of enrolment does not matter yet but will do in future releases. At this point, the enrolment must be either:

- DEP enrolment (user approval not required)
- User installing the enrolment profile manually
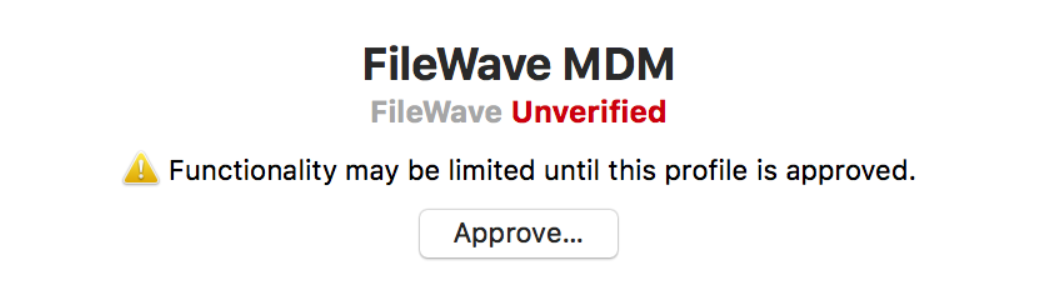
- User accepts the enrolment profile through System Preferences &gt; Profiles:

[![image.png](https://kb.filewave.com/uploads/images/gallery/2023-07/scaled-1680-/FWKkqX97VsRxoFhs-image.png)](https://kb.filewave.com/uploads/images/gallery/2023-07/FWKkqX97VsRxoFhs-image.png)

You will notice this approval box in 10.13.2, if the method of enrolment was hidden from the user, e.g. scripted. Devices enrolled on earlier versions and then upgraded will automatically be MDM enrolled as User Approved.

## Kernel Extensions

Apple introduced a halfway house with the release of 10.13. Apple has now released version 10.13.4 which has full implementation of this feature.

#### How does this affect kernel extensions?

Attempts to install a Kernel Extension with a device that is not enrolled into MDM will be greeted with the following message:

[![image.png](https://kb.filewave.com/uploads/images/gallery/2023-07/scaled-1680-/4Csm3CC95e4jf0zq-image.png)](https://kb.filewave.com/uploads/images/gallery/2023-07/4Csm3CC95e4jf0zq-image.png)
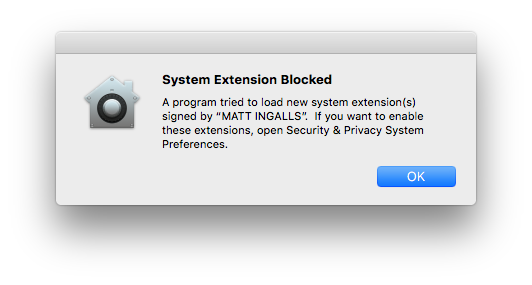
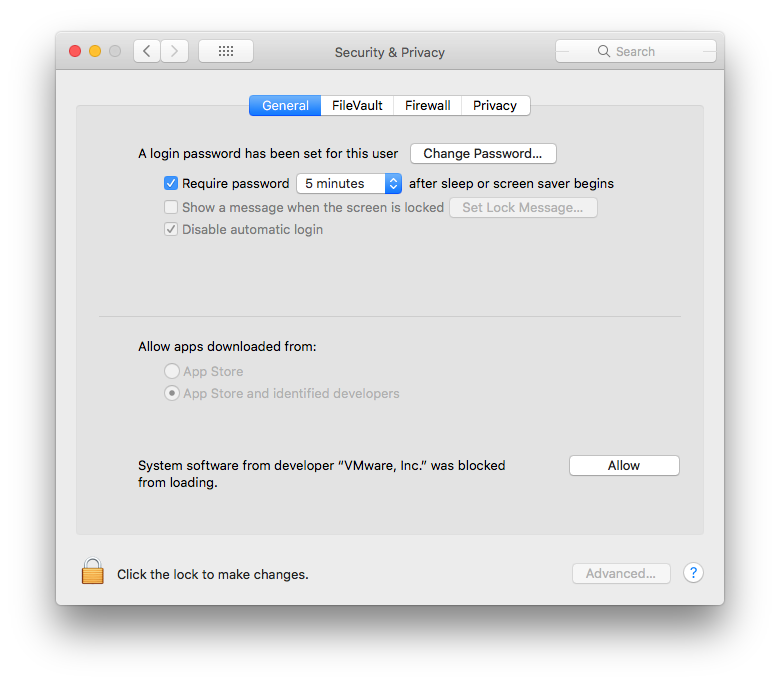
To approve the Kernel Extension will either require MDM enrolment or the user allowing the blocked Extension to run, via System Preferences &gt; Security &amp; Privacy &gt; General:

[![image.png](https://kb.filewave.com/uploads/images/gallery/2023-07/scaled-1680-/0vcxbRw70vqDSXYZ-image.png)](https://kb.filewave.com/uploads/images/gallery/2023-07/0vcxbRw70vqDSXYZ-image.png)

#### **What happens if I already have kernel extensions installed?**

Any extension installed prior to upgrading to 10.13 High Sierra will continue to work, only newly installed kernel extensions will be affected.

Once a particular kernel extension is approved, subsequent upgrades to that kernel extension will automatically be user-approved.

#### **Managing Kernel Extensions through MDM**

Prior to version 10.13.4, there is no management beyond having the device enrolled into MDM. However, with 10.13.4, management is now available through the Kernel Extension Policy payload, allowing extension loading without user consent when enrolled appropriately; the payload can only be delivered with MDM, to devices that are User Approved MDM Enrolled. This could result in apps relying on kernel extensions to stop functioning properly (e.g. VPN clients, antivirus software).

As of FileWave version 12.7.0, the Kernel Extensions payload was introduced. To allow Kernel Extensions requires either:

1. 'Team Identifier'
2. Individually using the 'Kernel Extension bundle ID'.

These values are stored locally on a device after installation. Therefore, to find these values involves installing them on a device and then reading these values from a file, e.g., for a machine that has VMware Tools installed. One machine could have all Extensions installed prior to running the command to list all necessary Kernel Extensions.

```bash
$ sqlite3 /var/db/SystemPolicyConfiguration/KextPolicy 'select team_id,bundle_id from kext_policy;'
EG7KH642X6|com.vmware.kext.VMwareGfx
EG7KH642X6|com.vmware.kext.vmhgfs

```

This lists the Team Identifier followed by the Bundle ID for two Kernel Extensions that have been added with the installation of VMware Tools. Both have the same Team Identifier, but have differing Bundle IDs.

1. To just use Team Identifier, add the returned Team Identifier from the command for the Kernel Extensions you wish to approve, to the 'Allowed Team Identifiers' whtielist. All Kernel Extensions with this Team Identifier will be whitelisted.
2. To only allow certain Kernel Extensions, instead use the 'Allowed Kernel Extensions' whitelist and add both Team Identifier and Bundle ID. Note, legacy Extensions may not have a Team Identifier. For those that don't, just supply the Bundle ID and leave the Team Identifier empty.

There is also a community of users that are adding Identifiers and Bundle IDs which could save you having to instal in advance.

### Community Kernel Extensions List

Data in this list is not checked in any way. As this is in place for security reasons and anyone can add information to this file, use with care:

[Community Kernel Extensions List](https://docs.google.com/spreadsheets/d/1IWrbE8xiau4rU2mtXYji9vSPWDqb56luh0OhD5XS0AM/edit#gid=0)

#### **Can I use User Approved Kernel Extension loading without MDM?**

Yes. This however involves booting the computer into recovery mode and using the following command:

> $ spctl

See the man page for required options:

[https://developer.apple.com/legacy/library/documentation/Darwin/Reference/ManPages/man8/spctl.8.html](https://developer.apple.com/legacy/library/documentation/Darwin/Reference/ManPages/man8/spctl.8.html)

N.B. This is stored in NVRAM. If you reset the NVRAM, you will lose the ability to use User Approved Kernel Extension loading with this method until the steps are retraced. A firmware password could be set to prevent unauthorized NVRAM resets.

#### Extensions Payload

The Extensions payload should not be confused with the Kernel Extensions payload.

[https://help.apple.com/profilemanager/mac/5.4/#/apd58550e429](https://help.apple.com/profilemanager/mac/5.4/#/apd58550e429)

The Extensions payload controls those extensions visible through the Extensions System Preferences and will not affect Kernel Extensions

# macOS MDM Enrollment State

## DESCRIPTION

macOS devices are unique, in as much as they may be managed by both the FileWave Client and Apple's MDM process. The MDM Enrollment State is an inventory item which shows the current state of MDM enrollment.

<p class="callout info">FileWave requires the FileWave Client for basic management of macOS devices. MDM is an additional extra to expand the management options, as provided by Apple. There is no MDM only option for macOS devices.</p>

## INFORMATION

### MDM Enrollment State

The state is a live report of the current status of the device's enrollment; imagine if a device was initially MDM enrolled, but the enrollment profile has been subsequently removed from the device. Status values include:

- **Full Enrolled** – Device was MDM enrolled and all is good. This would be usual for DEP or OTA
- **Server only** – Devices was MDM enrolled, but the device no longer has an enrollment profile installed
- **Device only** – Device has an MDM enrollment profile installed, yet the database has no reference of this
- **Undefined** – Device is running a version of FileWave older than 14.3.0 or has not yet reported back its state
- **Not Enrolled** – Device has never been MDM enrolled and is managed purely by the FileWave Client

### Preliminary troubleshooting

Before contacting FileWave Support, use the state value to narrow where the mismatch is happening:

- **Server only**: FileWave has a server-side MDM record, but the Mac no longer has the FileWave MDM enrollment profile. Check Profiles/System Settings on the Mac for the FileWave MDM profile and note whether the device was recently archived, retired, wiped, migrated, or manually modified. Removing the MDM profile normally requires an MDM command, such as when a device is archived.
- **Device only**: The Mac still has an MDM enrollment profile, but FileWave does not have the matching server-side record. This usually means enrollment did not complete or the server record no longer matches the device. Check the profile install date, APNs topic, and the custom fields below, then re-enroll the device if the server cannot match it.
- **Logs**: On the FileWave Server, `/usr/local/filewave/log/filewave_django.log` includes MDM communication that can help explain enrollment and profile-removal behavior. DEBUG logging only helps for future actions after it is enabled, so collect the existing server log, the profile install time from the Mac, and any recent archive/re-enrollment actions before escalating.

### DIRECTIONS

A query may be used to identify devices that are not in an expected state, for example, identify devices that no longer have an Enrollment Profile installed

An example query could look something like:
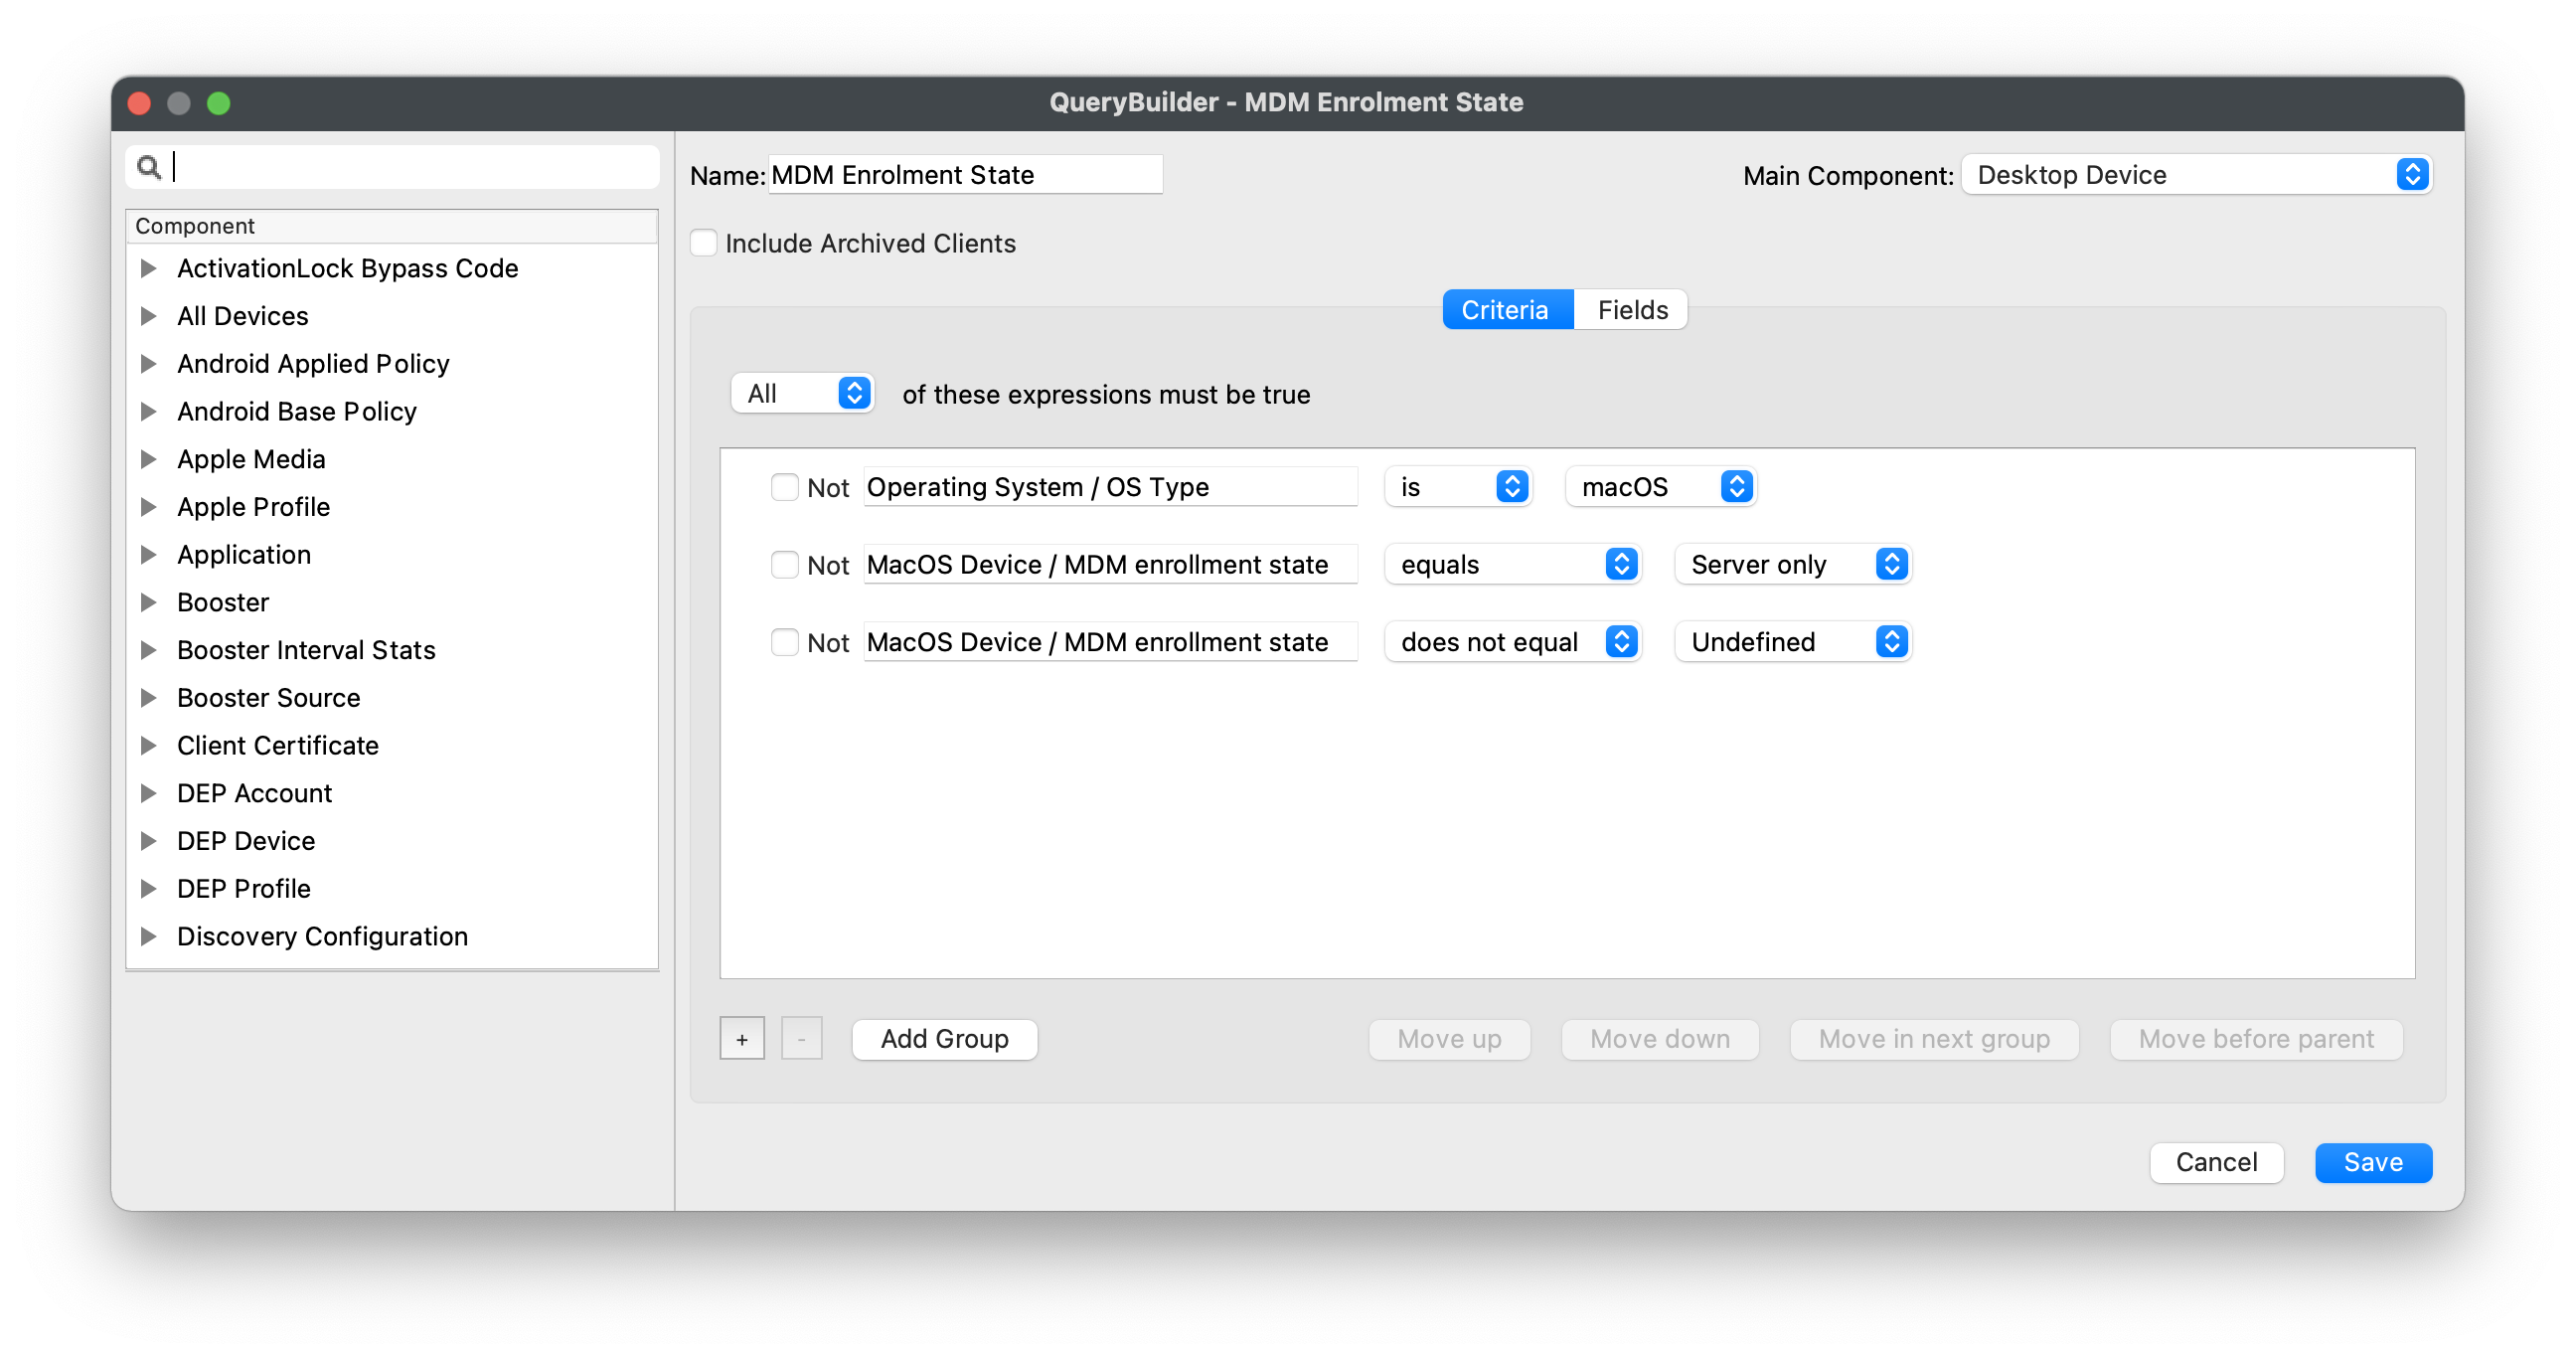
![](https://kb.filewave.com/uploads/images/gallery/2023-07/v0BNjUMquIvahvsb-embedded-image-hdr4n55n.png)

Add, edit or remove criteria to meet desired reporting.

### ADDITIONAL INFORMATION

To assist identifying why a device may show as 'Device Only', the following Custom Fields may be added, reporting the Server Root Cert Name and the APNs of the enrollment profile:

#### MDM Server Root Certificate Name

<table id="bkmrk-%E2%86%93-macos"><tbody><tr><td>↓ macOS

</td></tr><tr><td>[![](https://kb.filewave.com/uploads/images/gallery/2023-07/H9DzIJAxjNlu0VsP-embedded-image-bjognzyk.png)](https://kb.filewave.com/attachments/157)

</td></tr></tbody></table>

#### Enrollment Profile APNs Topic

<table id="bkmrk-%E2%86%93-macos-1"><tbody><tr><td>↓ macOS

</td></tr><tr><td>[![](https://kb.filewave.com/uploads/images/gallery/2023-07/n4nlb9KBuMgf2jtq-embedded-image-5hi0asas.png)](https://kb.filewave.com/attachments/158)

</td></tr></tbody></table>

# Enrolling Mobile Devices into FileWave

Mobile devices can be imported or represented in FileWave before enrollment so administrators can prepare groups, Filesets, and Deployments in advance. Apple mobile devices—including iPhone, iPad, and [Apple Vision Pro](https://kb.filewave.com/books/apple-general-info/page/managing-apple-vision-pro-and-visionos)—can enroll through Automated Device Enrollment (ADE) or the supported manual mobile-enrollment workflow. Android devices use the applicable Android enrollment workflow. After enrollment, the device has the FileWave certificate and MDM profile required for management.

## Web-based enrollment - Apple mobile devices

To enroll an iPhone, iPad, or Apple Vision Pro over the Internet, use the URL that points to the FileWave MDM server. In FileWave Central, the existing interface label remains **Assistants &gt; Enroll iOS Device**; this mobile-enrollment workflow also applies to supported iPadOS and visionOS devices.

[![image.png](https://kb.filewave.com/uploads/images/gallery/2026-02/scaled-1680-/WQGzaQZZ1T1n1pMX-image.png)](https://kb.filewave.com/uploads/images/gallery/2026-02/WQGzaQZZ1T1n1pMX-image.png)

  
You can create a Web Clip with that URL embedded or copy the URL to the Clipboard and email it to your users. When they go to that URL on their mobile device, they will get instructions on how to properly enroll their device with your server. Having your FileWave server linked to your LDAP server allows the users to authenticate as themselves, instead of using a generic user account. This provides the benefit of having the user's LDAP record link its account information to the device. Another result of this is that the user can be automatically invited to link their Apple ID with your FileWave VPP service.

![G6LgW4n9qTZPJHJu-embedded-image-xe7abw9y.png](https://kb.filewave.com/uploads/images/gallery/2023-07/G6LgW4n9qTZPJHJu-embedded-image-xe7abw9y.png)

  
The user is presented with a dialog prompting to install a MDM server certificate, then enroll the device. The second step is when the user will be asked to authenticate - and this is where LDAP integration comes in handy. If not using LDAP, you need to inform users of the generic credential to use, or else they will not be able to proceed with step 2.

![XiA4ix7fQnbBUeks-embedded-image-ycwzilhw.png](https://kb.filewave.com/uploads/images/gallery/2023-07/XiA4ix7fQnbBUeks-embedded-image-ycwzilhw.png)

Once the user has completed these two steps, the device will display the new profiles that have been installed:

![KEtR80YkxBUExFne-embedded-image-edtpx7y4.png](https://kb.filewave.com/uploads/images/gallery/2023-07/KEtR80YkxBUExFne-embedded-image-edtpx7y4.png)

If the user's device is not yet a FileWave Client (no placeholder record previously created), it will need to be captured in FileWave Admin. You will go to the **Clients** pane, select **New Client** from the toolbar.

![CTs8RA5SvKrkpfd8-embedded-image-xlzkxdxm.png](https://kb.filewave.com/uploads/images/gallery/2023-07/CTs8RA5SvKrkpfd8-embedded-image-xlzkxdxm.png)

Select **Enrolled Mobile Devices** and you will get the list of all mobile devices that have performed an online enrollment, or have been activated by Apple Configurator:

![nuGAA4RUxuDn2Glt-embedded-image-shdiuxha.png](https://kb.filewave.com/uploads/images/gallery/2023-07/nuGAA4RUxuDn2Glt-embedded-image-shdiuxha.png)

The device(s) can be automatically added to an existing client Group, or you can manually add them to a Group, if desired. If you have devices set to be automatically added to a specific Group, then you will just see them appear as members in that Group.  
**Note: Unless you want all devices that enroll during a specific timeframe to end up in a designated Group, you should leave automatic placement off. You should also think about using Clones instead of the actual device client as members of any Groups.**

## Automatic or Forced Enrollment - iOS

Another option for enrollment is using an embedded enrollment profile as part of a mobile device configuration. Apple Configurator allows you to import a FileWave MDM enrollment profile, which will then be used to assign the device to your FileWave MDM server.

Instructions are included here for Apple Configurator v2.2.1.

### Single device enrollment

In FileWave Admin, under **/Assistants/Enroll iOS Device**, you select **Device Enrollment**:

[![image.png](https://kb.filewave.com/uploads/images/gallery/2026-02/scaled-1680-/jnNljvQ3d4GYCTvX-image.png)](https://kb.filewave.com/uploads/images/gallery/2026-02/jnNljvQ3d4GYCTvX-image.png)

### Apple Configurator v2.2.1

Apple Configurator 2's blueprints let you record actions that can be applied to devices. You add configuration profiles and apps to blueprints, just as you would add them to a physical device. You can prepare a blueprint so it has the MDM data and supervision identify attached. Once you have the blueprint the way you want, you can apply it to a device. For detailed info on how to use Apple Configurator 2, see: [http://help.apple.com/configurator/mac/2.0/](http://help.apple.com/configurator/mac/2.0/)

To create a blueprint, click ![xpp0MTtLI6AcZGSF-embedded-image-dwqwyjup.png](https://kb.filewave.com/uploads/images/gallery/2023-07/xpp0MTtLI6AcZGSF-embedded-image-dwqwyjup.png) in the toolbar, select **Edit Blueprints**, then click on **New** in the bottom left corner to create a new blueprint. Perform your edits. When you finish, click **Done**.

![kdRPcRsM6FtWDXF7-embedded-image-2e04ohkf.png](https://kb.filewave.com/uploads/images/gallery/2023-07/kdRPcRsM6FtWDXF7-embedded-image-2e04ohkf.png)

AC2 allows you to configure sets of devices, re-installing iOS, setting up profiles, and assigning to an MDM server.

![3LxkvDsE9pKh5ZHz-embedded-image-f1iqrdwg.png](https://kb.filewave.com/uploads/images/gallery/2023-07/3LxkvDsE9pKh5ZHz-embedded-image-f1iqrdwg.png)

![TW7lHdfmy4pbCLrk-embedded-image-l5jzwajk.png](https://kb.filewave.com/uploads/images/gallery/2023-07/TW7lHdfmy4pbCLrk-embedded-image-l5jzwajk.png)

![Rn90KqeKnBnxDdOZ-embedded-image-6ujcot9e.png](https://kb.filewave.com/uploads/images/gallery/2023-07/Rn90KqeKnBnxDdOZ-embedded-image-6ujcot9e.png)

  
Apple Configurator 2 supports using an Apple VPP account to assign purchases to attached devices. You should only set this up if you are not going to be using VPP from your FileWave server to associate licensed content, or if you are going to use a separate account to apply specific core content to your iOS devices outside of any FileWave workflows.

<p class="callout danger">Note: You cannot use the same VPP account token you are using on your FileWave server to distribute content!  
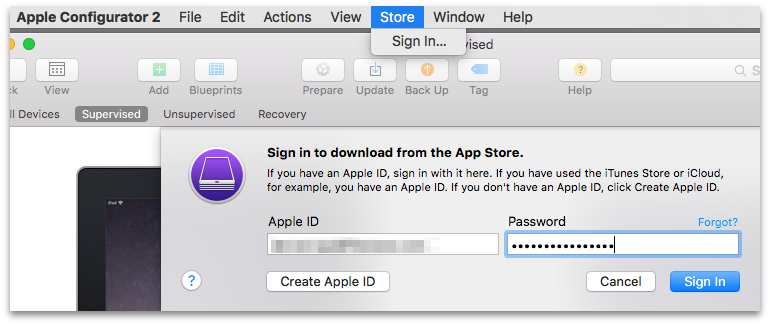
</p>

![5MQWDLwlhtr2ffRN-embedded-image-flqmraqy.png](https://kb.filewave.com/uploads/images/gallery/2023-07/5MQWDLwlhtr2ffRN-embedded-image-flqmraqy.png)

### App Store account

You can sign in to the App Store using the following:

*Volume Purchase Program (VPP) account:* You log in with the Apple ID associated with your VPP account or the Apple ID associated with a purchaser you specify

*Your personal account:* This is the iTunes account you use to purchase personal apps

<p class="callout danger">**WARNING:** If your VPP account is already associated with another instance of Apple Configurator 2 or an MDM solution, all app assignments from those previous associations will be revoked.  
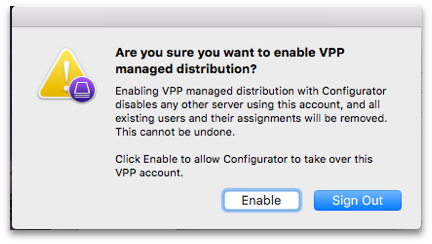
</p>

![zUlgnHwYDFRJVnY8-embedded-image-t83vxua4.png](https://kb.filewave.com/uploads/images/gallery/2023-07/zUlgnHwYDFRJVnY8-embedded-image-t83vxua4.png)

Once you have enrolled your mobile devices, and added them as clients in FileWave, you should see a set of installed profiles like the ones below.
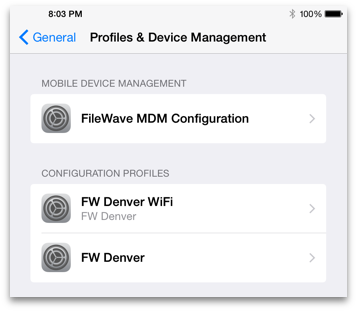
![xYIYaI7CIlp635HM-embedded-image-jadunelx.png](https://kb.filewave.com/uploads/images/gallery/2023-07/xYIYaI7CIlp635HM-embedded-image-jadunelx.png)

Using AC2 for direct assignment of applications allows you to preload your iOS devices with core applications without requiring user interaction. The workflow would create a layer in your deployment model that lets you preconfigure devices that will become FileWave Clients for all day-to-day operations and management; but come equipped with a starting set of tools.

## Mass Enrollment for iOS

You can set up Apple Configurator for bulk enrollment of preconfigured iOS devices by using this option in the **Enroll iOS Device** assistant. The device **must** be connected to Wi-Fi already before this process will work. If not, then make sure you add a Wi-Fi profile to your Apple Configurator setup. This process is built into AC2 using the steps above, since it already supports setting up multiple devices simultaneously.

[![image.png](https://kb.filewave.com/uploads/images/gallery/2026-02/scaled-1680-/sRK8QueKPSdwcHVl-image.png)](https://kb.filewave.com/uploads/images/gallery/2026-02/sRK8QueKPSdwcHVl-image.png)
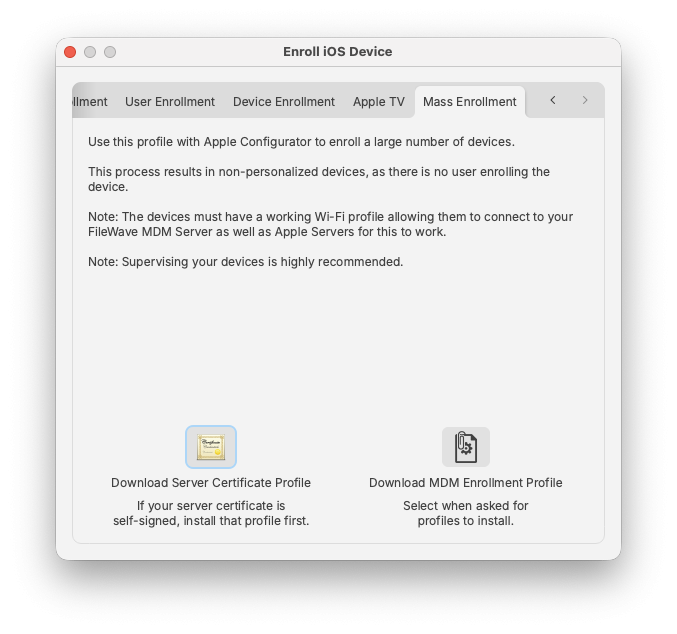
  
In this case, you would just download the MDM Enrollment profile, import it into Apple Configurator, and apply it to a set of iOS devices that were cloned with wireless settings, or a profile, already in place.

### FileWave Enterprise App Portal for iOS

Starting with FileWave 8.5, iOS devices running iOS 7+ use a native iOS App Portal (Kiosk) instead of the web clip. iOS 8+ devices must use the App Portal. Instructions on how to deploy the App Portal are covered in Chapter **5** on mobile Filesets. When iOS devices are enrolled, they get the web clip version of the Kiosk. The new Enterprise App Portal automatically replaces the web clip and provides a more robust, responsive self-service tool.

### Activation Lock Bypass

Since the introduction of iOS 7, device users have been able to enable a feature known as *Activation Lock* - which is linked to *Find My iPhone*. This feature ties a device to a specific Apple ID. In order to activate a device with an Activation Lock after a wipe or reset, the Apple ID credentials of the locking account are required. Where this can become problematical is having a 1:1 deployment where a user sets the Activation Lock on their device, then leaves without de-activating the lock. Prior to iOS 7.1, this issue was limited to unsupervised devices, since supervision inhibited the activation lock. Apple has provided a process now to supervise a device, yet still provide the activation lock - as well as a way to deactivate the lock when necessary.

FileWave Admin contains a new Assistant labeled **Activation Lock Management.** When an iOS device is enrolled in the FileWave MDM, its activation lock is stored in the FileWave Server.  


![TXH90zyThldNrafD-embedded-image-dq0zg40g.png](https://kb.filewave.com/uploads/images/gallery/2023-07/TXH90zyThldNrafD-embedded-image-dq0zg40g.png)![wKr1gj3DUpcZ0tZ9-embedded-image-0j12xbjq.png](https://kb.filewave.com/uploads/images/gallery/2023-07/wKr1gj3DUpcZ0tZ9-embedded-image-0j12xbjq.png)  
If a device is sent a remote wipe command, the activation lock can be disabled at the same time.
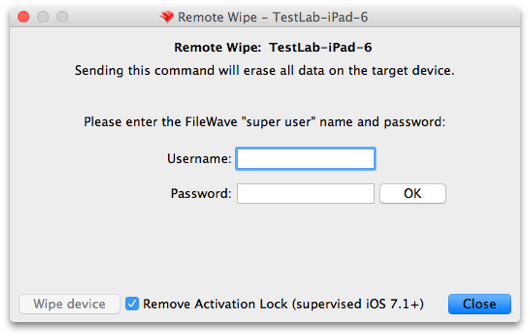
![YoB94Y89wBvnh9BG-embedded-image-yi4bdkev.png](https://kb.filewave.com/uploads/images/gallery/2023-07/YoB94Y89wBvnh9BG-embedded-image-yi4bdkev.png)

These lock bypass codes are stored in the FileWave server, and remain even when the device has been un-enrolled. The information concerning devices with bypass codes is even provided in Inventory queries. Best practice is to maintain the codes for institutional devices, regardless of the device's enrollment status, as a safety measure. If the device is no longer used, or taken offline, do **NOT** delete the device from your FileWave database, just archive the device. Once the device has been deleted, the activation lock information is deleted also.

<p class="callout danger">Note: In order to access the Activation Lock Bypass controls in FileWave Admin, you must login as the superuser (fwadmin).</p>

<table id="bkmrk-you-can-also-configu"><tbody><tr><td><p class="callout info">You can also configure Activation lock in the ADE profile: [Working with Apple’s Automated Device Enrollment (ADE)](https://kb.filewave.com/books/apple-school-business-manager/page/working-with-apples-automated-device-enrollment-ade "Working with Apple’s Automated Device Enrollment (ADE)")</p>

</td></tr></tbody></table>

## iOS/tvOS Device Placeholders

![2wdnDcqRIID7SQY8-embedded-image-60uyastk.png](https://kb.filewave.com/uploads/images/gallery/2023-07/2wdnDcqRIID7SQY8-embedded-image-60uyastk.png)

### Text File (iOS Devices from CSV)

When importing from a CSV file, FileWave Admin will ask for the CSV file first. The following fields are supported:

- serial number of the iOS device;
- client name; and,
- comments (optional).

After opening the file, a dialog opens with the list of parsed devices, allowing you to select which devices to import. The dialog is the same as for importing text files.

![51DjnT71mczZ6PYq-embedded-image-ctocy9fq.png](https://kb.filewave.com/uploads/images/gallery/2023-07/51DjnT71mczZ6PYq-embedded-image-ctocy9fq.png)

Just select any devices and click **Add X Clients**. After doing that, the new devices will appear in the Clients view. However, there's almost no information provided for them.

It's possible to create associations and manage licenses (VPP for instance) on placeholder records the same way as if the devices had already enrolled. Update the model and any associated Filesets will be deployed automatically when the devices enroll.

### iOS Devices from ADE

A ADE account must be configured in FileWave Admin before being able to pre-import from DEP.  
When importing from ADE, FileWave Admin will show the list of ADE accounts and the number of devices associated to that account that are iOS devices and whose serial number are not already used with your FileWave Server.

![Q0AasrS3HErutKgN-embedded-image-j4qh3ulj.png](https://kb.filewave.com/uploads/images/gallery/2023-07/Q0AasrS3HErutKgN-embedded-image-j4qh3ulj.png)

You check the ADE accounts from which you want to import devices, then click **OK**. After doing so, placeholders for all devices from the selected account will be created. You can create associations as usual, update the model, and their corresponding Filesets will be deployed when the devices enroll.

Once the device is enrolled, its name in FileWave transitions from the serial number to the actual device name. If there is a ADE naming convention, that will automatically apply.

<table id="bkmrk-see-placeholders-for"><tbody><tr><td>See [Placeholders](https://kb.filewave.com/books/filewave-client/page/placeholders "Placeholders") for what can be done with the imported devices

</td></tr></tbody></table>

## Related Content

- [Conflict Resolution](https://kb.filewave.com/books/filewave-central-anywhere/chapter/conflict-resolution "Conflict Resolution")
- [Enrolling Computer Clients](https://kb.filewave.com/books/filewave-client/page/enrolling-computer-clients-into-filewave "Enrolling Computer Clients")

# Enrolling Apple TV into FileWave

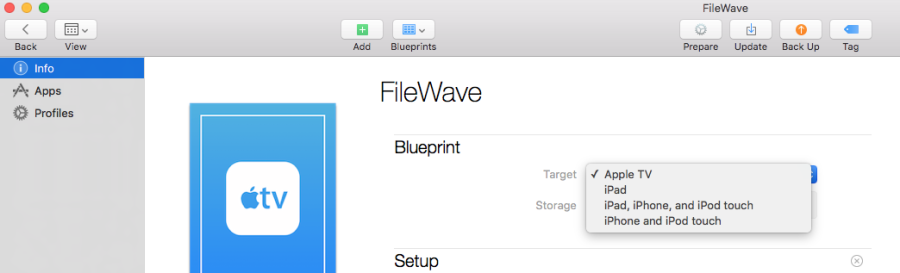
You can use Apple Configurator to enroll Apple TV devices into FileWave. The screenshots below show the blueprint-based workflow.

In Apple Configurator, create a new blueprint and set the target to **Apple TV**.

<p class="callout info">Newer Apple Configurator versions may change individual dialogs, but the overall process remains similar.</p>

![Apple Configurator blueprint creation with Apple TV selected as the target](https://kb.filewave.com/uploads/images/gallery/2023-07/93zIo7e724Esyw2M-embedded-image-cgo0vd4a.png)

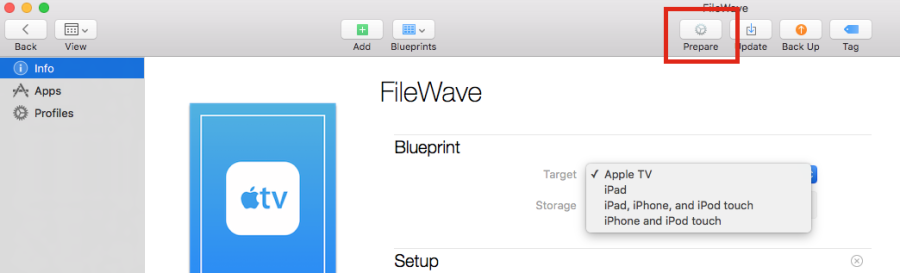
Click the **Prepare** icon.

![Apple Configurator toolbar with the Prepare icon available](https://kb.filewave.com/uploads/images/gallery/2023-07/fHbhI3e5dy1HK3CT-embedded-image-iclca3xv.png)

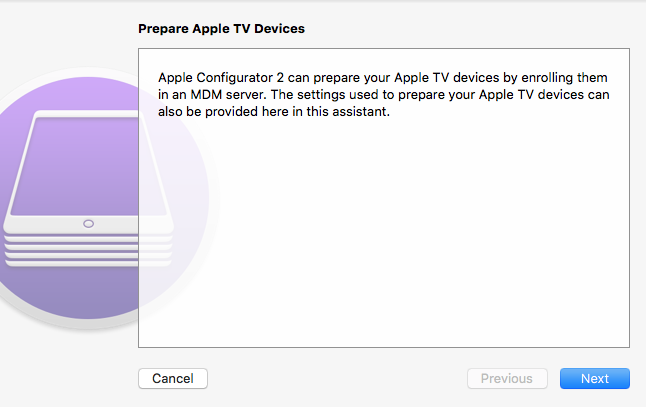
The Prepare Devices dialog opens.

![Apple Configurator Prepare Devices dialog](https://kb.filewave.com/uploads/images/gallery/2023-07/brMGr7ExgTiCqlZo-embedded-image-qtoywdqm.png)

Click **Next**. Select **New server...** in the server selection box, then click **Next**.
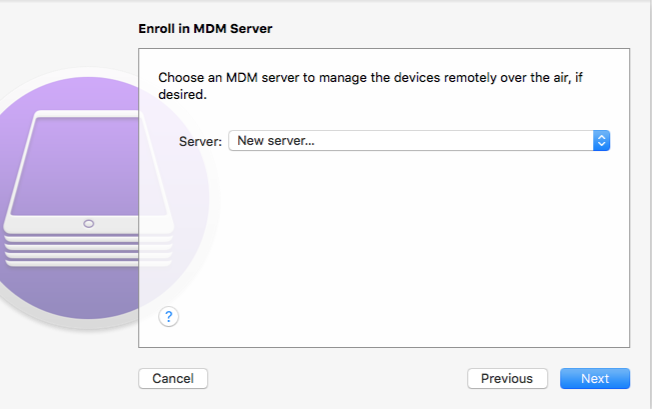
![Apple Configurator server selection dialog with New server selected](https://kb.filewave.com/uploads/images/gallery/2023-07/eGv4J12OWgle7qv8-embedded-image-zrvry9lg.png)

Enter a server name and the URL for over-the-air enrollment, including the required port number at the end of the URL, then click **Next**. The server name is only for identification in Apple Configurator and does not need to match DNS.
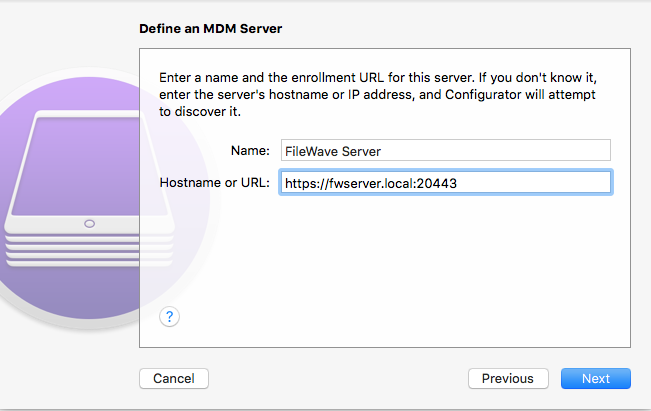
![Apple Configurator MDM server name and enrollment URL fields](https://kb.filewave.com/uploads/images/gallery/2023-07/Nj4RVRTeTBVKpHQ5-embedded-image-ryifgdez.png)

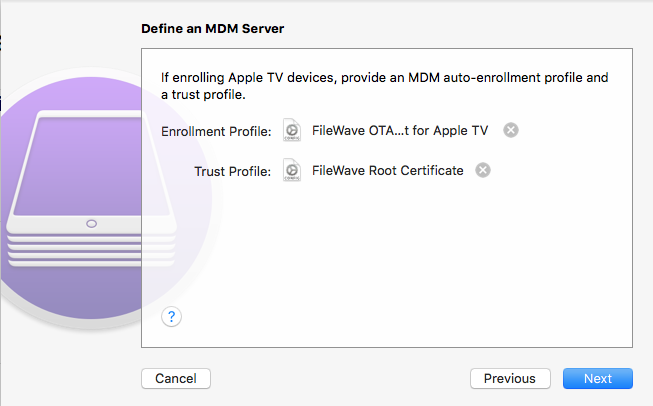
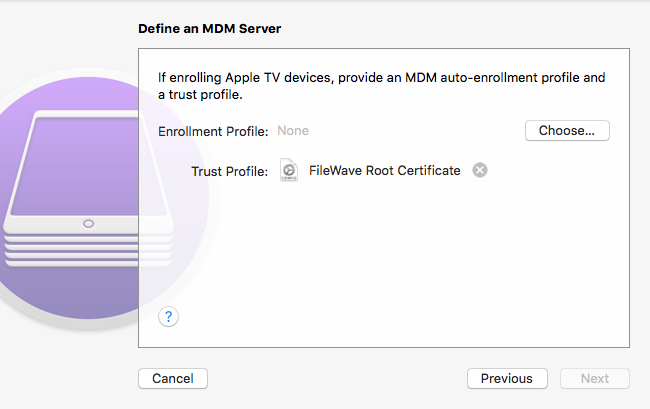
If Apple Configurator can connect to the FileWave Server, it shows the trust profile and FileWave Root Certificate. For the required enrollment profile, use FileWave Admin's **Enroll iOS Device** assistant and download the profile from the **Apple TV** tab.
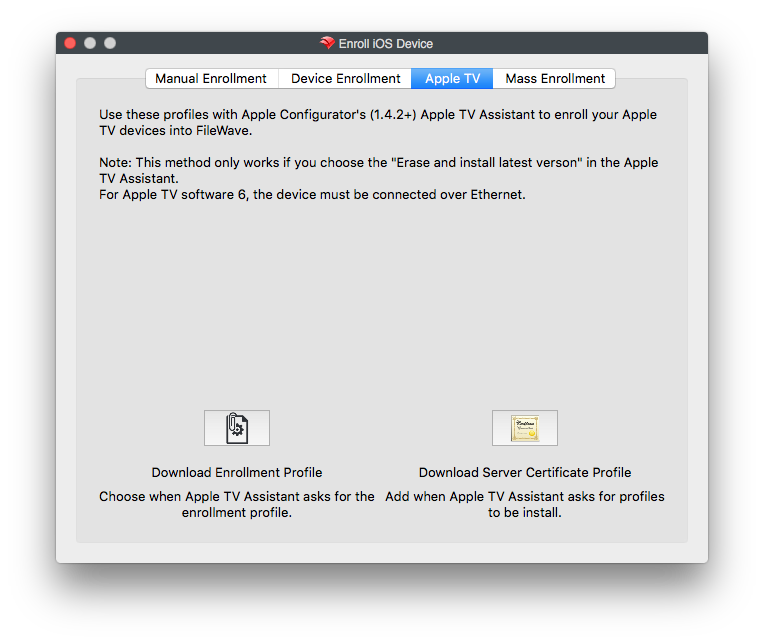
![Apple Configurator trust profile and root certificate screen for the FileWave Server](https://kb.filewave.com/uploads/images/gallery/2023-07/1Xnro2uT5VGzCuBs-embedded-image-i17mmv5d.png)

Click **Choose...** and select the enrollment profile you downloaded from FileWave Admin.
![Apple Configurator enrollment profile selection screen](https://kb.filewave.com/uploads/images/gallery/2023-07/XhBzQXMj1eJ1jw0f-embedded-image-tfefilmq.png)

![Apple Configurator screen showing the FileWave enrollment profile selected](https://kb.filewave.com/uploads/images/gallery/2023-07/rDUplcXWkcRXuEJh-embedded-image-b0ydpv4y.png)

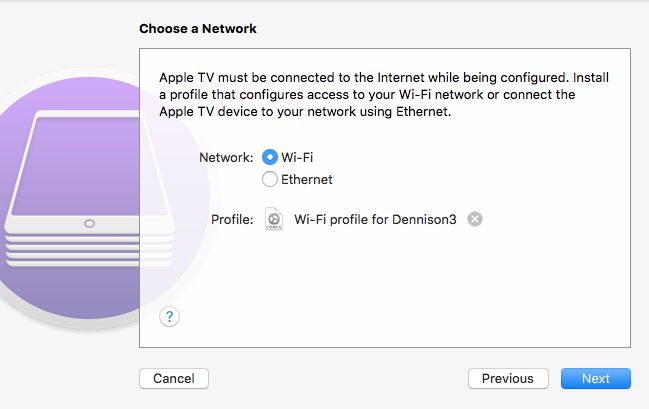
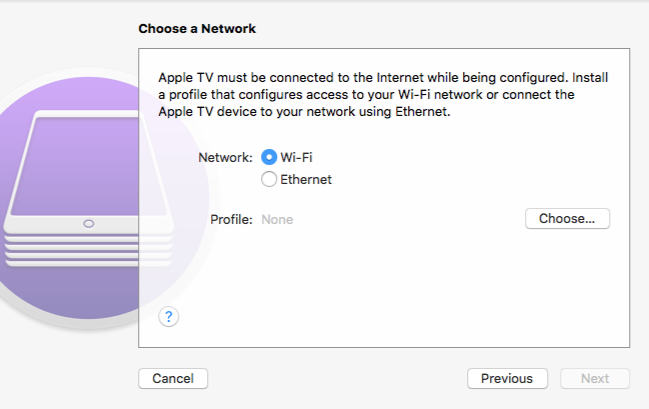
After the enrollment profile is selected, click **Next**. In FileWave, create a Wi-Fi profile with the SSID and password the Apple TV needs to join the wireless network. Add that Wi-Fi profile to the blueprint with **Choose...**.
![Apple Configurator screen for adding a Wi-Fi profile to the Apple TV blueprint](https://kb.filewave.com/uploads/images/gallery/2023-07/xeKliNBcfyAJcRbT-embedded-image-wcllj4zu.png)

Click **Next**.

![Apple Configurator setup assistant options before preparing Apple TV](https://kb.filewave.com/uploads/images/gallery/2023-07/bEplC437TLYX9rE9-embedded-image-5lqohr8y.png)

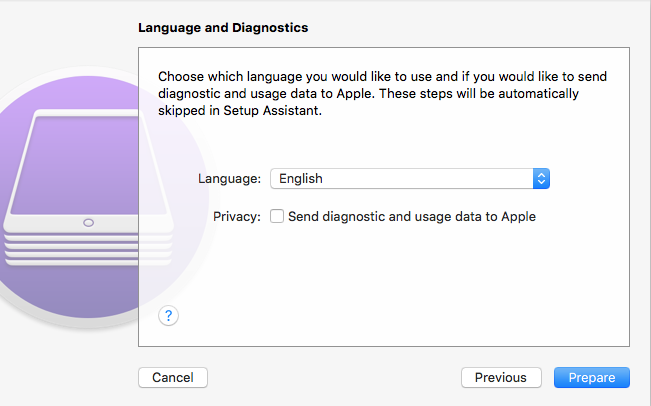
Select the language and diagnostic/usage-data options you want to use, then click **Prepare**.
![Apple Configurator final Prepare button for the Apple TV blueprint](https://kb.filewave.com/uploads/images/gallery/2023-07/Jh319kqrBPejRDfJ-embedded-image-p7e3lovk.png)

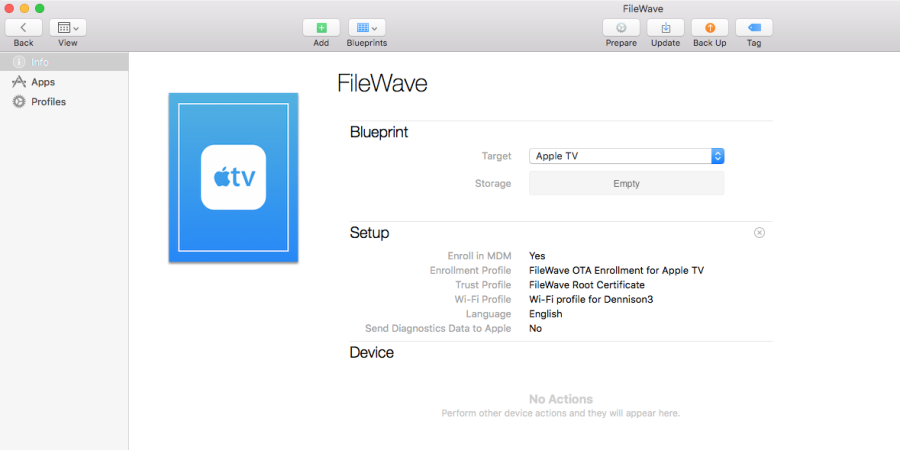
The blueprint now has the required pieces and can be applied to a connected Apple TV.
![Apple Configurator blueprint ready to apply to a connected Apple TV](https://kb.filewave.com/uploads/images/gallery/2023-07/AtFJCoQdcAOQ7uHC-embedded-image-wozyjno7.png)

## Related Content

- [Enrolling Devices](https://kb.filewave.com/books/filewave-client/chapter/enrolling-devices "Enrolling Devices")
- [Conflict Resolution](https://kb.filewave.com/books/filewave-central-anywhere/chapter/conflict-resolution "Conflict Resolution")

# Importing Computer Clients from a File

You can import a "tab-delimited" text file (not a CSV file).

See [Placeholders](https://kb.filewave.com/books/filewave-client/page/placeholders "Placeholders") for more workflow information. Can be useful for

- [Network Imaging Guide](https://kb.filewave.com/books/network-imaging-ivs "Network Imaging / IVS")
- [Automated Device Enrollment (ADE)](https://kb.filewave.com/books/apple-school-business-manager/chapter/automated-device-enrollment-ade "Automated Device Enrollment (ADE)")
- [Enrolling Mobile Devices into FileWave](https://kb.filewave.com/books/filewave-client/page/enrolling-mobile-devices-into-filewave "Enrolling Mobile Devices into FileWave")
- [Working with FileWave Clients](https://kb.filewave.com/books/filewave-central-anywhere/page/working-with-filewave-clients "Working with FileWave Clients")

The import location is in the **Create** **New Client** pane:
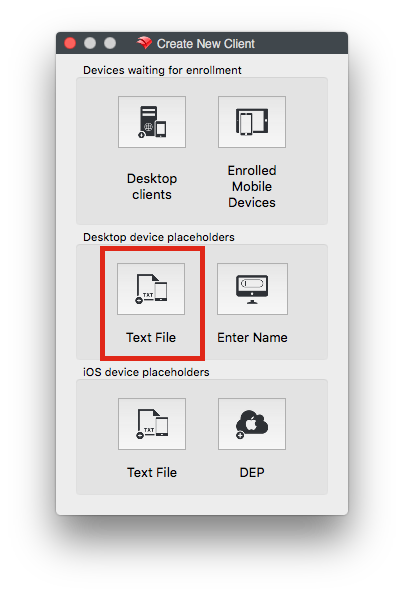
![](https://kb.filewave.com/uploads/images/gallery/2023-07/hej7PdGd5gAXn3YZ-embedded-image-wcw0vtbc.png)

The new format looks like this:

```
Client Name <tab> Comment <tab> Serial or MAC
```

- **Name** is mandatory
- **Comment** is optional
- **Serial** or **MAC** is optional if you are going to be adding clients that are already named later; otherwise, you must provide either a serial number or MAC address.

**MAC** address formats can have colons (:) between octets. For serial numbers, only capital letters (A-Z) and ordinal numbers (0-9) are allowed. Create the text file using a text editor that can save the file in plain text format with Unix or Windows line endings.  
  
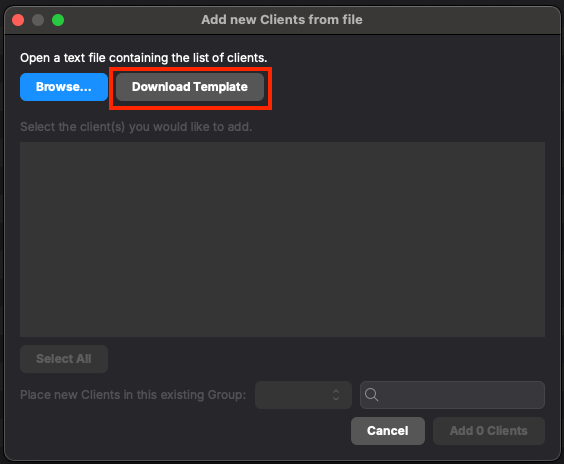
Please download the template for more details:

### Windows imaging placeholder import example

For Windows imaging placeholders, put the MAC address in the `Serial or MAC` column. Do not use `Imaging MAC Address` as the column header in the import file; FileWave Central parses the placeholder identifier from `Serial or MAC` and then uses it where needed for imaging.

Example tab-delimited import file: [filewave-central-placeholder-import-example.tsv](https://kb.filewave.com/attachments/523)

```
# Name	Serial or MAC	Comment
WIN11-0000	00:00:00:00:00:00	
```

<p class="callout info">If the optional `Comment` field is blank, keep the trailing tab at the end of the row. Without that final delimiter, Central may not parse the last empty column as expected.</p>

  
[![Screenshot 2025-07-31 at 12.46.15 PM.png](https://kb.filewave.com/uploads/images/gallery/2025-07/scaled-1680-/OkT3PKH0M98NJo41-screenshot-2025-07-31-at-12-46-15-pm.png)](https://kb.filewave.com/uploads/images/gallery/2025-07/OkT3PKH0M98NJo41-screenshot-2025-07-31-at-12-46-15-pm.png)  
  
When creating your own file, remember to include a header row on the first line to define the column names, just like in the template.

# FileWave Client Configuration

Essential so devices can contact the FileWave Server, with optional entries, but may require altering.

# FileWave Custom Installer

## Why

When installing the FileWave client on computers, it is necessary for the client to know certain information, for example, the FileWave Server address, whilst other information may also be useful to include: Boosters, Booster Routing, Enabling/Disabling Remote Connections, etc.

Similarly, when installing Boosters, they also require essential information including the FieWave Server and ports.

For this reason, the FileWave Custom Builder allows details to be entered and then for Clients download an MSI or PKG ready for provisioning devices or with Boosters there is the addition of creating a Debian custom installer.

## When

Each of the installers could be used manually on devices, but the custom MSI is particularly useful when imaging Windows onto devices, whilst the custom PKG achieves the zero-touch enrolment for macOS and DEP.

## Information

The FilleWave Custom Installer is available via two URLs:

- [https://custom.filewave.com](https://custom.filewave.com)
- [https://custom.filewave.ch](https://custom.filewave.ch)

Enter the details to match the FileWave Environment, e.g server's FQDN, Client or Booster version, etc. Once completed, hit the 'Build' button and FileWave will create the custom installer.

# Superprefs Fileset

## What

When you create a Custom Client installer, the FileWave Client preferences are packaged into that installer: server name, ports, Boosters, and related client settings. That is useful for the base configuration, but one preference set is not always right for every device.

A Superprefs file lets you deploy selected FileWave Client preference changes to macOS or Windows devices after the client is installed. You can use one Superprefs Fileset for a broad change, or multiple Superprefs Filesets for different groups of devices.

<p class="callout success">Only the settings included in the Superprefs file are changed. Settings that are not included remain untouched on the client.</p>

## When to use this

- Changing client logging level for troubleshooting
- Adjusting Booster or communication preferences for a specific group of devices
- Applying a new client preference without rebuilding and redeploying the Custom Client installer
- Returning temporary troubleshooting settings back to standard values after testing

## Ingredients

- FileWave Clients on macOS or Windows
- FileWave Superprefs Editor
- FileWave Central Admin App

## Create the Superprefs plist

The Superprefs Editor is installed with the FileWave Central Admin App:

<table id="bkmrk-macos%2Fapplications%2Ff" style="border-collapse:collapse;width:100%;"><colgroup><col style="width:50%;"></col><col style="width:50%;"></col></colgroup><tbody><tr><td>macOS</td><td>/Applications/FileWave/Superprefs Editor.app</td></tr><tr><td>Windows</td><td>C:\\Program Files (x86)\\FileWave\\FileWaveSuperPrefsEditor.exe</td></tr></tbody></table>

<p class="callout info">When the editor opens, it may ask you to open an existing plist. Cancel that window if you are creating a new Superprefs file.</p>

Only settings that you add or edit in the Superprefs Editor are written into the plist. This keeps the deployment focused and avoids overwriting unrelated client preferences.

### Example: set Debug Level to 99

Debug Level has three common values:

<table id="bkmrk-10standard-logging-%28" style="border-collapse:collapse;width:100%;"><colgroup><col style="width:50%;"></col><col style="width:50%;"></col></colgroup><tbody><tr><td>10</td><td>Standard logging (default)</td></tr><tr><td>99</td><td>Debug logging</td></tr><tr><td>101</td><td>Trace logging</td></tr></tbody></table>

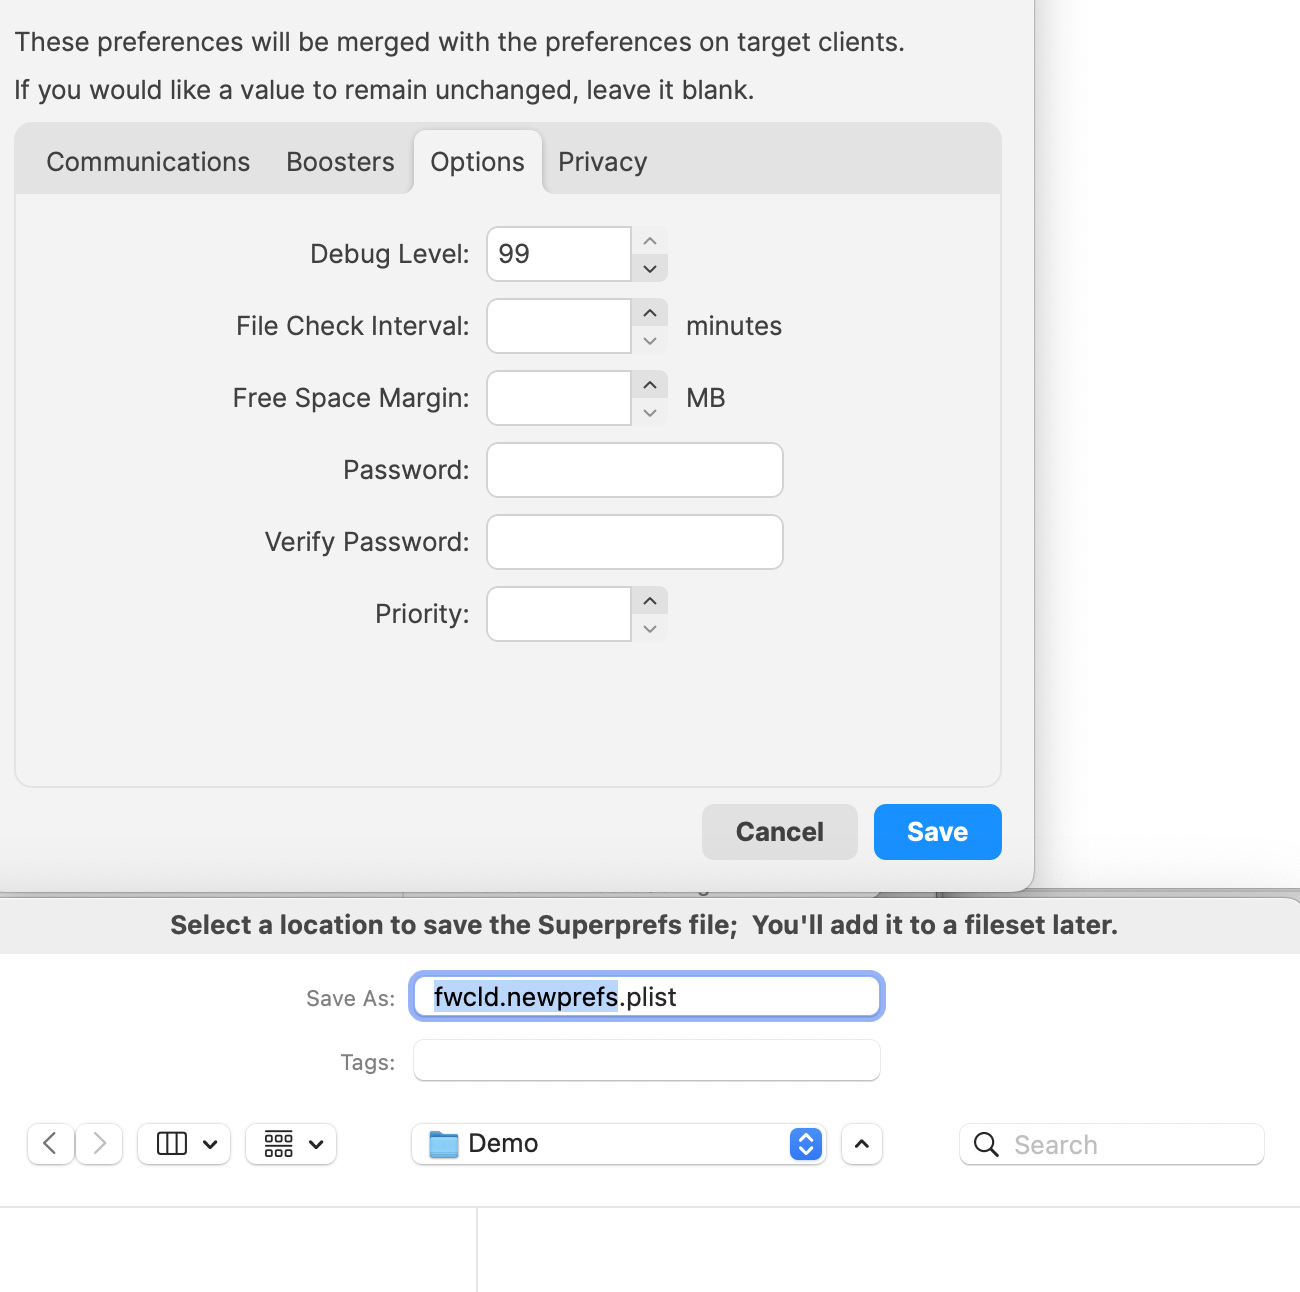
To enable debug logging, open the Superprefs Editor, cancel the Finder or Explorer window if you are creating a new file, go to the **Options** tab, set **Debug Level** to **99**, and save the file.

<p class="callout warning">The file must be named **fwcld.newprefs.plist**.</p>

[![Superprefs Editor Options tab with Debug Level set to 99 and saved as fwcld.newprefs.plist](https://kb.filewave.com/uploads/images/gallery/2024-11/scaled-1680-/SPAlw4crnUZBmFQ0-image.png)](https://kb.filewave.com/uploads/images/gallery/2024-11/SPAlw4crnUZBmFQ0-image.png)

The saved plist should contain only the changed key:

```
Dict {
    debugLevel = 99
}
```

## Package the plist in a Fileset

The **fwcld.newprefs.plist** file can be placed in any reasonable path inside the Fileset. A dedicated Superprefs folder makes the purpose clear and lets you keep separate folders for different preference sets.

<table id="bkmrk-macos%2Fusr%2Flocal%2Fetc%2F" style="border-collapse:collapse;width:100%;"><colgroup><col style="width:21.428571%;"></col><col style="width:78.571429%;"></col></colgroup><tbody><tr><td>macOS</td><td>/usr/local/etc/Superprefs/debug/fwcld.newprefs.plist</td></tr><tr><td>Windows</td><td>C:\\ProgramData\\FileWave\\Superprefs\\debug\\fwcld.newprefs.plist</td></tr></tbody></table>

You can add the file to an existing Fileset, but a dedicated Fileset is usually easier to target, test, and remove later.

From the FileWave Central Admin App:

- Create a new **Empty** Fileset and name it clearly.
- Open the Fileset and disable **Hide unused folders**.
- Select or create the desired location for the plist file.
- Drag **fwcld.newprefs.plist** from Finder or Explorer into that location in the Fileset.

Using the debug logging example for macOS, the Fileset could look like this:

[![Fileset contents showing fwcld.newprefs.plist in a Superprefs debug folder](https://kb.filewave.com/uploads/images/gallery/2024-11/scaled-1680-/52bR7hfZkkQXEryG-image.png)](https://kb.filewave.com/uploads/images/gallery/2024-11/52bR7hfZkkQXEryG-image.png)

When the Fileset activates on a client, Debug Level should switch to 99 and the client log should reflect the change.

<p class="callout success">Always test with one device or a small pilot group before associating the Superprefs Fileset more broadly.</p>

<p class="callout info">For temporary troubleshooting, create a matching Superprefs Fileset that returns Debug Level to the standard value of 10 when analysis is complete.</p>

## GUI observation

Some Superprefs Editor entries are Boolean values, such as Booster Routing. Boolean entries can be set to **True**, set to **False**, or left unset. A dash means the value is not included in the Superprefs file.

[![Superprefs Editor Privacy tab showing Boolean settings with unset values](https://kb.filewave.com/uploads/images/gallery/2024-11/scaled-1680-/twDU0dMYgYJFzi8o-image.png)](https://kb.filewave.com/uploads/images/gallery/2024-11/twDU0dMYgYJFzi8o-image.png)
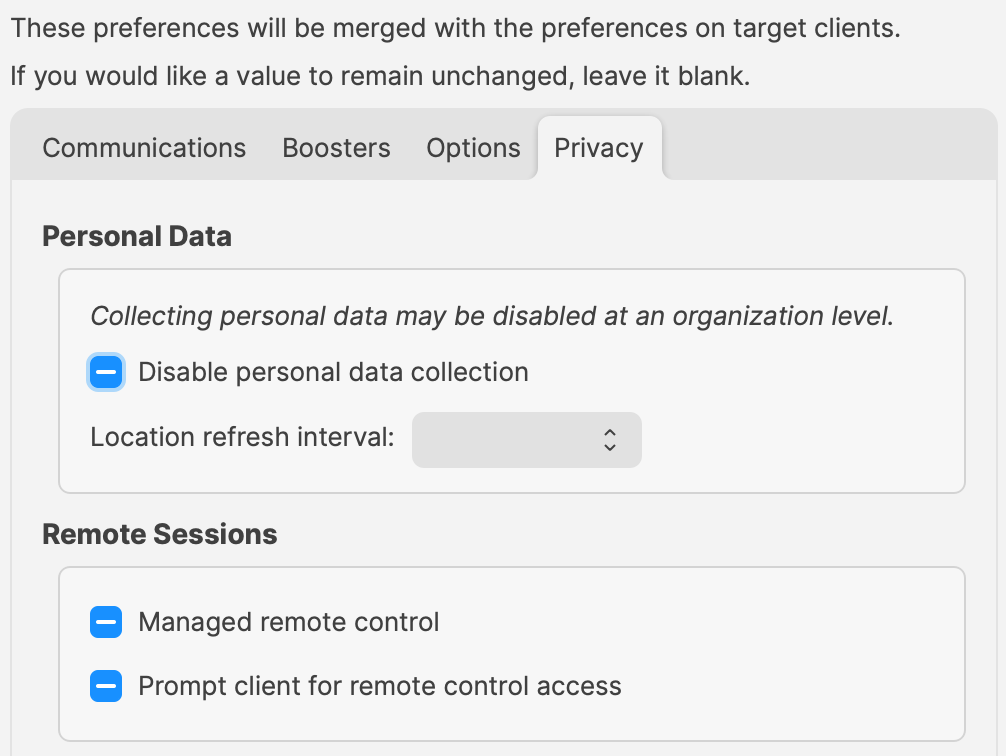
The three states appear as:

<table id="bkmrk-false-true-unset" style="border-collapse:collapse;width:100%;"><colgroup><col style="width:50%;"></col><col style="width:50%;"></col></colgroup><tbody><tr><td>[![Unchecked Boolean value](https://kb.filewave.com/uploads/images/gallery/2024-11/scaled-1680-/xPsuDQILYmx5k9uq-image.png)](https://kb.filewave.com/uploads/images/gallery/2024-11/xPsuDQILYmx5k9uq-image.png)

</td><td>False</td></tr><tr><td>[![Checked Boolean value](https://kb.filewave.com/uploads/images/gallery/2024-11/scaled-1680-/IoAX5eEP8d5VABk5-image.png)](https://kb.filewave.com/uploads/images/gallery/2024-11/IoAX5eEP8d5VABk5-image.png)

</td><td>True</td></tr><tr><td>[![Unset Boolean value](https://kb.filewave.com/uploads/images/gallery/2024-11/scaled-1680-/Tw6Jzp8HSZsC3NoQ-image.png)](https://kb.filewave.com/uploads/images/gallery/2024-11/Tw6Jzp8HSZsC3NoQ-image.png)

</td><td>Unset</td></tr></tbody></table>

## Related Content

- [FileWave Client Configuration Settings](https://kb.filewave.com/books/filewave-client/page/filewave-client-configuration-settings)
- [FileWave Fileset Types](https://kb.filewave.com/books/filesets-payloads/page/filewave-fileset-types)
- [How the FileWave Client Communicates](https://kb.filewave.com/books/filewave-client/page/how-the-filewave-client-communicates)

# FileWave Client Configuration Settings

Configuration Settings are found in the Windows registry or macOS plist:

- macOS: `/usr/local/etc/fwcld.plist`
- Windows FileWave 15.4.2 or lower: `HKLM\Software\FileWave\WinClient` (32bit OS), `HKLM\Software\FileWave\WOW6432\WinClient` (64bit OS)
- Windows FileWave 15.5.0 or higher: `HKLM\Software\FileWave\WOW6432\WinClient`

Please refer to [Creating a Superprefs Fileset](https://kb.filewave.com/books/filewave-client/page/superprefs-fileset "Creating a Superprefs Fileset") to find out how to change these settings on any number of clients using a fileset.

The following list shows the default settings in the left row, describes the function and valid alternative settings (native)

### Basic/Minimal Configuration

<table id="bkmrk-server-%3D-%22no.server." style="width: 100%;"><tbody><tr><td style="width: 30.8985%;">server = "no.server.set"</td><td style="width: 69.1015%;">FileWave server IP or DNS</td></tr><tr><td style="width: 30.8985%;">primaryPort = 20015</td><td style="width: 69.1015%;">FileWave Server Port</td></tr><tr><td style="width: 30.8985%;">fwPassword = ""</td><td style="width: 69.1015%;">Encrypted FileWave Client Password - used for remote configuration through client monitor</td></tr><tr><td style="width: 30.8985%;">fwUser = my.filewave.client.name</td><td style="width: 69.1015%;">FileWave Client name (visible in FileWave Admin)</td></tr></tbody></table>

<p class="callout info">Note: The default port setting above is 20015. However, SSL is now required, and the system will automatically use port 20017 instead when 20015 is entered. Do not manually set the port to 20017. Always enter 20015, and the system will handle the SSL port change for you.</p>

### Booster configuration

<table id="bkmrk-booster1-%3D-%22no.boost" style="width: 100%; height: 404.157px;"><tbody><tr style="height: 29.7969px;"><td style="width: 31.0218%; height: 29.7969px;">booster1 = "no.booster.set"</td><td style="width: 68.9782%; height: 29.7969px;">Booster 1 IP or DNS Address - When clearing the value it should be "no.booster.set"</td></tr><tr style="height: 29.7969px;"><td style="width: 31.0218%; height: 29.7969px;">booster1Port = 20013</td><td style="width: 68.9782%; height: 29.7969px;">Booster 1 Port - Should be 20013 by default when defining a booster</td></tr><tr style="height: 29.7969px;"><td style="width: 31.0218%; height: 29.7969px;">booster2 = "no.booster.set"</td><td style="width: 68.9782%; height: 29.7969px;">Booster 2 IP or DNS Address - When clearing the value it should be "no.booster.set"</td></tr><tr style="height: 29.7969px;"><td style="width: 31.0218%; height: 29.7969px;">booster2Port = 0</td><td style="width: 68.9782%; height: 29.7969px;">Booster 2 Port - Should be 20013 by default when defining a booster</td></tr><tr style="height: 29.7969px;"><td style="width: 31.0218%; height: 29.7969px;">booster3 = "no.booster.set"</td><td style="width: 68.9782%; height: 29.7969px;">Booster 3 IP or DNS Address - When clearing the value it should be "no.booster.set"</td></tr><tr style="height: 29.7969px;"><td style="width: 31.0218%; height: 29.7969px;">booster3Port = 0</td><td style="width: 68.9782%; height: 29.7969px;">Booster 3 Port - Should be 20013 by default when defining a booster</td></tr><tr style="height: 29.7969px;"><td style="width: 31.0218%; height: 29.7969px;">booster4 = "no.booster.set"</td><td style="width: 68.9782%; height: 29.7969px;">Booster 4 IP or DNS Address - When clearing the value it should be "no.booster.set"</td></tr><tr style="height: 29.7969px;"><td style="width: 31.0218%; height: 29.7969px;">booster4Port = 0</td><td style="width: 68.9782%; height: 29.7969px;">Booster 4 Port - Should be 20013 by default when defining a booster</td></tr><tr style="height: 29.7969px;"><td style="width: 31.0218%; height: 29.7969px;">booster5 = "no.booster.set"</td><td style="width: 68.9782%; height: 29.7969px;">Booster 5 IP or DNS Address - When clearing the value it should be "no.booster.set"</td></tr><tr style="height: 29.7969px;"><td style="width: 31.0218%; height: 29.7969px;">booster5Port = 0</td><td style="width: 68.9782%; height: 29.7969px;">Booster 5 Port - Should be 20013 by default when defining a booster</td></tr><tr style="height: 46.5938px;"><td style="width: 31.0218%; height: 46.5938px;">boosterRouting = 0</td><td style="width: 68.9782%; height: 46.5938px;">When set as 1, client connects to server through boosters, only for non HTTPS traffic (e.g. except for inventory / profile deployment ) - 1 is recommended.</td></tr><tr style="height: 29.7969px;"><td style="width: 31.0218%; height: 29.7969px;">connectorProbeAttemptDelay = 3</td><td style="width: 68.9782%; height: 29.7969px;">Number of Seconds the client waits between trying to reach boosters</td></tr><tr style="height: 29.7969px;"><td style="width: 31.0218%; height: 29.7969px;">connectorProbeAttempts = 10</td><td style="width: 68.9782%; height: 29.7969px;">Number of unsuccessful connections that lead to booster being marked "offline"</td></tr></tbody></table>

### TeamViewer (was Observe Client)

<table id="bkmrk-vncmanaged-%3D-0-contr" style="width: 100%;"><tbody><tr><td style="width: 30.8915%;">vncManaged = 0</td><td style="width: 69.1085%;">Controls whether remote connection is allowed:  
  
\* Teamviewer – FileWave 14.7+  
\* FileWave Client (fwcld) prior to 14.8</td></tr><tr><td style="width: 30.8915%;">vncPromptClient = 1</td><td style="width: 69.1085%;">Controls whether end user is prompted to allow remote connection:  
  
\* Teamviewer – FileWave 14.7+  
\* FileWave Client (fwcld) prior to 14.8</td></tr></tbody></table>

### Ports the client listens on

<table id="bkmrk-%C2%A0-%C2%A0-monitorport-%3D-20"><thead><tr><th> </th><th> </th></tr></thead><tbody><tr><td>monitorPort = 20010</td><td>Client Monitor connects here, over the network

\* Only on Filewave 15.5.x or lower

</td></tr><tr><td>kioskPort = 20020</td><td>Kiosk / Reboot Dialog connects here, from localhost</td></tr></tbody></table>

### Client behaviour

<table id="bkmrk-debuglevel-%3D-10-cont" style="width: 100%;"><tbody><tr><td style="width: 31.1435%;">debugLevel = 10</td><td style="width: 68.8565%;">Controls fwcld log verbosity; 10(normal),99(debug),101(trace)</td></tr><tr><td style="width: 31.1435%;">fileCheckInterval = 86400</td><td style="width: 68.8565%;">Number of seconds between verification cycles (default once every 24 hours after launch)</td></tr><tr><td style="width: 31.1435%;">freeSpaceMargin = 2147483648</td><td style="width: 68.8565%;">Minimum Number of free bytes left on disk so filesets can be deployed</td></tr><tr><td style="width: 31.1435%;">setUsersFilesOwner = 1</td><td style="width: 68.8565%;">Set ownership of Users files/folders to appropriate user</td></tr><tr><td style="width: 31.1435%;">syncComputerName = 0</td><td style="width: 68.8565%;">If set to 1, fwcld will query OS to retrieve computer name at startup, and use that as fwUser value</td></tr><tr><td style="width: 31.1435%;">tickleInterval = 120</td><td style="width: 68.8565%;">Number of seconds between attempts to contact FileWave Server for new Commands</td></tr></tbody></table>

### Location Related

<table id="bkmrk-locationrefreshinter" style="width: 99.6296%;"><tbody><tr><td style="width: 35.605%;">locationRefreshInterval = 0</td><td style="width: 64.395%;">If set to &gt;0, number of seconds between querying the OS for location data</td></tr><tr><td style="width: 35.605%;">deviceState = 3</td><td style="width: 64.395%;">Client State, e.g.: Missing, Tracked, Untracked</td></tr><tr><td style="width: 35.605%;">denyPersonalDataCollection = 0</td><td style="width: 64.395%;">If set to 1, disables Location Services</td></tr></tbody></table>

### Obsolete / Unused keys

<table id="bkmrk-testmode-desktopowne" style="width: 100.494%; height: 543.938px;"><tbody><tr style="height: 29.7969px;"><td style="width: 33.7454%; height: 29.7969px;">testMode</td><td style="width: 66.2546%; height: 29.7969px;">  
</td></tr><tr style="height: 29.7969px;"><td style="width: 33.7454%; height: 29.7969px;">desktopOwner</td><td style="width: 66.2546%; height: 29.7969px;">  
</td></tr><tr style="height: 29.7969px;"><td style="width: 33.7454%; height: 29.7969px;">currentFileWaveClientName</td><td style="width: 66.2546%; height: 29.7969px;">  
</td></tr><tr style="height: 29.7969px;"><td style="width: 33.7454%; height: 29.7969px;">niceTime</td><td style="width: 66.2546%; height: 29.7969px;">  
</td></tr><tr style="height: 29.7969px;"><td style="width: 33.7454%; height: 29.7969px;">priority</td><td style="width: 66.2546%; height: 29.7969px;">  
</td></tr><tr style="height: 29.7969px;"><td style="width: 33.7454%; height: 29.7969px;">useSSL</td><td style="width: 66.2546%; height: 29.7969px;">  
</td></tr><tr style="height: 63.3906px;"><td style="width: 33.7454%; height: 63.3906px;">srvPublishPort = 20005</td><td style="width: 66.2546%; height: 63.3906px;">ZeroMQ messaging port (Deprecated from FileWave 14.8+. Removed from FileWave server 15.0 and notifications from earlier clients (pre 14.8) will no longer work at this point)</td></tr><tr style="height: 46.5938px;"><td style="width: 33.7454%; height: 46.5938px;">vncRelayPort = 20030</td><td style="width: 66.2546%; height: 46.5938px;">Port used to connect towards the filewave server to forward VNC Data (Deprecated from FileWave 14.8+)</td></tr><tr style="height: 46.5938px;"><td style="width: 33.7454%; height: 46.5938px;">vncServerPort = 20031</td><td style="width: 66.2546%; height: 46.5938px;">Local Port VNC Data is relayed to/from (set to 5900 to use builtin VNC service) (Deprecated from FileWave 14.8+)</td></tr><tr style="height: 29.7969px;"><td style="width: 33.7454%; height: 29.7969px;">booster1PublishPort = 20003</td><td style="width: 66.2546%; height: 29.7969px;">Booster 1 ZeroMQ prior to 14.8</td></tr><tr style="height: 29.7969px;"><td style="width: 33.7454%; height: 29.7969px;">booster2PublishPort = 0</td><td style="width: 66.2546%; height: 29.7969px;">Booster 2 ZeroMQ prior to 14.8</td></tr><tr style="height: 29.7969px;"><td style="width: 33.7454%;">booster3PublishPort = 0</td><td style="width: 66.2546%;">Booster 3 ZeroMQ prior to 14.8</td></tr><tr style="height: 29.7969px;"><td style="width: 33.7454%;">booster4PublishPort = 0</td><td style="width: 66.2546%;">Booster 4 ZeroMQ prior to 14.8</td></tr><tr style="height: 29.7969px;"><td style="width: 33.7454%;">booster5PublishPort = 0</td><td style="width: 66.2546%;">Booster 5 ZeroMQ prior to 14.8</td></tr></tbody></table>

# FileWave Firewall Scripts for Windows

## Summary

FileWave installers leave Windows Firewall settings untouched by default. This historical article provides scripts that add Windows Firewall rules for FileWave Windows components when needed.

<p class="callout info">FileWave 15.5 added these firewall changes to the normal client upgrade process. The script remains here as an example and as a fallback if the upgrade Fileset did not add the rule.</p>

<p class="callout success">FileWave 16.0.0 removed the need for this rule. Use this article only for historical 15.5 firewall remediation or as an example of how to manage Windows Firewall rules with a script.</p>

## Procedure

Use the attached .bat file for FileWave 15.4.2 or earlier, or the Fileset for FileWave 15.5.x, to open the firewall for the matching executable at its standard install location. If you installed a FileWave component to a nonstandard path, update the path inside the script first.

- Script for FileWave 15.4.2 or lower: [fwcld-ports-15.4.2.bat](https://kb.filewave.com/attachments/50)
- Fileset for FileWave 15.5.x: [FileWave Firewall Settings 15.5.fileset.zip](https://kb.filewave.com/attachments/406)

The scripts allow inbound and outbound connections for the installed FileWave executables and use this basic syntax:

**Windows 10 and beyond running FileWave 15.5.x:**

```
netsh advfirewall firewall add rule name="FileWave Client" \
action=allow program="C:\Program Files\FileWave\client\fwcld.exe" \
enable=yes dir=in description="FileWave Client Inbound Access, usually only port 20010 is needed for client monitor connections"
```

##### Custom Fields  


The following download contains two Custom Fields to report the firewall status of the FileWave Client, for example:

[![image.png](https://kb.filewave.com/uploads/images/gallery/2023-07/scaled-1680-/HctoQyHgZvuMX8YQ-image.png)](https://kb.filewave.com/uploads/images/gallery/2023-07/HctoQyHgZvuMX8YQ-image.png)

Custom Fields download:

[![FileWave Download.png](https://kb.filewave.com/uploads/images/gallery/2023-06/scaled-1680-/LhUDCHKqr6dGiaoG-filewave-download.png)](https://kb.filewave.com/attachments/181)

## Related Content

- [Default TCP and UDP Port Usage](https://kb.filewave.com/books/filewave-general-info/page/default-tcp-and-udp-port-usage "Default TCP and UDP Port Usage")

# Upgrading FileWave Clients

## What

FileWave 16.4 provides an integrated upgrade workflow for supported macOS and Windows FileWave Clients that are already running **FileWave Client 16.3.0 or later**.

<div class="callout danger" id="bkmrk-the-client-upgrades-">**The Client Upgrades view is not a complete fleet-version report.** Clients running versions earlier than 16.3.0 do not appear in **Software Updates &gt; Client Upgrades**. An empty view does not prove that every managed client is current.

</div>## Choose the upgrade path by current client version

<table id="bkmrk-current-client-versi"><thead><tr><th>Current client version</th><th>Visibility in Client Upgrades</th><th>Required path</th></tr></thead><tbody><tr><td>**16.3.0 or later**</td><td>Eligible for the integrated workflow and shown when an applicable upgrade is available.</td><td>Use **Software Updates &gt; Client Upgrades**.</td></tr><tr><td>**Earlier than 16.3.0**</td><td>**Not shown** in Client Upgrades.</td><td>Deploy the applicable macOS or Windows Client Upgrade Fileset to reach at least 16.3.0, then use the integrated workflow for later upgrades.</td></tr><tr><td>**Unsupported operating system or failed requirements**</td><td>May not qualify for the target client version.</td><td>Review the target release’s platform requirements and the Upgrade Fileset result before assuming the client can be upgraded.</td></tr></tbody></table>

<figure id="bkmrk-a-client-already-run">![FileWave Central 16.4 Client Upgrades showing an eligible FileWave Client 16.3.4 with a 16.4.0 Beta upgrade available](https://kb.filewave.com/uploads/images/gallery/2026-07/sz4yNGwKZur7NLFO-filewave-central-16-4-client-upgrades-eligible-client-sanitized.png)<figcaption>A client already running FileWave Client 16.3.4 appears in Client Upgrades and is eligible for the integrated 16.4.0 upgrade mechanism. Example names and IDs are shown.</figcaption></figure>## Audit the fleet before trusting the upgrade view

1. Create an Inventory Report that returns Client Name, FileWave Client Version, Platform, OS Version, and Last Connect.
2. Identify every macOS and Windows client whose FileWave Client version is earlier than 16.3.0.
3. Deploy the applicable Client Upgrade Fileset to a representative pilot group of those legacy clients.
4. Confirm the clients check in and report at least version 16.3.0.
5. Open **Software Updates &gt; Client Upgrades** and confirm the bridged clients are now eligible for the integrated mechanism.
6. Continue in controlled batches and rerun the inventory report until no legacy client remains unexplained.

<div class="callout warning" id="bkmrk-%E2%80%9Call-clients-up-to-d">**“All Clients Up to Date” means there are no pending upgrades for clients eligible for this view.** It does not include clients earlier than 16.3.0. Always reconcile the view against an inventory report before declaring the fleet upgraded.

</div><figure id="bkmrk-the-empty-state-says">![FileWave Central 16.4 Client Upgrades empty state reading All Clients Up to Date](https://kb.filewave.com/uploads/images/gallery/2026-07/fuzwK7ShN2e45kDk-filewave-central-16-4-client-upgrades-empty-state-sanitized.png)<figcaption>The empty state says **All Clients Up to Date**, but clients earlier than 16.3.0 are outside this view and can still require the Upgrade Fileset bridge.</figcaption></figure>## Schedule an integrated client upgrade

1. Open **FileWave Central &gt; Software Updates &gt; Client Upgrades**.
2. Confirm the current version and available target version for the qualifying client or group.
3. Start with a representative pilot group.
4. For a normal production upgrade, use the toolbar scheduling action or right-click the selection and choose **Schedule Upgrade**.
5. Monitor Schedule Type and Upgrade Status before extending the rollout.

## Schedule an Early Access/Beta client upgrade

<div class="callout warning" id="bkmrk-the-toolbar-scheduli">**The toolbar scheduling button is for non-Beta upgrades.** When the Server is using Early Access/Beta package sources, select the eligible client or group, right-click it, and choose **Schedule Beta Upgrade**.

</div>1. Confirm the client is already running FileWave Client 16.3.0 or later and that an Available Beta Upgrade version is displayed.
2. Right-click the selected client or group.
3. Choose **Schedule Beta Upgrade**. Do not use **Schedule All** or **Schedule Upgrade** when the intended target is the Beta build.
4. Monitor the scheduled target and status before expanding beyond the pilot.

<figure id="bkmrk-for-an-early-access%2F">![FileWave Central 16.4 Client Upgrades right-click menu with Schedule Beta Upgrade selected](https://kb.filewave.com/uploads/images/gallery/2026-07/pnQRtJysxhCmepYA-filewave-central-16-4-client-upgrades-schedule-beta-sanitized.png)<figcaption>For an Early Access/Beta target, right-click the eligible client or group and choose **Schedule Beta Upgrade**. The toolbar scheduling action is for non-Beta upgrades.</figcaption></figure>## Upgrade Fileset bridge for clients earlier than 16.3.0

Download the applicable macOS or Windows Client Upgrade Fileset from the target FileWave release’s Downloads page, import it into Central, and deploy it to the legacy-client scope. The FileWave 16.4 Upgrade Filesets include a client-version requirement and are skipped on clients already running 16.3.0 or later.

If the required 16.4 Upgrade Fileset does not support the legacy source version, use the FileWave 16.3 Upgrade Fileset first. After the client reaches 16.3.0 or later and checks in, manage future upgrades through Client Upgrades.

<div class="callout info" id="bkmrk-upgrade-filesets-als">Upgrade Filesets also enforce operating-system requirements. A legacy client on an unsupported operating system may remain on its current FileWave Client version until the operating system or device is remediated.

</div>## Related content

- [FileWave Downloads](https://kb.filewave.com/books/downloads)
- [Enable Early Access (Beta) Package URLs](https://kb.filewave.com/books/downloads/page/enable-early-access-beta-package-urls)
- [Troubleshooting Windows Client Upgrade Fileset Issues](https://kb.filewave.com/books/filewave-client/page/troubleshooting-windows-client-upgrade-fileset-issues)
- [Troubleshooting Deployment Issues with the FileWave Upgrade Fileset](https://kb.filewave.com/books/filewave-client/page/troubleshooting-deployment-issues-with-the-filewave-upgrade-fileset)

# Placeholders

## Placeholders

![Custom_template.png](https://kb.filewave.com/uploads/images/gallery/2023-06/s9nWFeSvI6M3zqqc-custom-template.png)Placeholders for computers and mobile devices are useful in many situations where you need to create a device FileWave has not seen yet, and pre-assign them varying content:

- Import new Windows computers and assign them what image you want to put on them (see: [Windows Network Imaging - PXE](https://kb.filewave.com/books/network-imaging-ivs/page/windows-network-imaging-capturing-and-deploying-images "Windows Network Imaging - PXE Booting") )
- Import new devices (mac, Windows, iOS etc) and assign them custom names
- Import iOS or macOS devices and assign them custom fields so DEP can name with with variables (see: [DEP Naming](https://kb.filewave.com/books/apple-school-business-manager/page/ade-naming "DEP Naming"))
- Import devices (any OS) and assign them custom fields so that smart groups can deploy pre-assigned software immediately upon enrollment

This Article will focus on a situation where you need to import devices and give them custom field values before they are enrolled. This is great for fields like:

- Barcode / Asset tag
- Location
- Use
- Warranty information like expiration date

## Preparing the Files

We typically start out with one large file; A CSV/excel that looks something like this:

<table id="bkmrk-serial-or-mac-addres"><tbody><tr style="background-color:rgb(251,238,184);"><td>Serial or MAC address</td><td>Name</td><td>Barcode</td><td>Location</td><td>Use</td></tr><tr><td>AS5D64AS65D4</td><td>Lab-A-comp1</td><td>321654987</td><td>North Campus</td><td>Student</td></tr><tr><td>Q32WE1WQ3E21</td><td>Lab-A-comp2</td><td>321654988</td><td>North Campus</td><td>Student</td></tr><tr><td>X9C87ZX9C87ZC</td><td>Front-Desk-1</td><td>321654989</td><td>Main Office</td><td>Admin</td></tr><tr><td>DF9H51DF95H1</td><td>BreakRoom-A</td><td>321654990</td><td>Break Room</td><td>Faculty</td></tr></tbody></table>

We will actually need to import this file two times

1. To create the placeholders
2. To Assign the custom fields to the placeholders

## Creating the Placeholders

Use the "New Client" UI to import a tab delineated version of just serial number and name column

More detailed instructions:  
Windows / macOS : [Importing Computer Clients from a File](https://kb.filewave.com/books/filewave-client/page/importing-computer-clients-from-a-file "Importing Computer Clients from a File")  
iOS / tvOS : [Enrolling Mobile Devices into FileWave](https://kb.filewave.com/books/filewave-client/page/enrolling-mobile-devices-into-filewave "Enrolling Mobile Devices into FileWave")

### Create the Custom Fields and import

You can can either import the custom fields file or follow the create step

#### Import Custom Fields

1. Download the custom field file: [FileWave Custom Fields.customfields](https://kb.filewave.com/attachments/37)
2. Open your (Assistance → Custom Fields → ) "Edit Custom Fields" UI
3. Press "import" Browse for file

<p class="callout success">For more see: [Importing and Exporting Custom Field Files](https://kb.filewave.com/books/custom-fields/page/importing-and-exporting-custom-field-files "Importing and Exporting Custom Field Files")</p>

#### Create Custom Fields

Create any needed custom fields and assign them to all devices, or specific devices.

1. Open the custom field UI
2. Create Custom fields for Use, Location, barcode;
    
    
    1. **Use**: Provided: Admin, Type: string, Restricted: True, Values: None (DEFAULT), Faculty, Student, Administration
    2. **Location**: Provided: Admin, Type: string, Restricted: True, Values: None (Default), Site A, Site B
    3. **Barcode**: Provided: Admin, Type: string, Restricted: False, Use Default Values: True (Default: None)
    4. Take note of the "Internal Name" from the custom fields (I.E: barcode, location, use)

More detailed instructions:  
[Custom Fields](https://kb.filewave.com/books/custom-fields/page/custom-fields "Custom Fields")

### Import Custom Field Values

Once the fields are created and assigned to the proper devices we need to import your file again in the custom fields UI. This time with the serial, barcode, location, use column.

You can actually have FileWave to create a sample CSV file with the proper headings by going to

1. (Assistance → Custom Fields → ) "Import Custom Fields" UI
2. Press "Download Template"
3. Select the values you want to import (barcode, location and use in our case)
4. Specify the field to identify clients (for example Serial Number or Client Name)
5. Save

Edit in a spreadsheet app (excel, numbers, etc) and add the needed vales and bring it back in

<p class="callout info">Note that you can also set custom field values for placeholders manually by right-clicking if you have only a few to update</p>

# Locking Devices

## What is it?

![lock-vs-lock.png](https://kb.filewave.com/uploads/images/gallery/2023-06/gUBXgNI3dTf7cUPI-lock-vs-lock.png)Use this article to distinguish **Lock / Unlock** from **Lock Device**. They sound similar, but they control different behavior.

<p class="callout info">The locking behavior is the same for macOS, Windows, iOS, and non-EMM Android.</p>

## Answer

### Lock / Unlock

**Lock** binds a FileWave Client to its current model number. During a migration or update, a locked client ignores new manifests from the server until it is unlocked. See [Upgrading your On-Premise FileWave Server](https://kb.filewave.com/books/filewave-server/page/upgrading-your-on-premise-filewave-server "Upgrading your On-Premise FileWave Server").

**Unlock** allows the device to update to the latest model.

### Lock Device

**Lock Device** locks the device screen. The user cannot use the device again until the required passcode, if present, is entered.

## Additional information

When a client is locked to the current model, Kiosk is not available to the user. Kiosk can still open, but it displays a message that the user is blocked.

A locked client shows a lock icon or lock text in Client View, Device Info, and Client Monitor:
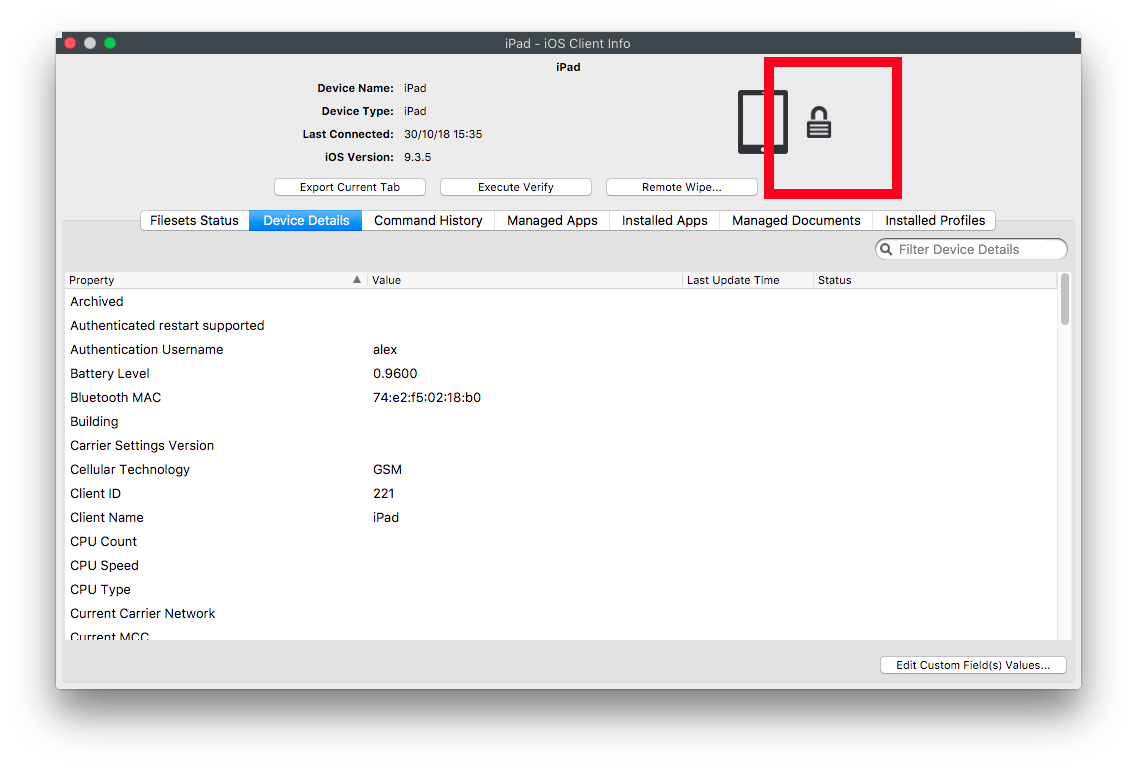
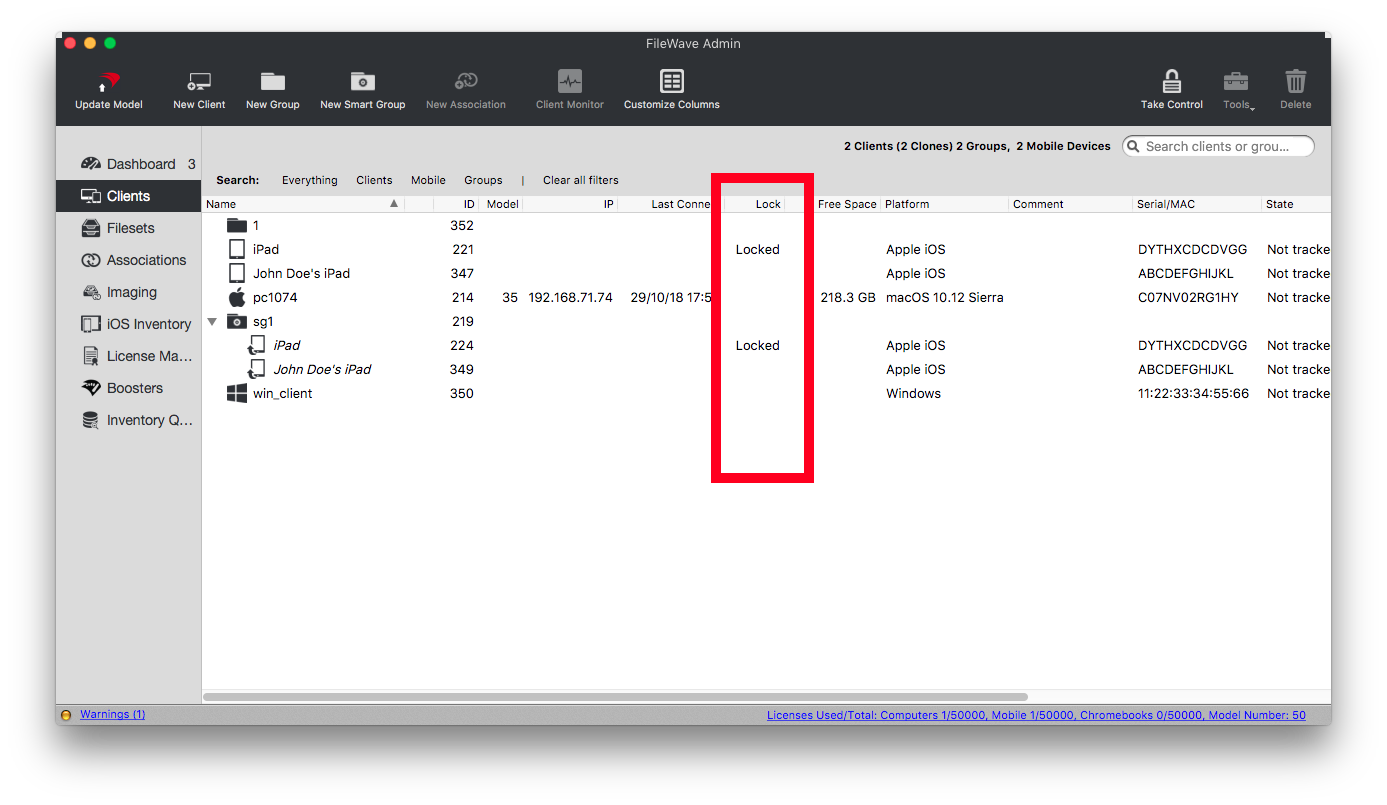
![lock-client_view.png](https://kb.filewave.com/uploads/images/gallery/2023-06/sw4uGLOxx88fpmn7-lock-client-view.png)![lock-client_info.png](https://kb.filewave.com/uploads/images/gallery/2023-06/KMesh7krckiwKQ3N-lock-client-info.png)

![lock-clent_lock.png](https://kb.filewave.com/uploads/images/gallery/2023-06/Ckr4QnvUogSwN04c-lock-clent-lock.png)

# Location Tracking

# Location Tracking Technologies

## **FileWave Location Tracking**<button aria-label="Copy link to heading" class="css-779anb"><svg height="24" role="presentation" viewbox="0 0 24 24" width="24"></svg></button>

The location reporting feature in FileWave is disabled by default. It is recommended that you; verify that this feature is per your organization’s policies and AUP (Acceptable Use Policy). Notify your end users before activating location reporting, as enabling the feature will prompt for permission to access location information. For details on how this works, look here: [Location Tracking](https://kb.filewave.com/books/filewave-client/chapter/location-tracking "/wiki/spaces/KB/pages/4329472")

### **Technologies used for Location Tracking**<button aria-describedby="320val-tooltip" aria-label="Copy link to heading" class="css-779anb"><svg height="24" role="presentation" viewbox="0 0 24 24" width="24"></svg></button>

Location tracking technologies used will differ from client platform to client platform.

### **Maps used:**<button aria-label="Copy link to heading" class="css-779anb"><svg height="24" role="presentation" viewbox="0 0 24 24" width="24"></svg></button>

- ThunderForest - [https://www.thunderforest.com/](https://www.thunderforest.com/ "https://www.thunderforest.com/")

### **Client location detection methods:**<button aria-label="Copy link to heading" class="css-779anb"><svg height="24" role="presentation" viewbox="0 0 24 24" width="24"></svg></button>

- On macOS/Windows - [https://doc.qt.io/qt-5/location-positioning-cpp.html](https://doc.qt.io/qt-5/location-positioning-cpp.html "https://doc.qt.io/qt-5/location-positioning-cpp.html") which tries different sources.
- On Windows specifically - [https://learn.microsoft.com/en-gb/windows/win32/api/locationapi/nf-locationapi-ilocation-getreportstatus](https://learn.microsoft.com/en-gb/windows/win32/api/locationapi/nf-locationapi-ilocation-getreportstatus "https://learn.microsoft.com/en-gb/windows/win32/api/locationapi/nf-locationapi-ilocation-getreportstatus")
- On iOS - The iOS API for location from Apple.
- On ChromeOS - The Google API for location from Google.

## Related Content

- [Location Tracking](https://kb.filewave.com/books/filewave-client/chapter/location-tracking "Location Tracking")

# Location Tracking Setup

## FileWave Location Tracking

The location reporting feature in FileWave is disabled by default. It is recommended that you; verify that this feature is in accordance with your organization’s policies and AUP (Acceptable Use Policy). Notify your end users before activating location reporting, as enabling the feature will prompt permission for access location information.

### Requirements:

- FileWave version 10.1+
- Location Tracking Enabled - Server/Client
- iOS devices require the [FileWave IPA App Portal](https://kb.filewave.com/books/kiosk/page/filewave-app-portal-for-ios-ipa-install "FileWave App Portal for iOS (IPA Install)") for passive tracking
- All devices you want to track are already enrolled into FileWave and currently communicating properly

### Supported Operating Systems:

- APK Android: 4.1+
- iOS 9+
- macOS 10.9+
- Windows 10+
- ChromeOS 43+

### Things to consider:

Client State. For the items: Tracked, Missing and Untracked, the item greyed out is the active state:

[![image.png](https://kb.filewave.com/uploads/images/gallery/2024-05/scaled-1680-/Kb3HODX5spuYNrIo-image.png)](https://kb.filewave.com/uploads/images/gallery/2024-05/Kb3HODX5spuYNrIo-image.png)
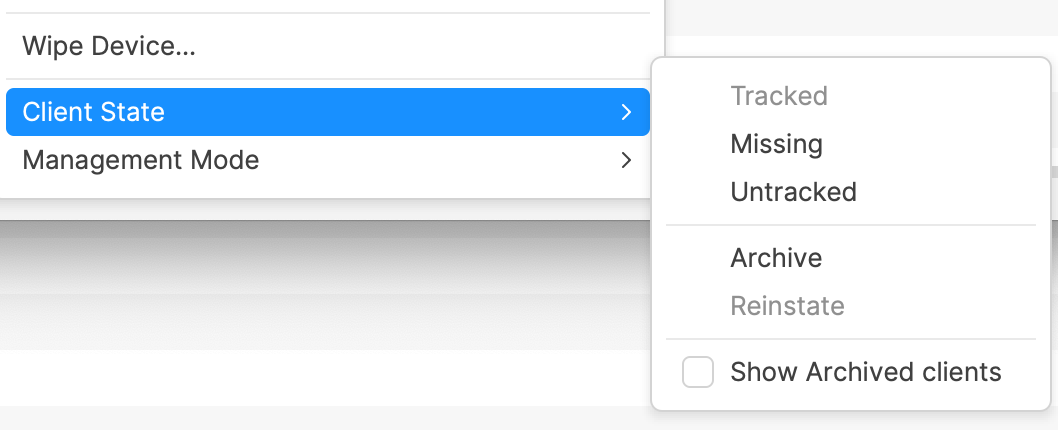
- Different States of Tracking 
    - **Tracked** - Tracking is enabled and will update the location at different intervals
    - **Missing** - Tracking is enabled and will be updated around every two minutes. The client also sends the location immediately and does not wait for other scans to finish. For supervised iOS devices this option puts the device in Lost mode, has a message/footnote that can set in the FileWave Preferences under the Organization Info tab, and locks the iOS device. The device will become usable again once the missing mode is switched off.
    - **Not Tracked** (DEFAULT)- No location is gathered at any time.
- The FileWave IPA App Portal needs to be sent out and opened at least once before you will be prompted and allowed to gather location from the iOS device. Once it is sent out, the old FileWave App Portal that gets installed automatically with enrollment will be removed and the new one will be installed.
- For any updated location from your iOS devices, the FileWave App Portal needs to be open, whether that be in the background or the currently active app.

There are two types of location tracking in FileWave, Passive Tracking, and Lost Mode. macOS, Windows, Chromebooks, and Android devices use Passive tracking to gather the location of the device without locking it down. Supervised iOS devices set to Missing mode will put the device in Lost mode, which locks down the device, making it unusable by the end user.

## Lost Mode Setup (iOS macOS):

1. Right Click on your Supervised iOS or MDM-enrolled macOS device(s)
2. Select Missing from the Client State menu   
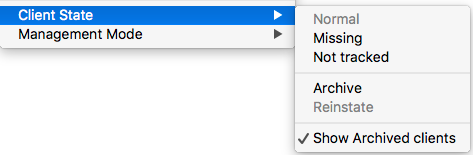
      
    ![ltclientstate.png](https://kb.filewave.com/uploads/images/gallery/2023-06/aA0RuRcbAwXI7Od8-ltclientstate.png)
3. Update Model  
    ![ltupdatemodel.png](https://kb.filewave.com/uploads/images/gallery/2023-06/9T7gEy1WCyqUVNma-ltupdatemodel.png)
4. Once the device checks in it will be in lost mode and report location.
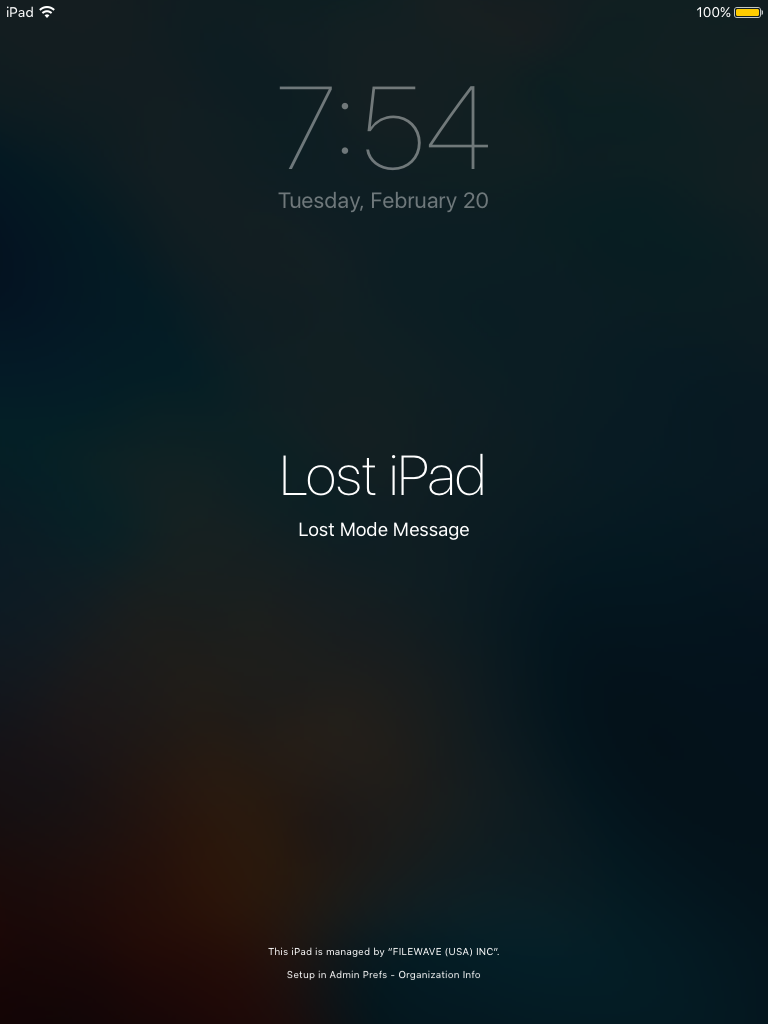
    
    ![LT-lostmodeipad.PNG](https://kb.filewave.com/uploads/images/gallery/2023-06/pW0lNWj3JHn7vW6N-lt-lostmodeipad.PNG)
5. To take it out of lost mode, select "Not Tracked" in the Client State menu

<p class="callout success">*When the iOS device is in Lost Mode, do not reboot it. If the device losses Wifi, you will no longer be able to take the device out of Lost Mode since it will no longer be connecting to FileWave.*</p>

When the device is in Lost Mode, a new option in the tools menu is available, "Play Lost Mode Sound (iOS 10.3+)"
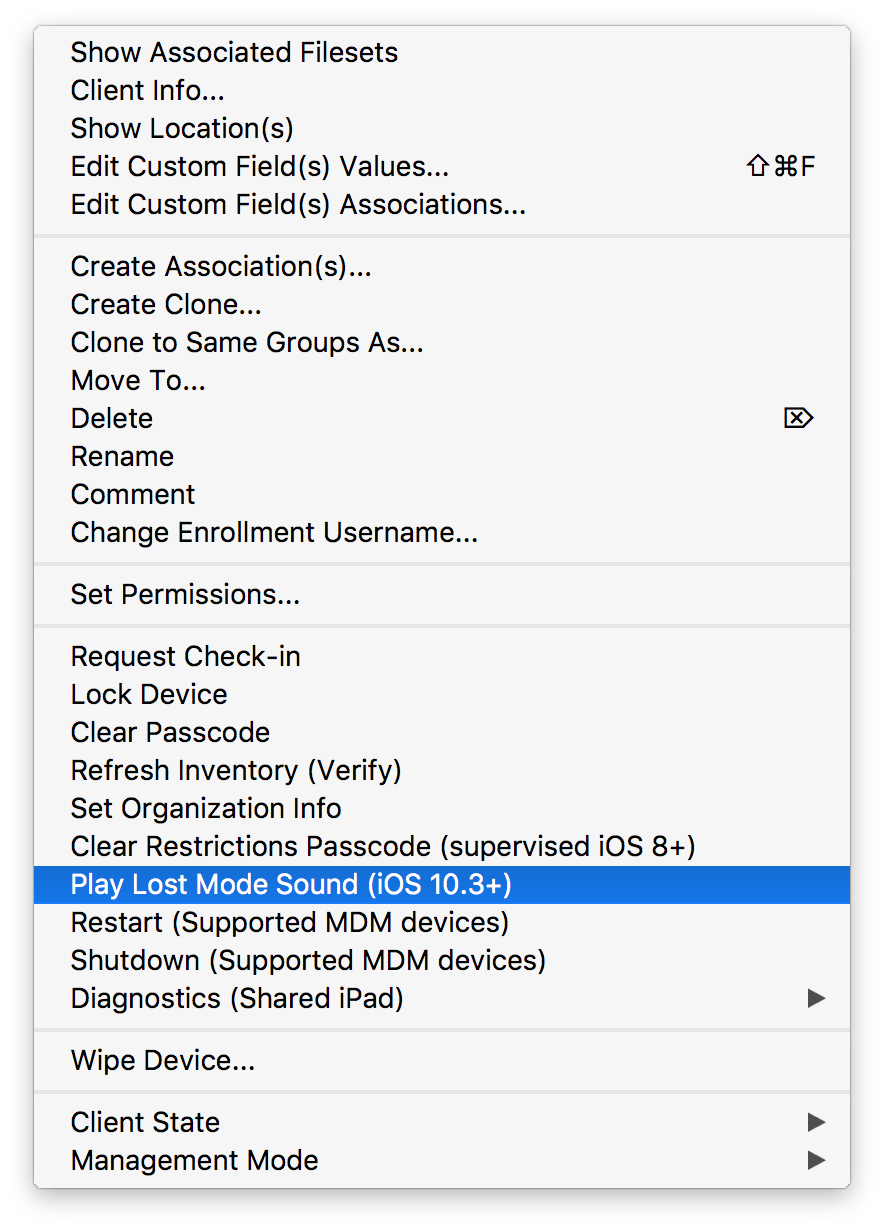
![LT-lostmodeping.png](https://kb.filewave.com/uploads/images/gallery/2023-06/8q7zWLZOru8fFW3r-lt-lostmodeping.png)

### Passive Tracking Setup

This is receiving tracking data continuously.

1. Check your server license to be sure you have "Allows collection of personal data:" set to Yes.  
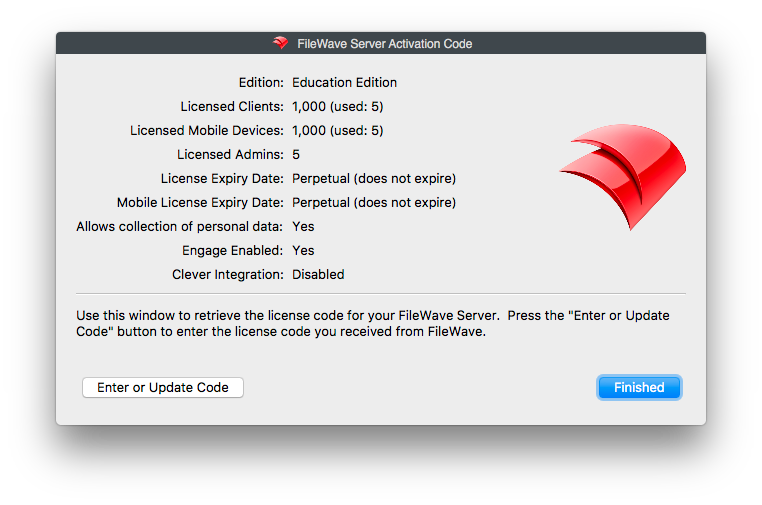
    ![ltactivationcode.png](https://kb.filewave.com/uploads/images/gallery/2023-06/U2r0l42NXGd3o4F1-ltactivationcode.png)
2. Make sure Location Services is enabled. On macOS, confirm **fwGUI** is allowed in Location Services before troubleshooting FileWave tracking.
    
    <table class="align-center"><thead><tr style="background-color:rgb(251,238,184);"><th>iOS</th><th>macOS</th></tr></thead><tbody><tr><td style="vertical-align:top;">![iOSLocation.jpeg](https://kb.filewave.com/uploads/images/gallery/2023-06/faLsT1NrHuLcKEII-ioslocation.jpeg)</td><td style="vertical-align:top;">![macOSLocation.png](https://kb.filewave.com/uploads/images/gallery/2023-06/HFwaEknNYtvj67Cl-macoslocation.png)</td></tr></tbody></table>
    
    <table class="align-center"><thead><tr style="background-color:rgb(251,238,184);"><th>Windows</th><th>Android</th></tr></thead><tbody><tr><td style="vertical-align:top;">![ltwindowslocation.png](https://kb.filewave.com/uploads/images/gallery/2023-06/j2dgpYsgDRjMfM9Q-ltwindowslocation.png)</td><td style="vertical-align:top;">![LT-android.png](https://kb.filewave.com/uploads/images/gallery/2023-06/8VCgxkEcwUxqJIOW-lt-android.png)</td></tr></tbody></table>
3. Prepare the clients
    
    
    1. **macOS and Windows** - Be sure that "Disable Personal Data Collection" option in the client preferences of your clients is not checked.  
        [![Screenshot 2025-08-20 at 10.42.59.png](https://kb.filewave.com/uploads/images/gallery/2025-08/scaled-1680-/tI1cOiwAdJGWyAwn-screenshot-2025-08-20-at-10-42-59.png)](https://kb.filewave.com/uploads/images/gallery/2025-08/tI1cOiwAdJGWyAwn-screenshot-2025-08-20-at-10-42-59.png)
        
        <p class="callout success">Client Monitor is no longer a separate app. Use FileWave Central for one-device changes to "Disable personal data collection", or create a Superprefs ([Creating a Superprefs Fileset](https://kb.filewave.com/books/filewave-client/page/superprefs-fileset "Creating a Superprefs Fileset")) to change it in bulk.  
          
        </p>
    2. **iOS** - The FileWave IPA App Portal automatically deploys to your iOS devices. This used to be manual.
        
        <p class="callout warning">FileWave 15.3+ will auto instal the latest App for you on qualifying devices. If the App is already open, when configuring the device for tracking, it may be necessary to close and re-open the App after the device has receive the subsequent MDM commands from the Model Update.</p>
    3. **Chromebook** - Be sure the Chrome Extension is installed and configured (See [Quick Start Guide for Chromebooks](https://kb.filewave.com/books/evaluation-guide/page/chromebook-client-pre-requisites "Quick Start Guide for Chromebooks"))
    4. **Android (EMM)**
        
        
        1. Force enable location tracking server side
            
            <p class="callout danger">By force enabling EMM tracking you are ignoring "Allows collection of personal data" in your license. Even is the license is set to false, this will collect data.</p>
            
            
            1. Edit
                
                ```
                /usr/local/filewave/django/filewave/settings_custom.py 
                ```
            2. add
                
                ```
                settings.EMM['FWCLIENT_FORCE_ALL_DEVICES_TRACKING_ENABLED'] = True
                ```
            3. Restart apache
                
                ```
                /usr/local/filewave/apache/bin/apachectl restart
                ```
            4. Update Model
        2. Force enable location services on devices (See: [Force Location for EMM Android Devices](https://kb.filewave.com/books/android/page/force-location-for-emm-android-devices "Force Location for EMM Android Devices"))
4. Change the state to Normal
    
    
    1. Right click on your macOS, Windows, Chromebook, and Android device(s)
        
        <p class="callout success">For multiple devices use the filter options at the top of the client view, then select all</p>
    2. Select Normal from the "Client State" option.
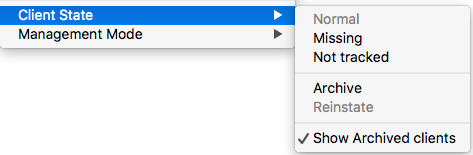
        
        ![ltclientstate 2.png](https://kb.filewave.com/uploads/images/gallery/2023-06/XUTse0K30yzokoyh-ltclientstate-2.png)
5. Update the model  
    ![ltupdatemodel 2.png](https://kb.filewave.com/uploads/images/gallery/2023-06/2HS8wbiM6pgX406t-ltupdatemodel-2.png)
6. Accept any device prompts
    
    <table style="width:100%;height:784.032px;"><thead><tr style="height:29.7969px;background-color:rgb(251,238,184);"><th class="align-center" style="width:53.0248%;height:29.7969px;">iOS</th><th class="align-center" style="width:46.9752%;height:29.7969px;">macOS</th></tr></thead><tbody><tr style="height:724.438px;"><td style="width:53.0248%;height:724.438px;vertical-align:top;">![LT-passivepromptios.PNG](https://kb.filewave.com/uploads/images/gallery/2023-06/0OXRCABghV1wO0NR-lt-passivepromptios.PNG)</td><td style="width:46.9752%;height:724.438px;vertical-align:top;">![LT-passivepromptmacOS.png](https://kb.filewave.com/uploads/images/gallery/2023-06/lfi95KVdSD7LnAad-lt-passivepromptmacos.png)</td></tr></tbody></table>
7. Wait a few minutes, can potentially take up to 15 minutes. Then simply right click on your device(s) and select the Show Location(s) option to see the map below. This will be accurate within a few hundred feet for most devices.
    
    ![LT-newmap.png](https://kb.filewave.com/uploads/images/gallery/2023-06/T52ftT5epwJHNUrc-lt-newmap.png)

<p class="callout danger">**Warning:** In order to avoid legal issues concerning user location tracking, it is highly recommended that you enable location tracking only on devices when a unique user may authorize the service.  
Privacy Policies: [Apple/iOS and macOS](http://www.apple.com/legal/privacy/) – [Microsoft/Windows](http://go.microsoft.com/fwlink/?LinkId=521839) – [Google/Android](http://www.google.com/intl/en/policies/)</p>

# Additional OS Specific Considerations

### macOS

Any user can agree to tracking, admin or not. Only an administrator can disable location services and/or FileWave's rights to location, as per [Apple Inc. policy.](https://www.apple.com/legal/privacy/en-ww/).

### iOS

Any user can agree to tracking, can disable location services, and revoke FileWave's right to location, as per [Apple Inc. policy.](https://www.apple.com/legal/privacy/en-ww/)

### Windows

The Windows operating system does not prompt the local user for access to location. Windows 10+ does have a location service that can be turned off.

### Android (APK Client)

Upon installing or upgrading the Android FileWave Client to version 10.1 or greater, the user is requested to approve all rights an application needs. This includes location services, running in the background and several other rights.

### Android (EMM Client)

A user can turn off their location tracking at anytime, but you can make a policy fileset that will [Force Location for EMM Android Devices](https://kb.filewave.com/books/android/page/force-location-for-emm-android-devices "Force Location for EMM Android Devices")

## Order of operation

It is important to note the way a client verifies it is able to ask the system for location information.  
For example setting the state to "Missing" but it has a Superprefs file telling it the refresh interval is 0 See the flowchart for reference:

[![location-tracking-flowchart-fwgui-location-services.png](https://kb.filewave.com/uploads/images/gallery/2026-07/scaled-1680-/dqfB1qwlTfsO908Y-location-tracking-flowchart-fwgui-location-services.png)](https://kb.filewave.com/uploads/images/gallery/2026-07/dqfB1qwlTfsO908Y-location-tracking-flowchart-fwgui-location-services.png)
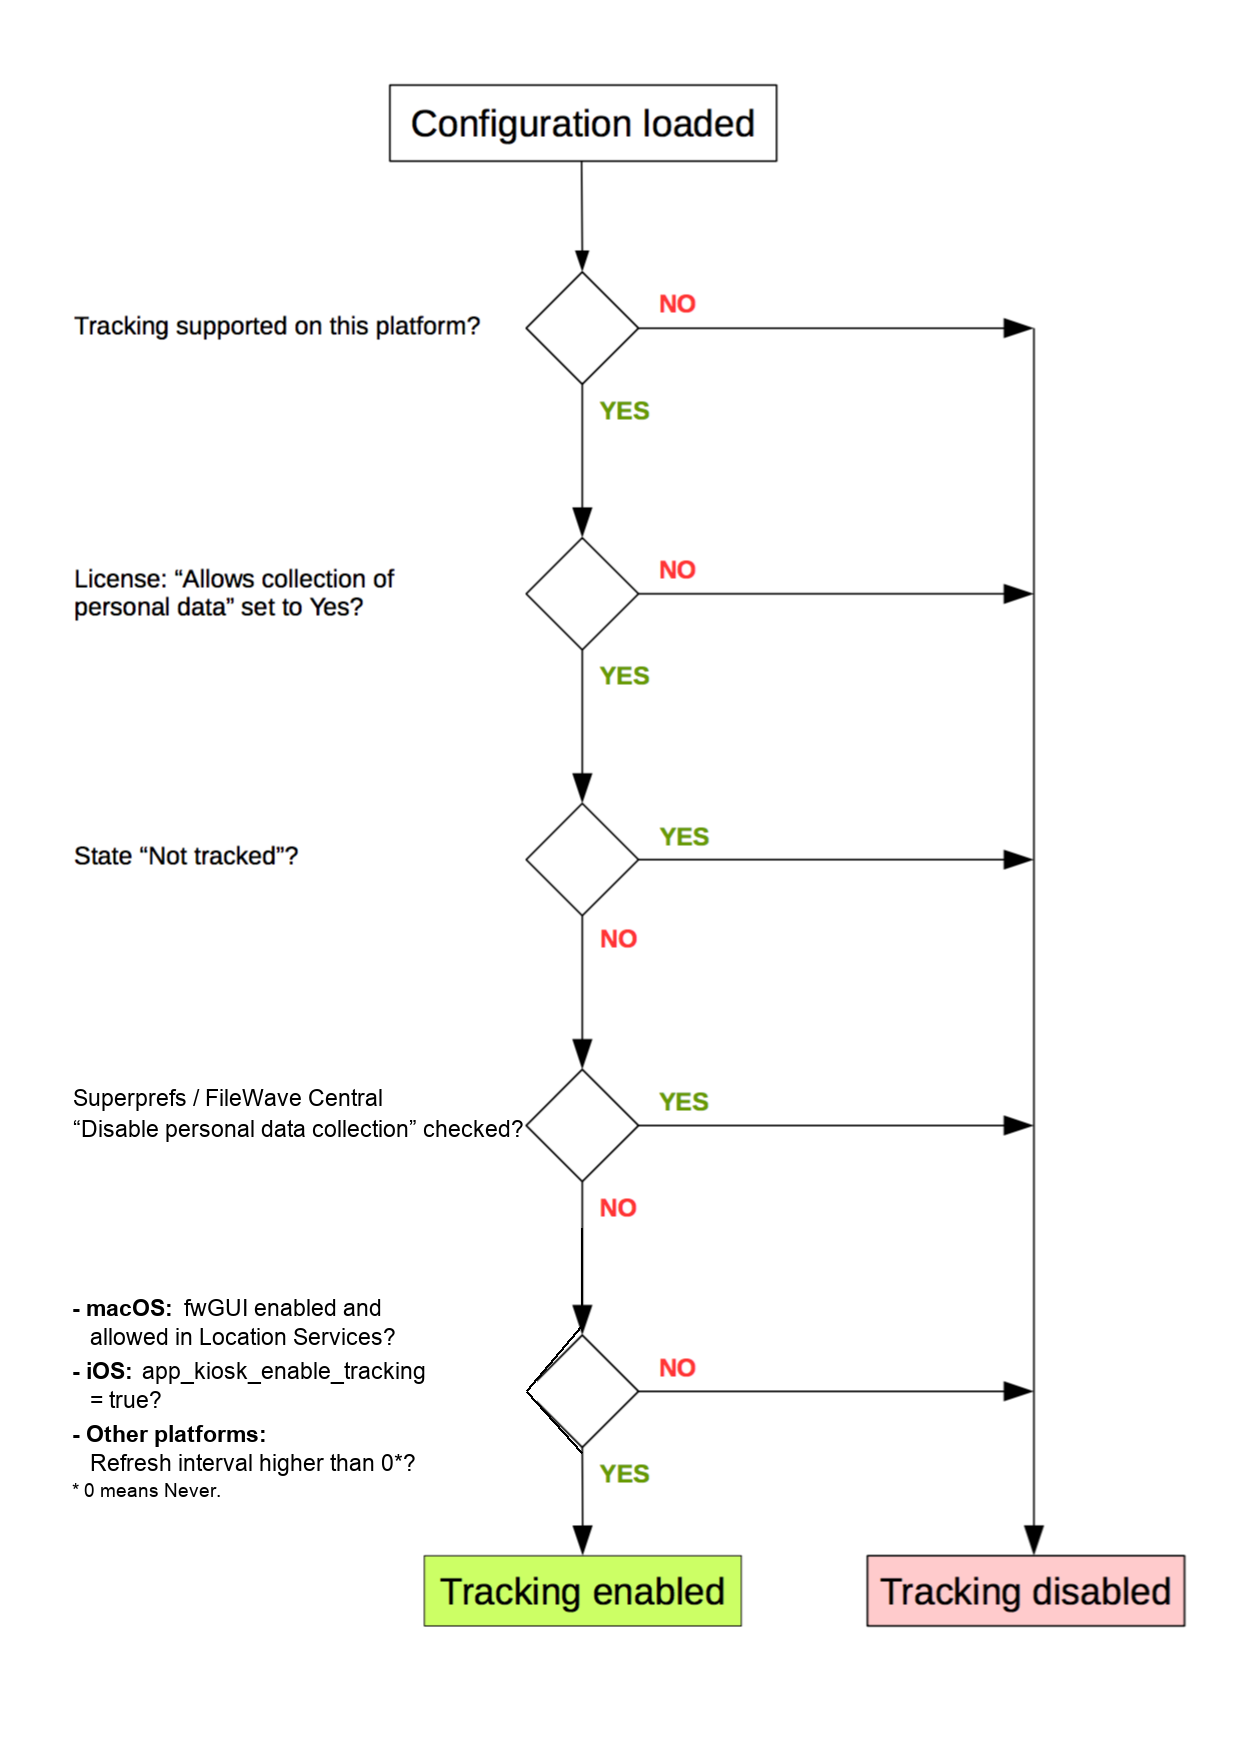
### Global Location Reporting Disable

If there are any reasons, legal or otherwise, that you do not wish to enable tracking on a global level within your organization, your FileWave license can be adjusted to enable personal mode. This will disable devices from sending application usage as well as location information.

  
To verify the current status of personal data collection. From FileWave Admin: Server Menu → "Activation Code..." → There you will see "Allow collection of personal data:" with Yes or No after it.

To have personal data enabled or disabled on your license, please submit a support ticket with "Personal data License" in the subject.

<p class="callout warning">Only tickets from authorized support agents whose names are on the support contract will be accepted to adjust license personal data settings.</p>

# How the FileWave Client Communicates

# What

This article explains how the FileWave Client securely communicates with FileWave infrastructure components during enrollment and ongoing operations. It covers certificate-based authentication, transport mechanisms, and platform-specific communication flows so administrators understand *what* talks to *what*, *how*, and *why*.

A key design principle of FileWave communication is **mutual TLS (mTLS)**, where both client and server authenticate each other using certificates issued by the FileWave Certificate Authority (CA).

# When / Why

Understanding FileWave client communication is important when:

- Designing network topology (firewalls, proxies, NAT, boosters, NATS)
- Troubleshooting enrollment or check-in failures
- Auditing security posture (certificate usage, authentication, encryption)
- Explaining FileWave behavior to security or infrastructure teams

This knowledge is especially critical in modern deployments where communication is brokered through **NATS** rather than direct point-to-point HTTP(S) connections.

# How

## Enrollment

At this point, you have either installed the FileWave client onto a device manually, or the device has received the client automatically (for example via Automated Device Enrollment).

1. The client uses the configured server address to initiate a connection to the FileWave server.
2. The client downloads the FileWave CA certificate from the server.
3. The client generates a unique Client ID.
4. The client generates a **Certificate Signing Request (CSR)** and securely stores the **private key locally**.
5. The client sends the Client ID, device name, and CSR to the server. 
    1. The client polls the server on the tickle/heartbeat interval until a certificate is issued.
    2. The server signs the CSR and returns a client certificate.
    3. The client validates the returned certificate against: 
        - Its locally stored private key
        - The FileWave CA certificate
6. The client record is created in FileWave Central: 
    1. **Auto-add**: The client is automatically approved and placed into the configured auto-add group.
    2. **Upgraded client**: The client is automatically approved and resumes normal operation.
    3. **Manual vetting**: The client remains pending in *Client View → New Clients* until approved.

> FileWave uses **mutual TLS (mTLS)** from this point forward. All subsequent communication requires both the client and server to present valid certificates signed by the FileWave CA.

> There is **no longer a compatibility mode**. Legacy documentation such as [What is Compatibility Mode?](https://kb.filewave.com/books/filewave-general-info/page/what-is-compatibility-mode) applies only to historical versions and should not be used for modern deployments.

## Daily Communication

The FileWave server continuously recalculates models and smart groups. As a result, a client check-in may result in new manifests even when the assigned model itself has not changed.

Modern FileWave deployments use **NATS** as the primary communication transport for tickle and command signaling.

### macOS and Windows

#### Tickle (Check-in)

1. The tickle interval expires (configurable via Superprefs).
2. The client initiates communication via **NATS**.
3. A mutual TLS handshake occurs: 
    - The server validates the client certificate.
    - The client validates the server certificate.
4. The server responds with the current model number. 
    1. If the model number matches, no model manifest is downloaded.
    2. If the model number differs, the client downloads the updated manifest.
5. The client processes the manifest(s).
6. The client downloads required Filesets: 
    1. From the server directly **or** via a Booster.
    2. The client validates the Booster certificate against the same FileWave CA.
    3. The Booster validates the client certificate and checks revocation status (CRL).
    4. If certificate validation fails at any stage, the TLS handshake fails and **no data is transferred**. The failure is reported back to the FileWave server.

#### Verify

1. A verification check-in occurs (default: every 24 hours, configurable via Superprefs).
2. After successful mTLS authentication: 
    - The client verifies Fileset state
    - Inventory is refreshed
    - Files are healed according to Fileset [verification](https://kb.filewave.com/books/filesets-payloads/page/verification) settings

> Verification also occurs when the client service starts (for example after a reboot) and can be triggered manually via Client Monitor, Client Info, or command line.

### Android EMM

FileWave Android EMM communication is mediated through Google’s Android Management API (AMAPI).

<p class="callout info">As of FileWave 16.3, this communication follows Google's recommended API rate limit settings. This is an internal behavior change that reduces the risk of throttling and improves stability for larger Android Enterprise deployments. No administrative action or configuration change is required.</p>

#### At Model Update

1. A single manifest is generated from all Android Policy Filesets assigned to the device.
2. Application assignments and permissions are included.
3. The manifest is sent to Google via AMAPI.
4. The Android device retrieves updates from Google.

#### Ongoing Operation

1. FileWave polls Google approximately every 5 minutes for device status updates.
2. Smart group changes trigger regeneration of manifests and updates via AMAPI.

### iOS / iPadOS

FileWave communicates with Apple devices using standard MDM push and check-in mechanisms.

#### At Model Update

1. A push notification is sent to the device via Apple Push Notification service (APNs).
2. The device initiates a connection to the FileWave MDM server.
3. Updated manifest data is delivered to the device.

#### Ongoing Operation

1. The inventory interval is reached (default: 24 hours).
2. FileWave sends an APNs push requesting the device to check in.
3. The device connects to the FileWave MDM server.
4. Any updated manifests are delivered.

# Related Content

- [Creating a Superprefs Fileset](https://kb.filewave.com/books/filewave-client/page/superprefs-fileset)
- [Default TCP and UDP Port Usage](https://kb.filewave.com/books/filewave-general-info/page/default-tcp-and-udp-port-usage)
- [Configuring Inventory Preferences](https://kb.filewave.com/books/filewave-central-anywhere/page/configuring-inventory-preferences)
- [Android EMM Known Issues](https://kb.filewave.com/books/android/page/android-emm-known-issues)

# Digging Deeper

FileWave’s use of **mutual TLS** ensures that:

- Only trusted clients can communicate with the server
- Clients are protected from impersonation or man-in-the-middle attacks
- Boosters cannot serve unauthorized devices

The introduction of **NATS** improves scalability and resilience by decoupling client signaling from traditional request/response patterns. This allows FileWave to efficiently handle large device fleets while maintaining strong security guarantees.

From a security perspective, FileWave’s communication model aligns well with modern Zero Trust principles: authenticate everything, encrypt everything, and assume the network is hostile by default.

# Executing a Client-Side Script-Based Verification

## What

The "verify" option of the fwGUI client application allows you to run a "verify" from the client programmatically.

## When/Why

We are going to use this option whenever we want to get "immediate" feedback from a client. For instance, as a post-installation script, calling a verify would immediately make the client report updated inventory rather than waiting (up to 24 hours, default) for the next "regular" verify.

## How

The verification is called as a command-line option to the fwcld app on either a Windows or macOS client as follows. The first table is for FileWave 16.0.4+ and the second table is for 15.5.x and below. Please note that 16.0.0 through 16.0.3 did not have this command.

<table id="bkmrk-%C2%A0-windows-client-mac" style="width:124.198%;"><tbody><tr style="background-color:rgb(251,238,184);"><td style="width:15.8522%;"> </td><td style="width:40.4052%;">**Windows Client**</td><td style="width:43.7426%;">**macOS Client**</td></tr><tr><td style="width:15.8522%;">**Path to FileWaveKiosk:**</td><td style="width:40.4052%;">"C:\\Program Files\\FileWave\\client\\"</td><td style="width:43.7426%;"><span class="s1">/usr/local/sbin/FileWave.app/Contents/MacOS/</span>

</td></tr><tr><td style="width:15.8522%;">**App to call:**</td><td style="width:40.4052%;">fwcld.exe</td><td style="width:43.7426%;">fwcld</td></tr><tr><td style="width:15.8522%;">**Command Line options:**</td><td style="width:40.4052%;">--verify  
  
*Sends a verification w/o user notification*</td><td style="width:43.7426%;">--verify  
  
*Sends a verification w/o user notification*</td></tr><tr><td style="width:15.8522%;">**Script examples:**</td><td style="width:40.4052%;">**Windows Batch Example**  
  
```powershell
@echo off
 
"C:\Program Files\FileWave\client\fwcld.exe" --verify
 
exit 0
```

</td><td style="width:43.7426%;">**macOS Bash Example**  
  
```shell
#!/bin/bash
 
/usr/local/bin/FileWave.app/Contents/MacOS/fwcld --verify
 
exit 0
```

</td></tr></tbody></table>

On FileWave version 15.5.x or lower these are the paths and executables. This is being left here so to document that the command changed on Windows between 15.4.2 and 15.5.0 and then in 16.0.0 the old Kiosk was removed and so in 16.0.3 the verify command was brought in to the new Kiosk as mentioned above;

<table id="bkmrk-%C2%A0-windows-client-mac-1" style="width:124.198%;"><tbody><tr style="background-color:rgb(251,238,184);"><td style="width:15.8522%;"> </td><td style="width:40.4052%;">**Windows Client**</td><td style="width:43.7426%;">**macOS Client**</td></tr><tr><td style="width:15.8522%;">**Path to fwGUI**</td><td style="width:40.4052%;">"C:\\Program Files\\FileWave\\client\\kiosk\\"</td><td style="width:43.7426%;">/usr/local/sbin/FileWave.app/Contents/Resources/</td></tr><tr><td style="width:15.8522%;">**App to call:**</td><td style="width:40.4052%;">fwGUI.exe</td><td style="width:43.7426%;">fwGUI.app</td></tr><tr><td style="width:15.8522%;">**Command Line options:**</td><td style="width:40.4052%;">--verify  
  
*Sends a verification (w/dialog by default...useful for troubleshooting)*</td><td style="width:43.7426%;">--verify  
  
*Sends a verification (w/dialog by default...useful for troubleshooting)*</td></tr><tr><td style="width:15.8522%;"> </td><td style="width:40.4052%;">--silent  
  
*Used with --verify, sends verification without user dialog*</td><td style="width:43.7426%;">--silent  
  
*Used with --verify, sends verification without user dialog*</td></tr><tr><td style="width:15.8522%;">**Script examples:**</td><td style="width:40.4052%;">**Windows Batch Example (FW 15.5.x)**  
  
```powershell
@echo off
 
"C:\Program Files\FileWave\client\fwGUI.exe" --verify --silent
 
exit 0
```

</td><td style="width:43.7426%;">**macOS Bash Example**  
  
```shell
#!/bin/bash
 
/usr/local/sbin/FileWave.app/Contents/Resources/fwGUI.app/Contents/MacOS/fwGUI --verify --silent
 
exit 0
```

</td></tr></tbody></table>

## Related Content

- You can change the default 24h by adjusting the "File Check Interval" in a Superprefs - [Creating a Superprefs Fileset](https://kb.filewave.com/books/filewave-client/page/superprefs-fileset "Creating a Superprefs Fileset")

# Inventory-only Clients

## *Management Mode*  


Management Mode controls whether a computer client is fully managed or inventory only. It has two values: **Managed**, which is the normal mode, and **Inventory only**. To change the setting, right-click the client and select **Management Mode**.

***Inventory only***

Inventory only clients still report inventory data to FileWave, but they do not install assigned Filesets except for critical Filesets. At this time, the critical Filesets are FileWave upgrade Filesets. Fileset status reports **Not installed, client is inventory only** when a normal Fileset is blocked by this mode.

# Troubleshooting

# Apple MDM Missing Enrolment Profile

## What

At times, MDM may appear slow or even worse, the MDM Enrolment Profile no longer seems to be apparent, preventing MDM management until re-enrolled.

## Why

Apple observed that osquery can cause such issues, depending upon configuration.

[osquery](https://github.com/osquery/osquery) is a tool to describe a device based upon SQL and can be used by management tools or similar, e.g. Malware detection software. It is a popular tool, as highlighted by a couple of example applications that use osquery: CrowdStrike and Microsoft Defender.

If you use ADE/DEP to enroll the macOS systems you may find that the following command restores the device's belief that it is supervised and in MDM. To run the command you must be logged in on the device as it will launch a notification to click on to re-confirm that the device should be in MDM;

```shell
sudo profiles renew -type enrollment
```

## Information

FileWave does not use osquery, so that may appear as if devices managed by FileWave could be immune, however, since other 3rd party software may do so, FileWave device management, as with any MDM, could be impacted.

Consider testing for devices running osquery, where MDM issues may arise or MDM Enrolment Profile is no longer present. If so, it would be recommended to communicate with the software vendor utilising osquery. Details imply a reduction in the aggressiveness of osquery should prevent this. Additionally, Apple were looking into mitigating against this issue.

## Related Content

- [https://www.osquery.io/](https://www.osquery.io/)

# Clearing FileWave Client Certs

In some situations, you may want to explicitly make the server clear and revoke a client certificate without deleting the client from FileWave, for instance if you are wiping a macOS client or reinstalling an IVS client.

## From FileWave Central

For desktop clients, you can right-click the client and choose "Clear Certificate(s)".

Note that the current administrator needs to have write permissions on the clients, and will need to enter credentials.

## From the Client

The first way is to use the client (13.1.1) certificate itself to authenticate, which is only possible if the certificate and its private key still exist on the client:

<p class="callout info">On macOS, the FileWave Client binary is normally located at `/usr/local/bin/fwcld`. The examples below use the full path so they can be copied into scripts more reliably.</p>

```bash
/usr/local/bin/fwcld -clearCertificate [-serverHost <fwserver_address> -serverPort 20445]

```

This is the equivalent of the following command using curl (replace &lt;fwserver\_address&gt; with the address of your FileWave server):

```bash
sudo curl --key /private/var/FileWave/client.key --cert /private/var/FileWave/client.crt -X POST https://<fwserver_address>:20445/auth/client/clear_certificate

```

The client will then be unable to communicate with the server (until a new CSR is created). This command can be used in the activation script of a macOS reinstall fileset to make the server properly clear the old client certificate.

<p class="callout info">**What happens next:** Clearing the certificate revokes the existing client identity. It does not reinstall or repair the client by itself. The device must run the FileWave Client again and create a new certificate request before it can communicate with the server. In wipe or reinstall workflows, clear the old certificate before or during the reinstall; if an existing device still cannot check in after clearing, verify the server address and trust settings, then restart or reinstall the client so it can generate and submit a new certificate request.</p>

Note that the command above uses the client certificate itself to identify the client. In case the certificate's private key is already lost, there is an alternative where you can authenticate with an administrator's token rather than with the client certificate:

```bash
/usr/local/bin/fwcld -clearCertificate -token <application_token> [-serverHost <fwserver_address> -serverPort <fwserver_port>]

```

- &lt;fwserver\_address&gt;: The FileWave server address (optional)
- &lt;fwserver\_port&gt; : 20445 by default
- &lt;application\_token&gt;: An administrator application token, with write permissions on this client. Can be found in the Application Tokens tab of the Manage Administrators dialog (example: {1ca3fe82-a41d-8866-bd4d-f83f9f1a8dd5}).

Alternatively, you can also clear certificates en masse using the inventory superadmin token. In this case, you are allowed to clear the certificate of any client (*obviously use with caution*):

```bash
curl -X POST https://<fwserver_address>:20445/auth/client/clear_certificates -H 'Authorization: <application_token>' -H 'Content-Type: application/json' -d '["<serial_1>", "<serial_2>", ...]'

```

Included in 13.1.1 and above are the options to clear with 'MAC address' or 'Device ID':

```bash
curl -X POST https://<fwserver_address>:20445/auth/client/clear_certificates?identifier=mac -H 'Authorization: <application_token_base64>' -H 'Content-Type: application/json' -d '["<mac_address_1>", "<mac_address_2>", ...]'

```

```bash
curl -X POST https://<fwserver_address>:20445/auth/client/clear_certificates?identifier=device_id -H 'Authorization: <application_token_base64>' -H 'Content-Type: application/json' -d '["<device_id_1>", "<device_id_2>", ...]'

```

The identifier parameter is optional, its default value is serial\_number.

- &lt;fwserver\_address&gt;: The FileWave server address.
- &lt;serial\_1&gt;, ...: serial numbers of clients to revoke. Must match the serial\_number field from inventory.
- &lt;mac\_address\_1&gt;, ...: MAC addresses or clients to revoke.
- &lt;device\_id\_1&gt;, ...: device ids of clients to revoke.
- &lt;application\_token\_base64&gt;: base64-encoded value of an administrator application token, with write permission on this client. Can be found in the Application Tokens tab of the Manage Administrators dialog (example: ezFjYTNmZTgyLWE0MWQtODg2Ni1iZDRkLWY4M2Y5ZjFhOGRkNX0=\_).

A dict of lists of clients for: SUCCESS, NOT\_FOUND and ERROR statuses is returned.

- SUCCESS: the client certificate was successfully revoked.
- NOT\_FOUND: no certificate was found on the server for this client, or no such client was found. Maybe the certificate was already revoked, or the client had no certificate yet, or the client had not reported its MAC address or serial number yet, if you passed a MAC address or a serial number.
- ERROR: an unexpected error occurred. Please check server logs for details.

## Potential log entries

```bash
2019-06-12 7:12:02.481|main|FATAL|CLIENT|Unable to retrieve the contents of the cached custom field values: Error decrypting data
2019-06-12 7:12:02.833|main|INFO|CLIENT|CRL updated
2019-06-12 7:12:02.834|main|INFO|CLIENT|No certificate private key yet. Sending a certificate signing request to server my.FQDN.com.
2019-06-12 7:12:03.235|main|FATAL|CLIENT|Failed to send enrollment request (and CSR): error 400 a CSR for this client was already sent.
2019-06-12 7:12:03.235|main|INFO|CLIENT|Falling back to no certificate.

```

# FileWave Client notification for zsh running in the background

## What

When I upgraded my FileWave Client to 15.3.0 or newer I saw a popup saying "zsh is now running in the background".

## When/Why

This happens once when first going to version 15.3.0 or higher of the client on macOS. There is nothing to do. This popup is because the FileWave client needs permission to run zsh for scripting. It can be ignored and development is going to look at ways to suppress it so that in the future it should not show, but it should only happen 1 time on each machine and then even on newer versions of the clients you should not see it because it should already have the permission.

## Related Content

- [FileWave Version 15.3.1](https://kb.filewave.com/books/downloads/page/filewave-version-1531-unsupported "FileWave Version 15.3.1")

# FileWave Client Rename Behavior

Renaming a desktop client in the admin console will now change the Client Name inventory field to match the new name entered and also **change the client name "sync" setting in the client's preferences**. This ensures that the device is able to connect properly with FileWave instance without duplicated entries. (The Device Name inventory filed is not modified)

So, when a client is renamed, the "Sync Computer Name" settings is turned off:

[![image.png](https://kb.filewave.com/uploads/images/gallery/2023-07/scaled-1680-/Y59VAUWnCuWVrf9i-image.png)](https://kb.filewave.com/uploads/images/gallery/2023-07/Y59VAUWnCuWVrf9i-image.png)

### Further Details

- The FileWave Client uses its name as part of the identity of the client (see: [How the FileWave Client Communicates](https://kb.filewave.com/books/filewave-client/page/how-the-filewave-client-communicates "How the FileWave Client Communicates") for more)
- The FileWave Client has a configuration ([FileWave Client Configuration Settings](https://kb.filewave.com/books/filewave-client/page/filewave-client-configuration-settings "FileWave Client Configuration Settings")) to "Sync Computer Name" that can be changed one at a time (Via Client Monitor) or en masse ([Creating a Superprefs Fileset](https://kb.filewave.com/books/filewave-client/page/superprefs-fileset "Creating a Superprefs Fileset")).
- Renaming devices in the FW Admin (r-click → rename) has a different behavior depending on the device (see below)

# FileWave Client Status Check: How to ask the client what it is doing on macOS and Windows

## What

Use `fwcld -s` to ask the FileWave Client what it is currently doing on macOS or Windows. This is useful when you have local access to a device and need a quick status check without waiting for server-side inventory or logs.

## When/Why

The command shows client status, Filesets in inventory, Filesets not meeting requirements, and the current worklist.

You might find this feature beneficial when:

- You are diagnosing why a Fileset or profile is not applying as expected.
- The FileWave Client appears stuck and you want to see its current worklist.

## How

Run the command on the device you want to check:

### macOS

1. Open the Terminal application on the macOS device.
2. Run: `/usr/local/sbin/FileWave.app/Contents/MacOS/fwcld -s`

### Windows

1. Open the Command Prompt on the Windows device.
2. On current Windows clients, run: `"C:\Program Files\FileWave\client\fwcld.exe" -s`

After running the command, you will see output similar to the example below:

```
**************************
**FileWave Client Status**
**************************
User ID: 11354
Current Model Number: 660

Filesets in Inventory:

1. Fileset Mac MDM OS Update - macOS Monterey 12.6.3 12.6.3, revision ID 10148, ID 10148, revision ID 10148, version 1 - Apple MDM OS Update is not supported (0)
2. Fileset Mac MDM OS Update - Safari 16.3, revision ID 10149, ID 10149, revision ID 10149, version 1 - Apple MDM OS Update is not supported (0)
3. Fileset FileWave_macOS_Client_14.10.2_df52a47c77, revision ID 10169, ID 10169, revision ID 10169, version 1 - Active (0)
4. Fileset Profile - TeamViewerHost Allow Standard User, revision ID 10173, ID 10173, revision ID 10173, version 1 - Handled via MDM (0)
5. Fileset Profile - Microsoft  Defender - Kernel Extension, revision ID 10190, ID 10190, revision ID 10190, version 1 - Handled via MDM (0)
6. Fileset Profile - Microsoft Defender - Notifications, revision ID 10191, ID 10191, revision ID 10191, version 1 - Handled via MDM (0)
7. Fileset Profile - Microsoft Defender - Web Content Filter, revision ID 10192, ID 10192, revision ID 10192, version 1 - Handled via MDM (0)
8. Fileset Profile - Microsoft Defender - TCC, revision ID 10193, ID 10193, revision ID 10193, version 1 - Handled via MDM (0)
9. Fileset Profile - Microsoft Defender - Data Acceptance, revision ID 10194, ID 10194, revision ID 10194, version 1 - Handled via MDM (0)
10. Fileset Profile - Microsoft  Defender - System Extension, revision ID 10195, ID 10195, revision ID 10195, version 1 - Handled via MDM (0)
11. Fileset Profile - Microsoft  - Background Service, revision ID 10196, ID 10196, revision ID 10196, version 1 - Handled via MDM (0)
12. Fileset MS Defender macOS, revision ID 10197, ID 10197, revision ID 10197, version 1 - Active (0)
Filesets not meeting requirements:


Worklist:
```

The output provides the following information:

- User ID (the FileWave device ID) and Current Model Number
- Filesets currently in the device's inventory, including their status
- Filesets not meeting requirements
- Current worklist

Use this output to confirm what the FileWave Client is processing before you move on to logs or server-side troubleshooting.

## Related Content

- [FileWave Log File Locations](https://kb.filewave.com/books/filewave-general-info/page/filewave-log-file-locations "FileWave Log File Locations")
- [Using PowerShell to Remotely Check the Windows FileWave Client Status](https://kb.filewave.com/books/filewave-client/page/using-powershell-to-remotely-check-the-windows-filewave-client-status "Using PowerShell to Remotely Check the Windows FileWave Client Status")

# FileWave Windows Network Sweeper

## What

FileWave Windows Network Sweeper is a troubleshooting bundle for finding Windows clients that are online but not communicating correctly with the FileWave Server, then attempting a targeted repair. Typical causes include misconfiguration, user intervention, or a previously failed client upgrade.

## When/Why

Run this during a normal peak-online window when you want to identify Windows devices that have recently checked in but have since gone quiet. A Group Policy deployment can enforce enrollment and check-in for many environments; the [Client Deployment via GPO](https://foundry.filewave.com/mod/scorm/view.php?id=10) training gives one example of that approach, and the same general pattern can support other compliance checks.

## How

Start with a small test group before running the process against a large exported list.

#### Prerequisites

- Run PowerShell as a user with administrative rights on the target Windows devices, usually a domain admin or an equivalent delegated admin account.
- The devices you are trying to catch must be online and reachable on the network.
- The process assumes the `C$` admin share is reachable and that device names resolve correctly. Dynamic DNS needs to be working if you are relying on names instead of IP addresses.
- Know the FileWave Server FQDN and have a valid FileWave API token available.
- Download and unzip the Windows Network Sweeper bundle:

<table id="bkmrk-windows-network-swee" style="border-collapse:collapse;width:19.2593%;"><colgroup><col style="width:100%;"></col></colgroup><tbody><tr><td class="align-center" style="background-color:rgb(206,212,217);">**Windows Network Sweeper**</td></tr><tr><td>[![Download Windows Network Sweeper](https://kb.filewave.com/uploads/images/gallery/2023-06/scaled-1680-/LhUDCHKqr6dGiaoG-filewave-download.png)](https://kb.filewave.com/attachments/388 "Network Sweeper")</td></tr></tbody></table>

<p class="callout info">PSTools is included in the download for convenience. You can also download the current PSTools package directly from Microsoft: [PSTools download](https://learn.microsoft.com/en-us/sysinternals/downloads/pstools).</p>

<p class="callout warning">Before using the repair script broadly, confirm that the bundled `FileWaveClient.msi` is the client version you intend to install, or replace it with the correct installer for your environment. Also review the expected client version in `3_Check_Status.ps1` before treating its status output as authoritative.</p>

#### Process Overview

1. Create an inventory query for Windows devices that have not checked in recently. A common starting point is **OS Type = Windows** and **Last Connected** within the past 30 days but not within the past 7 days. Adjust both date ranges for your environment.

[![Inventory query criteria for recently offline Windows devices](https://kb.filewave.com/uploads/images/gallery/2024-09/scaled-1680-/iIIhBsjbl4PaK1FT-image.png)](https://kb.filewave.com/uploads/images/gallery/2024-09/iIIhBsjbl4PaK1FT-image.png)
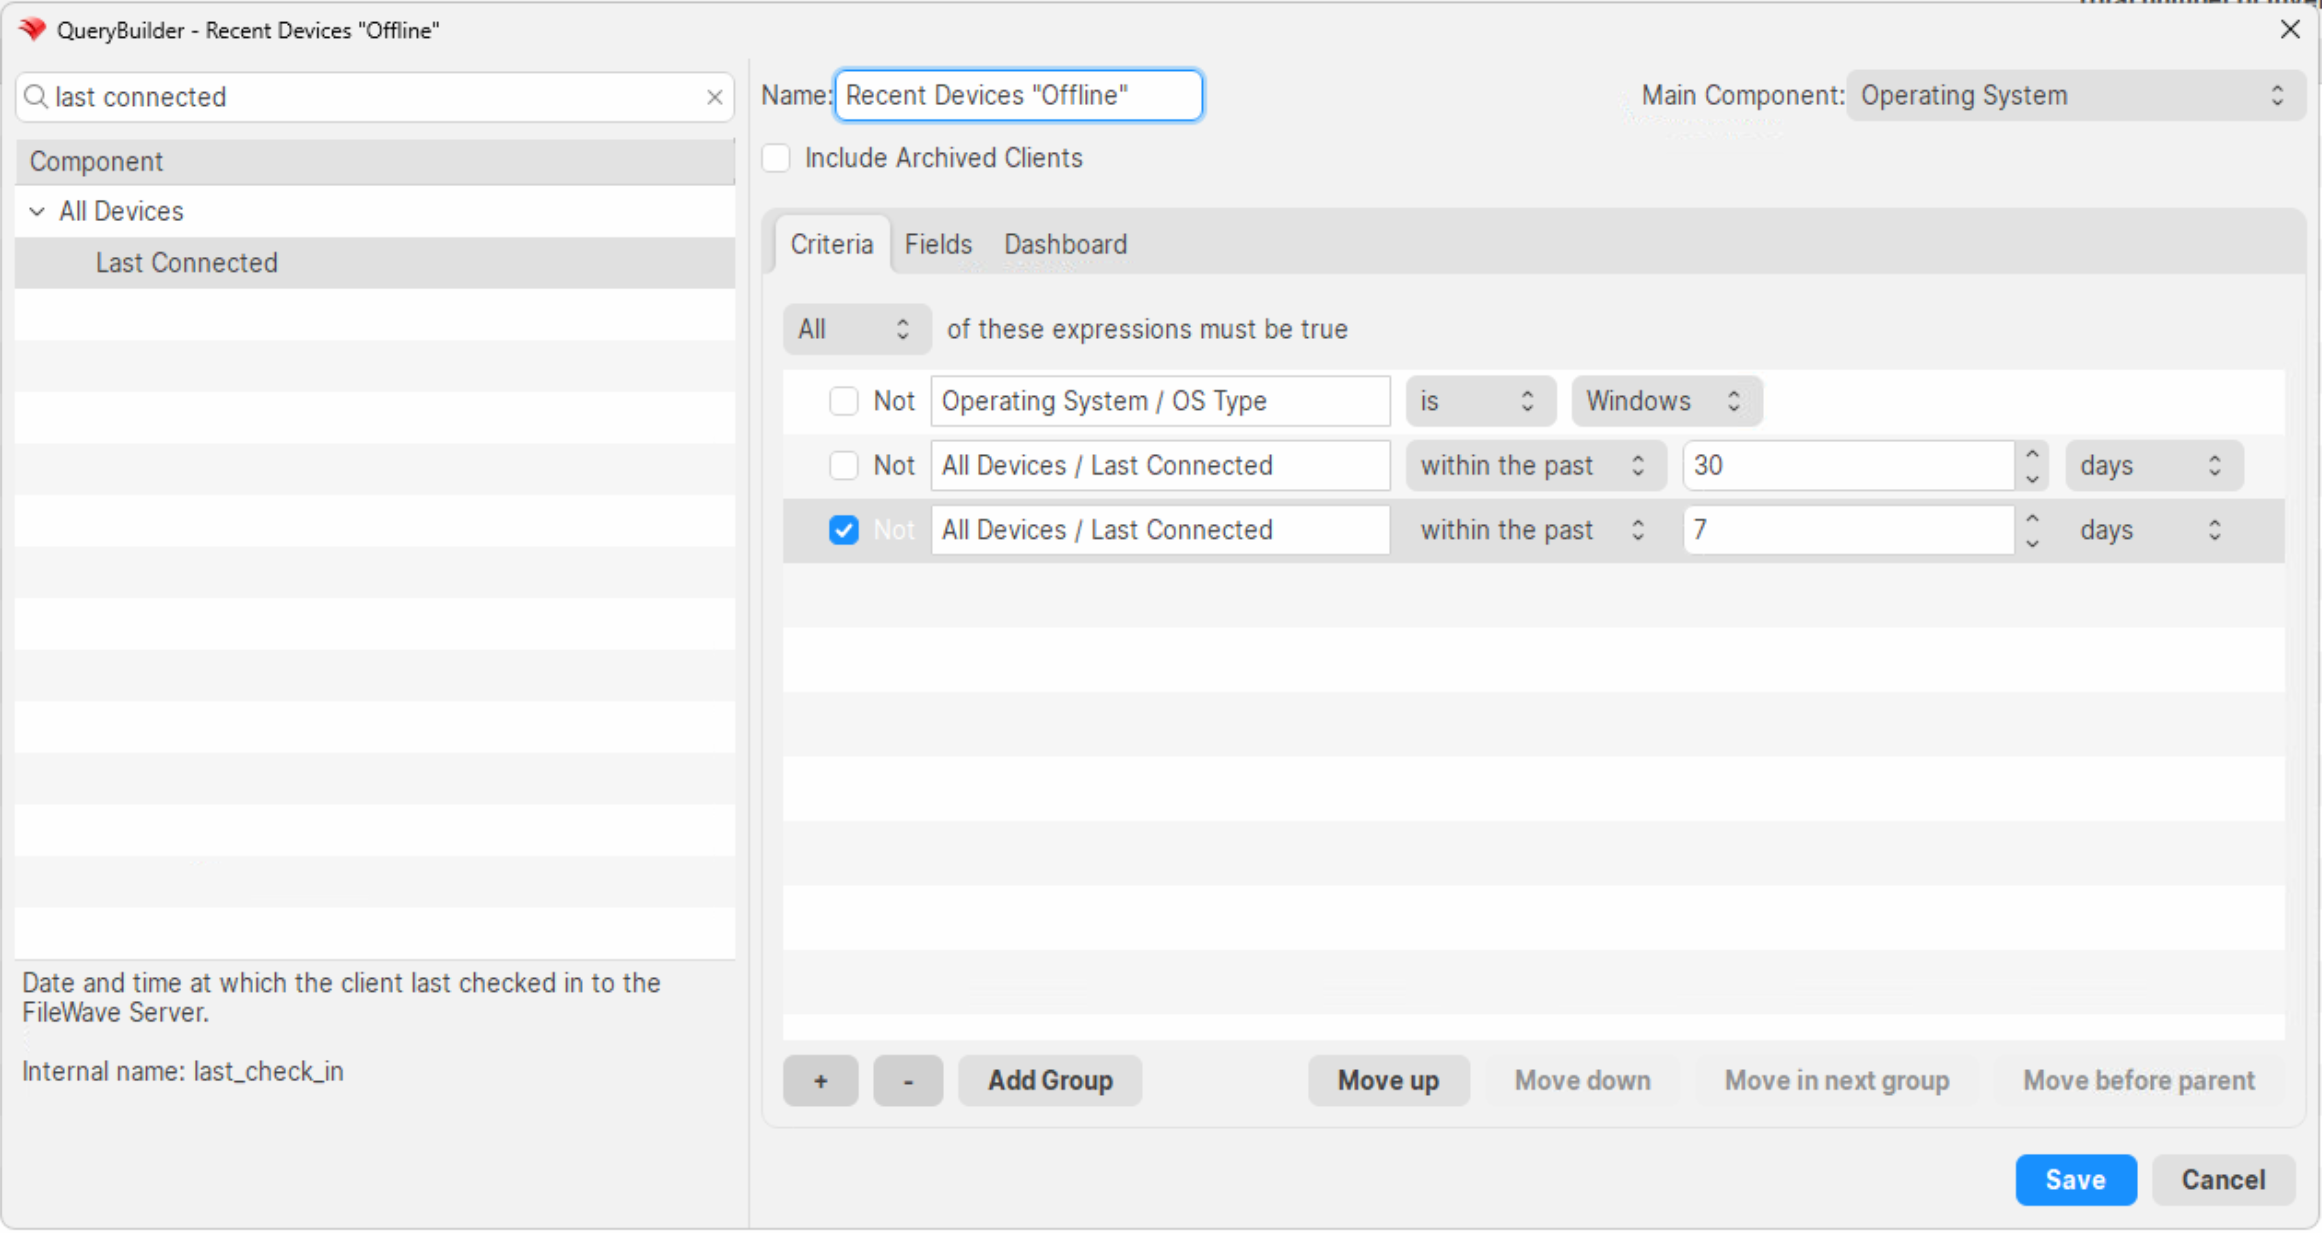
2. Set the query output to include **Device Name** only. You can export IP addresses from the client view, but avoid using IP addresses from an inventory query in DHCP-heavy environments because the address may no longer belong to the same device.

[![Inventory query report with Device Name output](https://kb.filewave.com/uploads/images/gallery/2024-09/scaled-1680-/AoBkCX6WmijN9VN4-image.png)](https://kb.filewave.com/uploads/images/gallery/2024-09/AoBkCX6WmijN9VN4-image.png)
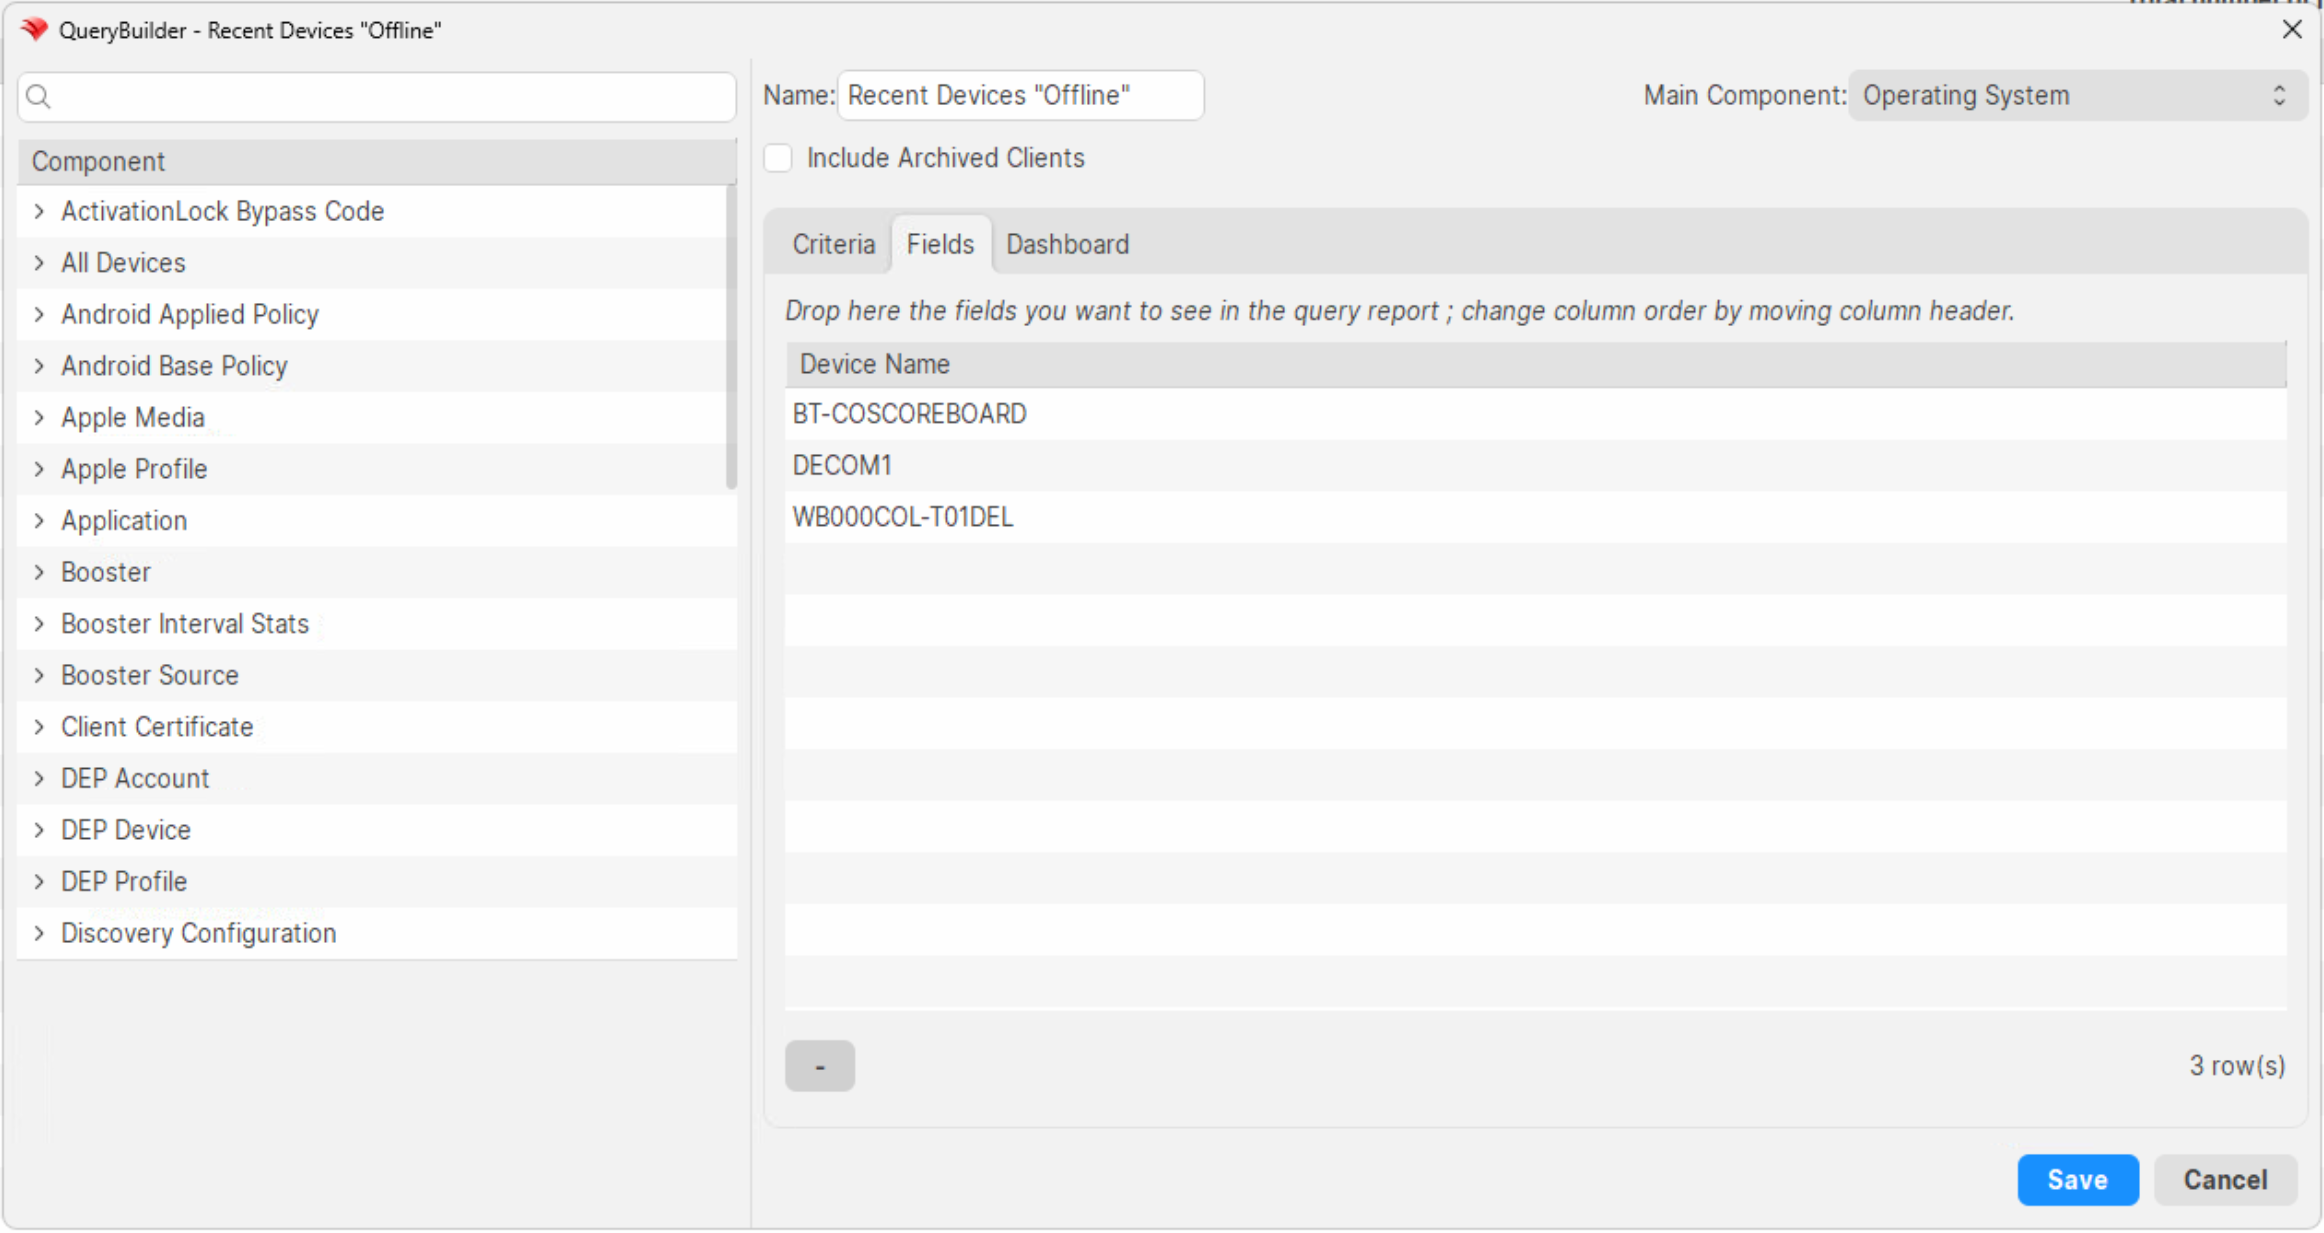
3. Export the query results into the `offline.txt` file included in the ZIP. **View &gt; Export Current View** is useful for this. Remove the header line that says `Device Name`.
4. Run `1_get_online.ps1` to test which exported devices are currently reachable. Reachable devices are written to `online.txt`.
5. If devices are found, run `2_repair_clients.ps1` to attempt the repair. This script uses PSExec to copy and run `fix_fwclient.bat` on the target device.
6. Run `3_Check_Status.ps1` to double-check repaired devices and identify anything that still needs manual remediation.

## Related Content

- [Client Deployment via GPO](https://foundry.filewave.com/mod/scorm/view.php?id=10)
- [Creating a Superprefs Fileset](https://kb.filewave.com/books/filewave-client/page/superprefs-fileset "Creating a Superprefs Fileset")
- [Inventory Queries (Reports)](https://kb.filewave.com/books/filewave-central-anywhere/chapter/inventory-queries-reports "Inventory Queries (Reports)")

## Digging Deeper

The download contains the scripts used in this workflow. Review them before running the bundle in your environment, test against a small set of known devices first, and keep the generated `online.txt`, `output.txt`, `double_check.txt`, and `still_bad.txt` files as your working record for follow-up remediation.

# PSExec as a Helper in Troubleshooting

## What

Microsoft PsTools includes **PsExec**, a remote command-line tool that can help troubleshoot a Windows device when the FileWave Client is not responding through normal FileWave channels.

## When/Why

Use PsExec when you need an interactive command prompt on a Windows client to inspect services, logs, processes, network state, or user sessions. The examples below focus on FileWave Client troubleshooting, but the same approach is useful for other Windows service issues.

## How

<p class="callout info">**Assumptions for the examples below:**  
1) You downloaded PsTools and unzipped it.  
2) You launched Command Prompt as a domain admin or another account with the needed rights on the remote device.  
3) You changed into the directory where PsTools is located.</p>

Connect to the remote computer by name in an interactive PsExec shell:

```
psexec64 \\computername -h cmd
```

You should end up in a shell like the one below. Type `exit` to leave the remote shell.

[![Interactive PsExec command prompt on a remote Windows device](https://kb.filewave.com/uploads/images/gallery/2024-05/scaled-1680-/CwfTGWcpSghoTMos-image.png)](https://kb.filewave.com/uploads/images/gallery/2024-05/CwfTGWcpSghoTMos-image.png)
From that shell, you can run normal Windows command-line tools on the remote device. These examples are useful when a Windows client is not reporting correctly.

1. Check the FileWave Client service: 
    - ```
        sc query filewavewinclient
        ```
        
        [![Querying the FileWave Client service from PsExec](https://kb.filewave.com/uploads/images/gallery/2024-05/scaled-1680-/EFH8hn8CF60dOUD2-image.png)](https://kb.filewave.com/uploads/images/gallery/2024-05/EFH8hn8CF60dOUD2-image.png)
2. Stop the FileWave Client service: 
    - ---
        
        ```
        sc stop filewavewinclient
        ```
3. Start the FileWave Client service: 
    - ---
        
        ```
        sc start filewavewinclient
        ```
4. If the service will not start or stop, identify and stop the process directly: 
    1. Find the FileWave Client process. 
        - ```
            tasklist | findstr fwcld
            ```
        - [![Finding the fwcld process ID with tasklist](https://kb.filewave.com/uploads/images/gallery/2024-05/scaled-1680-/ahddHIXSHiUMjOuZ-image.png)](https://kb.filewave.com/uploads/images/gallery/2024-05/ahddHIXSHiUMjOuZ-image.png)

    2. Kill the process by PID. 
        - ```
            taskkill /PID 16264 /F
            ```
        - <p class="callout info">The same pattern can help with a stuck Windows Update agent. When Windows Update hangs and the service will not stop, `tasklist /svc | findstr wuauserv` identifies the process that owns the service. A reboot can also clear the condition, but it interrupts whoever is using the device.</p>
5. Check the FileWave Client log for entries from today: 
    - ```
        type c:\programdata\filewave\fwclient\fwcld.log | findstr mm-dd
        ```
    - Replace `mm-dd` with today's month and day, such as `05-16`.
6. Get the IP address of the workstation: 
    - ```
        ipconfig
        ```
7. Restart the device immediately. This interrupts any active user session, so check before running it on a device in use. 
    - ```
        shutdown -r -t 0 -f
        ```
8. Check whether other users are logged in: 
    - ```
        quser
        ```
    - [![Checking logged-in users with quser](https://kb.filewave.com/uploads/images/gallery/2024-05/scaled-1680-/fbQGBi4UEdXl5b3a-image.png)](https://kb.filewave.com/uploads/images/gallery/2024-05/fbQGBi4UEdXl5b3a-image.png)

9. Get the last boot time: 
    - ```powershell
        Get-CimInstance -ClassName Win32_OperatingSystem | Select-Object LastBootUpTime
        ```
    - [![Getting the last Windows boot time with PowerShell](https://kb.filewave.com/uploads/images/gallery/2024-05/scaled-1680-/elLO7EOAz4KuwdN1-image.png)](https://kb.filewave.com/uploads/images/gallery/2024-05/elLO7EOAz4KuwdN1-image.png)

## Related Content

- [PS Tools](https://learn.microsoft.com/en-us/sysinternals/downloads/pstools)
- [Windows command-line reference (SS64)](https://ss64.com/nt/)
- [wmic deprecation](https://techcommunity.microsoft.com/blog/windows-itpro-blog/wmi-command-line-wmic-utility-deprecation-next-steps/4039242)

# Troubleshooting Windows Client Upgrade Fileset Issues

## What

The FileWave Windows Client upgrade fileset uses a more orchestrated process than a typical Windows software deployment.

For most Windows software deployments, the `FileWaveWinClient` service runs the installer as the local system account. A client upgrade has an extra challenge: it must remove the existing FileWave Client, install the updated one, and keep the process moving even though the service that normally performs installs has to be stopped and replaced.

To handle this, the upgrade fileset installs a temporary upgrade helper, creates a scheduled task, stops the existing FileWave Client service, runs the new client MSI, starts the upgraded service, and then removes the temporary upgrade pieces. This also helps the device continue the upgrade workflow and report back to FileWave when the upgrade completes.
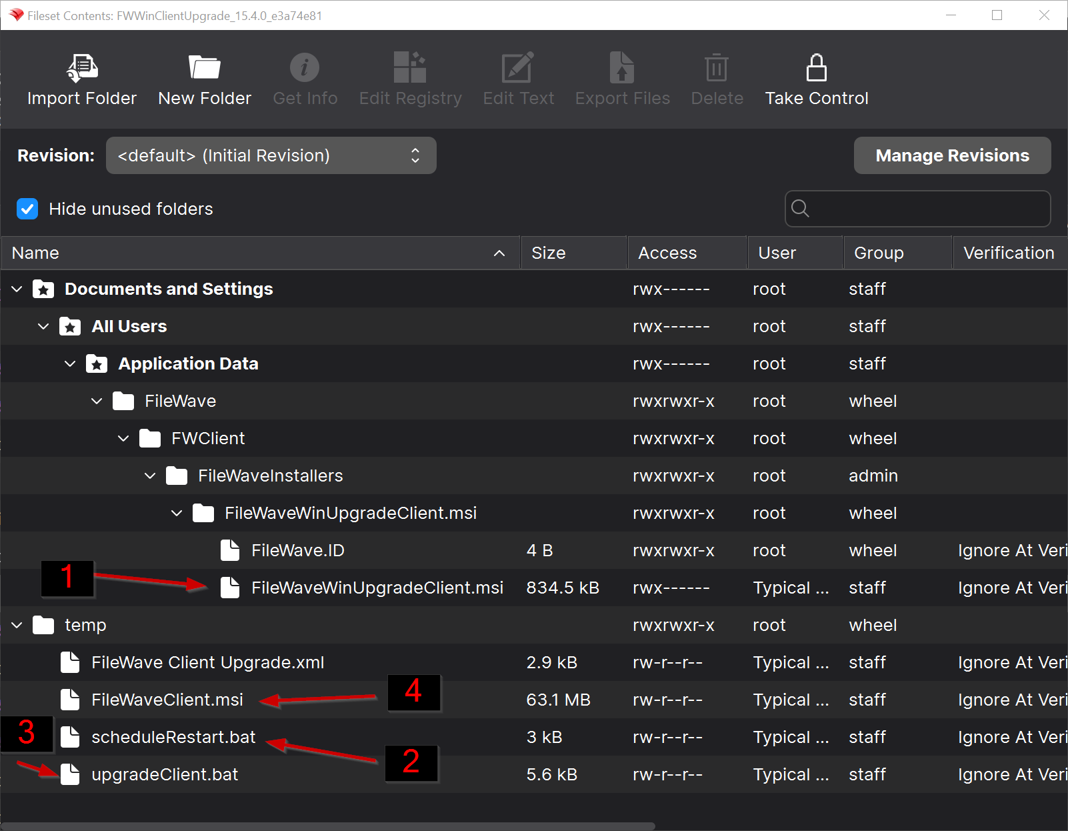
![Example Windows Client upgrade fileset contents](https://kb.filewave.com/uploads/images/gallery/2026-05/scaled-1680-/QpCdU8Ejm710ZloZ-windows-client-upgrade-fileset-components.png)

The example above shows the main upgrade fileset components:

- `FileWaveWinUpgradeClient.msi`: installs the temporary upgrade helper.
- `scheduleRestart.bat`: creates the scheduled task that starts the upgrade process.
- `upgradeClient.bat`: handles most of the upgrade workflow.
- `FileWaveClient.msi`: installs the target FileWave Windows Client version.

## When/Why

Use this article when a FileWave Windows Client upgrade fileset does not complete, the client version does not update in inventory, the Windows client service does not restart after an upgrade, or a device is left with a non-functional FileWave Client after an attempted upgrade.

If the issue is that the upgrade fileset did not import correctly, does not show the expected files, or was extracted incorrectly before deployment, start with [Troubleshooting Deployment Issues with the FileWave Upgrade Fileset](https://kb.filewave.com/books/filewave-client/page/troubleshooting-deployment-issues-with-the-filewave-upgrade-fileset).

This article is also useful before a broad Windows Client upgrade rollout, because most upgrade issues are easier to find and fix during a small pilot than after the fileset has been deployed widely.

## How

### 1. Understand the upgrade flow

The Windows Client upgrade fileset normally works in this order:

1. `FileWaveWinUpgradeClient.msi` runs first and installs a temporary upgrade helper.
2. `scheduleRestart.bat` creates the `FileWave Client Upgrade` scheduled task.
3. `upgradeClient.bat` checks the target version, disables automatic service restart during the upgrade, stops the existing `FileWaveWinClient` service, and starts the client installer.
4. `FileWaveClient.msi` installs the new FileWave Windows Client.
5. The upgrade process removes the scheduled task and temporary upgrade files after the installer completes.

If the old client service is hung, the upgrade script retries the stop process and may need to terminate the service process. That is expected behavior during this upgrade, but it can expose device-specific problems such as a stuck service, pending Windows Installer issue, or previous failed upgrade cleanup.

### 2. Collect the upgrade logs

Collect these logs before retrying the upgrade or manually cleaning up the device when possible. They are usually the fastest way to tell whether the issue is the upgrade workflow or the Windows MSI installer.

The primary logs are in `C:\temp`:

- `UpgradeClient.log`: shows the upgrade script flow, including version checks, scheduled task behavior, service stop attempts, and cleanup.
- `FileWaveClientUpgraderUninstall.log`: shows removal of the temporary upgrade helper.
- `FileWaveClient.log`: verbose MSI log for the new FileWave Windows Client installer.

Also check the Windows Application log in Event Viewer for Windows Installer errors, such as `1603` or `1638`. The normal FileWave Client log may be less useful during the upgrade because the client service is intentionally stopped as part of the process.

### 3. Check the common failure points

Most failed Windows Client upgrades fall into one of these categories:

- The existing `FileWaveWinClient` service is hung and does not stop cleanly.
- A previous failed upgrade left behind the scheduled task or temporary upgrade helper.
- The new `FileWaveClient.msi` launched, but Windows Installer failed to complete the install.
- The device has a local Windows issue that would also affect a manual client MSI install, such as a pending reboot, Windows Installer problem, security software interference, or an existing conflicting client install state. In some cases, Windows Installer blocks the new client install until the system restarts, and that condition is not always obvious before the upgrade starts.

If `FileWaveClient.log` shows an MSI failure, troubleshoot it as a Windows Installer/client MSI issue first. In many cases, the same failure would happen if the MSI were run manually on the device.

### 4. Clean up leftovers from a previous failed upgrade

Use these commands only when the logs or device state indicate that a previous failed upgrade left behind the scheduled task or temporary upgrade helper. Run them from an elevated Command Prompt.

Delete the scheduled task:

```cmd
schtasks /delete /f /tn "FileWave Client Upgrade"
```

Remove the temporary upgrade helper:

```cmd
start /wait msiexec /l*v C:\temp\FileWaveClientUpgraderUninstall.log /qn /norestart /x "{E3DC560D-C698-41DF-8B6C-EEA0BEFC44EF}"
```

Start the FileWave Windows Client service if it is installed and should be running:

```cmd
sc start filewavewinclient
```

After cleanup, retry the upgrade on the affected device or move the device back into a small test group before attempting broader deployment.

### 5. Isolate MSI installer issues

On a device that has not yet completed the upgrade, run the full `FileWaveClient.msi` manually to test the installer outside of the upgrade fileset workflow.

This removes the scheduled task, temporary helper, and service-stop logic from the test. If the manual MSI install fails the same way, focus on the MSI error, the Windows Application log, and the device state rather than the upgrade fileset.

### 6. Recover a non-functional client

If the FileWave Client is no longer functional and cannot receive a normal fileset, use remote administrative tools to inspect the device, collect logs, restart services, or run cleanup commands.

For one supported approach, see [PSExec as a Helper in Troubleshooting](https://kb.filewave.com/books/filewave-client/page/psexec-as-a-helper-in-troubleshooting).

### 7. Roll out upgrades in phases

<p class="callout danger"><strong>Deployment warning:</strong> Do not deploy a Windows Client upgrade fileset globally as the first test.</p>

Start with a small pilot group. After deployment, run a Verify and confirm that inventory reports the expected FileWave Client version. If that pilot succeeds, expand to a larger test group. Move to broad deployment only after the larger group is also successful.

This takes more time up front, but it is much easier than recovering many Windows clients after a failed broad rollout.

## Related Content

- [PSExec as a Helper in Troubleshooting](https://kb.filewave.com/books/filewave-client/page/psexec-as-a-helper-in-troubleshooting)
- [Using PsExec to Remotely Restart the FileWaveWinClient Service](https://kb.filewave.com/books/filewave-client/page/using-psexec-to-remotely-restart-the-filewavewinclient-service)
- [Troubleshooting Deployment Issues with the FileWave Upgrade Fileset](https://kb.filewave.com/books/filewave-client/page/troubleshooting-deployment-issues-with-the-filewave-upgrade-fileset)
- [Using Native Windows Tools to Troubleshoot](https://kb.filewave.com/books/microsoft-general-info/page/using-native-windows-tools-to-troubleshoot)

# Using PsExec to Remotely Restart the FileWaveWinClient Service

## **What**

Using PsExec to remotely restart the "FileWaveWinClient" Windows service allows you to remotely manage the FileWave client on Windows devices. This can be useful in situations where the client is not functioning properly and needs to be restarted in order to resolve the issue.

## **When/Why**

There may be a variety of reasons why you would need to remotely restart the FileWaveWinClient service on a Windows device. Some common reasons include:

- The service has stopped functioning properly and needs to be restarted in order to resolve the issue
- The service needs to be restarted in order to apply a configuration change
- The service needs to be restarted as part of a troubleshooting process

## **How**

To use PsExec to remotely restart the FileWaveWinClient service, you will first need to download and install PsExec on the device from which you will be initiating the restart. PsExec can be downloaded from the Microsoft TechNet website ([https://docs.microsoft.com/en-us/sysinternals/downloads/psexec](https://docs.microsoft.com/en-us/sysinternals/downloads/psexec) ).

Once you have PsExec installed, you can use the following command to remotely restart the FileWaveWinClient service:

psexec \\\[remote device\] -u \[username\] -p \[password\] net start "FileWaveWinClient"

Replace \[remote device\] with the hostname or IP address of the remote device, and \[username\] and \[password\] with the appropriate credentials for the remote device.

## **Related Content**

- Microsoft TechNet: PsExec ([https://docs.microsoft.com/en-us/sysinternals/downloads/psexec](https://docs.microsoft.com/en-us/sysinternals/downloads/psexec) )

## **Digging Deeper**

In addition to using PsExec to remotely restart the FileWaveWinClient service, you can also use the "net" and "sc" command-line tools to query and change Windows services.

To query a service using "net", you can use the following command:

net start \[service name\]

This will display the status of the specified service.

To start or stop a service using "net", you can use the following commands:

net start \[service name\] net stop \[service name\]

To change the startup type of a service using "net", you can use the following command:

net start \[service name\] \[startup type\]

Valid startup types include: boot, system, auto, demand, disabled

To query a service using "sc", you can use the following command:

sc query \[service name\]

This will display detailed information about the specified service, including its status, startup type, and binary path.

To start or stop a service using "sc", you can use the following commands:

sc start \[service name\] sc stop \[service name\]

To change the startup type of a service using "sc", you can use the following command:

sc config \[service name\] start=\[startup type\]

Valid startup types include: boot, system, auto, demand, disabled

Keep in mind that you will need to have the appropriate permissions on the remote device in order to use these commands. You can also use PsExec to execute these commands remotely, as described in the previous section.

# Network Proxy, Content Filter, and SSL Inspection Troubleshooting

## What

FileWave components need reliable network access to the destinations listed in [Default TCP and UDP Port Usage](https://kb.filewave.com/books/filewave-general-info/page/default-tcp-and-udp-port-usage). Depending on the workflow, that may include the FileWave Server, FileWave Boosters, FileWave cloud services, vendor services from Apple, Google, or Microsoft, licensing and notification services, remote-control services, cloud Fileset storage, or Kiosk/App Portal download locations. That traffic is encrypted. Proxies, web filters, secure web gateways, firewalls, and content filters can block or alter that traffic, which can cause the affected FileWave feature to fail even when the FileWave Server itself is working correctly.

This can happen with products such as Lightspeed Filter, GoGuardian Admin, Securly Filter, Linewize Filter, ContentKeeper, iboss, Cisco Umbrella, Zscaler Internet Access, Netskope, Fortinet/FortiGate, Palo Alto Networks, Sophos Firewall, WatchGuard, Check Point, and similar proxy or filtering systems. The exact product name is less important than the behavior: if the product blocks the required host, blocks an unknown or uncategorized URL, or performs SSL/TLS inspection on traffic that must remain end-to-end trusted, the FileWave feature that depends on that destination may not be able to communicate.

The Kiosk IPA URL `https://fw-kiosk-v2-ipas.filewave.cloud/` is one example because blocking it can prevent Kiosk installation. The same principle applies to any FileWave address or vendor address required by the workflow and listed in the port usage article.

## When/Why

Use this article when FileWave behavior changes depending on the network, filtering policy, or proxy path. Common examples include:

- The FileWave Client checks in on one network but not another.
- Devices stop reporting inventory or processing manifests.
- The FileWave Kiosk or App Portal does not appear or does not install.
- iOS/iPadOS Kiosk installation fails with an error like:

```
Could not validate manifest..An SSL error has occurred and a secure connection to the server cannot be made.
```

- A content filter shows FileWave URLs as blocked, uncategorized, unknown, newly seen, or unclassified.
- Security logs show a FileWave destination from [Default TCP and UDP Port Usage](https://kb.filewave.com/books/filewave-general-info/page/default-tcp-and-udp-port-usage) being blocked or inspected, such as the FileWave Server hostname, `*.filewave.cloud`, `fw-kiosk-v2-ipas.filewave.cloud`, cloud Fileset storage, notification services, or Apple/Google/Microsoft service endpoints.

FileWave communication relies on encrypted, certificate-based connections. On macOS and Windows, modern FileWave Client communication uses mutual TLS for client/server trust. Apple, Google, Microsoft, and FileWave cloud services also expect valid TLS connections. If a filtering product performs SSL inspection, HTTPS inspection, TLS inspection, SSL decryption, certificate inspection, deep packet inspection, DPI, or a similar feature that replaces the remote certificate with a filtering certificate, the connection may fail because the device is no longer seeing the certificate it expects.

This is not limited to one vendor. Lightspeed is a common example in schools, and Lightspeed environments that block `Unknown` or `Uncategorized` sites may block a FileWave cloud URL until it is recategorized or explicitly allowed. Other web filters and secure web gateways can create the same symptom under different names.

## How

### 1. Map the symptom to the FileWave feature

Before changing proxy or firewall rules, identify which FileWave feature is failing. Then use [Default TCP and UDP Port Usage](https://kb.filewave.com/books/filewave-general-info/page/default-tcp-and-udp-port-usage) to find the destinations and ports used by that feature.

<table id="bkmrk-symptom-destinatio" style="width:100%;border-collapse:collapse;"><thead><tr><th style="width:34%;">Symptom</th><th style="width:66%;">Destinations to check first</th></tr></thead><tbody><tr><td>Client does not check in, inventory is stale, or manifests do not process</td><td>FileWave Client, Server, and Booster destinations/ports. Make sure the device can reach the configured FileWave Server and any Booster it is expected to use.</td></tr><tr><td>Kiosk/App Portal does not appear or fails to install</td><td>Kiosk/App Portal destinations, the FileWave Server, `*.filewave.cloud`, and any specific Kiosk download host listed or referenced for the installed FileWave version.</td></tr><tr><td>Filesets do not download or install</td><td>Server/Booster traffic and, for hosted customers using cloud Filesets, the cloud Fileset storage destinations in the port article.</td></tr><tr><td>Remote control, notifications, license checks, version checks, AutoPkg, or Central/Anywhere features fail</td><td>The service-specific outbound destinations listed for those features in the port article.</td></tr><tr><td>Apple, Android, Chromebook, or Windows MDM/EMM workflows fail</td><td>The FileWave MDM/EMM ports plus the Apple, Google, or Microsoft service endpoints required by that platform.</td></tr></tbody></table>

A browser test is useful, but it is not the whole test. FileWave background services may run outside the user’s browser session, may not be able to answer a proxy authentication prompt, and may use ports or TLS behavior that a browser test does not exercise.

### 2. Confirm whether the filter or proxy is involved

Start by comparing a working and failing path.

- Test the affected device on a network that does not use the same proxy or content filter, such as a known-good test VLAN or temporary hotspot.
- Check the proxy, firewall, or web-filter logs for the affected device at the time of failure.
- Look for blocked or inspected traffic to the FileWave Server hostname, FileWave Booster hostname, FileWave cloud URLs, Apple services, Google services, or Microsoft services used by the platform.
- If only one network or policy fails, the issue is likely in the network path rather than the FileWave Server itself.

### 3. Allow the required FileWave destinations

Use [Default TCP and UDP Port Usage](https://kb.filewave.com/books/filewave-general-info/page/default-tcp-and-udp-port-usage) as the source of truth. Identify which FileWave component, platform, or workflow is failing, then verify every destination and port listed for that area. A blocked Kiosk download host breaks Kiosk installation, but a blocked license, notification, remote-control, cloud Fileset, Apple, Google, Microsoft, Server, or Booster destination can break the feature that depends on that traffic.

Common destinations to review include:

- The customer’s FileWave Server hostname or FQDN used by clients and enrolled devices.
- Any FileWave Booster hostnames used by clients.
- `*.filewave.cloud`
- `https://fw-kiosk-v2-ipas.filewave.cloud/`
- Hosted-customer cloud Fileset storage destinations listed in [Default TCP and UDP Port Usage](https://kb.filewave.com/books/filewave-general-info/page/default-tcp-and-udp-port-usage), when applicable.
- Apple, Google, and Microsoft endpoints required for the platform being managed.

Do not rely only on a port being open. Category-based filtering can still block an allowed port if the destination is classified as unknown, uncategorized, newly registered, or otherwise not allowed by policy.

Examples: blocking the FileWave Server or Booster can break check-in, inventory, manifests, or Fileset downloads; blocking `*.filewave.cloud` or `fw-kiosk-v2-ipas.filewave.cloud` can break Kiosk/App Portal downloads; blocking cloud Fileset storage can break hosted Fileset delivery; blocking licensing, notification, TeamViewer/remote-control, AutoPkg, or version-check destinations can break those specific services; and blocking Apple, Google, or Microsoft endpoints can break platform enrollment, app management, software updates, or MDM/EMM workflows.

### 4. Check common proxy/filter failure patterns

Proxies and filters can break FileWave traffic in several different ways. Check for all of these, not just a simple block/allow result:

- Category or reputation blocking: the destination is marked unknown, uncategorized, newly seen, or not in an allowed category.
- SSL/TLS interception: the filter replaces the real certificate with its own certificate so the device no longer trusts the connection.
- Authenticated proxy or captive portal requirements: browser traffic works after a user signs in, but FileWave background services cannot answer the prompt.
- Transparent proxy behavior: the proxy handles normal web browsing but not FileWave service traffic, NATS, Booster traffic, or other non-browser connections.
- DNS or SNI filtering: the device resolves or reaches a different path than expected, or the filter blocks based on hostname before the connection is established.
- Different rules by network, VLAN, device type, user group, time, or off-site/on-site policy.

### 5. Bypass SSL/TLS inspection for FileWave management traffic

For FileWave Client, Kiosk, MDM, Booster, and FileWave cloud traffic, allow the traffic without certificate replacement or HTTPS decryption. For Apple, Google, and Microsoft services used by managed-device workflows, follow the vendor network guidance and avoid inspection where the vendor requires direct TLS trust.

Depending on the product, this setting may be called:

- SSL inspection
- SSL decryption
- TLS inspection
- HTTPS inspection
- HTTPS proxy/content inspection
- Certificate inspection
- Deep packet inspection or DPI
- Secure web gateway inspection
- Man-in-the-middle inspection

The goal is the same: FileWave-managed devices must see the real certificate presented by the FileWave Server or cloud service, not a substitute certificate generated by the filtering product.

### 6. Lightspeed-specific example: Unknown or Uncategorized destinations

In Lightspeed environments, check whether the affected URL is listed as `Unknown` or blocked by an `Unknown` / `Uncategorized` category rule. Apply that check to the FileWave and vendor destinations required by the failing workflow. For FileWave Kiosk 15.3.1 and later, one known example is:

```
https://fw-kiosk-v2-ipas.filewave.cloud/
```

If Lightspeed is blocking this URL, the Kiosk installation may fail with a manifest validation or SSL error even though other FileWave functions appear normal. If a different FileWave feature is failing, check the corresponding destinations from the port usage article instead of focusing only on the Kiosk URL.

### 7. Test from the affected network

From macOS or Windows on the same filtered network, test the specific destination that matches the failing workflow. For the Kiosk IPA host, for example:

```
curl -Iv https://fw-kiosk-v2-ipas.filewave.cloud/
```

A successful connection should complete a TLS handshake and return an HTTP response from the destination. A failure may show certificate validation errors, proxy-generated certificates, connection resets, block pages, authentication prompts, or timeouts.

For iOS/iPadOS, use the filter logs and a browser test from the same network or policy where possible. The device may not expose the same command-line testing tools, so the proxy/filter logs are often the best evidence.

### 8. Retest FileWave behavior

After updating allow/bypass rules:

- Retry the FileWave Kiosk or App Portal installation.
- Force or wait for the FileWave Client to check in.
- Confirm inventory, manifests, and Fileset downloads behave normally.
- Review filter logs again to verify the FileWave traffic is allowed and not being decrypted.

### 9. If it still fails, collect evidence before escalating

If the traffic still fails after allow and inspection-bypass rules are updated, collect enough detail to show where the failure occurs:

- The affected FileWave feature, platform, and device name or serial number.
- The network, VLAN, proxy/filter policy, and whether the same device works on another network.
- The timestamp of the failure and the corresponding proxy/firewall log entry.
- The blocked destination, category, action, and whether SSL/TLS inspection was applied.
- Any command output, such as `curl -Iv`, showing the connection, certificate, block page, reset, timeout, or proxy-generated response.
- Relevant FileWave Client, Kiosk/App Portal, or MDM logs for the same time window.

## Related Content

- [Default TCP and UDP Port Usage](https://kb.filewave.com/books/filewave-general-info/page/default-tcp-and-udp-port-usage)
- [How the FileWave Client Communicates](https://kb.filewave.com/books/filewave-client/page/how-the-filewave-client-communicates)
- [Resolving SSL and Manifest Validation Errors with FileWave Kiosk Installation (15.3+)](https://kb.filewave.com/books/kiosk/page/resolve-filewave-kiosk-ssl-and-manifest-validation-errors-153)
- [Bypassing DPI for Apple Traffic in MDM Communication](https://kb.filewave.com/books/apple-general-info/page/bypassing-dpi-for-apple-traffic-in-mdm-communication)
- [Customer Technical Support](https://kb.filewave.com/books/community-engagement/page/customer-technical-support)

# Using PowerShell to Remotely Check the Windows FileWave Client Status

## What

The Windows FileWave Client runs as a Windows service, so uptime, local changes, crashes, or service problems can affect whether it is available. This article provides a PowerShell example for checking a list of Windows devices for FileWave Client service status, client version, and assigned server address.

## When/Why

You probably will not run this every day, but it is useful when you need to sweep a Windows network and find devices where the FileWave Client may be missing, stopped, unreachable, or pointed at the wrong server. Review the assumptions below before using it.

## How

Use the script below when you need a remote first pass before visiting devices or opening individual remote sessions.

```powershell
#import a list of computers
$mypath=$MyInvocation.MyCommand.Path
$mypath=Split-Path $mypath -Parent
try {
    $computers=Get-Content $mypath\computers.txt -ErrorAction Stop
} catch {
    #no computers.txt file found
    write-host "`nTo use this utility, a text file called computers.txt must exist in the same location as the script.  The file should contain one computer name or IP per line"
    break
}

foreach ($computer in $computers) {
    $online=$false
    try{
        #try to resolve the name
        $online = Resolve-DnsName $computer -quicktimeout -ErrorAction Stop
        $online = $true
    }catch{
        #Catching errors...machine offline
        $online= $false
    }

    if (!$online) {
        #device not online...show it in UI so that we see progress, but don't write it to the results file since it isn't actionable
        write-host "$computer, Not online"
    } else {
        #device online, so let's just see if the service is there
        $fw_service=""
        try{
            #Getting service ...sometimes device might not allow collection (if RPC is unavailable for instance)
            $fw_service = Get-Service -ComputerName $computer  -Name 'FilewaveWinClient' -ErrorAction Stop
            $fw_service=$fw_service.Status
        }catch{
            #Catching errors...no filewave service
            $fw_service="no"
        }

        if ($fw_service -eq "no") {
            #no need to look further since we either can't talk to RPC, or there is no FW service
            write-host "$computer, No FW Service or RPC unavailable" 
            Add-Content -Path $mypath\output.txt -Value "$computer, FW Needs Installed or RPC Unavailable"

        } else {
            #fw is there as a service, so let's return status, version, and server address            
            try {
                #using C$ share, which won't require winrm
                $TargetPath = "\\$computer\C$\Program Files (x86)\FileWave\fwcld.exe"
                $fw_version = [System.Diagnostics.FileVersionInfo]::GetVersionInfo($TargetPath)
                $fw_version = $fw_version.ProductVersion       
            } catch {
                #Catching errors
                $fw_version="version not readable"
            }

            #get fw server address from registry
            try {
                #read server address from registry
                #we need remote registry turned on to read, but we'll turn it back off
                #note this does not account for an environment where remote-registry is on by default...if so, comment out the remote registry lines
                Get-Service -ComputerName $computer -Name RemoteRegistry | Set-Service -StartupType Manual -PassThru| Start-Service

                $Reg = [Microsoft.Win32.RegistryKey]::OpenRemoteBaseKey('LocalMachine', $computer)
                $RegKey= $Reg.OpenSubKey("SOFTWARE\\WOW6432Node\\FileWave\\WinClient")
                $fw_server = $RegKey.GetValue("Server")

                #turn remote registry back off
                Get-Service -ComputerName $computer -Name RemoteRegistry | Set-Service -StartupType Disabled -PassThru| Stop-Service
                
            } catch {
                #Catching errors...no registry
                $fw_server="server address not readable"
            }

            #write the output
            write-host "$computer, $fw_service, $fw_version, $fw_server"
            Add-Content -Path $mypath\output.txt -Value "$computer, $fw_service, $fw_version, $fw_server"
            
        }
    }
}

```

<p class="callout info">**Assumptions made in the above code:**  
1. A text file named computers.txt exists in the same folder as the PowerShell script.  
2. computers.txt contains one computer name or IP address per line. Names are better when DNS is dynamic.  
3. The PowerShell session runs with domain administrator rights or equivalent remote-service and admin-share access.  
4. WinRM is not enabled. If WinRM is available in your environment, you may prefer a remoting-based version of this check.</p>

You can adapt this script to check other services, use a different authentication method, or add remediation. As written, it reports the device name, FileWave service status, FileWave Client version, and assigned FileWave Server address. For corrective action, use your approved remote-management tool; PsExec is one common option in Windows environments.

## Related Content

- [Script Best Practices](https://kb.filewave.com/books/filewave-general-info/page/script-best-practices "Script Best Practices")
- [Using PsExec to Remotely Restart the FileWaveWinClient Service](https://kb.filewave.com/books/filewave-client/page/using-psexec-to-remotely-restart-the-filewavewinclient-service "Using PsExec to Remotely Restart the FileWaveWinClient Service")
- [FileWave Client Status Check: How to ask the client what it is doing on macOS and Windows](https://kb.filewave.com/books/filewave-client/page/filewave-client-status-check-how-to-ask-the-client-what-it-is-doing-on-macos-and-windows "FileWave Client Status Check: How to ask the client what it is doing on macOS and Windows")

## Digging Deeper

If you want to pre-check which devices are online before running the main script, use this shorter example. A filtered list makes the service-status check run faster.

```powershell
#Let's just look for a list of devices online

#import a list of computers
$mypath=$MyInvocation.MyCommand.Path
$mypath=Split-Path $mypath -Parent
$computers=Get-Content $mypath\online_test.txt

foreach ($computer in $computers) {
    $online=$false
    try{
        #try to resolve 
        $online = Resolve-DnsName $computer -quicktimeout -ErrorAction Stop
        $online = $true
        write-host $computer
    }catch{
        #Catching errors...machine offline
        $online= $false
    }
}
```

# When does the inventory client run scans?

## Inventory

The FileWave Client runs an inventory scan at startup, every time you execute a verify on the client, and every 24 hours.

<div id="bkmrk-"><div class="highlighter-context page view" data-inline-comments-target="true" data-testid="page-content-only" id="bkmrk--1"><div class="_1bsb1osq _19pkidpf _2hwx1wug _otyridpf _18u01wug"><div class="css-h9aozg e5xcnr80" data-test-appearance="full-page" data-testid="pageContentRendererTinyRendererTestId"><div class="page view" data-testid="TinyMCEClientRendererTestId" id="bkmrk--2"><div class="wiki-content" data-inline-comments-target="true" id="bkmrk--3"></div><div>  
</div><div data-test-id="tinymce-editor-loaded">  
</div></div></div></div></div></div>

# Troubleshooting Deployment Issues with the FileWave Upgrade Fileset

<div id="bkmrk-if-you%E2%80%99re-experienci">If you’re experiencing issues deploying the Upgrade Fileset to devices, the resolution steps depend on the target operating system.</div><p class="callout info">**Scope:** This article covers upgrade fileset deployment, redeploy, and Windows import/extraction issues. If the Windows upgrade fileset imports and deploys but the client upgrade itself does not complete, the client version does not update in inventory, or the service does not restart, see [Troubleshooting Windows Client Upgrade Fileset Issues](https://kb.filewave.com/books/filewave-client/page/troubleshooting-windows-client-upgrade-fileset-issues).</p>

## macOS Deployment

##### Issue: Devices show that the latest FileWave Client is not installed despite deploying the Fileset.

##### Solutions:

<div class="elementToProof" id="bkmrk-1.-reinstall-on-sele">1. **Reinstall on Selected Devices**:</div>- <div class="elementToProof">Navigate to the Upgrade Fileset in FileWave Admin Central.</div>
- <div class="elementToProof">Select **Fileset Report** from the top menu.</div>
- <div class="elementToProof">Highlight all devices listed.</div>
- <div class="elementToProof">Choose **Reinstall on Selected Devices**.</div>

<div class="elementToProof" id="bkmrk-2.%C2%A0redeploy-the-file">**2. Alternatively, you can Redeploy the Fileset**:</div>- <div class="elementToProof">Remove the Fileset Association from all devices, or remove targets from the Deployment.</div>
- <div class="elementToProof">Perform model update after removing the association/deployment.</div>
- <div class="elementToProof">Re-add to deployment or recreate association, Update Model.</div>

##### Cause:

<div id="bkmrk-this-issue-occurs-du">This issue occurs due to the **Privacy Preferences Profile (v3)** required for the FileWave Client. The profile must install first, but it cannot complete until the FileWave Client is deployed. Redeploying ensures proper installation order.</div><div id="bkmrk-">  
</div><div id="bkmrk-note%3A-this-should-be">**Note**: This should be a one-time occurrence unless a new profile is required with a major macOS update post-Sequoia.</div>## Windows Deployment

##### Issue: Errors occur when deploying the Fileset due to improper extraction during setup.

##### Solution:

<div id="bkmrk-1.-remove-and-recrea">1. **Remove and Recreate the Fileset**:</div>- Remove the Fileset association from devices.
- Delete the current Fileset from FileWave.

<div id="bkmrk-2.-redownload-and-ex">2. **Redownload and Extract the Fileset**:</div>- Download the Upgrade Fileset again.
- Right-click the downloaded file and select **Extract All**.
- Open the extracted folder, which should look like this: ~Upgrade\_Fileset\_for\_Windows.fileset.
- Inside, you’ll find another folder with the same name. **Drag and drop this inner folder into FileWave** to create the new Fileset.

##### Verification:

<div id="bkmrk-after-importing-the-">After importing the Fileset, ensure its contents are correctly displayed in FileWave.</div>
##### Examples:

<div class="elementToProof" id="bkmrk-broken-example%3A">**Broken Example:**</div><div id="bkmrk--1">  
</div><div class="elementToProof" id="bkmrk-%E2%80%A2-windows%3A-the-extra">• **Windows fileset**: The extracted folder contains only a single ~Upgrade_Fileset_for_Windows.fileset folder containing unusable files.</div><div id="bkmrk--2"></div>[![image.png](https://kb.filewave.com/uploads/images/gallery/2024-11/scaled-1680-/Rb6ZptLoHSnodegT-image.png)](https://kb.filewave.com/uploads/images/gallery/2024-11/Rb6ZptLoHSnodegT-image.png)

<div id="bkmrk--4">  
</div><div class="elementToProof" id="bkmrk-working-example%3A">**Working Example:**</div><div id="bkmrk--5">  
</div><div class="elementToProof" id="bkmrk-%E2%80%A2-windows%3A-the-extra-1">• **Windows fileset**: The extracted folder includes only the temp folder, containing scripts/MSI required to update the Client, which is imported into FileWave as the Fileset.</div><div id="bkmrk--6"></div>[![image.png](https://kb.filewave.com/uploads/images/gallery/2024-11/scaled-1680-/4w8O8a0KFKQGbOP8-image.png)](https://kb.filewave.com/uploads/images/gallery/2024-11/4w8O8a0KFKQGbOP8-image.png)

<div id="bkmrk--8">  
</div><div id="bkmrk-by-following-these-s">By following these steps and verifying with the examples, you can ensure successful deployment of the FileWave Upgrade Fileset. If further assistance is needed, please contact [FileWave Support](https://kb.filewave.com/books/community-engagement/page/customer-technical-support "Customer Technical Support").</div>

# First FileWave Client 15.1.0+ Upgrade Requires Reboot on macOS 14+

## What

This article explains why, on macOS 14.0 or higher, a FileWave Client upgrade from a version <span class="s2">**prior to 15.1.0**</span> to <span class="s2">**15.1.0 or higher**</span> does not appear to complete until after the next system reboot. This is due to new Apple privacy restrictions (TCC) that block the script responsible for restarting the FileWave Client as part of the upgrade process.

## When/Why

This scenario occurs on the <span class="s2">**first upgrade**</span> to FileWave Client 15.1.0 or higher on any Mac running macOS 14.0 or later, if the device is upgrading from a version lower than 15.1.0.

- After the upgrade process runs, the *previous* FileWave Client version continues to operate and check in normally.
- The upgraded client is present on disk but will not run until the next reboot.
- Once the device is restarted, the new FileWave Client version launches, and—if the device is MDM-enrolled—the necessary TCC profile is deployed automatically. This resolves the restart issue for <span class="s1">**all future upgrades**</span>.

## How

**Recommended steps for best results:**

- <span class="s1">**Upgrade the FileWave Client to 15.1.0 or newer before updating to macOS 14**</span>, if possible. This ensures full compatibility and a seamless upgrade experience.
- <span class="s1">**MDM-enroll your macOS devices.**</span> FileWave 15.1.0+ will automatically deploy the needed TCC profile through MDM, which allows future upgrades to restart and activate the new client version immediately, even on macOS 14 or higher.
- **If you have already upgraded to macOS 14 before installing FileWave Client 15.1.0 or newer,**<span class="s1"> no action is needed:</span>
    
    
    - The older client will continue to run until the next system reboot.
    - After a reboot, the new client will be active, and upgrades going forward will complete as expected.

## Related Content

- [FileWave Release History](https://kb.filewave.com/books/downloads/page/filewave-release-history "FileWave Release History")

# Offboarding Clients

Use this chapter as the starting point for removing devices from FileWave management. Start with Retiring a device from FileWave to choose between archiving, deleting, wiping, uninstalling the FileWave Client, or using a platform-specific cleanup path. The sub-pages cover the managed platforms FileWave handles: macOS, Windows, Apple MDM, Android Enterprise, and ChromeOS/Chromebooks.

# Archiving Clients

Archive a client when you want to stop active management while keeping the device record and historical inventory in FileWave. Archived clients do not consume a FileWave license, are hidden from normal client views by default, and are removed from the active FileWave Model.

Archive is different from Delete. Delete removes the record from FileWave. Archive keeps the record as an inactive object that can be shown again or reinstated later.

[![Show archived clients option in FileWave Central](https://kb.filewave.com/uploads/images/gallery/2024-07/scaled-1680-/Xvytplw5wzplsuX5-image.png)](https://kb.filewave.com/uploads/images/gallery/2024-07/Xvytplw5wzplsuX5-image.png)

## What Archive does

- Removes the client from the active FileWave Model.
- Stops normal model and inventory updates for the archived record.
- Hides the client from normal views unless archived clients are shown.
- Frees the FileWave client license used by that record.
- Keeps the record available for historical review or later reinstatement.

A **Model Update** is required after changing client state.

## Before you archive

If the device should stop communicating with FileWave permanently, remove the active management path before or during the archive workflow.

- For Windows computers, deploy the uninstall Fileset before archiving. See [Uninstall the FileWave Client on Windows](https://kb.filewave.com/link/472).
- For macOS computers, deploy the uninstall Fileset or run the standalone uninstaller before archiving if the FileWave Client should be removed. See [Uninstall the FileWave Client on macOS](https://kb.filewave.com/link/666).
- For Apple MDM-enrolled devices, review the MDM enrollment behavior below before archiving.
- For Android or ChromeOS devices, use the platform-specific removal article instead of treating the device as a normal FileWave Client. See [Removing Android Devices](https://kb.filewave.com/link/924) and [Removing ChromeOS / Chromebook devices](https://kb.filewave.com/link/1166).

## Reinstating an archived client

Use **Reinstate** when a previously archived computer should return to active management. Reinstating only works if the device still has a working FileWave Client or enrollment path. If the FileWave Client was removed, reinstall the client before expecting the device to check in.

## Apple MDM enrollment

When an MDM-enrolled Apple device is archived, FileWave may attempt to remove the MDM enrollment profile. Whether FileWave attempts that removal depends on the enrollment type and the setting in **Preferences &gt; Mobile**.

[![FileWave Mobile preferences for enrollment profile removal](https://kb.filewave.com/uploads/images/gallery/2024-07/scaled-1680-/RKGdNXDkmM31NCeE-image.png)](https://kb.filewave.com/uploads/images/gallery/2024-07/RKGdNXDkmM31NCeE-image.png)

After an MDM enrollment profile is removed, the device may no longer have a management channel to report success back to FileWave. Treat the command as a best-effort offboarding action and verify the device state separately.

For Automated Device Enrollment devices, Apple generally provides two supported ways to remove a non-removable enrollment profile: send the MDM command that removes the profile, or wipe the device. FileWave can trigger the MDM removal command through the archive workflow when the applicable setting and enrollment state allow it.

## If MDM removal does not complete

If an Apple MDM profile is non-removable and the archive command did not reach the device, do not treat manual profile-file removal as a normal offboarding procedure. Wipe the device when appropriate, or contact FileWave Technical Support for guidance on the safest recovery path for that device.

If the goal is to repair a Mac that should still be managed but appears to have lost its MDM enrollment state, see [Apple MDM Missing Enrolment Profile](https://kb.filewave.com/books/filewave-client/page/apple-mdm-missing-enrolment-profile) before using destructive recovery steps.

## Related Content

- [Retiring a device from FileWave](https://kb.filewave.com/link/239)
- [Uninstall the FileWave Client on Windows](https://kb.filewave.com/link/472)
- [Uninstall the FileWave Client on macOS](https://kb.filewave.com/link/666)

# Retiring a device from FileWave

Use this article as the starting point when a device is leaving FileWave management, being reassigned, sold, disposed of, or preserved as an inactive record. The key rule is to remove or reset the device's management path before you delete the record from FileWave. If management is still active somewhere else, the device can check back in or be recreated by a platform sync.

If the **Delete** action is unavailable, confirm that you are viewing the original client record rather than a clone or grouped representation. Use **Show Original** from the client context menu when it is available, then remove or archive the original record after the relevant platform cleanup is complete.

If you only need to stop managing a device but keep its historical record, archive it instead of deleting it. See [Archiving Clients](https://kb.filewave.com/link/923).

## Choose the right offboarding path

<table id="bkmrk-device-or-scenariopr"><thead><tr><th>Device or scenario</th><th>Primary cleanup path</th><th>Use these articles</th></tr></thead><tbody><tr><td>macOS computer with FileWave Client</td><td>Uninstall the FileWave Client if the Mac should stop checking in. If the Mac is also MDM enrolled, remove the MDM profile or wipe the device as appropriate.</td><td>[Uninstall the FileWave Client on macOS](https://kb.filewave.com/link/666), [Archiving Clients](https://kb.filewave.com/link/923), [Wipe Device for macOS](https://kb.filewave.com/books/macos/page/wipe-device-for-macos)</td></tr><tr><td>Windows computer with FileWave Client</td><td>Uninstall the FileWave Client while the device can still receive Filesets, then delete or archive the record after the uninstall has run.</td><td>[Uninstall the FileWave Client on Windows](https://kb.filewave.com/link/472)</td></tr><tr><td>iPhone, iPad, or Apple TV</td><td>Remove MDM enrollment or wipe the device. If the device is leaving the organization and is assigned through Apple Business Manager or Apple School Manager, release it from Apple.</td><td>[Archiving Clients](https://kb.filewave.com/link/923), Apple release links below</td></tr><tr><td>Android Enterprise device</td><td>Use the Android wipe/removal path and wait for the Google synchronization state before deleting the FileWave record.</td><td>[Removing Android Devices](https://kb.filewave.com/link/924)</td></tr><tr><td>ChromeOS / Chromebook</td><td>Handle the device in Google Admin Console first. FileWave syncs Chromebook records from Google Admin, so Chromebook offboarding is not a normal FileWave Client uninstall/delete workflow.</td><td>[Removing ChromeOS / Chromebook devices](https://kb.filewave.com/link/1166)</td></tr><tr><td>Inactive record you may need later</td><td>Archive the client instead of deleting it. Archived clients do not consume a FileWave license and are hidden from normal views.</td><td>[Archiving Clients](https://kb.filewave.com/link/923)</td></tr></tbody></table>

## Before you delete a device

1. Decide whether the device should be **archived**, **wiped/reassigned**, or **permanently removed**.
2. Remove the active management path first. That might mean uninstalling the FileWave Client, removing an MDM profile, wiping the device, deprovisioning a Chromebook, or waiting for an Android/ChromeOS Google synchronization.
3. If the device is leaving Apple Business Manager or Apple School Manager ownership, release it from Apple before reuse or resale.
4. After the management path is removed or the wipe command has been sent, delete or archive the FileWave record and run **Update Model**.
5. Verify the device does not return after the next check-in or platform synchronization.

## Apple Business or School Manager

If devices are enrolled through Apple Business Manager or Apple School Manager and will no longer belong to the organization, release them from Apple. Releasing the device prevents future Automated Device Enrollment assignment by that organization.

- [Release devices in Apple Business Manager](https://support.apple.com/guide/business/release-devices-axmec4d28461/web)
- [Release devices in Apple School Manager](https://support.apple.com/guide/apple-school-manager/release-devices-axmec4d28461/web)

After releasing a device, run the relevant FileWave Apple/DEP synchronization so the FileWave view reflects the change. If the device is not released and still has an Automated Device Enrollment profile assignment, wiping it can cause it to enroll again.

## Delete from FileWave

Once enrollment, client software, or platform synchronization state has been handled, delete the record from FileWave if you no longer need the historical record.

1. Open the FileWave Central Admin App.
2. Select the device or devices in the Clients view.
3. Right-click and choose **Delete**.
4. Run **Update Model**.

If any enrollment configuration or client software remains active, the device may check back in or be recreated by a platform sync. In that case, fix the platform-specific cleanup first, then delete or archive again.

## Related Content

- [Archiving Clients](https://kb.filewave.com/link/923)
- [Uninstall the FileWave Client on Windows](https://kb.filewave.com/link/472)
- [Uninstall the FileWave Client on macOS](https://kb.filewave.com/link/666)
- [Removing Android Devices](https://kb.filewave.com/link/924)
- [Removing ChromeOS / Chromebook devices](https://kb.filewave.com/link/1166)

# Uninstall the FileWave Client on Windows

Use this Fileset when you need to uninstall the FileWave Client from Windows computers before archiving, deleting, selling, or otherwise removing those devices from FileWave management.

Deploy the uninstaller while the device can still receive Filesets. After the FileWave Client is removed, the device will no longer check in to the FileWave Server through the client.

## Before you begin

- Test the uninstaller on a small pilot group before broad deployment.
- Make sure no required Filesets, scripts, or inventory actions still need to run on the device.
- Plan the follow-up state change: archive the client if you need to keep the record, or delete the record if it should be removed from FileWave.

## Download

[Windows-ClientUninstaller-registry-2026-07-03.fileset.zip](https://kb.filewave.com/attachments/528)

This updated Fileset reads the Windows uninstall registry entries and runs the FileWave Client uninstall command silently. It does not use `wmic` or the `Win32_Product` WMI class.

## Directions

1. Download the attached Fileset and unzip it.
2. Drag the unzipped Fileset into the root level of the Filesets tab so it is not accidentally deployed from inside another folder.
3. Associate the Fileset to the Windows computers that should be removed from FileWave management.
4. Run a Model Update.
5. Confirm the uninstall has had time to run on the targeted devices.
6. Archive or delete the FileWave records as appropriate, then run another Model Update.

## How the Fileset works

The Fileset uses PowerShell to inspect these uninstall registry locations:

- `HKLM:\SOFTWARE\Microsoft\Windows\CurrentVersion\Uninstall`
- `HKLM:\SOFTWARE\WOW6432Node\Microsoft\Windows\CurrentVersion\Uninstall`

When it finds the FileWave Client uninstall entry, it runs the matching MSI uninstall command with quiet/no-restart options. This avoids the deprecated WMIC command-line utility and avoids querying `Win32_Product`, which Microsoft documents as a class that can trigger Windows Installer consistency checks.

## After uninstall

Once the FileWave Client is removed, the device cannot receive additional FileWave Client commands. If the record is only being kept for history, archive it. If the device should be removed from FileWave entirely, delete the record and run Update Model.

## Related Content

- [Retiring a device from FileWave](https://kb.filewave.com/link/239)
- [Archiving Clients](https://kb.filewave.com/link/923)
- [Uninstalling Filesets](https://kb.filewave.com/books/filesets-payloads/page/uninstalling-filesets)
- [Microsoft: WMI command line (WMIC) utility deprecation](https://techcommunity.microsoft.com/blog/windows-itpro-blog/wmi-command-line-wmic-utility-deprecation-next-steps/4039242)
- [Microsoft: Win32\_Product can trigger Windows Installer reconfiguration checks](https://learn.microsoft.com/en-us/troubleshoot/windows-server/admin-development/windows-installer-reconfigured-all-applications)

# Uninstall the FileWave Client on macOS

Use these uninstallers when you need to remove the FileWave Client from macOS computers before archiving, deleting, selling, or otherwise removing those devices from FileWave management.

Remove the client while the Mac can still receive Filesets. After the FileWave Client is removed, the Mac will no longer check in to the FileWave Server through the client.

## Before you begin

- Test the uninstaller on a small pilot group before broad deployment.
- Confirm whether the Mac is also MDM enrolled. Removing the FileWave Client does **not** remove the MDM enrollment profile.
- If the Mac should leave management entirely, handle the MDM enrollment separately. For Automated Device Enrollment devices with a non-removable MDM profile, the local FileWave Client uninstaller cannot remove that profile.
- Do not run this on a FileWave Server unless you understand what is installed on that Mac. The script is intended to remove the FileWave Client and client-side data.

## Downloads

<table id="bkmrk-optiondownloaduse-wh"><thead><tr><th>Option</th><th>Download</th><th>Use when</th></tr></thead><tbody><tr><td>Fileset</td><td>[FileWaveUninstallermacOSv4.1.2-kiosk-process-fix-fileset.zip](https://kb.filewave.com/attachments/529)</td><td>You can still deploy Filesets to the Macs being removed.</td></tr><tr><td>Standalone script</td><td>[FileWaveUninstallermacOSv4.1.2.sh.zip](https://kb.filewave.com/attachments/530)</td><td>You need to run the uninstaller locally or through another tool.</td></tr></tbody></table>

Version 4.1.2 keeps the version 4.1 behavior for clients that no longer use FileWave VNC, corrects the FileWave Kiosk app path, and terminates the running FileWave Kiosk process before removing the app bundle.

## Fileset directions

1. Download the attached Fileset and unzip it.
2. Drag the unzipped Fileset into the root level of the Filesets tab so it is not accidentally deployed from inside another folder.
3. Associate the Fileset to the Macs that should be removed from FileWave management.
4. Run a Model Update.
5. Confirm the uninstall has had time to run on the targeted Macs.
6. Archive or delete the FileWave records as appropriate, then run another Model Update.

## Standalone script directions

1. Download and unzip the standalone script.
2. Run the script locally as root with `zsh`:

```
sudo /bin/zsh ./FileWaveUninstallermacOSv4.1.2.sh
```

Do not run the script with `sh`. The script uses zsh process substitution. Running it with `sh` can produce this error:

```
syntax error near unexpected token `<'
done< <(pkgutil --files com.filewave.fwcld.pkg)
```

If you see that error, run the current standalone script again using `sudo /bin/zsh`, not `sh`.

## MDM enrollment note

This uninstalls the FileWave Client, but it does not remove an MDM enrollment profile. If the Mac is still MDM enrolled, FileWave may still have an MDM channel to the device, and a configured custom PKG can reinstall the FileWave Client during enrollment or later MDM-driven installation.

If the Mac is enrolled through Apple Business Manager or Apple School Manager using Automated Device Enrollment and the MDM profile is configured as non-removable, the user cannot remove that profile locally. Use one of the supported MDM/ADE offboarding paths instead:

- Send the MDM command to remove the enrollment profile while the device is powered on, online, and still enrolled. In FileWave, archiving an applicable Apple MDM device can send that removal command depending on the enrollment state and the setting in **Preferences &gt; Mobile**.
- Wipe the Mac when the profile cannot be removed or when the device is being fully reset.
- If the Mac is leaving the organization, release it from Apple Business Manager or Apple School Manager. If it should remain owned by the organization but move to another MDM, change the Automated Device Enrollment assignment before wiping and re-enrolling.

Do not treat SIP-disable/manual profile-store deletion as a normal offboarding method. Use the MDM command, wipe workflow, or FileWave Technical Support for exceptional recovery cases. See [Archiving Clients](https://kb.filewave.com/link/923), [Wipe Device for macOS](https://kb.filewave.com/books/macos/page/wipe-device-for-macos), and Apple's [device management profile removal guidance](https://support.apple.com/guide/deployment/intro-to-device-management-profiles-depc0aadd3fe/web).

## Uninstaller scope

The macOS uninstaller uses the FileWave Client package receipt, `com.filewave.fwcld.pkg`, to identify installed client components. That works best for a standard FileWave Client installation. It may not perfectly describe devices that were upgraded several times, modified manually, or changed by older upgrade Filesets. Those devices can have files or folders that are newer than the package receipt, or older files that are no longer part of the current client.

The script forgets the FileWave Client package receipt at the end of a successful run. If you run the script again after that, it may report that the package receipt is not found and exit without doing additional work.

You can check which FileWave package receipts macOS currently knows about with:

```
pkgutil --pkgs | awk '/com.filewave/ {print}'
```

The client receipt is `com.filewave.fwcld.pkg`. FileWave Server, Booster, Admin, and other FileWave components may have their own package receipts. The uninstaller checks for some shared FileWave components before removing shared resources, but it is still a client uninstaller. Review FileWave Server or multi-role Macs carefully before using it.

## If FileWave Kiosk remains visible

Version 4.1.2 removes `/Applications/FileWave Kiosk.app` and also attempts to terminate a running **FileWave Kiosk** process before removing the app bundle. If a menu bar icon remains immediately after uninstall, confirm that the device ran version 4.1.2 or newer, then log out or restart the Mac to clear any stale menu bar item that was already loaded in the user's session.

If the FileWave Kiosk app bundle or process remains after running version 4.1.2 and restarting, collect the uninstall output and contact FileWave Technical Support.

## Related Content

- [Retiring a device from FileWave](https://kb.filewave.com/link/239)
- [Archiving Clients](https://kb.filewave.com/link/923)
- [Wipe Device for macOS](https://kb.filewave.com/books/macos/page/wipe-device-for-macos)
- [Apple: Intro to device management profiles](https://support.apple.com/guide/deployment/intro-to-device-management-profiles-depc0aadd3fe/web)

# Removing Android Devices

Use this page when an Android Enterprise device should be wiped, reassigned, retired, or removed from FileWave. Android devices are synchronized through Google's Android Enterprise management path, so deleting the FileWave record alone is not enough if Google still considers the device managed.

## Choose the right Android removal path

<table id="bkmrk-situationrecommended"><thead><tr><th>Situation</th><th>Recommended path</th></tr></thead><tbody><tr><td>Device is being retired, sold, disposed of, or fully reset</td><td>Send the wipe command, wait for the next Google sync/state change, then delete the device from FileWave and run Update Model.</td></tr><tr><td>Device was erased locally or disappeared before FileWave sent a wipe</td><td>Do not rely on deleting the FileWave record alone. Google may add it back during synchronization. Resolve the managed device state in Google/FileWave first, then delete it.</td></tr><tr><td>Device is being reassigned inside the organization</td><td>Wipe/reset the device as appropriate, but keep the management path active if the device should remain managed.</td></tr></tbody></table>

## Wipe and remove an Android device

1. Send the Android wipe command to erase the device.
2. Run Update Model if the command was sent from FileWave.
3. Wait for the next Google synchronization. The device should turn red in FileWave when Google reports the changed state.
4. Delete the device from FileWave.
5. Run Update Model again.

## If the device comes back

If the device is erased locally, the FileWave Client is removed, or the FileWave record is deleted before the Android Enterprise state is cleaned up, FileWave and Google may still consider the device managed. Deleting it from FileWave can look successful at first, but Google can add it back on the next synchronization.

Use the same cleanup path: resolve the Android Enterprise device state, send the wipe command when possible, wait for the Google synchronization state, then delete the device once FileWave shows it is ready to remove.

## Related Content

- [Retiring a device from FileWave](https://kb.filewave.com/link/239)
- [Archiving Clients](https://kb.filewave.com/link/923)

# Removing ChromeOS / Chromebook devices

Use this page when a Chromebook should be reassigned, retired, sold, disposed of, or removed from FileWave’s ChromeOS management view. ChromeOS devices are different from macOS, Windows, and FileWave Client devices because FileWave syncs Chromebook records from Google Admin Console.

<p class="callout info">For standard FileWave Client retirement, see [Retiring a device from FileWave](https://kb.filewave.com/link/239). For Android Enterprise devices, see [Removing Android Devices](https://kb.filewave.com/link/924).</p>

## Choose the right ChromeOS removal path

<table id="bkmrk-situation-use-this-p" style="border-collapse:collapse;width:100%;"><tbody><tr><td>**Situation**</td><td>**Use this path**</td></tr><tr><td>Reassign a Chromebook to another student, staff member, or loaner user</td><td>Use [Wipe Users](https://kb.filewave.com/link/834) when the device should stay enrolled. Use Powerwash / Wipe Device when you need a full reset.</td></tr><tr><td>Retire, sell, dispose of, or permanently remove a Chromebook from management</td><td>Handle the device in Google Admin Console first, including [deprovisioning](https://support.google.com/chrome/a/answer/3523633) when it will no longer be managed. FileWave syncs Chromebook records from Google Admin, so do not rely on deleting the record in FileWave alone.</td></tr><tr><td>Wipe a device but keep it managed after reset</td><td>Review [Forcing wiped ChromeOS devices to re-enroll](https://kb.filewave.com/link/794) so the Google Admin enrollment setting matches your intent.</td></tr><tr><td>Stop ChromeOS management for the whole FileWave environment</td><td>Use [Disable Chrome OS in FileWave](https://kb.filewave.com/link/168). That removes the Google OAuth token and disables the ChromeOS integration for the environment.</td></tr></tbody></table>

## Remove or retire an individual Chromebook

1. Decide whether the Chromebook should remain managed after the work is complete.
2. If the device is being reassigned inside the organization, keep it provisioned in Google Admin Console and use [Wipe Users](https://kb.filewave.com/link/834) or Powerwash as appropriate.
3. If the device will no longer be managed by the organization, deprovision it in Google Admin Console. Google Admin is the source of truth for ChromeOS device management.
4. Allow FileWave’s [Google Admin sync](https://kb.filewave.com/link/849) to update the Chromebook record. If the device keeps returning to FileWave after you delete or reset it, check the Google Admin device state and forced re-enrollment settings.
5. Update the model in FileWave after any FileWave-side action, such as sending a wipe command.

## Important differences from normal client removal

- Chromebooks do not uninstall the FileWave Client like macOS or Windows devices.
- FileWave syncs Chromebook devices and groups from Google Admin Console, so the Google Admin device state controls whether the Chromebook should remain managed or return to FileWave after a sync.
- Powerwash resets the Chromebook. It does not automatically mean the device should leave management.
- Forced re-enrollment controls what happens after a wipe. If a Chromebook should not come back under management, deprovision it in Google Admin Console.

## Related Content

- [Chromebook Management](https://kb.filewave.com/link/459)
- [Google Admin Sync Interval for ChromeOS](https://kb.filewave.com/link/849)
- [Powerwash / Wipe Users on ChromeOS (15.3+)](https://kb.filewave.com/link/834)
- [Forcing wiped ChromeOS devices to re-enroll (15.3+)](https://kb.filewave.com/link/794)
- [Disable Chrome OS in FileWave](https://kb.filewave.com/link/168)
- [Retiring a device from FileWave](https://kb.filewave.com/link/239)