# Placeholders
## Placeholders
Placeholders for computers and mobile devices are useful in many situations where you need to create a device FileWave has not seen yet, and pre-assign them varying content:
- Import new Windows computers and assign them what image you want to put on them (see: [Windows Network Imaging - PXE](https://kb.filewave.com/books/network-imaging-ivs/page/windows-network-imaging-capturing-and-deploying-images "Windows Network Imaging - PXE Booting") )
- Import new devices (mac, Windows, iOS etc) and assign them custom names
- Import iOS or macOS devices and assign them custom fields so DEP can name with with variables (see: [DEP Naming](https://kb.filewave.com/books/apple-school-business-manager/page/ade-naming "DEP Naming"))
- Import devices (any OS) and assign them custom fields so that smart groups can deploy pre-assigned software immediately upon enrollment
This Article will focus on a situation where you need to import devices and give them custom field values before they are enrolled. This is great for fields like:
- Barcode / Asset tag
- Location
- Use
- Warranty information like expiration date
## Preparing the Files
We typically start out with one large file; A CSV/excel that looks something like this:
| Serial or MAC address | Name | Barcode | Location | Use |
| AS5D64AS65D4 | Lab-A-comp1 | 321654987 | North Campus | Student |
| Q32WE1WQ3E21 | Lab-A-comp2 | 321654988 | North Campus | Student |
| X9C87ZX9C87ZC | Front-Desk-1 | 321654989 | Main Office | Admin |
| DF9H51DF95H1 | BreakRoom-A | 321654990 | Break Room | Faculty |
We will actually need to import this file two times
1. To create the placeholders
2. To Assign the custom fields to the placeholders
## Creating the Placeholders
Use the "New Client" UI to import a tab delineated version of just serial number and name column
More detailed instructions:
Windows / macOS : [Importing Computer Clients from a File](https://kb.filewave.com/books/filewave-client/page/importing-computer-clients-from-a-file "Importing Computer Clients from a File")
iOS / tvOS : [Enrolling Mobile Devices into FileWave](https://kb.filewave.com/books/filewave-client/page/enrolling-mobile-devices-into-filewave "Enrolling Mobile Devices into FileWave")
### Create the Custom Fields and import
You can can either import the custom fields file or follow the create step
#### Import Custom Fields
1. Download the custom field file: [FileWave Custom Fields.customfields](https://kb.filewave.com/attachments/37)
2. Open your (Assistance → Custom Fields → ) "Edit Custom Fields" UI
3. Press "import" Browse for file
For more see: [Importing and Exporting Custom Field Files](https://kb.filewave.com/books/custom-fields/page/importing-and-exporting-custom-field-files "Importing and Exporting Custom Field Files")
#### Create Custom Fields
Create any needed custom fields and assign them to all devices, or specific devices.
1. Open the custom field UI
2. Create Custom fields for Use, Location, barcode;
1. **Use**: Provided: Admin, Type: string, Restricted: True, Values: None (DEFAULT), Faculty, Student, Administration
2. **Location**: Provided: Admin, Type: string, Restricted: True, Values: None (Default), Site A, Site B
3. **Barcode**: Provided: Admin, Type: string, Restricted: False, Use Default Values: True (Default: None)
4. Take note of the "Internal Name" from the custom fields (I.E: barcode, location, use)
More detailed instructions:
[Custom Fields](https://kb.filewave.com/books/custom-fields/page/custom-fields "Custom Fields")
### Import Custom Field Values
Once the fields are created and assigned to the proper devices we need to import your file again in the custom fields UI. This time with the serial, barcode, location, use column.
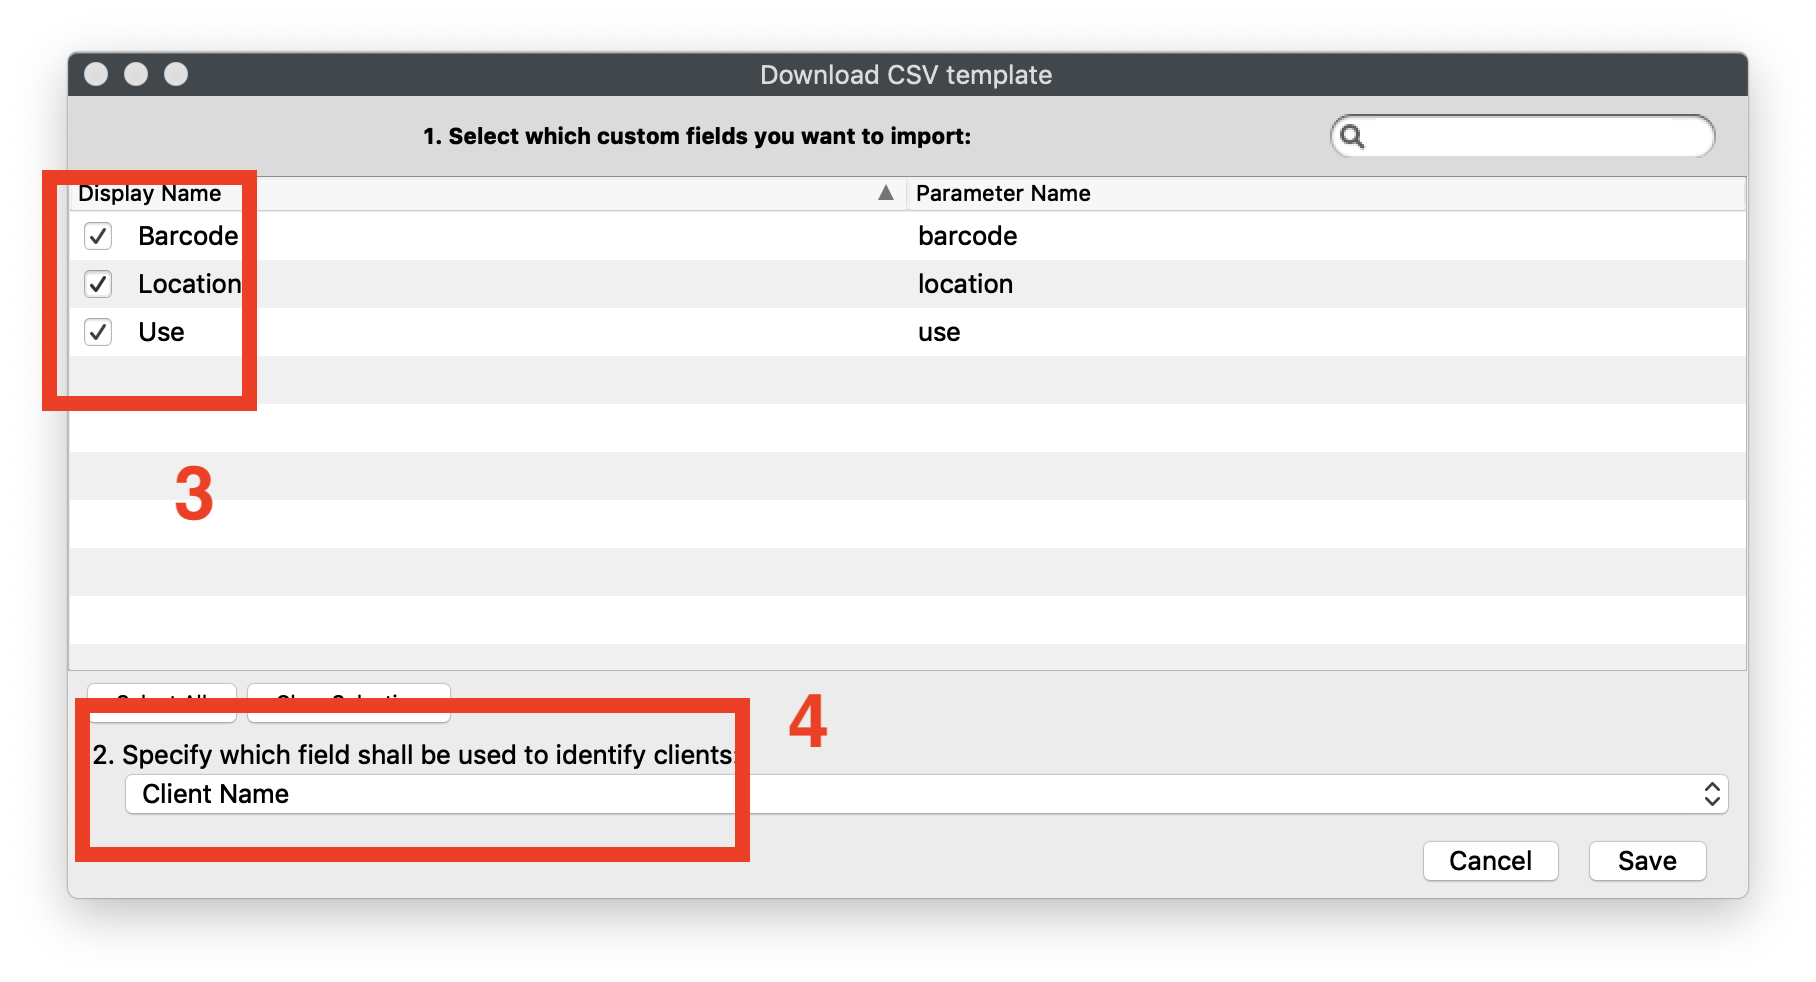
You can actually have FileWave to create a sample CSV file with the proper headings by going to
1. (Assistance → Custom Fields → ) "Import Custom Fields" UI
2. Press "Download Template"
3. Select the values you want to import (barcode, location and use in our case)
4. Specify the field to identify clients (for example Serial Number or Client Name)
5. Save
Edit in a spreadsheet app (excel, numbers, etc) and add the needed vales and bring it back in
Note that you can also set custom field values for placeholders manually by right-clicking if you have only a few to update