# FileWave Appliances on an Apple Silicon macOS system
## What
You may want to know how to load one of the Debian based FileWave Appliances for Server, Booster, or IVS so that you can test something, but your computer is an Apple Silicon Mac and so the x86 Appliances will not natively run on ARM based computers.
## When/Why
Usually, this is for testing purposes. There does not appear to be an emulator that runs on Apple Silicon that also directly supports OVA files like the ones used by VMWare. UTM can emulate x86 hardware and has a tool to convert the hard disk to allow this as explained below.
## How
### Outline of the work
1. Download the OVA image from [Downloads](https://kb.filewave.com/books/downloads "Downloads")
2. Convert OVA to QCOW2 on your Mac
- Install Homebrew to get the qemu conversion utility
- Convert the hard disk image
3. Import the converted disk in to UTM
4. Launch
### Download the OVA image from Downloads
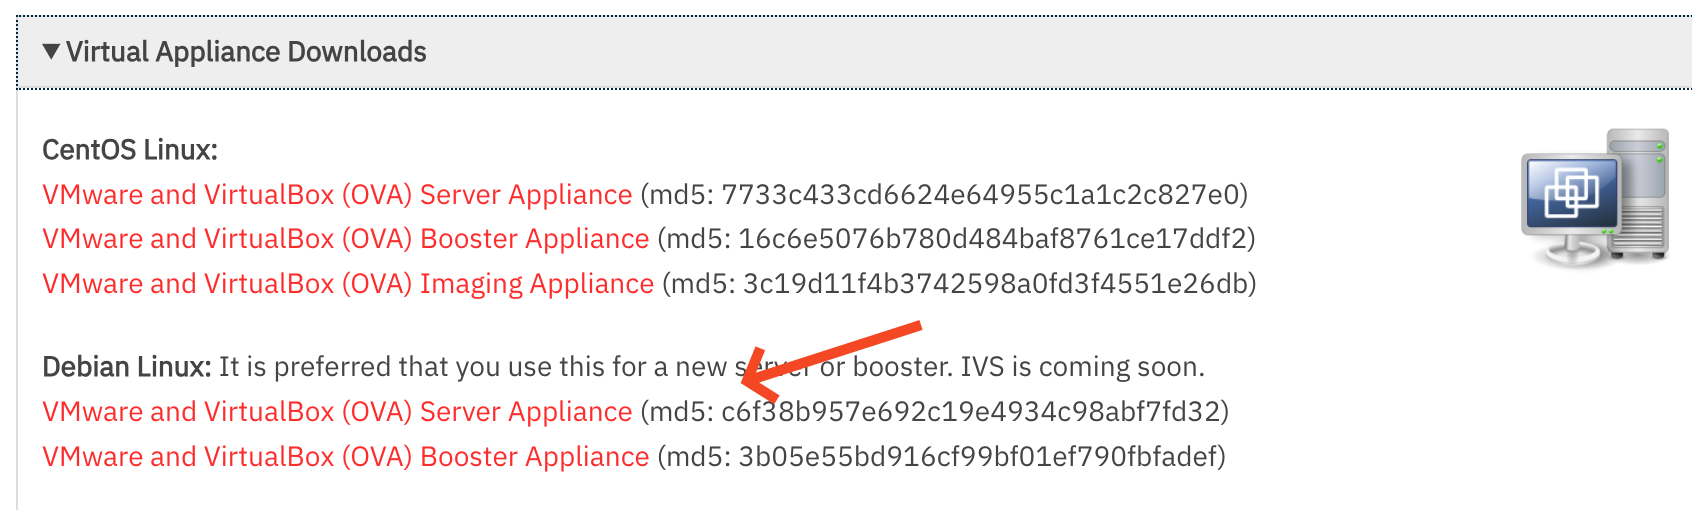
This step is simple. Just go to the [Downloads](https://kb.filewave.com/books/downloads "Downloads") page. Go to the most recent version of FileWave, and then download the Debian Server, Booster or IVS image.
[](https://kb.filewave.com/uploads/images/gallery/2024-01/kf13xJwABY8K8Xt2-image.png)
### Convert OVA to QCOW2 on your Mac
Extract the disk image included in ova with the command `tar -xvf`
```shell
tar -xvf FileWave_Server_Debian_15.2.1.ova
```
Once extracted you will have several files in the same folder as the OVA:
```shell
-rw-r--r--@ 1 jlevitsk staff 2861168640 Dec 12 13:23 FileWave_Server_Debian-disk-0.vmdk
-rw-r--r--@ 1 jlevitsk staff 8684 Dec 12 13:23 FileWave_Server_Debian-disk-1.nvram
-rw-r--r--@ 1 jlevitsk staff 320 Dec 12 13:23 FileWave_Server_Debian.mf
-rw-r--r--@ 1 jlevitsk staff 9185 Dec 12 13:23 FileWave_Server_Debian.ovf
-rw-r--r--@ 1 jlevitsk staff 2861199360 Jan 12 09:47 FileWave_Server_Debian_15.2.1.ova
```
#### Install Homebrew to get the qemu conversion utility
If you've never used [Homebrew](https://brew.sh/) before then this is an amazing tool you will come to love. Visit their website in case anything has changed but traditionally this command is what you'll want to install it. You will paste the entire line in to Terminal.app. They do now also have a PKG you can download from their [Homebrew's latest GitHub release](https://github.com/Homebrew/brew/releases/latest) page.
```bash
/bin/bash -c "$(curl -fsSL https://raw.githubusercontent.com/Homebrew/install/HEAD/install.sh)"
```
Once Homebrew is installed you can install the qemu utilities with this command in Terminal.app:
```shell
brew install qemu
```
#### Convert the hard disk image
For the next step you'll use the qemu-img command to convert the VMDK disk image over to QCOW2 that is used by UTM. The below command is done in Terminal.app, and you should consider if the file name differs, but it will be the VMDK that you extracted in the earlier step using `tar` and then the QCOW2 file won't exist until after you do this conversion command.
```shell
qemu-img convert -O qcow2 FileWave_Server_Debian-disk-0.vmdk FileWave_Server_Debian-disk-0.qcow2
```
### Import the converted disk in to UTM
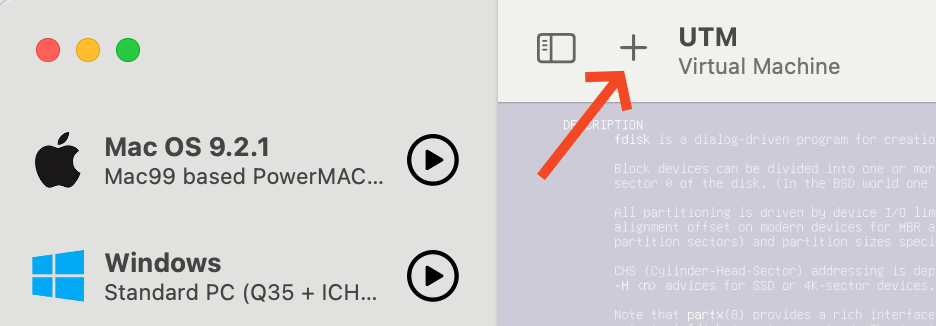
1. Press the + button in the upper left corner.
[](https://kb.filewave.com/uploads/images/gallery/2024-01/sxQI4bqyzjep4LGR-image.png)
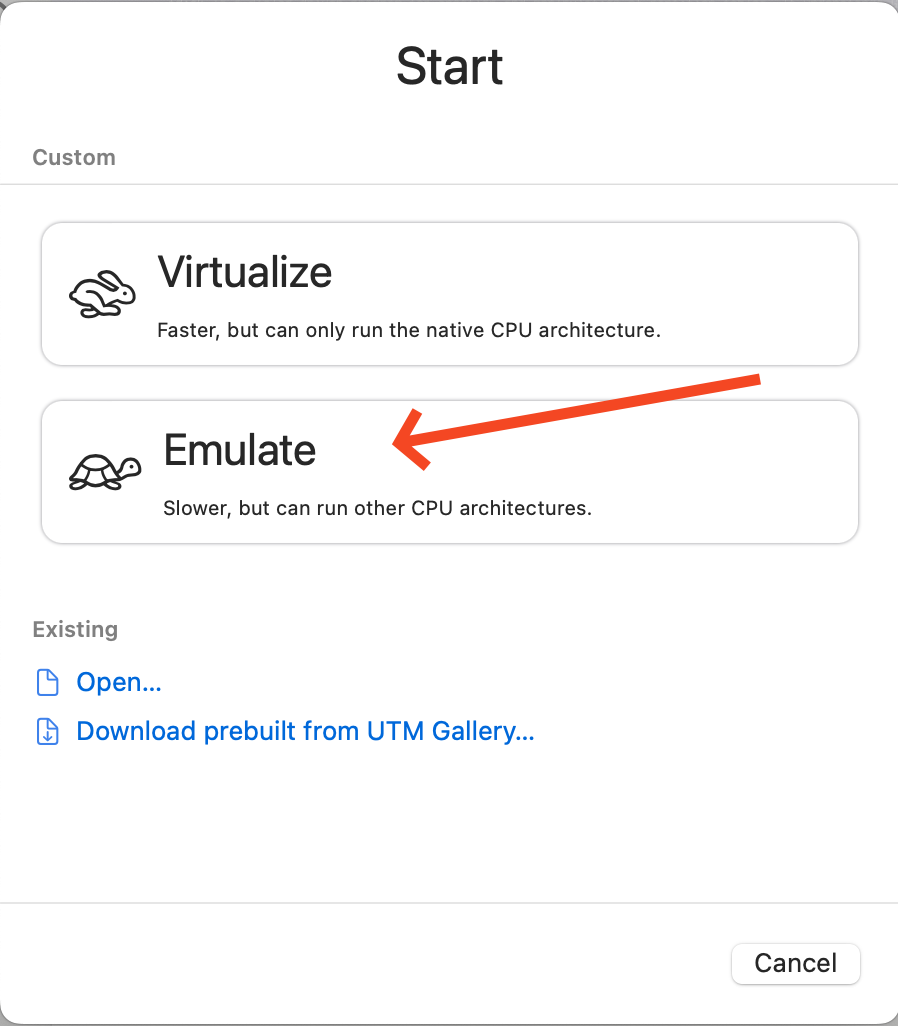
2. Select Emulate
[](https://kb.filewave.com/uploads/images/gallery/2024-01/fh1VIR4RBzkVMCfB-image.png)
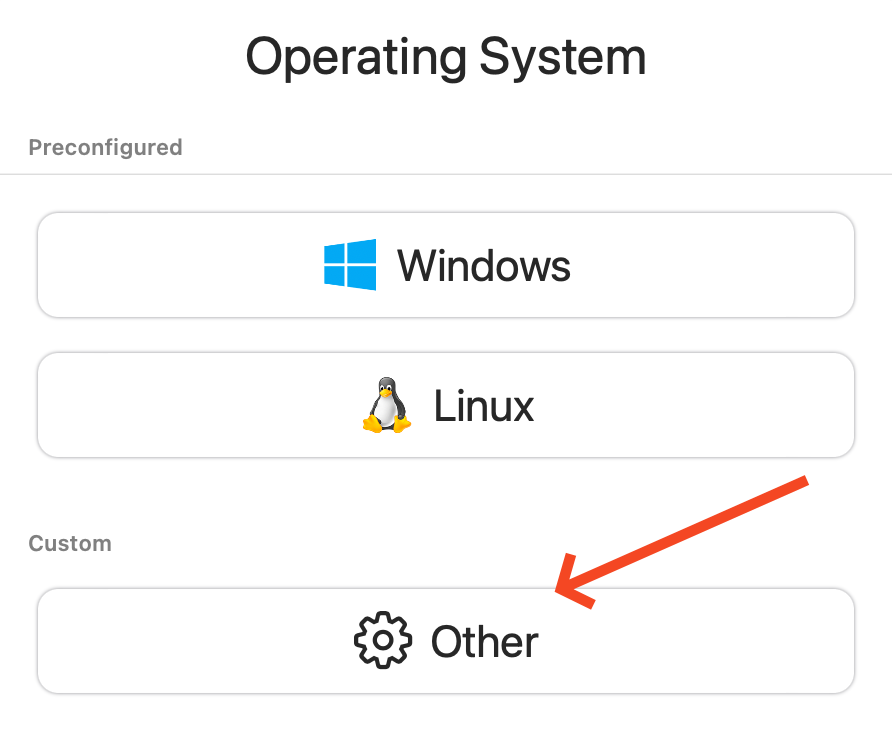
3. Select Other
[](https://kb.filewave.com/uploads/images/gallery/2024-01/AGMEnIbNkLbTilhM-image.png)
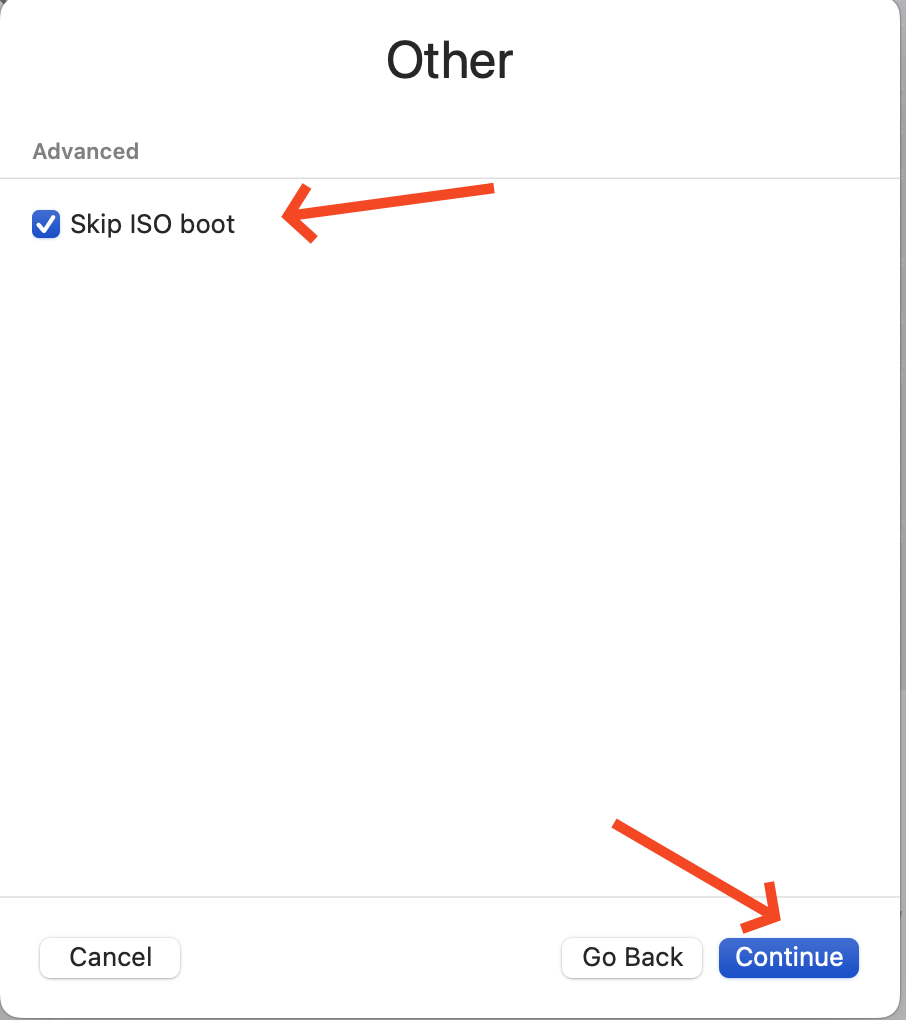
4. Check Skip ISO boot and then click Continue
[](https://kb.filewave.com/uploads/images/gallery/2024-01/s2aJKC2aIgl9Rg2k-image.png)
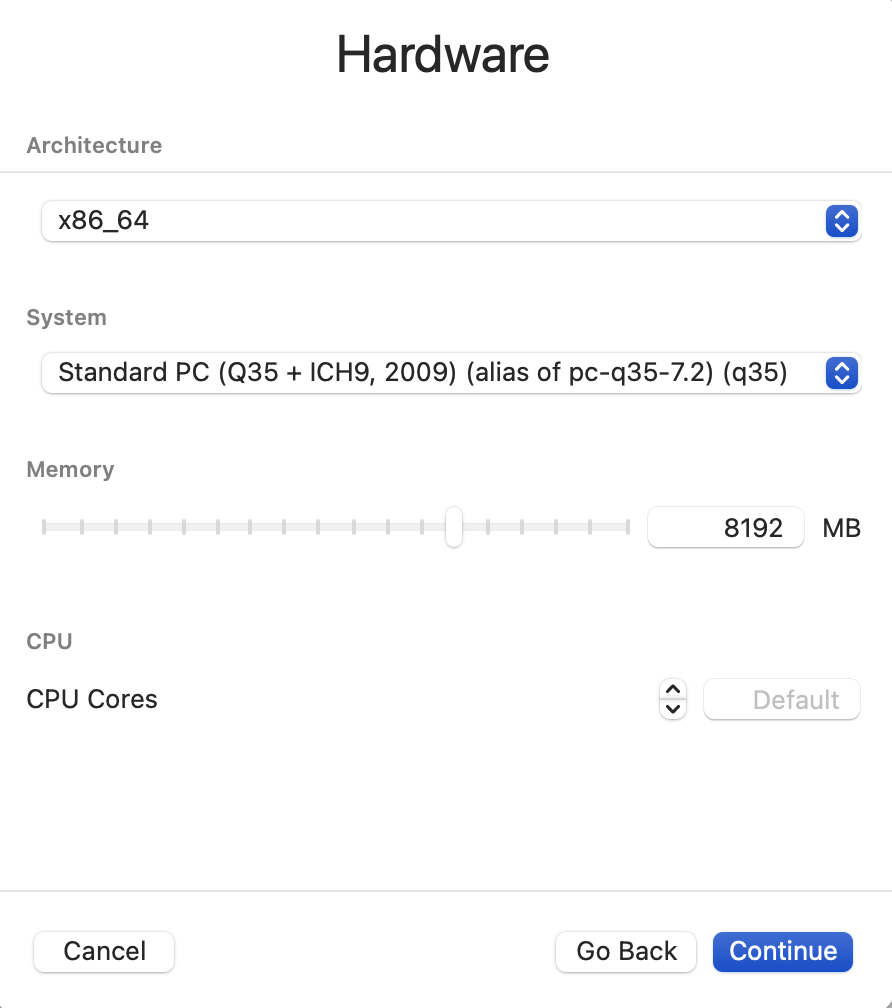
5. On this step the most important thing is to pick x86\_64 for the Architecture and to ensure you have at least 8192Mb of RAM.
[](https://kb.filewave.com/uploads/images/gallery/2024-01/GDxP1Mz4k9TdjWF5-image.png)
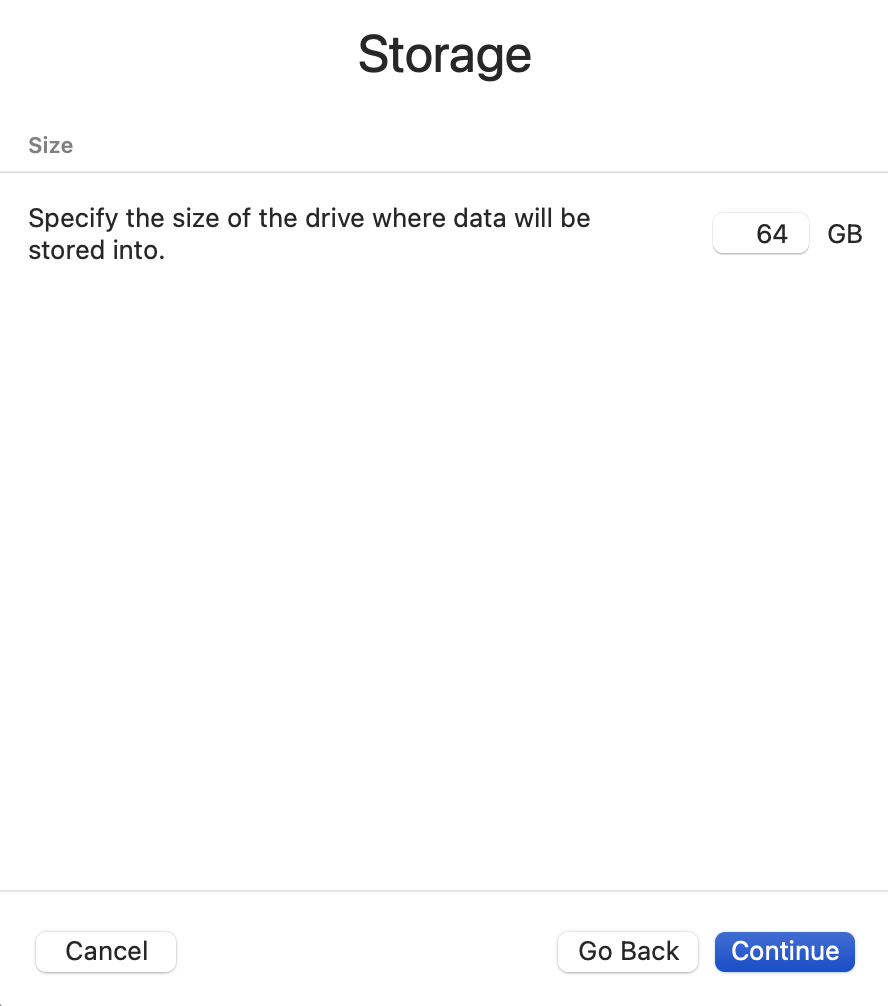
6. The size of storage won't matter because we will be deleting it later.
[](https://kb.filewave.com/uploads/images/gallery/2024-01/SAkGzWSw9Tw54uoO-image.png)
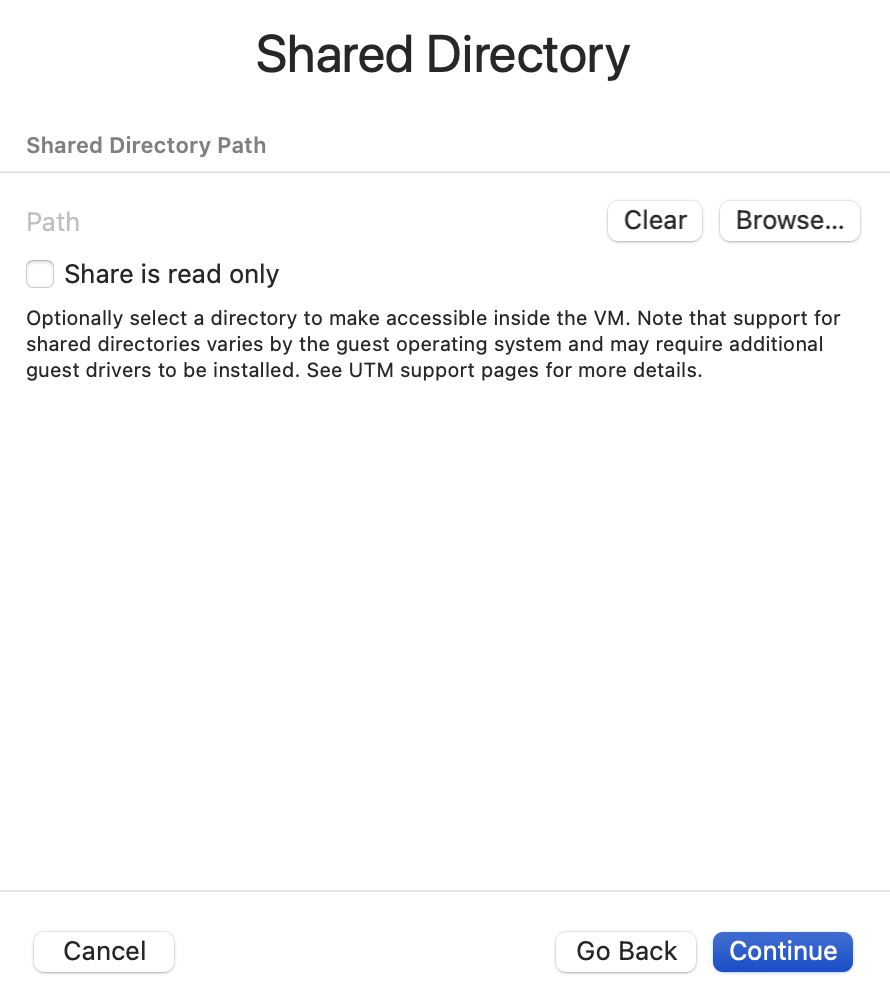
7. The Shared Directory is not something I've been using. This is up to you but may need some drivers installed for it to work.
[](https://kb.filewave.com/uploads/images/gallery/2024-01/A8zi2EbS6QmWXK0u-image.png)
8. Give the VM a name and check the Open VM settings box. Click Save to pick up the VM Setting screen. If you forget to check the box for this to appear then you can right-click the VM and pick Settings to access the same screen.
[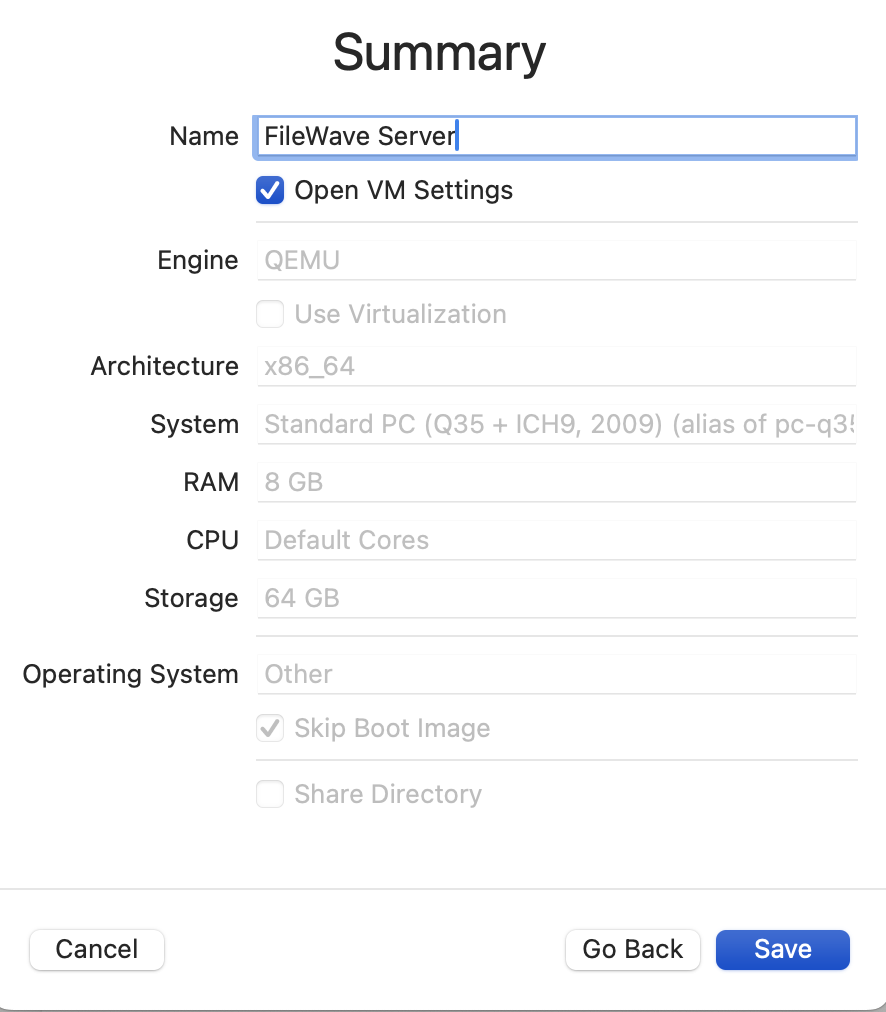](https://kb.filewave.com/uploads/images/gallery/2024-01/1lBRGZ3CCxwbwHh6-image.png)
9. You need to uncheck UEFI Boot or the appliance will not boot until you do.
[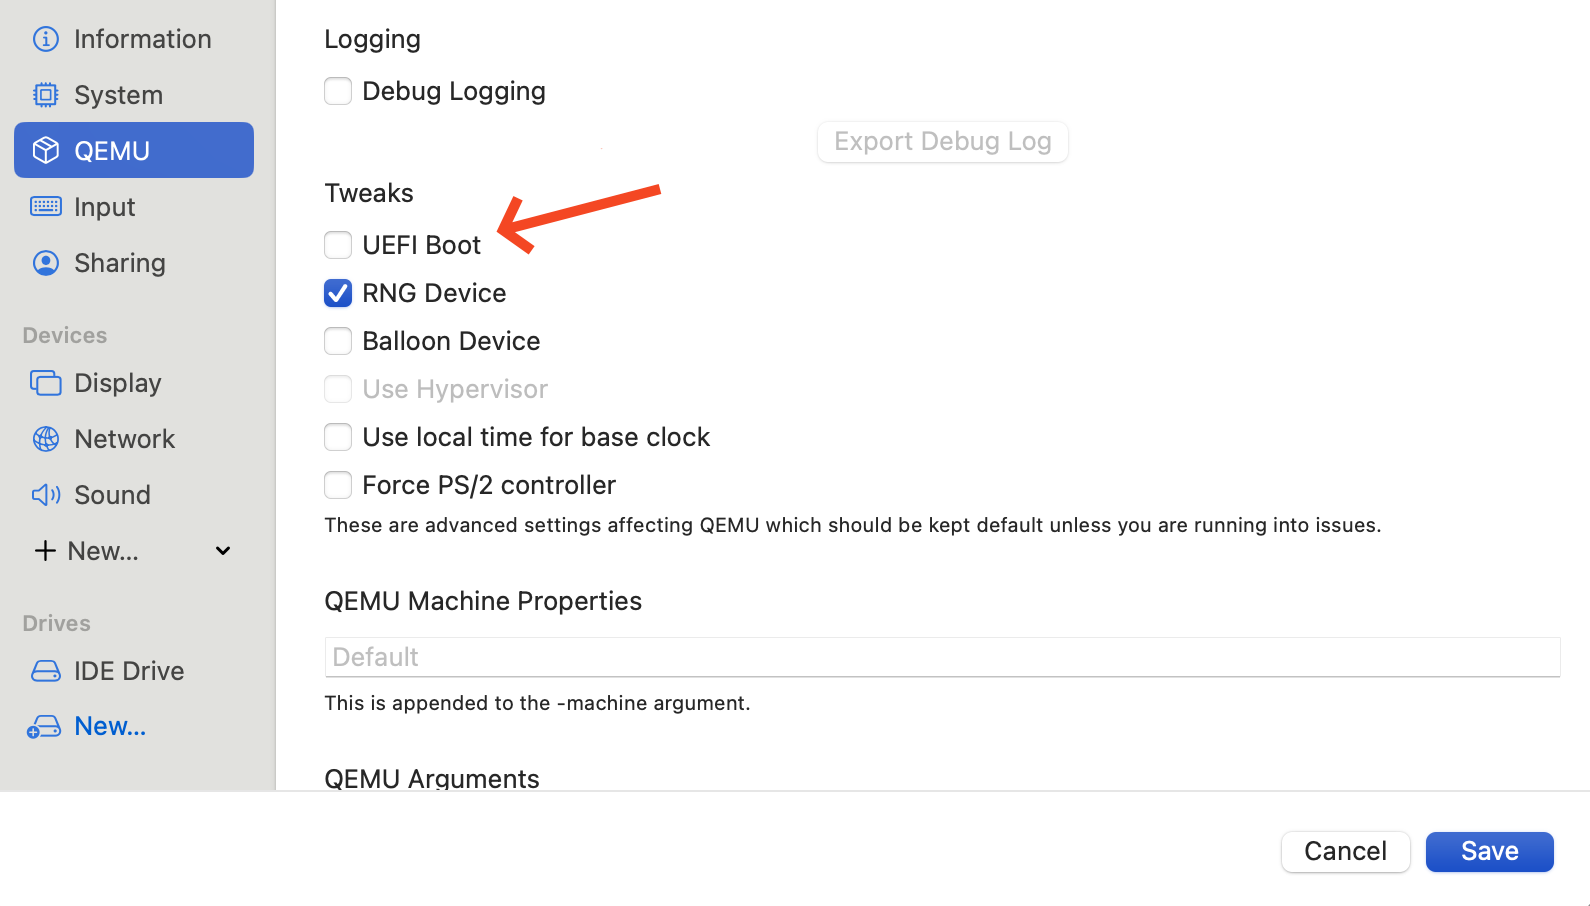](https://kb.filewave.com/uploads/images/gallery/2024-01/f33SFinbspjjS7nB-image.png)
10. Delete the existing IDE Drive.
[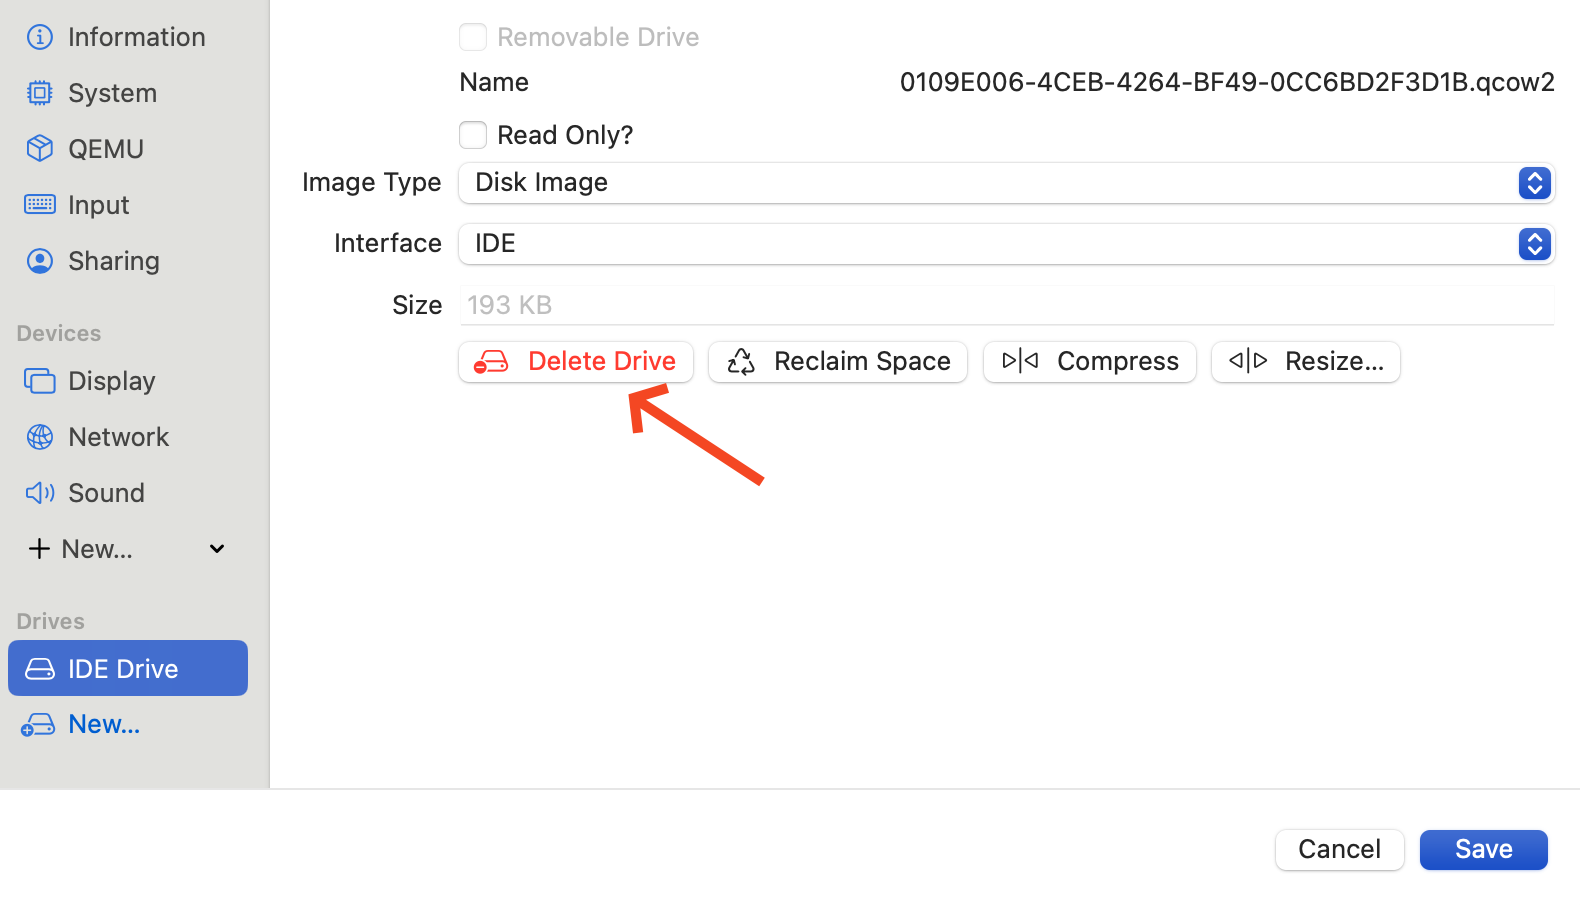](https://kb.filewave.com/uploads/images/gallery/2024-01/tXZe0p9XZCIlkibn-image.png)
11. Click New... to make a new drive. This is where we will import the QCOW2 file.
[](https://kb.filewave.com/uploads/images/gallery/2024-01/29jjkNwfnaY6uorg-image.png)
12. When you clicked New... you should put 500 GB for the size and then click Import...
[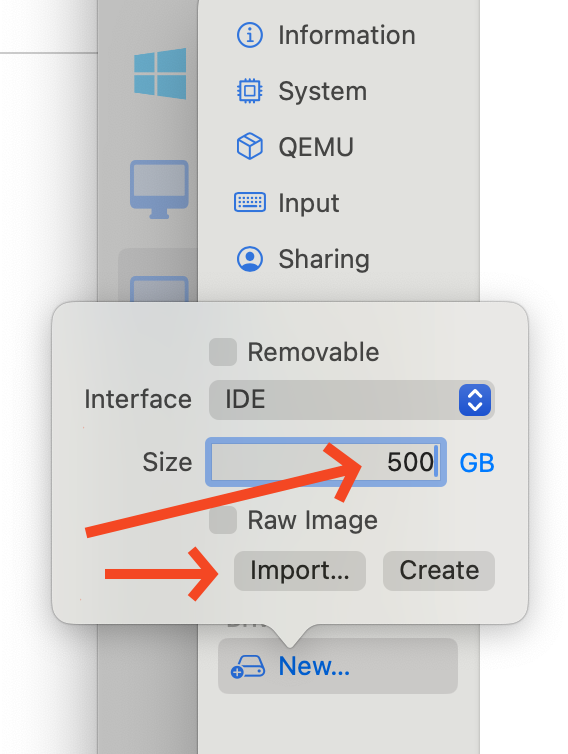](https://kb.filewave.com/uploads/images/gallery/2024-01/2XXvdOuIeNfXxI8M-image.png)
13. Browse to the QCOW2 file from the conversion step and select it. Now you can pick Save on the Settings page to finish.
### Launch
You'll now have the virtual machine listed and if you pick the play button to start it up it should boot up fully.
Once booted you can login as the user **fwadmin** with password **filewave** and then you can change the fwadmin password ([First Login to FileWave Appliances](https://kb.filewave.com/books/filewave-general-info/page/setting-the-password-on-first-login-to-filewave-appliances-155)) or use [Webmin](https://kb.filewave.com/books/filewave-server/page/webmin-gui-on-premise "Webmin GUI (On-Premise)") to change it.
## Related Content
- [UTM | Virtual machines for Mac (getutm.app)](https://mac.getutm.app/)
- [Homebrew — The Missing Package Manager for macOS (or Linux)](https://brew.sh/)
- [Convert ova to qcow2 and start it with UTM | by Simo | Medium](https://medium.com/@hitoshi.shimomae/convert-ova-to-qcow2-and-start-it-with-utm-13fa3fc4c3db) (The source for this article)