The FileWave preview is portrait only. Test the finished wallpaper on representative devices in both portrait and landscape orientations.
[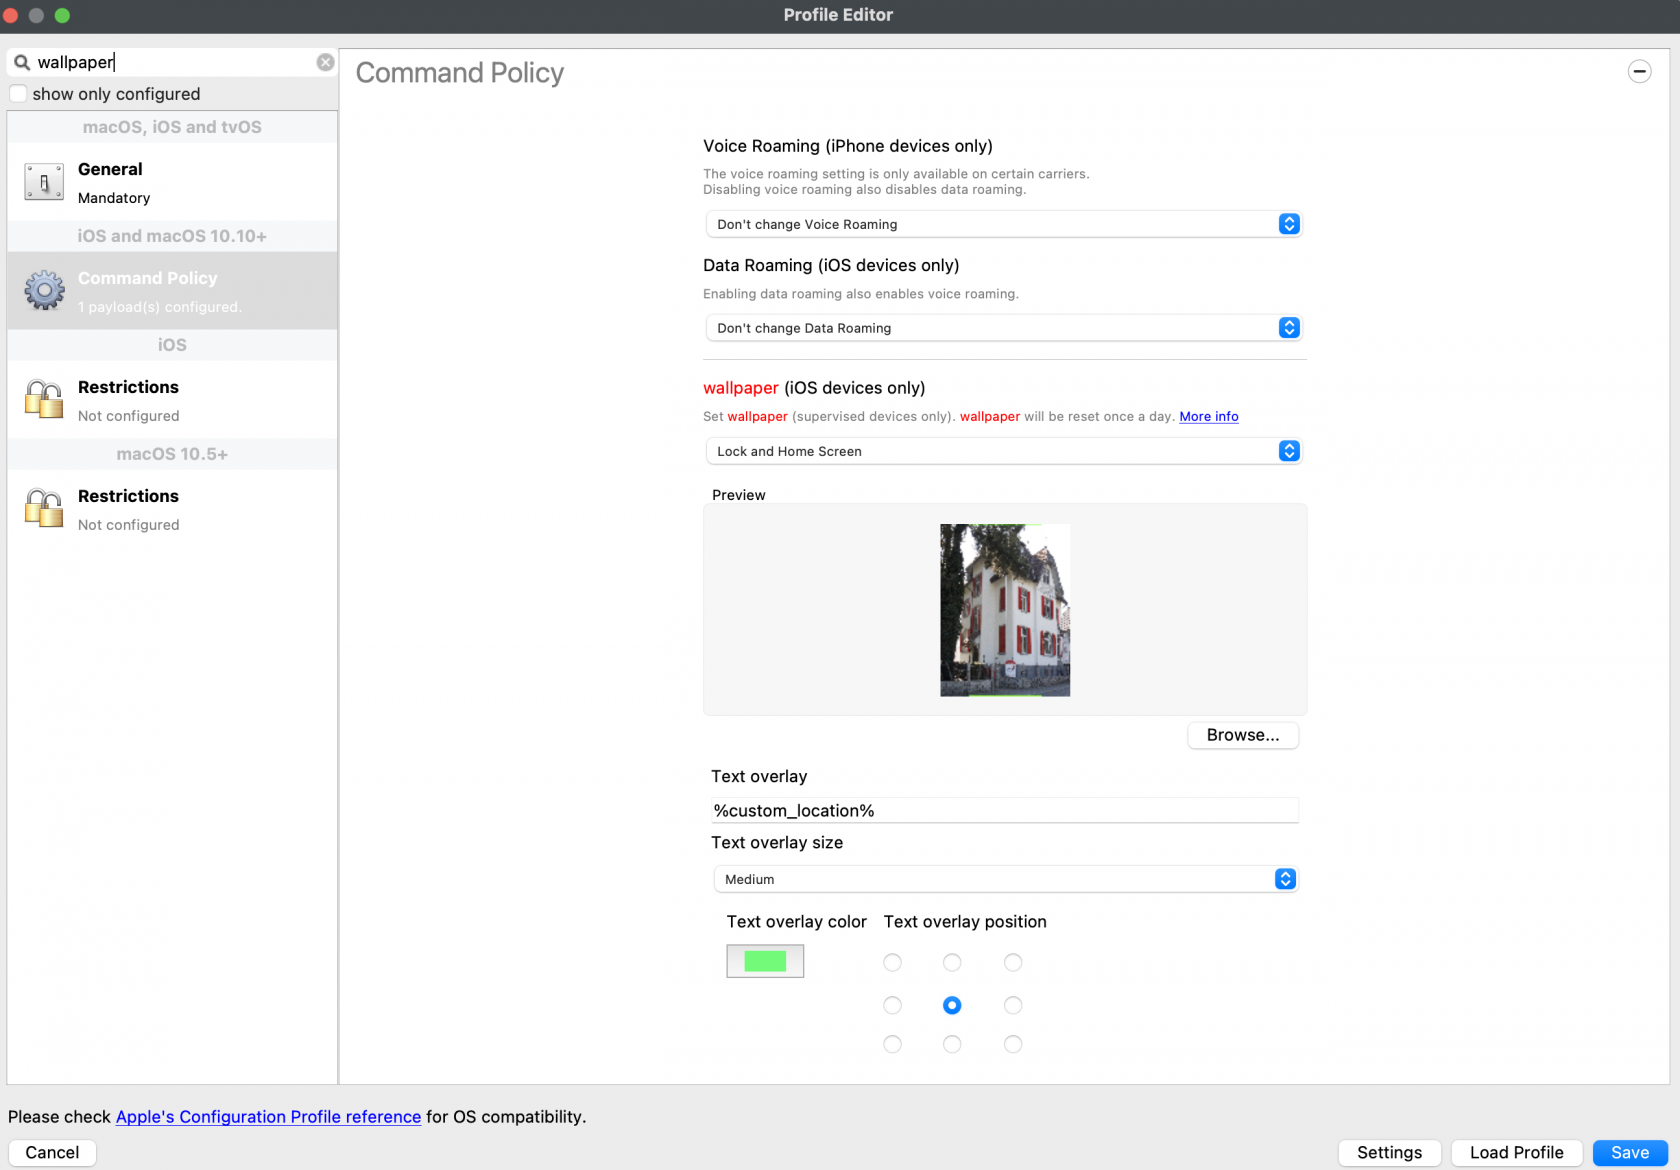](https://kb.filewave.com/uploads/images/gallery/2023-09/s7LQ6yFcn951Ptgi-image.png) The Font used is [GothicA1-Regular](https://fonts.google.com/specimen/Gothic+A1) and the sizes refer to:| SMALL | MEDIUM | BIG | |
| FONT SIZE | 65 | 80 | 95 |
The source image must be smaller than 2 MB before FileWave can add dynamic text.
## How Start with the screen aspect ratios in your fleet. Prepare a source image for each ratio you need to support, then use inventory such as **Product Name** to target the matching device models. Apple MDM inventory does not report screen resolution directly. [https://www.ios-resolution.com/](https://www.ios-resolution.com/) Alternatively, a tool like [Mactracker](https://mactracker.ca) lists details for all Apple device types. ### Smart Groups Since a Wallpaper Profile Command Policy will be required for each screen resolution, devices need to be targeted appropriately. Consider the following method: Obtain the Product Name for a device type to be managed (e.g. iPad6,11). Cross reference this with something like Mactracker to obtain details. - Create a New Smart Group - Type: Inventory Query - Criteria: Product Name > is > iPad6,11 - Group Name: (Something obvious)It may be sensible to include the screen resolution as part of the group name, but not use the Product Name. There is overlap with device types and resolution. E.g. both 'iPad 6th Gen' and 'iPad mini 5th Gen' have a resolution of 2048x1536, so one group could be used to target both device types. Example group name: iOS 2048x1536
Example of multiple device types for the Smart Group which all share the same resolution. Note the 'one or more expressions must be true' and the 'Main Component': [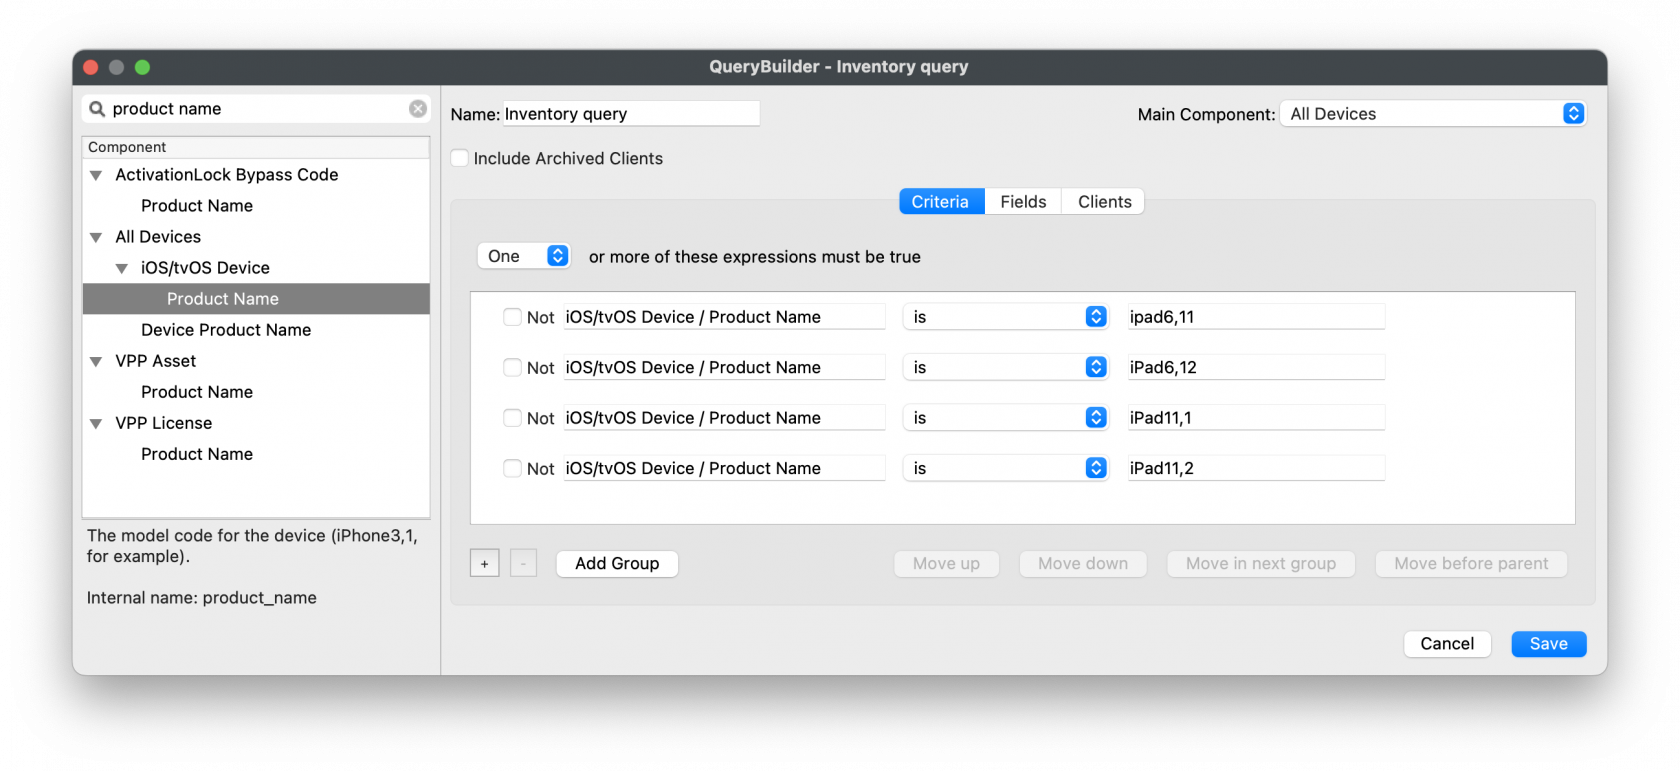](https://kb.filewave.com/uploads/images/gallery/2023-09/jUbJ4sjWFdtJEDN5-image.png) Copy the above process for each required resolution. ### Image Preparation Busy or high-contrast images can make text unreadable. Test the chosen text color against the darkest and lightest parts of the wallpaper, then adjust the image or color before deployment. Rotation can crop the sides or the top and bottom of the wallpaper. Keep dynamic text inside the safe area that remains visible in both orientations. For an accurate mock-up, install **Gothic A1 Regular** with [Font Book](https://support.apple.com/guide/font-book/install-and-validate-fonts-fntbk1000/mac) before building the Keynote test file. The walkthrough below uses a 2048 × 1536 target to build a safe-area overlay and test text visibility before upload. [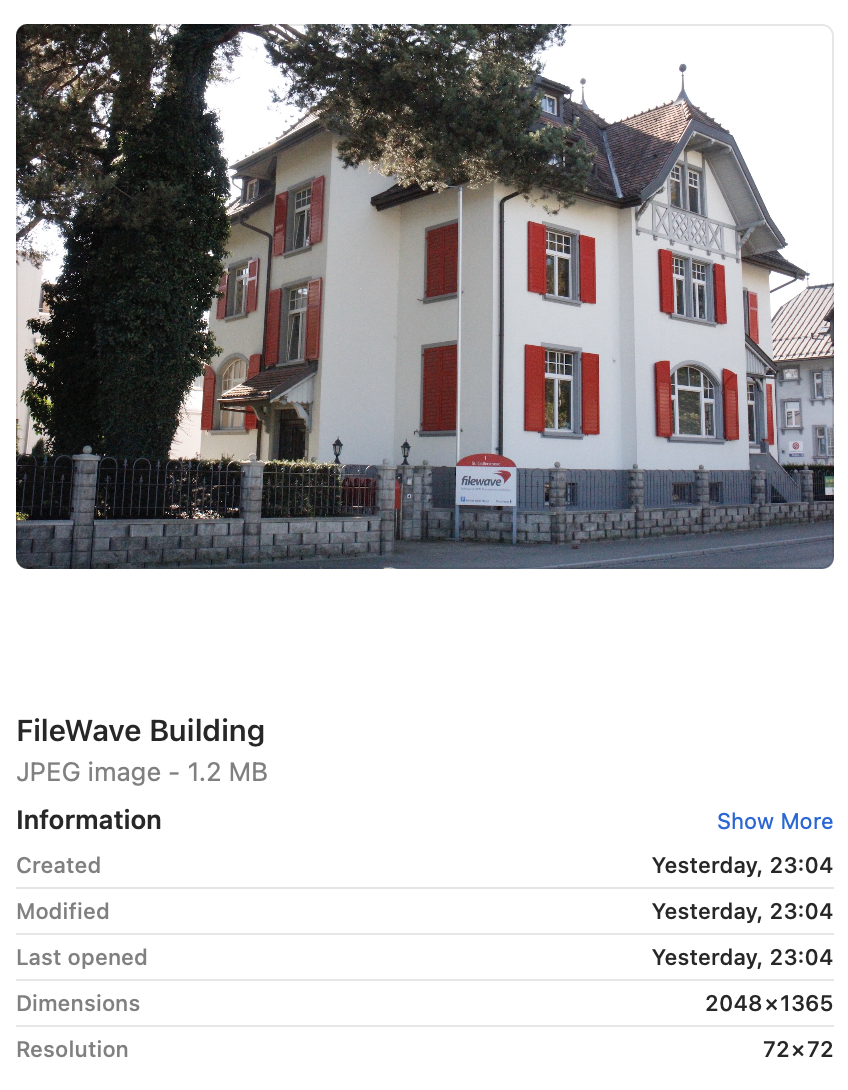](https://kb.filewave.com/uploads/images/gallery/2023-09/mMnuSnprOhfJkTWq-image.png) Note this image is currently the wrong resolution. Preview.app can be used to address this landscape image: 1. Open the image in Preview 2. Proportionally alter the height (which is currently too small) to match the height (y value in this example) of the device's screen resolution with the Adjust Size Tool. The image is now oversized, but will more than fill the entire screen in one axis and match in the other. (In this example, the height should now be 1536 and the width greater than 2048) 3. Zoom out so the entire image may be viewed 4. Select All 5. Move one of the sliders of the selection area, in this example left or right, until it reads 2048. 6. The selection can then be moved to the desired area [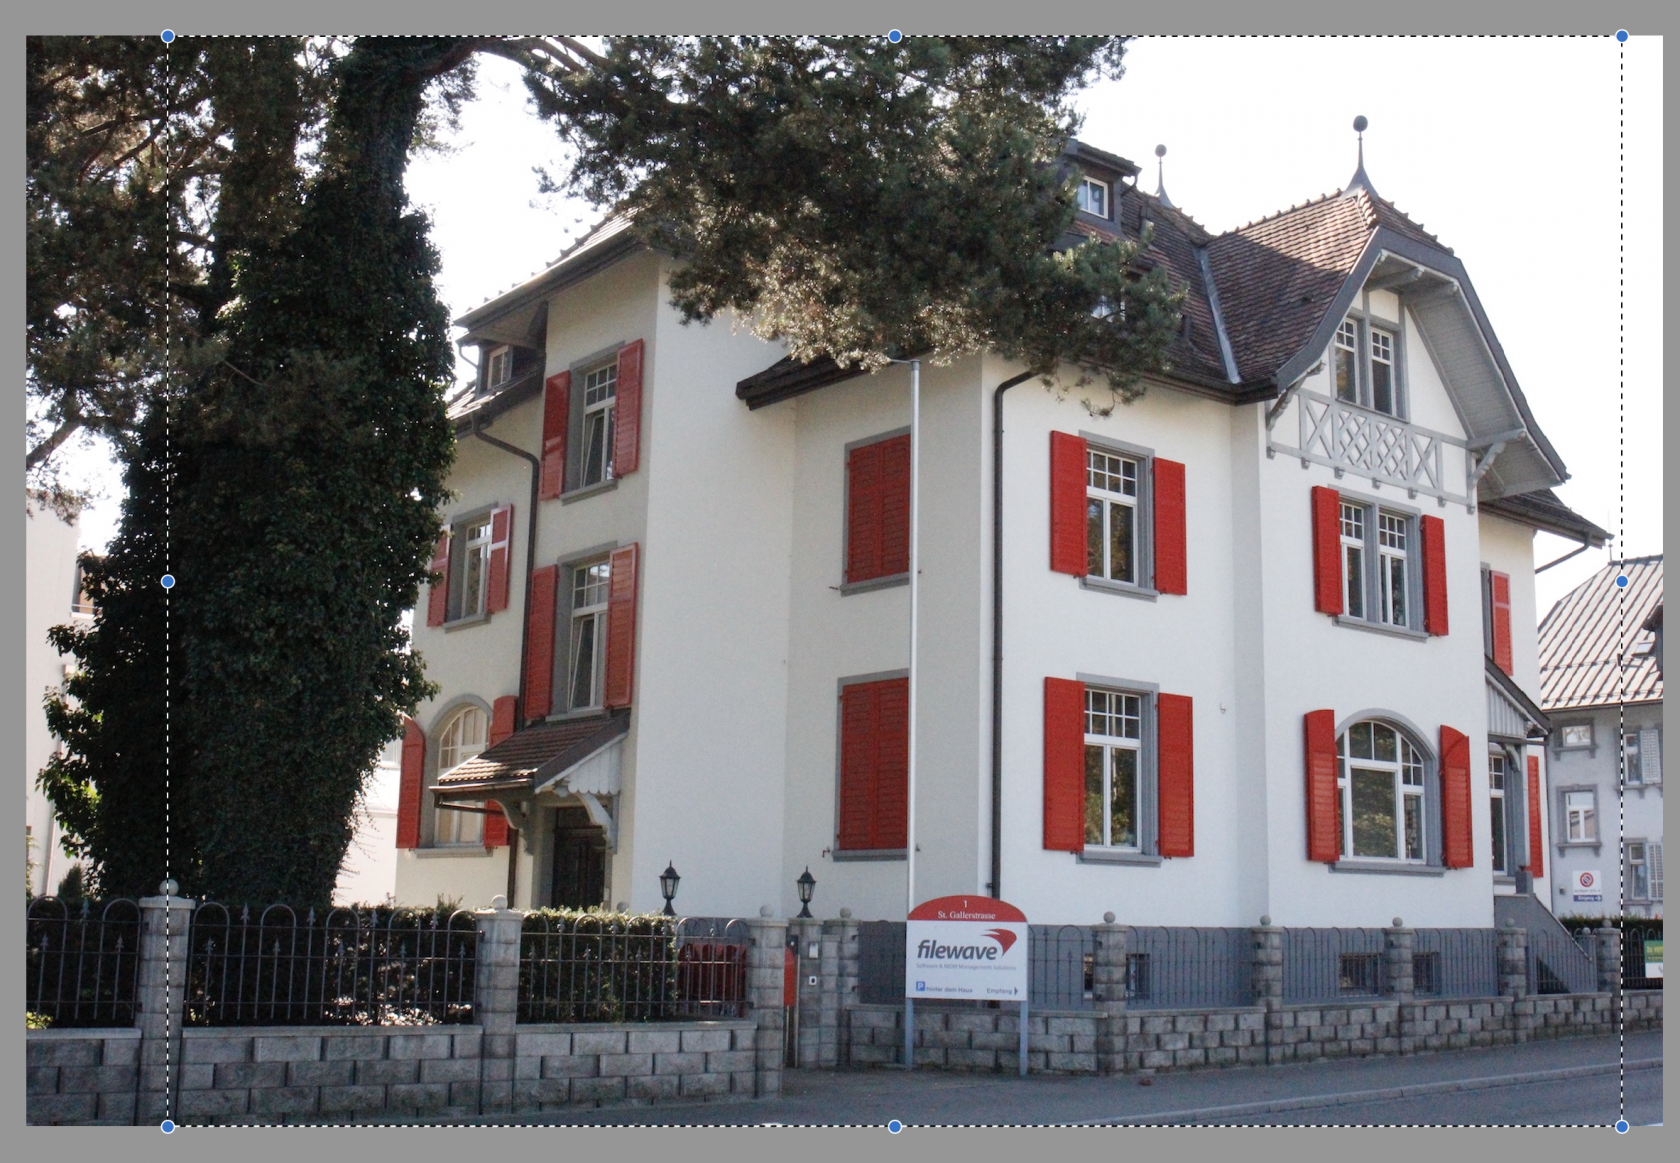](https://kb.filewave.com/uploads/images/gallery/2023-09/Szc4WNETJv298di5-image.png) Copy this selection, open into a new Preview window and save. Add an outline: 1. Alter the size of this new image, such that the smaller axis is set to match the larger. In this case alter 1536 to 2048 2. There will now be an image that is 2732x2048. Make a note of these values and undo. 3. Open Keynote 4. Select the Document button and alter the Document Slide Size to match this newly observed resolution: 2732x2048 5. From a blank slide, add a rectangle and remove the colour fill 6. Add a border line to the rectangle, choosing an obvious colour (for example bright green) and 5pt width should suffice 7. Alter the size of this rectangle, such that it matches the reverse dimensions of the device: 1536x2048 8. Centre the rectangle within the slide 9. Copy the rectangle 10. Alter the size of the new copied rectangle to match the resolution of the entire slide and centre: 2732x2048 11. [Edit the Master Slide](https://support.apple.com/en-gb/guide/keynote/tan7a2b69972/mac) so that it has no background 12. Export the slide as a PNG with transparent background 13. Open the exported image into Preview 14. Resize the image, matching the resolution back to the target resolution, in this case: 2048x1536 15. Select All from Preview and Copy 16. Back in Keynote, create a new document and alter the slide size to the desired screen resolution: 2048x1536 17. Add the desired matching sized image to the slide, in this case the 2048x1536 FileWave building image 18. Paste the copied green boxes from Preview over the top In Keynote there should now be an image, including the green inserted boxes, something like: [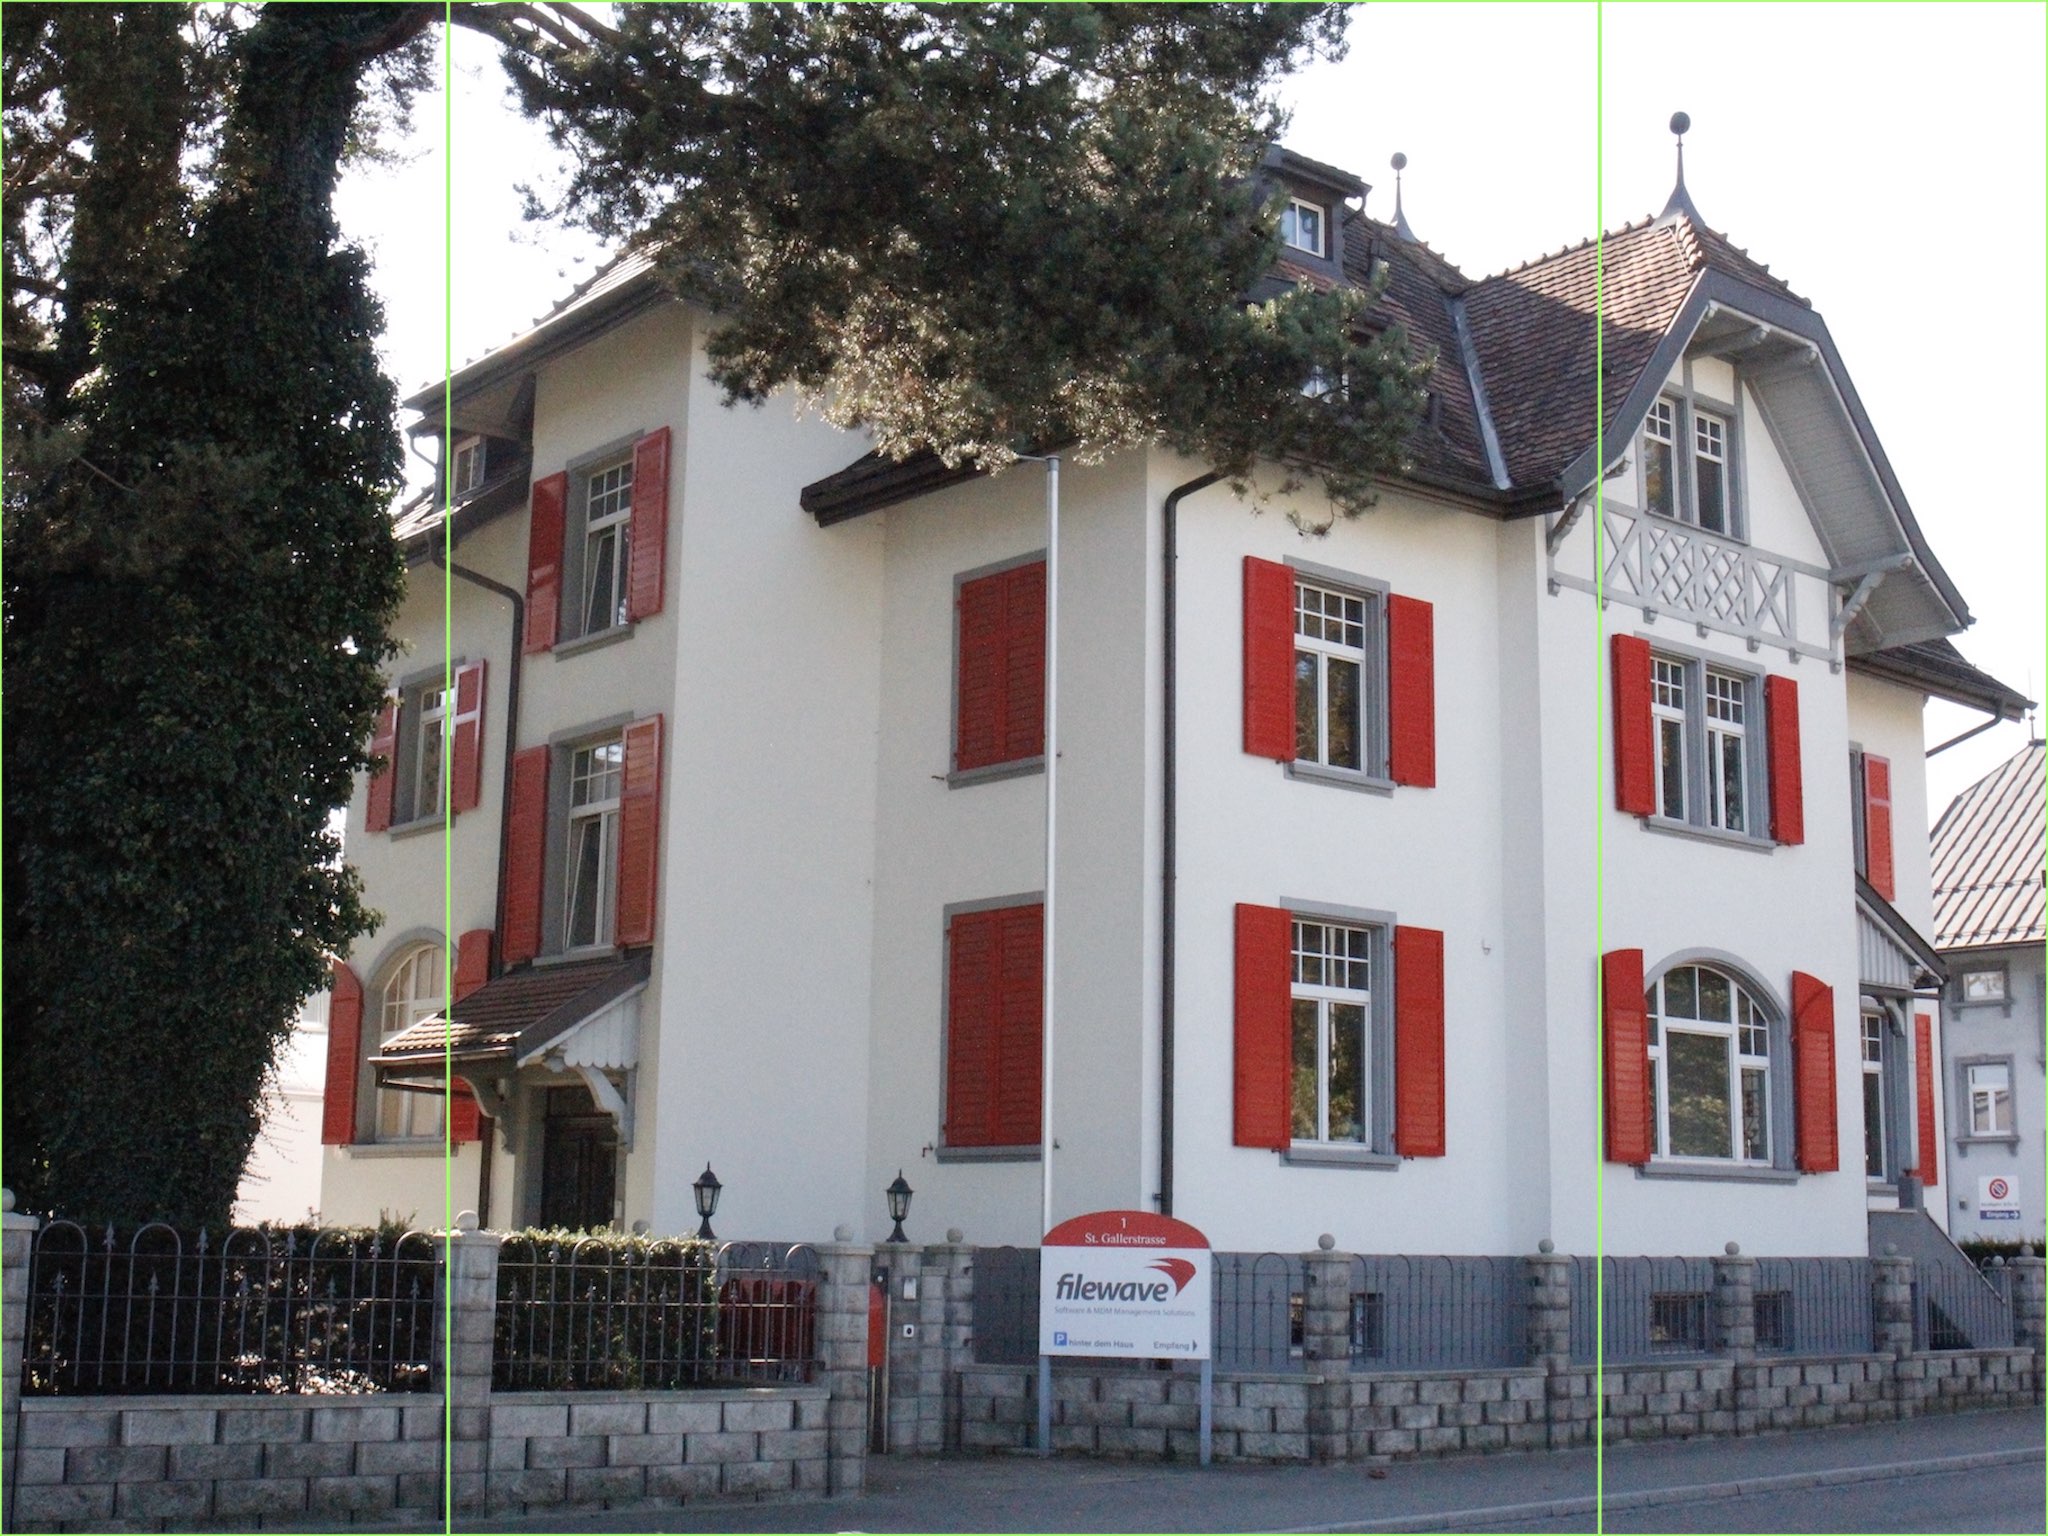](https://kb.filewave.com/uploads/images/gallery/2023-09/Qlmb68bV1kYEC90m-2048-2-green-boxes-002.jpeg)Since the green lines forming the boxes have a transparent background, the image behind may be altered, simplifying the testing of differing images.
Consider duplicating slides to test alternate images, in case the desire to revert is experienced!
### Test Text Keynote may now be used to test adding some text. - Add a text box - Set the Font as Gothic A1 Regular and a desired Font size, e.g. 80 - Select a colour for the Font - Add the chosen text, ensuring it does not cross over the lines when centred If the text does cross the lines, the smaller Font size of 65 could be chosen or reduce the amount of included characters.If using variables, confirm the longest value from FileWave and then test with that value as text in Keynote
From Keynote, if the text is unclear, it is easier to adjust the text colour or even make adjustments with the image itself, to enhance the appearance of the text.
Once happy, copy the line of text. ### Create Fileset Remove the text from the Keynote slide and save the slide as an image, using JPG (smaller size). Remember, the image to be uploaded needs to be less than 2MB. Open up the Profile Editor in FileWave and search for Wallpaper, it should be located in the Command Policy. As per the directions in the prior KB article, choose the image just saved as the Wallpaper and paste the desired text into the text box. Clearly, alter the text to include any parameters if necessary. Don't forget to set the Font colour. As per this example, the middle position is going to be chosen. Save the profile and consider including the screen resolution as part of the name: [](https://kb.filewave.com/uploads/images/gallery/2023-09/79bUT7dUS1Nbzs1X-image.png) ### Test Associate the Profile to a test device and Update Model, observing the Command History. The IntsallProfile command should appear and then disappear; this is not a permanent profile, but a one off command. However, the Settings command will persist. Further details in the following KB: [Profile Editor Command Policy](https://kb.filewave.com/books/profiles-apple/page/profile-editor-command-policy) Turn the screen to confirm the look for both Portrait and Landscape. ##### Portrait [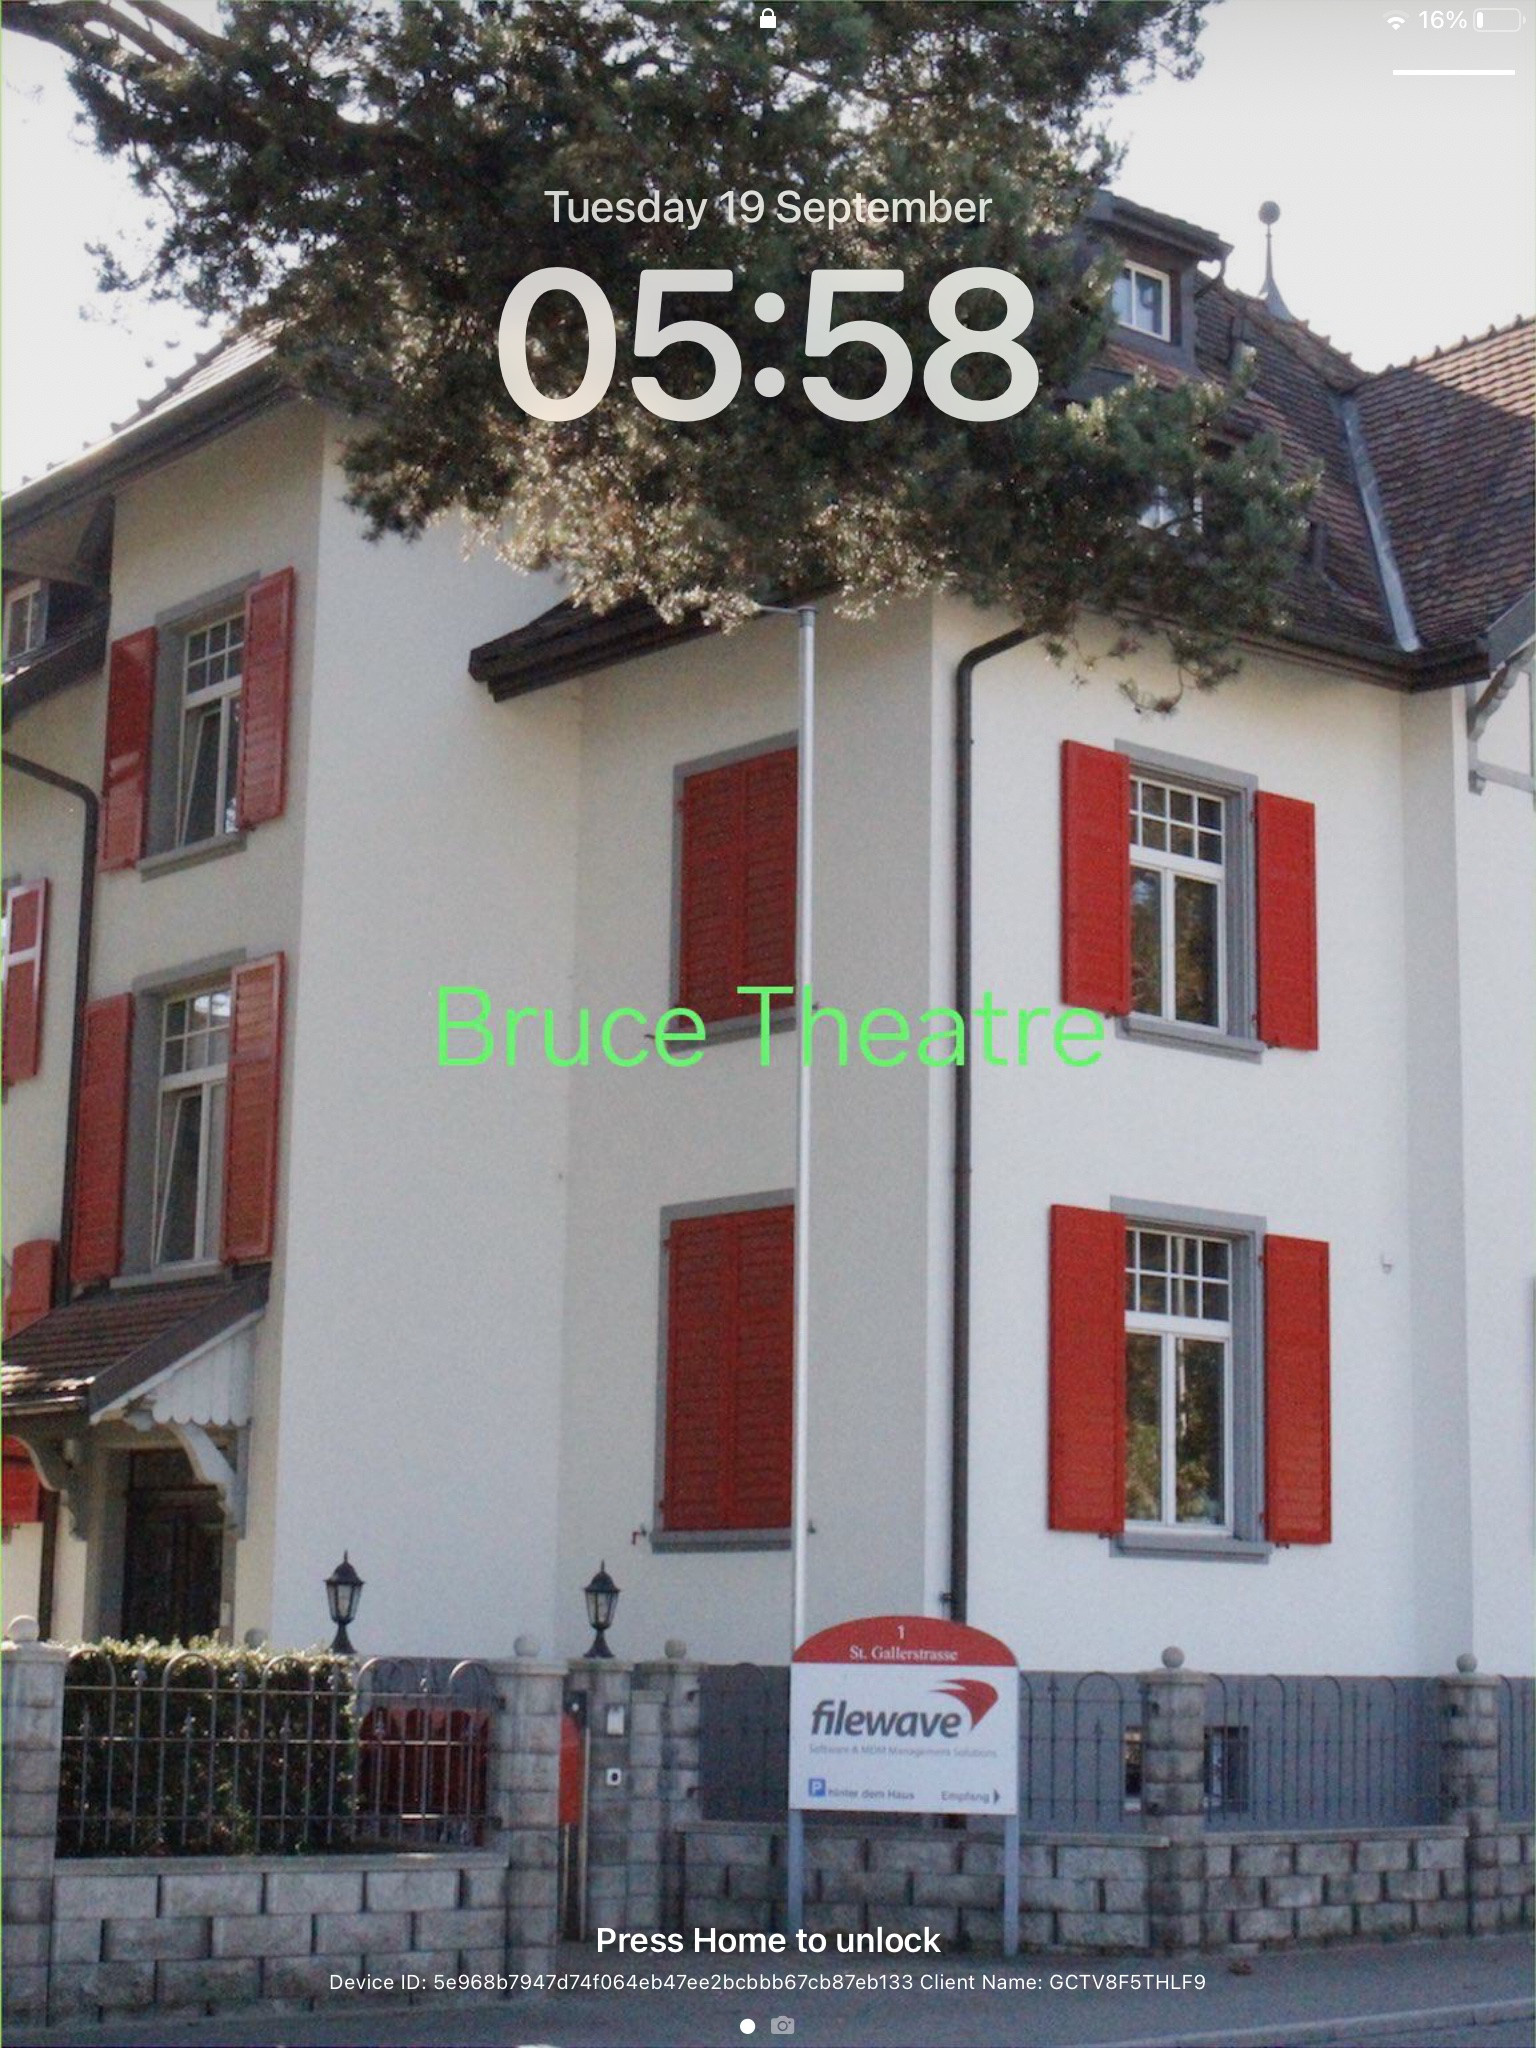](https://kb.filewave.com/uploads/images/gallery/2023-09/PGXtwASlyecVzKkN-portrait.jpg) ##### Landscape [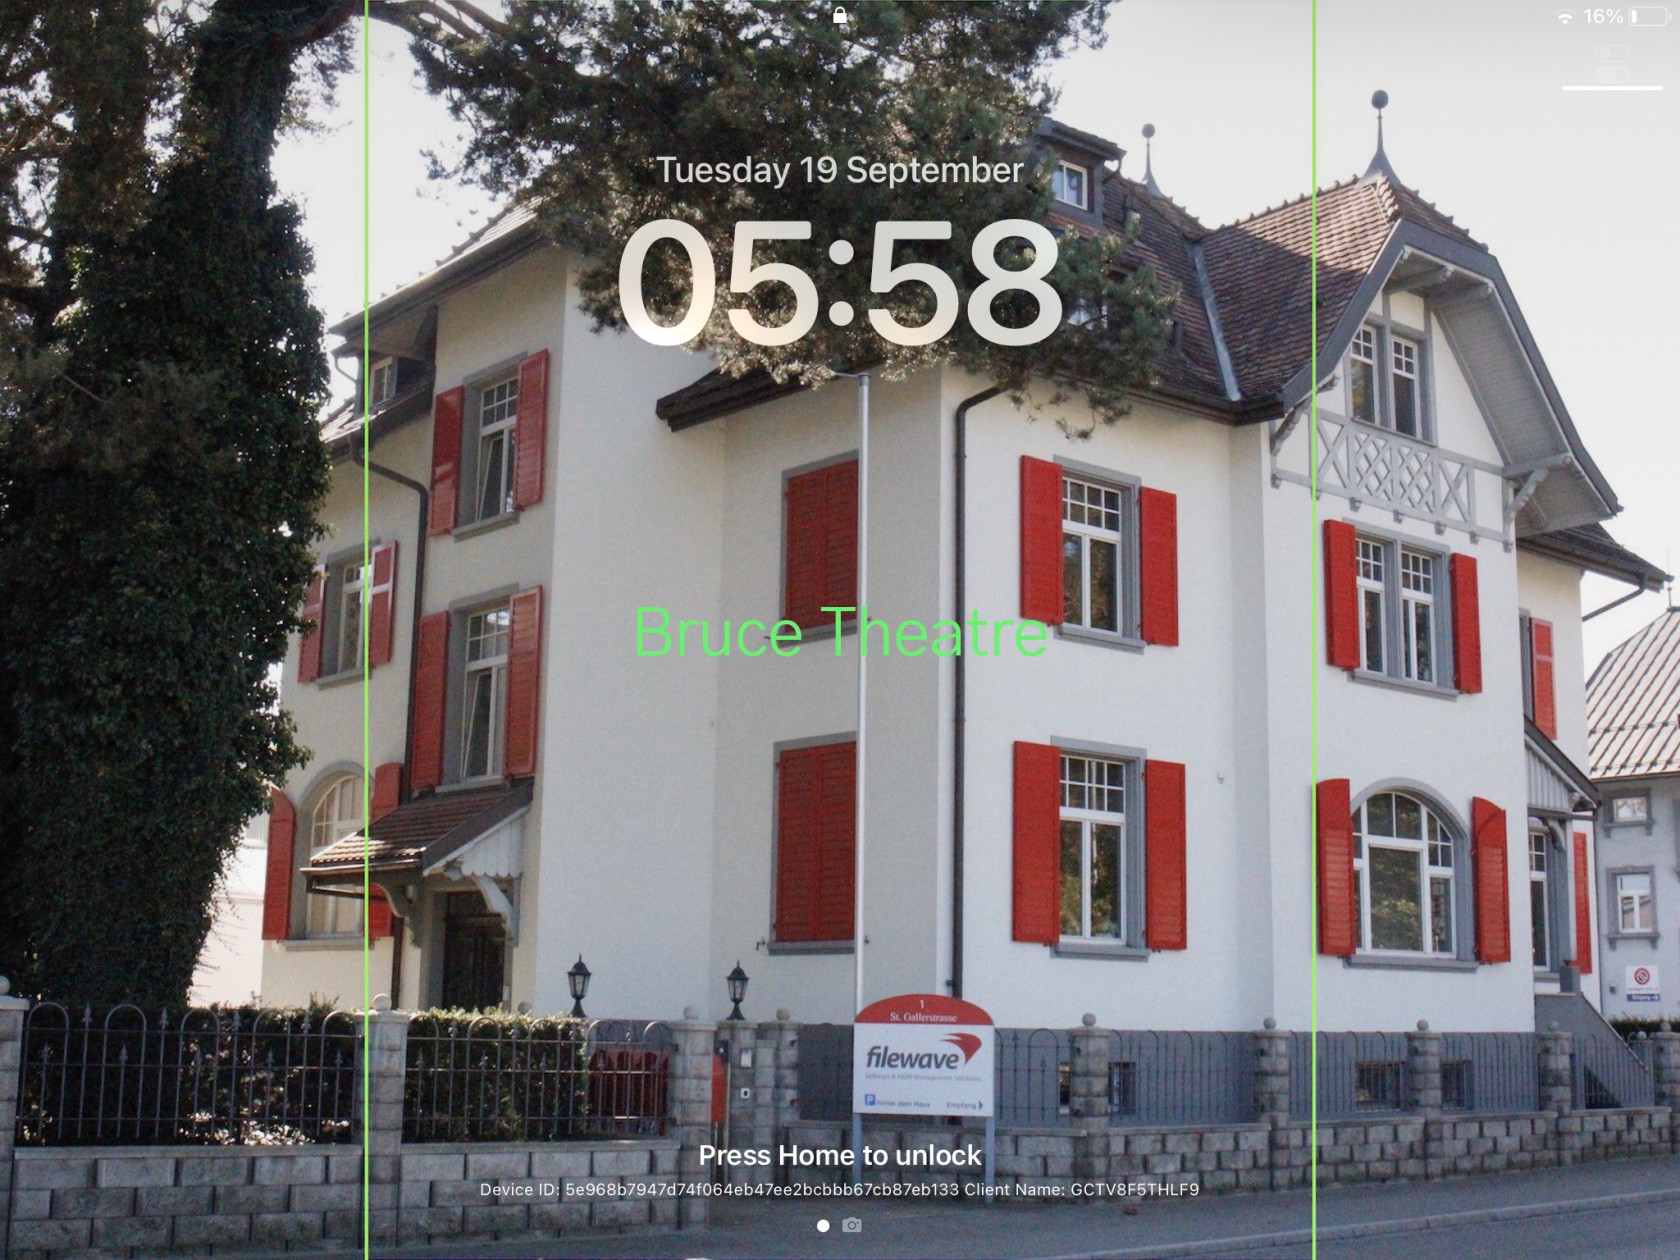](https://kb.filewave.com/uploads/images/gallery/2023-09/qATkxPmmoDp65SU1-landscape.jpg) ### Additional Info First, it is worth observing how Apple alter an image when the device is rotated between Landscape and Portrait. Apple avoid having black bars around the image. As such, to alter the image, as can be seen above, The smaller, un-matching aspect is resized to match the size of the device's resolution. The impact of this is that the large matching aspect is now oversized and the overall effect is the image appears cropped. The green lines from the image above show the crop position that will be seen in portrait when the device is turned from landscape. This has a consequence with the text. If the text position were bottom right instead, for example, the green box shows the text that would be lost: ##### Landscape [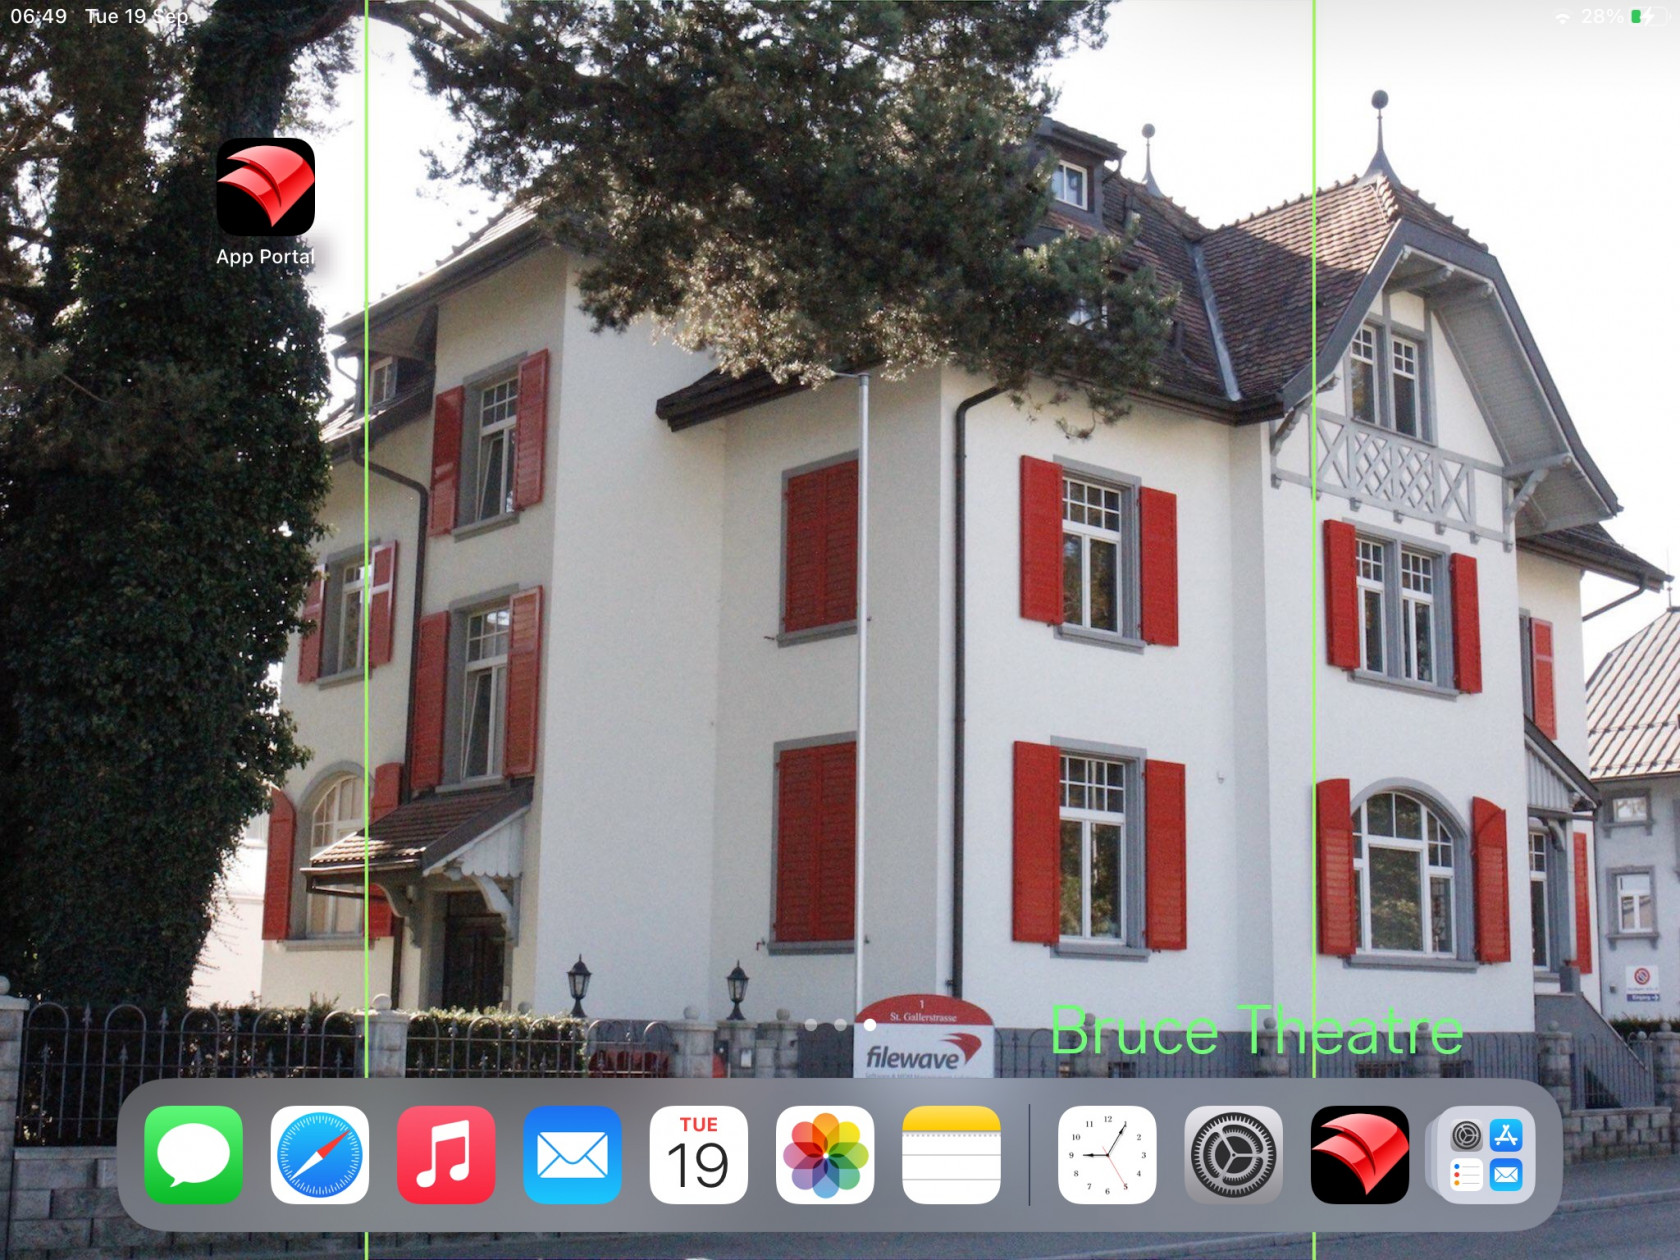](https://kb.filewave.com/uploads/images/gallery/2023-09/X1eQaHXdXPgcrYt9-landscape-br.jpg) ##### Portrait Indeed, rotating the device into portrait shows the loss of text: [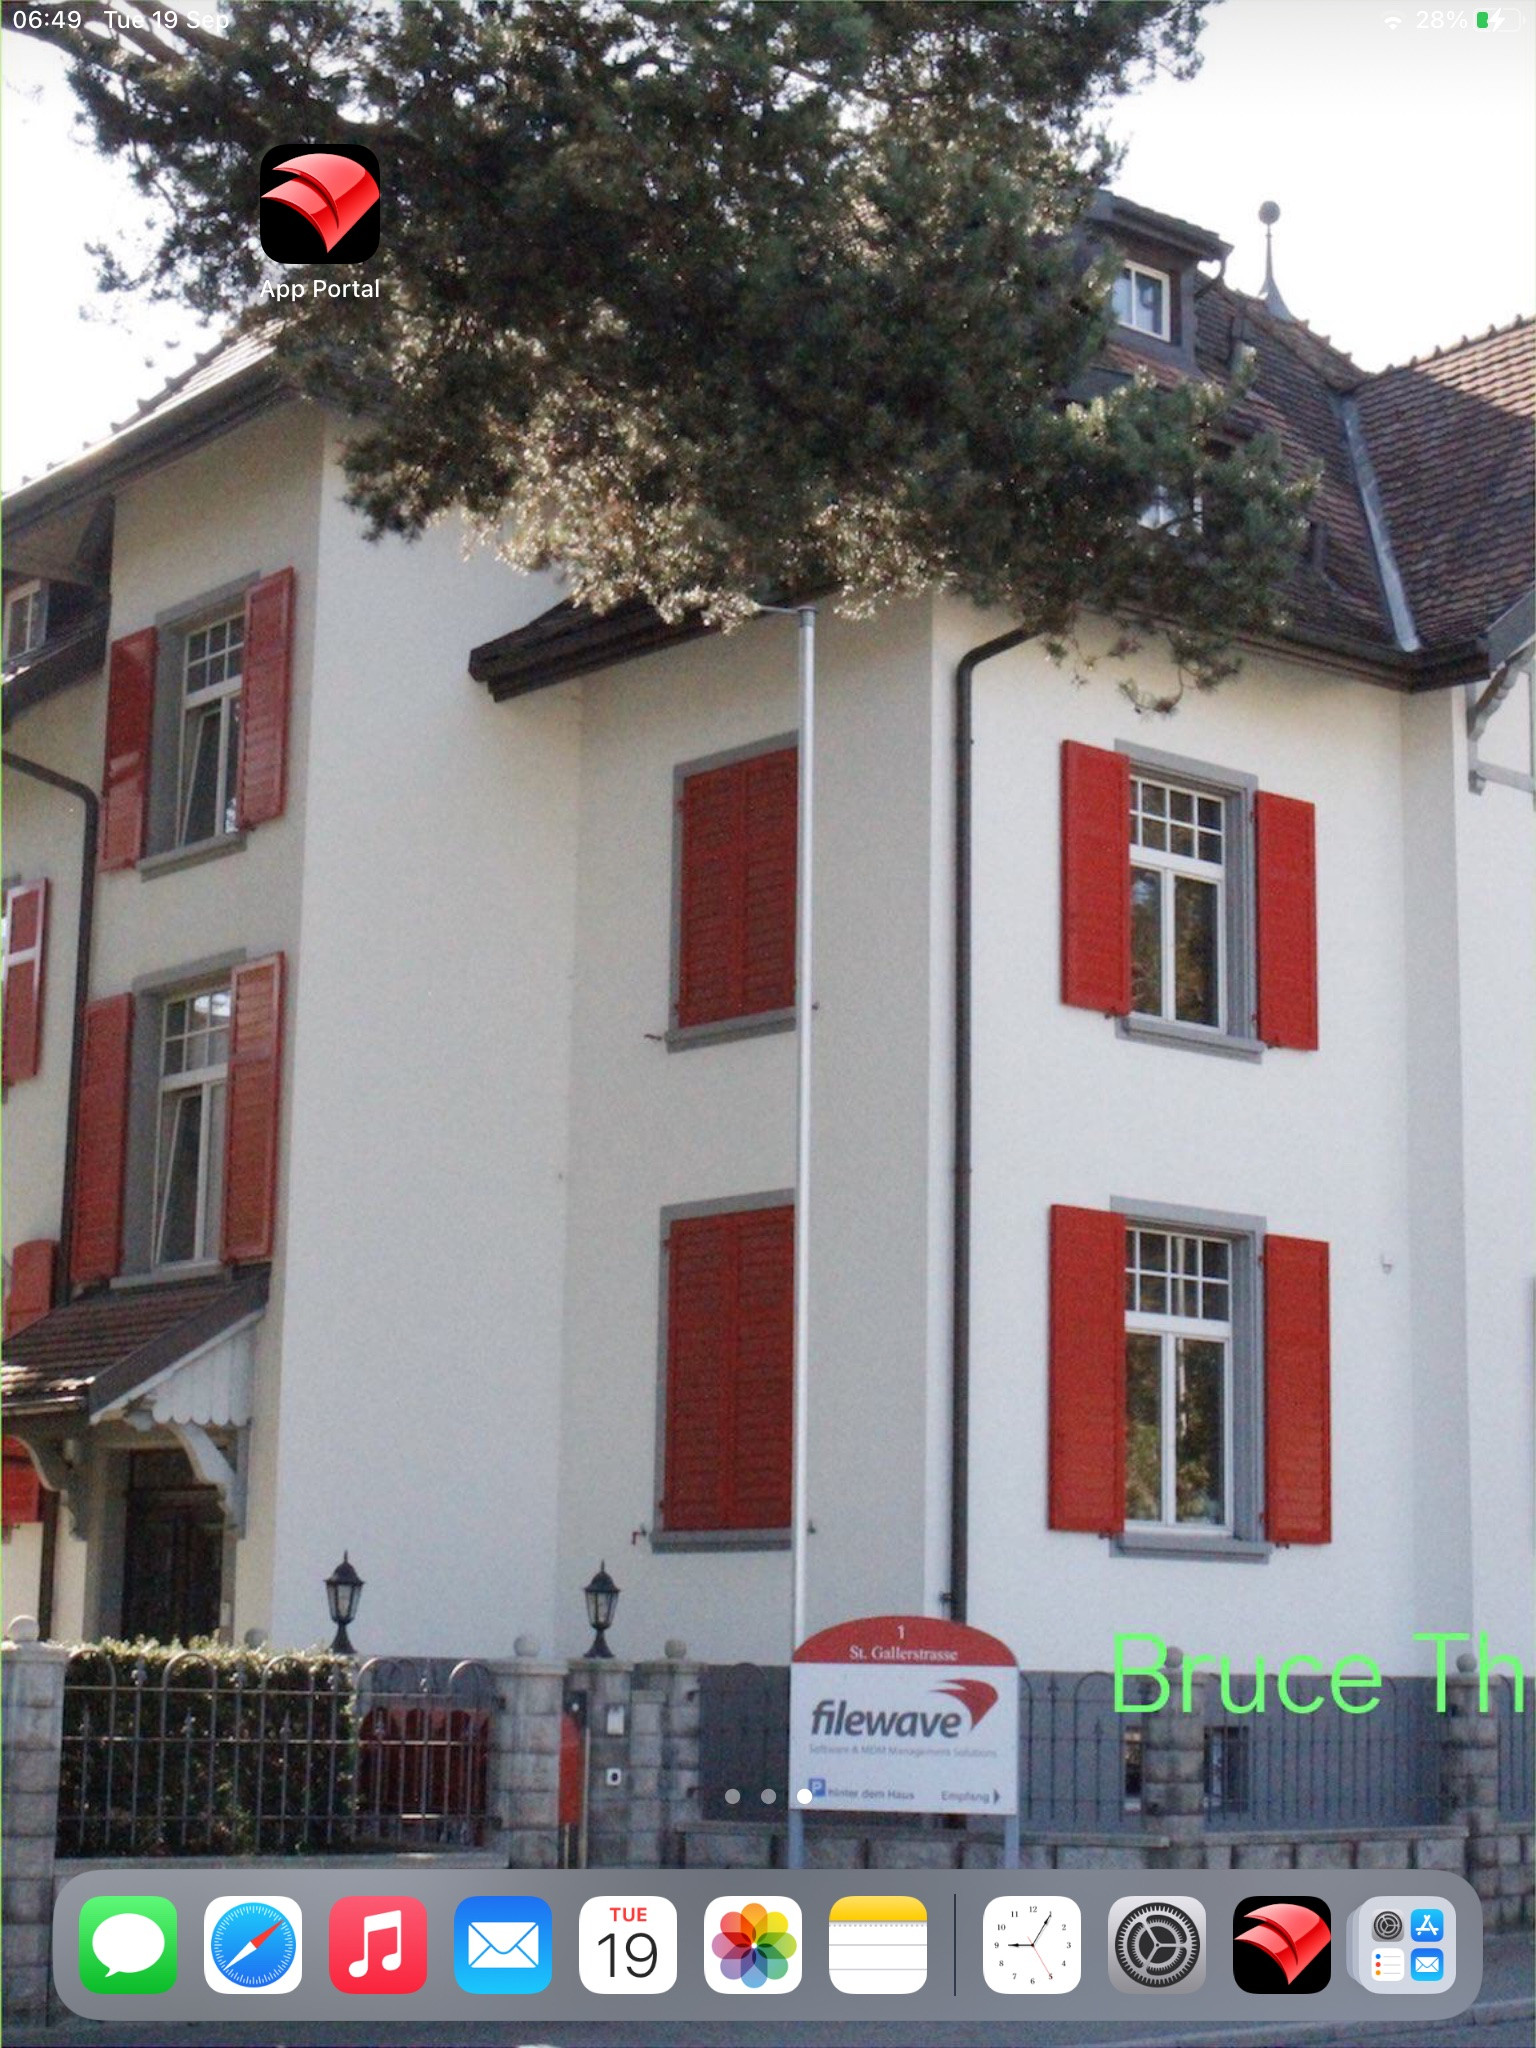](https://kb.filewave.com/uploads/images/gallery/2023-09/5a58961Mvpj8pLxf-portrait-br.jpg) With this in mind, best practice would be: - Where devices may be rotated - For a landscape image, only ever consider using Middle, Top Middle or Bottom Middle - For a portrait image, only ever consider using Middle, Left Middle or Right Middle - Where devices will not be rotated - Any position could be chosen Apple do not provide an option to prevent rotation, however, in some circumstances devices will not be rotated, e.g. wall mounted outside meeting rooms, lecture theatres, hospitals, etc. ### Conclusion Why use the profile, since the above has just made an image of the correct size and Keynote could have just added the text? This is indeed a good question and the above is to assist with a guide on building out the image, ensuring that the text will display clearly and not be cropped on the image size. Chances are once you have done this for one resolution, that you need not bother for others and will already be armed with a good approximate example. However, the Profile still comes into its own! The Profile can use parameters from FileWave, customising the text per device, based either upon built-in inventory or Custom Fields. This greatly exceeds the above method and is very much the beauty of this feature.