Be sure to review 7zip FAQs to use the proper install path. FileWave will force a silent install when using MSI installers.
## Directions 1. Download the 7zip MSI installer from 7zip: [Download](https://www.7-zip.org/download.html) 2. Upload MSI installer by creating New Desktop Fileset and choose MSI / PKG to create 3. Highlight the newly created MSI Fileset, and select Properties 4. Scroll down to the Custom MSI install options 5. Enter in the desired path for 7zip[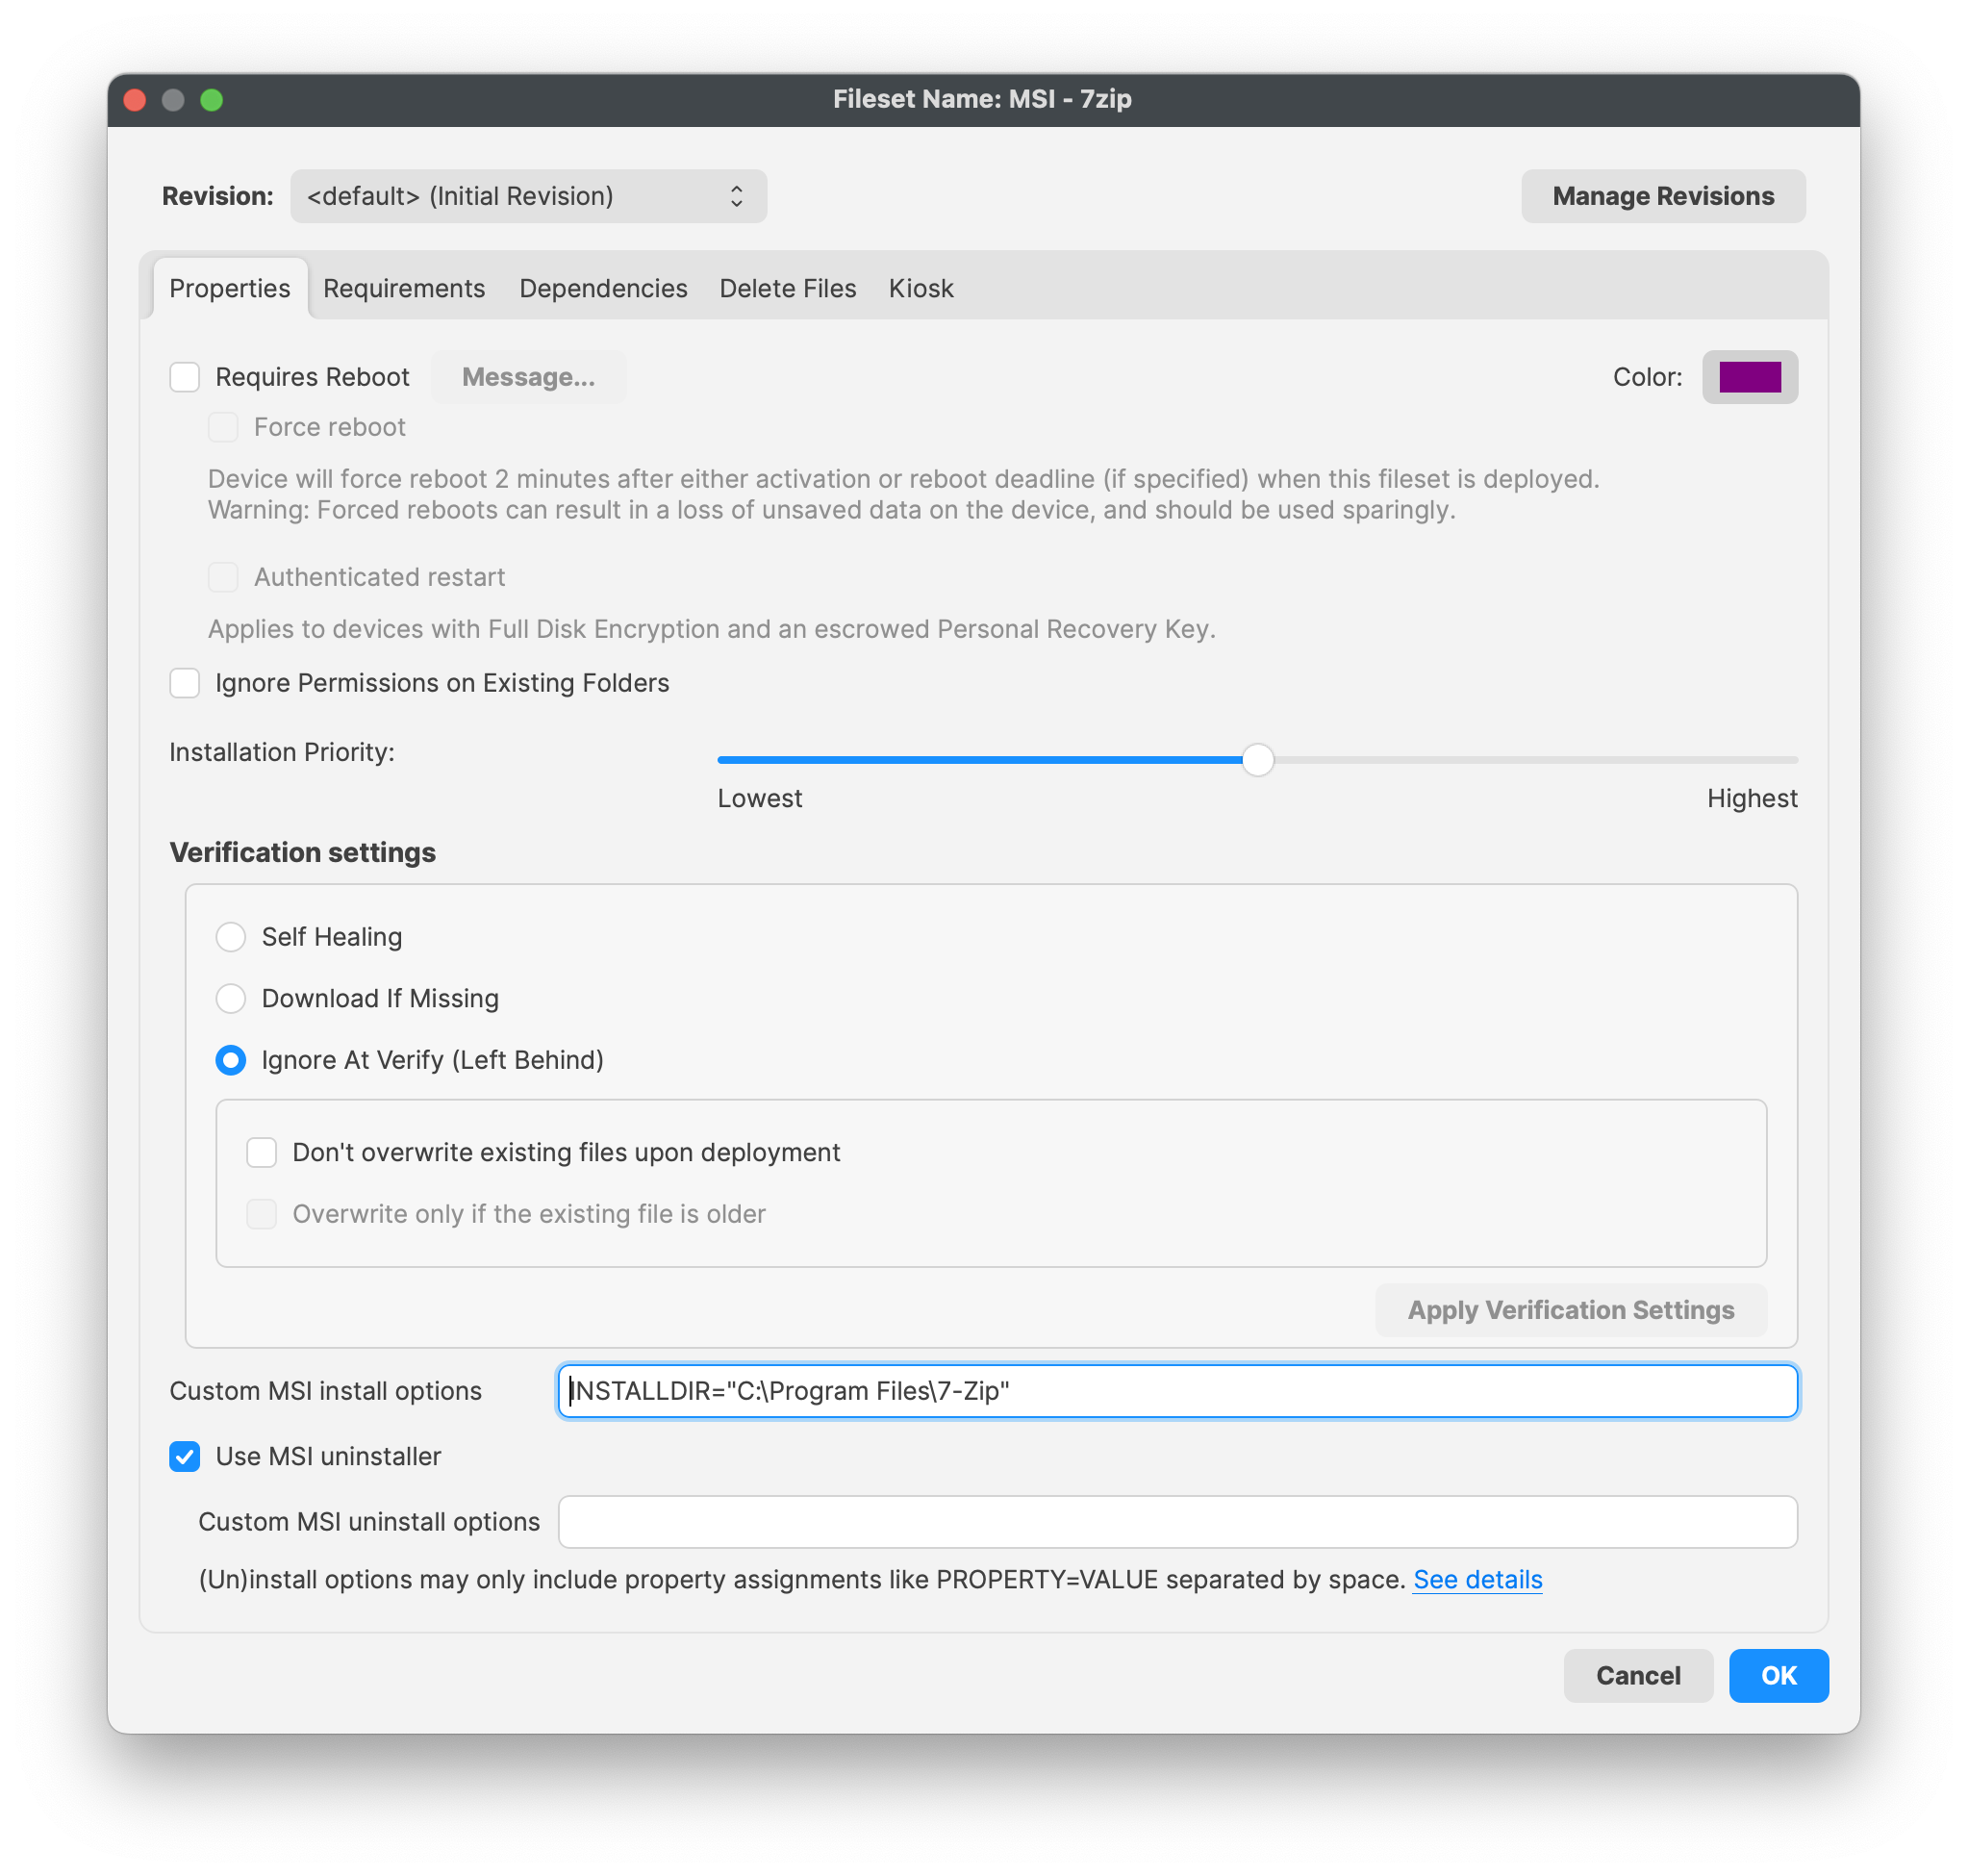](https://kb.filewave.com/uploads/images/gallery/2023-11/QhvdTbhbMalsBNYo-7zipmsi.png)Example here is installing to C:\\Program Files\\7-Zip 6. Click OK to saveAlways test deployment for both successful installation and uninstallations. If you were assigning via Self Service Kiosk, and then end users decides to uninstall, want to be sure it does uninstall successfully.
## Assign to Devices Once testing has been completed and is successful, assign your Fileset to your devices. By way of either a 'Deployment' or 'Association' within FileWave, assign the Fileset to your devices. ## Related Content - [7zip Frequently Asked Questions](https://www.7-zip.org/faq.html)