| Feature | Windows | macOS | Android | iOS/iPadOS | Chrome OS |
| Screen View | Yes | Yes | Yes | Yes | Yes |
| Screen Control | Yes | Yes | Yes | No | No\* |
| Unattended Access | Yes\*\* | Yes\*\* | No | No | No |
| Video | Yes | Yes | No | No | No |
| Audio | Yes | Yes | No | Yes | No |
| Text Chat | Yes | Yes | Yes | Yes | Yes |
| Whiteboard | Yes | Yes | No | No | No |
| File Transfer | Yes | Yes | Yes | Yes | No |
Licenses must be assigned to individual administrators, not groups. The administrator name must match exactly, including case. See [TeamViewer: Assigning Licenses](https://kb.filewave.com/books/teamviewer/page/teamviewer-assigning-licenses "TeamViewer: Assigning Licenses") for the assignment steps.
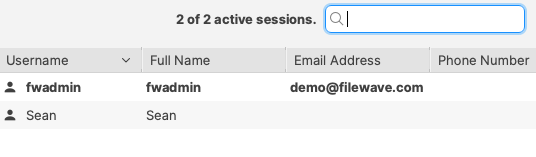
You can assign a license to a directory user. To confirm the exact username, sign in as that user and open the **Show Current Online Administrators** assistant. The username appears in the visible columns.
[](https://kb.filewave.com/uploads/images/gallery/2025-01/BtUzrbwmBV0Ogl80-image.png)**Example** Consider a setup with 2 licenses. Assign one license to **bsmith**. One month later, assign the other license to **pparker**. Five months later, the license assigned to **bsmith** can be reassigned because its 6-month assignment period has ended. The license assigned to **pparker** still needs one more month before it can be reassigned.
Plan license assignments before broad rollout. Each customer has at least one TeamViewer license, and additional licenses are available for additional administrators or technicians. ## **How** Assign licenses in **Native Administrator → Assistants → Manage Administrators**. That same settings area shows how many TeamViewer licenses are available. For detailed steps, see [TeamViewer: Assigning Licenses](https://kb.filewave.com/books/teamviewer/page/teamviewer-assigning-licenses "TeamViewer: Assigning Licenses"). # TeamViewer: Assigning Licenses ## **What** TeamViewer access in FileWave depends on the administrator's FileWave permissions and on the TeamViewer licenses available in your account. This article shows where to assign those licenses. ## **When/Why** A TeamViewer license is assigned to a FileWave administrator or technician, not to a managed device or end user. Each license can be assigned to one FileWave admin at a time and can only be changed once every 6 months, so review assignments before saving them. ## **How** To assign a TeamViewer license to an admin, open **Native Administrator → Assistants → Manage Administrators**, then select the **TeamViewer** tab. [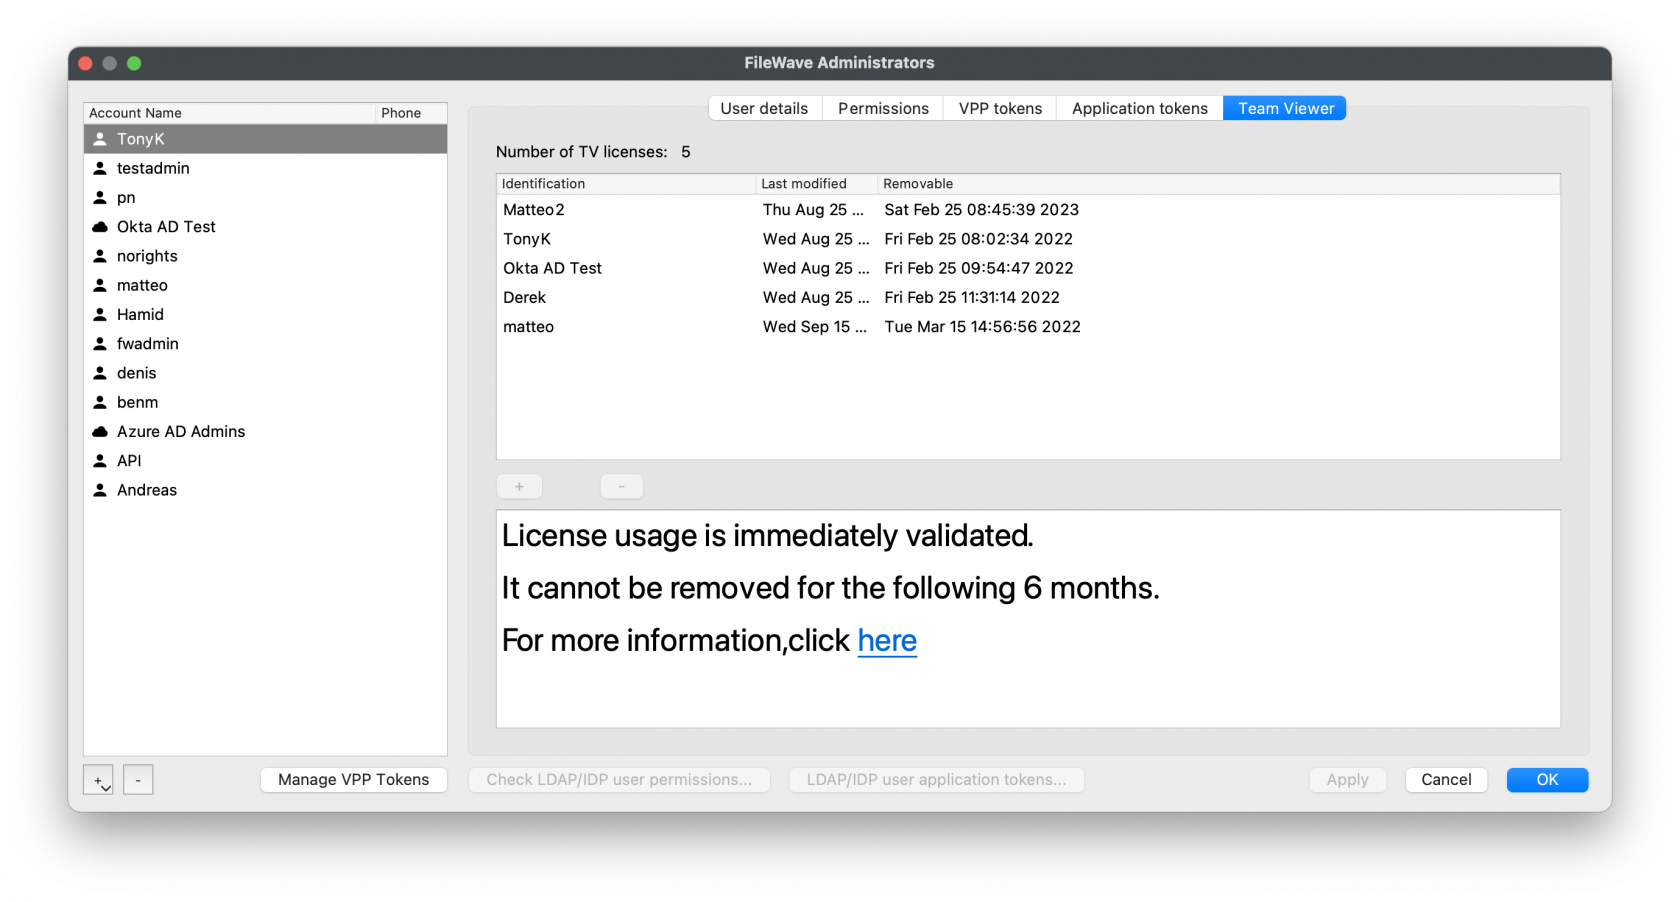](https://kb.filewave.com/uploads/images/gallery/2023-05/pQQUuNChx3DfSP1m-image2021-9-21-6-27-48.png) If licenses are available, click the plus sign and add administrators by login name or SMTP address. Login names must match exactly, including case. In the example above, **TonyK** is valid, but **tonyk** would not match. Generic accounts can use TeamViewer in only one FileWave session at a time. You can confirm the username from **Assistant → Administrators Online**. **Usernames** is one of the columns shown for each signed-in administrator. # TeamViewer Pre-Requisites # TeamViewer General Pre-Requisites ## What Each operating system platform will have its own set of pre-requisites that need to be satisfied before you can use the TeamViewer solution through FileWave. ## When/Why First, your FileWave Admin Account will need to have a license assigned to your account: [https://kb.filewave.com/books/teamviewer/page/teamviewer-assigning-licenses](https://kb.filewave.com/books/teamviewer/page/teamviewer-assigning-licenses "TeamViewer - Assigning Licenses") To remote to and control devices, will require your macOS or Windows device to have the full version of TeamViewer: - [Windows TeamViewer Full Installer](https://www.teamviewer.com/en-us/download/windows/) - [macOS TeamViewer Full Installer](https://www.teamviewer.com/en-us/download/mac-os/) Your managed clients will also need to have a version of TeamViewer installed. We recommend the Host version: - [Windows Clients - TeamViewer Deployment](https://kb.filewave.com/books/teamviewer/page/teamviewer-windows-client-setup) - [macOS Clients - TeamViewer Deployment](https://kb.filewave.com/books/teamviewer/page/teamviewer-macos-client-setup) - [IOS/iPadOS Devices - TeamViewer Deployment](https://kb.filewave.com/books/teamviewer/page/teamviewer-iosipados-client-setup) - [ChromeOS - TeamViewer Deployment](https://kb.filewave.com/books/teamviewer/page/teamviewer-chrome-os-client-setup) - [Android - TeamViewer Deployment](https://kb.filewave.com/books/teamviewer/page/teamviewer-android-emm-client-setup) We'll see conditional options in the FileWave Native and Web Administrator consoles (shown below) for a TeamViewer session whenever pre-requisites are met: 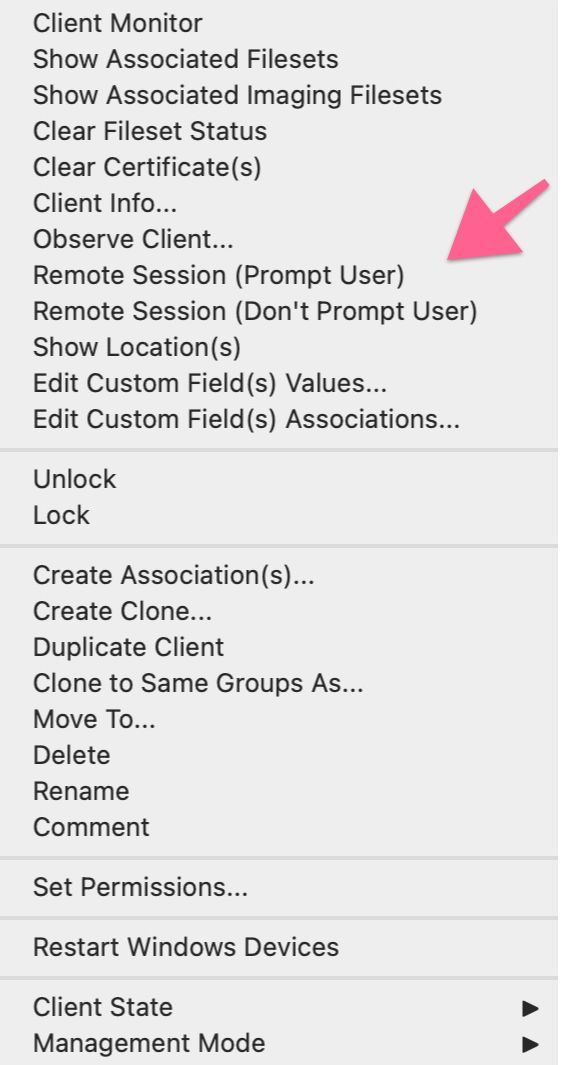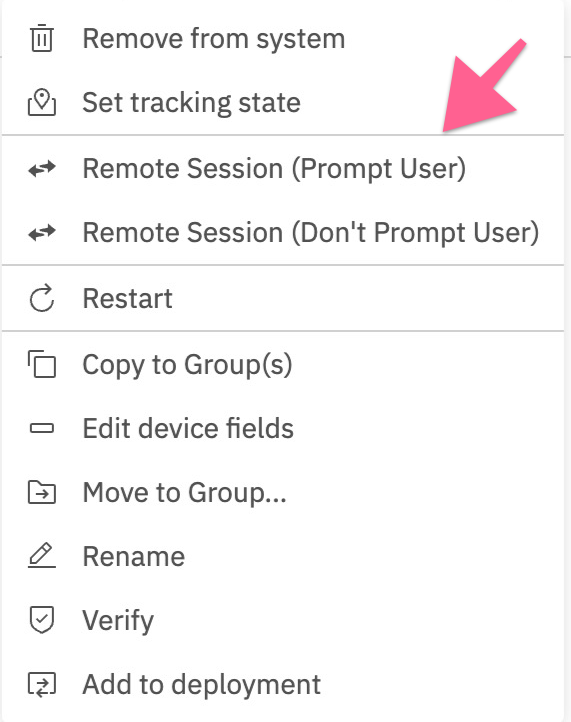 Computer Client Preferences Computer clients also rely upon the client settings for these options to be available: - FileWave Client Preferences > Privacy There are two options available: - Managed remote control - Prompt client for remote control access 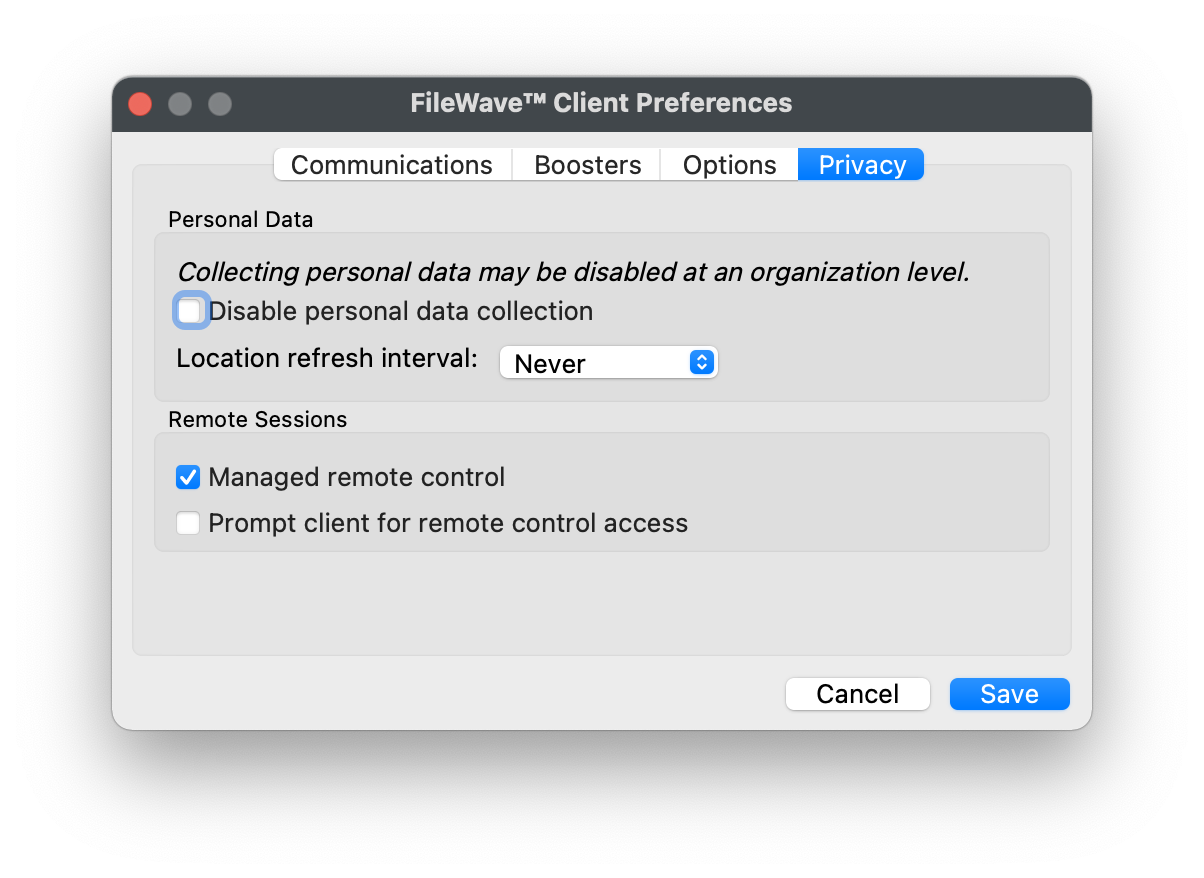 The first option will allow/deny any connection via TeamViewer. The second option will be considered when the first option is enabled. The second option, for prompting, will then either allow only one or both options to be available. When prompt is disabled, both the options to either prompt or not prompt should be available. If Prompt is enabled though, the option to action a 'Don't prompt user' will not be available and only prompted connections may be established. These options may be configured with a [Superpref Fileset](https://kb.filewave.com/books/filewave-client/page/superprefs-fileset "Creating a Superprefs Fileset"). ## **How** The following table highlights specific prerequisites for complete functionality and helpful tips:| Platform | FW Server | FW Client | Companion App/Kiosk/Extension | Supporting Apps |
| Windows/macOS | Version 14.7+ | Version 14.7+ | n/a | TeamViewer App pre-deployed |
| iOS/iPadOS | Version 14.7+ | n/a | FileWave Kiosk IPA v 14.6+ | TeamViewer QuickSupport App (Licensed through VPP and deployed) |
| Android | Version 14.7+ | n/a | Companion App v 14.6+ (auto-deployed) | TeamViewer QuickSupport App required, TeamViewer device-specific add-on also needed for device control |
| Chrome OS | Version 14.7+ | n/a | Extension v 2021.10.07 (auto-deployed) | TeamViewer QuickSupport App required, QS add-on eventually for device control |
Although TeamViewer does not support remote control of Chrome OS devices, it has been seen to work (but without consistency) in some instances by applying the QS Universal Add-on. As such, the add-on could also be considered. \* The Google Play Store TeamViewer QS Universal Add-On \* The add-on allows device control
## **How** TeamViewer’s full application for Windows can be found here: [https://www.teamviewer.com/en-us/download/windows/](https://www.teamviewer.com/en-us/download/windows/) For macOS here: [https://www.teamviewer.com/en-us/download/mac-os/](https://www.teamviewer.com/en-us/download/mac-os/). You will need to run that on the device that runs the FileWave Administrator console or WebAdmin. For your clients, the below steps discuss the deployment of TeamViewer Host. If you aren't currently distributing the FileWave Chromebook Inventory Extension, you'll want to do that, and detailed instructions can be found [here](https://kb.filewave.com/books/evaluation-guide/page/chromebook-client-pre-requisites "Quick Start Guide for Chromebooks").Details about what the Inventory Extension enables, and frequently asked questions can be found [here](https://kb.filewave.com/books/chromeos/page/chrome-os-filewave-inventory-extension-capabilities "Chrome OS: FileWave Inventory Extension Capabilities") and [here](https://kb.filewave.com/books/chromeos/page/chrome-os-filewave-inventory-extension-behavior-faq "Chrome OS: FileWave Inventory Extension Behavior (FAQ)") respectively.
Additionally, it will be very helpful to pre-deploy the QuickSupport App and the Universal Add-On through your Google Admin Console. In our environment, we chose to push both: 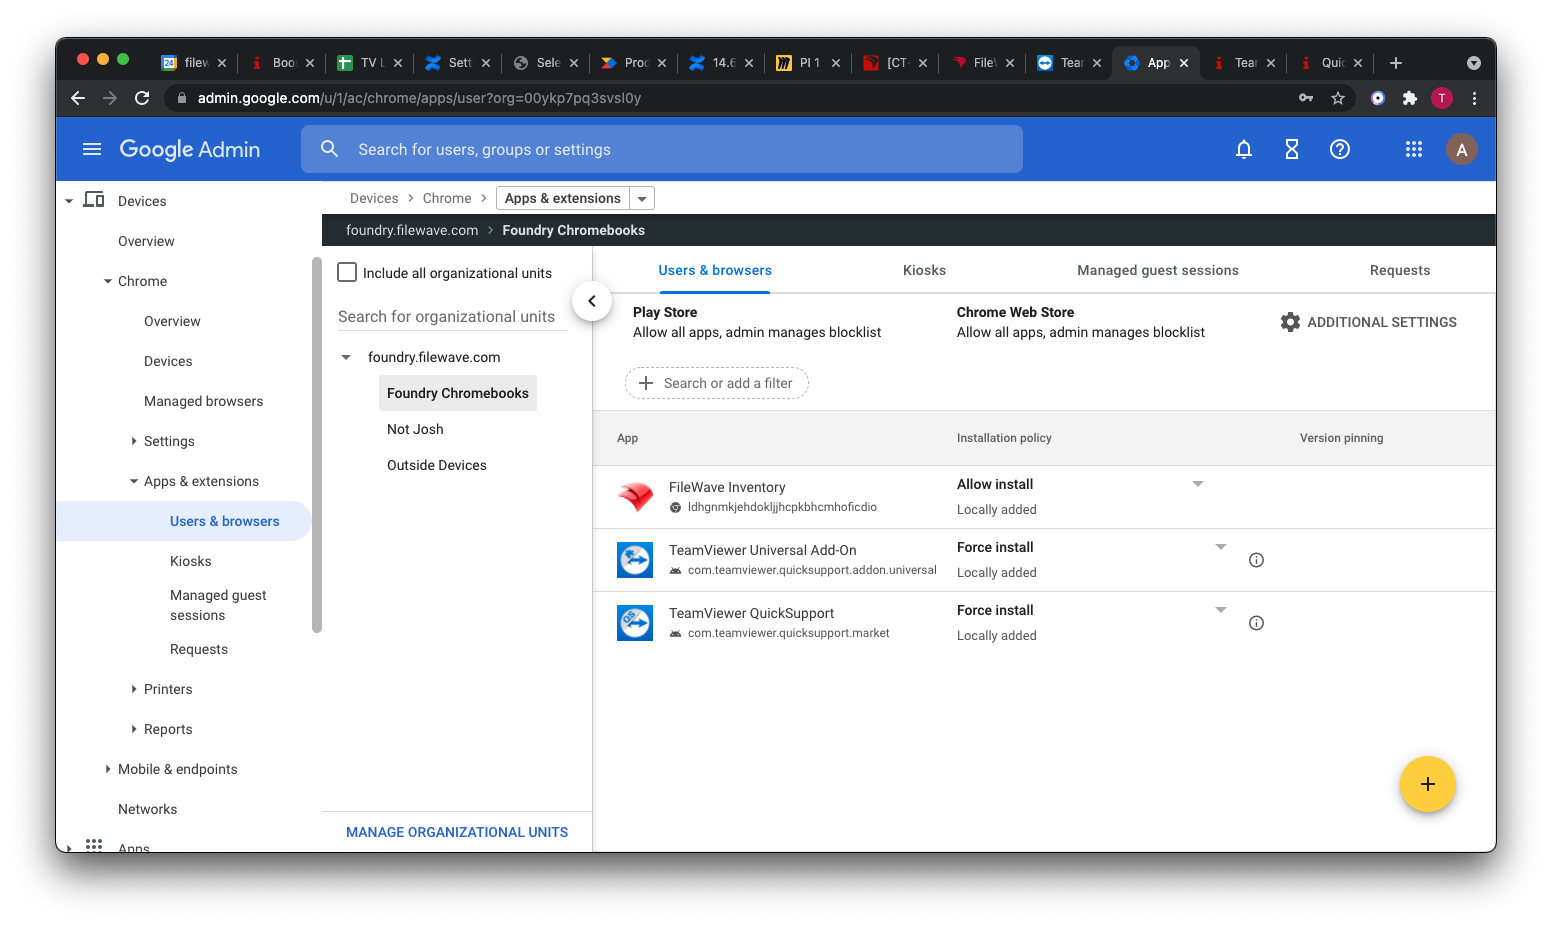 Note that both apps are from the Google Play Store, not from the Chrome store: 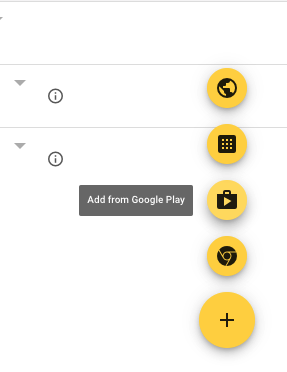 # TeamViewer: iOS/iPadOS Client Setup ## What For iPhone and iPad remote support, plan for the FileWave Kiosk app, TeamViewer QuickSupport, a technician workstation running TeamViewer, and Apple user approval for screen control. ## When/Why ### Requirements: - FileWave Kiosk app. Kiosk V2 installs it automatically. - TeamViewer QuickSupport app from the App Store, deployable through MDM with VPP. - A supported FileWave and TeamViewer integration configuration. Available view/control options vary by Apple platform and OS version. - User approval for screen control. Apple requires this for user privacy.Apple requires the user to approve screen control on iOS/iPadOS devices. FileWave and TeamViewer cannot bypass that privacy prompt.
Older FileWave deployments may still have manually deployed the FileWave Kiosk IPA. In current Kiosk V2 deployments, FileWave installs the Kiosk app automatically.
## **How** #### TeamViewer Full Application The technician's computer needs the full TeamViewer application, available from the TeamViewer download pages: - Windows: [https://www.teamviewer.com/en-us/download/windows/](https://www.teamviewer.com/en-us/download/windows/) - macOS: [https://www.teamviewer.com/en-us/download/mac-os/](https://www.teamviewer.com/en-us/download/mac-os/) #### TeamViewer QuickSupport The iPhone or iPad needs TeamViewer QuickSupport from the App Store: - [TeamViewer QuickSupport App Store Link](https://apps.apple.com/us/app/teamviewer-quicksupport/id661649585) - If searching for the App, e.g in Apple Business or School Manager, the App ID is: 661649585 TeamViewer QuickSupport is a free App. Deploy the required apps through FileWave before testing remote support.Test on a small device group before broad deployment.
TeamViewer through FileWave requires a TeamViewer license assigned to the FileWave administrator who starts the session in Manage Administrator Preferences. Only assigned administrators can control devices.
# TeamViewer: macOS Client Setup ## What FileWave version 14.7 introduced a TeamViewer integration that requires endpoint prerequisites on each supported platform. The majority of these have been left untouched, but may be altered, allowing slightly more work (if desired) but much greater control. ## When/Why TeamViewer is used to remotely control your clients, providing access to a device for troubleshooting or assisting a user. TeamViewer for macOS differs from other OSs since it requires a few privacy permissions before allowing TeamViewer to be installed. ## How Prerequisites for macOS client devices must be met for TeamViewer to work seamlessly: - [General TeamViewer Prerequisites](https://kb.filewave.com/books/teamviewer/page/teamviewer-general-pre-requisites) are met, ensuring that clients are set to allow remote control - [Profile for TeamViewer Host - Notifications, Accessibility, and Full Admin Access](#bkmrk-tcc-profile-for-team) - [TeamViewer Host Fileset](#bkmrk-teamviewer-host-file) - \*TeamViewer Full Client Application is installed on the device initiating the session. \*The TeamViewer Full Client application is only necessary for computers that need to remotely connect to other computers. You can download the TeamViewer Full Client here: [https://www.teamviewer.com/en-us/download/portal/](https://www.teamviewer.com/en-us/download/portal/) The below describes the process for deploying and configuring the TeamViewer Host application. The Host application is only allowed to accept connections and not initiate them, and is highly recommended for client deployment. ### TCC Profile for TeamViewer Host - Accessibility, Notifications, Screen Recording, and Full Admin AccessScreen Recording is a privacy setting that can not be allowed by anyone other than a local user. Standard Users do not have permissions to allow Screen Recording by default. In the current Profile, the option to allow a non-Admin to accept Screen Sharing is enabled. This option is available starting in macOS Big Sur (11). If you have clients running older versions, please deploy the Legacy profile.
#### Privacy Settings Profiles Permissions to allow TeamViewer access rights. **TCC Profile for TeamViewer Host (current):** **[Profile - TeamViewerHost15.fileset](https://kb.filewave.com/attachments/469)** **TCC Profile for TeamViewer Host (Legacy, before macOS Big Sur):** **[Profile - TeamViewerHost15 < macOS Big Sur.fileset](https://kb.filewave.com/attachments/468)** [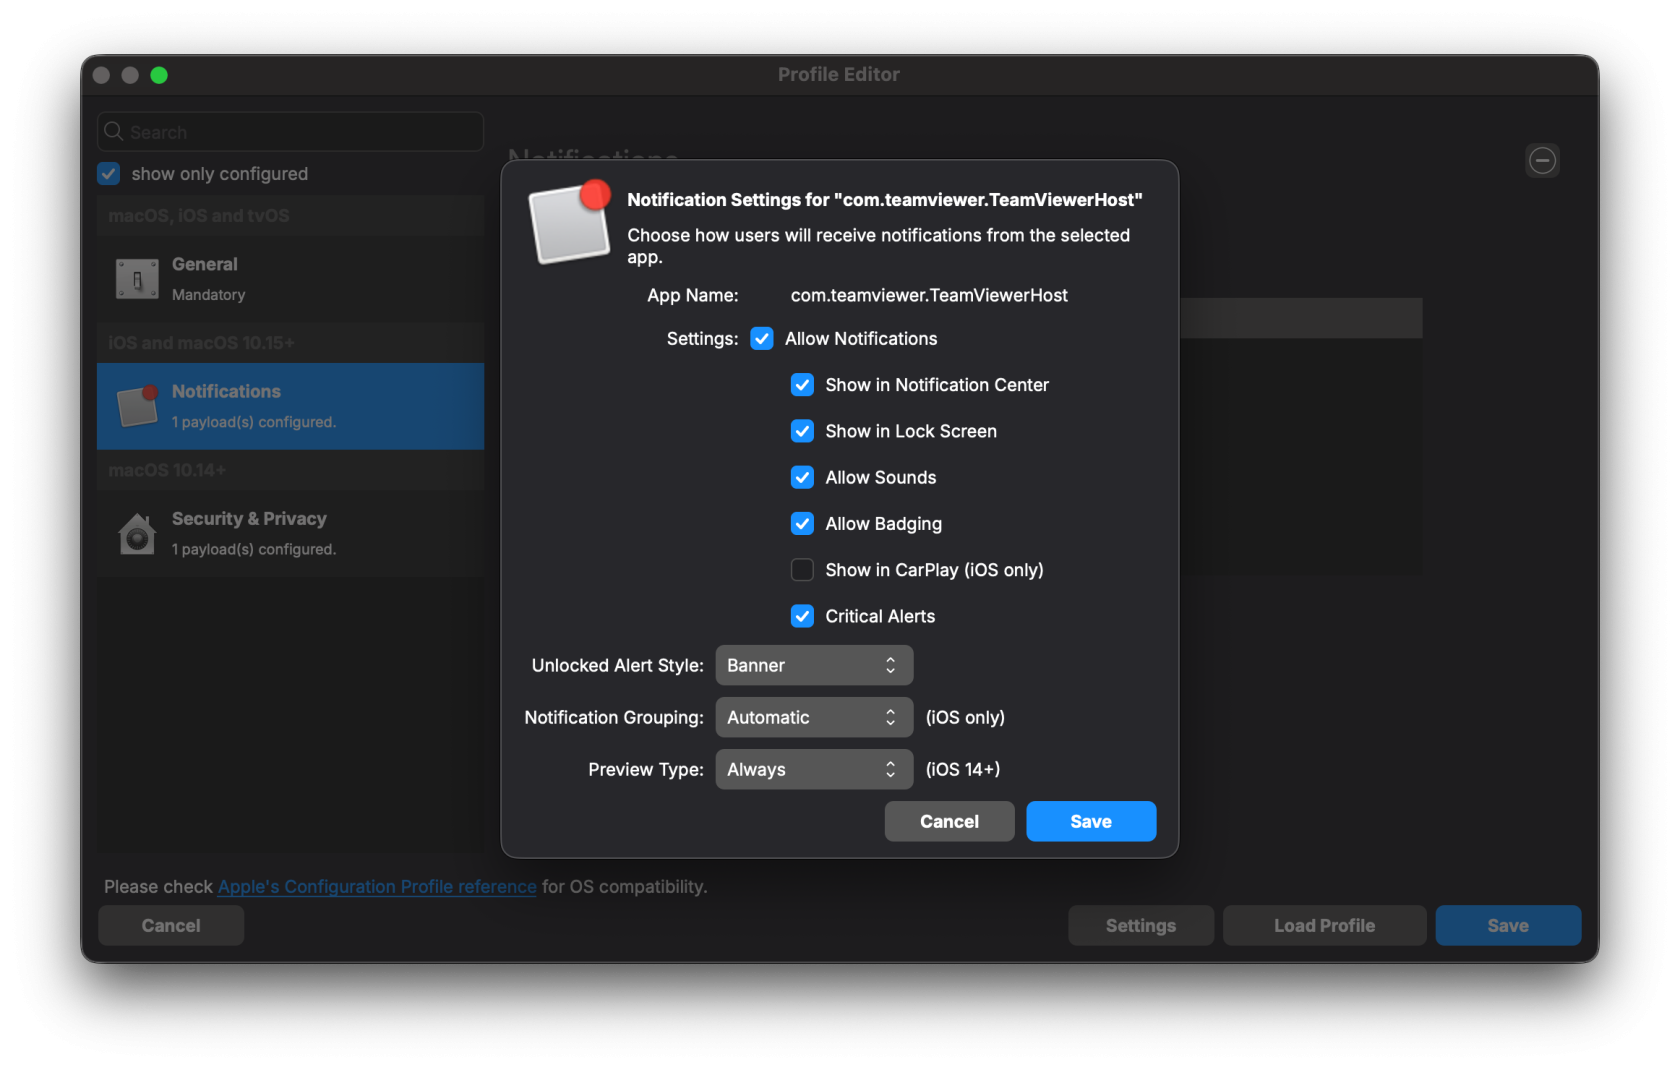](https://kb.filewave.com/uploads/images/gallery/2025-10/qr2ycjEpFMRGcz6o-screenshot-2025-10-07-at-4-57-41-pm.png) [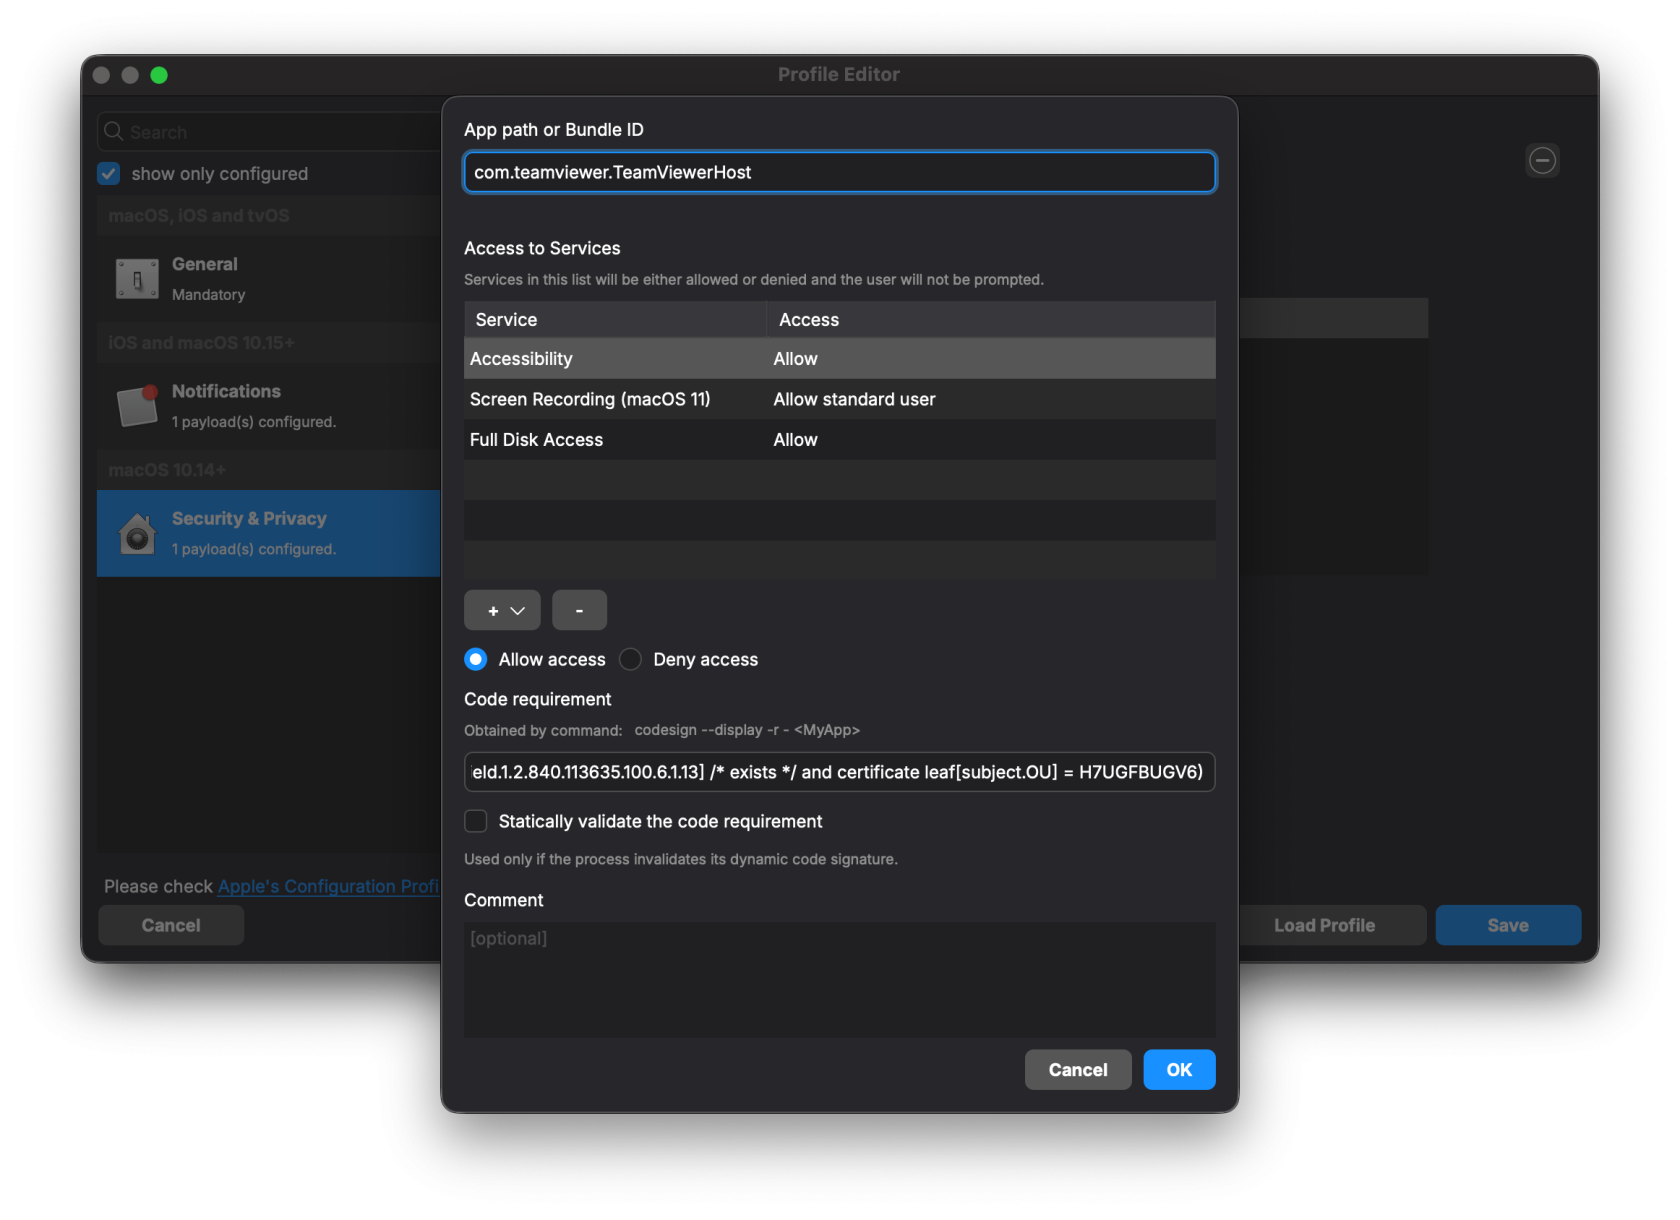](https://kb.filewave.com/uploads/images/gallery/2025-10/IDPSbew6hinKT4Gl-screenshot-2025-10-07-at-4-57-48-pm.png) ### TeamViewer Host Fileset The included Fileset utilizes a settings file, set to install the software silently. This Fileset is current at the time of this article's publishing date. [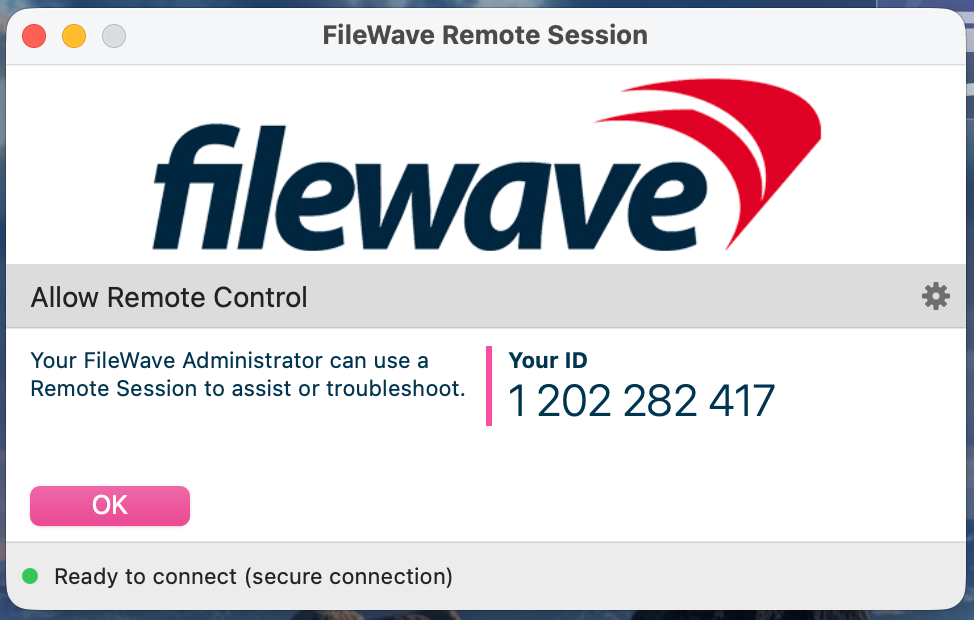](https://kb.filewave.com/uploads/images/gallery/2025-10/q9XIkeDcYL64DsHx-image.png) Current TeamViewer Fileset: **[macOS TeamViewer Host Install 15.70.4.fileset.zip](https://kb.filewave.com/attachments/470)** #### Fileset Contents: [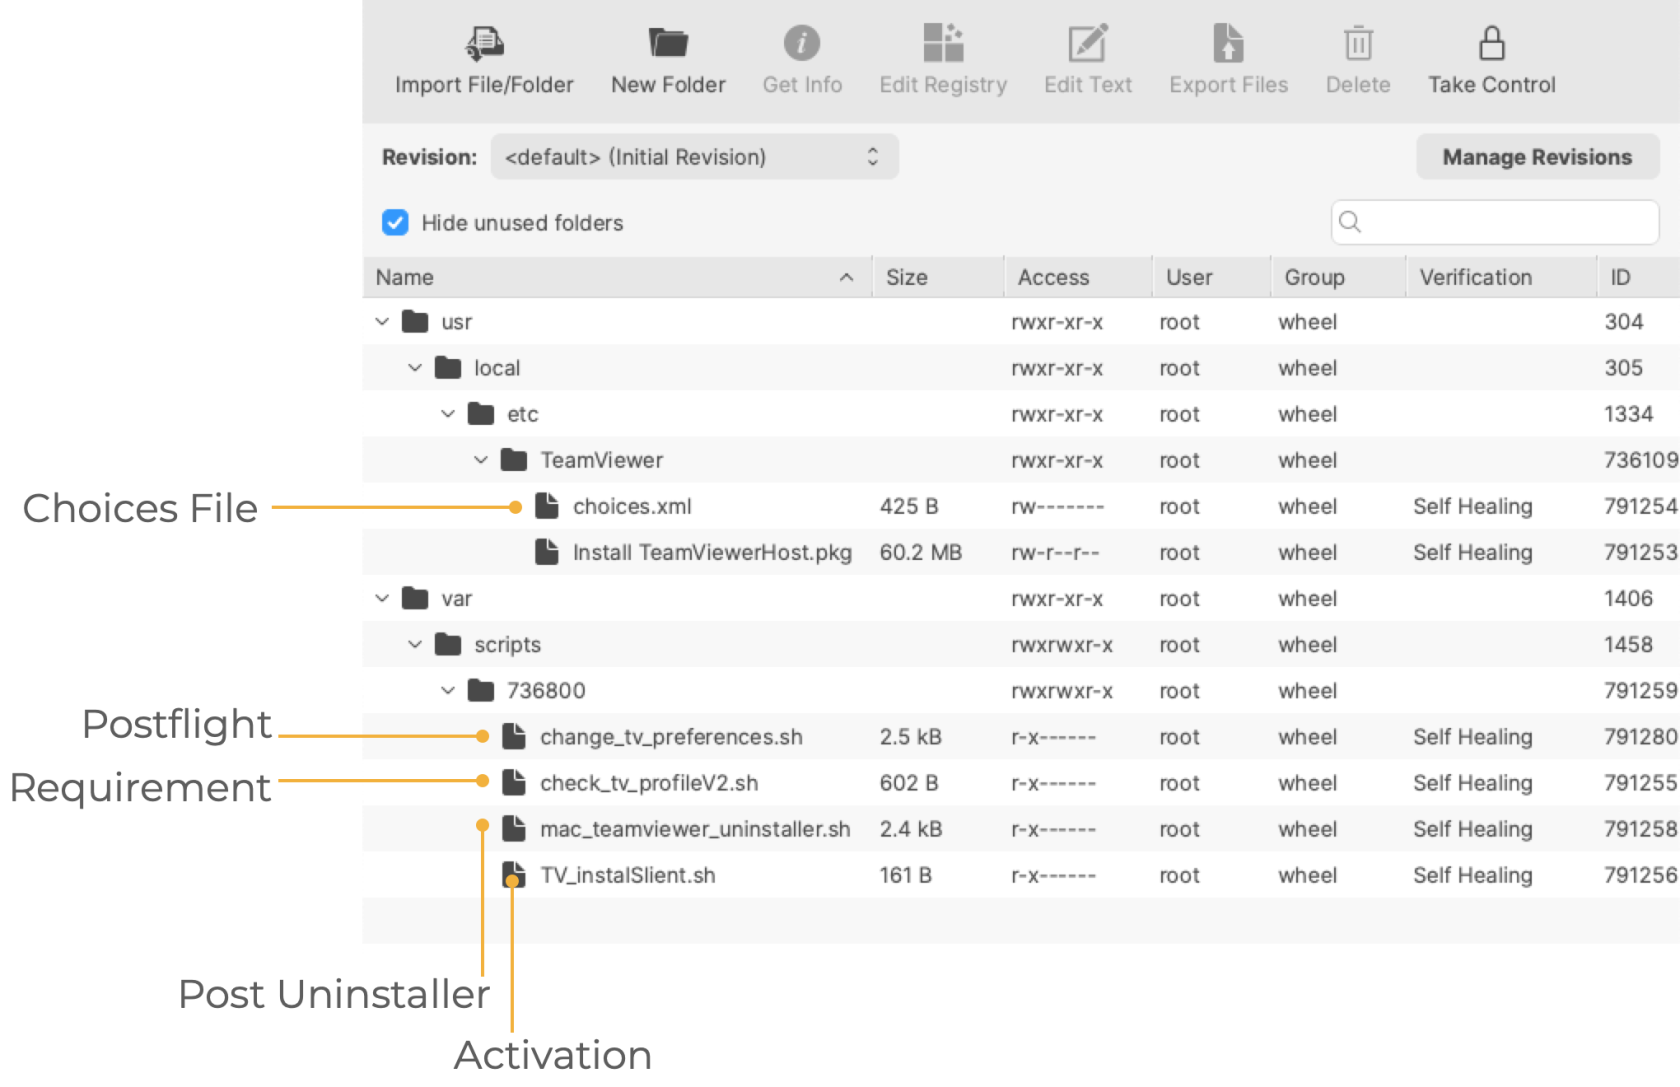](https://kb.filewave.com/uploads/images/gallery/2025-03/2XlZBYLDFNuyrzw2-image.png) The choices.xml file is configured to install the .pkg silently. ##### Requirement Script: Where the software is already installed and services are active, privacy settings payloads subsequently require the service of that software to be restarted after installation. The attached Fileset includes a Requirement Script that checks for profile installation before activating TeamViewer, preventing the need to restart the TeamViewer Host service. The 'check\_tv\_profile.sh' script is designed to recognise one of the two provided Profiles and, once installed, allow activation of the Fileset. If Profiles with a different Profile ID are used instead of those supplied, the script settings will require alteration. - Double-click the Fileset - Select the 'check\_tv\_profile.sh' (located in a numbered subfolder in /var/scripts/) - Choose Get Info > Executable view The Launch Arguments show the two possible Payload IDs, one for the current Profile and one for the legacy profile. No changes are needed if you're only using one Profile. Add in the correct Fileset Profile ID if not using the provided ones. [](https://kb.filewave.com/uploads/images/gallery/2024-04/Zg9Ly21aSi8Abtnz-image.png) ##### Activation Script: The script in this case is installing the PKG. Note that the script allows the specification of the 'choices.xml' file when executed. ``` #!/bin/zsh installer -applyChoiceChangesXML /usr/local/etc/TeamViewer/choices.xml -pkg "/usr/local/etc/TeamViewer/Install TeamViewerHost.pkg" -target / exit 0 ``` ##### Postflight This script provides examples of configuring the TeamViewer Host. Three settings are configured, which may be removed/not changed by selecting the Postflight Script and deleting the file from the Fileset: [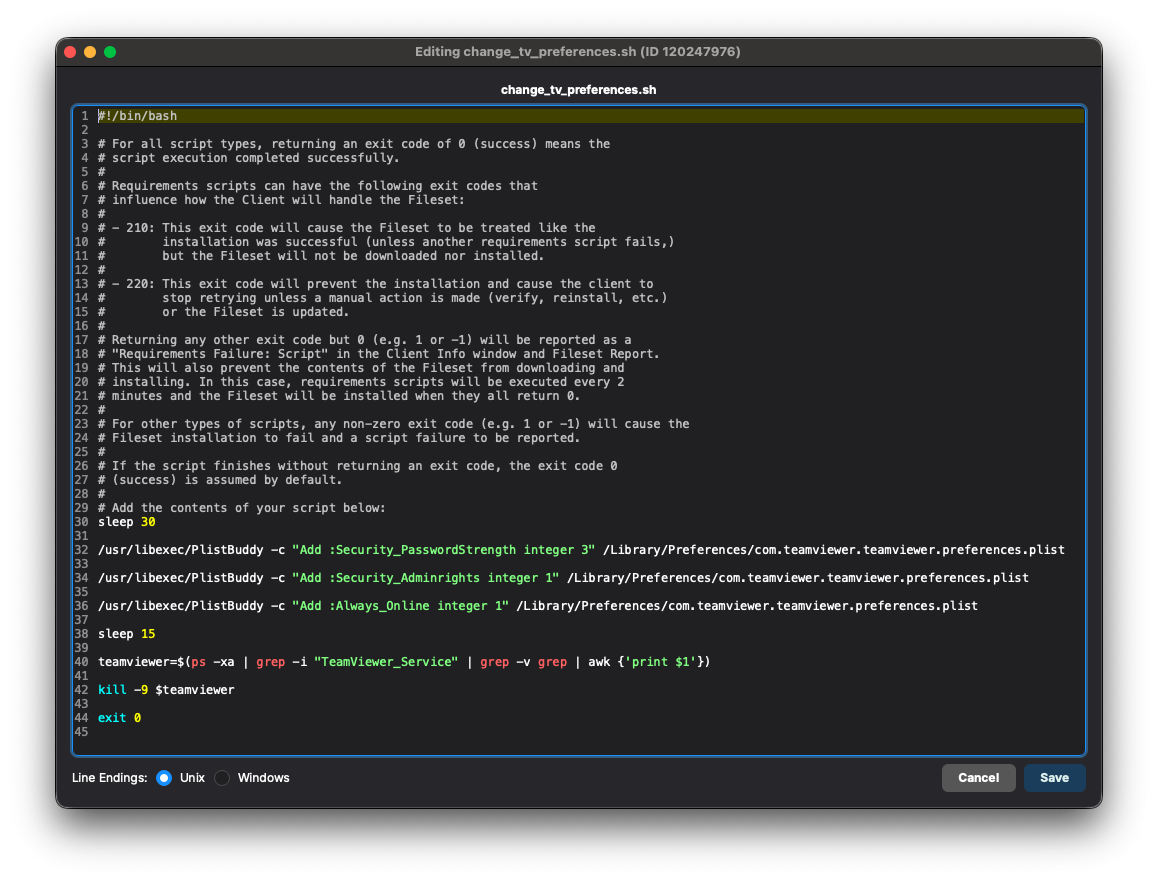](https://kb.filewave.com/uploads/images/gallery/2025-10/r7lCZ0WqZox07ofB-preferences-script.png) Possible Values:| Setting | Value | Outcome |
| Security\_Adminrights | 0 | Any user may change settings |
| 1 (Recommended) | Only administrators may change settings | |
| Security\_PasswordStrength | 3 (Recommended) | No password - Will not allow other devices outside of the FileWave API to connect |
| 2 | 10 Character Password | |
| 1 | 6 Character Password | |
| 0 | 8 Character Password | |
| Always\_Online | 0 | False: TeamViewer will not start again if it's forced to close |
| 1 (Recommended) | True: TeamViewer will start again if it's forced to close |
Setting No Password for password strength prevents anything other than FileWave from connecting to devices through TeamViewer Host.
**Preference changes require TeamViewer to reload:** `Security_Adminrights` is still used by the TeamViewer Host configuration shown here, but TeamViewer must restart or the device must reboot before a newly written preference is enforced. If standard users can still edit settings immediately after deployment, restart TeamViewer Host, verify the latest Fileset/Profile package is installed, then test again.
##### Post-Uninstallation Script: The 'mac\_teamviewer\_uninstaller.sh' script uninstalls TeamViewer if an association or deployment no longer exists. ### Updates The software should auto-update to the latest version. If you would like the latest installer, you can download it from [https://go.filewave.com/tvhost](https://go.filewave.com/tvhost). If you're on a macOS system, the PKG will download. If you're on Windows, the EXE will download.Don't forget to upgrade the full TeamViewer version on the Admin device.
## Related Content - [TeamViewer macOS Mass Deployment Guide](https://community.teamviewer.com/English/kb/articles/50739-mass-deployment-on-macos) - [Latest TV Host (Download from macOS or Windows to get that platform's installer)](https://go.filewave.com/tvhost) # TeamViewer: Windows Client Setup ## What FileWave's TeamViewer integration requires endpoint prerequisites on each supported platform. In future versions, we may embed some of these prerequisites, but at this time, we err on the side of letting you control the elements. So, slightly more work but much greater control. ## When/Why We'll need to meet the prerequisites for Windows client devices for TeamViewer to work seamlessly. We'll need the following: - [TeamViewer Pre-Requisites](https://kb.filewave.com/books/teamviewer/chapter/teamviewer-pre-requisites "TeamViewer Pre-Requisites") are met, ensuring that clients are set to allow remote control - **TeamViewer Full Application** installed on computers running FileWave Central (Native) or Anywhere (Web) - **TeamViewer Host Application** is installed on devices to be controlled.The required TeamViewer Host installer is bundled in the below-provided Fileset and pre-configuration by way of a 'tvopt' file
The host version of TeamViewer does not provide the ability for users to control other devices.
## How ### TeamViewer Full Application The computer used to view/control devices will require the full version of TeamViewer and may be downloaded from the TeamViewer site: [https://www.teamviewer.com/en-us/download/](https://www.teamviewer.com/en-us/download/windows/) ### TeamViewer Client The installer is actioned with scripts inside the provided Fileset, configured to ensure the installation is silent, including: - Disabling the prompt to configure Unattended Access - Removing the desktop icon - Requires an Admin account to change settings **Current TeamViewer Fileset: [Windows TeamViewer Host v15.70.3.fileset.zip](https://kb.filewave.com/attachments/471)**TeamViewer Host MSI download requires an account with TeamViewer. FileWave includes the MSI within the Fileset, but this should not be exported and redistributed. FileWave will aim to update the Fileset periodically to include newer versions of TeamViewer.
If there is a need to update before FileWave has provided a newer version, the download of the latest version of TeamViewer Host is only available publicly as an EXE: - [Windows TeamViewer Host 64-bit](https://download.teamviewer.com/download/TeamViewer_Host_Setup_x64.exe) - [FileWave Branded TV Host (Click on a Windows system)](https://go.filewave.com/tvhost) If downloading the EXE, a new Fileset should be created using the EXE to upgrade.Disassociation of the Fileset will uninstall TeamViewer Host with a pre-uninstallation script.
#### Customization The Fileset provided has an example 'tvopt' file, which will customize the installation if left as is. If no customization is desired, this file may be removed. Alternatively, it is possible to upload an alternate 'tvpopt; file, preset as desired. Example file 'example.custom.tvopt' highlighted in the image. Add a built file into the same directory called 'custom.tvopt' to override this; the 'example.custom.tvopt' may be left behind or removed. 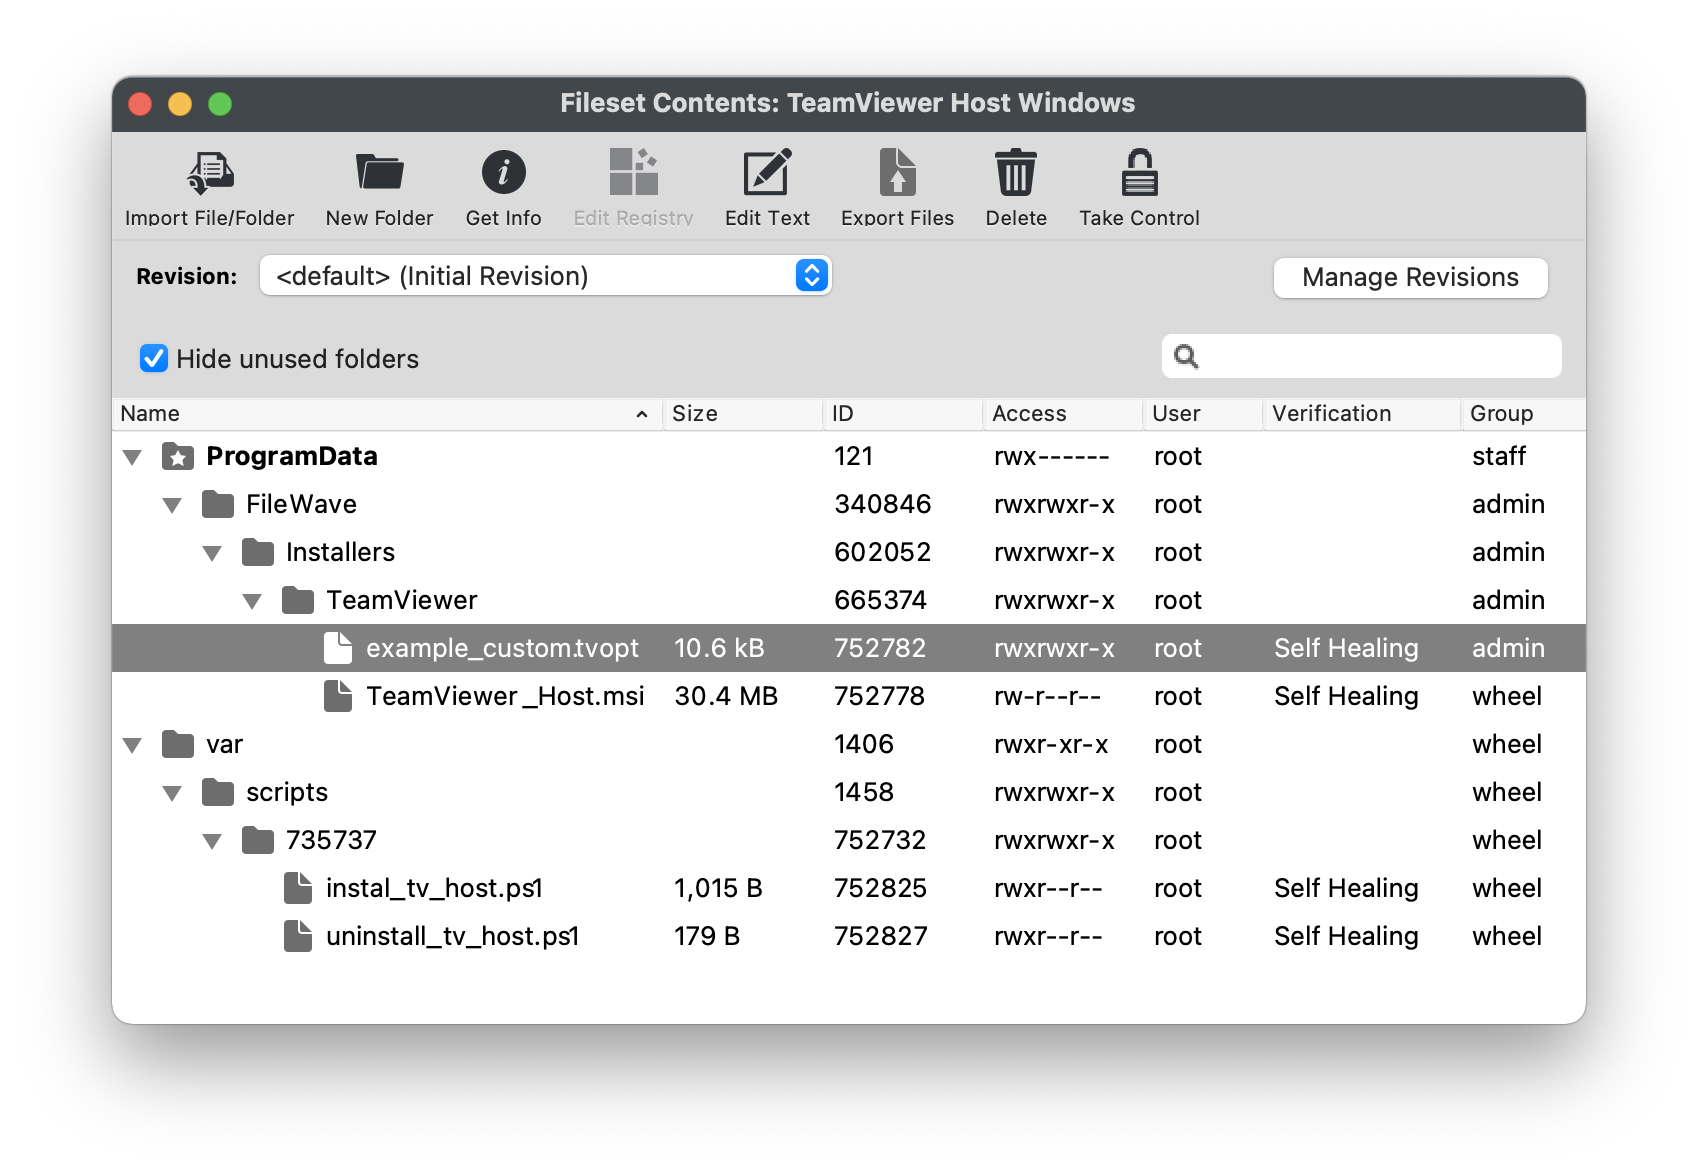 #### Create Custom 'tvopt' Follow the example instructions below to create a TeamViewer Host custom settings file for enforcement at the time of installation.The TeamViewer Host app can be customized and secured to: \* Prevent users from connecting to their own devices remotely. Connections will only be possible via FileWave \* Blocking users from editing the settings by protecting them with a password.
For example, to secure the TeamViewer Host app and export its settings: 1. Install the TeamViewer Host component on a test device. 2. Launch it from the TeamViewer icon in the system tray, edit the settings and set the following options: - Security > Random password (for spontaneous access) > Password strength=Disabled (no random password) - Advanced > TeamViewer options > Changes require administrative rights on this computer - Set Options/Confirm password fields 3. Click the Export button at the bottom of the Advanced options sections on the right. Save it as 'custom.tvopt'. - Check Export user-specific settings as default for all users 4. Drag the 'custom.tvopt' file into the Fileset within the same directory as the current example file and installer MSI 5. Test before deploying en masse TeamViewer also provides guidance here on mass deployment that may be helpful: [https://community.teamviewer.com/English/kb/articles/39639-mass-deployment-on-windows](https://community.teamviewer.com/English/kb/articles/39639-mass-deployment-on-windows) # TeamViewer: Android EMM Client Setup ## What FileWave's TeamViewer integration requires endpoint prerequisites on each supported platform. In future versions, we may embed some of these prerequisites, but at this time, we erred on the side of letting you control the elements. So, slightly more work but much greater control. ## When/Why TeamViewer’s full application for Windows can be found here: [https://www.teamviewer.com/en-us/download/windows/](https://www.teamviewer.com/en-us/download/windows/). For macOS, here: [https://www.teamviewer.com/en-us/download/mac-os/](https://www.teamviewer.com/en-us/download/mac-os/). You will need to run that on the device that runs the FileWave Administrator console or WebAdmin. For your clients, the below steps discuss the deployment. We'll need to meet prerequisites for Android client devices for TeamViewer to work seamlessly. We'll need the FileWave companion app to be upgraded to at least 14.7, and we'll want to deploy the TeamViewer QuickSupport and add-on applications as well.| Component | Install? | Notes |
| Android EMM Companion App (FW Client App) | \* Yes | Auto-deployed |
| TeamViewer QuickSupport App (Google Play Store) | \* Yes | [Details](https://play.google.com/store/apps/details?id=com.teamviewer.quicksupport.market), which can be deployed as a FileWave Fileset: [Play Store App - TeamViewer QuickSupport.fileset.zip](https://kb.filewave.com/attachments/190) |
| TeamViewer Add-On (Google Play Store) | \* Yes | The add-on is required for device control (typing, screen clicks, etc)...and is specific to each type of Android device, reference the article linked to from the How section below for specifics about best practices for deployment |
FW Client App must be able to both resolve the server DNS name and reach the server since communication from this App is direct to the server, not via Google. Without this communication, the version of FW Client will not be updated on the server and the option to 'Open Remote Session' will be greyed out.
## How There are two elements we need to deploy to support TeamViewer on Android EMM devices: - The TeamViewer QuickSupport App, which provides basic TeamViewer viewing capabilities, and - The TeamViewer QuickSupport Add-On tool, which provides the ability to control the endpoint's cursor and keyboard To keep the distribution simple and elegant, we'll probably want to build a structure that looks something this: [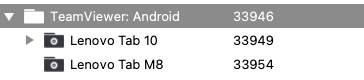](https://kb.filewave.com/uploads/images/gallery/2023-07/eA5qEmA2n3V5Isz4-image.png)Note that you could also publish all of the apps needed to the Play Store Kiosk on the devices as well, but we feel that would be pretty cluttered for the users of the devices, albeit simpler for the FileWave admin.
In our structure, the top-level group is just a manual group, and we will assign the Fileset (Payload) for the TeamViewer QuickSupport app here. Below that top-level group we'll create groups for ***each*** type of Android device we have. The add-on is device-specific, therefore we will create a smart group for each device type based on the ***Device Product Name*** field. [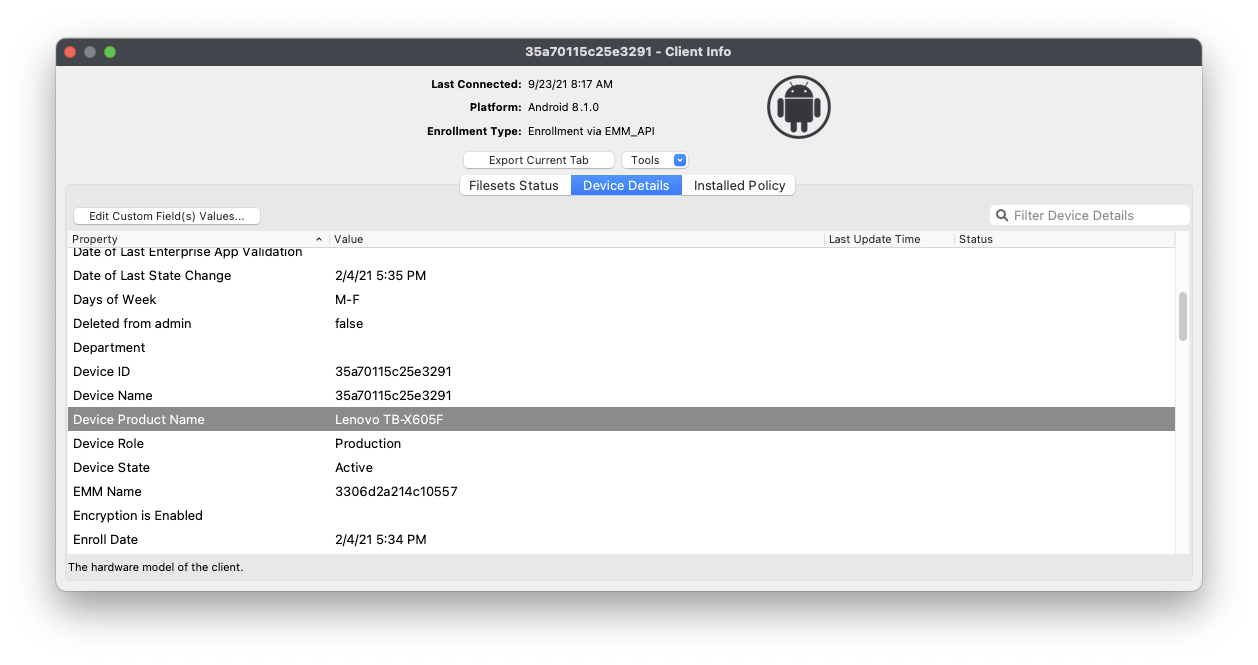](https://kb.filewave.com/uploads/images/gallery/2023-07/xXouthust1xPtx9D-image.png) In the case of the Lenovo M10 tablet, the product name is "Lenovo TB-X605F", so we created a Smart Group based on Device Product Name matching that exact name. Because this group is a smart group all M10 tablets will automatically be included and, therefore will have the QuickSupport app assigned from the group above, which addresses our first pre-requisite.Remember, you can duplicate a smart group by right-clicking and choosing "Duplicate"...this makes it much simpler to add multiple similar smart groups.
Now, for the Add-On installation...it is a bit more complicated because we don't know which add-on fits our device best. In this case, it is best just to cheat and let the TeamViewer QuickSupport app recommend the add-on to install on a sample device. In our case, it recommends an add-on for the x705F, found here: [https://play.google.com/store/apps/details?id=com.teamviewer.quicksupport.addon.lenovo\_tb\_x705f](https://play.google.com/store/apps/details?id=com.teamviewer.quicksupport.addon.lenovo_tb_x705f) So, we'll now create a Fileset for that app. and assign it to the appropriate smart group. Then, rinse and repeat for each device type, which hopefully won't be too many.There is also a Universal Add-On available, but at least in our testing, the device-specific add-ons worked best.
On initial setup, the option for starting a remote control session for an Android can be delayed to allow synchronization between FileWave/Google. This is only at the setup of the device though and should complete within 15-30 minutes maximum.
# TeamViewer: Creating a new session # Start a TeamViewer Remote Session ## **What** A FileWave administrator can start a TeamViewer remote support session from a supported device record after the TeamViewer integration, client permissions, and administrator permissions are configured. ## **When to use it** Start a session when a technician needs attended or approved unattended access to troubleshoot a managed endpoint. ## **Start the session** In FileWave Central or FileWave Anywhere, open the context menu for a device that reports a supported TeamViewer state and choose **Remote Session**. The administrator must have remote-session permission. On macOS and Windows, **Remote Session (Don't Prompt User)** appears only when the FileWave Client allows managed remote control without a user prompt. A [Superprefs Fileset](https://kb.filewave.com/books/filewave-client/page/superprefs-fileset "Creating a Superprefs Fileset") can manage these client settings.  ### Computer Client preferences The available session choices depend on two settings under **FileWave Client Preferences > Privacy**: - **Managed remote control** enables or disables TeamViewer remote sessions for the client. - **Prompt client for remote control access** requires the user to approve a session. When prompting is enabled, FileWave offers only the prompted session. When prompting is disabled, the context menu can offer both **Remote Session (Prompt User)** and **Remote Session (Don't Prompt User)**.  Use a [Superprefs Fileset](https://kb.filewave.com/books/filewave-client/page/superprefs-fileset "Creating a Superprefs Fileset") to configure these settings across managed computers. Test the intended prompt behavior on a pilot device before allowing unattended sessions more broadly. The screenshots above show the prompted and unprompted context-menu choices in FileWave Central and FileWave Anywhere. Start the session from a macOS or Windows administrator workstation with TeamViewer installed. FileWave opens `get.teamviewer.com` in a browser, which then asks to launch the installed TeamViewer app. Allow the pop-up or external-application prompt if the browser blocks it. [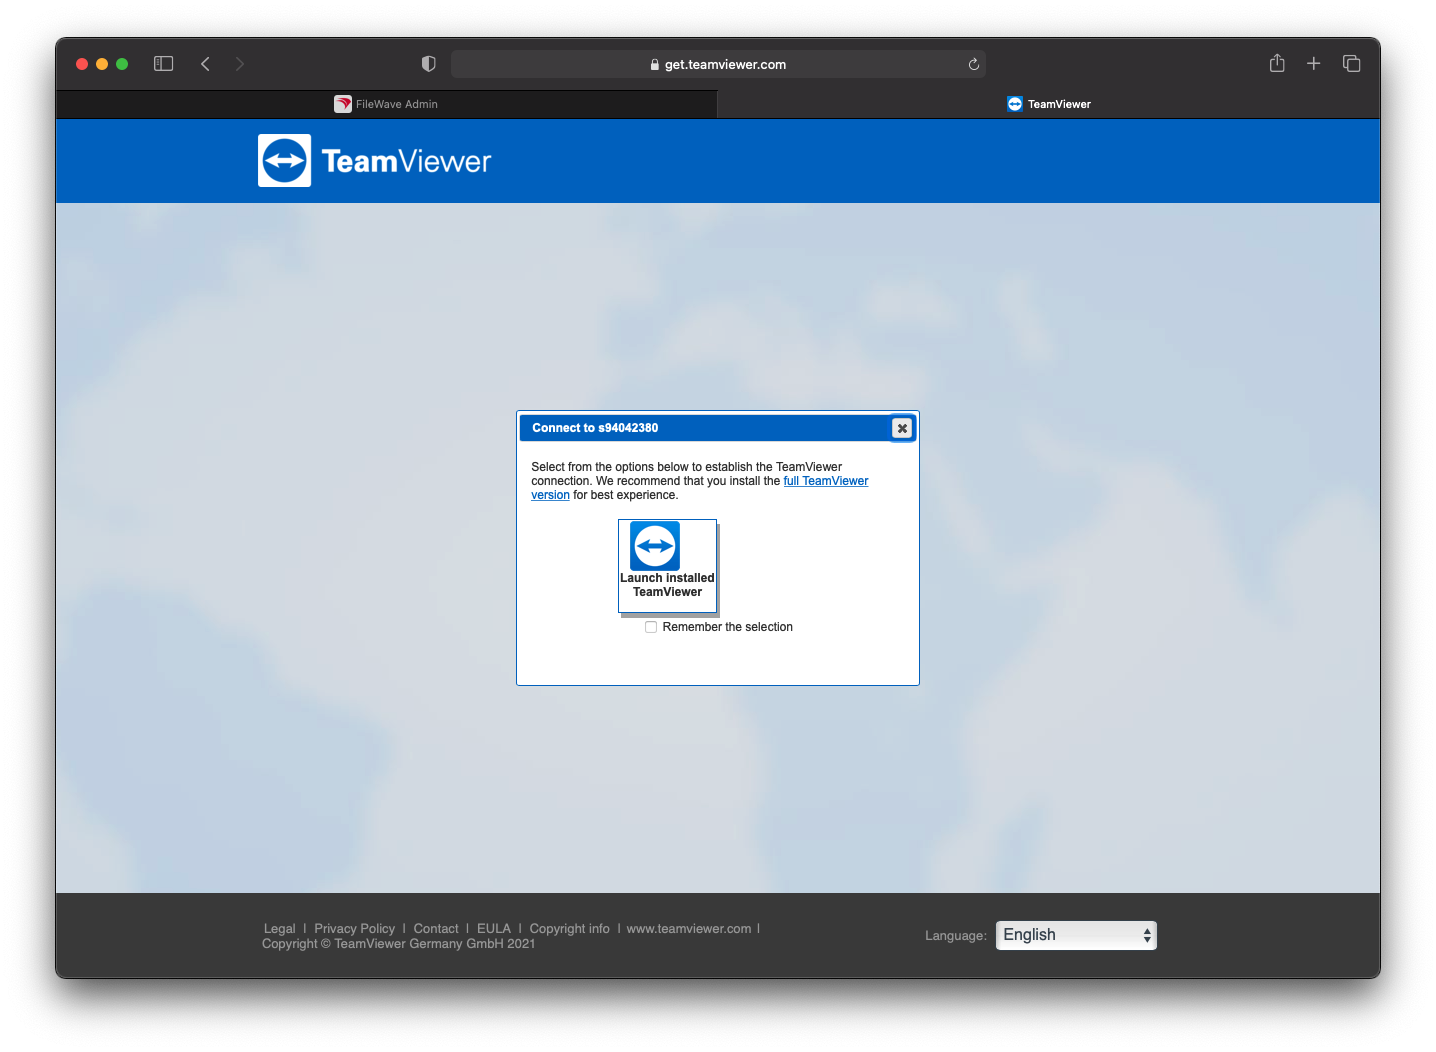](https://kb.filewave.com/uploads/images/gallery/2023-06/bZrVYj37plSLPZ9N-tv1.png) You can remember the browser choice for later sessions. Choose the installed TeamViewer application to continue: [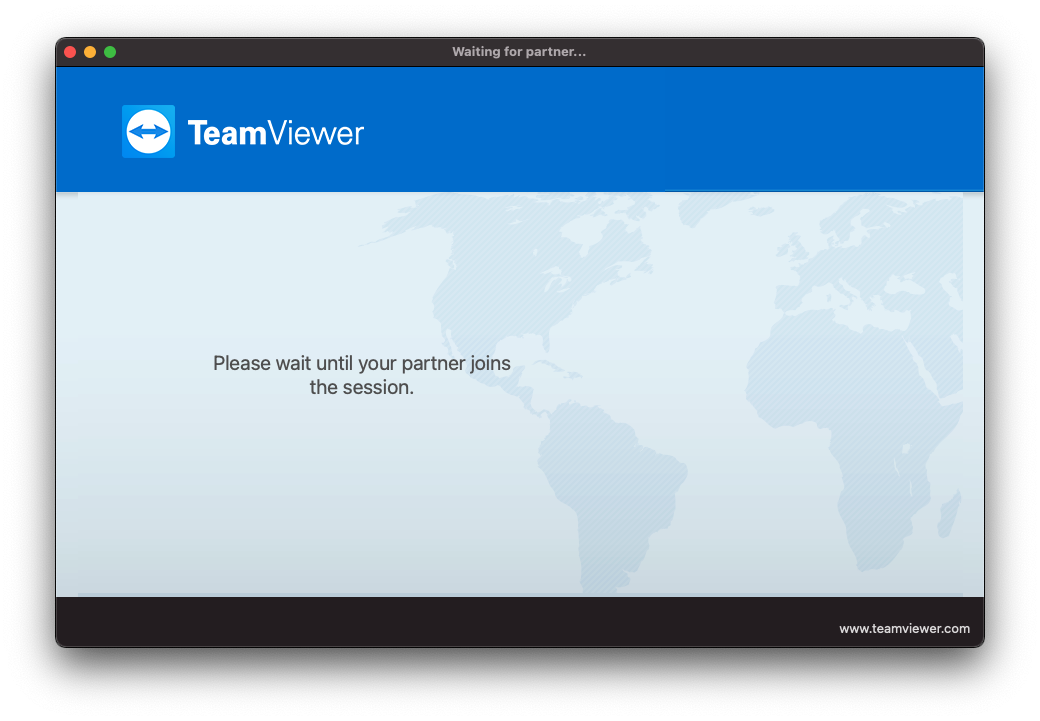](https://kb.filewave.com/uploads/images/gallery/2023-06/qmrtR7Us1wPvjrBd-tv2.png) For a prompted session, TeamViewer waits for the remote user to accept. After acceptance, the technician is redirected into the session. The request times out if the user does not respond. # TeamViewer: Android EMM Session Overview ## **What** This article picks up from the administrator requesting a remote control session through TeamViewer. It presumes that all device pre-requisites are already met.TeamViewer support for Android EMM sessions requires the current FileWave Companion app.
## **When/Why** We'll usually create a remote session to try to resolve some type of support issue on a remote device. When we begin the remote session with an Android device, it is important that we know how it behaves on the remote endpoint so that we can assist the end user if need be. ## **Behavior** Once the device receives the remote session notification (think of this as an alert to the device to begin a session), the FileWave EMM app will receive a notification to the device. But note, this notification (a behavior of the OS) is somewhat subtle...It plays a notification sound and shows an icon at the top of the window. Opening the notification will show the prompt for the session: 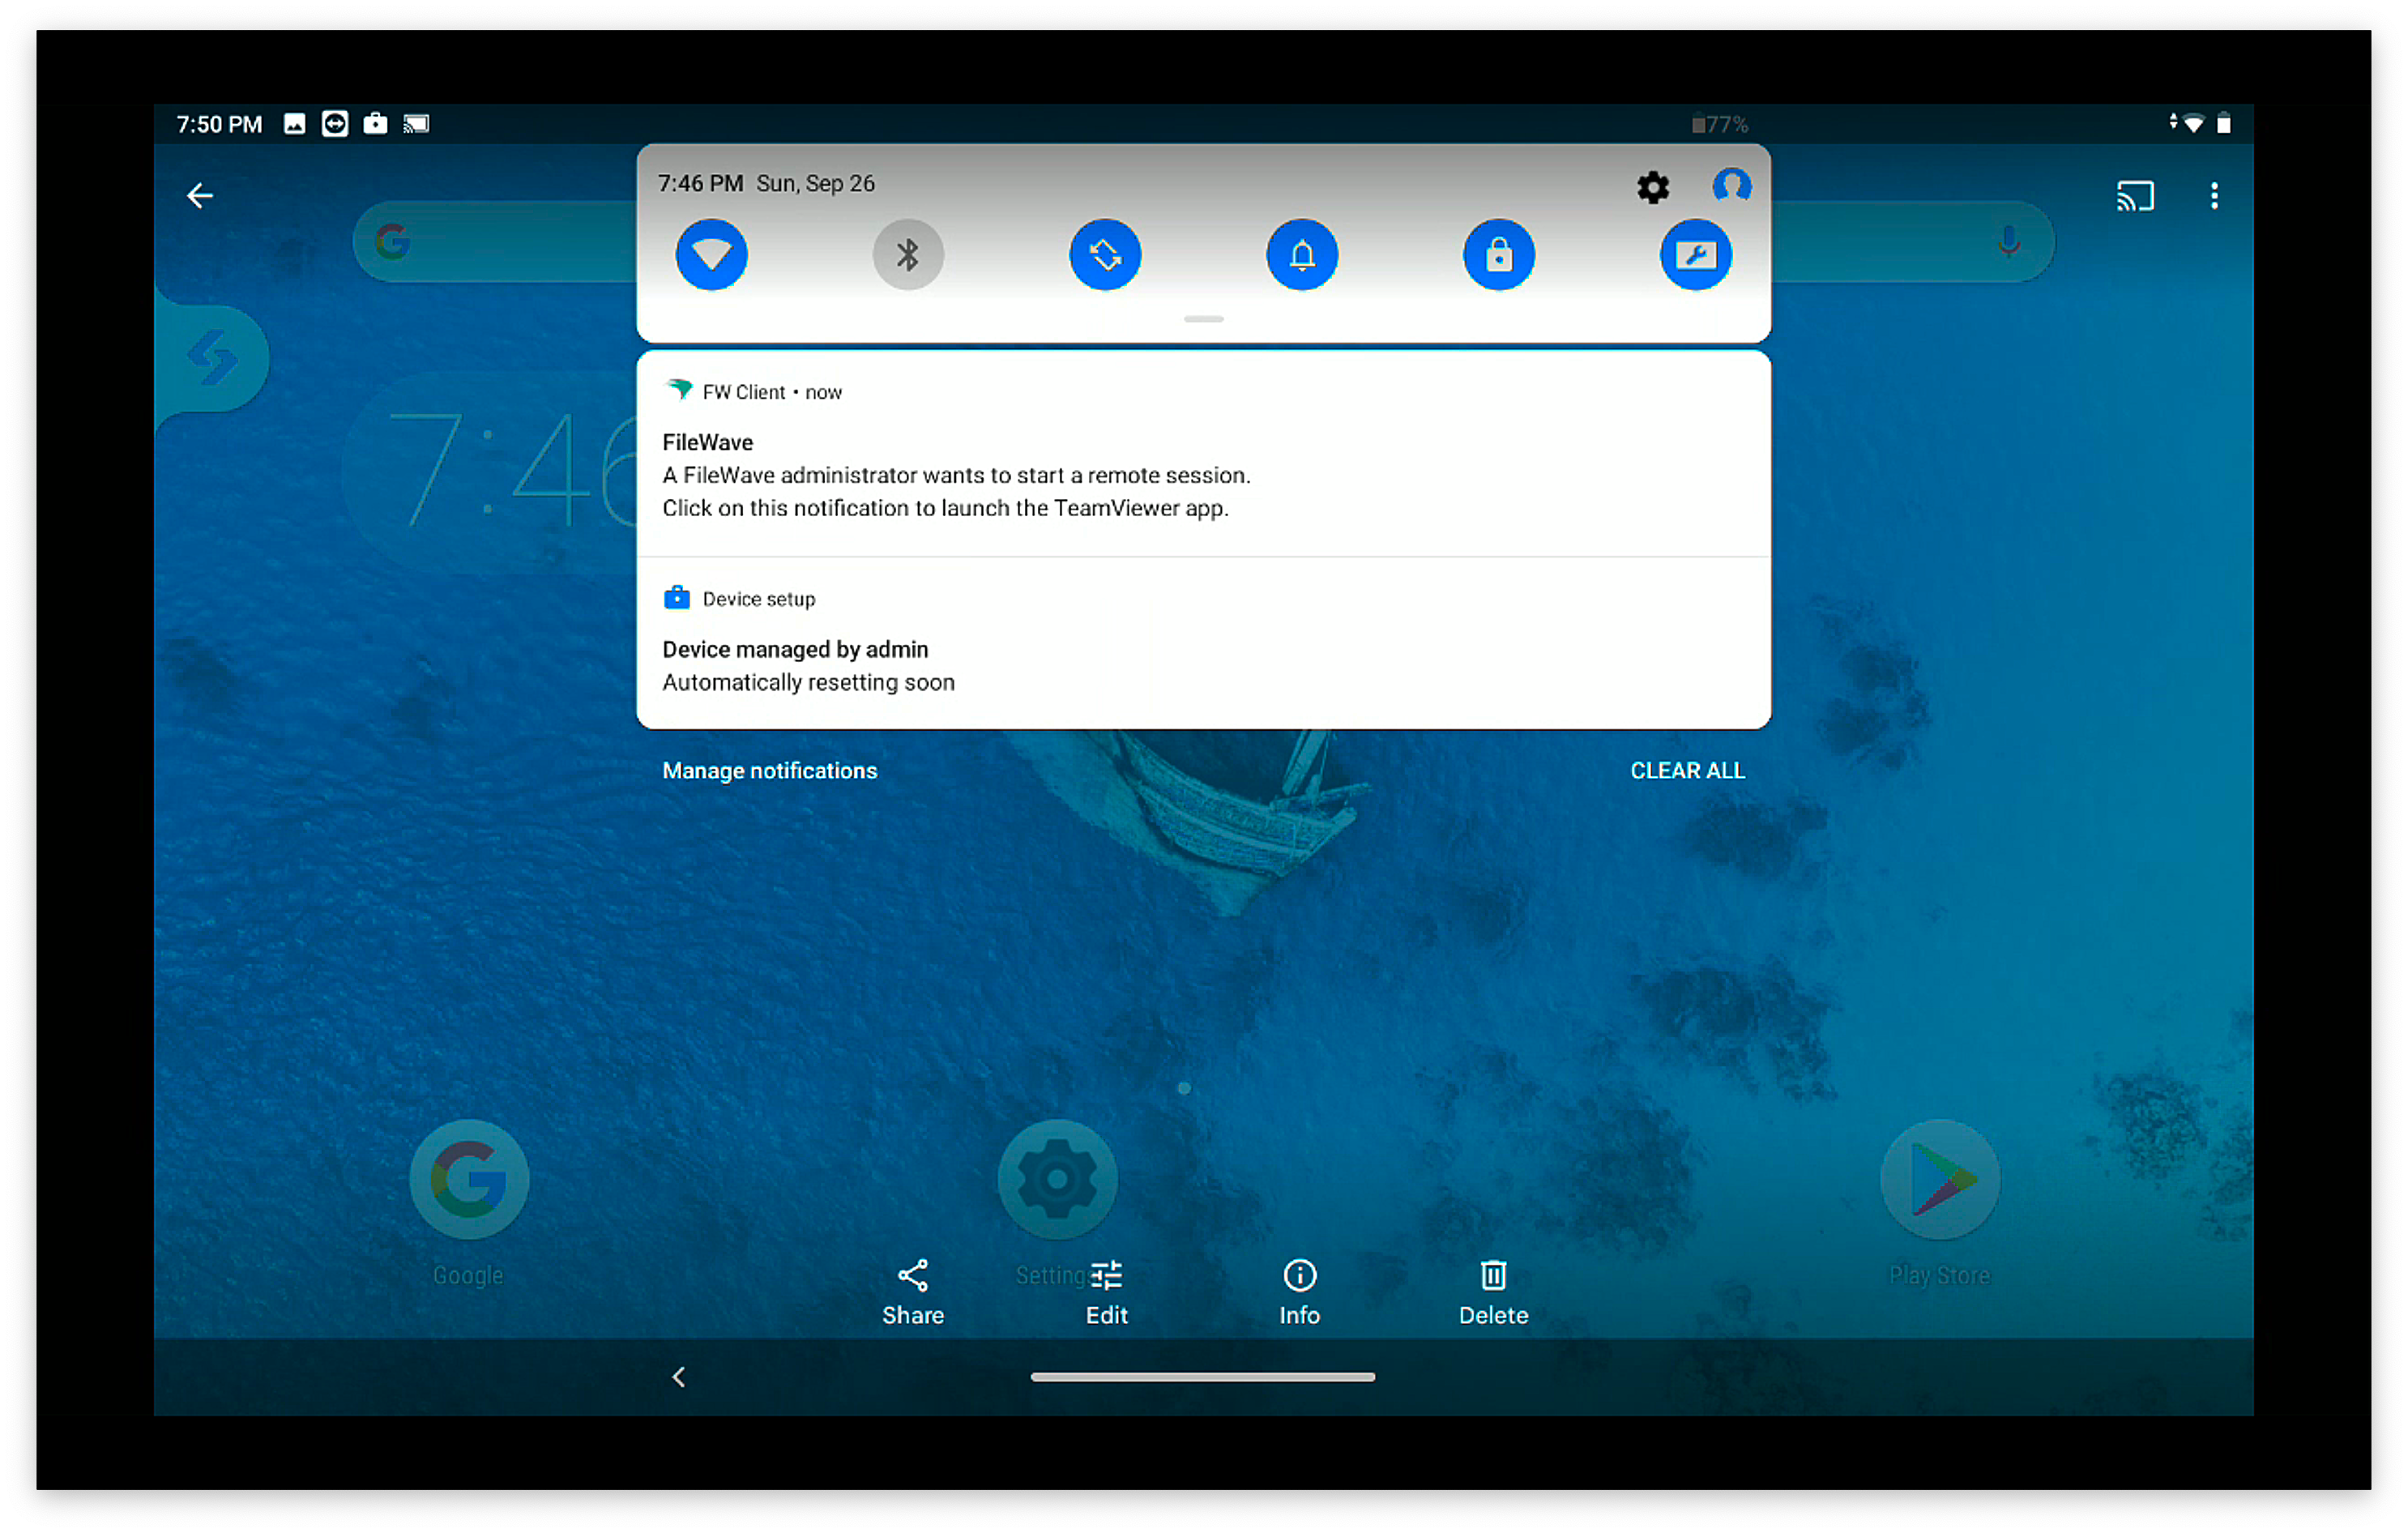 When that notification is acknowledged, the TeamViewer QuickSupport App will open to start a remote session. 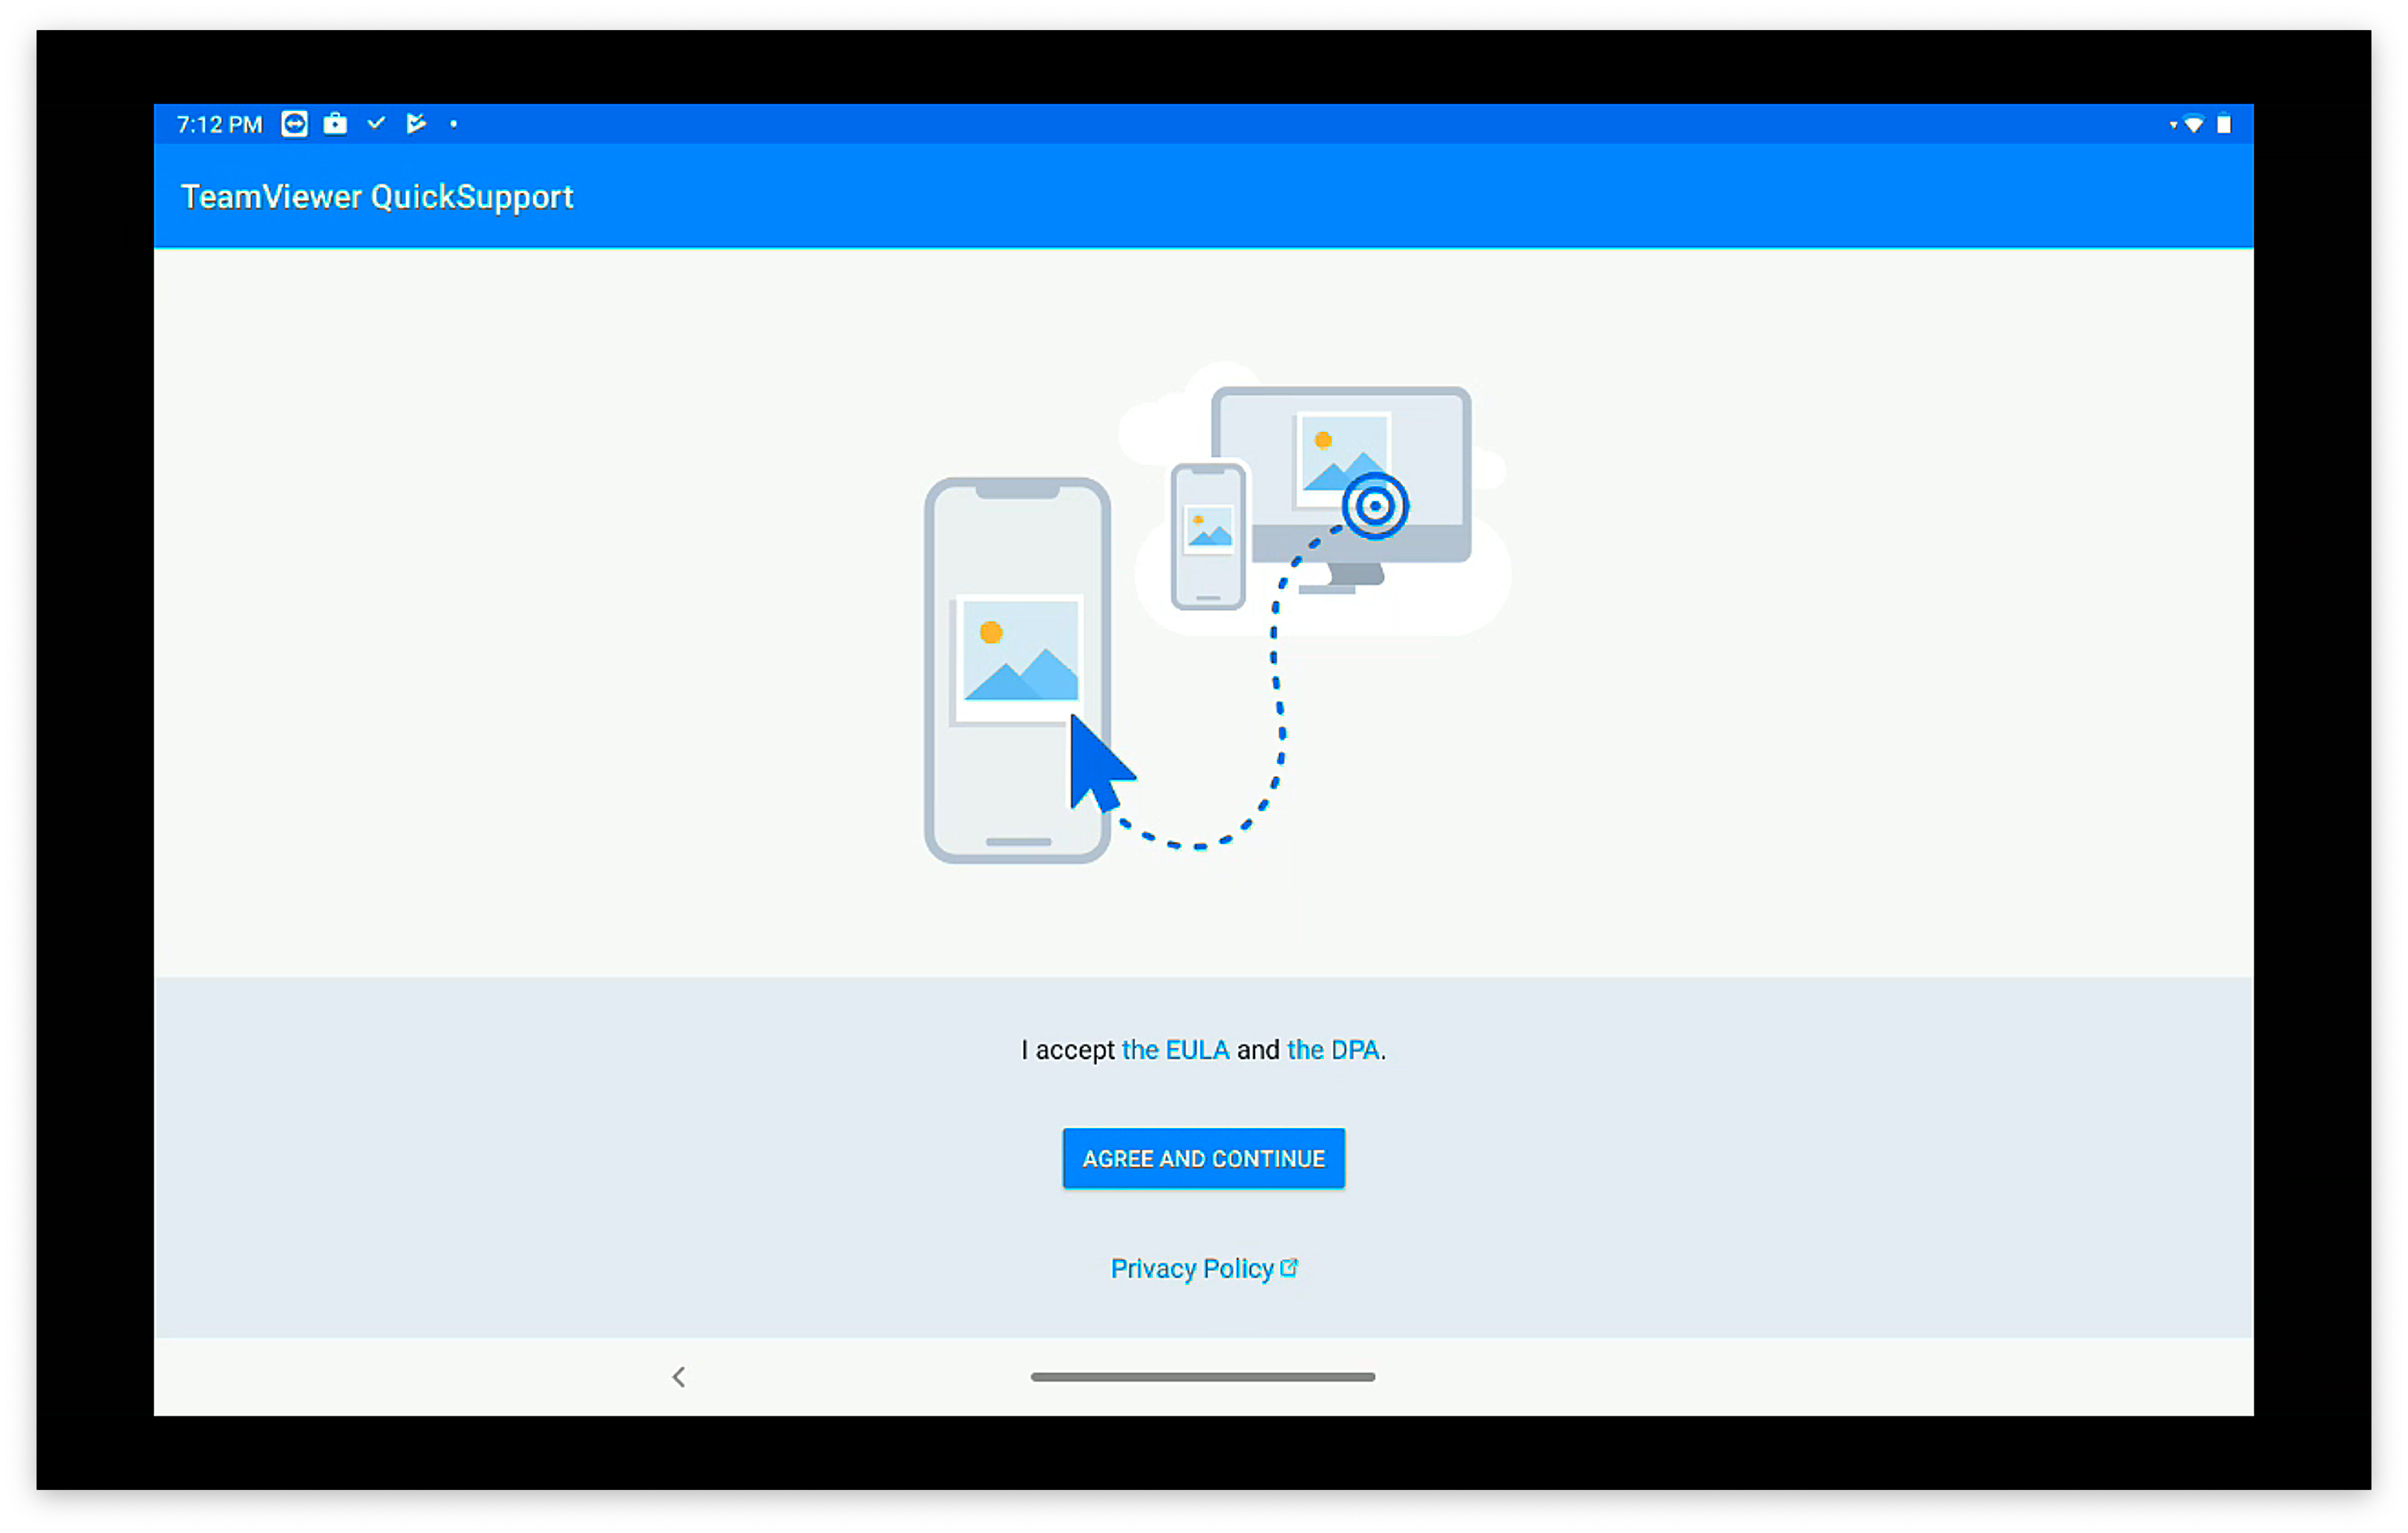On first launch, the QuickSupport app will prompt the user to accept the EULA as shown above
The FileWave EMM companion App **MUST** be running for the initial notification to be received by the device.
Once the EULA is agreed to (one time prompt), then the client-side session will begin:  When the administrator's TeamViewer is also running, then the user will be prompted to allow this specific session (for attended access): 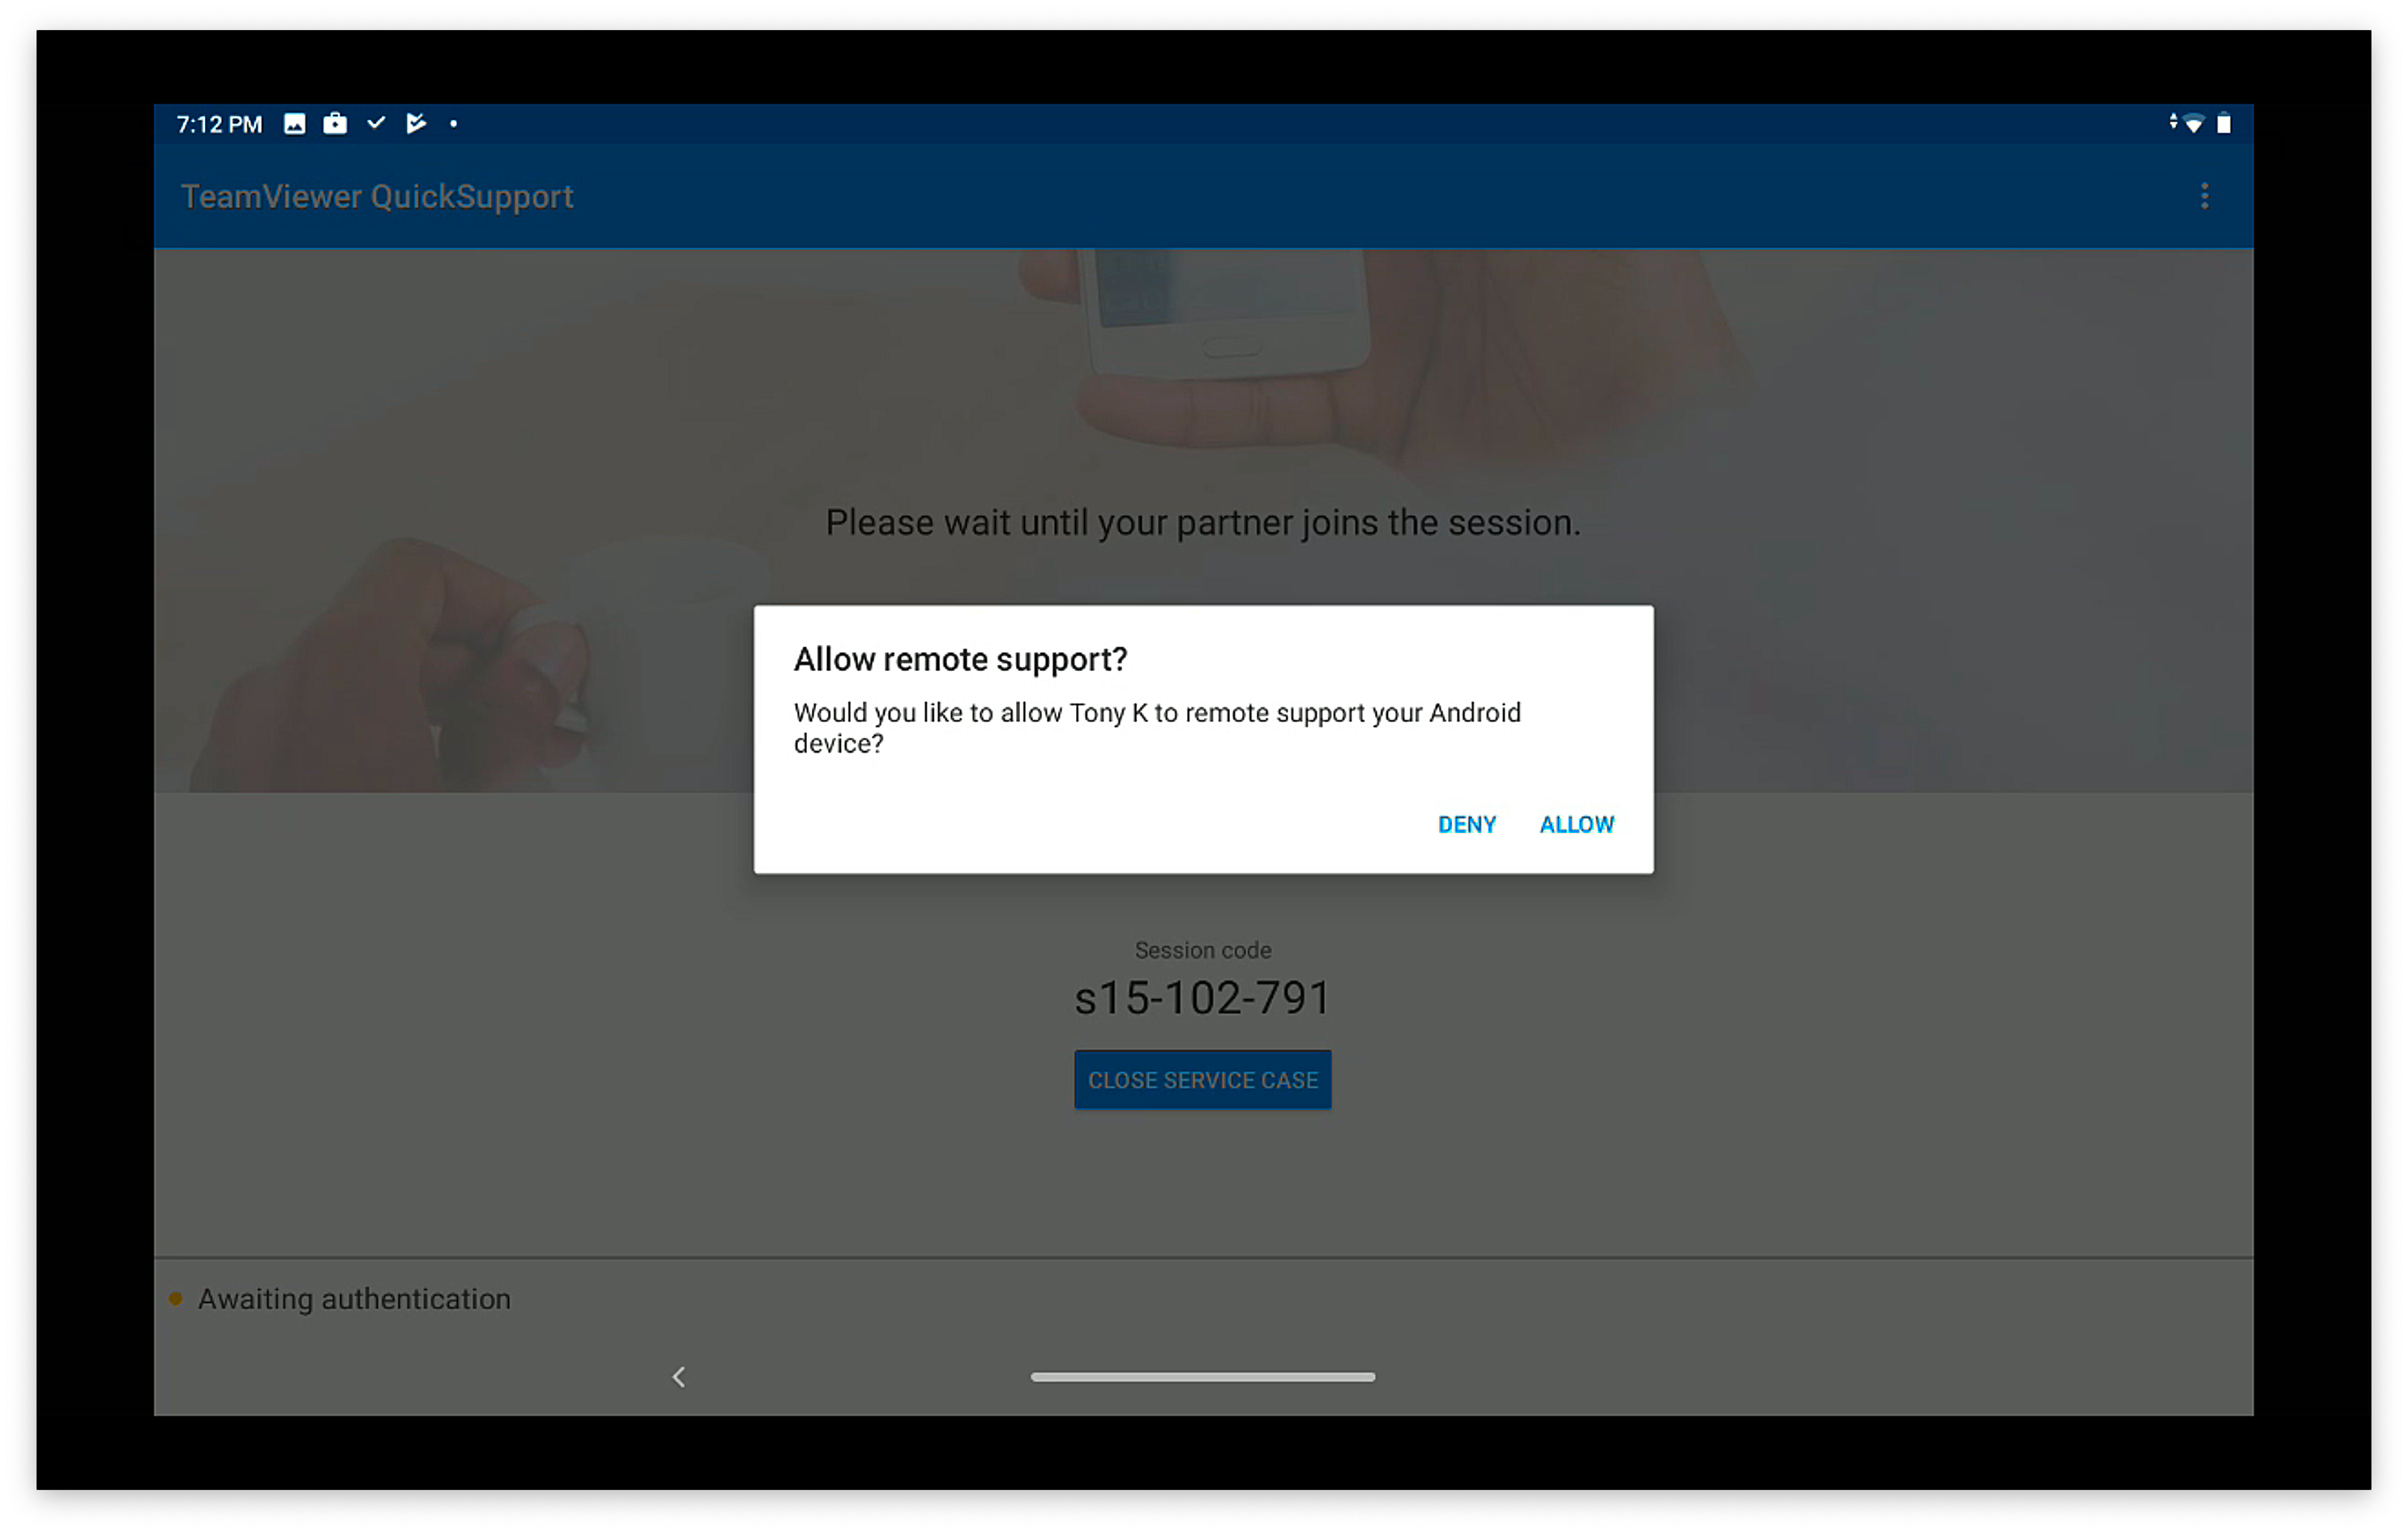 Once each of the above are completed, the remote session will look like this from the admin's machine: 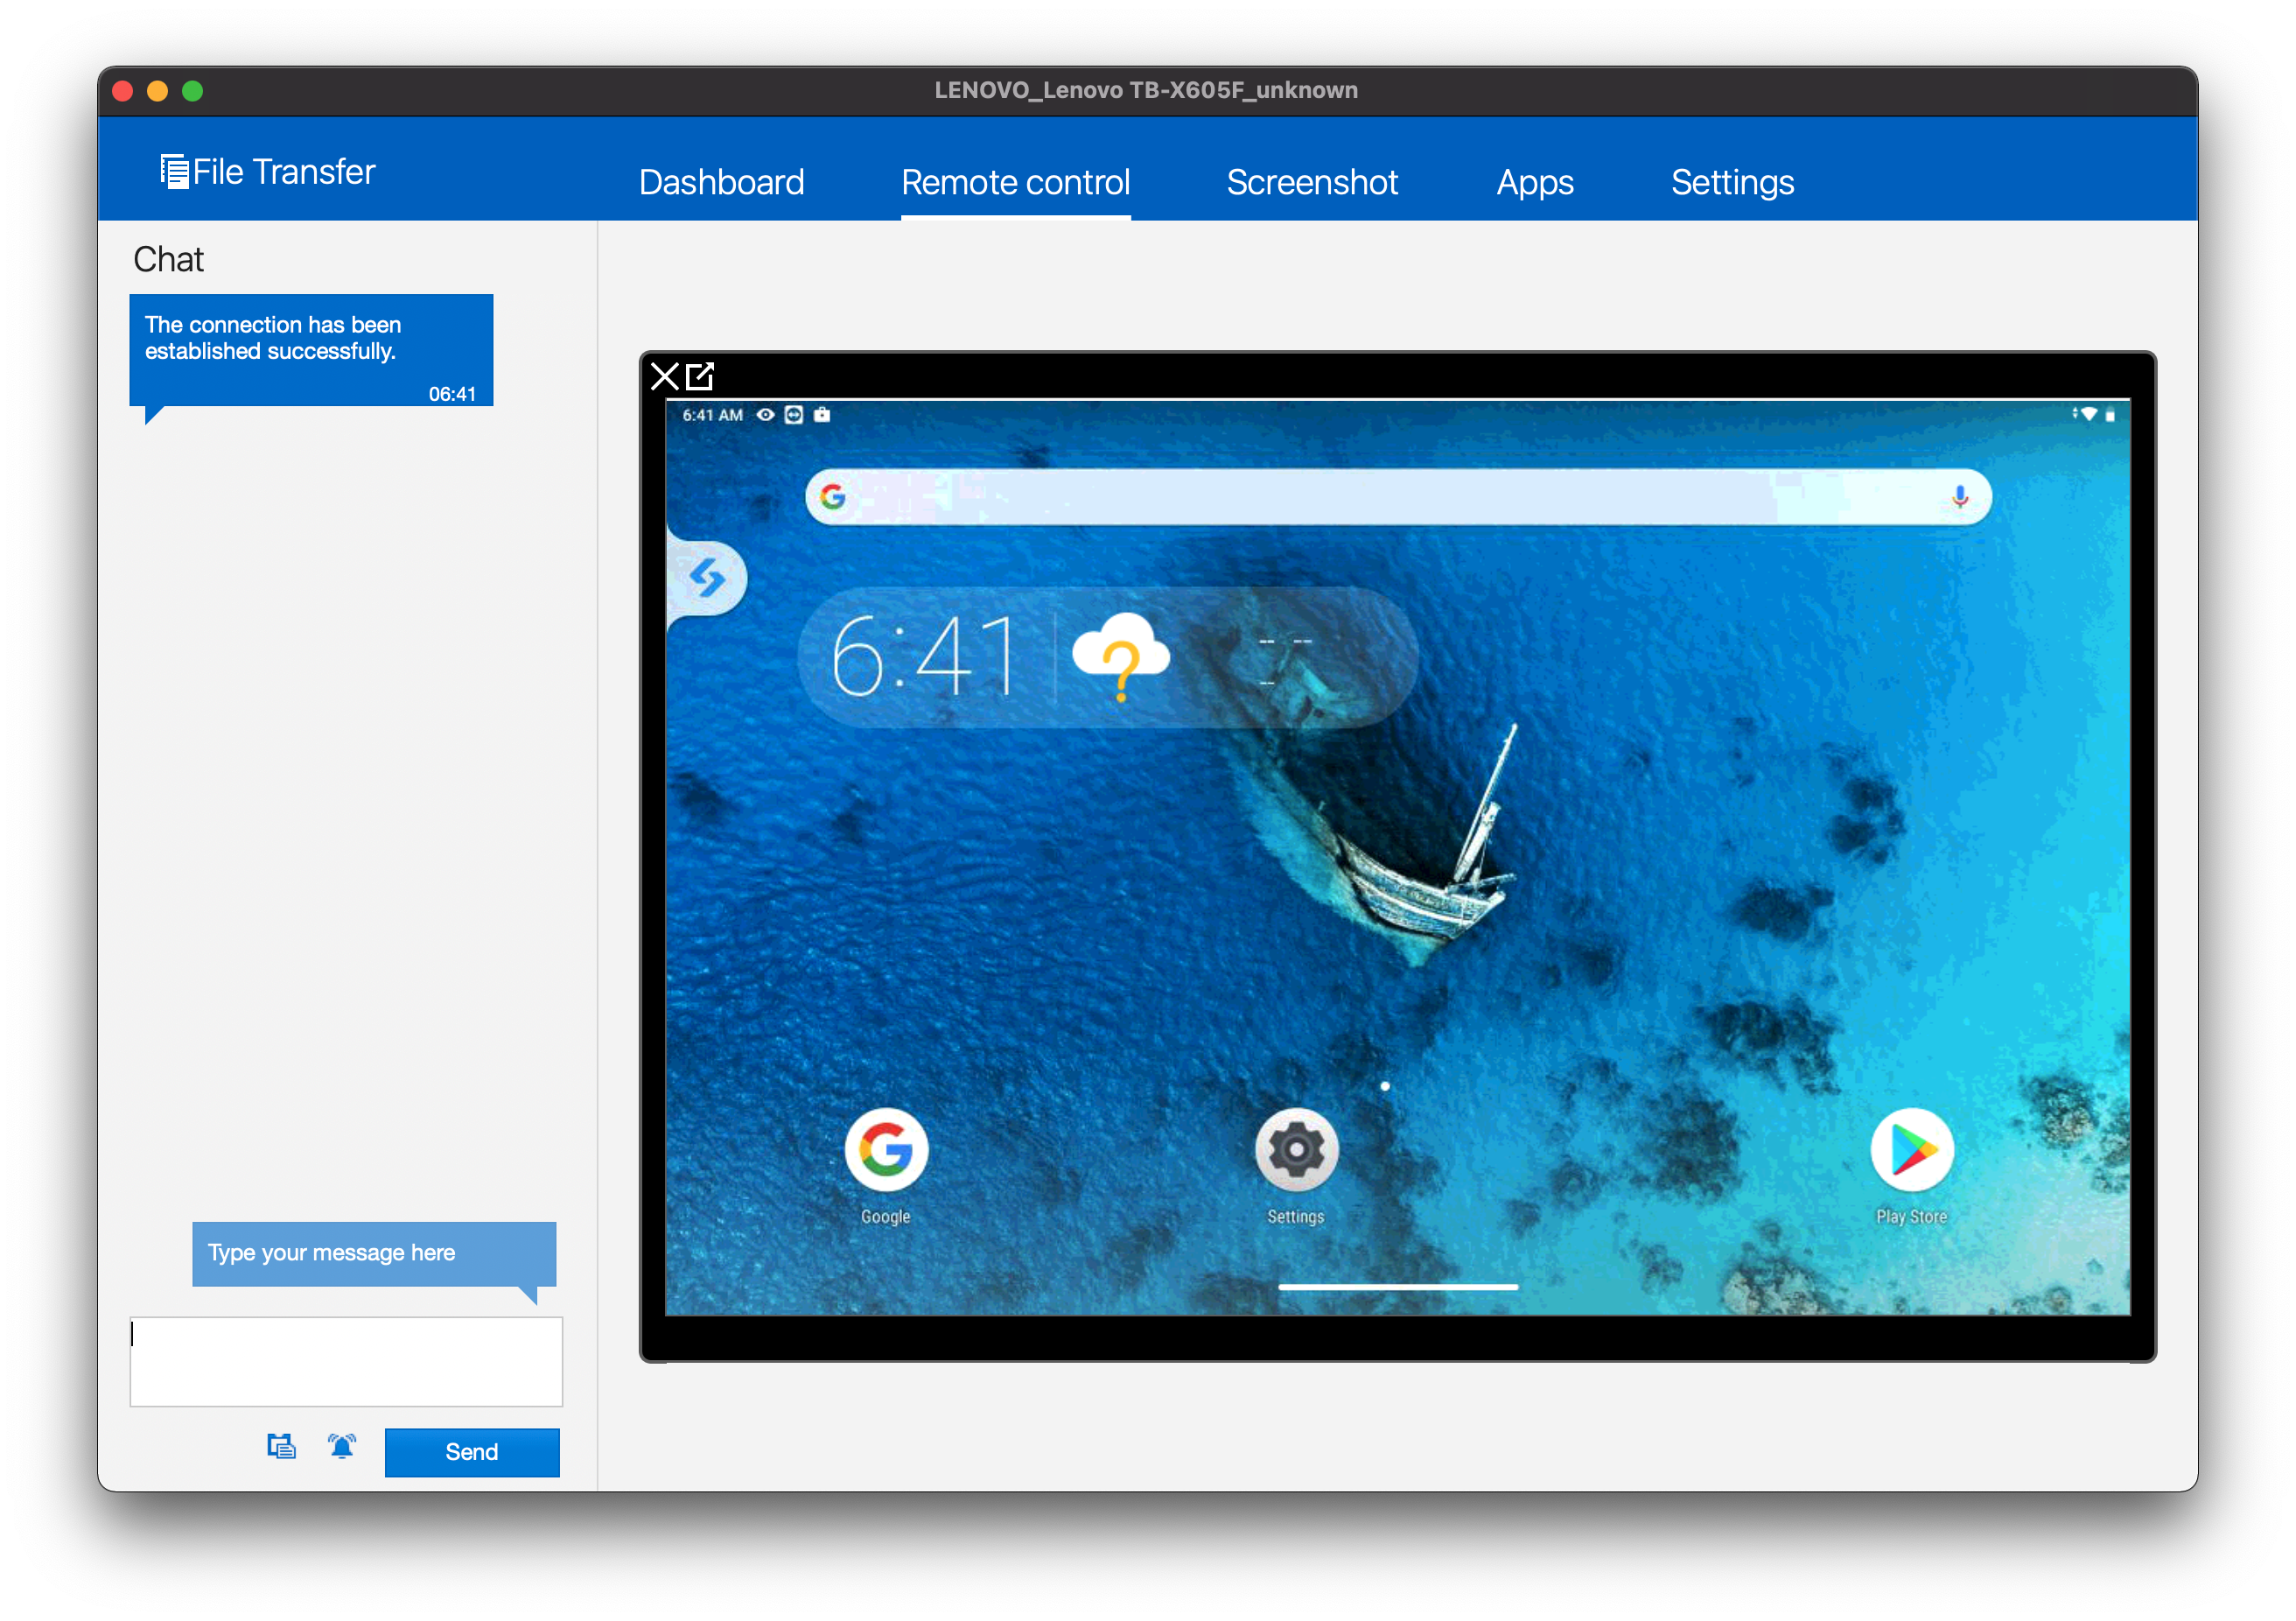 # TeamViewer: Chrome OS Session Overview ## **What** This article picks up from the administrator requesting a remote control session through TeamViewer. It presumes that all device pre-requisites are already met. ## **When/Why** We'll usually create a remote session to try to resolve some type of support issue on a remote device. When we begin the remote session with a Chrome OS device, it is important that we know how it behaves on the remote endpoint so that we can assist the end user if need be. ## **Behavior** Once the device receives the remote session notification (think of this as an alert to the device to begin a session), the FileWave Inventory extension will open a tab in the client's browser that will then force a prompt for a remote session (the browser MUST be active for this to work) 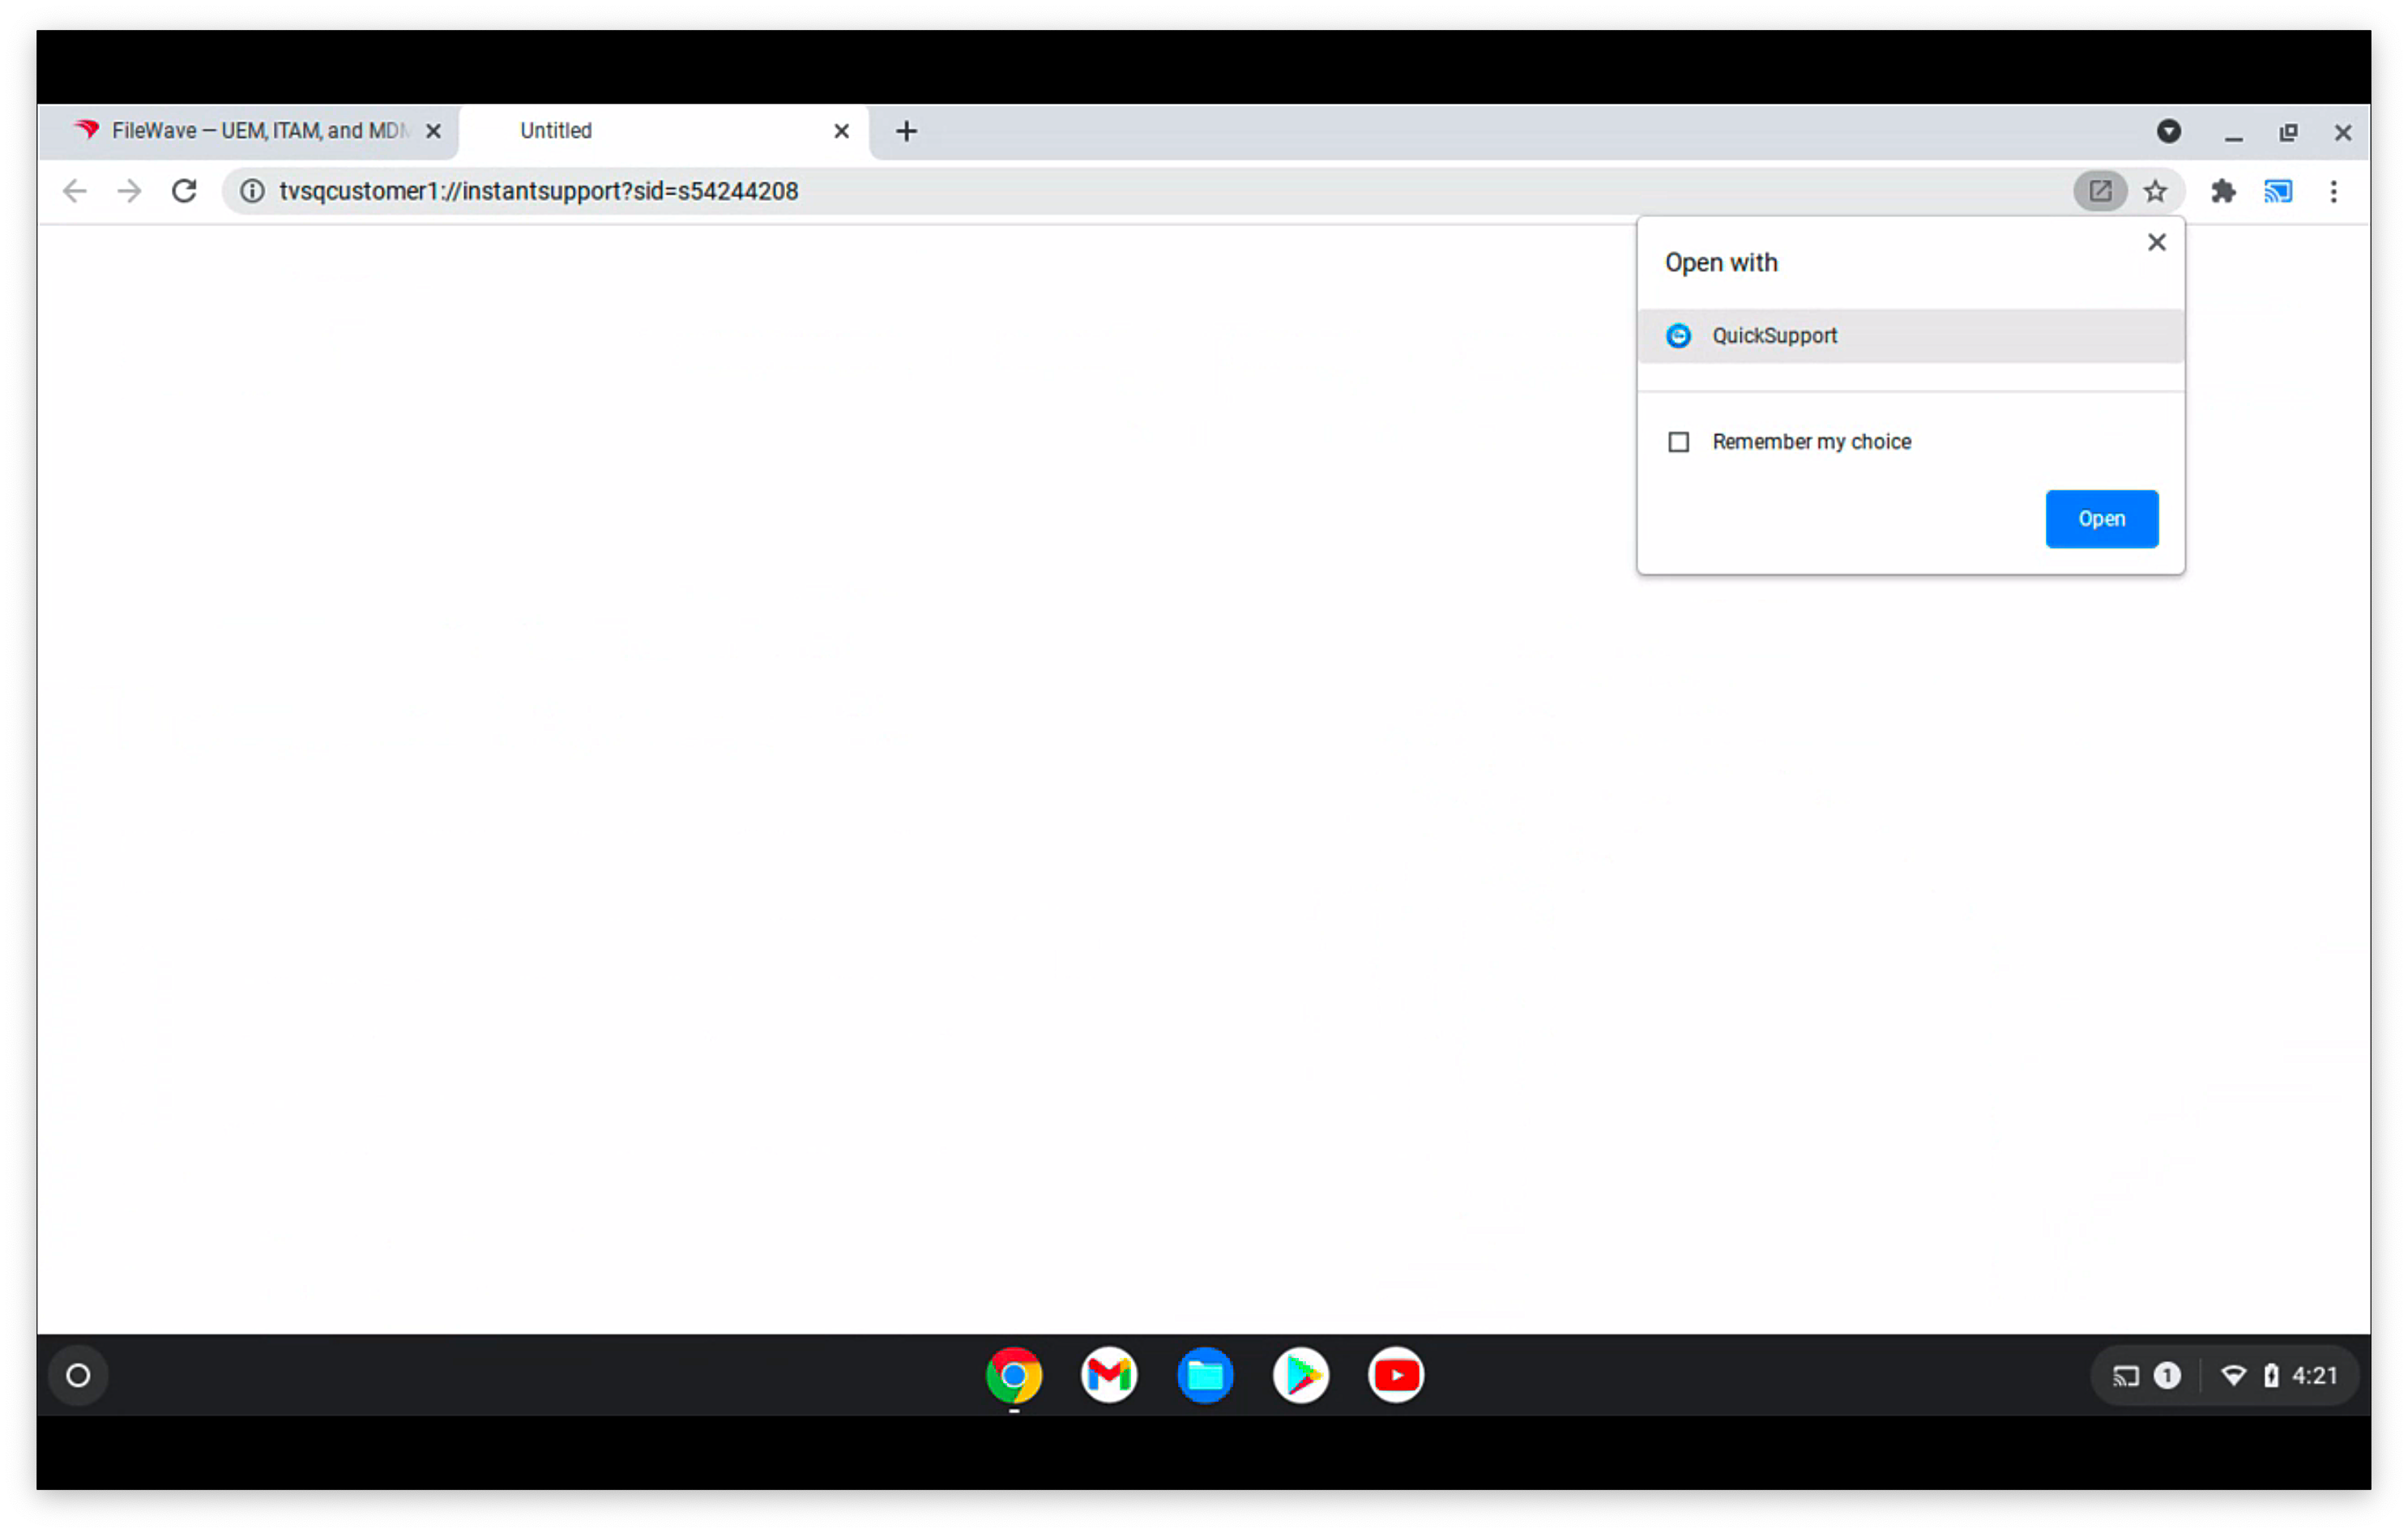 On first launch the QuickSupport app will prompt the user to accept the EULA, and will also prompt to allow the add-on to function 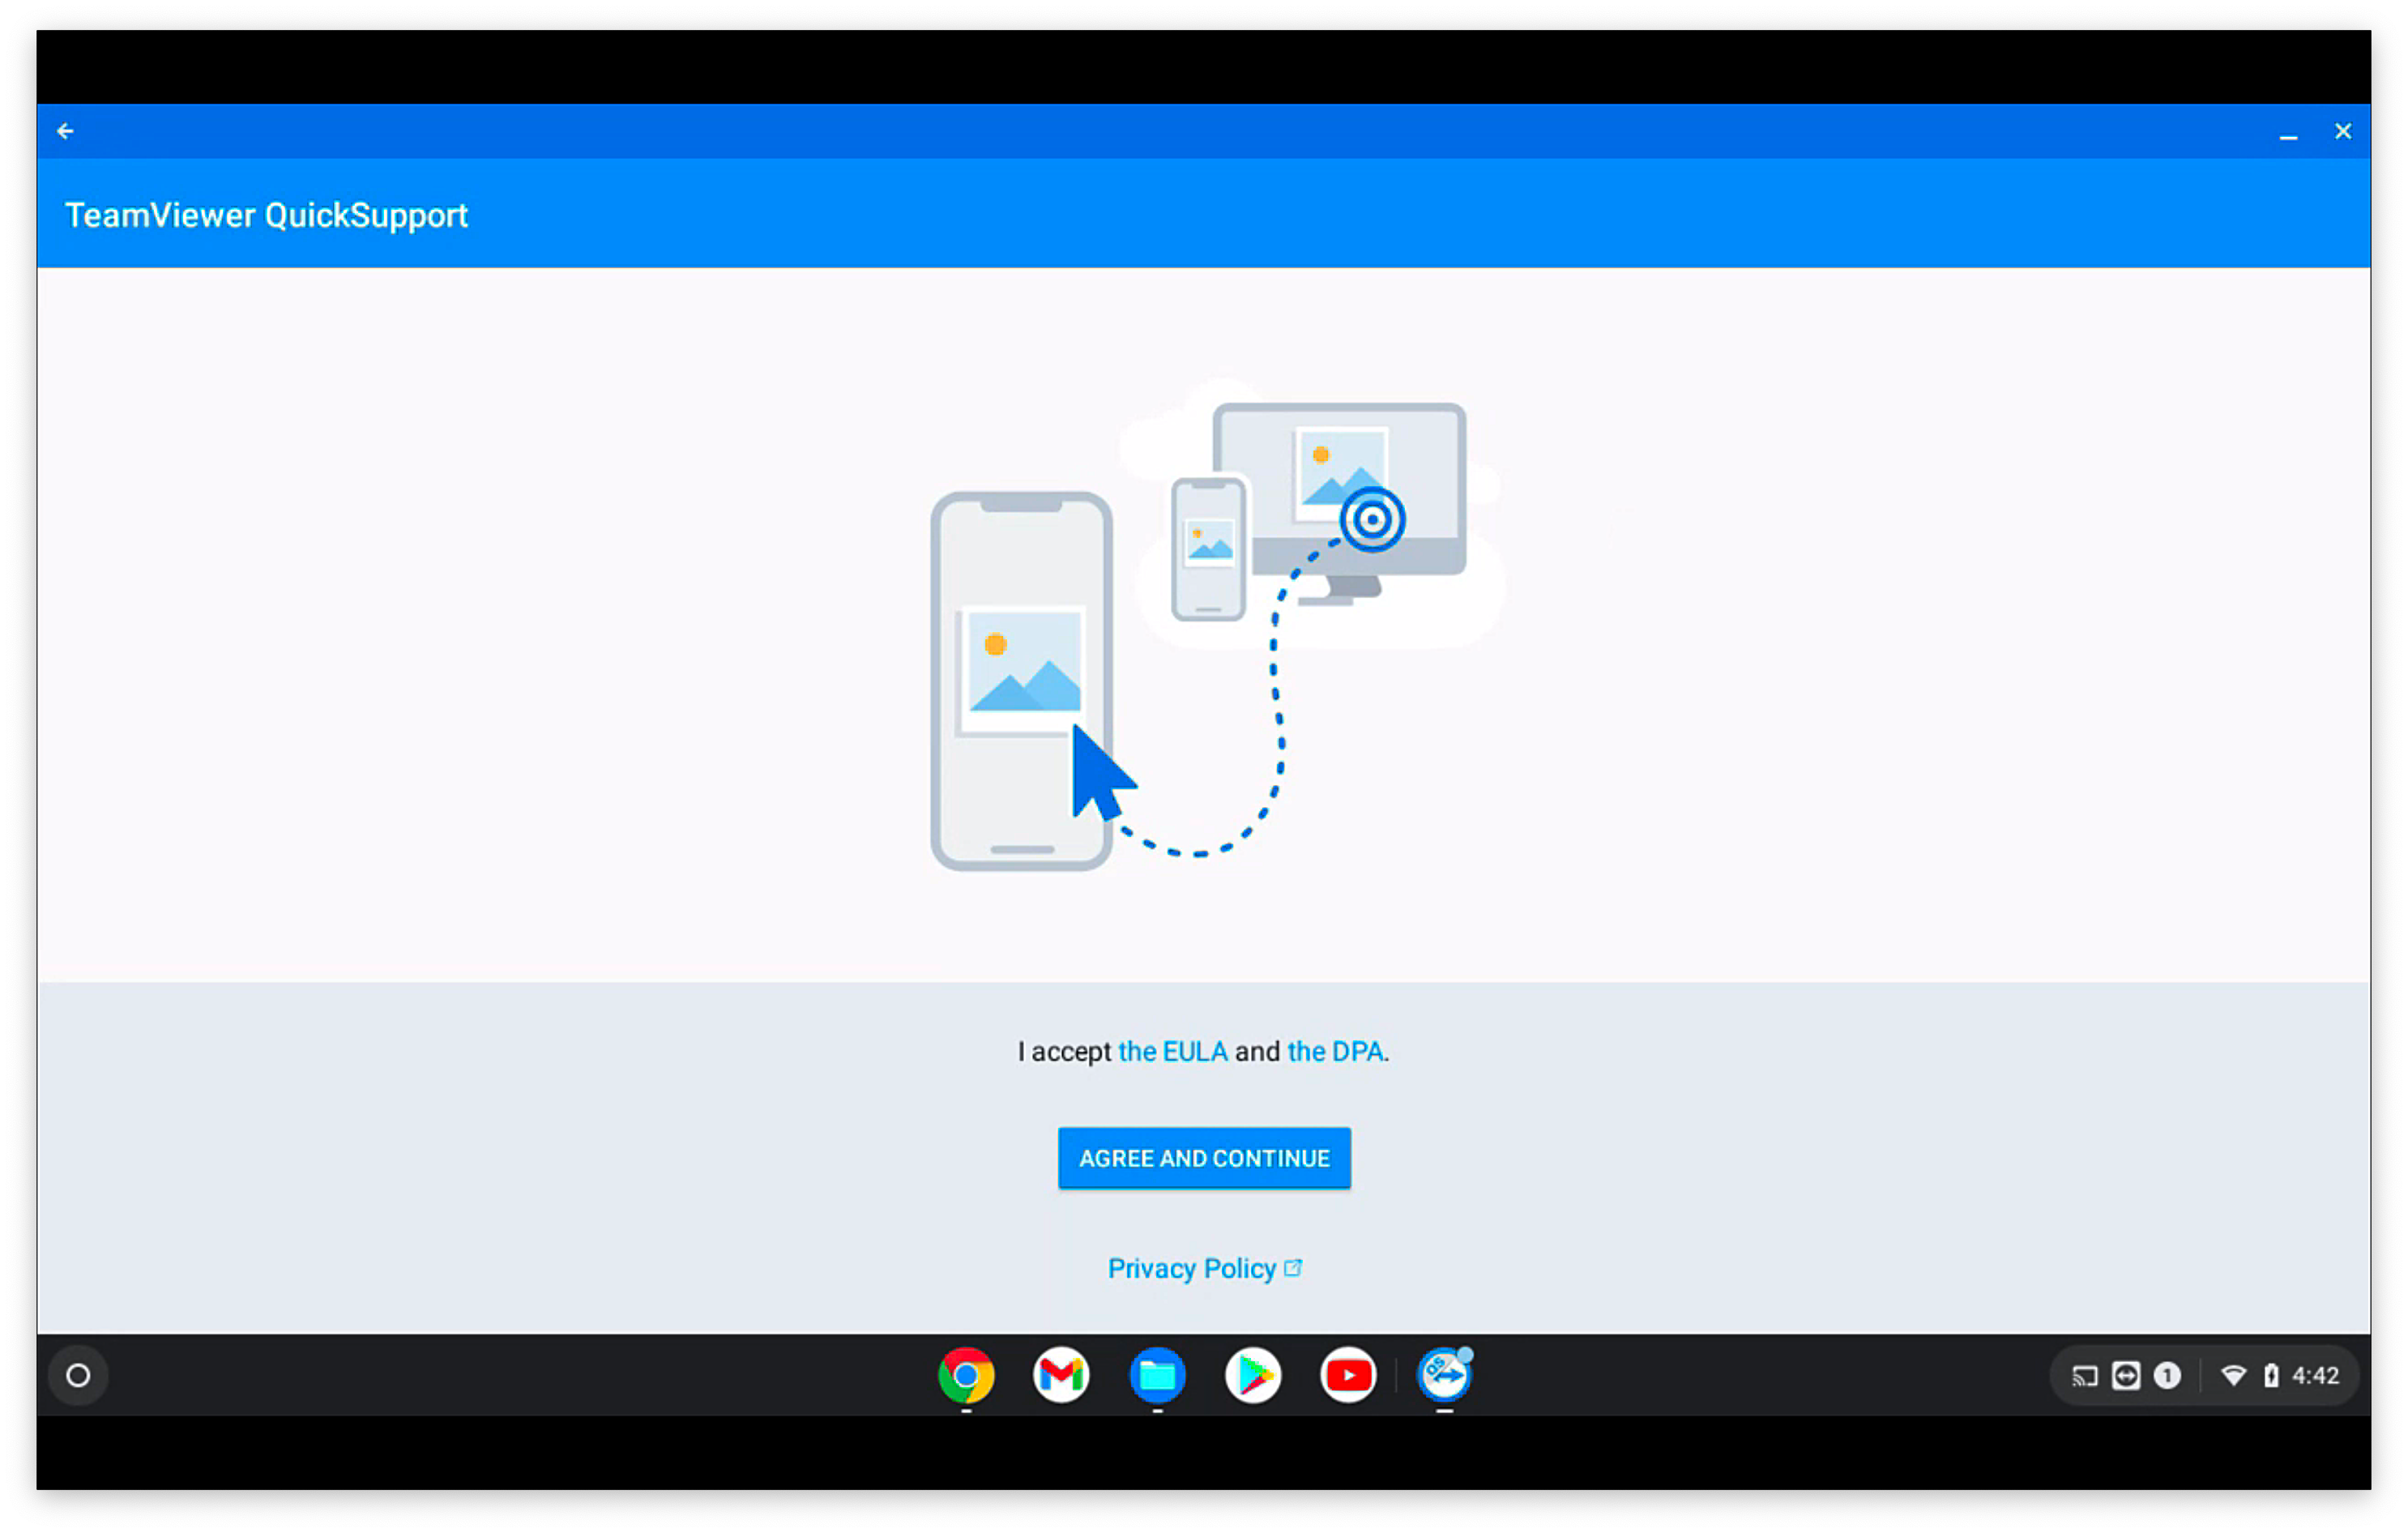 Once the EULA is agreed to and the add-on allowed (one time prompts for each), then the client-side session will begin: 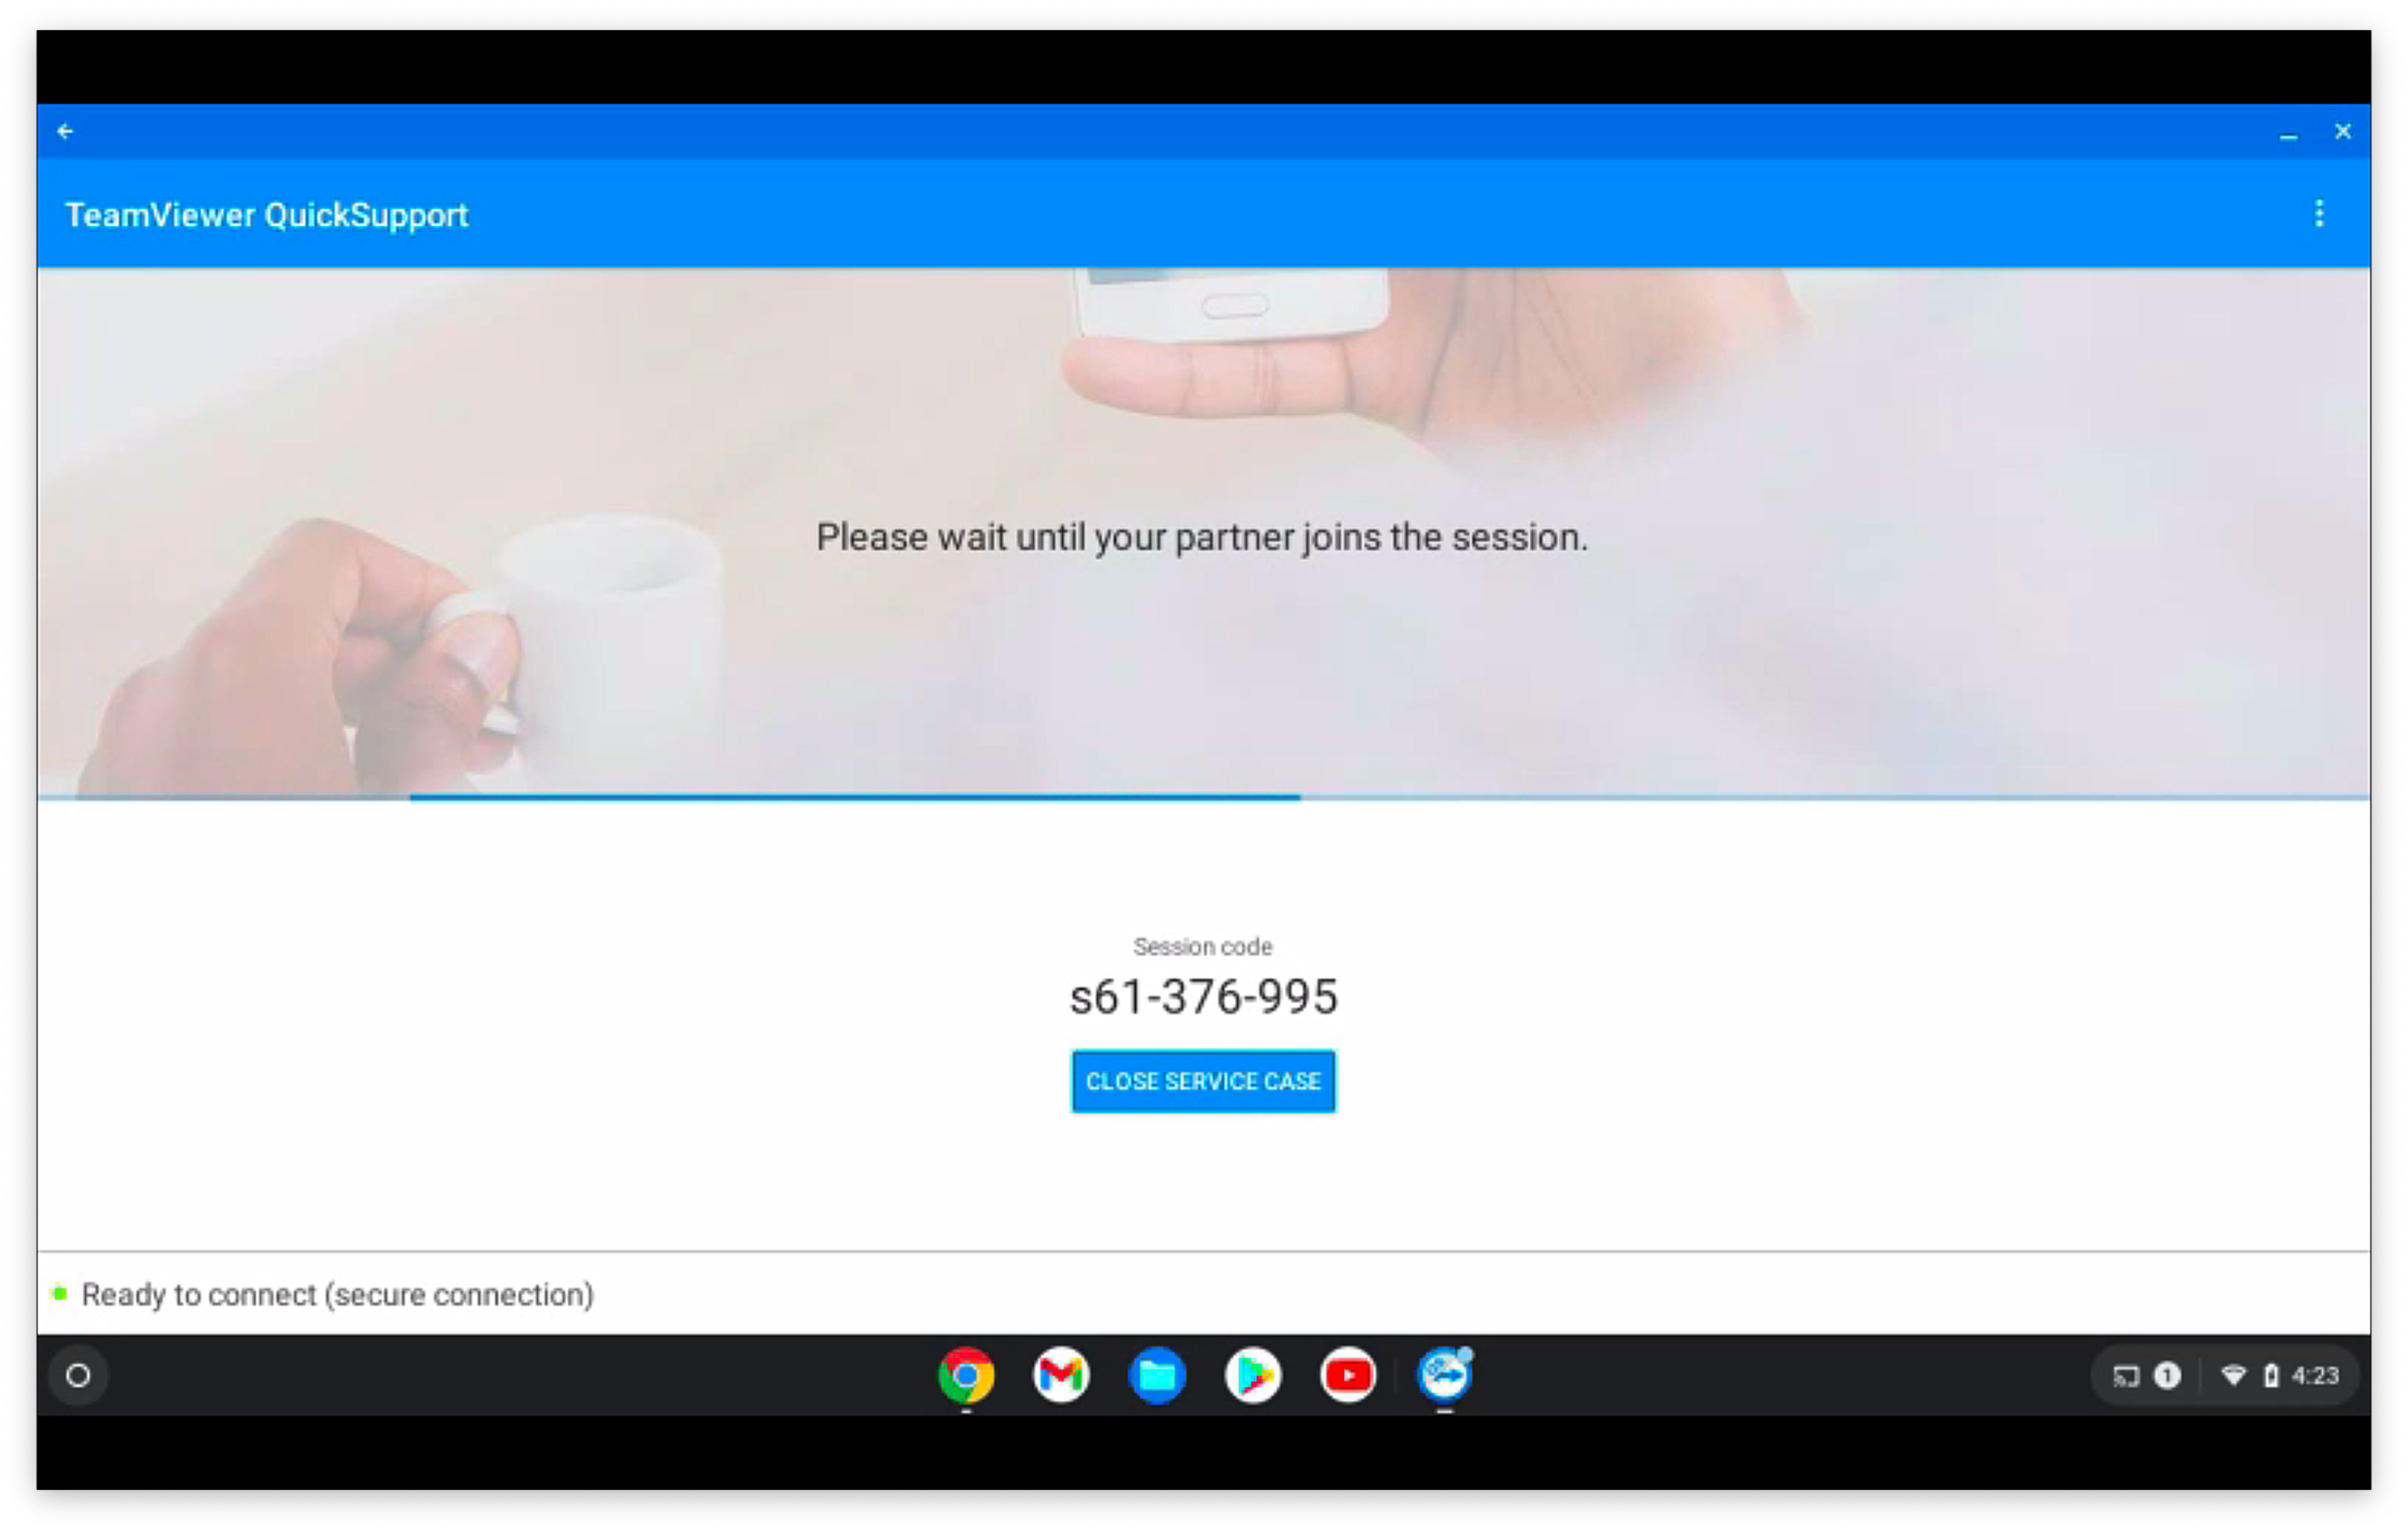 When the administrator's TeamViewer is also running, then the user will be prompted to allow this specific session (for attended access): 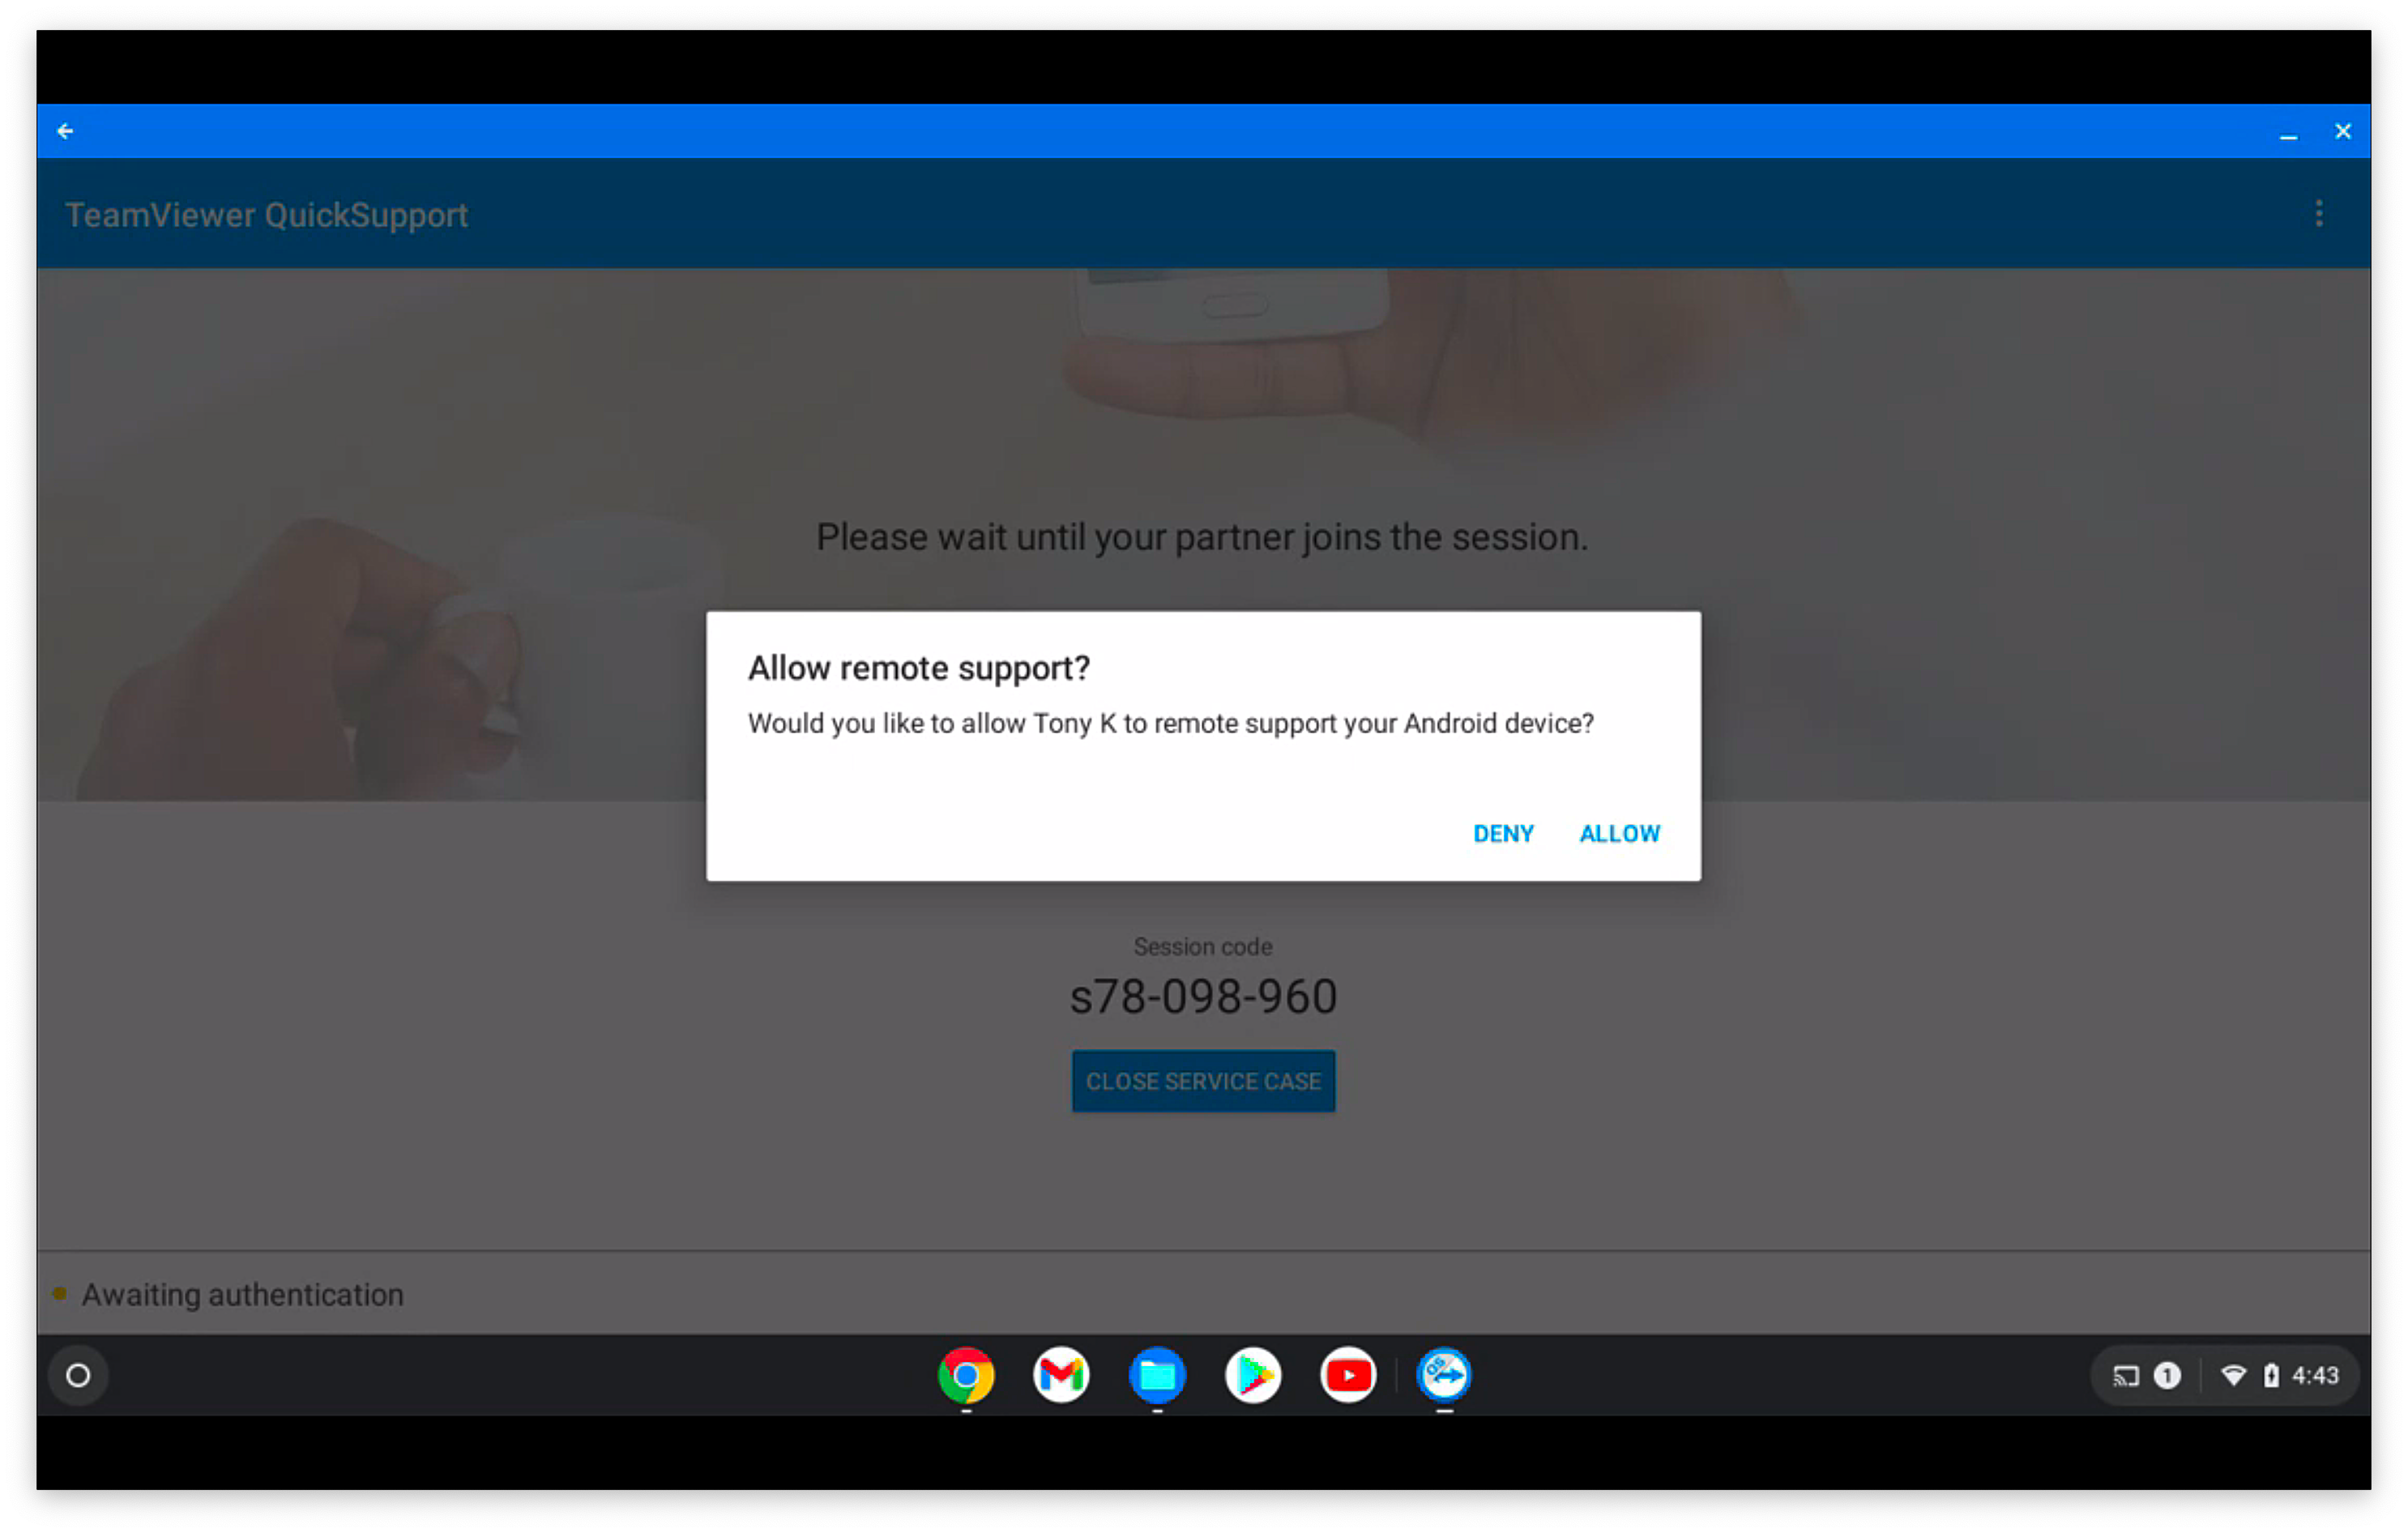 Once the session begins, this is where the one-time prompt for the add-on will display (the user must enable for the admin to be able to click or type on the remote screen...currently not working in our testing) 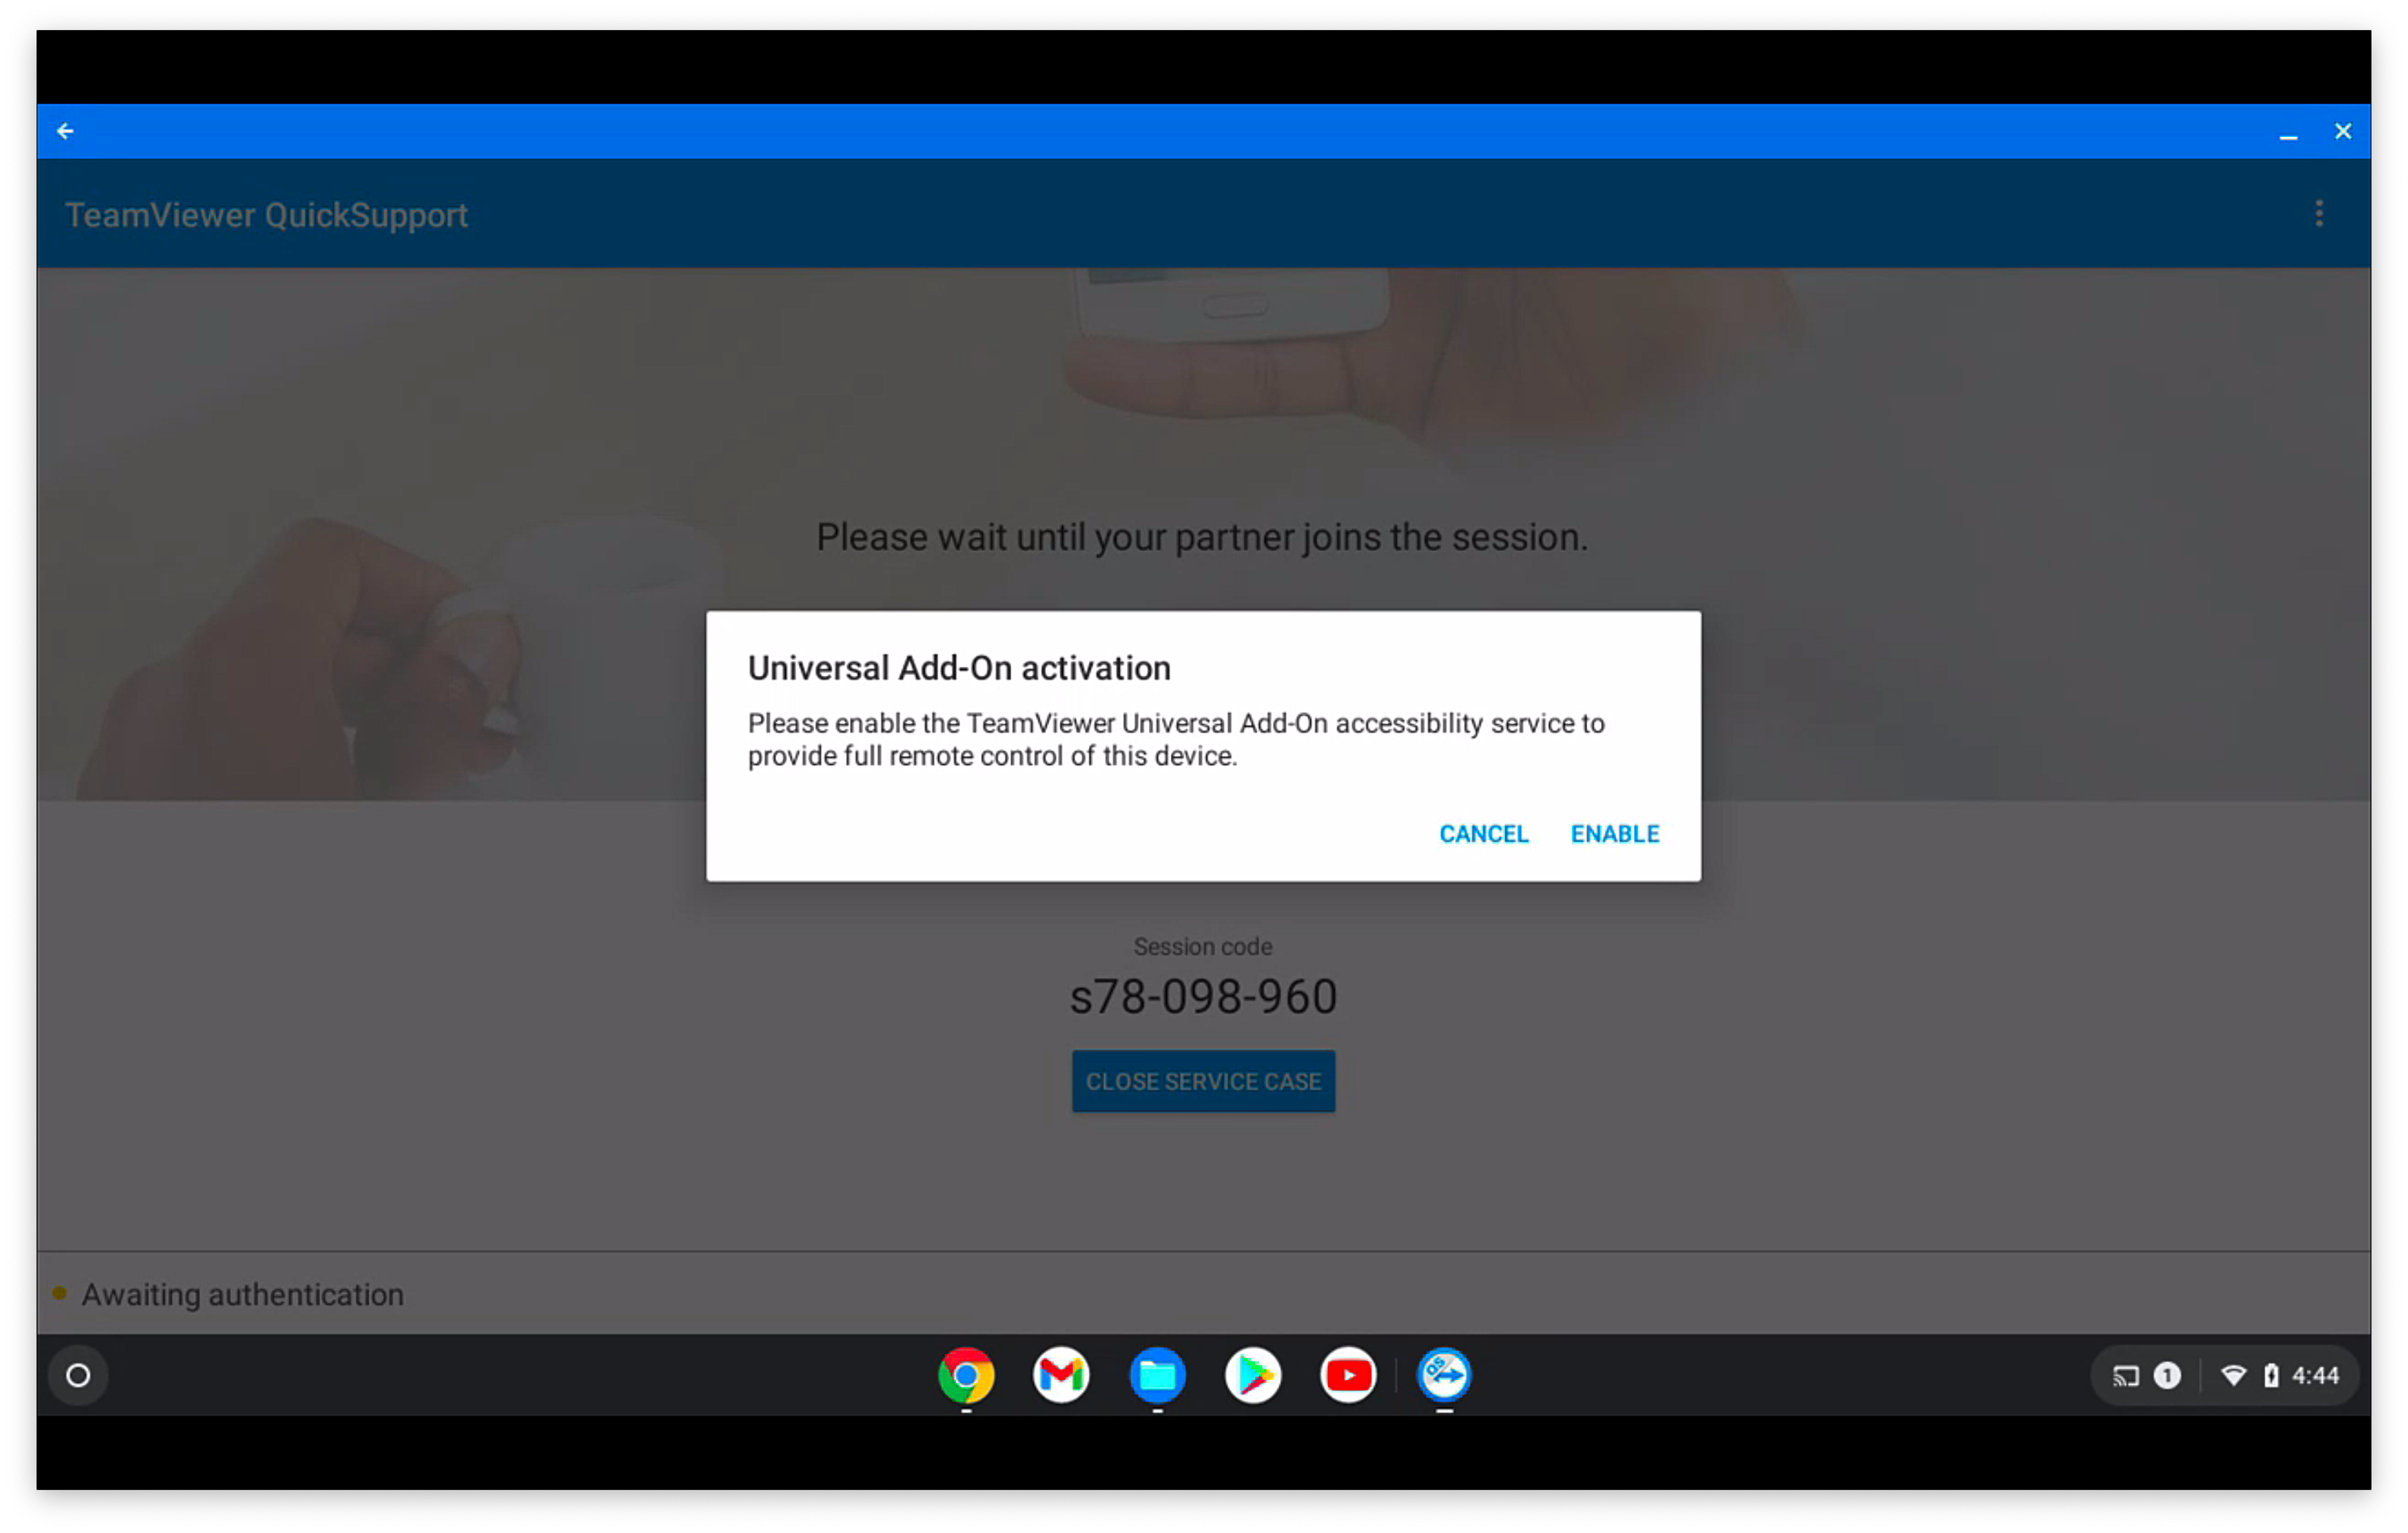 And then, the user must allow the screen to be shared explicitly by clicking on the screen image, and then allowing: 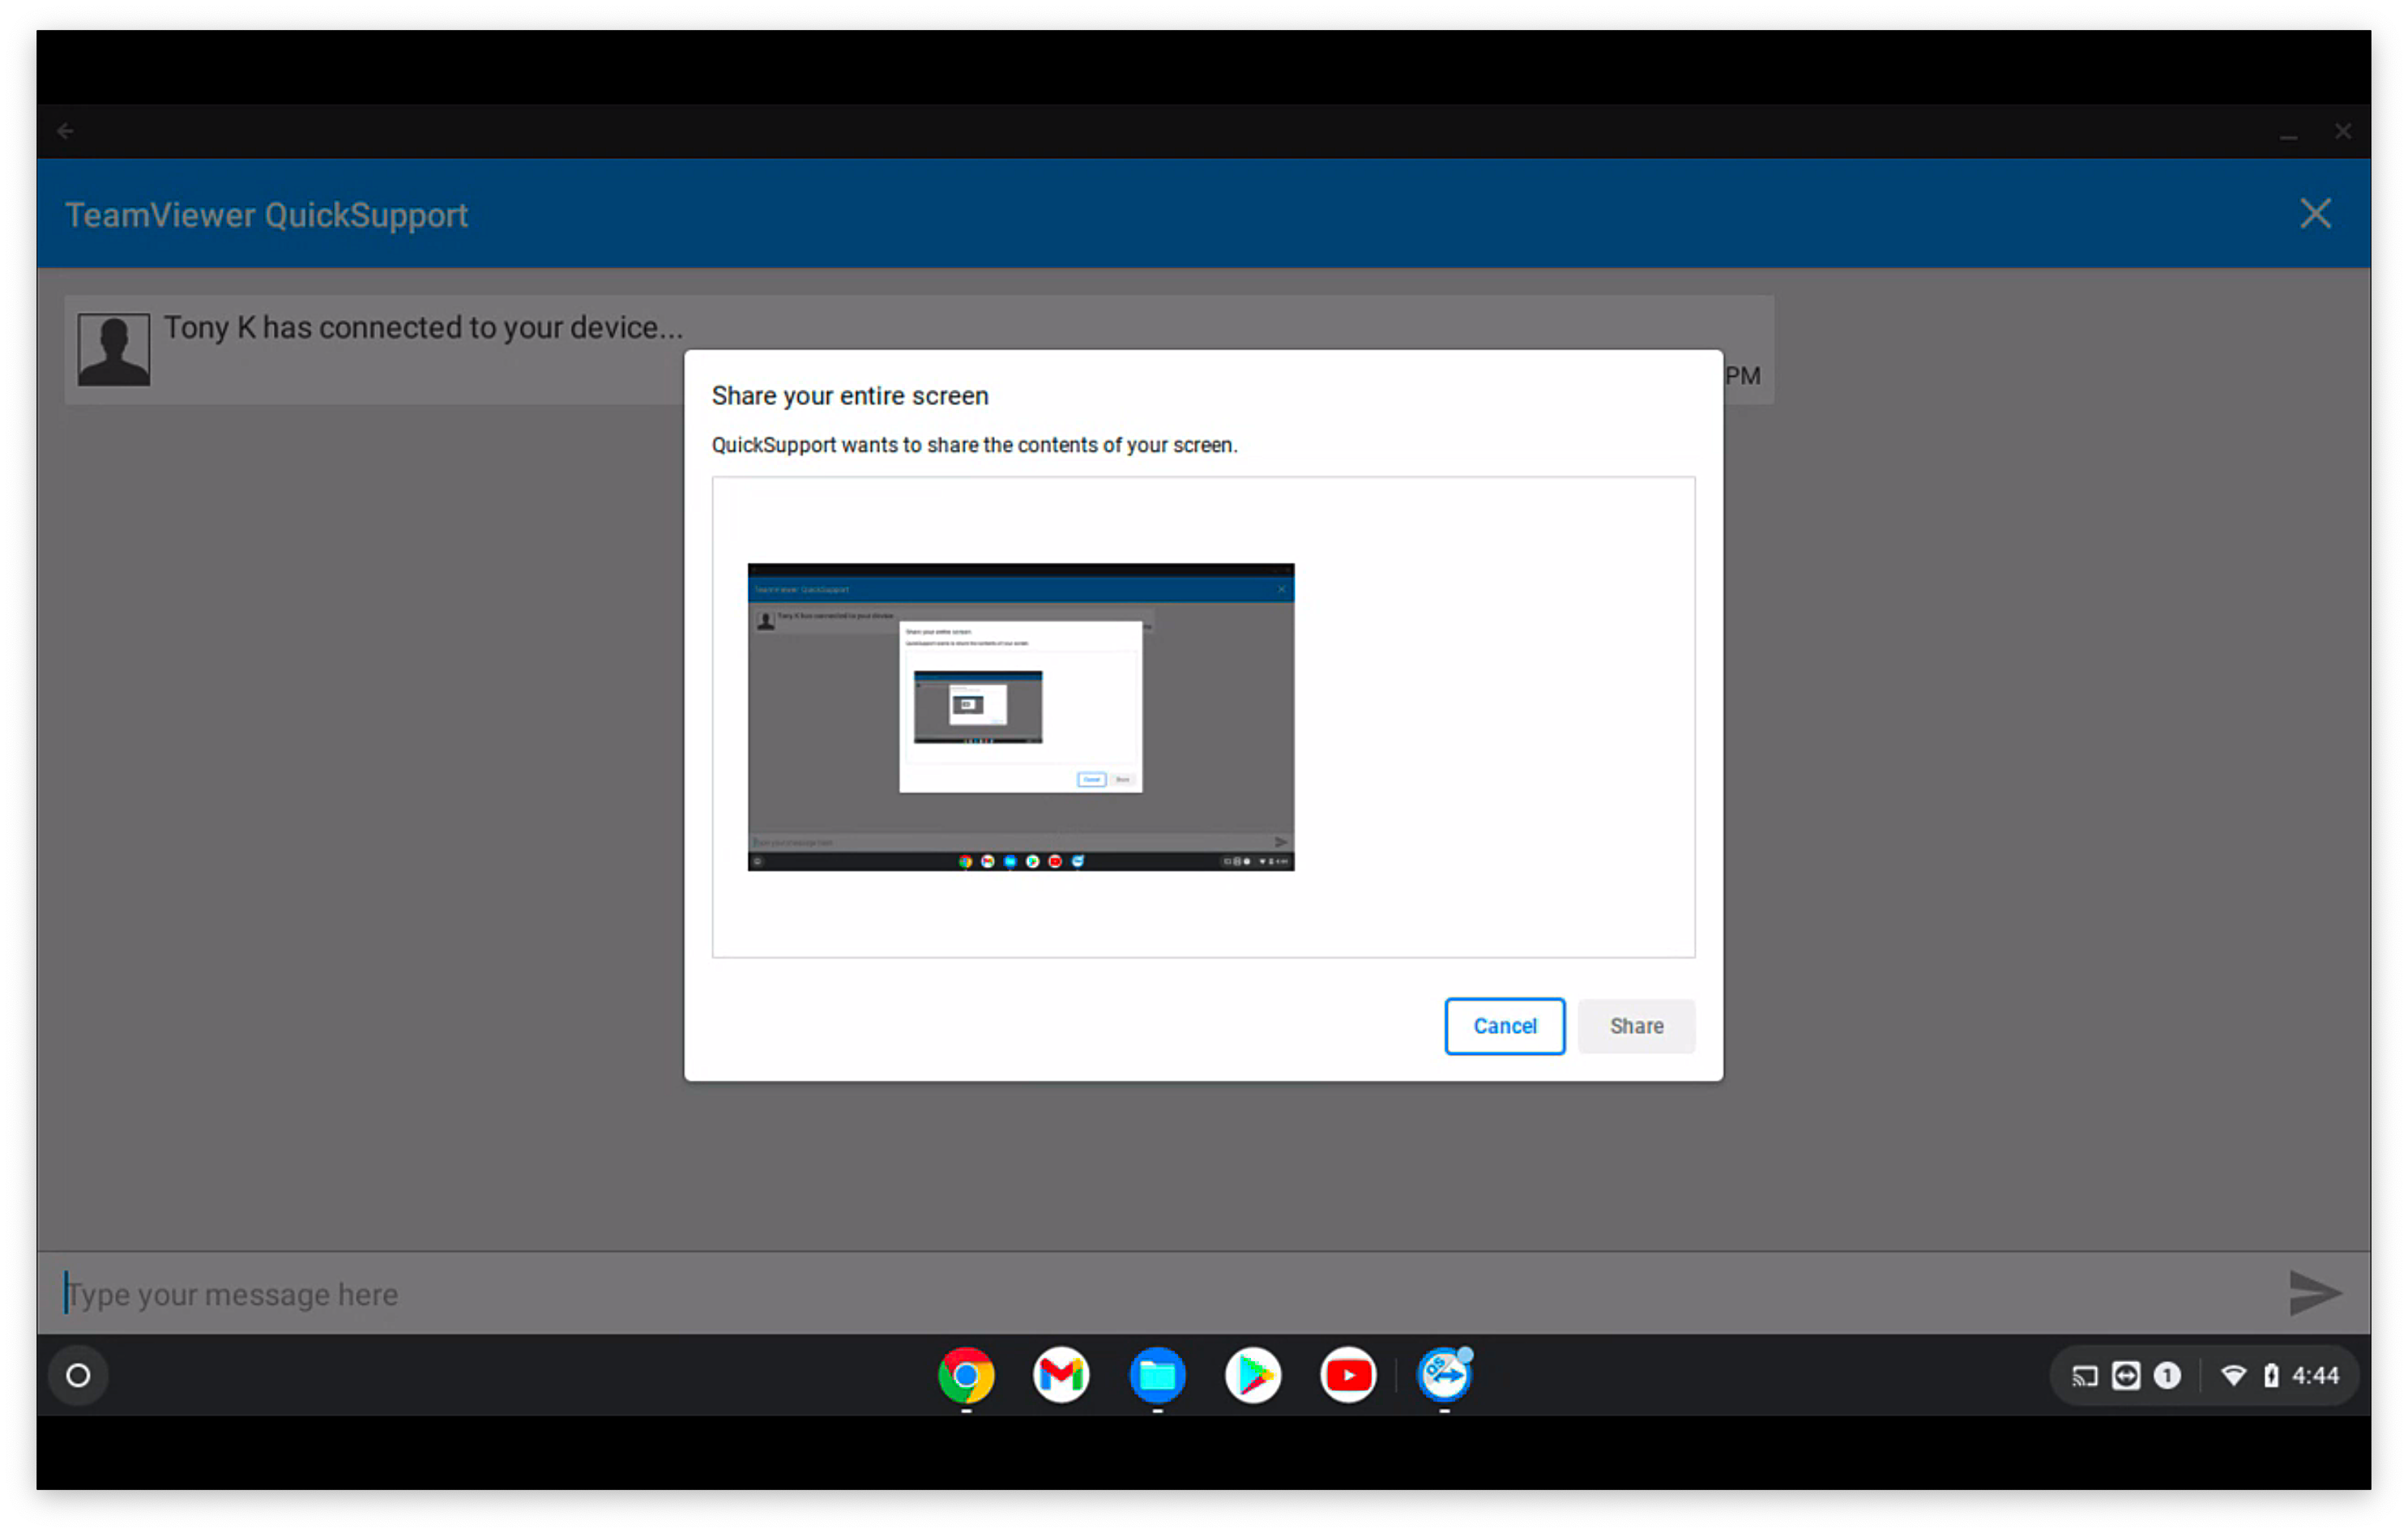 Once each of the above is completed, the remote session will look like this from the admin's machine: 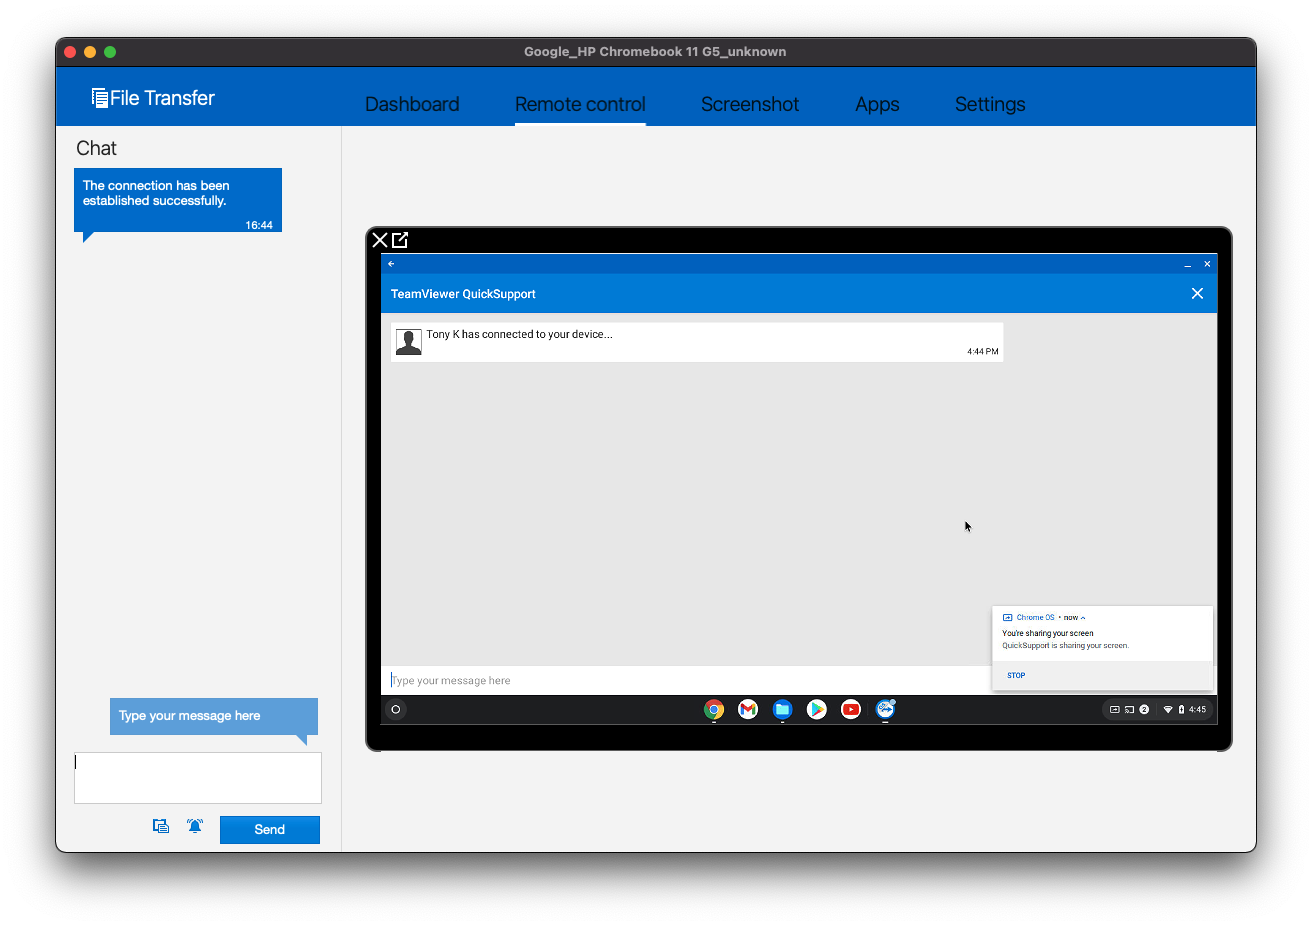 # TeamViewer: iOS/iPadOS Session Overview ## **What** This article shows what an iPhone or iPad user sees after a FileWave administrator requests a TeamViewer remote support session. Complete the FileWave and TeamViewer prerequisites before starting. ## **When to use it** Use these steps to guide the user through accepting an attended support session and starting the screen broadcast that TeamViewer needs. The user must remain available because iOS and iPadOS require confirmation on the device; the administrator cannot accept these prompts remotely. ## **Join the session** After the device receives the session request, iOS or iPadOS plays a notification sound and displays a TeamViewer notification. The user must open that notification to view the session prompt: 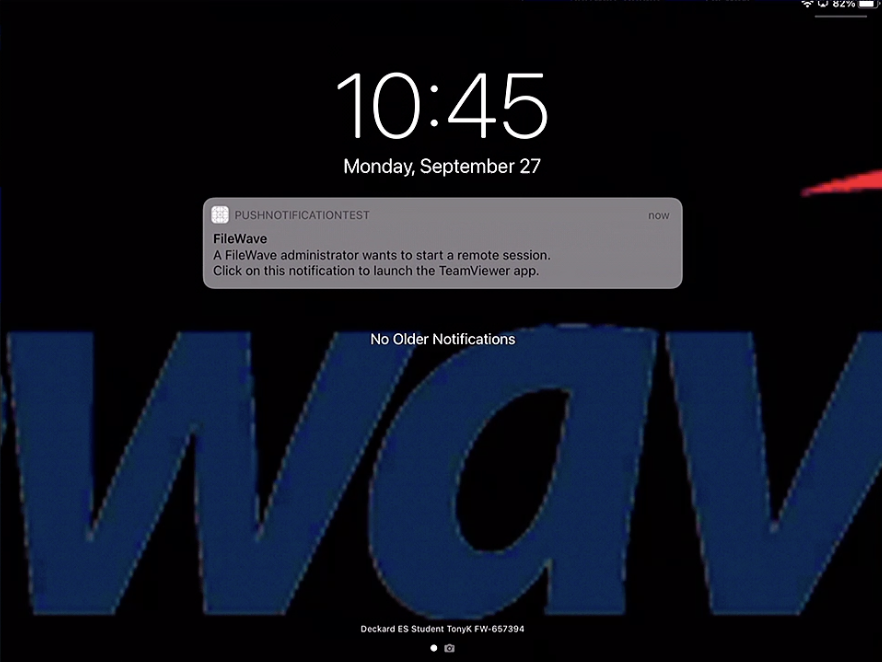 Opening the notification launches the TeamViewer QuickSupport app. QuickSupport displays the session code while it waits for the administrator to join. 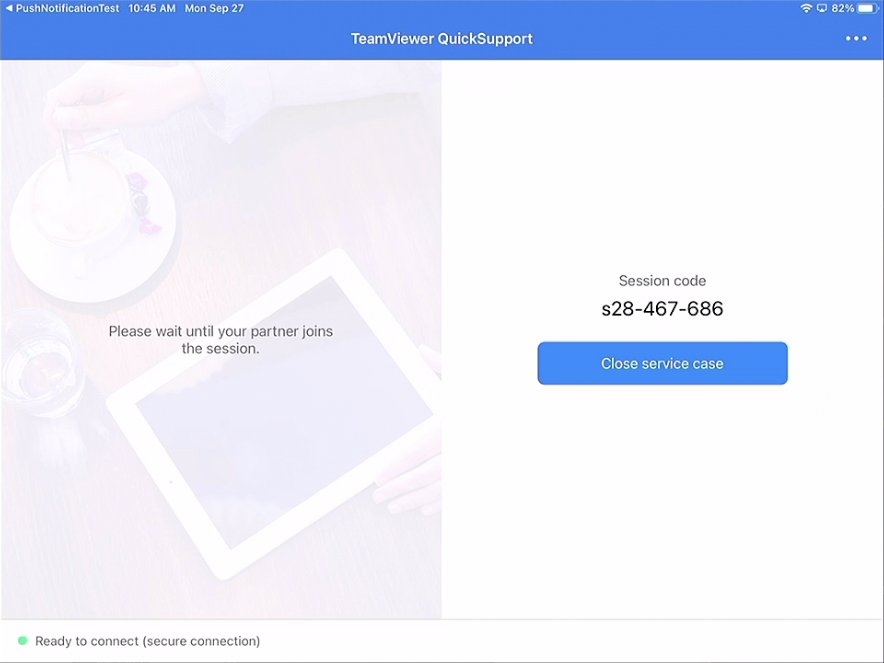 When the administrator's TeamViewer session is ready, the user is prompted to allow the attended session: 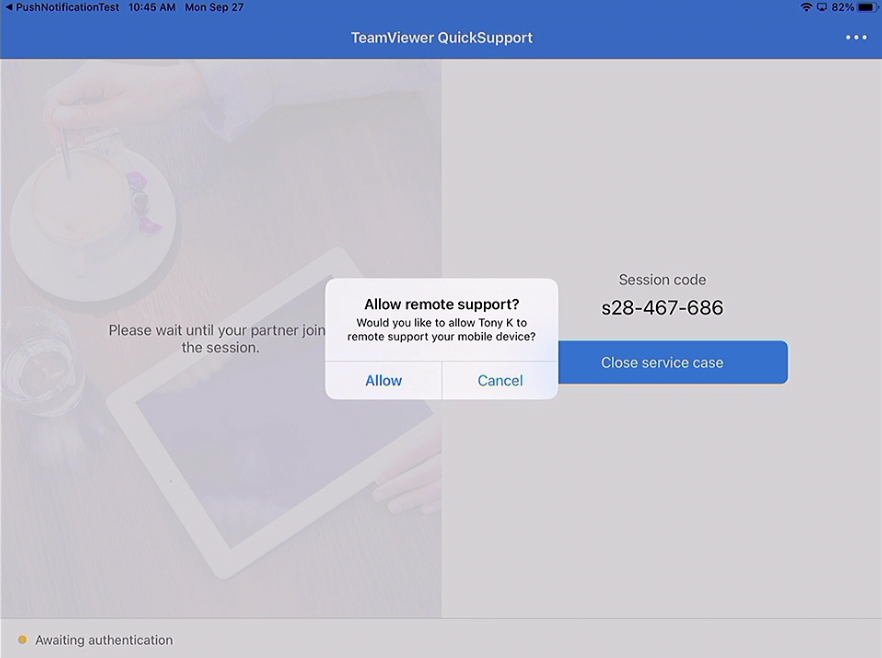 After the user allows the attended session, QuickSupport displays **Start Broadcast**. Select it to continue: 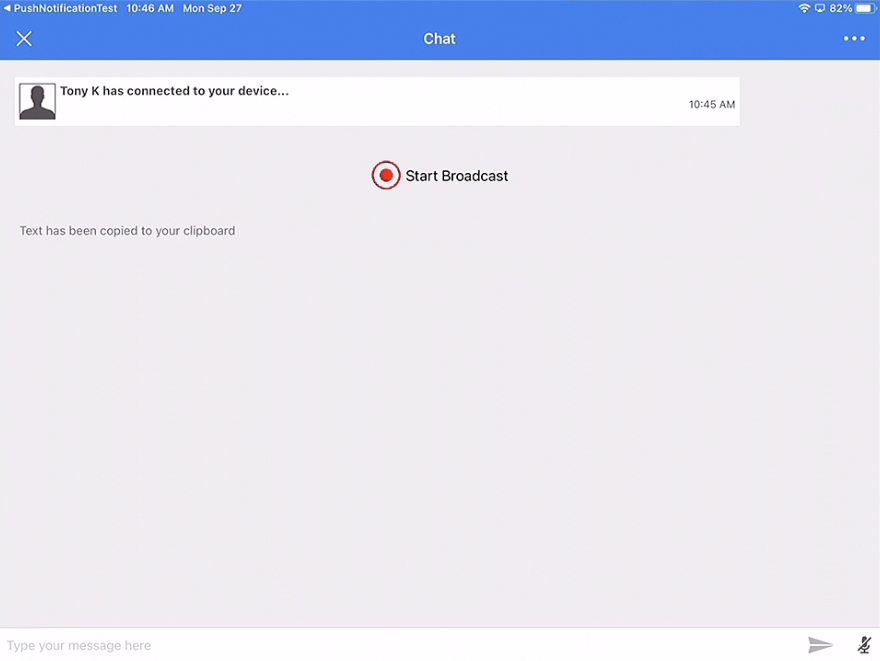 iOS or iPadOS then opens the **Screen Broadcast** control. Select TeamViewer and choose **Start Broadcast**: 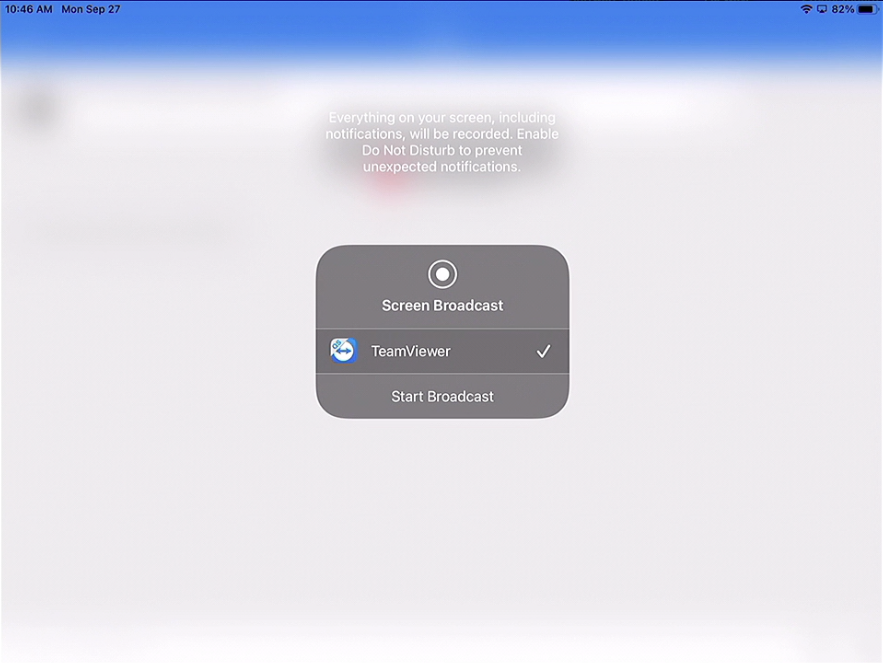 Once the user approves the session and starts the broadcast, the administrator can view the screen. iPhone and iPad sessions are screen-view only, so the administrator guides the user rather than controlling the device: 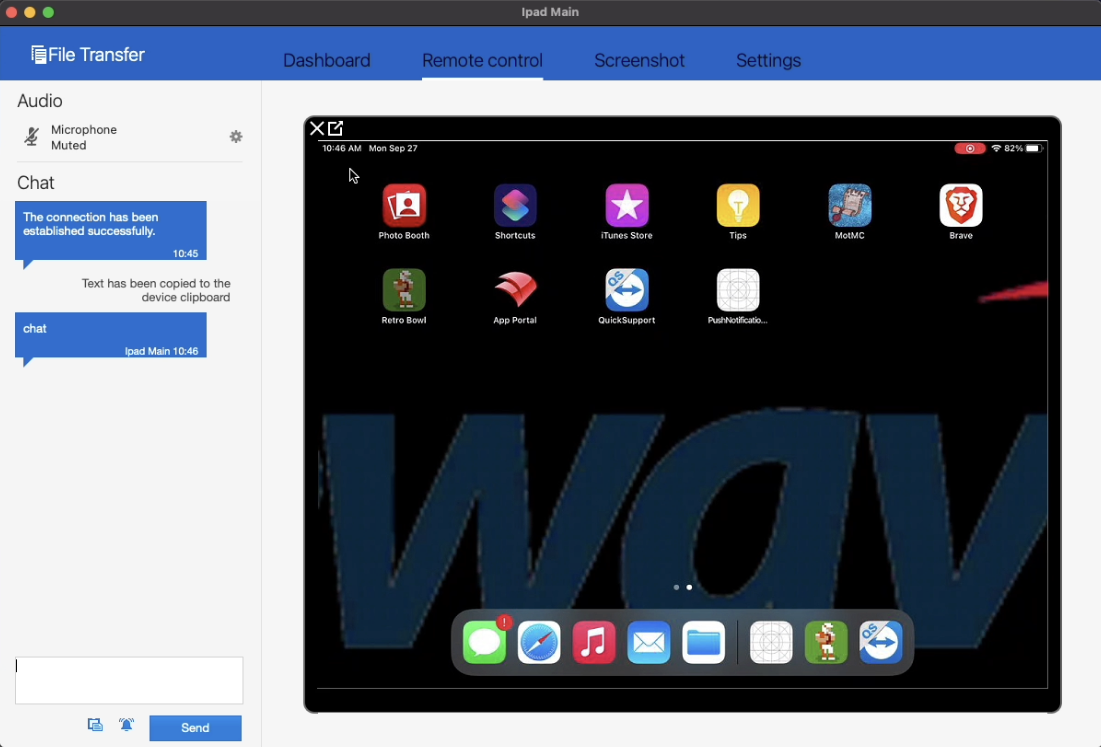 # TeamViewer: macOS Session Overview ## **What** This article picks up from the administrator requesting a remote control session through TeamViewer. It presumes that all device pre-requisites are already met. ## **When/Why** We'll usually create a remote session to try to resolve some type of support issue on a remote device. When we begin the remote session with a macOS device, it is important that we know how it behaves on the remote endpoint so that we can assist the end user if need be. ## **Behavior** For macOS and Windows devices it is possible to have both attended as well as unattended access to the device. From any macOS or Windows device in the admin console that meets pre-requisites (web and native shown below), you can choose to open a **Remote Session** from the context menu. Note that the admin user must have rights, and the client itself must have reported the right "state" to be controlled. macOS and Windows clients will be the only ones to show **Don't Prompt User** but that will only appear if the FileWave client has been set to allow remote control and to allow unattended remote control to see both options. The original Observe client permissions are how TeamViewer permissions are being controlled for macOS and Windows. If you would like to change a client's permissions then a [Superpref](https://kb.filewave.com/books/filewave-client/page/superprefs-fileset "Creating a Superprefs Fileset") can change these settings.  Computer Client Preferences Computer clients also rely upon the client settings for these options to be available: - FileWave Client Preferences > Privacy There are two options available: - Managed remote control - Prompt client for remote control access  The first option will allow/deny any connection via TeamViewer. The second option will be considered when the first option is enabled. The second option, for prompting, will then either allow only one or both options to be available. When prompt is disabled, both the options to either prompt or not prompt should be available. If Prompt is enabled though, the option to action a 'Don't prompt user' will not be available and only prompted connections may be established. These options may be configured with a [Superpref Fileset](https://kb.filewave.com/books/filewave-client/page/superprefs-fileset "Creating a Superprefs Fileset"). If all of the prerequisites have been met then picking **Remote Session (Don't Prompt User)** will simply result in TeamViewer opening on both your admin workstation and the remote computer. If TeamViewer or TeamViewer Host are not installed then FileWave will return an error that TeamViewer was not found. Otherwise, for a prompted session the below workflow will get you connected. Note that if you pick to start a session from your admin workstation and it appears as if nothing happens then please check if you have a pop-up blocker. We have found even in a default install of Safari that there will be a pop-up blocker icon shown in the URL bar. Once you allow the pop-up then everything should work. #### Remote Session (Prompt User) Workflow Once the device receives the remote session notification (think of this as an alert to the device to begin a session), the FileWave client will open a new browser tab to prompt for the opening of TeamViewer. 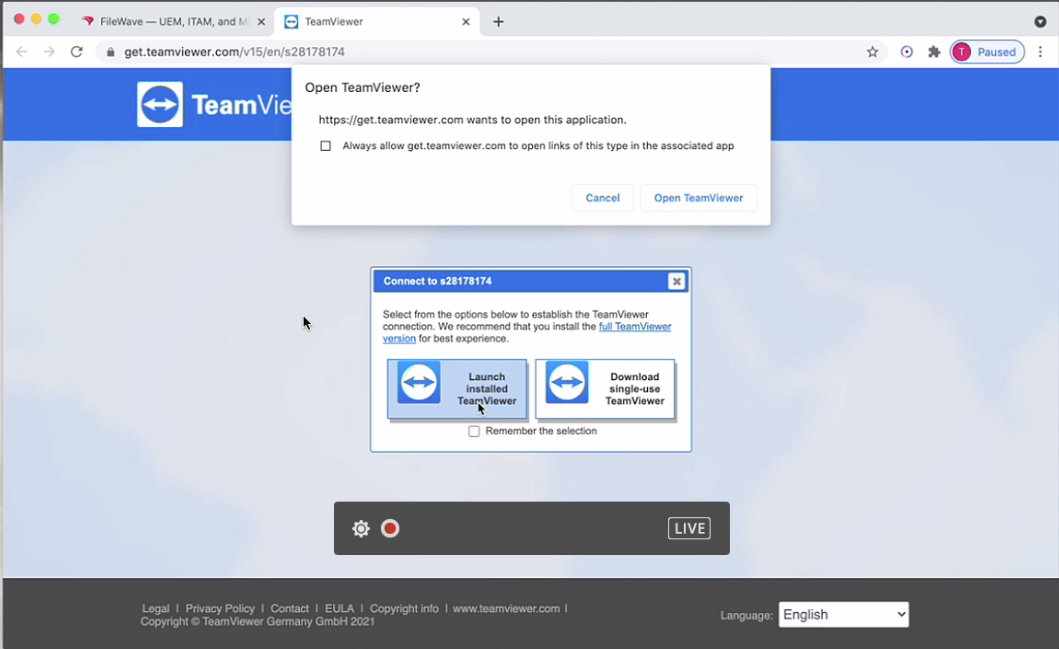 When that notification is acknowledged, the TeamViewer App will open to start a remote session. Note that if the TeamViewer App is not pre-deployed, there is an option to launch a single use version of TeamViewer. The single-use version does not require administrative credentials to run, but it does require the user to allow screen access, etc within System Preferences. 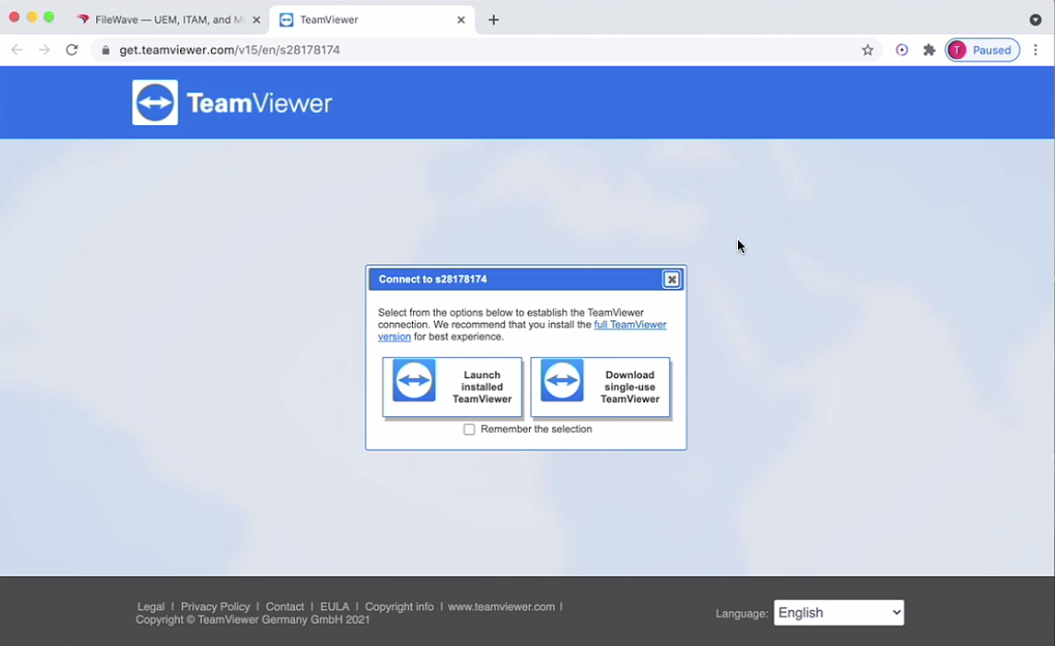 On first launch the TeamViewer app will prompt the user to accept the EULA. Once the admin and client devices have both acknowledged the session, the remote device will be prompted to allow the session:  Once this prompt is acknowledged (and the admin session is also launched), then the session will begin: 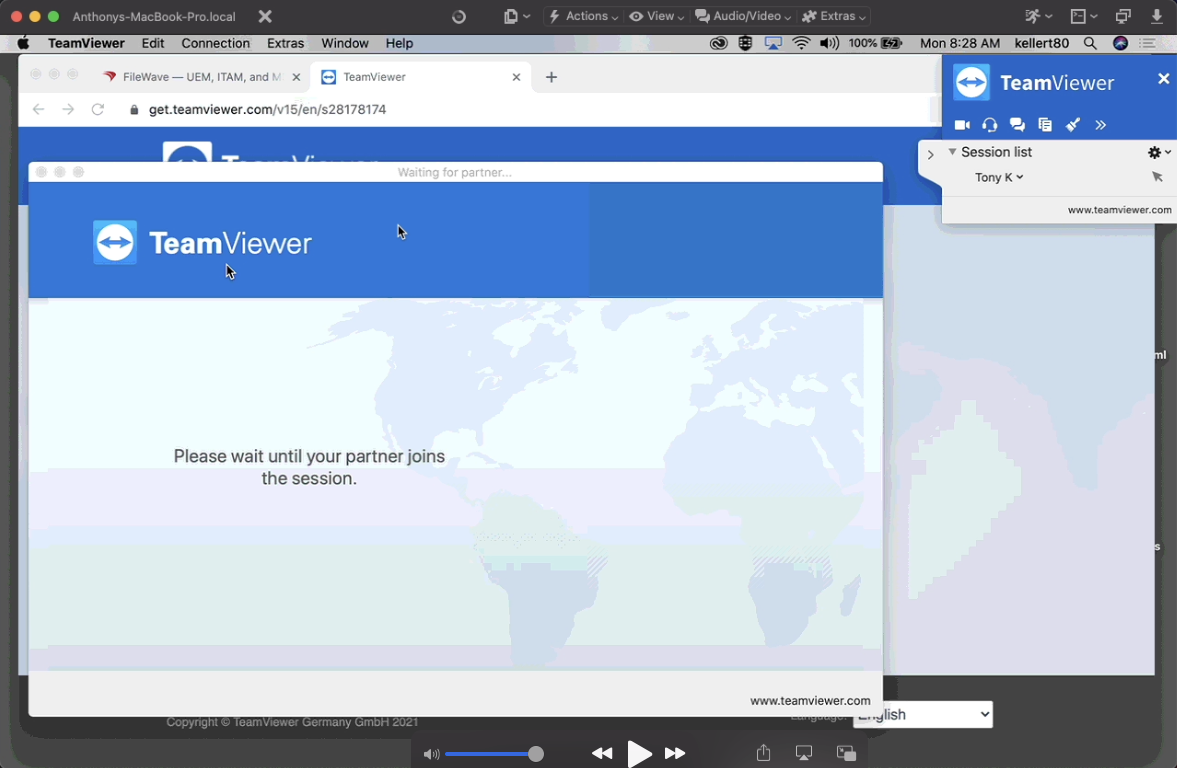 # Start a TeamViewer Remote Session on Windows ## **What** This page shows what a Windows user sees during a prompted TeamViewer session and how FileWave Client preferences control prompted versus unattended access. Complete the TeamViewer prerequisites before starting. ## **When/Why** Use this workflow when a technician needs to view or control a Windows device while troubleshooting with the user. ## **Behavior** Windows supports prompted and unattended TeamViewer sessions. In FileWave Central or FileWave Anywhere, select **Remote Session** from the device context menu. The available choices depend on the administrator's permissions, the client state, and the FileWave Client remote-control preferences. **Remote Session (Don't Prompt User)** appears only when managed remote control is allowed and the client is not required to prompt the user. Use a [Superprefs Fileset](https://kb.filewave.com/books/filewave-client/page/superprefs-fileset "Creating a Superprefs Fileset") to manage these settings.The screenshots show older FileWave and TeamViewer interfaces. Current wording may differ, but the prompted and unattended session choices follow the same permission logic described here.
 ### FileWave Client preferences Computer clients also rely upon the client settings for these options to be available: - FileWave Client Preferences > Privacy There are two options available: - Managed remote control - Prompt client for remote control access  **Managed remote control** allows or blocks TeamViewer connections. FileWave evaluates the prompt setting only when managed remote control is enabled. **Prompt client for remote control access** controls whether the end user must approve the session. When it is enabled, technicians can start prompted sessions only. When it is disabled, both prompted and **Don't Prompt User** choices are available. Configure these options with a [Superprefs Fileset](https://kb.filewave.com/books/filewave-client/page/superprefs-fileset "Creating a Superprefs Fileset"). With the prerequisites in place, **Remote Session (Don't Prompt User)** opens TeamViewer on the technician workstation and remote computer without an approval prompt. If TeamViewer or TeamViewer Host is missing, FileWave reports that TeamViewer was not found. Prompted sessions follow the workflow below. #### Remote Session (Prompt User) Workflow After the device receives the remote-session request, the FileWave Client opens a browser tab that asks the user to open TeamViewer. 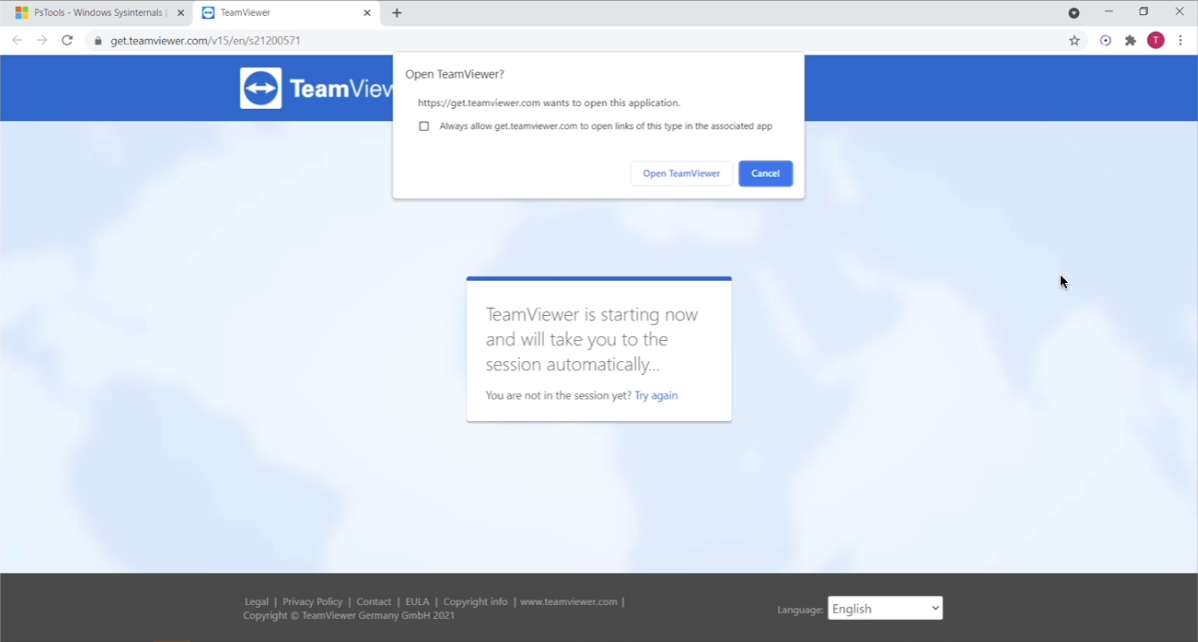 When that notification is acknowledged, the TeamViewer App will open to start a remote session. Note that if the TeamViewer App is not pre-deployed, there is an option to launch a single use version of TeamViewer. The single-use version does not require administrative credentials to run. 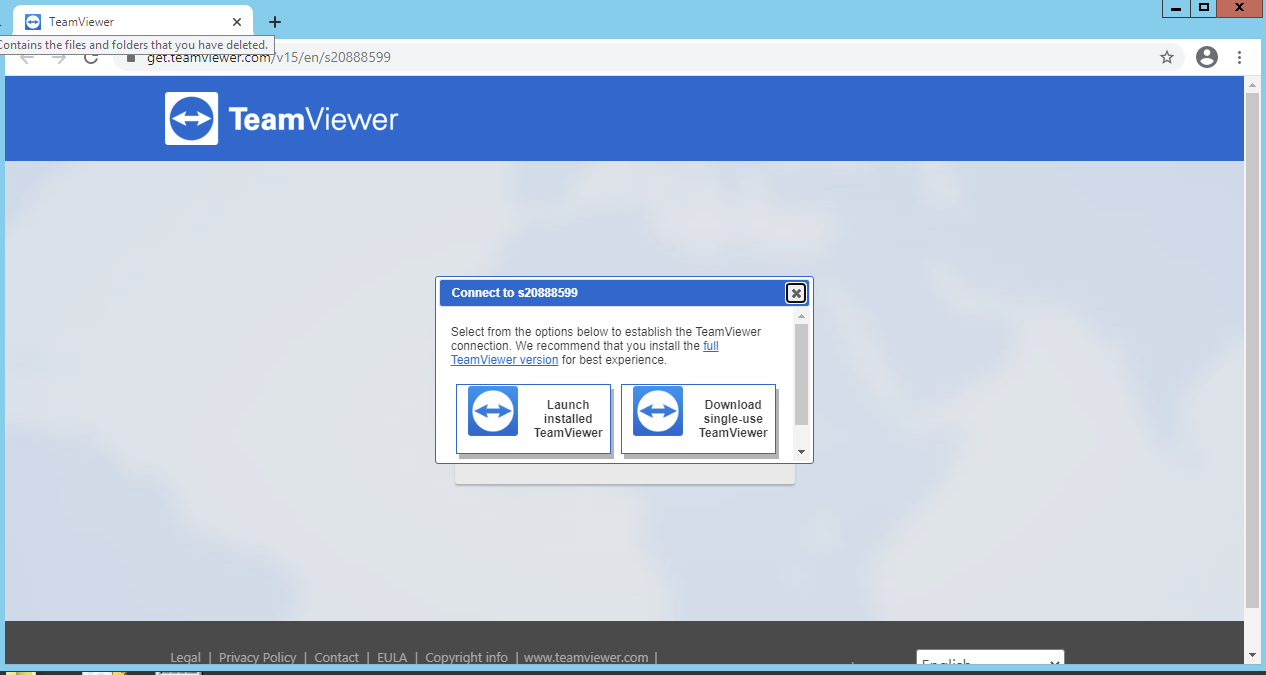 On first launch the TeamViewer app will prompt the user to accept the EULA. Once the admin and client devices have both acknowledged the session, the remote device will be prompted to allow the session: 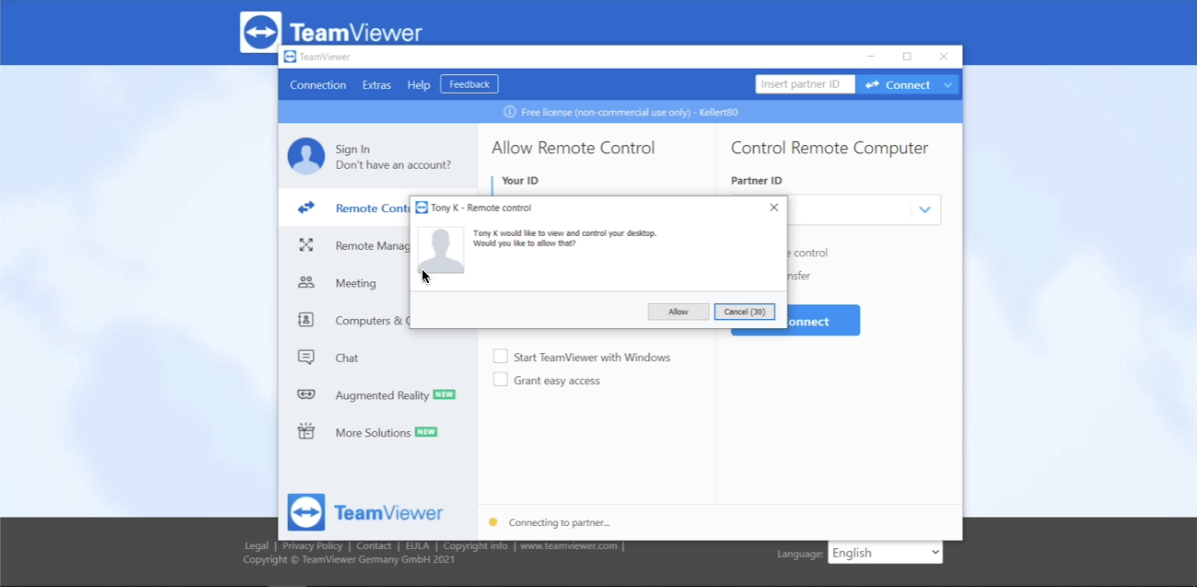 The session begins after the user approves the prompt and the technician launches the corresponding TeamViewer session. 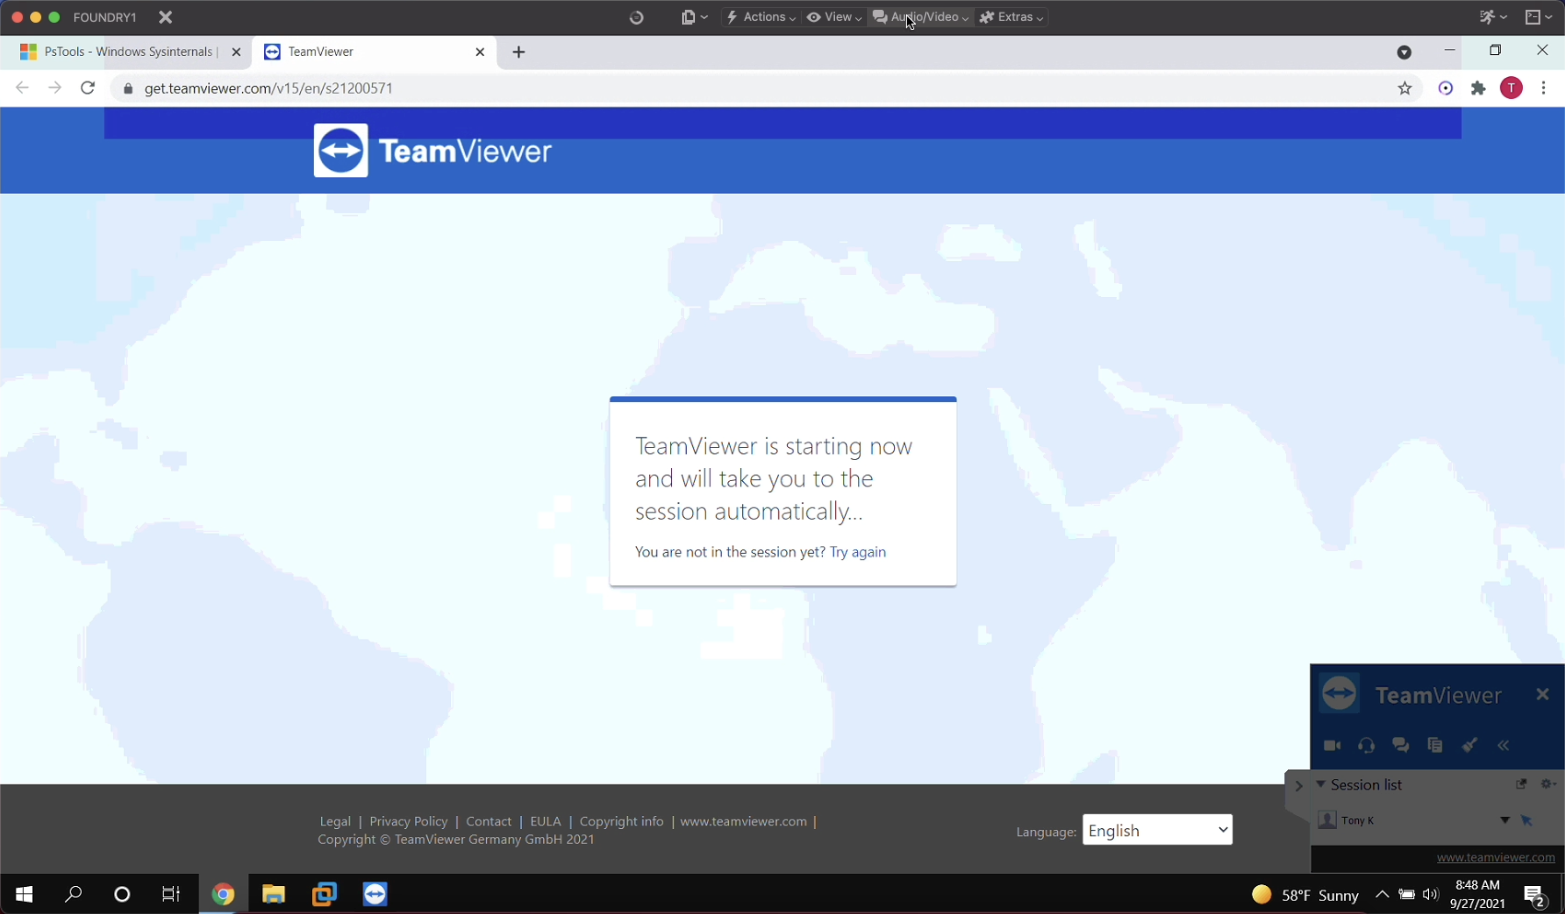 # TeamViewer: Session to a Device where the FileWave agent is broken or missing ## **What** What if the device you are trying to manage doesn't have a FileWave client installed yet, or what if it is malfunctioning in some way? Is there a way to start a TeamViewer session in another way through FIleWave? ## **When/Why** Many times a remote device is in some state of disrepair. Perhaps someone had admin credentials to it and removed all your tools and you need to start the repair process. FileWave gives you a method for starting a remote TV session with that endpoint in a simpler manner than sharing passcodes, etc. ## **How** This particular feature is in the FileWave Web Admin console only. If you have proper access to use TeamViewer, you'll see a new icon in the toolbar beside the model number:  This icon (  ) will allow you to create a link for the customer to use, that you can just send them via email etc: [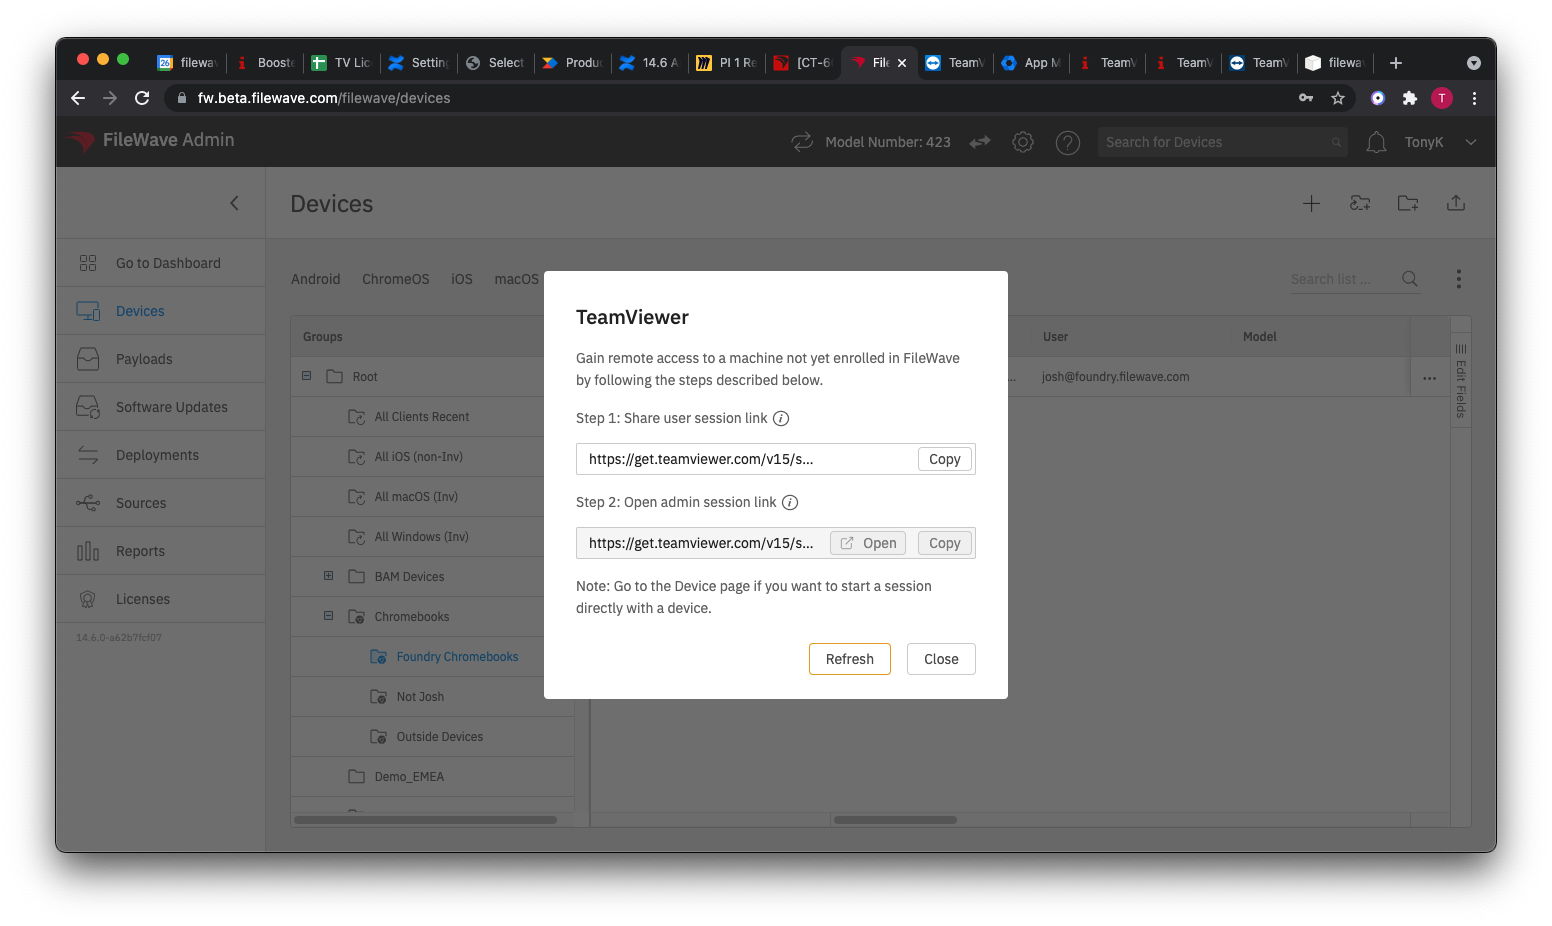](https://kb.filewave.com/uploads/images/gallery/2023-05/1nvIxKWzQfms4ipb-image2021-9-26-17-7-1.png) You share the link with the customer, then click on the second link yourself. Once the customer navigates to the link you sent them, the session will begin just as if the device was in FileWave. # TeamViewer: Frequently Asked Questions ## **What** This FAQ covers common questions about using TeamViewer through FileWave. ## **FAQ** Q: Can you open multiple TeamViewer sessions at the same time? A: Yes. Q: What happens if you try to open a session to a device that is offline? A: The admin computer tries to start the session, but the remote device cannot answer. The request eventually times out. Q: Can the end-user approval steps be skipped? A: Not for attended access. The remote user must accept and allow the session. For unattended access, those prompts can be avoided only if unattended access was set up ahead of time. Q: I already own TeamViewer licenses. Can I use those with FileWave? A: No. TeamViewer use through FileWave is coordinated through FileWave licensing. FileWave does not use a separate license key or a special TeamViewer client, so FileWave can connect to TeamViewer installs whether those installs are licensed separately or not. Q: Is TeamViewer through FileWave licensed per device or per technician? A: TeamViewer through FileWave is licensed per technician. The license controls which technicians can start TeamViewer sessions from FileWave; it is not based on the number of managed devices. Q: Do end users need their own TeamViewer license? A: No. The licensing applies to the technician starting the session from FileWave, not the end user receiving support. Q: Can I add more TeamViewer technician licenses to FileWave? A: Yes. TeamViewer access through FileWave is licensed per technician, not per managed device. If you need additional technician licenses, contact the FileWave [Customer Success](https://kb.filewave.com/link/188) team at