Securly Classroom macOS Agent (Beta)
Overview
Securly Classroom now supports macOS devices, allowing educators to monitor student screens, manage web access, and control application usage. This guide outlines the steps to install and verify the Securly Classroom macOS agent using FileWave.
Why Use the Securly Classroom macOS Agent?
The macOS agent enables:
- Screen Monitoring: View students’ screens in real-time.
- Web Access Management: Enforce content filtering policies in Safari and Chrome.
- Application Control: Restrict or allow certain applications during class sessions.
Installation Steps
1. Deploy the MDM Privacy Profile
Before installing the Securly Classroom agent, you must configure the necessary Privacy Preferences Policy Control (PPPC) profile via FileWave MDM. This profile ensures the agent has permissions to:
- Automation: Allow interaction with the system and other apps.
- Accessibility: Enable monitoring features.
- Screen Recording: Capture student screens.
There are two profiles available from Securly, allowing two deployment options:
- Admin Only: Requires an administrator to grant permissions manually.
- Admin or Students: Allows students to enable permissions themselves.
Admin Only: In this scenario, admins would update each device to ensure that students are unable to change this permission. This is labor-intensive but locked down.
Admin or Students: In this scenario, teachers instruct students on how to enable this permission. Please note that in this configuration, students will then be able to remove this permission. Such matters should be handled by instructing students in your district’s Acceptable Use Policy. This scales more easily, but it requires coordination.
Please note: Screen recording policy follows Apple's privacy policy. Any user can agree to allow screen recording for the application, disable screen recording services, and revoke FileWave's right to view the screen, as per Apple Inc. policy.
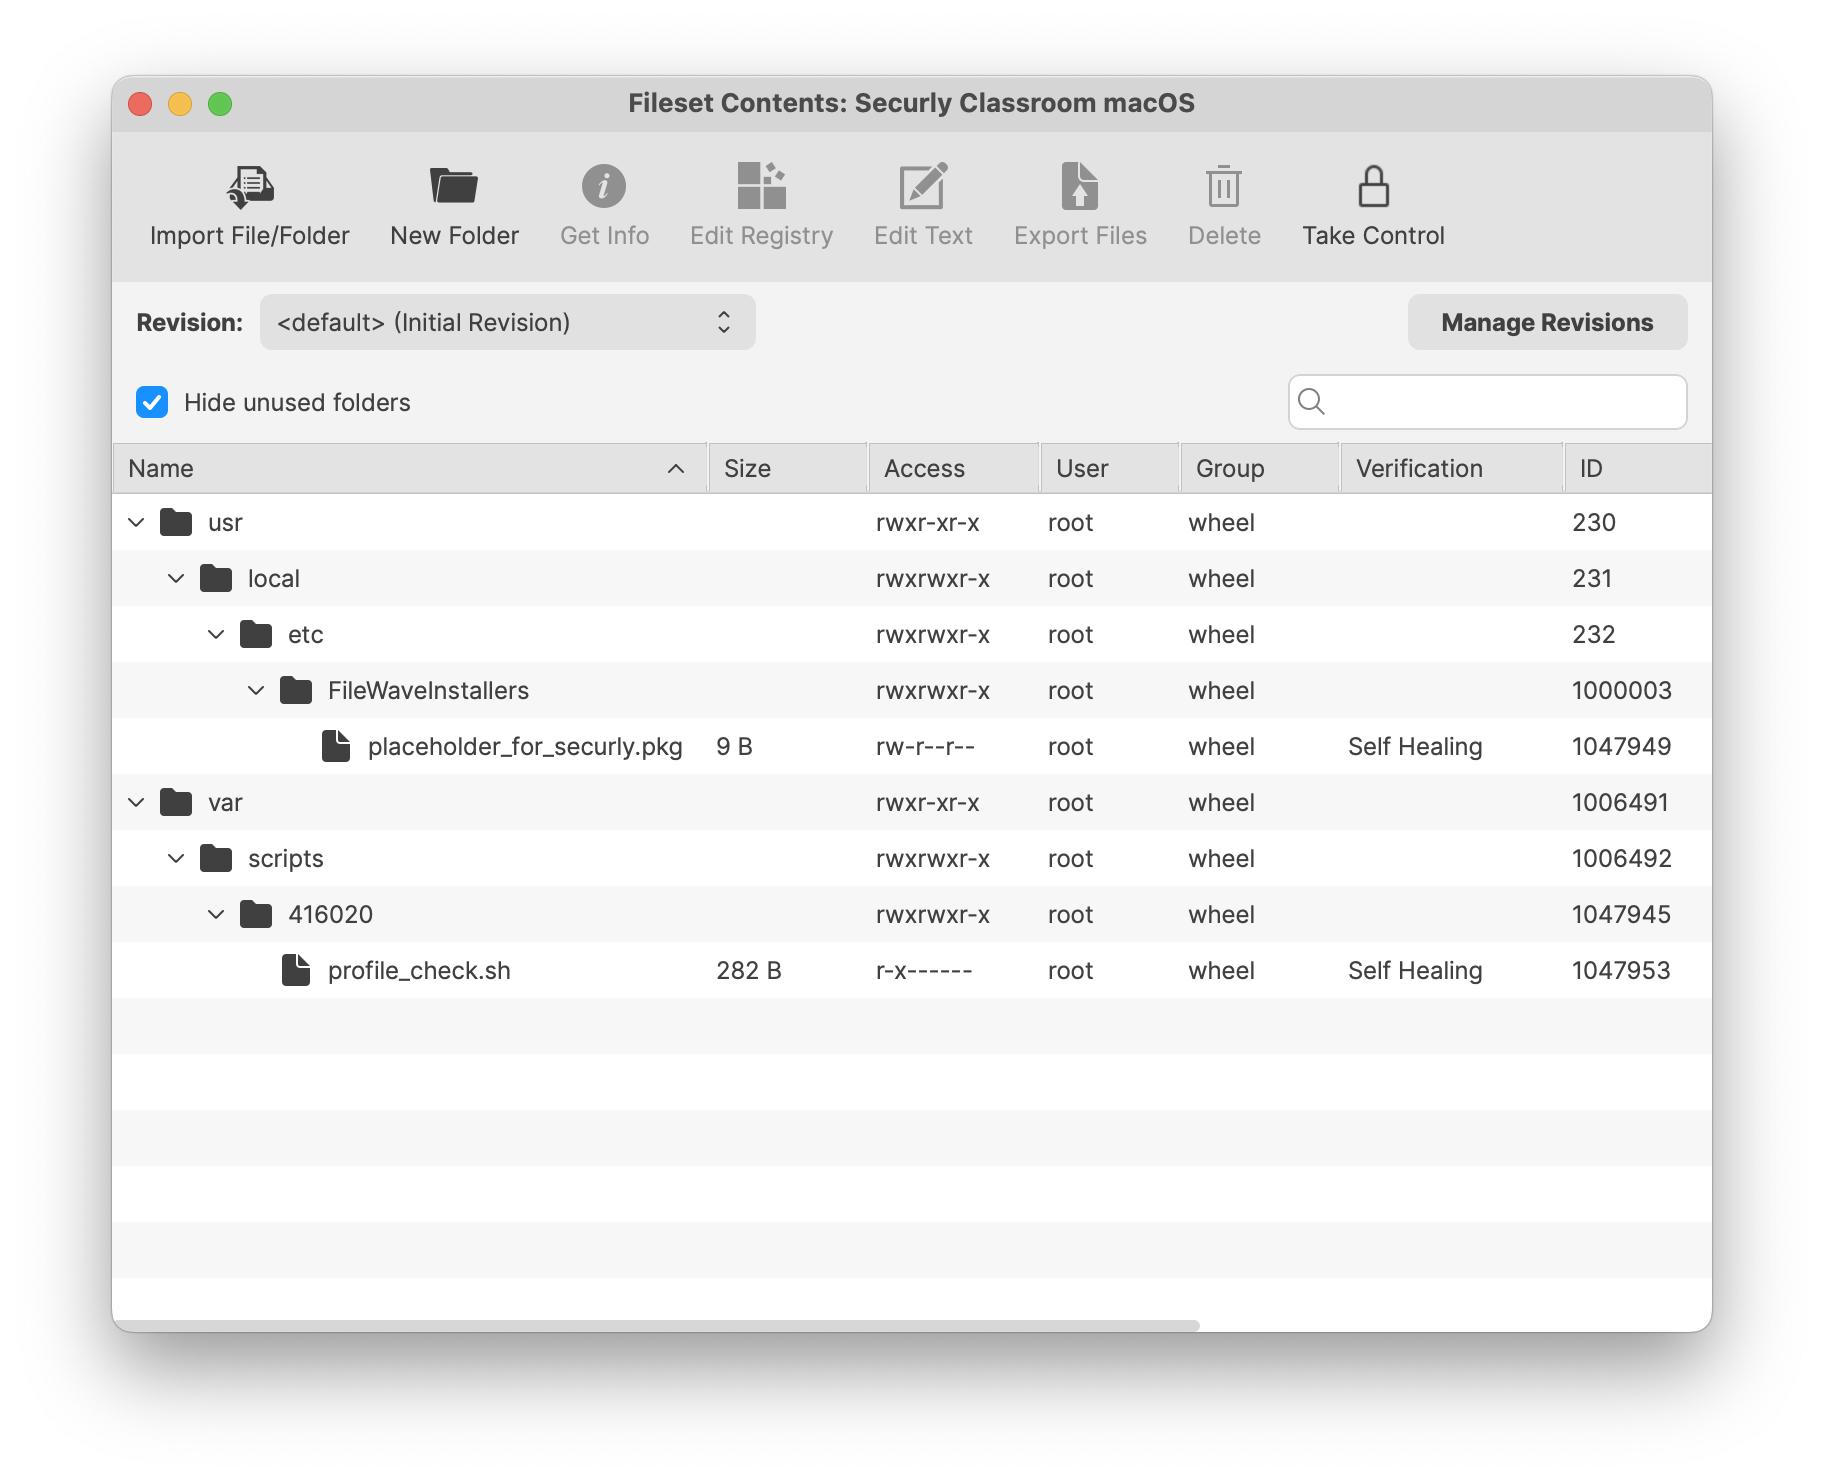
Ensure this profile is deployed before proceeding with the PKG installation. Securly Classroom macOS Fileset has a placeholder for the PKG installer and a requirement script to check TCC Profile is installed before the PKG installation.
Securly Classroom macOS.fileset.zip
Requirement Script:
Where software is already installed and services are active, Privacy Settings Profiles installed subsequently require the service of that software to be restarted. This Fileset example includes a Requirement Script that checks for profile installation before activating Securly, preventing the need to restart the service.
The 'check_profile.sh' script is designed to recognise one of the two provided Profiles and, once installed, allow activation of the Fileset. If Profiles with a different Profile ID are used instead of those supplied, the script settings will require alteration.
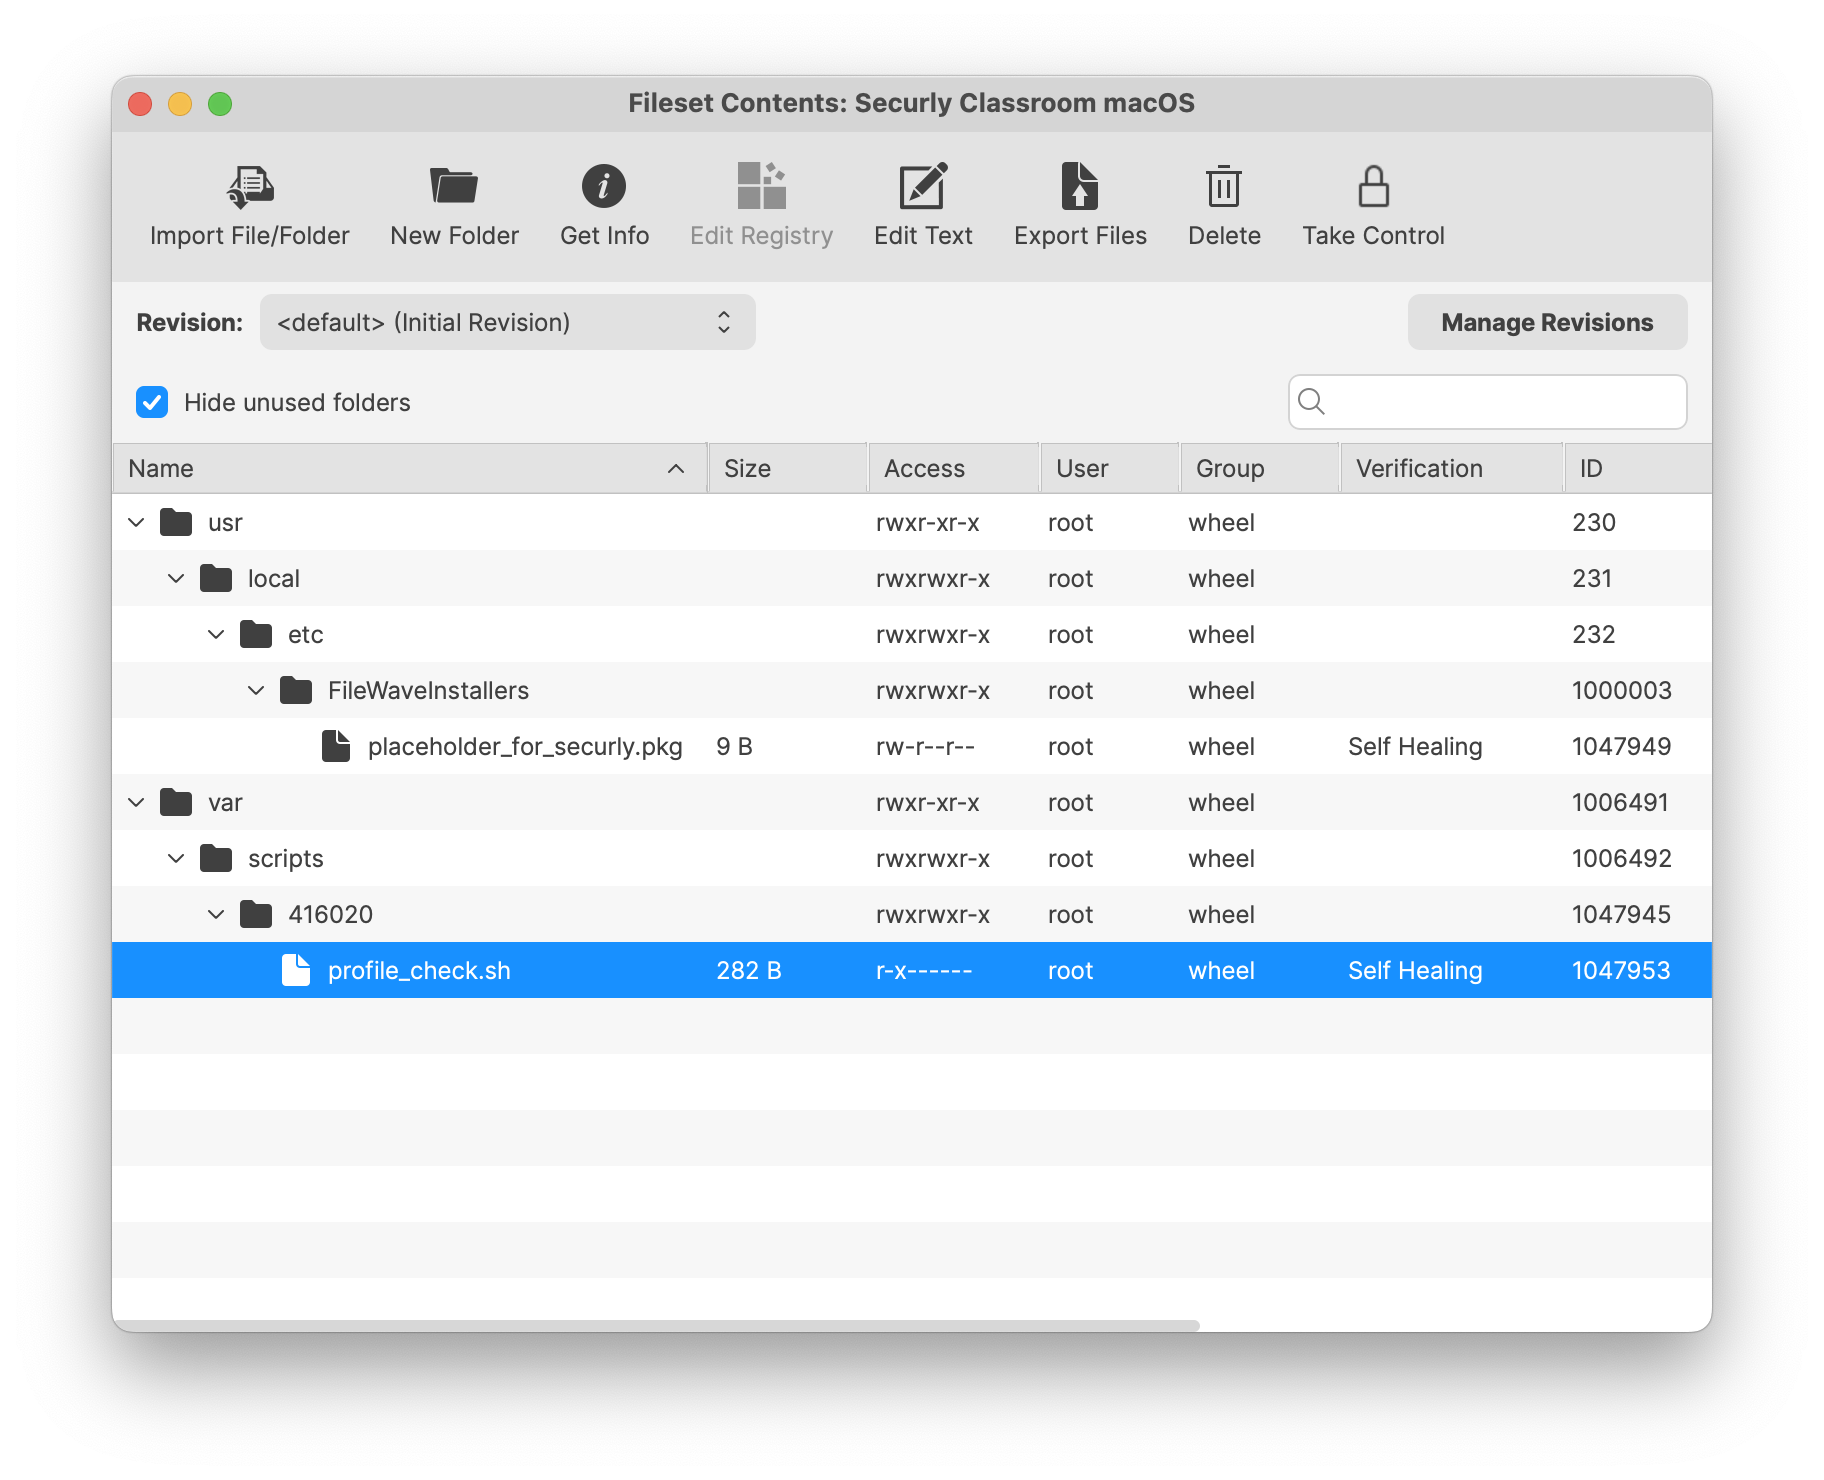
- Double-click the Fileset
- Select the 'check_profile.sh' (located in a numbered subfolder in /var/scripts/)
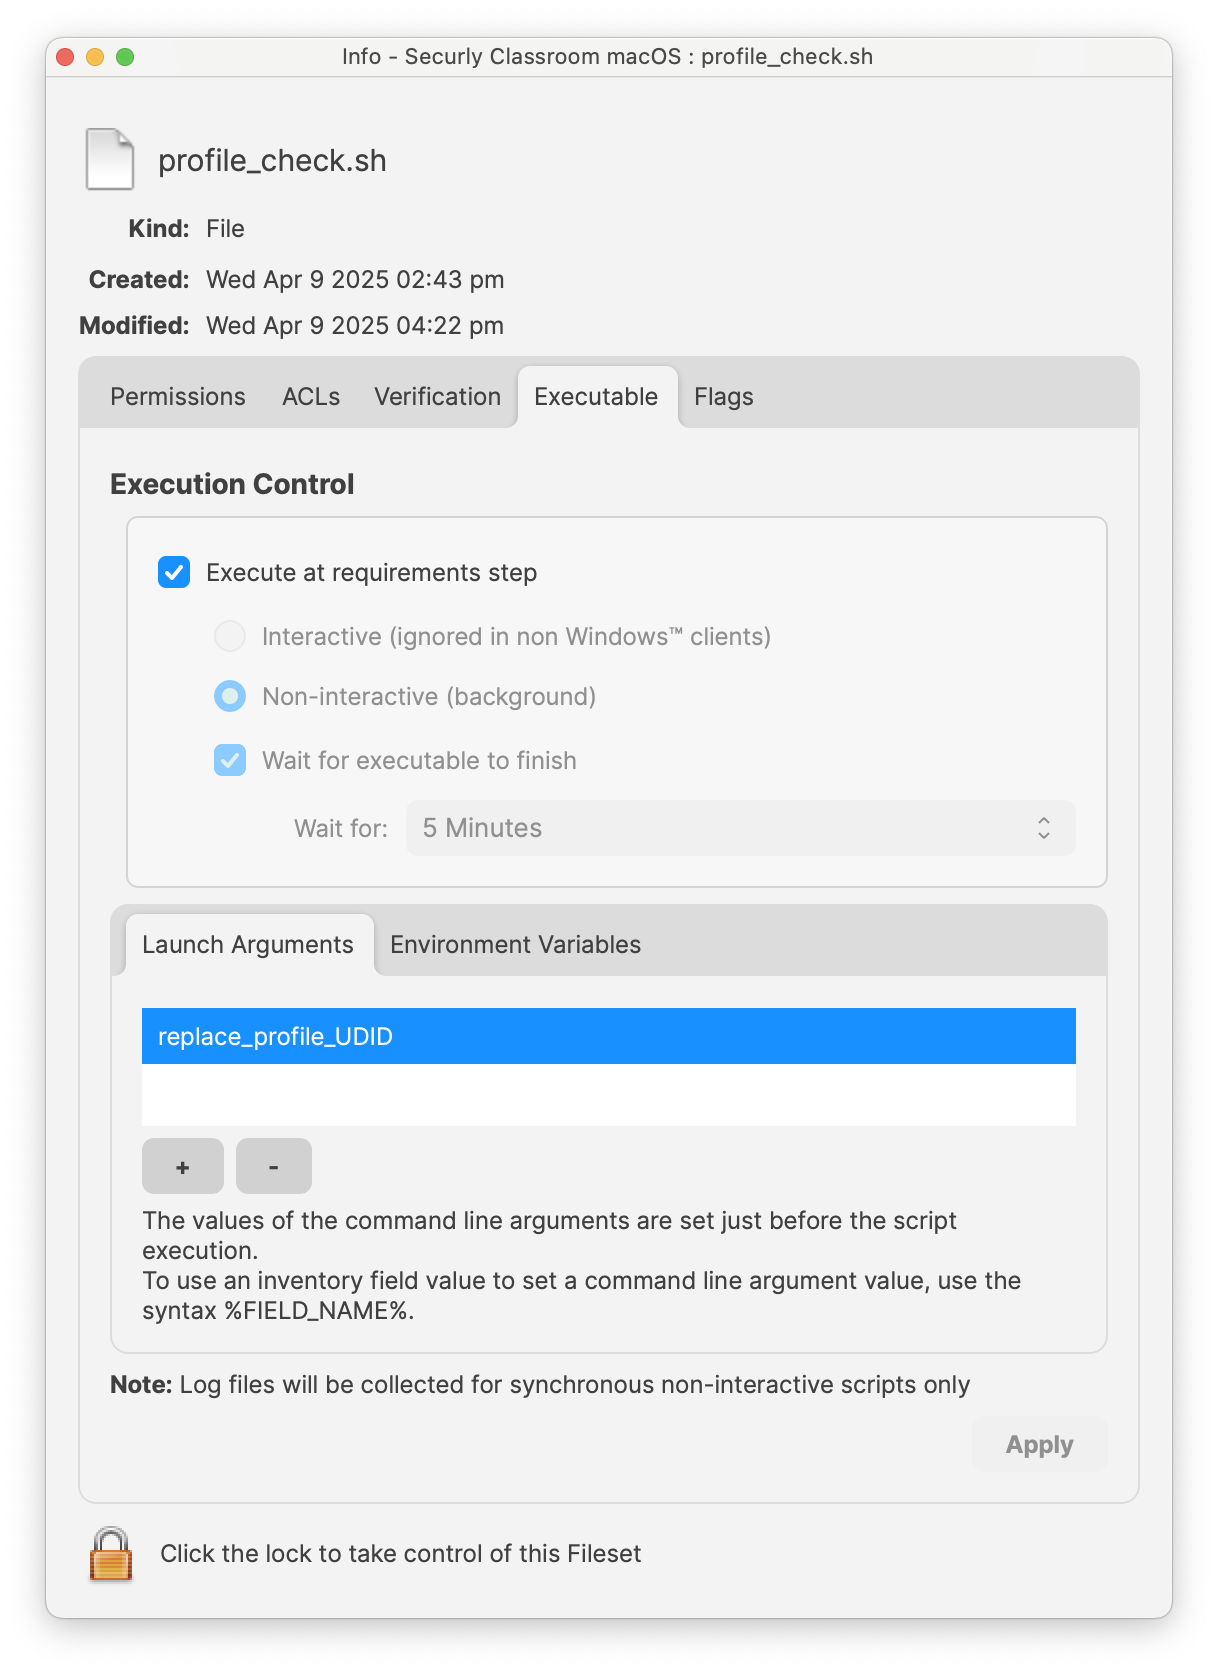
- Choose Get Info > Executable view
The Launch Arguments display the Payload ID of the TCC profile. Add in the correct Fileset Profile UDID.
| Fileset Contents | Check Profile script | Enter the TCC Profile UDID |
 |
 |
 |
2. Obtain and Deploy the PKG Installer/Profile
Once the MDM profile is installed:
- Download the Securly Classroom macOS agent PKG from Securly.
- Import the PKG into the Fileset using FileWave to a few test devices.
- Reboot the device after installation, or require a reboot in the Fileset's properties (Reboot is required by Securly)
- Verify installation by checking for the Securly Classroom icon in the menu bar.
- Deploy the Fileset to your student devices.
3. Update Student Account Information
4. Configure Device Settings
Adjust parental controls or additional security settings to ensure Securly Classroom is always allowed.
Additional Considerations
- Application Blocking: Supports limiting app usage for classroom management.
- Troubleshooting: Ensure the agent is running and permissions are correctly configured if students appear offline.
For further assistance, refer to Securly's official guide.