Booster Installation
Description
A FileWave Booster softwarecan isrun compatible with eitheron macOS, WindowsWindows, or Debian. AllInstallers, necessaryappliances, installers or appliances can be found on theand current downloadinstall pages:commands are on FileWave Software Downloads.
Installers
Debian
LinuxDebian has two options. FileWave provides (as with the FileWave Server) a pre-built Debian VM.VM, Alternatively, it is possiblesimilar to the FileWave Server appliance, or you can self-install the Booster software on a Debian system.
macOS & Windows
Installers are available as PKG or MSI.
AsThe typically withWindows MSI installers, options exist not only forcan install, butrepair, repairor andremove deletionthe Booster software.
Install Paths
Booster installs the software to one of the following locations:
- Windows: C:\Program Files\FileWave\fwBooster.exe
- macOS, Debian: /usr/local/sbin/fwBooster
Booster Configuration
Once installed, configuration is via the Booster Monitor application, available for both macOS and Windows from the same downloads page.
Note that the standalone application, Booster Monitor, will only be able to connect to a Booster for initial configuration. Once a Booster is configured you must access Booster Monitor from FileWave Central in the Boosters section. This is because authentication is protected, and the FileWave Central application provides a secure connection. Launching Booster Monitor directly would not have that same authentication, and you will see an error about the Booster not running.
Installation
Debian
If using the pre-built Debian Appliance, simply add the VM to the VM infrastructure. Alternatively, follow the commands provided on the downloads page.
macOS & Windows
Run the relevant PKG or MSI installer, accepting any terms and agreements.
Custom Installers may be created, pre-defining details, e.g. Server Address, Port and Booster Monitor Preferences password: Custom Installers
Configuration
Network Address
Configure a static IP for the Booster and consider adding a Domain Name within the DNS for this IP.
macOS and Windows Boosters can be configured using thethrough Settings. However, Debian willBoosters require somecommand-line command linenetwork configuration.
Debian IP Setup
Network Interface
The current IP may be determined with the 'ip addr' command:
# ip addr
1: lo: <LOOPBACK,UP,LOWER_UP> mtu 65536 qdisc noqueue state UNKNOWN group default qlen 1000
    link/loopback 00:00:00:00:00:00 brd 00:00:00:00:00:00
    inet 127.0.0.1/8 scope host lo
       valid_lft forever preferred_lft forever
    inet6 ::1/128 scope host noprefixroute
       valid_lft forever preferred_lft forever
2: ens192: <BROADCAST,MULTICAST,UP,LOWER_UP> mtu 1500 qdisc mq state UP group default qlen 1000
    link/ether 00:0c:29:9d:4d:7e brd ff:ff:ff:ff:ff:ff
    altname enp11s0
    inet 192.168.1.98/24 brd 192.168.1.255 scope global dynamic ens192
       valid_lft 68853sec preferred_lft 68853sec
    inet6 fe80::20c:29ff:fe9d:4d7e/64 scope link
       valid_lft forever preferred_lft forever
The key part here is the name of the network interface. In the above example, this is 'ens192'.
Edit Network File
Make a backup of the current file:
cp /etc/network/interfaces /etc/network/interfaces-mybackupEdit the original file:
sudo nano /etc/network/interfacesAdd the chosen IP and other necessary details for this interface. Given the details above, it may look something like the below once edited:
# This file describes the network interfaces available on your system
# and how to activate them. For more information, see interfaces(5).

source /etc/network/interfaces.d/*

# The loopback network interface
auto lo
iface lo inet loopback

# The primary network interface
iface ens192 inet static
address 192.168.1.22
netmask 255.255.255.0
gateway 192.168.1.255
dns-nameservers 8.8.4.4 8.8.8.8
Once complete, save and then restart the network service:
sudo systemctl restart networkingRe-running the 'ip addr' command should now show the new details.
Add a name with this IP on the DNS.
Booster Setup
Install the Booster Monitor on a chosen macOS or Windows device. OnWhen launchingyou thelaunch Booster Monitor, useconnect to the abovenetwork address you created networkfor address.the Booster. The initial view is akinsimilar to the FileWave Client Monitor, but withit Boostershows Booster-specific details:

Select Preferences, then enter the created password (you created, or the default password as provided from the downloadsDownloads page)page.
ConsiderChange changingthe thisdefault Booster Monitor password atduring the earliest possible momentsetup.
This password is only used to access the Preferences from the Booster Monitor.
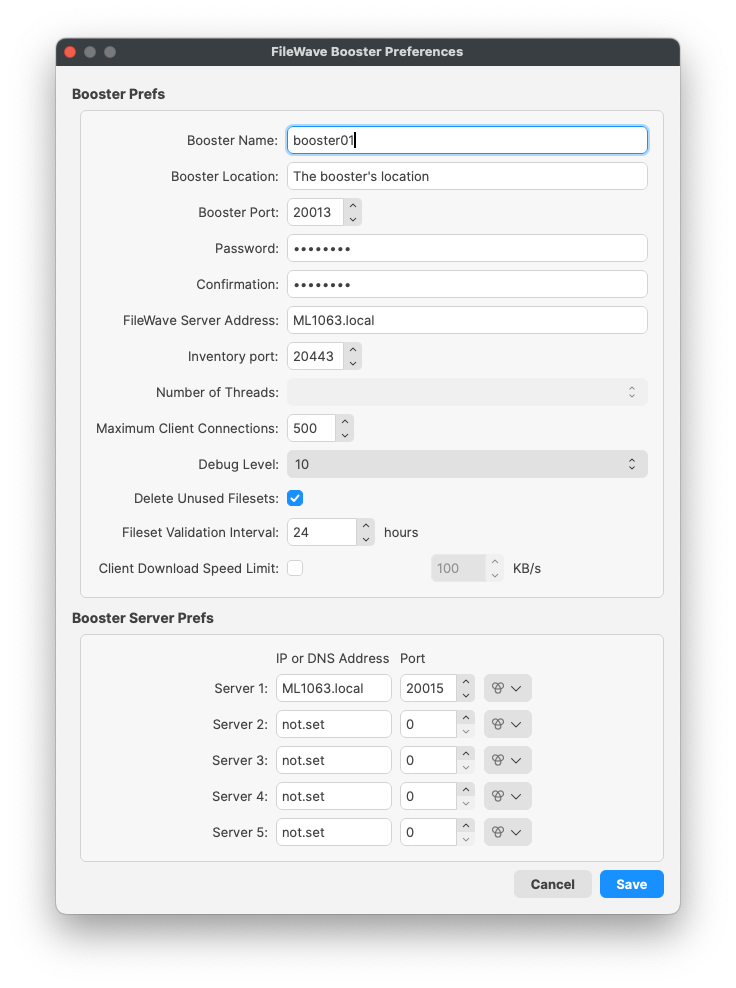
The Booster Monitor may then be used to configure the Booster. At a very basic level, the Server Address and port should be added.
Approving Boosters
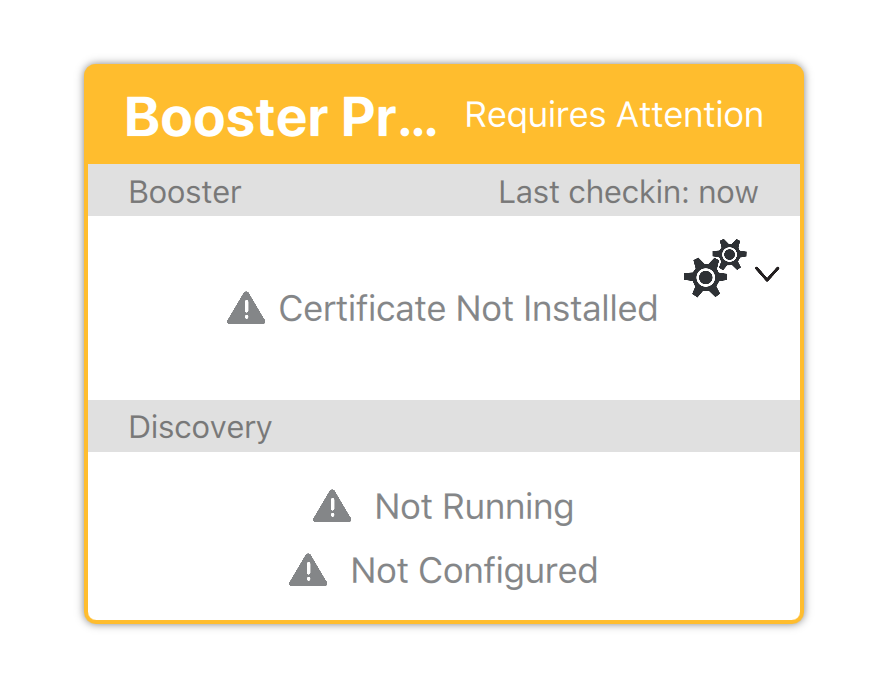
Once a Booster is setup on the network with the relevant FileWave Server details, it should then check-in with the server and be visible in the Booster section of the FileWave Central admin application software.
AsCurrent ofBoosters use certificate-based approval before the FileWave 13.1.0,Server additionaltrusts security and certificates were introduced, requiring the approval process.them.
The approval process generates a certificate for the Booster. There are four ways to generate a certificate for a booster.
- Select booster(s) in the Booster view → right-click → Create Certificate/Enroll Booster
- Select booster(s) in the Booster view → Create Certificate/Enroll Booster (in the button bar)
- Select booster(s) in the Booster Details → right-click → Create Certificate/Enroll Booster
- Select booster(s) in the Booster Details → Create Certificate/Enroll Booster (in the button bar)
Booster Deletion
If you delete a Booster were deleted from FileWave, thisFileWave willrevokes revoke theits certificate. If the Booster is still running, onit a subsequent check-in, the approval process should need tomust be re-actioned.approved again after its next check-in.