
Windows Sysprep Guide


Use this guide when preparing a Windows reference device for capture and deployment with FileWave Network IVS.
Before capturing the image, run Microsoft Sysprep. Sysprep removes system-specific data from Windows and prepares the image to complete setup the next time it starts.
Basic workflow
/generalize /oobe /shutdown.
When the device shuts down, leave it off and capture it with FileWave IVS. If Windows starts again before capture, run Sysprep again before capturing.
Create or validate an answer file
An answer file is only needed if you want to automate Windows setup or OOBE choices after the image is deployed. If you do use one, create or validate it before running Sysprep.
For the examples below, save the file on the reference device as C:\Sysprep\unattend.xml.
If you are new to this process, start with the smallest answer file that handles the setup choices you actually need. Add disk or Windows PE settings only when you know the workflow requires them.
The Microsoft-supported method is Windows System Image Manager, which is included with the Windows Assessment and Deployment Kit (ADK). Use ADK/Windows SIM that matches the Windows version you are preparing as closely as possible.
Third-party generators can be helpful for building a starting point, but FileWave does not own or validate their output. If you use one, review the XML and test it in a lab before using it for a master image.
If a generator includes Windows PE, disk partitioning, or UEFI/GPT settings, check those settings carefully. For a normal FileWave reference-image capture, you usually only need the Sysprep answer file; Windows PE partitioning scripts are a separate clean-install workflow.
For UEFI/GPT systems, Microsoft documents the EFI System Partition as FAT32 with a minimum size of 200 MB.
Check the reference device
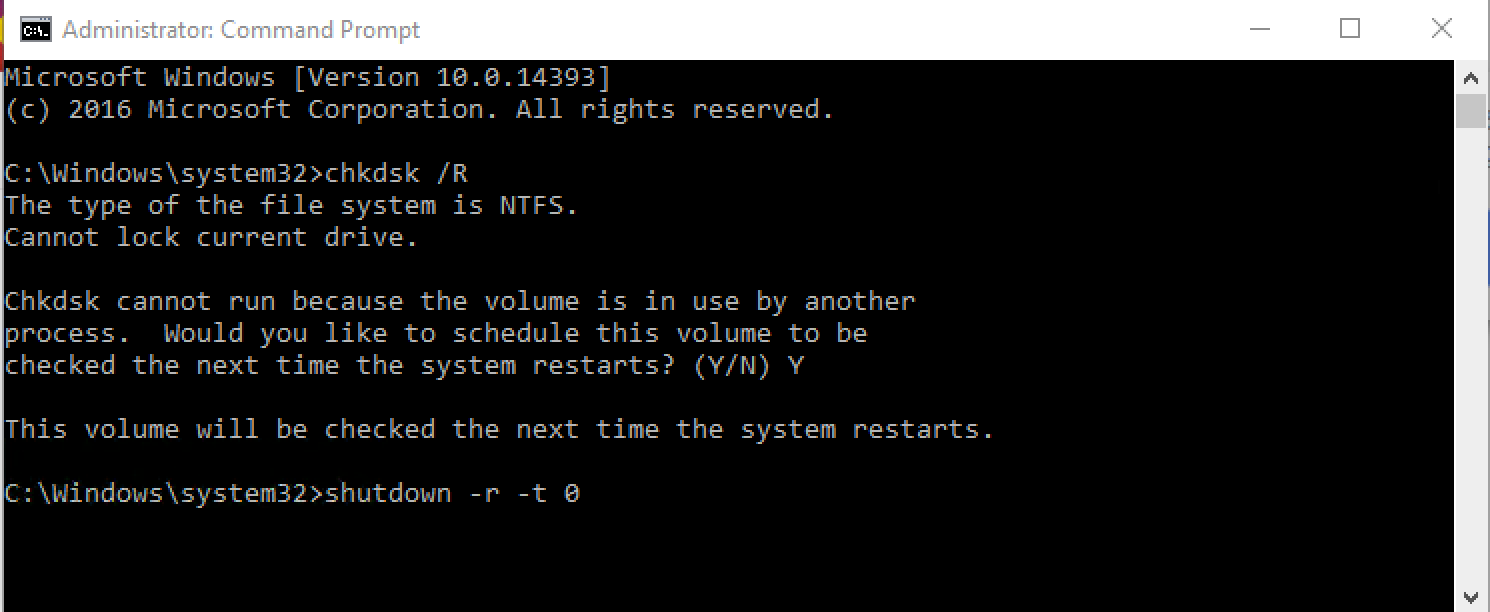
Run Check Disk before Sysprep. Open Command Prompt as administrator and run:
chkdsk /R
shutdown /r /t 0
If Windows says the disk is in use, choose to schedule the check for the next restart, then restart with the second command.
Run Sysprep
After Check Disk completes and Windows starts again, run Sysprep from an administrator Command Prompt.
With an answer file:
C:\Windows\System32\Sysprep\sysprep.exe /generalize /oobe /shutdown /unattend:C:\Sysprep\unattend.xmlIf the answer file path contains spaces, quote the path:
C:\Windows\System32\Sysprep\sysprep.exe /generalize /oobe /shutdown /unattend:"C:\Path With Spaces\unattend.xml"Without an answer file:
C:\Windows\System32\Sysprep\sysprep.exe /generalize /oobe /shutdownWhen Sysprep finishes, the device shuts down. Do not boot it back into Windows before capture. At that point, upload the master image to the FileWave Imaging Appliance.
If Sysprep or deployment fails
- Confirm the
/unattend:path points to the actual XML file on the reference device. - Avoid spaces in the answer file path, or quote the path as shown above.
- Review
C:\Windows\System32\Sysprep\Panther\setupact.logandC:\Windows\System32\Sysprep\Panther\setuperr.log. - Run Sysprep again without an answer file. If that works, focus on the answer file, generator choices, or partitioning settings.
- If UEFI/GPT or EFI partition behavior is involved, compare the answer file or generated Windows PE script with Microsoft guidance for UEFI/GPT partitions.
- If Sysprep succeeds but capture or deployment fails, troubleshoot FileWave Network IVS separately.