Microsoft Office Deployment for Windows: Office 2019/2021, Office LTSC 2024, and Microsoft 365 Apps
Description
Need to deploy Microsoft Office to Windows devices with FileWave? This recipe covers deployment of current Click-to-Run Office packages, including:
This recipe uses the Microsoft Office Deployment Tool, also called ODT, to download Office installation files, create an offline/local deployment source, and silently install or uninstall Office 365through ontoa yourFileWave WindowsFileset.
Microsoft We'verecommends gotusing youthe covered!latest Office Deployment Tool and the Office Customization Tool to build the configuration XML
Note the Fileset below is based fromon the Microsoft Article listed here: https://docs.learn.microsoft.com/en-us/deployoffice/office2019/office/ltsc/2024/deploy
Ingredients
- FileWave Central
- Office Deployment Tool
- Office Config XML
- Office
2019DeploymentFileset TemplateTemplate.fileset.zip
This Fileset utilizes scripts to install and uninstall Office. After the Fileset is deployed and activated it can take a few minutes for the Office installation to be completed. When the Office Fileset is removed from the device (by removing the association in FileWave) a script will start that will uninstall Office from the clients.
ForDo not mix 32-bit and 64-bit Office 365on justthe substitutesame device. If Office is already installed and your XML specifies a different architecture, the installation can fail unless you intentionally use architecture migration options.
Set up and Configurations
For silent deployment, use:
<Display Level="None" AcceptEULA="TRUE" />Microsoft documents that Level="None" suppresses the Office installation UI and that administrators should set AcceptEULA="TRUE" for silent installations.
Common Office product IDs and channels
O365ProPlusRetail
Current, MonthlyEnterprise, or SemiAnnual
Microsoft 365 Apps for business
O365BusinessRetail
Current, MonthlyEnterprise, or SemiAnnual
Microsoft 365 Apps enterprise, no Teams
O365ProPlusEEANoTeamsRetail
Current, MonthlyEnterprise, or SemiAnnual
Microsoft 365 Apps business, no Teams
O365BusinessEEANoTeamsRetail
Current, MonthlyEnterprise, or SemiAnnual
Office LTSC Professional Plus 2024
ProPlus2024Volume
PerpetualVL2024
Office LTSC Standard 2024
Standard2024Volume
PerpetualVL2024
Project Professional 2024
ProjectPro2024Volume
PerpetualVL2024
Project Standard 2024
ProjectStd2024Volume
PerpetualVL2024
Visio Professional 2024
VisioPro2024Volume
PerpetualVL2024
Visio Standard 2024
VisioStd2024Volume
PerpetualVL2024
Office LTSC Professional Plus 2021
ProPlus2021Volume
PerpetualVL2021
Office Professional Plus 2019
ProPlus2019Volume
PerpetualVL2019
Microsoft’s supported product ID list includes Microsoft 365 product IDs, Office 2024 volume product IDs, Project 2024, Visio 2024, and Office 2021 IDs. Microsoft also documents that Office LTSC 2024 uses PerpetualVL2024, Office LTSC 2021 uses PerpetualVL2021, and Office 2019 whereuses it'sPerpetualVL2019.
Recommended belowFileset structure
Create one Fileset per Office deployment type, for example:
Office-2024-ProPlus-Windows.fileset
Office-365-Apps-Enterprise-Windows.fileset
Office-365-Apps-Business-Windows.fileset
Office-2024-Visio-Project-Windows.fileset
Inside the Fileset, use a consistent folder path such as:
C:\ProgramData\FileWave\Installers\OfficeRecommended Fileset contents:
C:\ProgramData\FileWave\Installers\Office\setup.exe
C:\ProgramData\FileWave\Installers\Office\configuration.xml
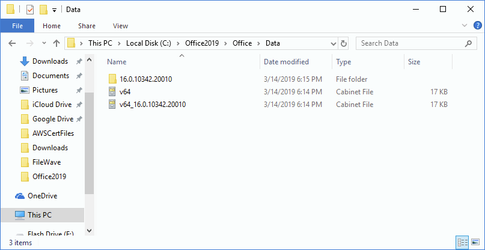
C:\ProgramData\FileWave\Installers\Office\Data
C:\ProgramData\FileWave\Installers\Office\install-office.ps1
C:\ProgramData\FileWave\Installers\Office\uninstall-office.ps1The Office folder is created by ODT when using /download. Microsoft notes that after a download, the source folder should contain an Office folder with a Data subfolder and versioned download content.
Directions
These
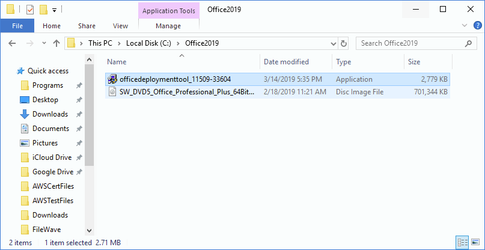
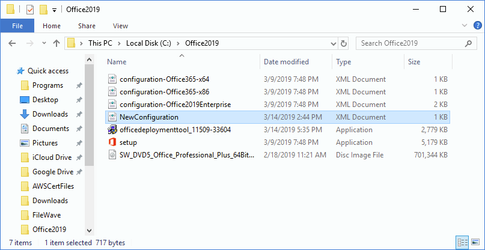
Step directions1: assume you are creating an Office2019 folder on your local C:\ drive and you name the XML NewConfiguration. If you change the folder location, folder name, or XML name make sure you modify the steps below with your modifications.
Download the latest Office Deployment Tool from Microsoft and extract it to a working folder on your technician machine, for example:
C:\OfficeDeployment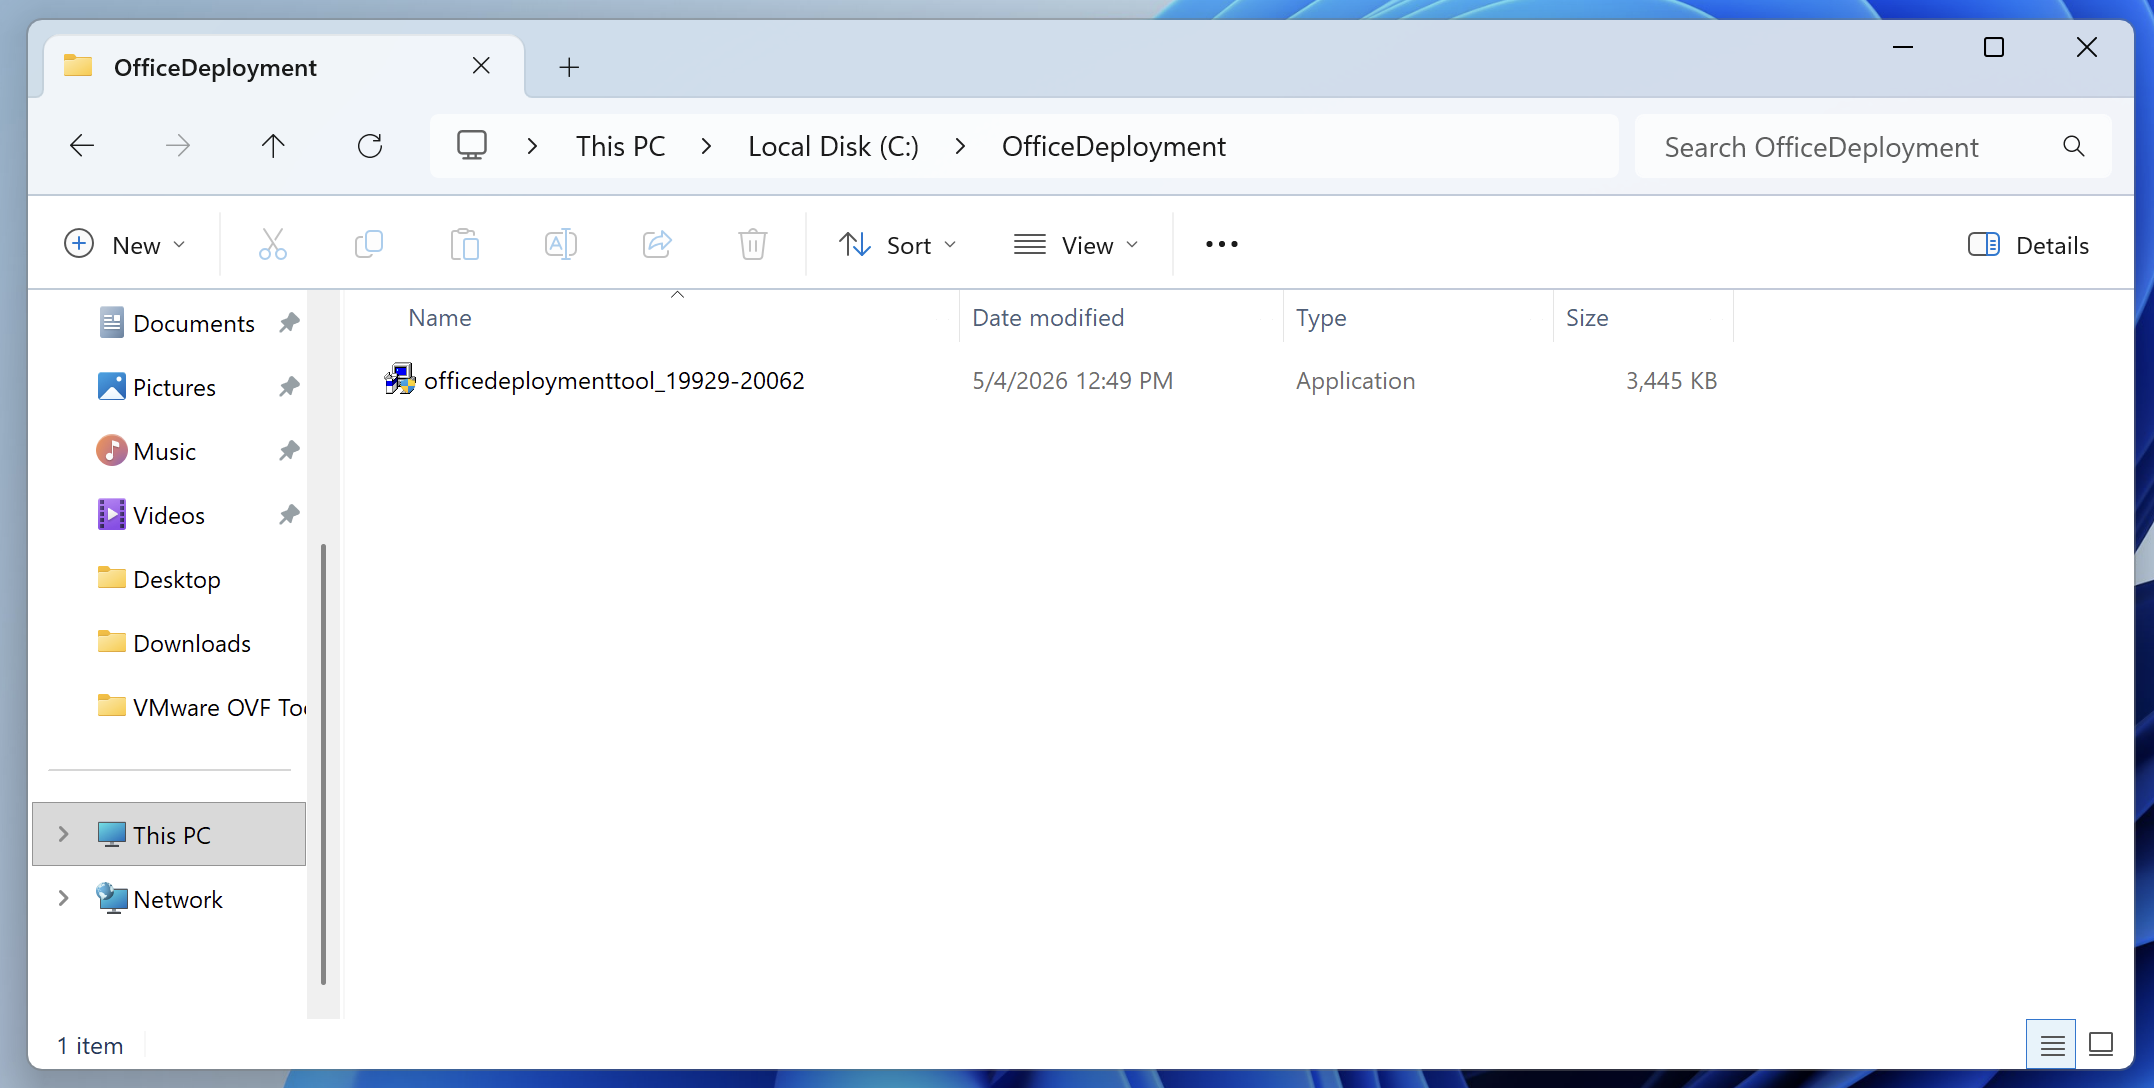
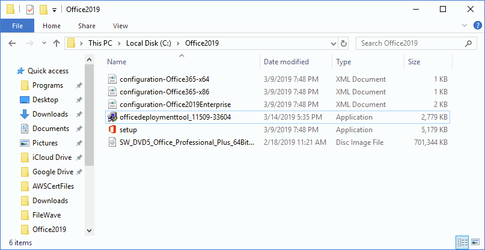
After extraction, the sitefolder below:
should contain:
setup.exe
configuration.xml or configuration-Office365-x64
https://www.microsoft.com/en-us/download/details.aspx?id=49117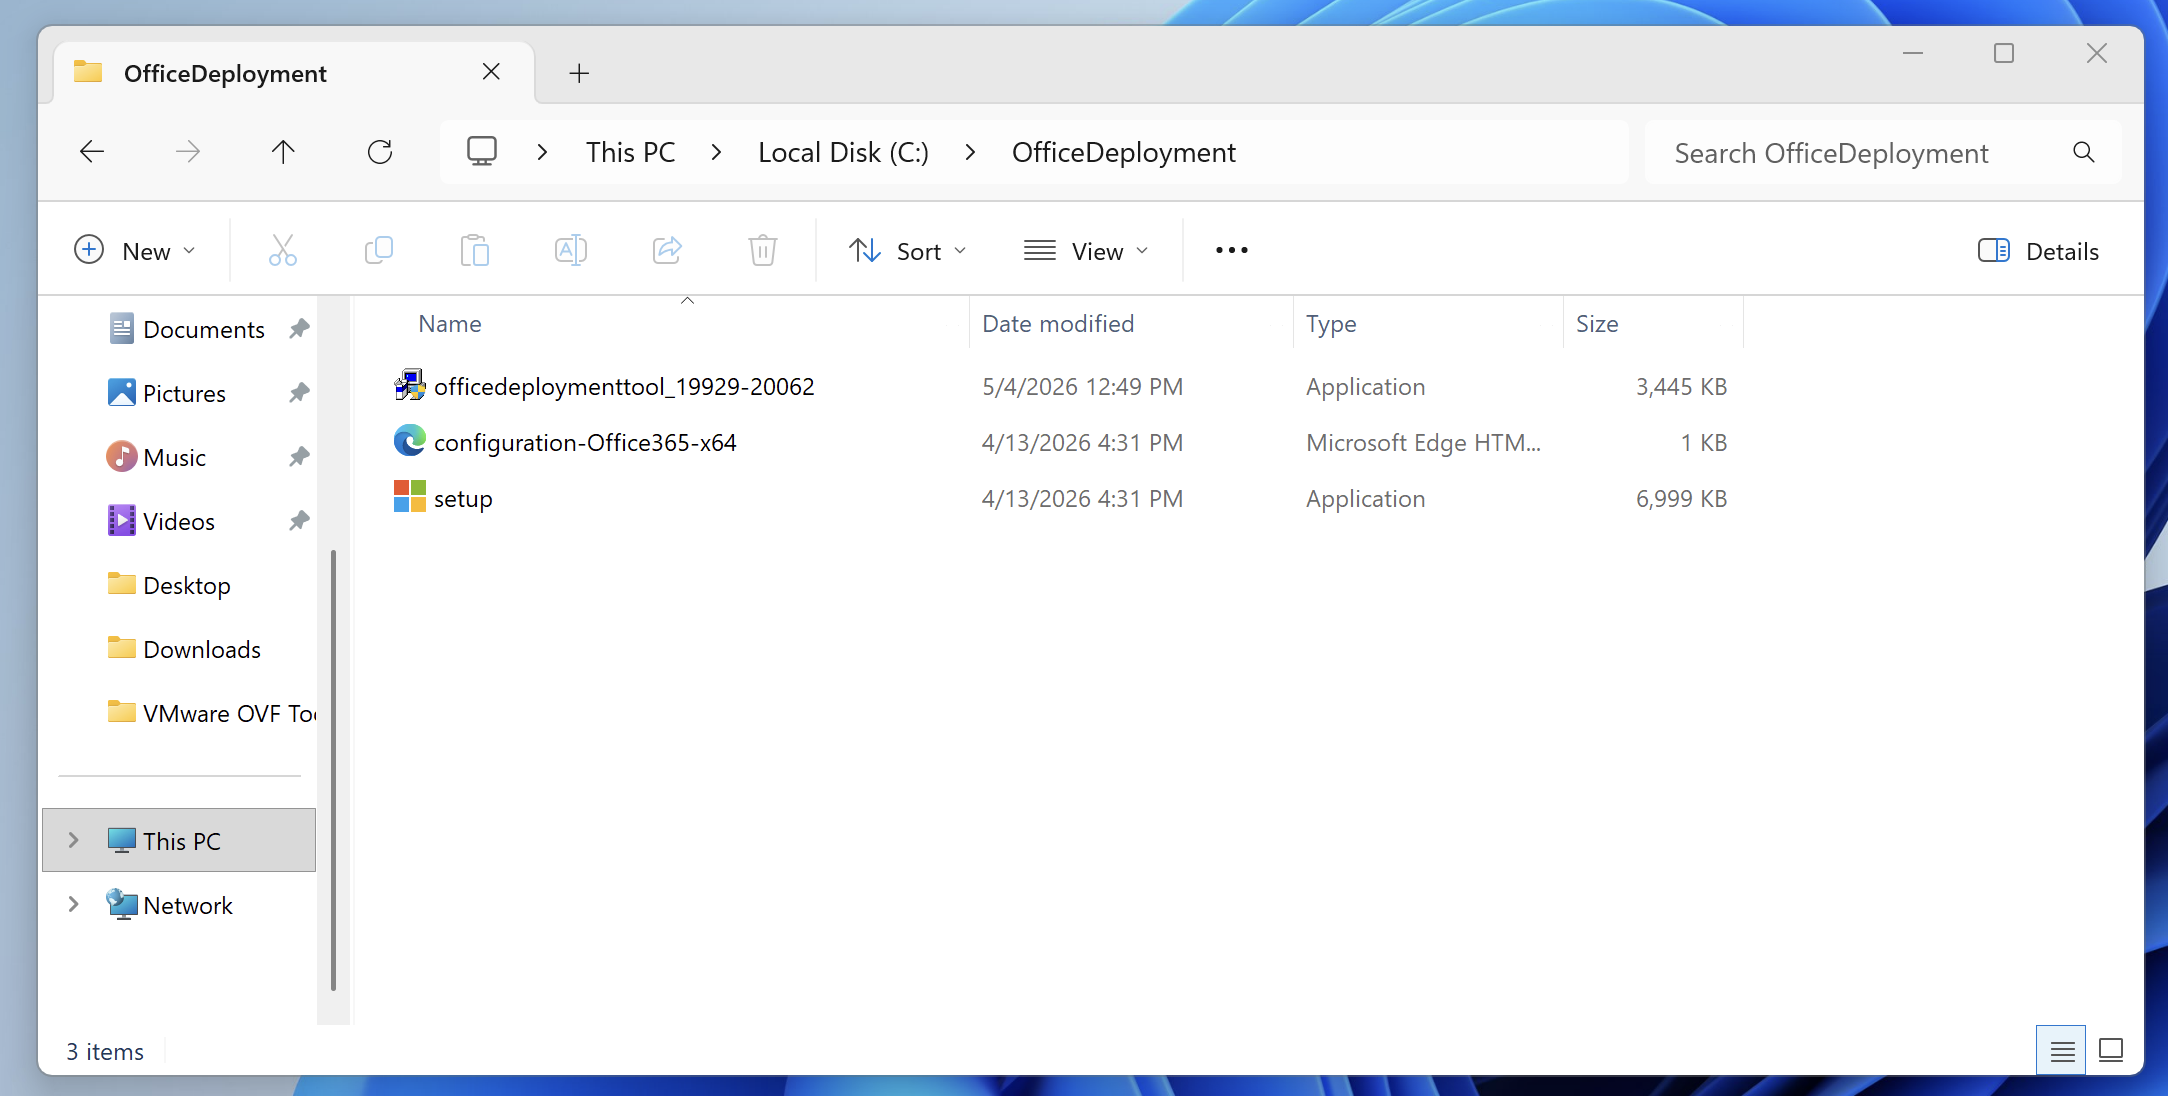
The setup.exe file is the Office Deployment Tool tocommand-line getexecutable which we will use later in Step 3.
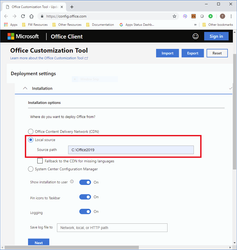
Step 2: Create the setup.execonfiguration XML
Use Microsoft’s Office Customization Tool to generate your XML. Microsoft recommends using the Office Customization Tool rather than manually writing XML, because it helps define products, languages, update behavior, display behavior, and examplelicensing settings.
When creating the XML, confirm the following:
Source path example:
C:\ProgramData\FileWave\Installers\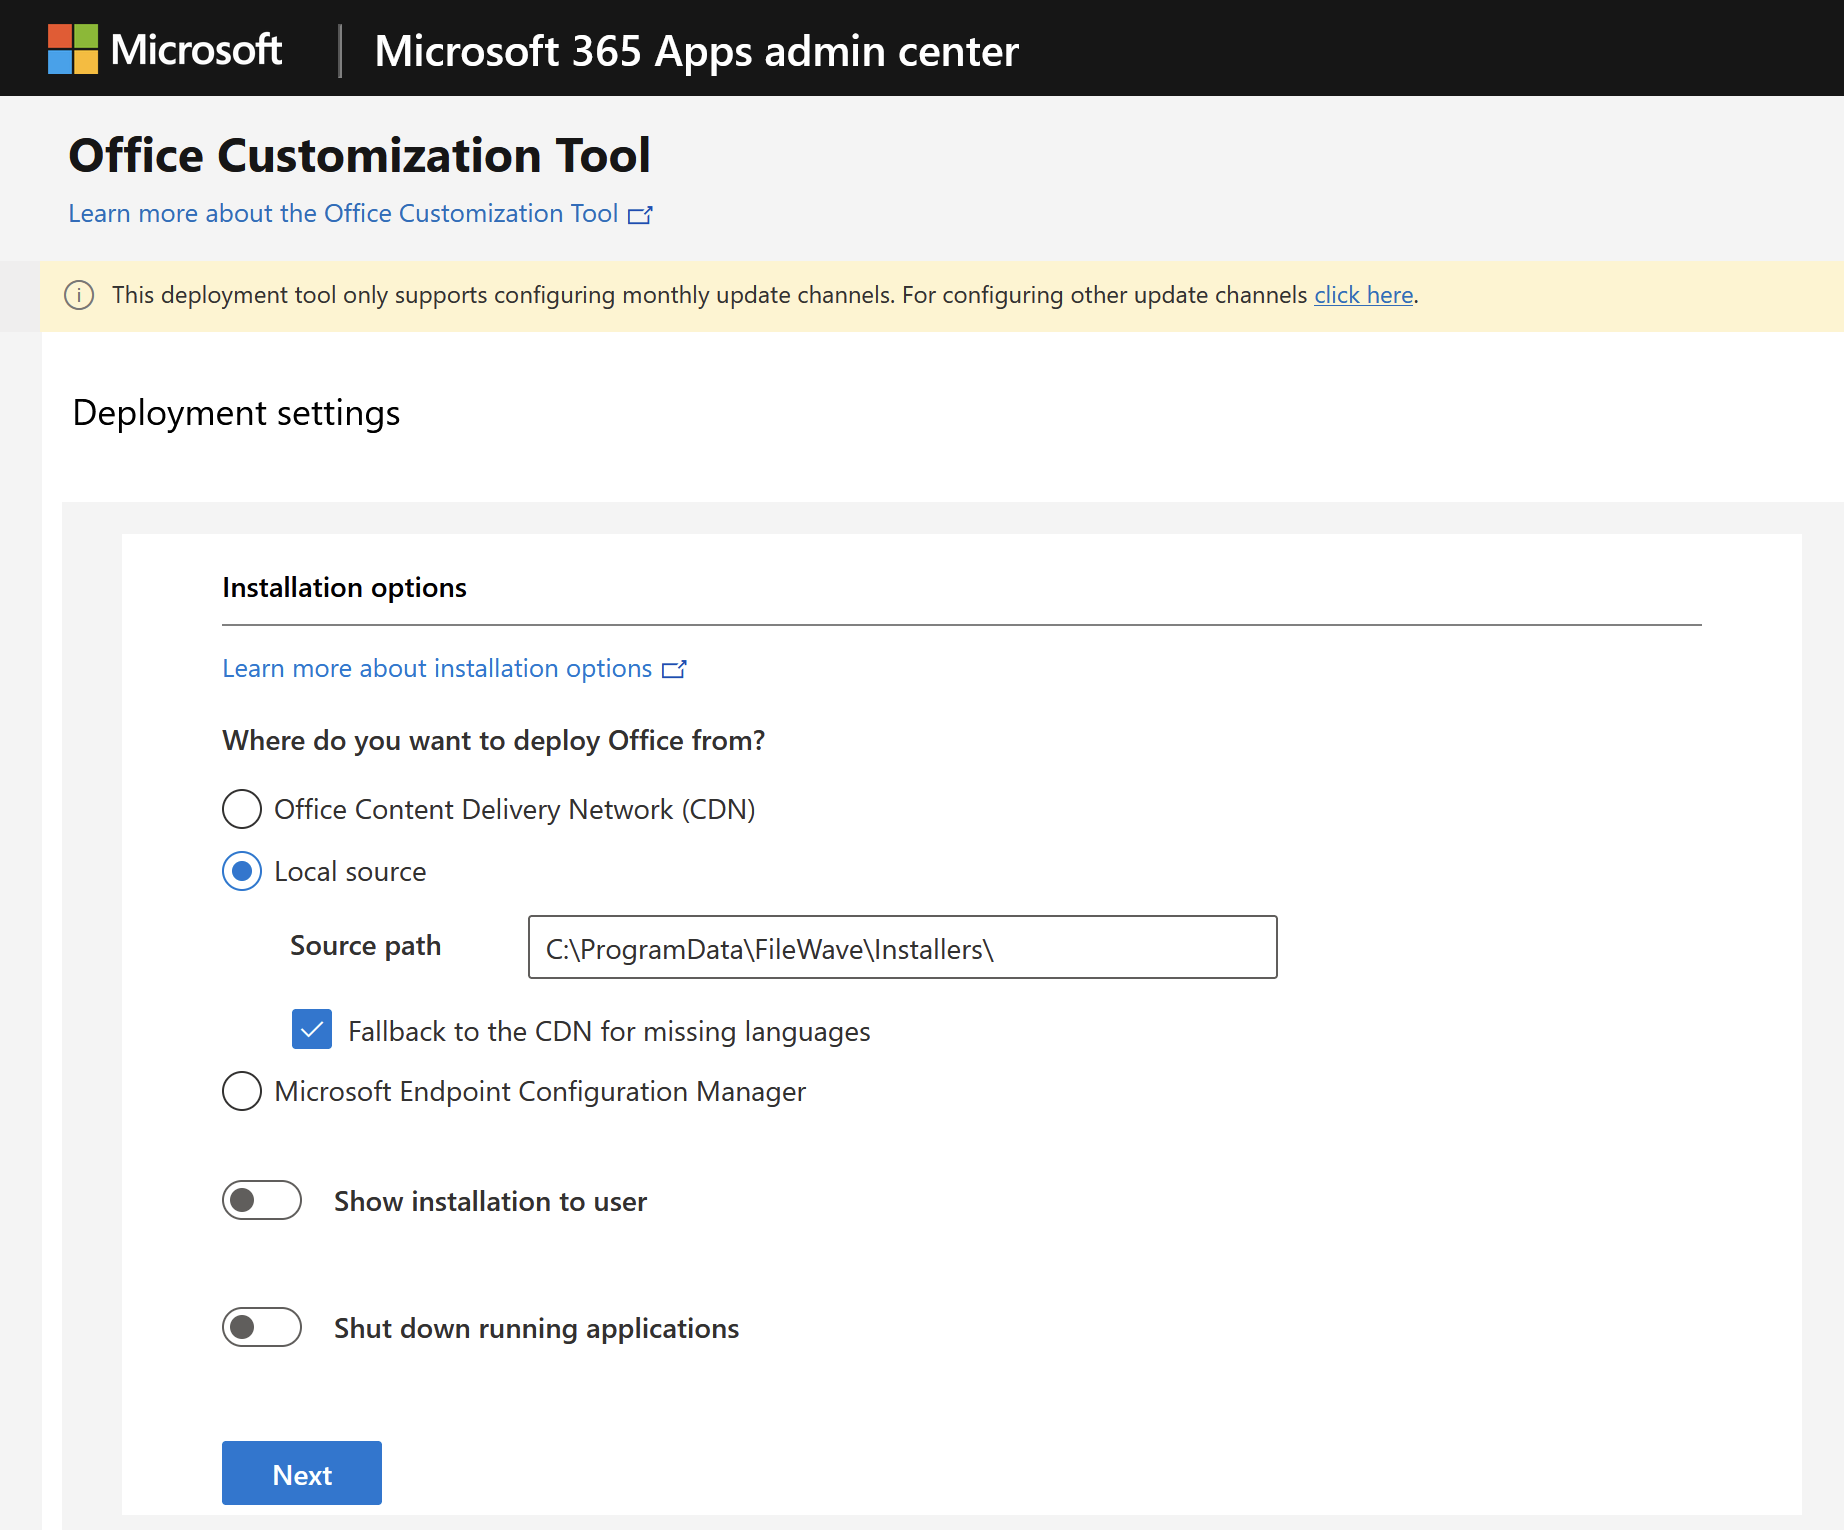
Example XMLs:
Office LTSC Professional Plus 2024
Use this style of XML for Office LTSC 2024 volume-license deployments:
Office LTSC Professional Plus 2024
<Configuration>
  <Add OfficeClientEdition="64" Channel="PerpetualVL2024" SourcePath="C:\ProgramData\FileWave\Installers\Office">
    <Product ID="ProPlus2024Volume">
      <Language ID="en-us" />
      <!-- Optional exclusions -->
      <!-- <ExcludeApp ID="Access" /> -->
      <!-- <ExcludeApp ID="Publisher" /> -->
    </Product>
  </Add>

  <RemoveMSI />

  <Display Level="None" AcceptEULA="TRUE" />

  <!-- For MAK activation, add your MAK key if required:
  <Property Name="PIDKEY" Value="XXXXX-XXXXX-XXXXX-XXXXX-XXXXX" />
  -->

  <Property Name="AUTOACTIVATE" Value="1" />
</Configuration>
Office LTSC Standard 2024
Office LTSC Standard 2024
<Configuration>
  <Add OfficeClientEdition="64" Channel="PerpetualVL2024" SourcePath="C:\ProgramData\FileWave\Installers\Office">
    <Product ID="Standard2024Volume">
      <Language ID="en-us" />
    </Product>
  </Add>

  <RemoveMSI />
  <Display Level="None" AcceptEULA="TRUE" />
  <Property Name="AUTOACTIVATE" Value="1" />
</Configuration>
Microsoft 365 Apps
Use this style of XML for Microsoft 365 Apps deployments:
Microsoft 365 Apps for enterprise
<Configuration>
  <Add OfficeClientEdition="64" Channel="MonthlyEnterprise" SourcePath="C:\ProgramData\FileWave\Installers\Office" AllowCdnFallback="True">
    <Product ID="O365ProPlusRetail">
      <Language ID="en-us" />
      <!-- Optional exclusions -->
      <!-- <ExcludeApp ID="Access" /> -->
      <!-- <ExcludeApp ID="Publisher" /> -->
      <!-- <ExcludeApp ID="Teams" /> -->
      <!-- <ExcludeApp ID="OutlookForWindows" /> -->
    </Product>
  </Add>

  <RemoveMSI />

  <Updates Enabled="TRUE" Channel="MonthlyEnterprise" />

  <Display Level="None" AcceptEULA="TRUE" />
</Configuration>
AllowCdnFallback="True" can help when language files are missing from the local source, because ODT can retrieve missing language content from Microsoft’s CDN.
Microsoft 365 Apps for business
<Configuration>
  <Add OfficeClientEdition="64" Channel="Current" SourcePath="C:\ProgramData\FileWave\Installers\Office" AllowCdnFallback="True">
    <Product ID="O365BusinessRetail">
      <Language ID="en-us" />
    </Product>
  </Add>

  <RemoveMSI />
  <Updates Enabled="TRUE" Channel="Current" />
  <Display Level="None" AcceptEULA="TRUE" />
</Configuration>
Export the configuration files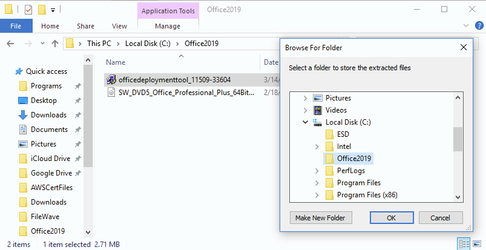
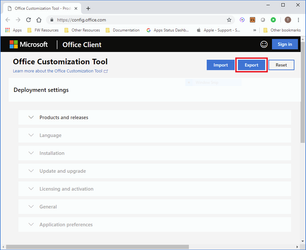
file
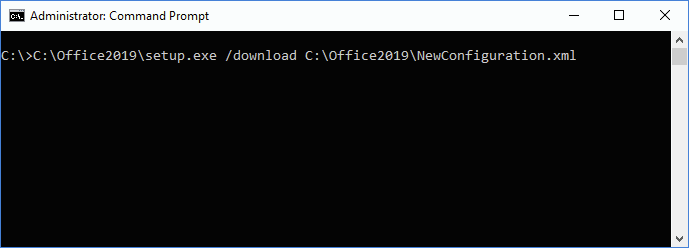
Step 3: Download the Office installation files
From an elevated Command Prompt or PowerShell window on your technician machine, run:
C:\Office2019\OfficeDeployment\setup.exe /download C:\Office2019\NewConfiguration.OfficeDeployment\configuration.xml 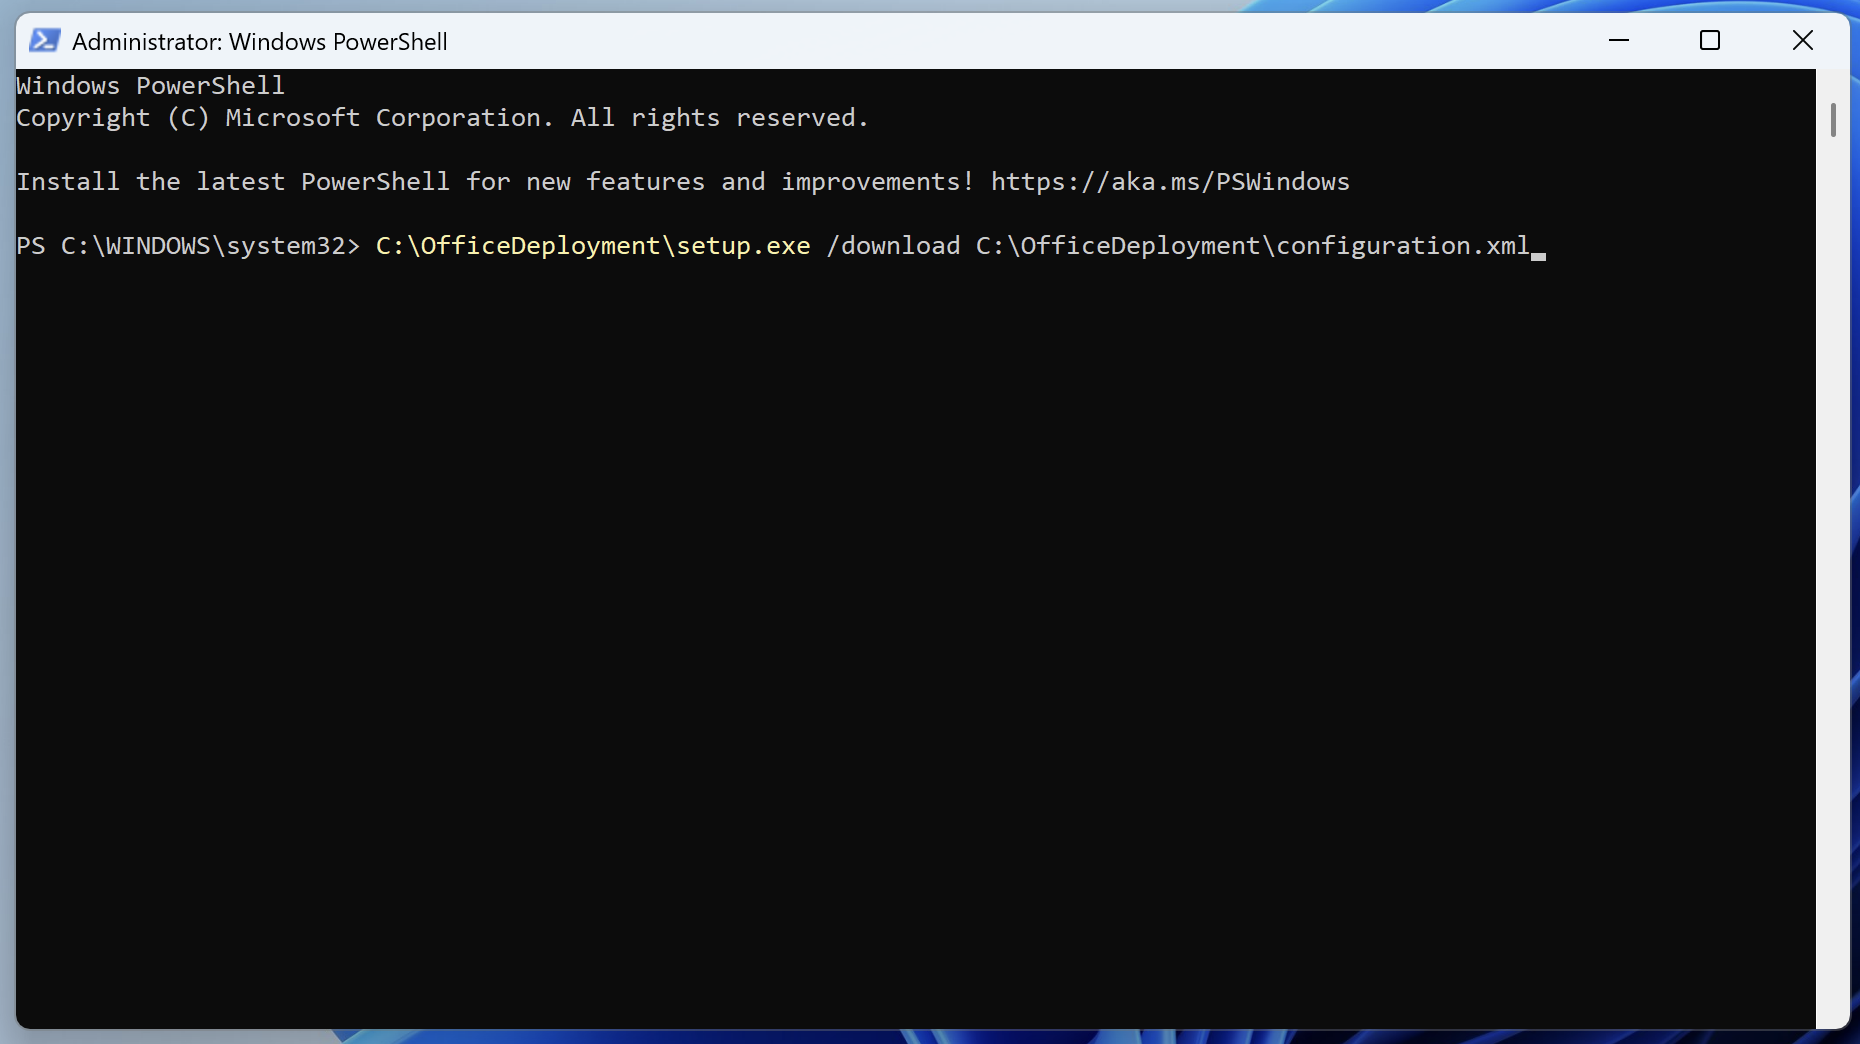
This downloads the Office source files into the path defined by SourcePath from the configuration xml file. If SourcePath is assumingomitted, youODT randownloads the deployment tool to a folder in the C:\ drive called Office2019 and you also added the xmlfiles to the same folder where setup.exe is located. Microsoft documents /download for downloading Office LTSC 2024 files and /configure for installing from earlierthe steps.XML.
After This command willthe download fromcompletes, Microsoftconfirm that an Office folder exists:
C:\ProgramData\FileWave\Installers\Office\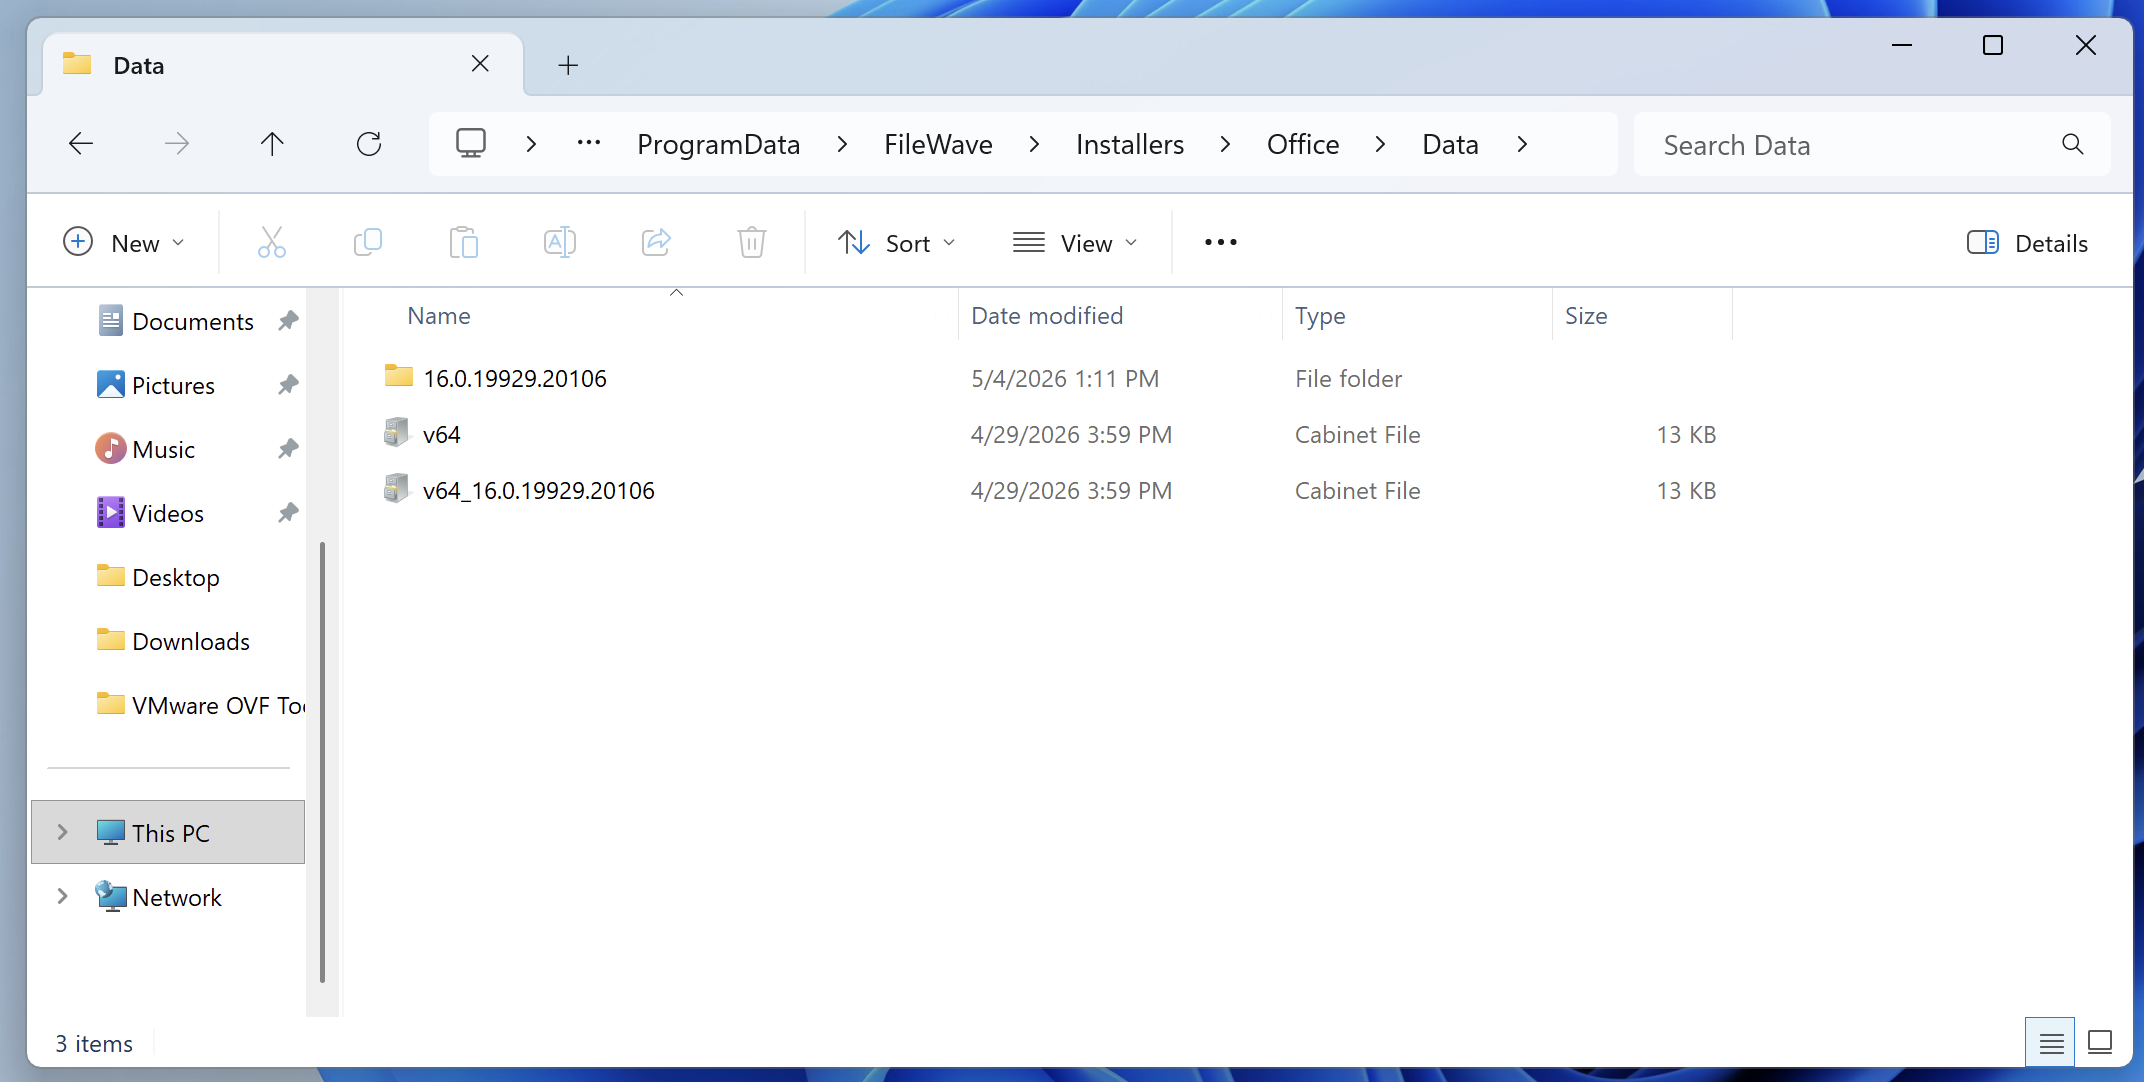
The completed downloaded Office files are stored within the Office folder.
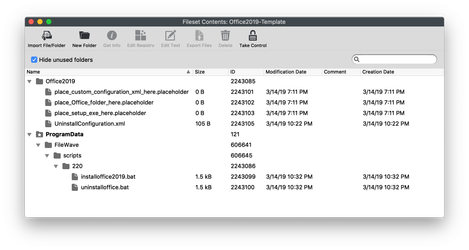
Step 4: Build the FileWave Fileset
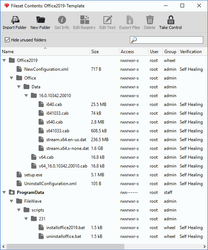
Upload the following into the Fileset:
Office\
setup.exe
configuration.xml
install-office.ps1
uninstall-office.ps1
Place them under:
C:\ProgramData\FileWave\Installers\Office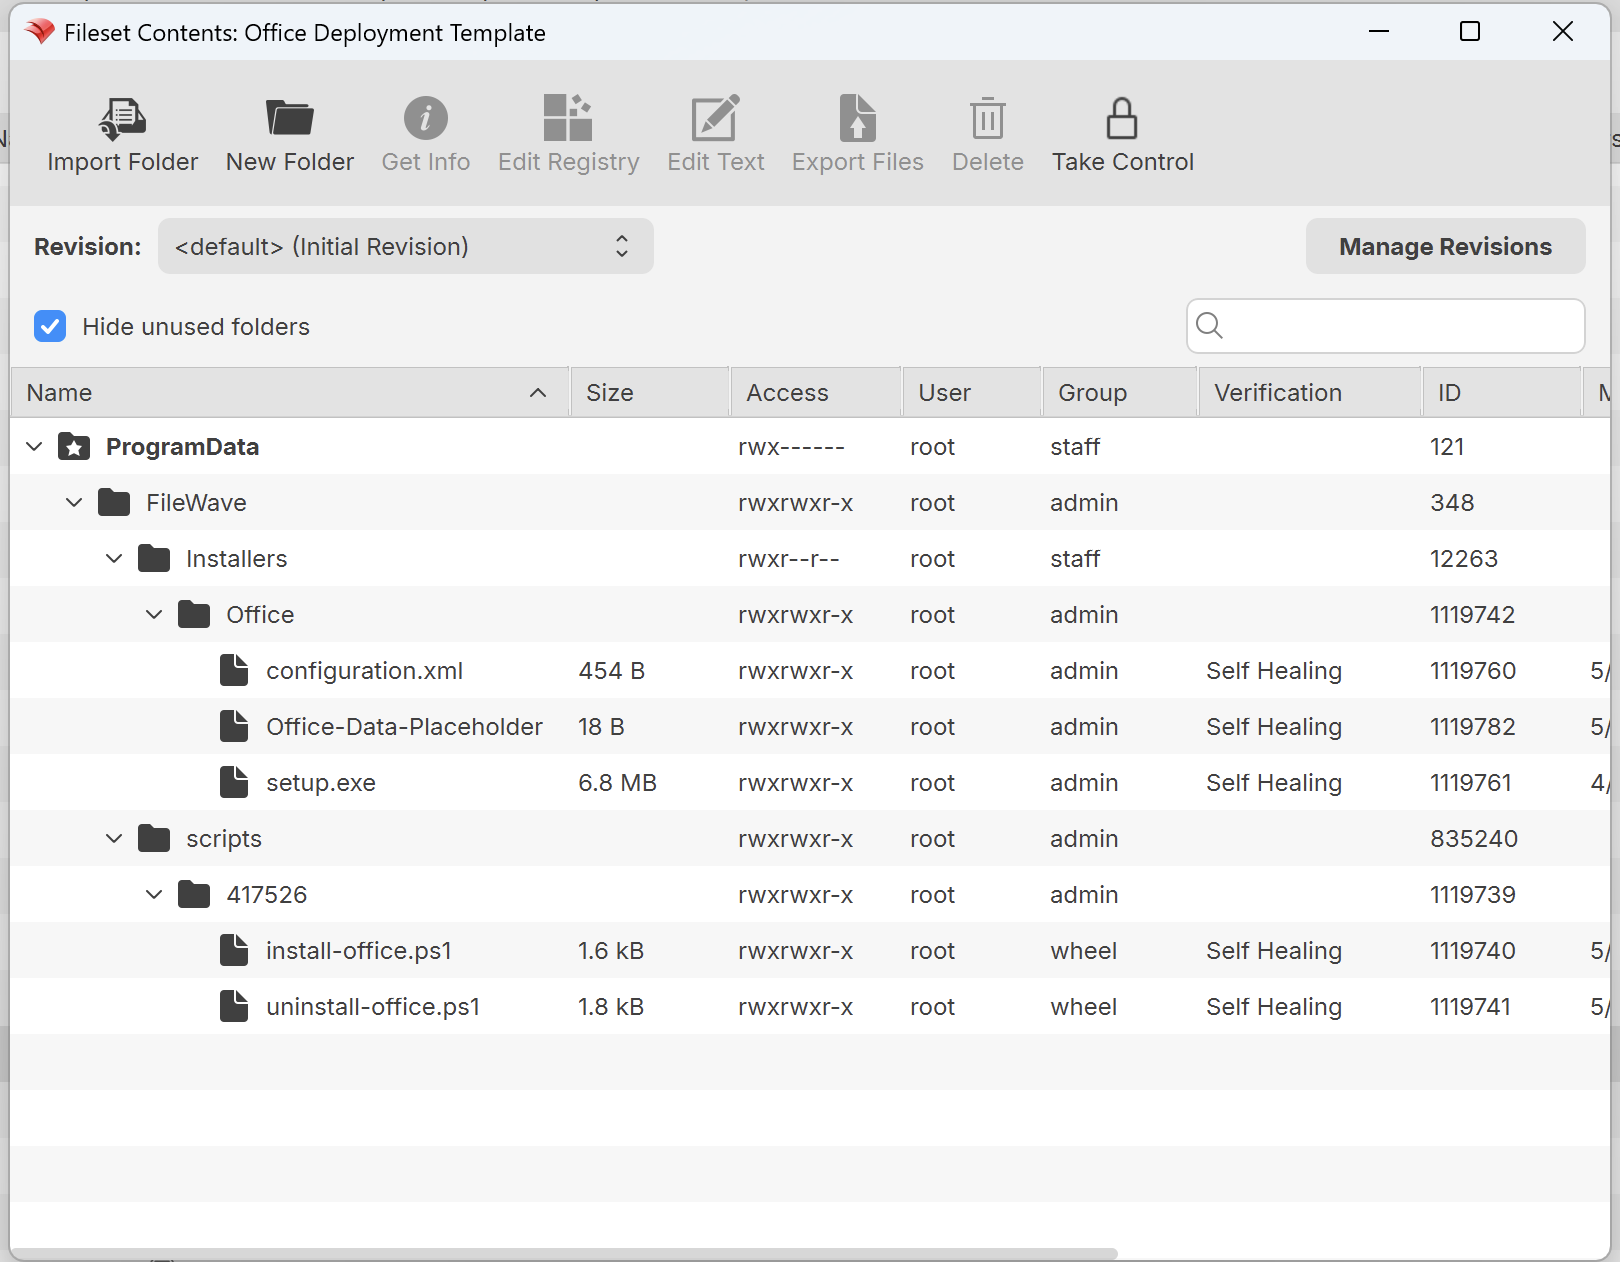
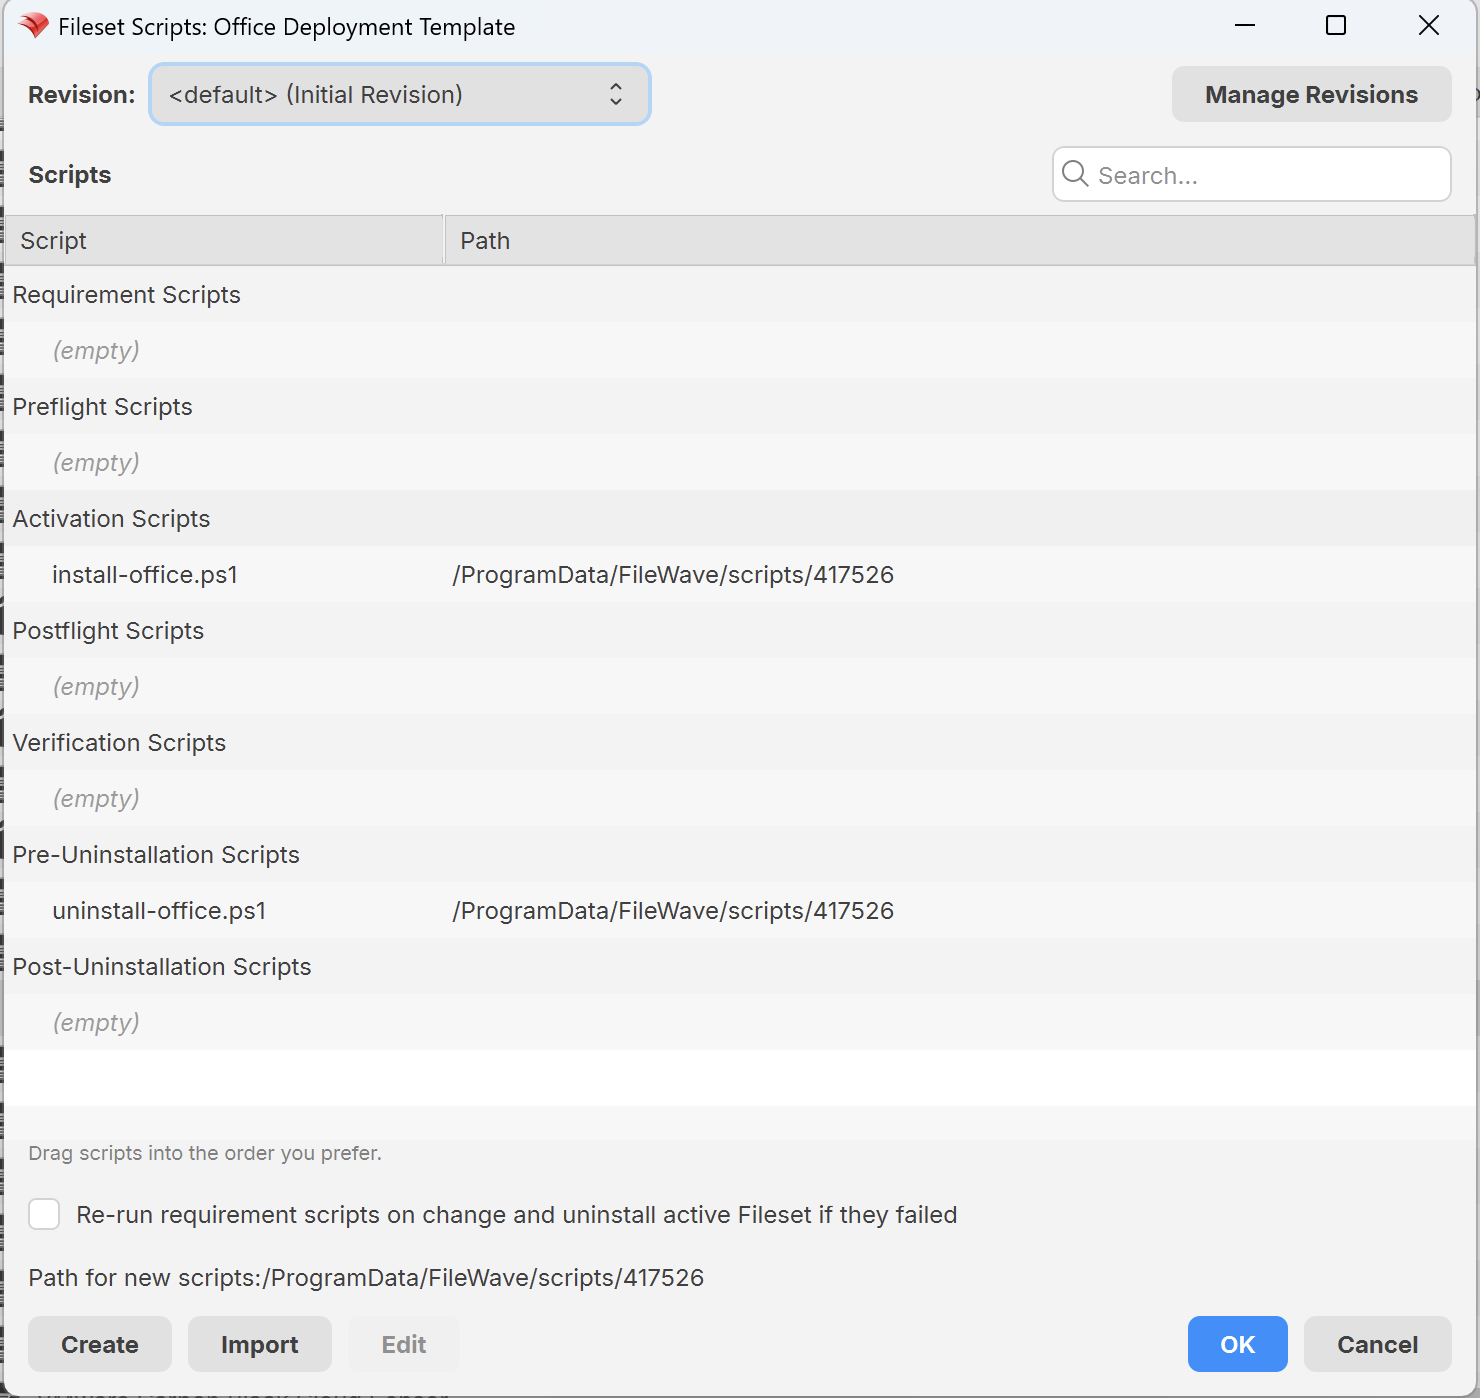
Step 5: Add the installation script
Use a folderPowerShell calledactivation "Office" with configuration files that you will need to install Office on your clients

install-office.ps1
# install-office.ps1
# Installs Microsoft Office folderusing the Office Deployment Tool and the configuration XML
# included in this FileWave Fileset.

$OfficeRoot = "C:\ProgramData\FileWave\Installers\Office"
$SetupExe = Join-Path $OfficeRoot "setup.exe"
$ConfigXml = Join-Path $OfficeRoot "configuration.xml"
$LogRoot = "C:\ProgramData\FileWave\Logs"
$LogFile = Join-Path $LogRoot "office-install.log"

# Ensure logging directory exists.
if (-not (Test-Path $LogRoot)) {
    New-Item -Path $LogRoot -ItemType Directory -Force | Out-Null
}

function Write-Log {
    param (
        [string]$Message
    )

    $Timestamp = Get-Date -Format "yyyy-MM-dd HH:mm:ss"
    "$Timestamp $Message" | Tee-Object -FilePath $LogFile -Append
}

Write-Log "Starting Microsoft Office installation."

# Validate required files before attempting installation.
if (-not (Test-Path $SetupExe)) {
    Write-Log "ERROR: setup.exe younot getfound fromat running$SetupExe"
    exit 1
}

if (-not (Test-Path $ConfigXml)) {
    Write-Log "ERROR: configuration.xml not found at $ConfigXml"
    exit 1
}

try {
    $Process = Start-Process -FilePath $SetupExe `
        -ArgumentList "/configure `"$ConfigXml`"" `
        -Wait `
        -PassThru `
        -WindowStyle Hidden

    Write-Log "Office Deployment Tool exited with code $($Process.ExitCode)."

    if ($Process.ExitCode -ne 0) {
        Write-Log "ERROR: Office installation failed."
        exit $Process.ExitCode
    }

    Write-Log "Microsoft Office installation completed successfully."
    exit 0
}
catch {
    Write-Log "ERROR: $($_.Exception.Message)"
    exit 1
}
Step 6: Add the deploymentuninstallation toolscript
Use stepa 2.pre-uninstallation Alsoscript uploadwith the following:
uninstall-office.ps1
# uninstall-office.ps1
# Removes Click-to-Run Office products using the Office Deployment Tool.
# This script is intended to run as a FileWave pre-uninstallation script
# when the Office Fileset association is removed.

$OfficeRoot = "C:\ProgramData\FileWave\Installers\Office"
$SetupExe = Join-Path $OfficeRoot "setup.exe"
$RemoveXml = Join-Path $OfficeRoot "remove-office.xml"
$LogRoot = "C:\ProgramData\FileWave\Logs"
$LogFile = Join-Path $LogRoot "office-uninstall.log"

if (-not (Test-Path $LogRoot)) {
    New-Item -Path $LogRoot -ItemType Directory -Force | Out-Null
}

function Write-Log {
    param (
        [string]$Message
    )

    $Timestamp = Get-Date -Format "yyyy-MM-dd HH:mm:ss"
    "$Timestamp $Message" | Tee-Object -FilePath $LogFile -Append
}

Write-Log "Starting Microsoft Office removal."

if (-not (Test-Path $SetupExe)) {
    Write-Log "ERROR: setup.exe not found at $SetupExe"
    exit 1
}

# Remove all Click-to-Run Office products installed by ODT, including Office, Project, and Visio.
# Use a more targeted Remove XML you created in step 3 (if you didonly notwant nameto remove a specific product.
$RemoveXmlContent = @"
<Configuration>
  <Remove All="TRUE" />
  <Display Level="None" AcceptEULA="TRUE" />
</Configuration>
"@

$RemoveXmlContent | Out-File -FilePath $RemoveXml -Encoding utf8 -Force

try {
    $Process = Start-Process -FilePath $SetupExe `
        -ArgumentList "/configure `"$RemoveXml`"" `
        -Wait `
        -PassThru `
        -WindowStyle Hidden

    Write-Log "Office Deployment Tool exited with code $($Process.ExitCode)."

    if ($Process.ExitCode -ne 0) {
        Write-Log "ERROR: Office removal failed."
        exit $Process.ExitCode
    }

    Write-Log "Microsoft Office removal completed successfully."
    exit 0
}
catch {
    Write-Log "ERROR: $($_.Exception.Message)"
    exit 1
}
Microsoft documents the xmlRemove NewConfigurationelement thenand younotes needthat toAll="TRUE" updateremoves theMicrosoft installoffice2019365 scriptApps inproducts and languages, including Project and Visio.
Step 7: Deploy the Fileset with that new name)
After the Fileset activatesactivates, the install script runs:
setup.exe /configure configuration.xmlOffice installation can take several minutes depending on hardware, network speed, Office edition, language count, and whether the content is being installed from local Fileset content or Microsoft’s CDN.
Check the target Windows device for new installations of Micrsoft's Office applications.
Troubleshooting
Office 2024 does not install
Confirm that the XML uses:
Channel="PerpetualVL2024"and one of the correct Office LTSC 2024 product IDs, such as:
<Product ID="ProPlus2024Volume">or:
<Product ID="Standard2024Volume">Microsoft 365 Apps installs the wrong channel
Confirm both the <Add> channel and <Updates> channel. The channel on the <Add> element controls the channel used during installation, while the <Updates> element can control update behavior after installation.
Installation fails on devices with existing Office
Confirm whether the existing Office install is:
Use <RemoveMSI /> for older MSI-based Office. For Click-to-Run Office 2019/2021/2024 or Microsoft 365 Apps, use a targeted <Remove> configuration or <Remove All="TRUE" /> when a full Office removal is intended.
32-bit to 64-bit migration fails
Do not simply change OfficeClientEdition from 32 to 64 on an existing Office installation. Microsoft documents the MigrateArch attribute for changing the architecture of an existing Microsoft 365 Apps installation.
Missing language files
If you use a local source and support multiple languages, make sure every required language was downloaded. For Microsoft 365 Apps, consider using:
AllowCdnFallback="True"so ODT can retrieve missing language content from Microsoft’s CDN when needed.
Updating Office source files later
For Microsoft 365 Apps, re-run ODT /download periodically using the same XML to refresh the Office source files. Microsoft notes that ODT conserves bandwidth by downloading only missing files when the target folder already contains the same build and language content.
For Office LTSC 2024, keep the source current according to the organization’s update strategy. Office LTSC 2024 can receive updates from the Office CDN by default or from a defined local update path.