
APNs Certificate Creation and Renewal on macOS with XCA
Description
Apple Mobiledevice Device Management (MDM)management requires an Apple Push Notification service (APNs) certificate;certificate renewablethat yearly.must be renewed every year.
APNsDo ExpiryIfnot let the APNs certificatescertificate areexpire
An allowedexpired tocertificate expire,stops allApple MDM communication willand be lost, until renewed.prevents Update Model willfrom also failcompleting until the certificate is renewed.
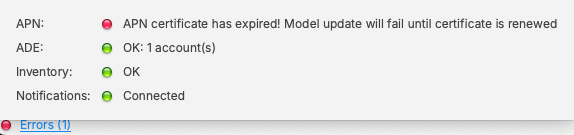
This guide explains how to create the Apple Push Notification Serviceservice (APNS)APNs) certificate for FileWave using an online CSR generator and the XCA certificate management tool, instead of the Apple Keychain. The Apple Keychain often causes issues with private key handling on newer macOS versions, so this method provides a more reliable alternative. You may use any online CSR generator (for example ssl.com), it does not have to be ssl.com specifically.
APNs Topic
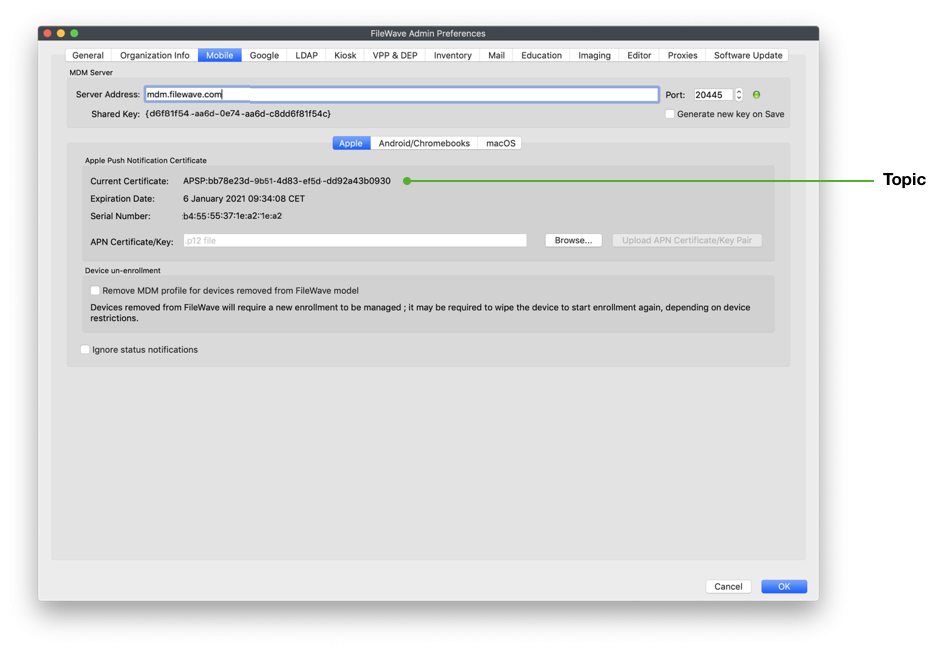
An APNs certificate has a unique topic, in the form of a hexadecimal string, and belongs to the Apple ID used to create the certificate. When renewing, the topic must match to ensure devices continue to communicate with the server. As such, not only must the same Apple ID be used when renewing an APNs certificate, but the current certificate must also be selected for renewal.
Step-By-Stepby-step Guideguide
Prerequisites
- Access to the Apple Push Certificates Portal ( https://identity.apple.com/pushcert/ ).
- A valid Apple Business/School Manager account or Apple ID.
- Access to the FileWave Central console.
- Installed XCA tool: https://github.com/chris2511/xca/releases
Step 1: Generate CSR (Certificate Signing Request)
- Open the CSR generator at ssl.com. ( https://www.ssl.com/online-csr-and-key-generator/ )
- Enter the required details:
- Common Name (CN): e.g. FileWave APNS
- Organization (O): your company or school name
- Organizational Unit (OU): optional, e.g. IT Department
- Country (C): two-letter ISO code (e.g. DE)
- Generate the CSR and download the files:
- CSR file (.csr)
- Private Key (.key)
⚠️ Keep the .key file safe – you will need it later in XCA.
Step 2: Sign the CSR with FileWave
Before the CSR can be uploaded to Apple, it must be signed by FileWave.
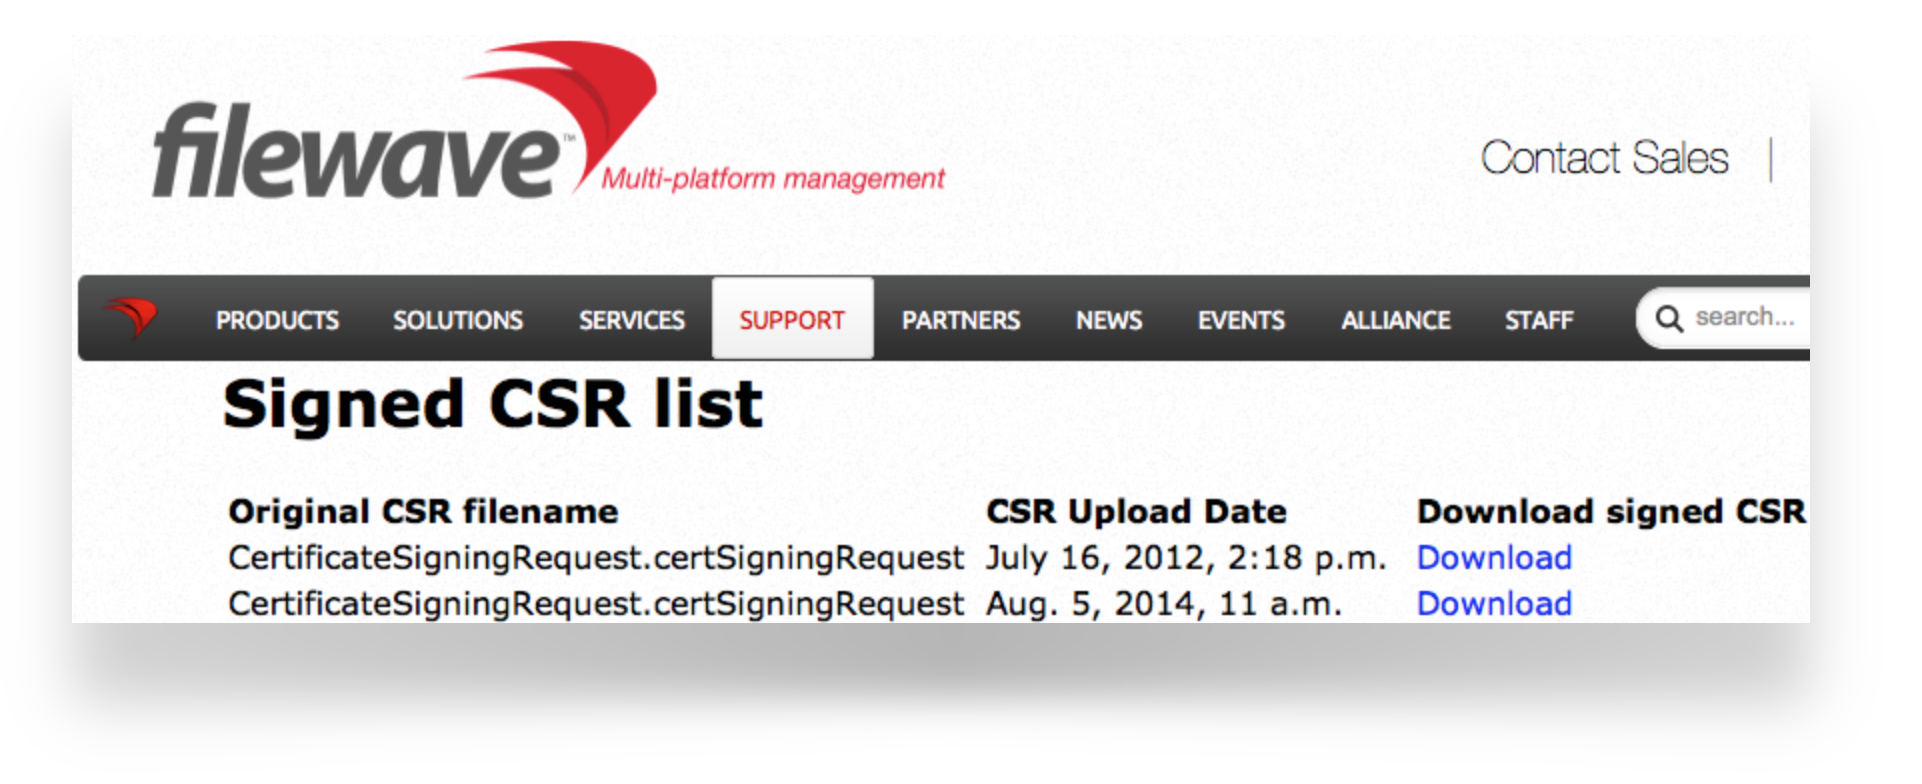
Step 3: Upload the signed FileWave CSR to Apple
If you are renewing a certificate then jump to Renewing a Certificate
Creating a new certificate
- Go to the Apple Push Certificates Portal: https://identity.apple.com/pushcert/.
- Sign in with an Apple ID (⚠️ do not use a personal Apple ID – use a generic business or institution Apple ID for long-term use).
- Click Create.
- Accept Apple’s Terms of Use.
- Click Choose File and upload the signed FileWave CSR.
- Click Upload – Apple will confirm the request.
- Download the issued APNS certificate (.pem or .cer).
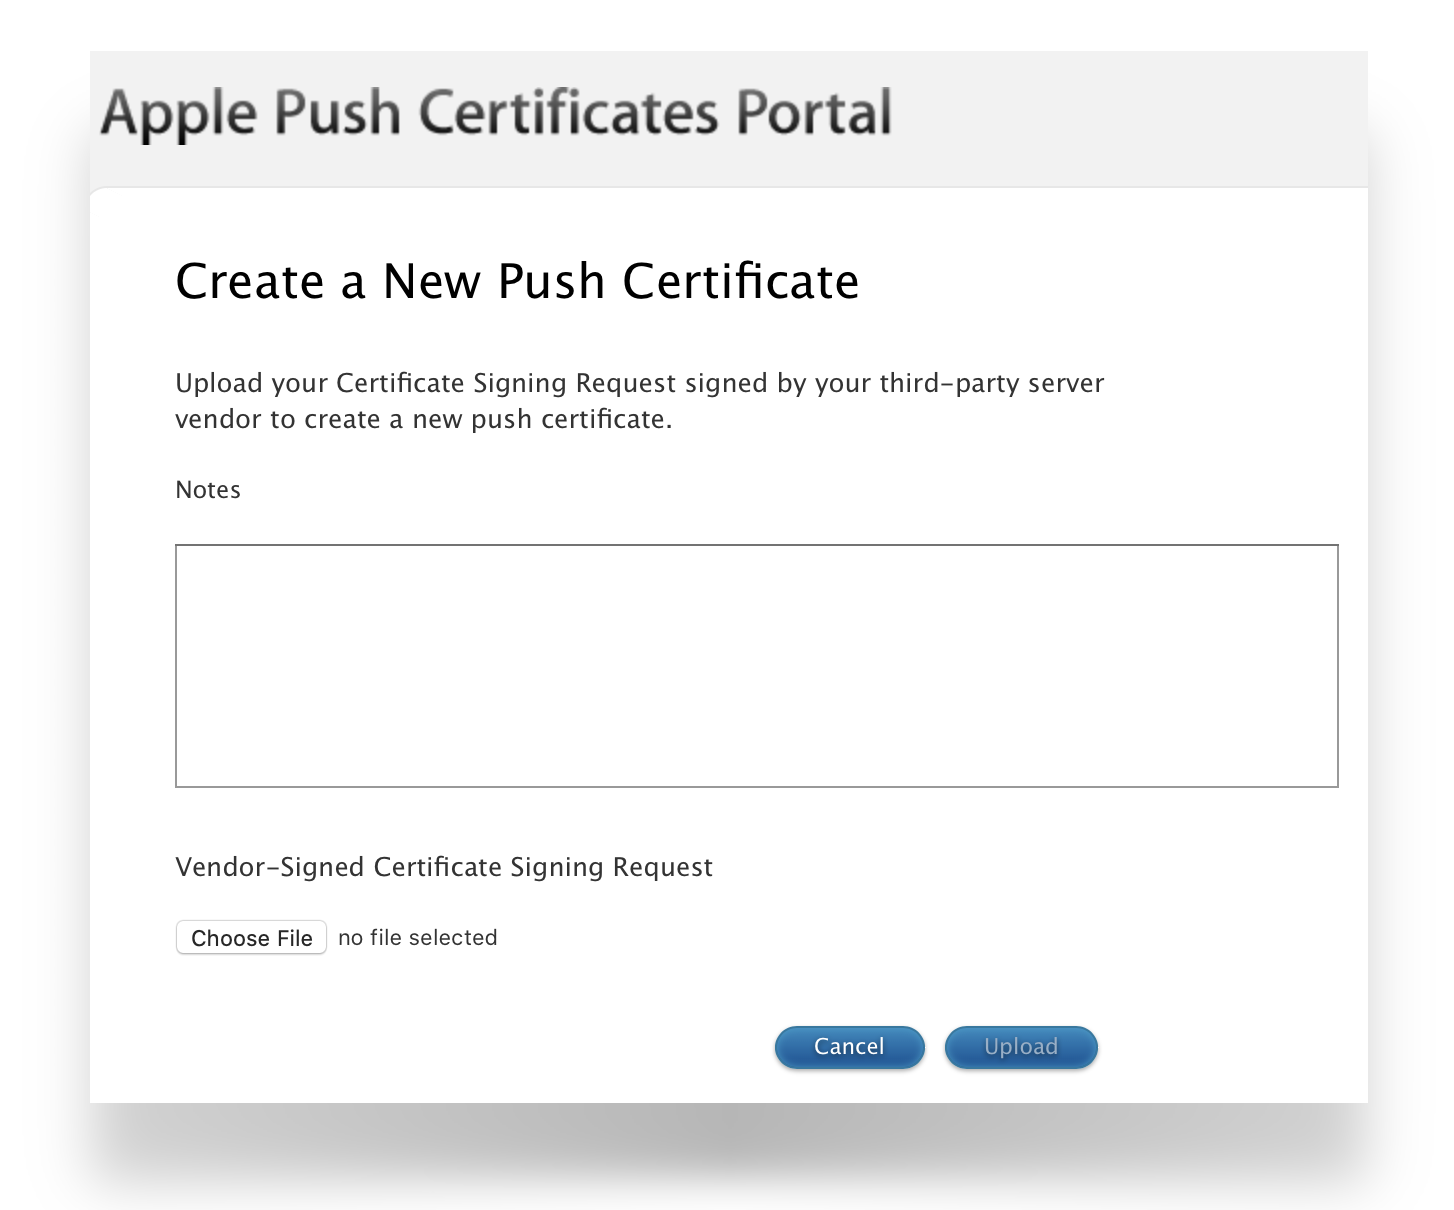
Renewing an existing certificate
- Go to https://identity.apple.com/pushcert/ and log in with the same Apple ID that owns the certificate.
- Locate the certificate to renew, confirm the Subject DN (Topic) matches the certificate in FileWave
Admin.Central. - Click Renew.
- Upload the signed FileWave CSR.
- Download the renewed APNS certificate (.pem or .cer).
If the 'Topics'topics do not matchmatch, do not continue. If the correct certificate is not in the list on Apple's website, this is the wrong Apple ID. If this guide was followed in creating the original certificate, the previously used Apple ID will be viewable from the certificate "Private Key".
To confirm the certificate, compare the Subject DN (Topic) and current certificate.
Clicking the 'i' button will show the certificate details, including the Topic:
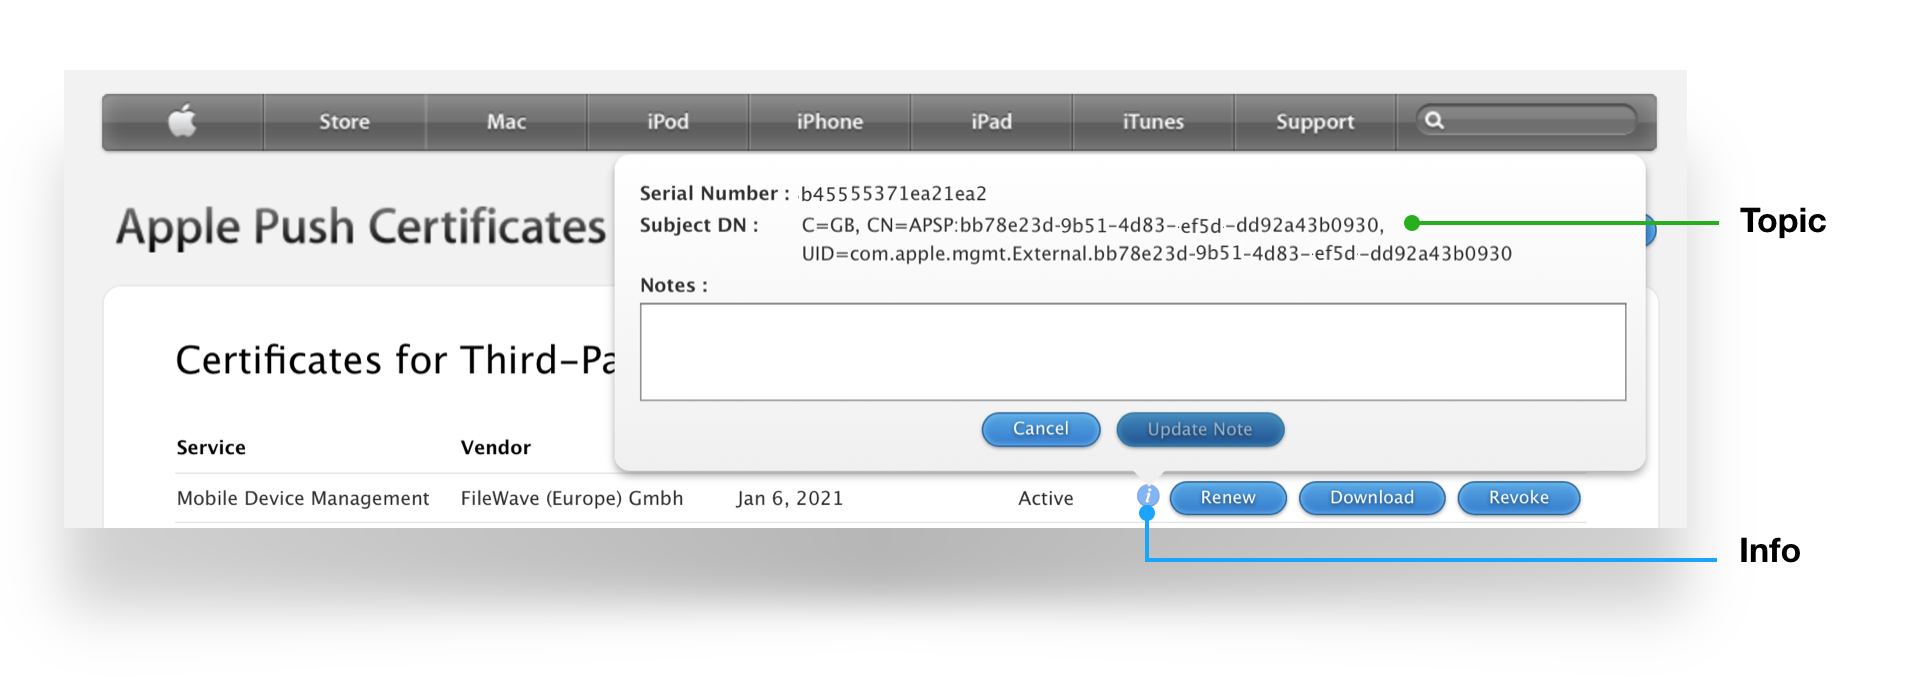
EnsureConfirm thisthat it matches with the 'Current Certificate'Certificate in FileWave AdminCentral >under Preferences > Mobile > Apple Push Notification Certificate:Certificate:
Step 4: Import and process the certificate in XCA
- First, download XCA for macOS: https://github.com/chris2511/xca/releases
- Install and start XCA.
- Go to Private Keys → Import and select the previously saved .key file from Step 1.
- Go to Certificates → Import and load the APNS certificate you downloaded from Apple (.cer/.pem).
- Link the certificate with the corresponding private key in XCA.
- Export the certificate as a PKCS #12 (.pfx) file – important: without a password.
- After export, rename the .pfx file to .p12 (FileWave requires the .p12 extension).
Step 5: Import the certificate into FileWave
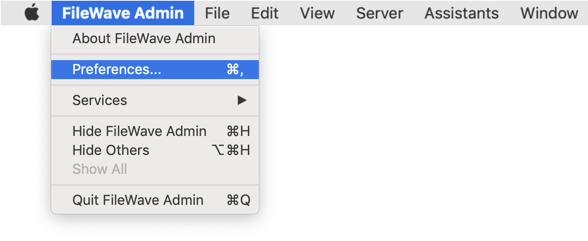
- Open the FileWave Admin.
- Go to Preferences → Mobile.
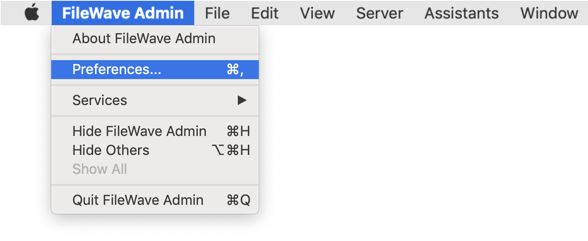
- Import the .p12 file you exported from XCA by browsing to the file and then picking to Upload.
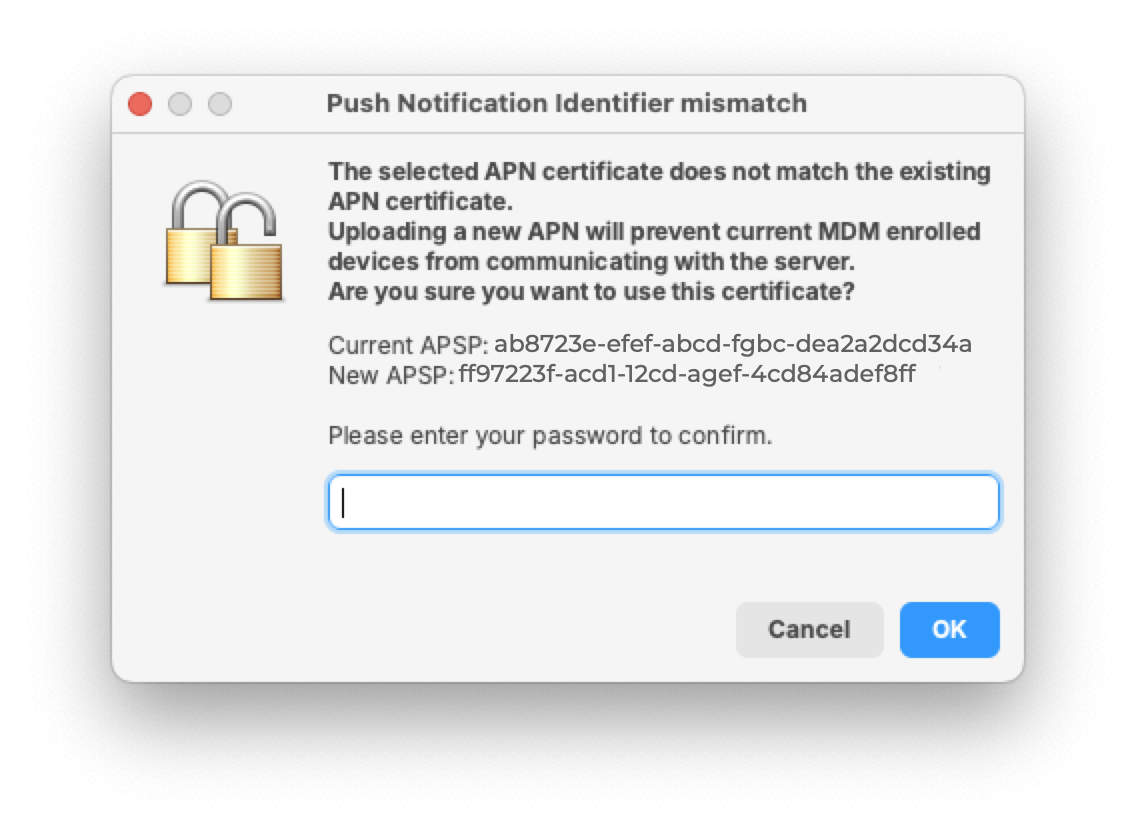
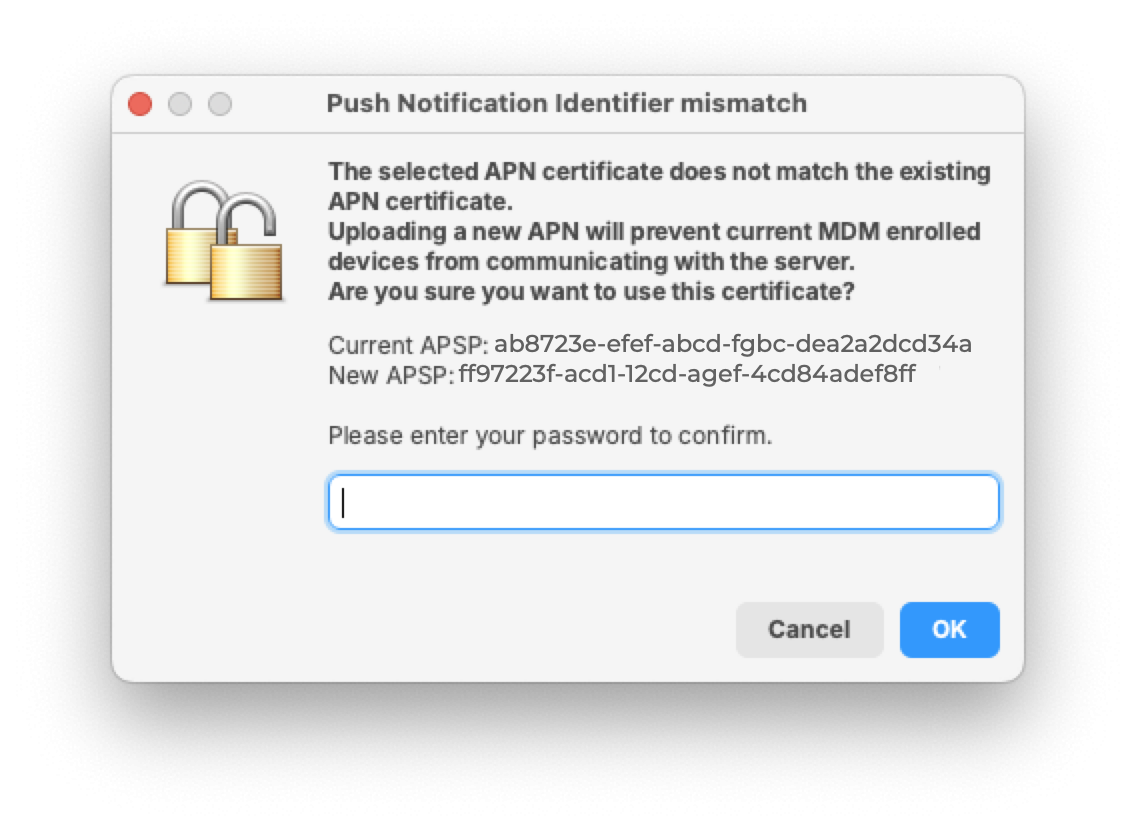
TheFor a renewal, the topicshouldmust match the previoustopic.certificate. FileWave Centralshould warnwarns if the topics do not match before accepting the upload.
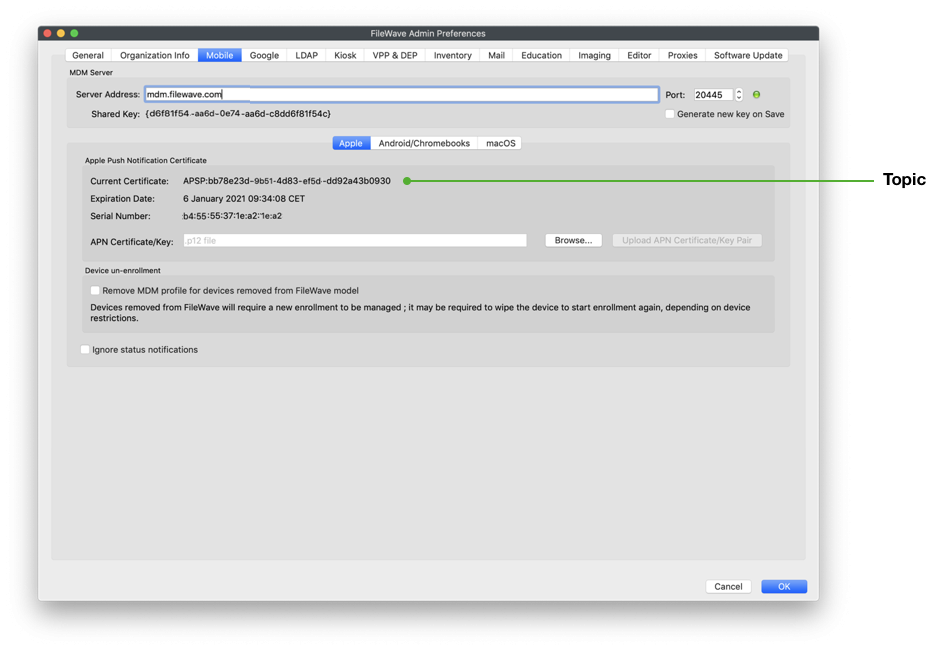
- Save the settings by clicking OK to close the preferences dialog and verify that devices are communicating.
Step 6: Verification
- Test whether new or existing MDM clients correctly connect to the APNS service.
- Check the logs in FileWave Admin to ensure there are no certificate errors.
APNsSet certificatesa requirerenewal yearlyreminder. renewals. ThroughIn FileWave AdminCentral, >open Dashboard > Alert Settings,Settings automatedand emailsadd maythe configured. Consider adding 'APN for MDM'.MDM Noteemail thisalert. requiresAutomated alerts also require the Emailemail preferencessettings in AdminCentral to be configured.
Contact Apple for help
If you forgotcannot identify the emailApple tiedID toassociated yourwith the Apple Push NotiifcationNotification youcertificate, may reach out tocontact Apple for assistanthelp.
Contact Apple for help with APNAPNs certificates