APNs Certificate Creation & Renewal on macOS Computers (XCA)
Description
Apple Mobile Device Management (MDM) requires an Apple Push Notification service (APNs) certificate; renewable yearly.
APNs Expiry
If APNs certificates are allowed to expire, all MDM communication will be lost, until renewed.
The followingThis guide providesexplains the stepshow to create andthe renewApple Push Notification Service (APNS) certificate for FileWave using an APNsonline CSR generator and the XCA certificate usingmanagement tool, instead of the Apple Keychain. The Apple Keychain often causes issues with private key handling on newer macOS withversions, Keychainso app.this method provides a more reliable alternative. You may use any online CSR generator (for example ssl.com), it does not have to be ssl.com specifically.
APNs Topic
An APNs certificate has a unique topic, in the form of a hexadecimal string, and belongs to the Apple ID used to create the certificate. When renewing, the topic must match to ensure devices continue to communicate with the server. As such, not only must the same Apple ID be used when renewing an APNs certificate, but the current certificate must also be selected for renewal.
Step-By-Step Guide
CreatingPrerequisites
Step 1: Generate CSR (Certificate Signing Request (CSR)Request)
Open
KeychaintheAccess,CSRlocatedgeneratorin:atApplicationsssl.com.
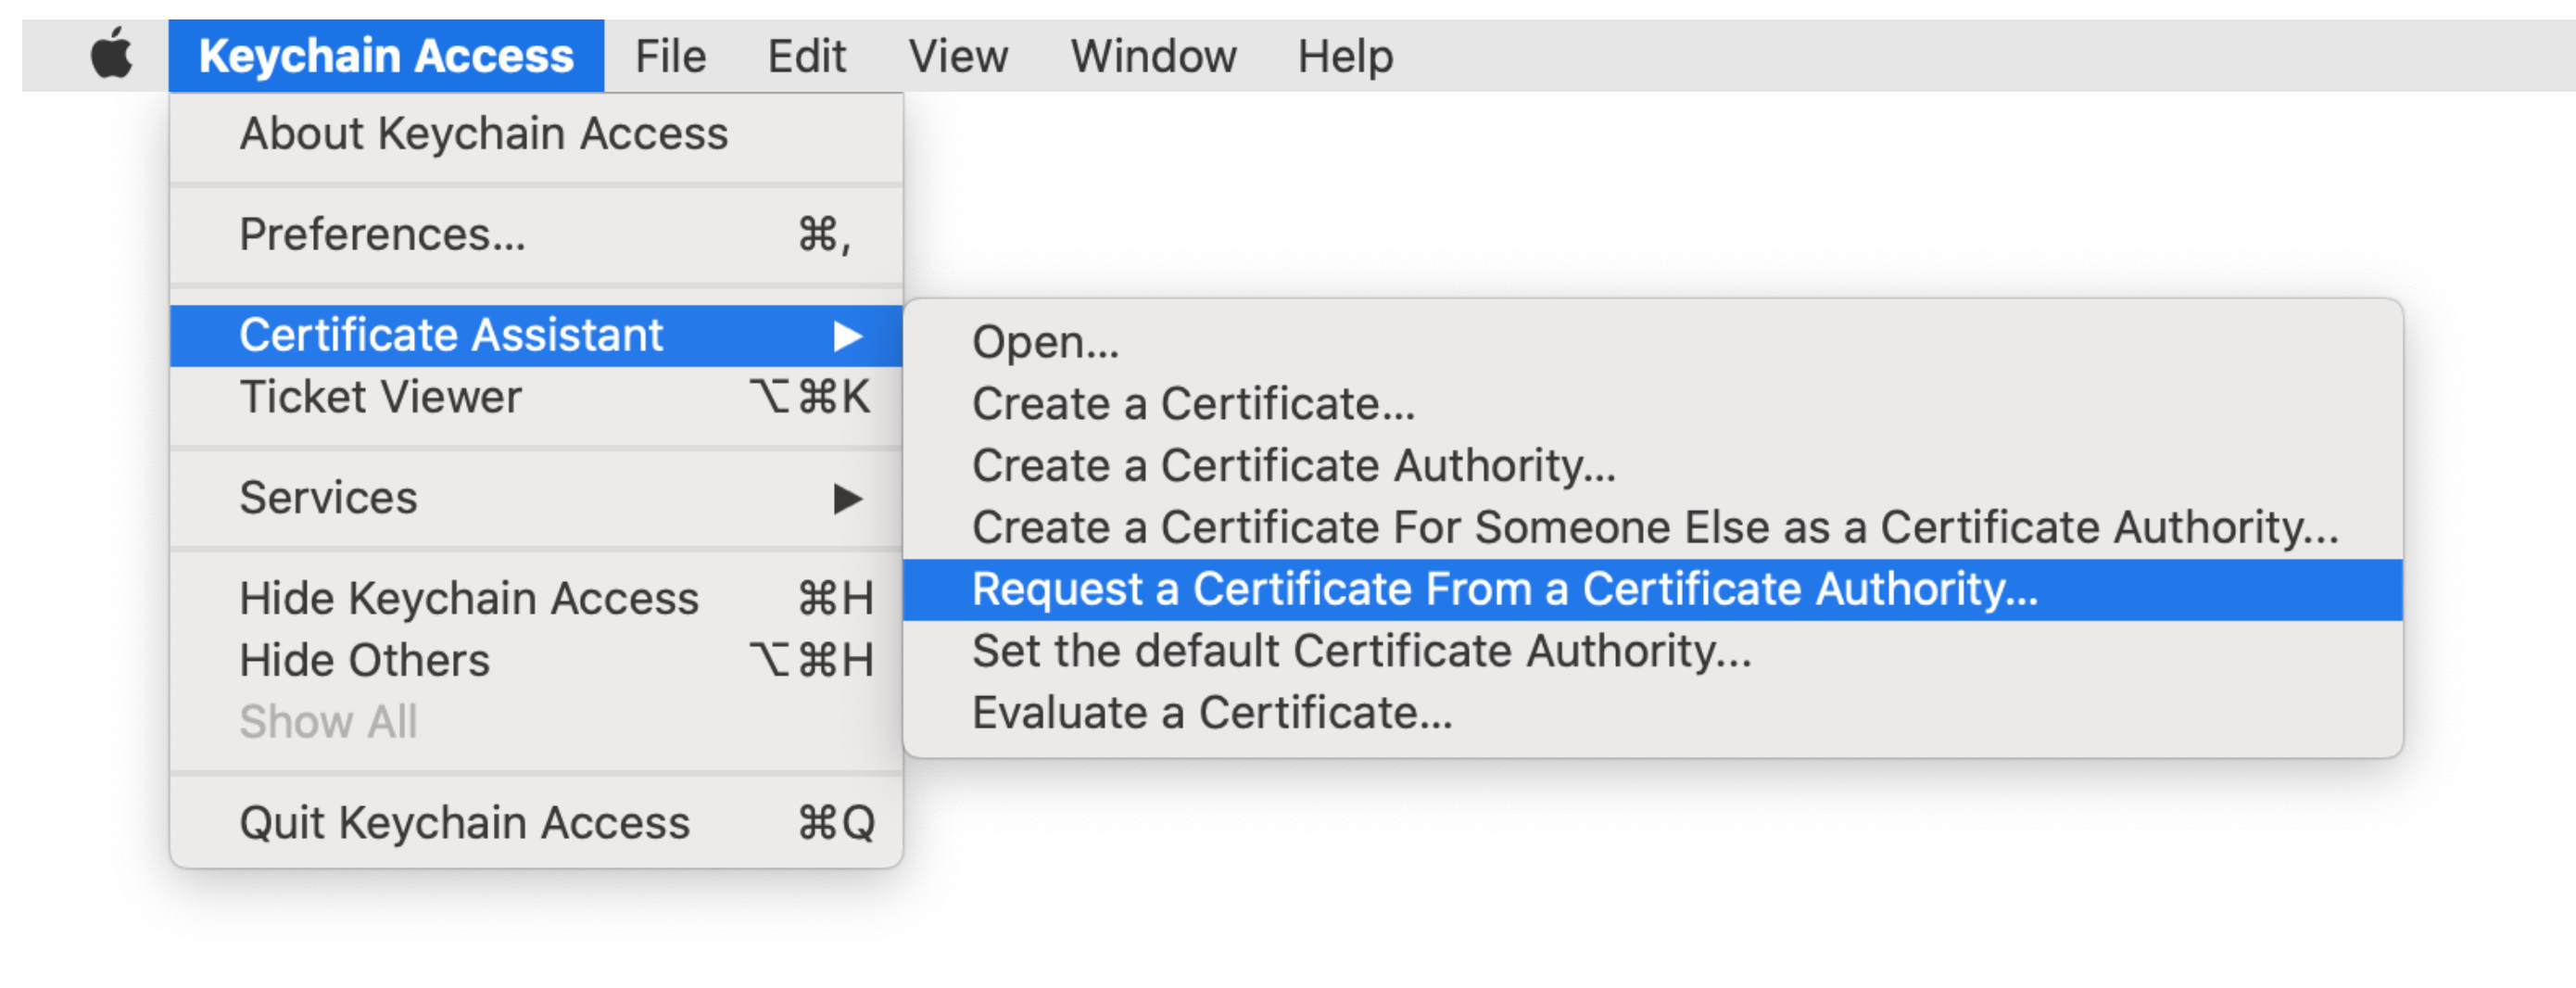
Create a CSR. Keychain Access > Certificate Assistant > Request a Certificate from a Certificate Authority...
Enter the AppleID and Server name that you are going to be associating with this certificate in the "Common Name" field.
Common NameCertificate Private Key names are visible in Keychain and the Common Name is used to set the Private Key name. Supplying the Apple ID and Server as the Common Name, ensures the Apple ID used to generate the certificate will be stored for future reference.
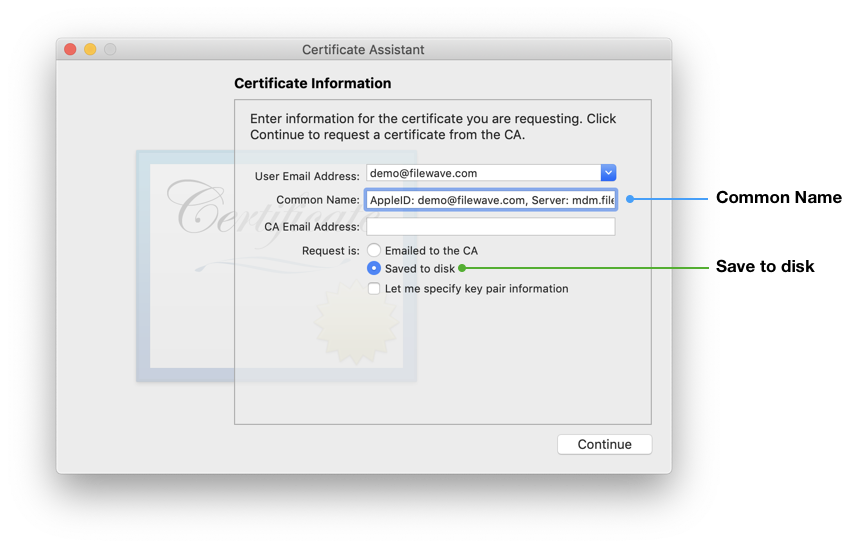
Select the radio button "Saved to disk" and click Continue.
SaveGenerate the CSR request,and ready to upload to FileWave indownload the nextfiles:
section.
Certificate
⚠️ Keep the .key file safe – you will need it later in XCA.
Step 2: Sign the CSR with FileWave
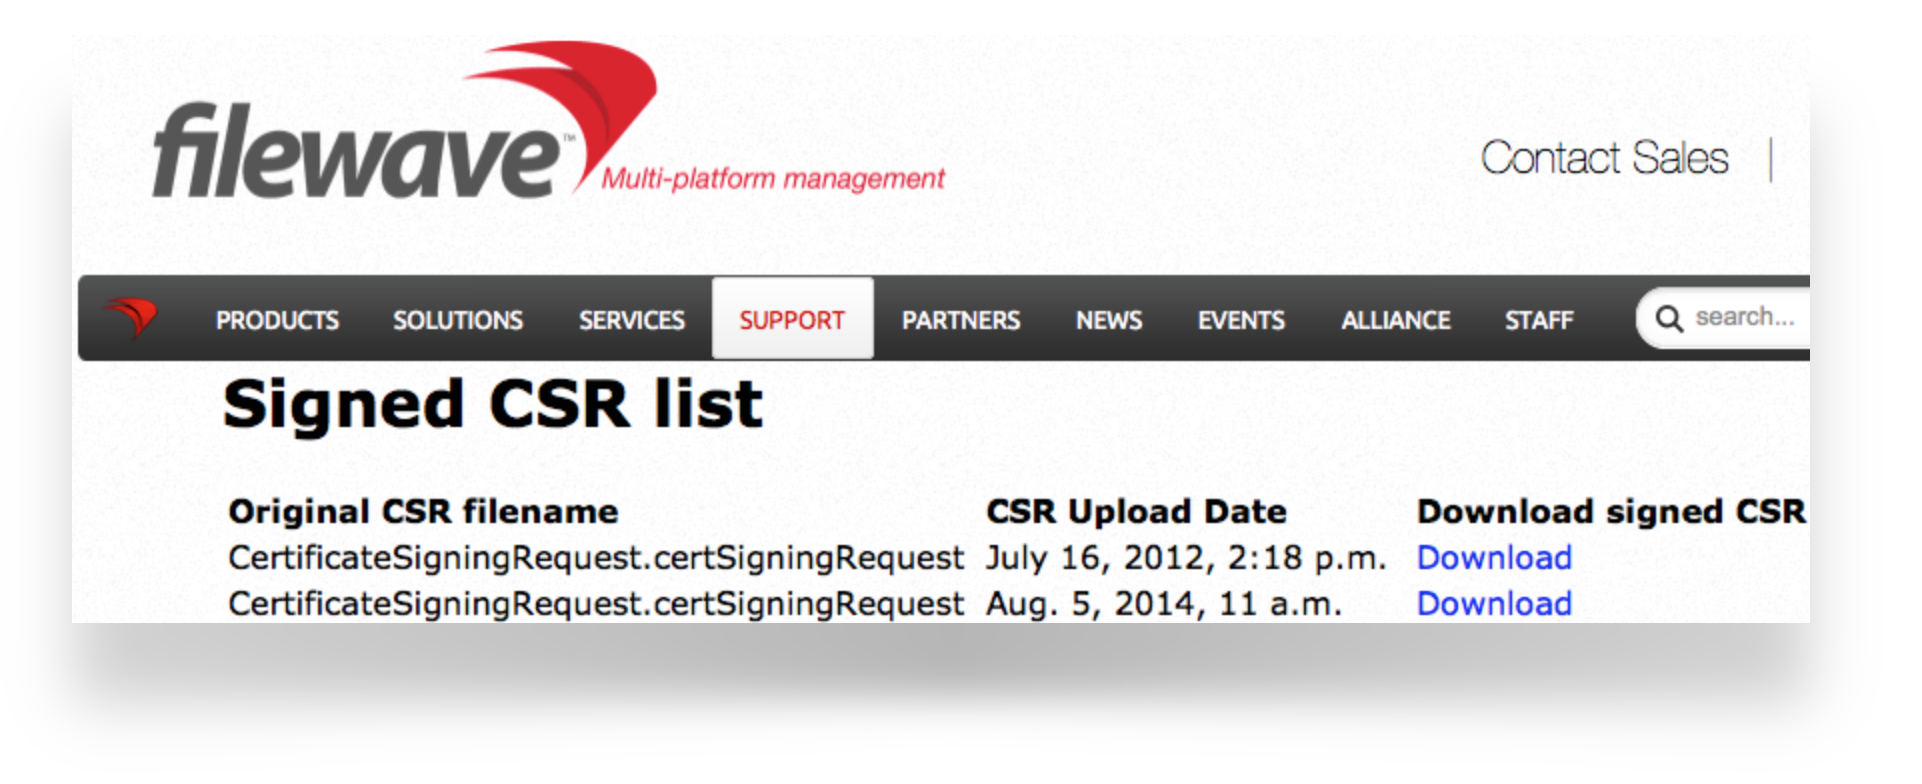
Before the CSR requestscan be uploaded to Apple, it must be signed beforeby uploading to Apple. FileWave has a portal for this process, which requires an active FileWave account.FileWave.
Step 3: Upload the signed FileWave CSR to Apple
Creating a new Certificate
If you are renewing a certificate then jump to Renewing a Certificate
Creating a new certificate
- Go
Navigatetoto:the Apple Push Certificates Portal: https://identity.apple.com/pushcert/.
This Apple ID will(⚠️ own the certificate and is required for every renewal. Dodo not use a personal Apple ID,ID to– avoiduse complicationsa if that person where to leave thegeneric business or institution.
Click 'Create'Create.
'Accept' Apple'Apple’s 'Terms of Use'Use.
Renewing aan Certificateexisting certificate
NavigateGoto:to https://identity.apple.com/pushcert/ and log in with the same Apple IDusedthatto initially createowns the certificate.ConfirmLocate theCertificatecertificate torenew.
Torenew, confirm the certificate, compare the Subject DN (Topic) and current certificate.
Clicking the 'i' button will showmatches the certificate details, including the Topic:
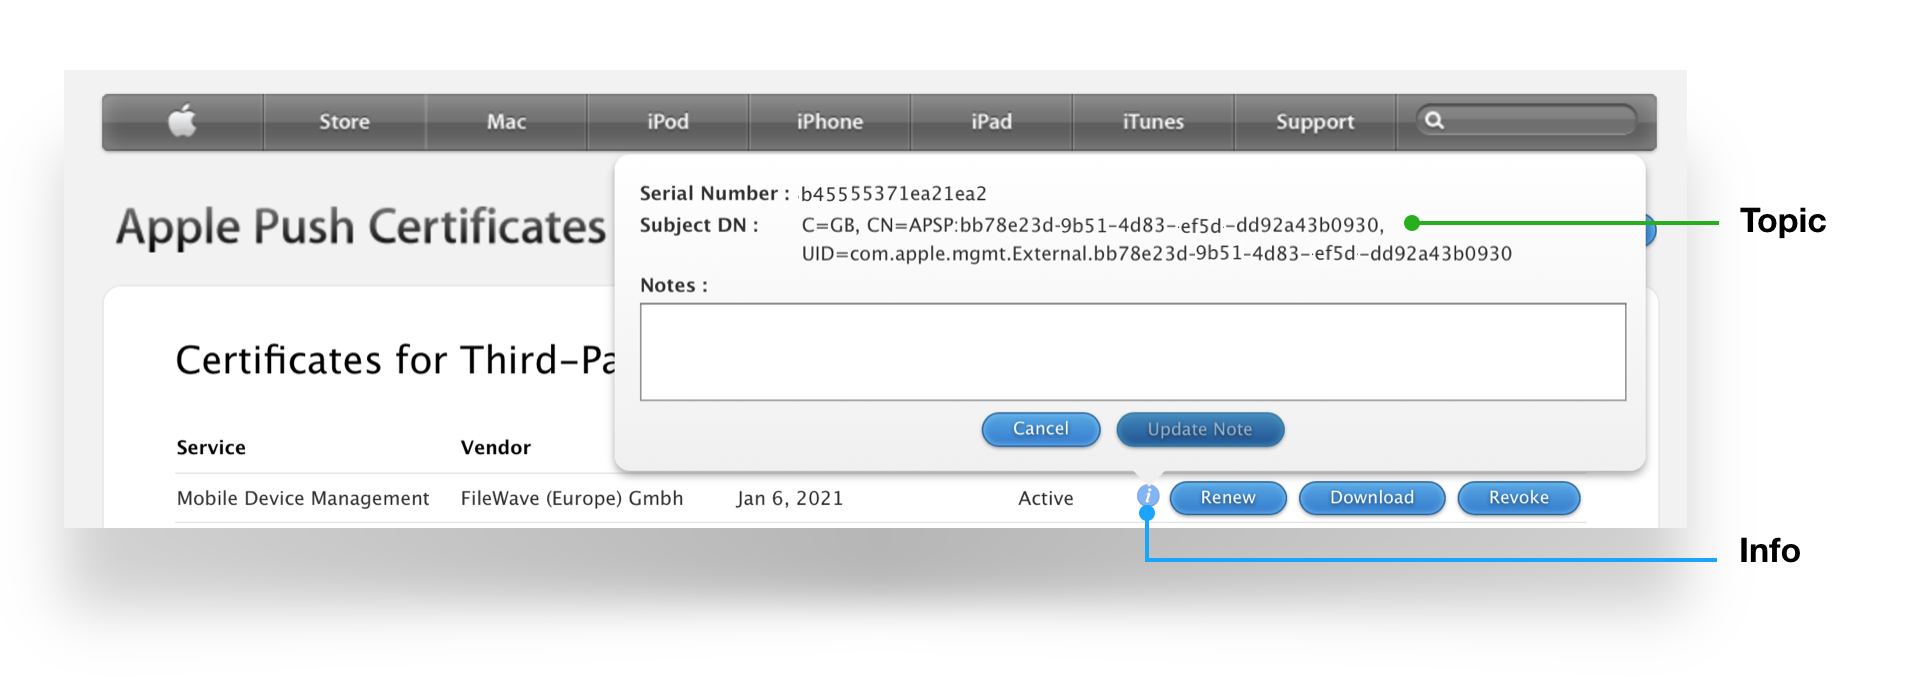
Ensure this matches with the 'Current Certificate' in FileWave AdminAdmin.
>

If the 'Topics' do not match do not continue. If the correct certificate is not in the list on Apple's website, this is the wrong Apple ID. If this guide was followed in creating the original certificate, the previously used Apple ID will be viewable from the certificate "Private Key".
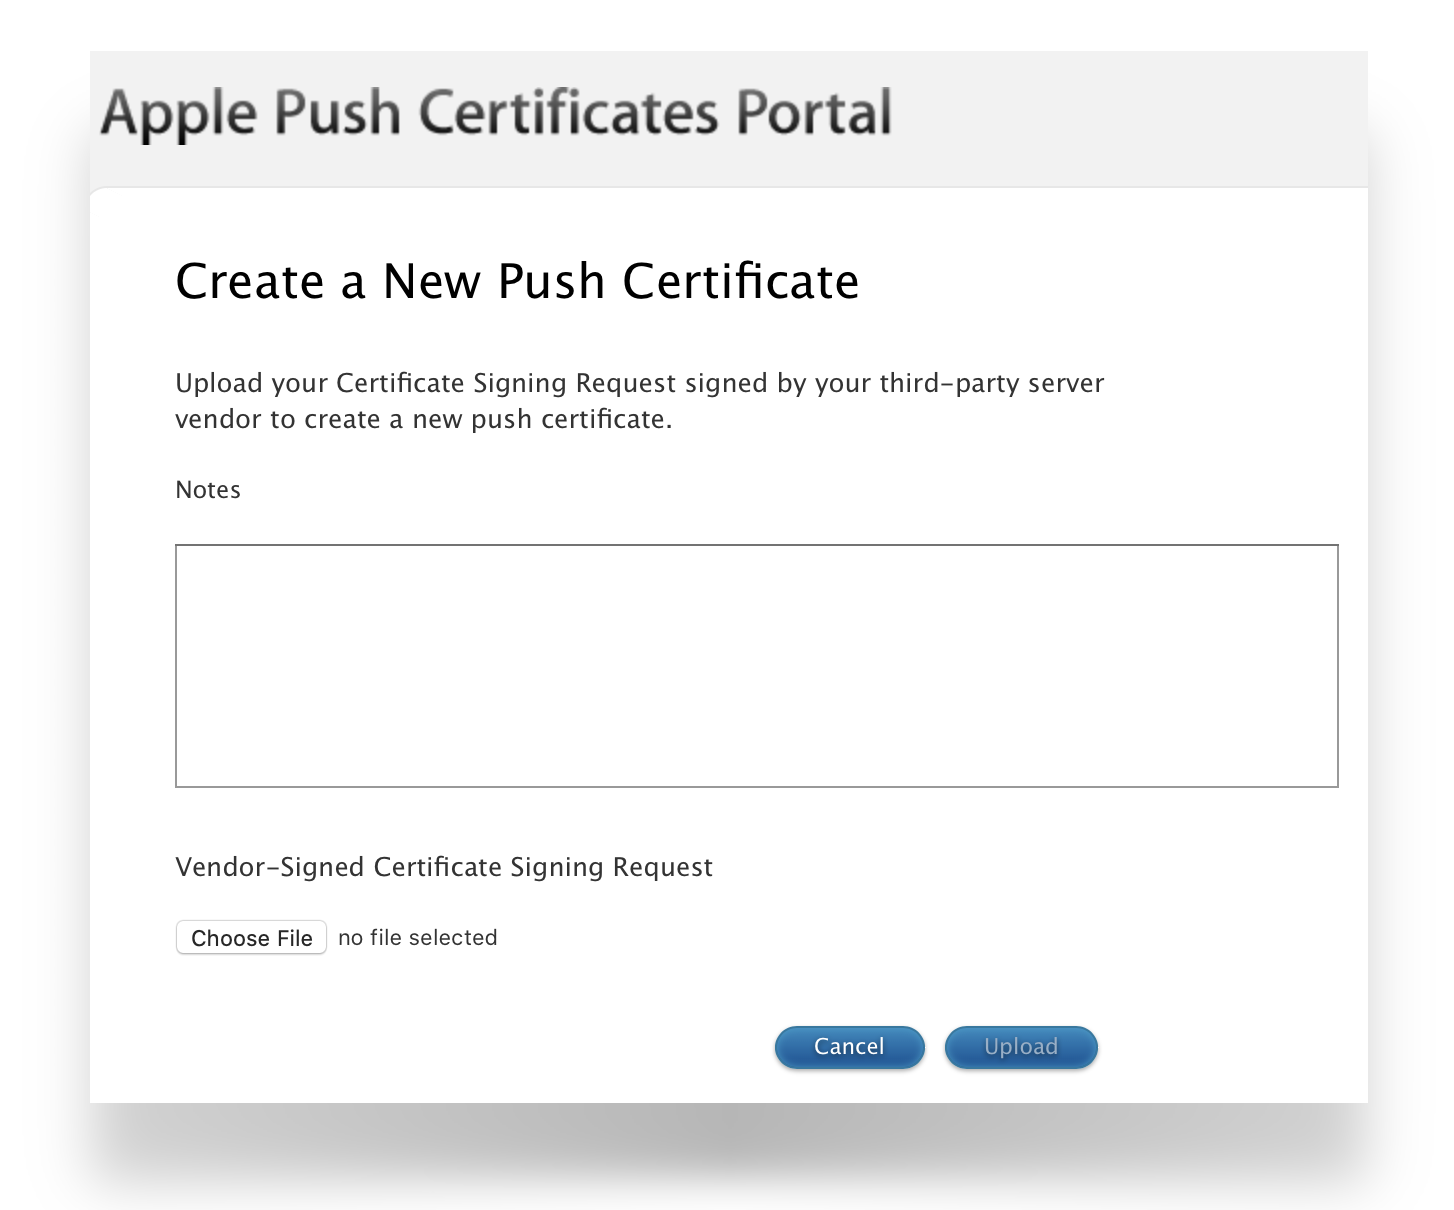
Click
To 'Chooseconfirm File'the certificate, compare the Subject DN (Topic) and browsecurrent tocertificate.
Clicking the signed'i' FileWavebutton CSRwill fromshow the previouscertificate section.
Clickincluding 'Upload'the and Apple will return a 'Confirmation'.Topic:
ClickEnsure 'Download'this andmatches savewith the ".pem"'Current file.Certificate' Againin considerFileWave whereAdmin this> certificatePreferences is> stored.Mobile > Apple Push Notification Certificate:
CreateStep a4: ".p12"Import fromand process the Signedcertificate CSRin XCA
- First,
Open Keychain Access app, select login from the Keychains list and then choose 'My Certificates' tab.KeychainIf imported into the System Keychain, the Private Key will not be accessible.downloadIfXCA'AllforItems'macOS:tabis - Install
Dragandthestartdownloaded PEM file into the Keychain main window. - Go
LocatetothePrivateimportedKeyscertificate.→It will begin with "APSP:".
Click the disclosure triangleImport and select the expandedpreviously saved .key file from Step 1.
Commonin NameXCA.

From the 'File' menu, choose 'Export Items...'.
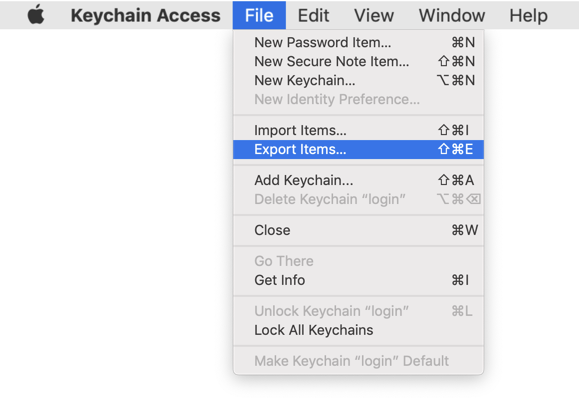
Exportcertificate as a PKCS #12 (.pfx) file – important: without a password.
Step where5: thisImport the certificate isinto stored.FileWave
Clickto Save.
→ Mobile.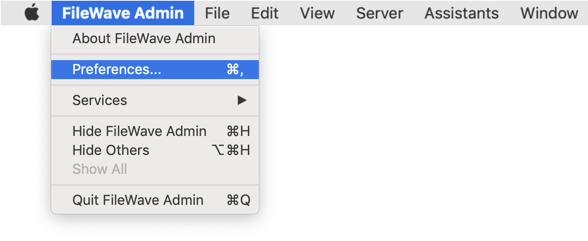
LeaveImport the password.p12 blank.
you exported from XCA by browsing to the file and then picking to Upload.
Save
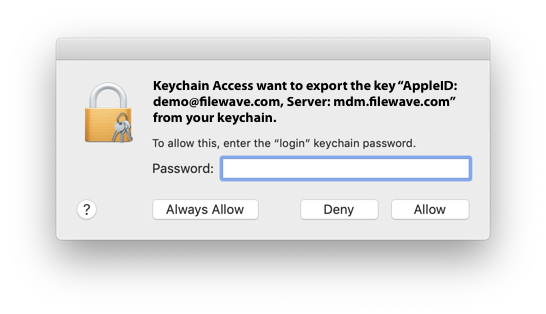
Enterthe yoursettings localby adminclicking account, when prompted, allowing KeychainOK to export.
UploadingStep 6: Verification
LaunchCheck the logs in FileWave Admin and login to theensure FileWavethere server.
Open the FileWave Admin Preferences.
Select the 'Mobile' tab.
Click 'Browse' and navigate to the saved ".p12" APNs certificate.
Select the exported ".p12" certificate.
Click 'Upload APN Certificate/Key Pair'.
The topic should match the previous topic.
That is it! FileWave may now manage Apple devices using Apple’s Push Notification Service.
APNs certificates require yearly renewals. Through FileWave Admin > Dashboard > Alert Settings, automated emails may configured. Consider adding 'APN for MDM'. Note this requires the Email preferences in Admin to be configured.
Contact Apple for help
If you forgot the email tied to your Apple Push Notiifcation you may reach out to Apple for assistant
Contact Apple for help with APN