Apple ADE Enrollment
Benefits of DEPADE Enrollment
iOS, tvOS, and macOS can all take advantage of Apple DEPADE enrollment. DEPADE enrollments will force a specific set of preferences on the device and force enrollment to FileWave any time the device is Factory Reset. Another huge benefit of DEPADE is that DEPADE is the only enrollment option that prevents the end-user from removing the MDM Profile and unenrolling the device. These two aspects can be very helpful in device recovery situations since if the device is wiped after being lost or stolen, the device will automatically enroll back into FileWave where you can lockdown the device and collect Location Tracking information to report to the authorities.
If you have not already created your Apple Push Notification Service Certificate (APNS) or configured DEPADE to sync with FileWave, please review the Platform Integrations > Apple Integration section before continuing.
Creating DEPADE Profiles
The first step to enrolling your Apple devices via DEPADE is to create a DEPADE Profile. The DEPADE Profile is what will determine the initial settings applied to the device during enrollment and applies to all Apple platforms. Unless needing explicit seperation of the initial enrollment settings, one DEPADE Profile can suffice for all of your devices. This is partly possible since we can use FileWave Custom Fields to uniquely name the devices.
- Open FileWave Admin and navigate to "Assistants >
DEPADE Association Management". - Click the "[+]" button on the right-hand side under "Profiles".
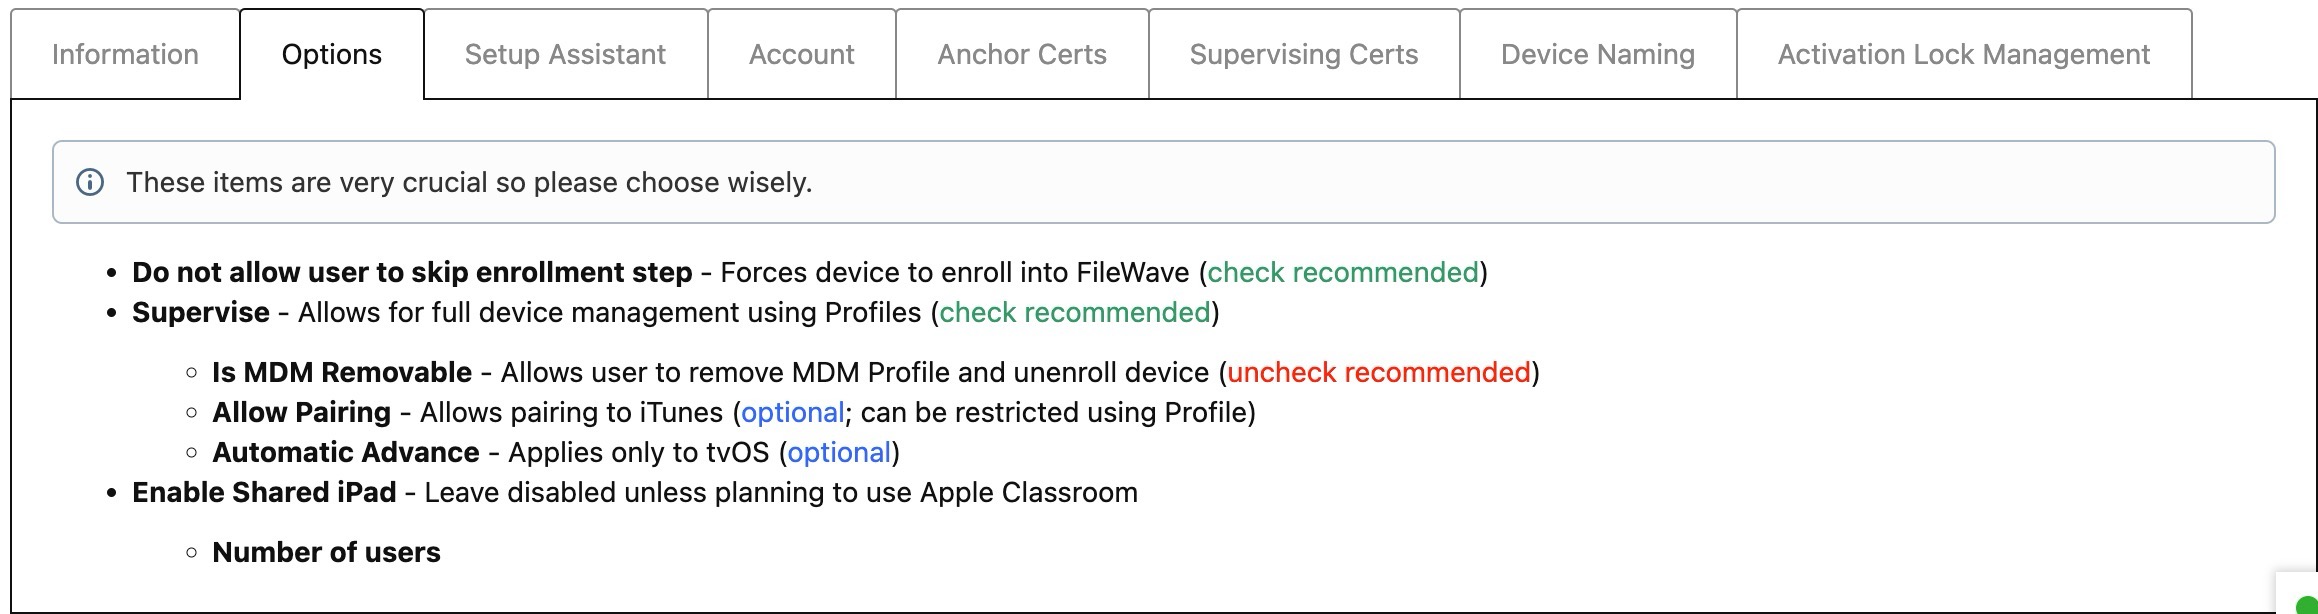
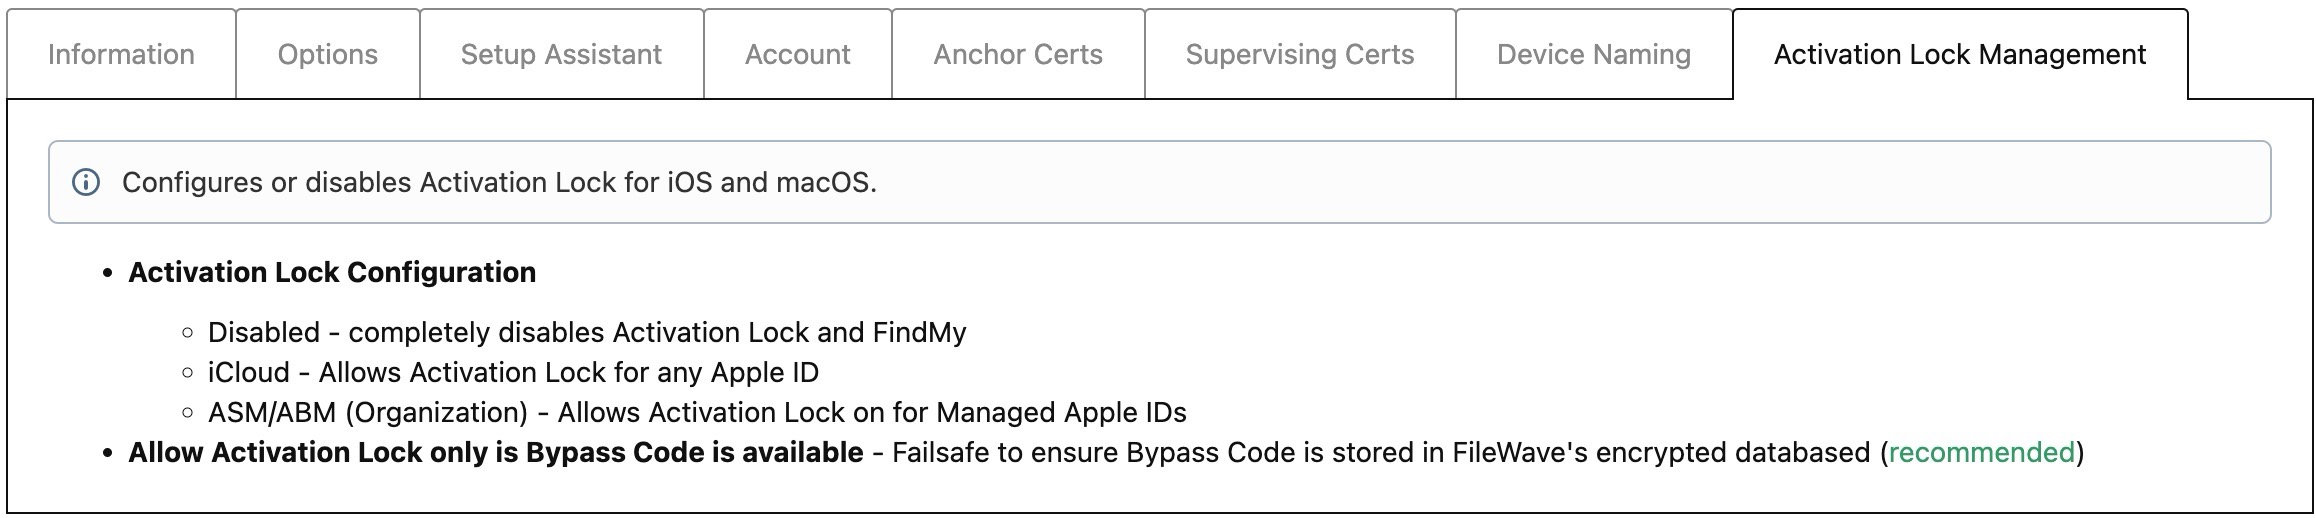
- Fill out each tab according to your management preferences.


Assigning DEPADE Profiles
Assigning DEPADE Profiles is very easy within FileWave, especially if you only have one DEPADE Profile since you can set a Default DEPADE Profile. With a Default DEPADE Profile configured, anytime you assign a new device to the FileWave MDM Server from within Apple School Manager or Apple Business Manager, the DEPADE Profile will automatically apply and the device will be ready for DEPADE enrollment. However, if you have multiple DEPADE Profiles, FileWave will also enable you to create Rule-based DEPADE Profile assignments or you can always just drag-n-drop a DEPADE Profile onto a single device or multiple devices onto a DEPADE Profile.
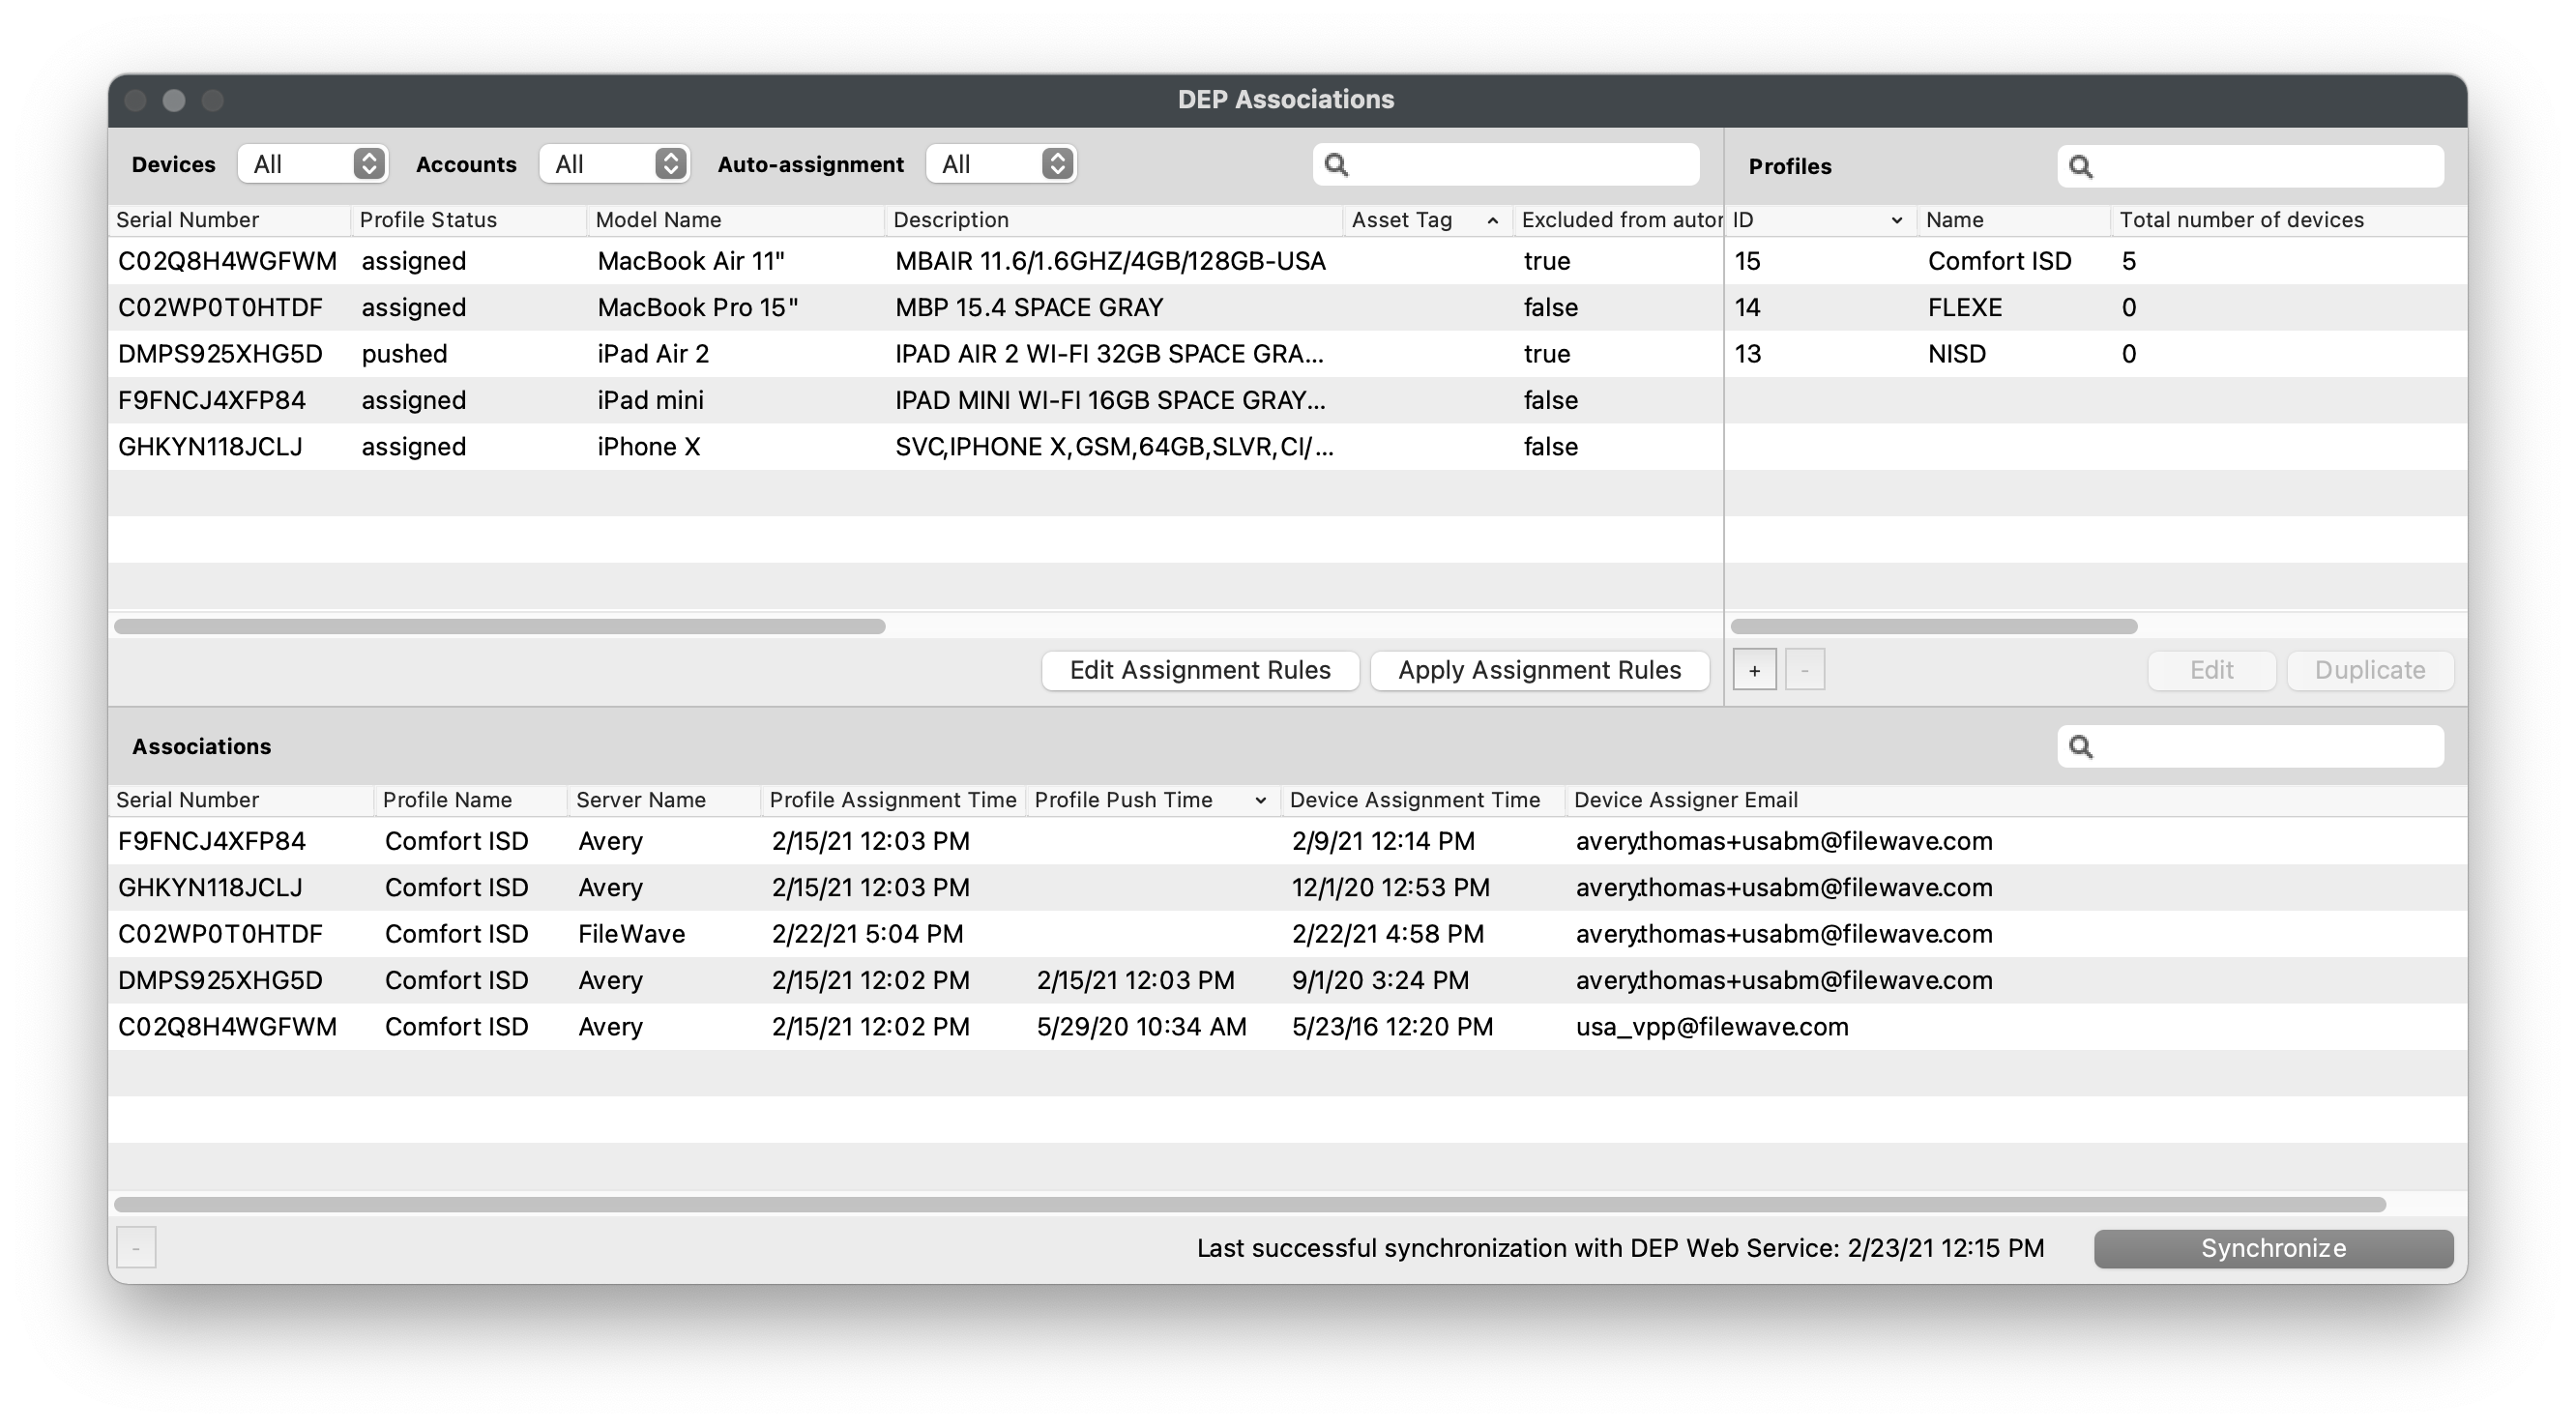
The "Profile Status" field in the "Devices" pane tells you the current status of the DEPADE profile on the client device.
- Empty - no
DEPADE Profile assigned - Assigned -
DEPADE Profile has been assigned butDEPADE enrollment has not occurred - Pushed - Setup Assistant setting has run and settings have been enforced on client device
- Removed -
DEPADE profile has been unassigned from device, will be changed to "Empty" afterDEPADE sync
Setting Default DEPADE Profile
- Open FileWave Admin and navigate to "Assistants >
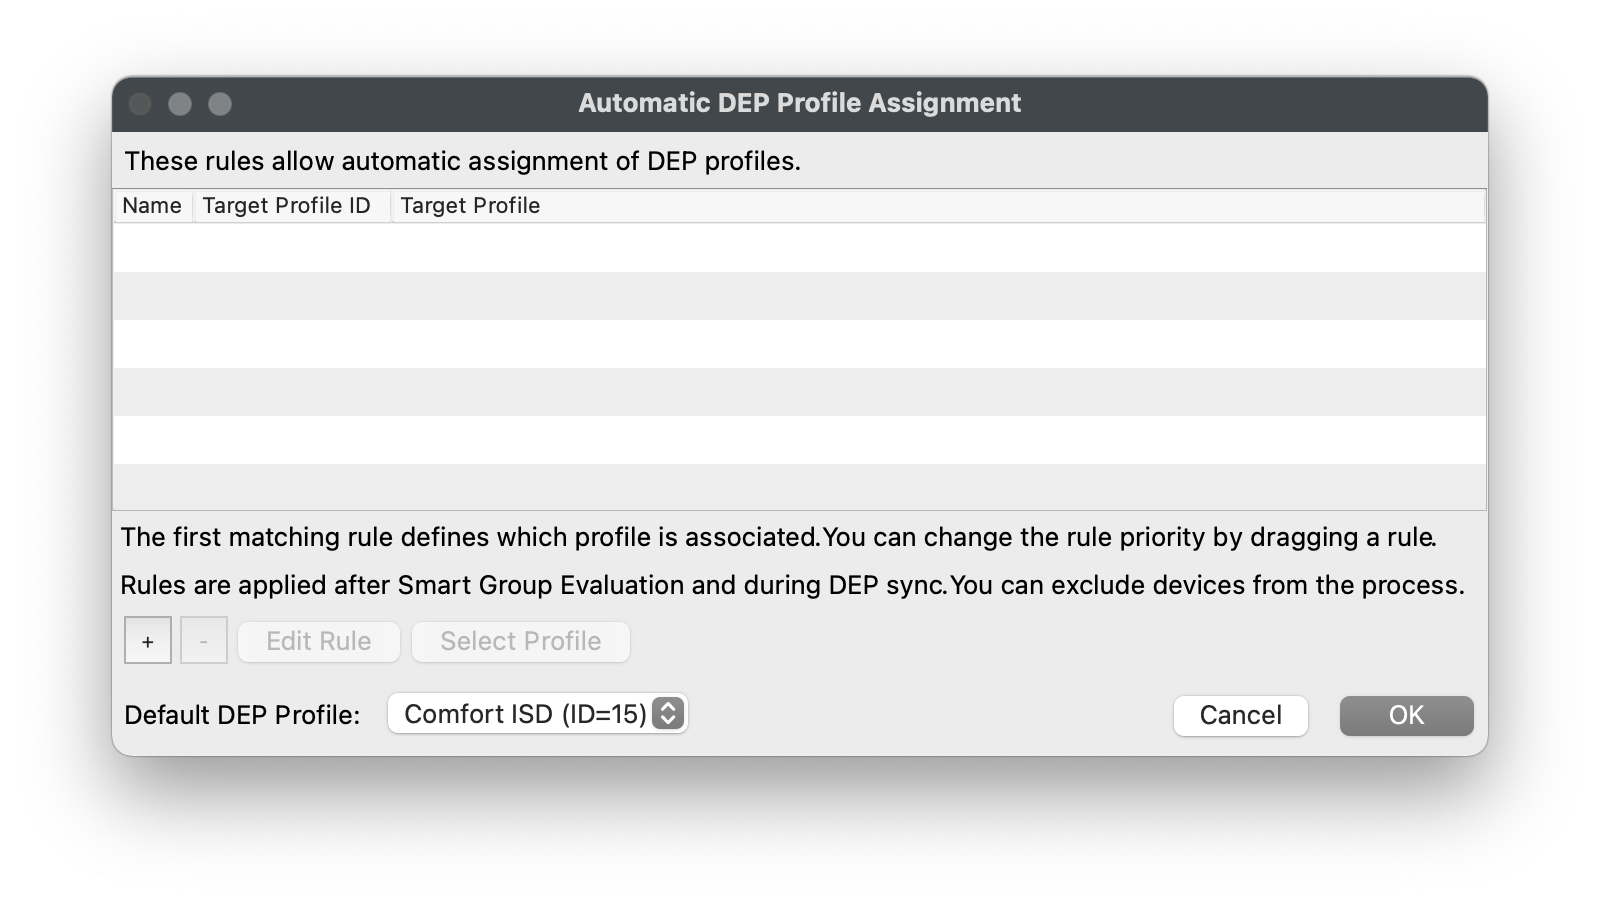
DEPADE Association Management". - Click "Edit Assignment Rules".
- Select your recently created
DEPADE Profile from the "DefaultDEPADE Profile" dropdown menu. - Click "OK".
- Click "Apply Assignment Rules" to save the changes.
- Hold the Option or Alt key on your keyboard and click "Synchronize (full sync)" button in lower right-hand corner
- You should now see that all of your devices have been "Assigned" to your
DEPADE Profile.
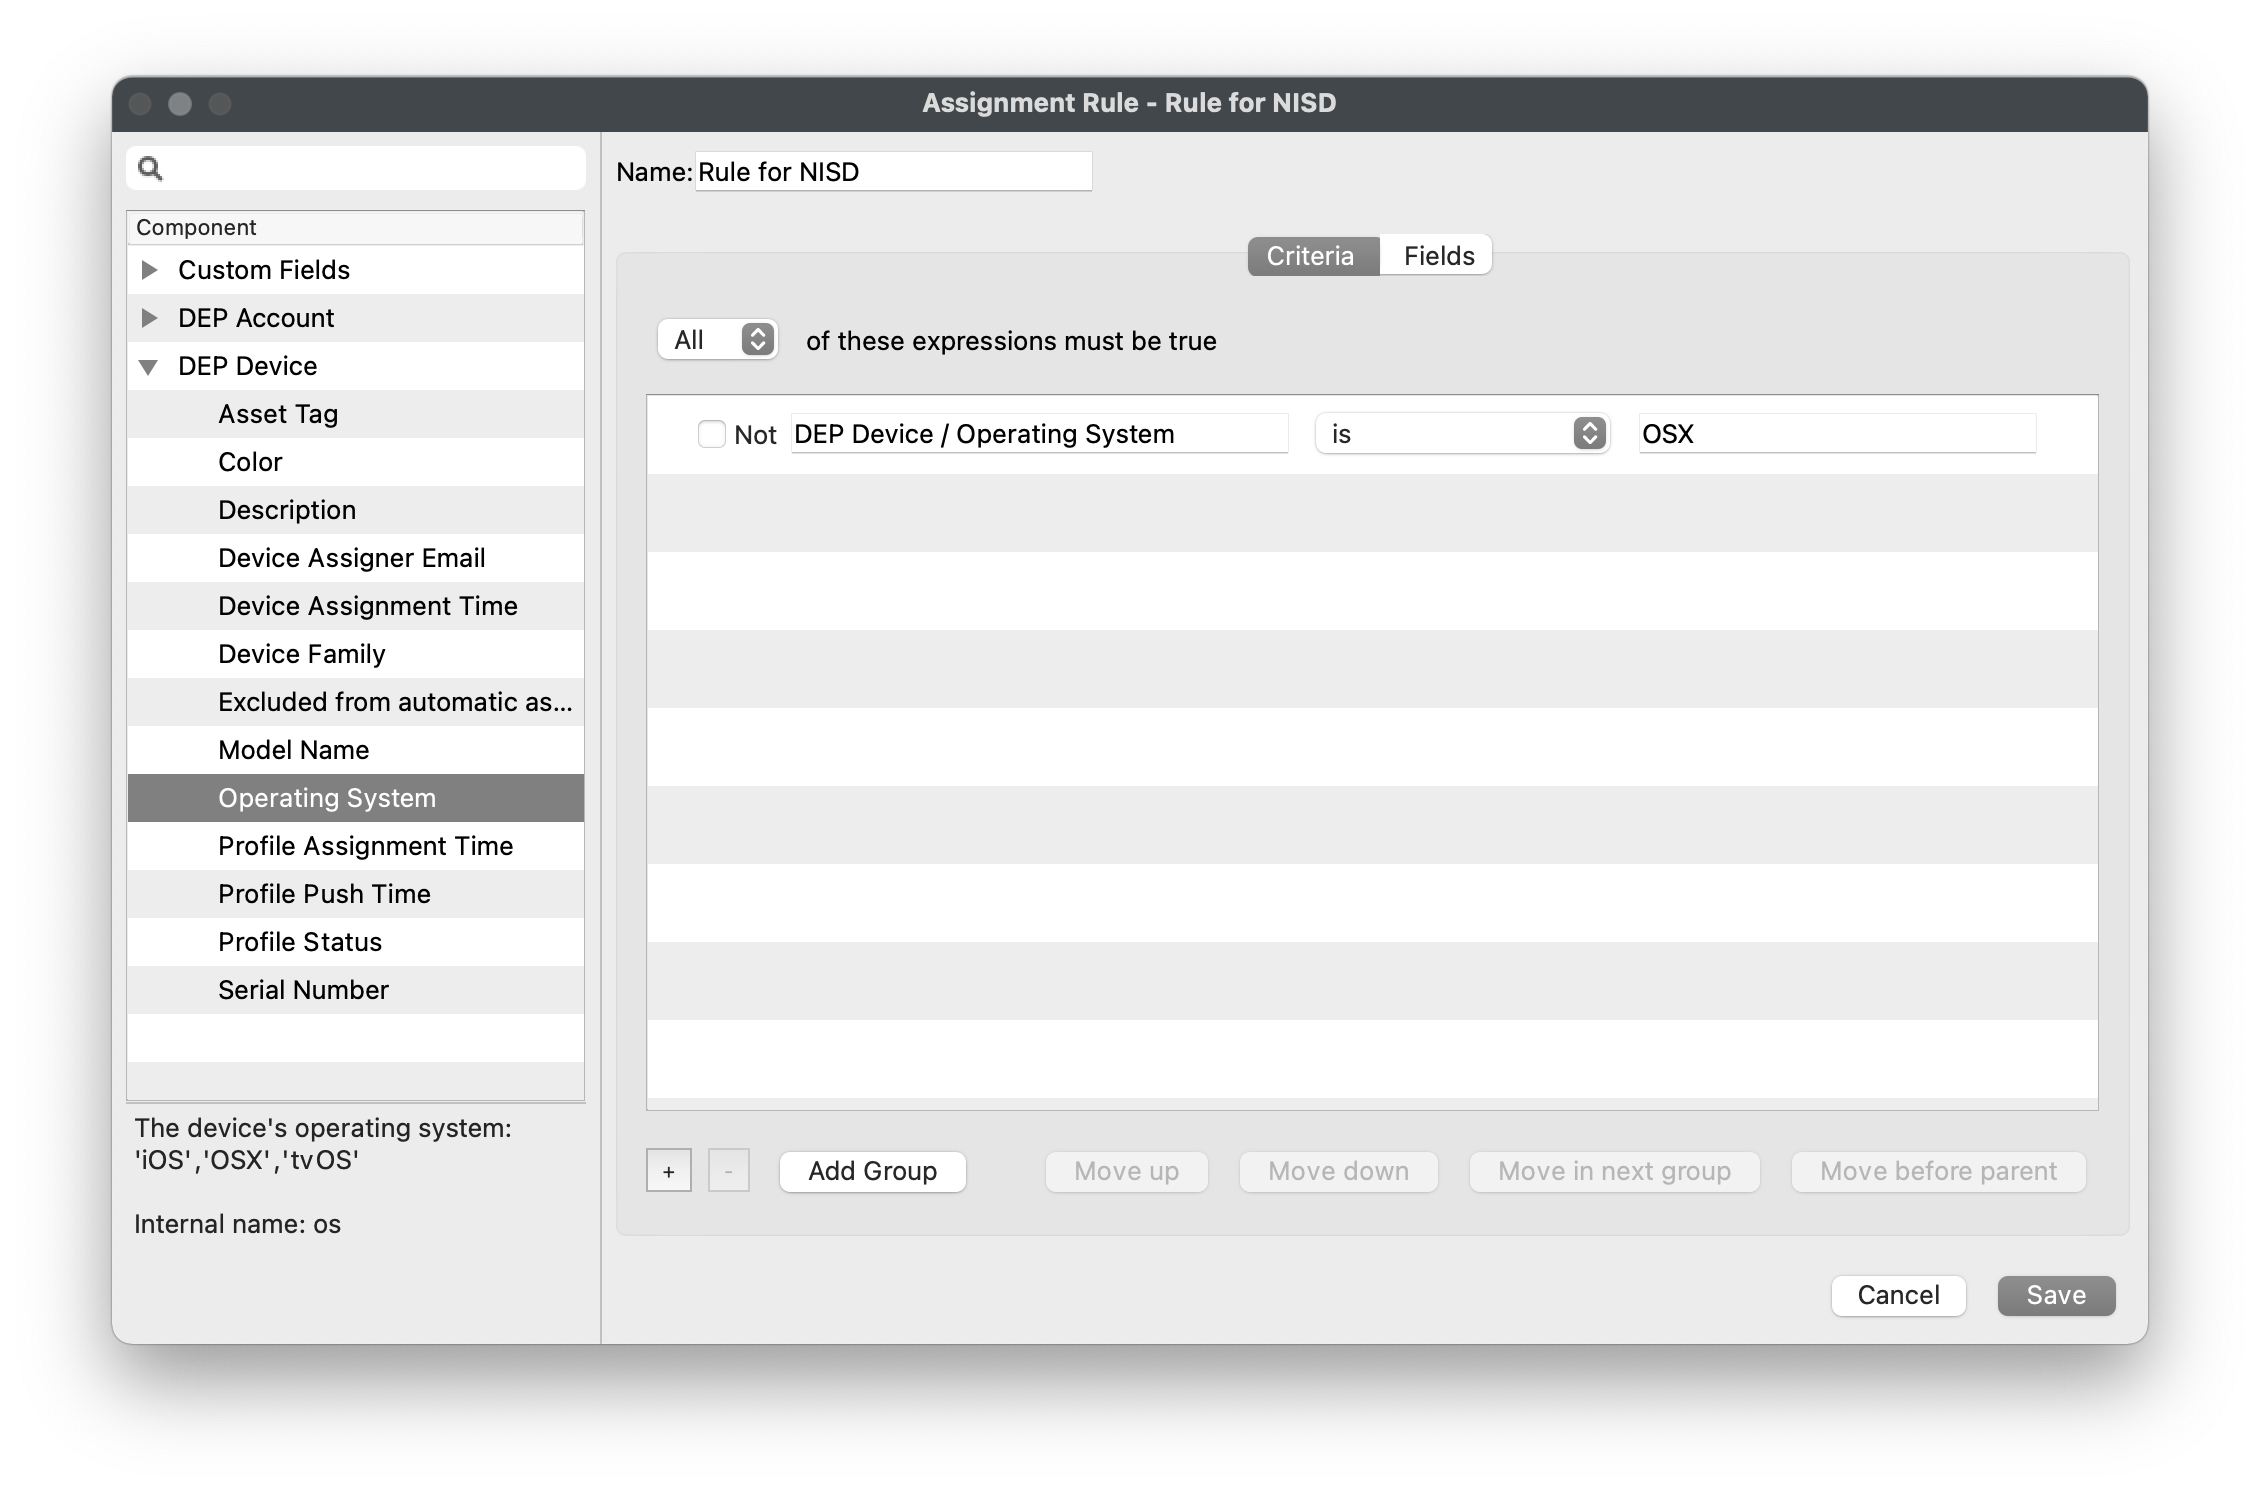
Rule-based DEPADE Profile Assignment
- Open FileWave Admin and navigate to "Assistants >
DEPADE Association Management". - Click "Edit Assignment Rules".
- Click "[+]".
- Select the
DEPADE Profile you'd like to assign based on rules. - Drag-n-drop the Inventory data point the devices must meet to be assigned to the
DEPADE Profile into the "Criteria" section. - Verify the criteria is correct by viewing the returned devices in the "Fields" section.
- "Save" the query and "OK" to save rule definition.
- Click "Apply Assignment Rules" to save the changes.
- Hold the Option or Alt key on your keyboard and click "Synchronize (full sync)" button in lower right-hand corner.
- You should now see that your selected devices have been "Assigned" to your
DEPADE Profile.
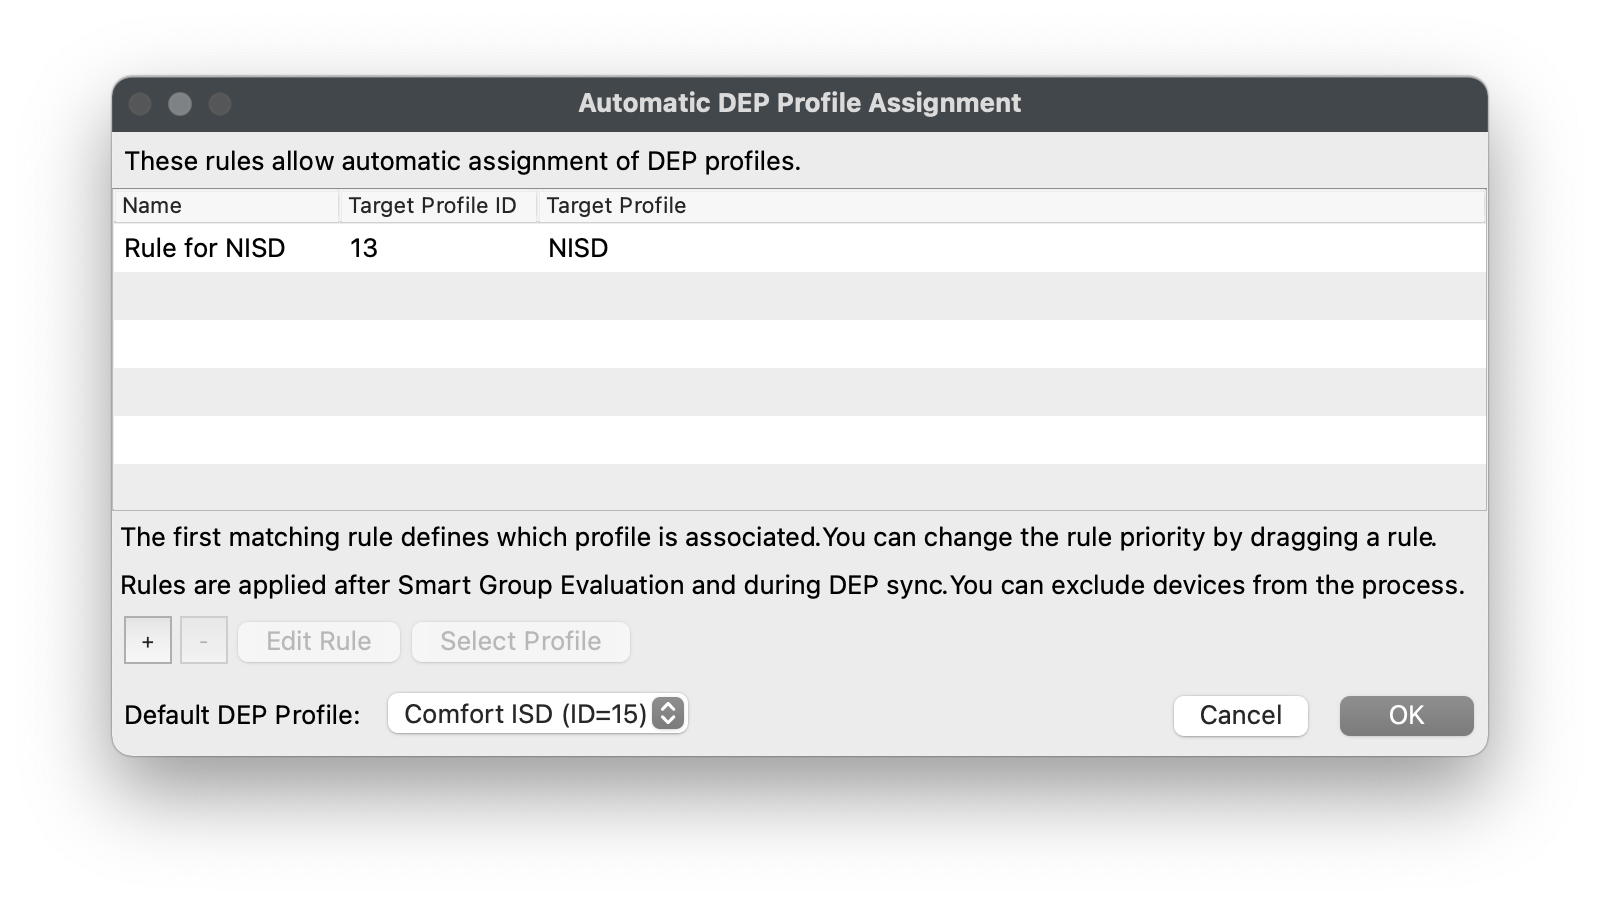

As noted in the Screenshot, the first matching rule (top to bottom) will be honoured; automated rules will override a Default Profile. Hence, Default Profile, if set, is considered the fallback if no rules are met.
Manually assign DEPADE Profile
- Open FileWave Admin and navigate to "Assistants >
DEPADE Association Management". - Select one or more devices from left pane and drag-n-drop onto a
DEPADE Profile.- or...
- Select one
DEPADE Profile from the right pane and drag-n-drop it onto one device.
Generate custom FileWave Client for macOS DEPADE enrollments
During a DEPADE enrollment, your macOS devices will automatically download and install the FileWave Client. Before enrolling a macOS device via DEPADE we must first upload a customized FileWave Client PKG to the FileWave Server.
Generate a custom FileWave Client PKG
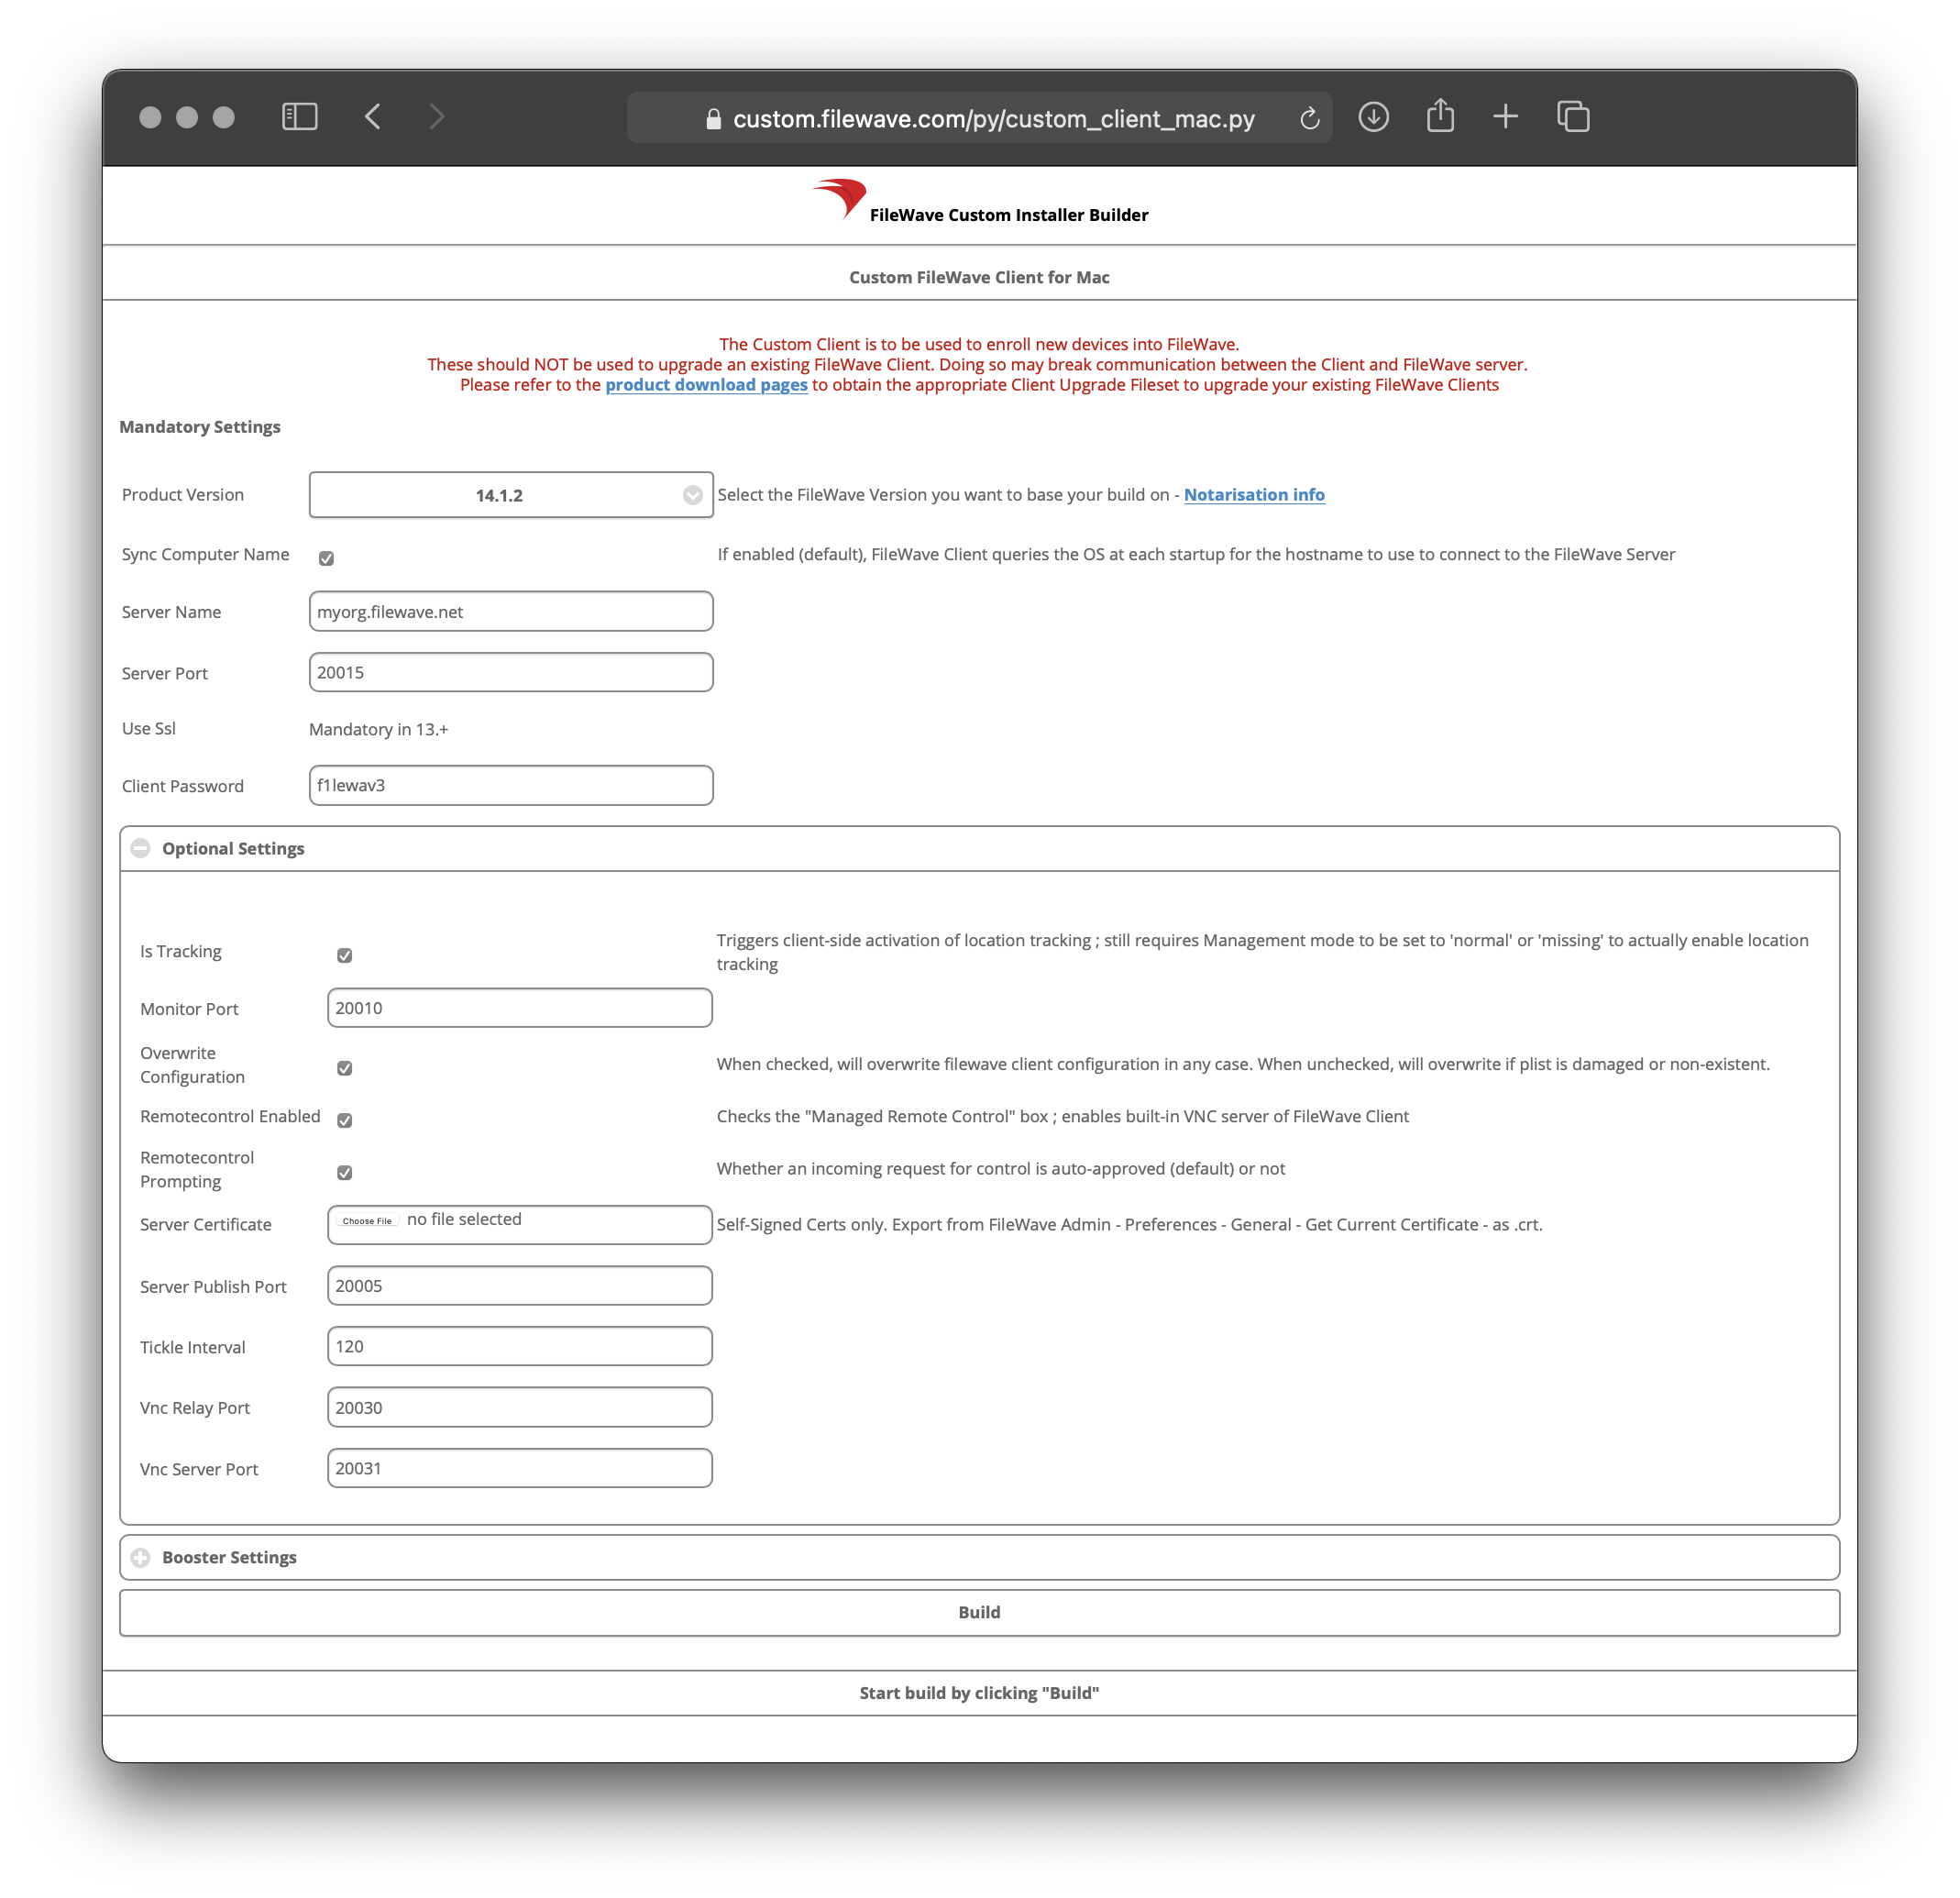
- Visit FileWave Custom Installer Builder
- Change the following settings to match your FileWave Server.
- Click "Build" and wait for automatic download of ZIP.
- Extract ZIP.
- Mandatory Settings
- Product Version = Your FileWave Server Version
- Sync Computer Name = macOS Hostname will be FileWave Client Name (recommended)
- Server Name = Fully Qualified Domain Name of your FileWave Server
- Server Port = 20015 (do not modify this as it will automatically go to the proper SSL port if you put in 20015)
- Client Password = Password used to change individual Client Preferences and to start screen-sharing session
- Optional Settings
- Is Tracking = Is Location Tracking Enabled for macOS Clients
- Monitor Port = Port used for FileWave Client Monitor (do not modify)
- Overwrite Configuration = Overwrite any existing FileWave Client configuration with settings entered here (recommended)
- Remotecontrol Enabled = Screen-sharing enabled for Windows Clients
- Remotecontrol Prompting = Whether or not to Prompt the end-user before starting screen-sharing session
- Server Certificate = Only upload certificate is using a Self-Signed Certificate; not required for CA-signed certificate
- Server Publish Port = 20005 (do not modify)
- Tickle Interval = Idle time for Windows Clients before checking for new Model Update (do not modify)
- Vnc Relay Port = 20030 (do not modify)
- Vnc Server Port = 20031 (do not modify)
- Booster Settings
- Do not configure unless instructed by FileWave SE
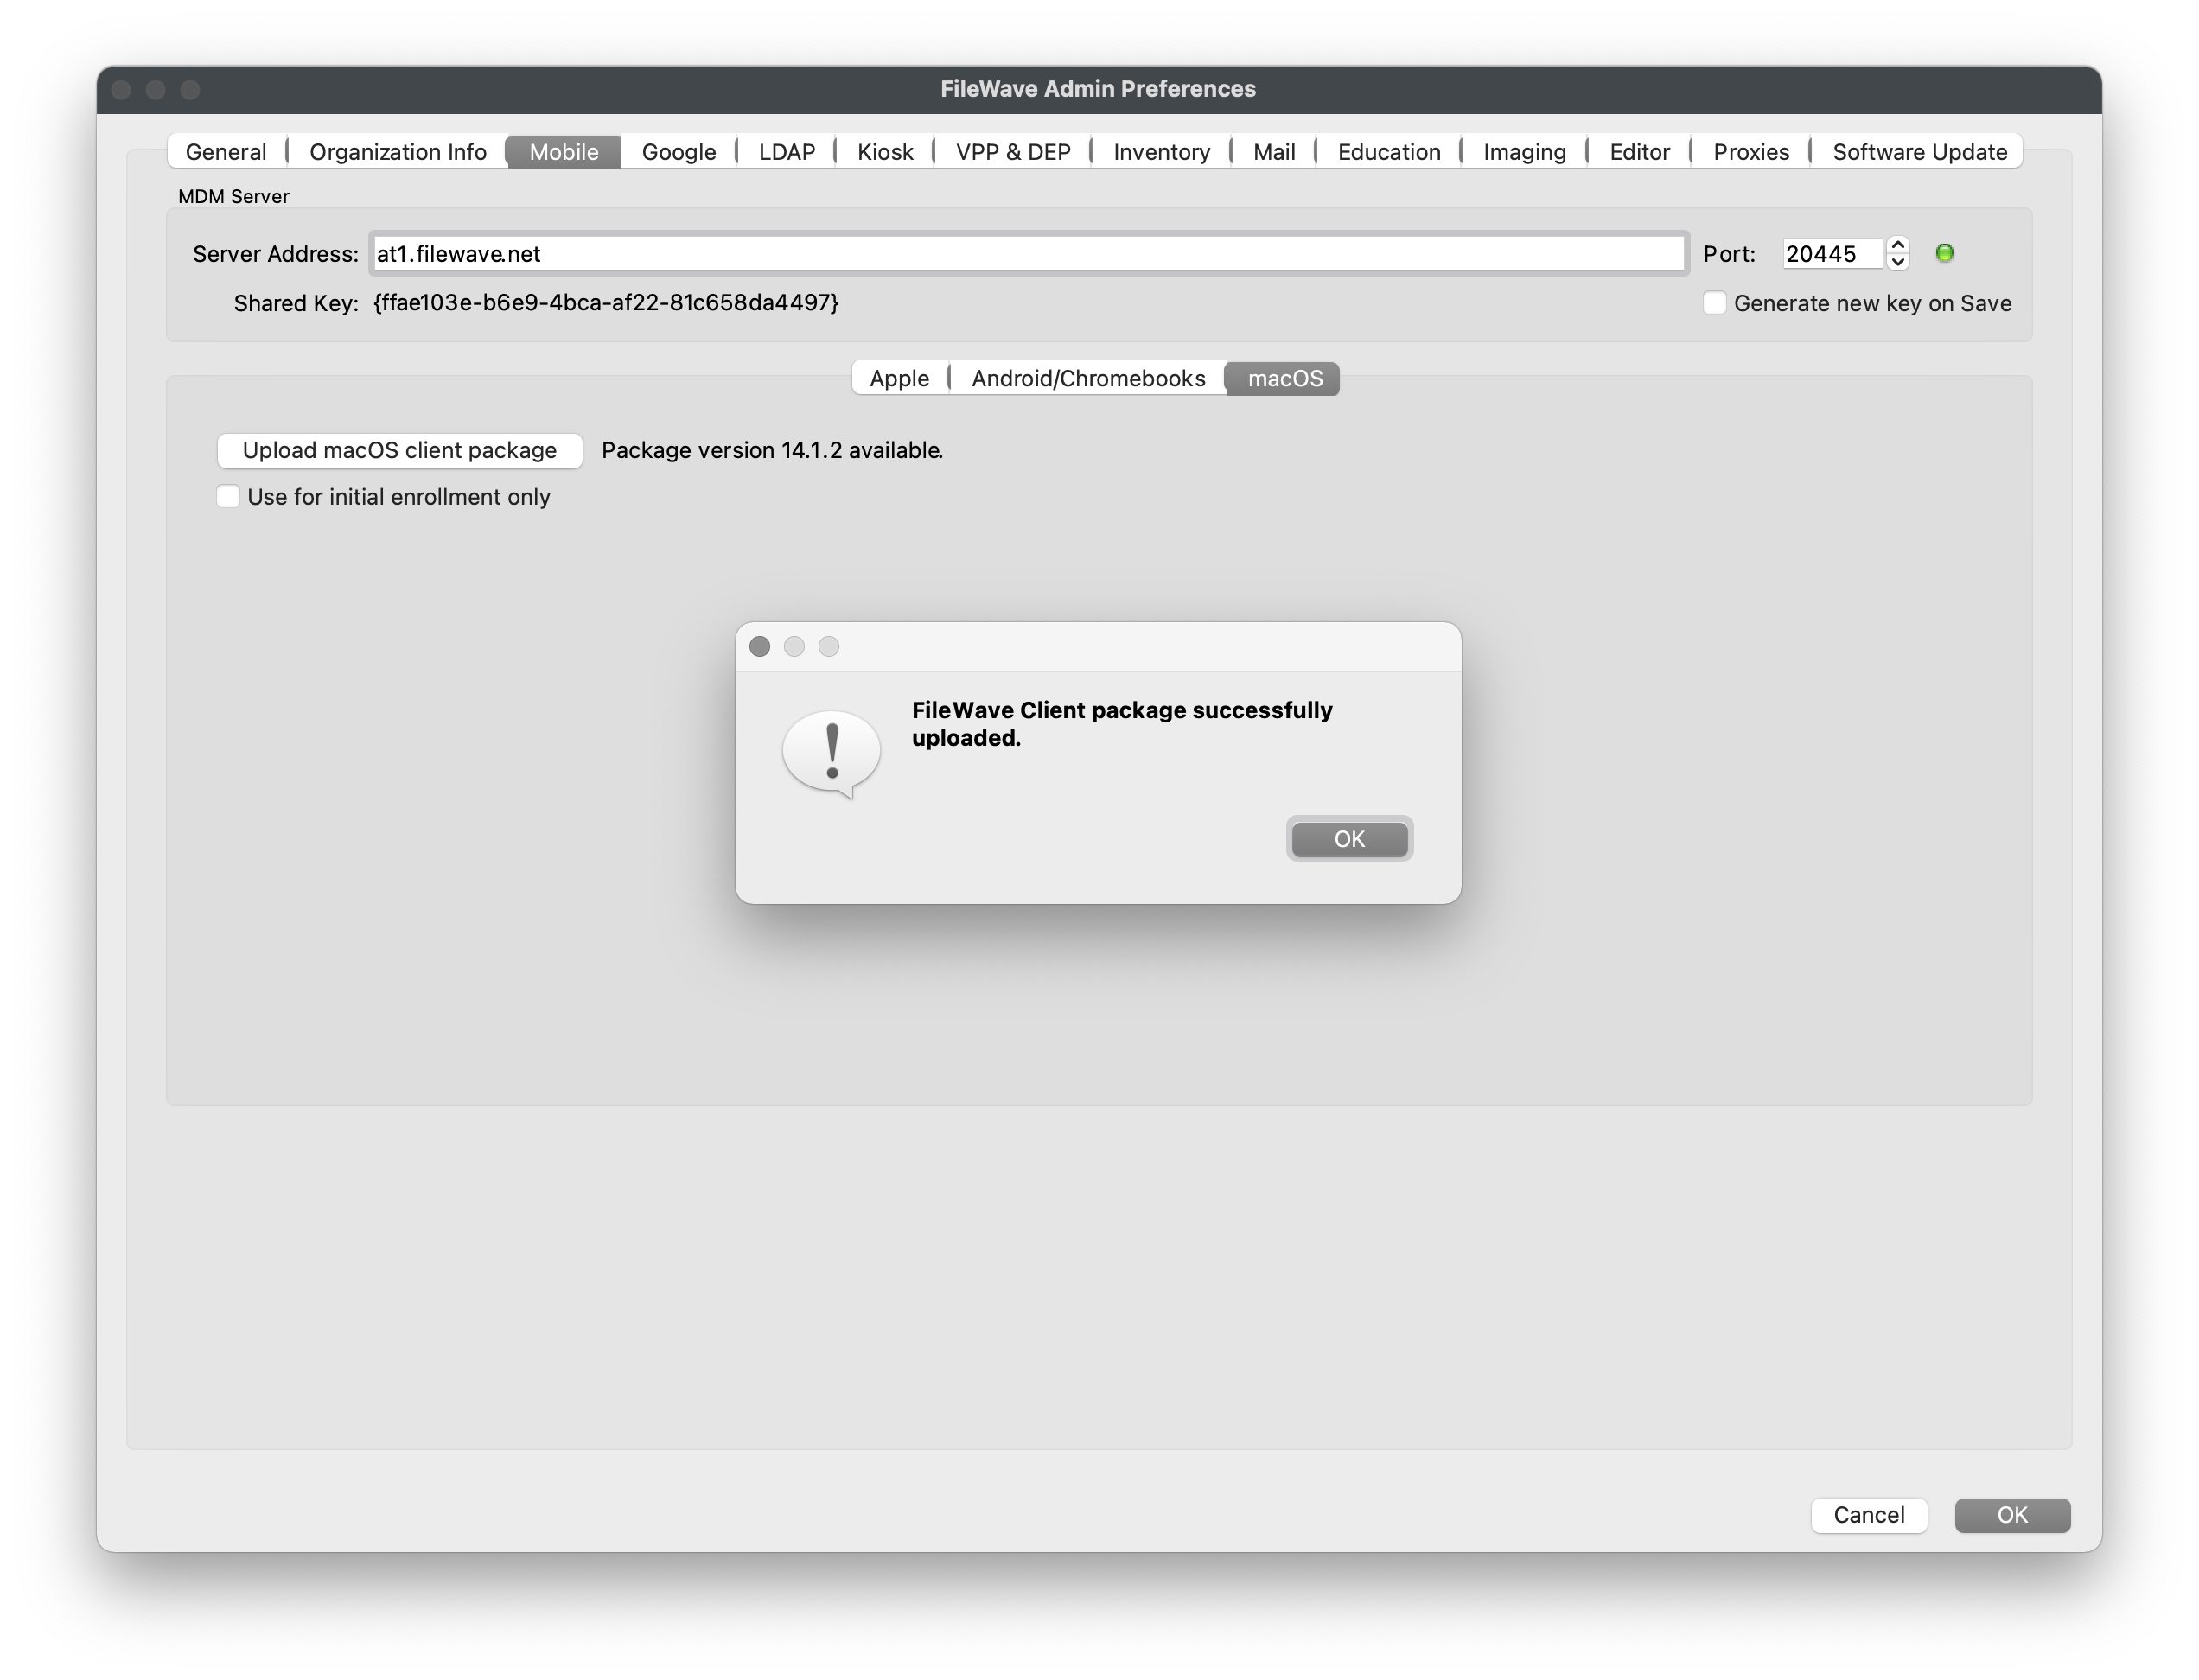
Upload custom FileWave Client PKG to FileWave
Enrolling Apple devices via DEPADE
Now that your devices have been "Assigned" to a DEPADE Profile, they can either be Factory Reset if already configured or taken fresh out of the box from Apple and they will automatically enroll into FileWave.
If getting authentication required during enrollment, please review this section to learn how to disable DEPADE enrollment authentication.
|
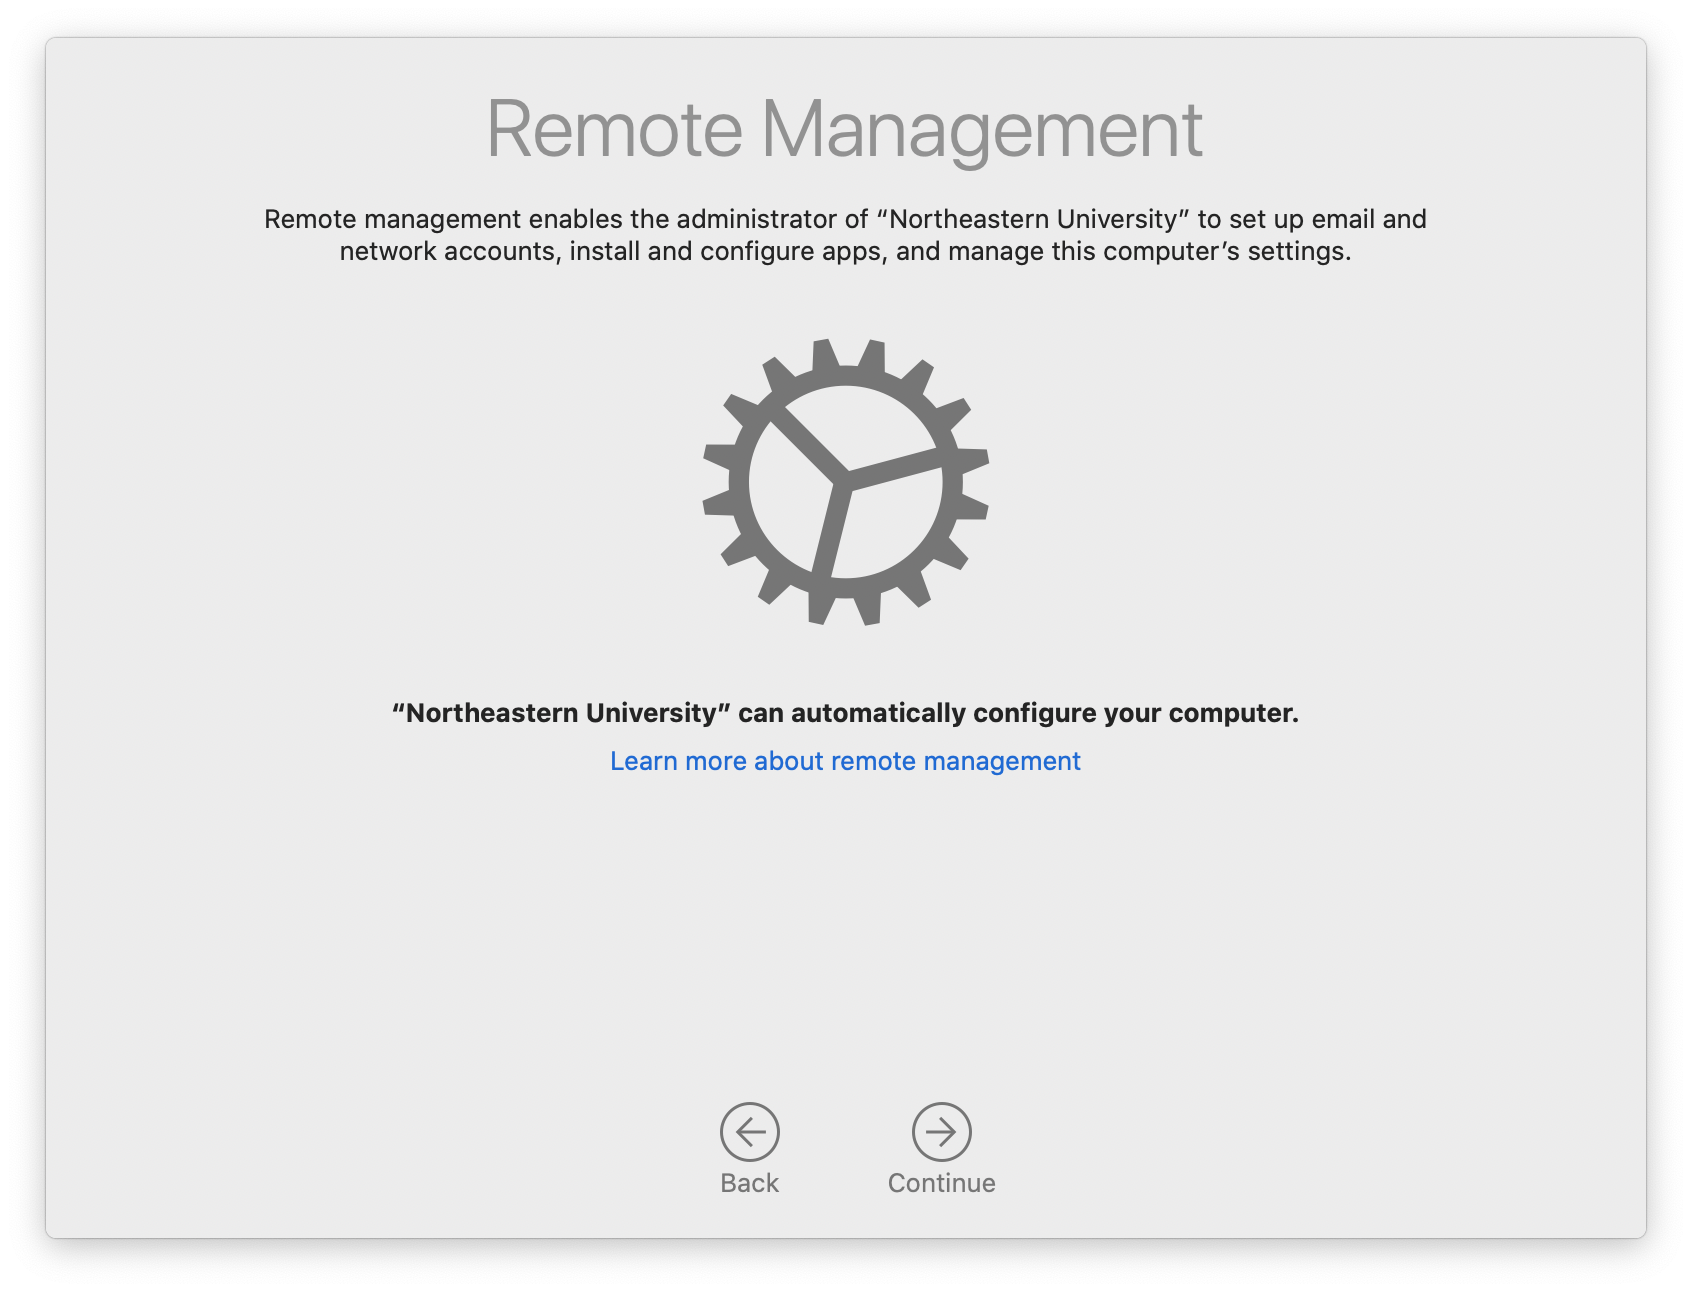
macOS
|
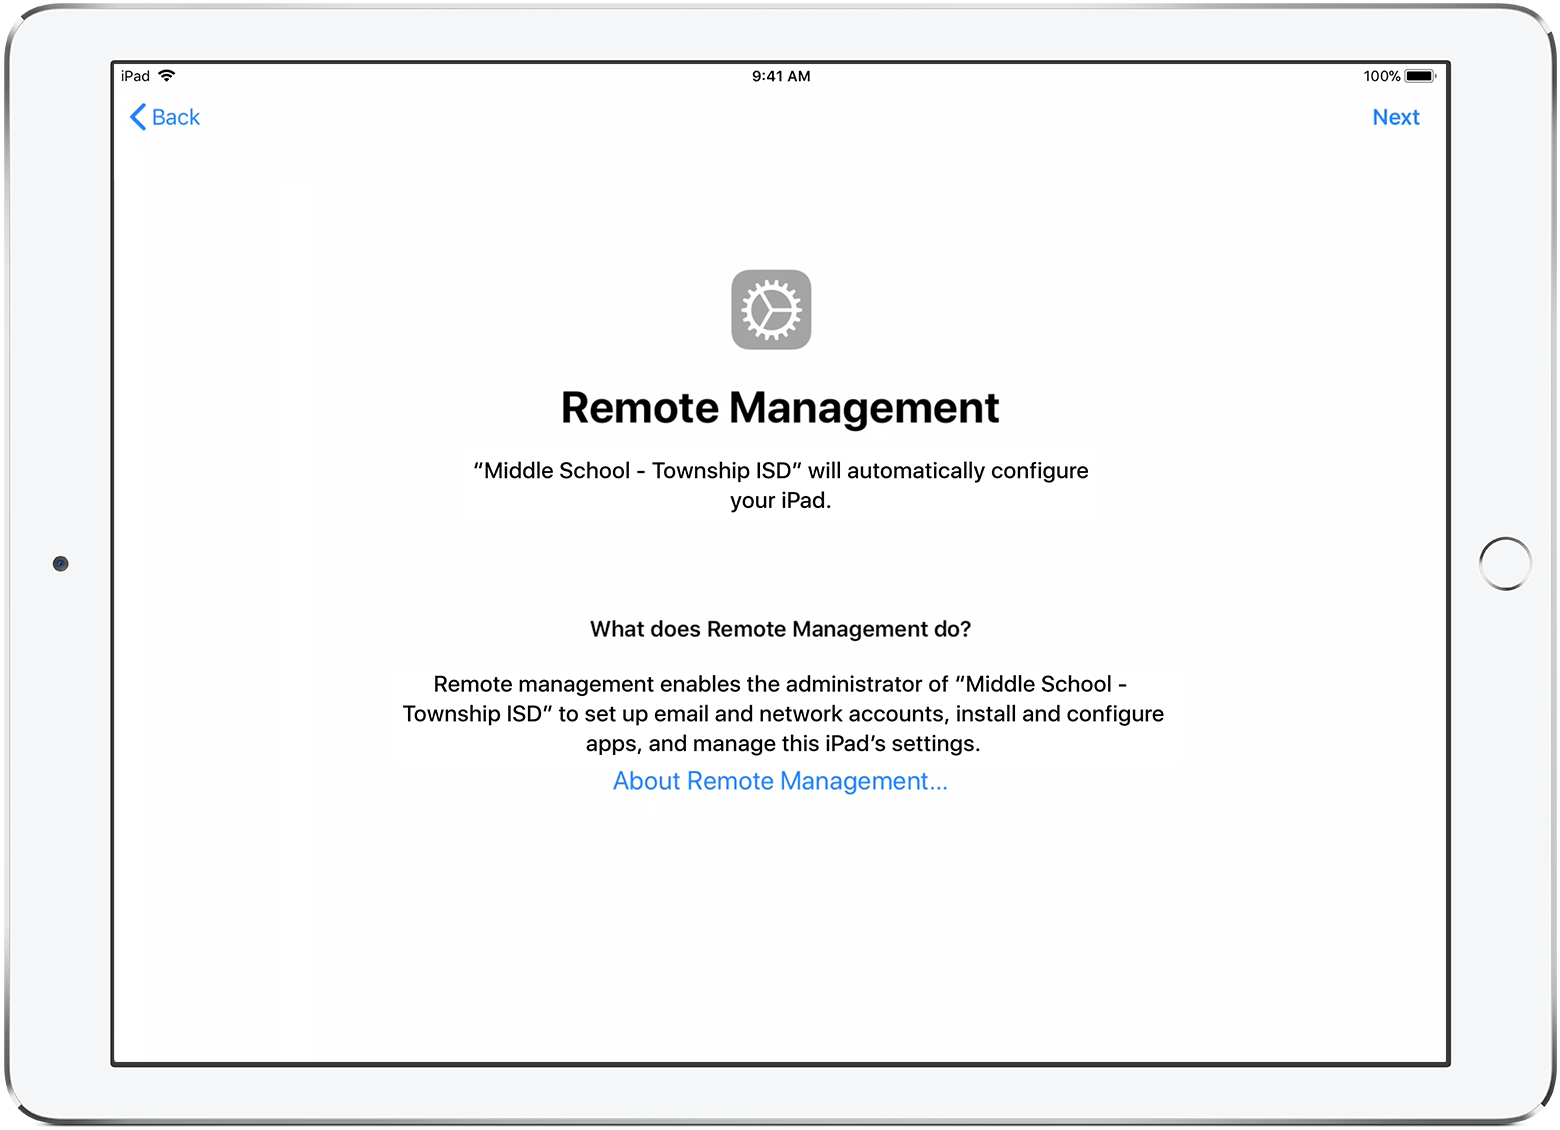
iPadOS
|
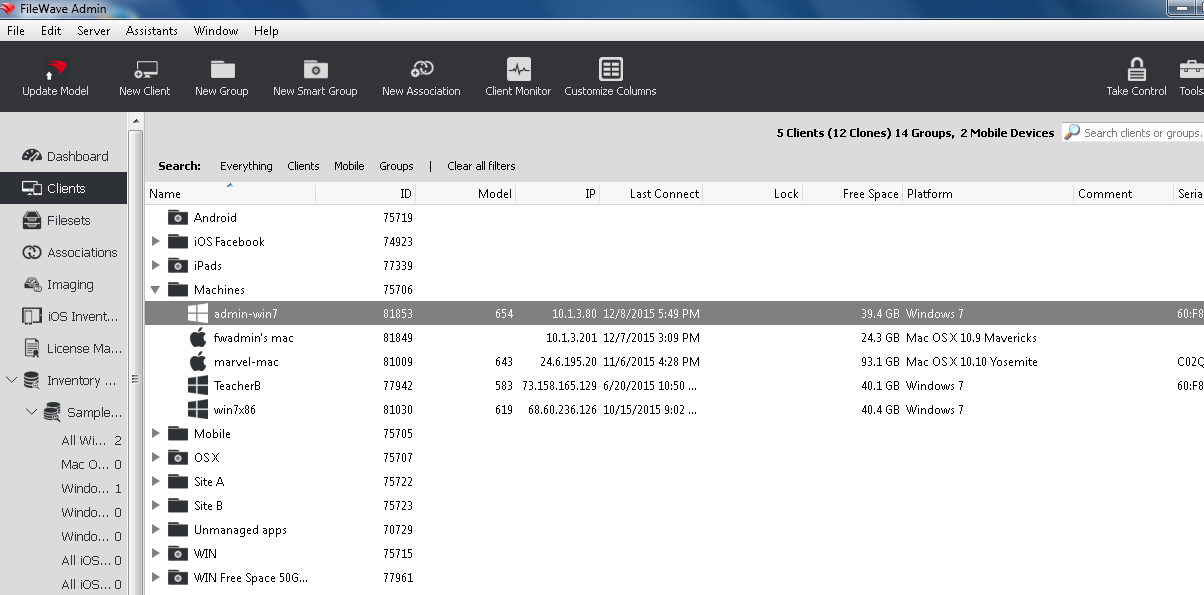
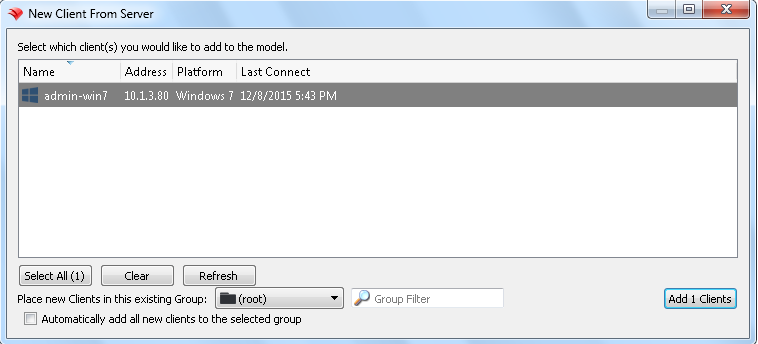
Finalizing adding of clients
FileWave Clients communicating to the FileWave server will not be able to connect until you add them to the model. We will now allow our new client to join the FileWave server.
- Open FileWave Central.
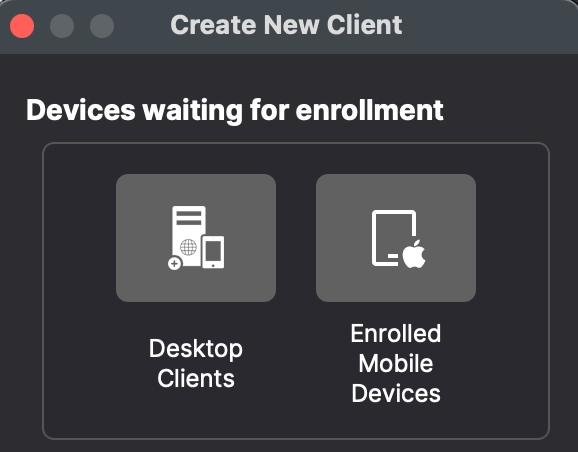
- Click on the “New Client” button in the tool bar
- Select either "Desktop Clients" or "Enrolled Mobile Devices" from the dialog box depending on whether it is a macOS or iPad.
- Select your new client from the list presented.
- Click the “Add Clients” button in the lower right.
Once you have selected “Add Clients”, you will be taken to the Clients view in FileWave Admin. By adding a client to the server, we have made changes to the model. In order for those changes to take effect, we need to perform a model update.
You can also decide to automatically add new clients to skip the step of adding devices. This is discussed here: Conflict Resolution
Making Changes to the Model
Remember that you will need to update the model anytime that you want to apply changes you have made. You can update the model after a single change or multiple changes (adding multiple clients, creating groups, etc.)
Congratulations! Your FileWave environment is now up and running! From here you can continue to add clients, build and deploy Filesets!