FileWave Central Preferences
What
FileWave Central Preferences contains server-wide configuration, platform integrations, content-delivery defaults, inventory behavior, and settings that apply only to the local Central installation. Use this overview to find the correct area, then follow the linked workflow article for settings that need detailed preparation.
FileWave 16.4 navigation: This page reflects the Preferences categories and locations in FileWave Central 16.4. Earlier releases may place some settings elsewhere. In particular, automatic Booster-upgrade timing is under Preferences > General in 16.3.x and Preferences > Upgrades in 16.4.0 and later.
Open Preferences
Open Preferences from FileWave Central. The categories appear as tabs across the top of the window. Use the left and right arrows when the window is not wide enough to display every tab.
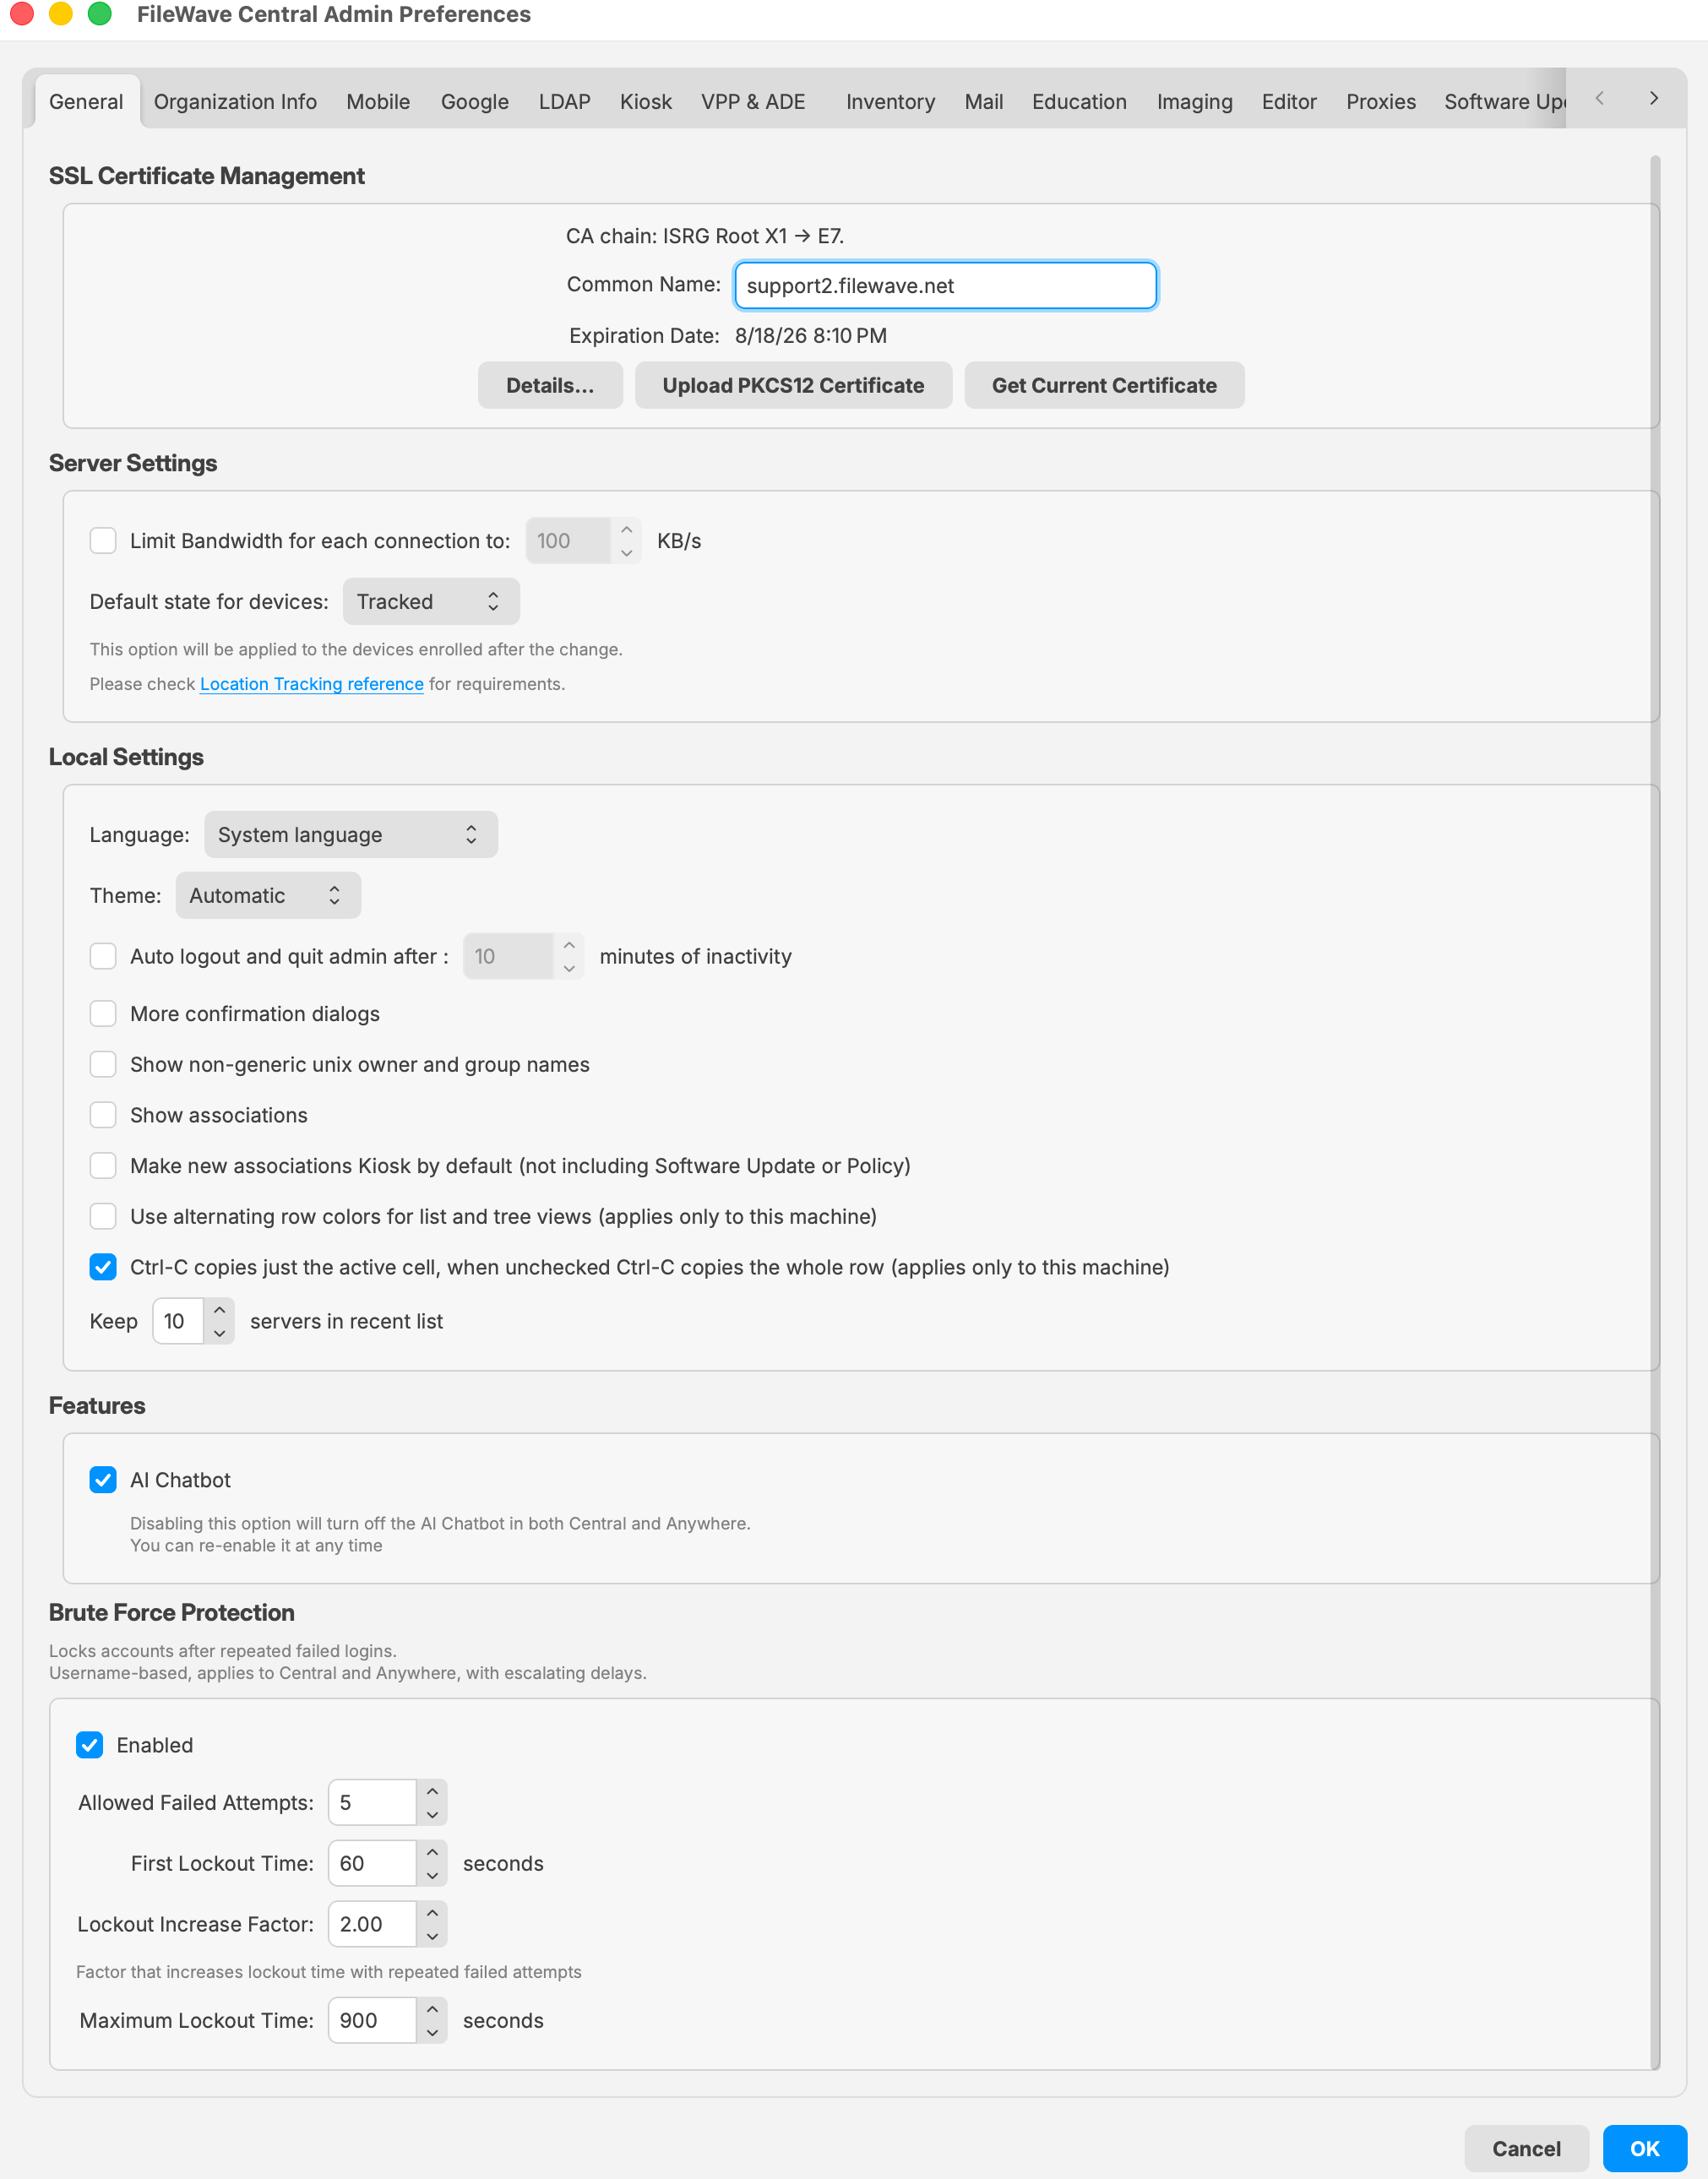
FileWave Central 16.4 General Preferences provides the current category navigation and server, security, certificate, and local Central settings.
An administrator needs the applicable permission before opening or changing a protected area. Sensitive operations can also require the currently signed-in administrator to authenticate again. Use named administrator accounts and least-privilege permissions for daily work instead of sharing the fwadmin account.
See Managing FileWave Administrators for account and permission management.
Evaluation and initial-configuration priorities
- General: Review the active SSL certificate, server-wide defaults, local Central behavior, and brute-force protection.
- Organization Info: Enter the organization information that should be associated with managed-device records.
- Mobile: Verify the MDM server address, APNs configuration, and Apple mobile-management prerequisites. FileWave 16.4 also builds and stores macOS and Windows enrollment packages here.
- Platform integrations: Configure only the services in scope for the evaluation—such as Google, LDAP, VPP & ADE, Education, or Imaging—and validate each integration before expanding enrollment.
- Inventory and Mail: Confirm reporting cadence and notification delivery without making intervals more aggressive than the evaluation requires.
- Upgrades: Review client-upgrade concurrency, failure thresholds, reporting cadence, and the automatic Booster-upgrade delay before using integrated upgrades.
FileWave Central 16.4 Preferences map
| Category | Use it for |
|---|---|
| General | SSL certificate management, server defaults, device tracking default, local Central behavior—including the recent-server list—optional AI Chatbot access, and brute-force protection. |
| Organization Info | Organization metadata associated with the FileWave environment and managed-device information. |
| Mobile | MDM server connectivity, Apple push configuration, mobile-management settings, and FileWave 16.4 macOS/Windows enrollment-package builds. |
| Google and Android EMM integration and its organization-wide configuration. | |
| LDAP | Directory connections, synchronization safeguards, directory-backed groups, enrollment identity, and parameterized data. |
| Kiosk | Kiosk categories and organization of self-service content. |
| VPP & ADE | Apps and Books tokens, Automated Device Enrollment services, Apple School or Business Manager API accounts, synchronization, and advanced Apple service settings. |
| Inventory | Apple MDM inventory polling, Smart Group refresh timing, LDAP Custom Field cleanup behavior, and IDP Custom Field synchronization. |
| Outgoing email configuration used by FileWave notifications and tests. | |
| Education | Education-specific integrations and classroom-related server configuration. |
| Imaging | Imaging Virtual Server registration, status, and FileWave 16.4-managed IVS upgrades. |
| Editor | Preferences that control supported content-editor behavior in FileWave Central. |
| Proxies | Proxy settings used when FileWave services must reach external resources through an intermediary. |
| Software Updates | Server-level Software Update behavior used by the Software Updates workflow. |
| Upgrades | Client upgrade batch size, permanent-failure threshold, scheduled reports, and automatic Booster-upgrade delay. |
Configure the recent-server list
FileWave Central 16.4 adds Keep n servers in recent list under Preferences > General. Set the number of recently used FileWave Servers that Central should retain for the login window.
- Increase the value when the same administrator regularly connects to several FileWave environments.
- Use a smaller value on shared administration Macs or where old environment names should not remain in the login history.
- This setting changes the recent list in FileWave Central; it does not add, remove, rename, or reconfigure a FileWave Server.
Enrollment authentication during setup
For most evaluations—and for many organization-owned devices using Automated Device Enrollment—FileWave recommends leaving generic URL/ADE enrollment authentication disabled unless the organization has a deliberate enrollment-identity requirement. Requiring a shared username and password can interrupt zero-touch enrollment after a wipe or reassignment. When user identity is required, configure LDAP or an identity-provider enrollment workflow instead of distributing generic credentials.
FileWave-hosted Servers
The SSH and mdm_auth.conf steps below do not apply to FileWave-hosted Servers. Hosted environments are normally provisioned without generic enrollment authentication unless another configuration was requested. Contact FileWave Support or the assigned FileWave representative when that server-side behavior needs to be confirmed or changed.
On-premises FileWave Appliances
On new Debian-based FileWave Appliances, sign in through the console or SSH as fwadmin. The initial password is filewave, and the Appliance requires it to be changed on first login. Direct root login is disabled on new Appliances beginning with FileWave 15.5; use sudo for administrative commands. See Setting the Password on First Login to FileWave Appliances.
To disable generic enrollment authentication on an on-premises Appliance:
- Connect from a trusted network or use the Appliance console:
ssh fwadmin@filewave-server.example.org - Back up the current authentication configuration:
sudo cp /usr/local/filewave/apache/conf/mdm_auth.conf /usr/local/filewave/apache/conf/mdm_auth.conf.backup - Edit the active configuration:
sudo nano /usr/local/filewave/apache/conf/mdm_auth.conf - Comment out the complete active
<Location>blocks—including each opening and closing tag—that require generic credentials for enrollment. Preserve any unrelated configuration. - Save the file and reload Apache gracefully:
sudo /usr/local/filewave/apache/bin/apachectl graceful - Test the FileWave enrollment URL from a non-production device. Confirm that the enrollment profile downloads without a generic credential prompt and that the device still completes MDM enrollment.
Keep the backup until enrollment is verified. If the result is not correct, restore the backup and reload Apache. Limit SSH access to trusted networks and change the Appliance’s initial password immediately.
Change Preferences safely
- Record the current value before changing a server-wide setting.
- Change one integration or operational behavior at a time and test it before continuing.
- Do not replace certificates, shared keys, service tokens, package settings, or enrollment authentication casually; those changes can affect existing devices and integrations.
- Keep credentials, private keys, tenant identifiers, tokens, server hostnames, and certificate details out of screenshots and support notes unless the destination is approved for that data.
- Use the focused workflow articles below instead of treating this overview as the procedure for every Preferences category.
No comments to display
No comments to display