
Deploy a Windows Image with FileWave IVS
Before you begin: Applying an image restores disk partitions and can overwrite existing data. Use one explicitly approved, expendable test device first. Confirm its identity and MAC address, back up any needed data, and verify the image has reached the IVS before PXE booting. Do not target a production group for the first test. Client-conflict choices later in this procedure can remove an old Client record and its clones; make that choice only after confirming which identity must be retained.
This optional route continues from Windows Imaging - Capture Image; it is not ordinary software delivery. Confirm the approved image, hardware and driver compatibility, firmware and security requirements, and recovery plan before making an association. If imaging is outside your chosen goal, return to Inventory Reports or the Getting Started with FileWave introduction.
Before each required Update Model, review the exact target and all administrators’ pending work. The confirmation dialog is not a preview, and selecting one device does not make the shared commit private. Use the monitor to read Model and download progress; Verify is not a passive refresh and may process work. The older screenshots illustrate the workflow; they are not proof that this image or hardware is ready.
Start the deployment
For this separately approved imaging test, associate the captured master image with one approved, expendable device, confirm that the IVS has downloaded it, and then PXE boot that device. Wider deployment is outside this pilot.
Associate an image with devices
Associate the image with an enrolled FileWave Client or with a bare-metal device represented by a placeholder. For a bare-metal placeholder, use only steps 1–6 under Create a placeholder for Master Image association, substituting the approved target device’s name and Ethernet MAC address for the build VM’s. Those six steps end with OK to create the placeholder; do not continue into the capture-only Master Image association steps. If the target already has a Client record, do not delete it merely to use the bare-metal route; review the identity and conflict options below.
- Open FileWave Central and navigate to "Imaging".
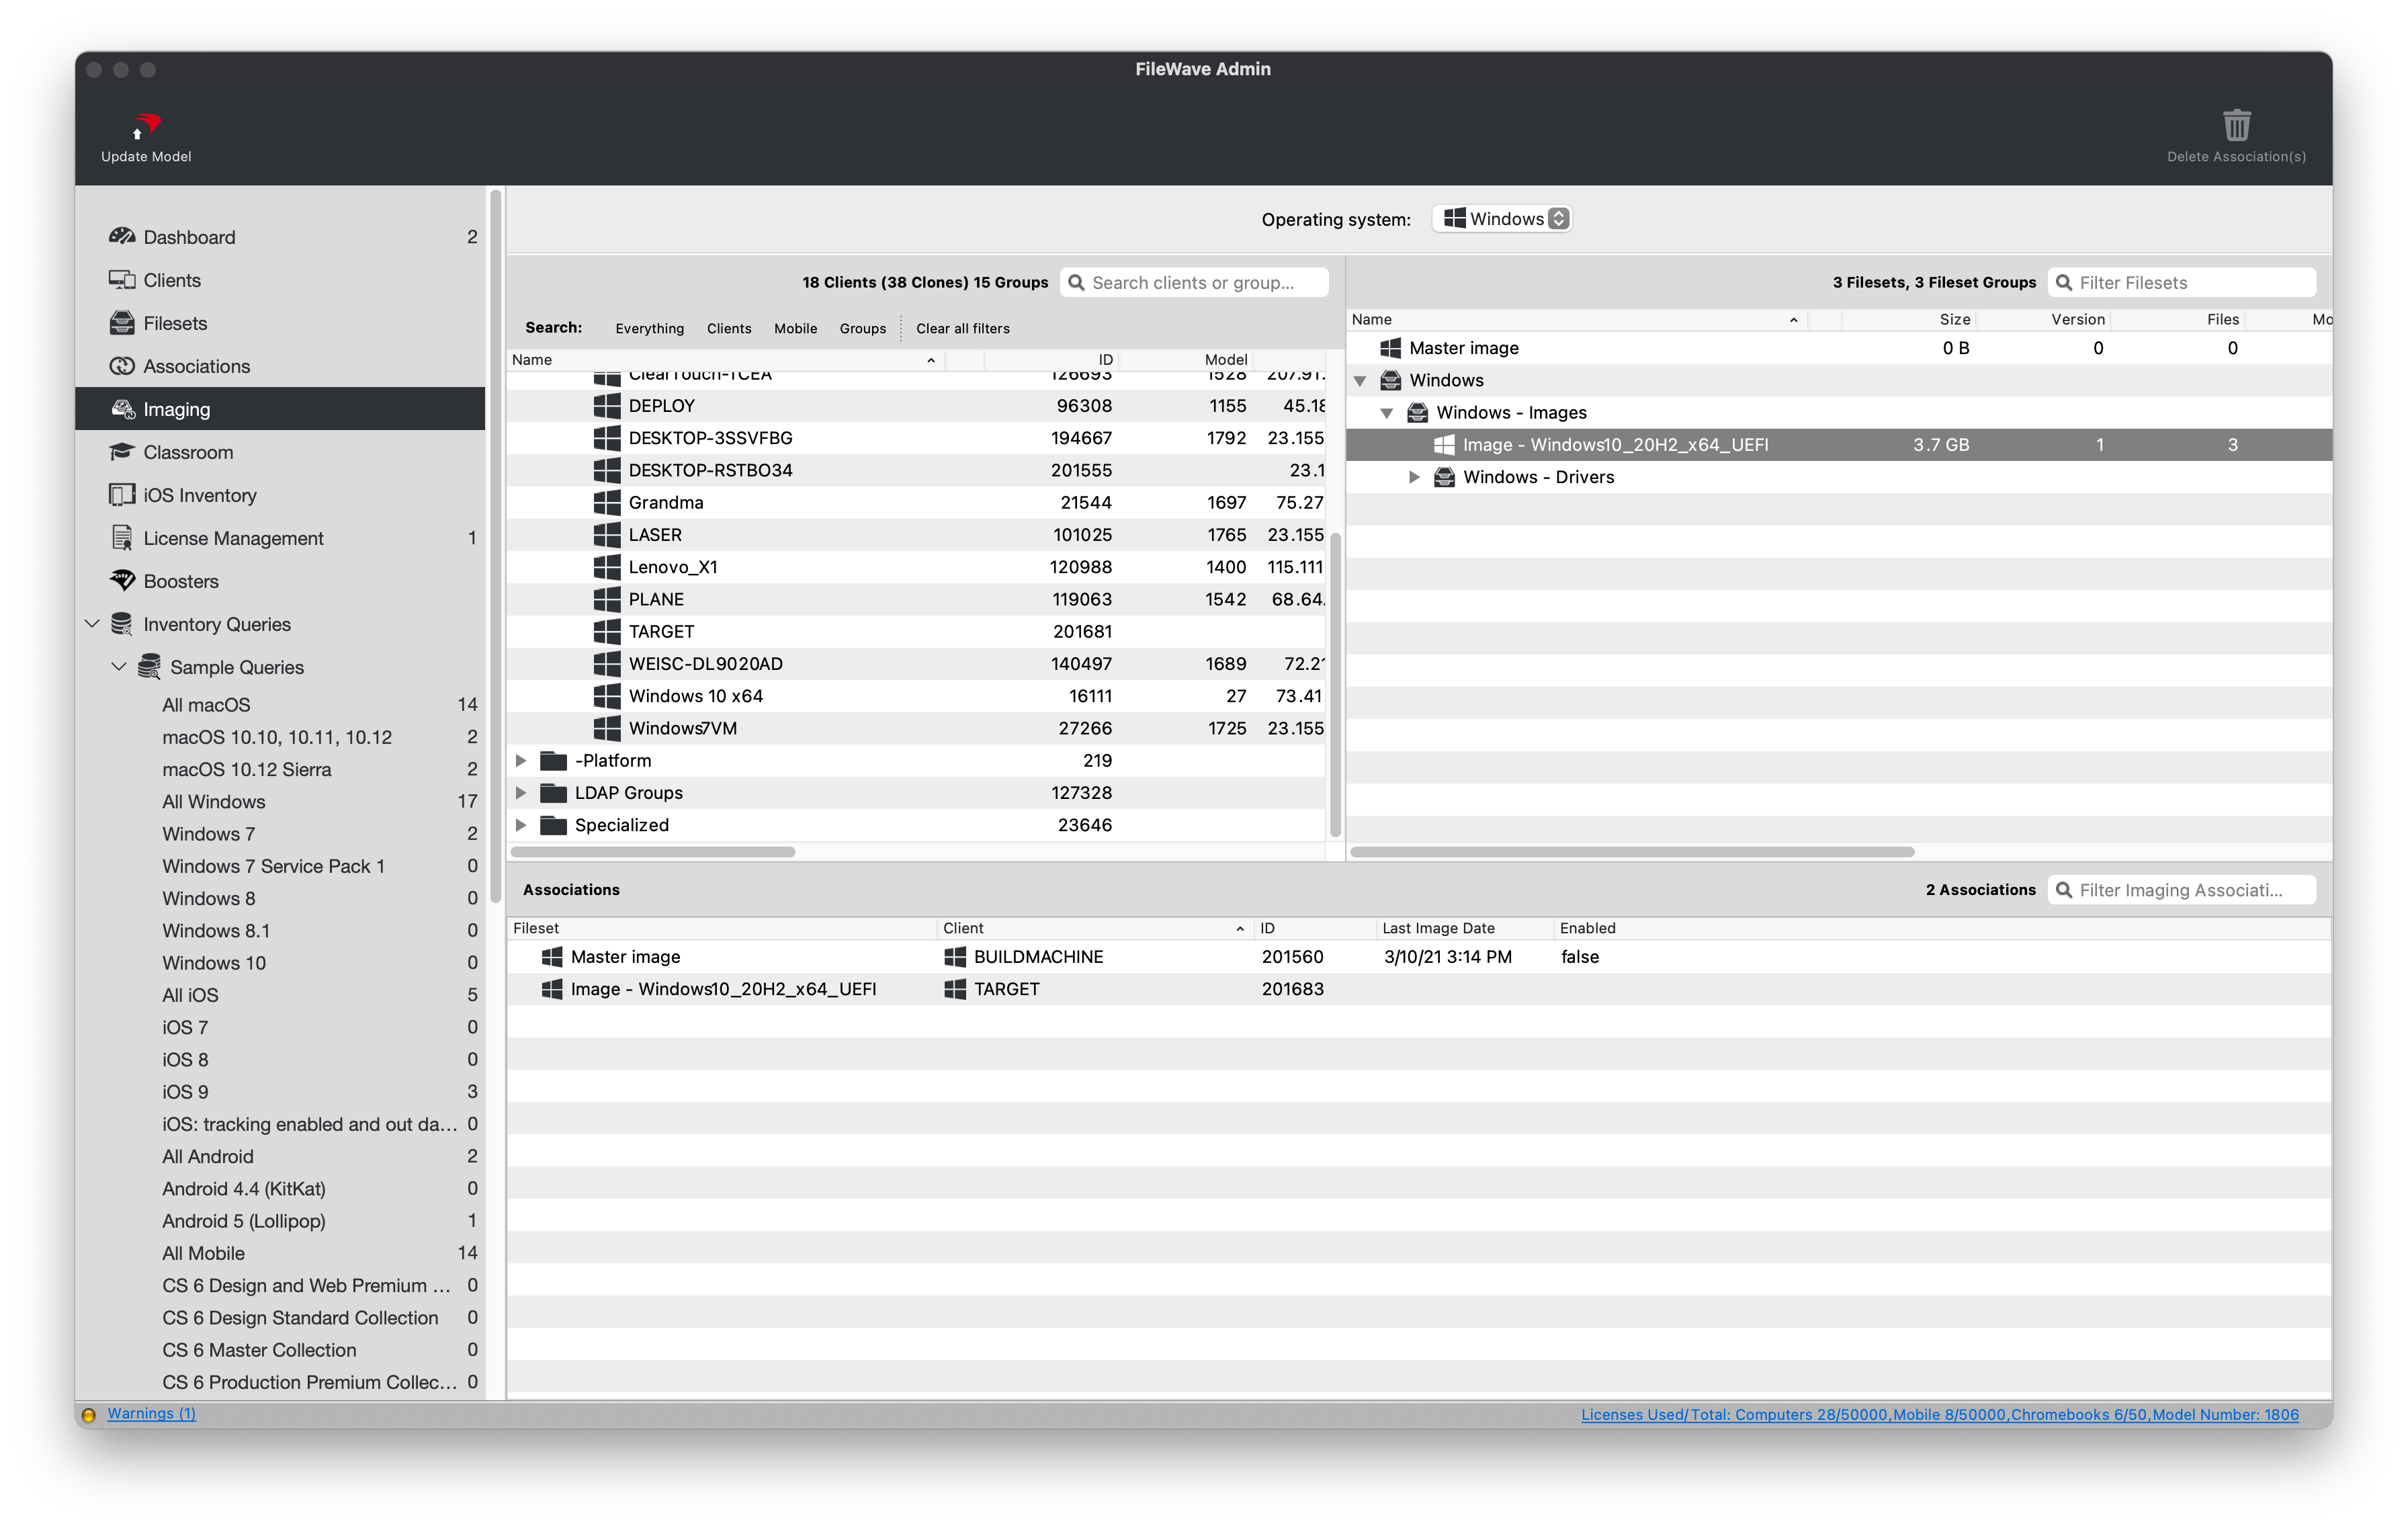
- For this first test, drag the new image only to the approved individual device or its verified placeholder. Group imaging is a separate broader rollout and is outside this pilot.
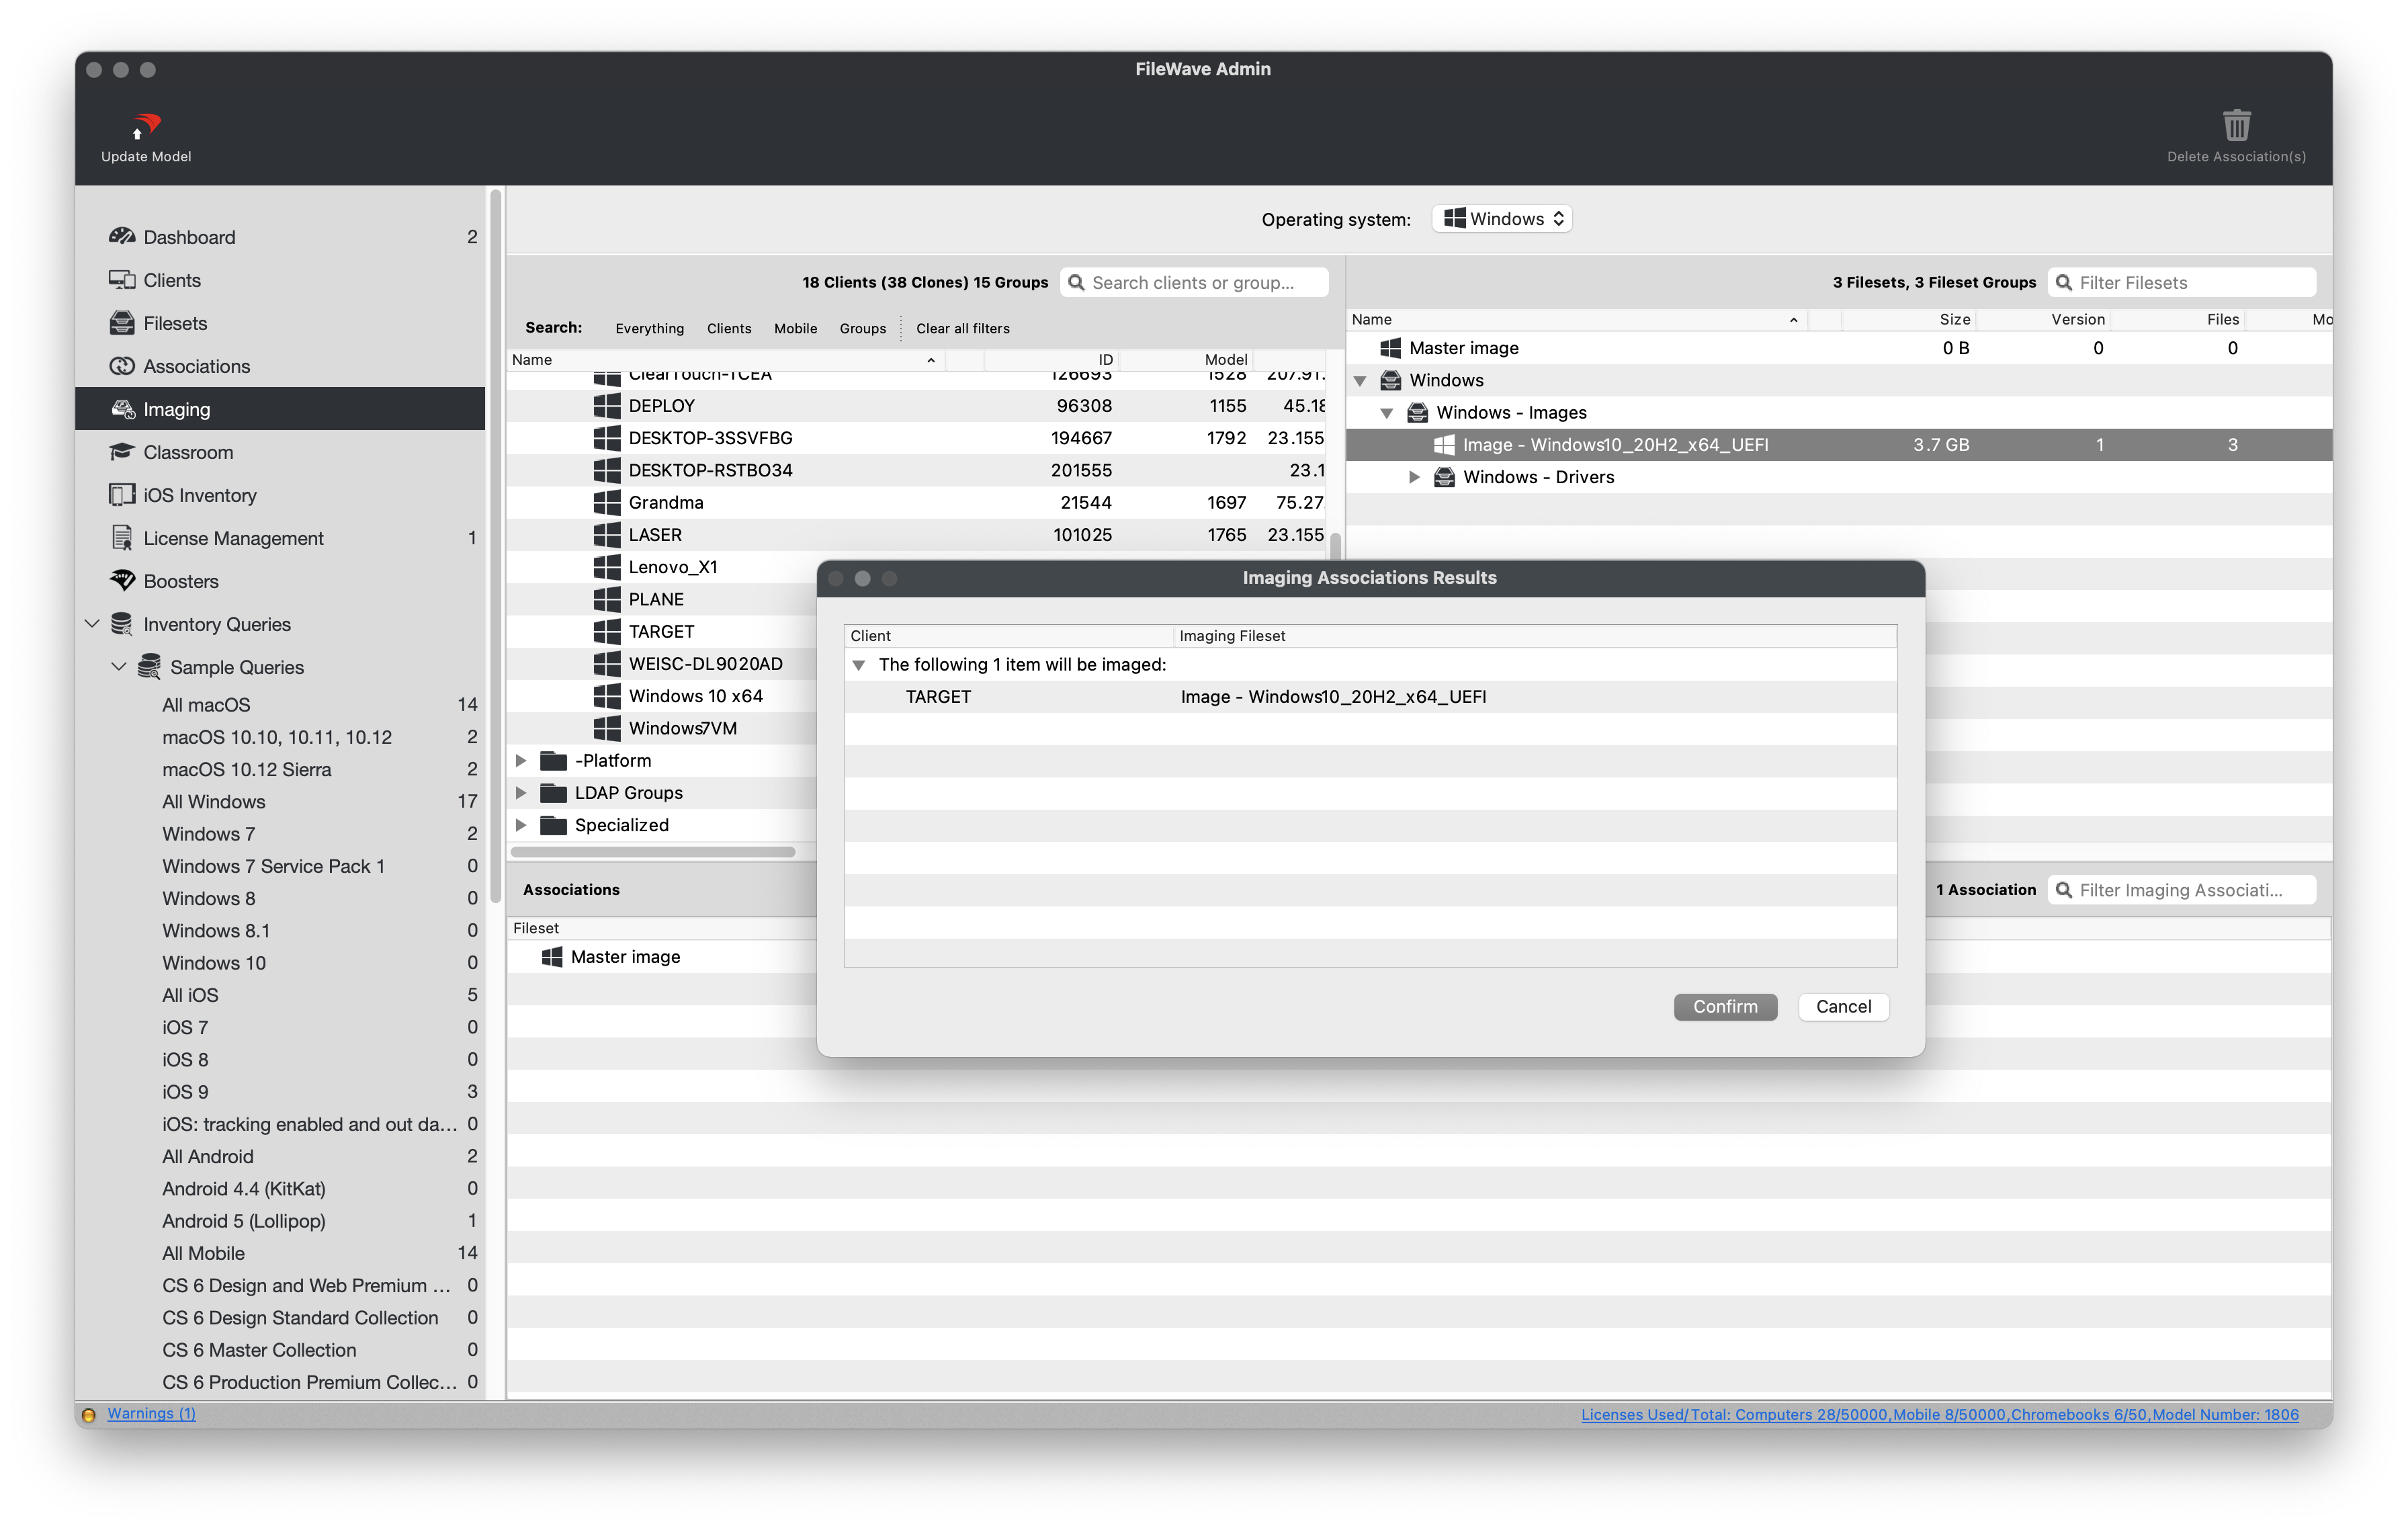
- Confirm the imaging associations.
- You should now see your new image association in the bottom pane of the "Imaging" tab.
- Optionally, drag a Windows Driver Fileset onto the association.
- After reviewing the target and shared pending work, select Update Model to publish the associations.
- The image should now download to the FileWave IVS; check its progress in the next step.
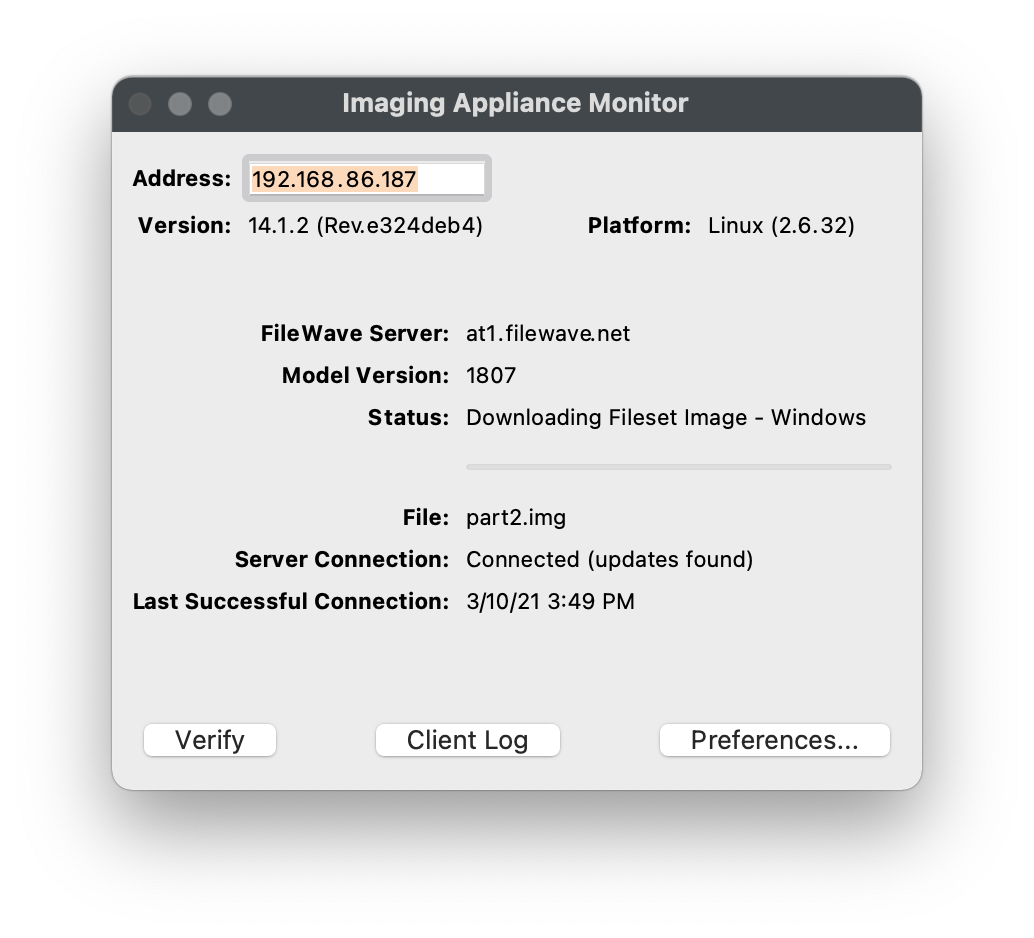
- In Preferences > Imaging, select the IVS and choose Monitor to verify that it received the current Model.
- You should see the image download progress from the FileWave Server to the FileWave IVS.
- The image remains on the IVS while at least one association references it.
- Only after the image has fully downloaded and you have rechecked the target identity, backups, and recovery plan, PXE boot the one approved expendable target. Stop if any of these checks is unresolved.
PXE boot the target devices
- Verify that your target machine is set to Network Boot and is on the same subnet as the FileWave IVS.
- PXE boot your target machine.
- If using Legacy BIOS, you will see progress text as the PXELinux environment is loading.
- With UEFI, the device may show a black screen without progress text while the environment loads.
- You should now see a blue screen showing progress as it restores each partition from the FileWave IVS.
- After the restore, you will see a black screen with white text.
- The device should restart into Windows and begin the Out-of-Box Experience defined by the unattended answer file.
- If you get a message similar to "no boot media found" after reboot, please reboot again and ensure the machine is not set to Network/PXE boot.
- After Windows starts, check that the FileWave Client included in the Master Image begins communicating with FileWave.
Resolve Client conflicts
A reimaged device may check in with an identity that conflicts with its previous Client record. Resolve the conflict carefully so the intended associations and inventory history stay with the managed device.
- Open FileWave Central and navigate to "Clients".
- Select "New Client" from the black menubar.
- Select "Desktop Clients" from the "Devices waiting for enrollment section".
- Locate and select the Client that is reporting a conflict and click the "Solve Conflict" button.
- Select the option that matches the device state.
-
Remove the new client
- Select this option if you want to refuse the client for now. You can fix the device identifier and re-enroll it later
-
Remove the old client and enroll the new client
- Select this option if the old entry is obsolete and can be safely removed; all clones will be removed
-
Replace the old client with the new client (recommended)
- Select this option if you want the new client to replace the existing entry (this will take over the old record with all clones, associations, etc.)
-
- Confirm that the newly imaged Windows Client checks in and downloads Filesets associated with the retained Client record.
Verify the result and return
On the test device, confirm that Windows completes the expected startup, that required drivers and networking work, and that the intended FileWave Client identity checks in. Review the retained record and its assignments, then use Inventory Reports to compare the device’s identity, OS build, and Client version. A Model number or FileWave status is not independent proof of device or application health. If anything differs, stop before imaging another device. Return to capture guidance for the source-image context or the Getting Started with FileWave introduction to record what succeeded and what remains untested.
No comments to display
No comments to display