Inventory Reports
Your information. Your way.
FileWaveInventory allowsReports help you choose exactly which device data to getreturn, asthen muchsave that view for refresh planning, Smart Groups, troubleshooting, or asscheduled littleemail informationdelivery.
Quick youanswer: needIn tocurrent reportFileWave byversions, leveragingthis Inventoryfeature Queriesis Reports. Older Central screens and ifscreenshots youmay havestill othersay peopleQueries outsideor ofQueryBuilder; FileWavethose wantinglabels refer to the same reports,saved we'veinventory gotreport you covered with Schedule Reporting to automatically send emails on your behalf.workflow.
Create an Inventory QueryReport (formerly Query)
Creating an Inventory QueryReport is the first step totoward tracking all your device information,data, scheduling emailed reports, or leveragingusing thereport Querycriteria to createbuild a Smart Group. ThisThe sectionexamples willbelow includeshow anone examplereport of how to create an Inventory Query to find allfor devices with less than 8GB8 GB of RAM, regardless of their OS platform,RAM and showanother somereport other helpful information that could be used in the context of a end-of-year device refresh. This section will also cover a more simple Inventory Query showing allfor iOS and Chrome devices with a specific Building Code (Customcustom Field).field.
New QueryReport
- Open FileWave
AdminCentral andnavigatego to "Inventory Queries"Reports". - Click "New
Query"Report" from theblackmenumenubar.bar. - Name the
Queryreport and begin draggingInventoryinventory data pointstointo the "Criteria" pane.
Less than 8GB of RAM
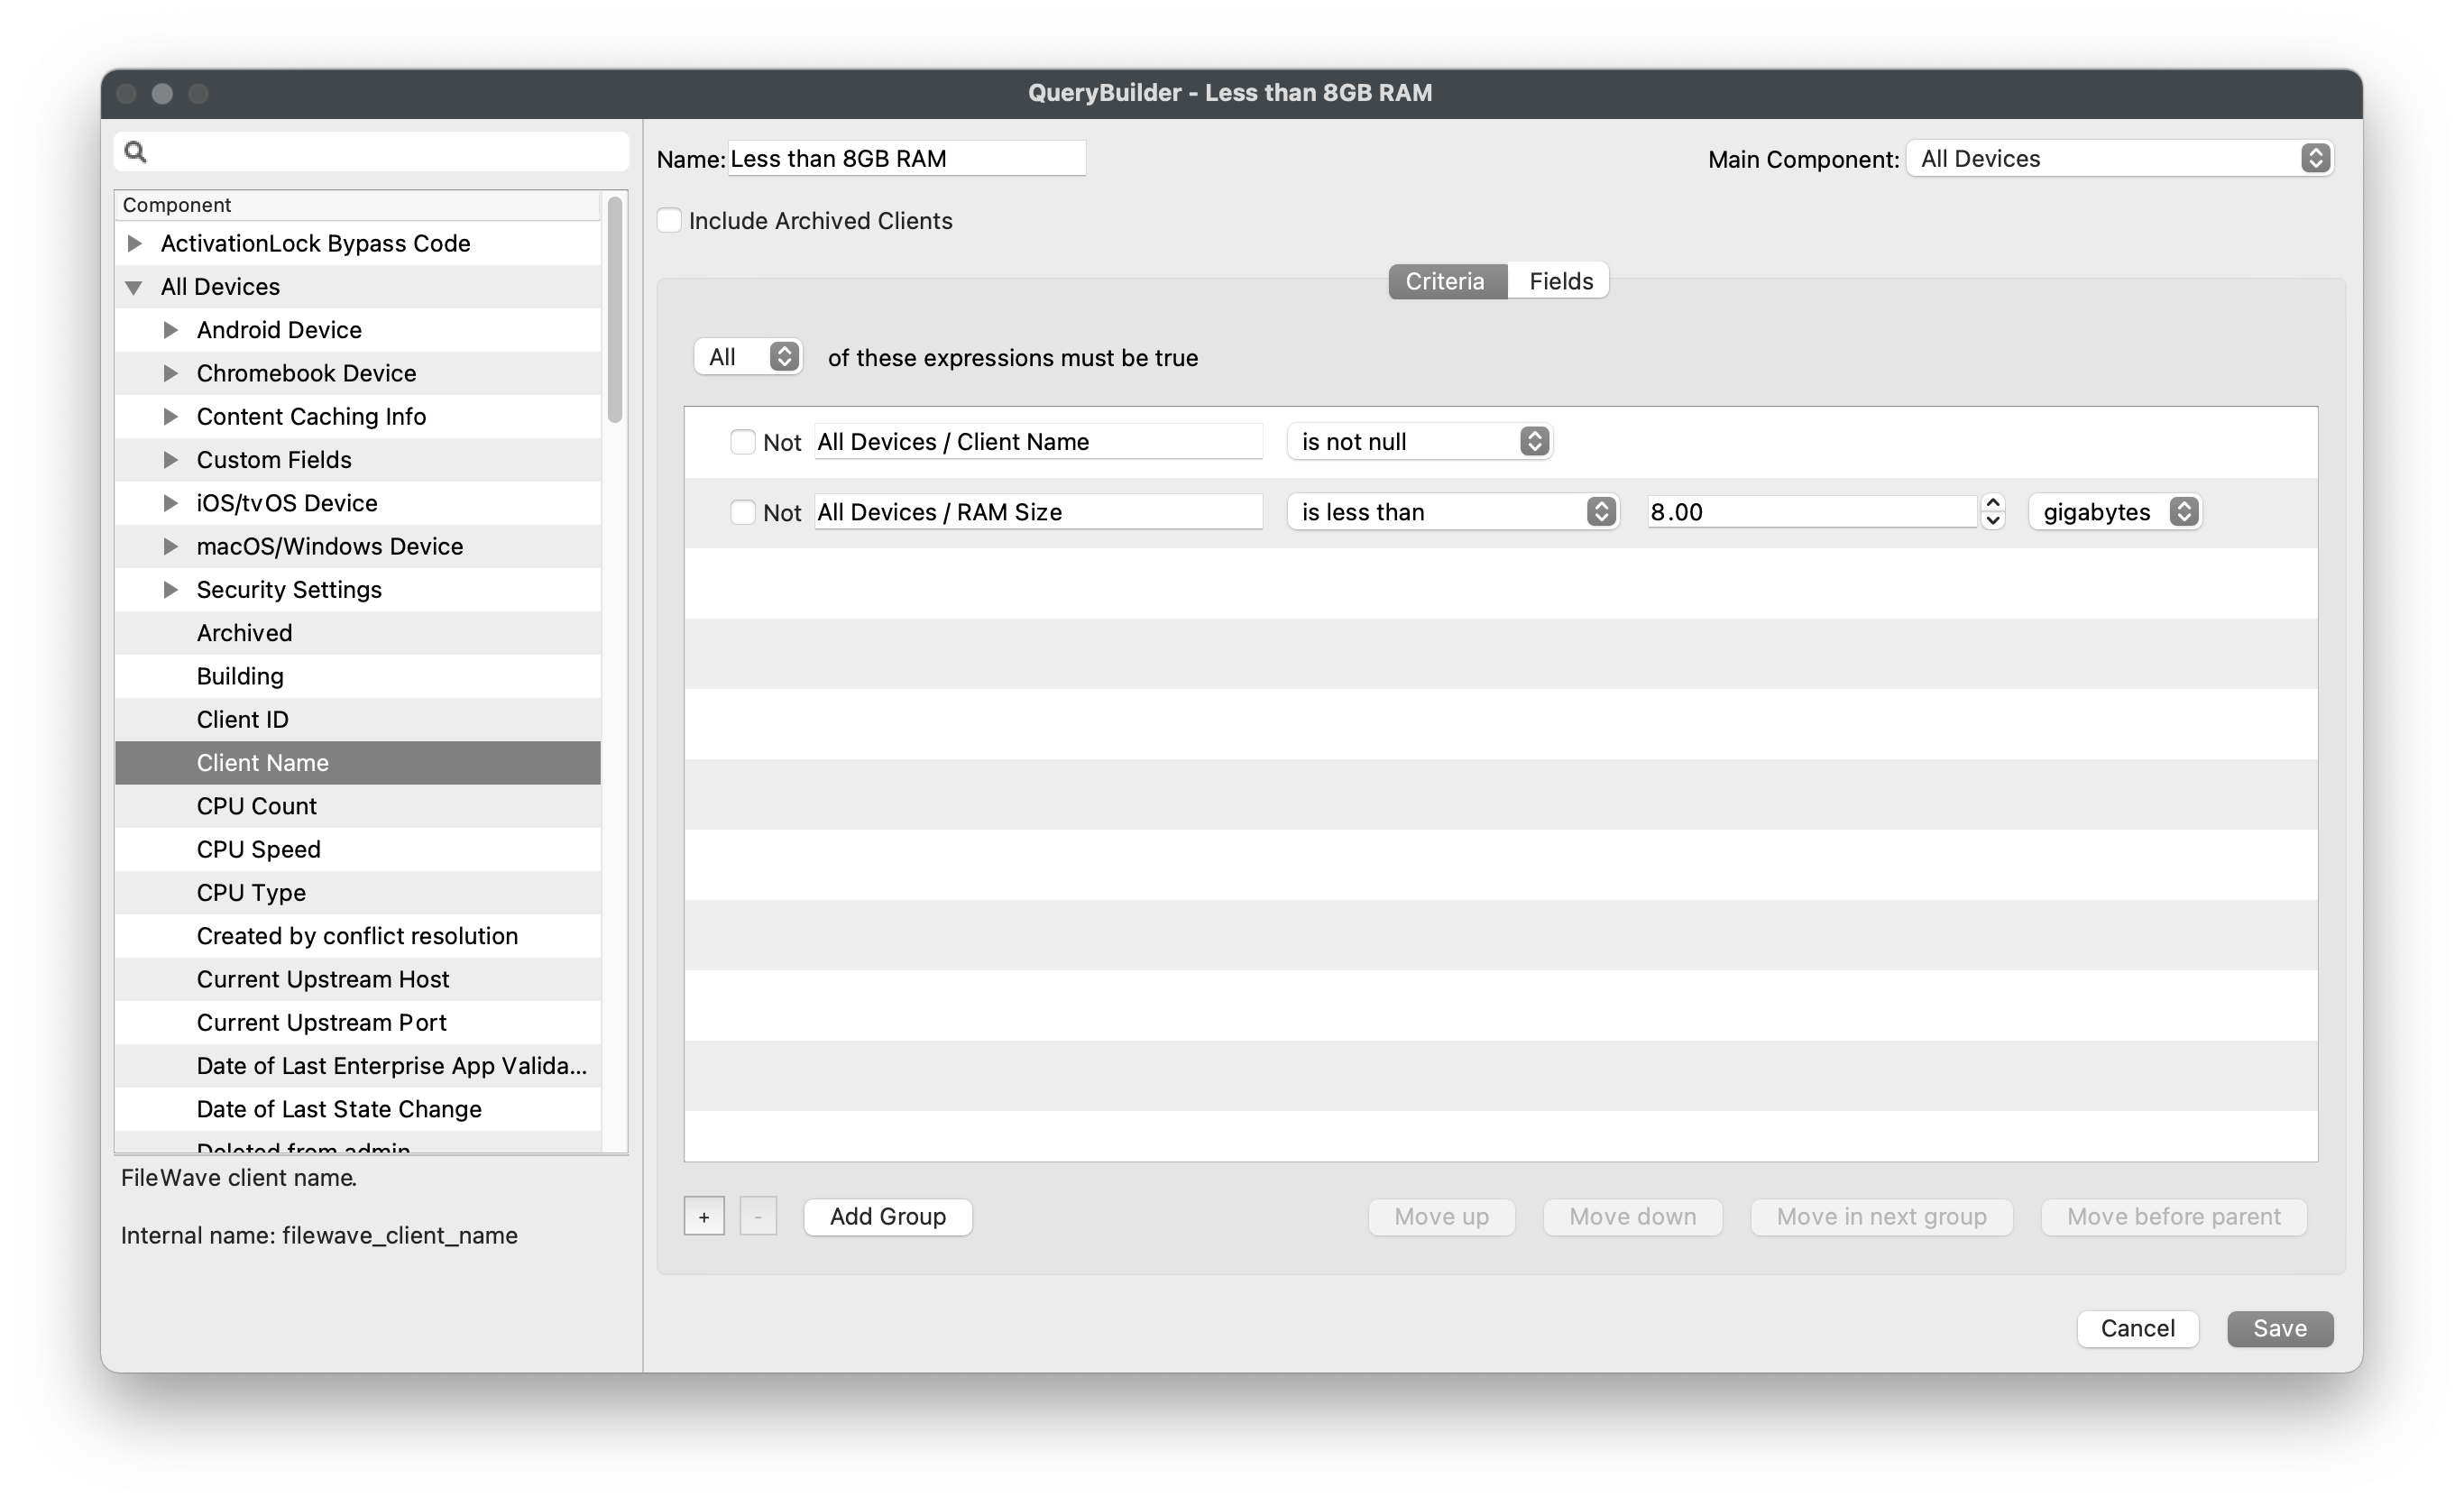
Drag-n-dropDrag "All Devices > Client Name" into the "Criteria" pane.- Set "All Devices > Client Name" qualifier to "is not null".
- This
isstartstobroadensuresowethegetreport includes all devicesintobefore theQuerynextbyfiltersstartingnarrowbroadtheand getting more restrictive.results.
- This
Drag-n-dropDrag "All Devices > RAM Size" into the "Criteria" pane.- Set "All Devices > RAM Size" qualifier to "is less than" : "8.00 gigabytes".
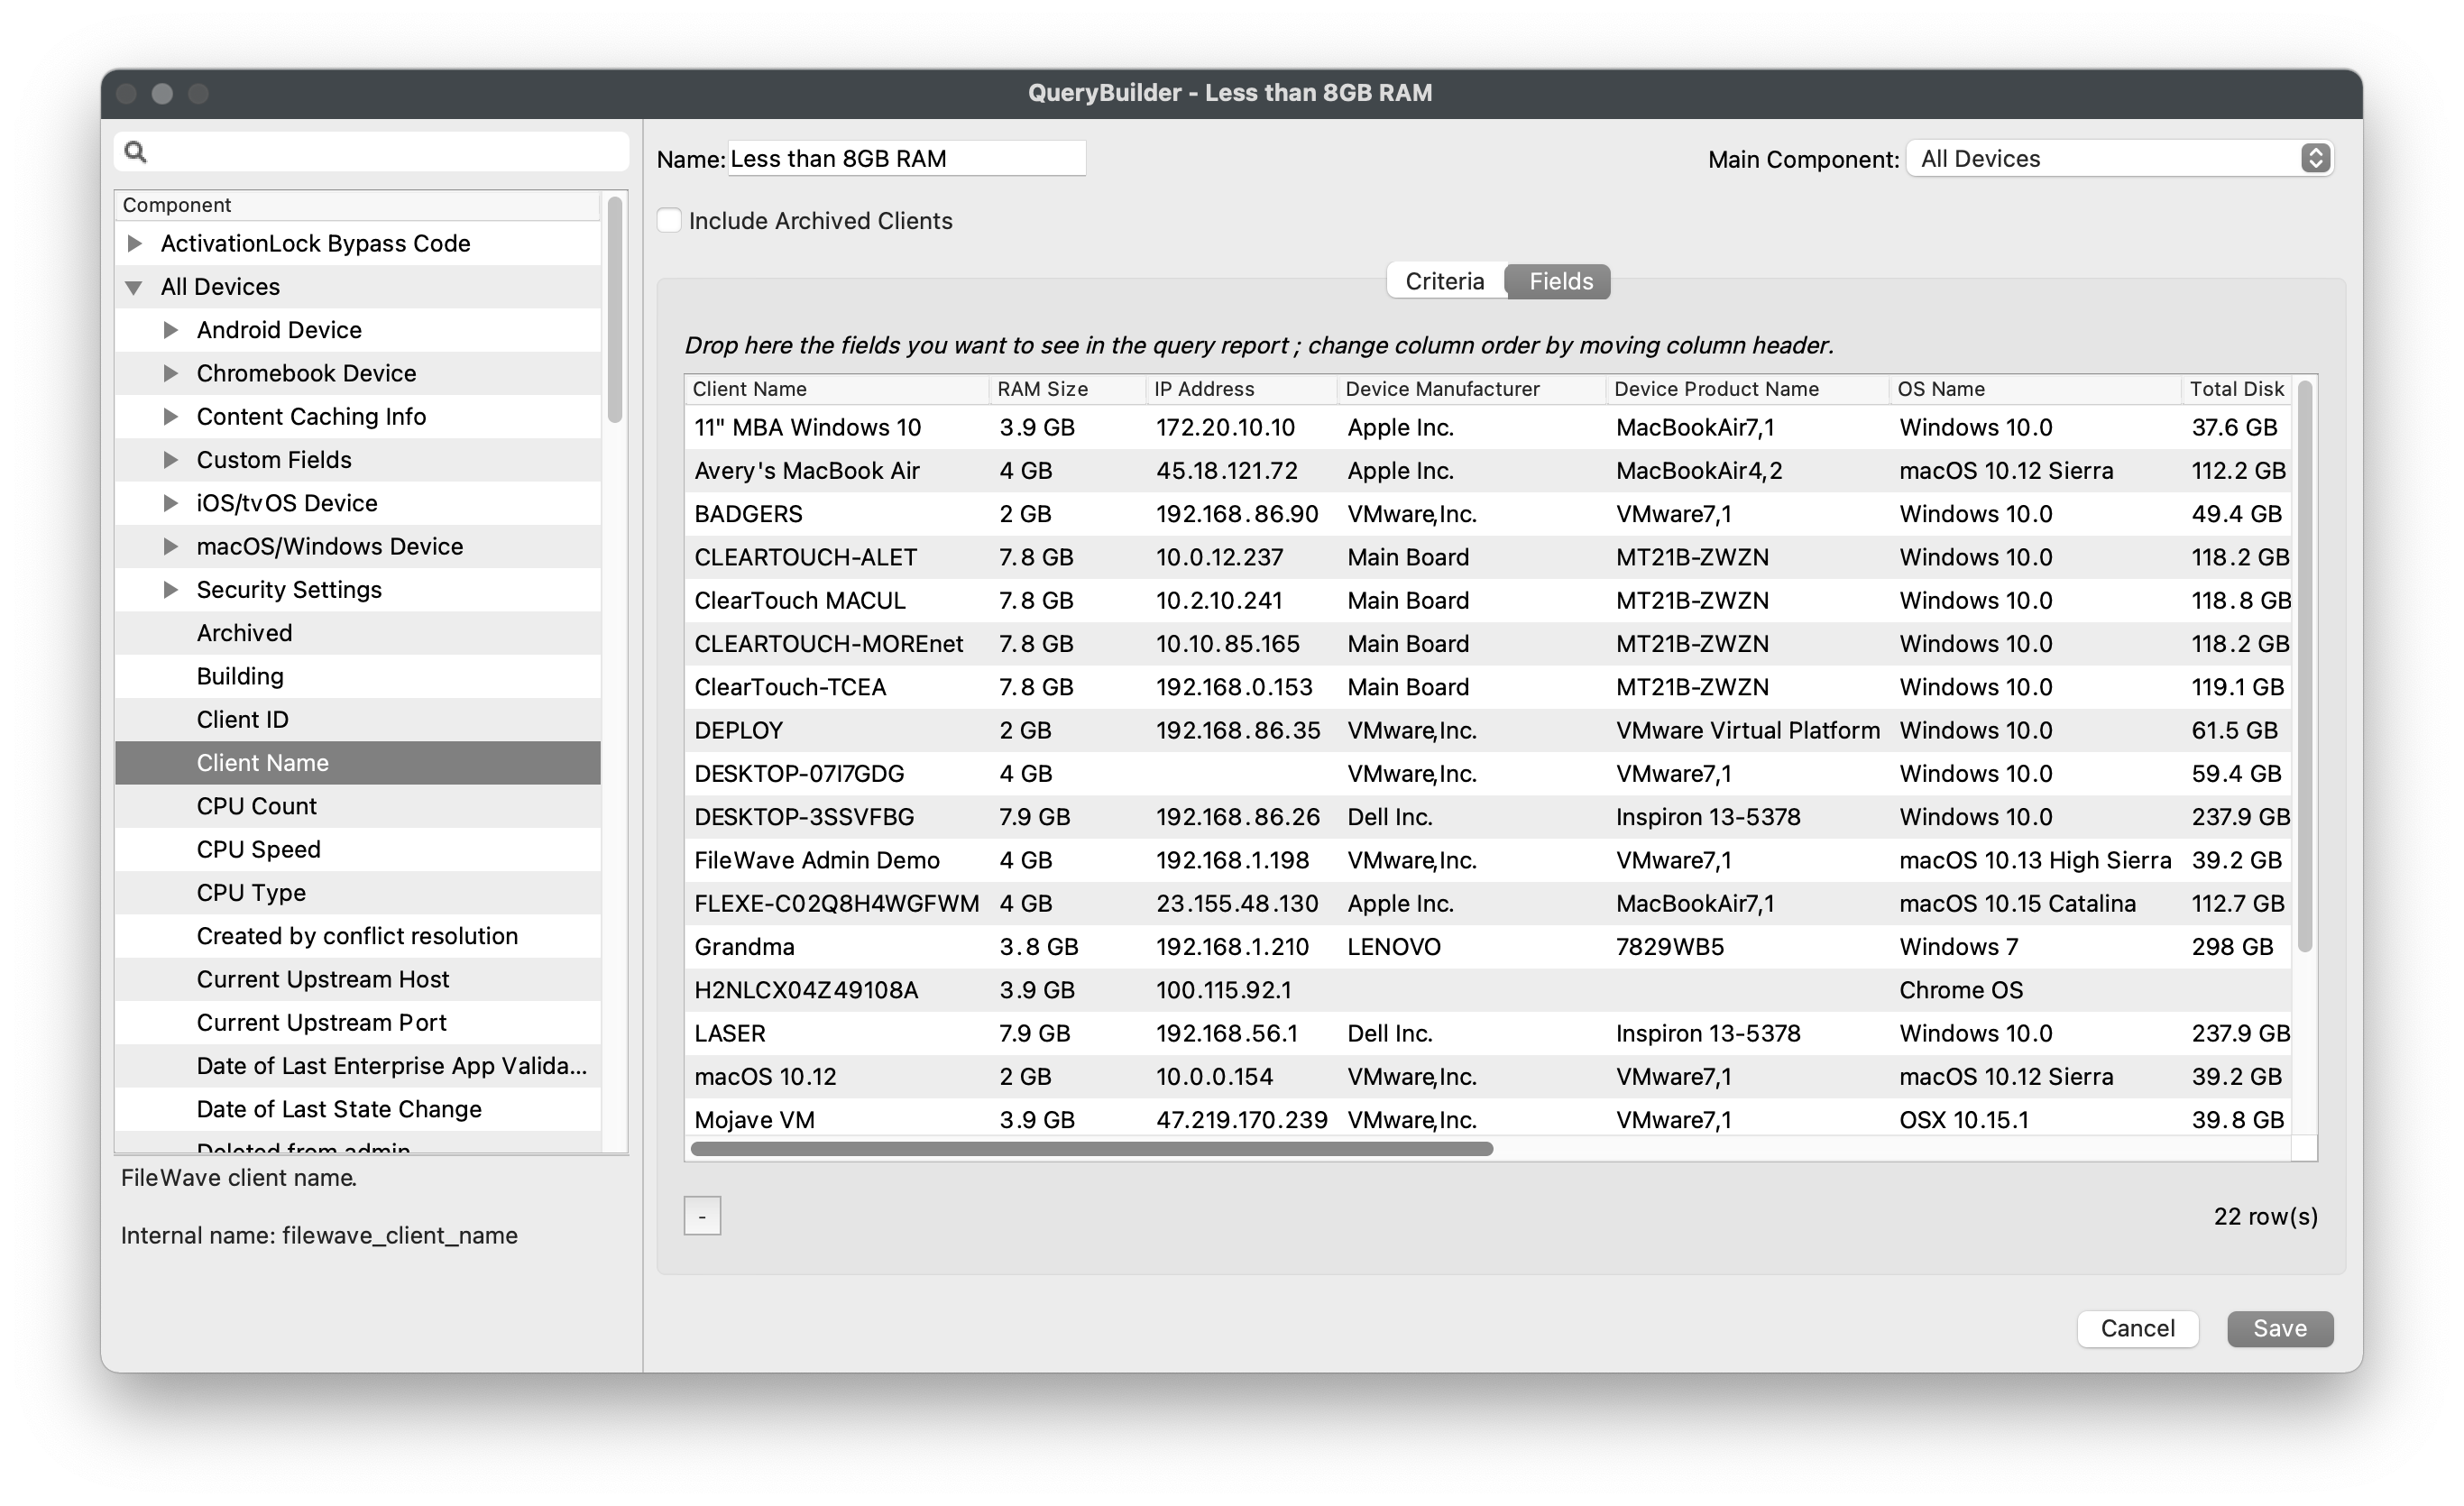
- Click the "Fields" tab.
BeginAdddragging-n-droppingtheallfieldsFieldsyouyou'd like to return inwant the InventoryReport.Report to return.- Client Name
- RAM Size
- IP Address
- Device Manufacture
- Device Product Name
- OS Name
- Total Disk Space
- CPU Type / Speed / Count
- Click "Save".
- You should now see your new Inventory Report.


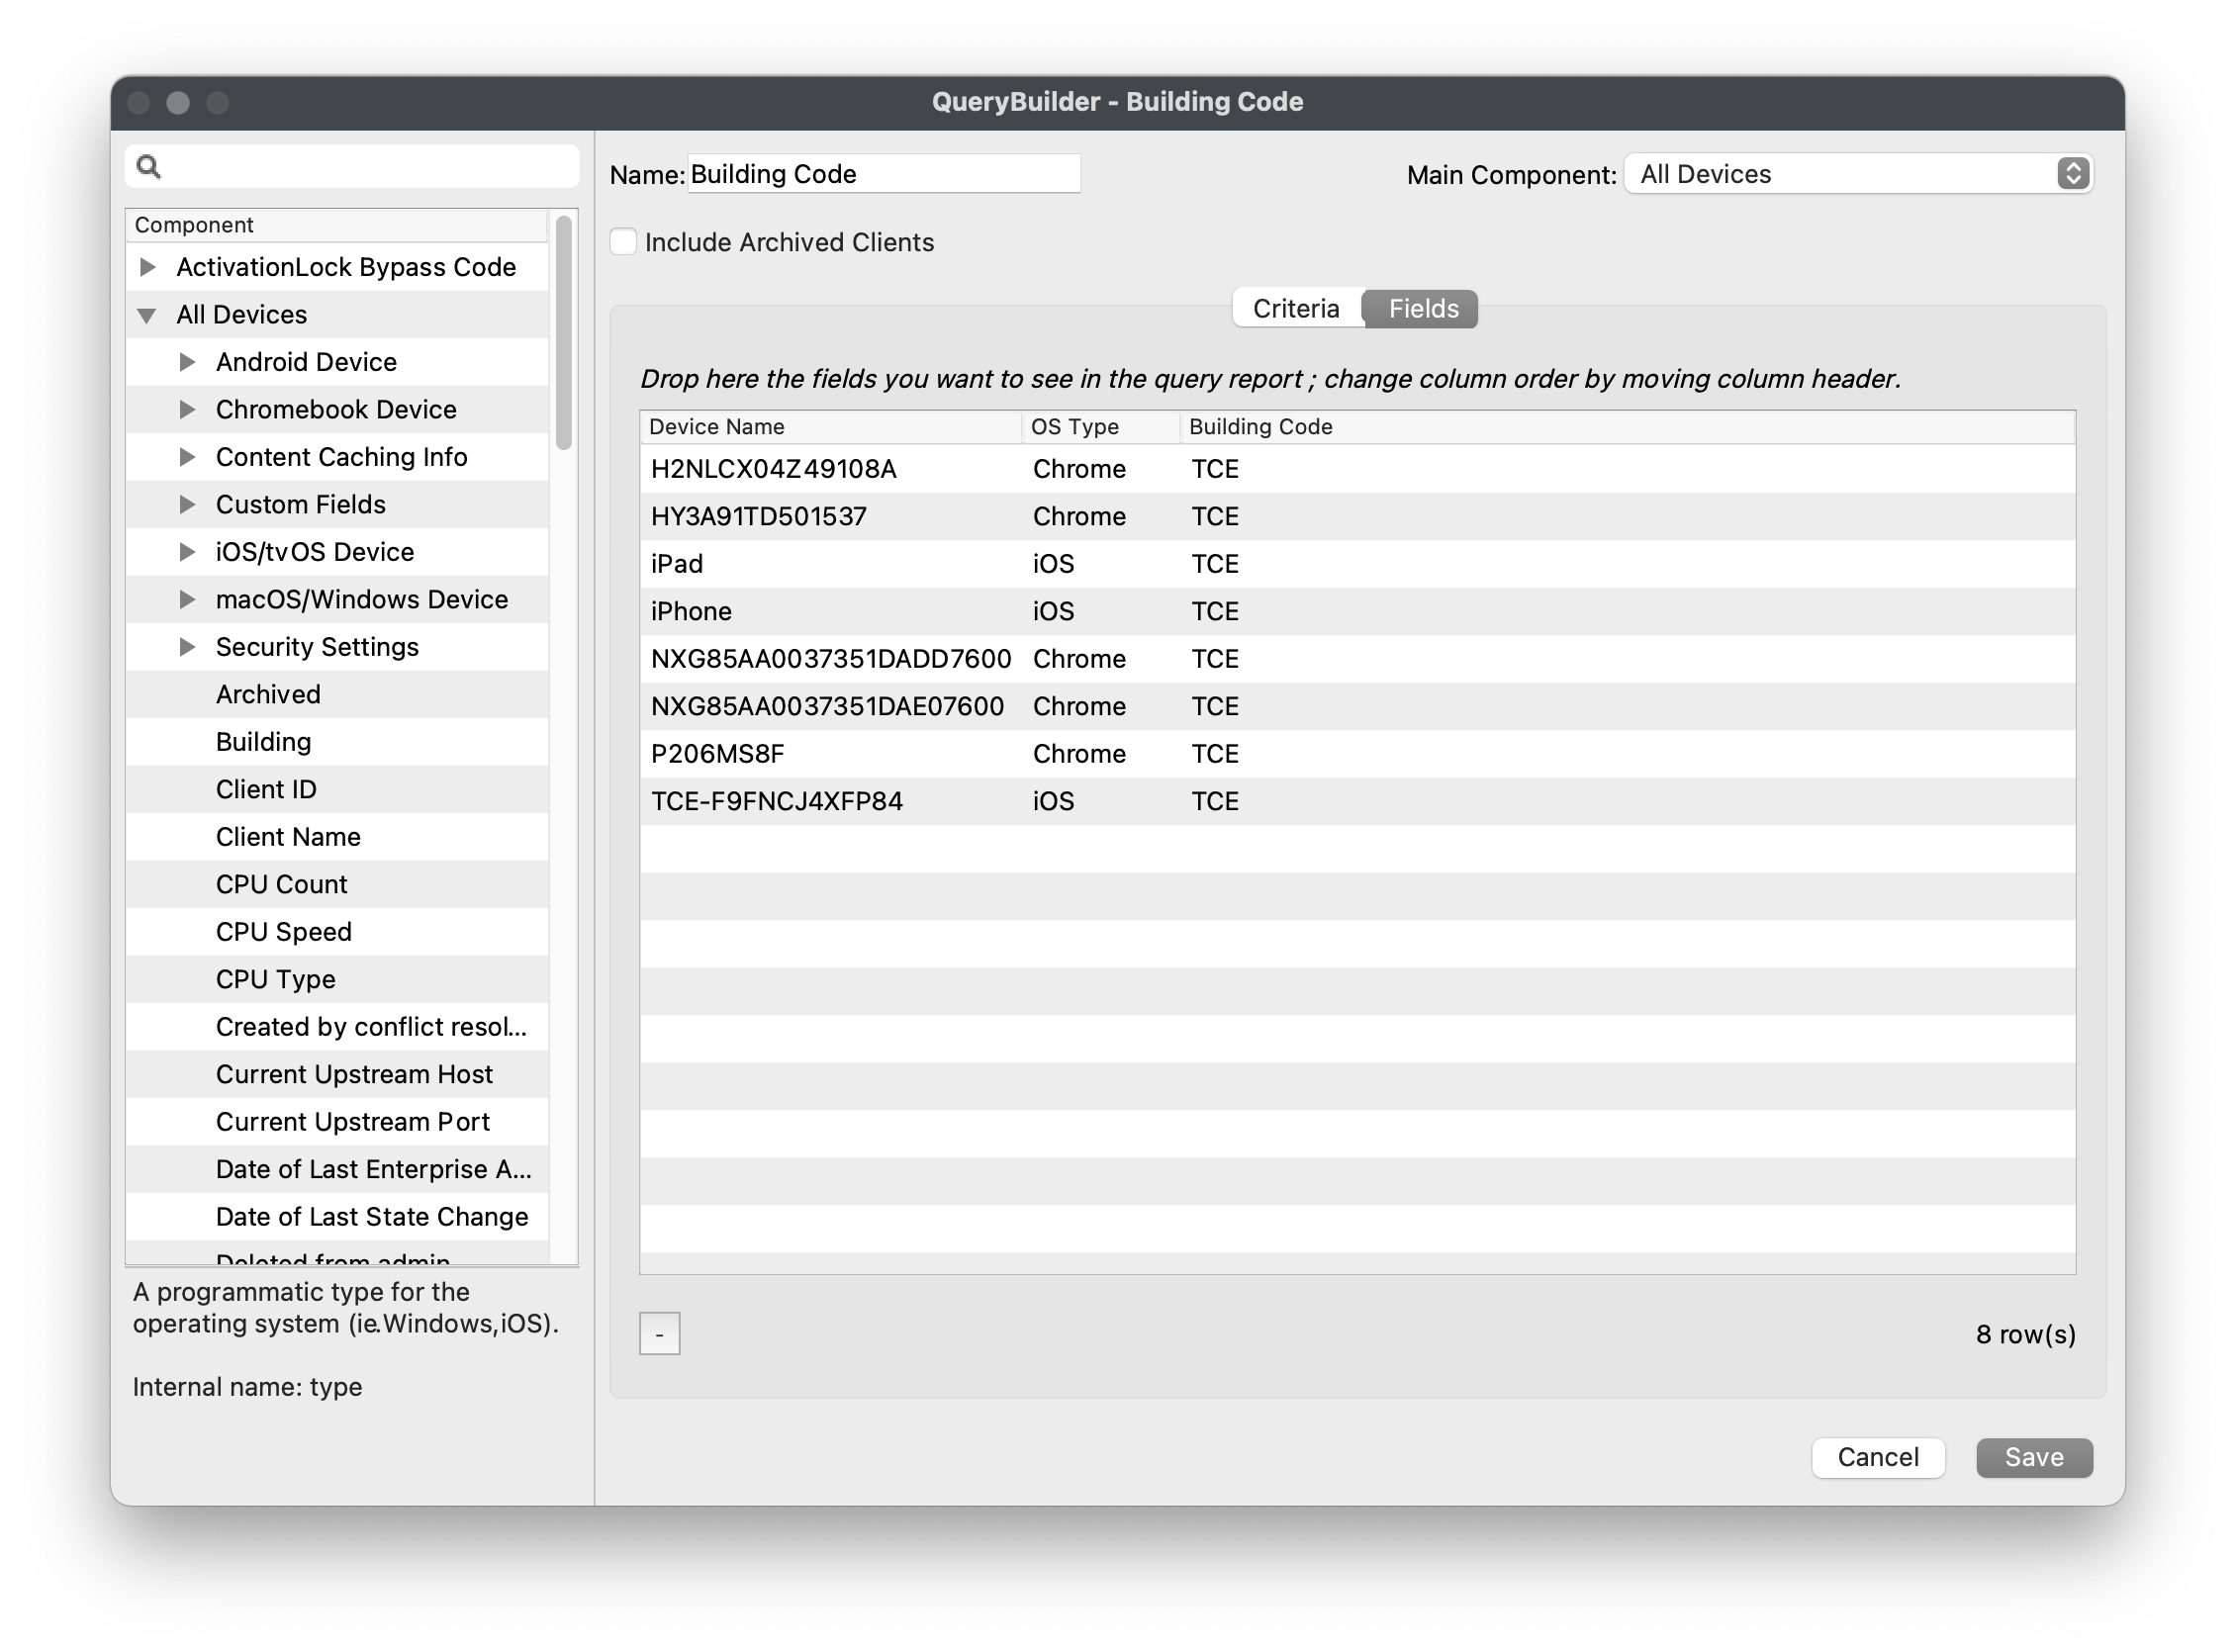
Building Code
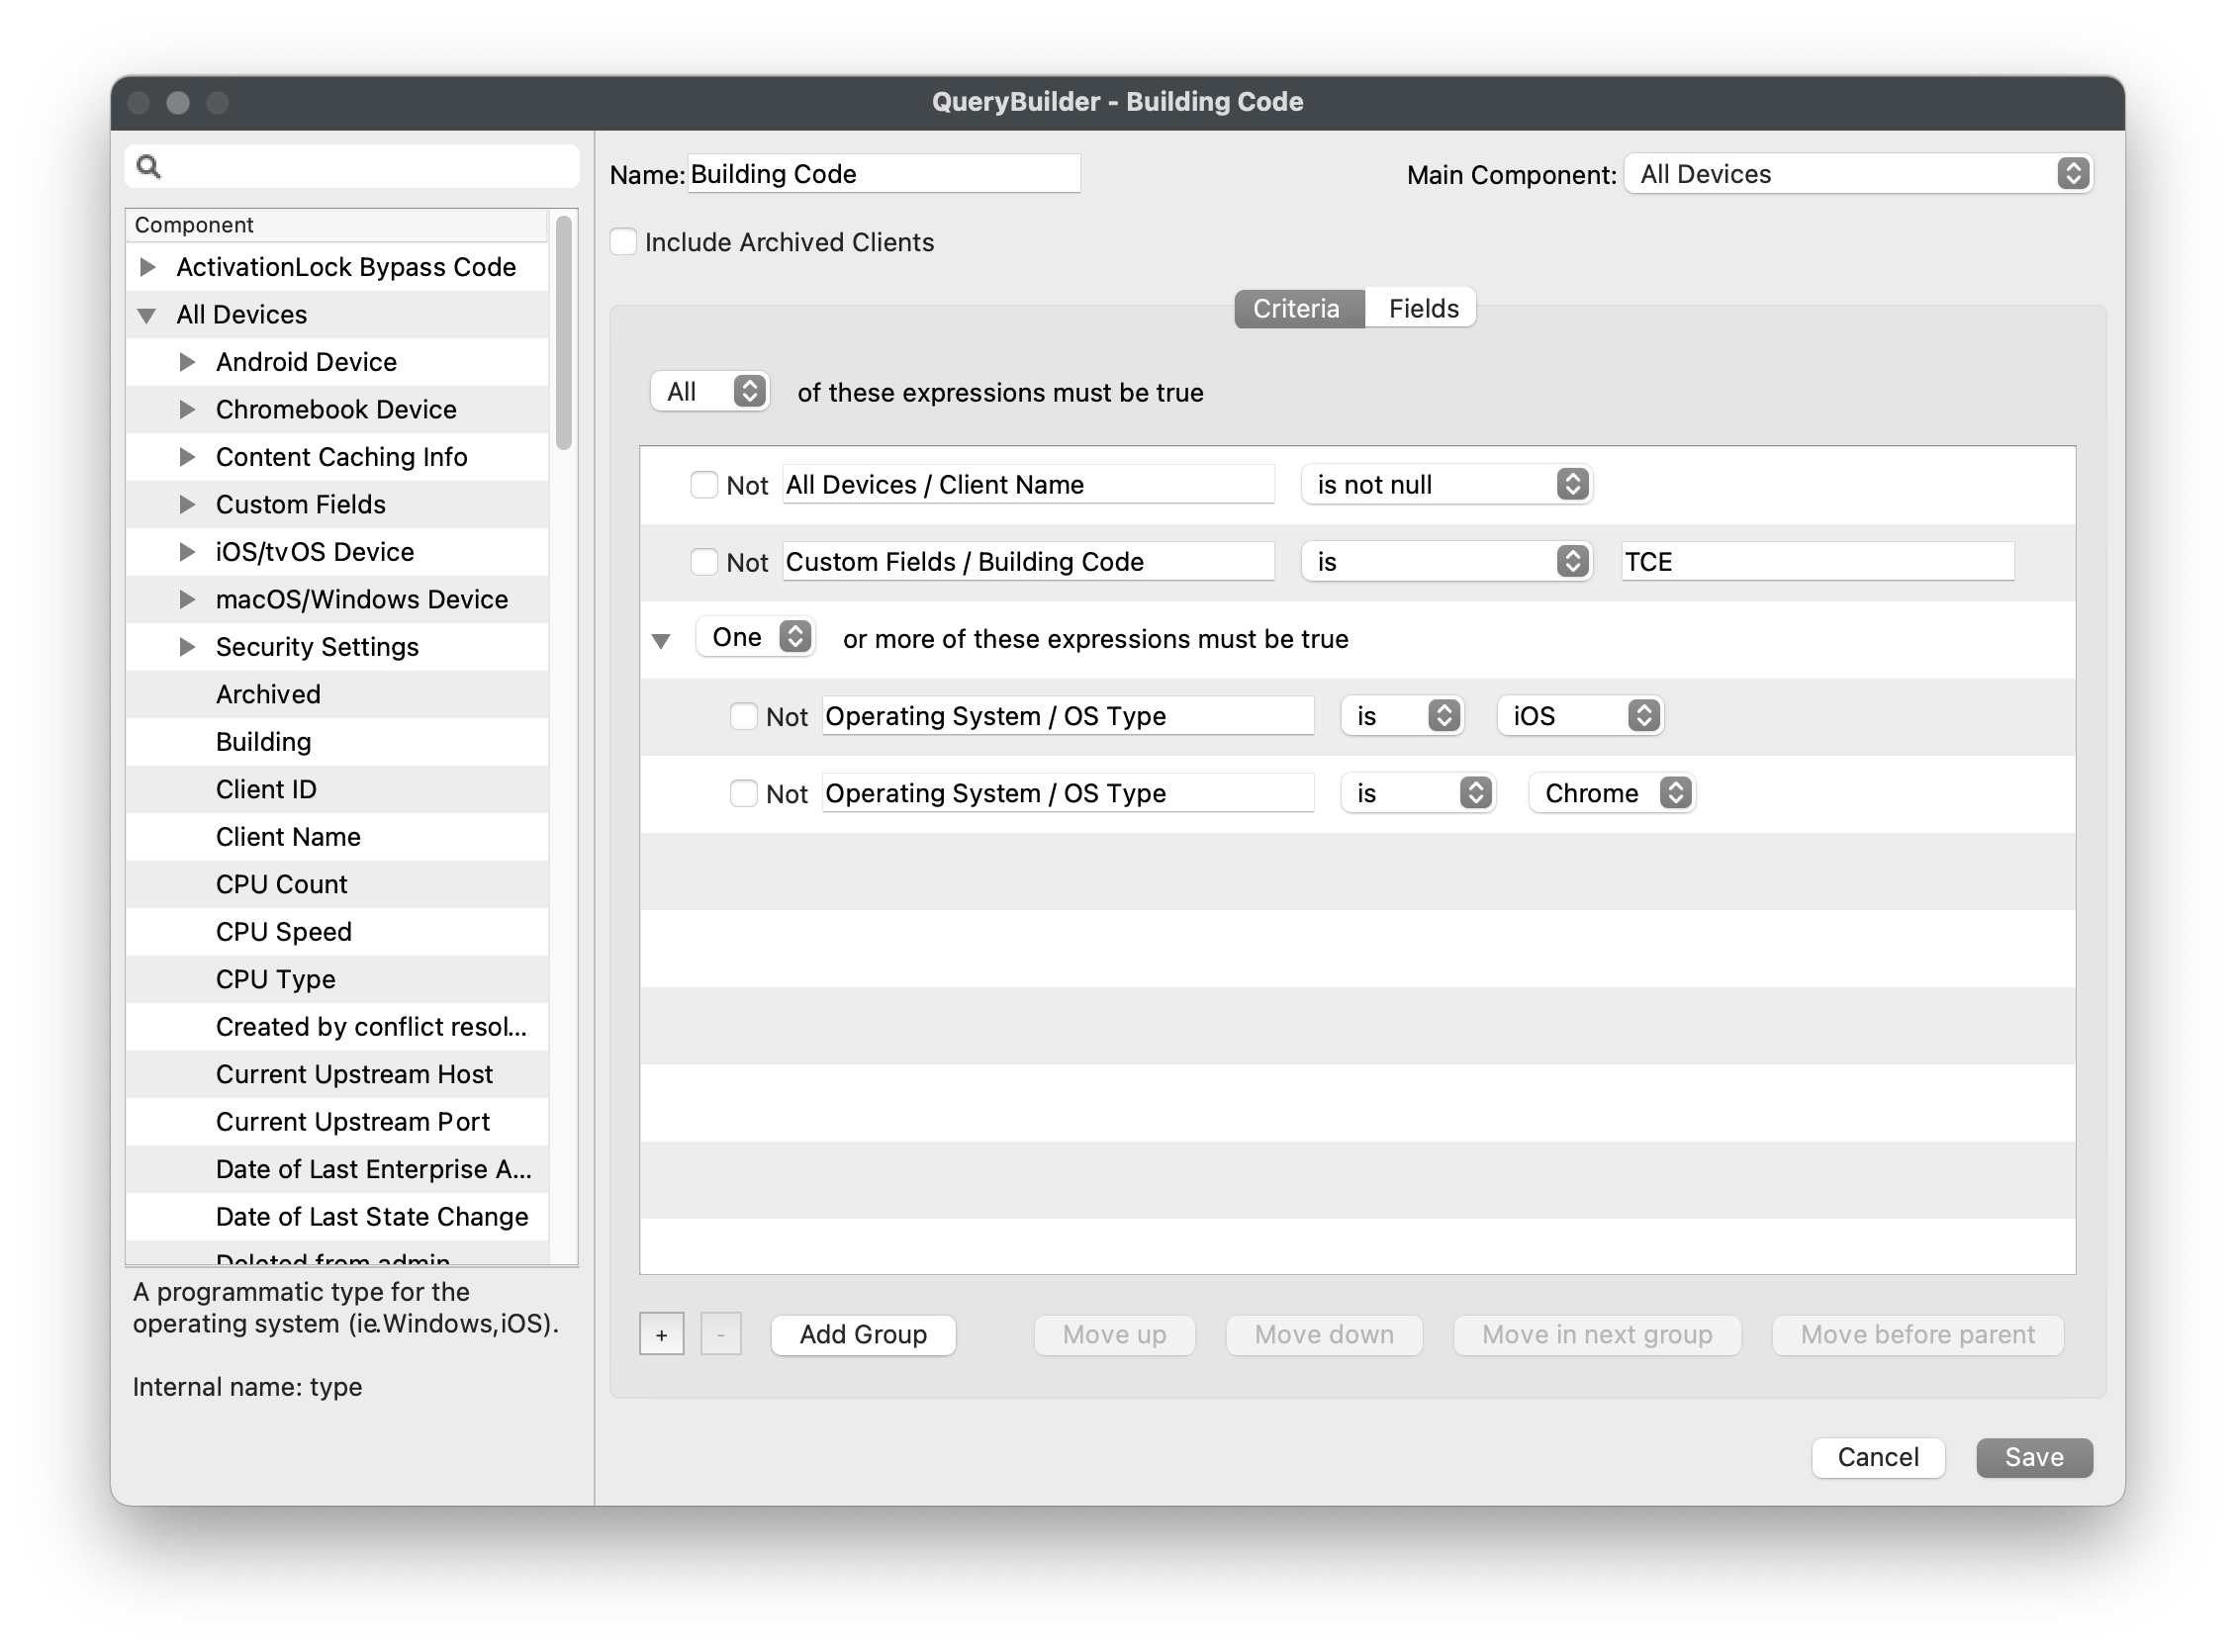
Drag-n-dropDrag "All Devices > Client Name" into the "Criteria" pane.- Set "All Devices > Client Name" qualifier to "is not null".
- This
isstartstobroadensuresowethegetreport includes all devicesintobefore theQuerynextbyfiltersstartingnarrowbroadtheand getting more restrictive.results.
- This
Drag-n-dropDrag "All Devices > Custom Fields > Building Code" into the "Criteria" pane.- Set "All Devices > Custom Fields > Building Code" qualifier to "is" : "TCE".
- Add a new inventory sub-group via the "Add Group" button.
Drag-n-dropDrag "Operating System > OS Type" intothethe new sub-group.- Set "Operating System > OS Type" qualifier to "is" : "iOS".
Drag-n-dropDrag "Operating System > OS Type" intothethe new sub-group.- Set "Operating System > OS Type" qualifier to "is" : "Chrome".
- Change the sub-group's logic to "One or more of these expressions must be true".
* Devices must be either iOS or Chrome since noA device can be iOS or Chrome, but not both atonethegivesame time. - Click the "Fields" tab.
BeginAdddragging-n-droppingtheallfieldsFieldsyouyou'd like to return inwant the InventoryReport.Report*to return, such as DeviceName *Name, OSTypeType,*and BuildingCodeCode.- Click "Save".
- You should now see your new Inventory Report.


Scheduled Reporting
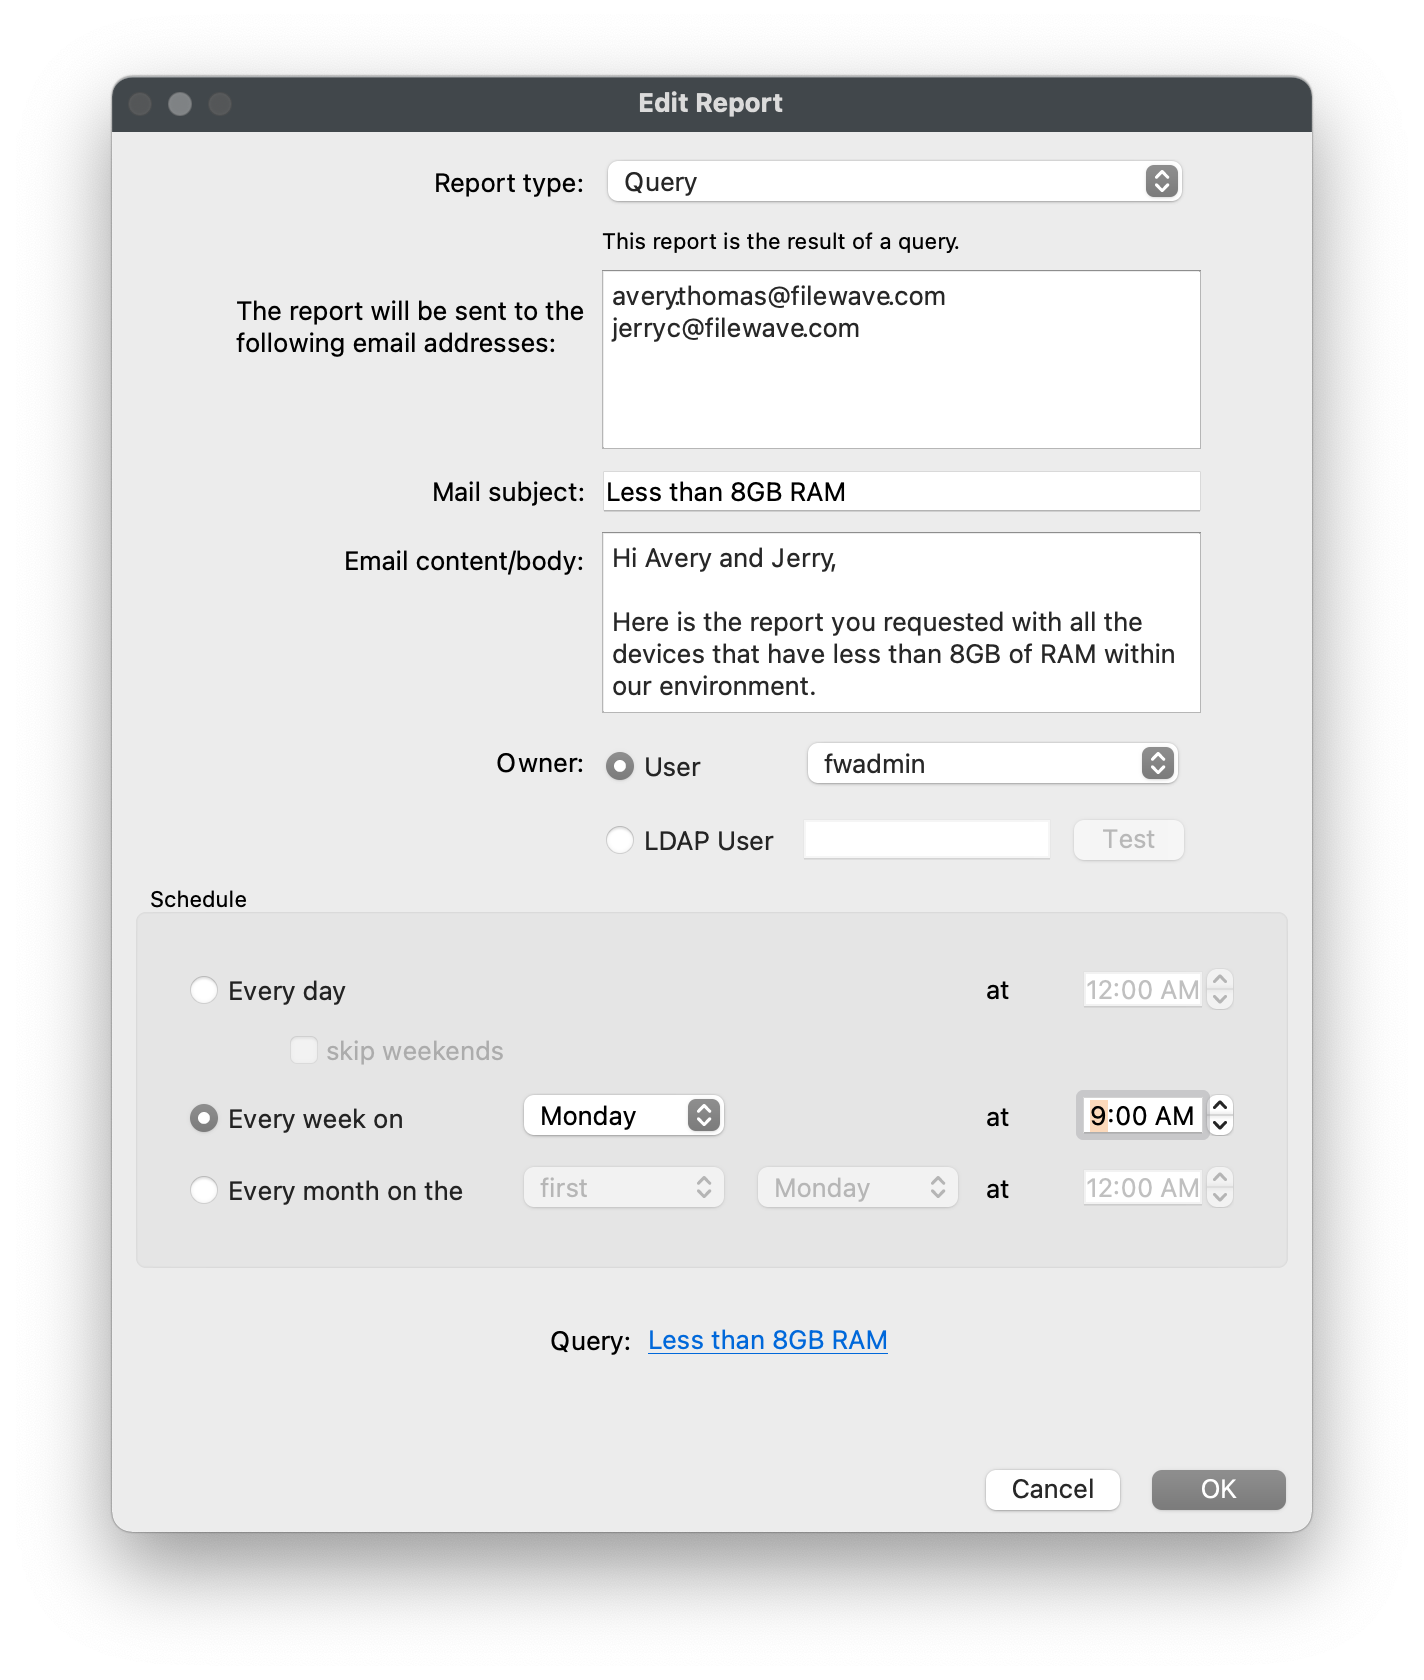
Now thatAfter you have severalsaved Inventory QueriesReports, created,you let'scan schedule the automatic email of those Inventory Reports.delivery. Before being able to schedulescheduling reports, you must first configure the "Email"Email preferences in FileWave Admin Preferences.Central.
Inventory QueryReport Scheduled Reporting
- Open FileWave
AdminCentral andnavigatego to "Assistants > Scheduled Reports". - Click the "[+]" button to add a
new schedulescheduled report. - Change the "Report type" to "Query".
- Enter the target email addresses with each new address on a new line.
- Fill out the Mail Subject and Body.
- Optionally, select a different "Owner" of the report for logging purposes.
- Schedule your automated report.
- Select the
Queryreport using the "select a query" link. Older dialogs may still use the word Query here. - Click "OK" to save the changes.

License Scheduled Reporting
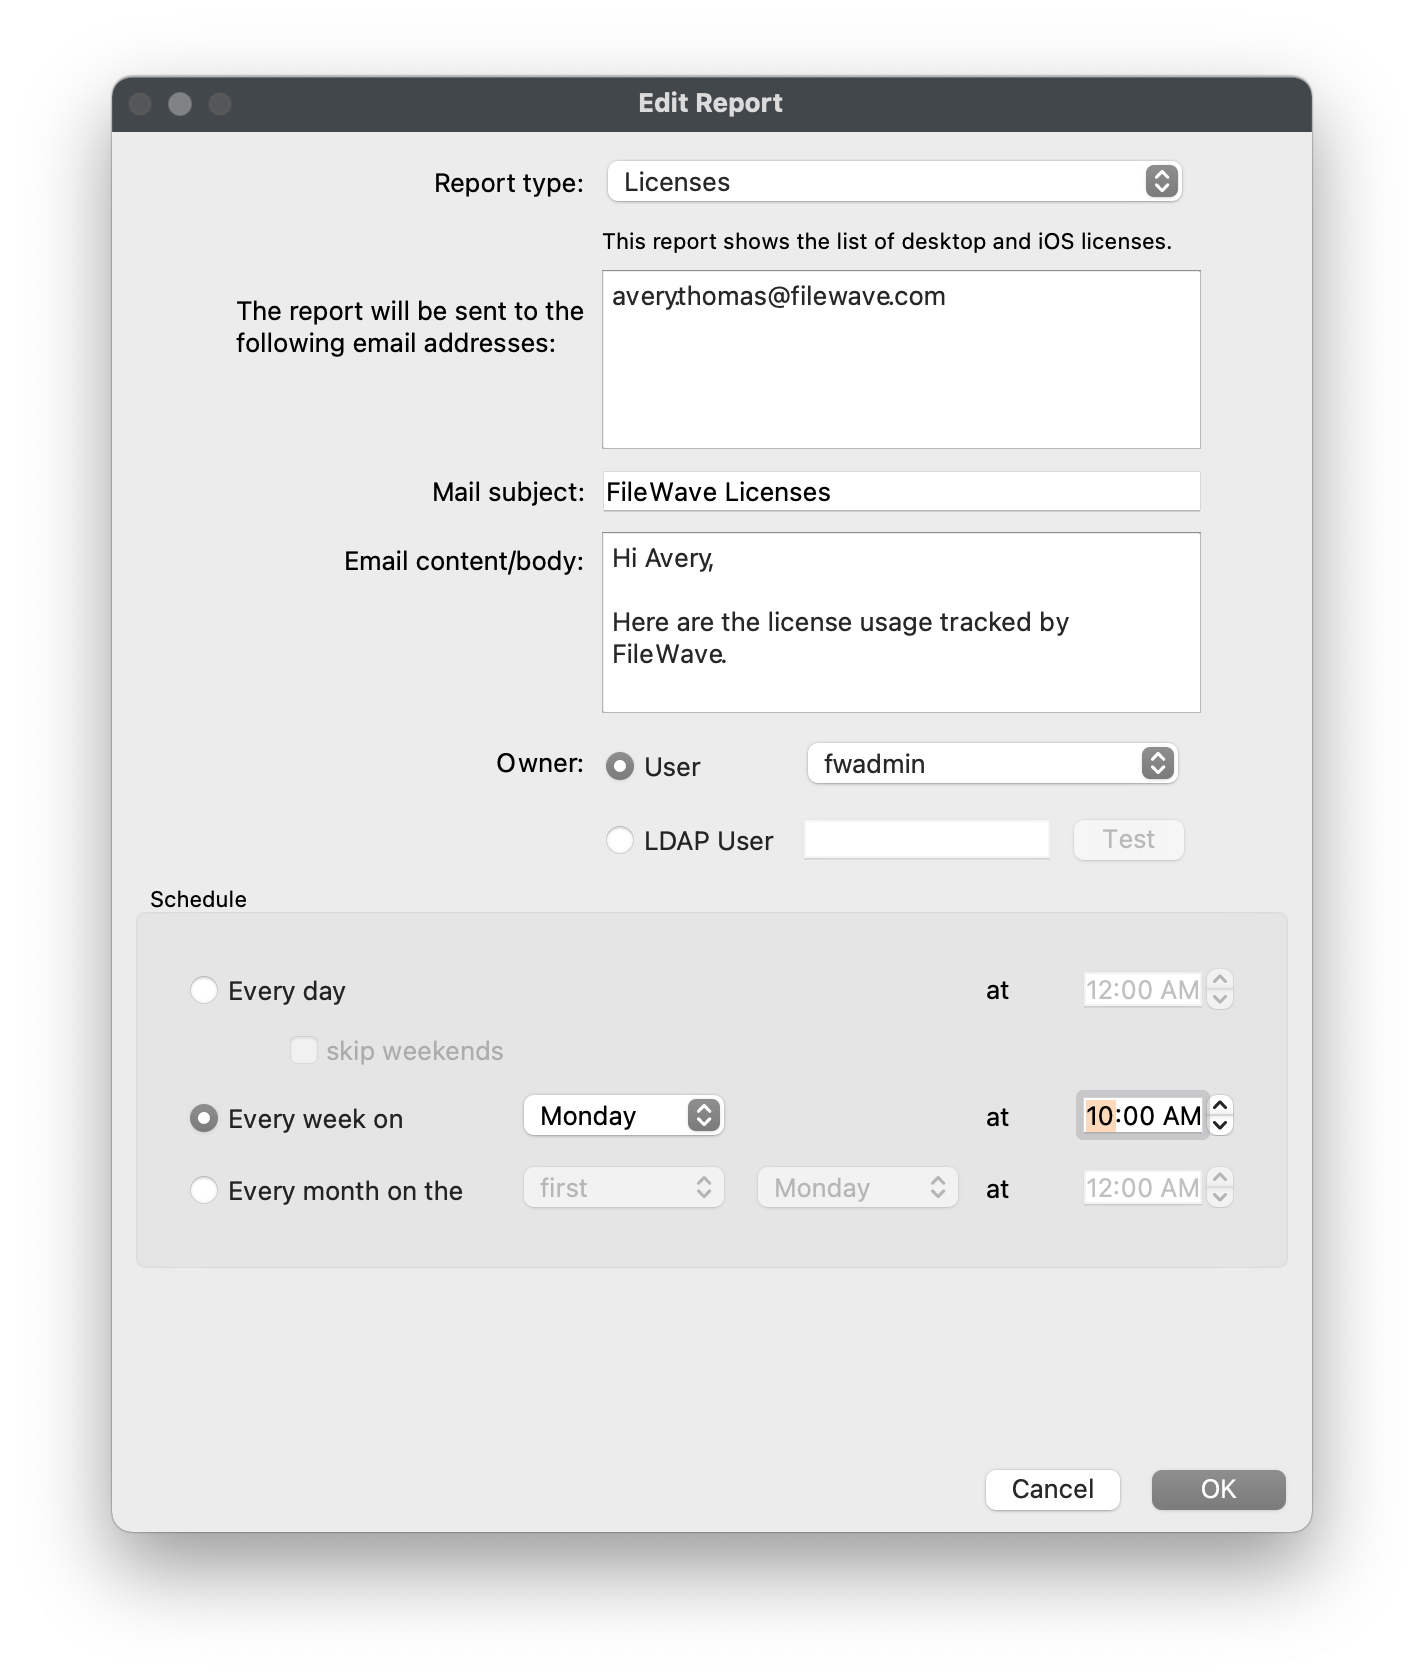
FileWave can also send a report containing a list of all licenses that display within "License Management" via Scheduled Reports.
- Open FileWave
AdminCentral andnavigatego to "Assistants > Scheduled Reports". - Click the "[+]" button to add a
new schedulescheduled report. - Verify the "Report type" is set to "License".
- Enter the target email addresses with each new address on a new line.
- Fill out the Mail Subject and Body.
- Optionally, select a different "Owner" of the report for logging purposes.
- Schedule your automated report.
- Click "OK" to save the changes.