Inventory Reports
Your information. Your way.
Inventory Reports help you choose exactly which device data to return, then save that view for refresh planning, Smart Groups, troubleshooting, or scheduled email delivery.
Quick answer: In current FileWave versions, this feature is Reports. Older Central screens and screenshots may still say Queries or QueryBuilder; those labels refer to the same saved inventory report workflow.
Create an Inventory Report (formerly Query)
Creating an Inventory Report is the first step toward tracking device data, scheduling emailed reports, or using report criteria to build a Smart Group. The examples below show one report for devices with less than 8 GB of RAM and another report for iOS and Chrome devices with a specific Building Code custom field.
New Report
- Open FileWave Central and go to "Reports".
- Click "New Report" from the menu bar.
- Name the report and begin dragging inventory data points into the "Criteria" pane.
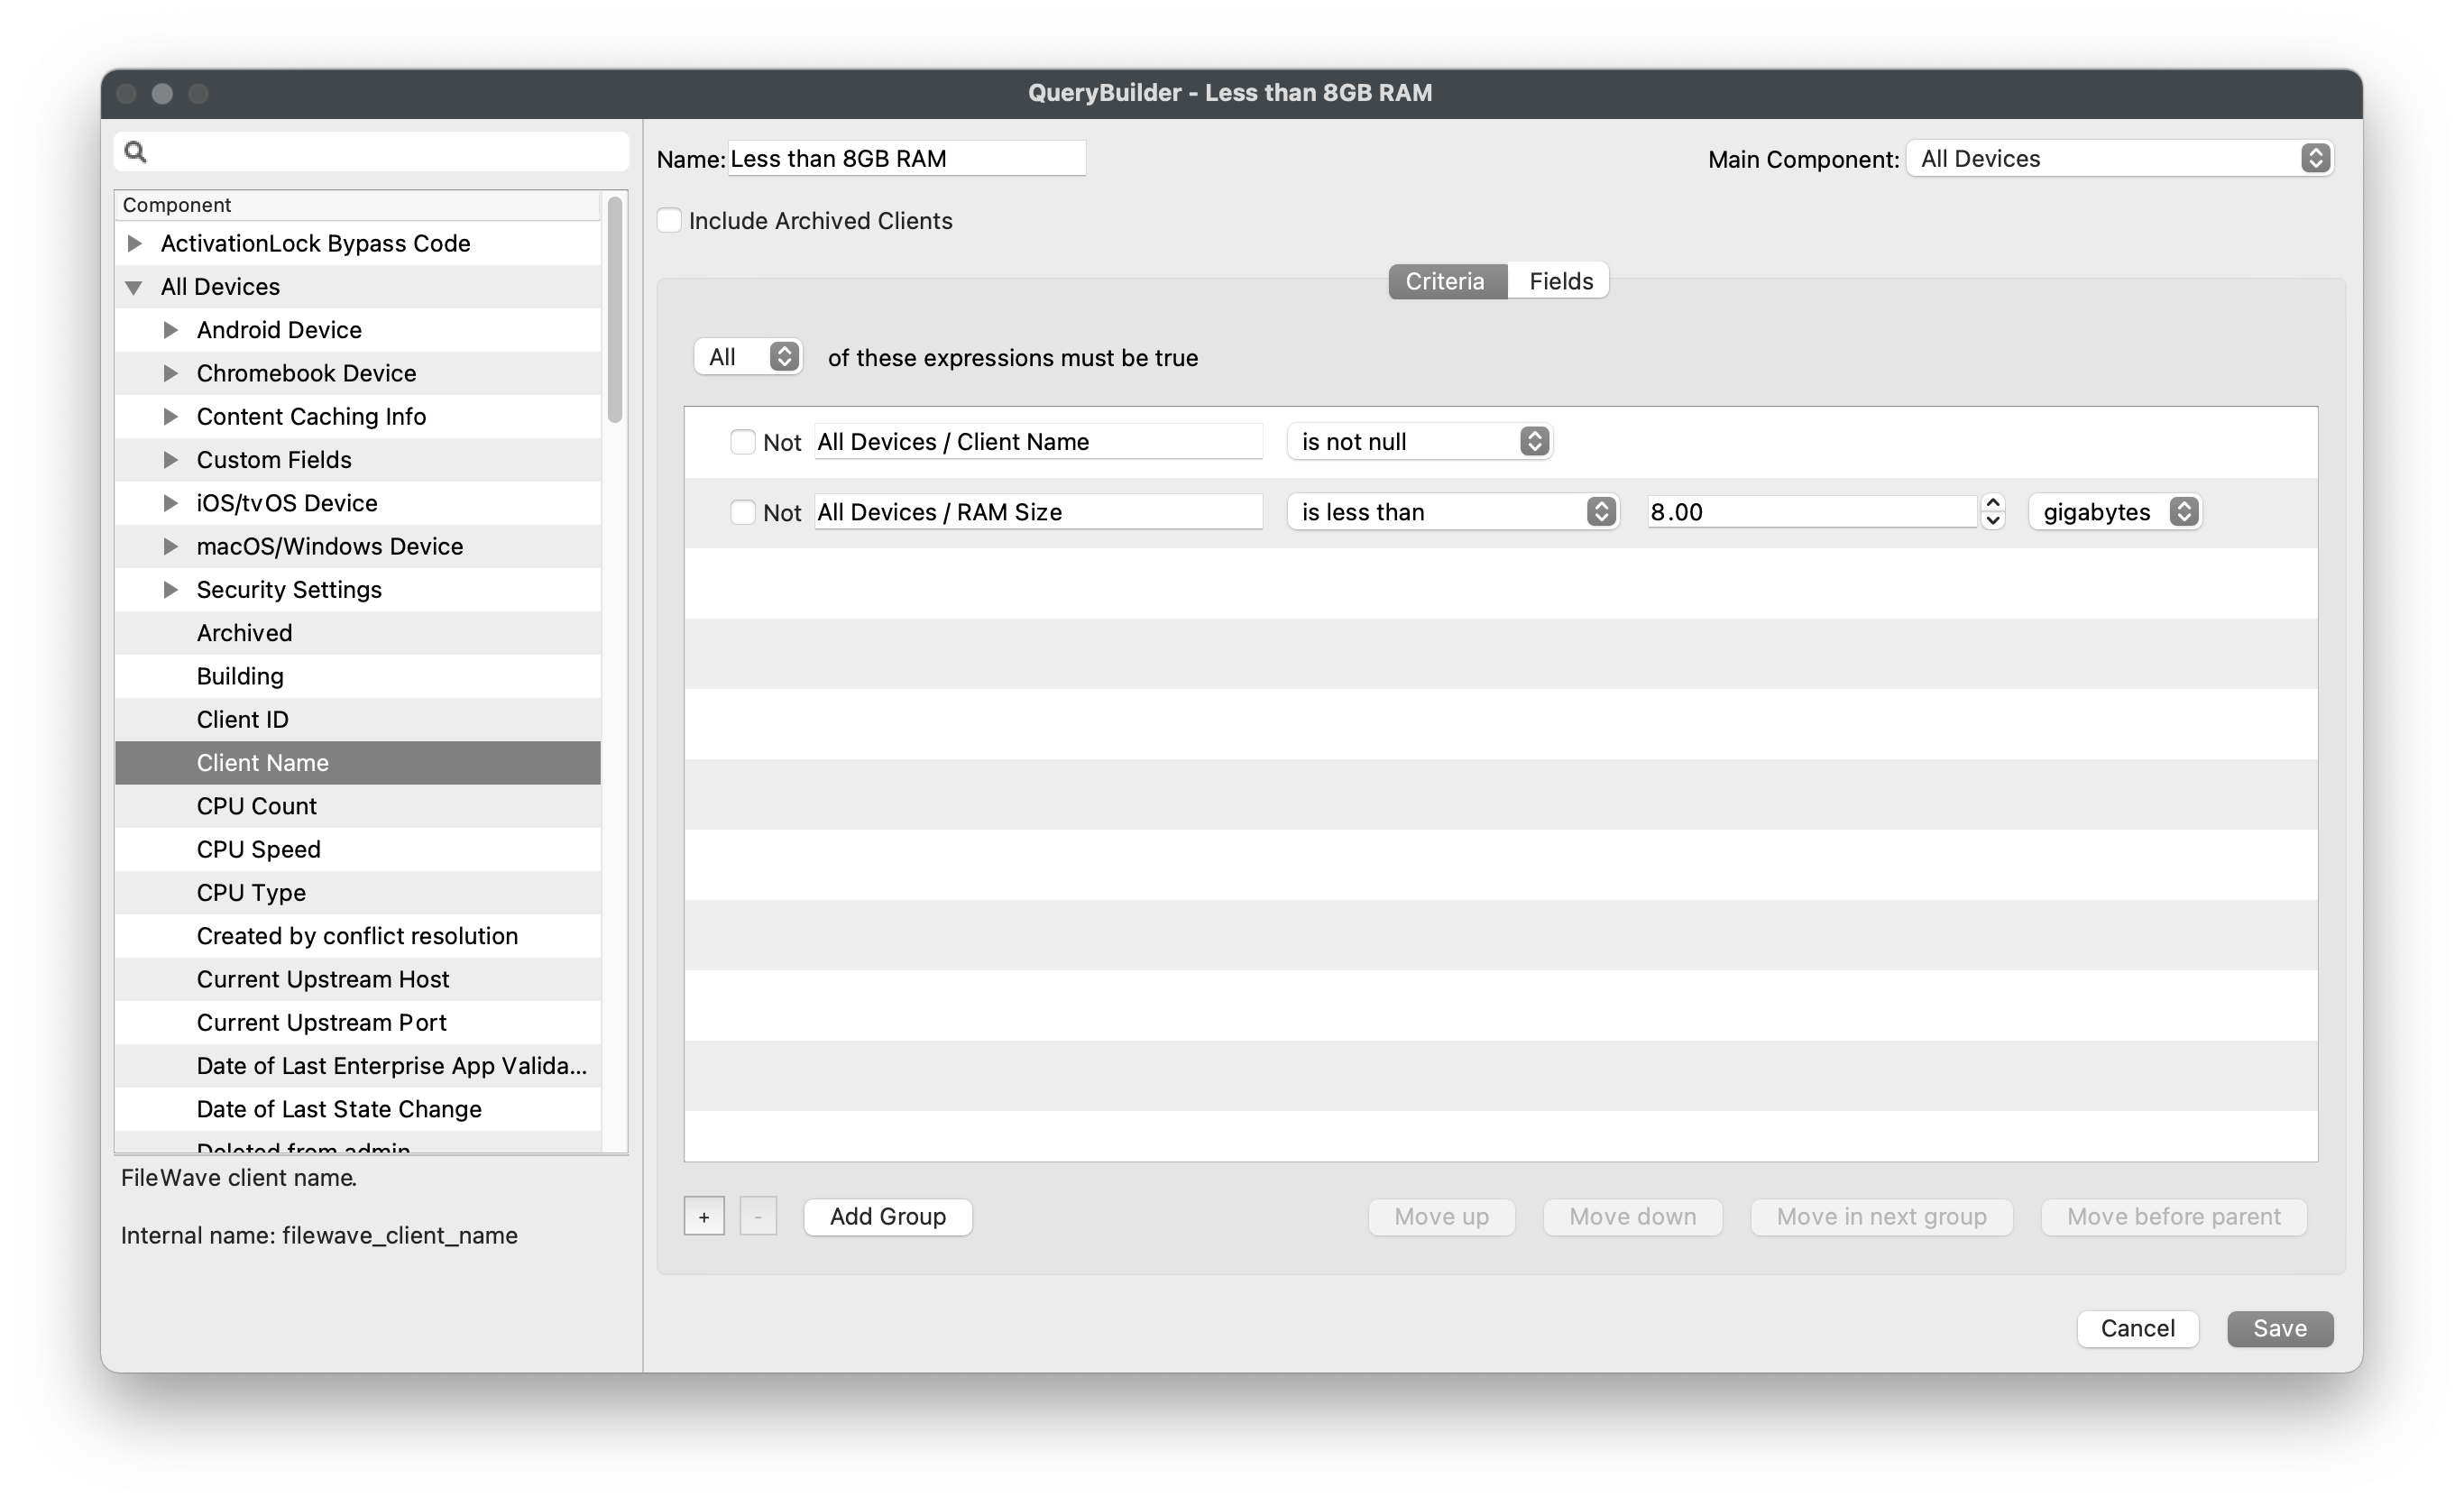
Less than 8GB of RAM
- Drag "All Devices > Client Name" into the "Criteria" pane.
- Set "All Devices > Client Name" qualifier to "is not null".
- This starts broad so the report includes all devices before the next filters narrow the results.
- Drag "All Devices > RAM Size" into the "Criteria" pane.
- Set "All Devices > RAM Size" qualifier to "is less than" : "8.00 gigabytes".
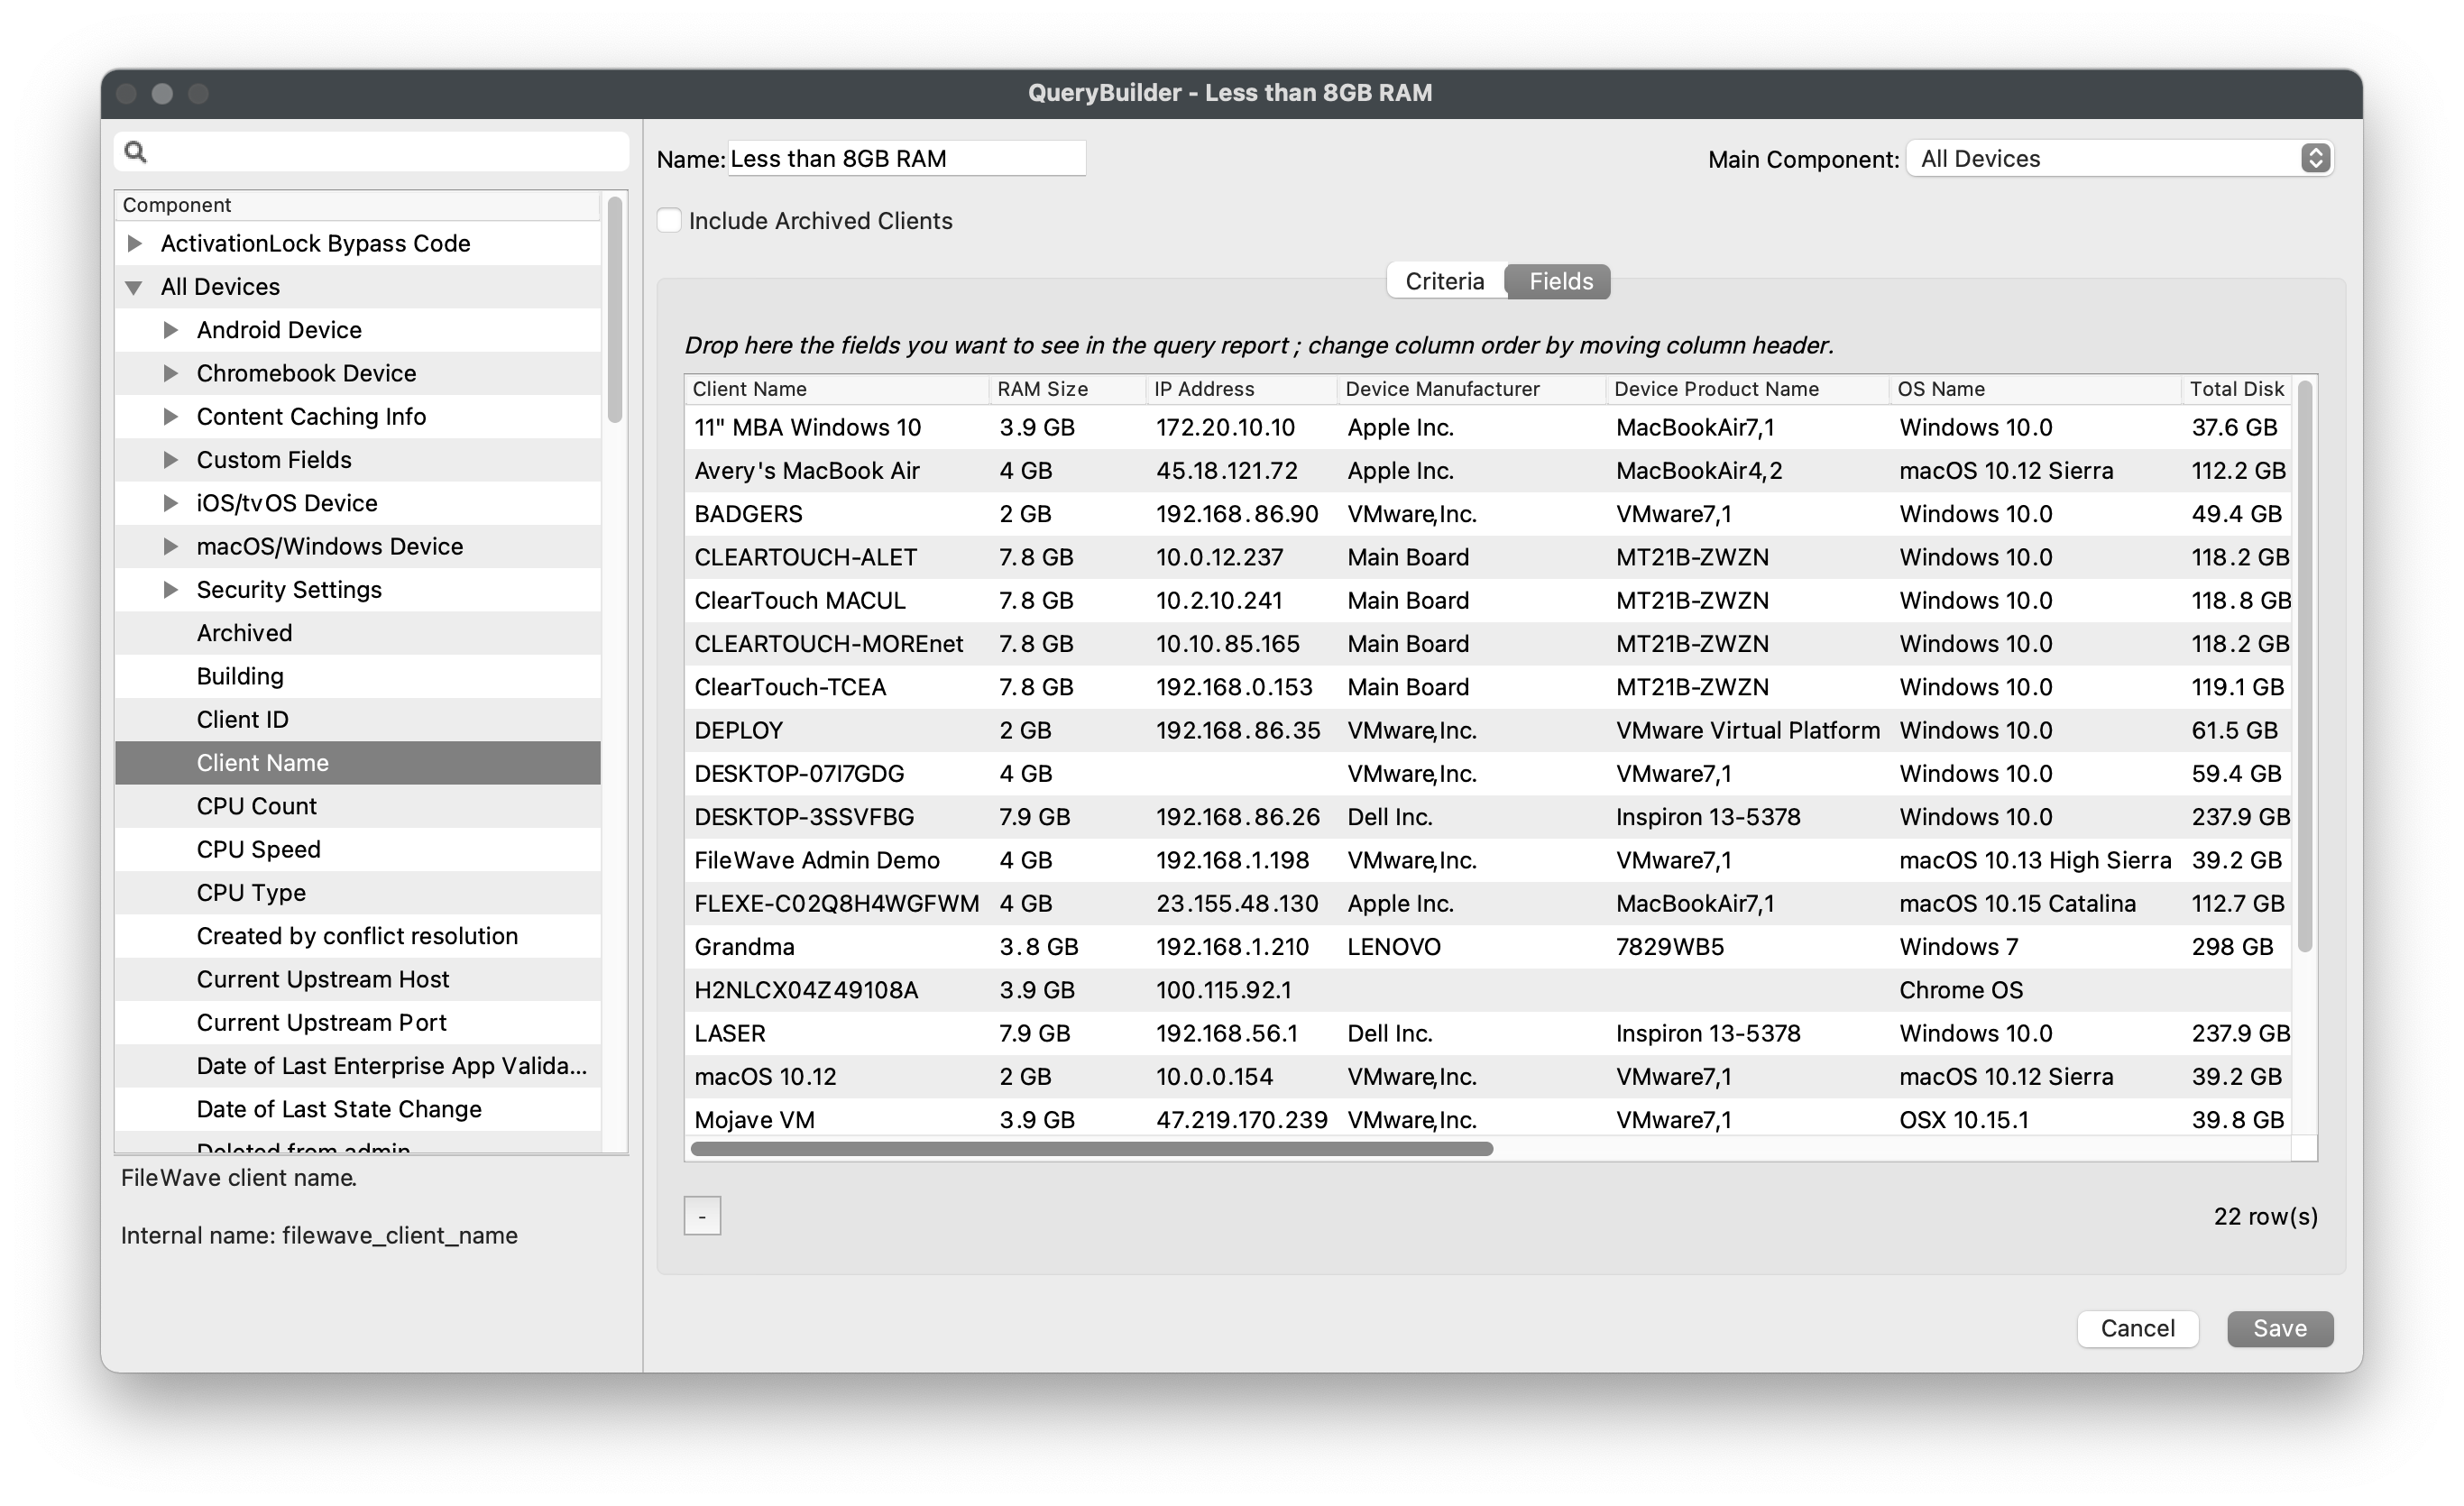
- Click the "Fields" tab.
- Add the fields you want the Inventory Report to return.
- Client Name
- RAM Size
- IP Address
- Device Manufacture
- Device Product Name
- OS Name
- Total Disk Space
- CPU Type / Speed / Count
- Click "Save".
- You should now see your new Inventory Report.
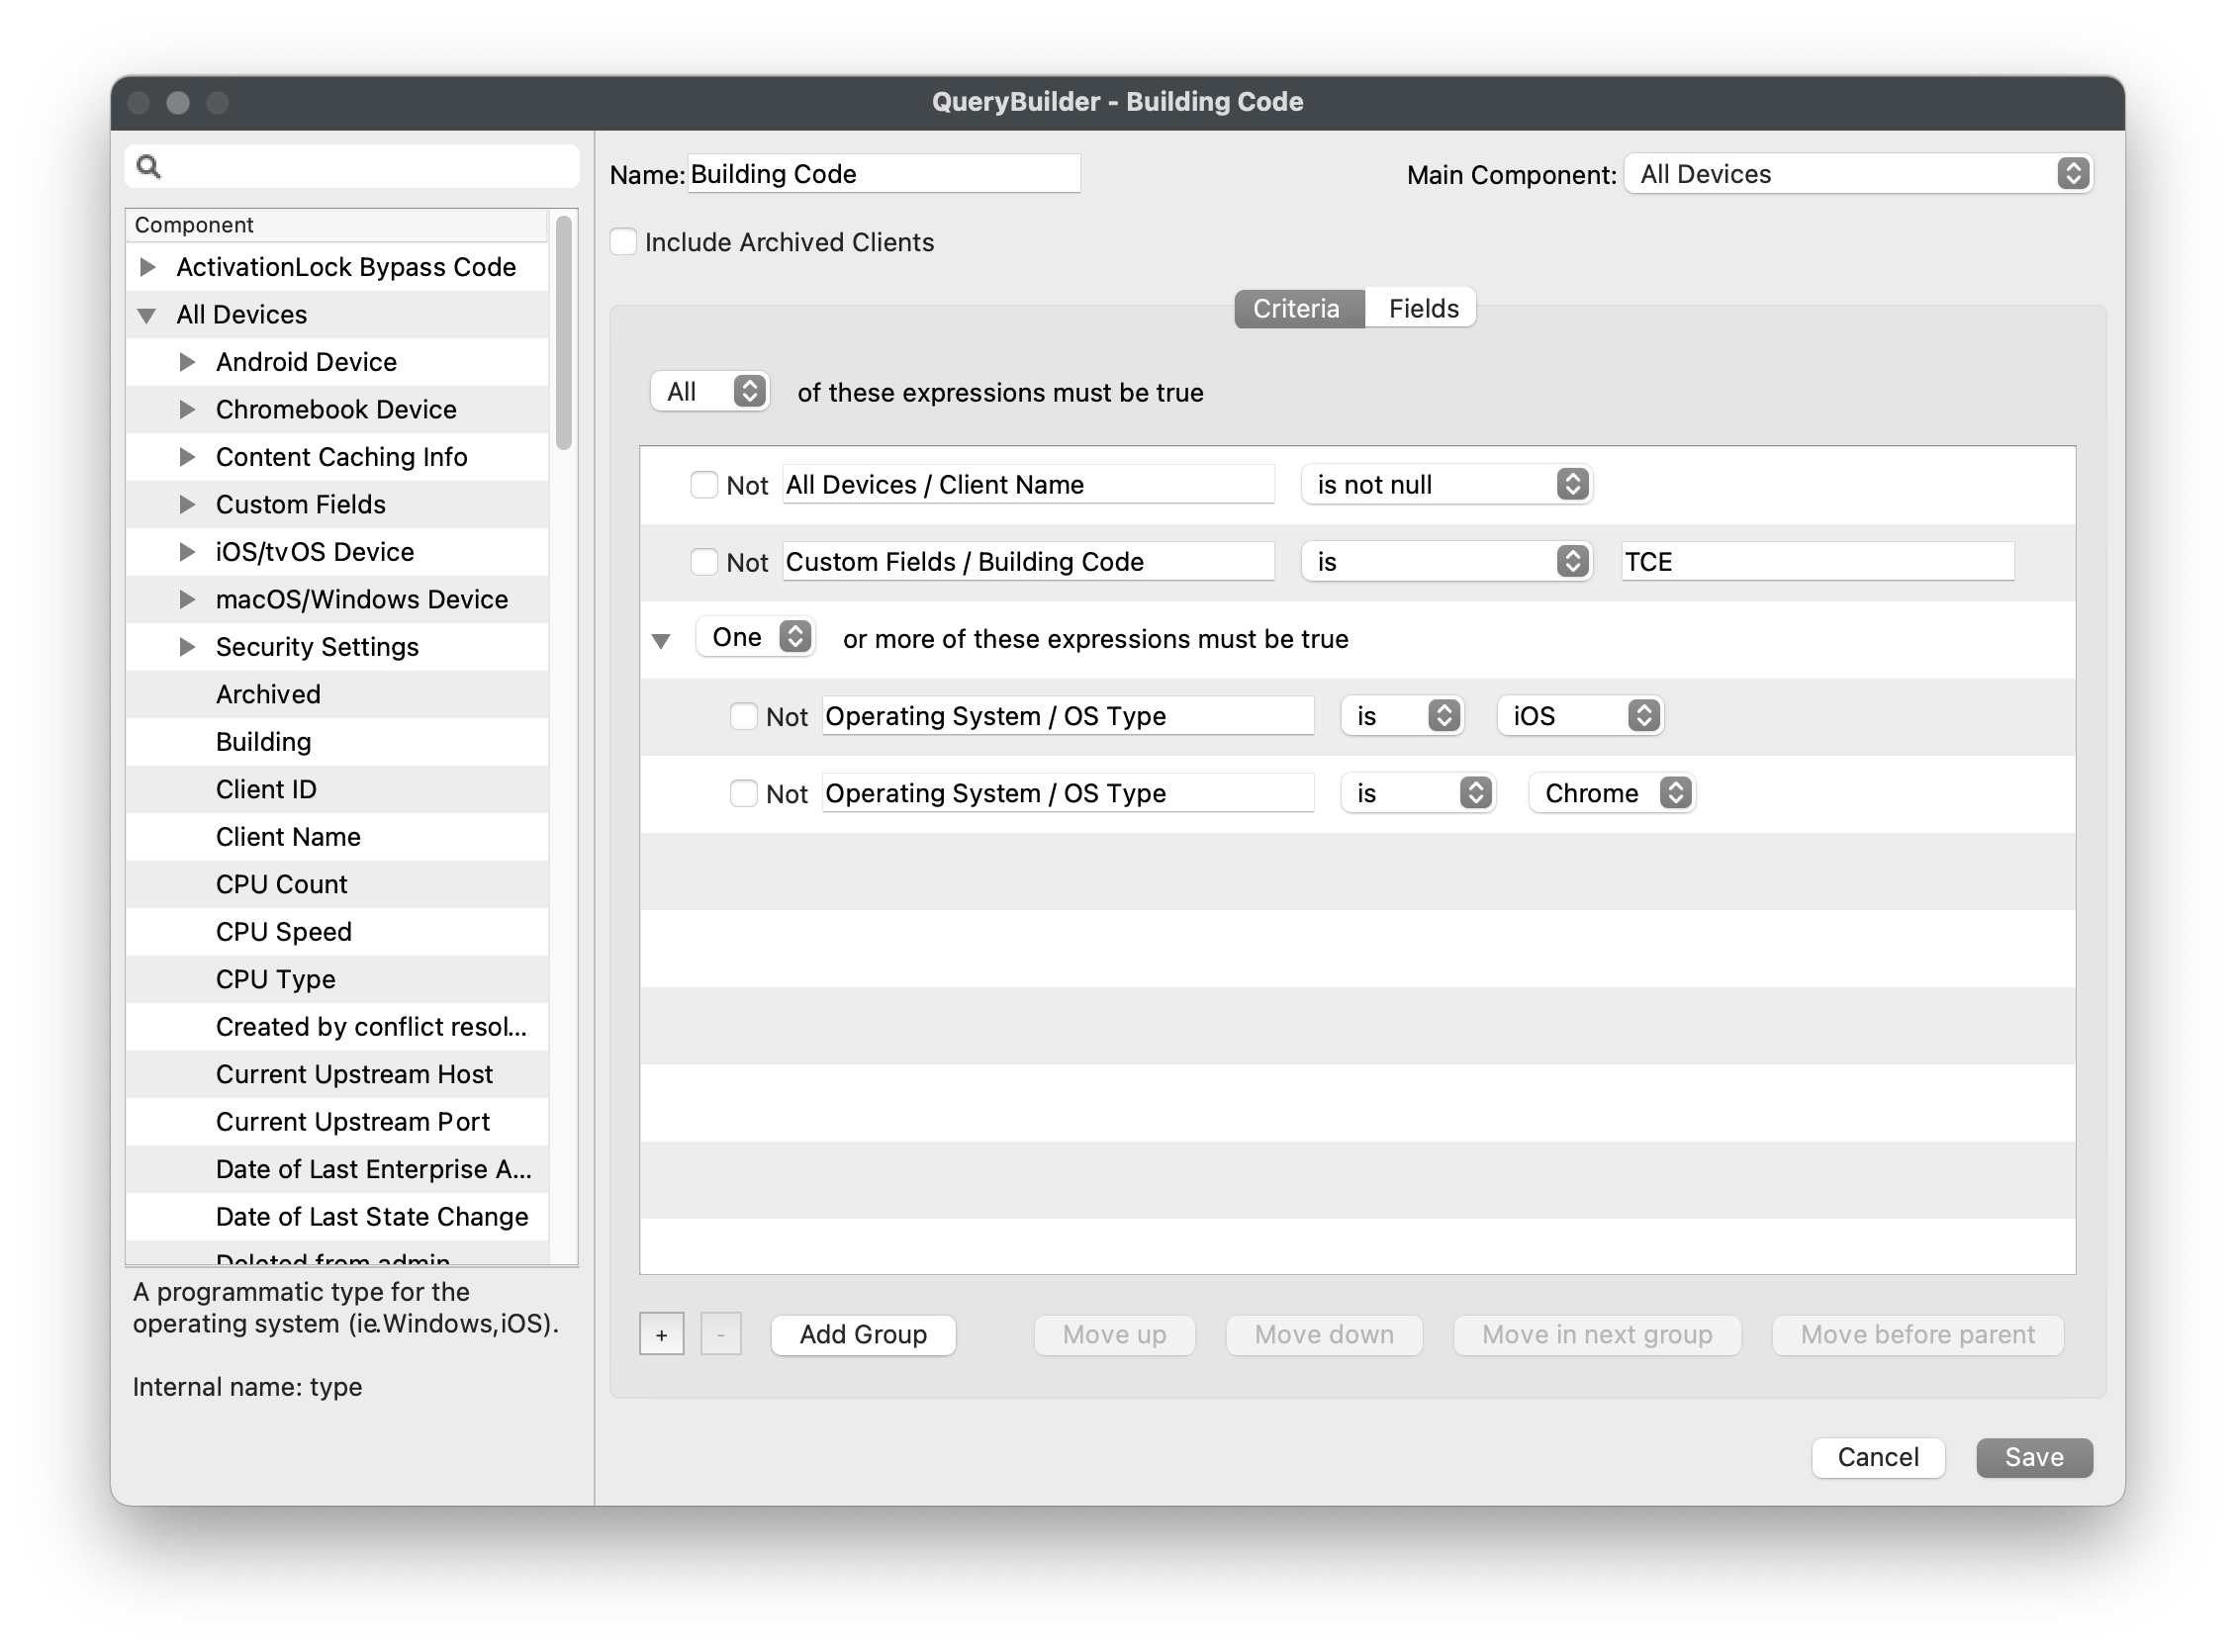
Building Code
- Drag "All Devices > Client Name" into the "Criteria" pane.
- Set "All Devices > Client Name" qualifier to "is not null".
- This starts broad so the report includes all devices before the next filters narrow the results.
- Drag "All Devices > Custom Fields > Building Code" into the "Criteria" pane.
- Set "All Devices > Custom Fields > Building Code" qualifier to "is" : "TCE".
- Add a new inventory sub-group via the "Add Group" button.
- Drag "Operating System > OS Type" into the new sub-group.
- Set "Operating System > OS Type" qualifier to "is" : "iOS".
- Drag "Operating System > OS Type" into the new sub-group.
- Set "Operating System > OS Type" qualifier to "is" : "Chrome".
- Change the sub-group's logic to "One or more of these expressions must be true". A device can be iOS or Chrome, but not both at the same time.
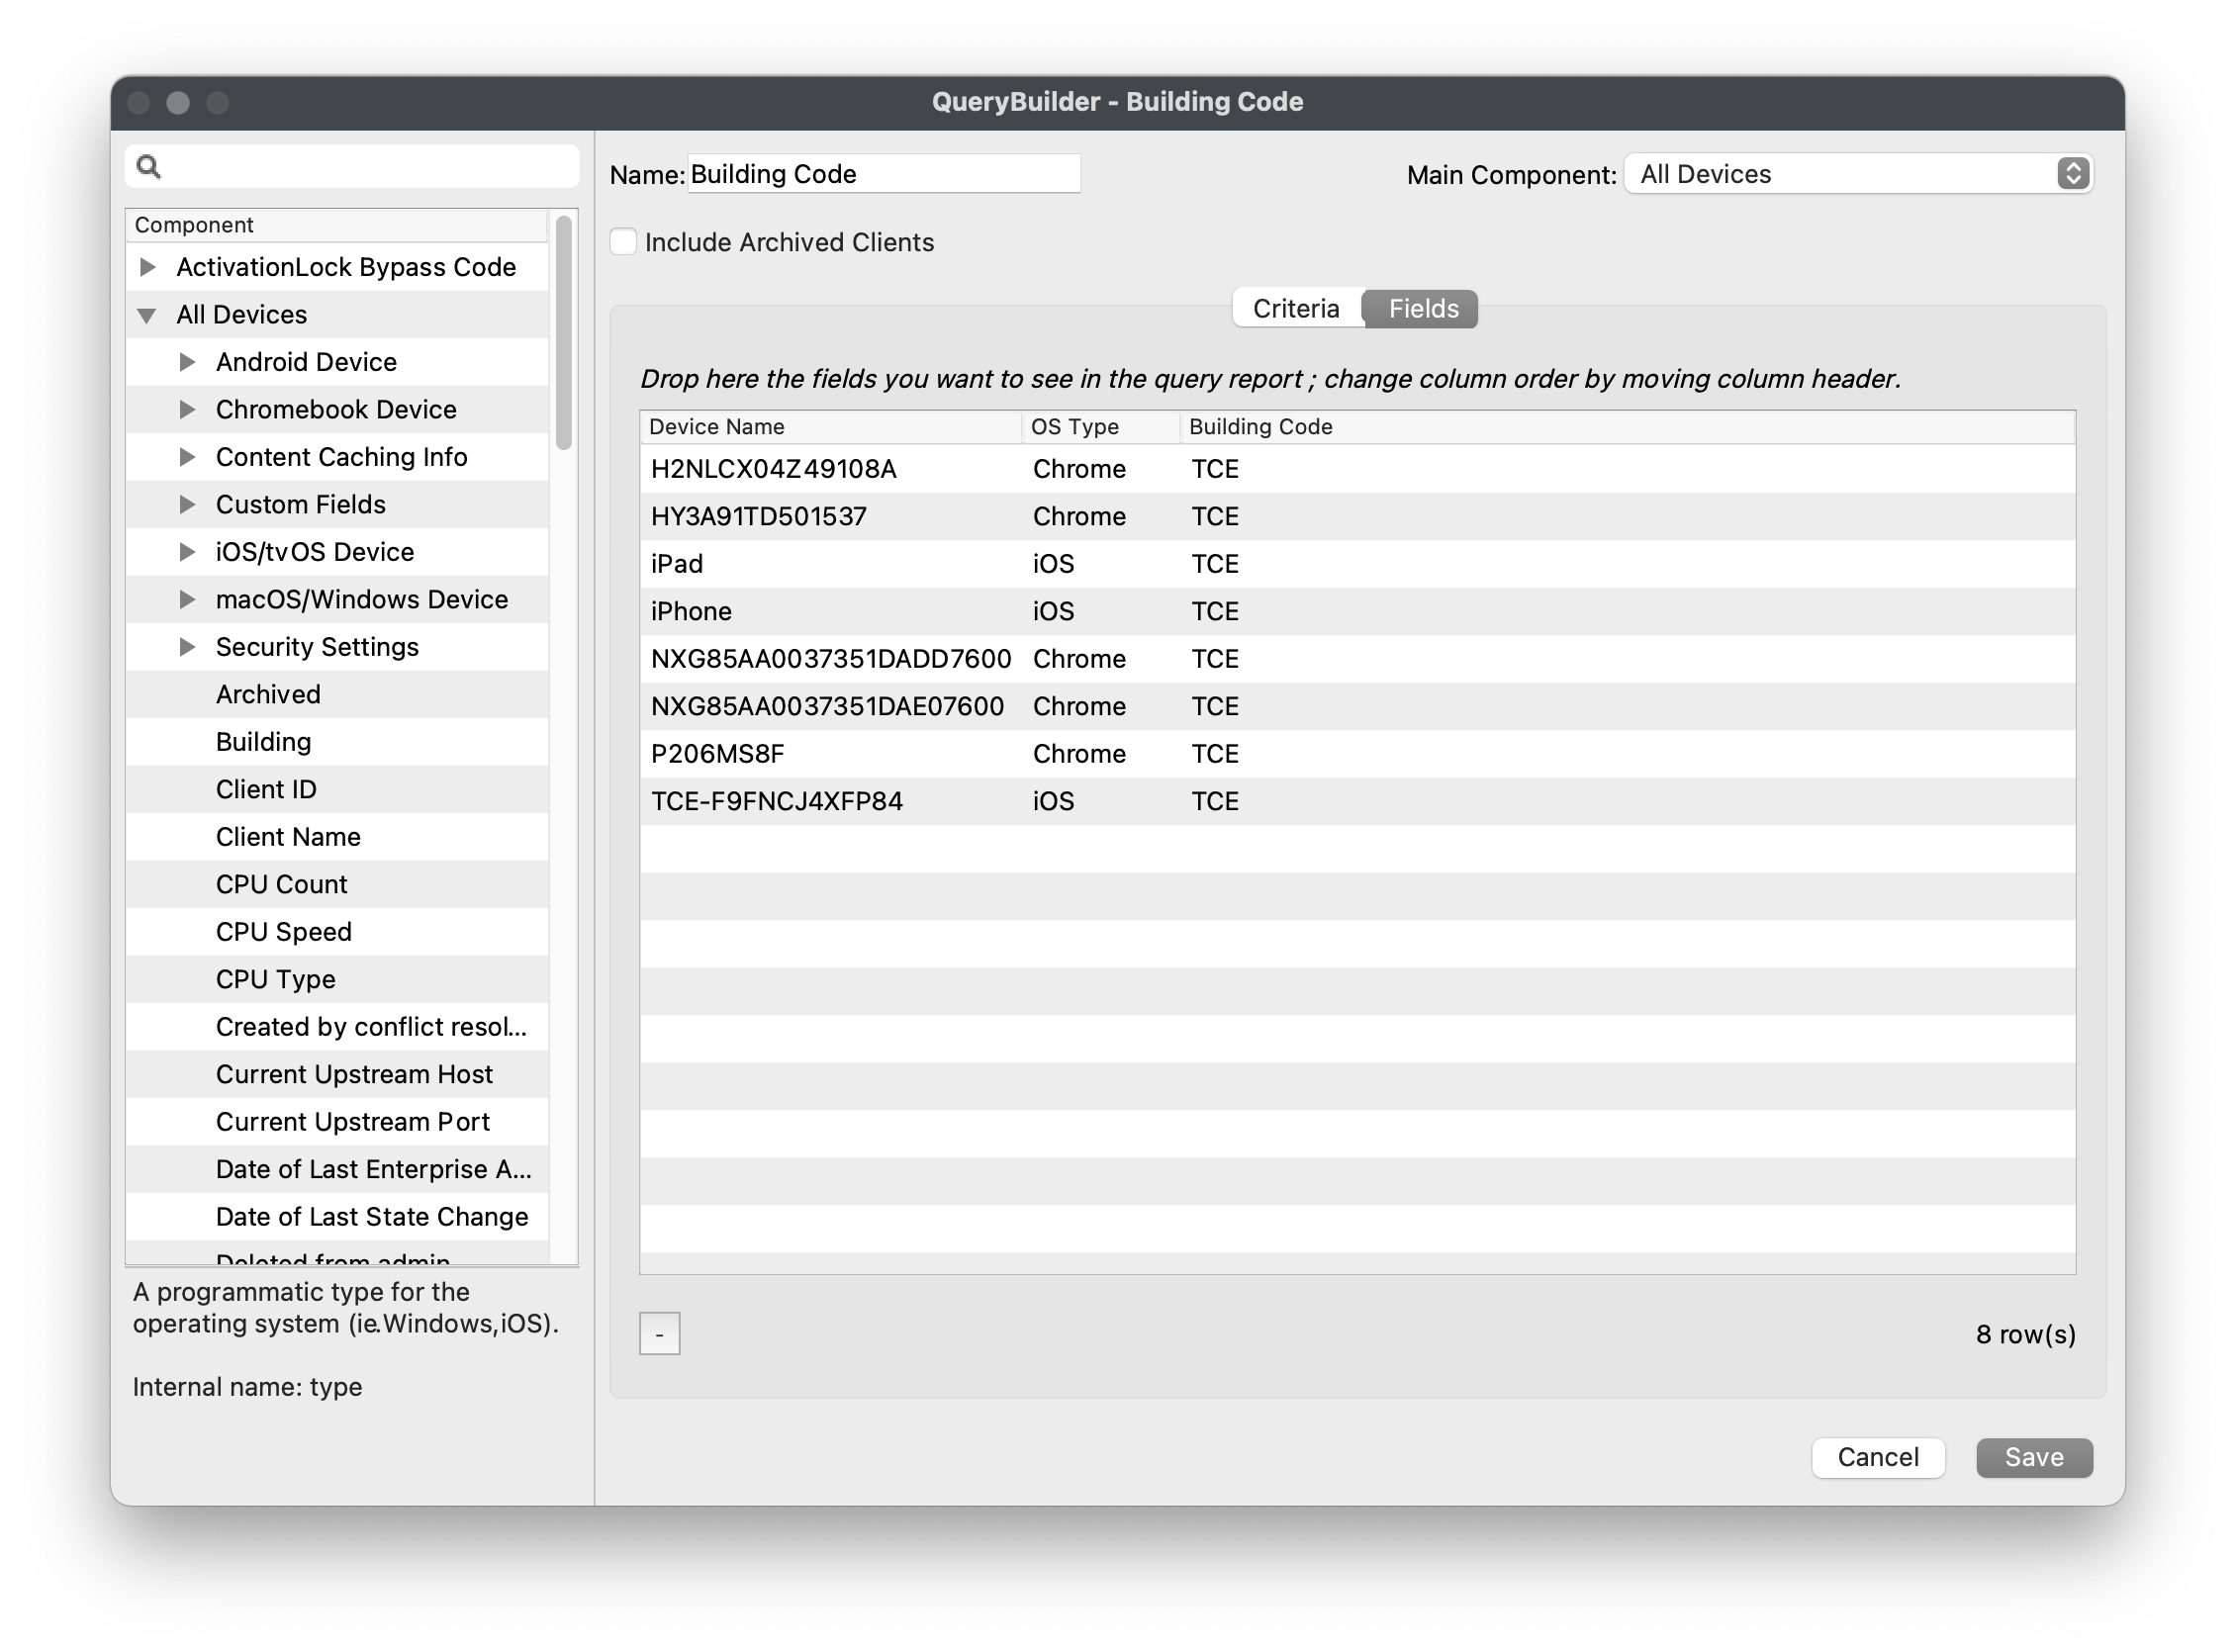
- Click the "Fields" tab.
- Add the fields you want the Inventory Report to return, such as Device Name, OS Type, and Building Code.
- Click "Save".
- You should now see your new Inventory Report.
Application Architecture Reporting in FileWave 16.4
FileWave 16.4 adds application architecture to macOS and Windows inventory records. Use it to find software that needs compatibility review before an operating-system or hardware transition.
| Platform | Reported architecture values | Typical use |
|---|---|---|
| macOS | Intel, Apple Silicon, Universal, iOS app | Find Intel-only applications, confirm native Apple silicon coverage, and separate iOS apps installed on Macs. |
| Windows | 32-bit (x86), 64-bit (x86-64) | Inventory remaining 32-bit applications and plan compatibility testing or modernization. |
Create an application architecture report
- Open FileWave Central > Reports and create a new Inventory Report.
- Use the application inventory component as the report’s main component so each installed application instance can appear as a result.
- Add application fields such as name, version, path, and architecture.
- Add device context such as Client Name, OS Name or OS Type, and CPU Type so each application result can be tied to the correct endpoint.
- Add architecture criteria when you need a focused list. For example, filter macOS applications for Intel or Windows applications for 32-bit (x86).
- Save the report. Export it, schedule it, or use its criteria to create a Smart Group when follow-up work should be targeted through FileWave.
Recommended report patterns
| Goal | Criteria | Useful returned fields |
|---|---|---|
| Find Intel-only Mac applications | Platform is macOS; application architecture is Intel | Client Name, Application Name, Version, Path, Architecture, OS Version, CPU Type |
| Confirm native Apple silicon availability | Platform is macOS; architecture is Apple Silicon or Universal | Application Name, Version, Architecture, Client Name |
| Find iOS apps installed on Macs | Platform is macOS; application architecture is iOS app | Application Name, Version, Client Name, OS Version |
| Find 32-bit Windows applications | Platform is Windows; application architecture is 32-bit (x86) | Application Name, Version, Path, Client Name, OS Version |
Architecture is a compatibility signal, not proof of active use or business impact. Confirm application ownership and usage before removing software or blocking an operating-system upgrade. A Universal app can also depend on an Intel-only plug-in or extension, so investigate critical workflows rather than treating the top-level application value as the whole dependency chain.
For Apple transition planning, see Apple EOL Advisory: Intel-Based Apps and Rosetta Dependencies on Apple Silicon.
Scheduled Reporting
After you have saved Inventory Reports, you can schedule automatic email delivery. Before scheduling reports, configure the Email preferences in FileWave Central.
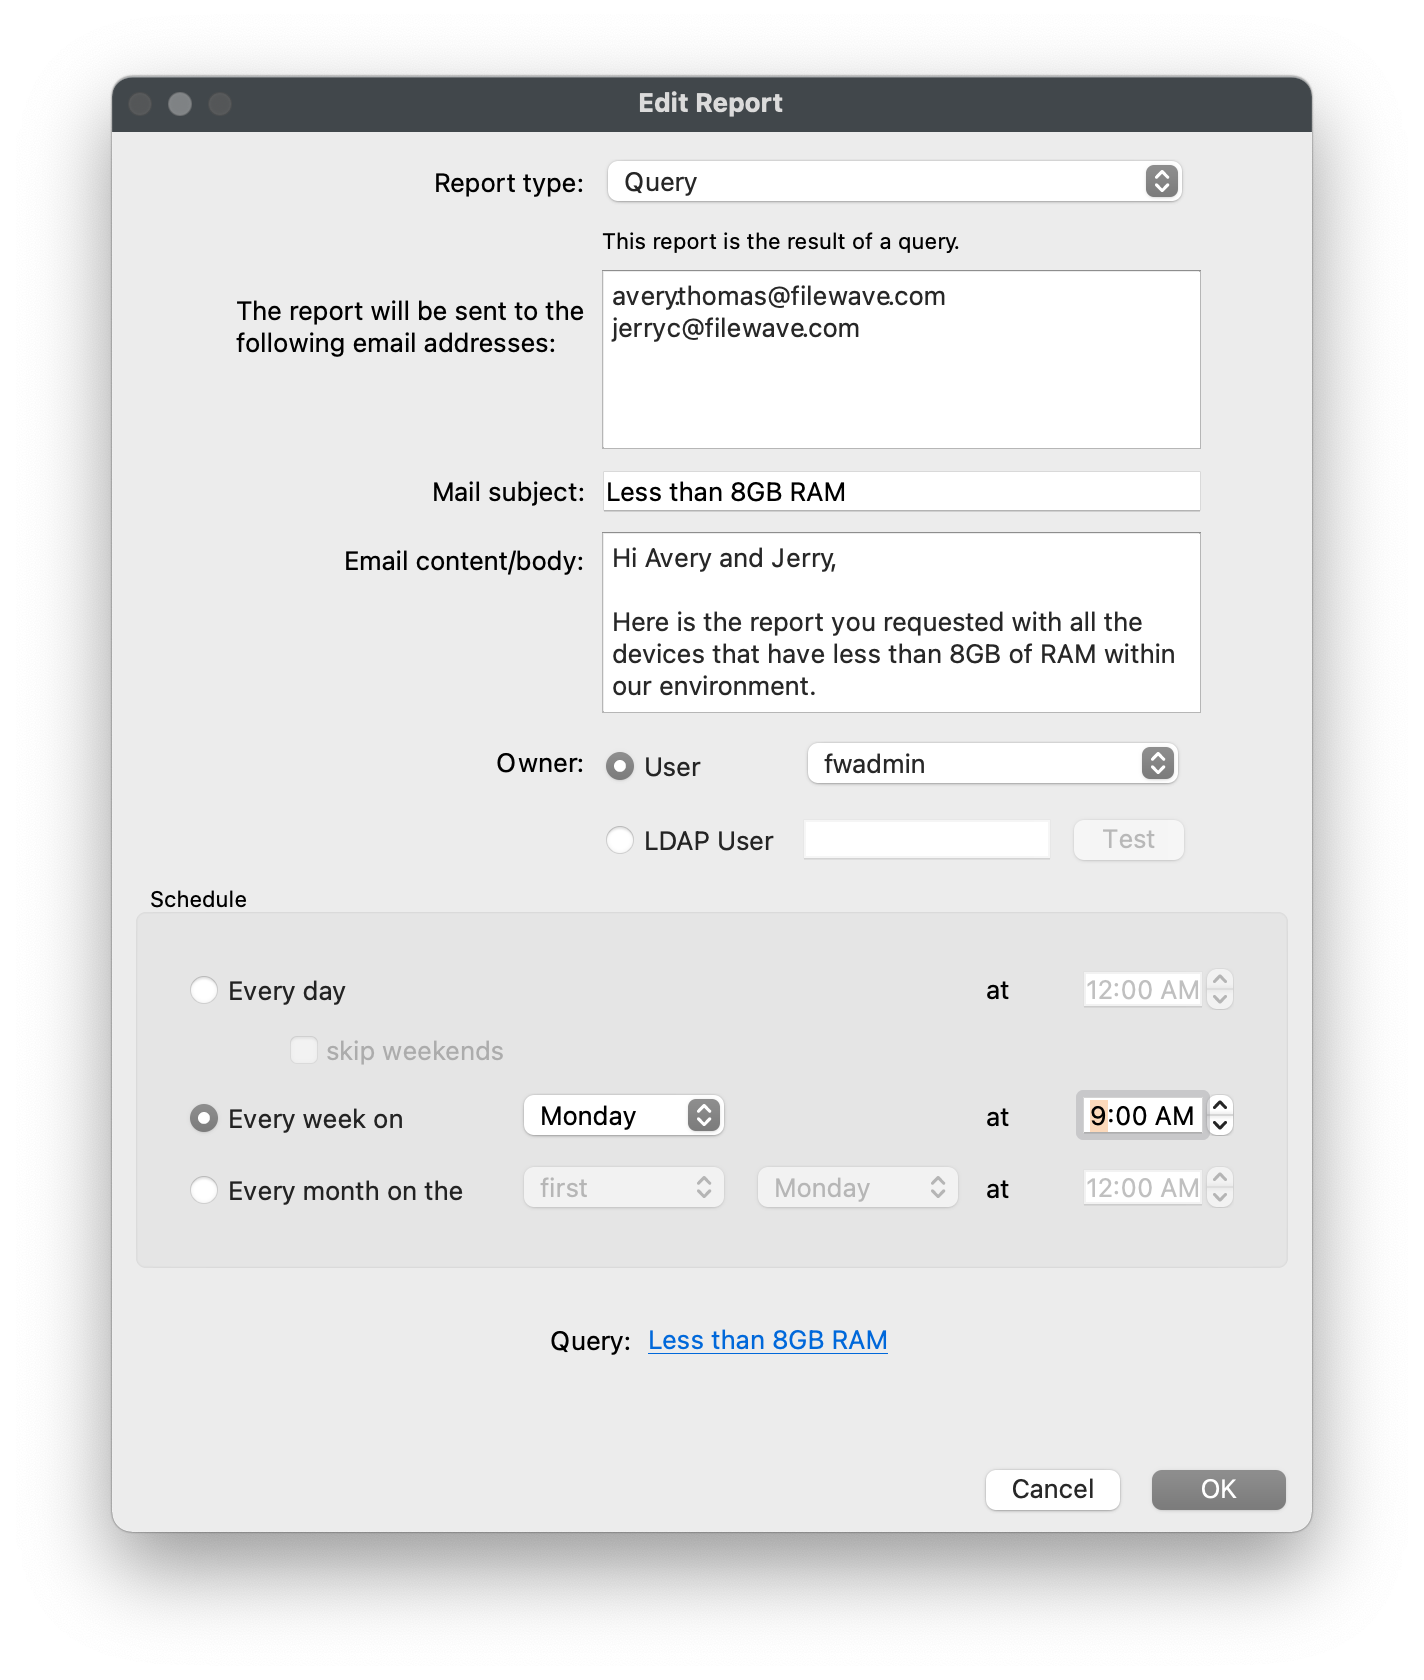
Inventory Report Scheduled Reporting
- Open FileWave Central and go to "Assistants > Scheduled Reports".
- Click the "[+]" button to add a scheduled report.
- Change the "Report type" to "Query".
- Enter the target email addresses with each new address on a new line.
- Fill out the Mail Subject and Body.
- Optionally, select a different "Owner" of the report for logging purposes.
- Schedule your automated report.
- Select the report using the "select a query" link. Older dialogs may still use the word Query here.
- Click "OK" to save the changes.
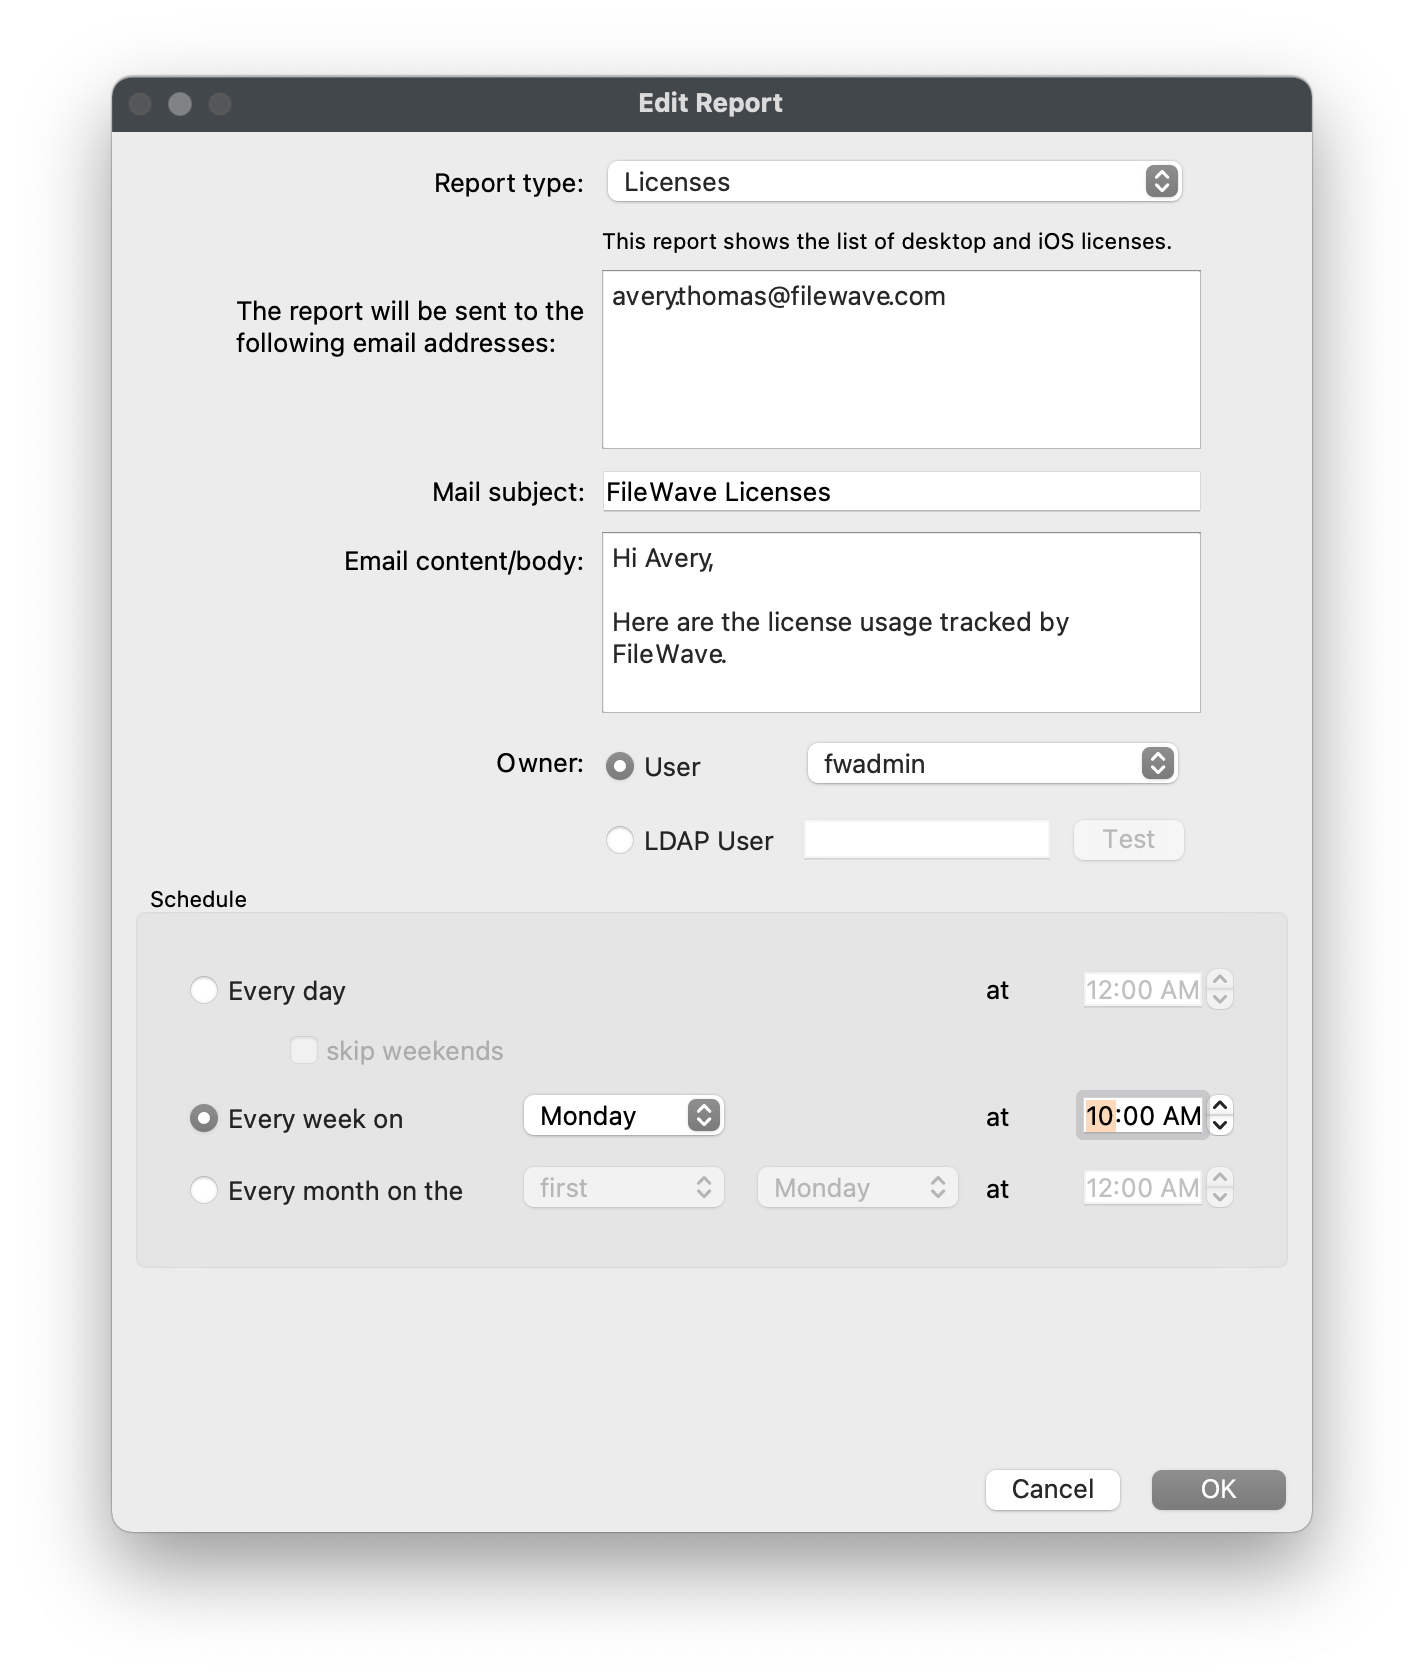
License Scheduled Reporting
FileWave can also send a report containing a list of all licenses that display within "License Management" via Scheduled Reports.
- Open FileWave Central and go to "Assistants > Scheduled Reports".
- Click the "[+]" button to add a scheduled report.
- Verify the "Report type" is set to "License".
- Enter the target email addresses with each new address on a new line.
- Fill out the Mail Subject and Body.
- Optionally, select a different "Owner" of the report for logging purposes.
- Schedule your automated report.
- Click "OK" to save the changes.
No comments to display
No comments to display