
Customised Screen Saver (macOS)
Description
Quick answer: Use this example Fileset to install a custom macOS screen saver (.saver) that displays a static image or custom HTML/JavaScript, then set it as the login window screen saver with a profile.
Ingredients
- FileWave Central
- Example Fileset: Example_FileWave.saver.zip
Taken from: https://github.com/tlrobinson/WebSaver
Directions
Fileset Installation
- Download and unzip the
Example_FileWave.saver.zipattachment from this article. - Import the Fileset in FileWave Central.
Customize the screen saver name (optional)
- Open the Fileset contents.
- Expand
/var/scripts/498452. The number will differ in your Fileset. - Select
FileWaveExampleScreenSaver.sh.
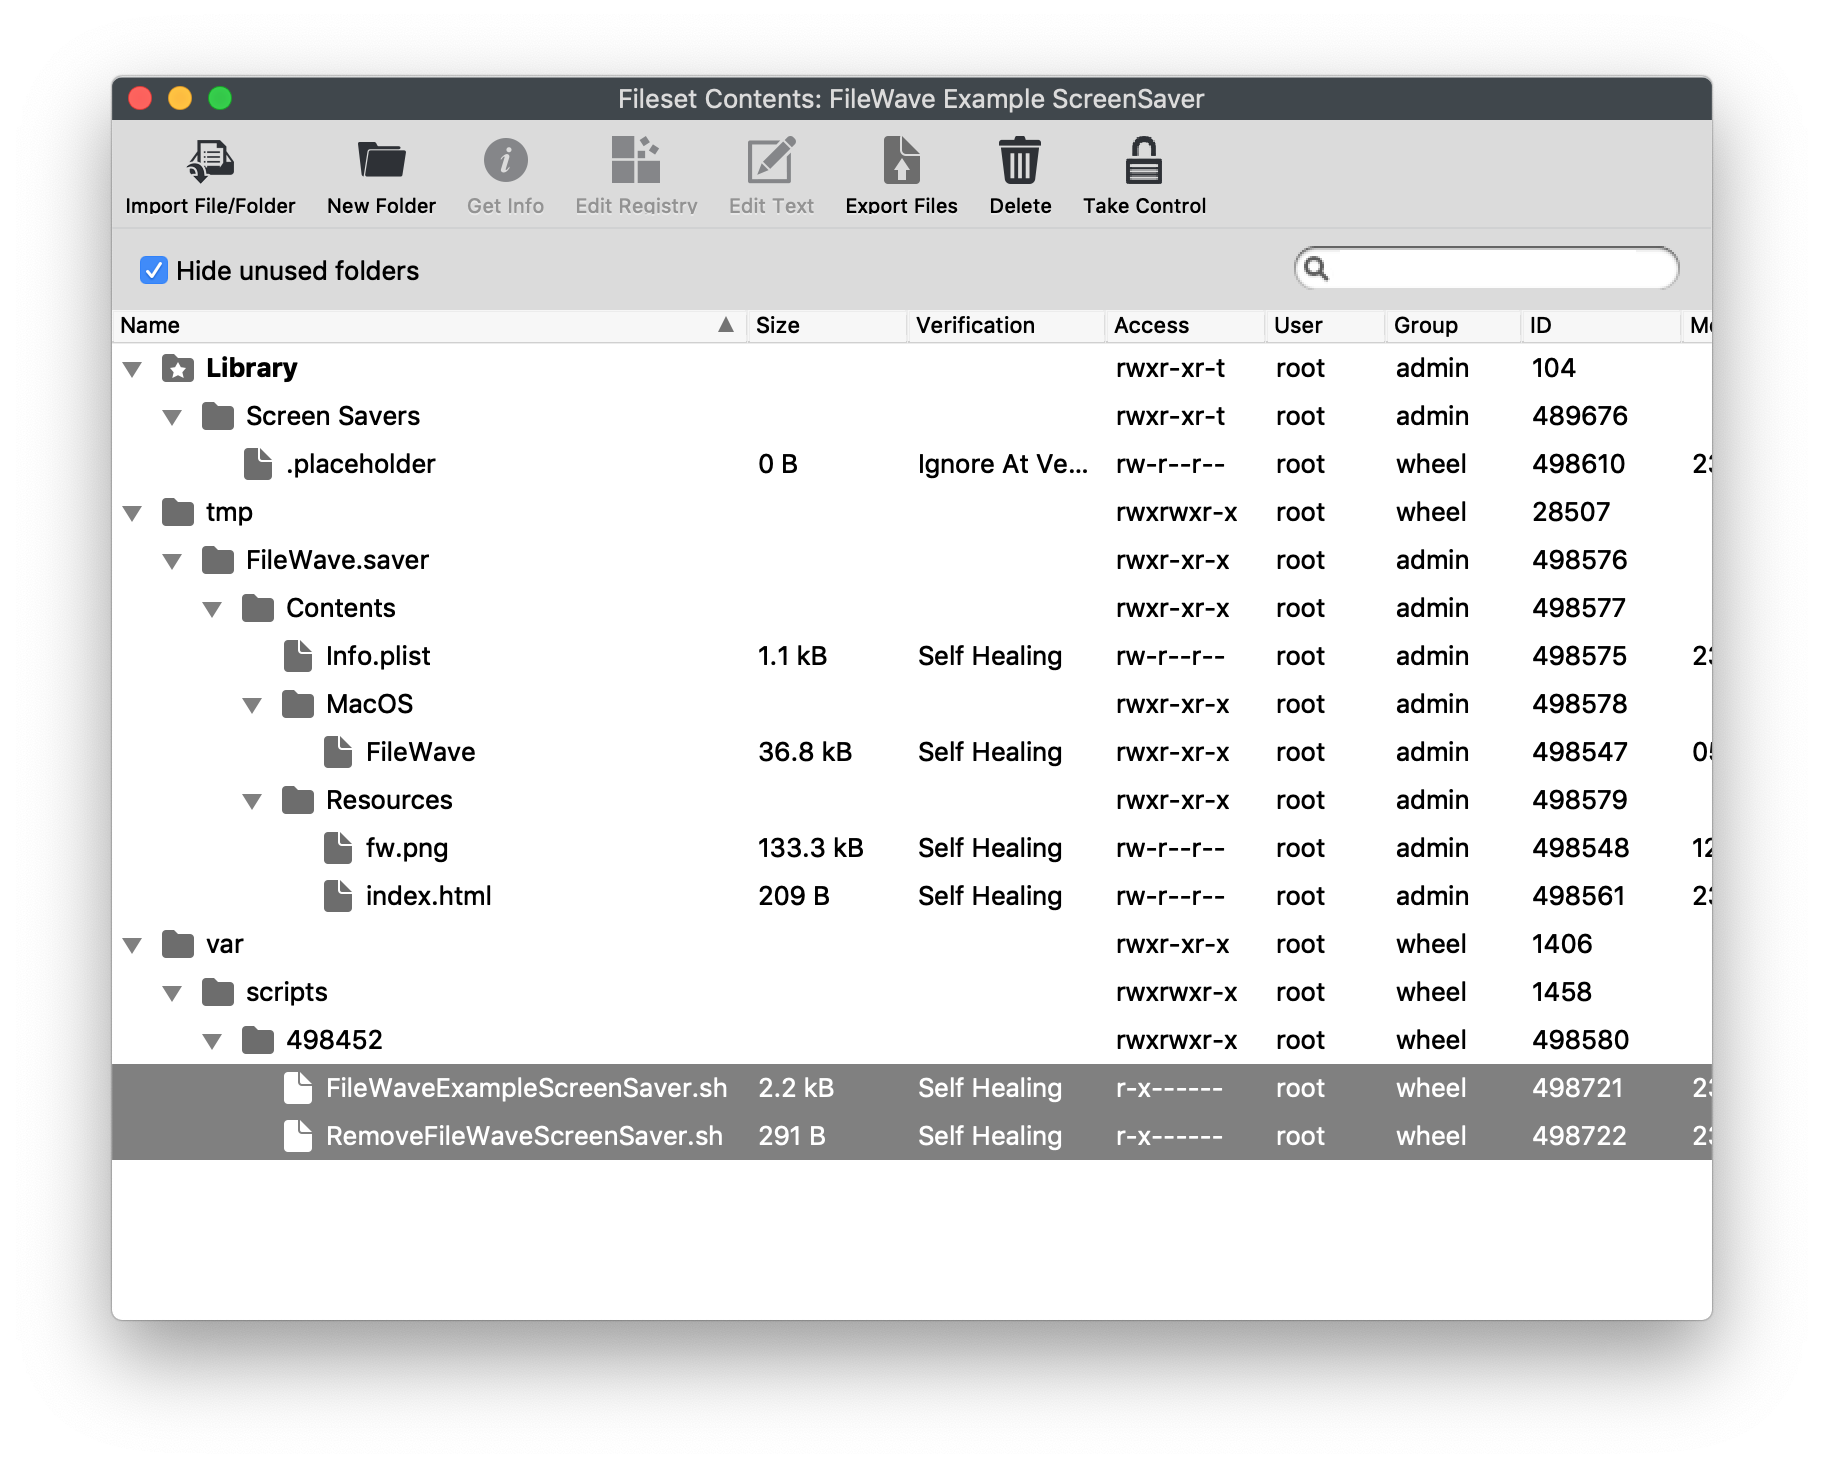
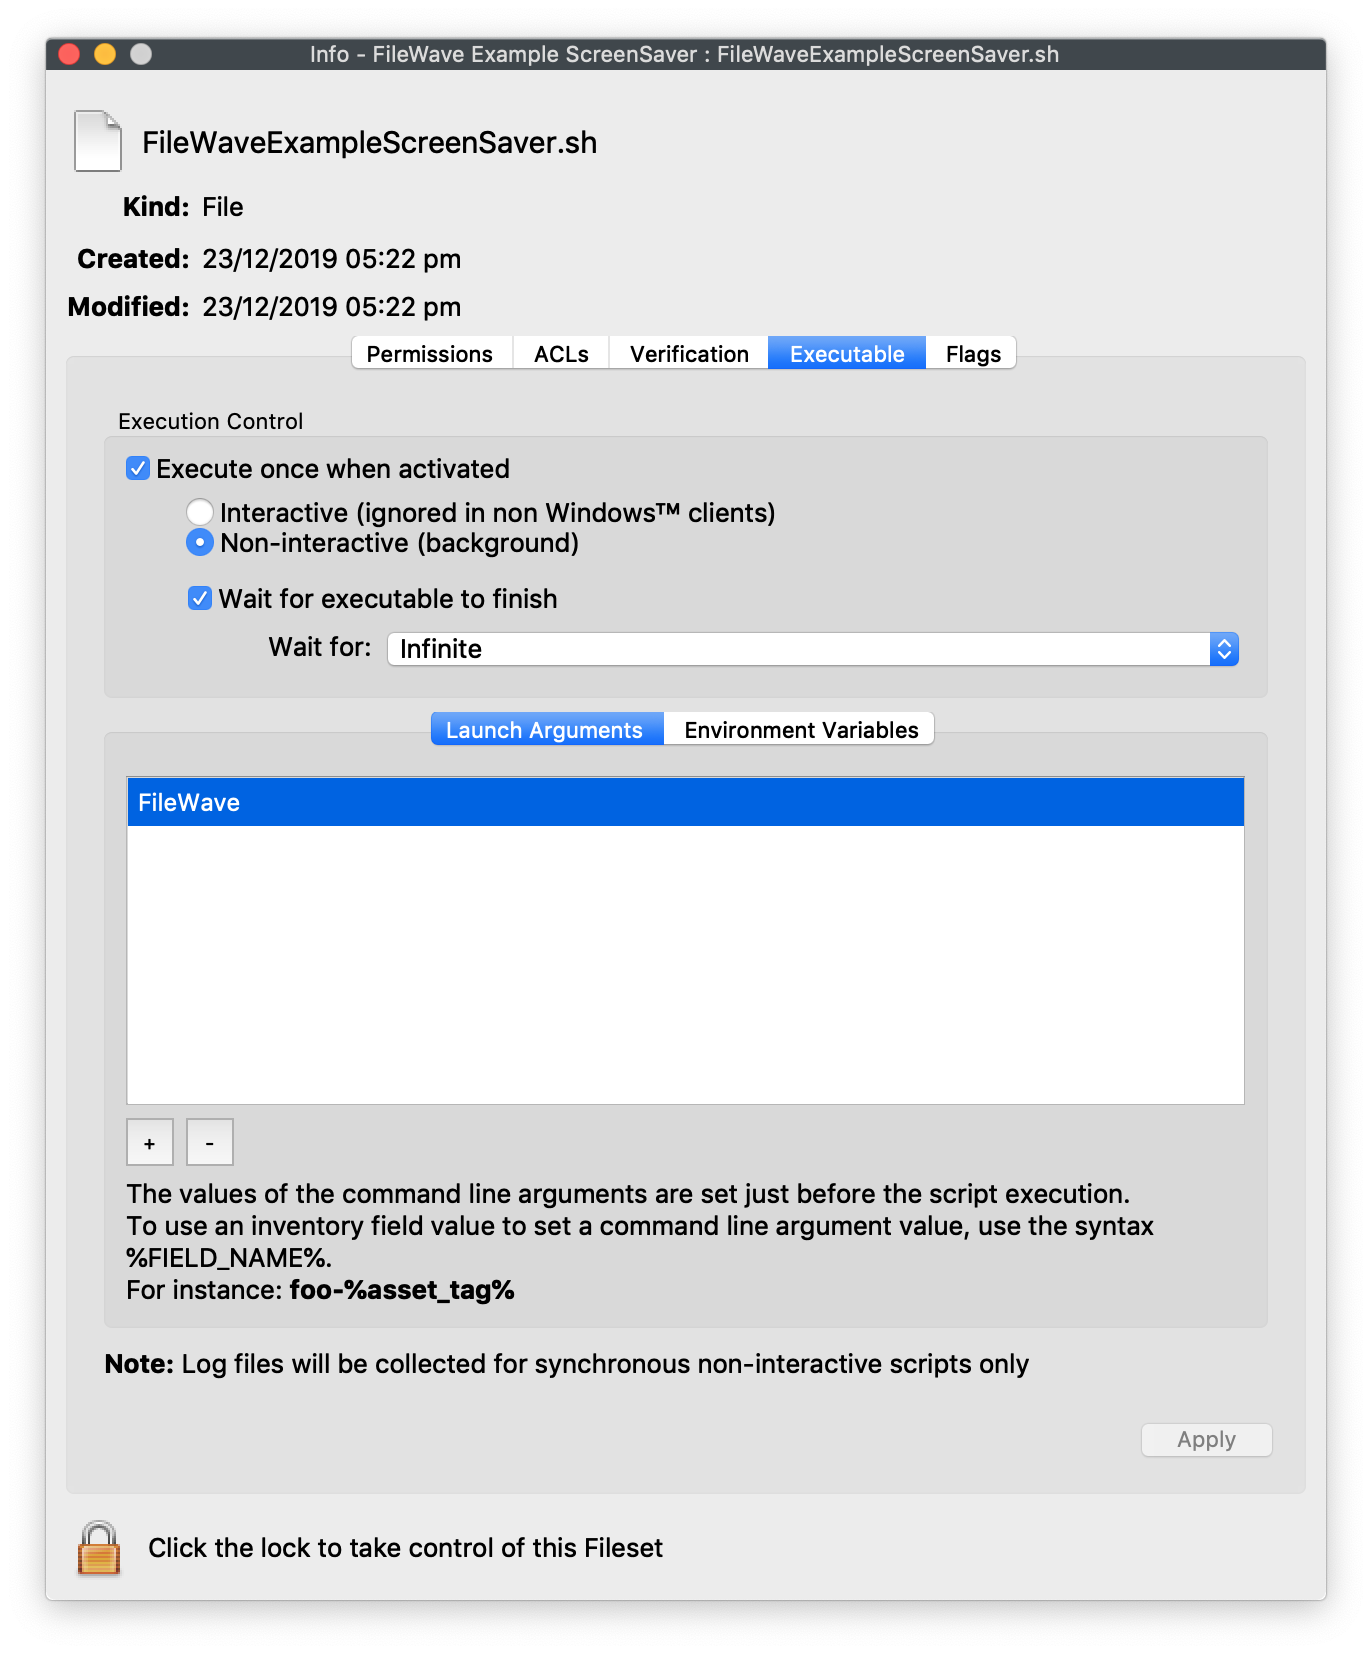
- Select Get Info > Executable.
- Set LaunchArgument 1 to the desired screen saver name, replacing
FileWave. - Repeat the same LaunchArgument change for
RemoveFileWaveScreenSaver.sh.
Customize the source file (optional)
- Replace
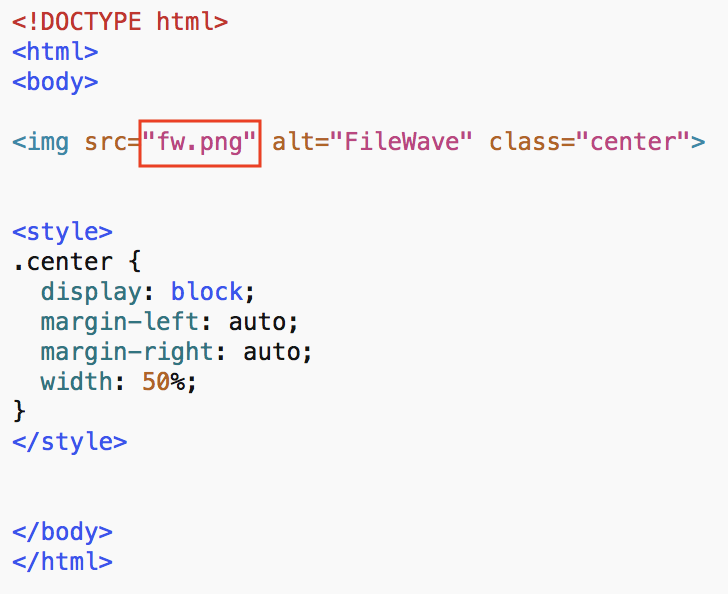
/tmp/FileWave.saver/Contents/Resources/fw.pngwith the image you want to display. - Edit
/tmp/FileWave.saver/Contents/Resources/index.htmland replacefw.pngwith the new image filename.
Optional
You can replace the entire contents of index.html with your own HTML/JavaScript if the screen saver should show more than a static image.
Test
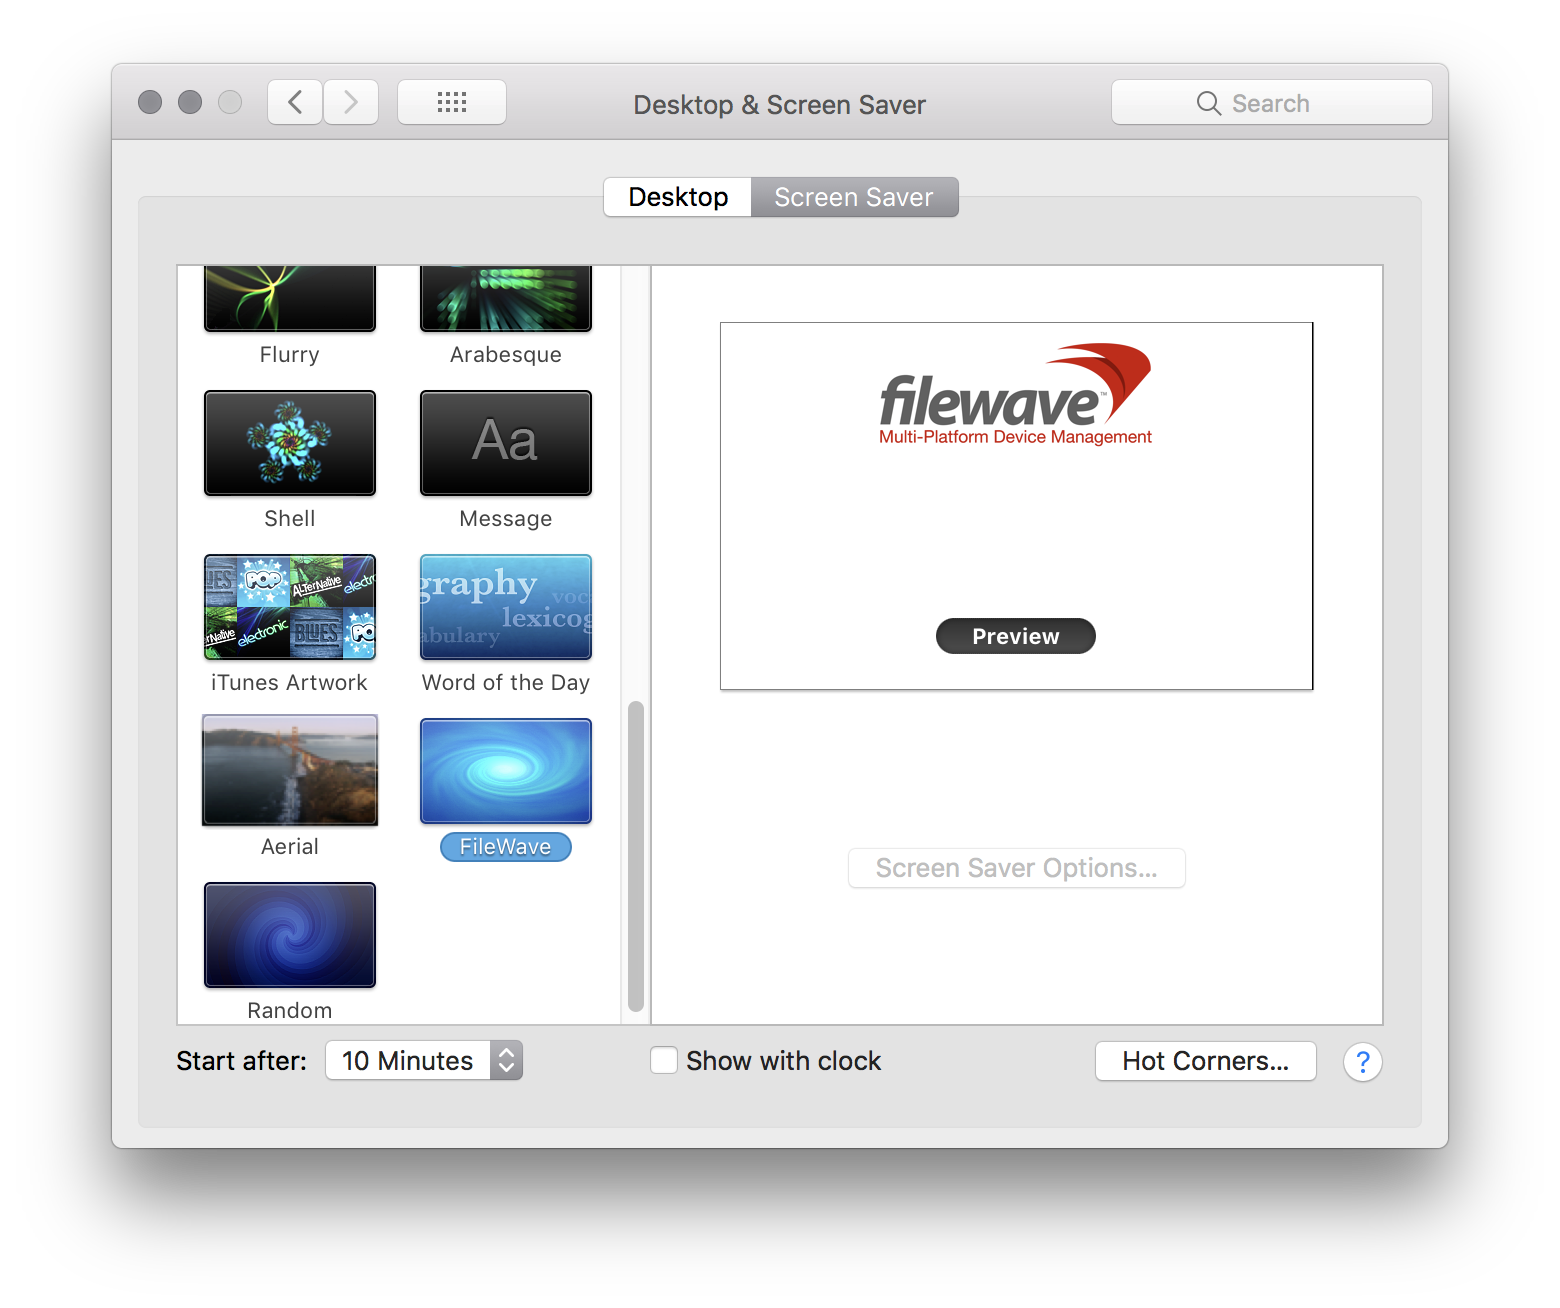
Associate the Fileset to a test Mac first. After installation, the example screen saver should appear as shown below:
Set Screen Saver as Default
- Open Profile Editor and select Login Window.
- Set Use screen saver module at path to
/Library/Screen Savers/FileWave.saver. ReplaceFileWave.saverwith your custom name if you changed it above.
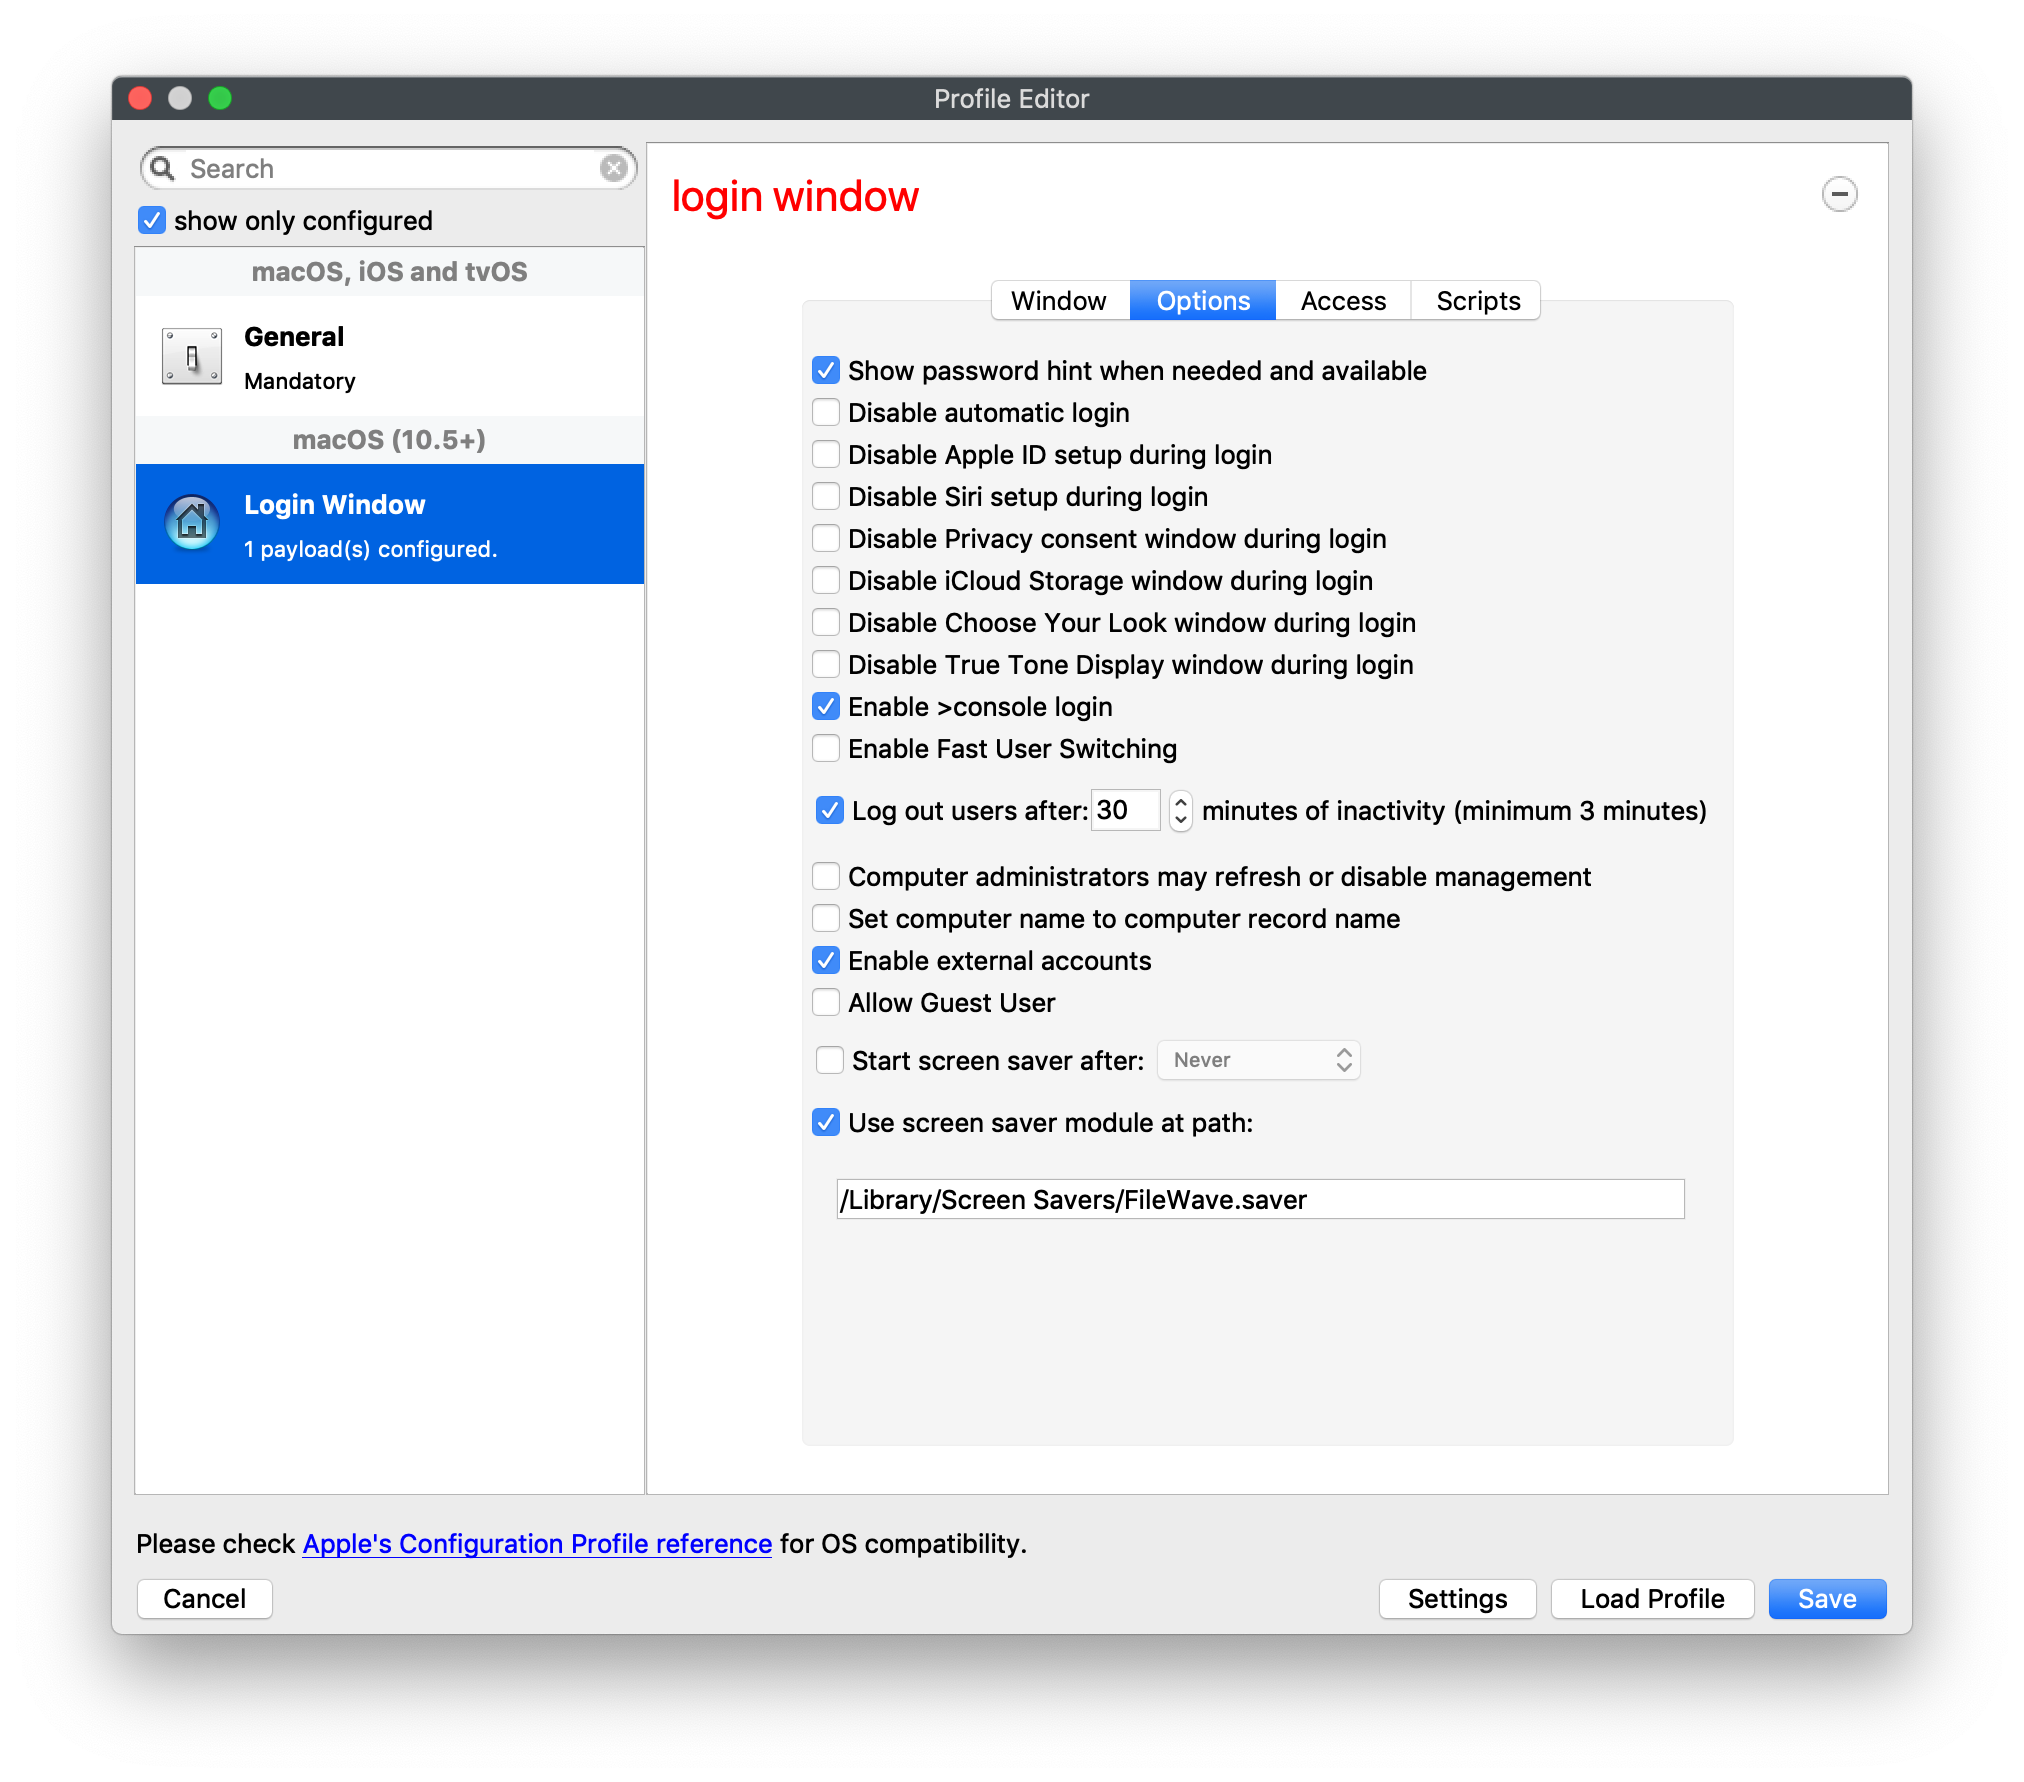
Login Window profile requirement
Edit an existing Login Window profile if you already use one. If this is your first Login Window payload, review the other profile settings before deploying it.