Creating and Deploying Images
The following articles will walk you through both capturing and deploying images to Windows computers.
- Windows Network Imaging - Capturing and Deploying Images
- Including the FileWave client on an image
- Windows Sysprep Guide
- Imaging Windows from a USB Drive
- Creating Windows Driver Filesets
- Imaging MAC Addresses (Pass-Through MAC Addresses)
- Using Smart Groups with Windows Imaging
- Windows Imaging - Import Image
Windows Network Imaging - Capturing and Deploying Images
Windows Imaging (PXE):
The following are the steps you will need, from start to finish, to create a Windows image from FileWave and send it out to your devices.
This guide assumes the following:
- FileWave Imaging Server is set up
- Devices are on the same subnet (unless the proper steps were taken to image across subnets)
- Windows devices are in the FileWave Admin with valid Mac addresses, either as an active client or a placeholder where the name isn't longer than 15 characters
IMPORTANT:
Windows does not permit computer names that exceed 15 characters (Naming conventions in Active Directory for computers, domains, sites, and OUs)
PLEASE NOTE for UEFI imaging:
If you want to create/deploy an image from/to a native UEFI machine, you will need to create a new master from a native UEFI machine using the latest IVS.
The DHCP server has to be the same as the THTP server. If not, the following error message will be thrown in the boot sequence: PXE-E99: Unexpected network error. This is caused by the PXE UEFI firmware, so PXE legacy mode should still work normally.
Prepare and download all needed parts
Before starting, be sure you have:
- FileWave Management Server and Admin
- FileWave Imaging server setup: Network Imaging Guide
- FileWave Custom Client MSI download from here
- Supported Windows devices
Procedures
Creation and Importation of an Image:
To create an image, we will need to capture it from a pre-configured device.
NOTE:
If you intend for the master image to include the FileWave Client pre-installed, please pay careful attention to the steps included in this article: Including the FileWave Client on an image.
Otherwise, you could create multiple enrollment conflicts with each freshly imaged Windows device.
Note: You will need to have the Windows device you are capturing the image from in FileWave before the capture. This can be done with either enrolling the Windows device in FileWave with the Client or using a Placeholder.
NOTE: You will only be able to deploy your image to devices with a hard drive that is larger than or equal to the captured drive. So best practice would be to capture your image on the smallest hard drive possible so that you may deploy the image to any larger drive. A VM would be perfect for this task.
-
Install a clean version of Windows
-
Make any desired changes you want to the OS, including installing the FileWave Custom Client MSI
-
Follow the guide below to create an answer file, run chkdsk, and sysprep.
Windows Sysprep - Automated Install Settings
If you have an existing answer file, then skip to the chkdsk and sysprep steps in the article
Sysprep is REQUIRED -
Once the computer has shutdown after Sysprep, you will need to make an association in FileWave
-
- It's recommended that you take a snapshot (if using a VM) here. This way, if the computer accidentally gets rebooted, you won't need to run Sysprep again.
-
-
Launch the FileWave Admin and navigate to the the Imaging section
-
Once there use the drop down menu to select Windows
This then filters the devices and images seen below for Windows
-
Now find your device on the left pane and the object called Master Image on the right pane. Click, drag, and drop Master Image to your device on the left.
This will then launch a dialog box stating that the association has been made. -
Make sure the association shows "True" under the Enabled column. If not, right-click the association and select "Enable Associations"
-
Update the Model

-
Open the FileWave Preferences, go to the Imaging tab, select your imaging server, and then click Monitor
You will need to make sure it is on the same model number as your FileWave server by waiting 2 mins or clicking the verify button
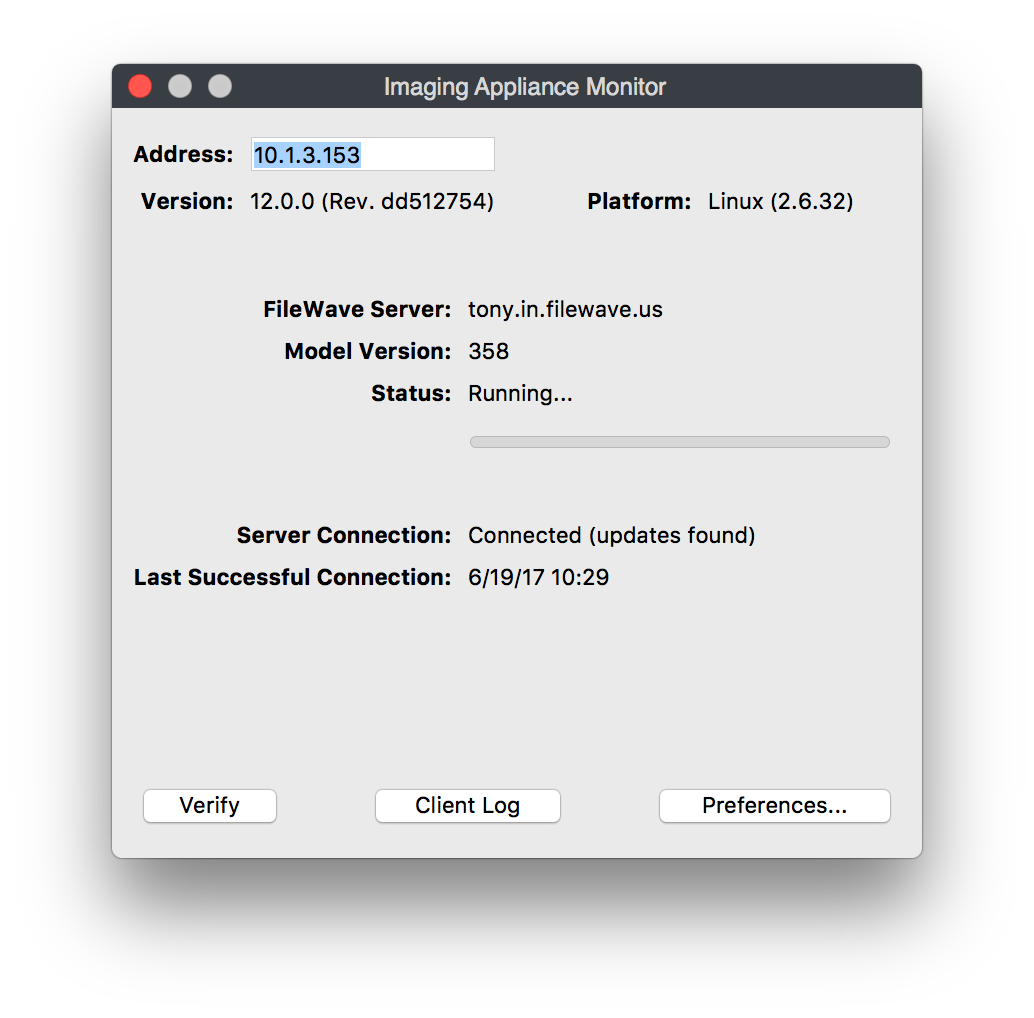
- Once the IVS is on the same model as your FileWave server you can now PXE boot your target machine for image capture.
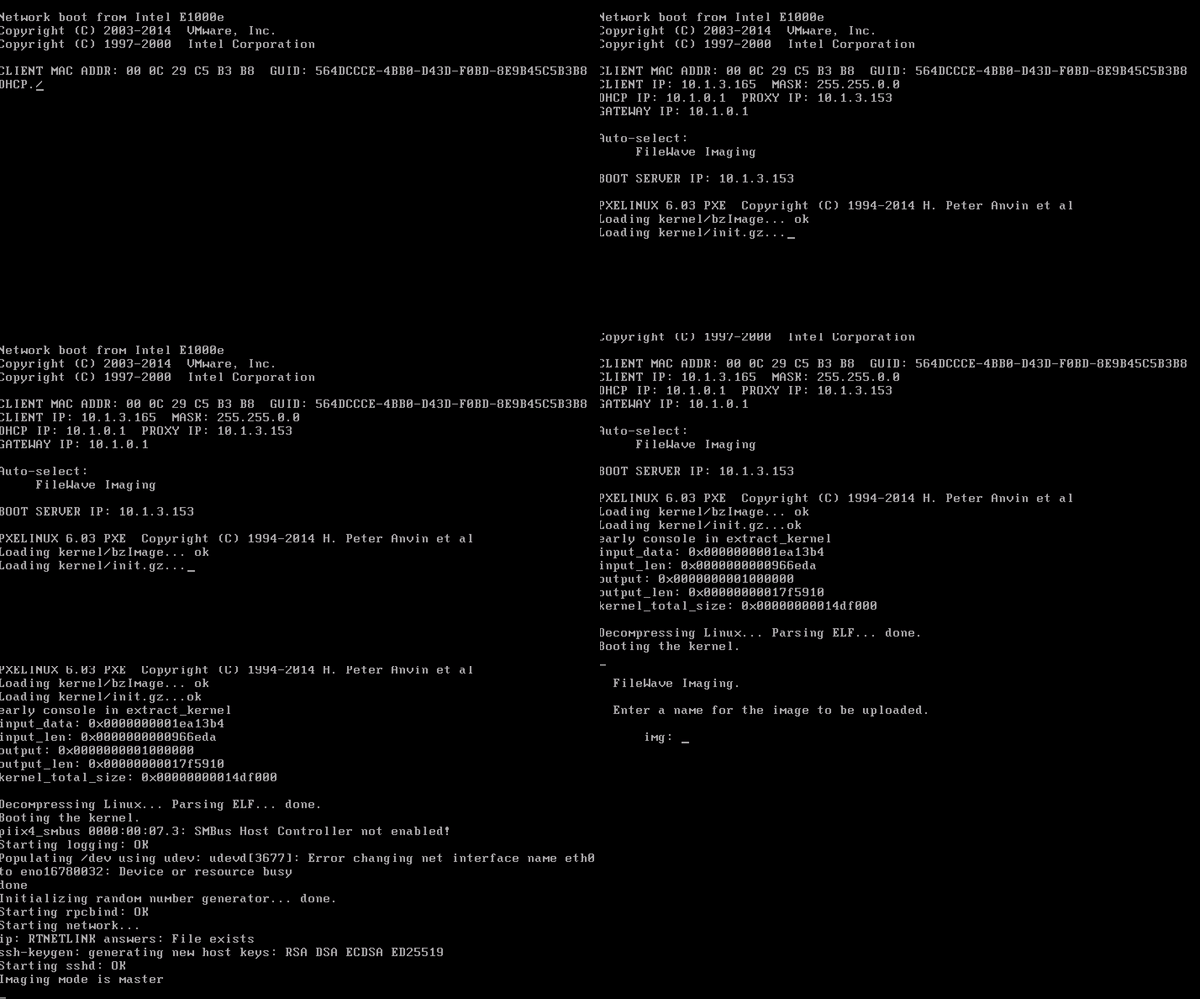
The device will then find an IP address from DHCP, see the FileWave server, and go through the booting process.
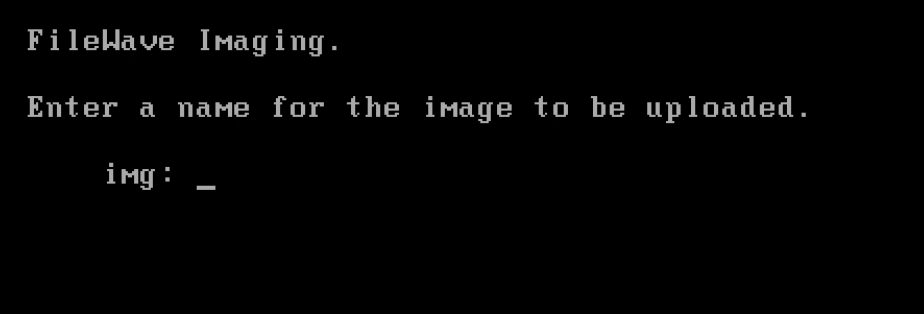
- You will then be prompted Enter a name for the image to be uploaded.

- Once you have named the image it will go through the capture process for all of the partitions.
After the IVS has captured the image it will automatically upload to your FileWave server. The image will appear in the Filesets and the Imaging section.
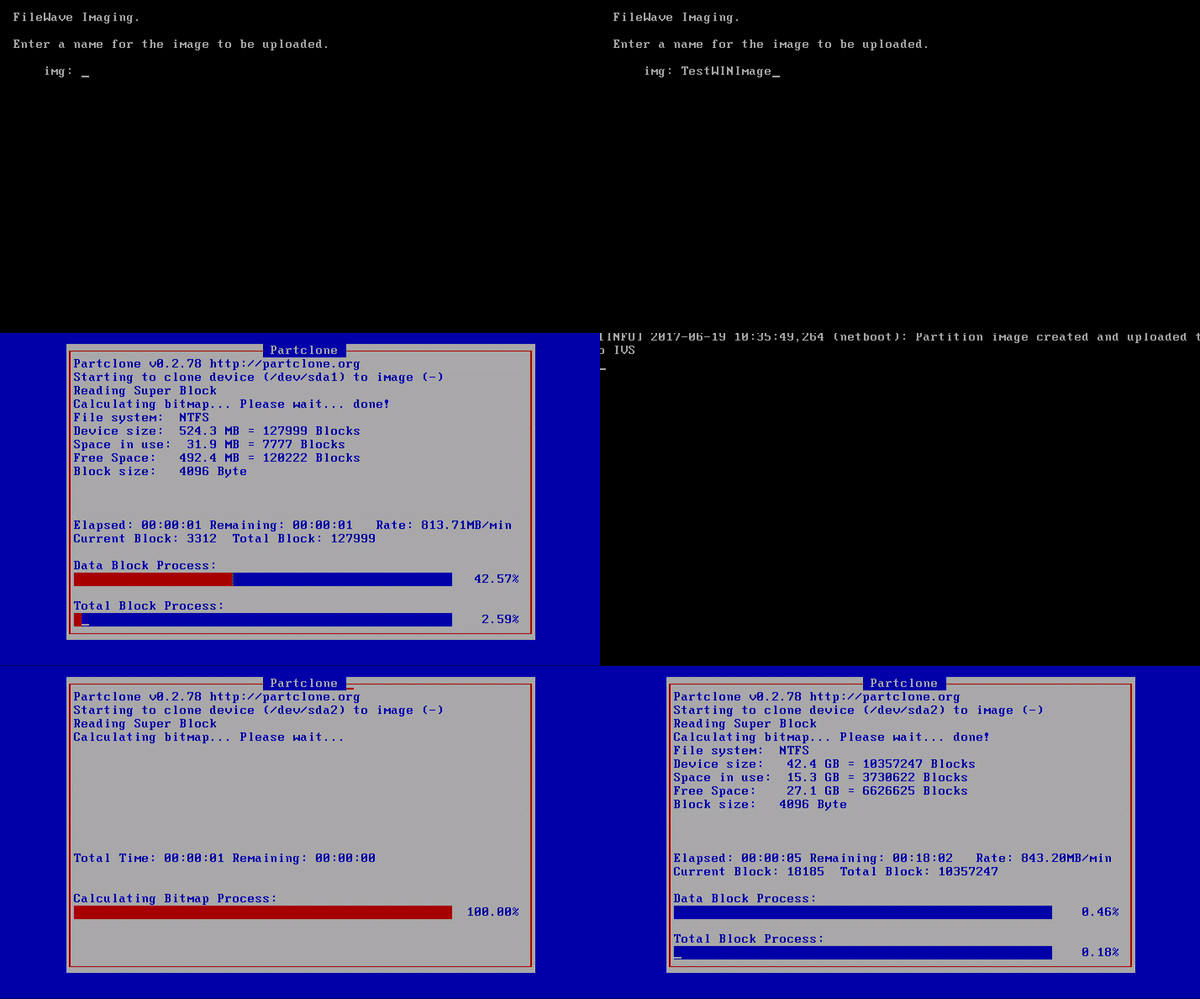
You have now successfully created an image to be deployed to your Windows machines.
Associating and deploying the Image:
To deploy an image you already have in FileWave is a very easy process and is similar to the steps above for creating an image.
-
Launch the FileWave Admin and navigate to the Imaging section
-
Once there use the drop down menu to select Windows
This then filters the devices and images for Windows -
Now find your device, or group of devices, on the left pane and your image on the right pane. Click, drag, and drop your image to the device, or group of devices, on the left.
This will then launch a dialog box stating that the association has been made.
NOTE: If you have a Driver fileset in FileWave you will follow the same steps in step 3 above to assign those drivers after you assign the image. Creating Windows Driver Filesets
NOTE: If you have association to another image (including the master image) you will need to delete that first prior to making a new image association. -
Make sure the association shows "True" under the Enabled column. If not, right-click the association and select "Enable Associations"
-
Update the Model

-
Open the FileWave Preferences, go to the Imaging tab, select your Imaging server, and then click Monitor
You will need to make sure it is on the same model number as your FileWave server by waiting 2 mins or click the verify button.
Note: If there are no other associations to this image then the image has to be transferred to your IVS before you PXE boot your devices.
-
When the imaging server is on the same model as your FileWave server (and the image has been copied over) you are now ready to PXE boot your devices.
-
Connect your Windows device to ethernet, power on the device, and hold down the F12 key. Or go into the boot menu and select to boot from the NIC
Note: Boot keys can change between hardware, you may need to check the devices manual for the correct key to push. -
Your device(s) will then find an IP address from DHCP, see the FileWave Imaging server, and go through the booting process
-
From here the image will be deployed to the machine, named accordingly to the FileWave client object, driver files will be copied over in preparation for first boot, and the machine will restart to launch into the OS.
Note: After the image process has completed the imaging association in FileWave will be disabled. You can see this by looking at the association's column Enabled is set to false.
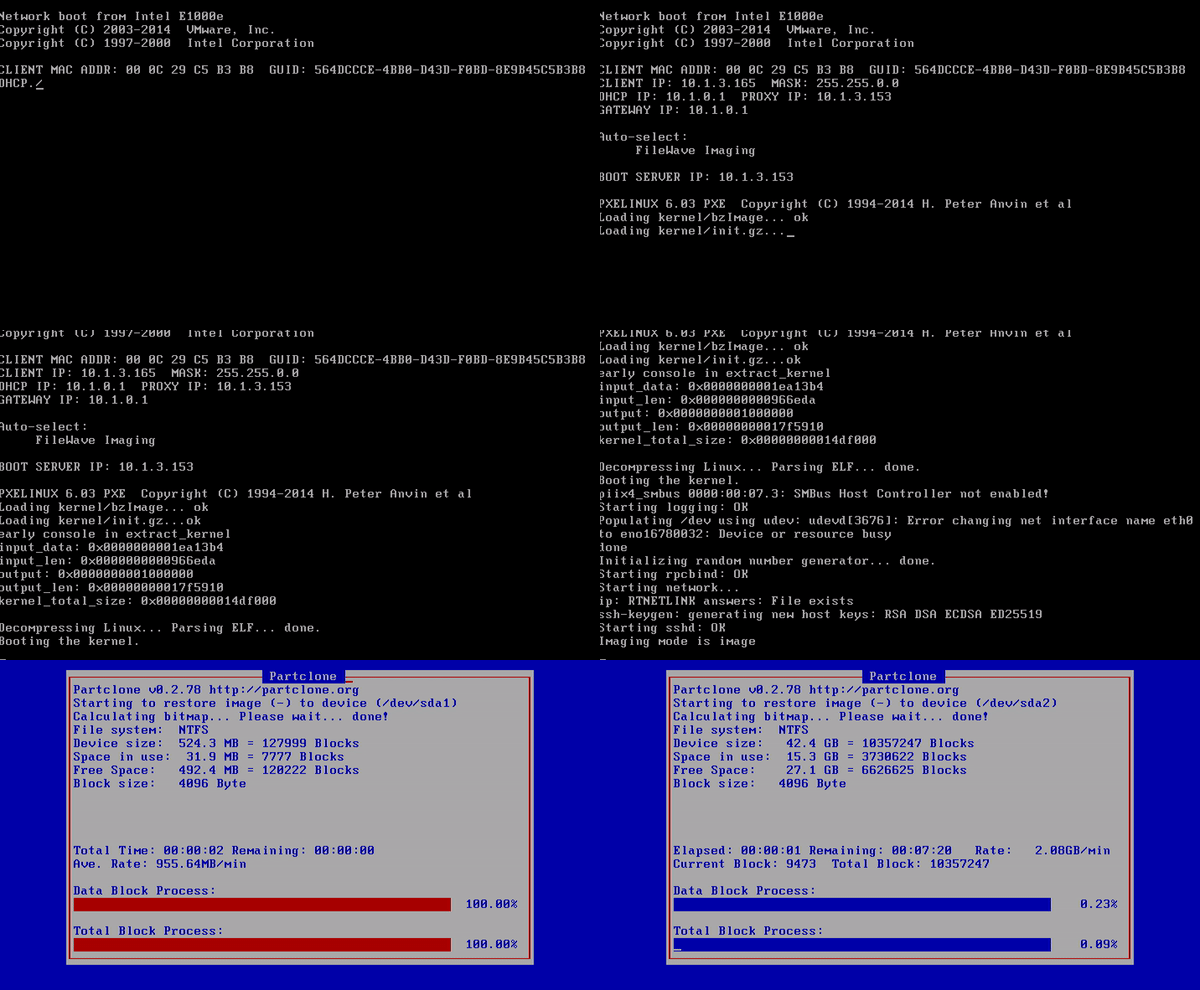
Congratulations, you have successfully associated and deployed a Windows image through the network!
Related Links:
https://kb.filewave.com/books/network-imaging-ivs/page/including-the-filewave-client-on-an-image
Including the FileWave client on an image
What
The generated Windows base image should be left as clean as possible, with any chosen installations handled afterwards to prevent having to recreate the image more often than absolutely required. However, the base image should include the FileWave Client, to ensure imaged devices check-in immediately after the imaging process. The purpose of this guide is to avoid creating duplicate enrollments (namely, the Device ID can easily be cloned if not careful) for Windows devices when imaged.
Installing the FileWave Client should take place just before Sysprep is commenced.
When/Why
The FileWave Client should be installed, prior to generating the image, using the personalized Custom MSI. The Custom MSI installer can be found here: Custom FileWave Client for Windows.
However, this source device should not be allowed to check into the FileWave Server, to ensure that the client does not have any unique configuration passed onto each imaged device or that any database entries are created for this device.
Consider using a VM and taking a snapshot before making any prior configuration changes to the base image. If a mistake is made, it will then be easy to rollback and redo that stage.
If after the FileWave Client is installed the source device is allowed to check-in, then the client service will still need to be stopped. Afterwards, the generated client record should be removed (run a Model Update after removal) and either the FileWave client should be uninstalled and re-installed, generated FileWave Client files should be removed/edited or roll the VM back, if created, to redo this step.
Files required for removal/edited may be found on the following KB: FileWave File Locations
How
-
Prepare the device as per the prior instructions
-
Disable the network for this device
-
Open the Windows Services (in preparation to stop the FileWave Client)
-
Instal the Custom MSI
-
Stop the FileWave Client service
-
Re-enable the network

The device is now ready to generate the base image with ‘Sysprep’. Next is to capture the image, be sure follow the Windows Network Imaging.
Windows Sysprep Guide


Use this guide when preparing a Windows reference device for capture and deployment with FileWave Network IVS.
Before capturing the image, run Microsoft Sysprep. Sysprep removes system-specific data from Windows and prepares the image to complete setup the next time it starts.
Basic workflow
- Build the Windows reference device the way you want deployed devices to start.
- If you need to automate setup or OOBE choices, create an answer file and save it on the reference device.
- Run Check Disk and restart.
- Run Sysprep with
/generalize /oobe /shutdown. - When the device shuts down, leave it off and capture it with FileWave IVS. If Windows starts again before capture, run Sysprep again before capturing.
Create or validate an answer file
An answer file is only needed if you want to automate Windows setup or OOBE choices after the image is deployed. If you do use one, create or validate it before running Sysprep.
For the examples below, save the file on the reference device as C:\Sysprep\unattend.xml.
If you are new to this process, start with the smallest answer file that handles the setup choices you actually need. Add disk or Windows PE settings only when you know the workflow requires them.
The Microsoft-supported method is Windows System Image Manager, which is included with the Windows Assessment and Deployment Kit (ADK). Use ADK/Windows SIM that matches the Windows version you are preparing as closely as possible.
Third-party generators can be helpful for building a starting point, but FileWave does not own or validate their output. If you use one, review the XML and test it in a lab before using it for a master image.
If a generator includes Windows PE, disk partitioning, or UEFI/GPT settings, check those settings carefully. For a normal FileWave reference-image capture, you usually only need the Sysprep answer file; Windows PE partitioning scripts are a separate clean-install workflow.
For UEFI/GPT systems, Microsoft documents the EFI System Partition as FAT32 with a minimum size of 200 MB.
Check the reference device
Run Check Disk before Sysprep. Open Command Prompt as administrator and run:
chkdsk /R
shutdown /r /t 0If Windows says the disk is in use, choose to schedule the check for the next restart, then restart with the second command.

Run Sysprep
After Check Disk completes and Windows starts again, run Sysprep from an administrator Command Prompt.
With an answer file:
C:\Windows\System32\Sysprep\sysprep.exe /generalize /oobe /shutdown /unattend:C:\Sysprep\unattend.xmlIf the answer file path contains spaces, quote the path:
C:\Windows\System32\Sysprep\sysprep.exe /generalize /oobe /shutdown /unattend:"C:\Path With Spaces\unattend.xml"Without an answer file:
C:\Windows\System32\Sysprep\sysprep.exe /generalize /oobe /shutdownWhen Sysprep finishes, the device shuts down. Do not boot it back into Windows before capture. At that point, upload the master image to the FileWave Imaging Appliance.
If Sysprep or deployment fails
- Confirm the
/unattend:path points to the actual XML file on the reference device. - Avoid spaces in the answer file path, or quote the path as shown above.
- Review
C:\Windows\System32\Sysprep\Panther\setupact.logandC:\Windows\System32\Sysprep\Panther\setuperr.log. - Run Sysprep again without an answer file. If that works, focus on the answer file, generator choices, or partitioning settings.
- If UEFI/GPT or EFI partition behavior is involved, compare the answer file or generated Windows PE script with Microsoft guidance for UEFI/GPT partitions.
- If Sysprep succeeds but capture or deployment fails, troubleshoot FileWave Network IVS separately.
Related articles
Imaging Windows from a USB Drive
What
Occasionally you might run into an issue with PXE boot for imaging, or just generally need to test the imaging process. The USB bootable image provided here is meant to be a workaround, or a tool of convenience, for imaging devices using the FileWave IVS.
Please note that FileWave 15.5.0 changed the process to mount a share and this article will need to be adjusted. If you depend on this process of imaging from USB please know that some updates are needed to how the USB config will need to be due to a VPN connection being used to secure the NFS mounts as of 15.5.0.
When/Why
There are several situations where this utility may be useful. A few examples follow:
- You are not sure broadcast forwarding is setup correctly (network troubleshooting)
- Your need to image a device at a location which does not have an IVS locally
- For deeper access to debugging imaging problems
- You can't PXE boot on a physical connection (i.e. a non-PXE supporting dongle)
- You need to image over a w-fi connection
How
Using this utility is in two parts:
- Building the USB drive
- We recommend using Rufus to write this image file to your USB drive. (Note that this is a destructive process for your USB drive)
- Imaging the device. Once you have the drive built, you will attach it to the device to be imaged, and:
- Boot up to BIOS as you would for PXE based imaging
- Choose to boot off of the bootable USB drive you attached (each BIOS will be different regarding how to do this)
- Once booted, the Linux kernel will ask you for the address of your IVS...you can enter the IP or the FQDN if you have one set.
- All things being equal, the device will now read all settings dynamically from the IVS and begin imaging your device
- Note that there is minimal error trapping with this particular setup
- All other requirements like an image being assigned to the mac address, the association being enabled, etc. still hold
Related Content
Creating Windows Driver Filesets
Description
This recipe walks through finding Windows driver packs and uploading them into FileWave for Network Imaging.
You can assign a driver Fileset only after an image association has been made.
To learn more about FileWave network imaging with Windows, including creating, assigning, and deploying an image, see the Network Imaging Guide.
Ingredients
- FileWave Central
- Internet connection
- An unarchiving tool, such as 7-Zip
Directions
-
Find the driver pack from the manufacturer. You usually need the driver package that contains the
.CABor.INFfiles. In the screenshot below, a Google search for "Dell Latitude E6410 driver pack" leads to a Dell driver pack download where the.CABfile can be downloaded.
-
After you download the driver pack, extract it. Right-click the
.CABfile and use 7-Zip to extract the files.
-
After the drivers are extracted, upload the whole driver folder into FileWave.
-
Log in to FileWave Central, go to Filesets, and select New Image Fileset. In the Create New Fileset window, choose Windows Drivers.

-
Select the extracted folder from the
.CABfile and import it into FileWave. The Windows driver Fileset appears in both the Fileset and Imaging sections. It remains red until the import finishes. -
When the Fileset turns black, associate the drivers in the Imaging section. FileWave sends these drivers to the device during the network imaging process.
-
In the Imaging section, find the device or device group in the left pane and find the driver Fileset in the right pane. Click, drag, and drop the driver Fileset onto the device or group.
The drivers deploy with the image that is already assigned to the device.

Imaging MAC Addresses (Pass-Through MAC Addresses)
What
For Windows imaging, FileWave can store a manually entered Imaging MAC Address separately from the MAC addresses the client reports through inventory. This matters when the imaging address belongs to a USB Ethernet adapter, or is a pass-through MAC address, and is not always active on the device. Keeping the imaging value separate prevents inventory updates from overwriting the address IVS should use.
When/Why
Some Windows devices expose a pass-through MAC address for USB Ethernet adapters. Instead of using the adapter's own MAC address, the adapter presents a device-specific address. This avoids many devices sharing the same adapter MAC address, but the pass-through address may not appear in FileWave inventory unless it is active during inventory reporting.
How
Use the editable "Imaging MAC Address" column in views that show clients, such as Clients, Imaging, and Associations. When you enter an Imaging MAC Address for a Windows client, FileWave stores it separately from "Serial/MAC". The value can be set in these cases:
- When a placeholder is created
- When a placeholder is imported from a text file
When "Imaging MAC Address" is set for an added client, the "Serial/MAC" column is unchanged. Because this field is used for Windows imaging, it does not create enrollment conflicts; serial/MAC enrollment conflicts apply to macOS.

IVS recognizes Windows client MAC addresses reported to inventory and the manually specified Imaging MAC Address, if one exists.
You can also mass-import Imaging MAC Addresses with the import tool in the web admin console.
Using Smart Groups with Windows Imaging
What
With versions of FileWave earlier than 14, smart groups would not show in the imaging view of the FileWave admin. With v14(+), smart groups are now available for image association.
When/Why
Why do smart groups improve the ability to image? Before the advent of custom fields, the lack of smart groups in imaging didn't matter too much, but with custom fields FileWave can quite easily determine the make and model of a particular device or if the device is UEFI or MBR. And this matters for smart groups, because then that allows us too much more easily assign the proper image and driver packs.
Consider the following simple (imaginary) environment:
- 1000 Windows devices, all needing re-imaged this summer
- 3 Make/model combinations (Lenovo P50, Dell 5550, HP 1210)
- The Lenovo is UEFI, the others are all MBR
- Two base Windows images: one for UEFI, one MBR
If we had to mass image the above, we only had two options previously: create image associations one by one, or associate to a group. But, to associate easily to groups, the logical thing would be to create smart groups by device type rather than having to organize the devices manually. Thus, the inability to use smart groups for imaging began to be a severe restriction for easy imaging association. This restriction is no more.
How
Associating images & driver packs to a smart group is the same as any other imaging association, as shown below:
Smart groups will only show in the Imaging view if there are Windows devices in them. Also note that the association is not really to the group, but rather just to the devices in that group at that exact moment. (This is the same way assigning images to a manual group has always worked.)
Windows Imaging - Import Image
What
The Import Image option in Filesets > New Fileset > Microsoft imports an existing FileWave Windows imaging folder into the current FileWave environment as a Windows imaging fileset.
Use it when you already have a FileWave-formatted Windows image folder and want to bring it into FileWave without capturing the image again.
After the import, the image becomes a normal Windows imaging fileset that can be assigned in the Imaging area just like an image created through the standard capture workflow.
Important: This is not for a raw WIM, ISO, VHD/VMDK, or an exported .fileset package. If you have a .fileset or .fwtemplate package, use the regular Import Fileset workflow instead.
When/Why
Use Import Image when:
- you already have a FileWave image folder from an earlier capture
- you want to reuse an existing FileWave image instead of building and capturing it again
- PXE capture is inconvenient in the current environment, but the FileWave image folder already exists
- you need to bring an existing FileWave image folder into another FileWave server or admin workflow
This option is helpful when the image already exists in FileWave's imaging format and the real goal is simply to ingest it into the current environment.
If what you have is a FileWave export package, use Import Fileset. If what you have is a generic Windows imaging artifact like a WIM or ISO, this menu option is not the right workflow.
How
1) Confirm you have the right source folder
A valid Import Image source is a folder that contains the FileWave imaging metadata file and the image parts that belong to it.
At minimum, the folder needs:
image.json- the image files referenced inside
image.json
If those required files are missing, FileWave will reject the import.
2) Open the Import Image workflow
- Open FileWave Admin.
- Go to Filesets.
- Click New Fileset.
- Select Microsoft.
- Under Imaging, click Import Image.

3) Select the image folder
- Browse to the existing FileWave image folder.
- Select the folder itself.
- Confirm the import.
Do not select an individual .img file.
Do not use this workflow for a .fileset package.
4) Let FileWave create the imaging fileset
When the folder is valid, FileWave creates a Windows imaging fileset and uploads the referenced image data into the current FileWave environment.
The imported item will appear as an image fileset in Filesets, and it can then be used in Imaging.
5) Assign the imported image
After the import finishes:
- Open the Imaging area.
- Drag the imported image onto the target device, placeholder, or group.
- Optionally add a Windows Drivers fileset.
- Run Update Model.
- Allow the IVS to download the image before attempting deployment.
From that point forward, deployment works the same way as any other FileWave Windows image.
6) Troubleshoot common import failures
If FileWave shows an error that the folder does not contain the required files, verify that:
image.jsonis present- every image file referenced by
image.jsonis present in the same folder - you selected the folder, not a single file inside it
If the image was exported as a .fileset, use Import Fileset instead.
If you only have a WIM, ISO, or virtual disk file, you do not yet have a FileWave image folder for this workflow.
Related Content
- Windows Network Imaging - Capturing and Deploying Images
- Creating Windows Driver Filesets
- Including the FileWave client on an image
- FileWave Fileset Types
Digging Deeper
The confusing part is that FileWave has two different import ideas that sound similar but are not the same thing.
- Import Fileset is for FileWave package exports such as
.filesetand.fwtemplate - Import Image is for a Windows imaging folder that is already in FileWave's imaging format
That distinction is easy to miss in the UI, so it is worth calling out directly in support responses and in related KB content.