Windows Network Imaging - Capturing and Deploying Images
Windows Imaging (PXE):
The following are the steps you will need, from start to finish, to create a Windows image from FileWave and send it out to your devices.
This guide assumes the following:
- FileWave Imaging Server is set up
- Devices are on the same subnet (unless the proper steps were taken to image across subnets)
- Windows devices are in the FileWave Admin with valid Mac addresses, either as an active client or a placeholder where the name isn't longer than 15 characters
IMPORTANT:
Windows does not permit computer names that exceed 15 characters (Naming conventions in Active Directory for computers, domains, sites, and OUs)
PLEASE NOTE for UEFI imaging:
If you want to create/deploy an image from/to a native UEFI machine, you will need to create a new master from a native UEFI machine using the latest IVS.
The DHCP server has to be the same as the THTP server. If not, the following error message will be thrown in the boot sequence: PXE-E99: Unexpected network error. This is caused by the PXE UEFI firmware, so PXE legacy mode should still work normally.
Prepare and download all needed parts
Before starting, be sure you have:
- FileWave Management Server and Admin
- FileWave Imaging server setup: Network Imaging Guide
- FileWave Custom Client MSI download from here
- Supported Windows devices
Procedures
Creation and Importation of an Image:
To create an image, we will need to capture it from a pre-configured device.
NOTE:
If you intend for the master image to include the FileWave Client pre-installed, please pay careful attention to the steps included in this article: Including the FileWave Client on an image.
Otherwise, you could create multiple enrollment conflicts with each freshly imaged Windows device.
Note: You will need to have the Windows device you are capturing the image from in FileWave before the capture. This can be done with either enrolling the Windows device in FileWave with the Client or using a Placeholder.
NOTE: You will only be able to deploy your image to devices with a hard drive that is larger than or equal to the captured drive. So best practice would be to capture your image on the smallest hard drive possible so that you may deploy the image to any larger drive. A VM would be perfect for this task.
-
Install a clean version of Windows
-
Make any desired changes you want to the OS, including installing the FileWave Custom Client MSI
-
Follow the guide below to create an answer file, run chkdsk, and sysprep.
Windows Sysprep - Automated Install Settings
If you have an existing answer file, then skip to the chkdsk and sysprep steps in the article
Sysprep is REQUIRED -
Once the computer has shutdown after Sysprep, you will need to make an association in FileWave
-
- It's recommended that you take a snapshot (if using a VM) here. This way, if the computer accidentally gets rebooted, you won't need to run Sysprep again.
-
-
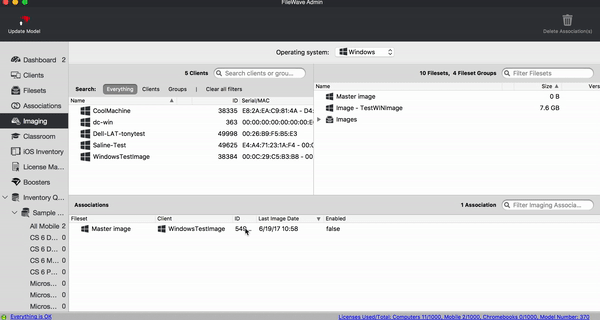
Launch the FileWave Admin and navigate to the the Imaging section
-
Once there use the drop down menu to select Windows
This then filters the devices and images seen below for Windows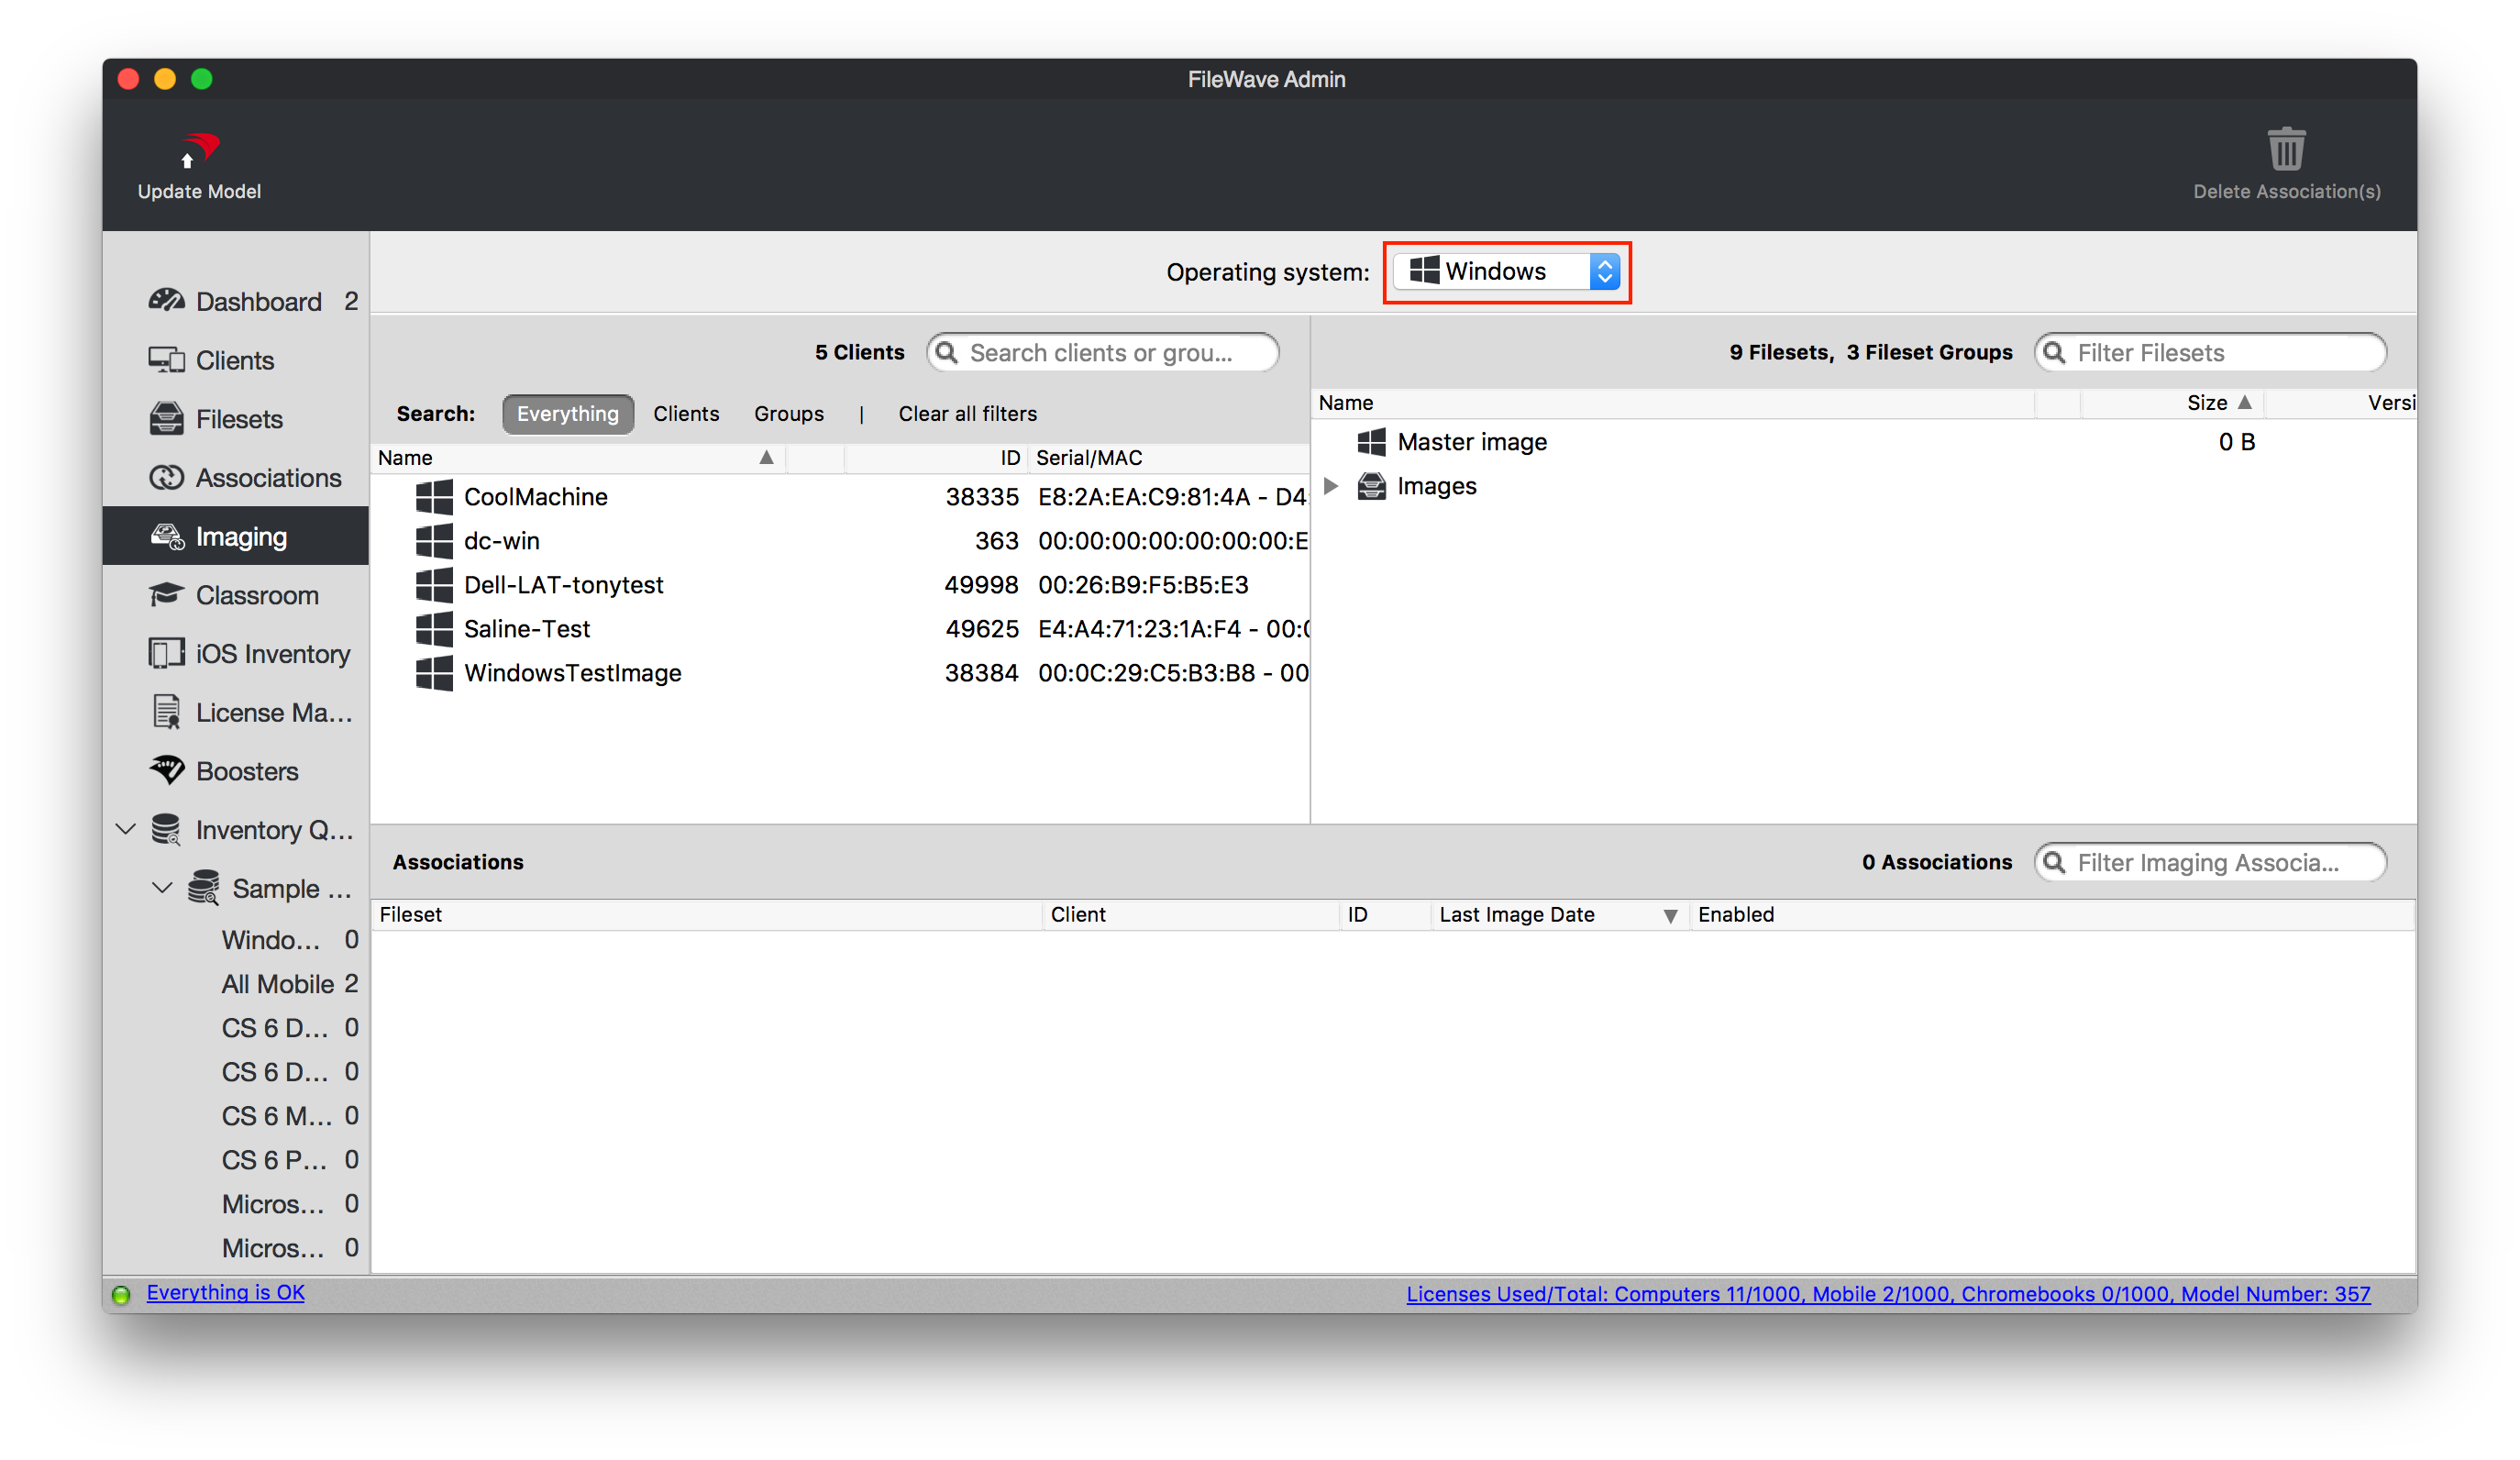
-
Now find your device on the left pane and the object called Master Image on the right pane. Click, drag, and drop Master Image to your device on the left.
This will then launch a dialog box stating that the association has been made. -
Make sure the association shows "True" under the Enabled column. If not, right-click the association and select "Enable Associations"
-
Update the Model
-
Open the FileWave Preferences, go to the Imaging tab, select your imaging server, and then click Monitor
You will need to make sure it is on the same model number as your FileWave server by waiting 2 mins or clicking the verify button
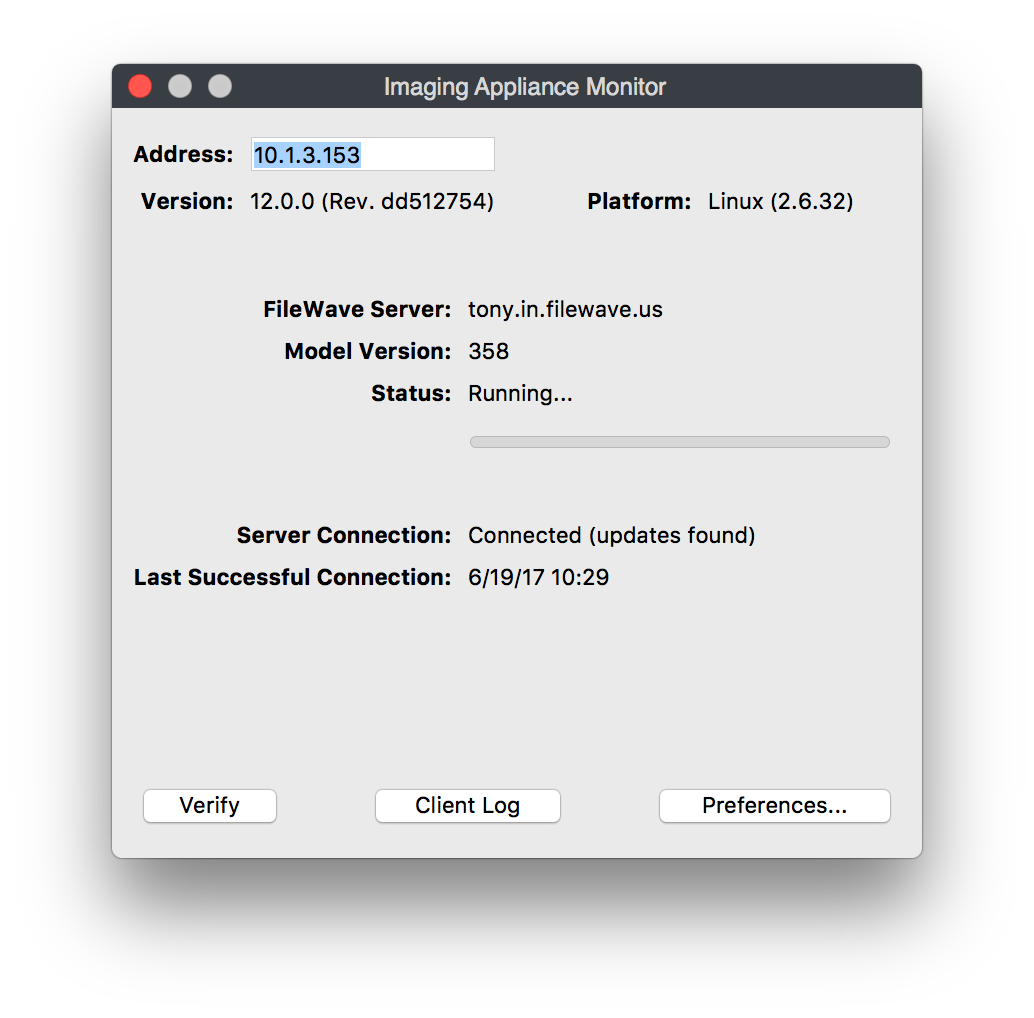
- Once the IVS is on the same model as your FileWave server you can now PXE boot your target machine for image capture.
The device will then find an IP address from DHCP, see the FileWave server, and go through the booting process.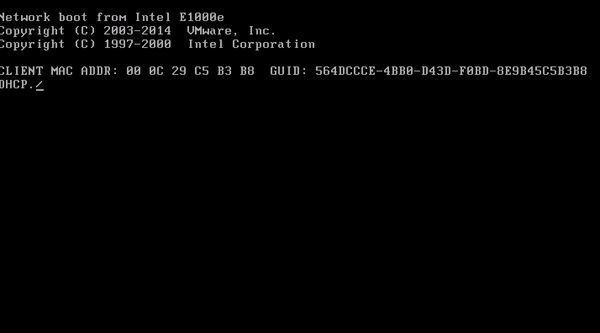
- You will then be prompted Enter a name for the image to be uploaded.

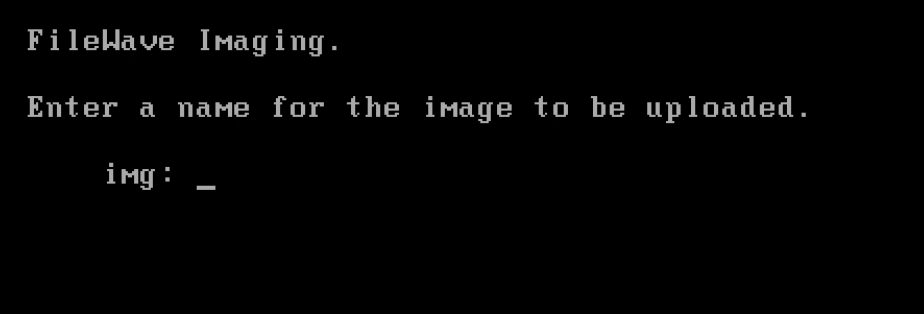
- Once you have named the image it will go through the capture process for all of the partitions.
After the IVS has captured the image it will automatically upload to your FileWave server. The image will appear in the Filesets and the Imaging section.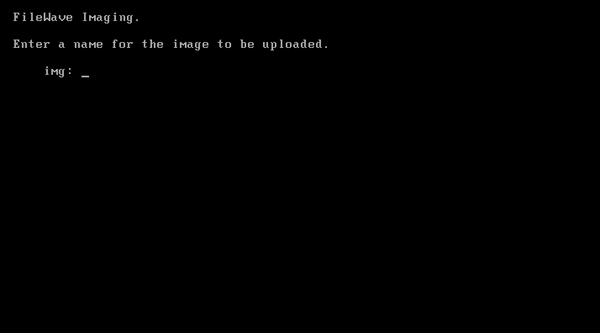
You have now successfully created an image to be deployed to your Windows machines.
Associating and deploying the Image:
To deploy an image you already have in FileWave is a very easy process and is similar to the steps above for creating an image.
-
Launch the FileWave Admin and navigate to the Imaging section
-
Once there use the drop down menu to select Windows
This then filters the devices and images for Windows -
Now find your device, or group of devices, on the left pane and your image on the right pane. Click, drag, and drop your image to the device, or group of devices, on the left.
This will then launch a dialog box stating that the association has been made.
NOTE: If you have a Driver fileset in FileWave you will follow the same steps in step 3 above to assign those drivers after you assign the image. Creating Windows Driver Filesets
NOTE: If you have association to another image (including the master image) you will need to delete that first prior to making a new image association. -
Make sure the association shows "True" under the Enabled column. If not, right-click the association and select "Enable Associations"
-
Update the Model
-
Open the FileWave Preferences, go to the Imaging tab, select your Imaging server, and then click Monitor
You will need to make sure it is on the same model number as your FileWave server by waiting 2 mins or click the verify button.
Note: If there are no other associations to this image then the image has to be transferred to your IVS before you PXE boot your devices.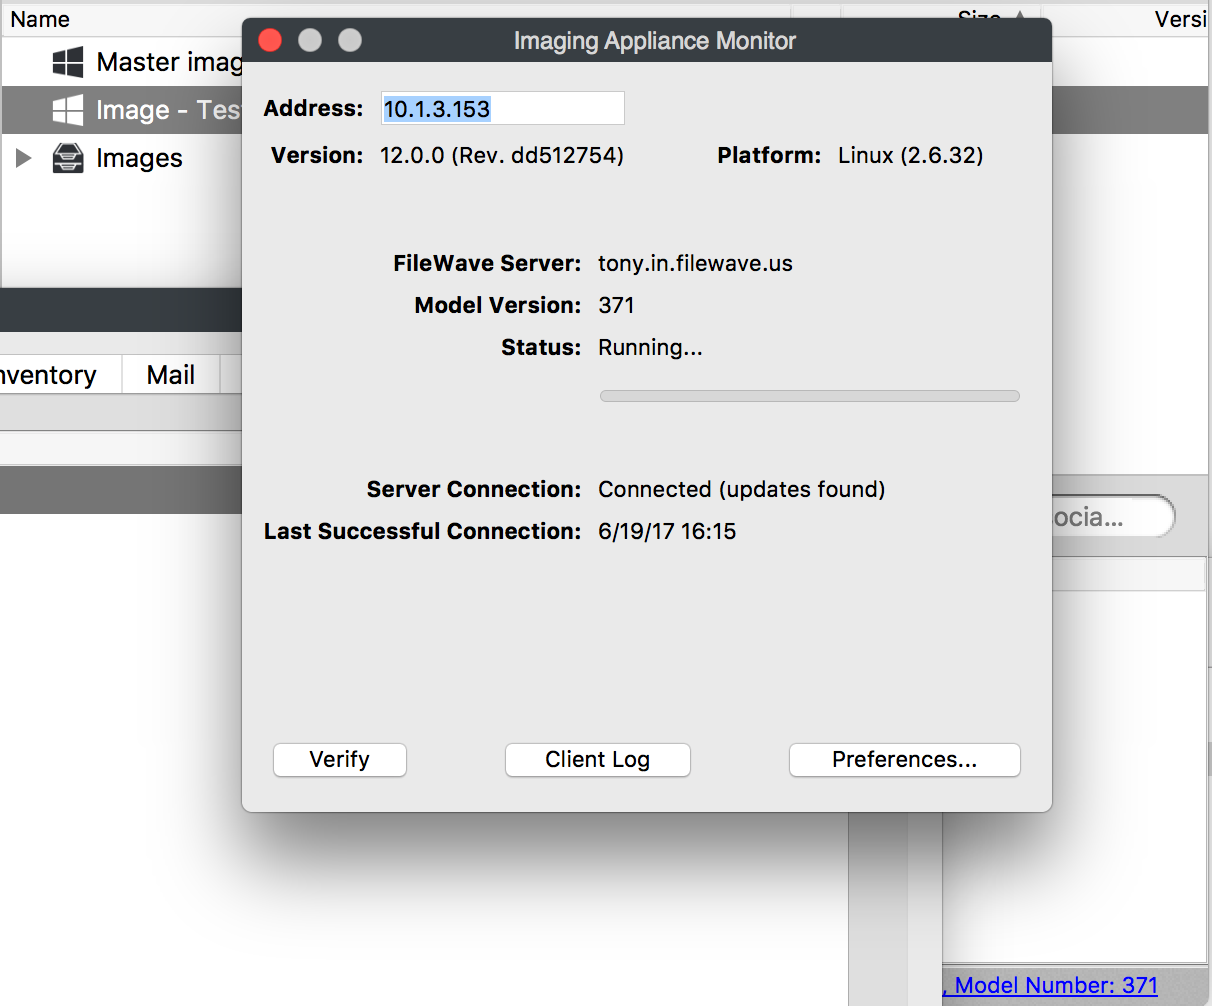
-
When the imaging server is on the same model as your FileWave server (and the image has been copied over) you are now ready to PXE boot your devices.
-
Connect your Windows device to ethernet, power on the device, and hold down the F12 key. Or go into the boot menu and select to boot from the NIC
Note: Boot keys can change between hardware, you may need to check the devices manual for the correct key to push. -
Your device(s) will then find an IP address from DHCP, see the FileWave Imaging server, and go through the booting process
-
From here the image will be deployed to the machine, named accordingly to the FileWave client object, driver files will be copied over in preparation for first boot, and the machine will restart to launch into the OS.
Note: After the image process has completed the imaging association in FileWave will be disabled. You can see this by looking at the association's column Enabled is set to false.
Congratulations, you have successfully associated and deployed a Windows image through the network!
Related Links:
https://kb.filewave.com/books/network-imaging-ivs/page/including-the-filewave-client-on-an-image
No comments to display
No comments to display