CrowdStrike Falcon Protection (macOS)
Description
Needing to deploy to CrowdStrike Falcon antivirus to your macOS fleet? FileWave has you covered.
CrowdStrike's flagship product is called Falcon, which is a cloud-native platform that combines next-generation antivirus, endpoint detection and response (EDR), threat intelligence, and proactive threat hunting. Falcon aims to provide real-time visibility into endpoint activity, rapid threat detection, and automated response to security incidents.
Ingredients
- FileWave Admin Central
- CrowdStrike Falcon Profiles
- One for macOS Sonoma and earlier
- One for macOS Sequoia and later
- CrowdStrike PKG installer
- CrowdStrike License code
Directions
Deploying the CrowdStrike Falcon to your devices
CrowdStrike deployment on macOS requires three filesets: two TCC profiles and the PKG installer. The required TCC profiles depend on the macOS version in your environment. Screenshot examples are included in this article as a reference if you choose to create the profiles manually.
The PKG installer should also include two scripts that apply your CrowdStrike Falcon license and verify that the appropriate TCC profile is installed before the CrowdStrike application is deployed.
Download TCC profile
Note: Please log in to your CrowdStrike portal and download the latest TCC profiles. The screenshots below are provided for reference if you choose to create the TCC profiles manually.
Falcon Configuration Profile for Sonoma and earlier:
Sonoma and earlier TCC Profile
|
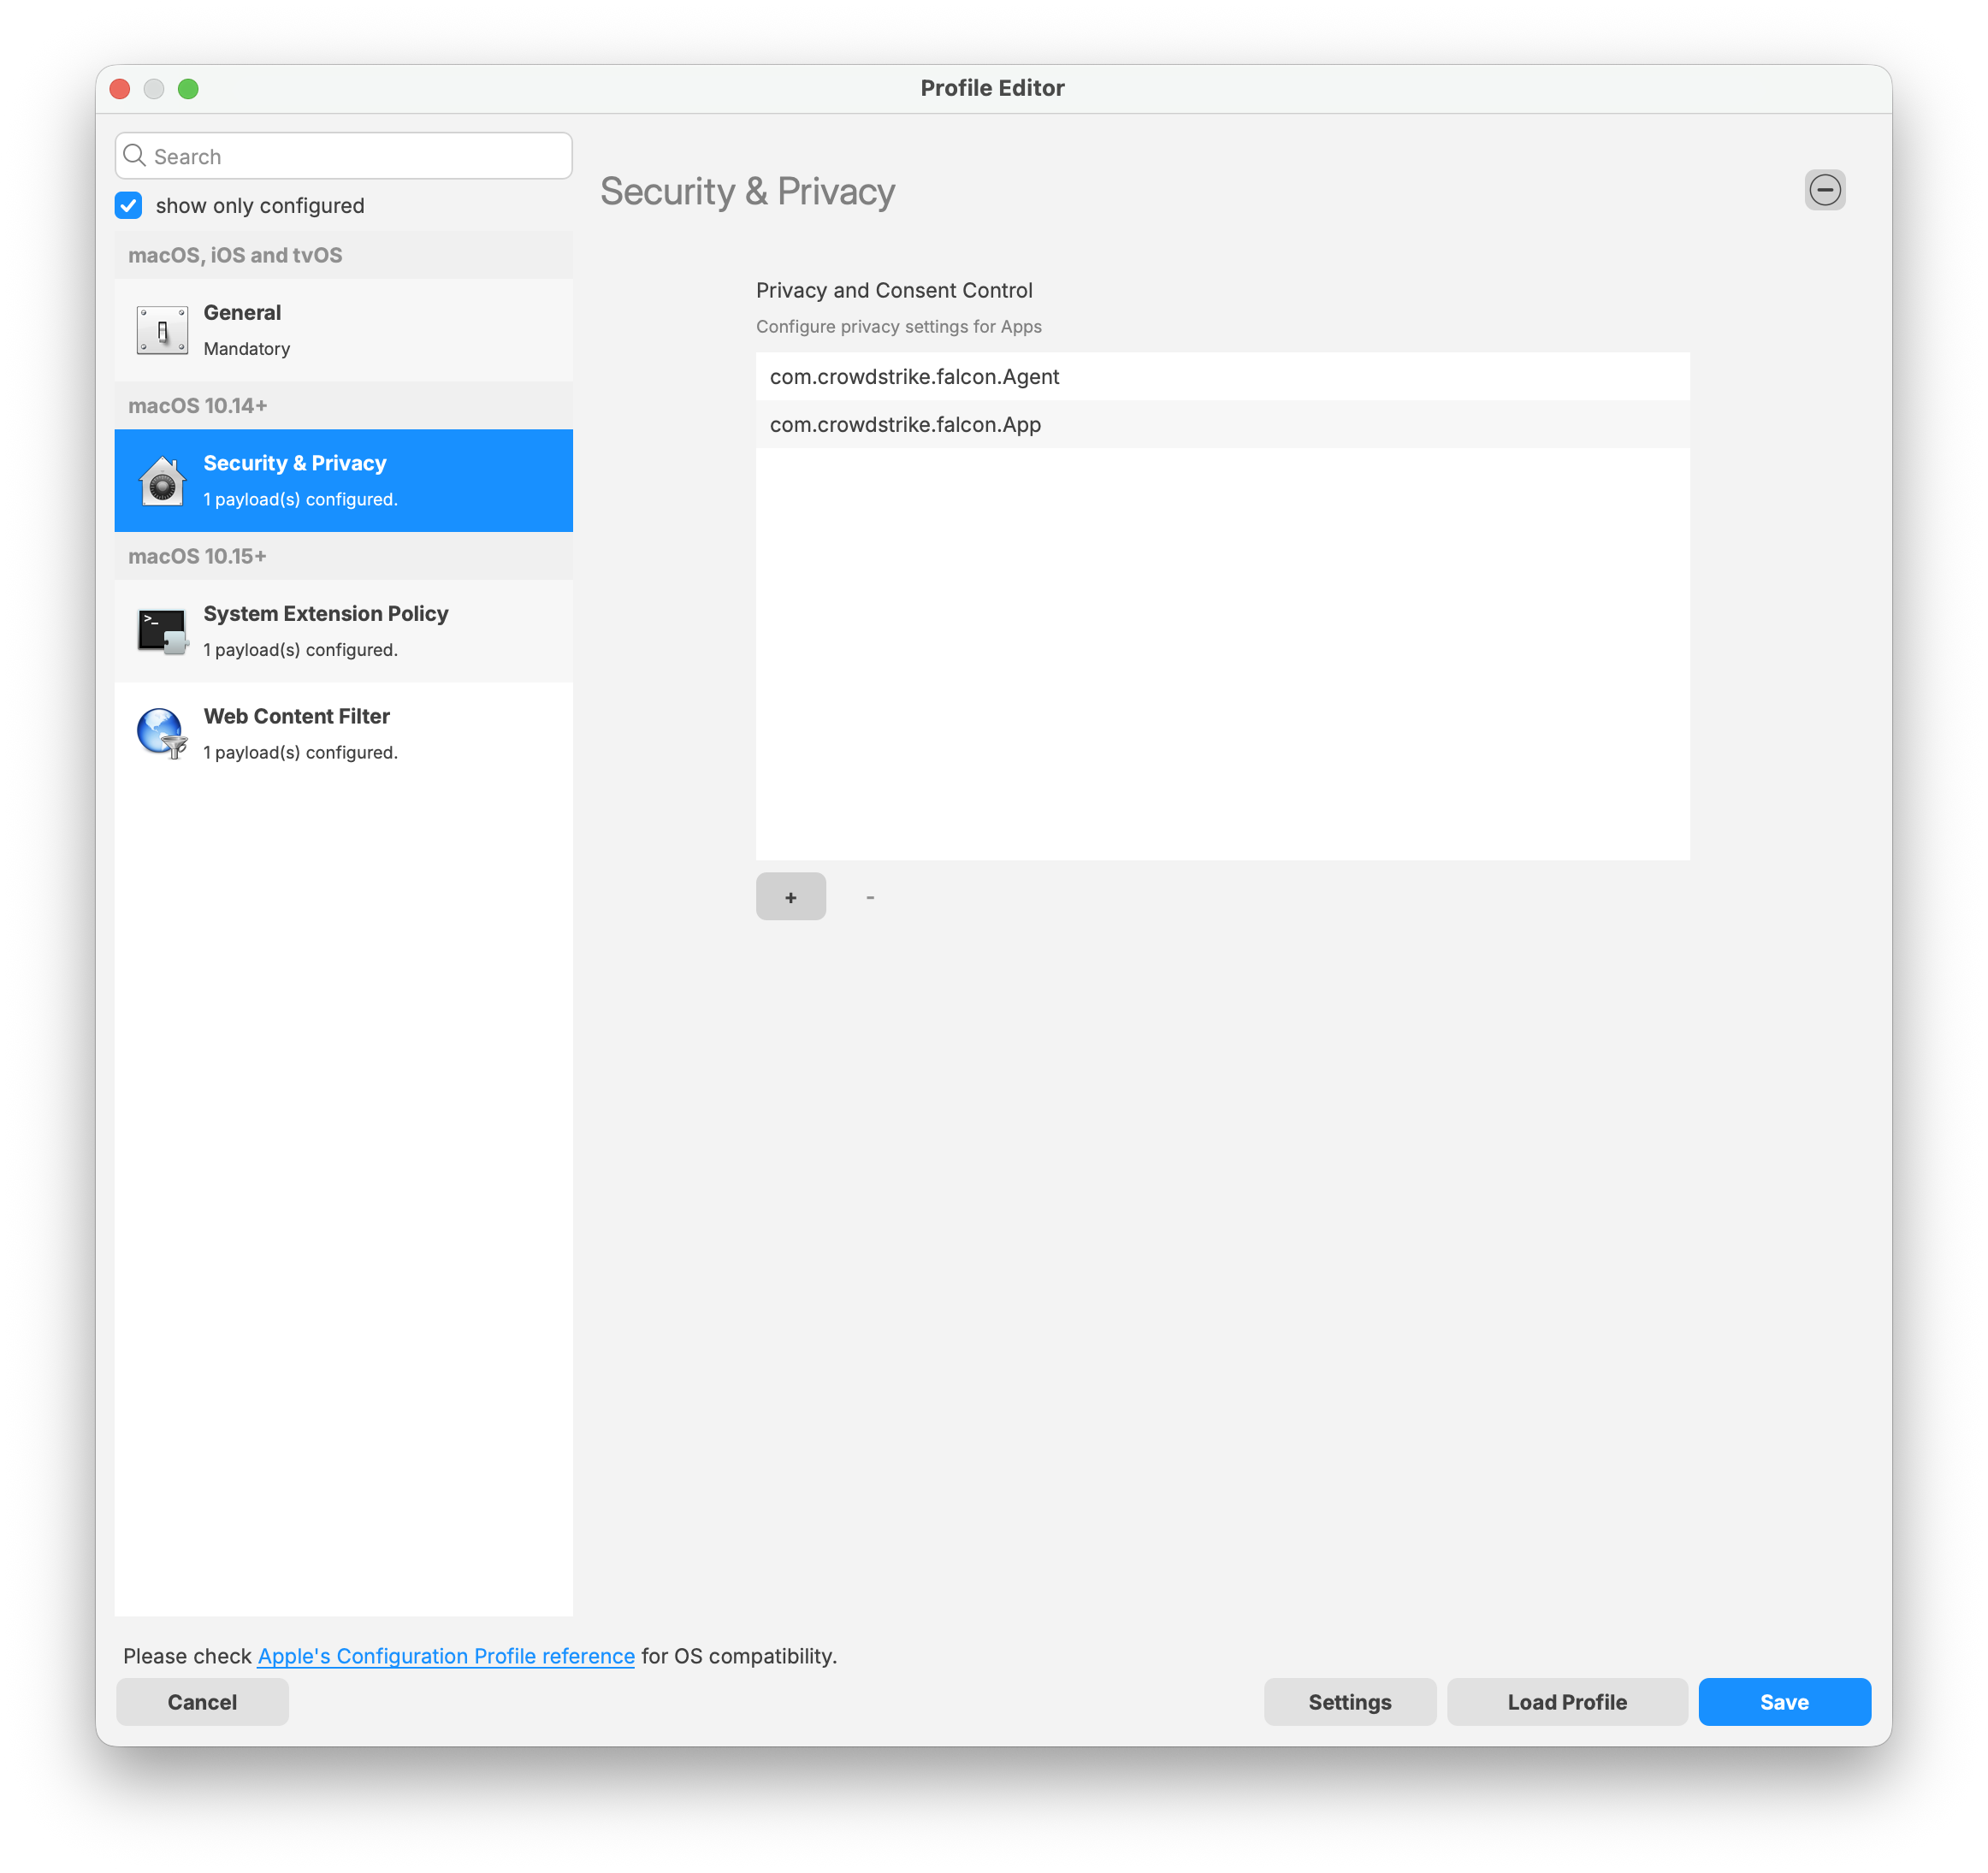
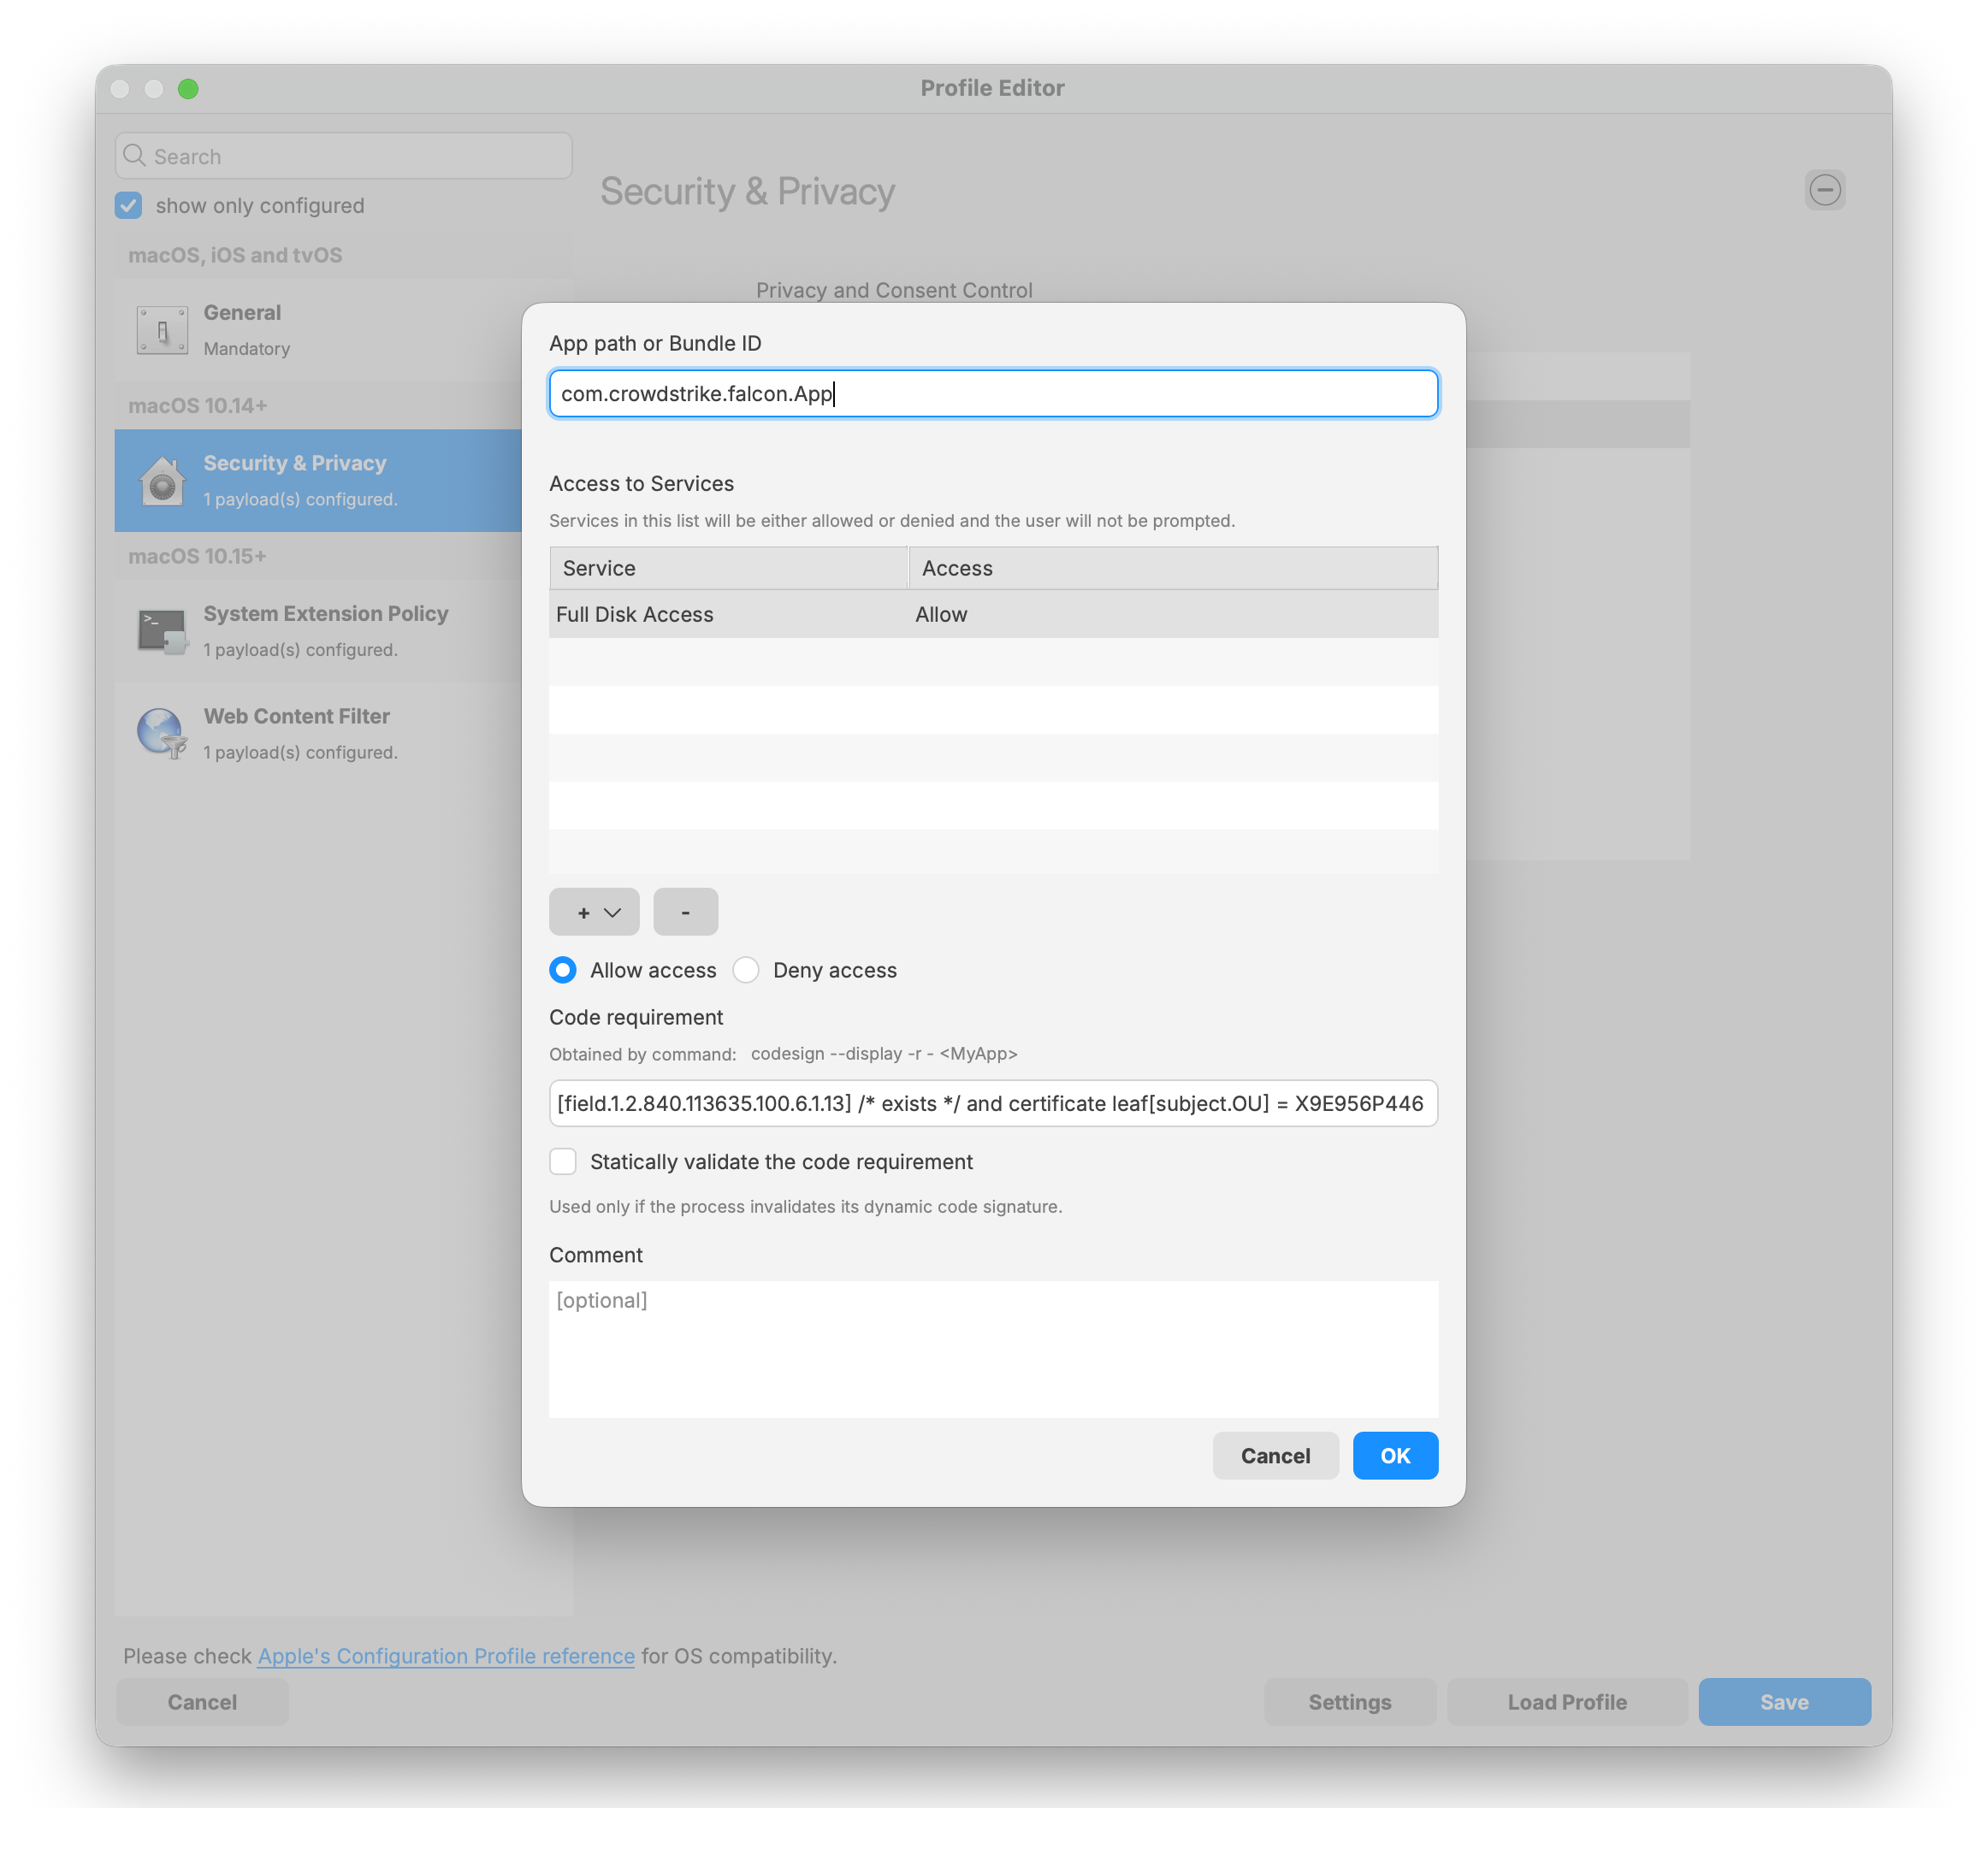
Security & Privacy Payload:
|
 |
|
 |
|
 |
|
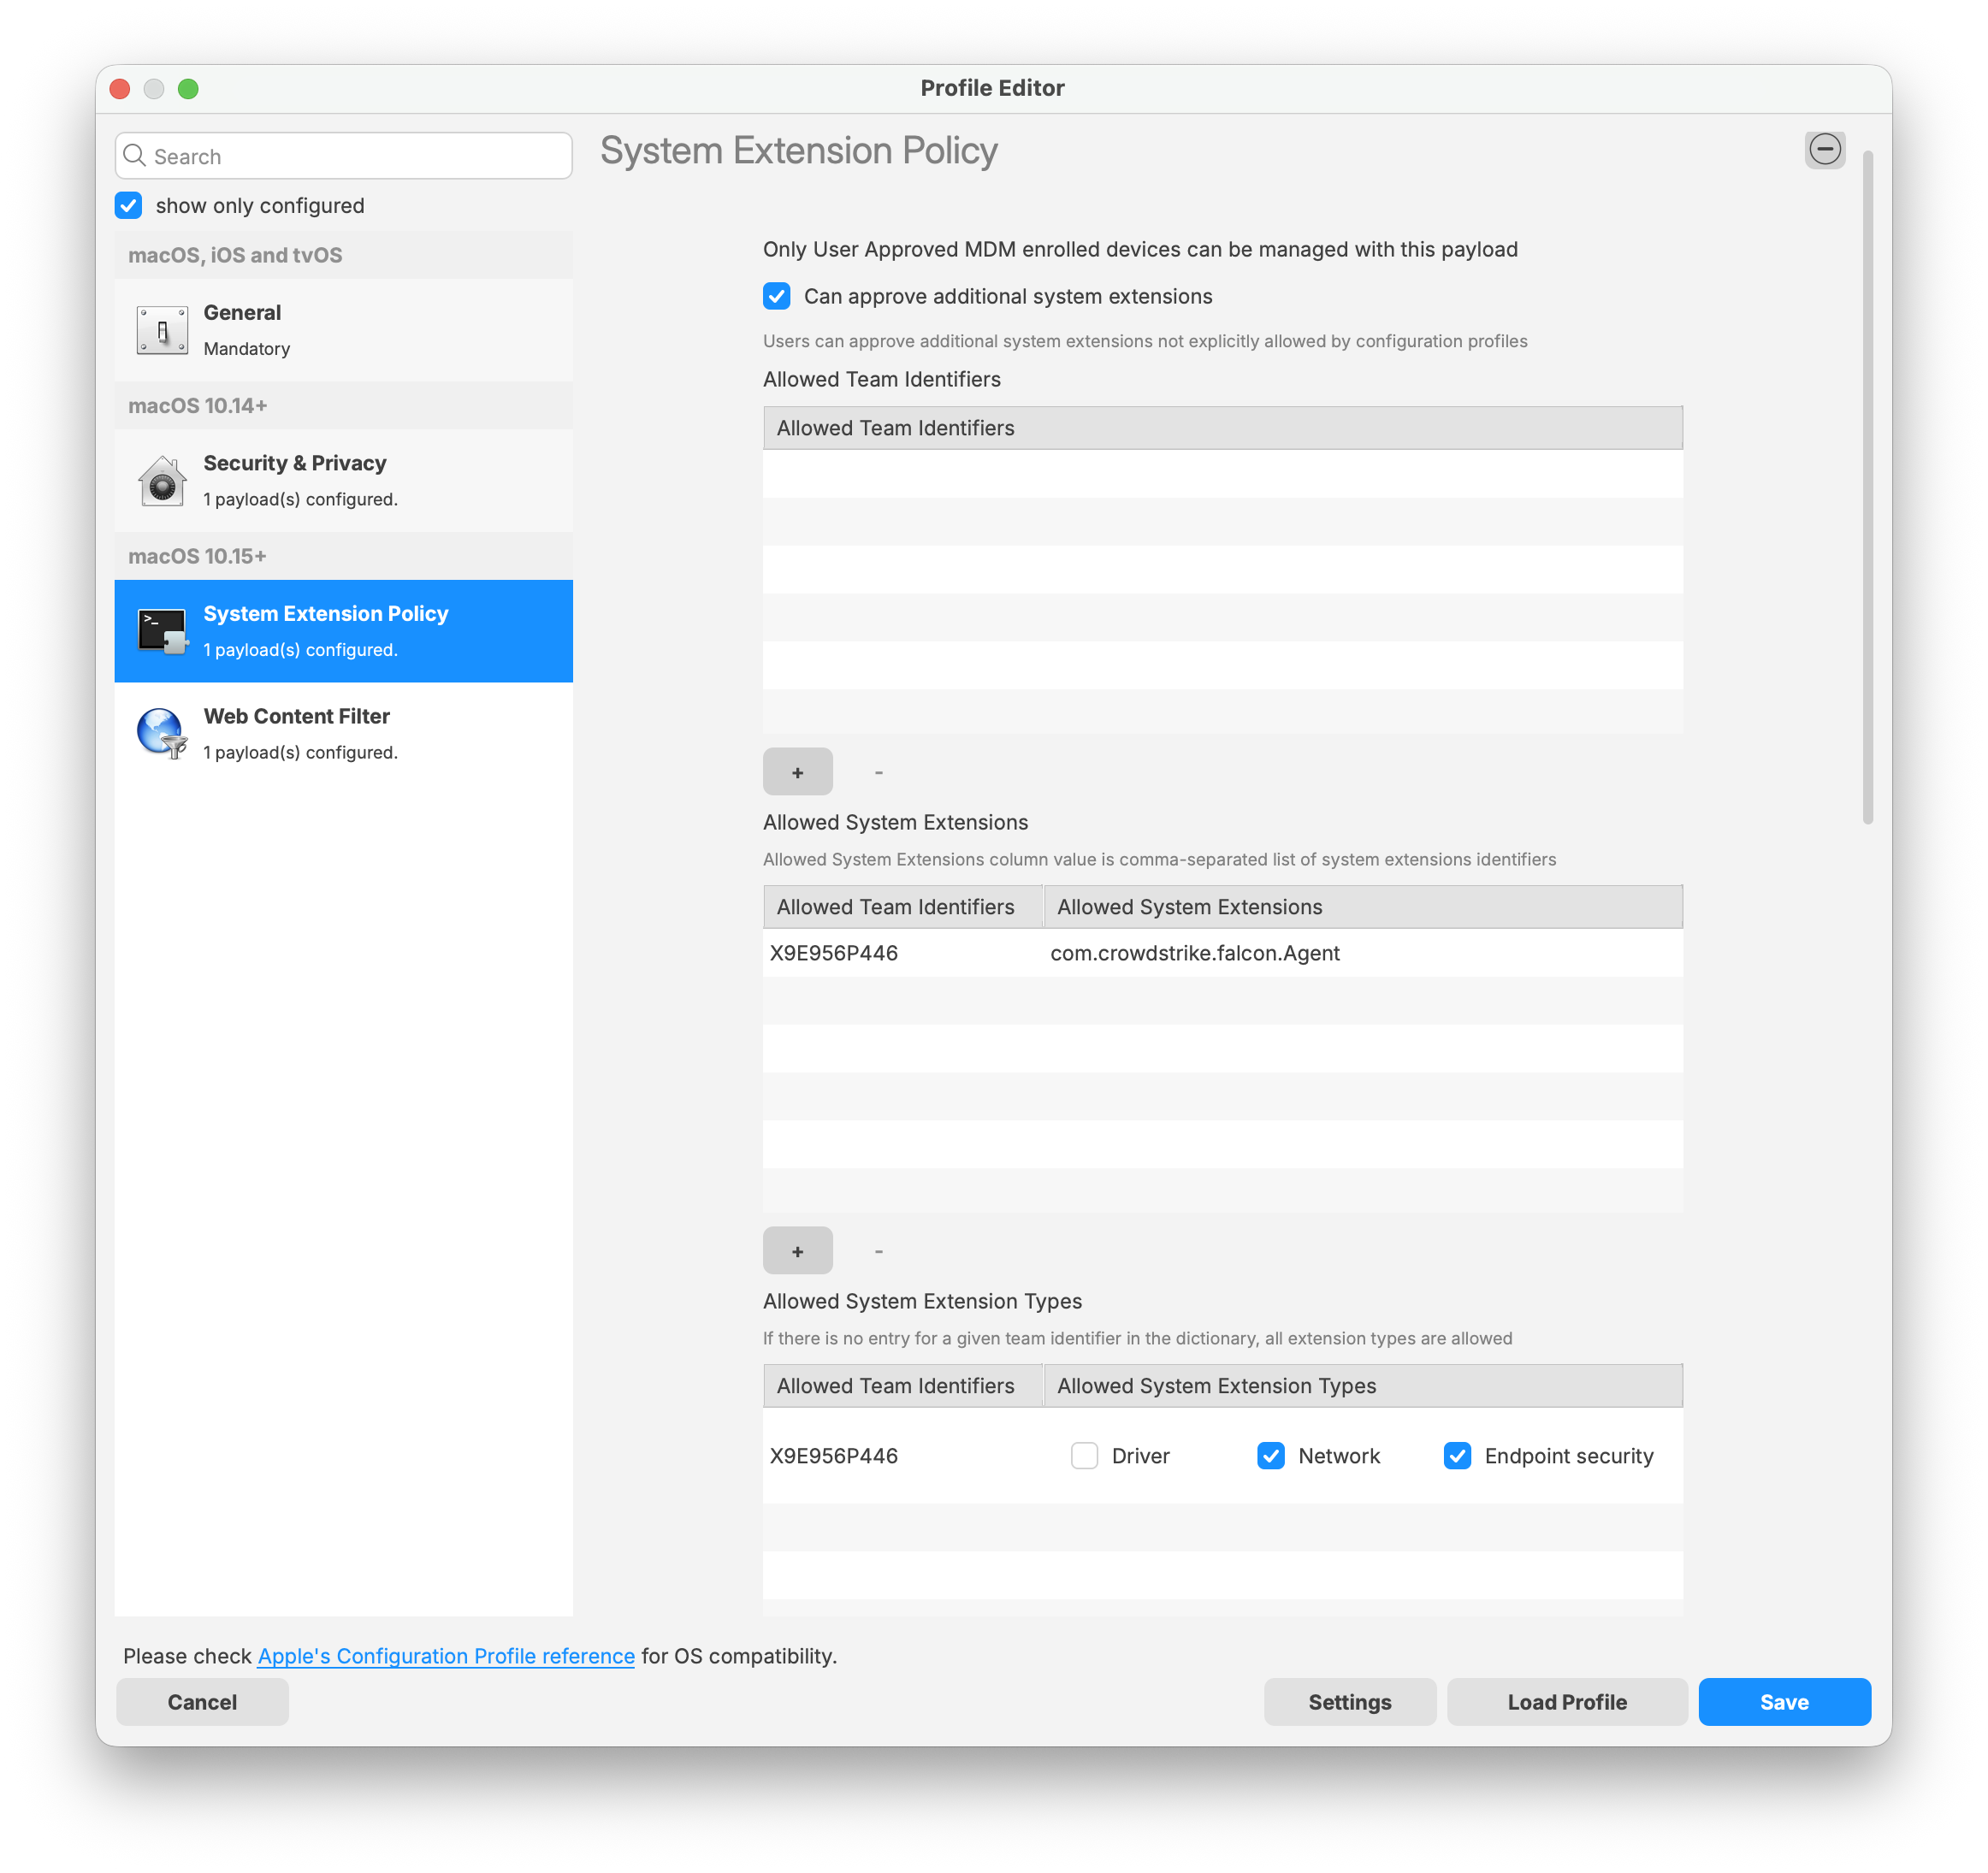
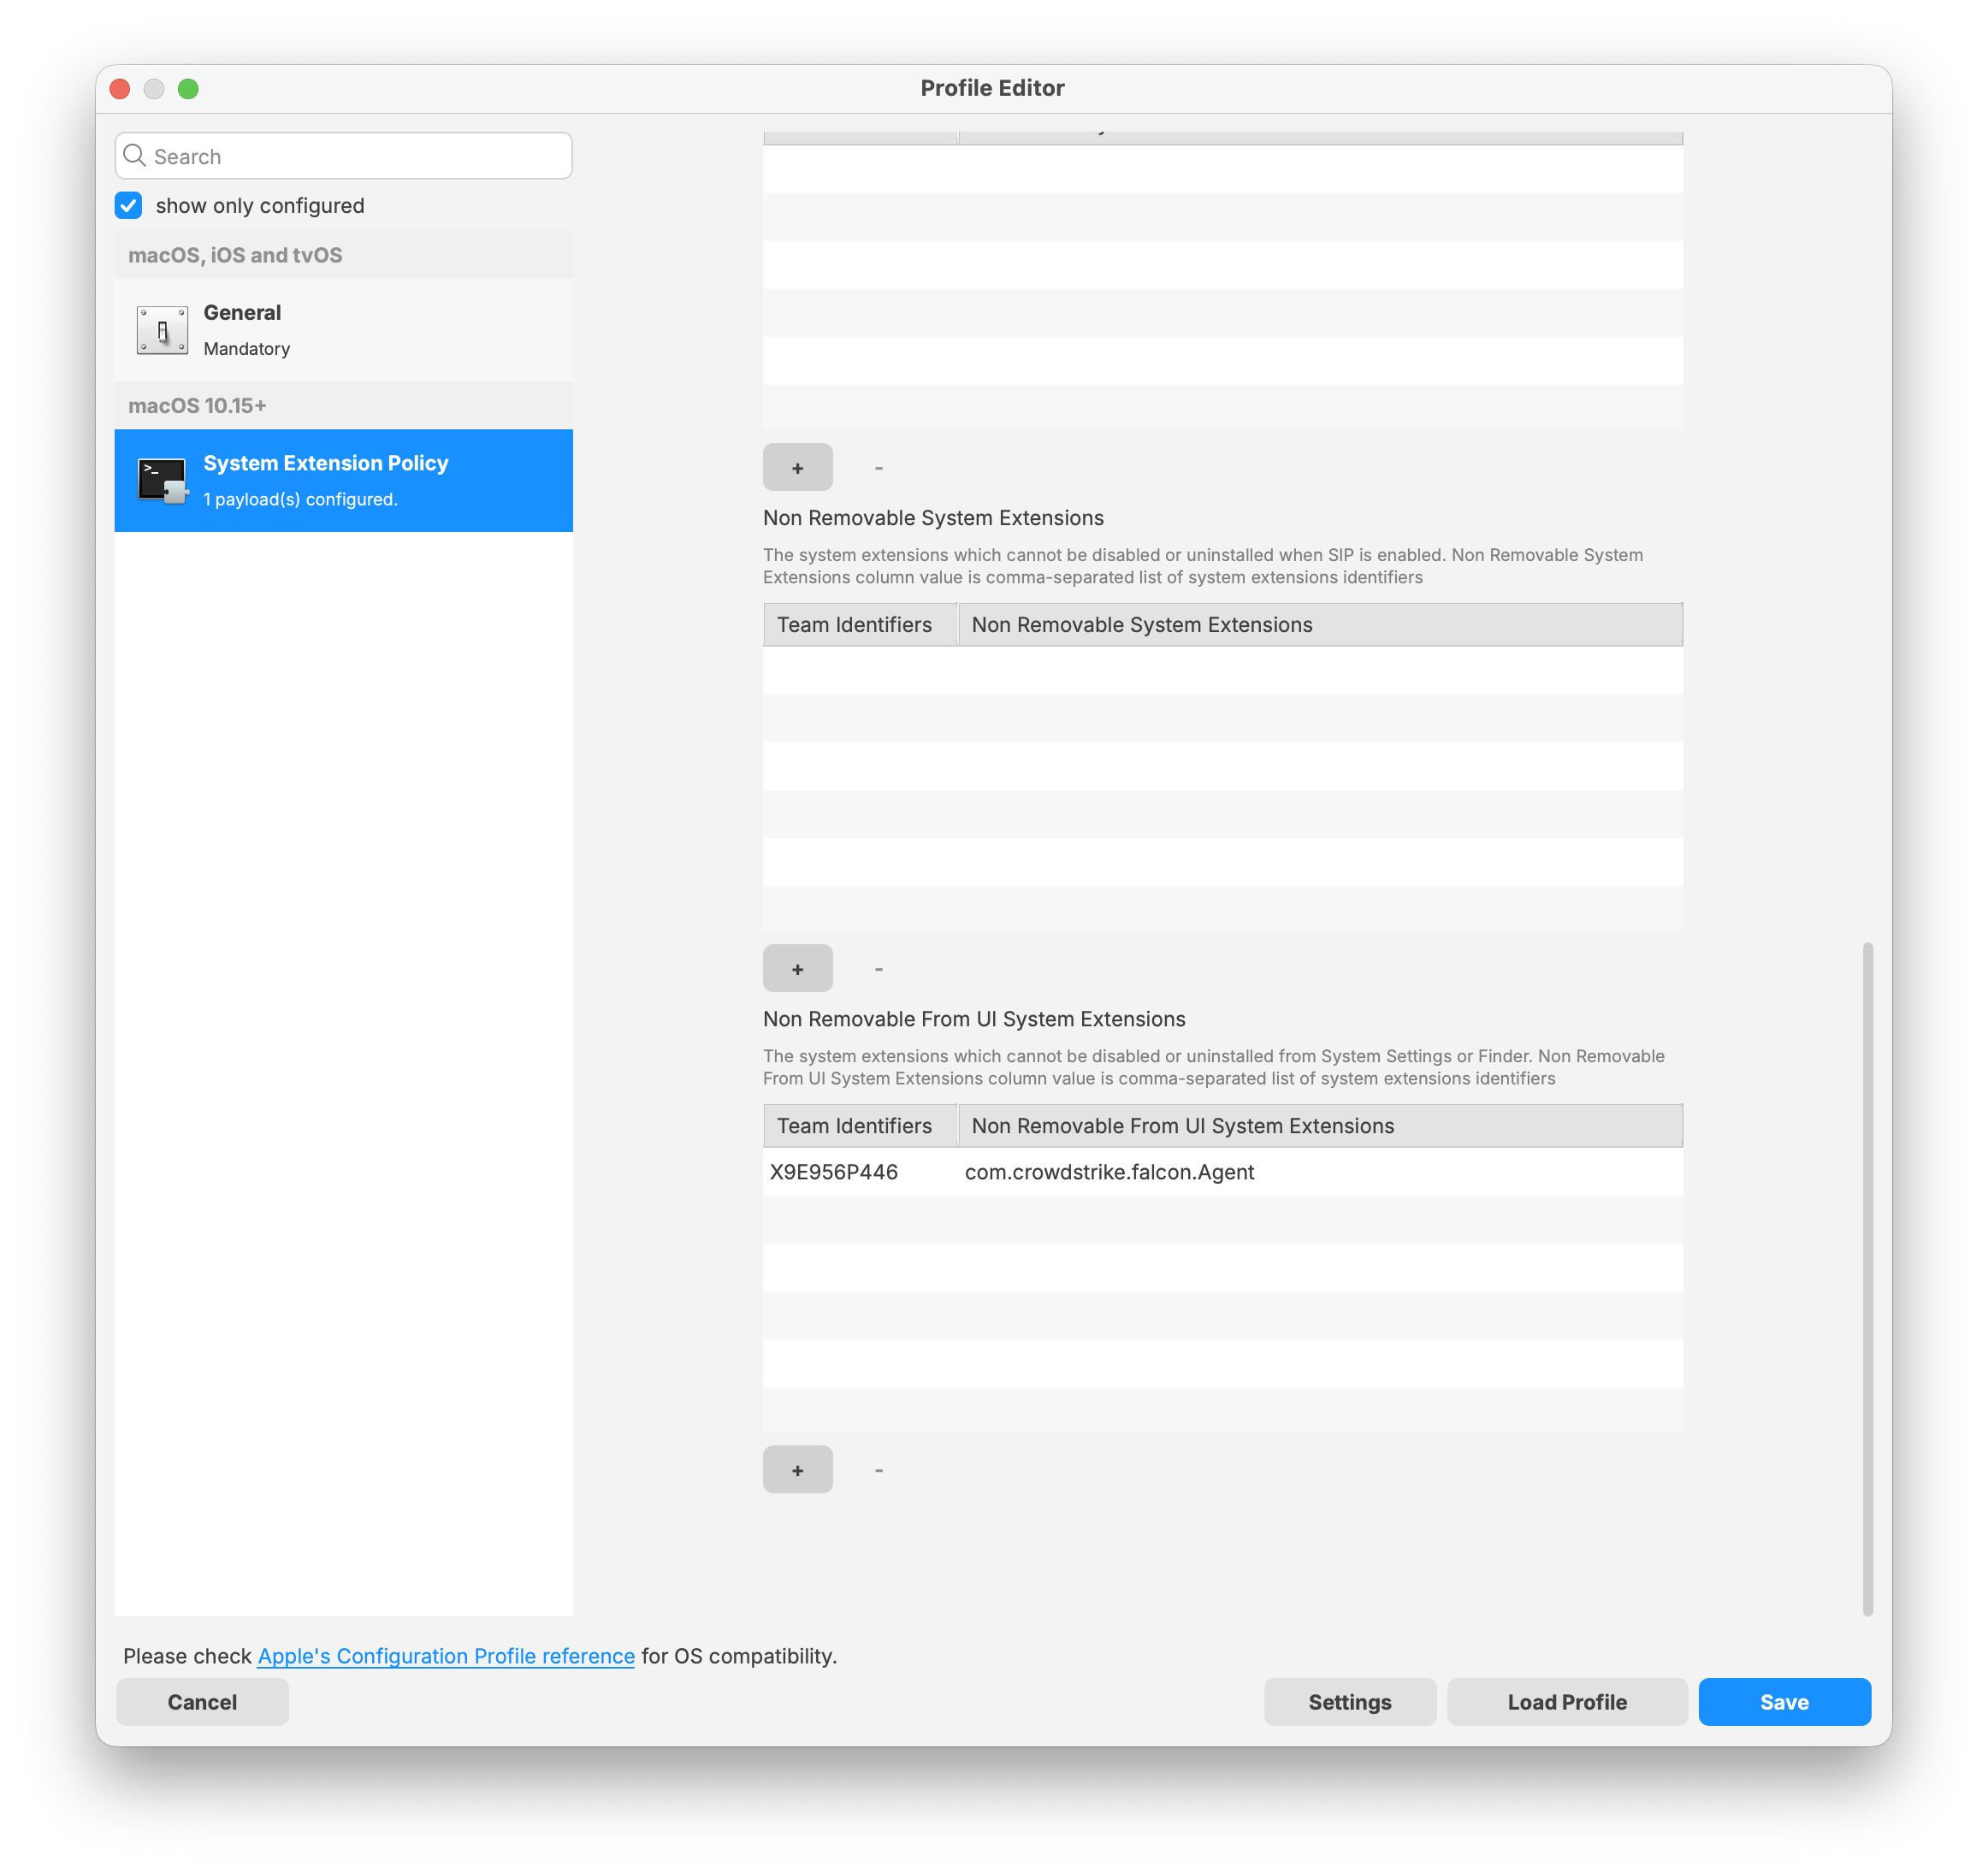
System Extension Policy Payload:
|
 |
|
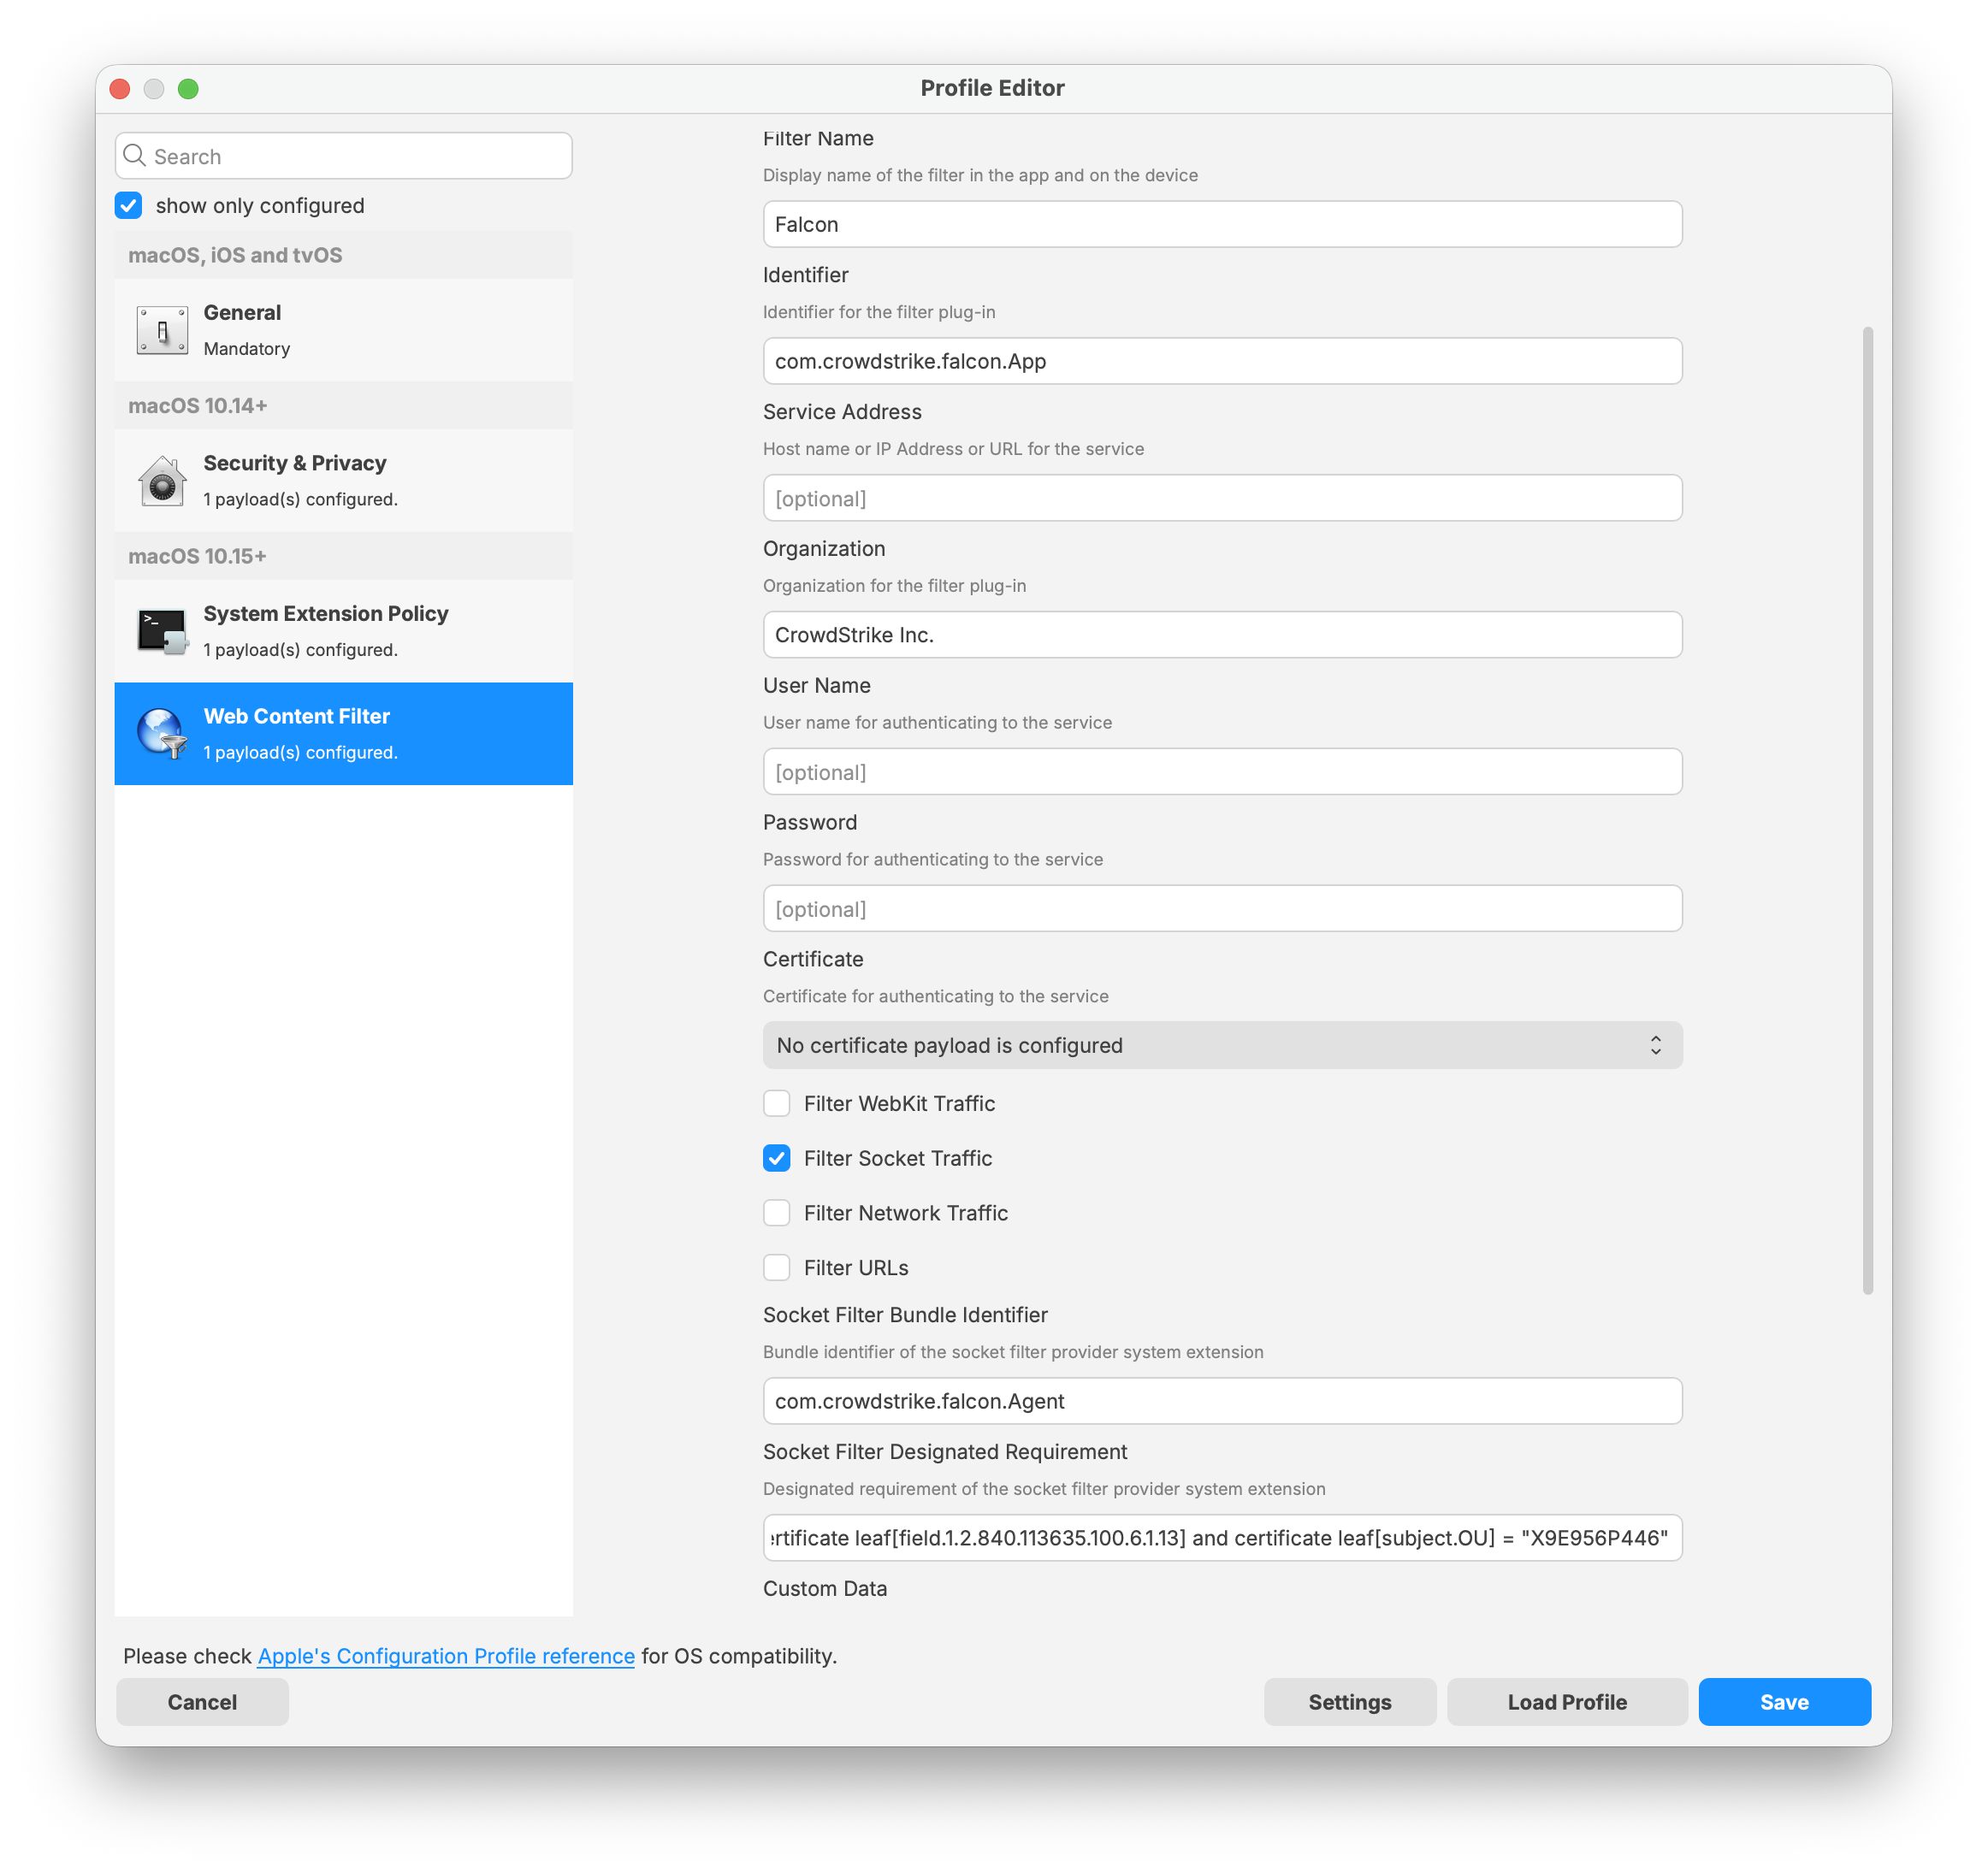
Web Content Filter Payload:
|
 |
Falcon Configuration Profile for Sequoia and later:
Sequoia and later TCC Profile
|
System Extension Policy Payload:
|
 |
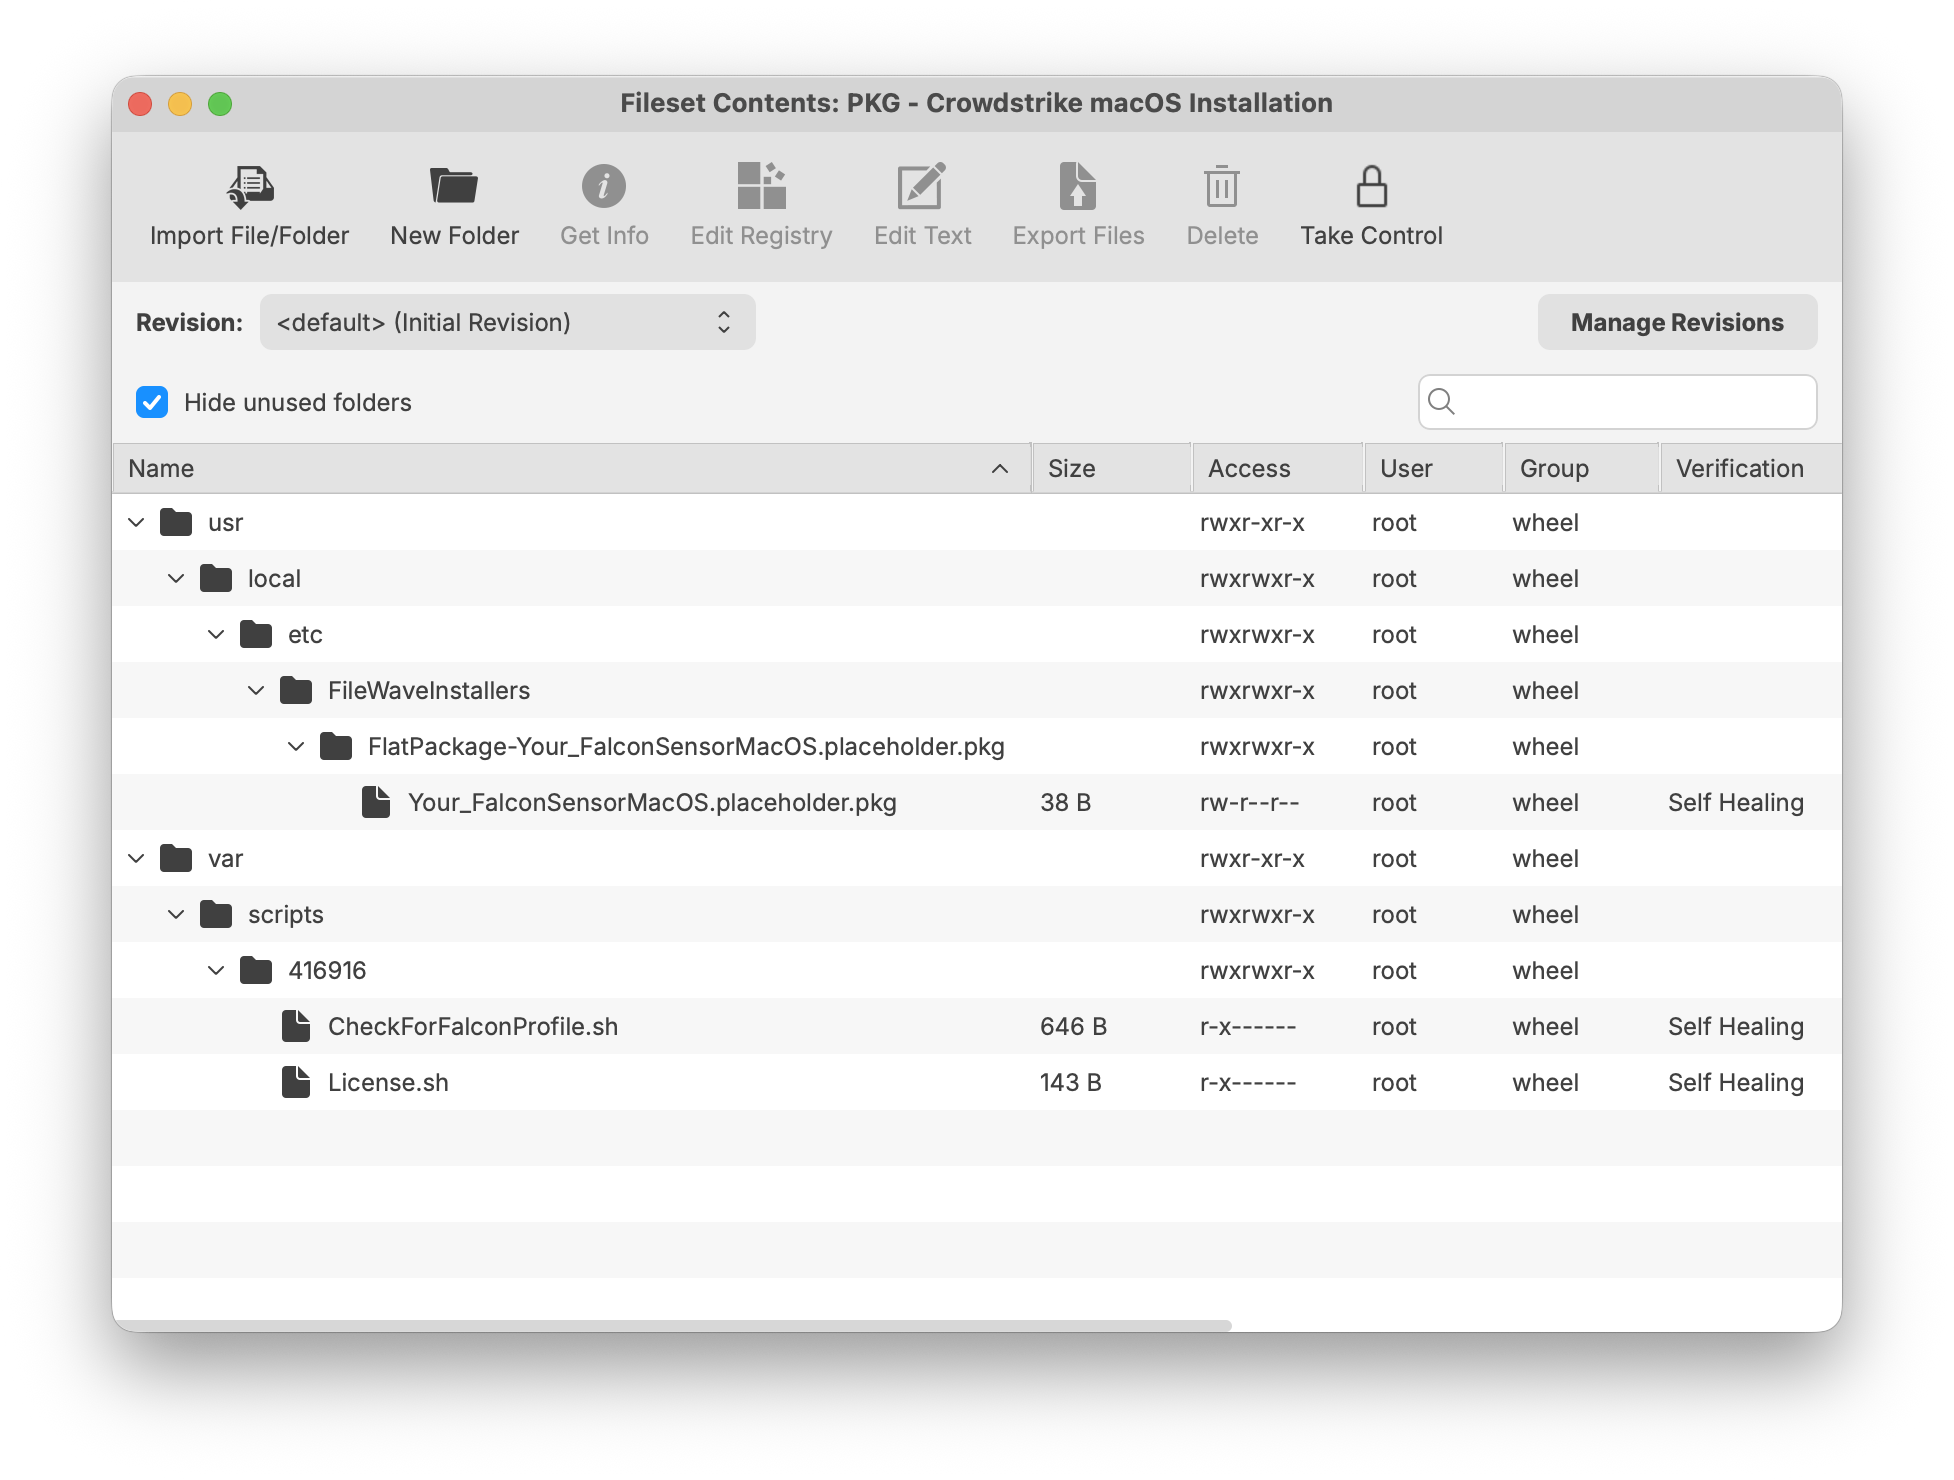
Download the PKG installer
The PKG installer fileset includes three components. The template below can be used to upload your specific version of the CrowdStrike PKG installer. Ensure the installation folder and PKG file name are labeled correctly to support a successful deployment.
Note: Please log in to your CrowdStrike portal and download the latest PKG installer to ensure a successful import and deployment. The PKG installer must be used along with the two required scripts: the Requirement script and the Activation script.
CrowdStrike License
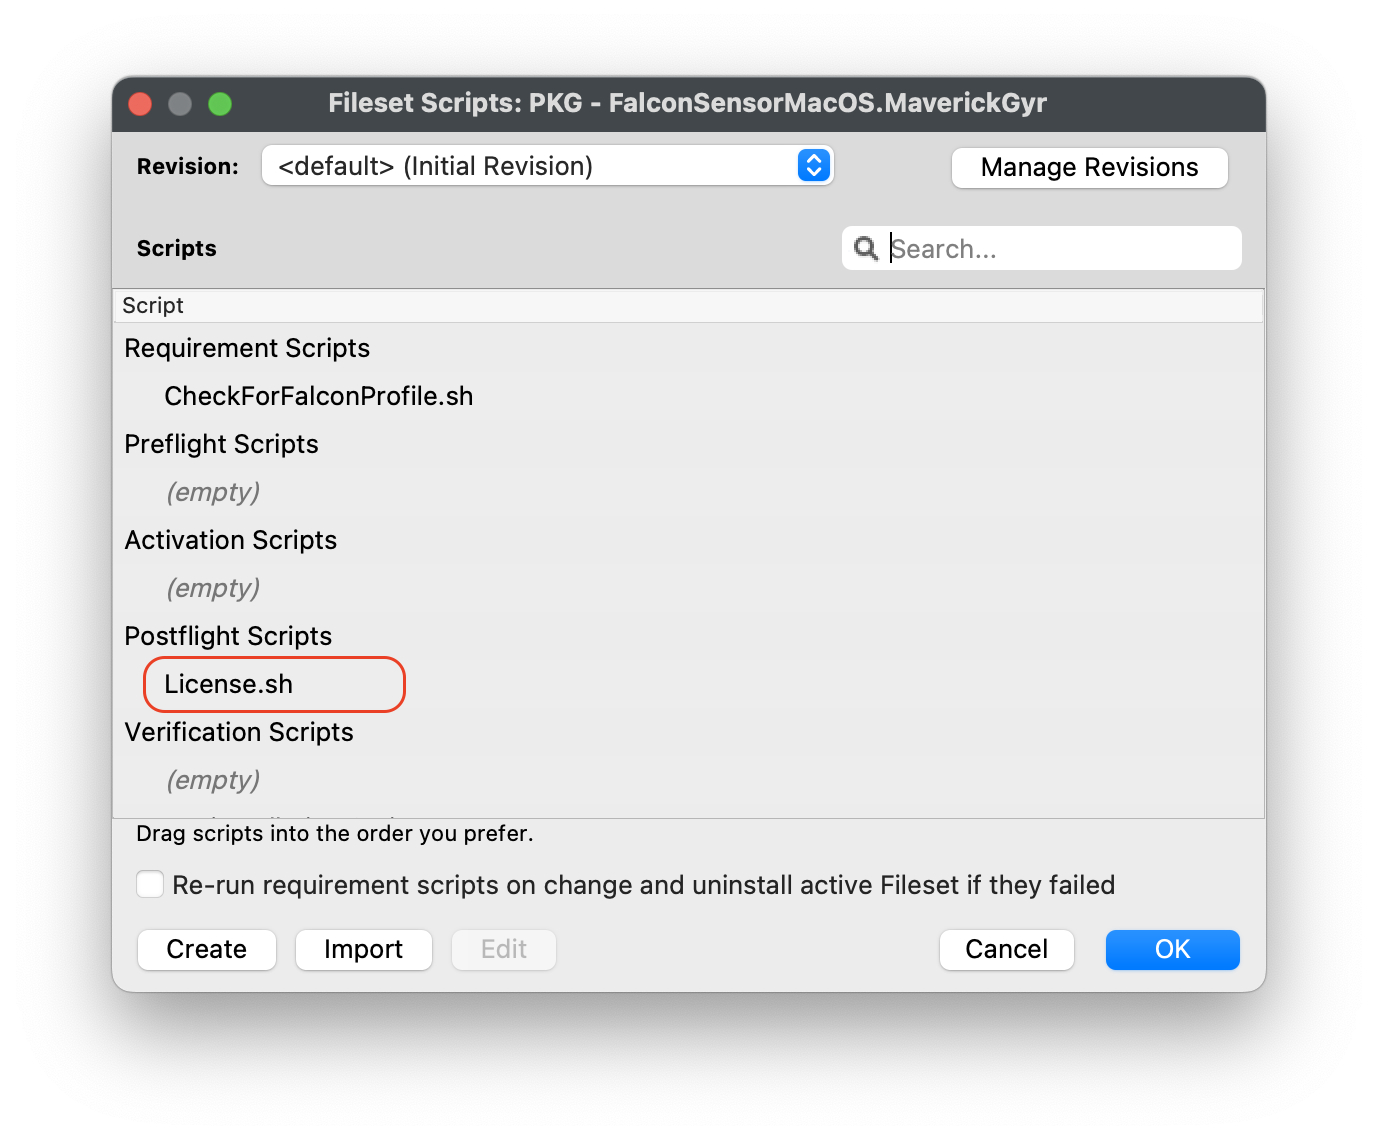
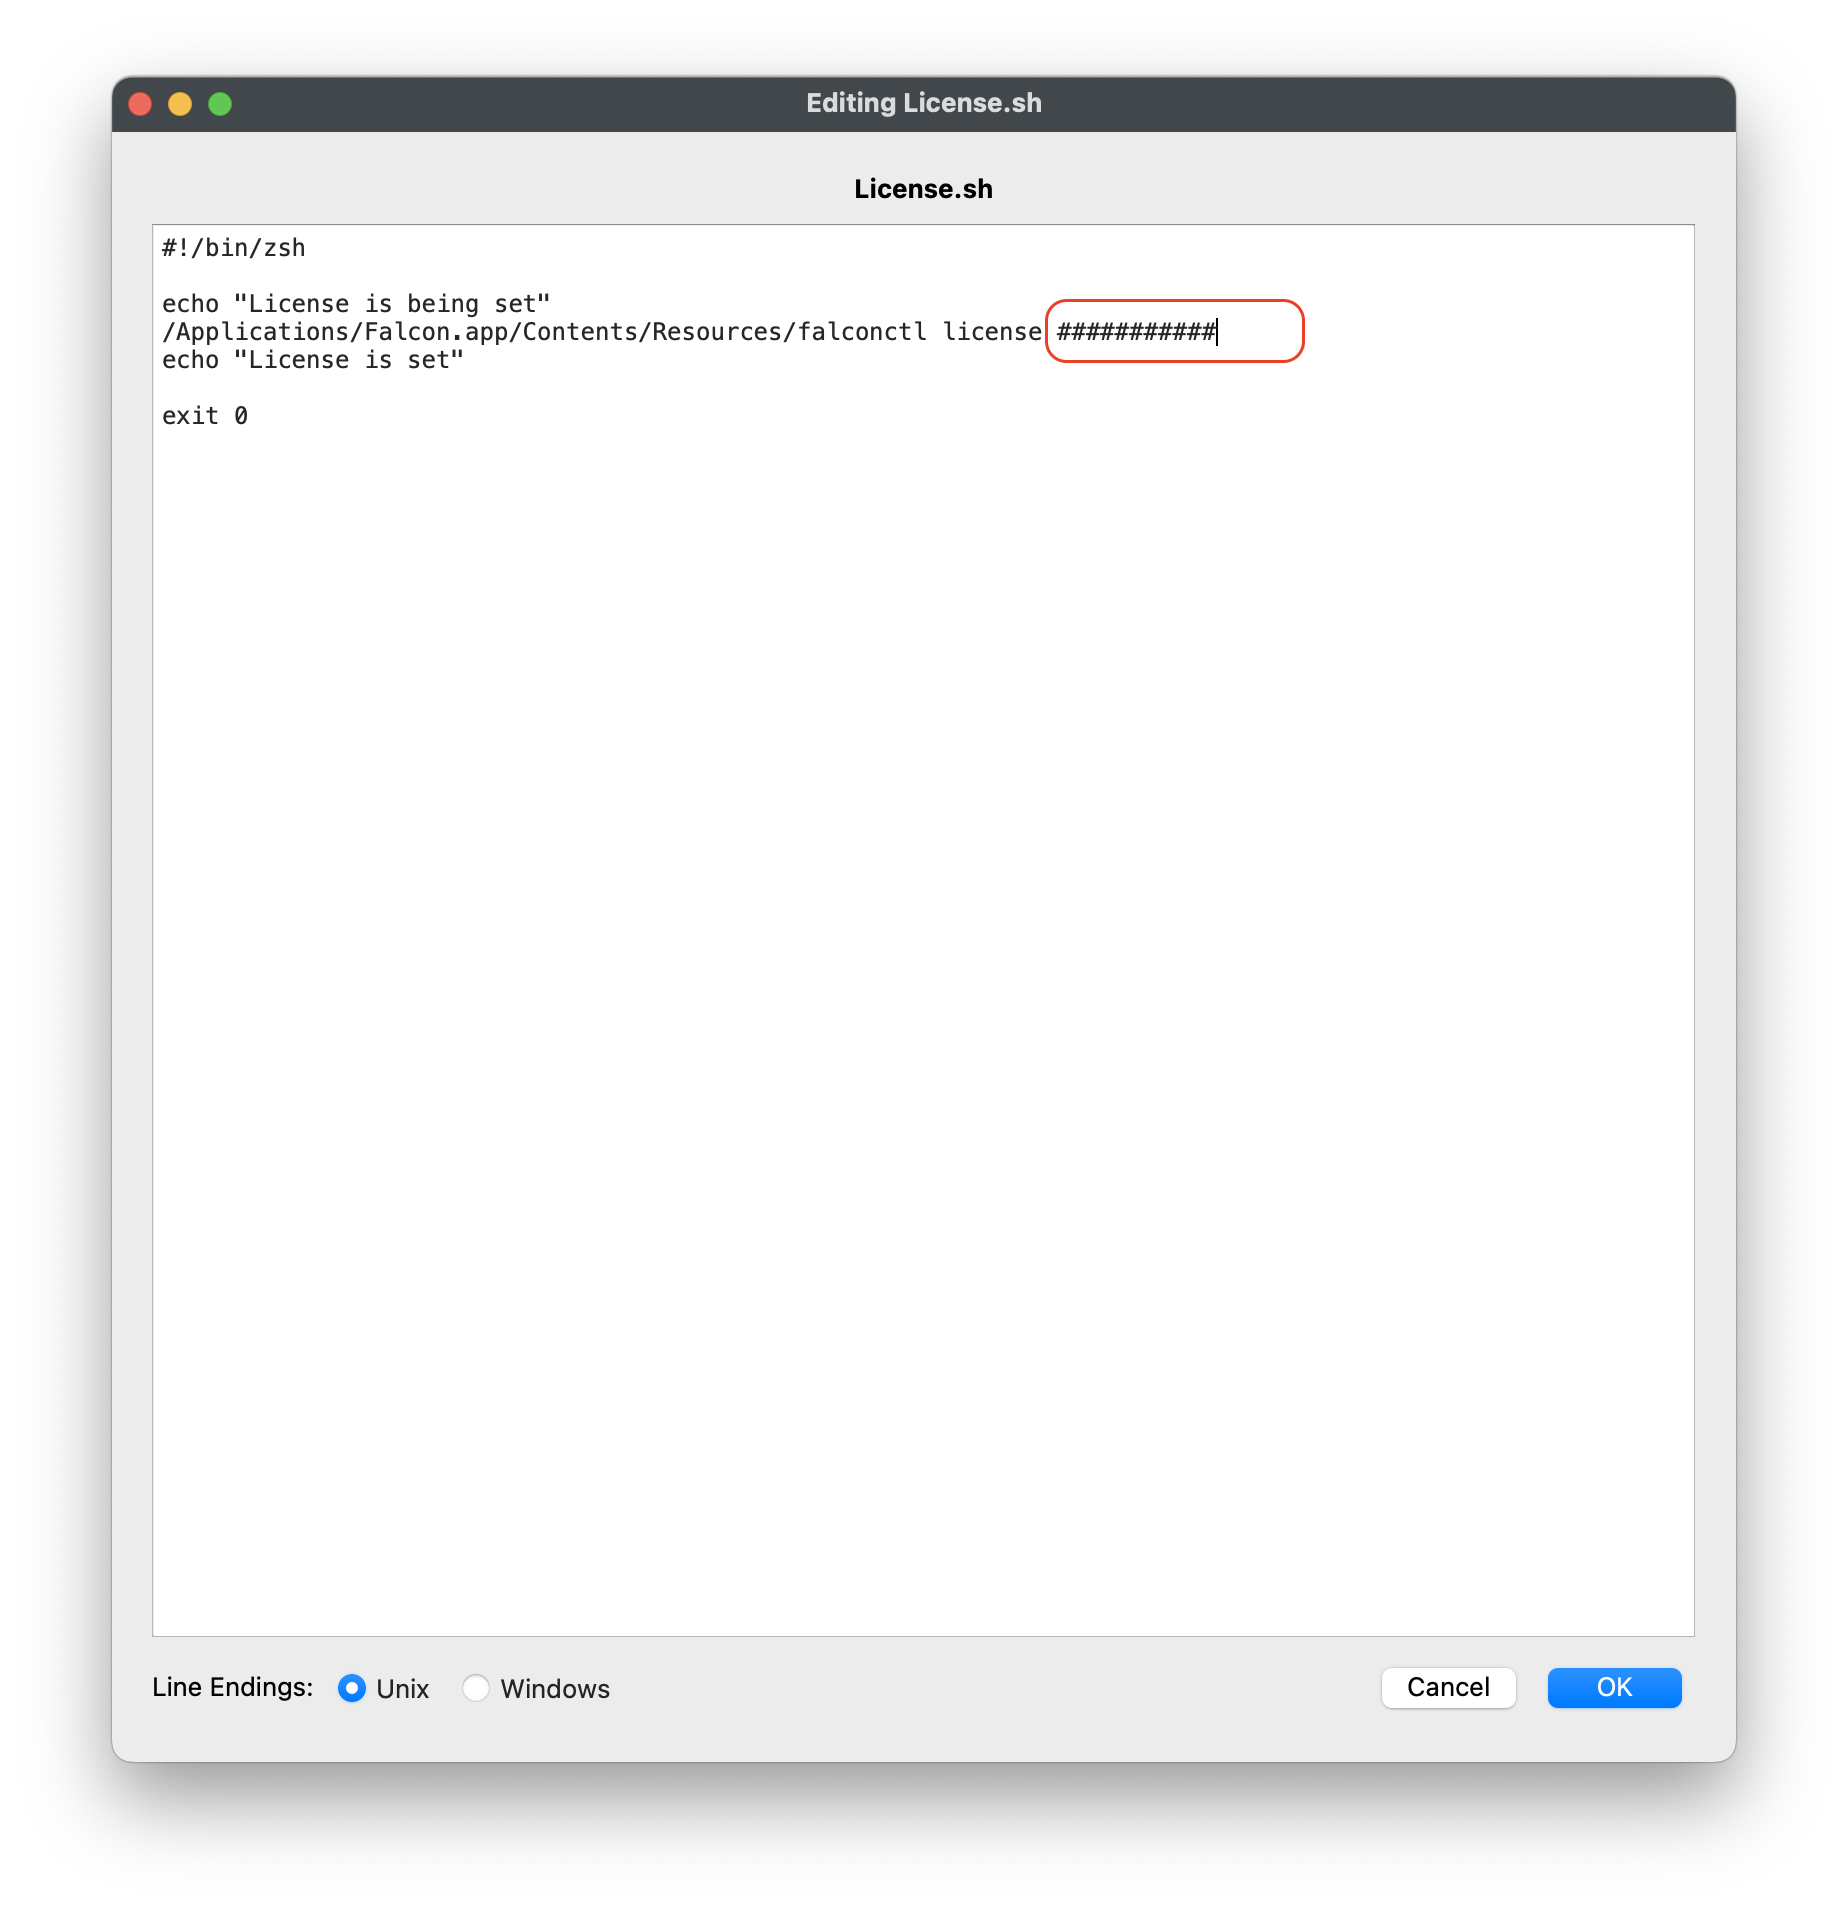
Customizing the Fileset with your CrowdStrike license is required. The Fileset has a License.sh script to edit and enter in your license code.
Editing the License.sh script
|
 |
Entering in your license code
|
License code script
|
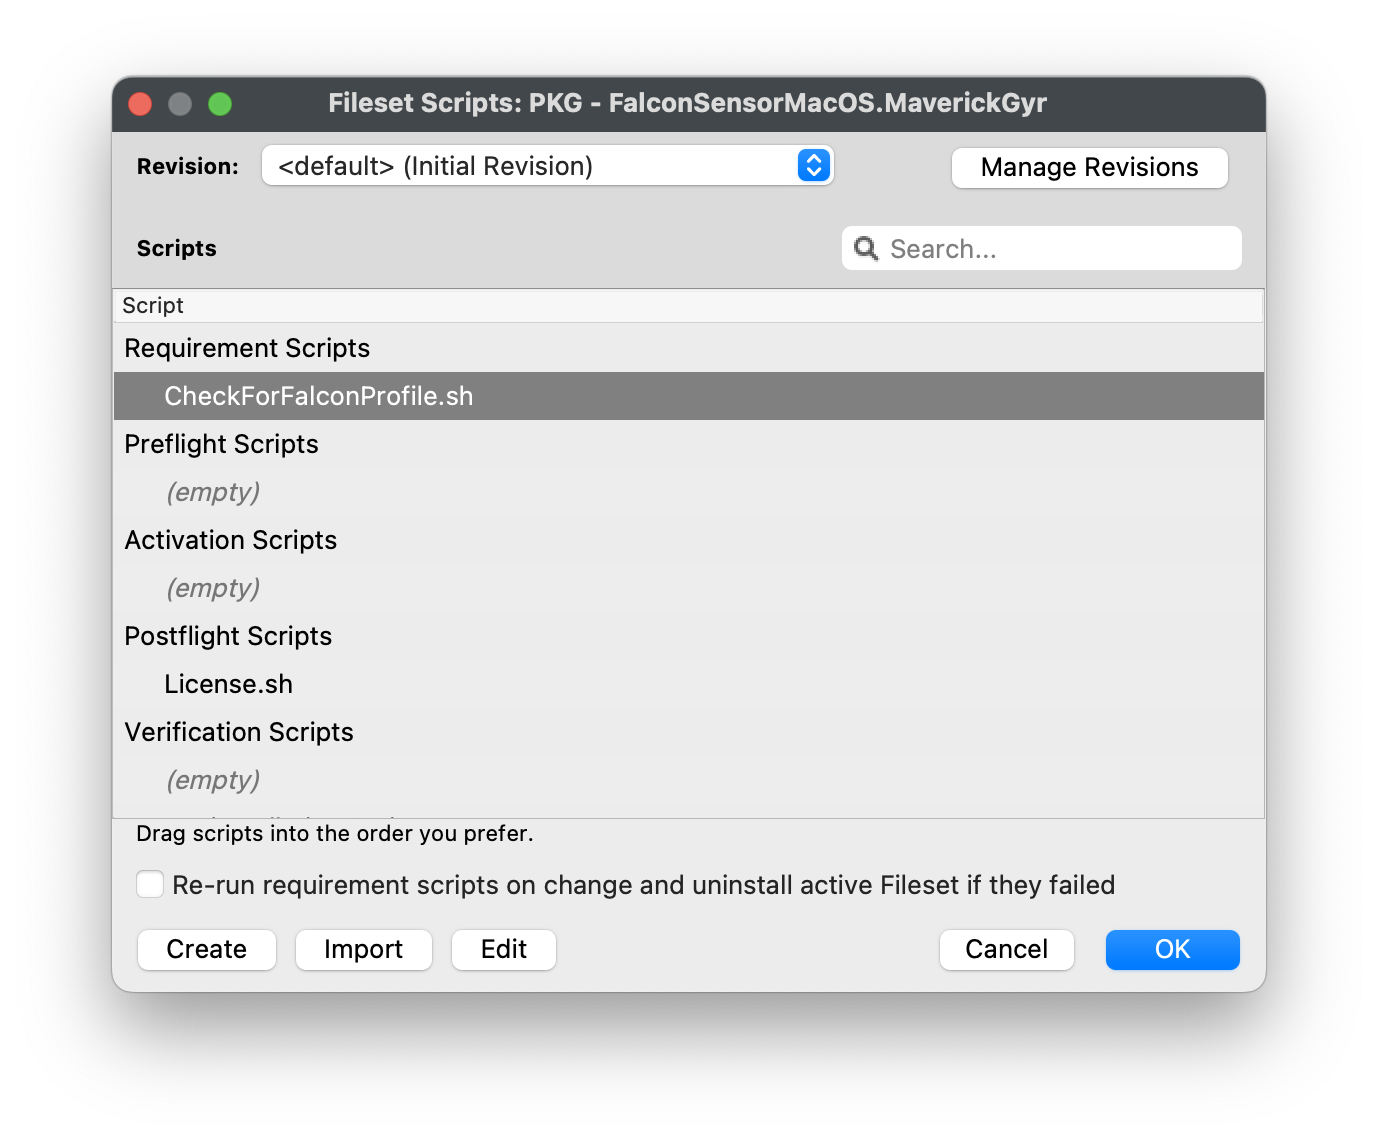
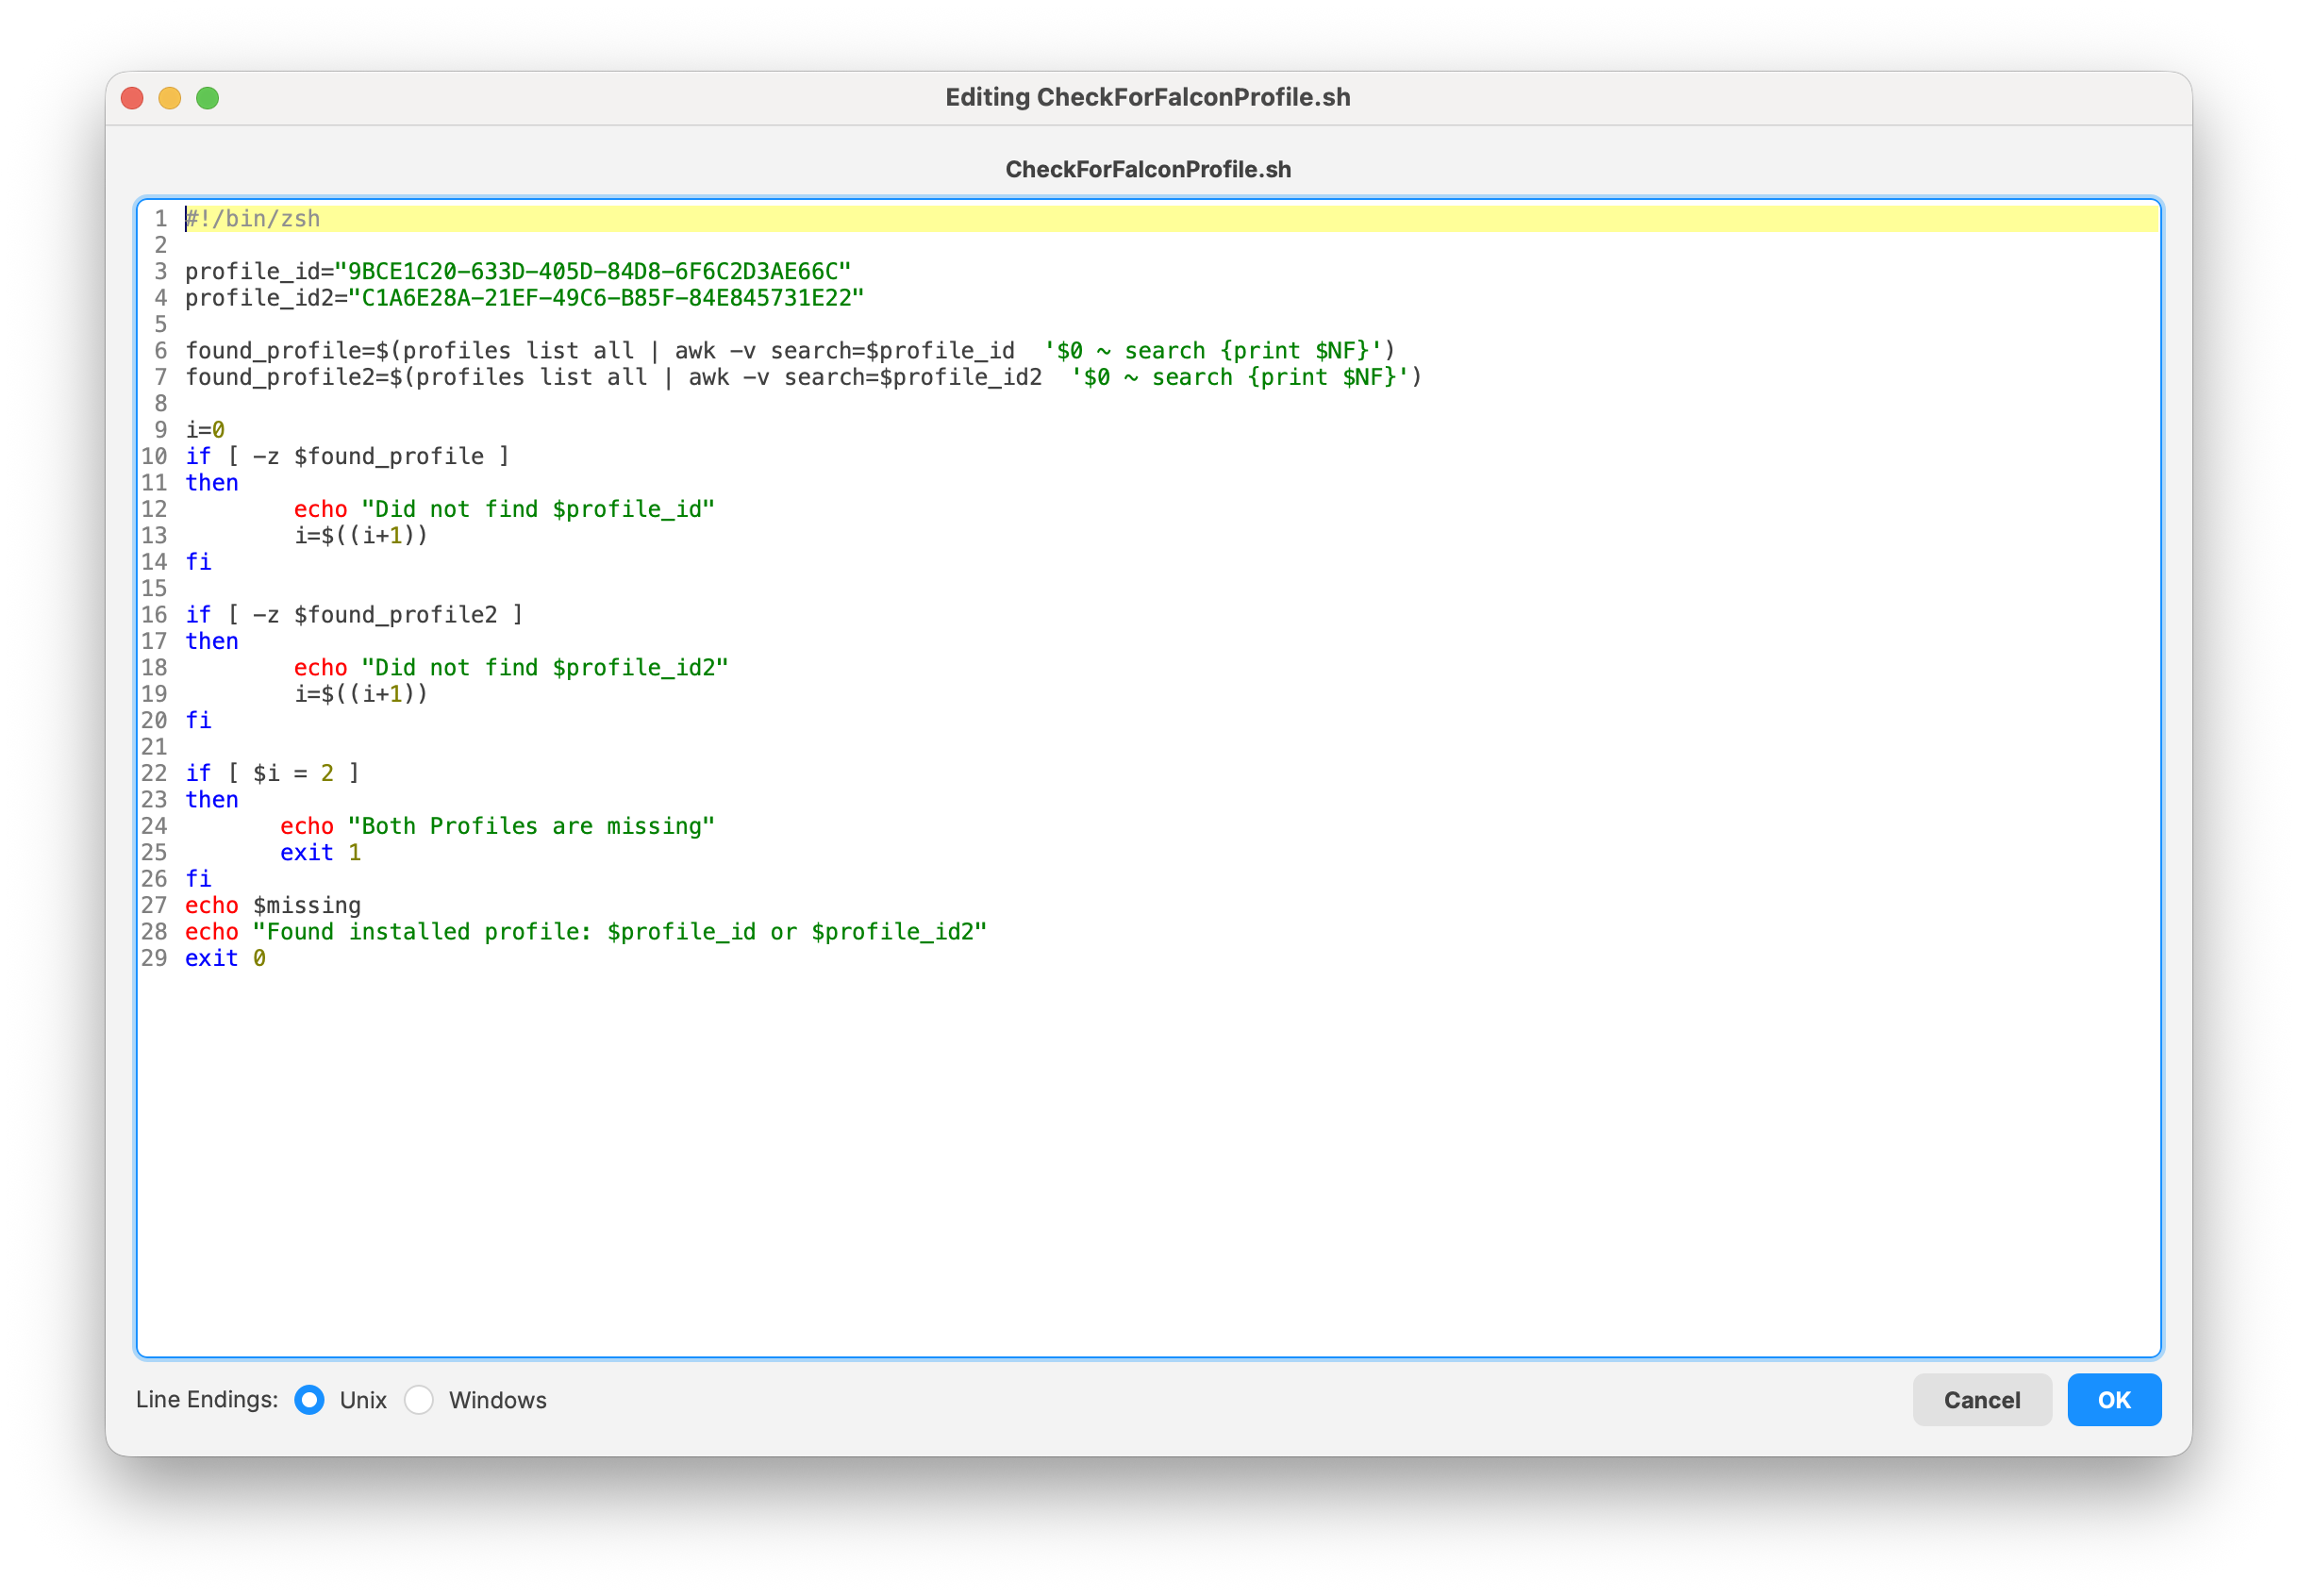
Check for Falcon Profiles
The payload identifiers are preconfigured in the provided template fileset. The steps below explain how to add your own Payload Bundle Identifier if needed.
Note: The Requirement script verifies that the CrowdStrike Falcon TCC profiles are installed successfully before the CrowdStrike installer runs. The script checks for both profiles and confirms they are installed before proceeding with the CrowdStrike deployment.
Editing the CheckForFalconProfile.sh
|
 |
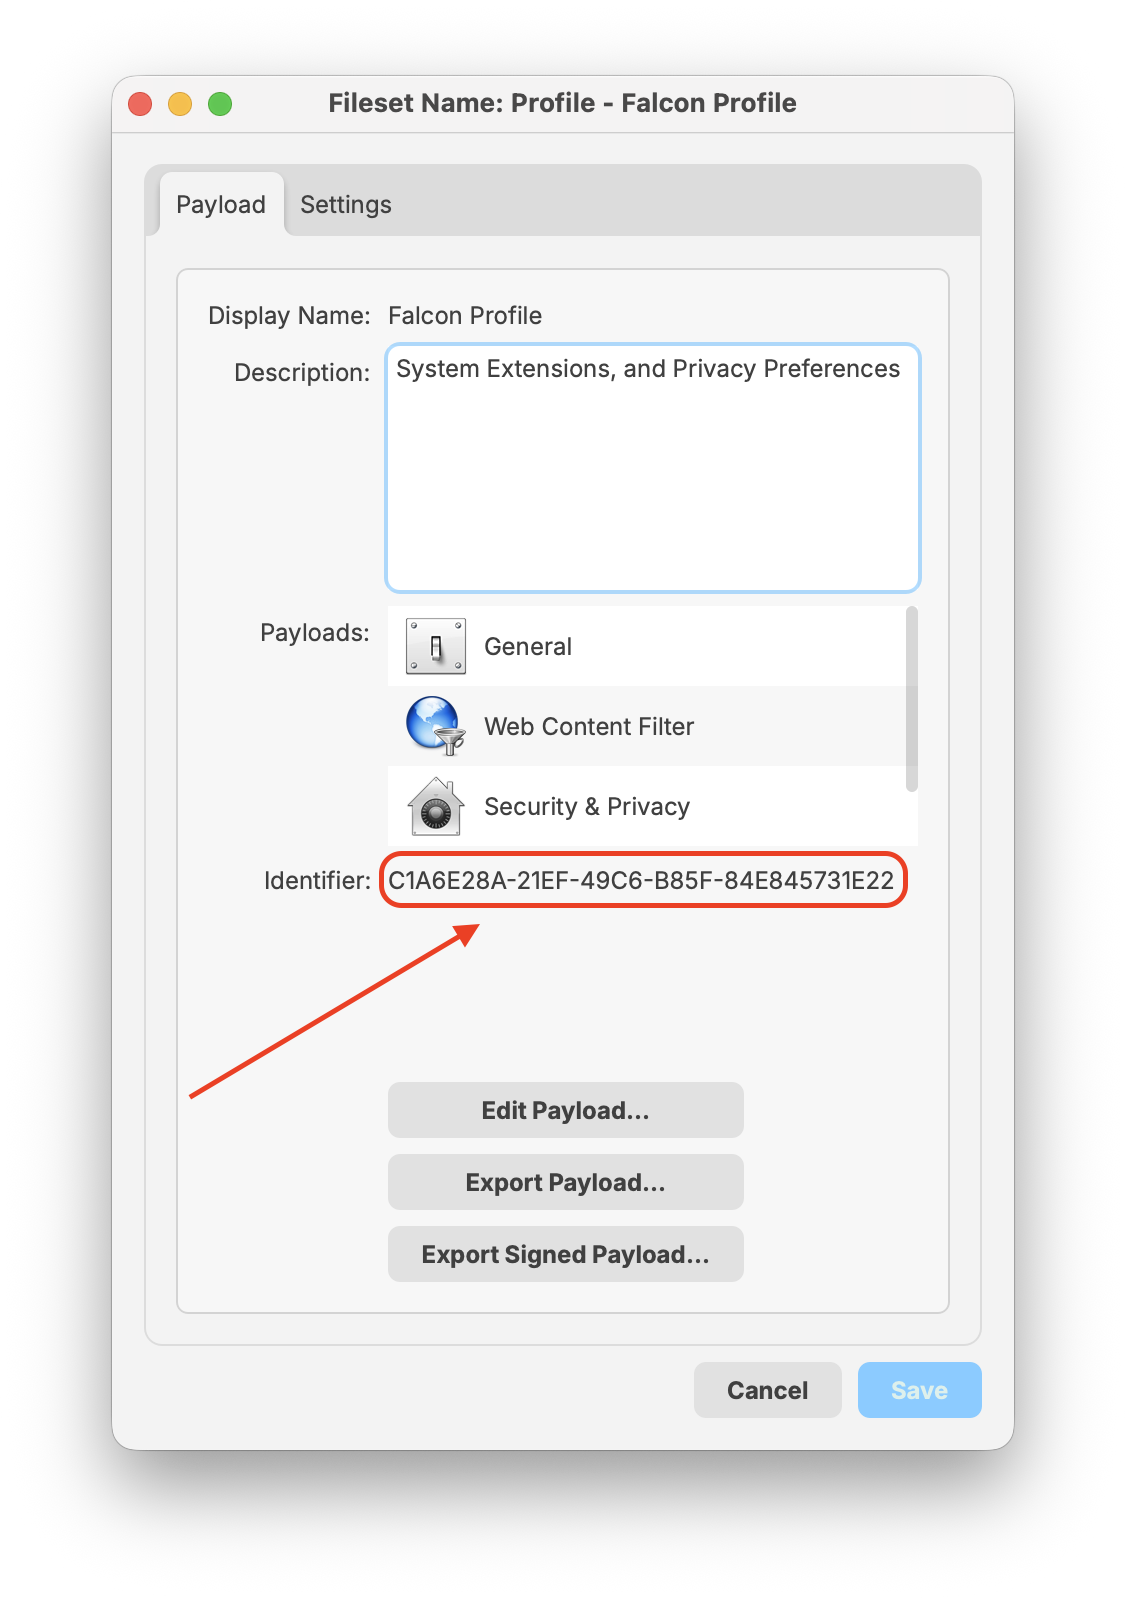
Entering in your Payload Profile Identifiers
|
 Check for Falcon profile script
 |
Creating a Fileset Group
Keeping your filesets organized is a recommended best practice, especially when managing multiple software deployments. You may create a new Fileset Group (for example, CrowdStrike Falcon (macOS 2023)) and move all related filesets into that group. This allows you to associate the Fileset Group with your devices instead of assigning individual filesets separately.
Once the filesets and profiles have been created, you can assign the CrowdStrike Falcon (macOS 2023) Fileset Group to a few test devices. This helps verify that the software installs correctly and that the configured license code is applied successfully.
FileWave Custom Fields to validate installation
Monitoring the CrowdStrike Falcon Sensor through FileWave custom fields helps ensure endpoint protection remains active and compliant. By validating that the Falcon service is running and reporting the installed sensor version, administrators can quickly detect inactive or outdated agents that may leave devices exposed.