
Custom Fields
Optional: add one organization-specific inventory value
Custom Fields add organization-specific data, such as a building code, asset tag, assigned cart, or department, to device inventory. Their values can appear in Inventory Reports, Smart Groups, and API results. Start with an administrator-entered value on one test device; scripts and bulk CSV imports are separate, optional tasks.
1. Create a static test field
First complete the read-only Inventory Report. Continue here only if you need a value that built-in inventory does not already provide. Use an account allowed to manage Custom Fields, and confirm that the new test field is not referenced by device naming, profiles, scripts, or Smart Groups.
Create Custom Fields in FileWave Central by opening Assistants > Custom Fields > Edit Custom Fields.
Static Custom Field: Building Code
Create a separate field called Evaluation Building Code with the description Evaluation-only static field for one test device. Do not modify an existing production Building Code field. The older screenshot uses Building Code; use your new field throughout this exercise.
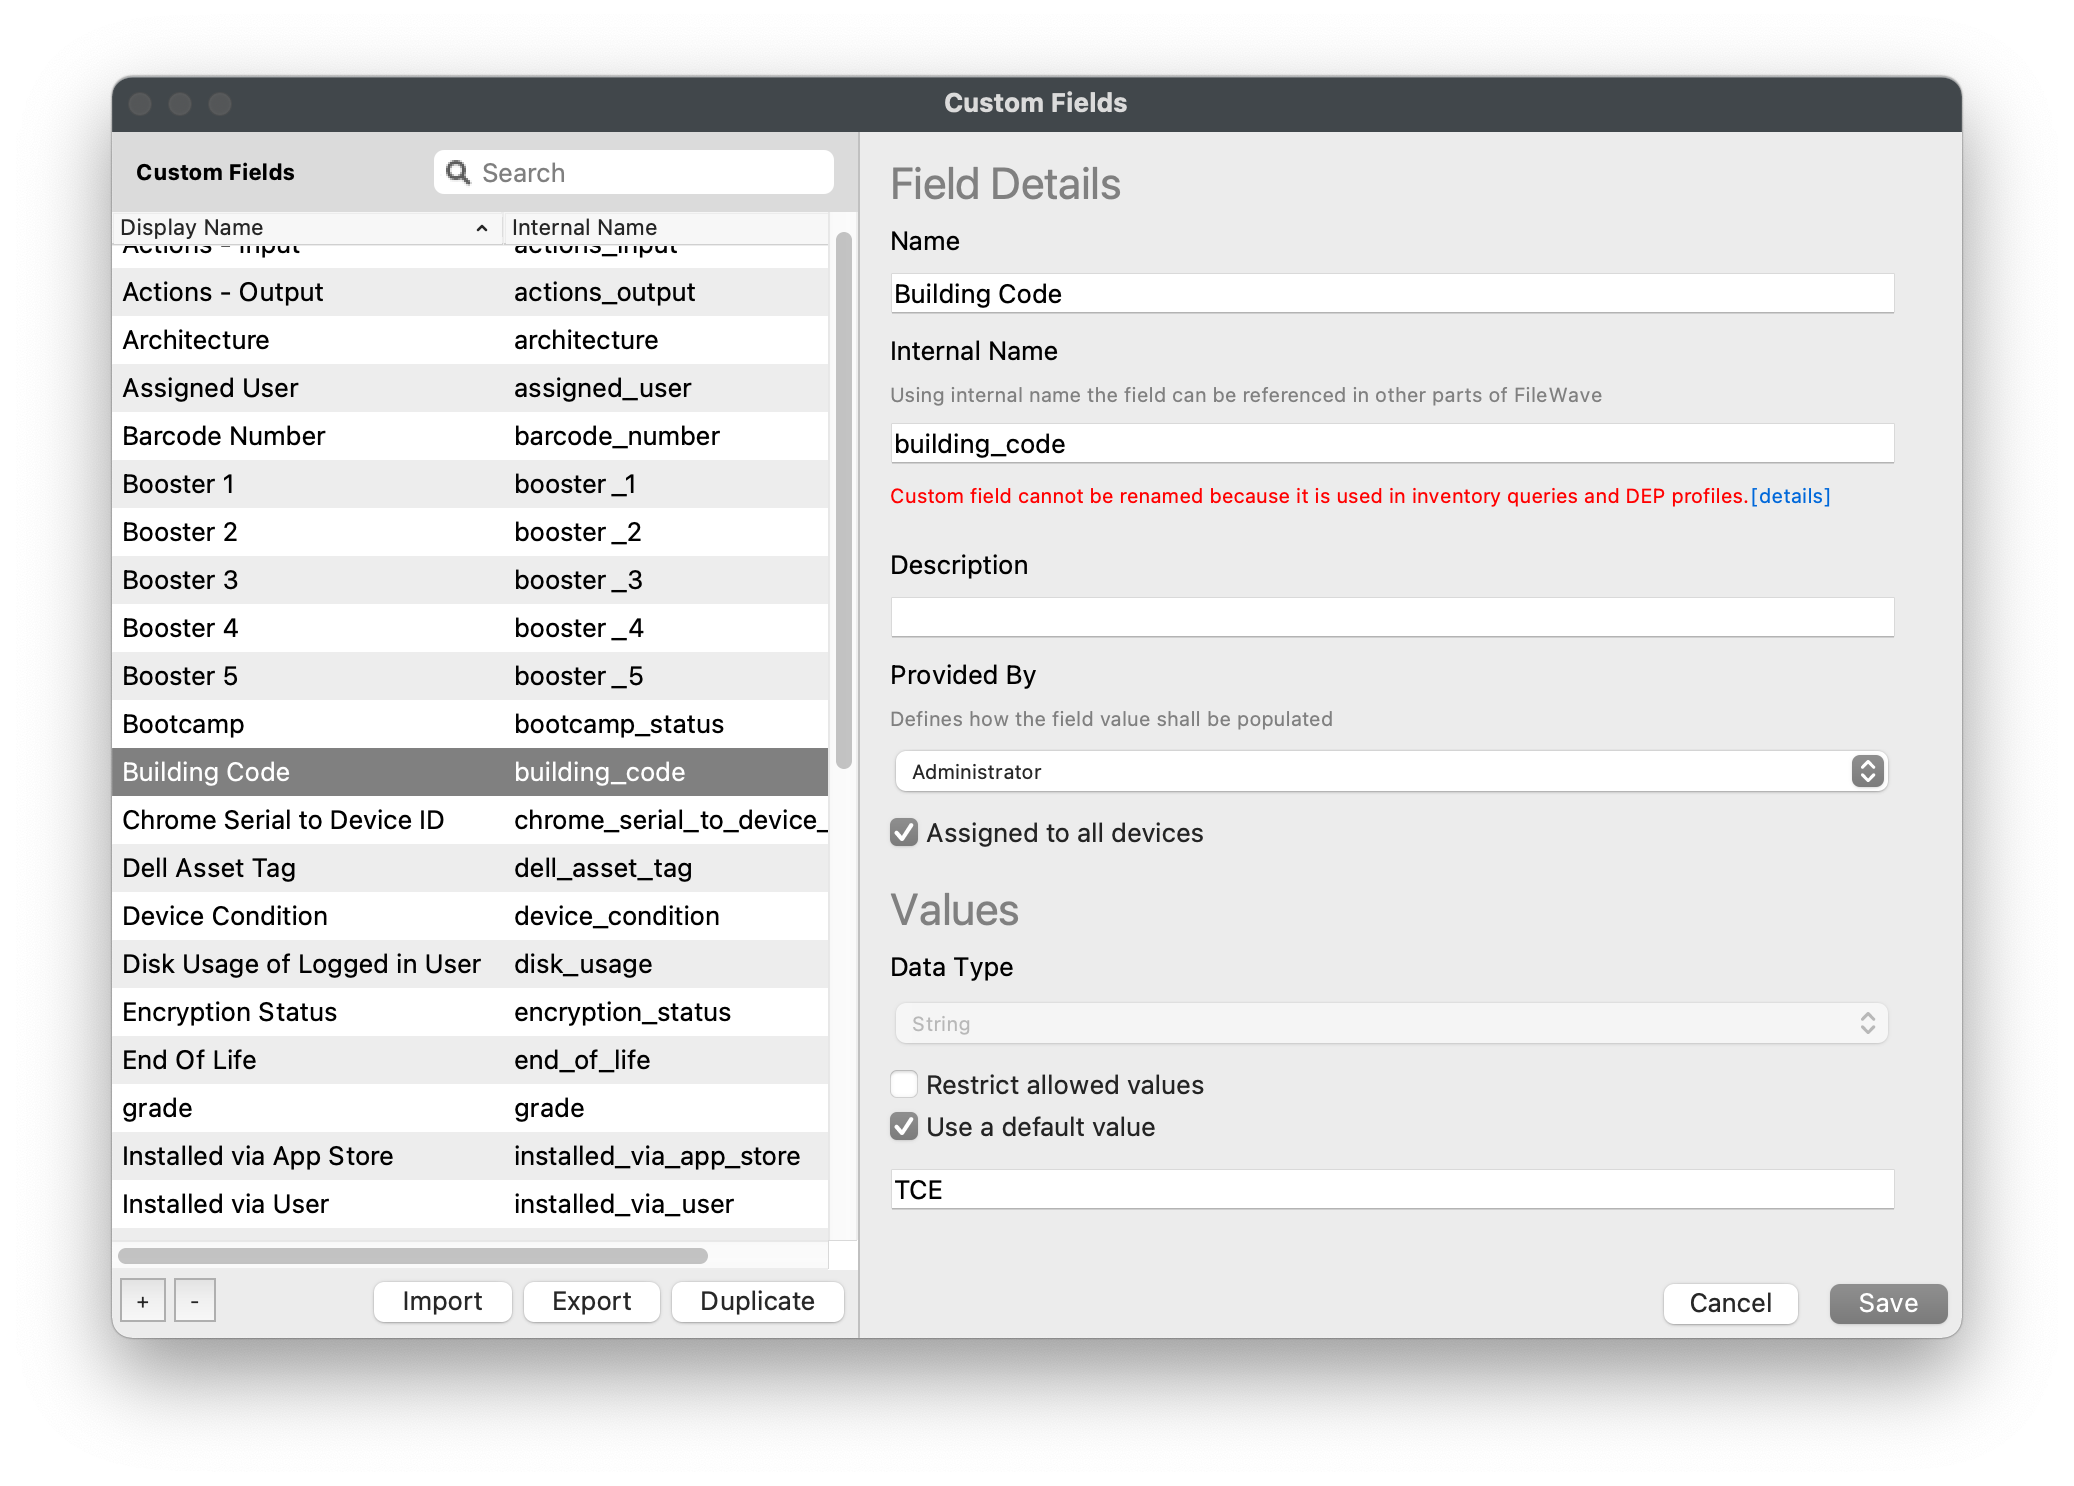 Open FileWave Central and navigate to "Assistants > Custom Fields > Edit Custom Fields".
- Click the "[+]" button in the lower left-hand corner.
- Name the field Evaluation Building Code and note its generated Internal Name. The display name appears alphabetically in Device Details; the internal name is the variable identifier. Do not use special characters in the field name.
- Optionally, enter a "Description" for the Custom Field so other team members know what the field is designed for.
- Change the "Provided By" drop-down menu to "Administrator".
- Administrator means a FileWave administrator provides the Custom Field value.
- Leave Assigned to all devices unchecked. You will associate the field with only the known test device in the next section.
- Choose Data Type > String for a text building code.
- For this test, leave Restrict allowed values unchecked so you can type the value. When you need controlled entries later, enable it and provide the allowed list; the input then becomes a drop-down menu.
- If you use a default, choose Unknown. A default is a placeholder, not a measured value. Defaults can be useful for safe device-name or variable substitution, but do not use a default such as Secure or Compliant to hide missing data.
- Click "Save".
2. Associate the field with the test device
A field definition and its device associations are separate. With Assigned to all devices unchecked, select the test device explicitly. The feature is called Custom Field Associations; it has not been renamed to Deployments.
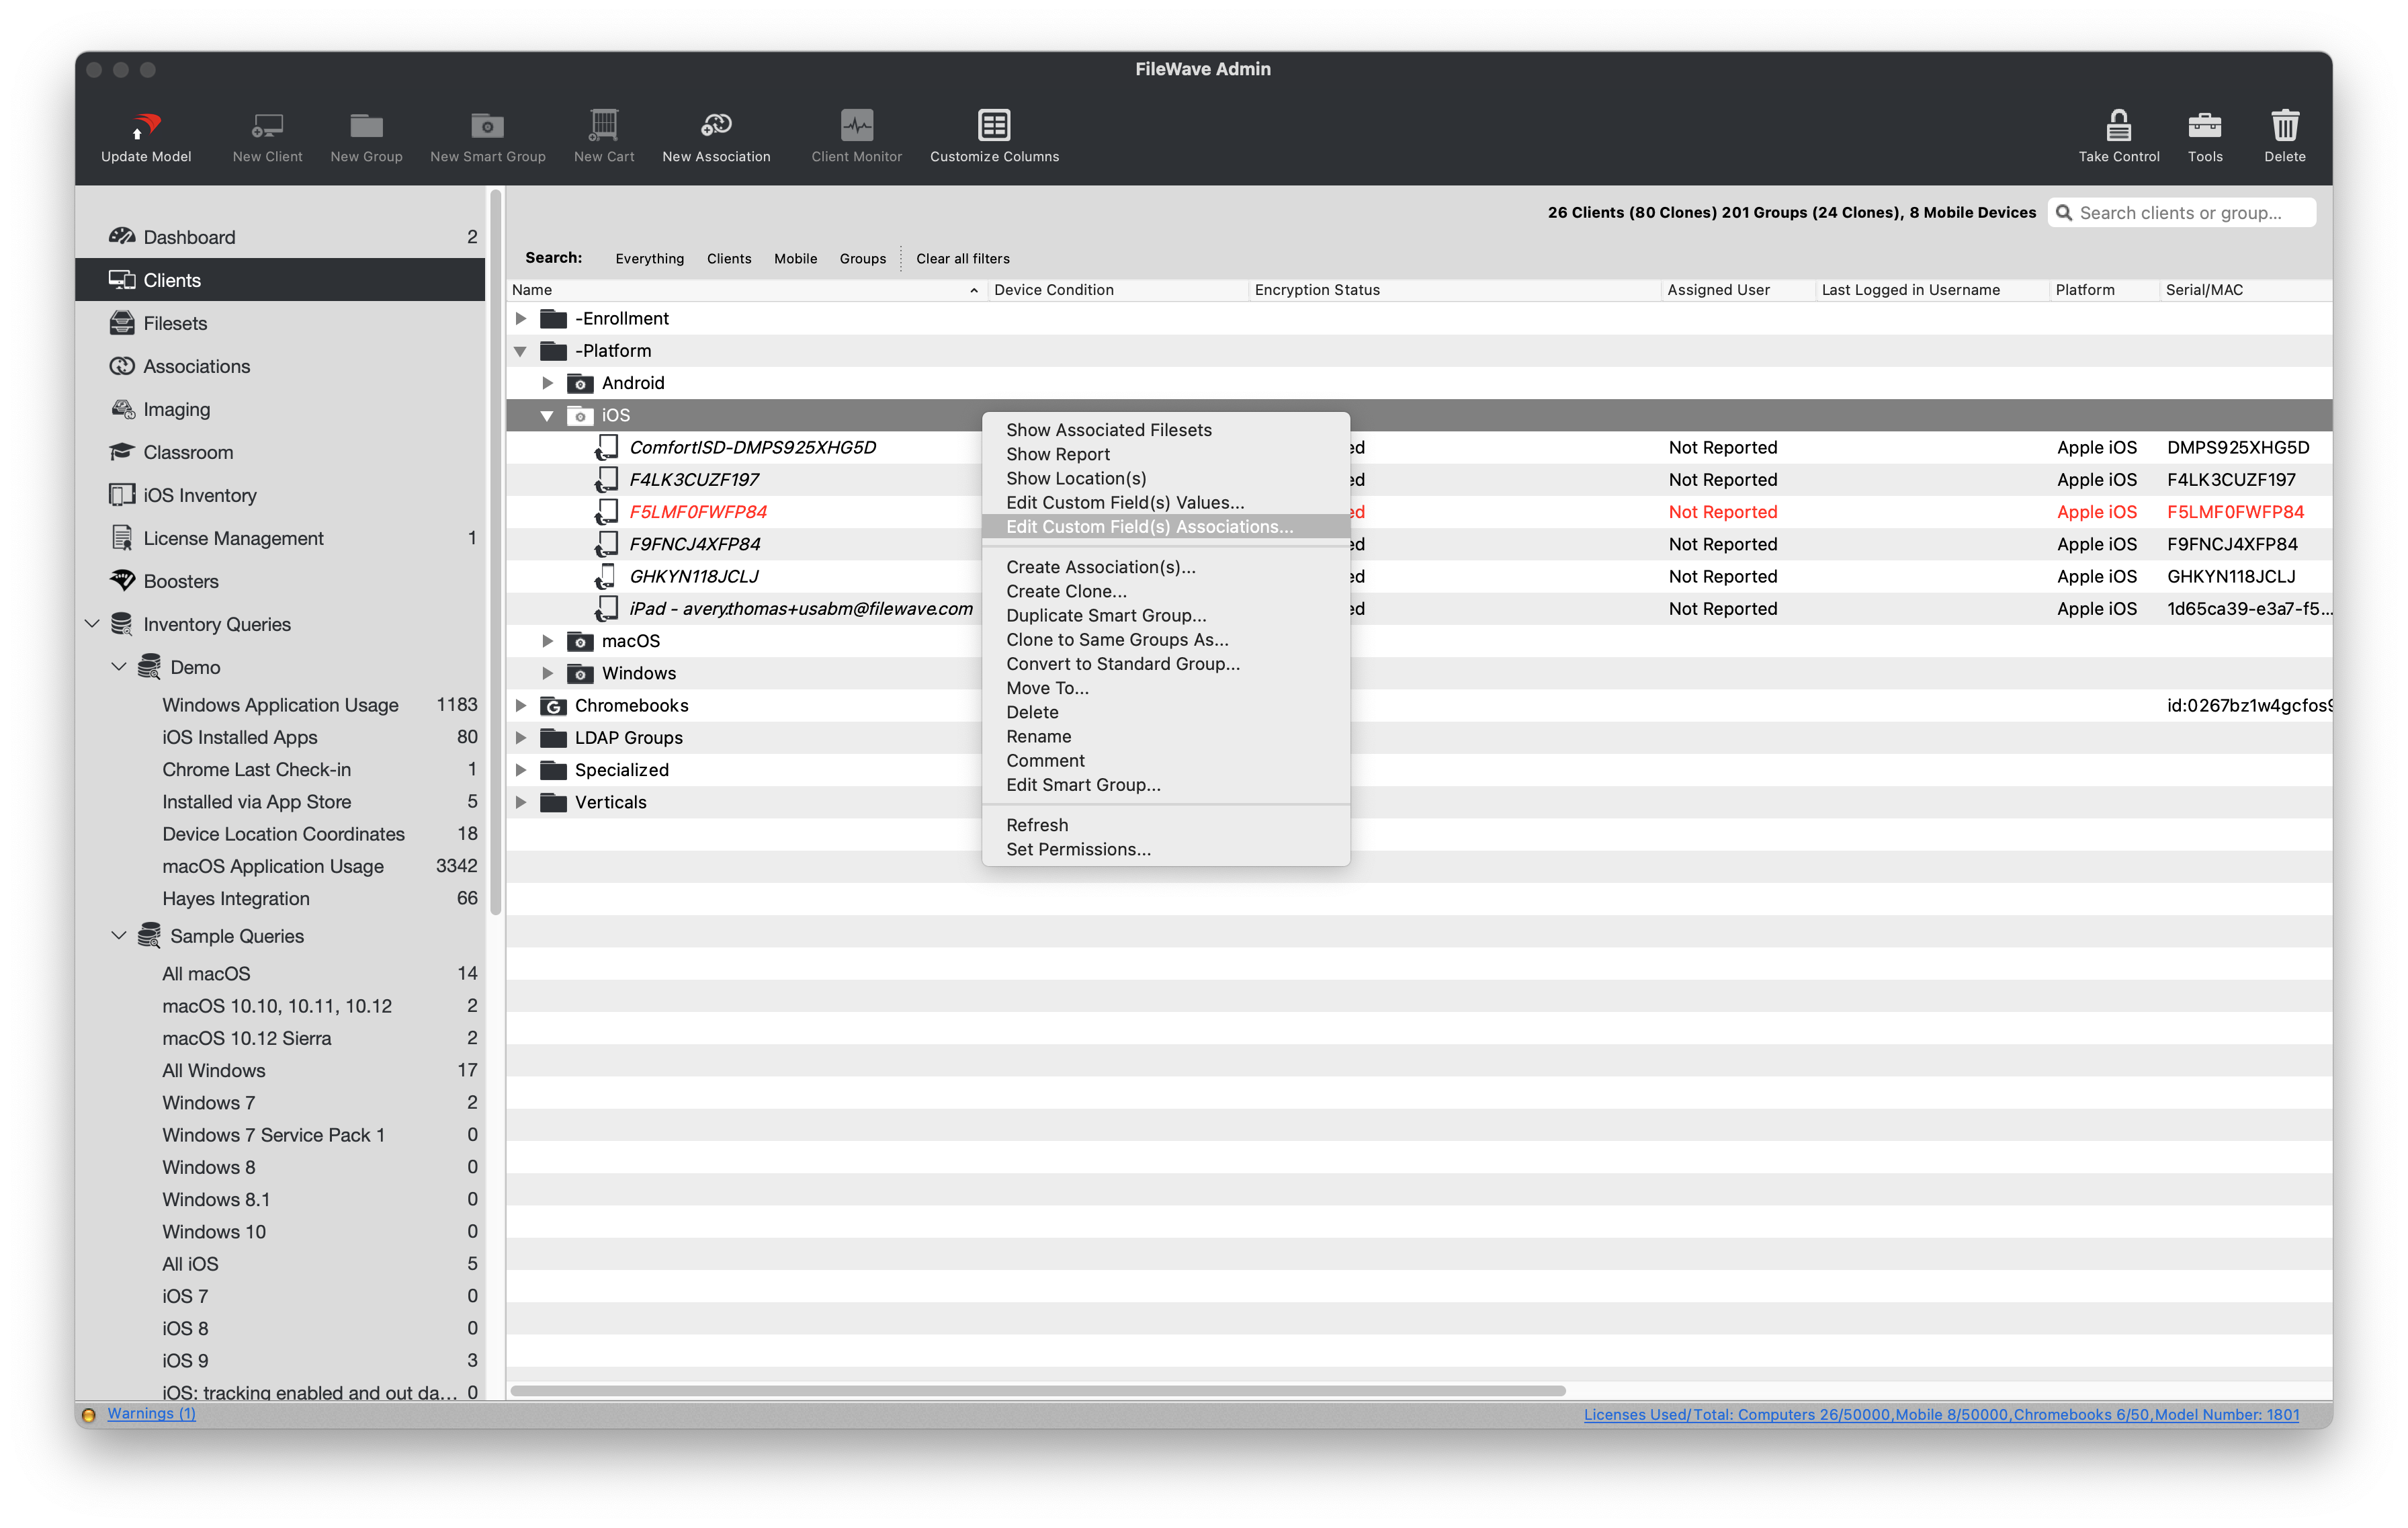
- Open FileWave Central and navigate to "Clients".
- Right-click only the known test device.
- Select "Edit Custom Field(s) Associations" from the right-click menu.
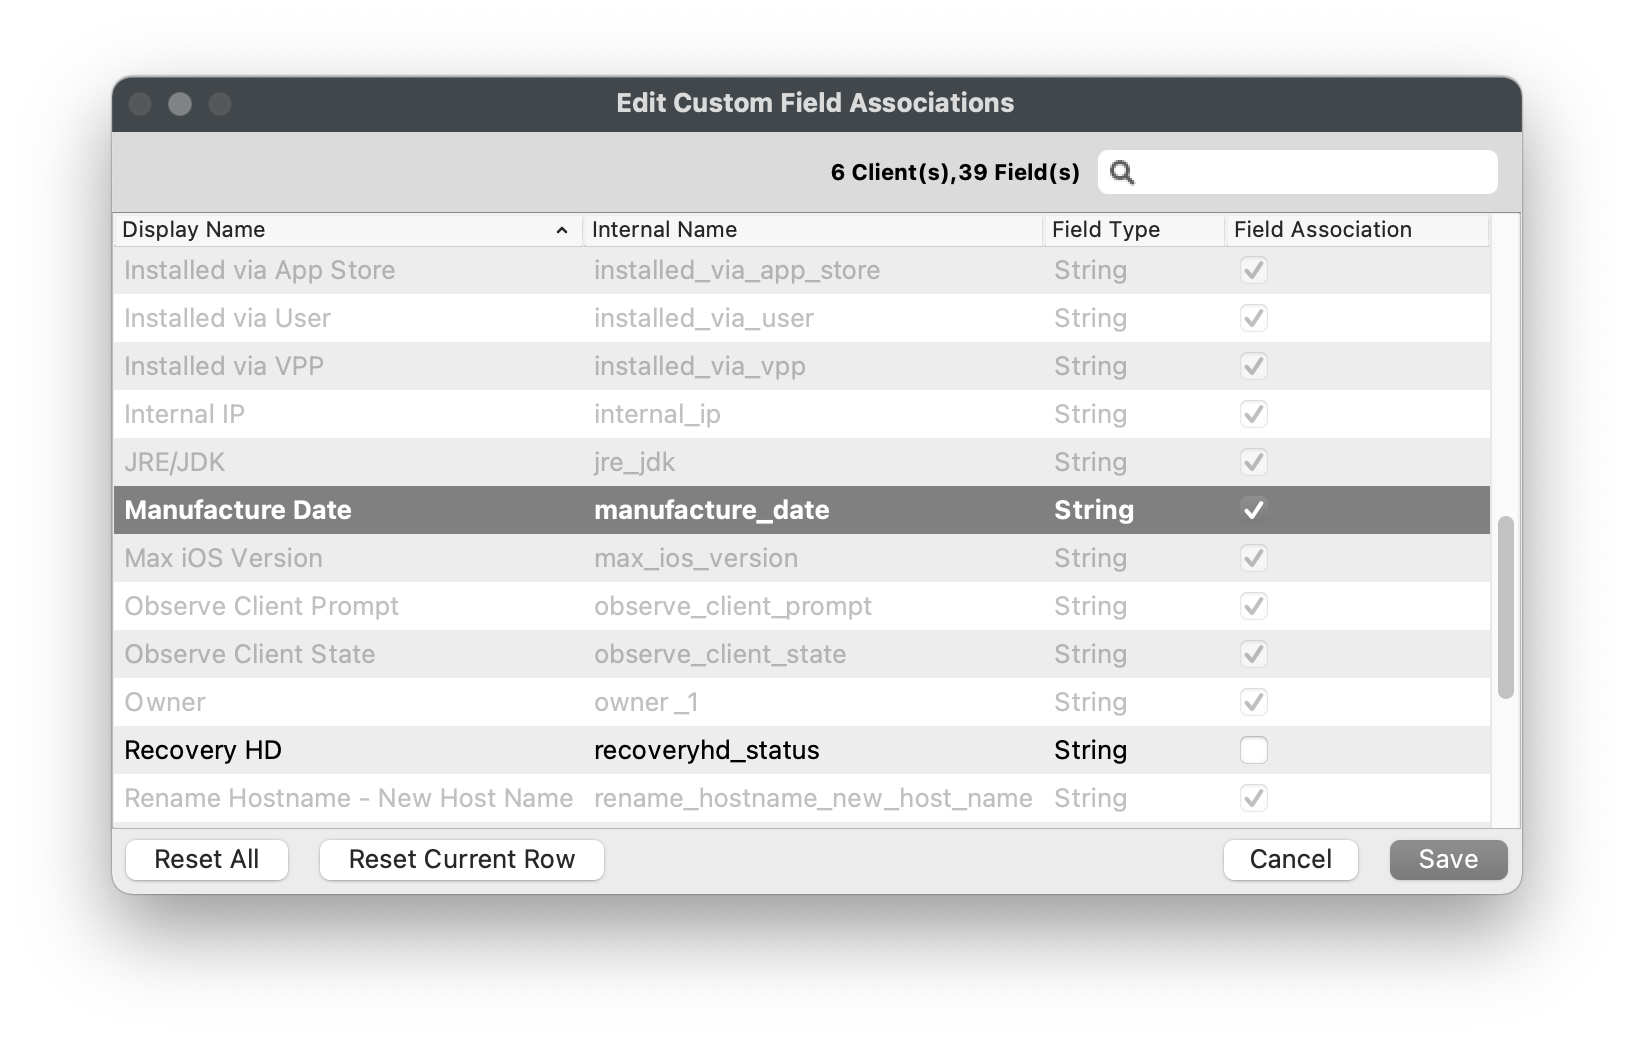
- Check the box for Evaluation Building Code. Leave unrelated Custom Field associations unchanged.
- Click "Save".
- You should now see the Custom Field listed in the device's "Device Details".
3. Enter the value and verify it
Enter EVAL for Evaluation Building Code on your test device. The older images show how to edit a different field, Device Condition, using a drop-down menu of restricted values. Your test field accepts typed text.
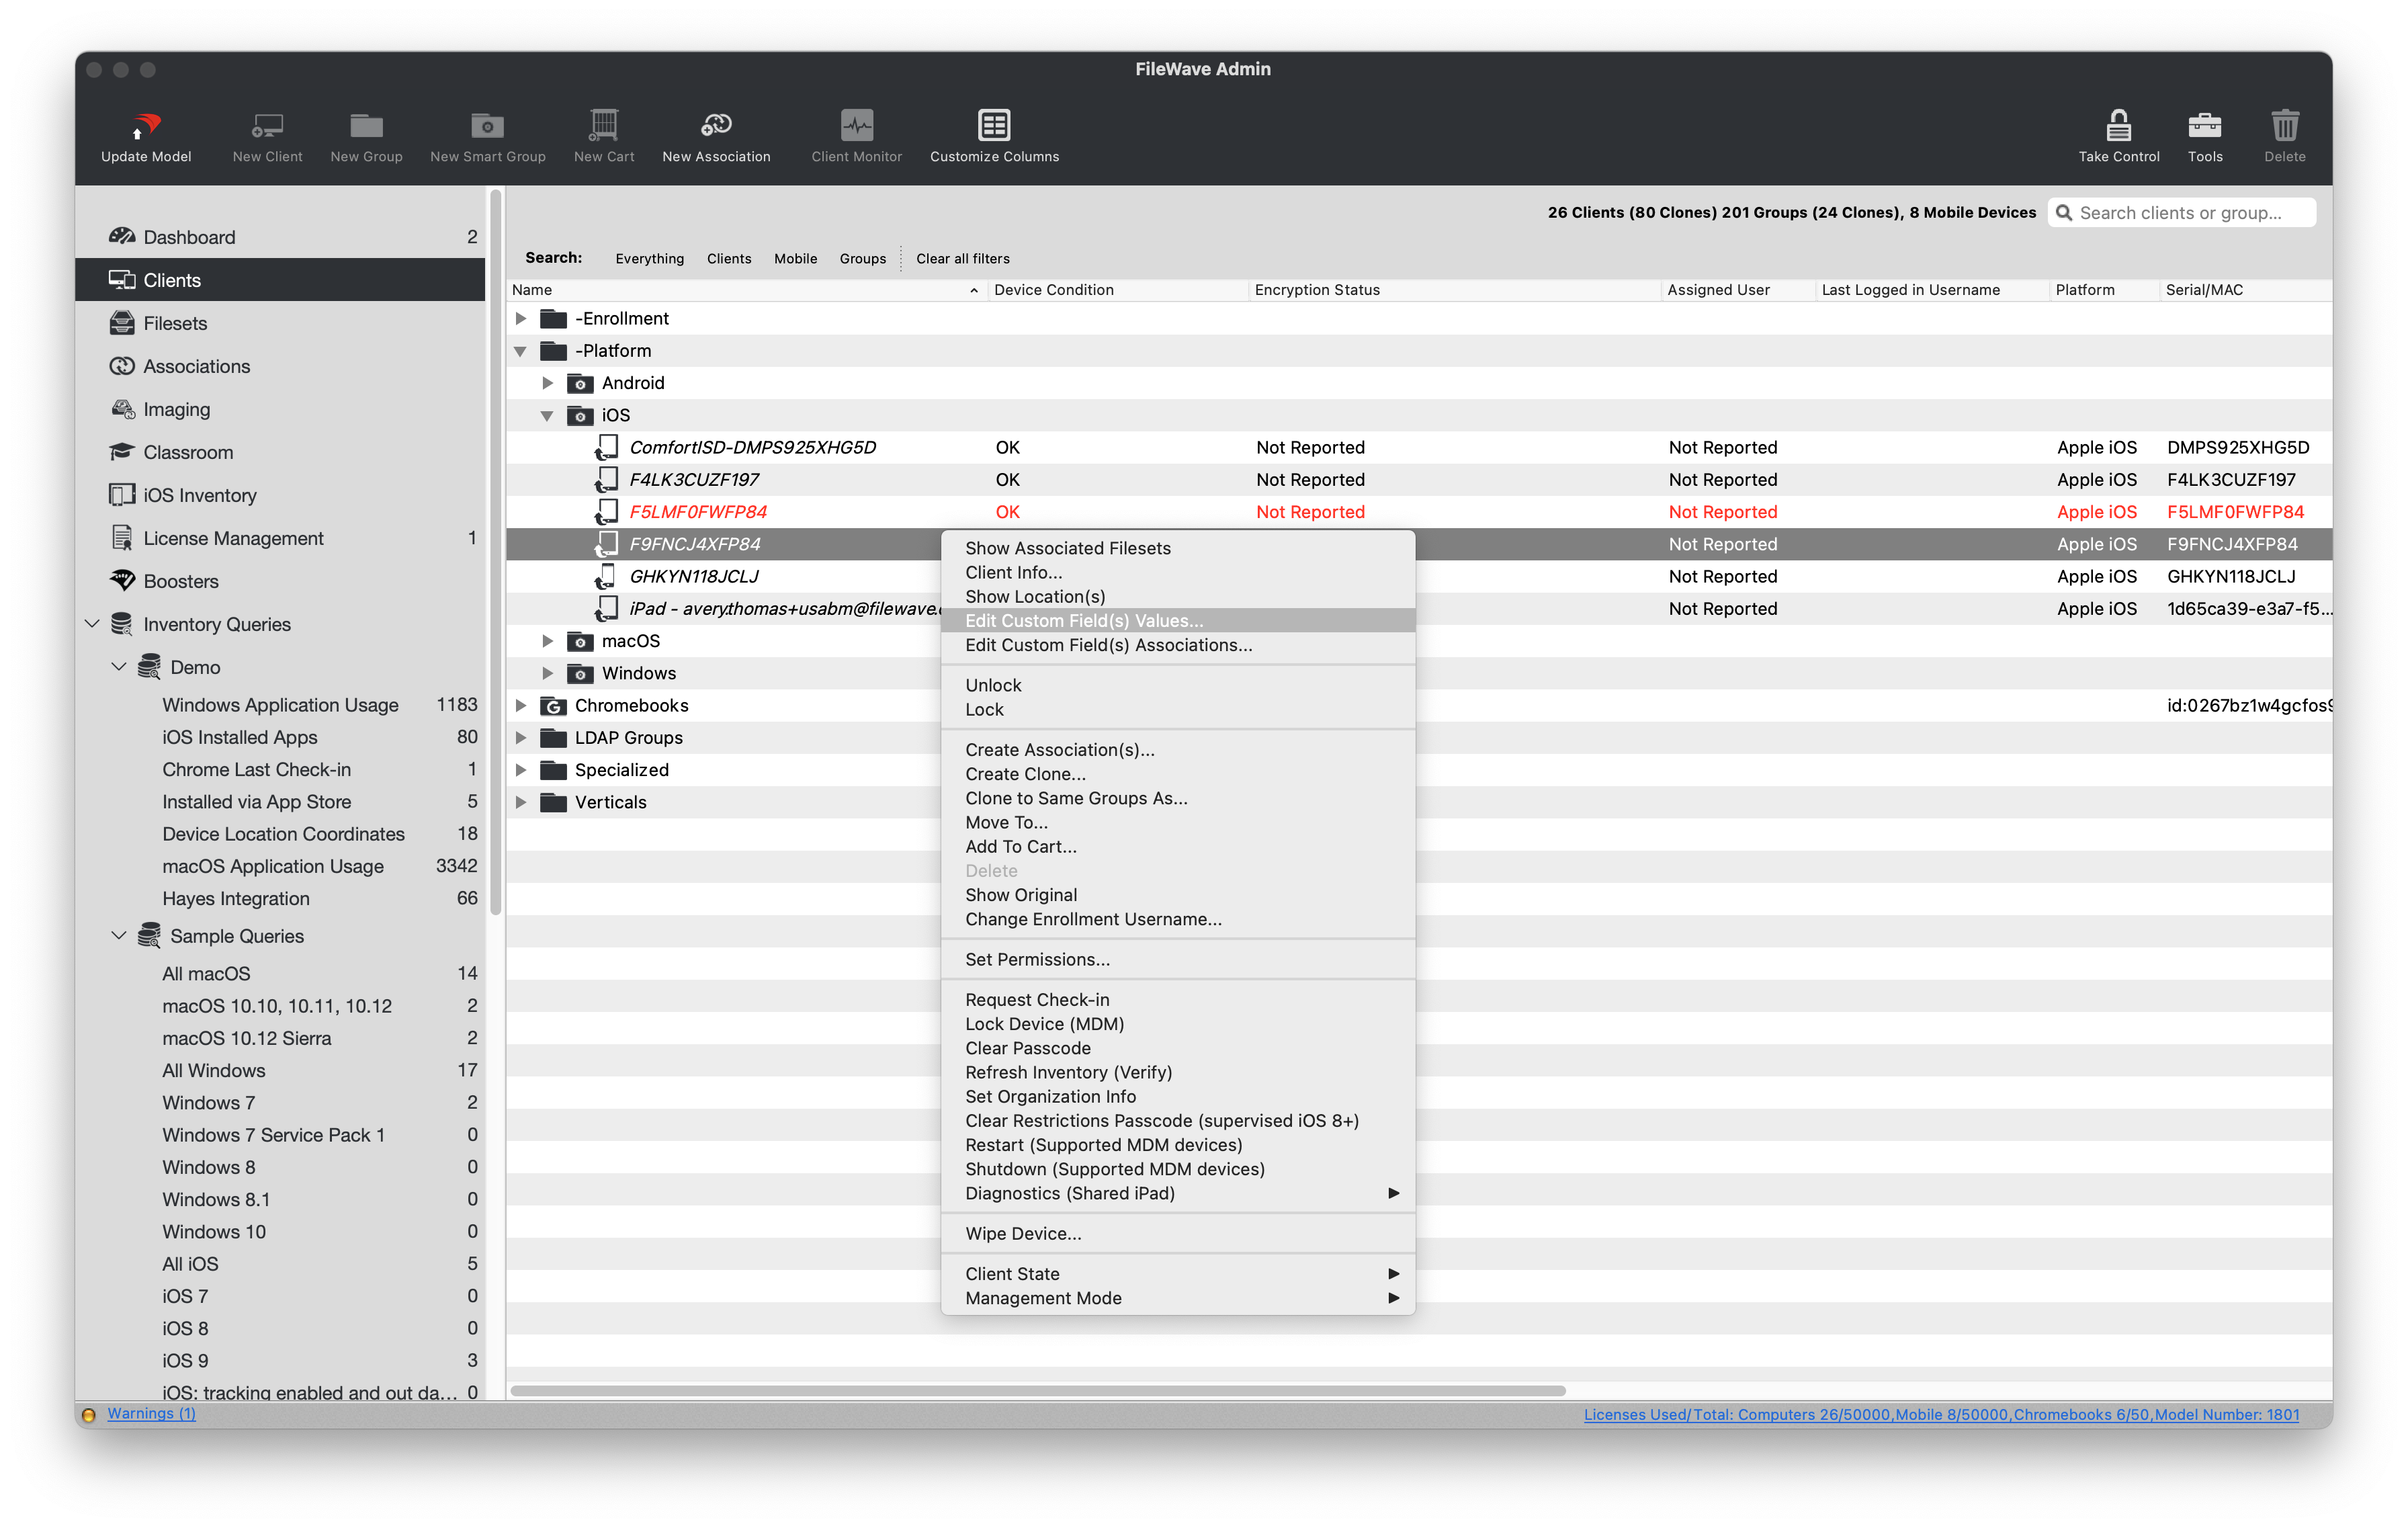
- Open FileWave Central and navigate to "Clients".
- Right-click only the known test device.
- Select "Edit Custom Field(s) Values" from the right-click menu.
- Slowly double-click the "Field Value" cell for Evaluation Building Code and enter EVAL. For fields with restricted values, select an option from the drop-down menu instead.
- Click "Save".
- You should now see the Custom Field modification in the device's "Device Details".
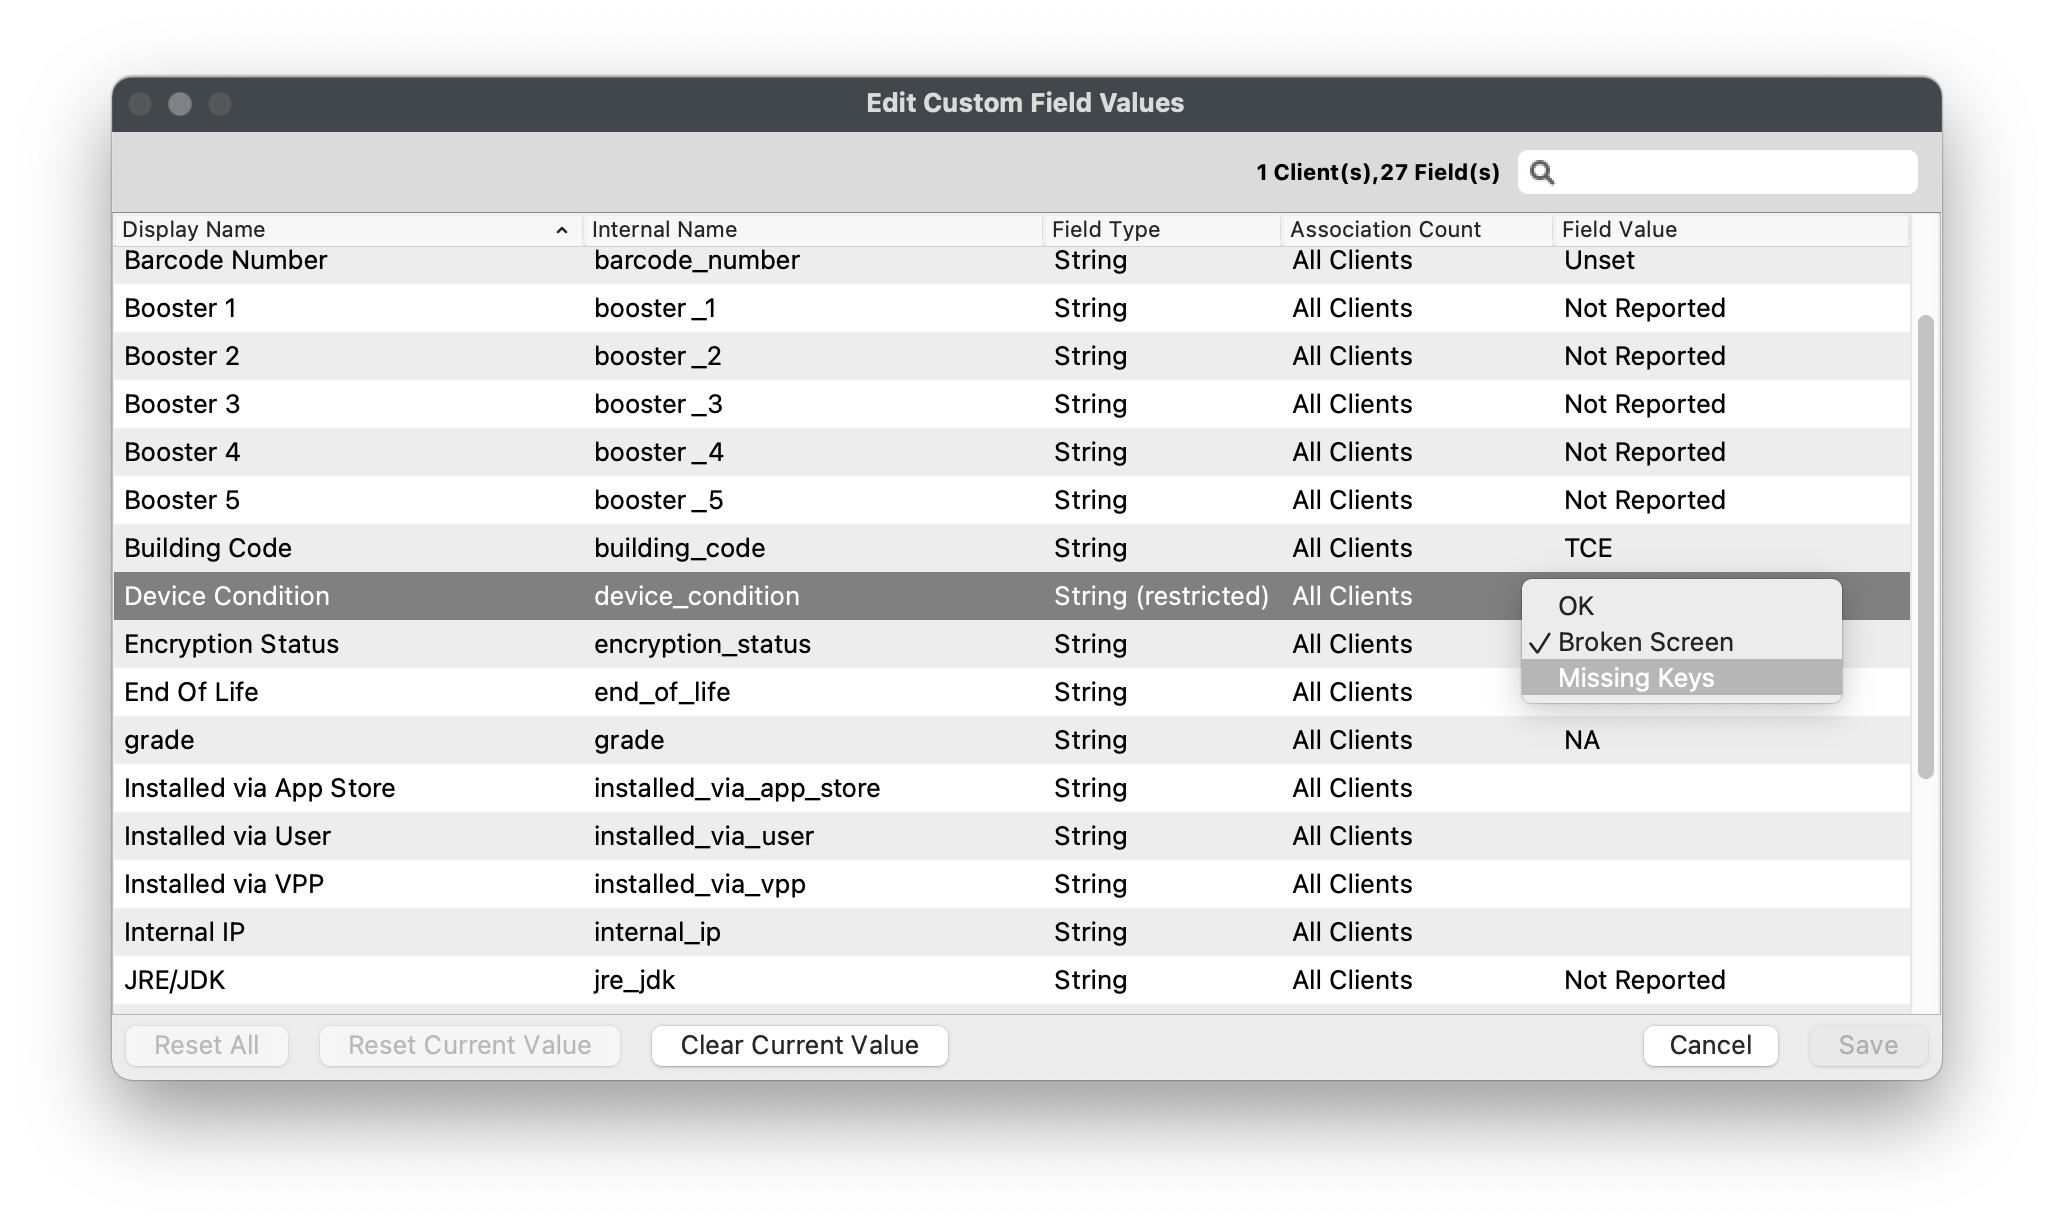
Open Device Details and confirm Evaluation Building Code = EVAL on the correct device. Then add your field under All Devices > Custom Fields to the saved one-device report's Fields, save the report, and confirm the same value. This is administrator-managed data: the Client does not need to measure or return it. It is not evidence that the device is physically in that building.
If the field is missing, first check that its association was saved for this device. If the value is wrong, check the selected device, provider, allowed values, and report filter. Do not request Verify or run Update Model just to refresh this view. Update Model is for actual pending model changes, not a universal extra Save step; review any such changes with the environment owner before committing them.
The static-field exercise is complete. Leave the test field in place only if you will use it for the report example. Otherwise, restore any test value you changed and remove only this field's test-device association after checking that no report, naming rule, script, or group depends on it. Verify the result in Device Details; do not delete a shared definition.
Optional: field scope and variable names
Assigned to all devices associates a field with existing devices and new devices as they enroll. It is a broad policy choice, not a prerequisite for creating a field. Manually associating a field with a Smart Group's current devices does not automatically associate it with future members. For example, selecting an iOS group for a Manufacture Date field requires reviewing new members separately.
The older examples use internal variables such as %building_code% and %encryption_status%. To avoid collisions with built-in inventory names, Custom Fields documents context-specific prefixes: %custom_field.location% in an MDM Profile and %CustomFields.location% in script launch arguments or environment variables. Use the actual internal name of your field, not the example's name. The same reference covers LDAP providers and legacy Client Command Line fields; those are not needed for this static test.
Optional: script-based Custom Fields on macOS and Windows
A Client Script field runs code on associated devices and returns its output to inventory. Use it only when built-in inventory cannot answer your question. Examples include a needed registry or plist value; first check native inventory before adding encryption or security-state scripts. Scripts run as root on macOS or SYSTEM on Windows, so this is privileged device work, not a read-only report.
Have the script owner review its commands, interpreter availability, output type, error handling, runtime cost, and privacy impact. Test a reviewed read-only script on one authorized device before broader assignment. Do not copy the encryption scripts from the older screenshots as a new demonstration; those images illustrate editor controls, not a current approved security check.
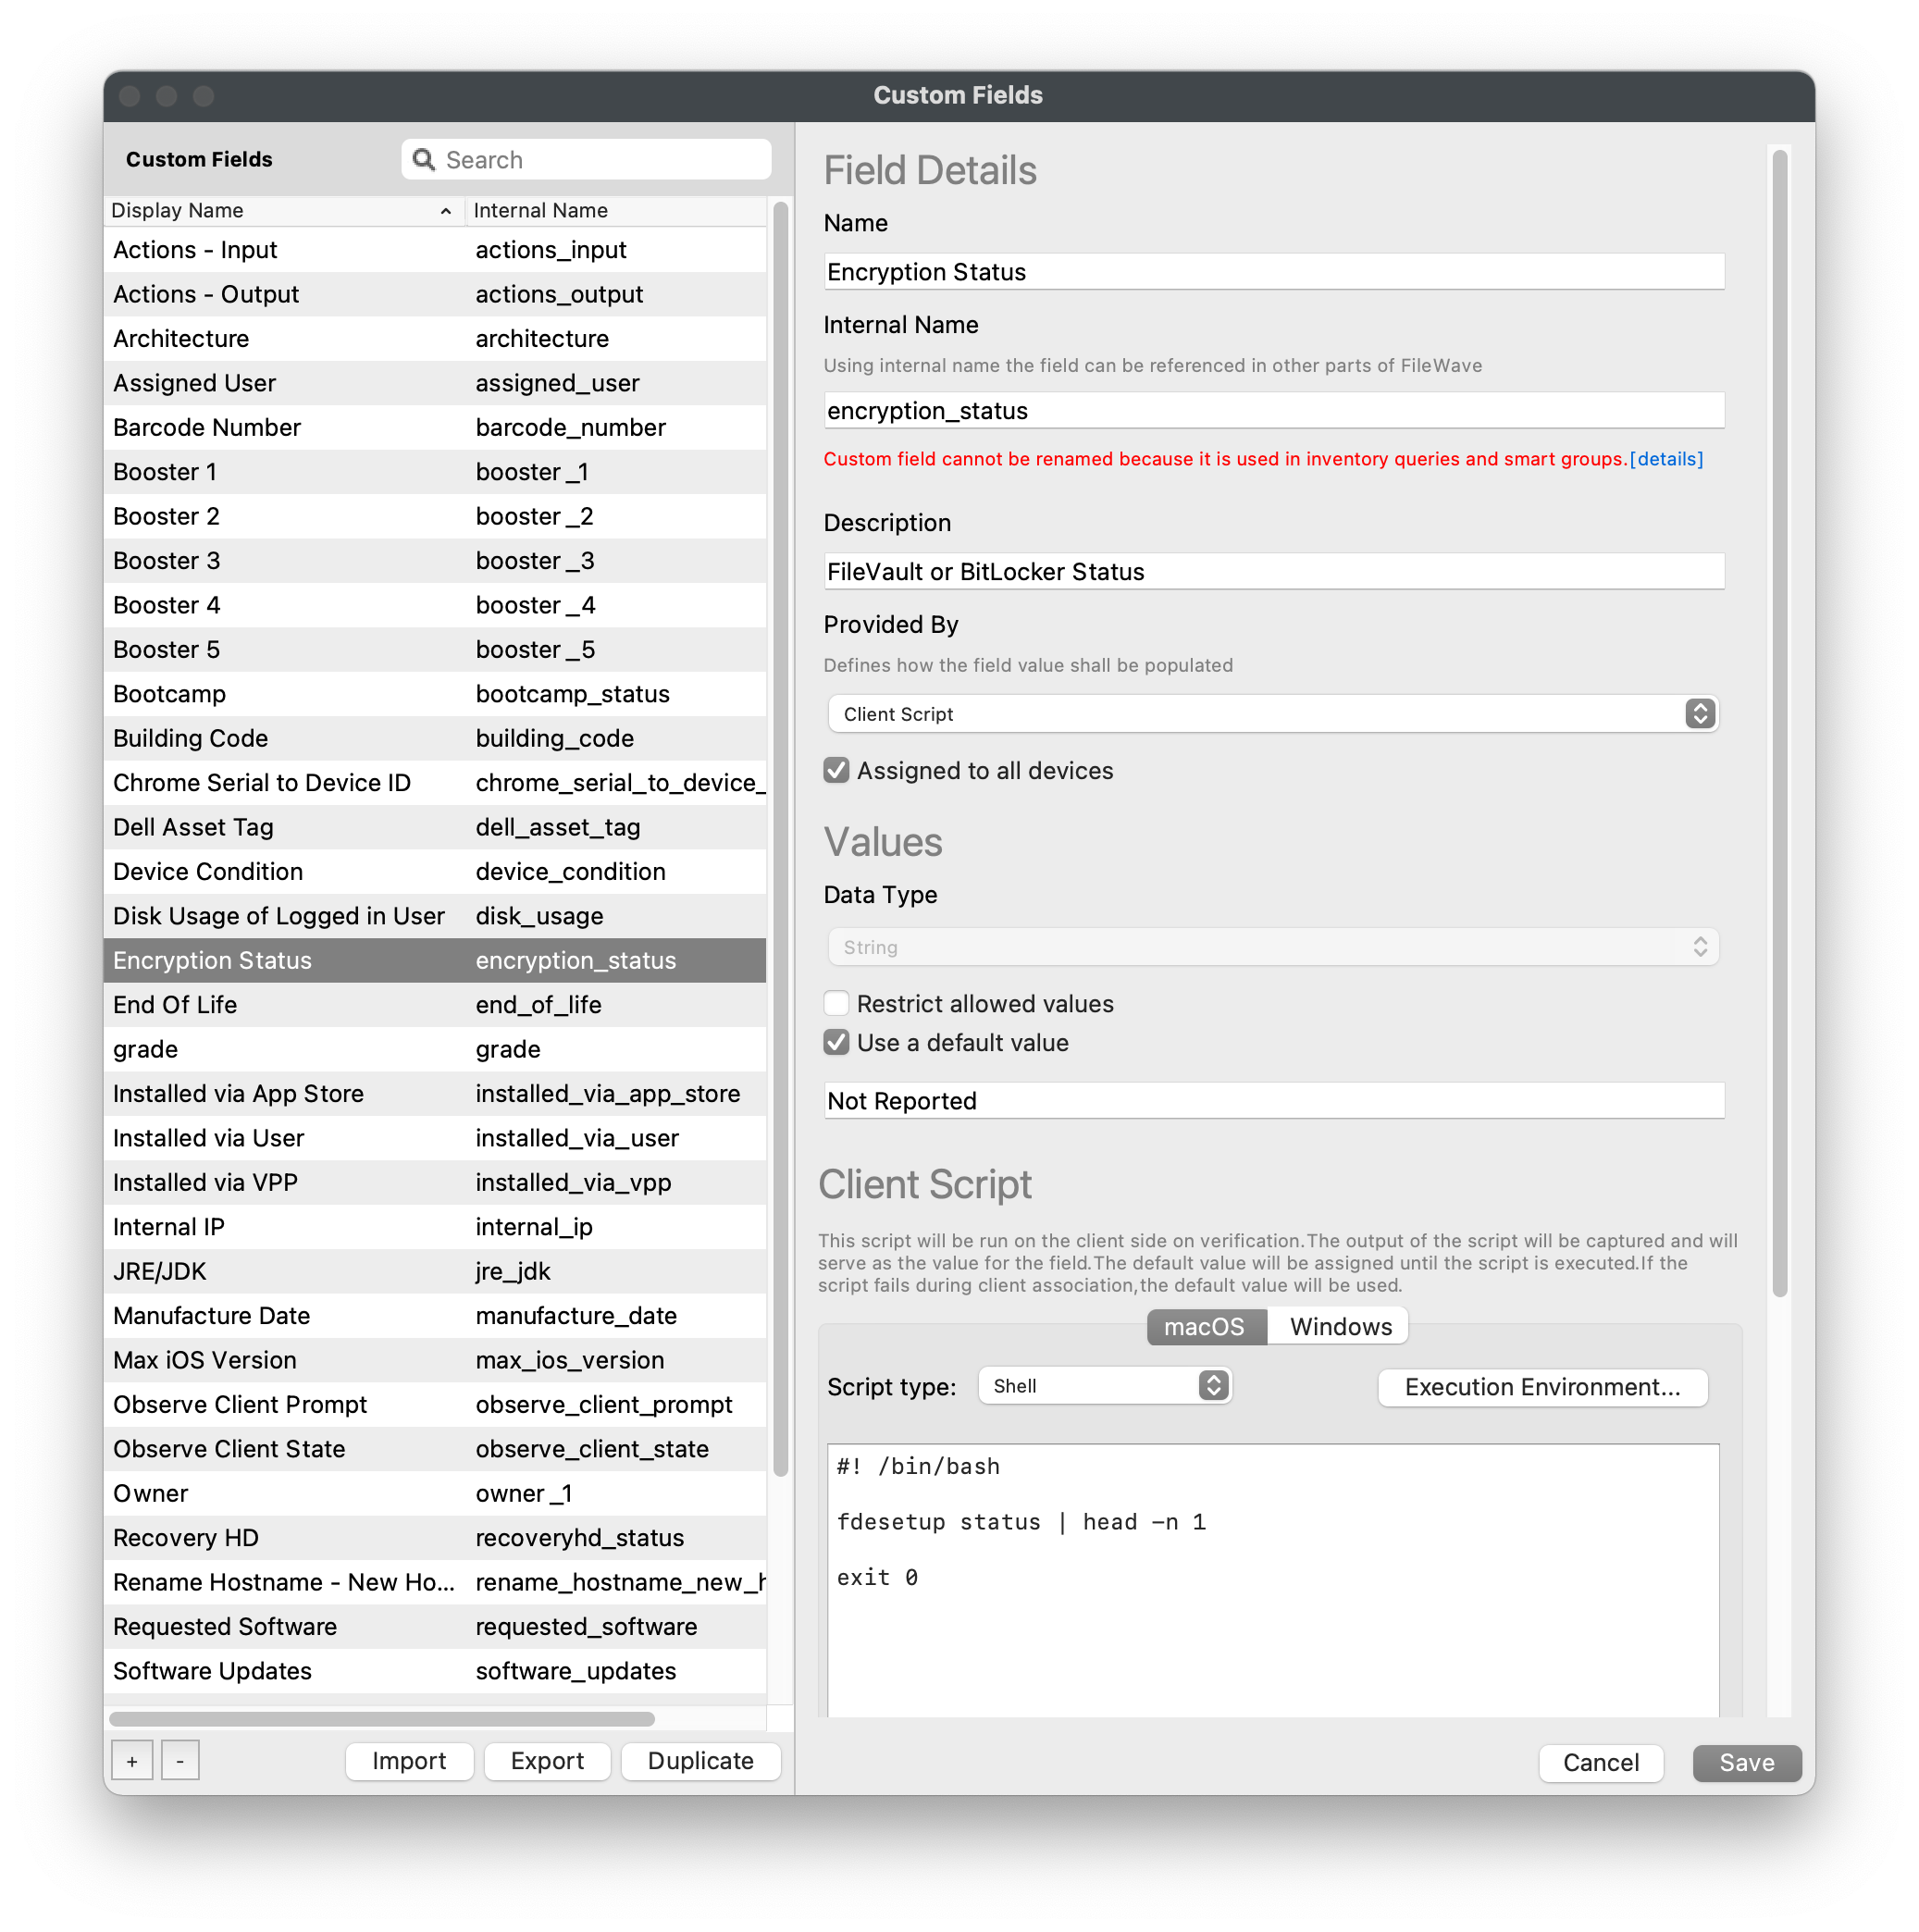 Open FileWave Central and navigate to "Assistants > Custom Fields > Edit Custom Fields".
- Click the "[+]" button in the lower left-hand corner.
- Name the Custom Field accordingly and take note of the automatically generated "Internal Name".
- Custom Fields appear in Device Details and are sorted alphabetically, so choose names that will be easy to scan later.
- The "Internal Name" will be used as the variable name throughout FileWave. (ex: %encryption_status%).
- Optionally, enter a "Description" for the Custom Field so other team members know what the field is designed for.
- Change the "Provided By" drop-down menu to "Client Script".
- Client Script runs a script periodically and returns the script output to the Custom Field.
- Scripts run as the
rootuser on macOS or as theSYSTEMaccount on Windows.
- Leave Assigned to all devices unchecked. After saving the definition, use Edit Custom Field(s) Associations to associate the reviewed field only with the approved test device.
- Choose the Data Type that matches the script output. Use String for text; date/time values must use ISO-8601 format.
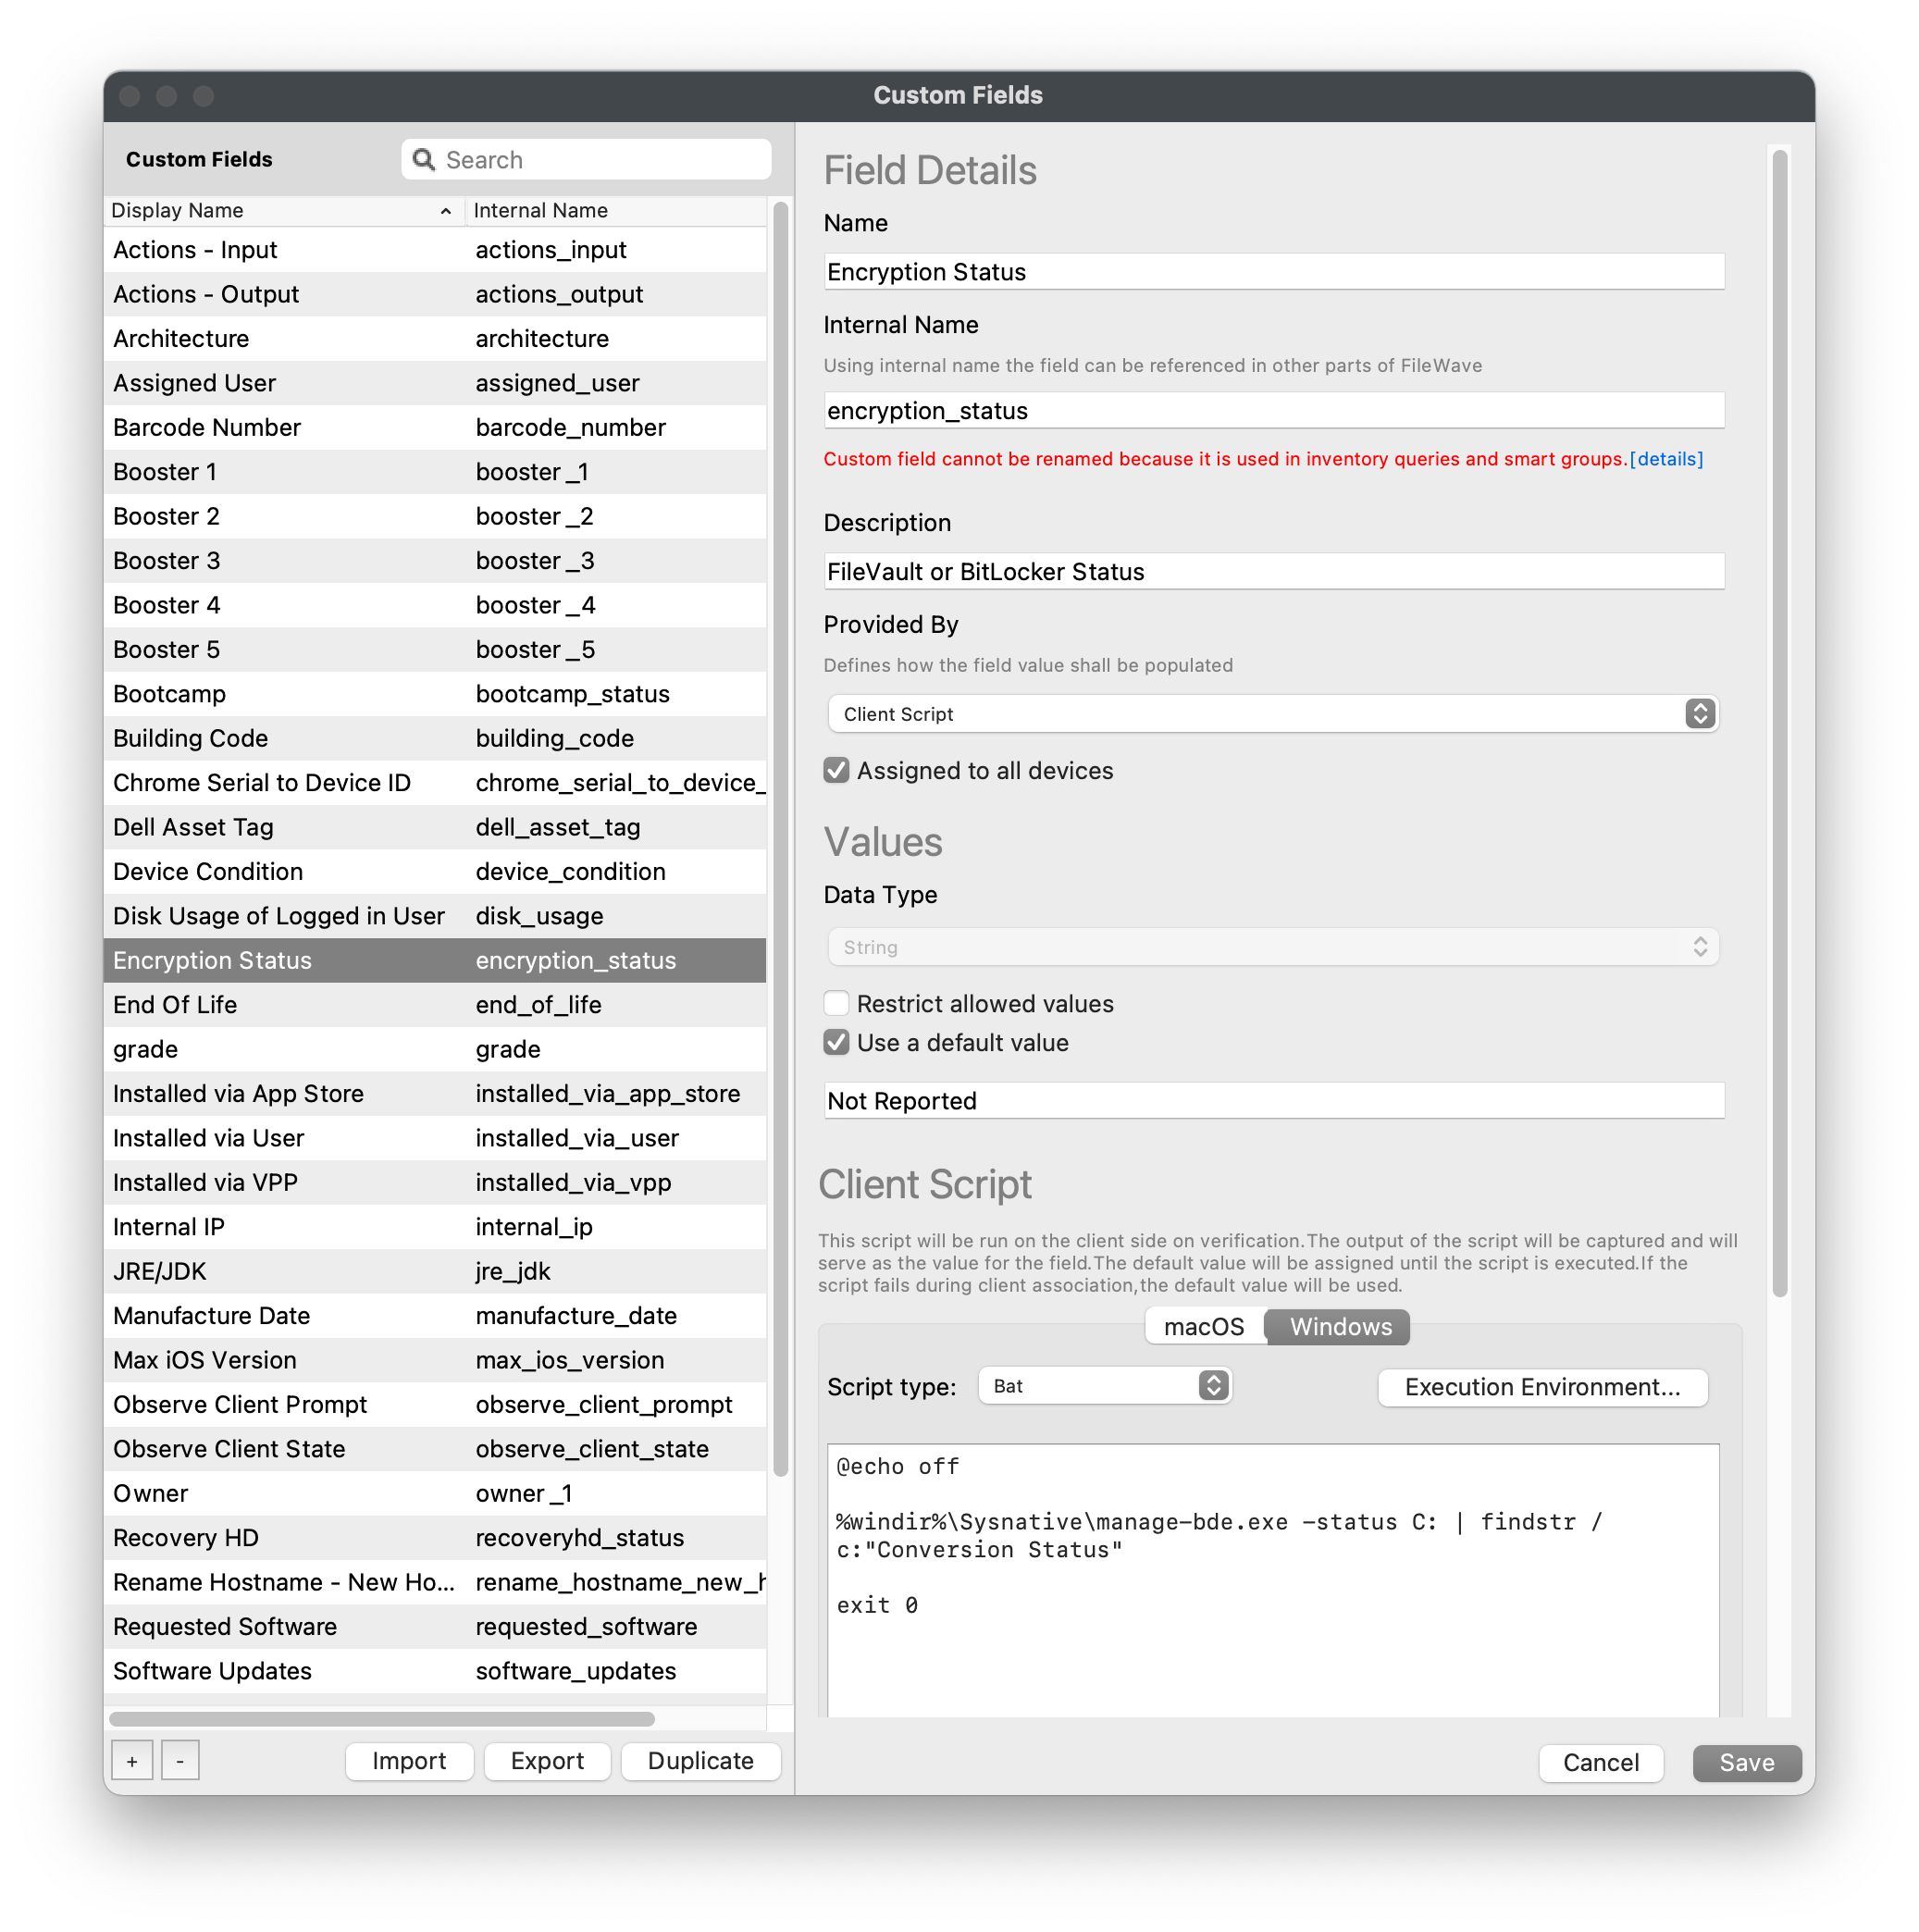 Optionally, check the "Restrict allowed values" box.
- If you check "Restrict allowed values", enter the allowed values for the Custom Field.
- This replaces free-text entry with a drop-down menu of allowed values.
- For script-based Custom Fields, use this option only if the allowed values cover every expected result, including error output.
- If you need a default, make its meaning explicitly Unknown or Not collected. For non-string fields, choose a missing/error design that cannot be mistaken for a successful measurement.
- For a macOS test, select the correct scripting language and enter the reviewed script under "macOS".
- For a Windows test, select the correct scripting language and enter the reviewed script under "Windows".
- Optionally, check Use output only when script exits with code 0. This depends on the script, but most successful scripts exit with code 0.
- Optionally, check Replace line feed characters with space to convert multi-line output into a single-line Custom Field value.
- Click "Save".
Windows bitness and output checks
The current editor has On Windows, run as 64-bit. Choose the context the reviewed script requires. Older fields may retain 32-bit execution after upgrades for compatibility; do not flip that setting across existing scripts without testing. Sysnative is relevant only when a script actually runs in a 32-bit process and needs a 64-bit Windows component. See Running Built-in PowerShell Commands with Custom Fields.
Use output only when script exits with code 0 accepts successful output according to the script's exit-code contract; verify that the script really reports errors correctly. Replace line feed characters with space can normalize multiline output. Avoid Restrict allowed values unless every expected result, including error handling, is accounted for. Windows Python or Perl scripts also require that interpreter to be installed and available in the system path.
Client Script fields run after a verify and before inventory is sent. Script execution, accepted output, inventory upload, report execution, and Smart Group evaluation are distinct events. Wait for the reviewed normal cycle; do not trigger Verify blindly to accelerate it. Confirm fresh successful output on the test device and its matching reported value before relying on the field. An old value or default must not become a good security verdict. Remove the test association when finished and verify that the test script is no longer assigned; do not delete another workflow's field.
Optional: import Custom Field values from CSV
CSV import can update one or more fields across many devices. Begin with one row for your known test device, not a fleet export. Back up the current values and confirm the selected identifier is unique. Import updates only fields already associated with each target device; otherwise FileWave skips the value and reports an error. Review Custom Fields before a bulk import.
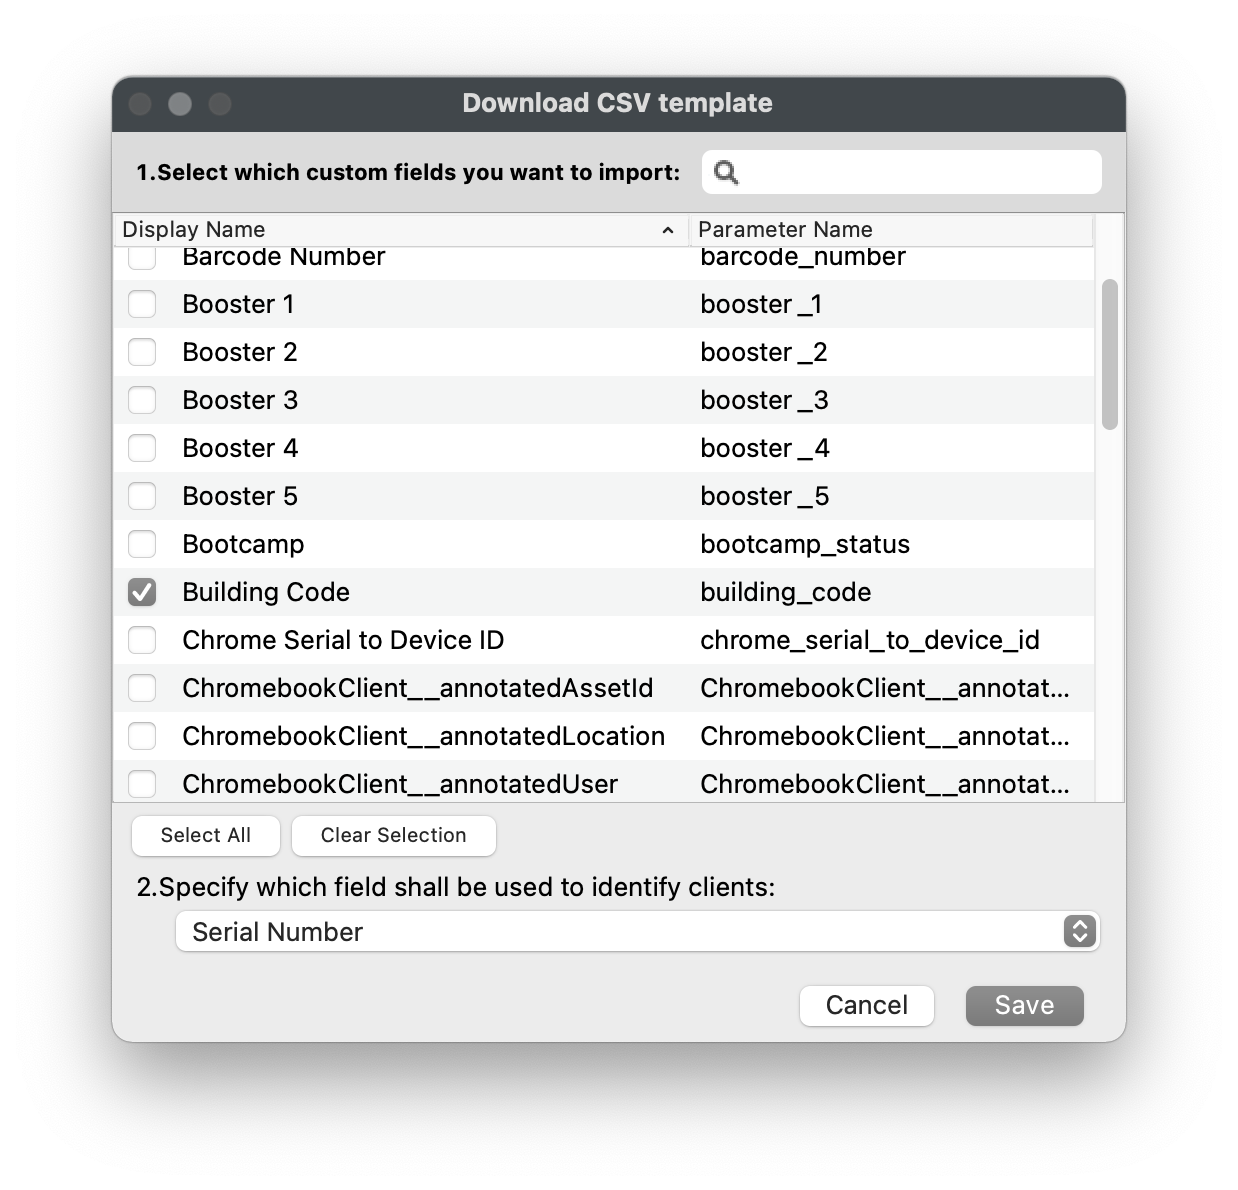 Open FileWave Central and navigate to "Assistants > Custom Fields > Import CSV".
- Click "Download Template".
- Select only Evaluation Building Code for the one-row test. A later reviewed import can include more fields.
- Select the unique identifier from the drop-down menu.
- Serial Number can be useful where populated and unique; confirm it identifies exactly the intended record.
- Client Name commonly reflects a Windows hostname, but names can be duplicated or changed. The template also supports Device ID and FileWave ID; choose and validate the identifier for this dataset.
- Click "Save" to download the CSV template.
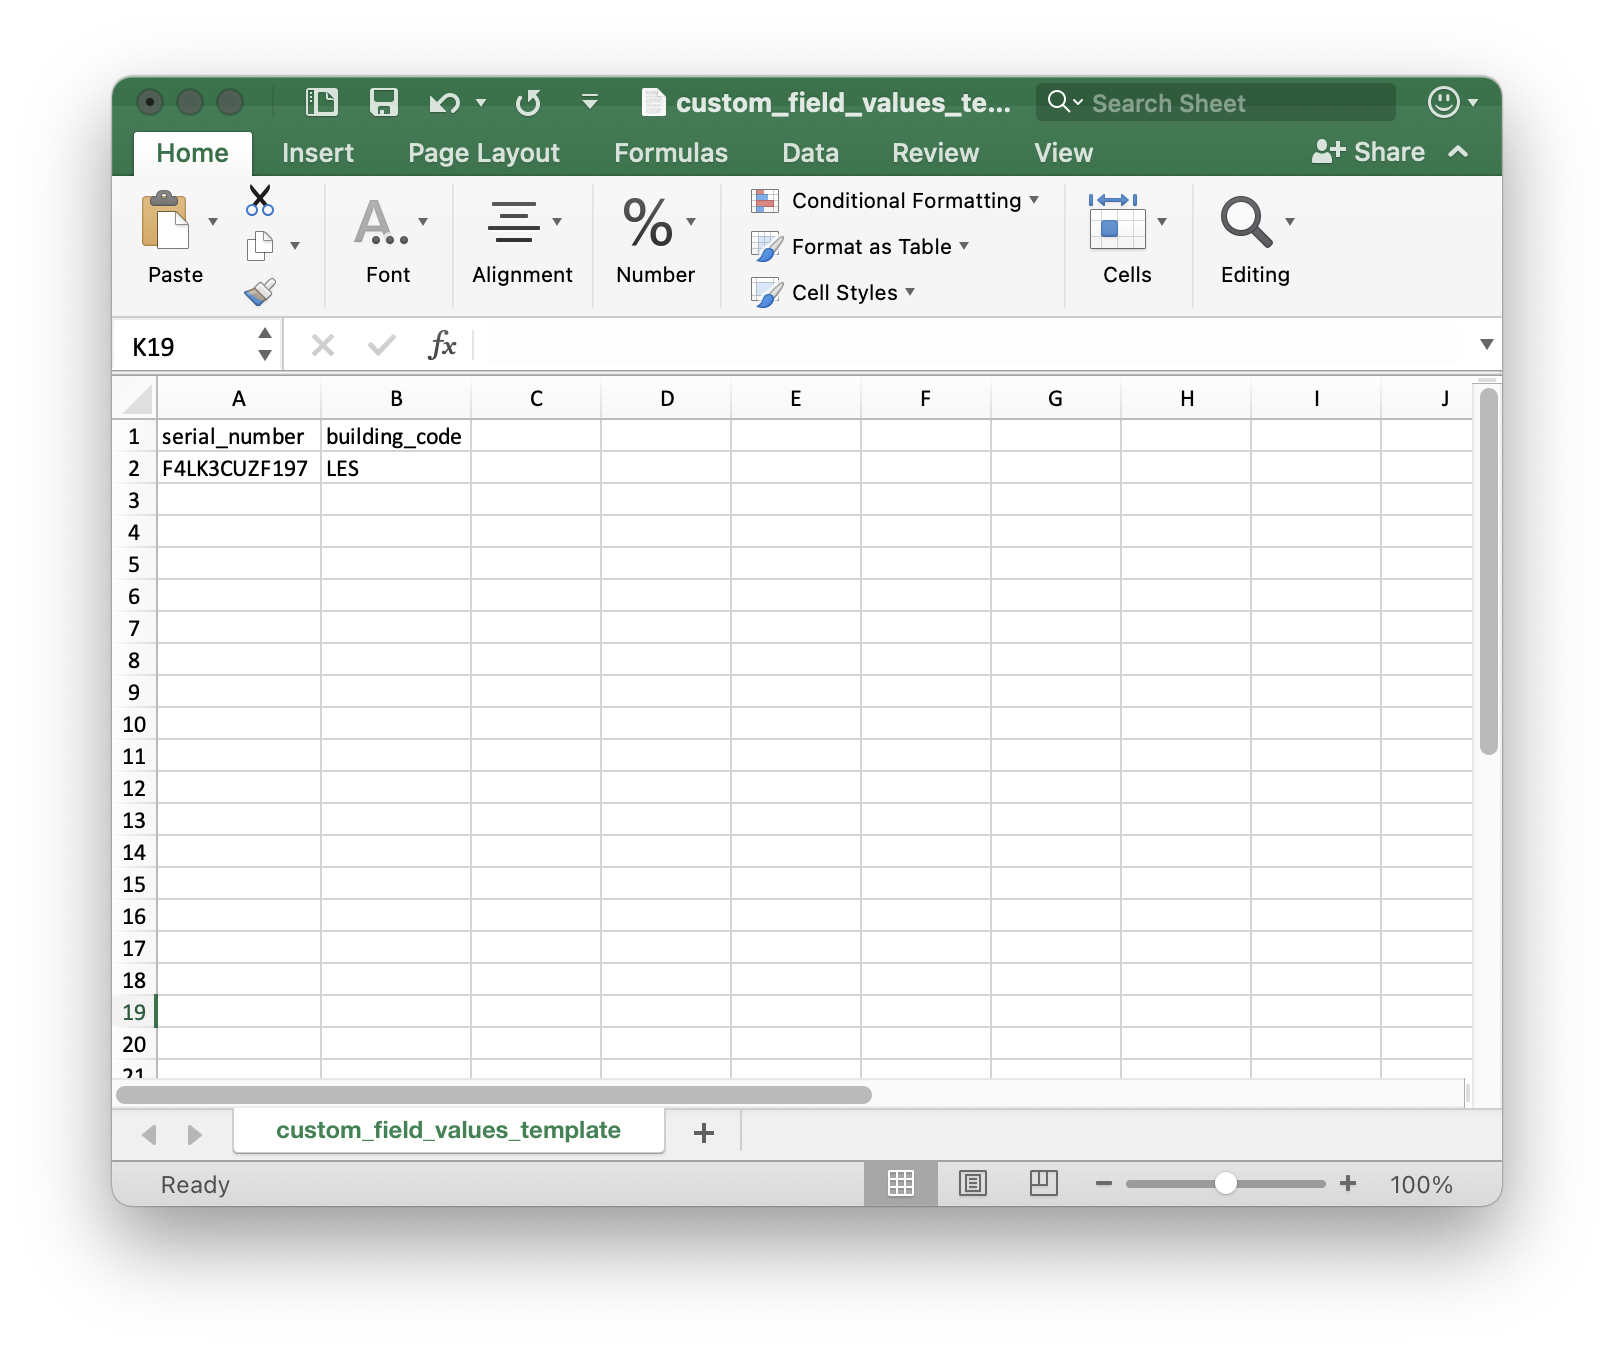
- Open the CSV template in your editor of choice (ex: Excel).
- Leave the "header" line intact, remove the comments, and add your values.
- The CSV template will default to using semicolons ";" as the delimiter.
- If changing delimiters, use CSV-aware import/export so quoted delimiters inside values are preserved. Do not globally replace semicolons with commas.
- In Excel, import using the template delimiter, keep one field per column, and export with the intended CSV delimiter and encoding. Reopen the file to check headers and values.
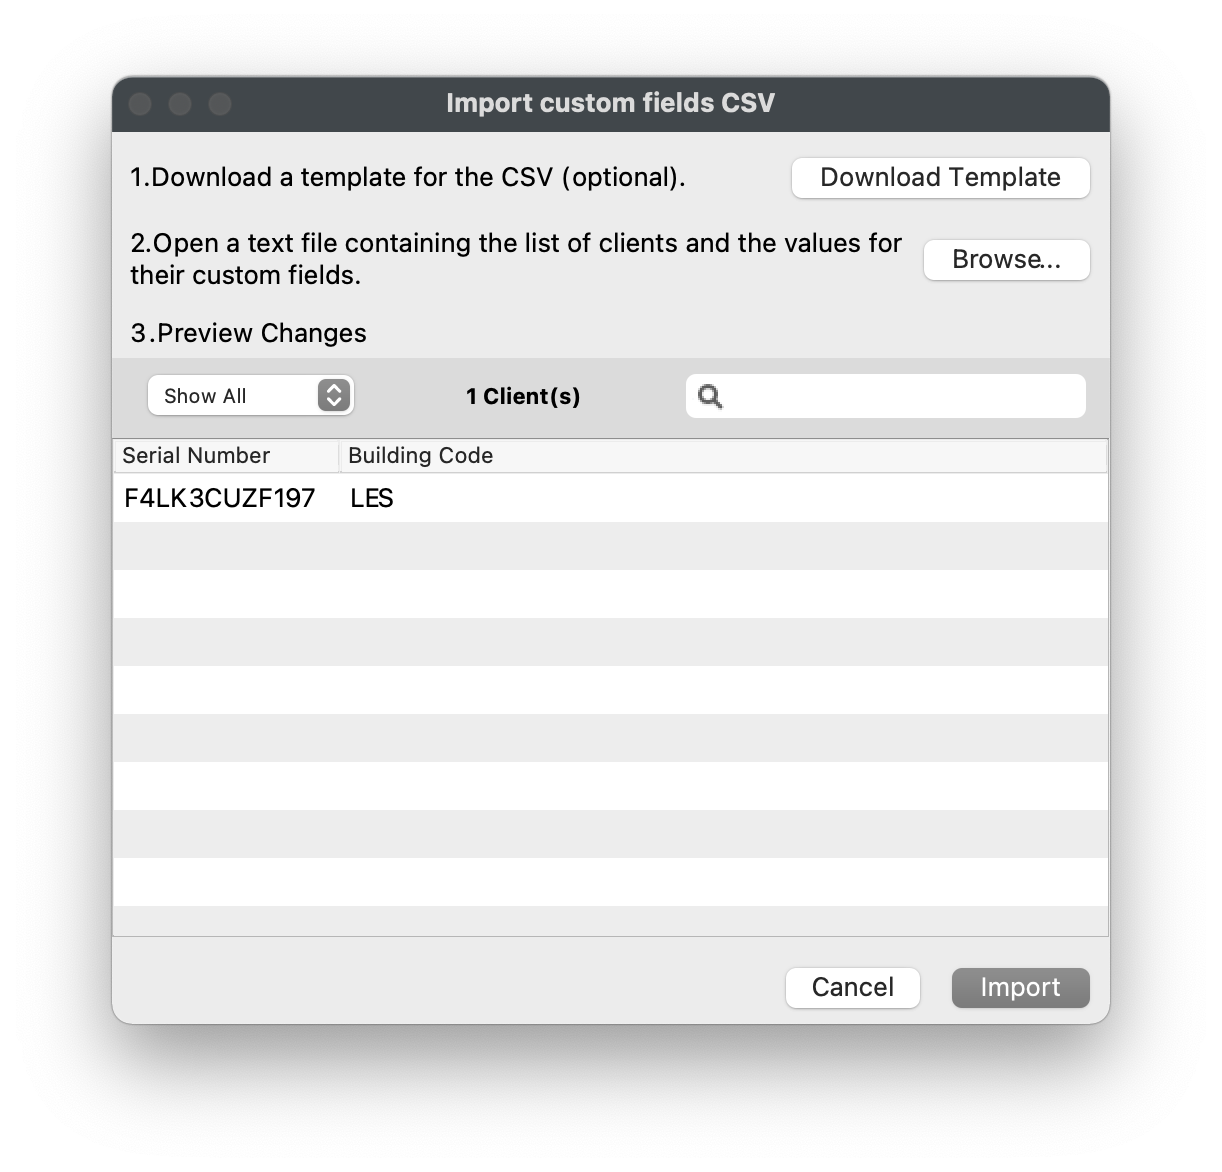
- Click Browse in the Import custom fields CSV window and select your CSV template.
- Inspect the preview: exactly one intended device, the selected field, the expected value, no extra rows, and no unmatched identifiers or conversion errors. Stop if any entry is missing or unexpected.
- Click "Import".
- After Import, verify the actual value in Device Details and the one-device Inventory Report. Restore the backed-up test value if the import was only a demonstration. Validate every intended target before later bulk work.
Troubleshooting
If you see an error like this, check the CSV file's encoding, header, and delimiter:
Error while processing CSV data: Error transferring https://yourserver.filewave.net:20445/inv/api/v1/custom_field/upload/?mode=dry-run - server replied: Bad Request: Unknown key field 'serial_number' in CSV
A Byte Order Mark (BOM) at the start of the file can cause this header error. Check the downloaded template header and delimiter too. Save a copy as plain UTF-8, not UTF-8 with BOM, then reopen it and rerun the preview. Correcting the encoding does not validate device identifiers or authorize the import.
No comments to display
No comments to display