Android Client Pre-Requisites
Obtaining JSON File
Android EMM (Enterprise Mobility Management) is built into FileWave as of version 13.1. This feature requires activation. Activation may be generated from the following link:
Add the FileWave Server Activation Code in the Customer ID box and select Generate Key. On doing so, the required JSON file will need to be downloaded and saved.
This process cannot be repeated. If you have an issue with activation, please contact support.
Setup
Requirements
- Server and Admin running FileWave Version 13.1.0 +
- Android 8 or newer Device(s) as of FileWave 15.3.0 (Requirements may change, confirm with latest release notes)
- Generated JSON key (see above)
- Network Port 443 inbound and outbound between FileWave server and Google (See Default TCP and UDP Port Usage for full list and topology)
- A standard Google account (non G-Suite, currently a Google API requirement))
- Perform the changes in FileWave as the fwadmin user specifically because some steps will not be able to be accomplished without doing so
A Google account may only be registered to a single EMM instance:
Unlike standard Google or Gmail accounts, a G Suite administrator manages all accounts associated with each of these editions. G Suite provides access to a core set of apps that include Gmail, Calendar, Drive, Docs, Sheets, Slides, Forms, Google+, Hangouts Meet, Hangouts Chat, Sites, and Groups.
You are not required to setup Google Cloud Messaging (GCM/Firebase) for Android EMM to work. Any references to it are for Chromebooks.
Configure Service Account
Open FileWave Admin 'Preferences' > 'Google' tab and click 'Configure Enterprise' under the EMM Configuration section. If the Google tab is not yet apparent, the FileWave server service will require a restart after requesting the JSON.
- Proceed by selecting the 'Choose File' button in the 'Set Up an Android Management Enterprise' window
- Select service account file, then press 'Upload'
- When requested, enter a display name for your enterprise and 'Sign Up'. This is merely an internal identifier but will be visible on devices.
- Press 'Click here' link to finalize the setup. The link opens a browser, navigating to Google Play website. Finalize enterprise creation using the chosen Google account.
- On registration completion, the browser should redirect to the FileWave server website informing success. 'Enterprise "[display name]" successfully created.'
The FileWave Admin should now display the successfully configured Android EMM account:

Enrolling Android devices to FileWave
Devices in Safe Mode may not be enrolled
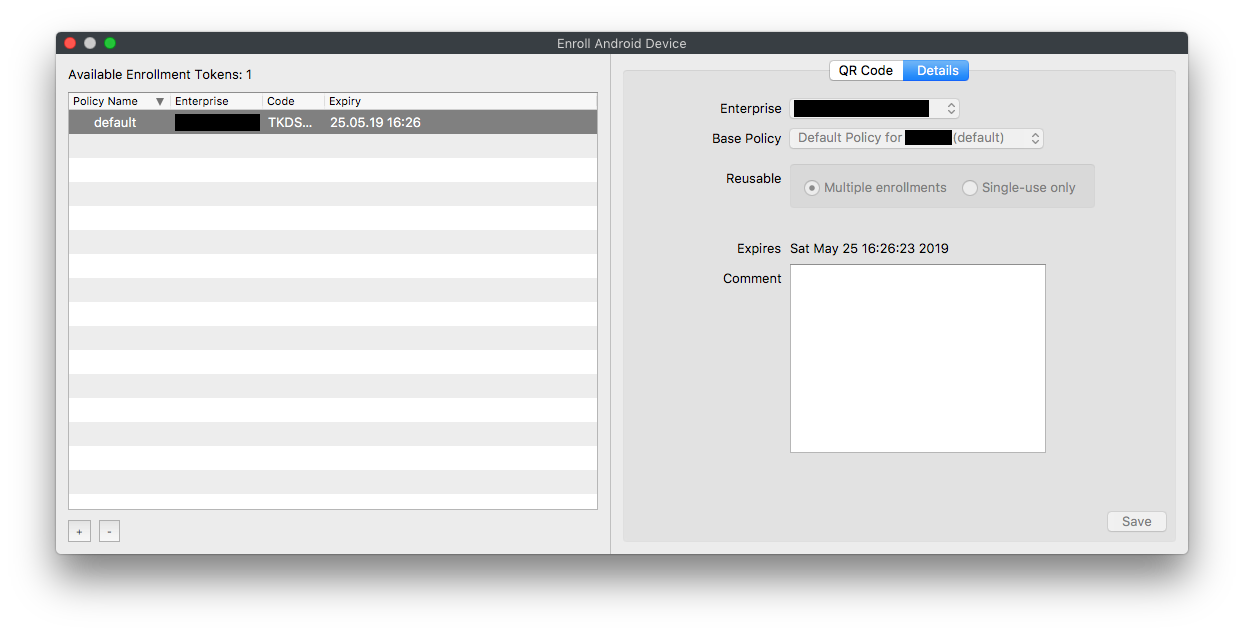
First create an enrolment token from the menu item: 'Assistants' > 'Enroll Android Device...'
Multiple tokens may be created, but one token may be configured for multi-use with an expiration of 30 days (recommended)
Make sure the device is fully wiped to factory settings and is not yet activated. Most modern Android versions can commence the process by either:
- Tap the screen seven times (in the same spot)
- Enter
afw#setupin place of a Google account.
Enter the Wi-Fi code and scan the QR code. A few minutes later, accept the prompt to Install Work Apps. This will install the FileWave Client.
On completion a summary will appear. Click Setup.
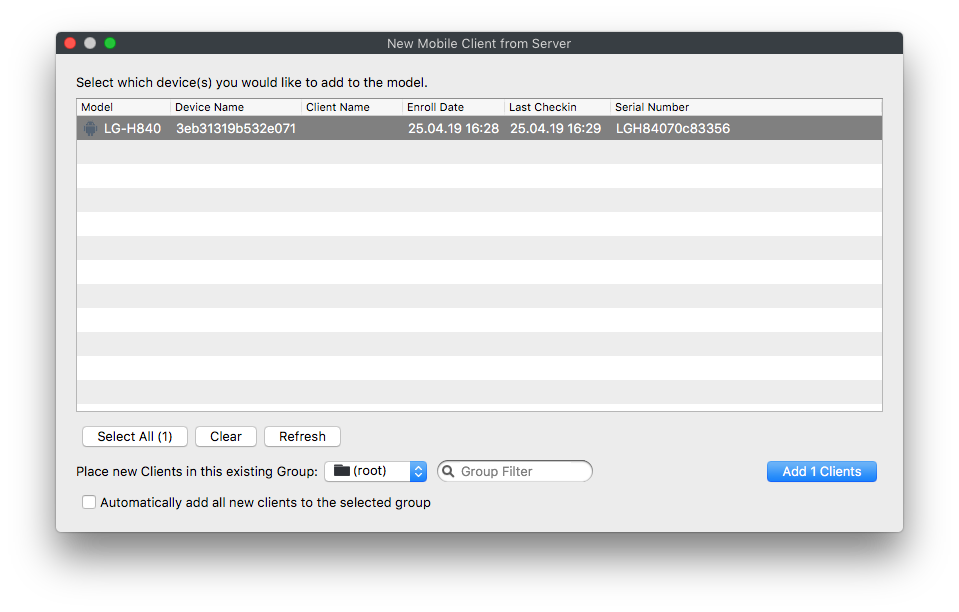
Where auto enrolment is configured in the New Client > Enrolled Mobile Devices, the device should appear within a few minutes. Otherwise use the New Client window to accept the device and then Update Model.
Android BYOD (EMM)
Android BYOD (Bring Your Own Device) Enrollment, also known as Android Enterprise Work Profile, is a method of enrolling personal Android devices in an Enterprise Mobility Management (EMM) system. This allows organizations to manage and secure corporate data and apps on employees' personal devices, while maintaining user privacy and keeping personal data separate from work data.
In this enrollment method, a work profile is created on the user's personal device, which acts as a separate container for work-related apps and data. This ensures that the organization can only manage and access the work profile, without interfering with the user's personal data and apps.
Android BYOD Enrollment offers several benefits, such as:
- Increased flexibility: Employees can use their personal devices for work, reducing the need for organizations to provide dedicated work devices.
- Enhanced security: Corporate data is secured within the work profile, preventing unauthorized access and data leakage.
- Improved privacy: Users maintain control over their personal data and apps, as the organization can only manage the work profile.
- Simplified management: EMM administrators can easily manage and configure work profiles, apply policies, and distribute apps to enrolled devices.
To implement Android BYOD Enrollment, organizations need an EMM solution that supports Android Enterprise, such as FileWave. The EMM solution will guide users through the enrollment process and help administrators manage and configure work profiles on enrolled devices.
Getting Started with BYOD (EMM)
The very first step before getting start with BYOD (EMM) is to setup Android EMM using the start of this article.
After going through the EMM setup, continue with the next steps.
- Download Android device policy App (https://play.google.com/store/apps/details?id=com.google.android.apps.work.clouddpc&hl=en_US)
- From the App scan the Enrollment QR code
- Add the devices to admin as normal
- (Observe) you will have a "Play Store" app and a "Work Play Store"
The devices will have the same icon in admin.
If the Inventory field "Is User-Owned" is True, the device is a BYOD.
I would add this as a column in the client view to more easily identify.

Enrollment Workflow (EMM)
If you have a Google Policy Fileset with Network information in it. You can select it when you generate a QR code. This inserts the information onto the device for easy enrollment.
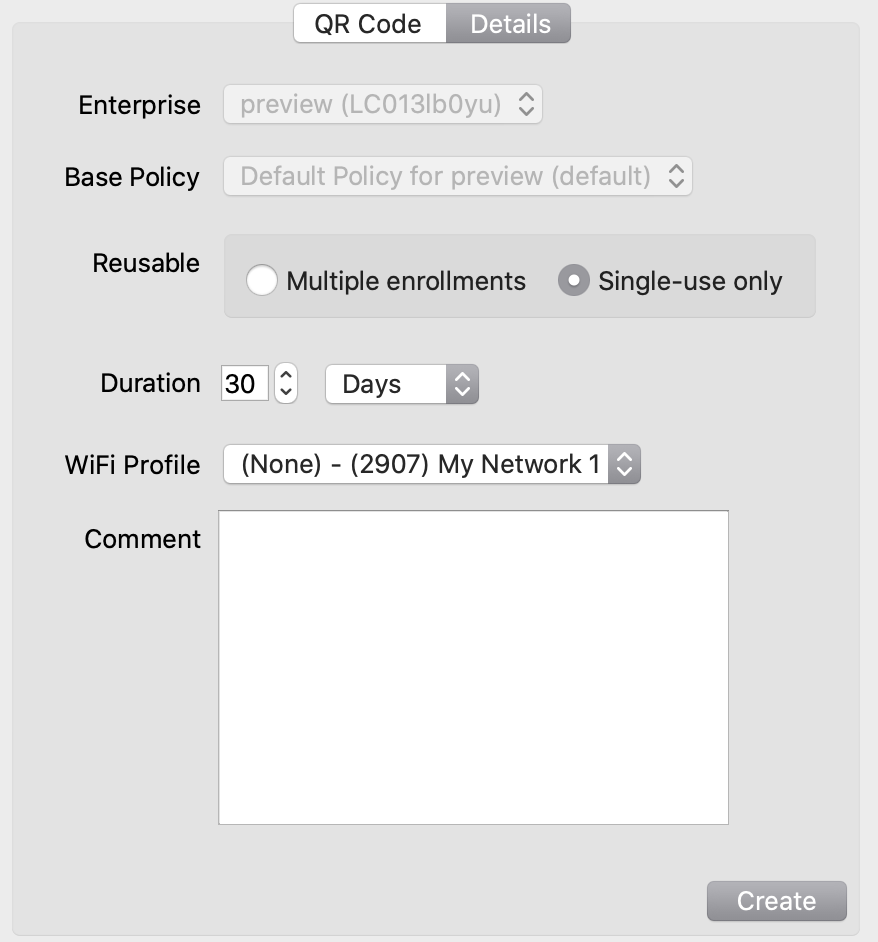 |
| Figure 1.1 - WiFi selected in enrollment QR |
The QR code that is generated contains the WiFi password in plain text.
DO NOT leave the QR code just sitting around.
Android EMM Location Tracking
Android EMM devices need to install a FileWave "companion" application onto the device that will send us location data. Reference Force Location for EMM Android Devices for details.