
Organize Devices with Client Groups
Optional: broader Client group design. Use this section after one approved device has enrolled and completed its first deployment. You do not need automatic admission, platform-wide Smart Groups, or a full group hierarchy for that first result. If you need a test group before then, use only the small static group below, then return to Fileset Creation and Deployment.
If your first task needs one static test group
In FileWave Central, open Clients, choose New Group, and give the standard group a clear test-only name. Keep it separate from groups already assigned content. For a device already enrolled, confirm its identity, use Create Clone, and select only this test group. Check that the group contains exactly the intended device and review any inherited or existing assignments before using it as a target. A clone is another reference to the same managed device, not an isolated copy. For a device still waiting for admission, follow its platform enrollment lesson and admit only that device; leave automatic admission off.
Before any required Update Model, review the target, assignments, and pending changes with the other administrators. A Model Update publishes shared pending work, not just this test group. Central’s Update Server Model dialog confirms the action; it does not preview the pending changes. Stop if you cannot account for the work being published. See how FileWave turns changes into device work.
The examples below show an older FileWave Admin interface. FileWave Admin is now FileWave Central; use the matching controls in your installed version.
Plan your Client group structure
A clear group structure makes device targeting easier to understand and maintain. This article covers standard groups, FileWave Smart Groups, LDAP-based Smart Groups, and clones for organizing Client devices around enrollment, platform, department, or other operational needs.
Creating a basic structure for automatic device enrollment
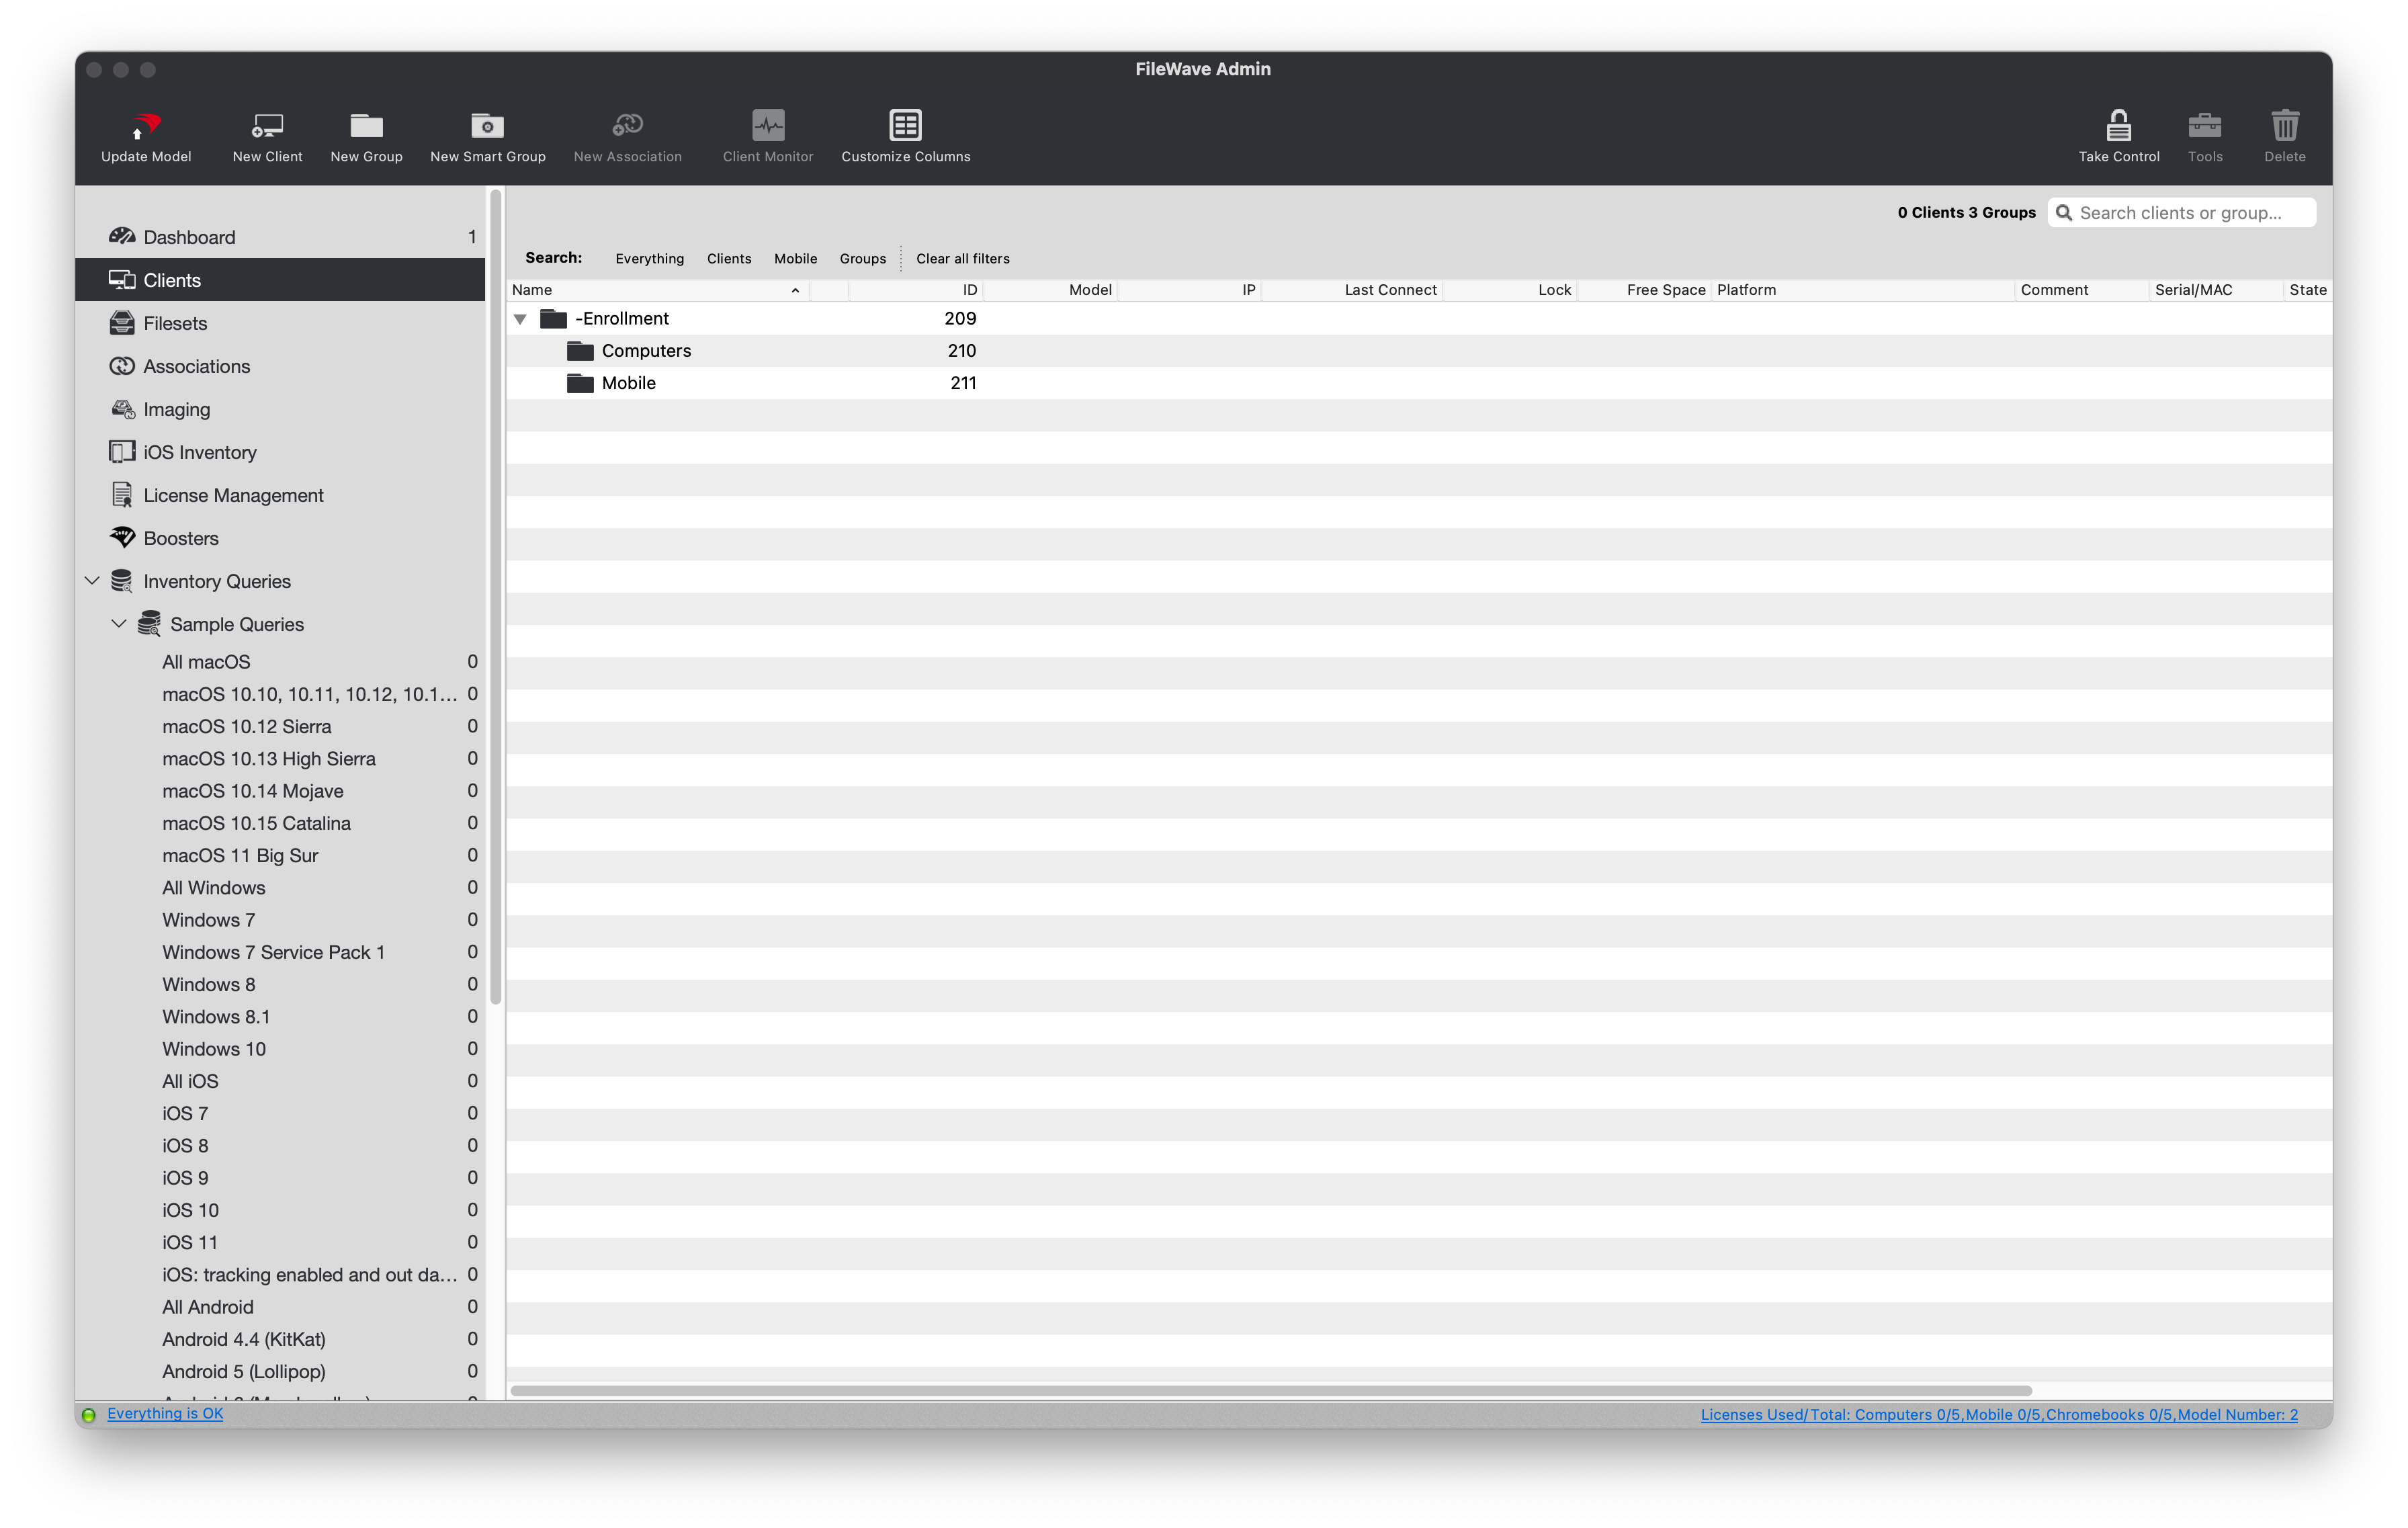
For an approved automatic-admission design, the following example creates separate groups for Client (Windows, macOS) and Mobile (iOS, tvOS, Android) devices. The "-Enrollment" group holds the original device records; keep software and settings assignments in other, more specific groups. This organizational convention is not a security boundary and does not limit which new devices an automatic-admission rule accepts.
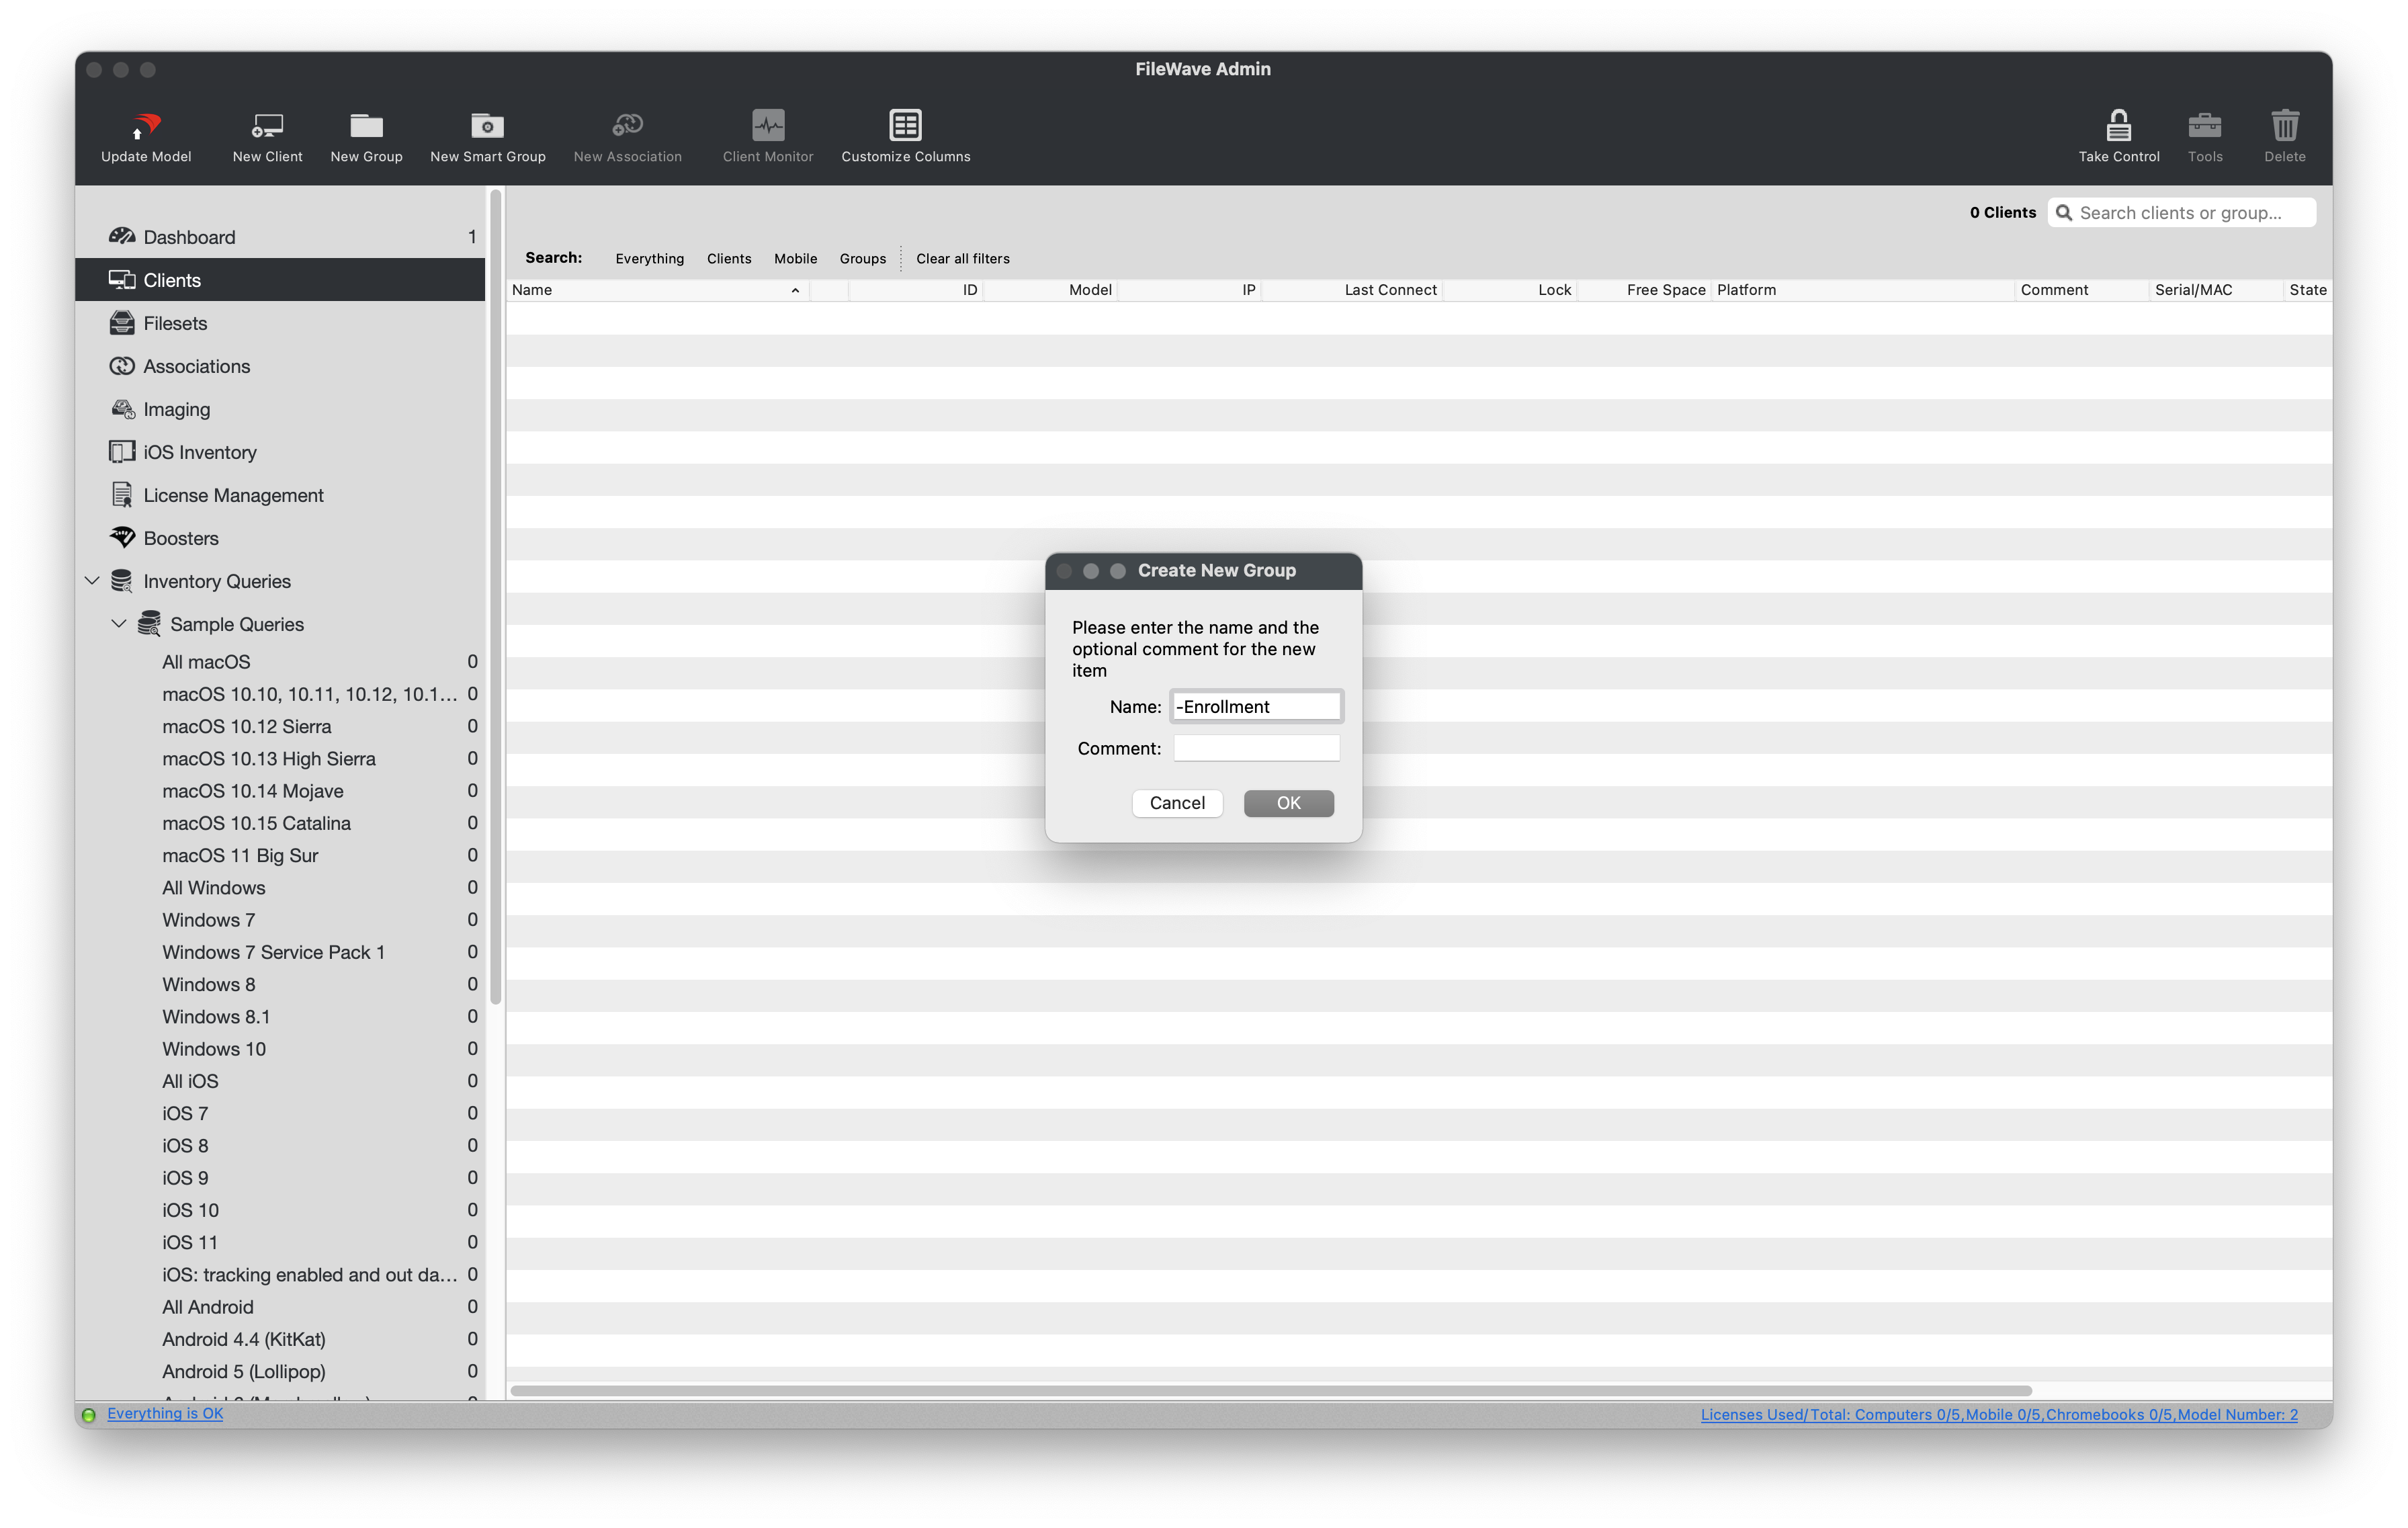
Create a New Group
- Open FileWave Central and navigate to "Clients" from the left pane.
- Click "New Group" from the black menubar.
- Name the first group "-Enrollment".
- The "-" prefix places the group near the top of an alphabetically sorted list.
Repeat the process to create a "Computers" group and a "Mobile" group inside "-Enrollment". If you create a group in the wrong location, drag it into the intended parent group.
Enable automatic device enrollment
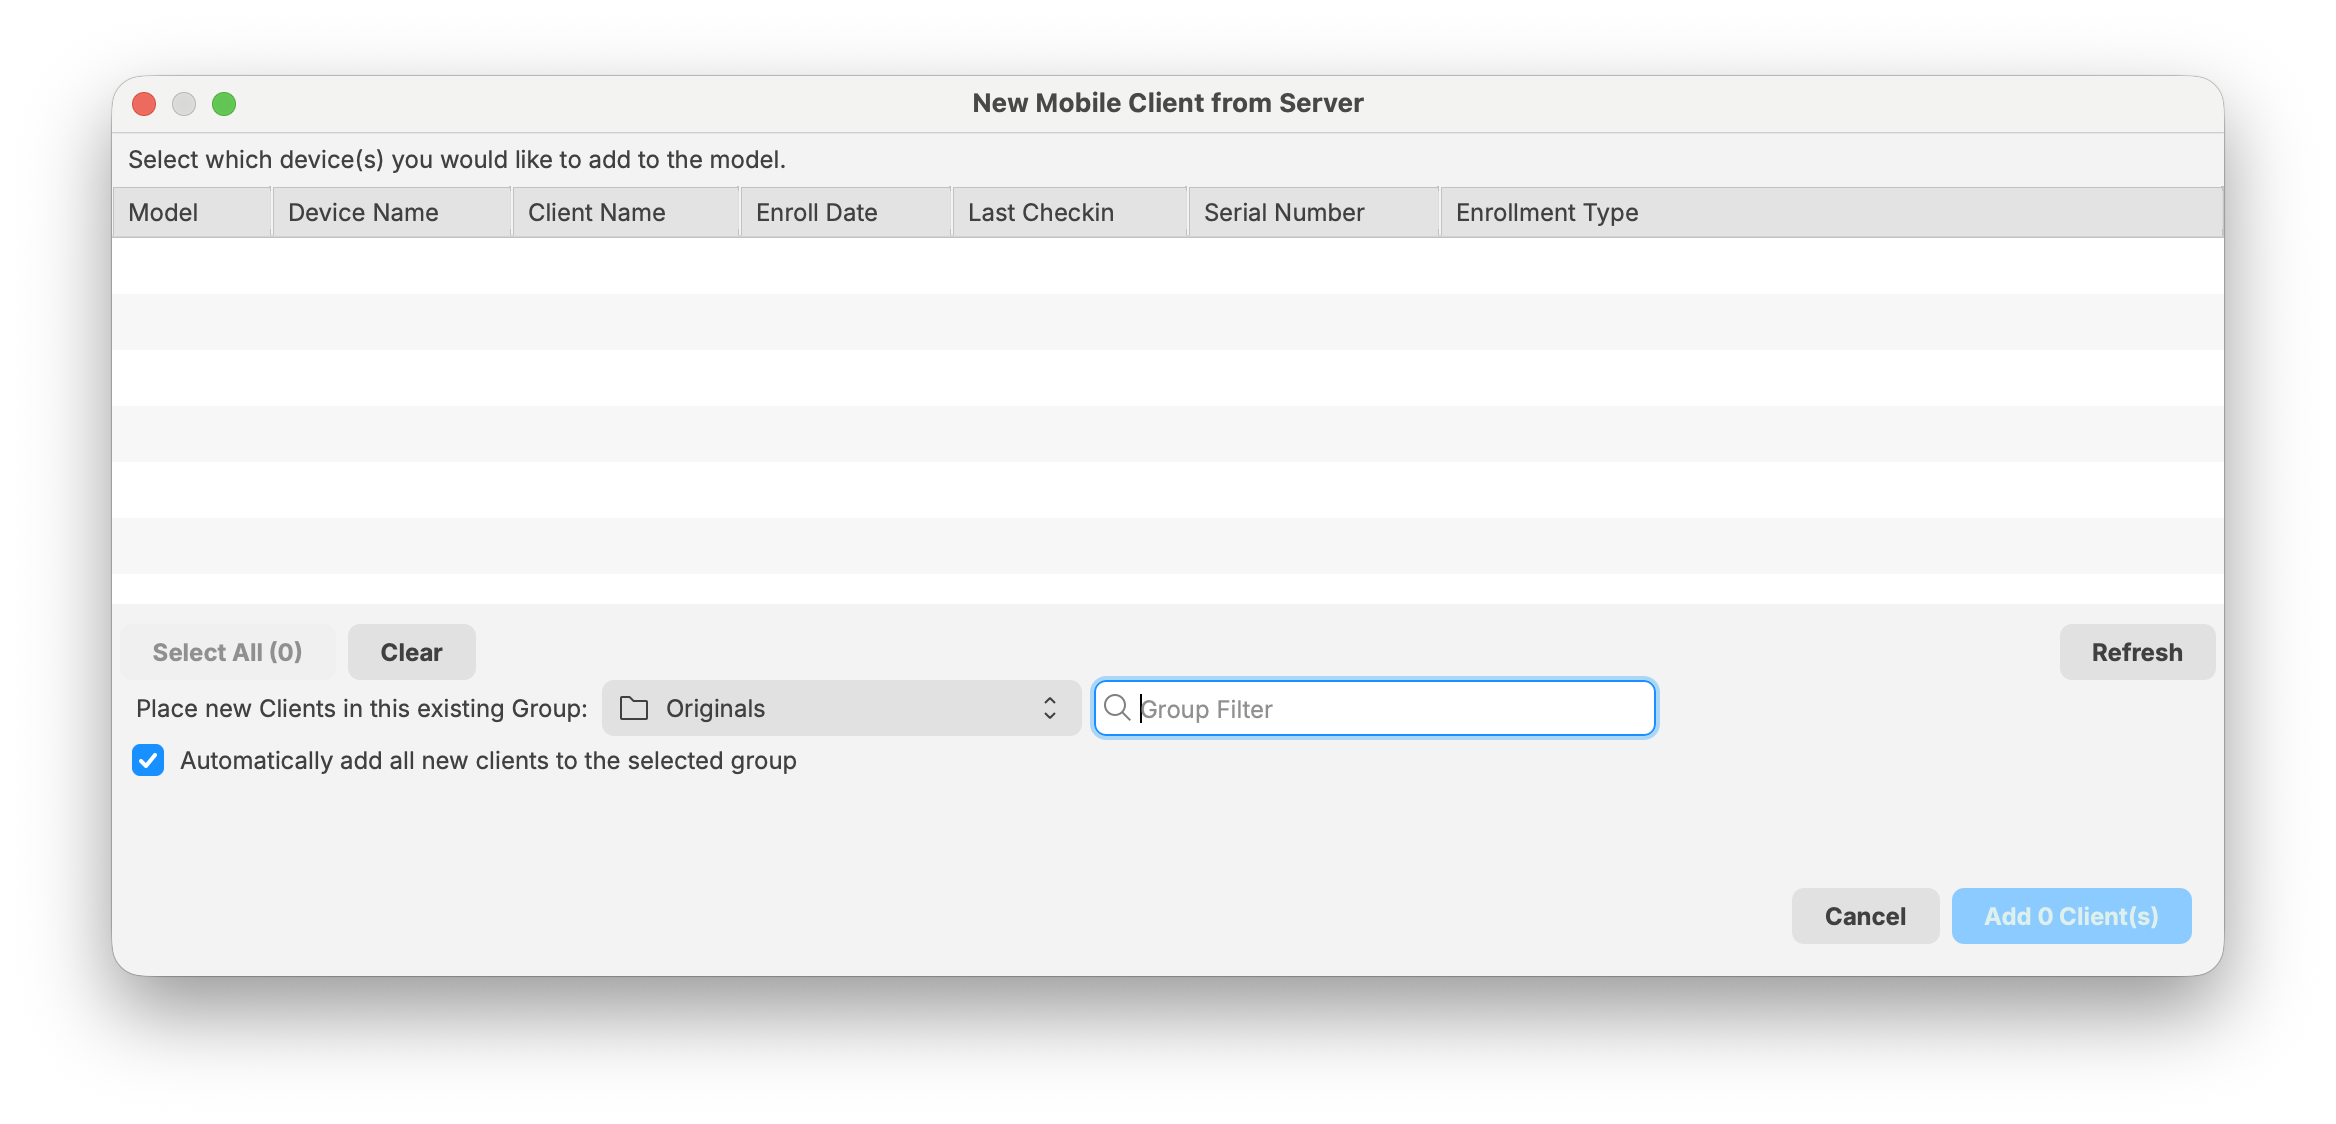
New devices can wait for manual admission. Keep that approval step for the first-device pilot. Enable automatic admission only when the enrollment owner has approved which incoming devices may be accepted; the all-new-clients option is broader than your pilot device.
- Select the "Computers" group from the previous section.
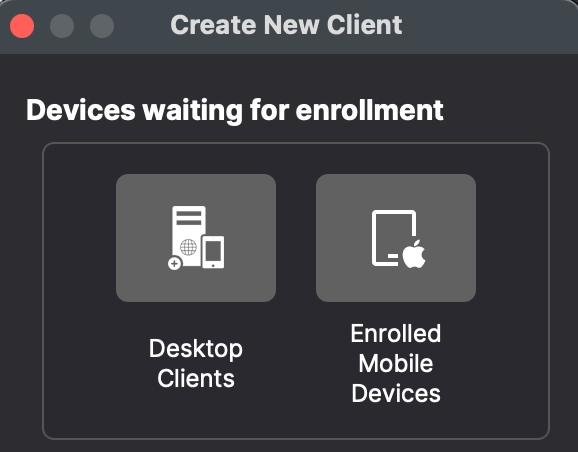
- Click "New Client" from the black menubar.
- Select "Desktop Clients" from the "Devices waiting for enrollment" section.
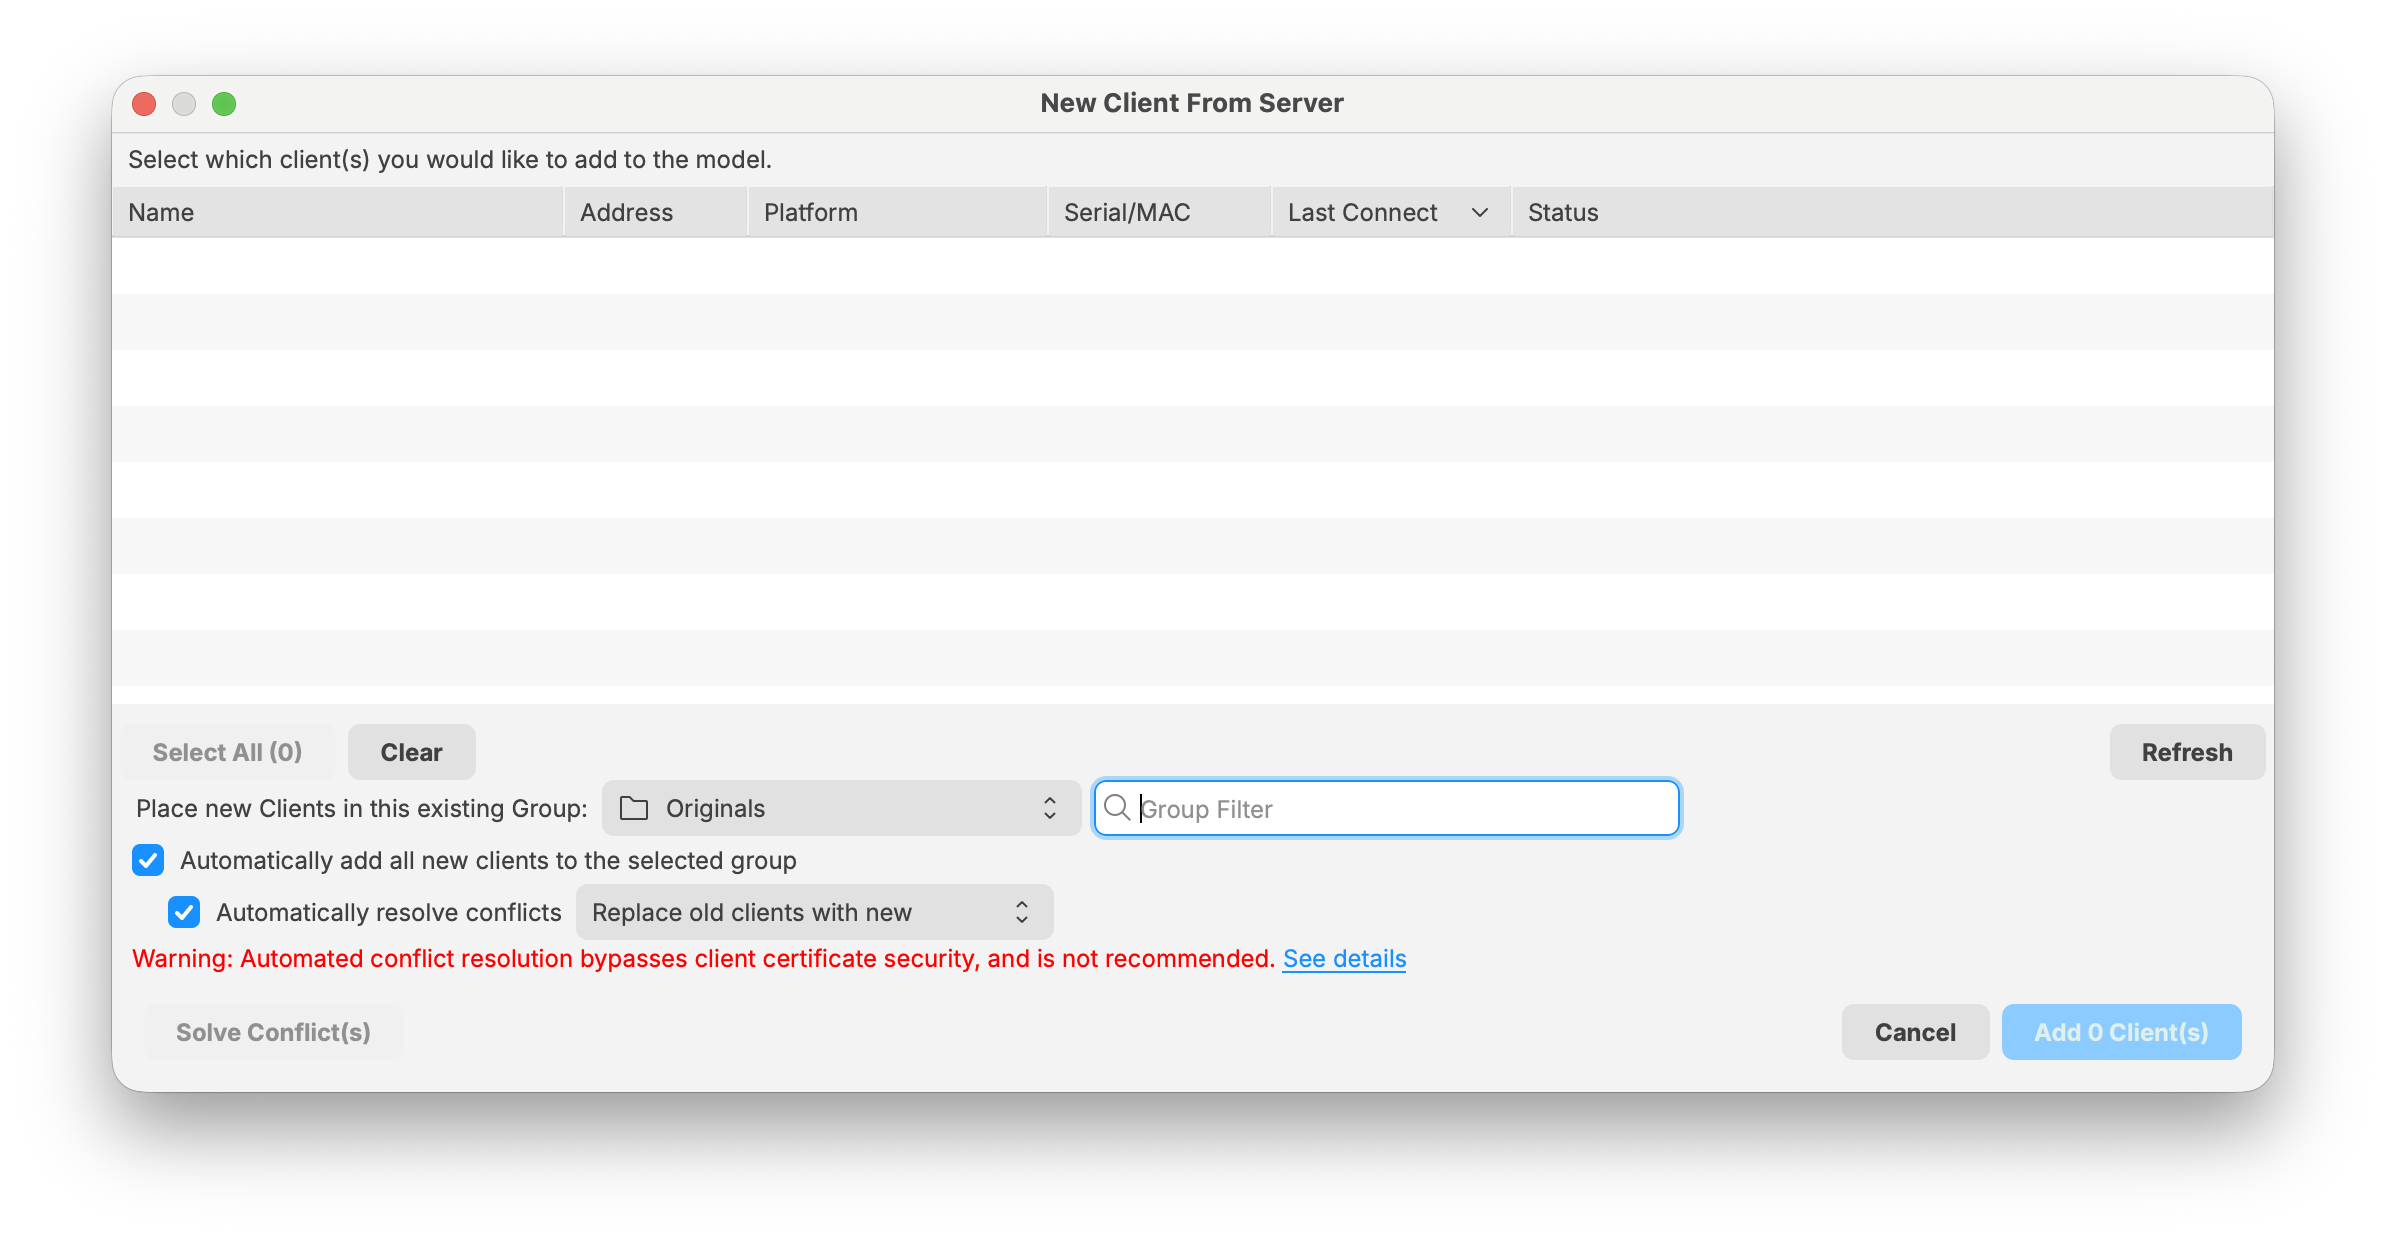
- Only for that approved automatic-admission design, check "Automatically add all new clients to select group". Leave it unchecked when clients require individual approval. This is discussed in more detail in Conflict Resolution.
- Click "Save".
For the approved automatic-admission design, repeat this process for the "Mobile" group, selecting "Enrolled Mobile Devices" from the "Devices waiting for enrollment" section.
The New Client window requires Update Model to publish this preference change. Review shared pending work first; saving the dialog is not the same as publishing the change or proving a device has enrolled.
Creating Smart Groups
A Smart Group adds and removes references to devices automatically as their inventory matches or stops matching its criteria. Criteria can use hardware, software, directory data, or Custom Fields. These references are clones of the same managed devices, not duplicate devices. Software and settings assignments follow the group’s changing membership. For example, a Media department group could match macOS devices whose Department Custom Field is Media. Review that membership before assigning an application.
The following examples show platform-based Smart Groups for a later group-design exercise. An OS-only rule can match many devices, including devices enrolled later; it is not a pilot boundary. Inspect the matching devices before assigning content, and keep a first deployment on the known static test target.
Create "Platform" Smart Groups
 Open FileWave Central and navigate to "Clients" from the left pane.
- Create a standard Group named "-Platform" following the steps above.
- Select the "-Platform" group and click "New Smart Group" from the black menubar.
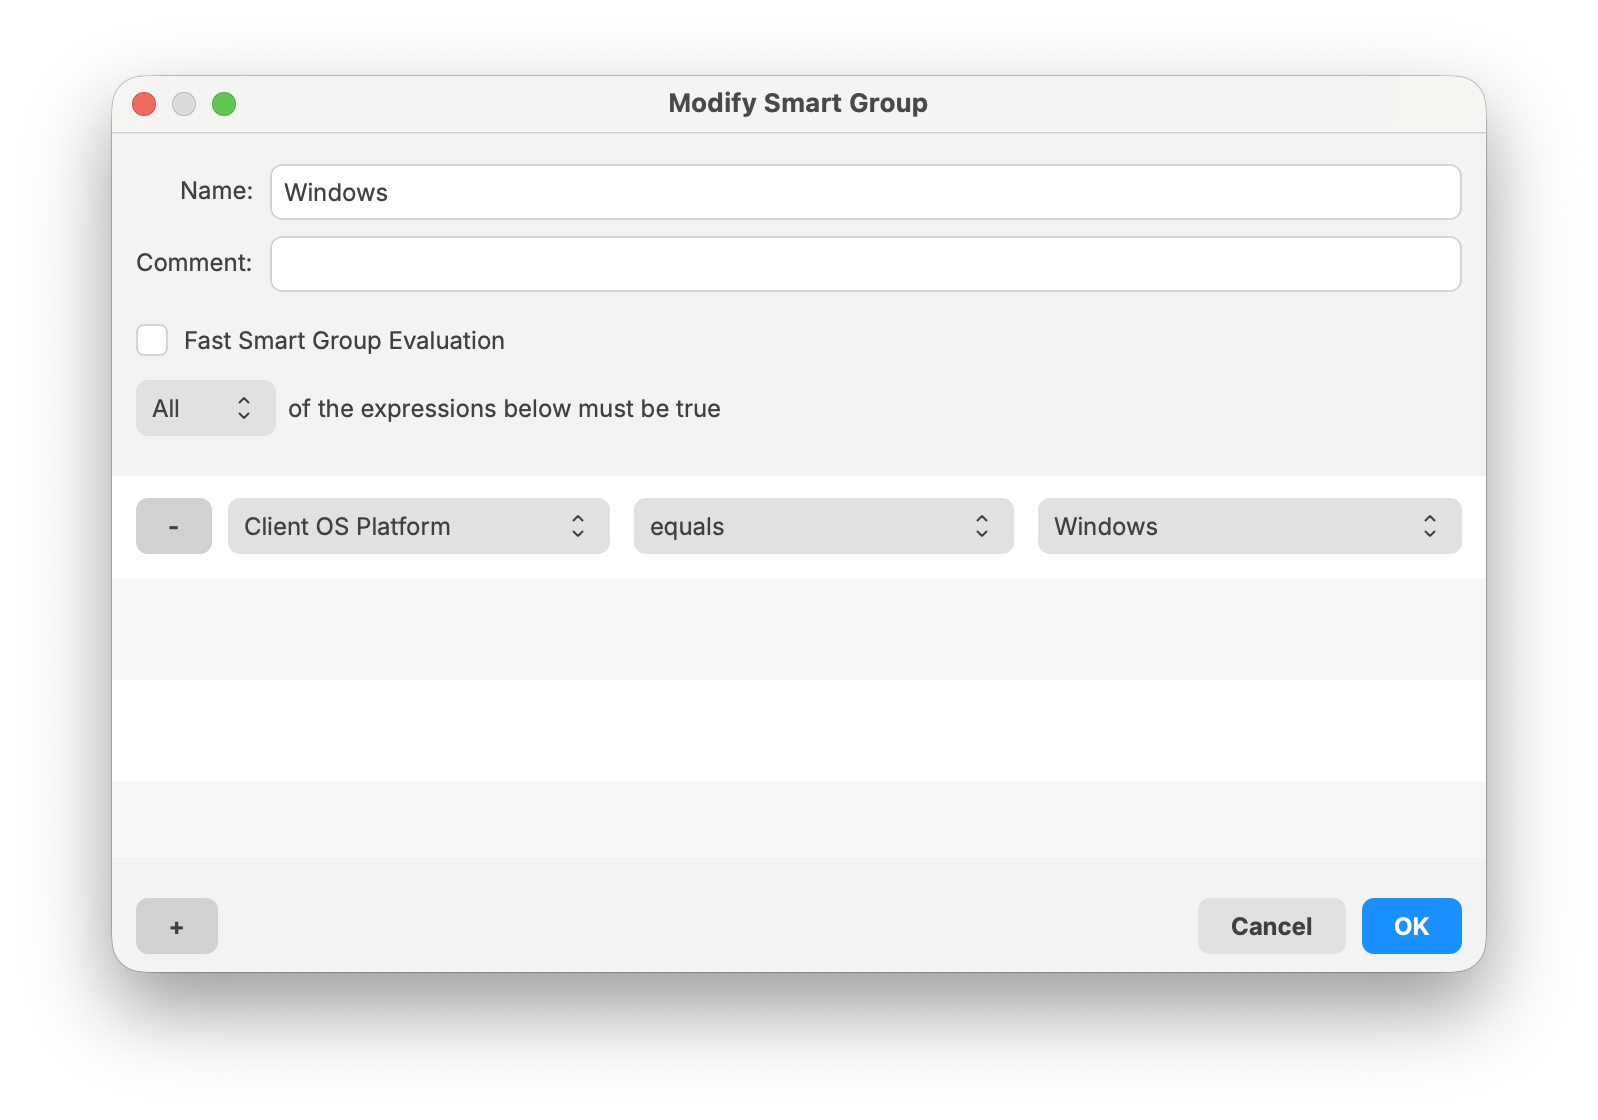
- Name the Smart Group for its operating system. In this example, use "Windows".
- Click the "[+]" button in the lower left-hand corner.
- Select "Client OS Platform" from the dropdown menu on the left.
- Select "Windows" from the dropdown menu on the right.
- Click "OK" to save the changes.
Repeat these steps as needed for the platforms in your approved group design:
- macOS - Client OS Platform [equals] macOS
- iOS - iOS Device Type [equals] Any iOS Device
Creating more advanced Smart Groups
For more detailed criteria, use the inventory report builder to choose from the data available for your devices and their management methods, including Custom Fields. Older Smart Group controls call this Inventory Query. First build and inspect a read-only Inventory Report; a matching rule can include devices beyond the original pilot as inventory changes.
Use the Inventory Query Builder to create an Android Smart Group in the "-Platform" group.
 Open FileWave Central and navigate to "Clients" from the left pane.
- Select the "-Platform" group and click "New Smart Group" from the black menubar.
- Name the Smart Group for its operating system. In this example, use "Android".
- Click the "[+]" button in the lower left-hand corner.
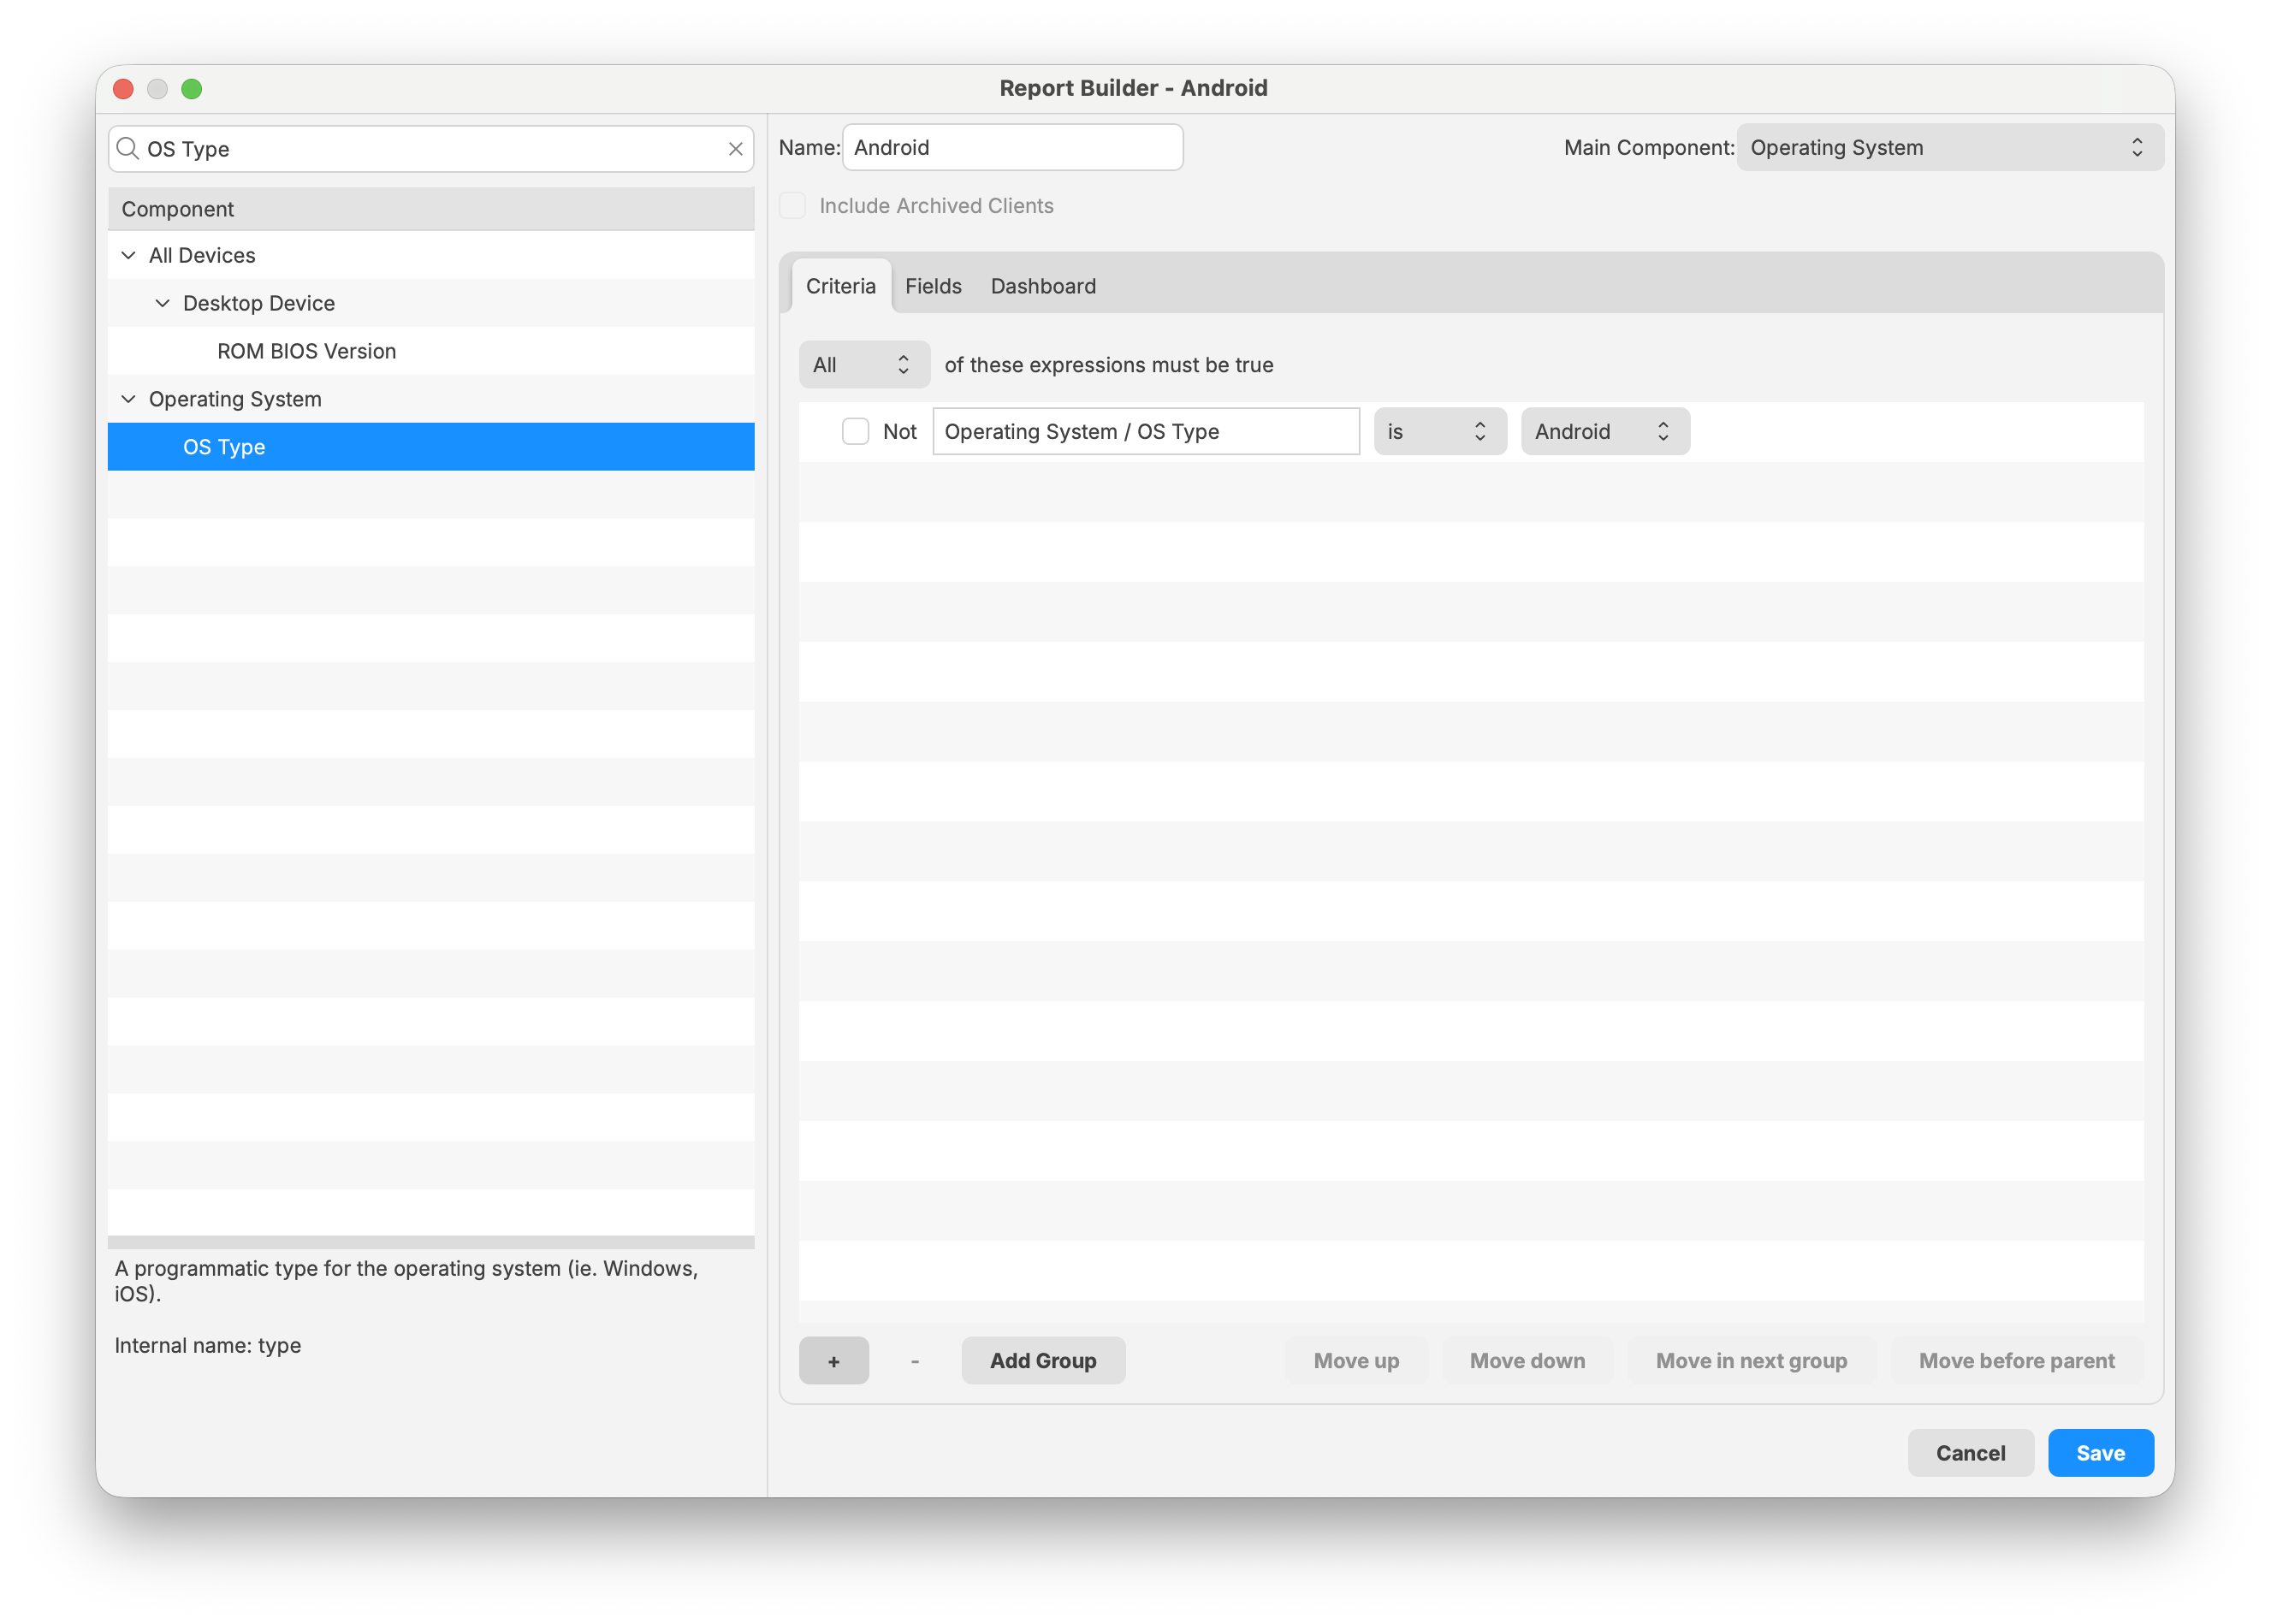
- Select "Inventory Query" from the dropdown menu on the left.
- Click the "[...]" button to the right.
- Use "Search" or open the subgroups to find "Operating System > OS Type".
- Drag the selected criteria from the left pane into the "Criteria" pane on the right. Set the comparison to is and the value to Android, leaving Not unchecked.
- Verify that the expected results appear in the right-hand "Clients" pane.
- Click "Save" to save the Inventory Query, then click "OK" in the Smart Group window.
Finishing up
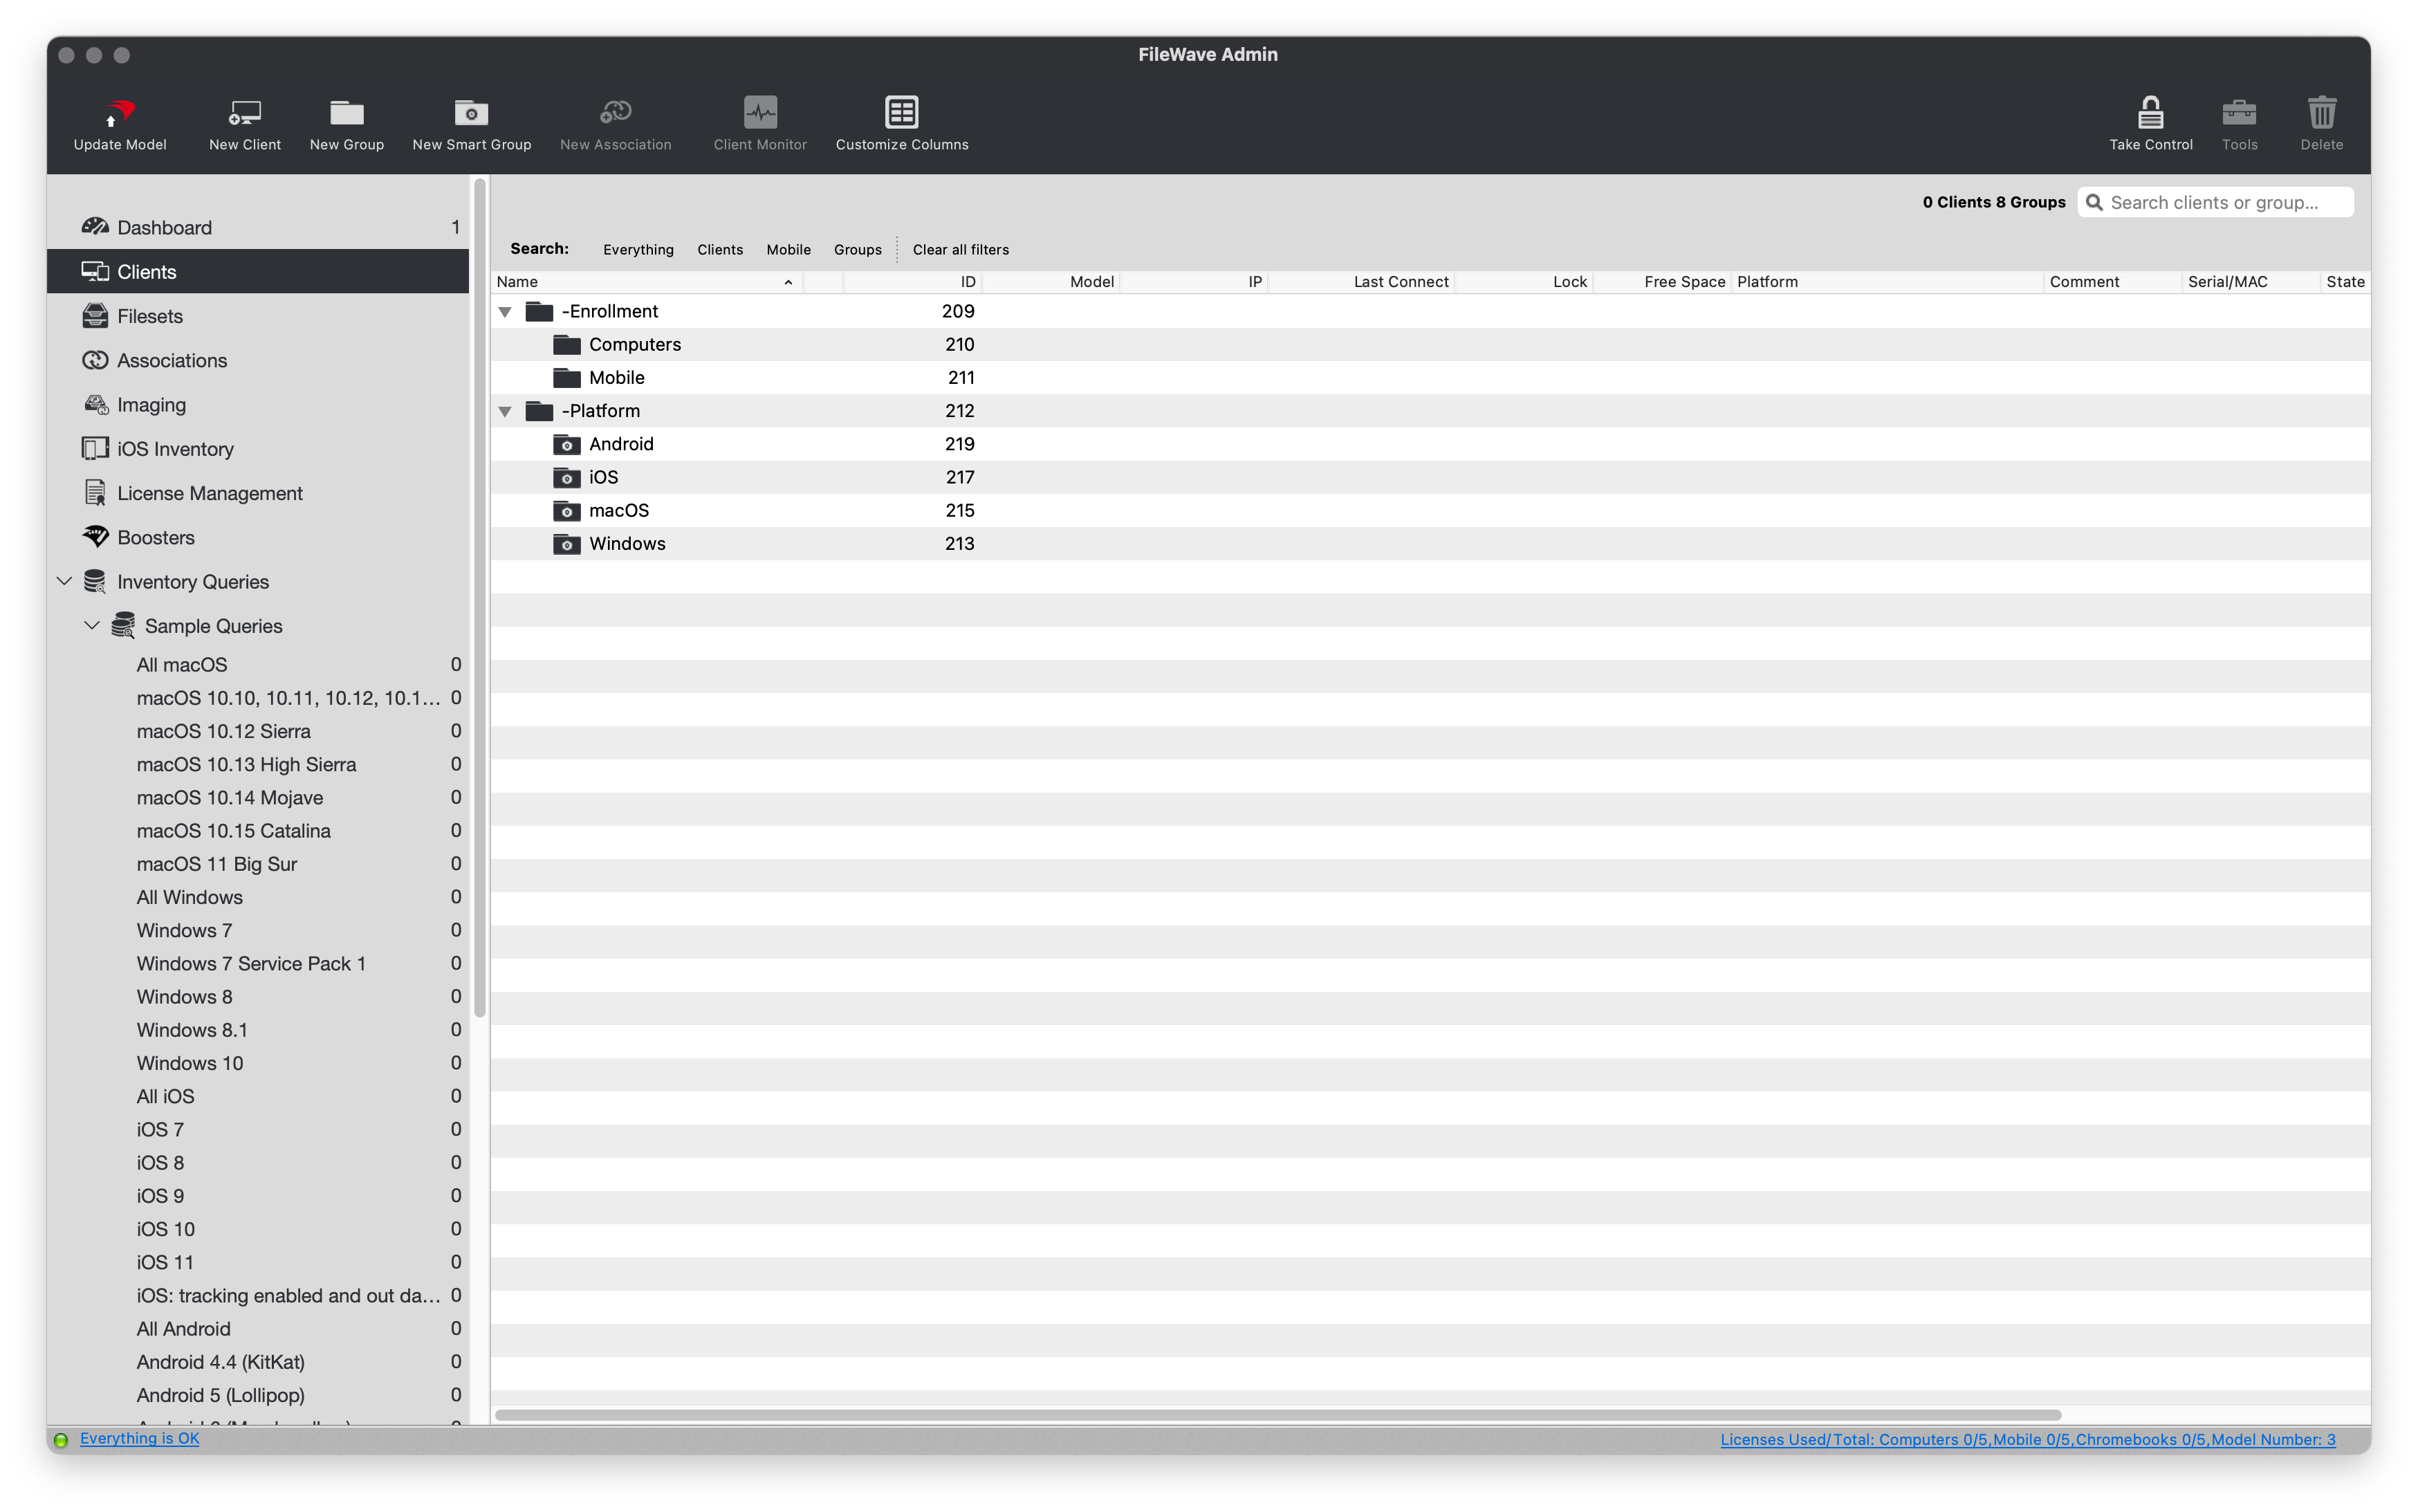
These platform-based Smart Groups automatically add or remove references to devices as their inventory matches or stops matching the criteria. For an approved platform-wide deployment, these Smart Groups keep content targeting separate from the original records in the "-Enrollment" groups. Do not use them for a one-device pilot unless their actual membership is independently restricted and checked. Chromebook devices use their own group structure and do not belong to other typical FileWave groups.
Review memberships, assignments, and all administrators’ pending work before the required Update Model. Then inspect the intended device’s result; an increased model number does not prove endpoint completion.
Cloning devices
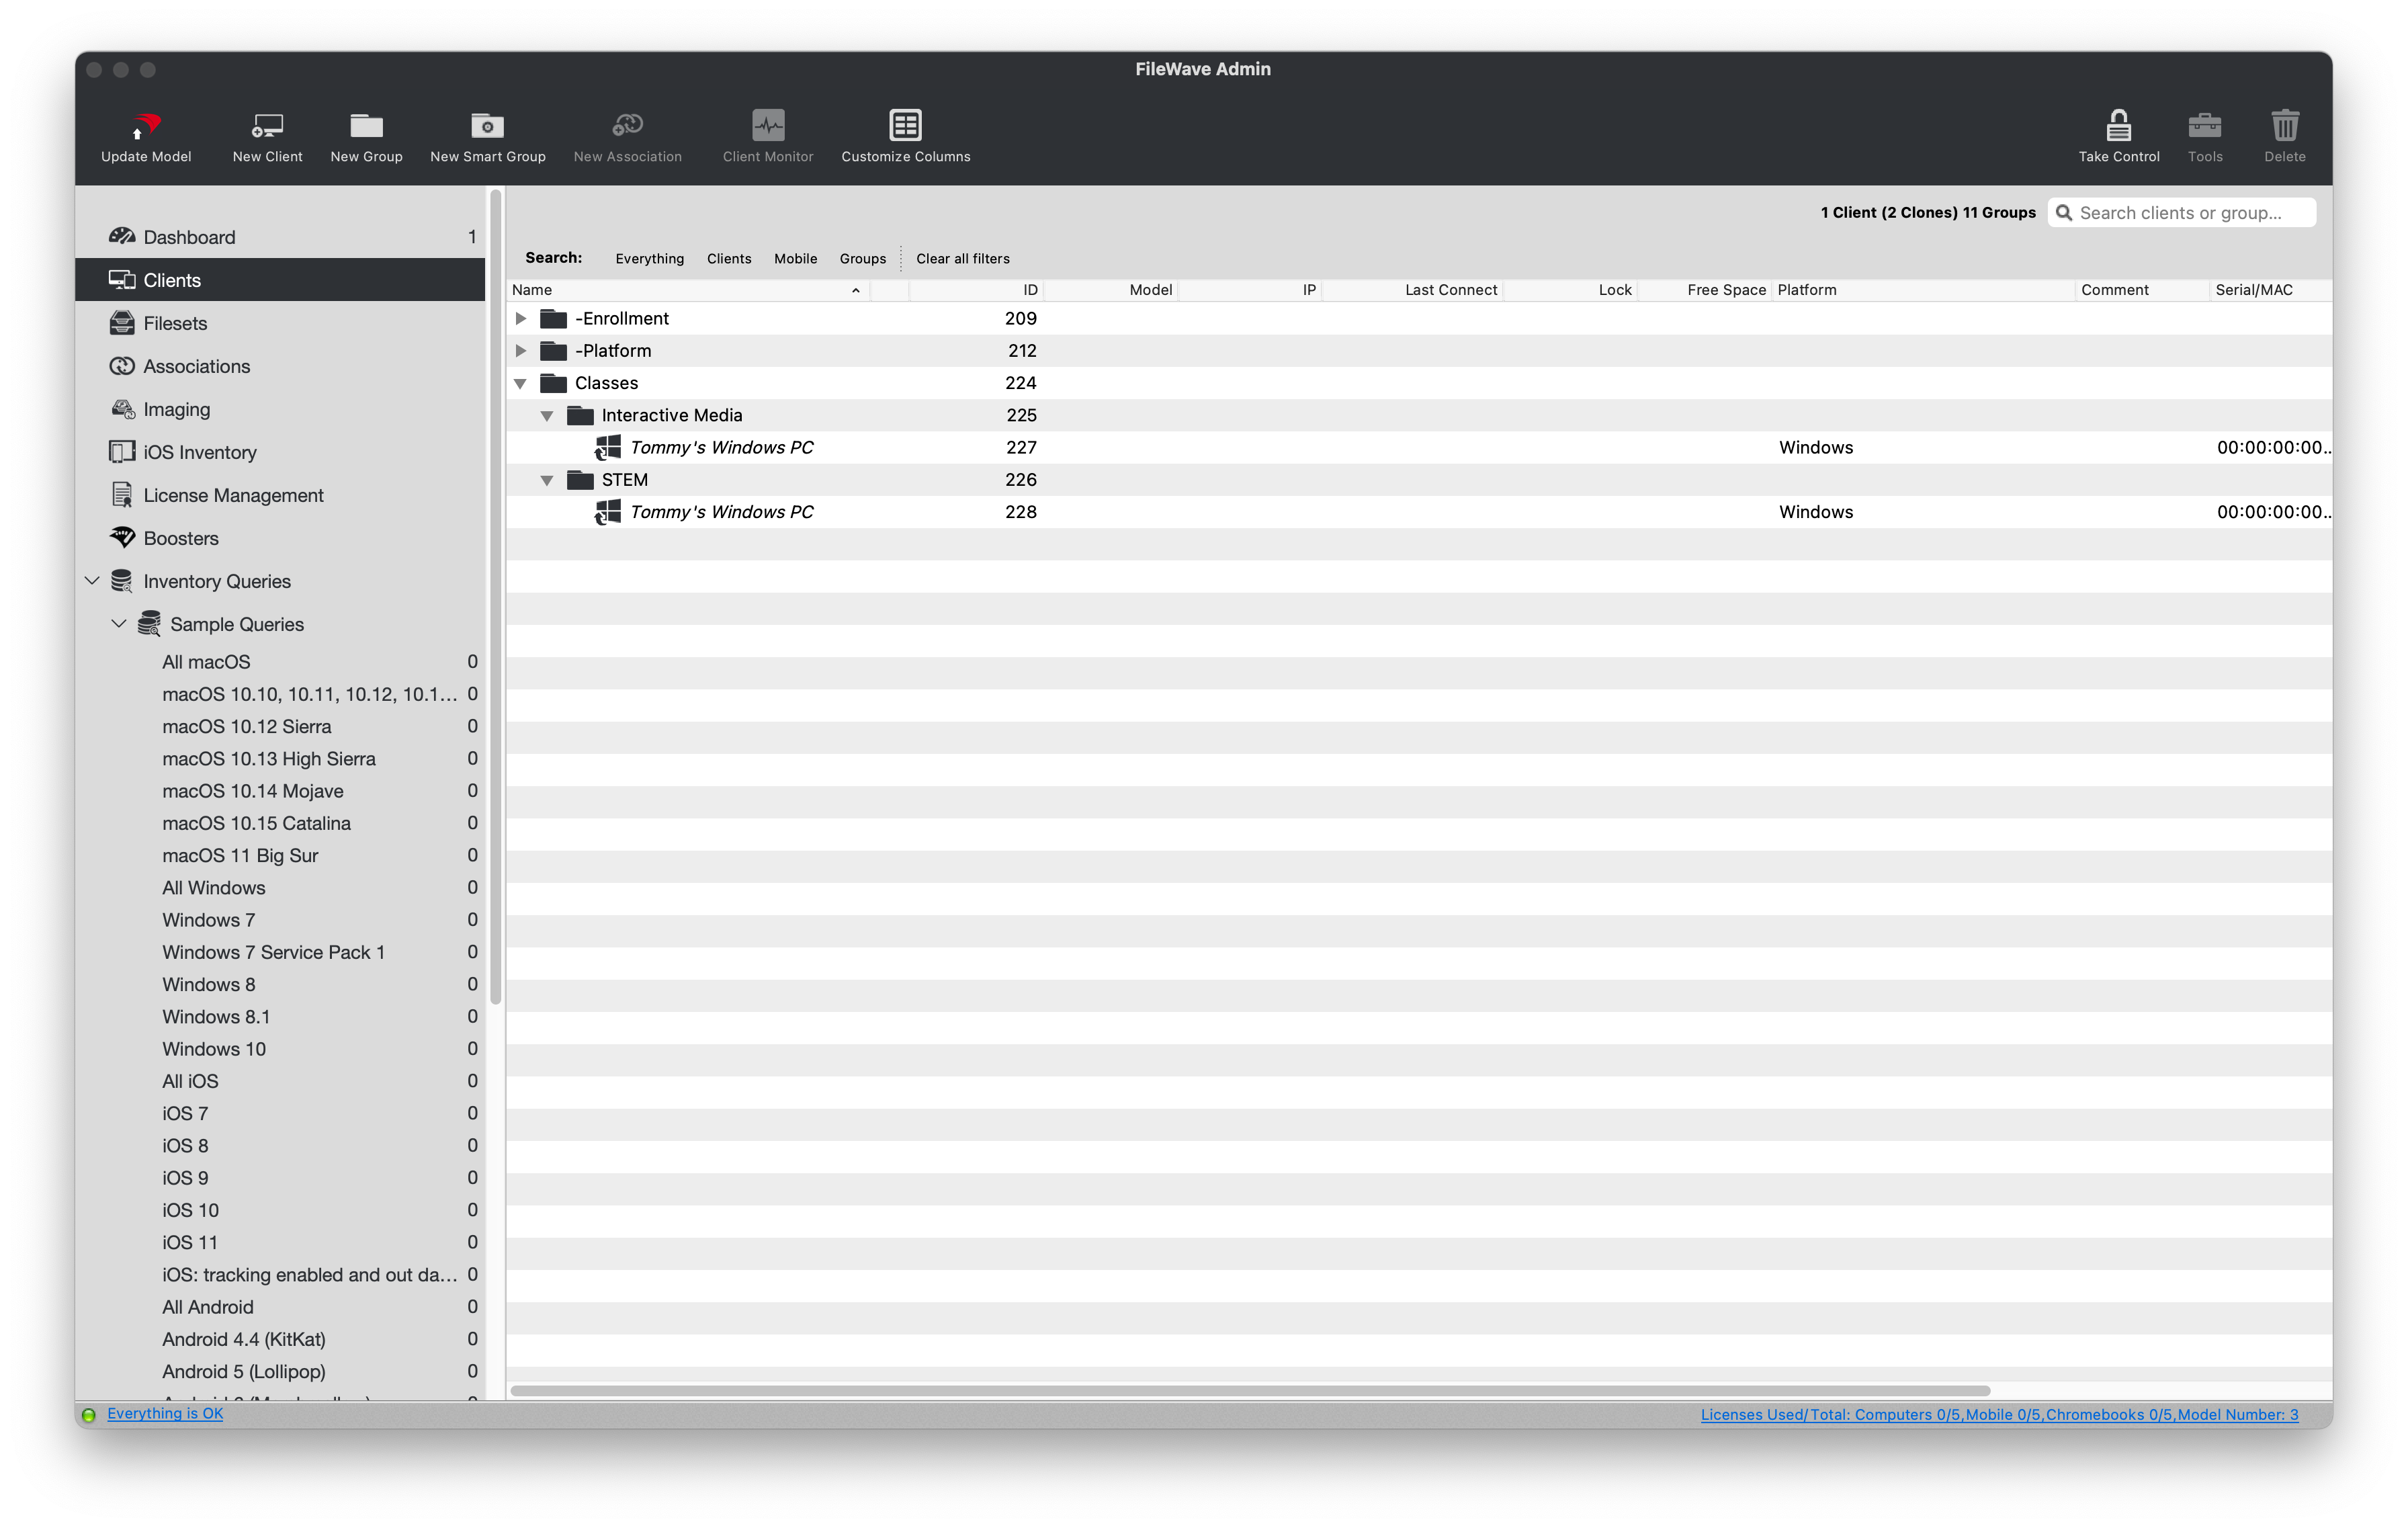
If the devices you need to group have no suitable shared attributes for a Smart Group, you can "clone" them into a standard group. Clones let you organize Fileset Deployments while keeping the original Client record in the "-Enrollment" group. Moving or deleting a clone leaves the original record and other clones intact, but can change the content assigned to the same managed device. For example, Tommy participates in both "Interactive Media" and "STEM" classes during first semester but in second semester he only participates in "Interactive Media". Since Tommy's device no longer needs the "STEM" software, we can delete his cloned device from the "STEM" Client group while keeping his "Interactive Media" group reference. Check the resulting device content separately; the retained reference does not guarantee that every app or setting is unchanged.
Moving or deleting a clone leaves the original record intact, but can change the content assigned to that same device through the group. Check the affected assignments and their removal behavior before changing a clone; keeping another clone does not guarantee that every application or setting remains unchanged.
Creating a clone
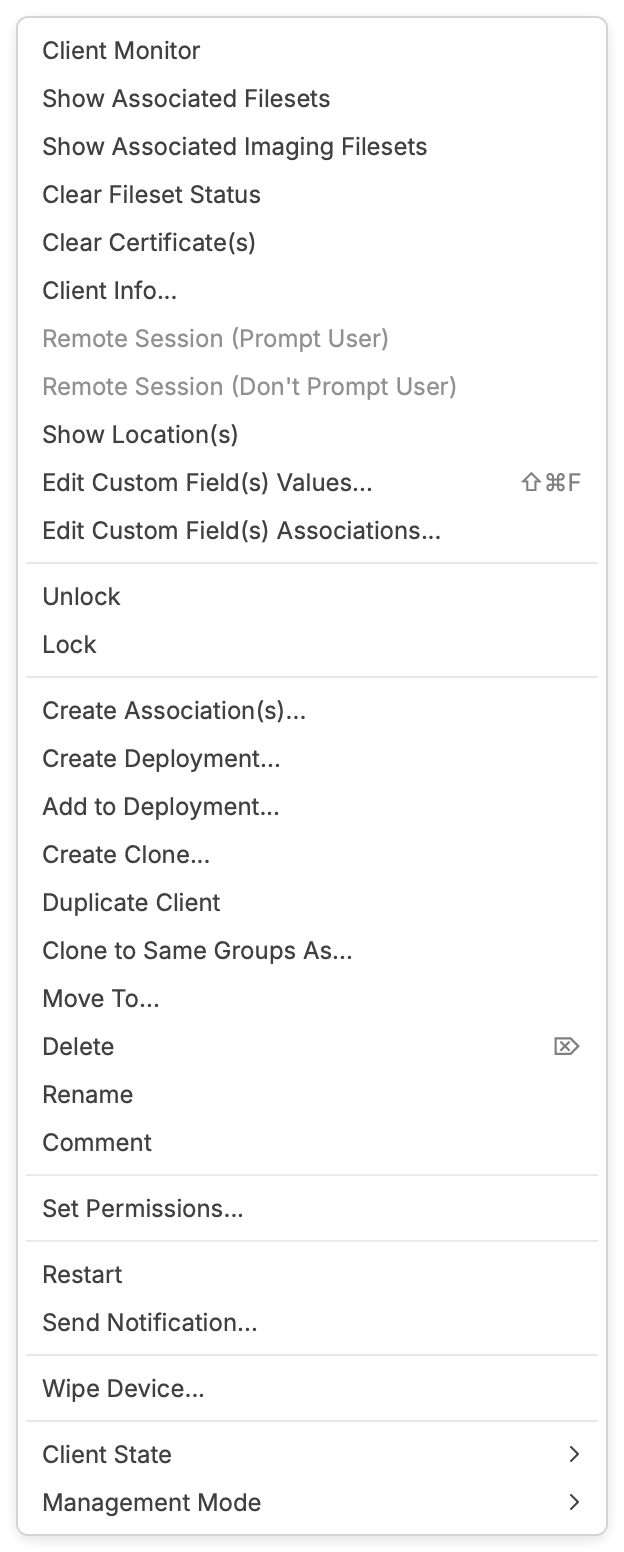 Right-click on any device or device clone and select "Create Clone".
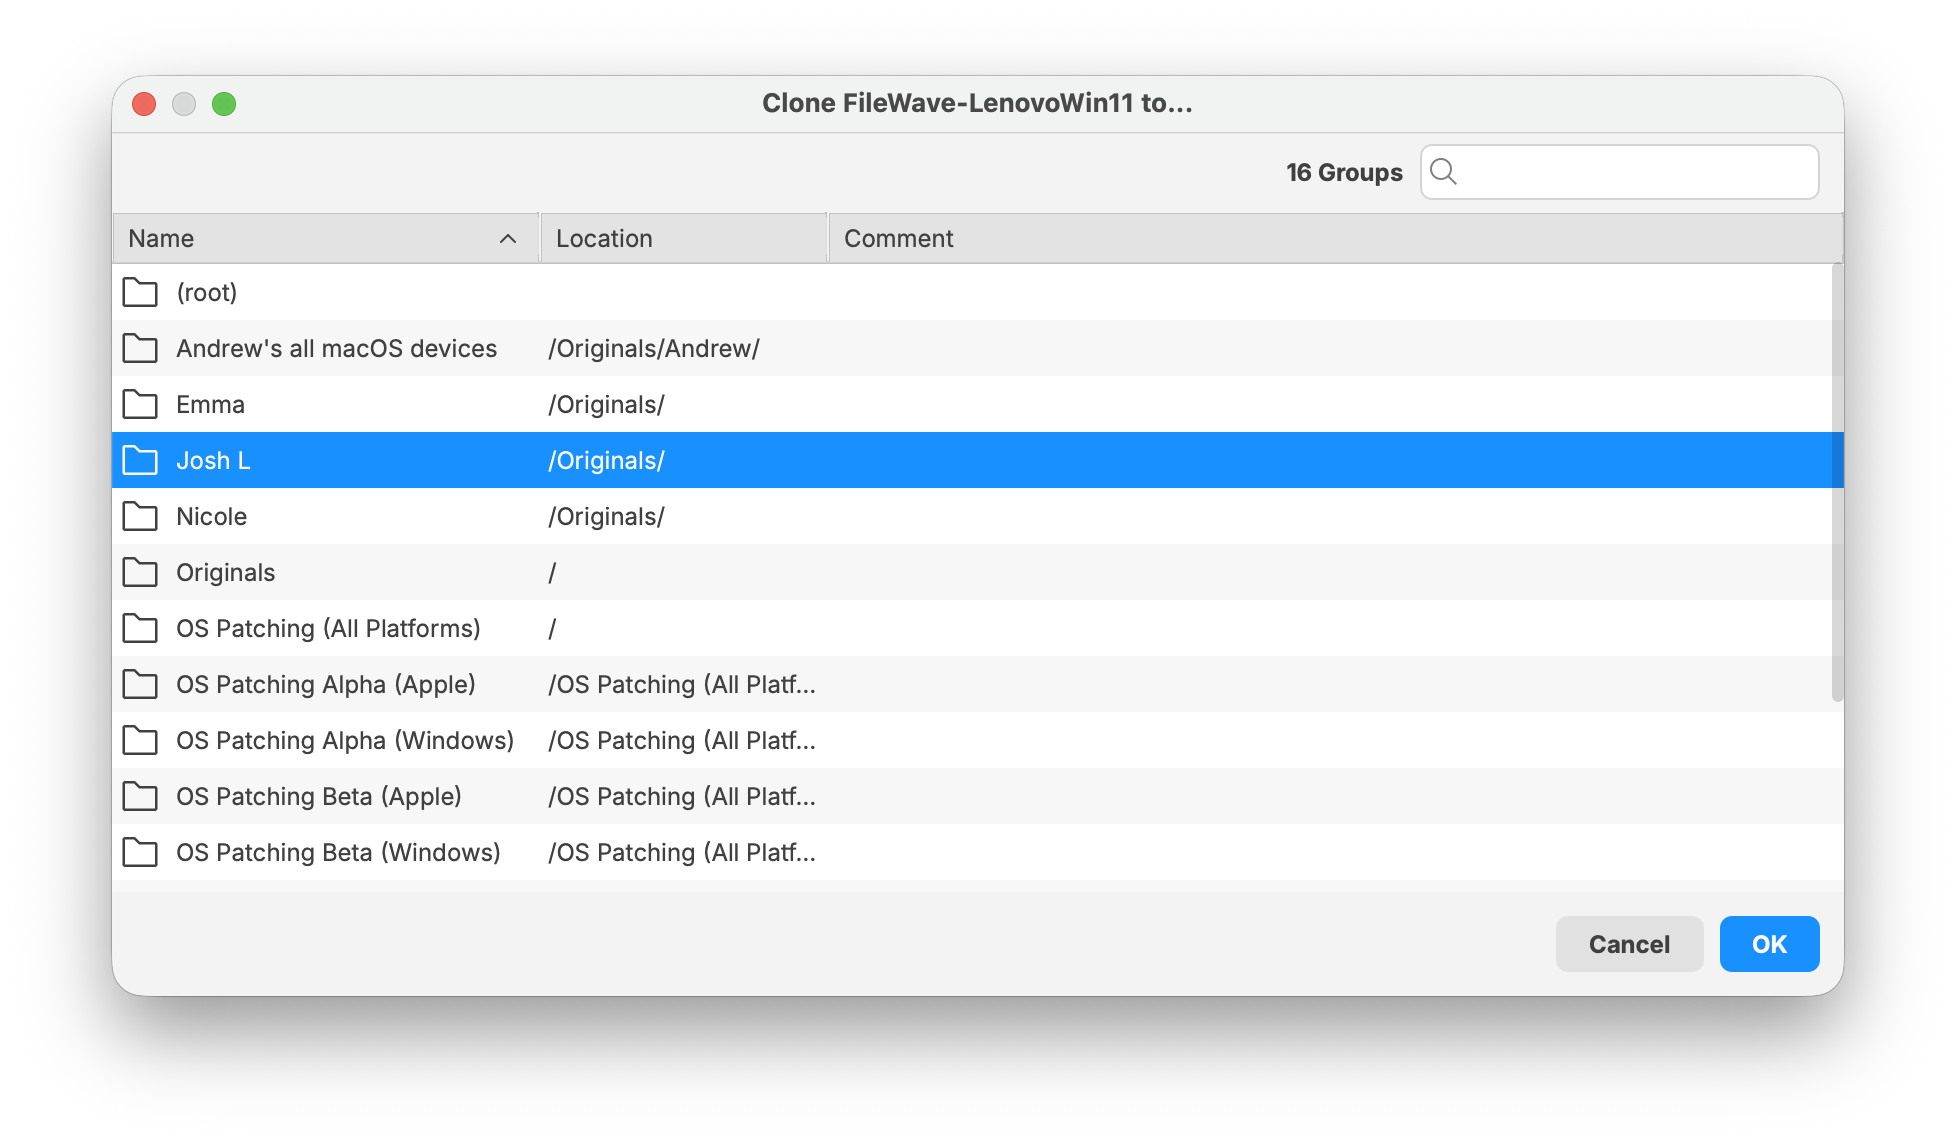
- Select the Client group where you want the clone to be created.
- The new clone appears in italic text with an upward-pointing arrow on the Client's icon.
Return to your evaluation
When the group test is finished, review the test group’s assignments and their removal behavior before removing its clone or group. Remove only the test objects you created, coordinate any required Model Update, and check the original device record and its intended content afterward. A clone is not a backup or an isolated test device.
If you created only a static test group, return to your first deployment and verify the result in Inventory Reports. For optional content organization, continue to Organize Filesets into Groups. Stop before enabling automation or assigning content to a broader group unless that scope has been approved.
No comments to display
No comments to display