iboss iOS Zero Trust Connector (GEN2) Deployment
Description
Need to deploy iboss iOS Zero Trust Connector to your iOS/iPadOS devices? Here's an example deployment for completing this configuration in FileWave to block restricted sites in Safari and on a separate browser like Chrome using the Per-App VPN profile.
Ingredients
- Your completed configuration set up with iboss
- FileWave Anywhere/Central Profile Editor
Directions
- Bring in the iboss iOS Zero Trust Connector app into your FileWave server as you would for a usual VPP application: Adding licensed applications to your FileWave Server
-
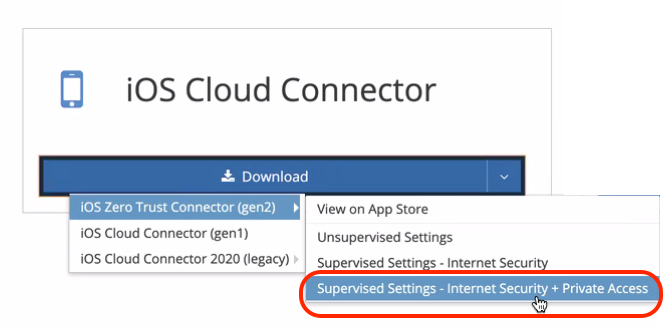
For this complete example that allows you to filter web traffic for both the built-in Safari browser as well as filtering an extra browser like Chrome, you should search for this profile, which is available for download in your iboss portal. We specifically need the 'Supervised Settings - Internet Security + Private Access' profile.
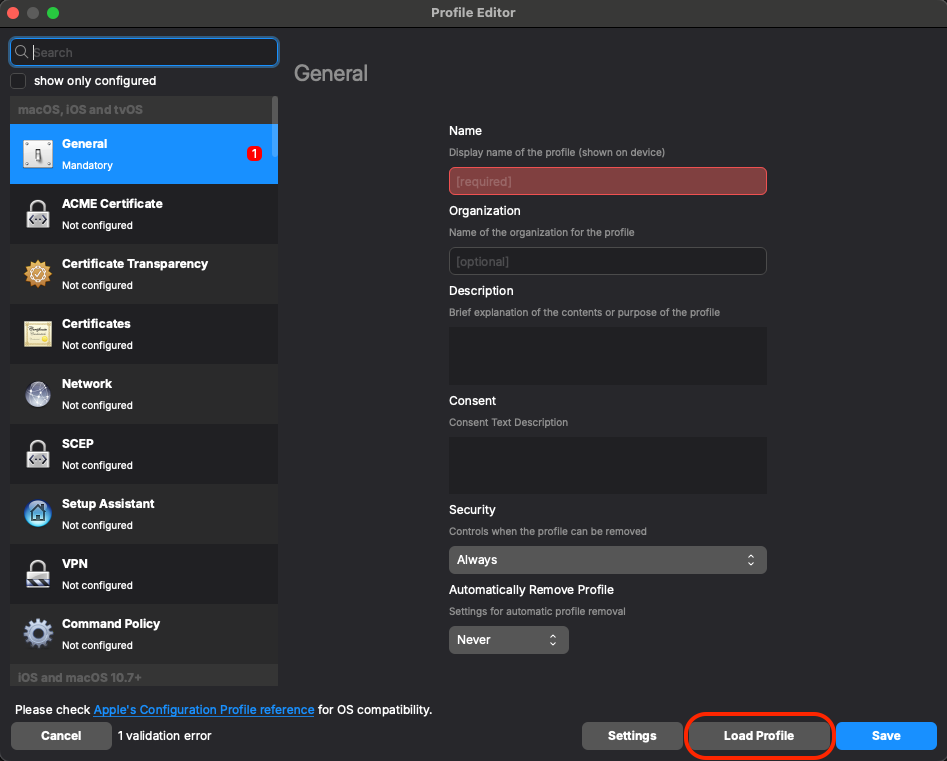
- Now that you have it downloaded, go back into FileWave Admin. In FileWave Central we'll find our next step in Filesets > New Fileset > Apple > Profile and we'll want to use the 'Load Profile' button to import the pre-configured .mobileconfig file:
- Confirm that you have a certificate and your DNS Proxy profile is correctly configured. To also add web filtering on a separate browser app like Chrome, you'll want to edit or just confirm the Per-App VPN payload configuration in your profile.
Here's an example of the configuration settings you'll want to use. Usually, iboss profiles will come with the required fields filled. But you'll want to check things like "Route all traffic through the VPN" and "Exclude Local Networks" if that is your intention: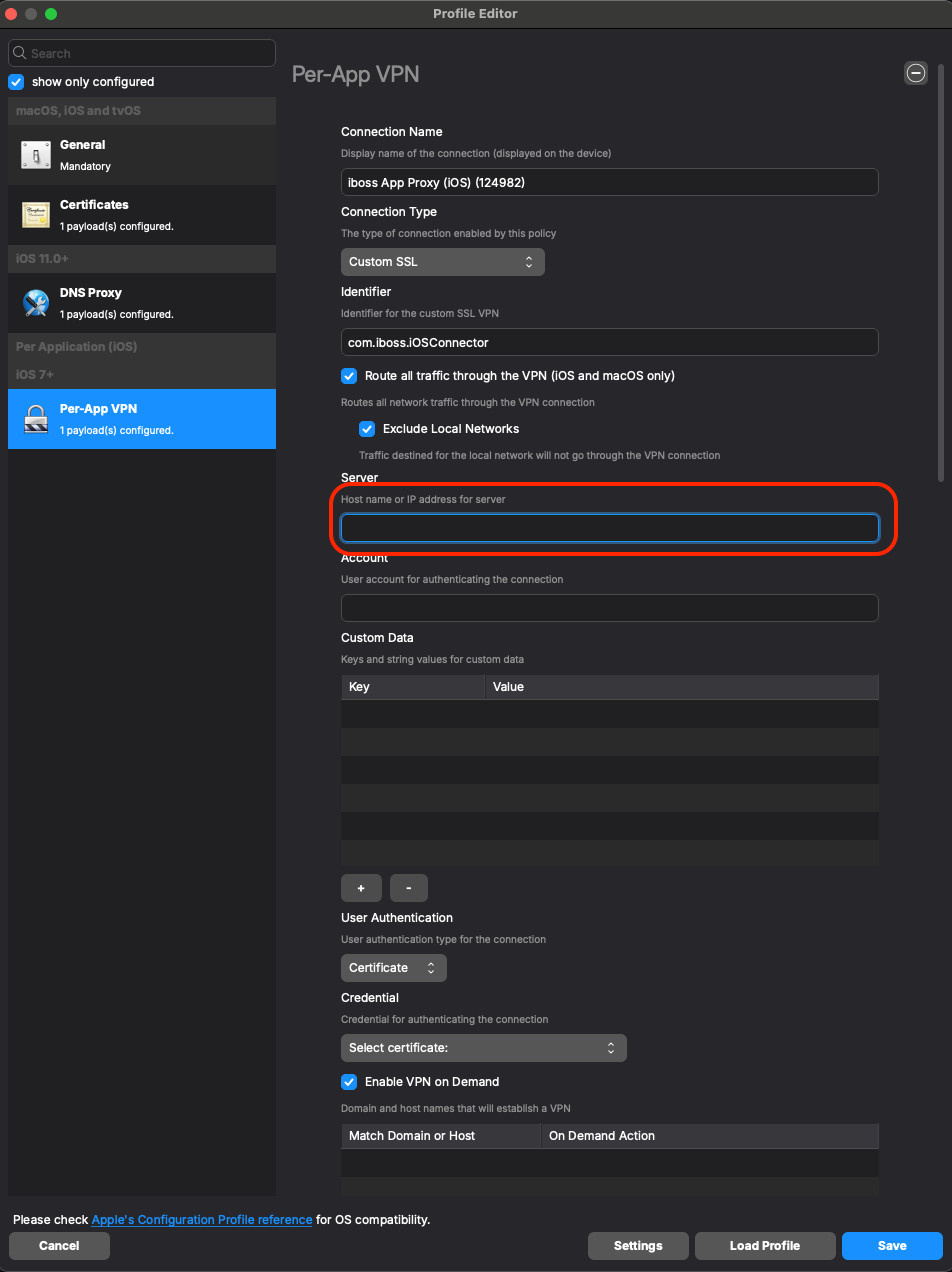
- For the 'Server' field, you should leverage your specific “*.ibosscloud.com cluster FQDN” - it should come preloaded in there. If you need help finding it, please reach out to iboss.
- For the 'Account' field, depending on what you have configured in your DNS Proxy payload, you may want to utilize a parameter based on what you are using in your environment for authenticating. If there is no user account being used to authenticate the connection, you can leave the field blank.
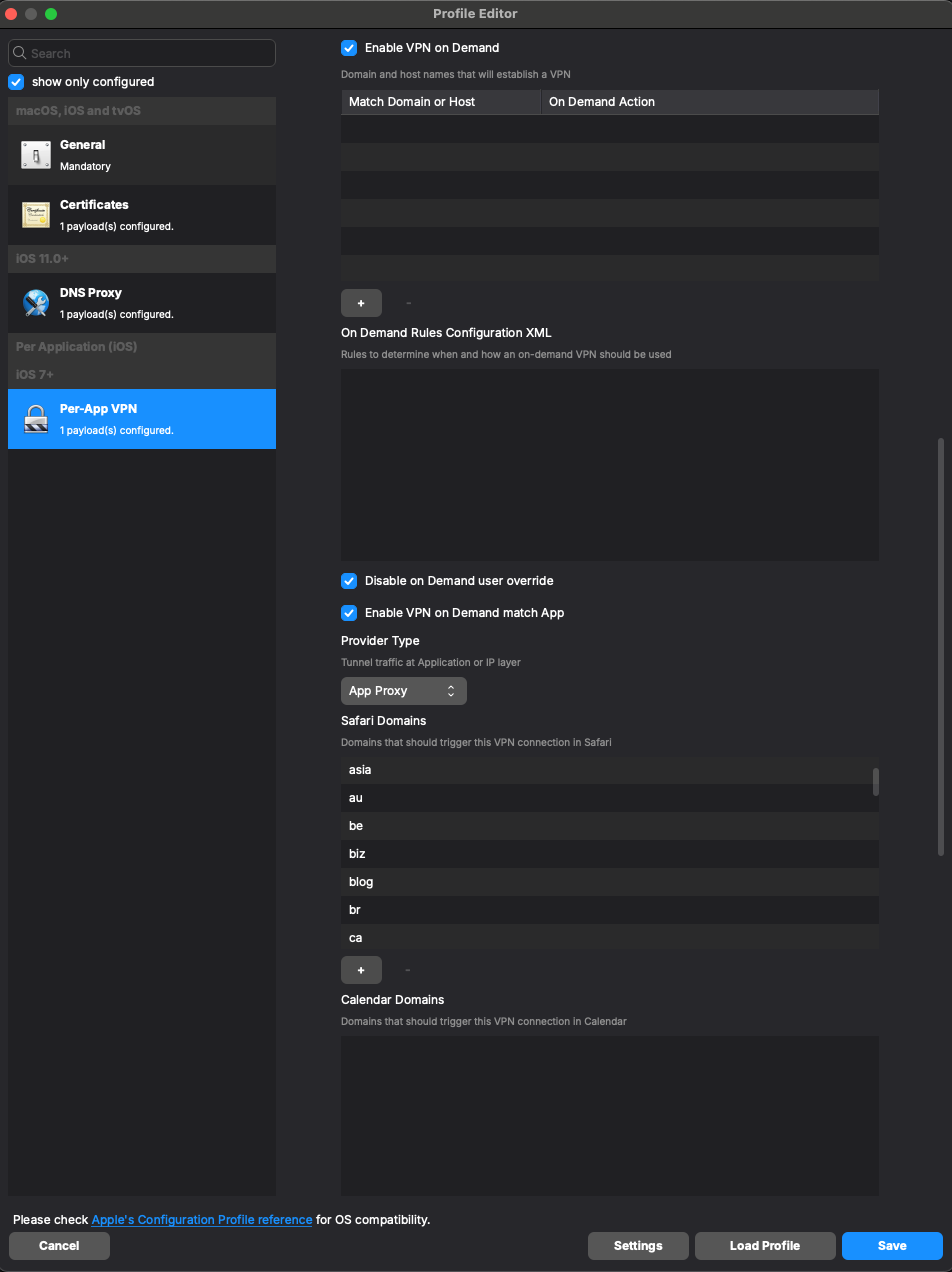
Please ensure your settings match the ones in the example here. However, your 'Safari Domains' may differ from the default depending on what your profile already includes from iboss. If it already includes a list of domains, just leave it as iboss configured it and move on:
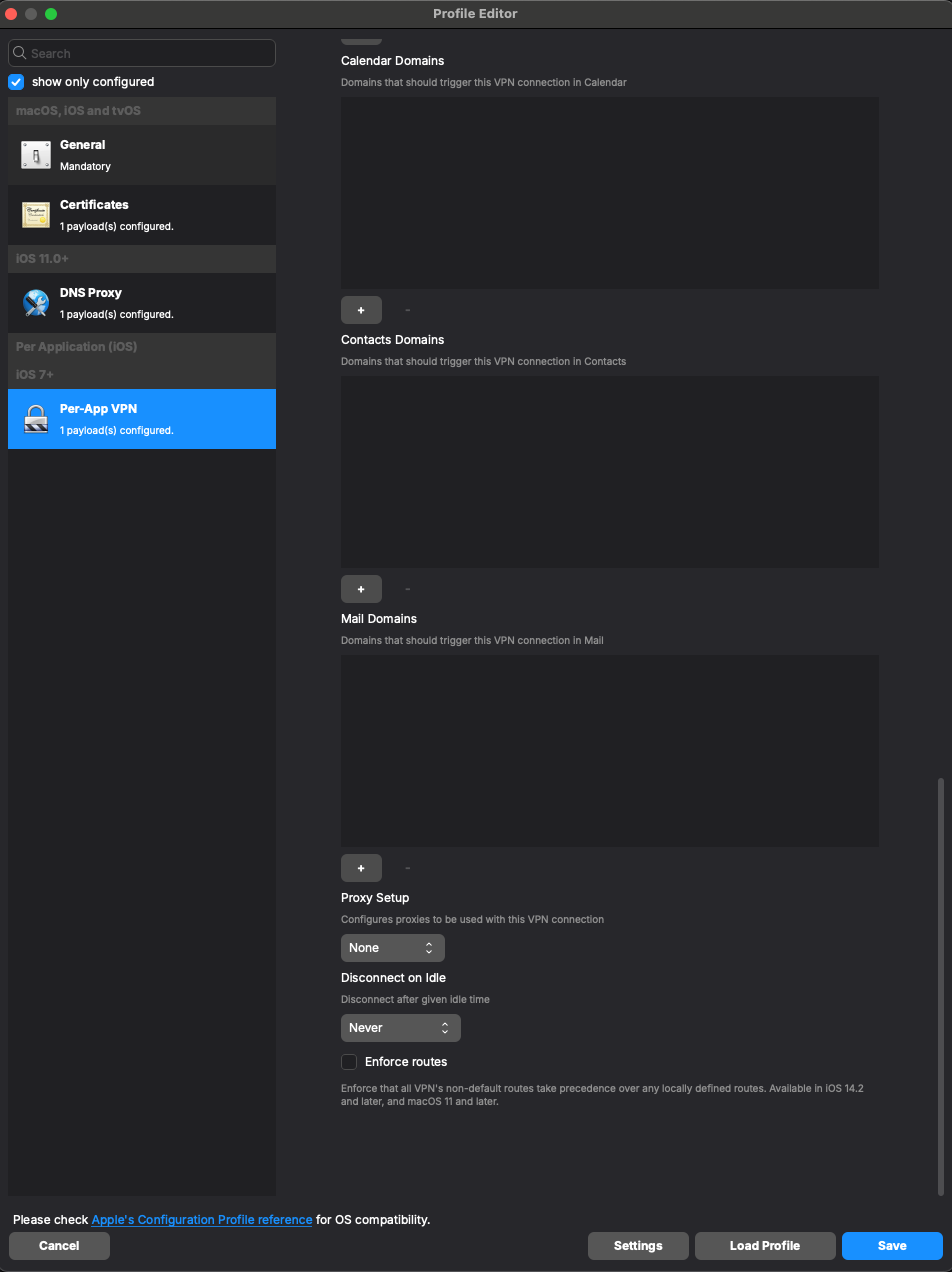
- For the 'Server' field, you should leverage your specific “*.ibosscloud.com cluster FQDN” - it should come preloaded in there. If you need help finding it, please reach out to iboss.
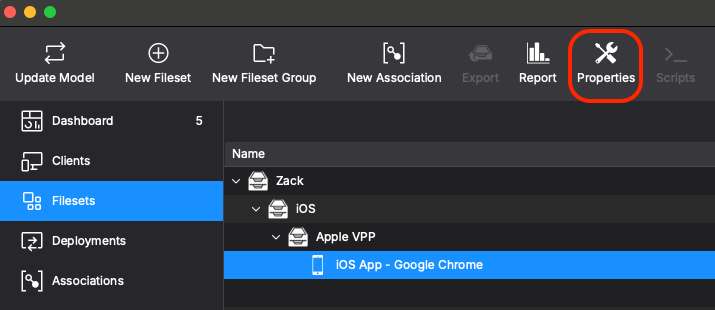
- Lastly, this all comes together by adding the configuration to your browser of choice. Once again, we are using Google Chrome as our example here. Find your VPP app for Google Chrome in your filesets. Select it and use the 'Properties' button or double-click the fileset to open up the fileset's Properties:
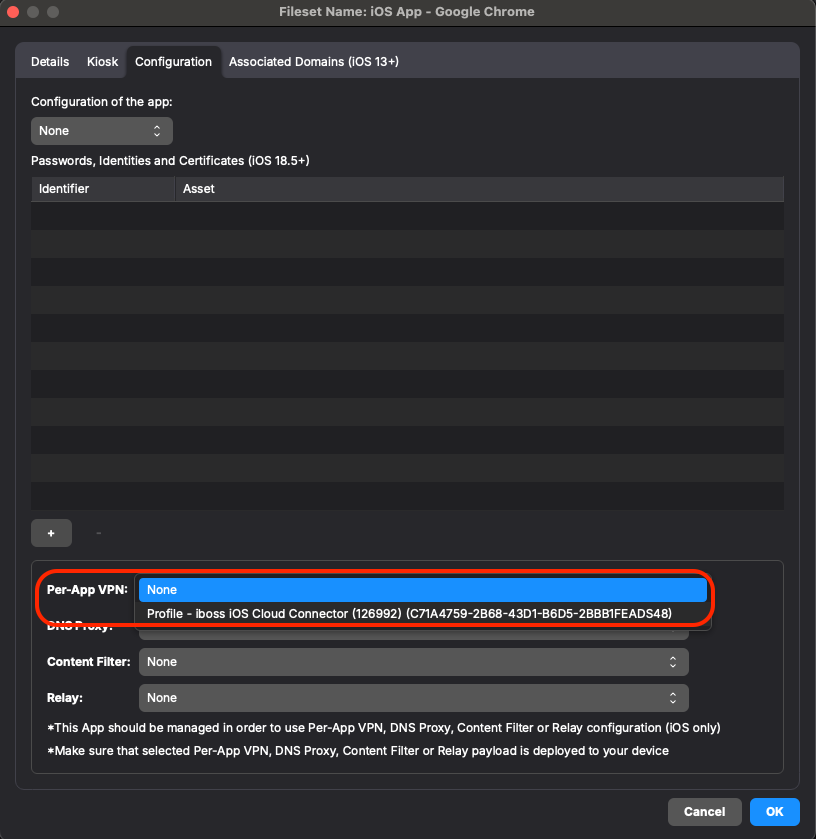
- Then in the 'Configuration' tab, under Per-App VPN, you should now be able to click it and see your configured profile. Select and choose your iboss cloud connector profile you just finished configuring in the earlier steps. Then, click OK to save:
Make sure you have the three things deployed to your test device - the iboss zero trust connector VPP app, the iboss profile you configured and the Google Chrome VPP app fileset with the proper "Per-App VPN" profile selected in it. Update Model to save your work and test with your device to confirm that sites from your blocked list are indeed blocked on the device.
No comments to display
No comments to display