Lightspeed Smart Filter Deployment (iOS)
Description
Need to deploy Lightspeed Smart Filter along with your configurations. FileWave has got you covered in this step-by-step guide to creating the required Profile to deploy to your iOS devices.
Ingredients
-
FileWave Anywhere/Central Profile Editor
Web Content Filter - In creating a Web Content Filter within FileWave Central it changes the UDID and is unsuccessful in deployment. The issue can be resolved by re-creating the Web Content Filter in FileWave Anywhere as a workaround. The issue should be resolved in the next release. See Known Issues
Directions
-
Open FileWave Admin
-
Select Filesets
-
Create New Mobile Fileset
-
Select Profile
-
Enter the name of the Profile, i.e. Lightspeed Filter
-
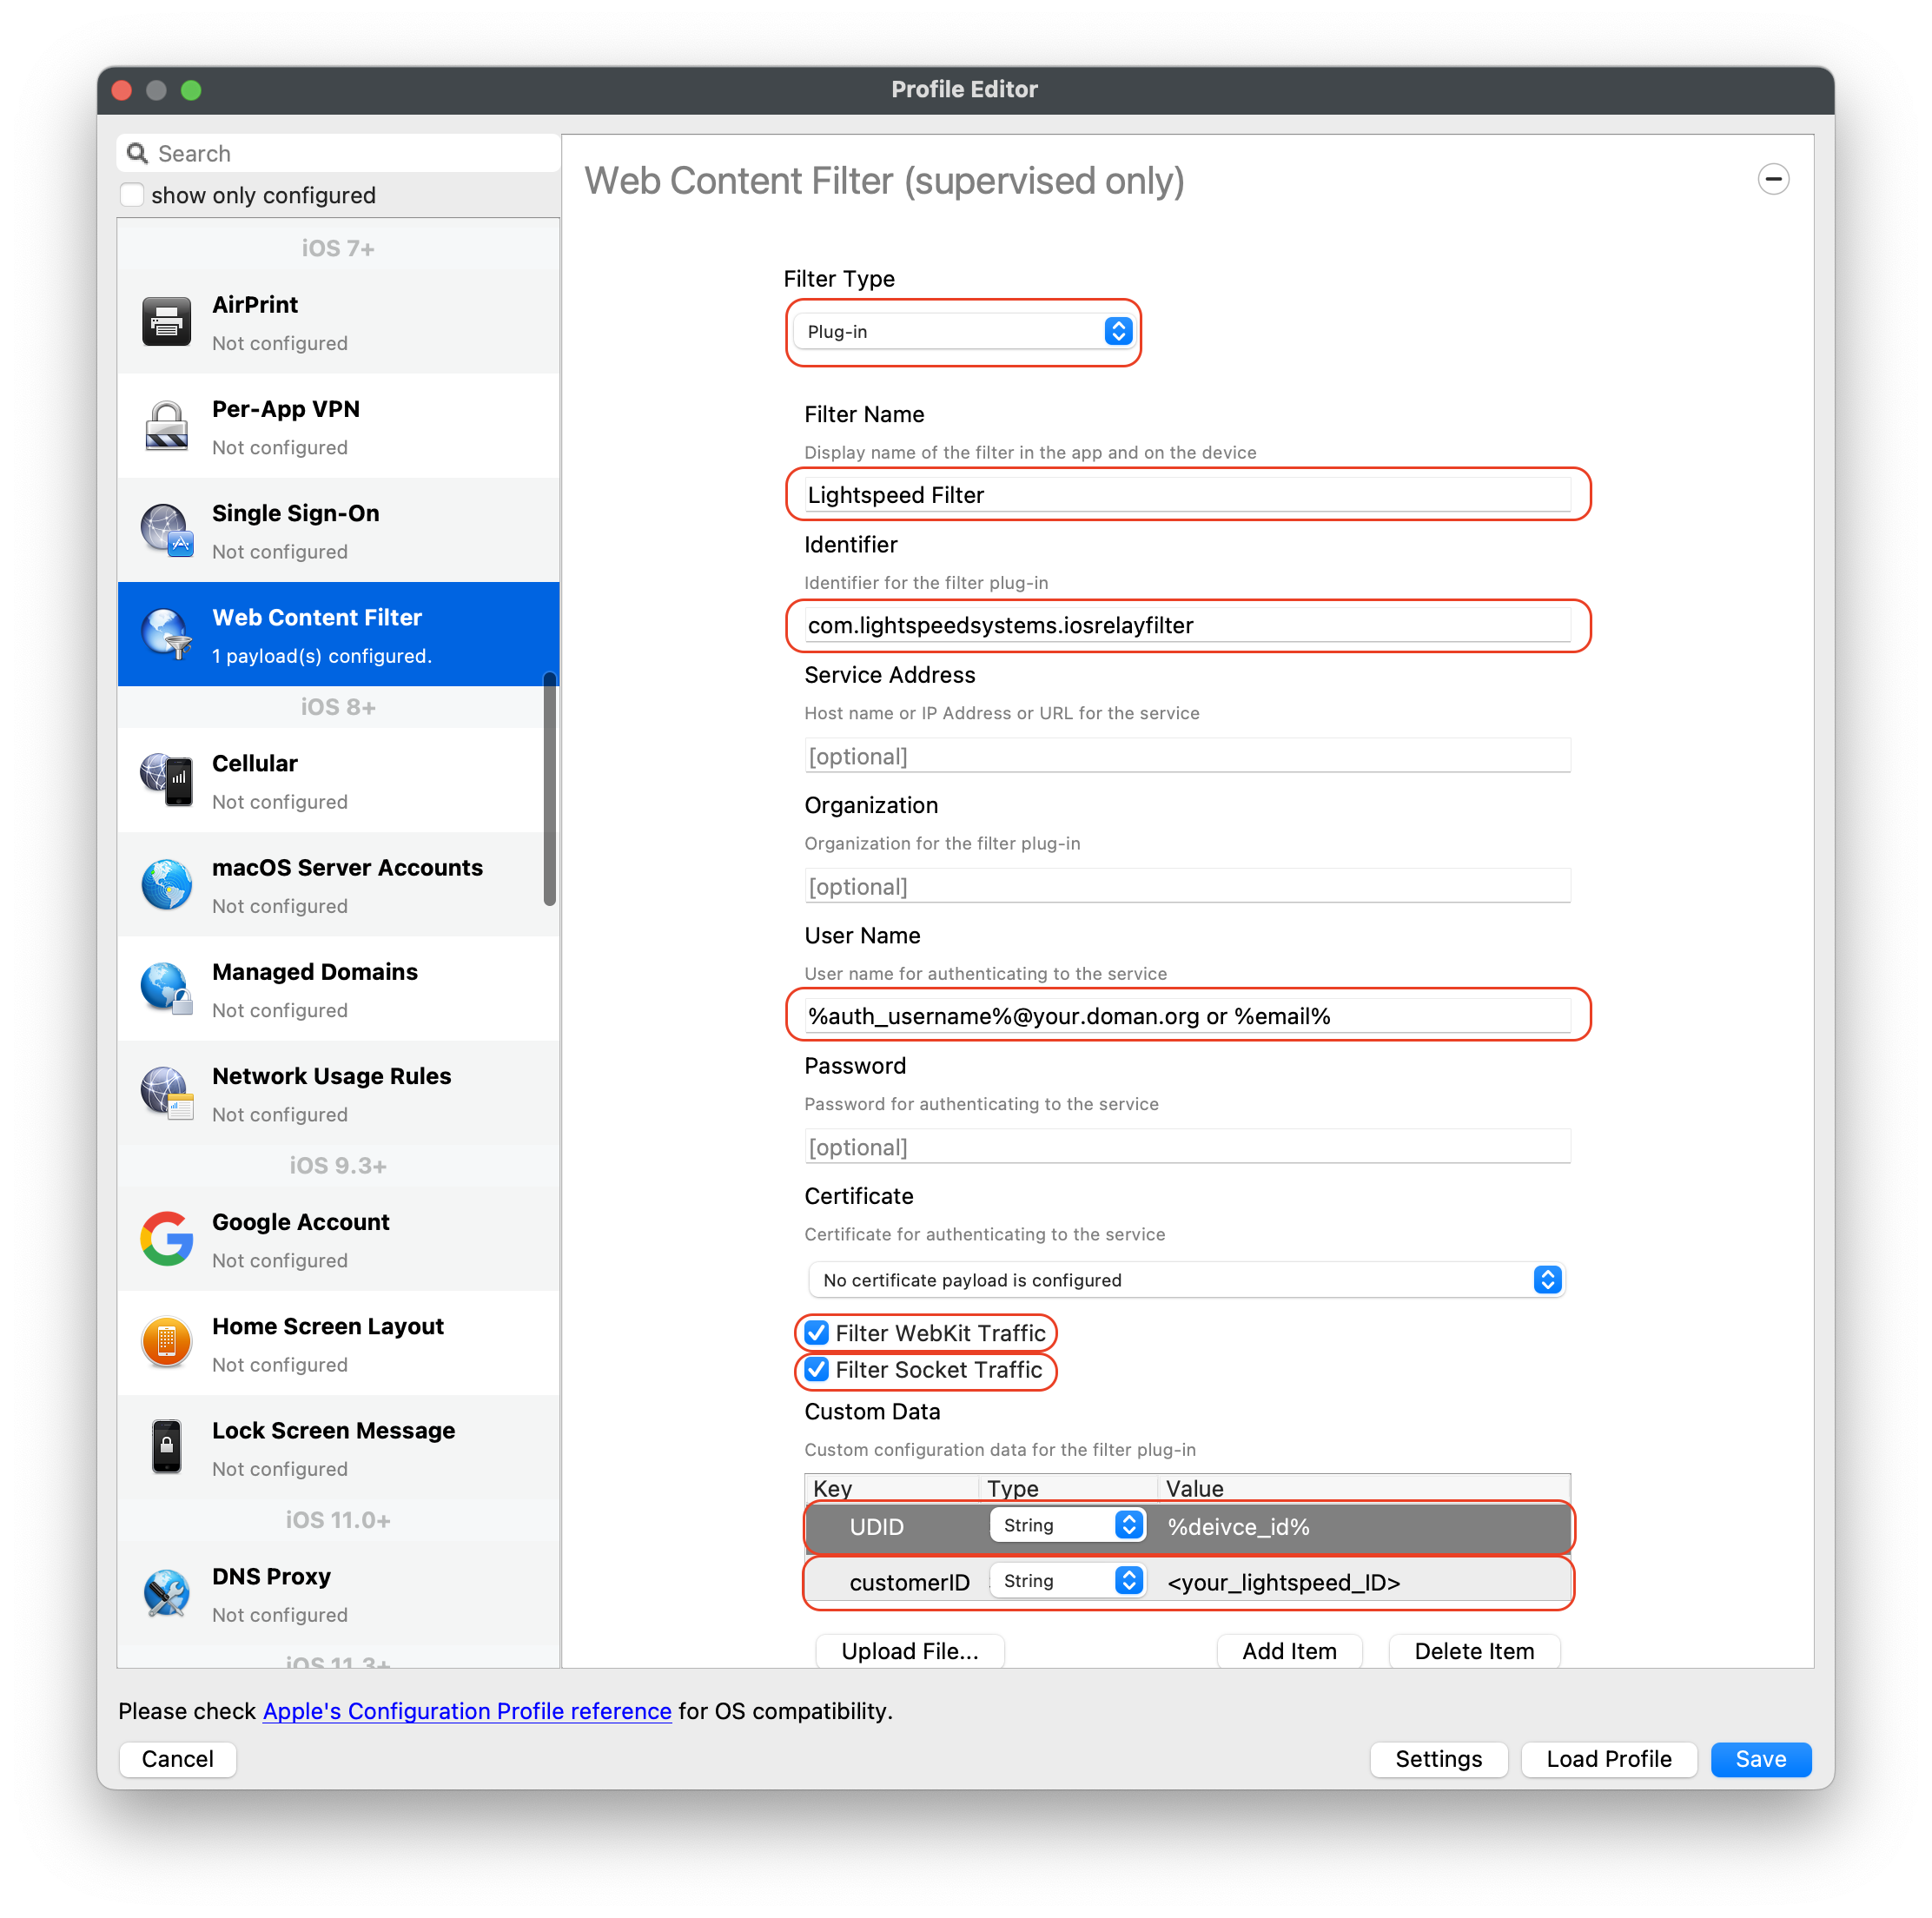
Select Web Content Filter (Supervised Only) payload
-
Select and enter the following:
-
Filter Type: Plug-in
-
Filter Name: Lightspeed Filter
-
Identifier: com.lightspeedsystems.iosrelayfilter
-
User Name: %auth_username%@your.domain.org or %email%
-
Filter Webkit Traffic: enable
-
Filter Socket Traffic: enable
-
Custom Data:
-
Key: UDID - Type: String - Value: %device_id%
-
Key: customerID - Type: String - Value: your_lightspeed_ID
-
-
-
Click Save
-
Assign/associate to test device
-
Update Model
Always test web content filtering with one or two devices before mass deployment. This ensures the filter is working properly and has configurations set to allow your devices to communicate back to your FileWave services.
Lightspeed Smart Agent for macOS devices
Looking to deploy your Lightspeed Smart Agent for macOS devices? Review the KB article here: Lightspeed Smart Agent Deployment (macOS 2023).
Needing to deploy Lightspeed for macOS using Certificate Manager? Review the KB article here: Lightspeed Smart Filter Deployment (macOS v2.3.1+ using Certificate Manager)
No comments to display
No comments to display