
Custom Fields in Client View
In FileWave Central, add an existing inventory field or Custom Field as a column in Client View to compare values across devices. This changes the displayed columns; it does not create a Custom Field or populate its values. For the separate FileWave Anywhere workflow, see Columns Adding and Removing (Customizing).
Steps to add new fields
- From Client View, press Customize Columns.
- Press Add Inventory Field for advanced inventory options.
- Select an inventory field. For a Custom Field, expand All Devices > Custom Fields, choose the existing field, and confirm with OK.
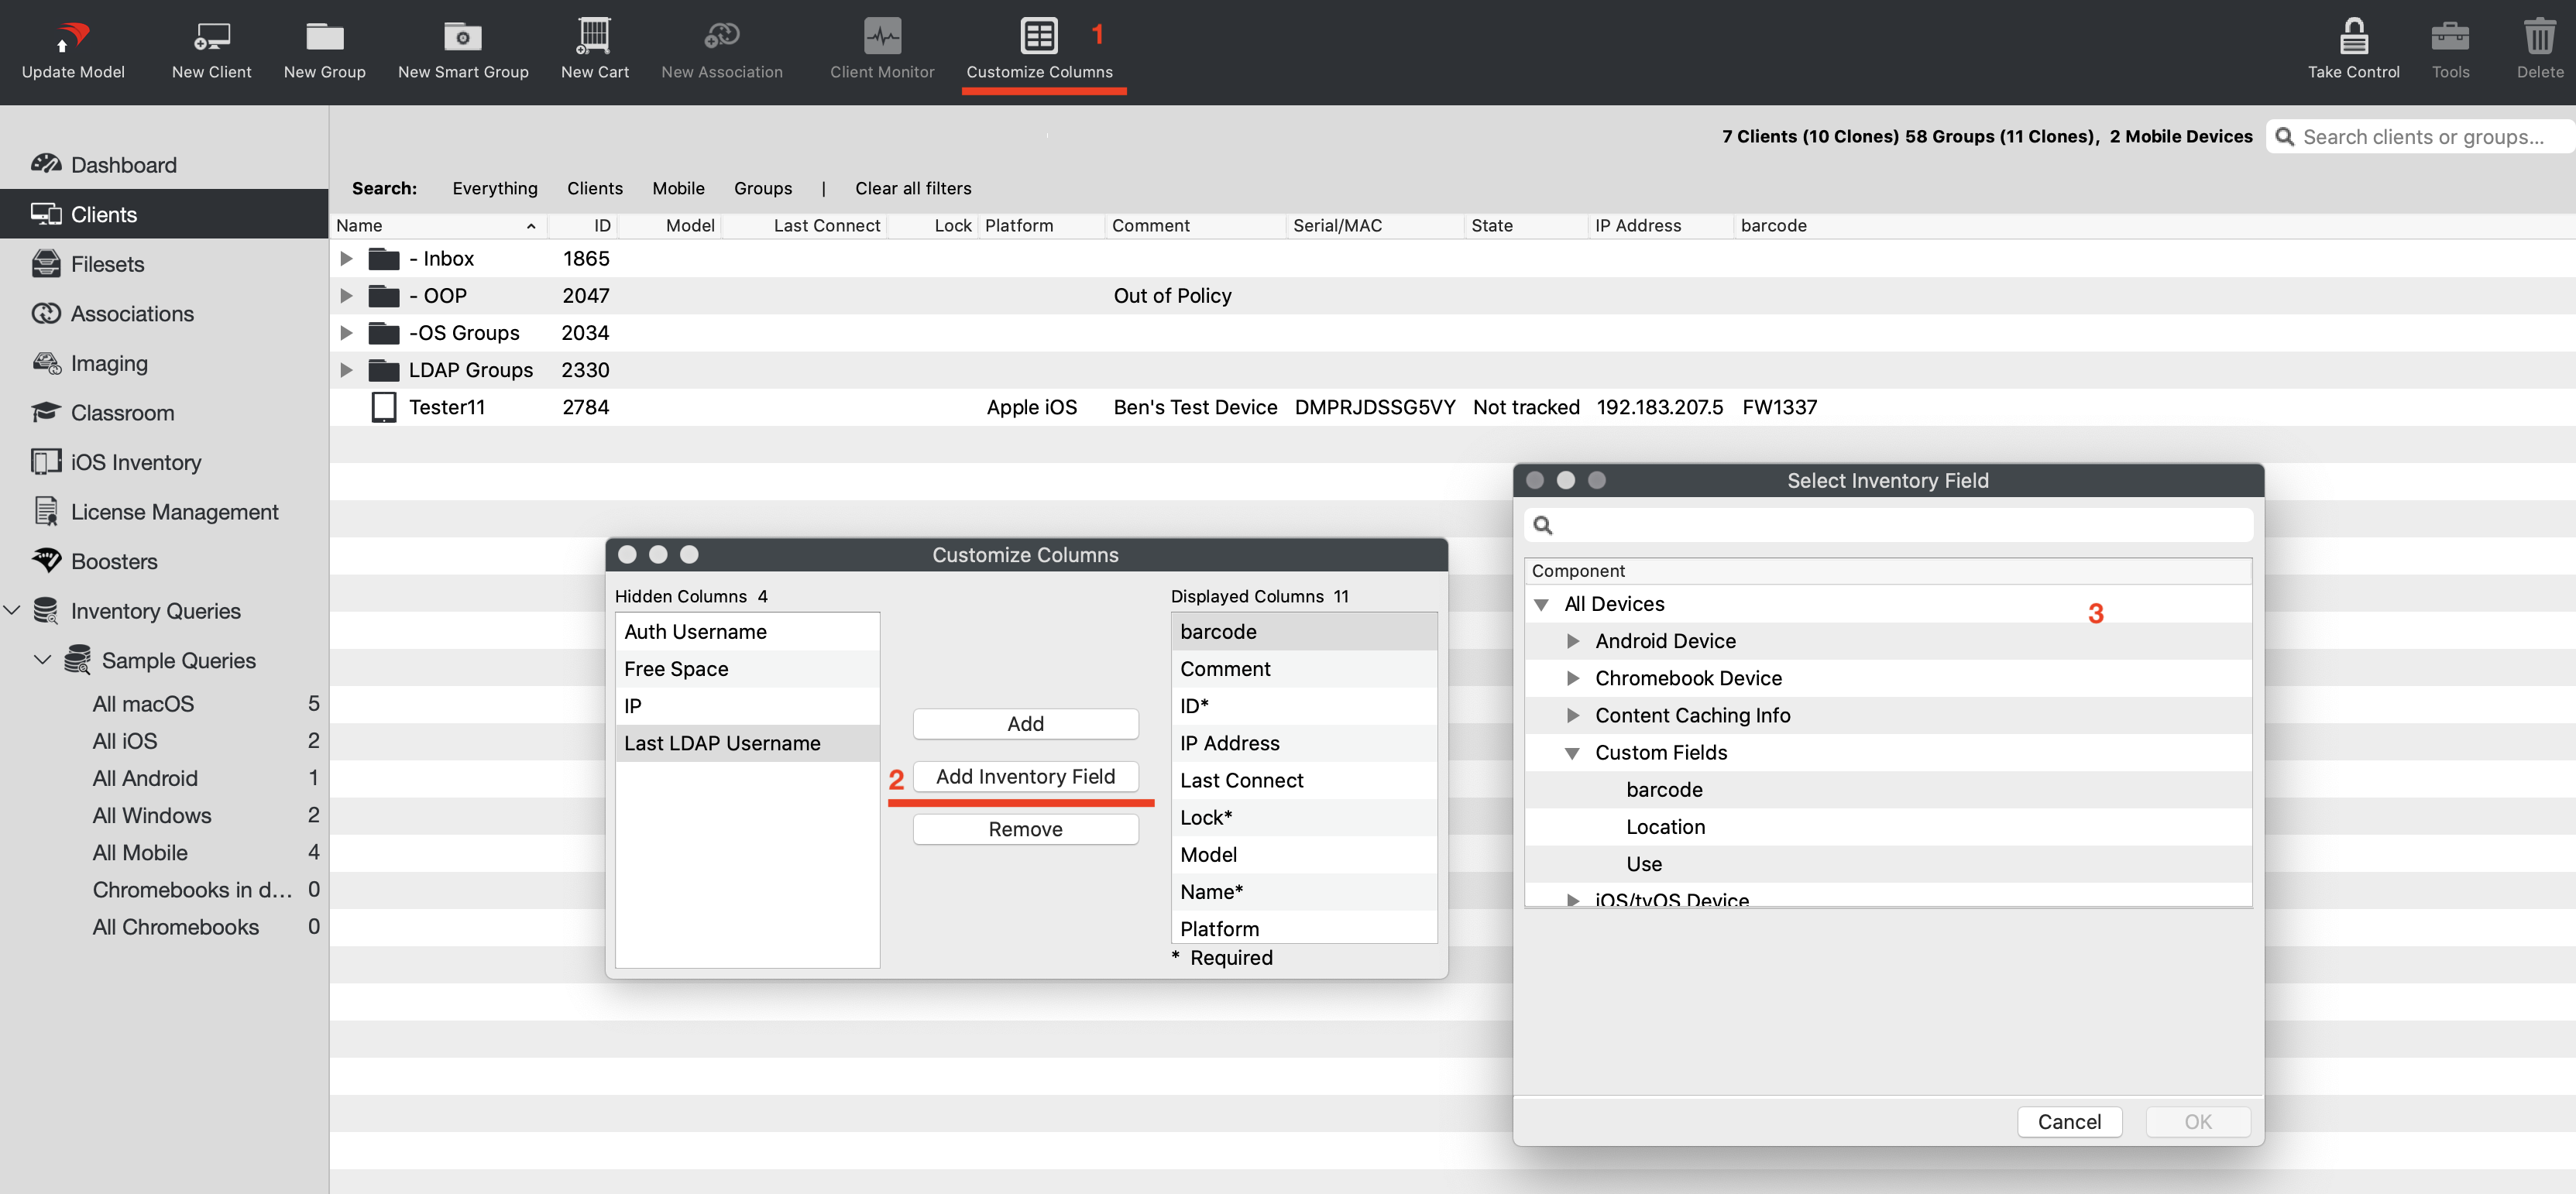
After you add an inventory field, it still appears the next time you open the Select Inventory UI.
If you select a field that is already in Client View, FileWave closes the selector. Open it again and choose a field that has not already been added.
The Select Inventory Fields UI has fewer fields than QueryBuilder because Client View only supports direct 1:1 inventory fields.
Hiding the built-in IP column and adding Inventory: All Devices / IP Address Column does not change which IP address Client Monitor uses.
Check the displayed values
Confirm that the new column appears and compare its value on a device whose Custom Field value you already know. If the column is empty, check the field definition and assignment to that device before treating the blank as a measured result. An Administrator-provided field needs an assigned value or default; a Client Script field needs output from its script. Follow Custom Fields to create, assign, or populate the field, then return here to display it.
Related Content
- See Custom Fields for more.
No comments to display
No comments to display