Set Up the FileWave Imaging Virtual Server (IVS)
What the Imaging Virtual Server does
FileWave Windows network imaging uses an on-premises Imaging Virtual Server (IVS)
FileWave's ability to image is done by leveraging an on-premise server that we refer to as the "IVS". ThisThe servervirtual mustappliance be virtualizedruns in either Hyper-V or VMWare environments. The IVS usesVMware, PXE Boot to network boot yourboots Windows machinesdevices usingin eitherUEFI Legacyor legacy BIOS or UEFI,mode, captures theor entiredeploys disk contents,images, and uploadstransfers thecaptured imageimages to the FileWave ServerServer. forKeep permanentthe storage. We recommend capturing a "thin"base image tothin reducewhen thepossible, timethen spentdeploy deploying the imageapplications and alsomodel-specific becausedrivers through FileWave can be used to deploy any software and/or driver to the machine after the imaging process has completed.imaging.
Import the IVS into virtual environmentappliance
- Download the latest version of the FileWave IVS that matches your FileWave Server version and virtual environment.
- Import the virtual appliance into
eitherHyper-V orVMWareVMware.following the same steps listed inThe1.FileWave Server Setup.article shows the same virtual-appliance import pattern.
Configure IVS network settings
-
Access the FileWave IVS console via virtual environment.
-
Log into the FileWave console with the username "root" and the password "filewave".
-
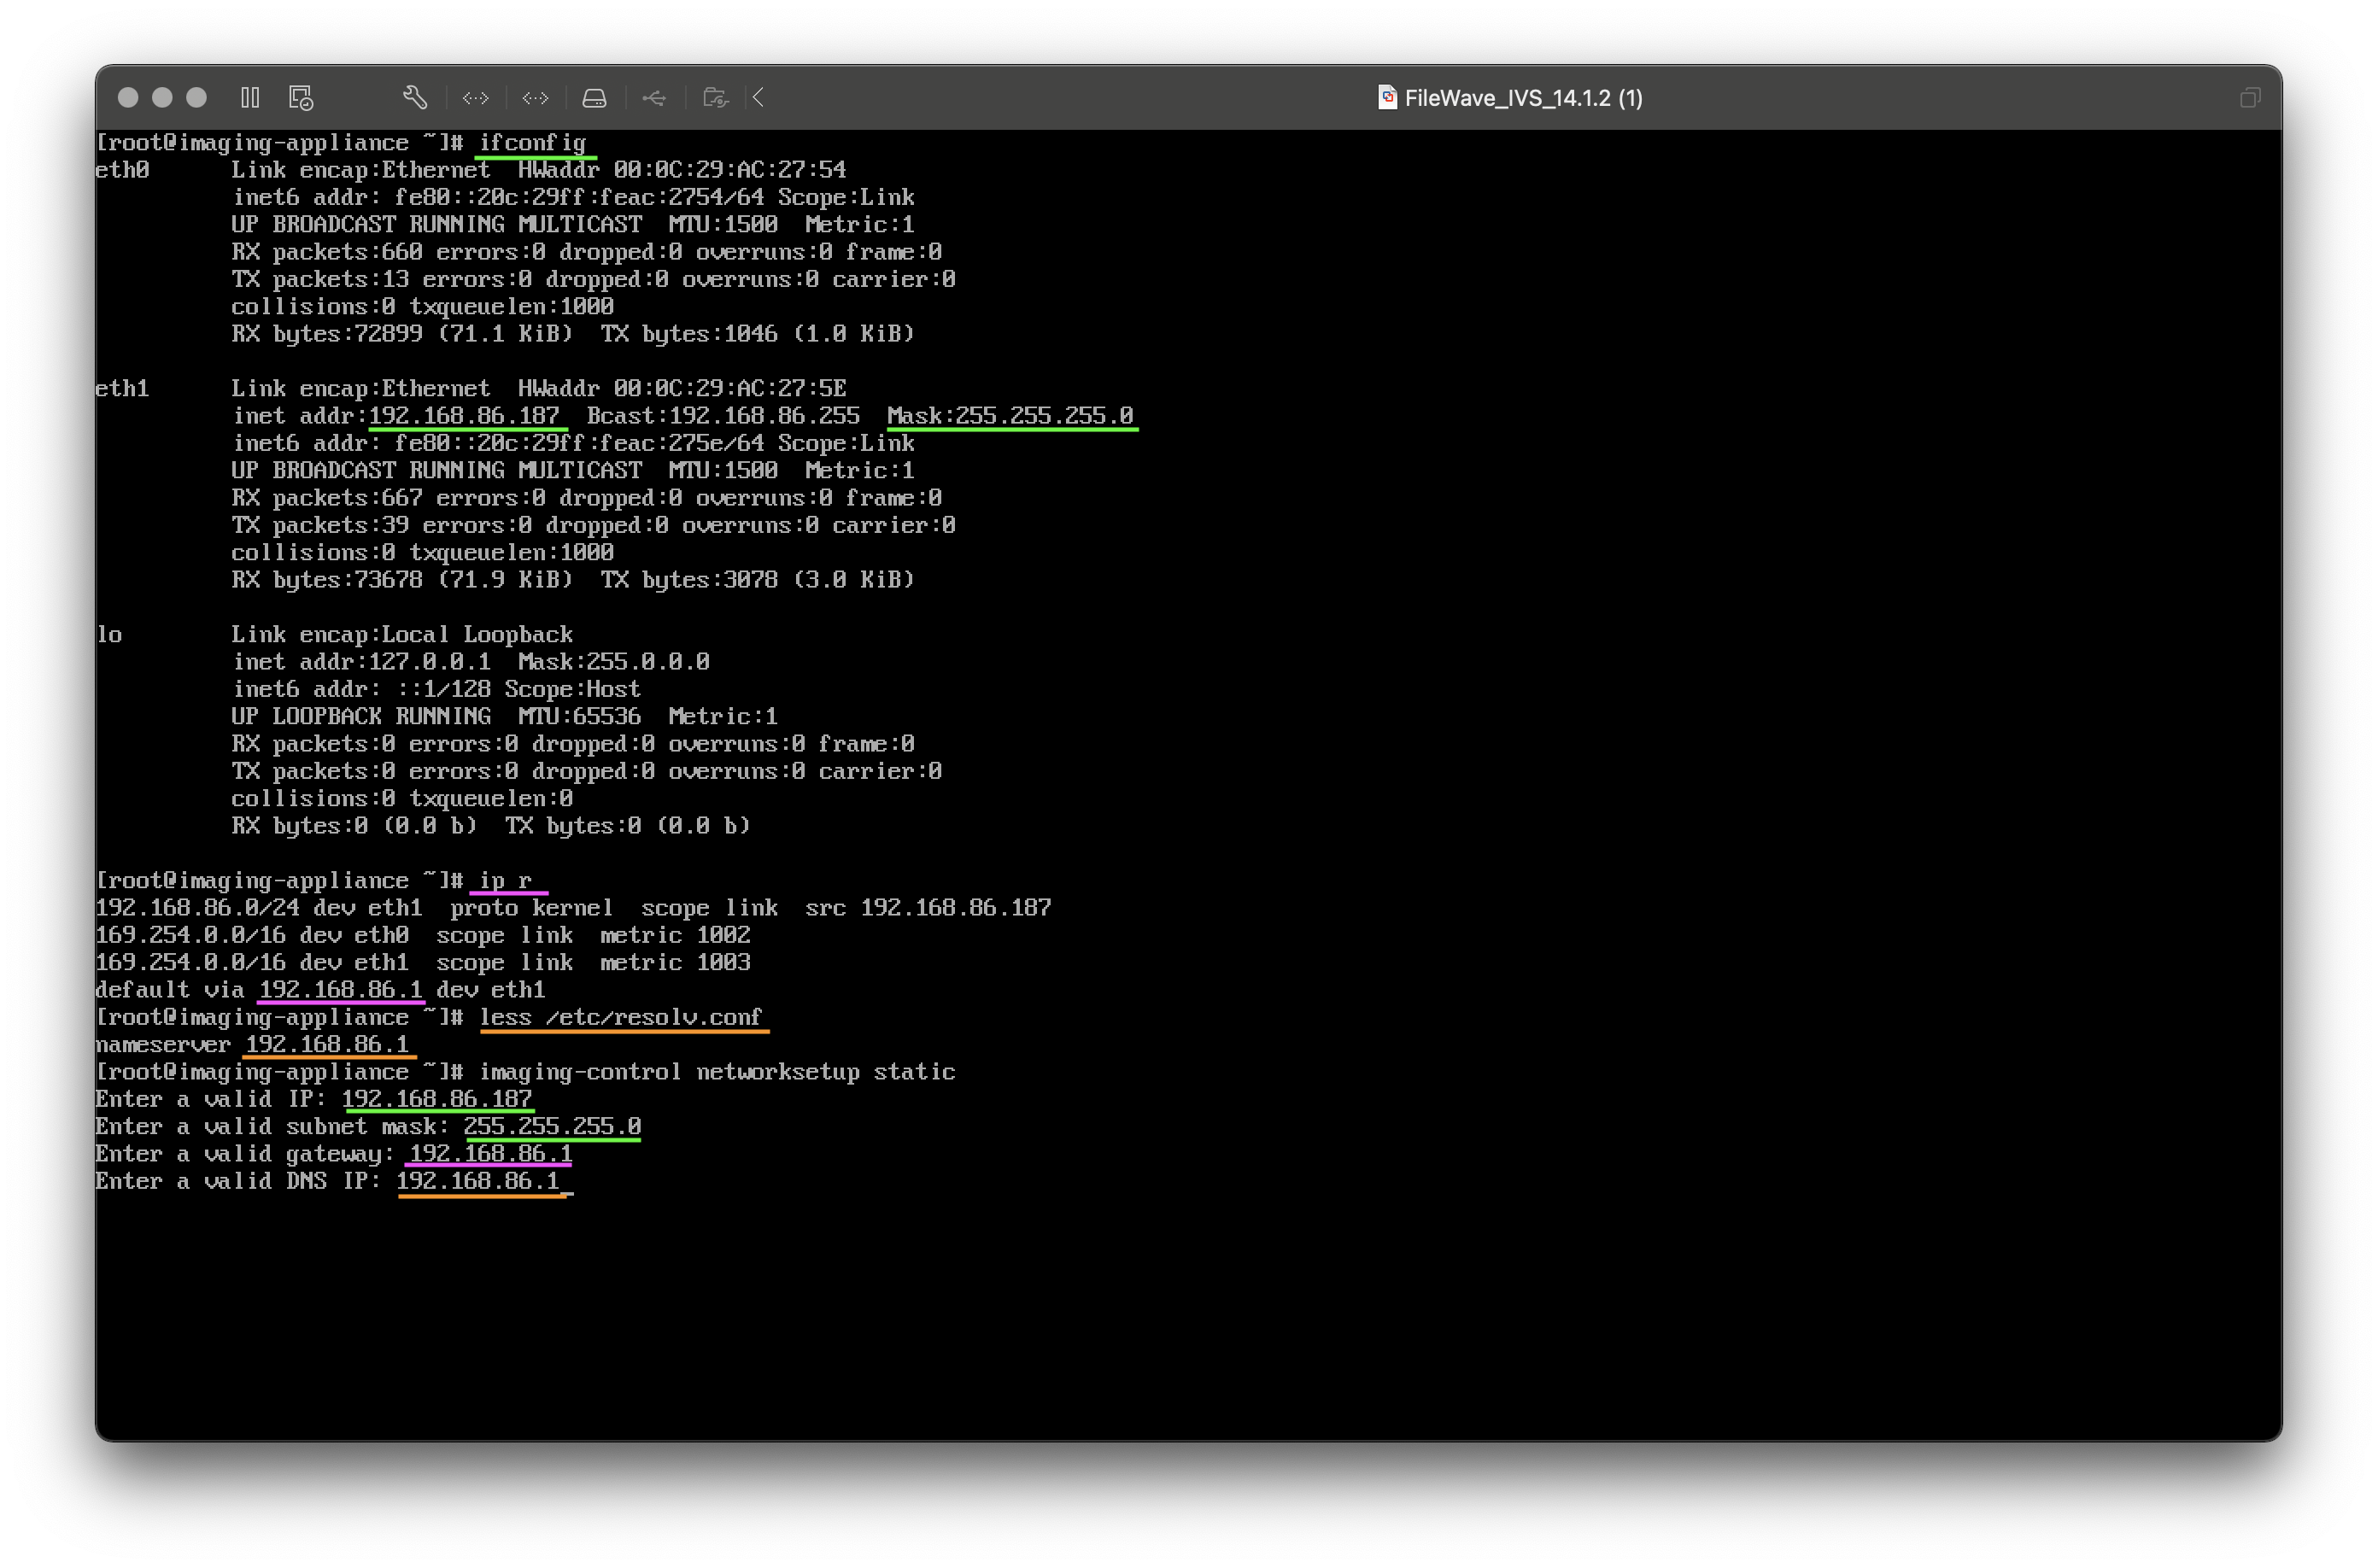
Verify and take note of the current network settings obtained via DHCP using the commands below.
IP address and netmask
ifconfigGateway / Router
ip rDNS Servers
less /etc/resolv.conf -
Set a Static IP address for the FileWave IVS using the command below.
Set static IP address
imaging-control networksetup static
Add the IVS to FileWave AdminCentral
If yourHosted FileWave Servercustomers isshould Hosted by FileWave rather than being On-Premise you will need toalso follow this: FileWave Hosted Servers and IVS Setup for the hosted-server connection requirements.
- Open FileWave
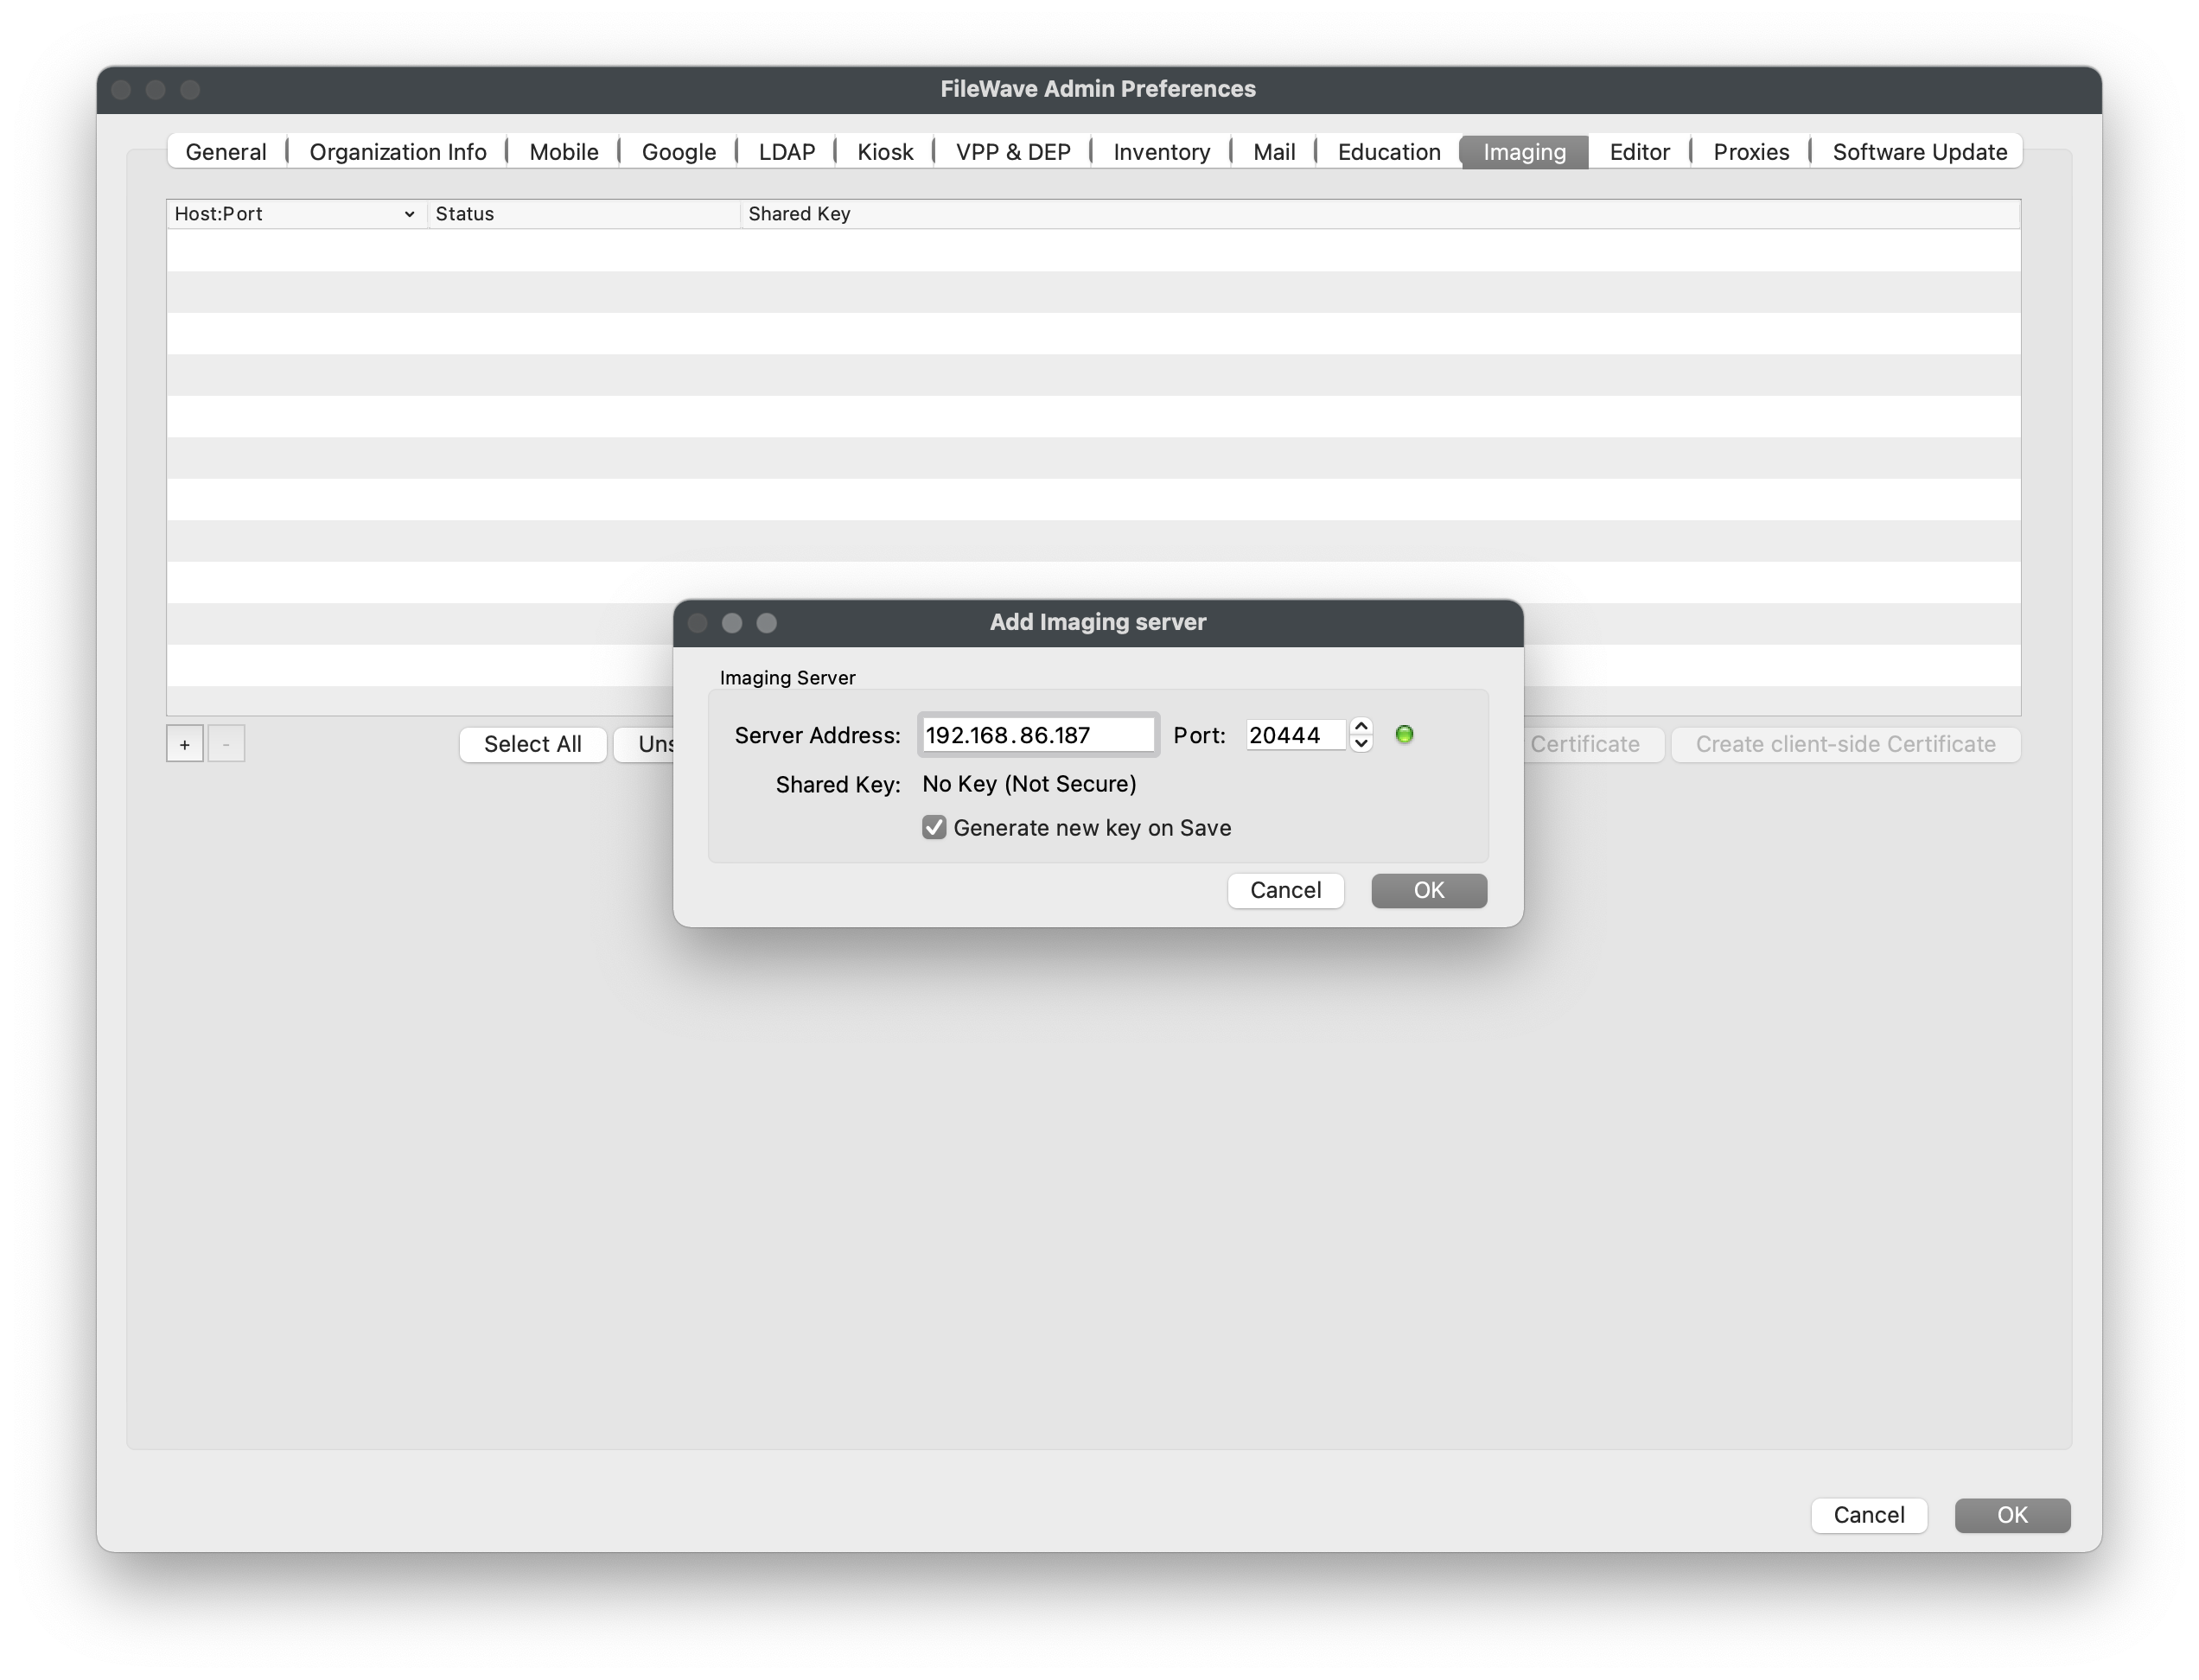
AdminCentral andnavigatego to"Preferences >Imaging"Imaging. - Click the "[+]" button to add a new FileWave IVS.
- Enter the IP
Addressaddress of the FileWaveIVsIVS and confirm that the status light turns green.- Leave the port as "20444".
- Verify that the "Generate new key on Save" box is checked.
- Click "OK" on the "Add Imaging Server" window.
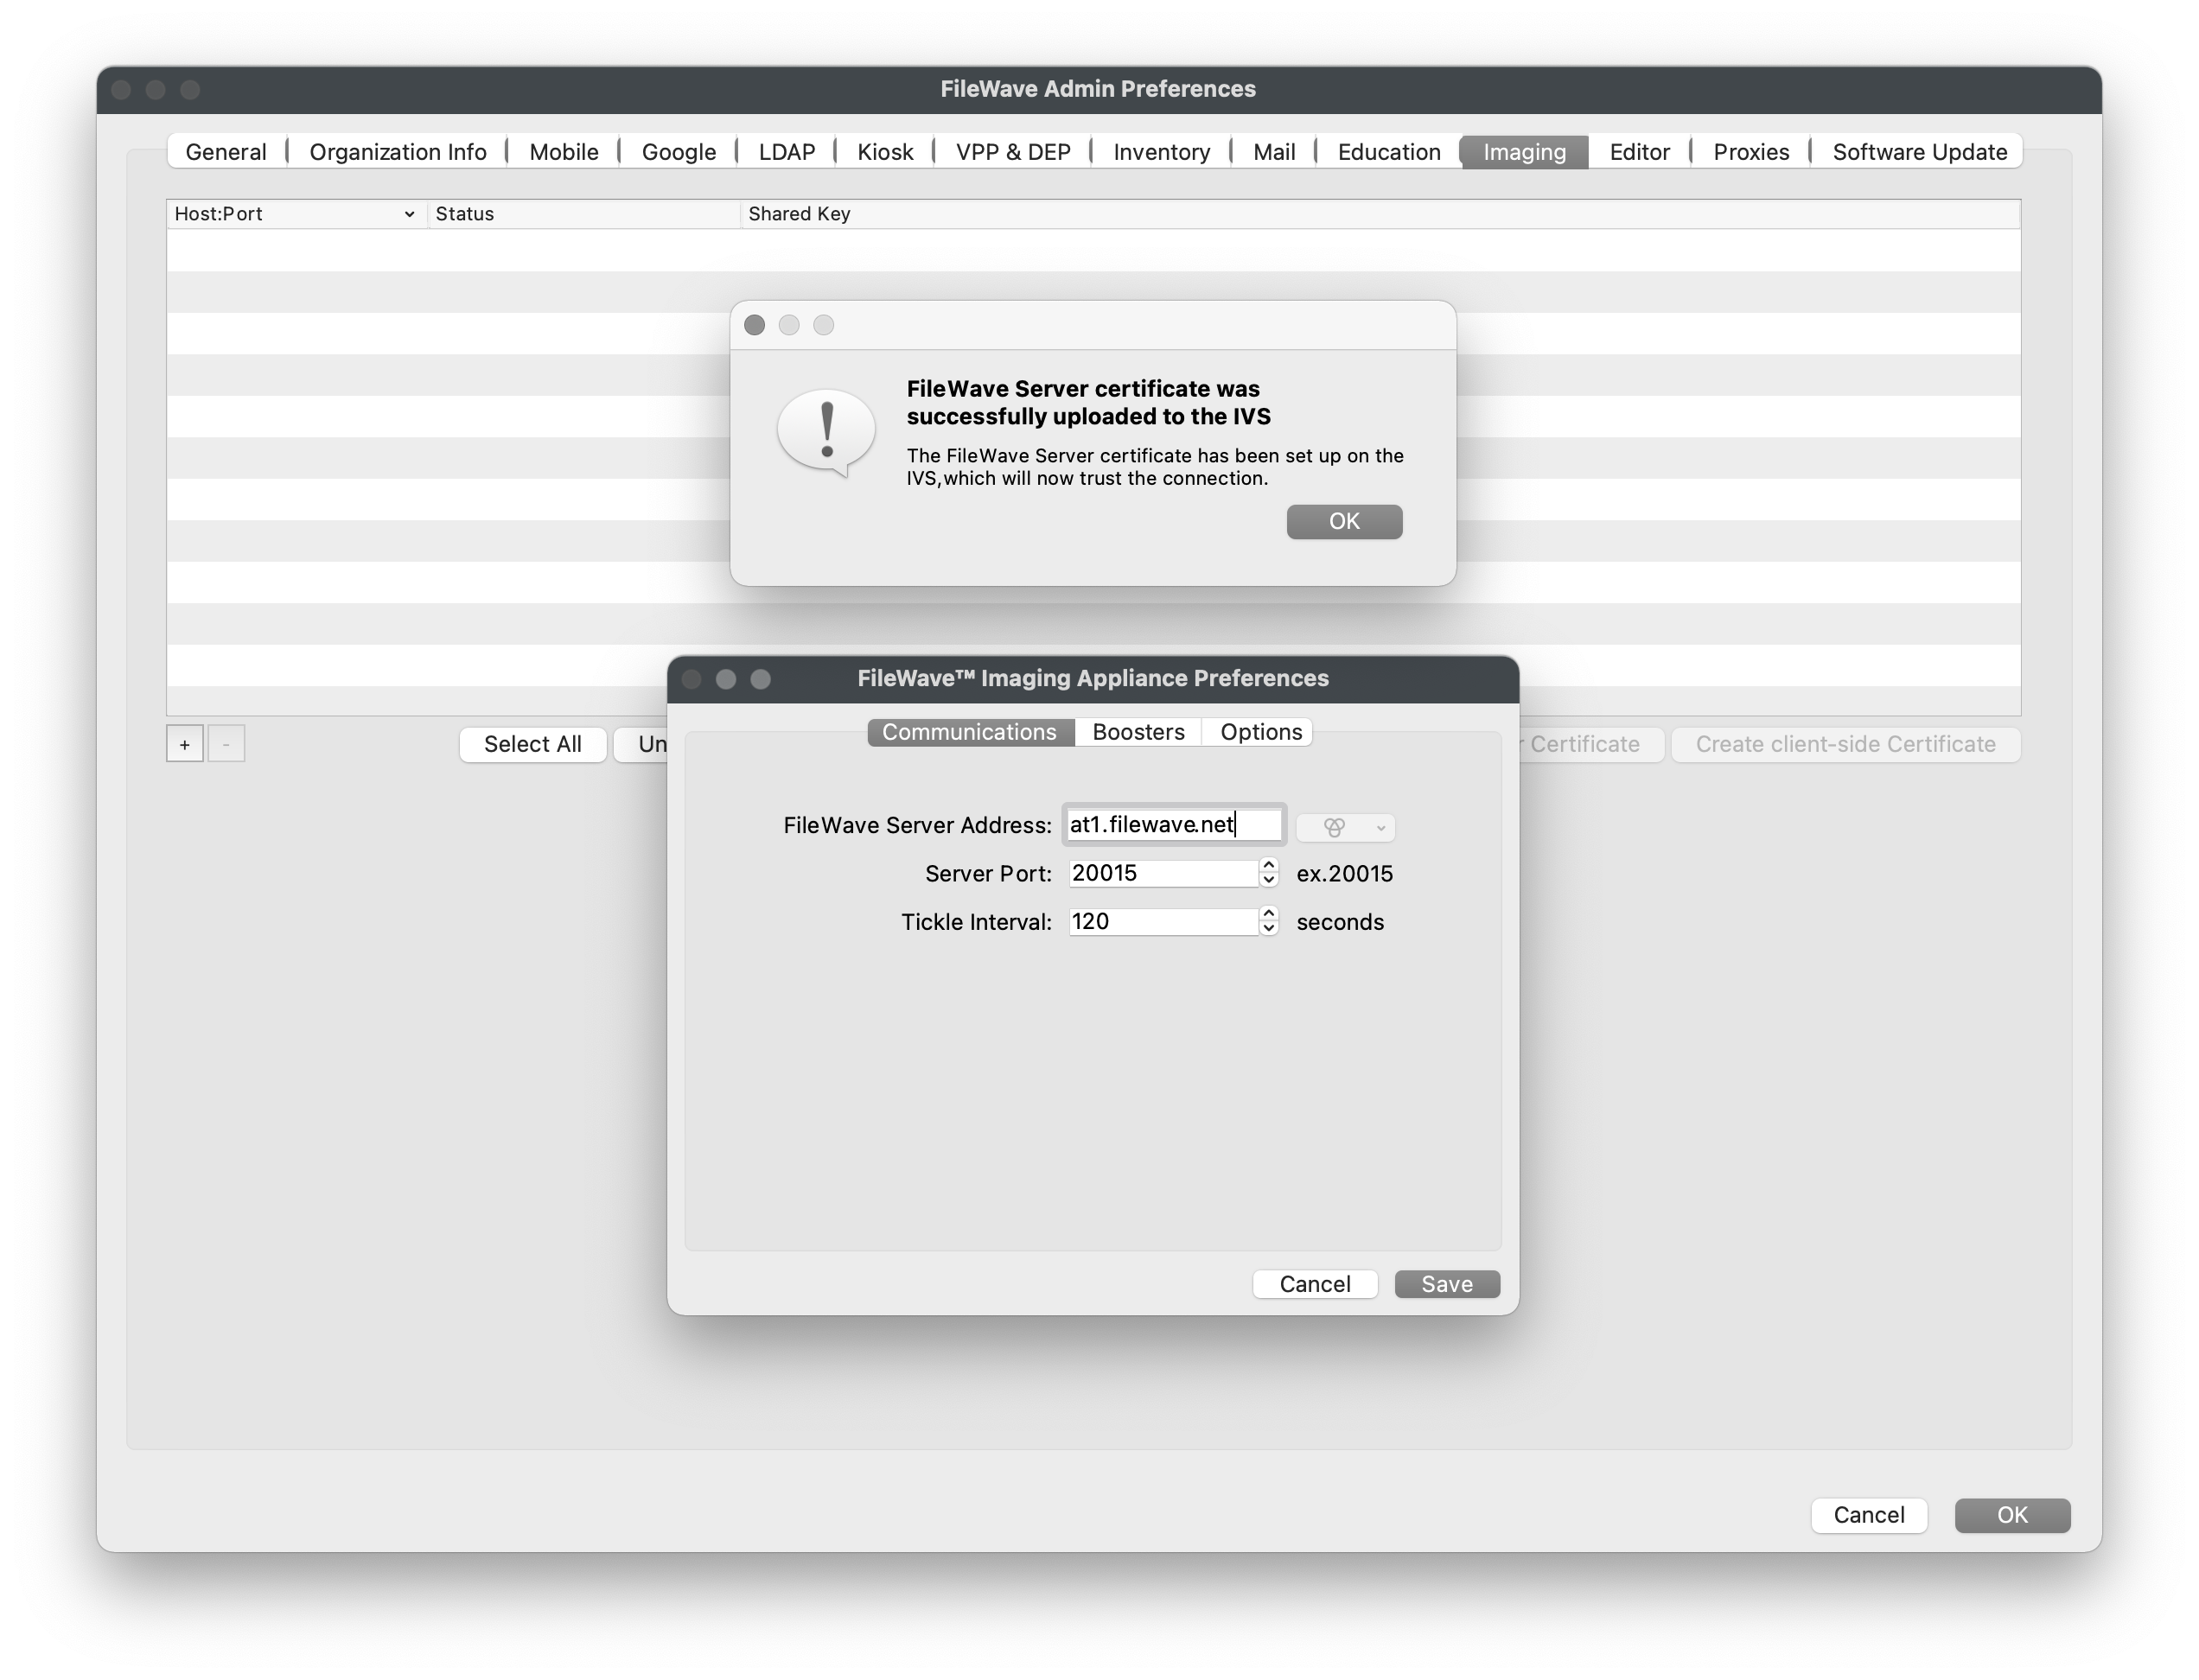
- Verify that the "FileWave certificate was successfully uploaded to the IVS" pop-up appears.
- Verify that the "FileWave Server Address" is correct within the "FileWave Imaging Appliance Preferences" window.
- Leave the port as "20015". Note: The default port setting is 20015. However, SSL is now required, and the system will automatically use port 20017 instead when 20015 is entered. Do not manually set the port to 20017. Always enter 20015, and the system will handle the SSL port change for you.
- Click "OK" within the "FileWave Imaging Appliance Preferences" window.
ClickSelect"OK"OKwithin thein FileWaveAdminCentral Preferences to save the changes and generate the shared key.- Open
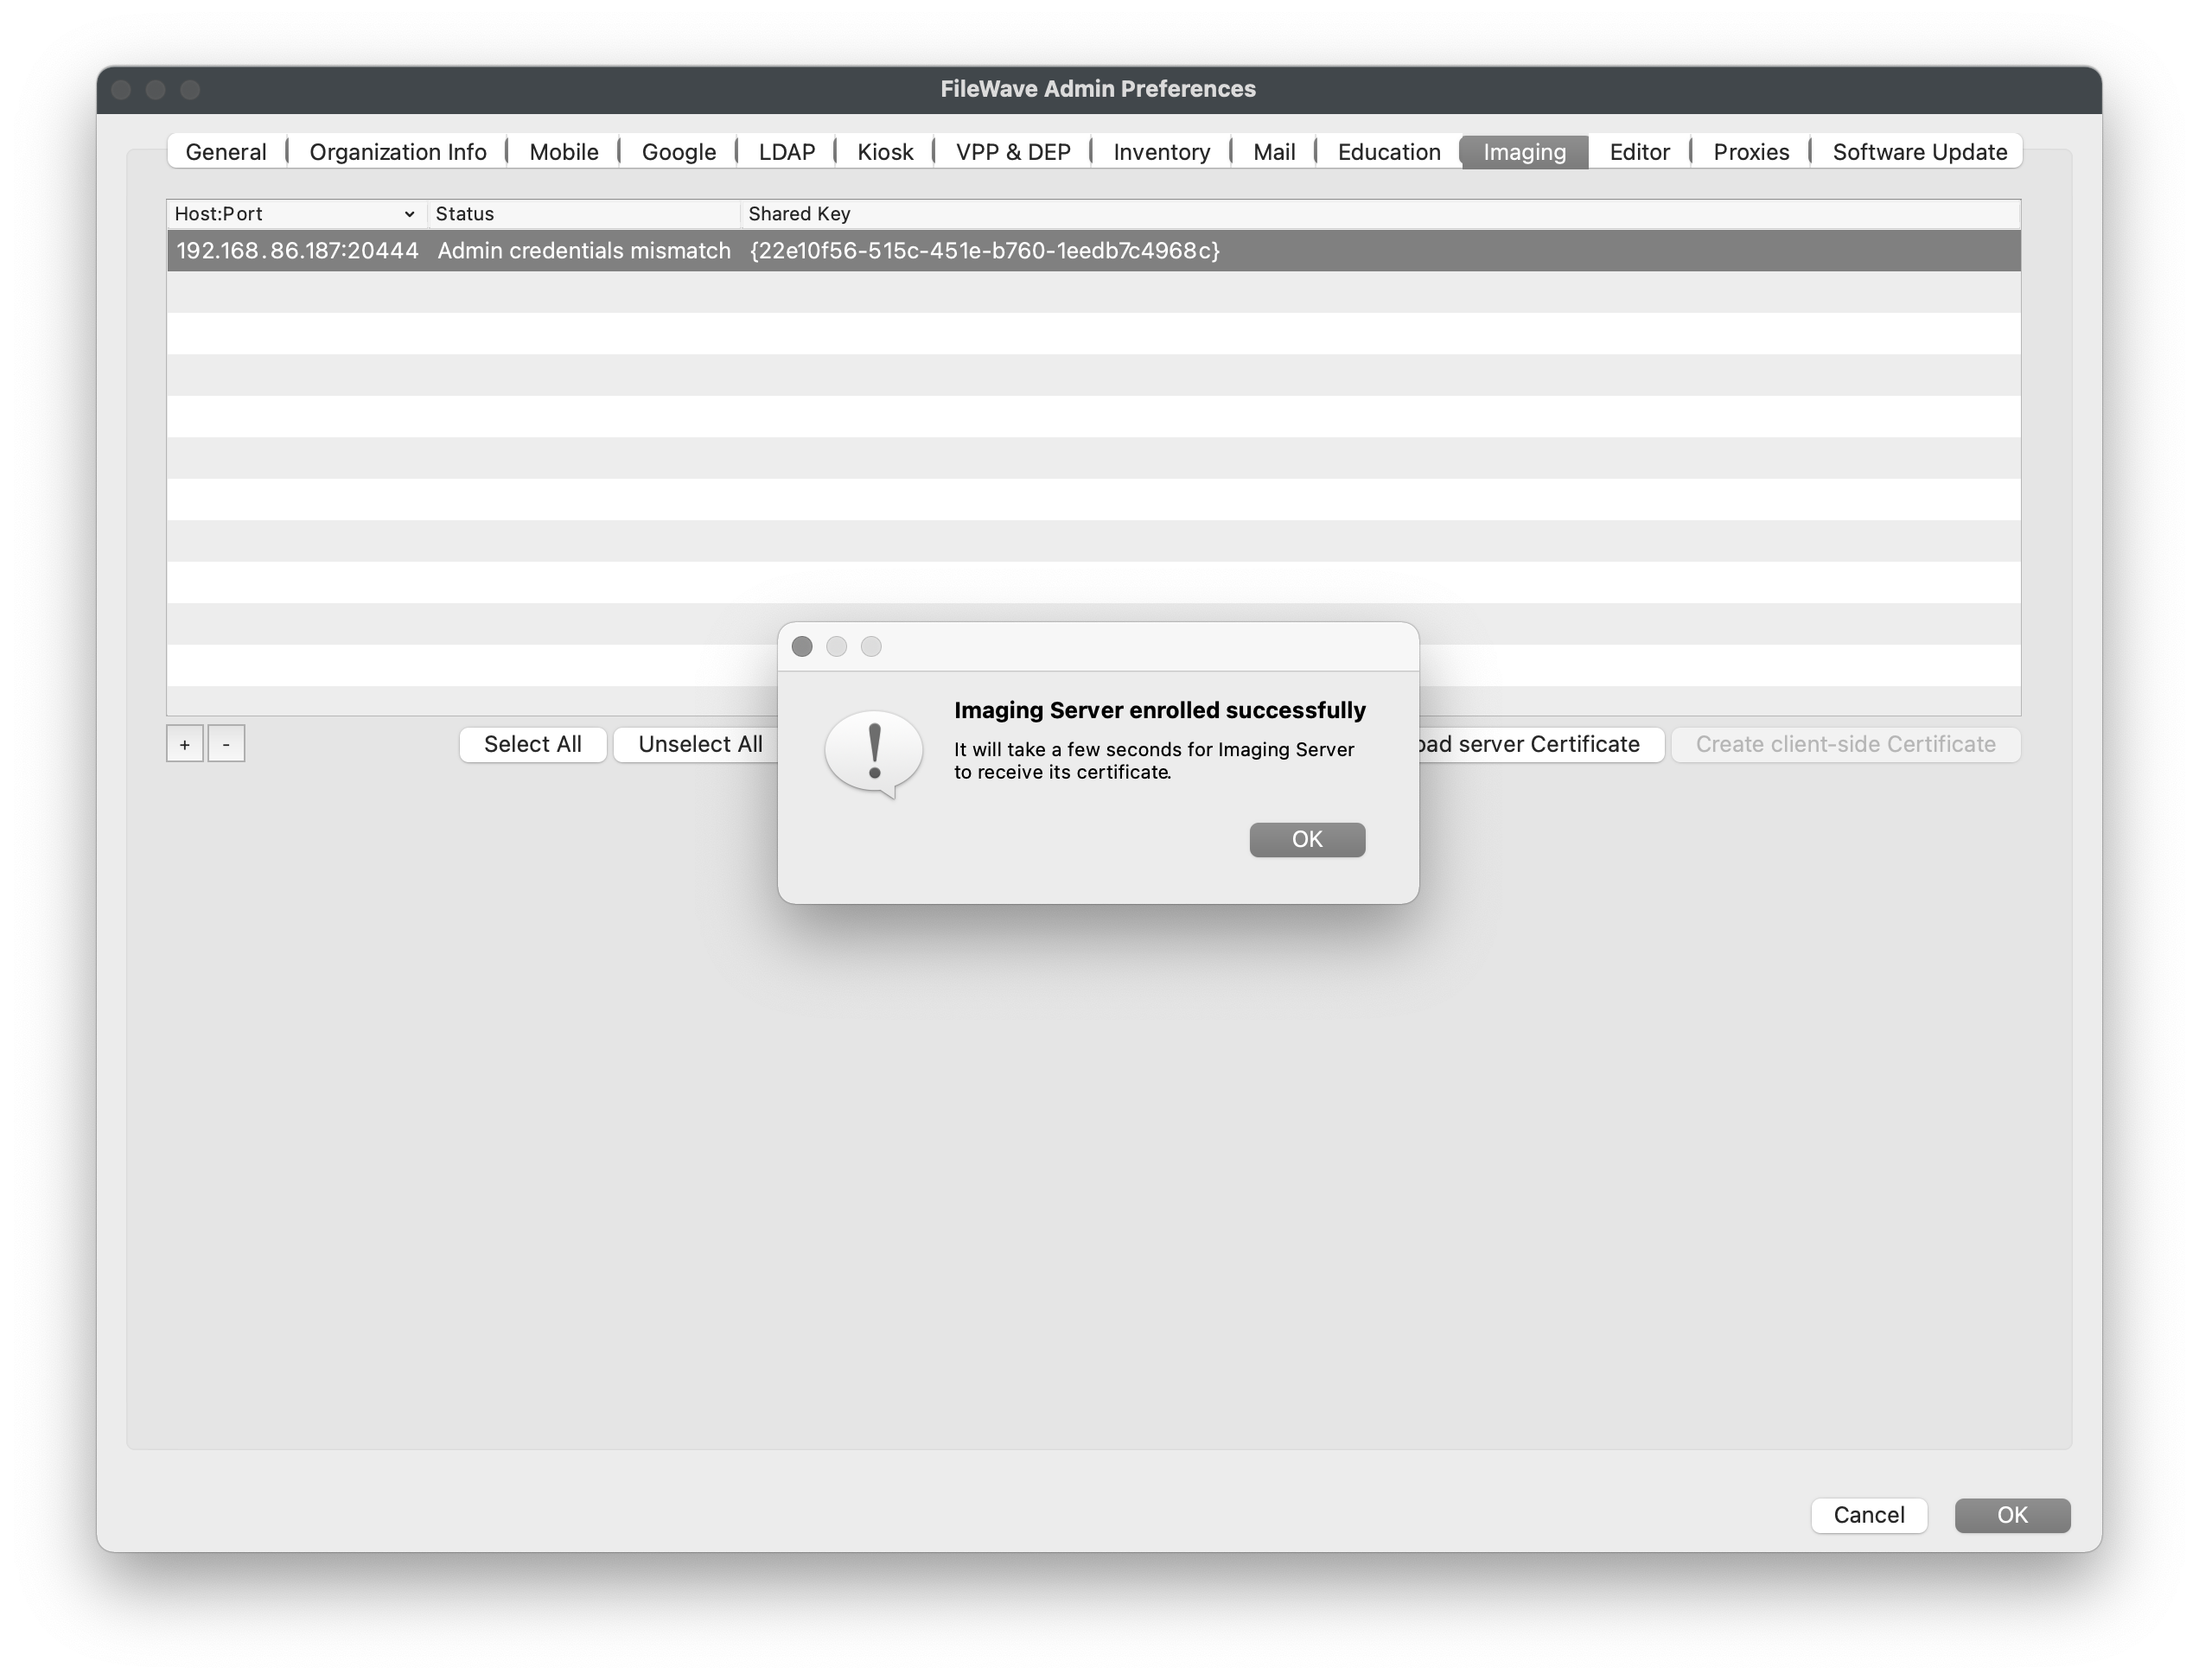
theFileWaveAdminCentral Preferences again andnavigatereturn to"Imaging"Imaging. - Click the right-most button for either "Enroll Imaging Server" or "Create client-side Certificate".
- Wait for the "Imaging Server enrolled successfully" pop-up message.
ClickSelect"OK"OKwithin thein FileWaveAdminCentral Preferences to save the changes.The IVS will not fully check-in untilCreate at least one ImagingAssociationAssociation,hasthenbeenconfirmmade.that the IVS completes check-in.