FileWave Hosted Servers and IVS Setup
Using IVS imaging for Windows for Hosted customers is supported but is different than an on-prem implementation. A Hosted customer is one where FileWave runs your FileWave Server in our cloud services. Notes below explain how to use IVS with a Hosted Server, but for you, as a customer, know that all the steps listed in this article that are on the FileWave Server must be completed with the assistance of Customer Technical Support because you won't have direct access to your FileWave Server. The article is here to explain what is needed and why it is needed.
Setup Differences
When you set up an IVS, the first part of the configuration will work as normal, because your admin is actually doing the communication to the IVS. You set it up, choose OK to save, relaunch preferences, and then choose the “Enroll Imaging Server” button. After this is done, and you relaunch preferences, you’ll notice that you have an “Admin credentials mismatch error”. This error is NOT meaningful. To check admin credentials, the FW server will attempt to talk to the IVS directly on port 20444, and this will not work ever for a Hosted customer.
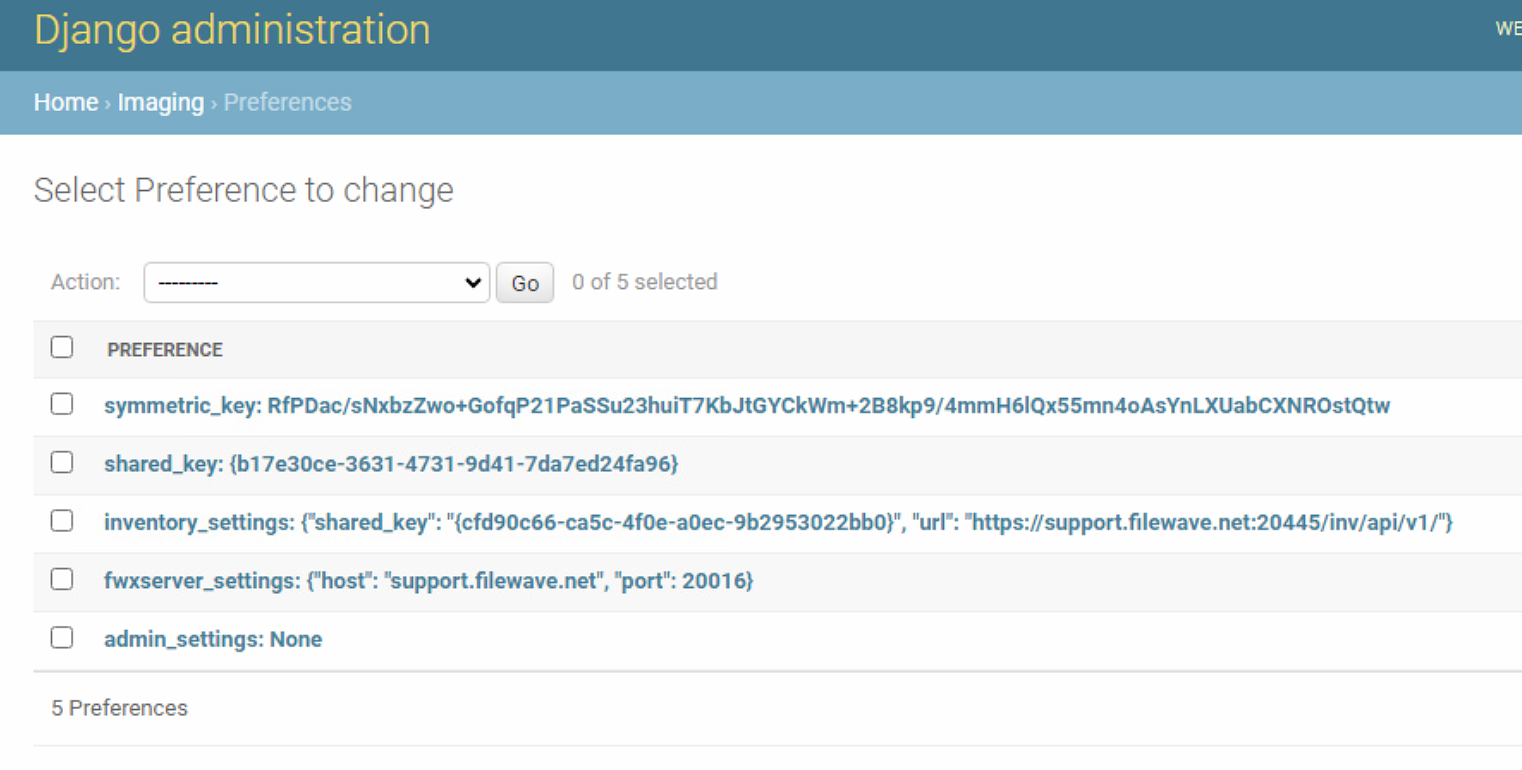
However, if you look in the actual django interface on the IVS, you should see it has the proper shared key, etc. Here is an example:
Extra First-Time Setup
We know that image capture will NOT work for a Hosted customer without these additional steps. The IVS simply can’t upload the image that is generated, so you’ll see it go immediately from “capture done” to “upload done” within one second if you don’t fix the admin settings entry you see above.
In the last step of the initial IVS setup, the FW server tells the IVS what credentials it should use for logging in to upload an image. But, in cloudV2, the FW server can NOT talk to the IVS directly, so it can’t do that last bit and the admin settings part in the local DB ends up empty. Never fear though, we can work around this problem.
To do so, we need to:
-
Find out the user that was created for imaging
-
Reset the password for that account to something we know
-
Enter the information from the above in the IVS Django admin
Step 1, Find out the user (FileWave Support)
For this step, we need access to the server in a shell. FileWave Support will have to do this since a hosted customer can not access the server. Once logged in, we'll start an interactive python shell as:
sudo /usr/local/filewave/python/bin/python /usr/local/filewave/django/manage.pyc shellAnd once we are in the shell, we’ll look up all usernames, but the one we are looking for will start with imagingadmin
from fwauth.models import User
User.objects.all().values_list("username")
This will give us a result like this:
Out[2]: <QuerySet [('tony.keller',), ('fwadmin',), ('noaccess',), ('filewave_imaging_uploader_admin-3fcb9f455d5e062b',), ('alexdsl',), ('derekd',), ('brian.millbrook',), ('PS',), ('emma.ainsworth',), ('james.carter',), ('nicole.jemison',), ('fw',), ('shana.good',), ('filewave_imaging_uploader_admin-e850f155825fadd5',), ('alexkdsl',), ('robert.daniel',), ('sean.holden',), ('joshua.heinz',), ('andrew.kloosterhuis',), ('andreas.rein',), '...(remaining elements truncated)...']>
Once you've received this information from Support, you can continue to the next step on the IVS.
Step 2, Reset the Password
It is easy to see that filewave_imaging_uploader_admin-e850f155825fadd5 is the user we need. But now, we need to set a password. And we’ll do that like this:
u=User.objects.get(username="filewave_imaging_uploader_admin-e850f155825fadd5")That assigns u as a variable, and obviously you’ll use the right username from the first step, not the example one. Once we have that, we can set the password, and then save u:
u.set_password("let_me_image")
u.save()
The new password is now set, but we can confirm we did it right. You’ll see below how we can test a bad password, and a good one:
In [6]: u.check_password("dont_let_me_image")
Out[6]: False

In [7]: u.check_password("let_me_image")
Out[7]: True
Step 3, Configure IVS Django Admin
Well, now we know the account and the password, we just need to set it on the IVS. To do so, login to the IVS admin at https://ivsaddress:20444, then click SIGN IN. Creds are fwadmin, filewave. Note that it likely won’t be a proper SSL cert on the server, so you’ll have to choose to bypass security in your browser to get to the web interface.
Once logged in, go to Admin, Preferences as shown at the top of the article. Then, click on admin_settings, and you’ll get a screen like this (except yours won’t have a value in it):
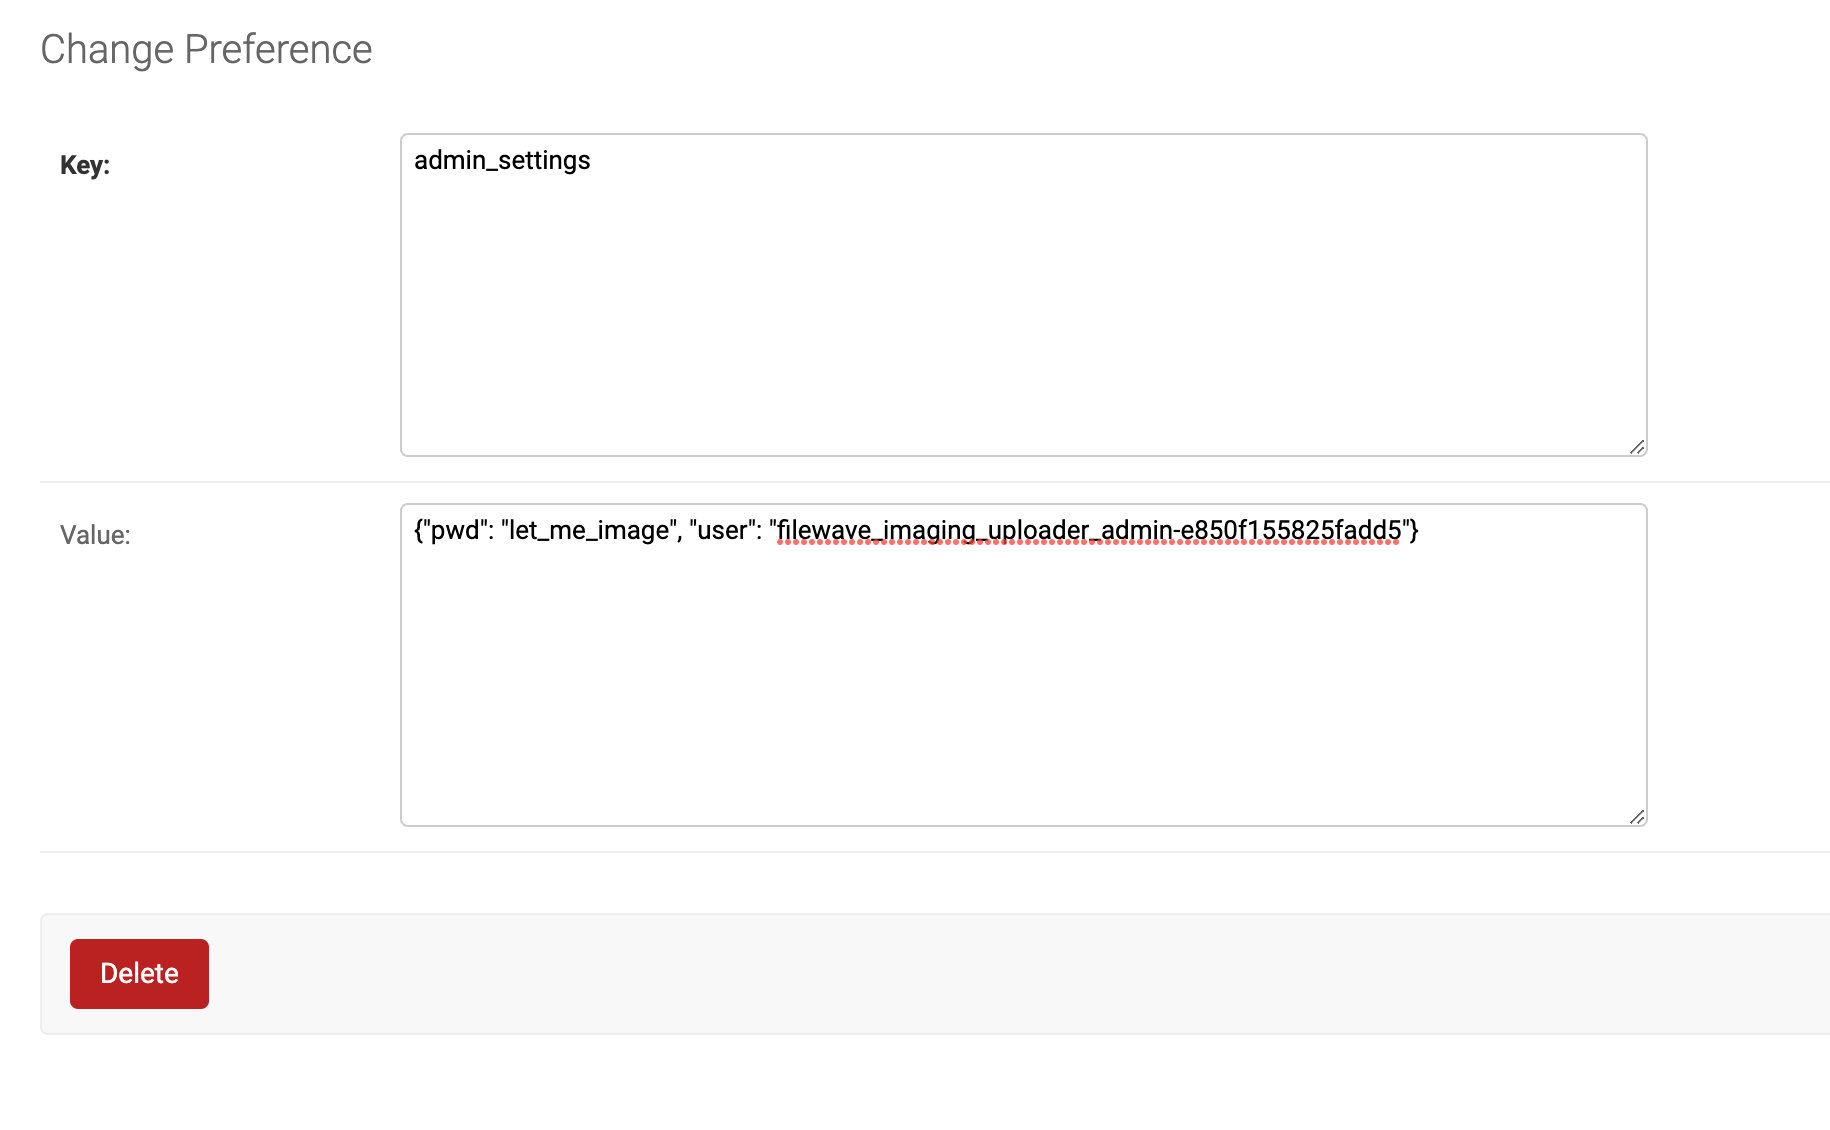
All you need to do now is paste in the following text, replacing your specific username and your password:
{"pwd": "let_me_image", "user": "filewave_imaging_uploader_admin-e850f155825fadd5"}Once you SAVE this field, your IVS is ready for operation.
Capture
Because IVS upload has no ability to retry the upload of an image built in, and transferring over the WAN is more sensitive than a local transfer, an image upload could get interrupted. Note that the image will have been captured to the IVS, it just had trouble uploading to the FW server. But you can use the FileWave Admin's command line to force the upload replacing the image name, a FileWave Admin username, password, and server address:
/usr/local/bin/FileWaveAdmin --importImage /imaging/images/windows/FS_-1 -u myfwusername -p mypassword -H support.filewave.net -P 20016Restore
Restoring images is fairly normal because once an image is assigned to any device, it is downloaded to the IVS appliance itself. The download does retry on failure because it is like any other Fileset. And, since image application to the actual “to be imaged” device happens locally to the network, the fact that the FileWave Server is Hosted is not in play here.
No comments to display
No comments to display