
Configuring FileWave Server Mail Preferences
What
FileWave Server Mail Preferences controls outgoing email used for scheduled reports and other FileWave-generated messages. FileWave Central 16.4 provides two authentication methods under Preferences > Mail: Manual Setup for an SMTP server or relay, and OAuth for Google or Microsoft 365.
Version boundary: OAuth mail authentication was introduced in FileWave 16.1.1. FileWave 16.4 also allows Manual Setup to use an SMTP server that does not require a username and password.
Choose an authentication method
| Method | Use it when | Required configuration |
|---|---|---|
| Manual Setup | The organization uses an SMTP relay, transactional-mail service, app password, or other direct SMTP configuration. | Host, port, TLS choice, sender address, and credentials only when the SMTP server requires them. |
| OAuth | Google or Microsoft 365 is the mail provider and organization policy permits a provider application to send mail. | Provider application, FileWave callback URL, client information, provider authorization, and a valid token. |
FileWave may generate a large volume of mail when scheduled reports or notifications are used broadly. Confirm the provider’s sending limits and whether a transactional-mail service or dedicated relay is more appropriate than a personal mailbox.
Manual Setup
- In FileWave Central, open Preferences > Mail.
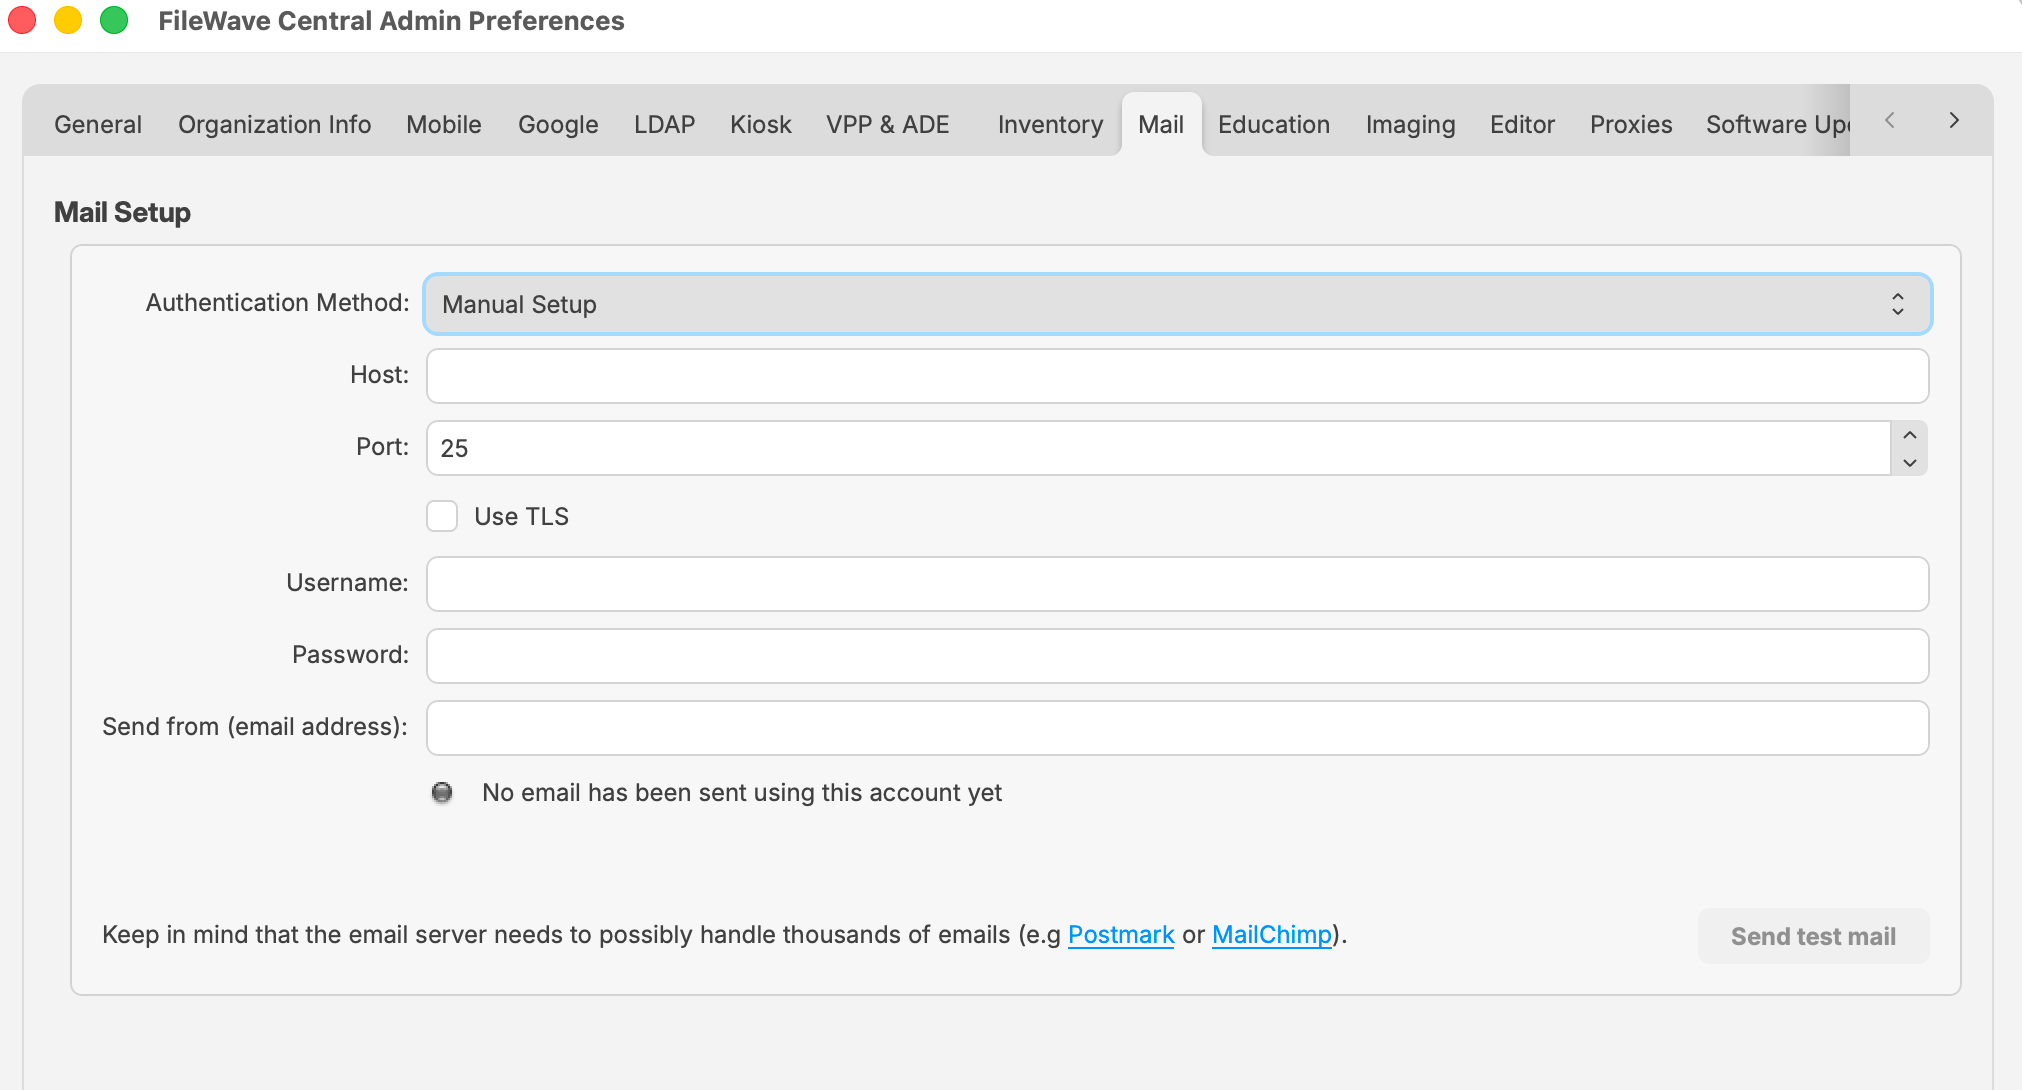
- Set Authentication Method to Manual Setup.
- Enter the SMTP Host and Port supplied by the mail administrator or provider. The value initially displayed by Central is not a substitute for the provider’s documented port.
- Select Use TLS when required by the provider.
- Enter Username and Password when the SMTP server requires authentication. In FileWave 16.4, leave both fields empty when the relay intentionally permits the FileWave Server to send without SMTP authentication.
- Enter the Send from (email address) value permitted by the mail system.
- Choose Send test mail and confirm that the message reaches the destination and is not rejected or quarantined.
Do not use a normal account password when the provider requires an app password or OAuth. For Google Manual Setup, see the related Google app-password troubleshooting article below.
OAuth
OAuth avoids storing a normal mailbox password in FileWave. Before selecting Authorize, create a provider application and configure this exact FileWave callback pattern as a Web redirect URI:
https://<filewave-server-fqdn>:20445/inv/notifications/configuration/auth-callbackReplace <filewave-server-fqdn> with the fully qualified domain name users and the provider can resolve for the FileWave Server. The scheme, port, and callback path must match the redirect URI registered with the provider.
Complete OAuth in FileWave Central
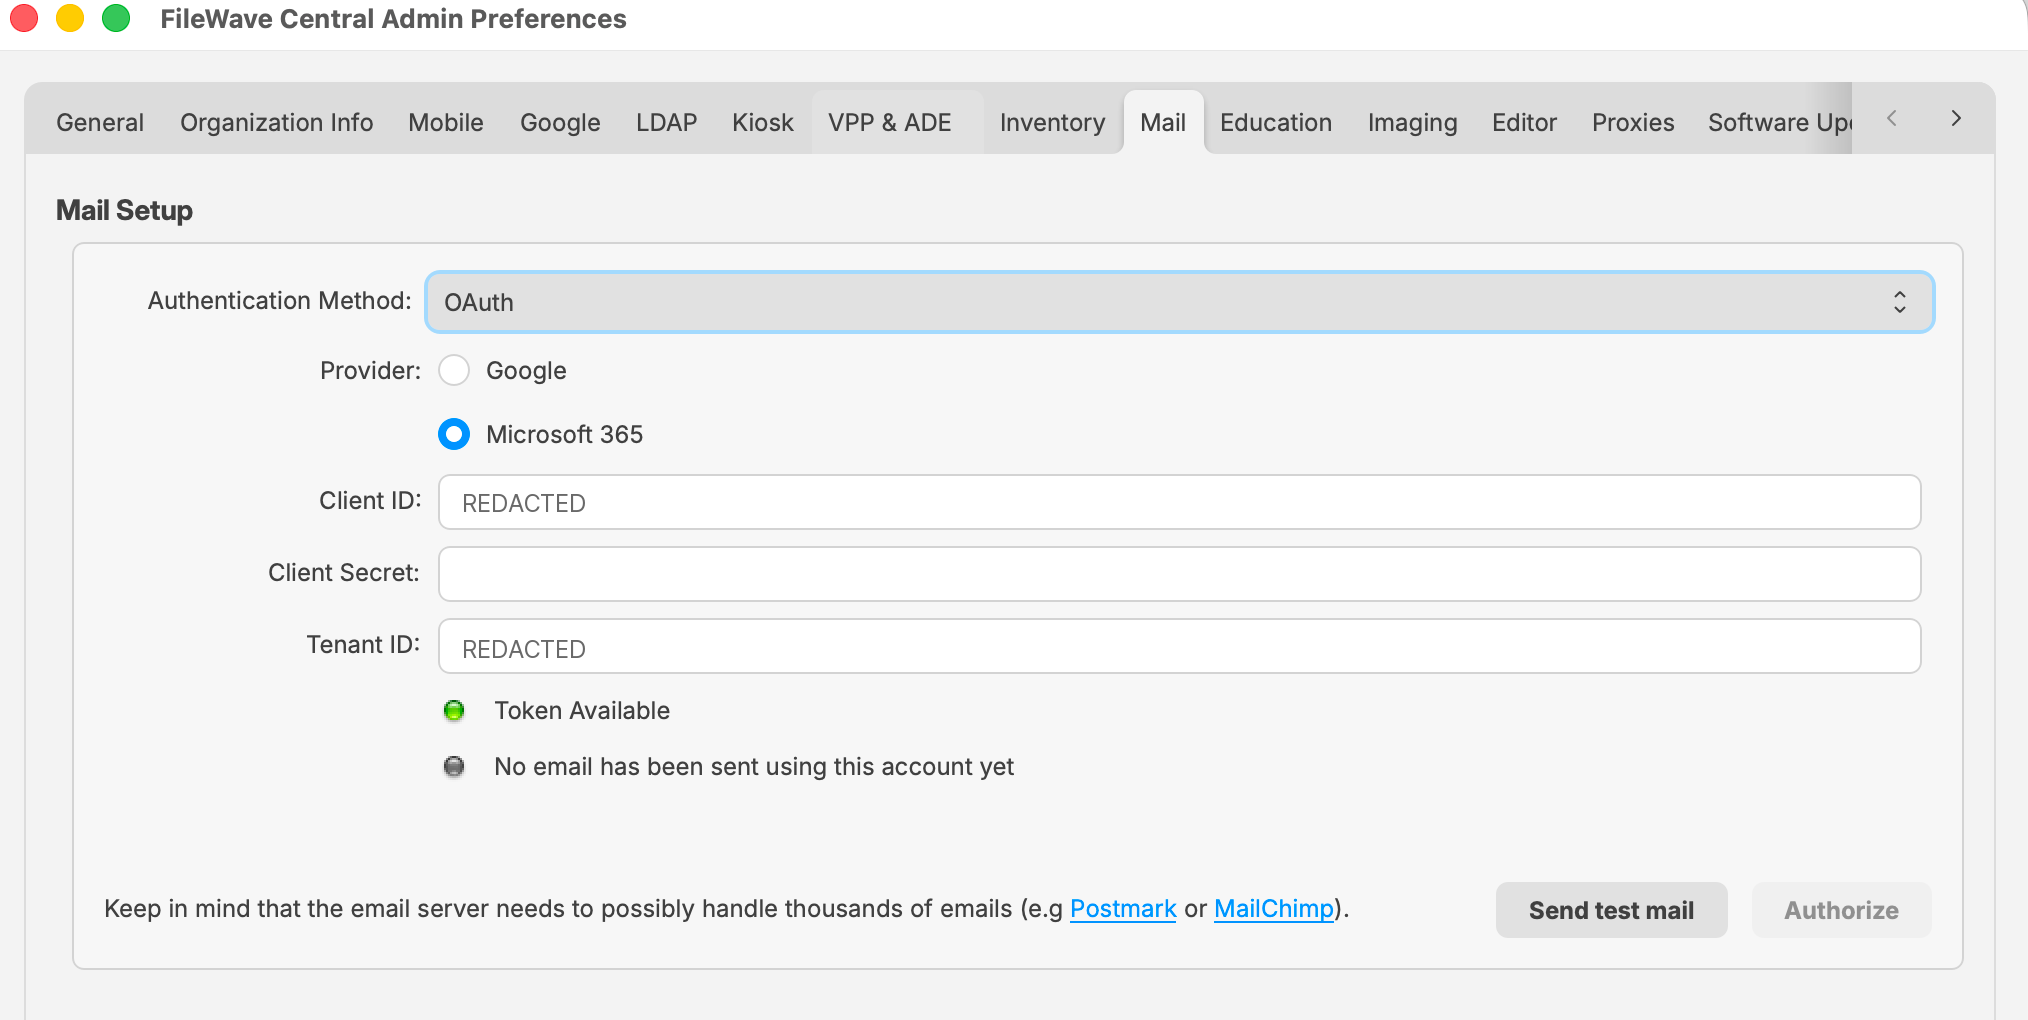
- Open Preferences > Mail and set Authentication Method to OAuth.
- Select Google or Microsoft 365.
- Enter the provider application’s Client ID and Client Secret. Microsoft 365 also requires the Tenant ID.
- Choose Authorize and complete the provider sign-in and consent process using the mailbox that FileWave should use.
- Return to FileWave Central and confirm that the status shows Token Available.
- Choose Send test mail and verify delivery.
Microsoft 365
- Open the Microsoft Entra admin center and create an App registration.
- Add the FileWave callback URL above as a Web redirect URI.
- Copy the application’s Client ID and directory Tenant ID.
- Create a client secret and record its value securely when Microsoft displays it.
- Ensure the account used during authorization has an Exchange Online license and is permitted to send mail under the organization’s policy.
- Enter the Client ID, Client Secret, and Tenant ID in FileWave Central, then select Authorize.
Record the client-secret expiration date. Rotate the secret in Entra and reauthorize FileWave before it expires.
- Open the Google Cloud Console and create or select a project dedicated to FileWave mail.
- Configure the Google Auth Platform for that project. Select the audience required by the organization; Internal is commonly appropriate for a single Google Workspace tenant.
- Create an OAuth client with Web application as the application type.
- Add the FileWave callback URL above under Authorized redirect URIs. An Authorized JavaScript origin is not required for this FileWave workflow.
- Enable the Gmail API for the same project.
- Copy the Client ID and Client Secret into FileWave Central, then select Authorize.
Verify and monitor mail
- Test immediately: A saved configuration is not proven until Send test mail succeeds and the message is received.
- Review status: OAuth should show Token Available. Manual Setup and OAuth also show whether mail has been sent successfully through the configured account.
- Exercise the real workflow: Send a scheduled report to a controlled recipient after the basic test passes.
- Monitor provider limits: Review rate limits, sender restrictions, spam handling, and mailbox or relay quotas.
- Protect credentials: Keep Client IDs, Tenant IDs, client secrets, SMTP credentials, and authorized mailbox details out of screenshots and unapproved support notes.
Troubleshooting
| Symptom | Check |
|---|---|
| Send test mail is unavailable or fails | Confirm required fields, provider host and port, TLS choice, DNS, firewall access, sender authorization, and provider quotas. |
| SMTP relay does not require authentication | On FileWave 16.4, leave Username and Password empty. Verify that the relay permits the FileWave Server’s address to send. |
| OAuth authorization fails | Compare the registered Web redirect URI with the FileWave callback URL exactly, then verify provider application status, consent, license, API availability, Client ID, Tenant ID when applicable, and client secret. |
| Token is unavailable or later stops working | Reauthorize the provider and check whether the client secret, provider consent, mailbox license, or organization policy changed. |
| Google Manual Setup returns Bad Request | Use OAuth when appropriate, or verify Google 2-Step Verification and an app password for the Manual Setup workflow. |