
FileWave Central Setup
Connect to your FileWave Server
FileWave Central is the administration application for macOS and Windows. If a matching Central version is already installed, use it; otherwise install it on the computer you will use to administer FileWave. Connect to the intended Server and confirm authorized application access. Secure the initial application account only when setting up a new Server. FileWave Anywhere provides browser access for supported workflows, but this setup uses Central.
After Server Setup, have the Server’s fully qualified domain name (FQDN), version, and authorized access details ready. This lesson ends with a secure Central connection. Next you will check initial Preferences; the lesson that follows those checks explains how FileWave turns your changes into device work. You do not need to run Update Model to log in.
If FileWave hosts your server, use the address and access details supplied by FileWave. If you need a new self-managed server, complete Server Setup first. The FileWave application administrator account is separate from the appliance operating-system account, even when both are named fwadmin.
Download and install FileWave Central
- Open the Software Downloads page and select the release that matches your Server.
- Find macOS Downloads or Windows Downloads for your administration computer. In 16.4.1, choose macOS Central (Admin) or Windows Central (Admin), not a Server, Client, or Booster download.
- Run the downloaded installer:
FileWave Admin.pkgon macOS orFileWaveAdmin.msion Windows for 16.4.1. Accept the license if authorized and complete the installer using your computer’s administrator credentials. - Wait for installation to finish, then open FileWave Central. If installation fails or you see an unexplained security warning, stop and check with your FileWave contact. Do not bypass the warning.
Connect FileWave Central to the server
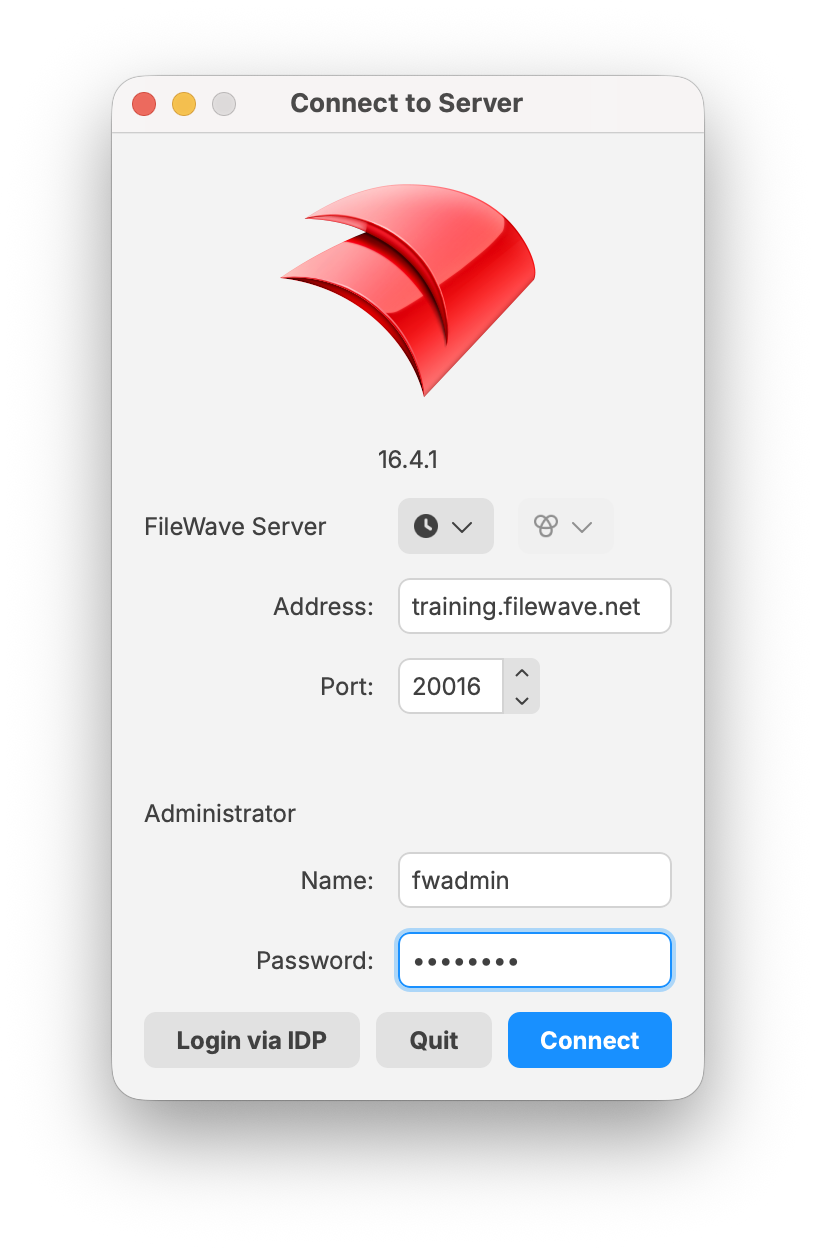 Open FileWave Central
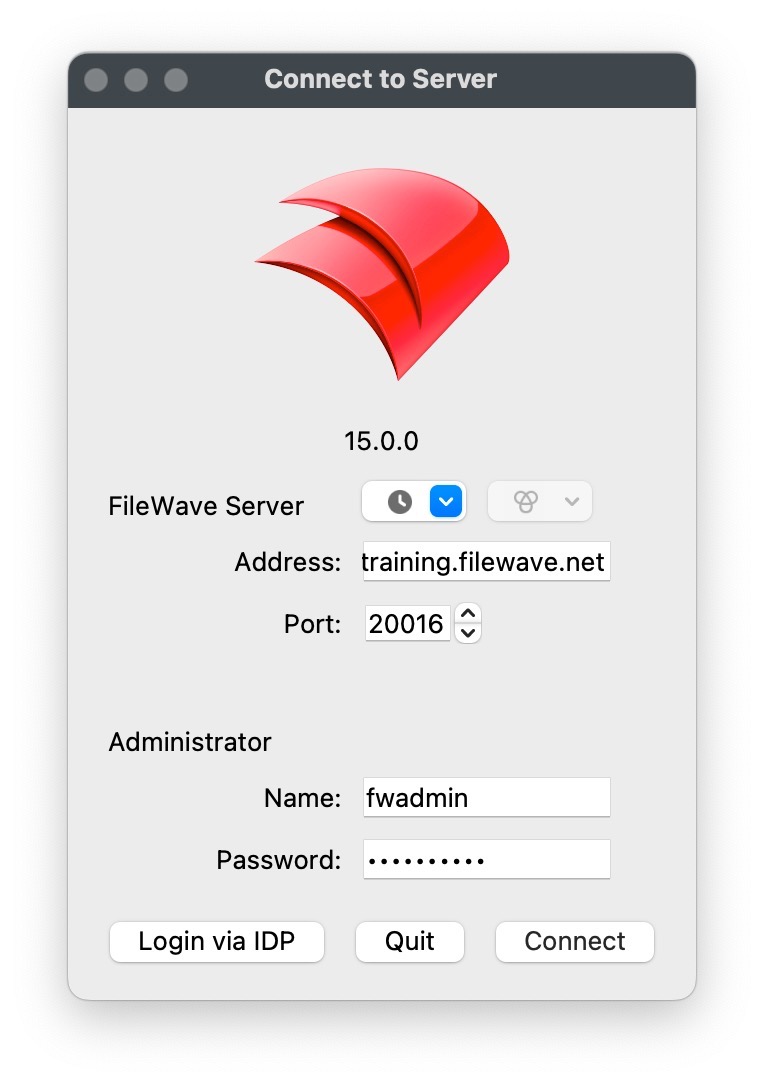
Connection dialog in FileWave 16.4.1. Use your assigned Server and account details, not the example shown. Layout and labels may differ in your installed version.
You do not need Fileset Magic or its privileged application for this connection.
Enter the Server details and connect
- Enter the agreed FQDN in Address, without
https://. Leave Port set to20016. - Enter the application Username and Password for this Server, using the credentials described below for your server type, then select Connect.
- If a certificate prompt appears during first setup, confirm the Server’s identity with its owner before trusting it. Do not accept an unexplained name or trust mismatch.
Credentials
- Existing Server: obtain authorized application access from its administrator; do not try factory credentials.
- New hosted FileWave Server: the Address, Username, and Password are provided by your FileWave contact or implementation team.
- Fresh self-managed FileWave Server: initial username fwadmin and password filewave. Change the default password immediately after the first successful connection.
Secure the initial application account
For a fresh self-managed Server, change the initial FileWave application password immediately after the first successful connection. This is a separate change from securing the Mac or Debian operating-system account. Administrators of a new hosted Server should confirm with their FileWave contact whether the supplied account needs an initial password change; do not replace an established account’s credentials without authorization.
- In Assistants > Manage Administrators, select
fwadmin. - Open User details, choose Set password, enter and confirm a unique password, and save with Apply.
- Store the password securely and verify a new Central login before closing the original session. If Central prompts about an existing session, use its additional-connection option for this check.
See Managing FileWave Administrators for details about accounts and permissions. If your version’s controls differ, complete this step with the Server owner before continuing. Use authorized named accounts with appropriate permissions for daily work.
Confirm the connection
Check that you reached the intended Server and can open the administration views your account is permitted to use. A new Server may not contain device records yet. A successful Central connection does not prove that device-enrollment services or certificates are ready.
If Central cannot connect, first confirm the FQDN, Server and Central versions, application account, and allowed network connections with the relevant owner. On a newly installed Mac Server, allow service startup to finish. On an appliance, have its owner check the address at the console. Do not repeatedly guess passwords, reimport a VM, or restart shared services to troubleshoot a login.
You do not need Update Model yet
Update Model publishes pending management changes from all administrators, not just yours. Do not click it as a login test or screen refresh. After initial Preferences, How FileWave turns your changes into device work explains how pending changes are published together and why device results must be checked separately.
Ready to continue: you can reconnect to the intended Server with authorized application credentials, the initial password is secured or its status confirmed, and the expected views load. Go to Central Preferences for initial readiness checks. Do not enroll a device or assign content yet.
No comments to display
No comments to display