
Deploy a Windows Image with FileWave IVS
Start yourthe imagin' !deployment
NowAfter capturing the master image, associate it with target devices, confirm that wethe haveIVS capturedhas ourdownloaded Masterit, Image,and let'sPXE deployboot ita outrepresentative todevice somebefore Windowswider machines.deployment.
Associate an image towith machinesdevices
YouAssociate can associate a Windowsthe image towith a previouslyan enrolled FileWave Client or towith a "bare-metal"metal machinedevice usingrepresented by a Placeholder.placeholder. If you are going to useFor a Placeholder,placeholder pleaseworkflow, followcomplete steps 1-1–6 ofin thisWindows Imaging - Capture Image section to learn more.first.
- Open FileWave Central and navigate to "Imaging".
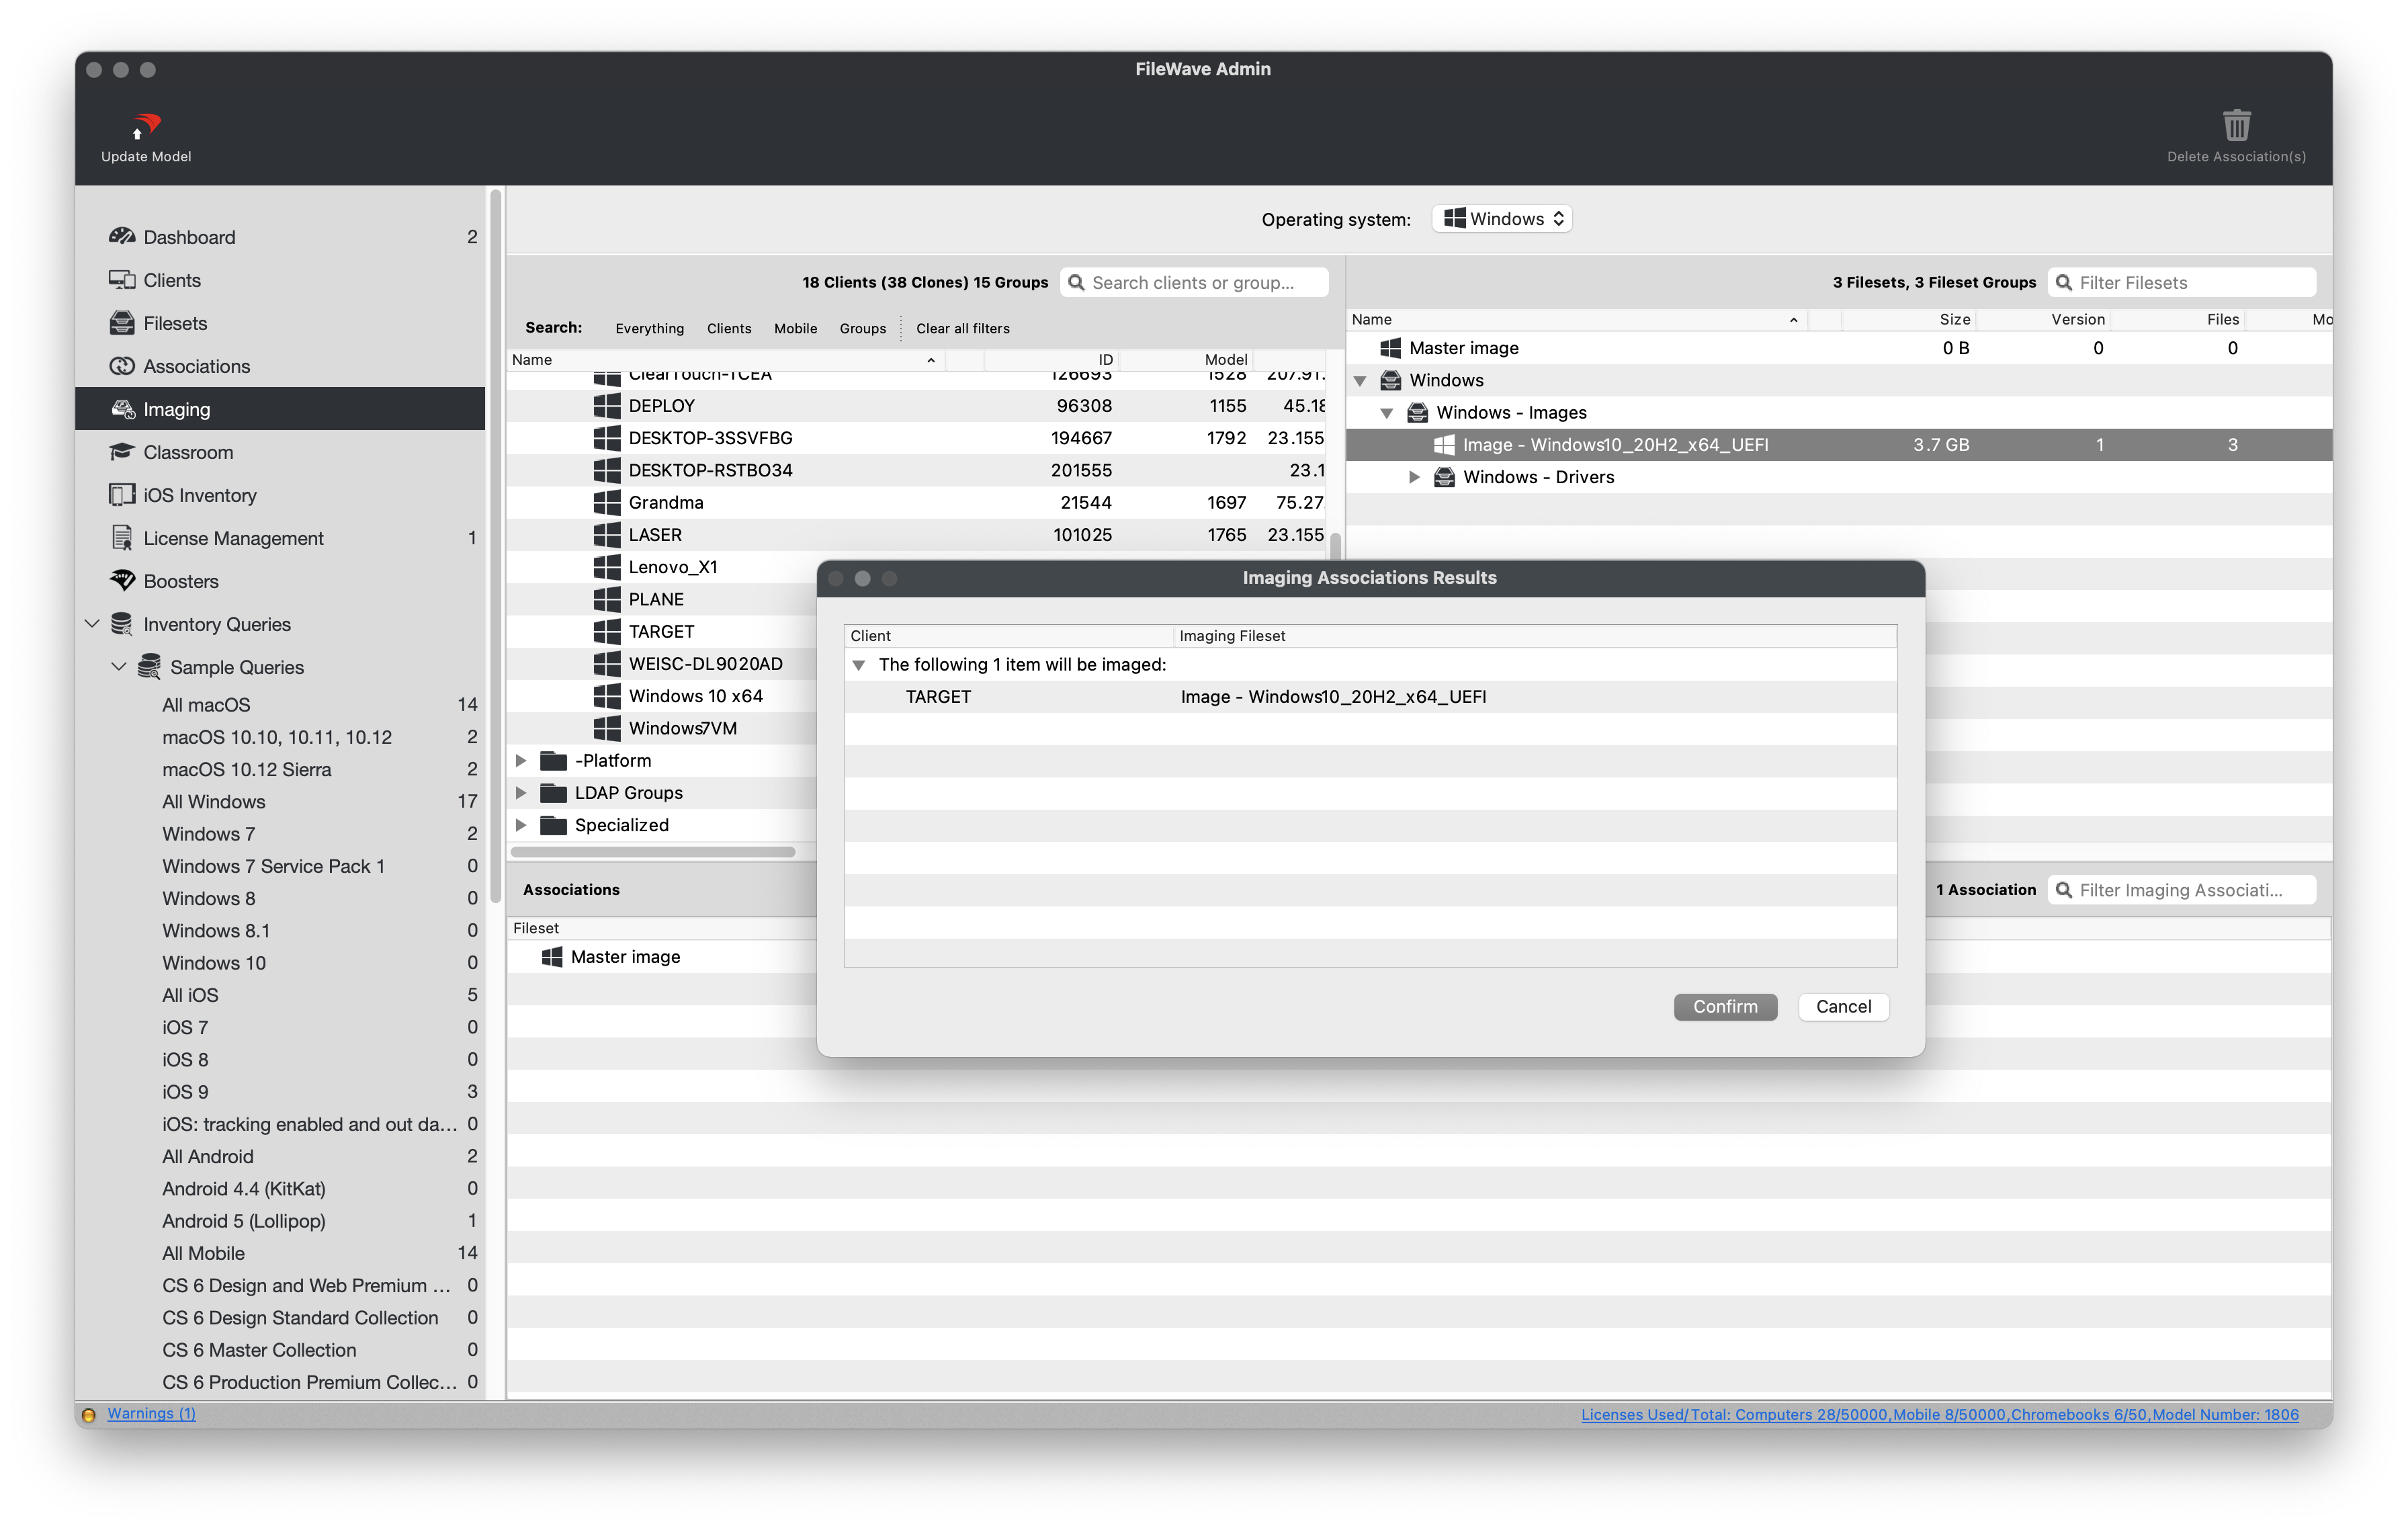
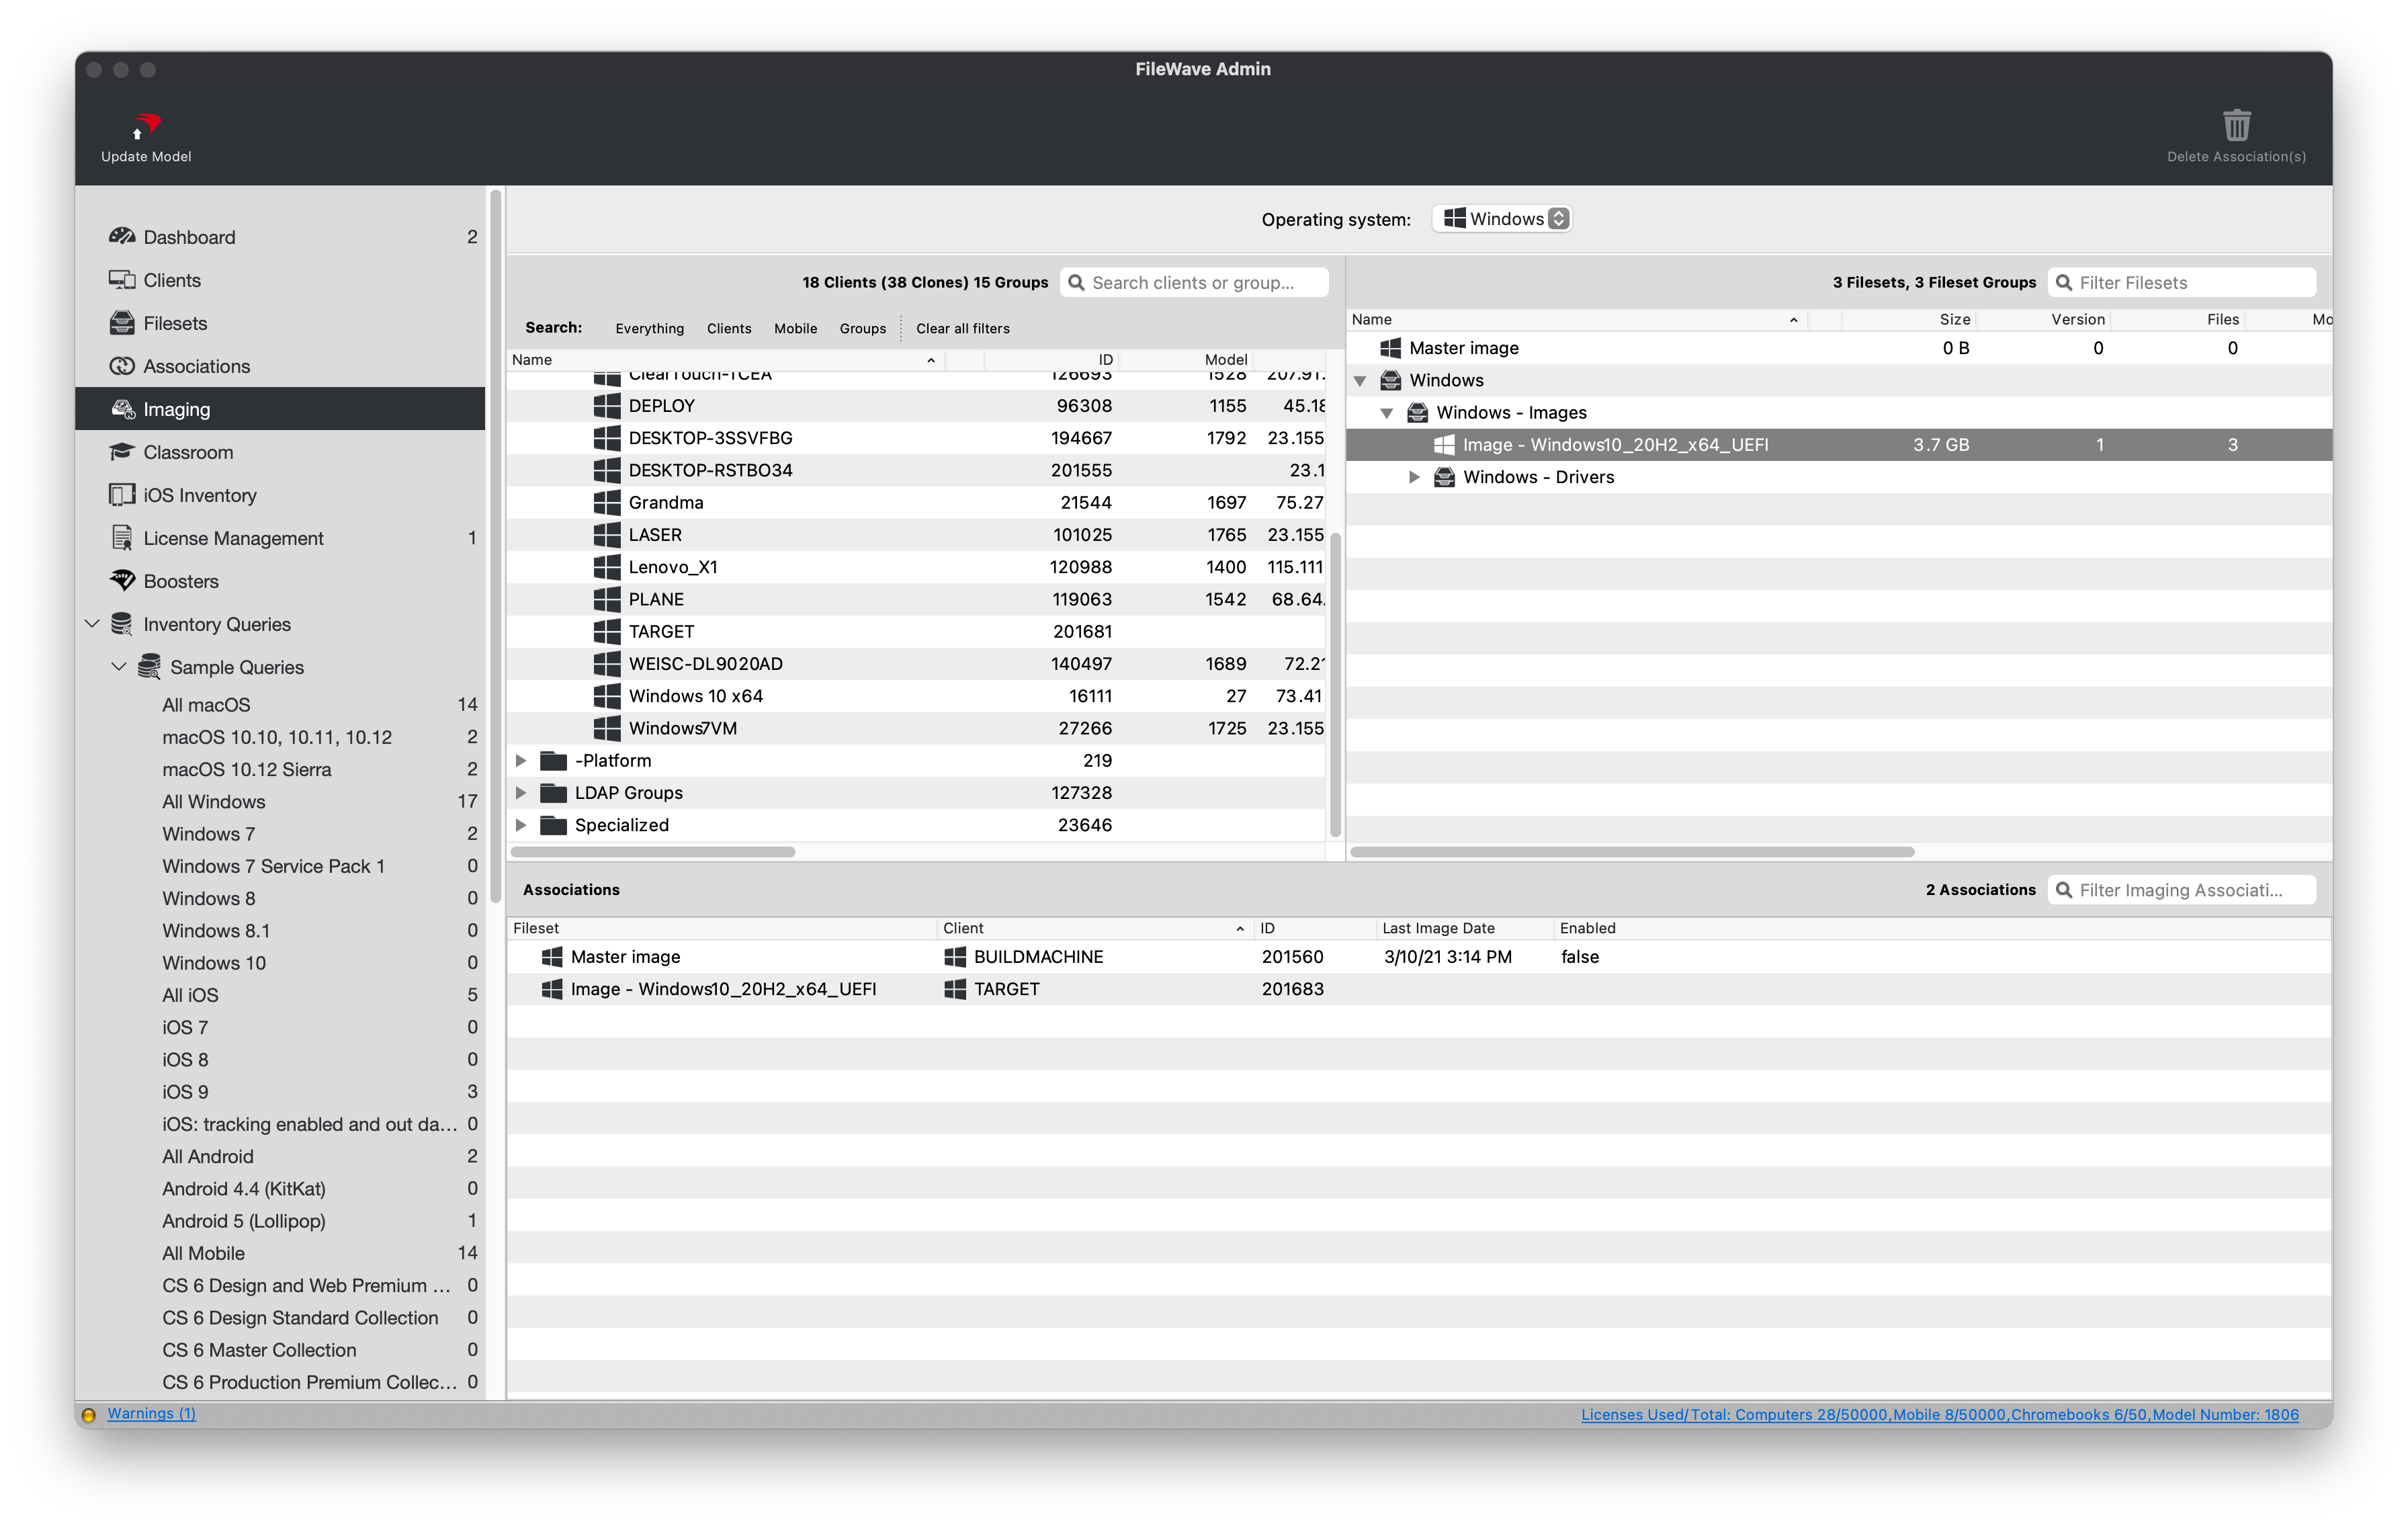
Drag-n-dropDragyourthe newImageimage toeitheran individual device or agroupdeviceof devices.group.- Confirm the imaging associations.
- You should now see your new image association in the bottom pane of the "Imaging" tab.
- Optionally,
drag-n-dropdrag a Windows Driver Fileset onto thenewassociation.
- Optionally,
"Select UpdateModel"Model to saveyourthechanges.associations.- Your image will now be downloaded to the FileWave IVS.
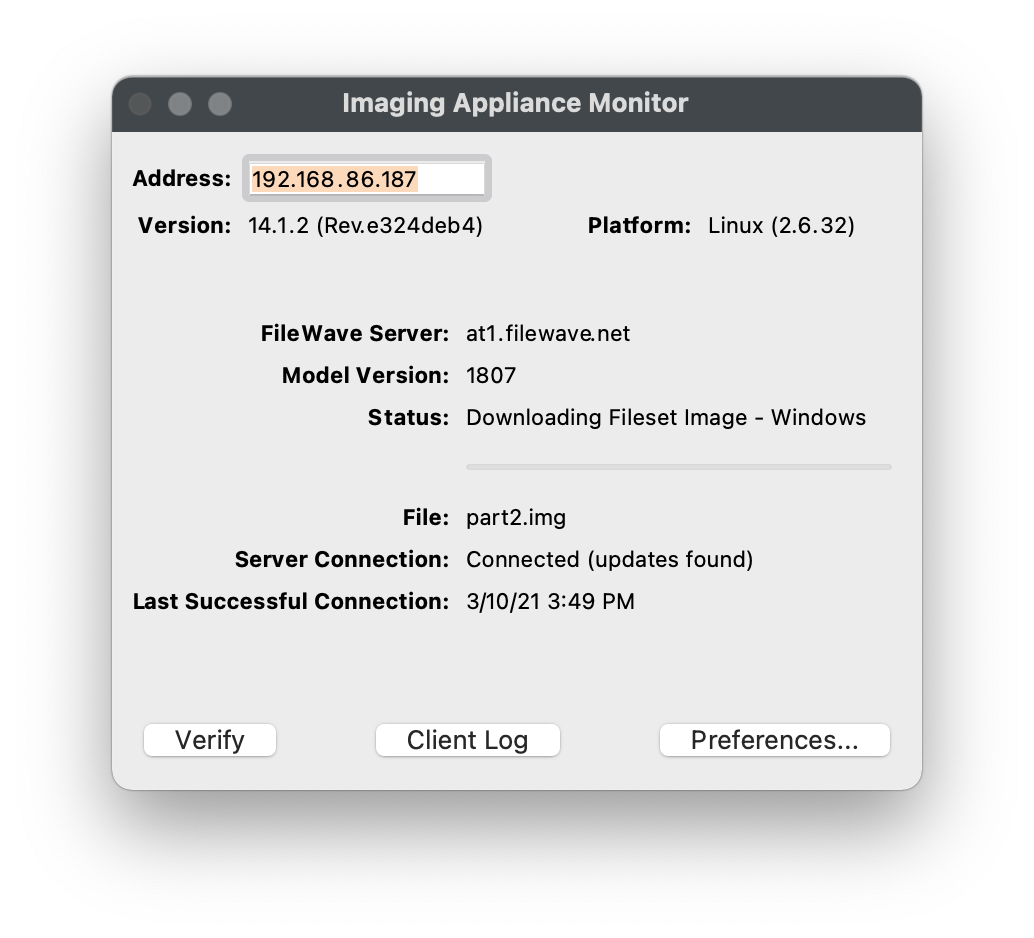
VerifyInthat the FileWave IVS has gotten the latest Model via"Preferences >Imaging"Imaging, selectyourtheFileWave IVS,IVS andclickchoose"Monitor".Monitor to verify that it received the current Model.- You should see the image download progress from the FileWave Server to the FileWave IVS.
- The image
will persistremains on theFileWaveIVSas long as there'swhile at least oneAssociationassociationmadereferencesto that image.it.
- Once the image has completed downloading, proceed to PXE Booting your Windows machines.



PXE Bootboot the target machinesdevices
- Verify that your target machine is set to Network Boot and is on the same subnet as the FileWave IVS.
- PXE boot your target machine.
- If using Legacy BIOS, you will see progress text as the PXELinux environment is loading.
If usingWith UEFI,pleasethebedevicepatientmayas no boot progress while be shown, onlyshow a blackscreen.screen without progress text while the environment loads.
- You should now see a blue screen showing progress as it restores each partition from the FileWave IVS.
- After the restore, you will see a black screen with white text.
- The
machinedevice shouldautomatically rebootrestart into Windows andstartbegin theOut ofOut-of-Box Experiencedetermineddefined byyourtheUnattendedunattendedAnsweranswerFile.file.- If you get a message similar to "no boot media found" after reboot, please reboot again and ensure the machine is not set to Network/PXE boot.
- Since the Master Image contained the FileWave Client, it should start communicating with FileWave immediately.
SolveResolve Client Conflictsconflicts
AfterA areimaged Windows machine finishes imaging and checks into FileWave, itdevice may conflictcheck in with an identity that conflicts with its previous Client enrollment.record. Please followResolve the stepsconflict tocarefully resolveso conflictsthe intended associations and inventory history stay with anythe newlymanaged imaged machine.device.
- Open FileWave Central and navigate to "Clients".
- Select "New Client" from the black menubar.
- Select "Desktop Clients" from the "Devices waiting for enrollment section".
- Locate and select the Client that is reporting a conflict and click the "Solve Conflict" button.
- Select
onetheofoption that matches thefollowingdeviceoptions that best suites your situation.state.-
Remove the new client
- Select this option if you want to refuse the client for now. You can fix the device identifier and re-enroll it later
-
Remove the old client and enroll the new client
- Select this option if the old entry is obsolete and can be safely removed; all clones will be removed
-
Replace the old client with the new client (recommended)
- Select this option if you want the new client to replace the existing entry (this will take over the old record with all clones, associations, etc.)
-
YourConfirm that the newly imaged Windows Clientshouldchecksbegan checking into FileWavein anddownload anydownloads Filesetspreviouslyassociatedtowith the retained Cliententry.record.