Windows Imaging - Capture Image
One image to rule them all
Well, at least that's the plan. Since FileWave recommends using a thin image that has been Sysprep'd with "/generalize" and "/oobe", your Master Image will not be specific to any make/model of computer and will go through the default Windows Out of Box Experience to scan for any hardware. This will allow you to deploy one image to all of your Windows machines and deploy device specific drivers and software after the imaging process has completed. The only reason you'd possibly have multiple images is to account for differences in your machine's BIOS (Legacy vs. UEFI) or architecture (32bit vs. 64bit).
Preparing your build machine
The first step is to prepare the machine you plan to capture the Master Image from. This can be a physical machine or a virtual machine, however most prefer to use a virtual machine as they can install Windows much quicker via ISO and more easily put the VM on the same VLAN as the IVS. Putting the machine on the same VLAN/subnet is crucial as by default, the IVS only listens to DHCP traffic on the subnet it resides on. After ensuring the essential imaging traffic is OK on the same subnet, we can later configure the IVS to listen to multiple subnets by leveraging IP Helpers. This section will cover creating a virtual machine but the same steps will apply to a physical machine.
-
Create a blank virtual machine within your virtual environment.
-
Configure your VM's BIOS to match your environment's most used BIOS, Legacy or UEFI (with Secure Boot disabled).
-
Configure the VM's network interface to be on the same VLAN/subnet as the FileWave IVS.
-
Configure the VM's hard disk to be as small as your smallest drive in your environment. 40GB is a good baseline.
-
Download and attach the Windows 10 ISO or Windows 11 ISO to your VM's optical drive.
- If you are attempting to download from a Windows machine you will be redirected to another page and not have access to the ISO.
- Use this guide to change how your browser identifies to access the ISO.
-
Boot your VM to the DVD/optical drive and install Windows 10/11 with default disk partition settings.
-
Create an Offline (non-Microsoft) Administrator user account.
- This account will persist after Sysprep so name and set password accordingly.
-
Once at the Desktop, open Powershell as Administrator.
-
Copy and paste the following Powershell commands into the Powershell window and press Enter.
-
These commands will remove the built-in Windows Apps that have been known to prevent Sysprep from completing successfully.
-
These commands are sourced from Experts Exchange - Windows 10 Sysprep Guide.
-
If copy/paste into VM is not working, please consider opening this page directly within VM.
Remove built-in Windows Apps
Get-AppxPackage *3dbuilder* | Remove-AppxPackage
Get-AppxPackage *windowsalarms* | Remove-AppxPackage
Get-AppxPackage *Appconnector* | Remove-AppxPackage
Get-AppxPackage *windowscalculator* | Remove-AppxPackage
Get-AppxPackage *windowscommunicationsapps* | Remove-AppxPackage
Get-AppxPackage *windowscamera* | Remove-AppxPackage
Get-AppxPackage *CandyCrushSaga* | Remove-AppxPackage
Get-AppxPackage *officehub* | Remove-AppxPackage
Get-AppxPackage *skypeapp* | Remove-AppxPackage
Get-AppxPackage *getstarted* | Remove-AppxPackage
Get-AppxPackage *zunemusic* | Remove-AppxPackage
Get-AppxPackage *windowsmaps* | Remove-AppxPackage
Get-AppxPackage *Messaging* | Remove-AppxPackage
Get-AppxPackage *solitairecollection* | Remove-AppxPackage
Get-AppxPackage *ConnectivityStore* | Remove-AppxPackage
Get-AppxPackage *bingfinance* | Remove-AppxPackage
Get-AppxPackage *zunevideo* | Remove-AppxPackage
Get-AppxPackage *bingnews* | Remove-AppxPackage
Get-AppxPackage *onenote* | Remove-AppxPackage
Get-AppxPackage *people* | Remove-AppxPackage
Get-AppxPackage *CommsPhone* | Remove-AppxPackage
Get-AppxPackage *windowsphone* | Remove-AppxPackage
Get-AppxPackage *photos* | Remove-AppxPackage
Get-AppxPackage *WindowsScan* | Remove-AppxPackage
Get-AppxPackage *bingsports* | Remove-AppxPackage
Get-AppxPackage *windowsstore* | Remove-AppxPackage
Get-AppxPackage *Office.Sway* | Remove-AppxPackage
Get-AppxPackage *Twitter* | Remove-AppxPackage
Get-AppxPackage *soundrecorder* | Remove-AppxPackage
Get-AppxPackage *bingweather* | Remove-AppxPackage
Get-AppxPackage *xboxapp* | Remove-AppxPackage
Get-AppxPackage *XboxOneSmartGlass* | Remove-AppxPackage
-
-
Press Enter once more to ensure the last command is executed.
-
Close the Powershell window.
-
Generate and install your Custom FileWave Client MSI. * More instructions on how to do so can be found in the Windows setup section. * This can be done directly from the VM if file transfer is difficult.
-
Generate and download a Sysprep unattended answer file via Answer File Generator. * "Computer Name" can be any generic placeholder. * "Product Key" is not required for remote Windows activations. * "Domain Join" is optional, FileWave can join machines to Active Directory after the imaging process. * This can be done directly from the VM if file transfer is difficult. An alternative tool that has some nice options is https://schneegans.de/windows/unattend-generator/
-
After the "unattend.xml" file is downloaded, move the file to "C:\Windows\".
- Run the Check Disk command before your Sysprep the image. This will ensure the disk is cleared of any errors. The below commands are run in Command Prompt run as administrator.
chkdsk /R shutdown -r -t 0 -
Open Command Prompt as Administrator and run the following commands to Sysprep and shutdown your machine.
cd Sysprep sysprep.exe /generalize /oobe /shutdown /unattend:C:\Windows\unattend.xml -
Your machine will shutdown automatically, do not boot until instructed in future section.
Create a placeholder for Master Image association
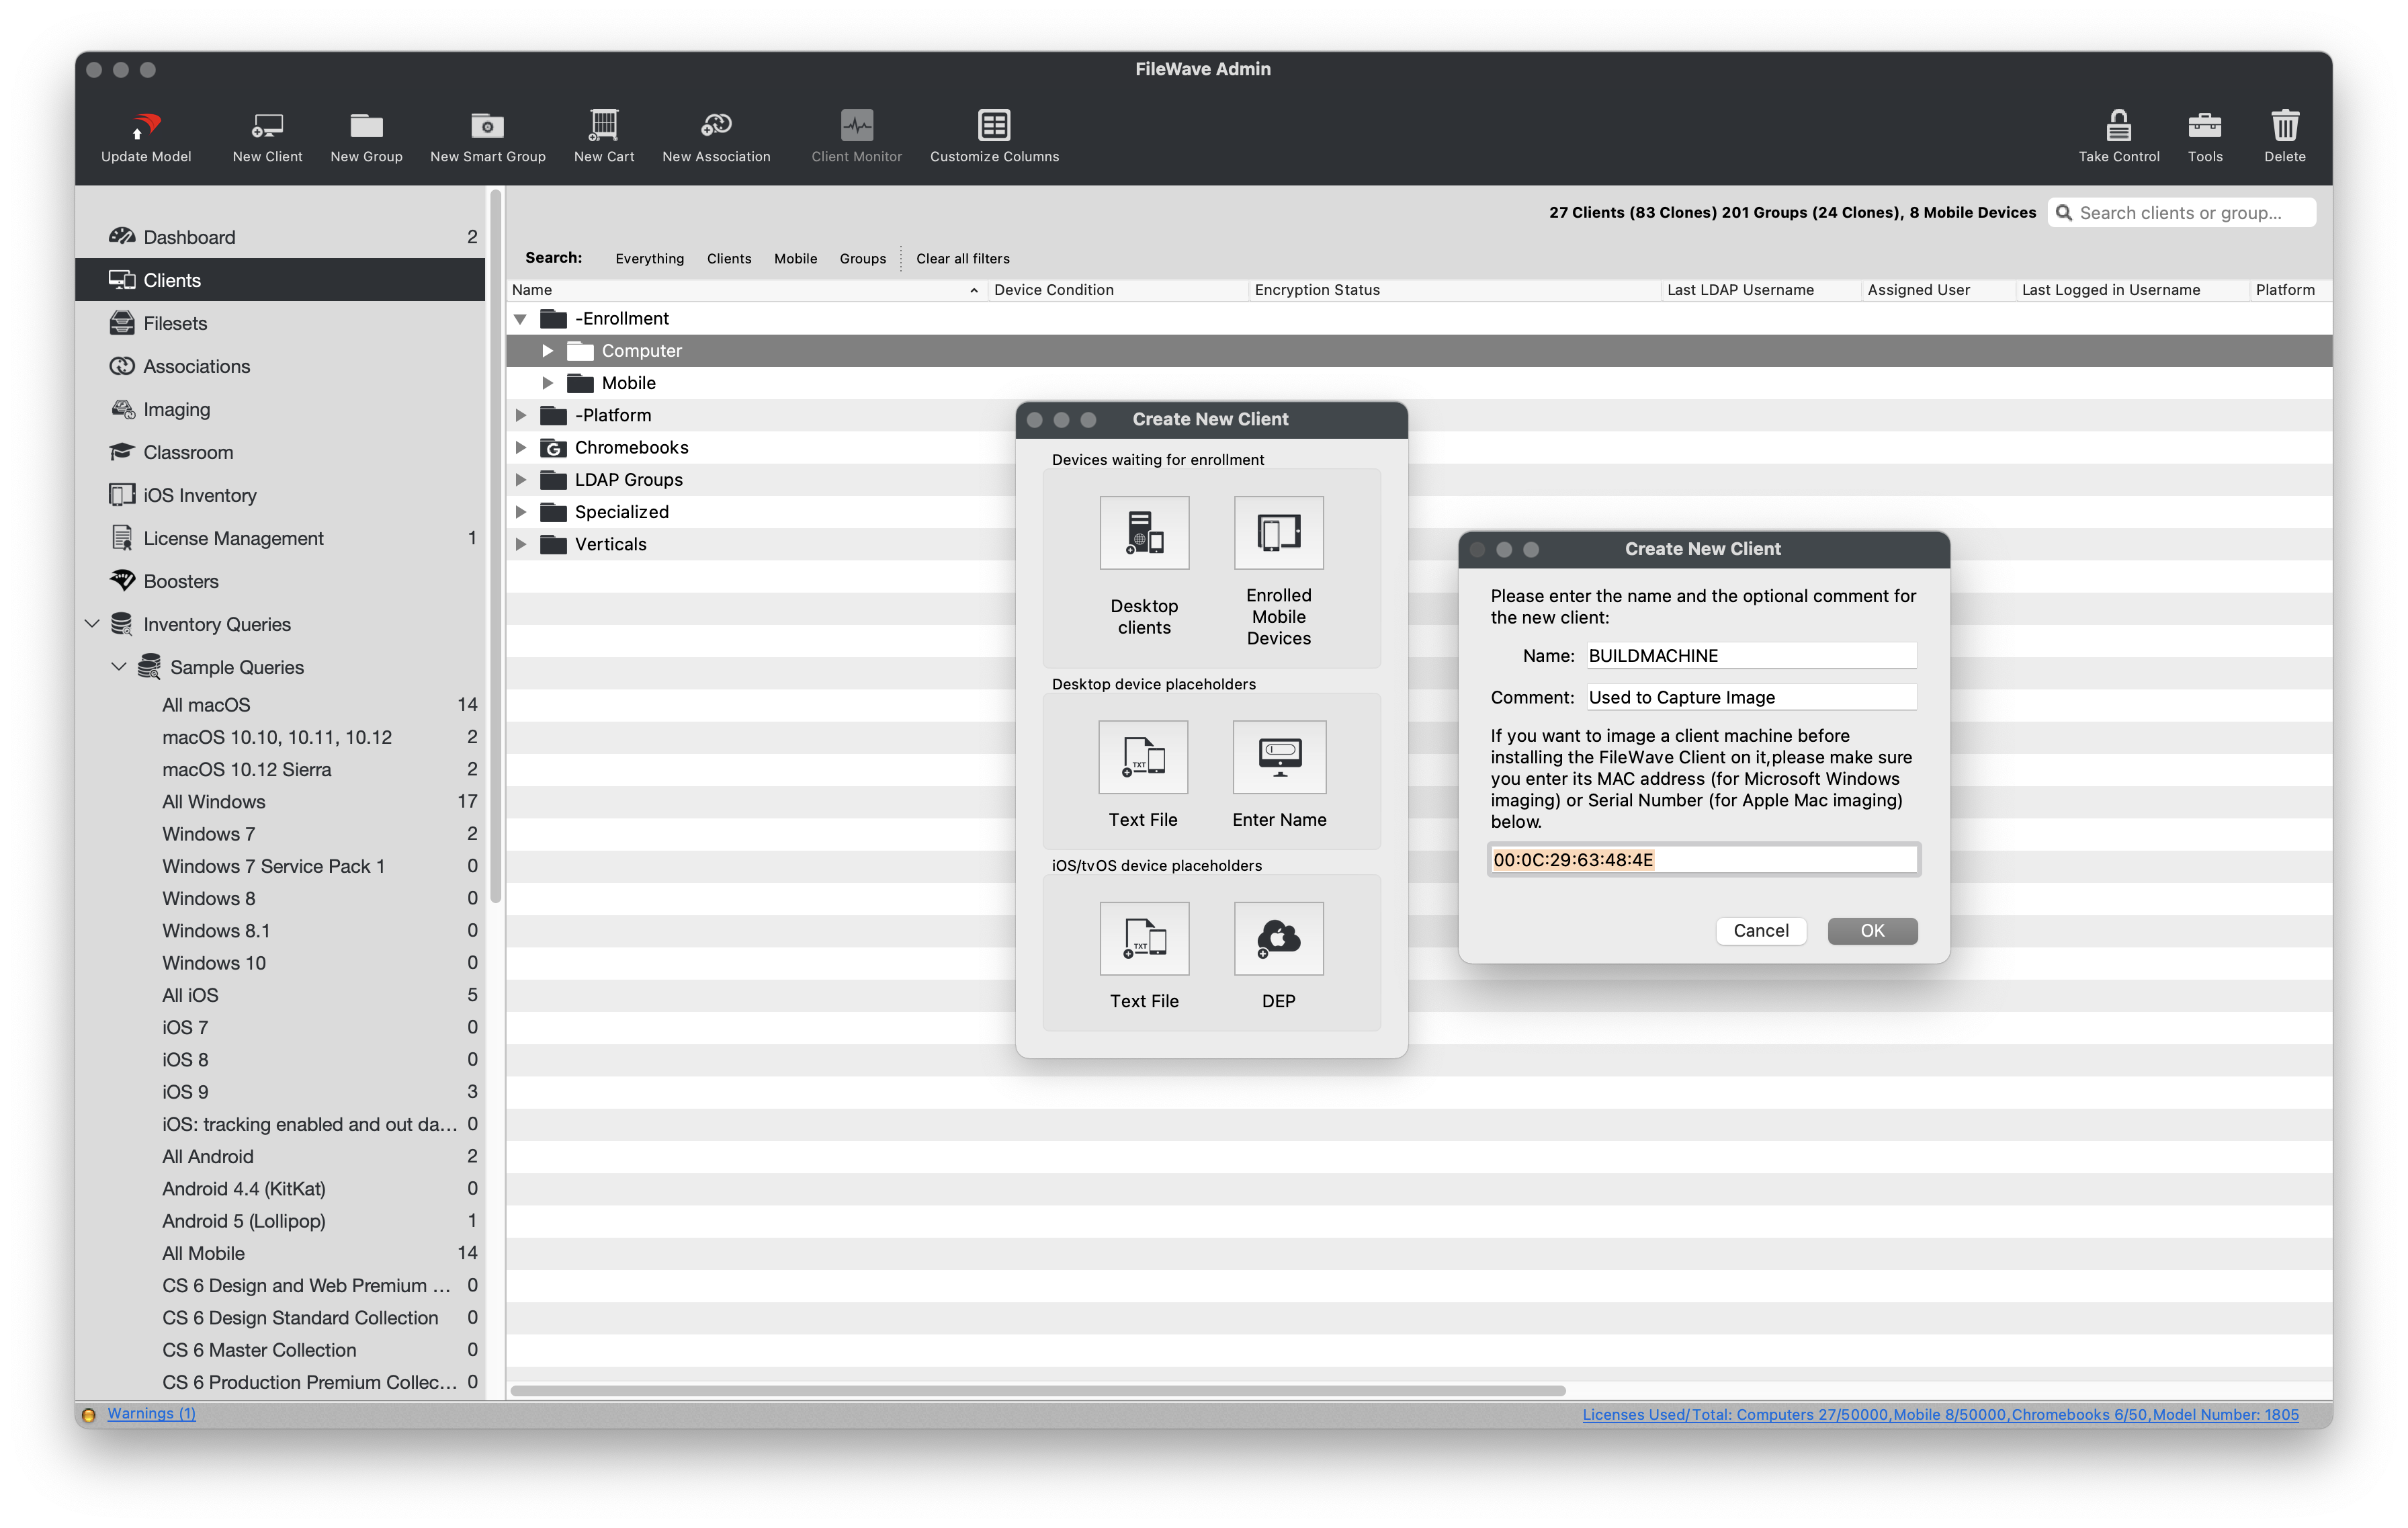
To capture an image from our build machine we must add the Client machine as a Placeholder within FileWave using its desired Windows Hostname and its Ethernet MAC address.
- Open FileWave Admin and navigate to "Clients".
- If your build machine checked into FileWave during the preparation stage, please delete the Client from FileWave and "Update Model".
- Click "New Client" button from black menubar and select "Enter Name" from the "Desktop device placeholders" section.
- Enter in a generic name for the placeholder and optionally add a "Comment".
- Reference your VM's settings and obtain the Ethernet MAC address used by the VM.
- Click "OK" to finish adding the Placeholder.
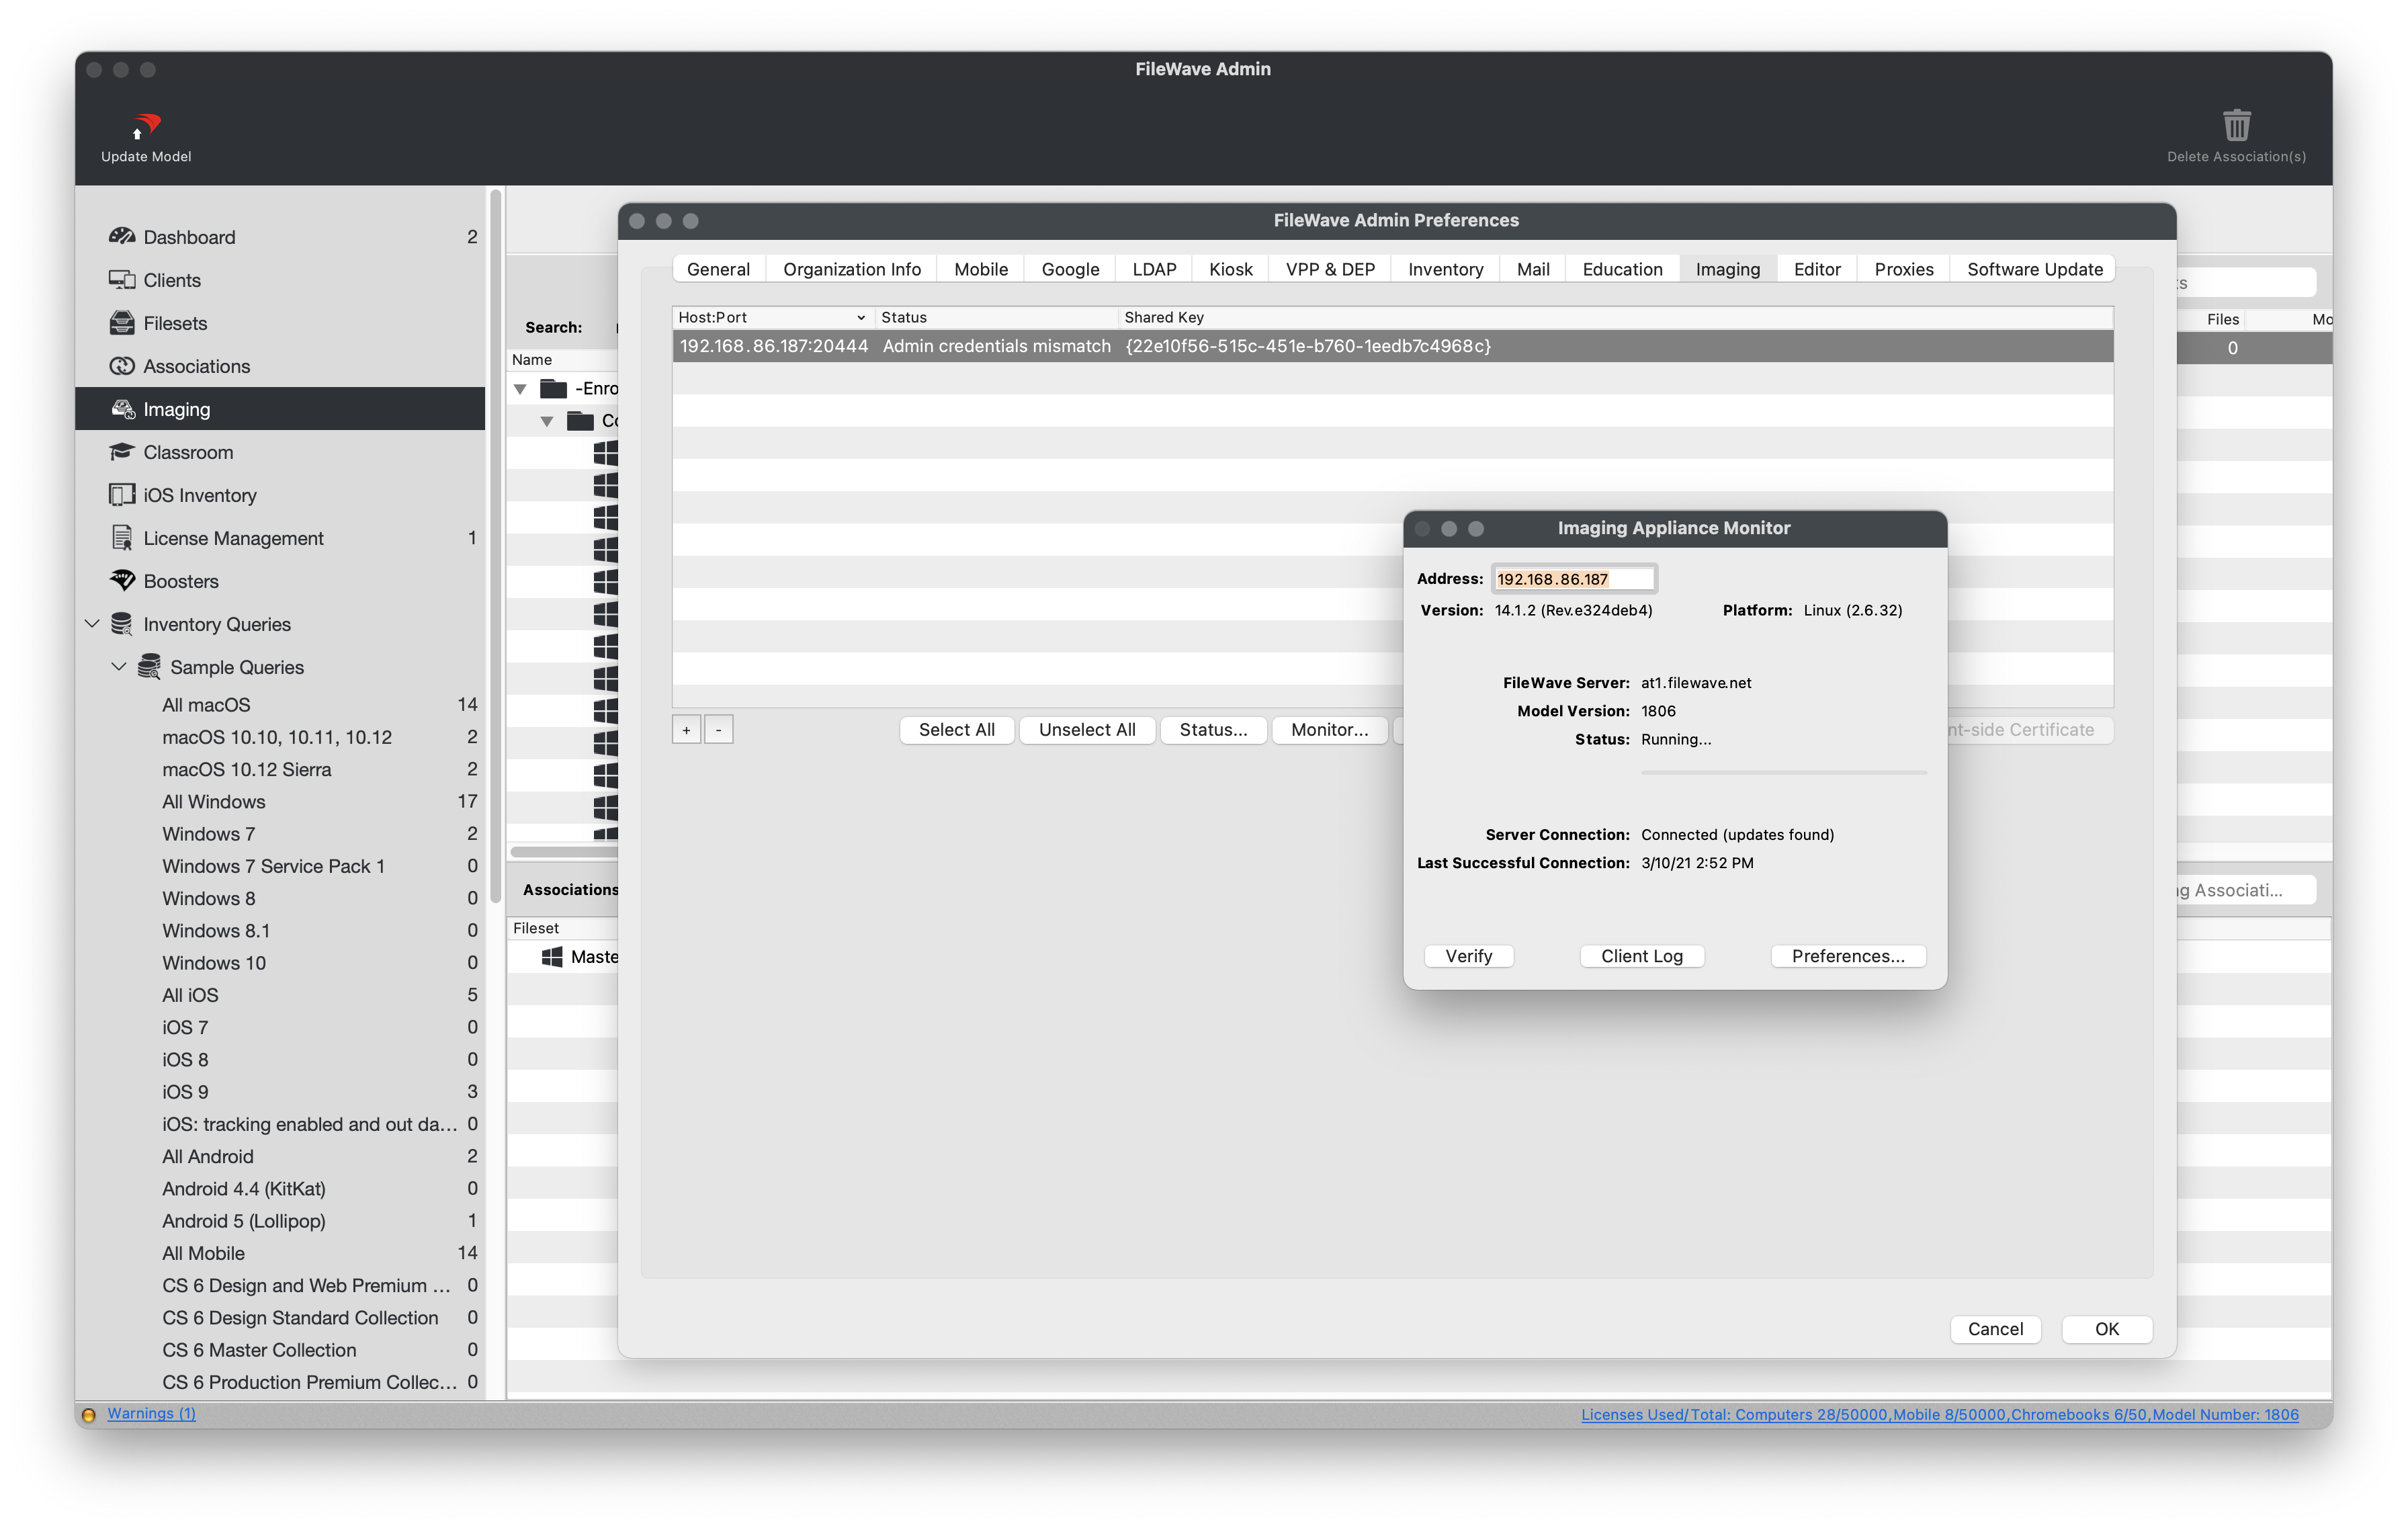
- Navigate to "Imaging".
- Drag-n-drop the "Master Image" item from the right-hand pane to the newly added Placeholder.
- "Update Model" to save changes.
- Navigate to "Preferences > Imaging", select your FileWave IVS, and click "Monitor".
- Wait for at least 5 minutes and verify that the FileWave IVS is getting the latest Model. * The current Server Model Number can be found in the lower-right hand corner of the FileWave Admin.
- Once the FileWave IVS is fully checking in and getting the latest Model, proceed to capturing the Master Image.

Capture Master Image
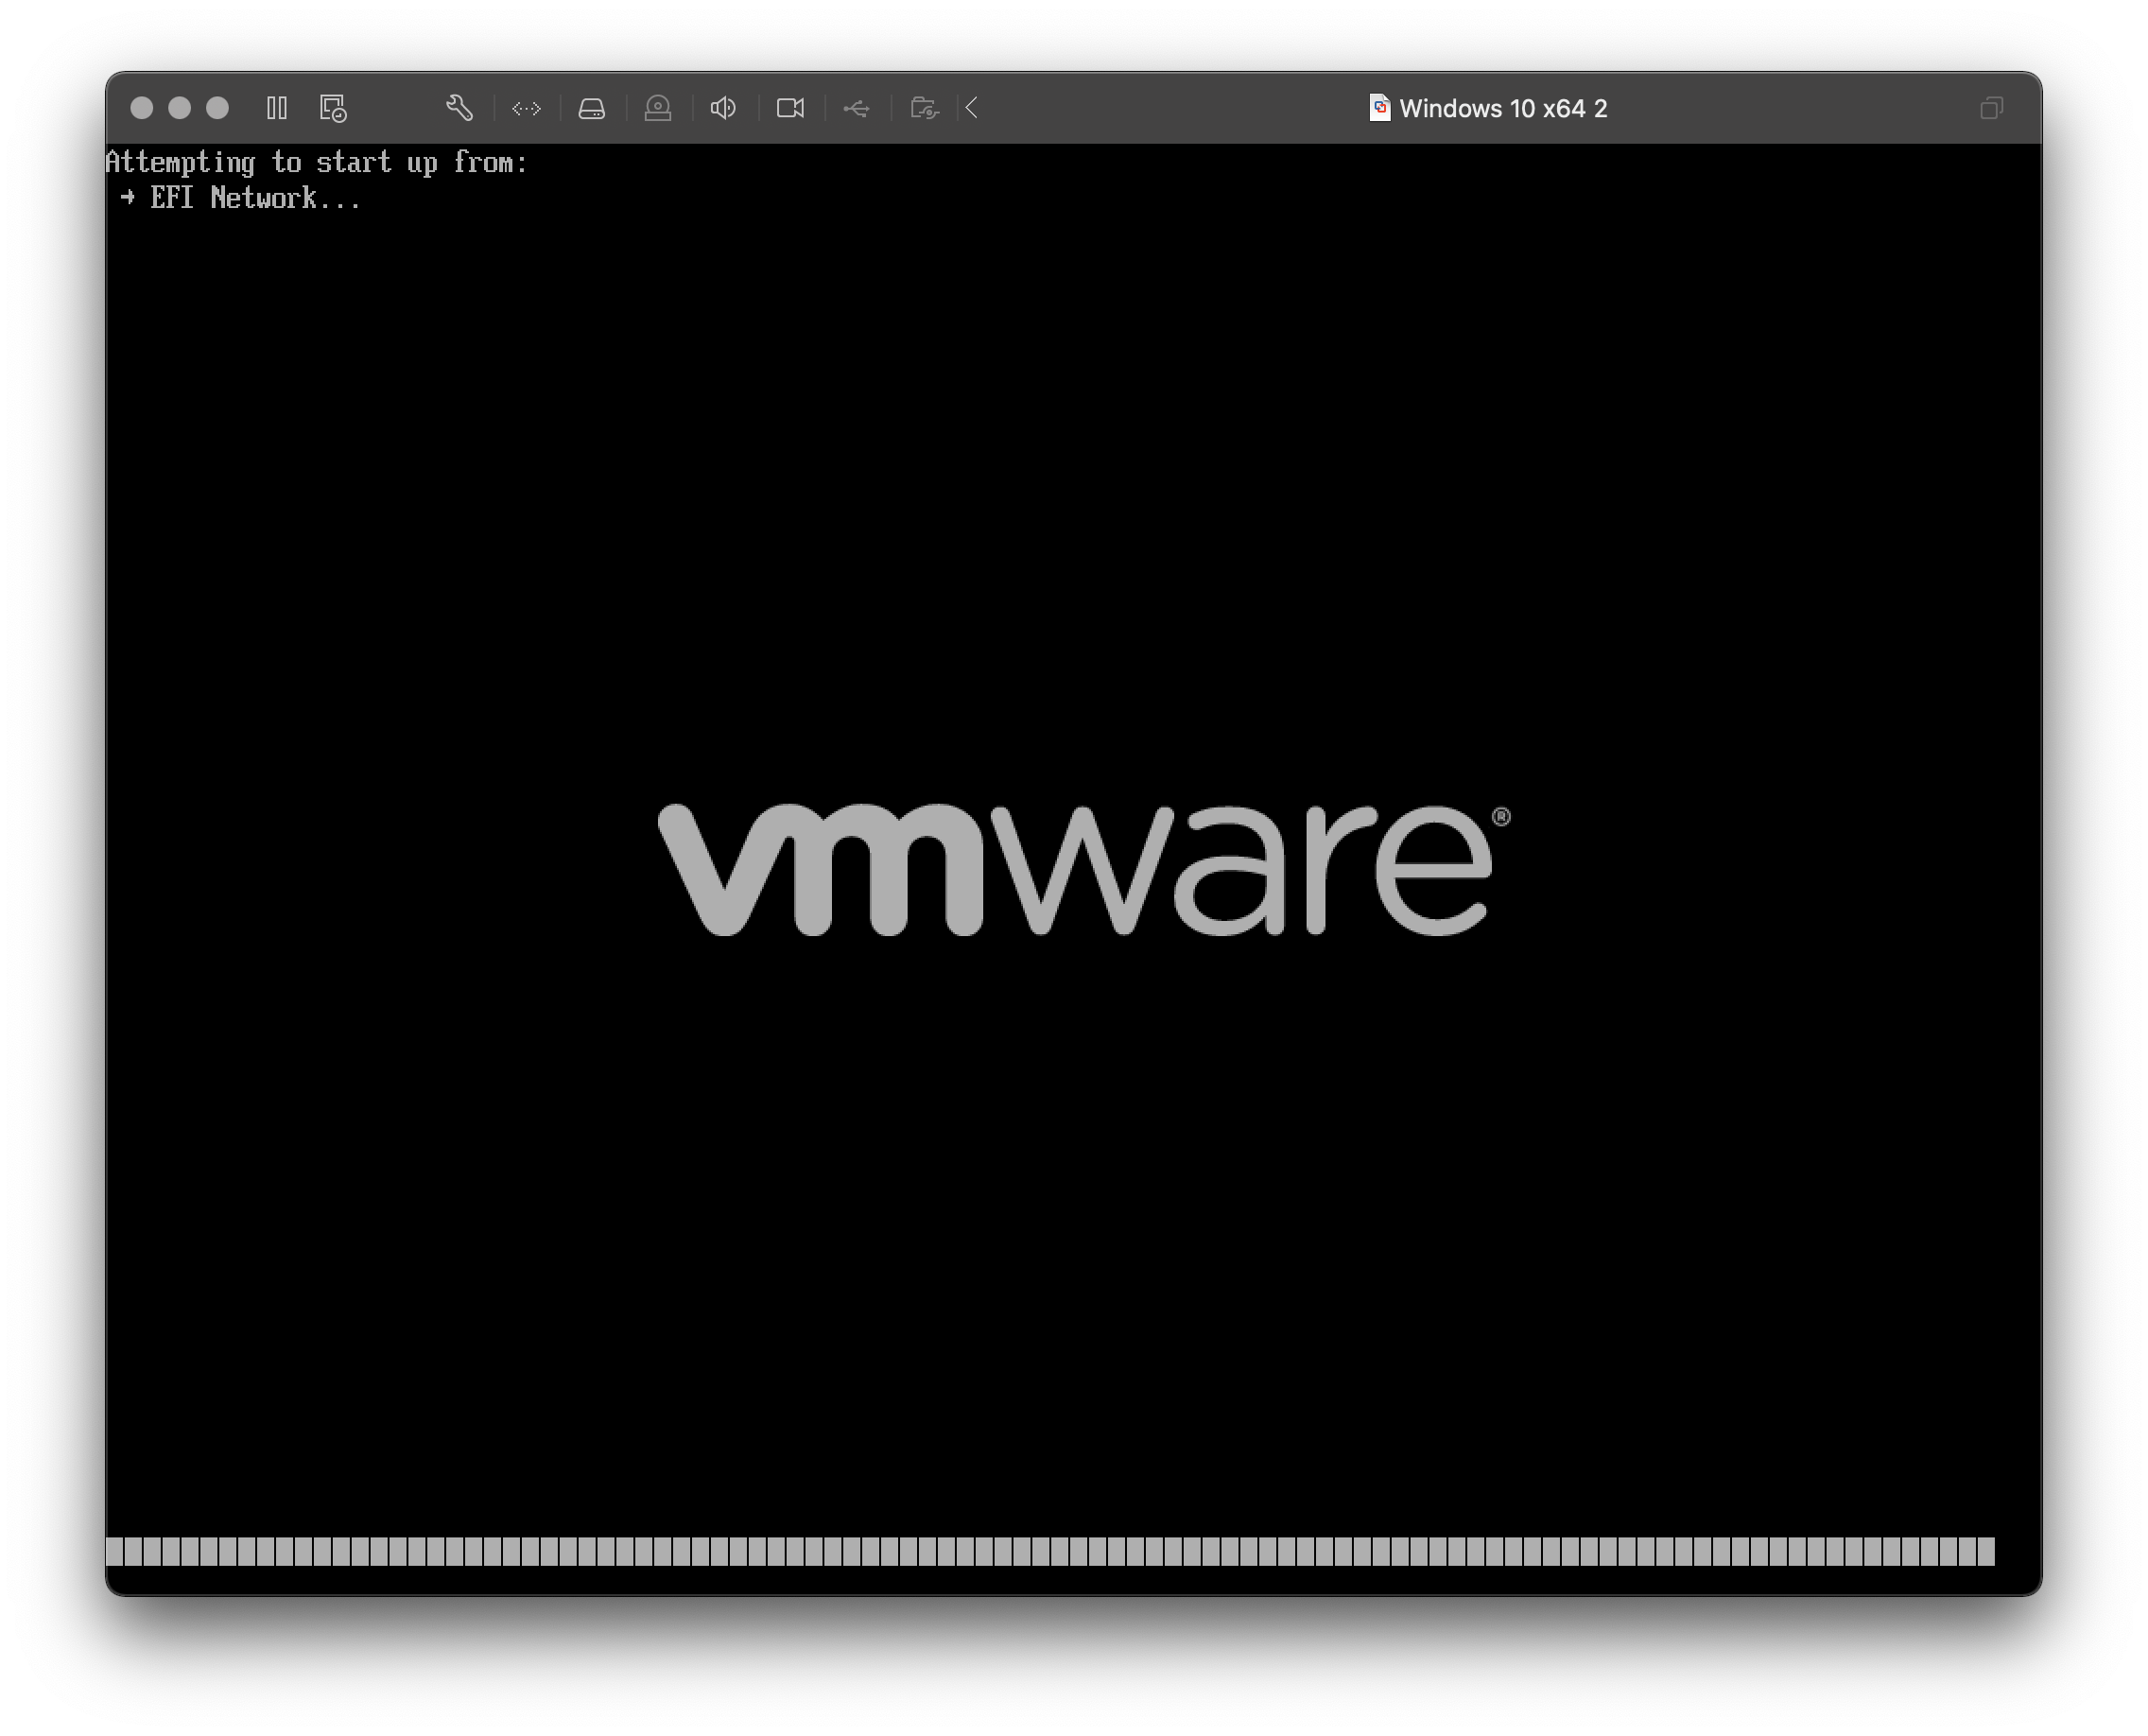
Now that the FileWave is aware of the Master Image association, it is time to PXE Boot your build machine and capture your image.
- Verify that your build machine is set to Network Boot and is on the same subnet as the FileWave IVS.
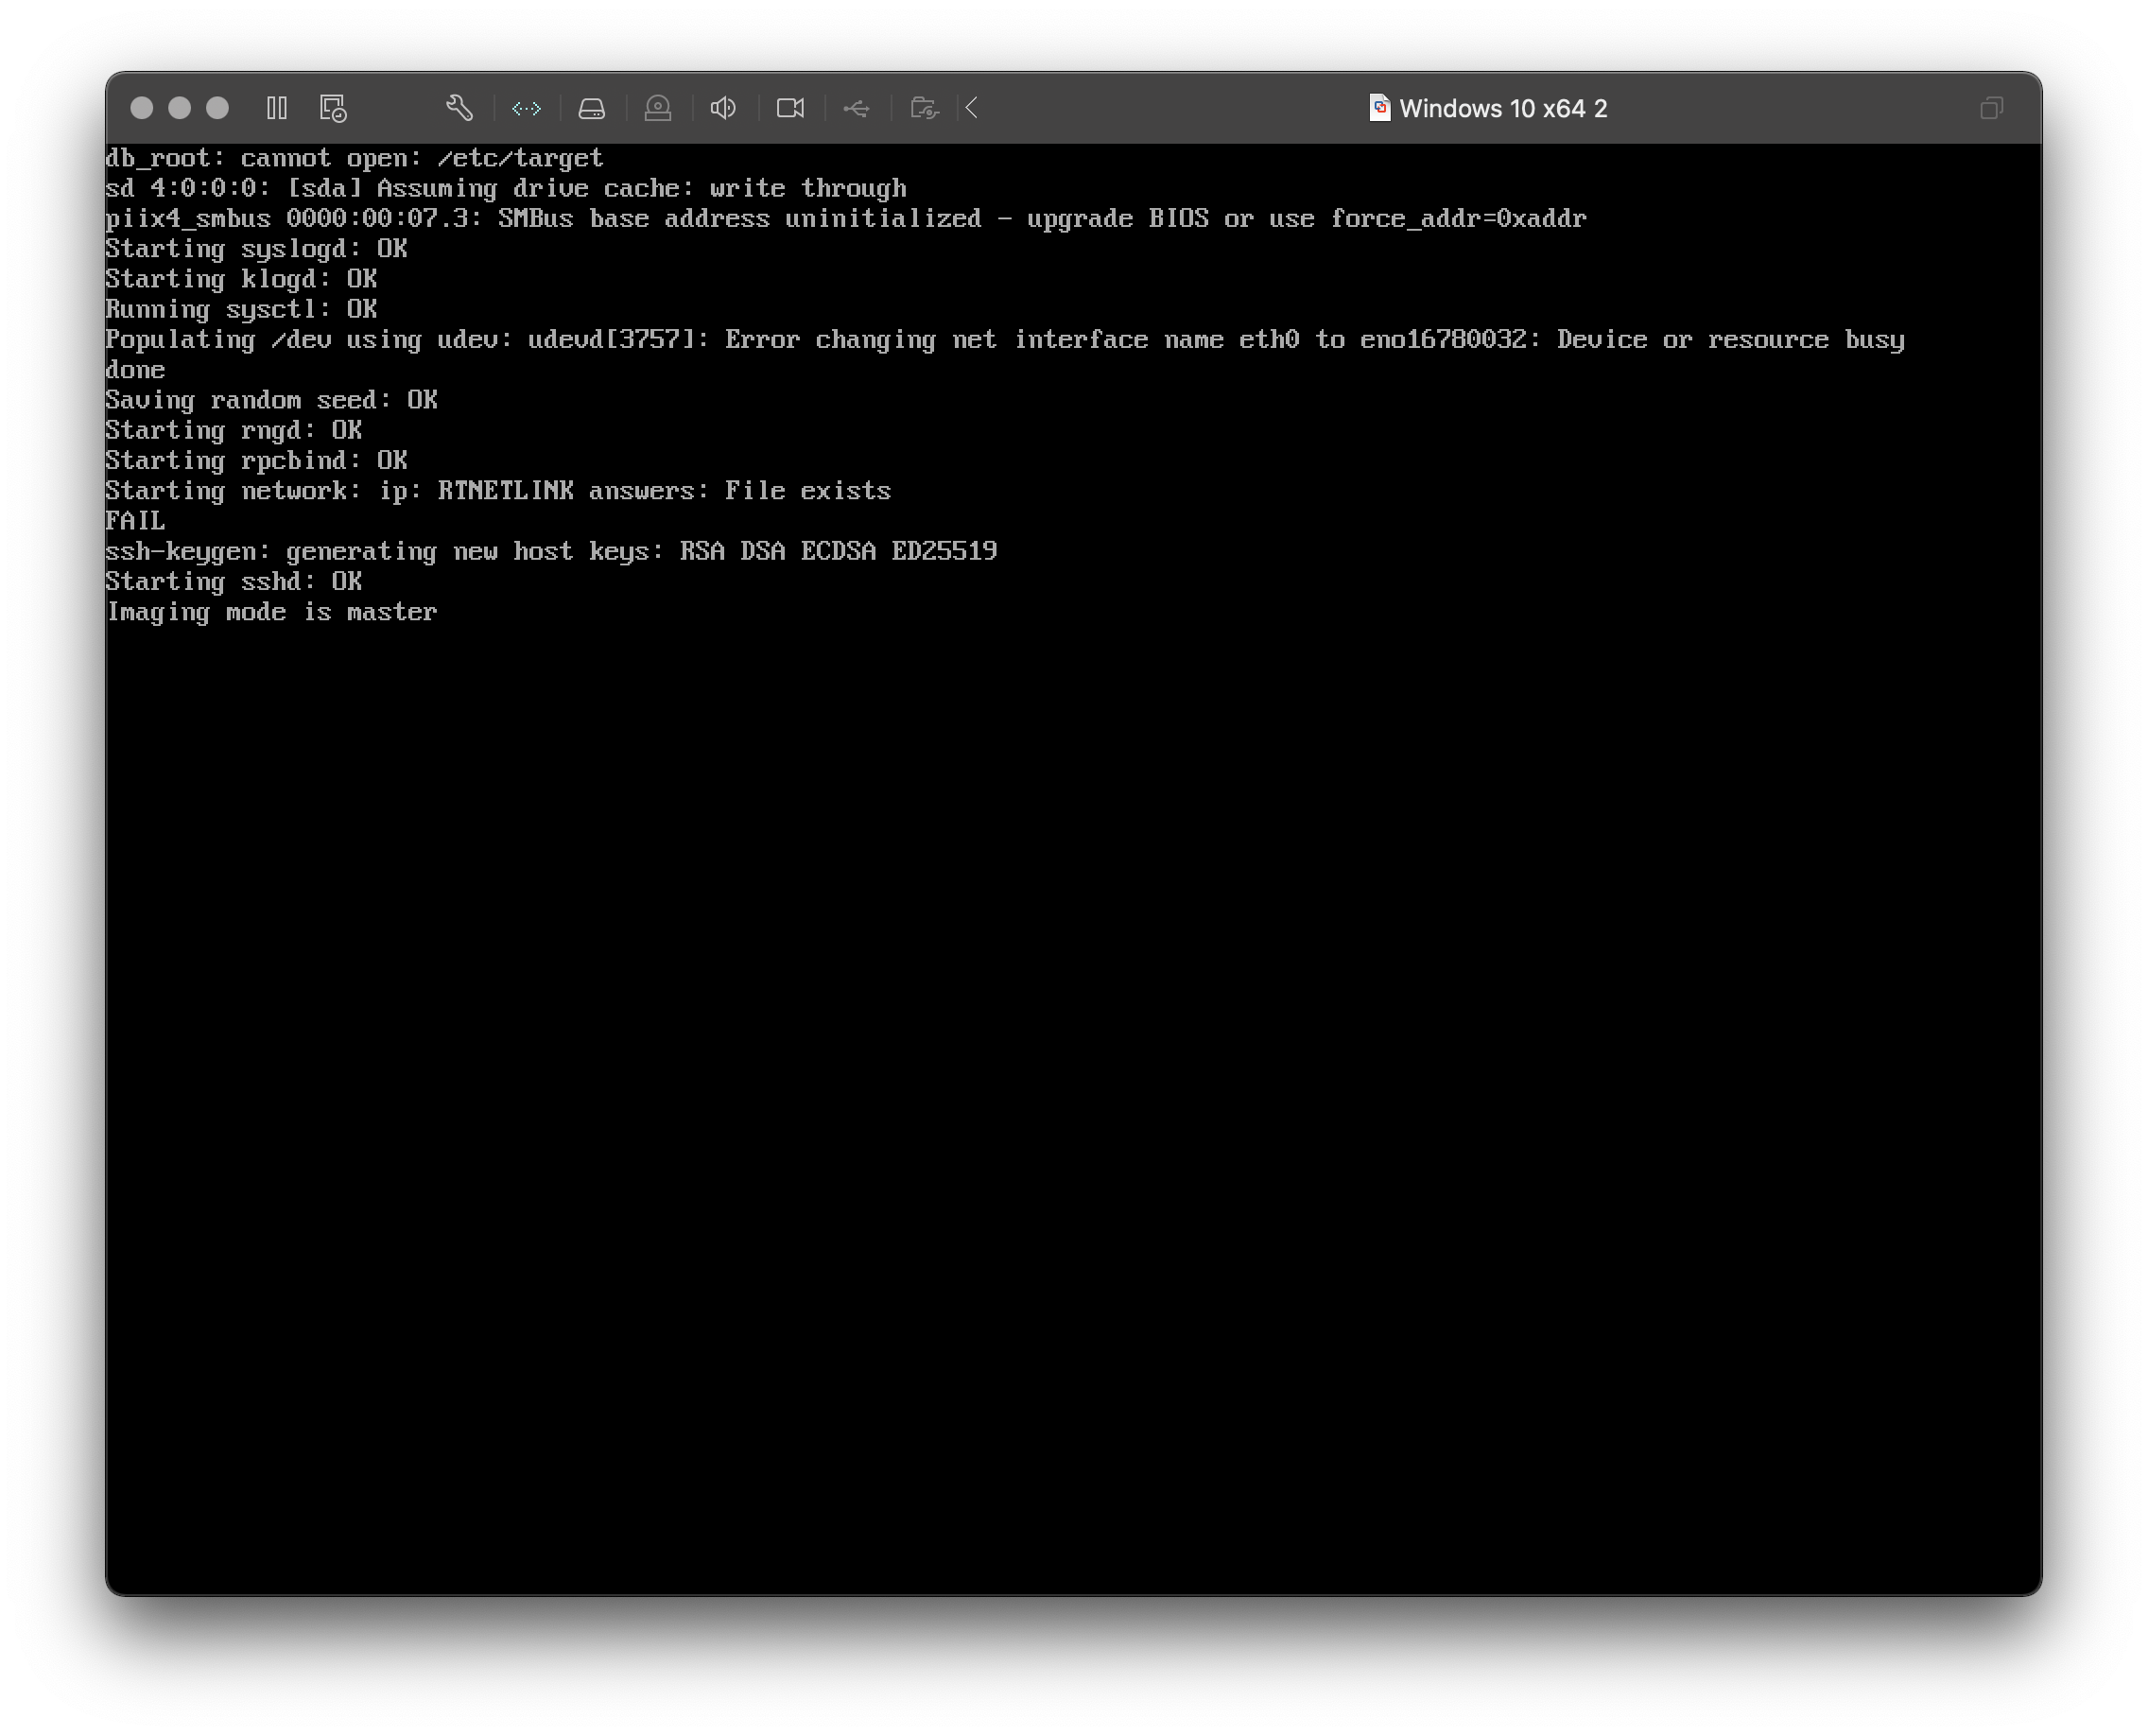
- PXE boot you build machine.
- If using Legacy BIOS, you will see progress text as the PXELinux environment is loading.
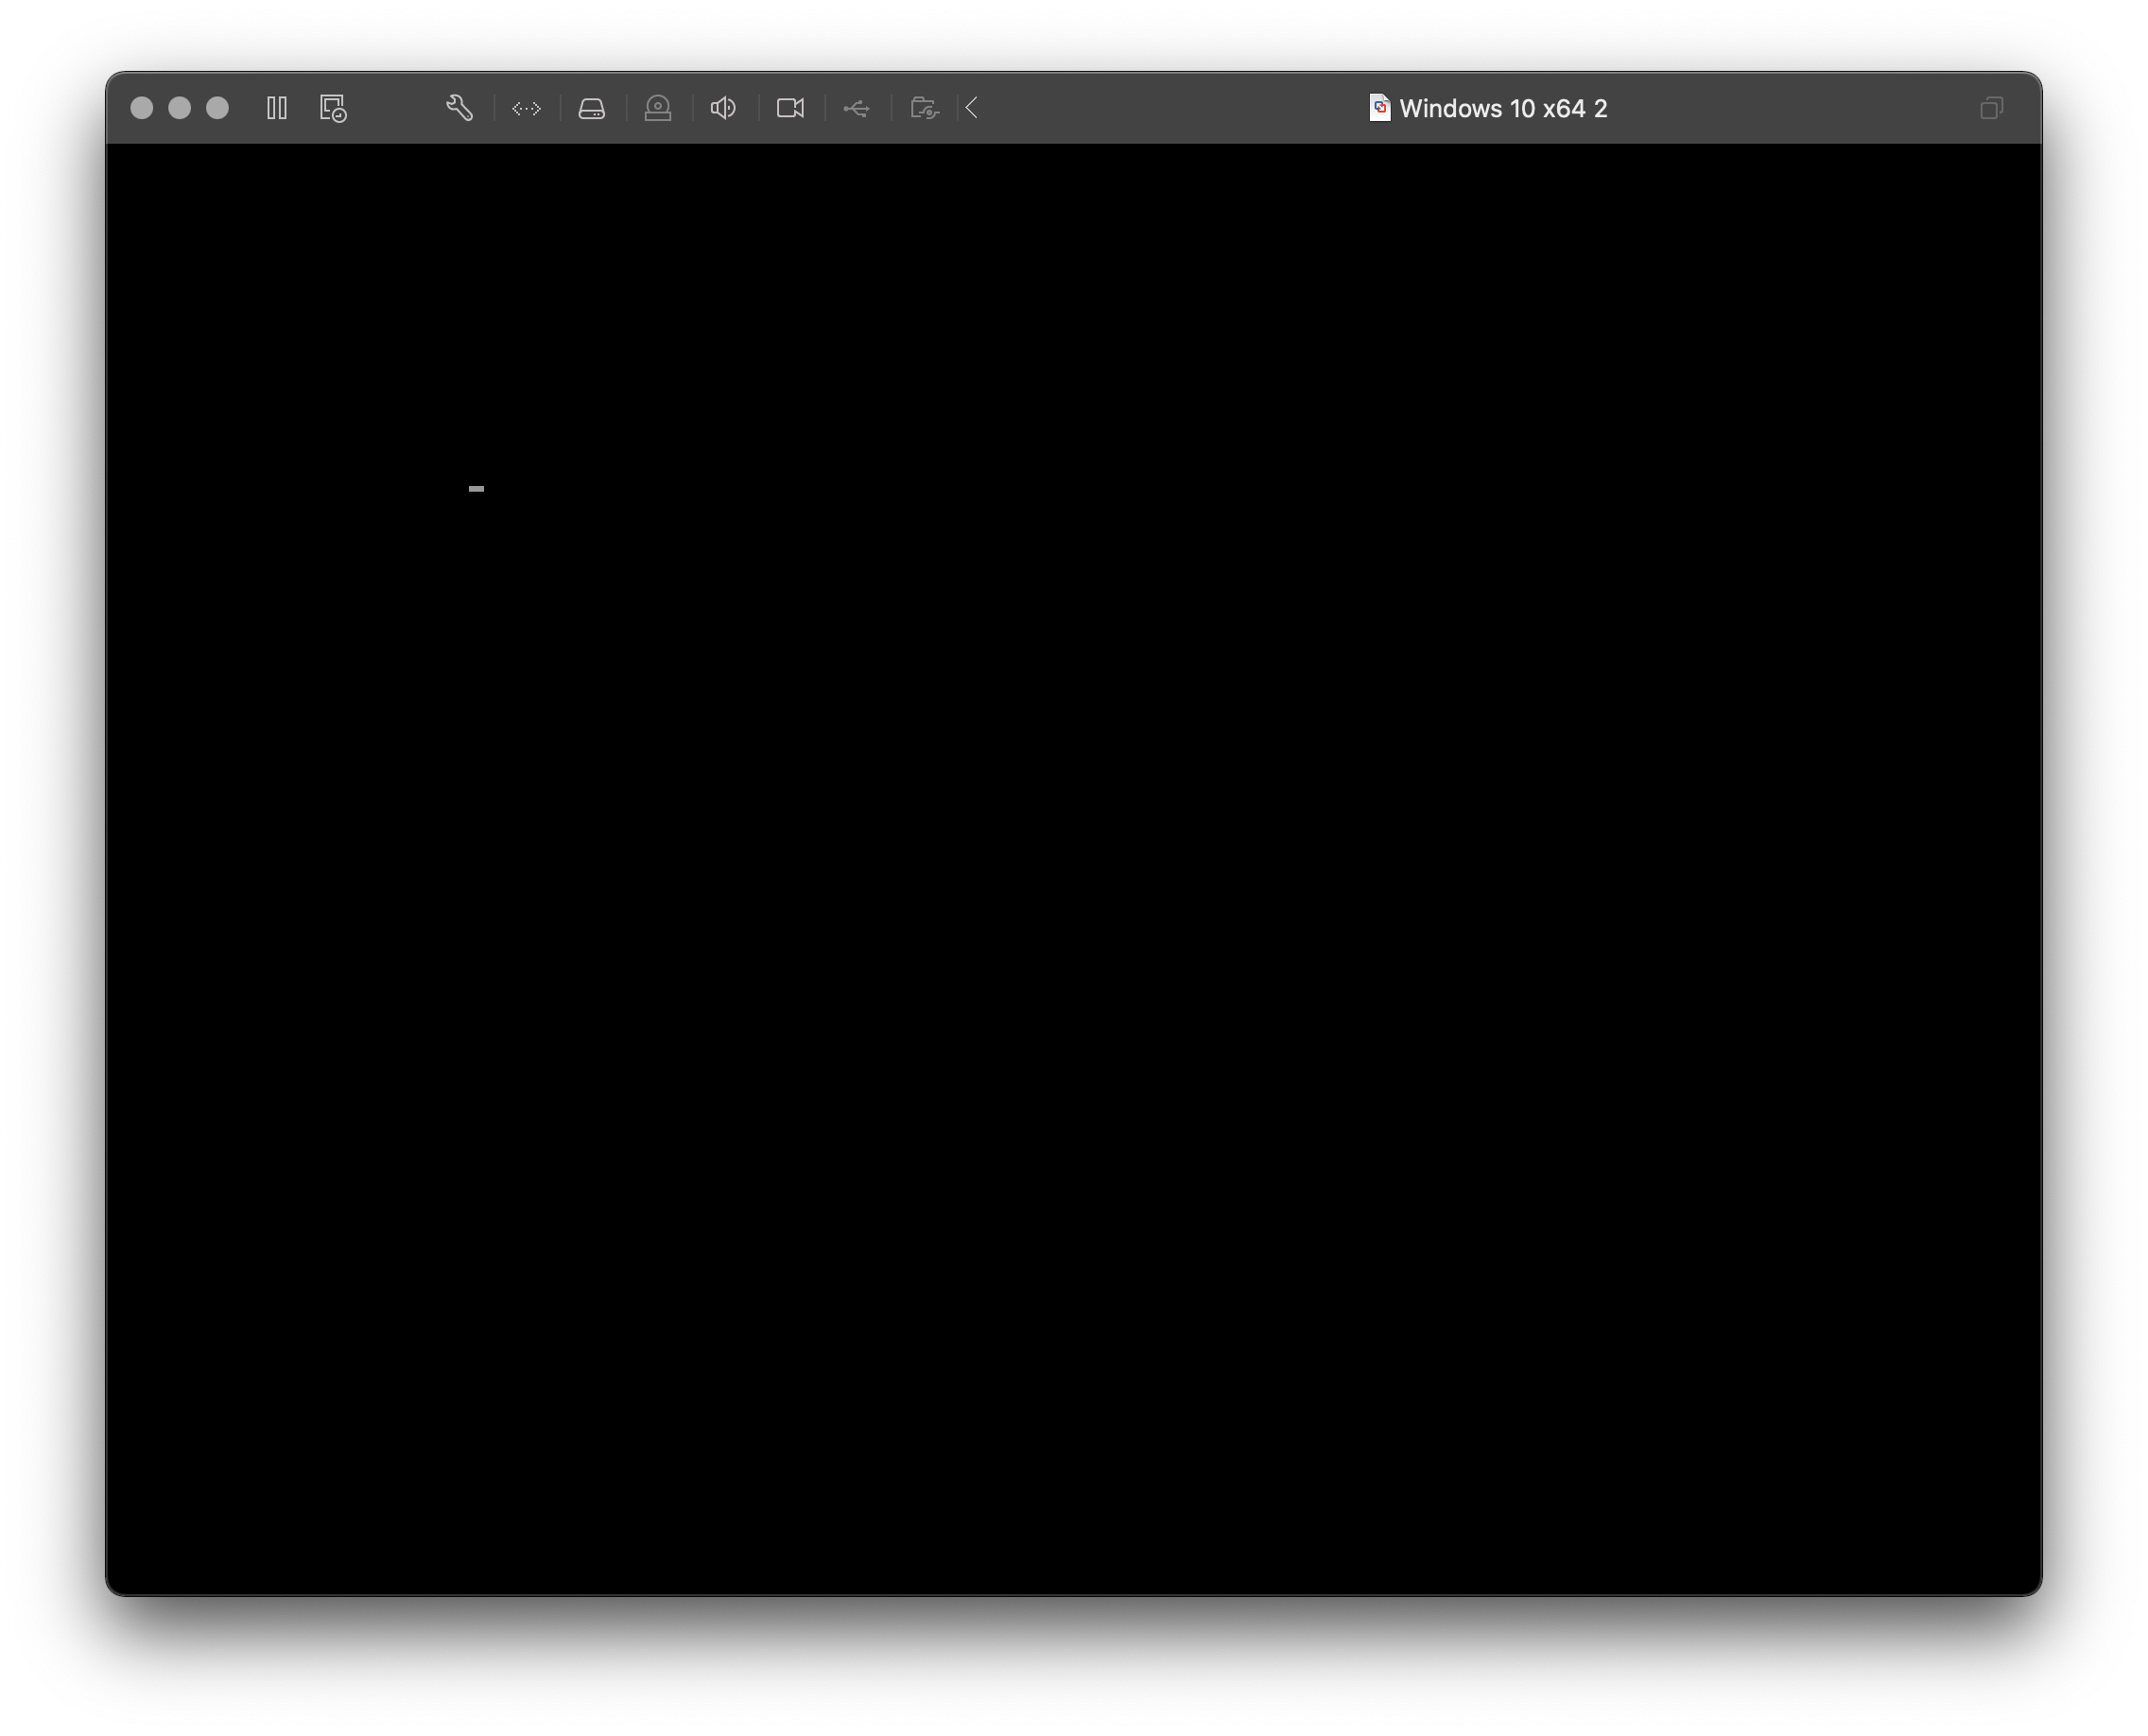
- If using UEFI, please be patient as no boot progress will be shown, only a black screen.
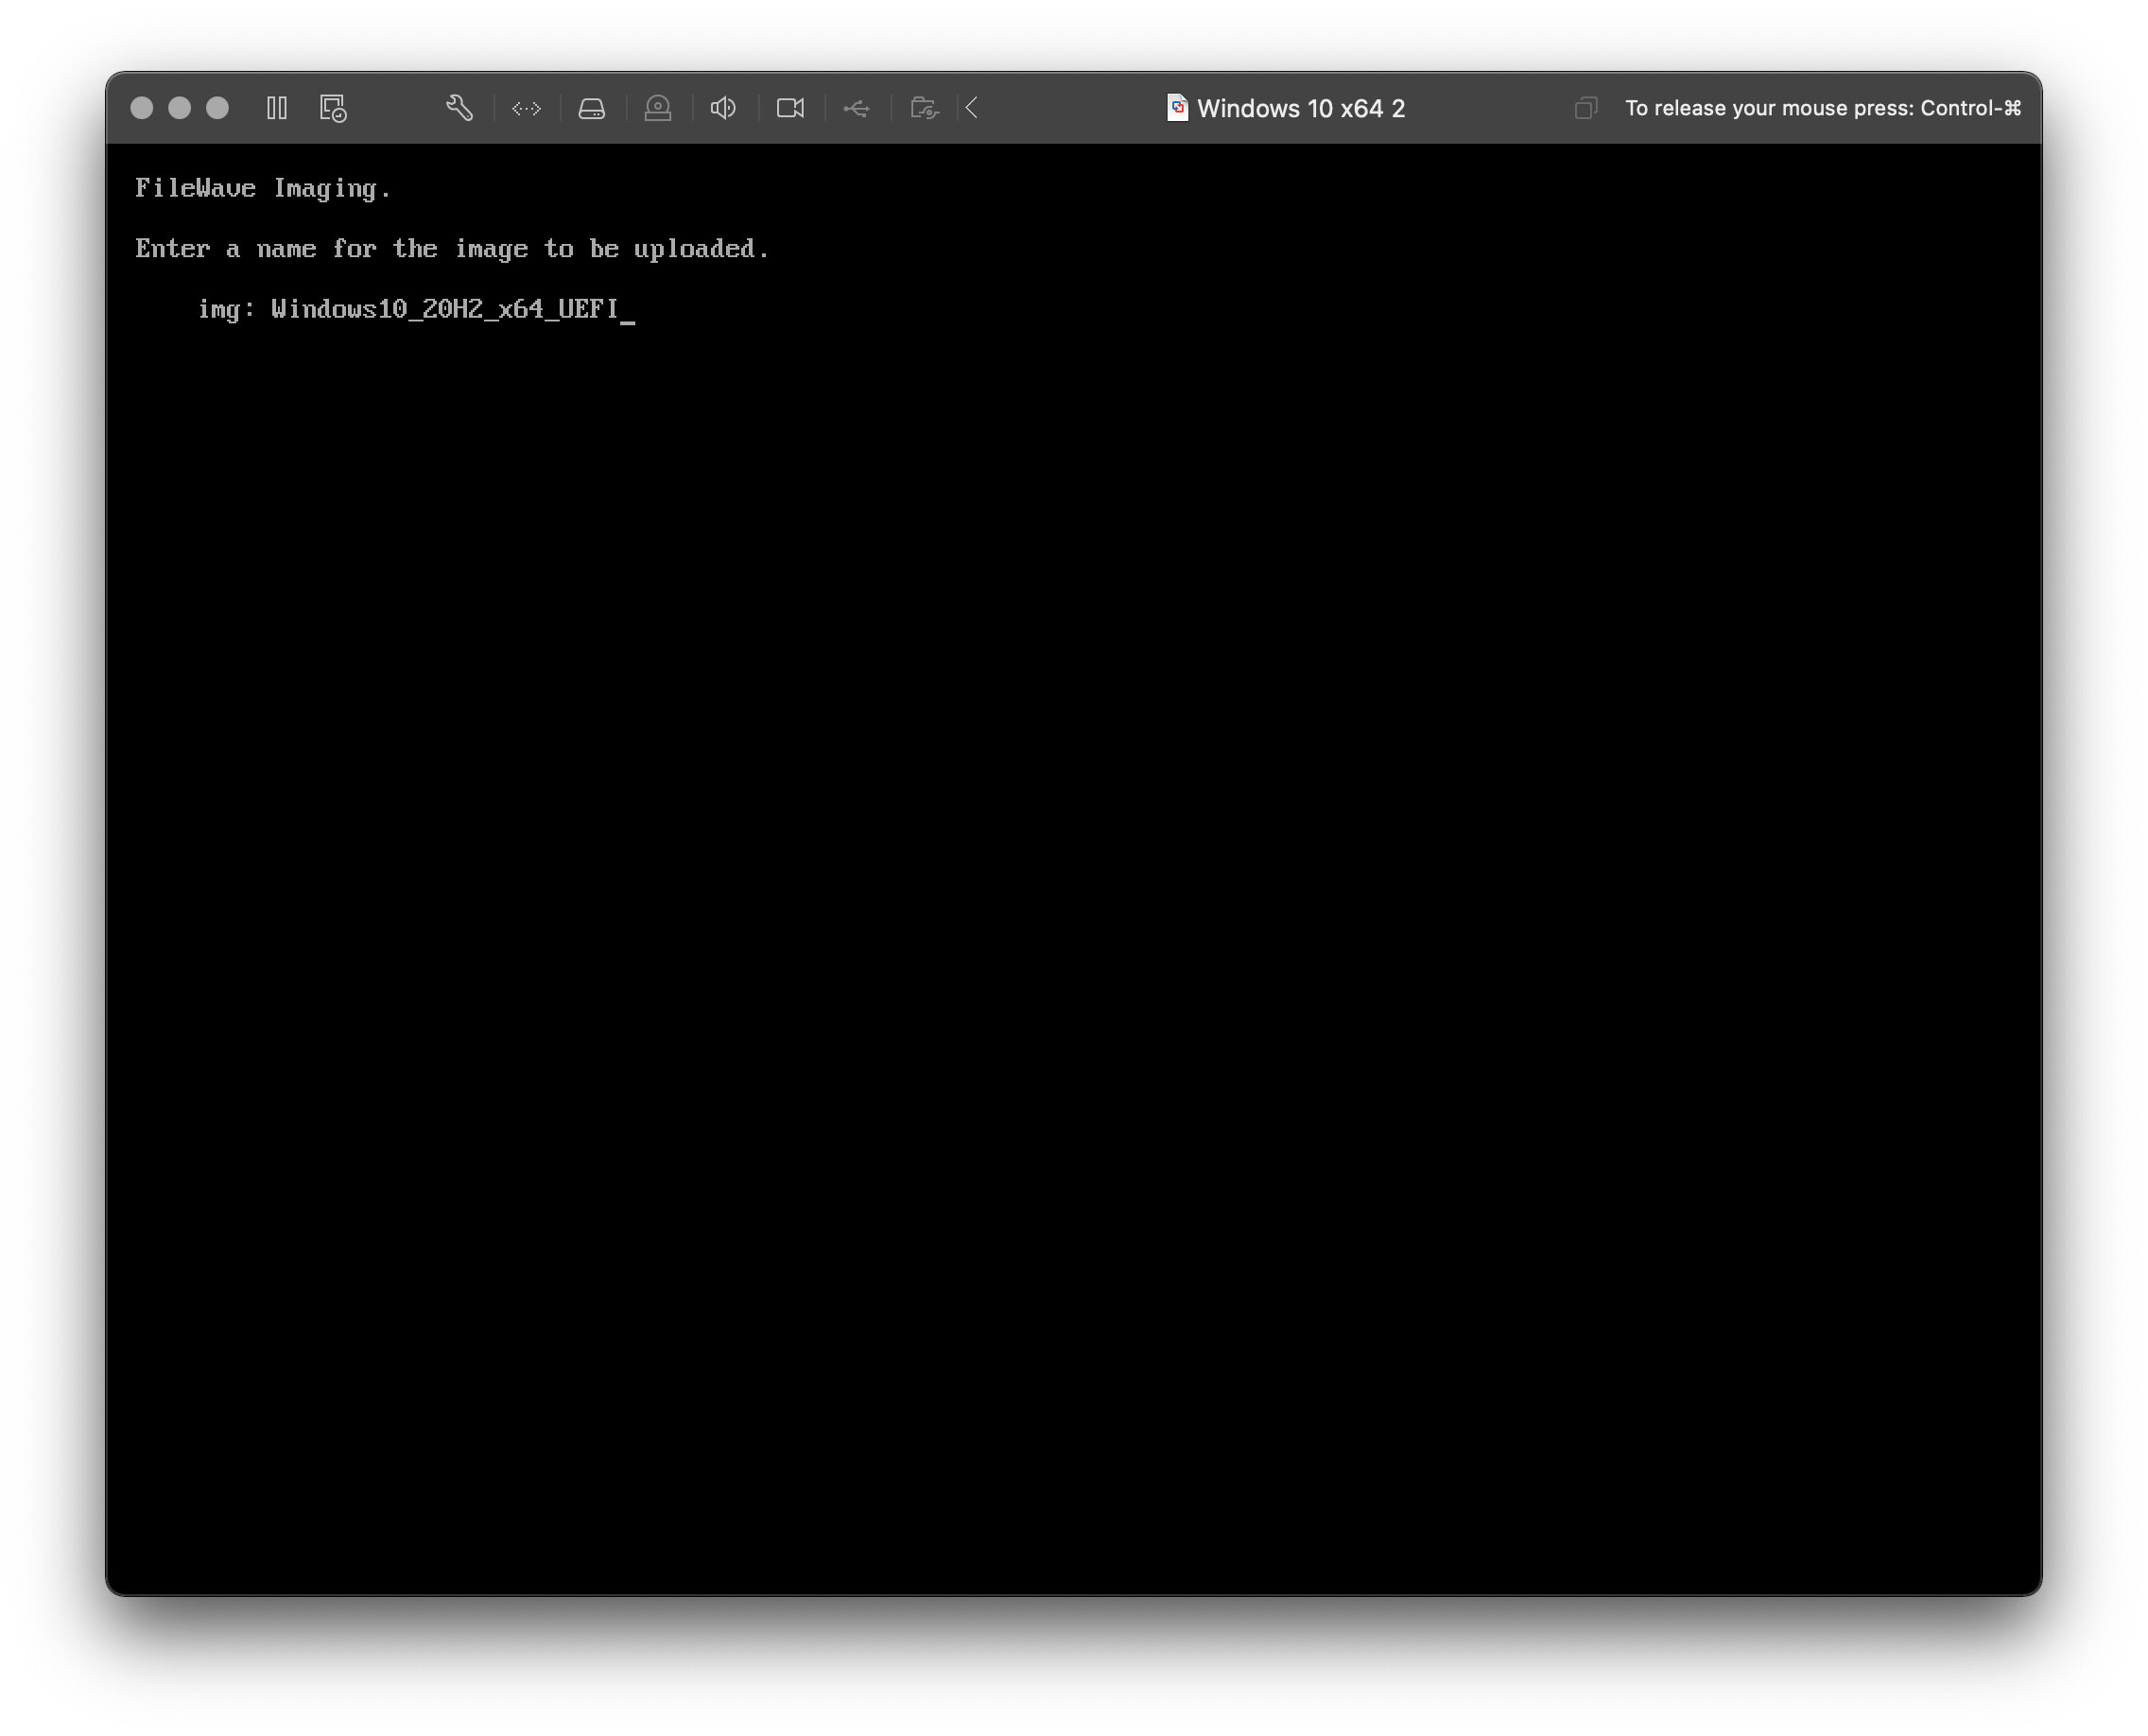
- After successful PXE, name your Windows image.
- It is recommended to include the Windows build version, architecture, and BIOS type in the image name.
- Ex: Windows10_20H2_x64_UEFI
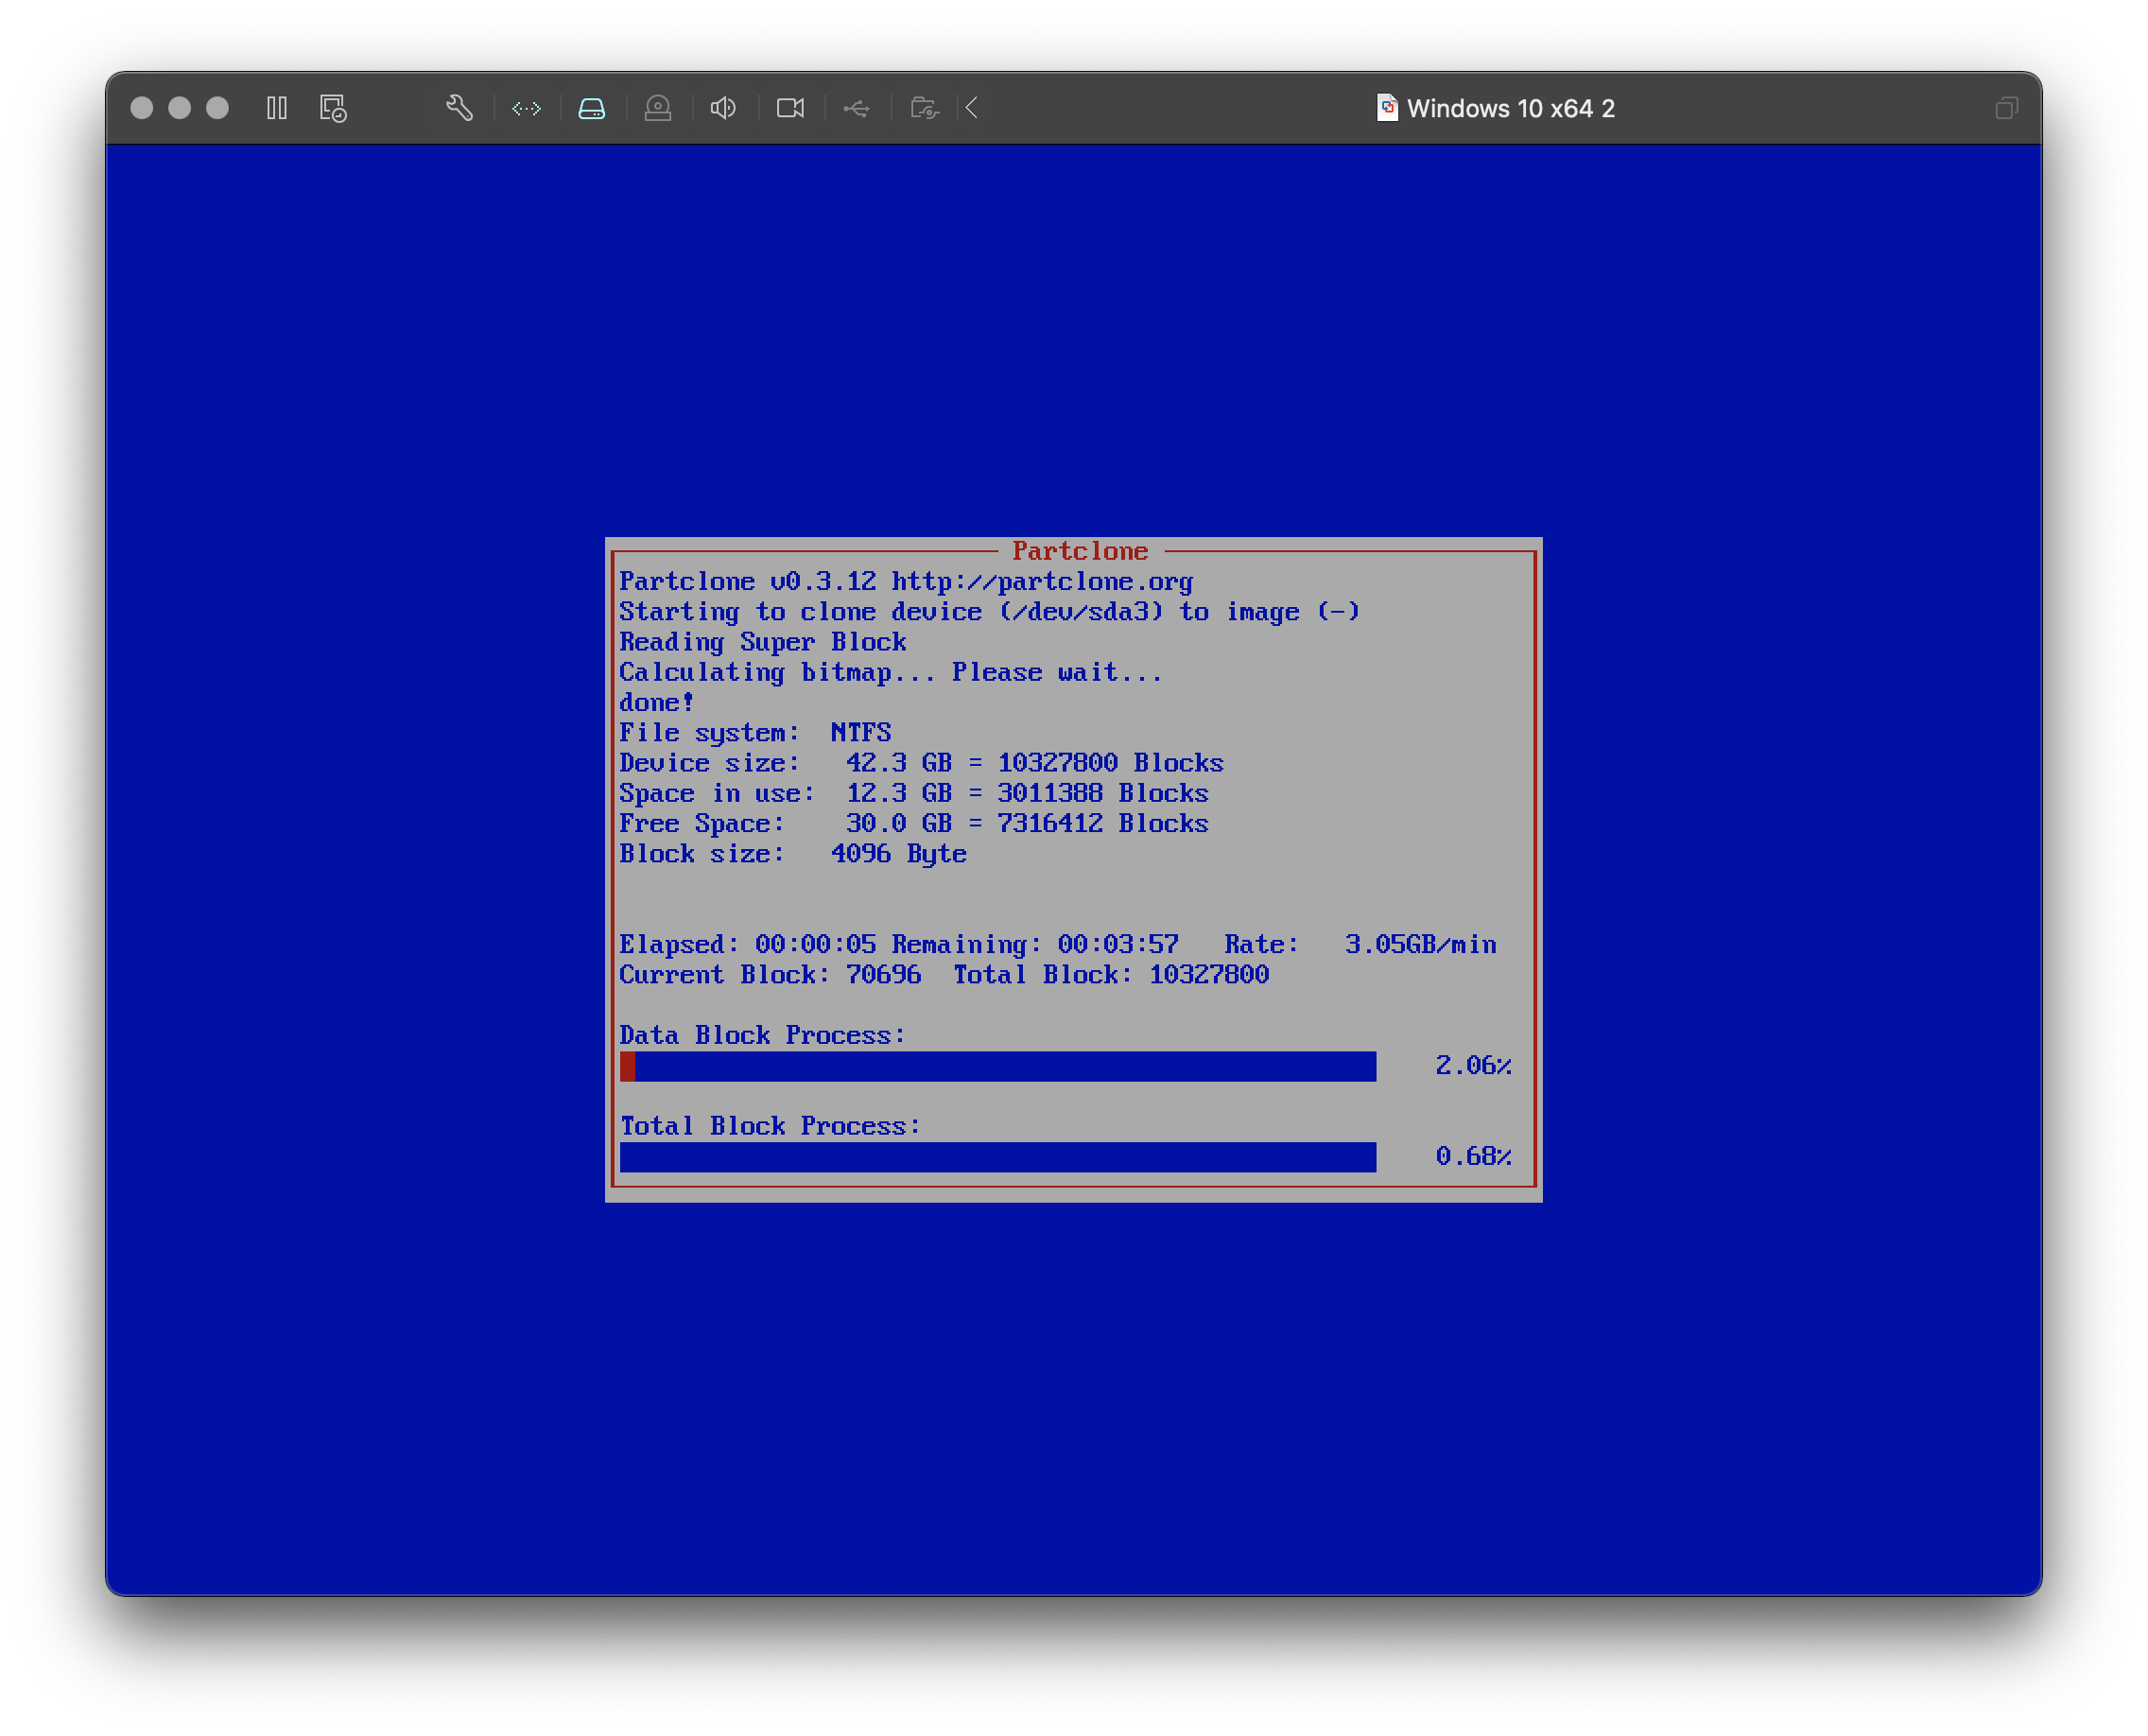
- You should now see a blue screen showing progress as it captures each partition and uploads it to the FileWave IVS.
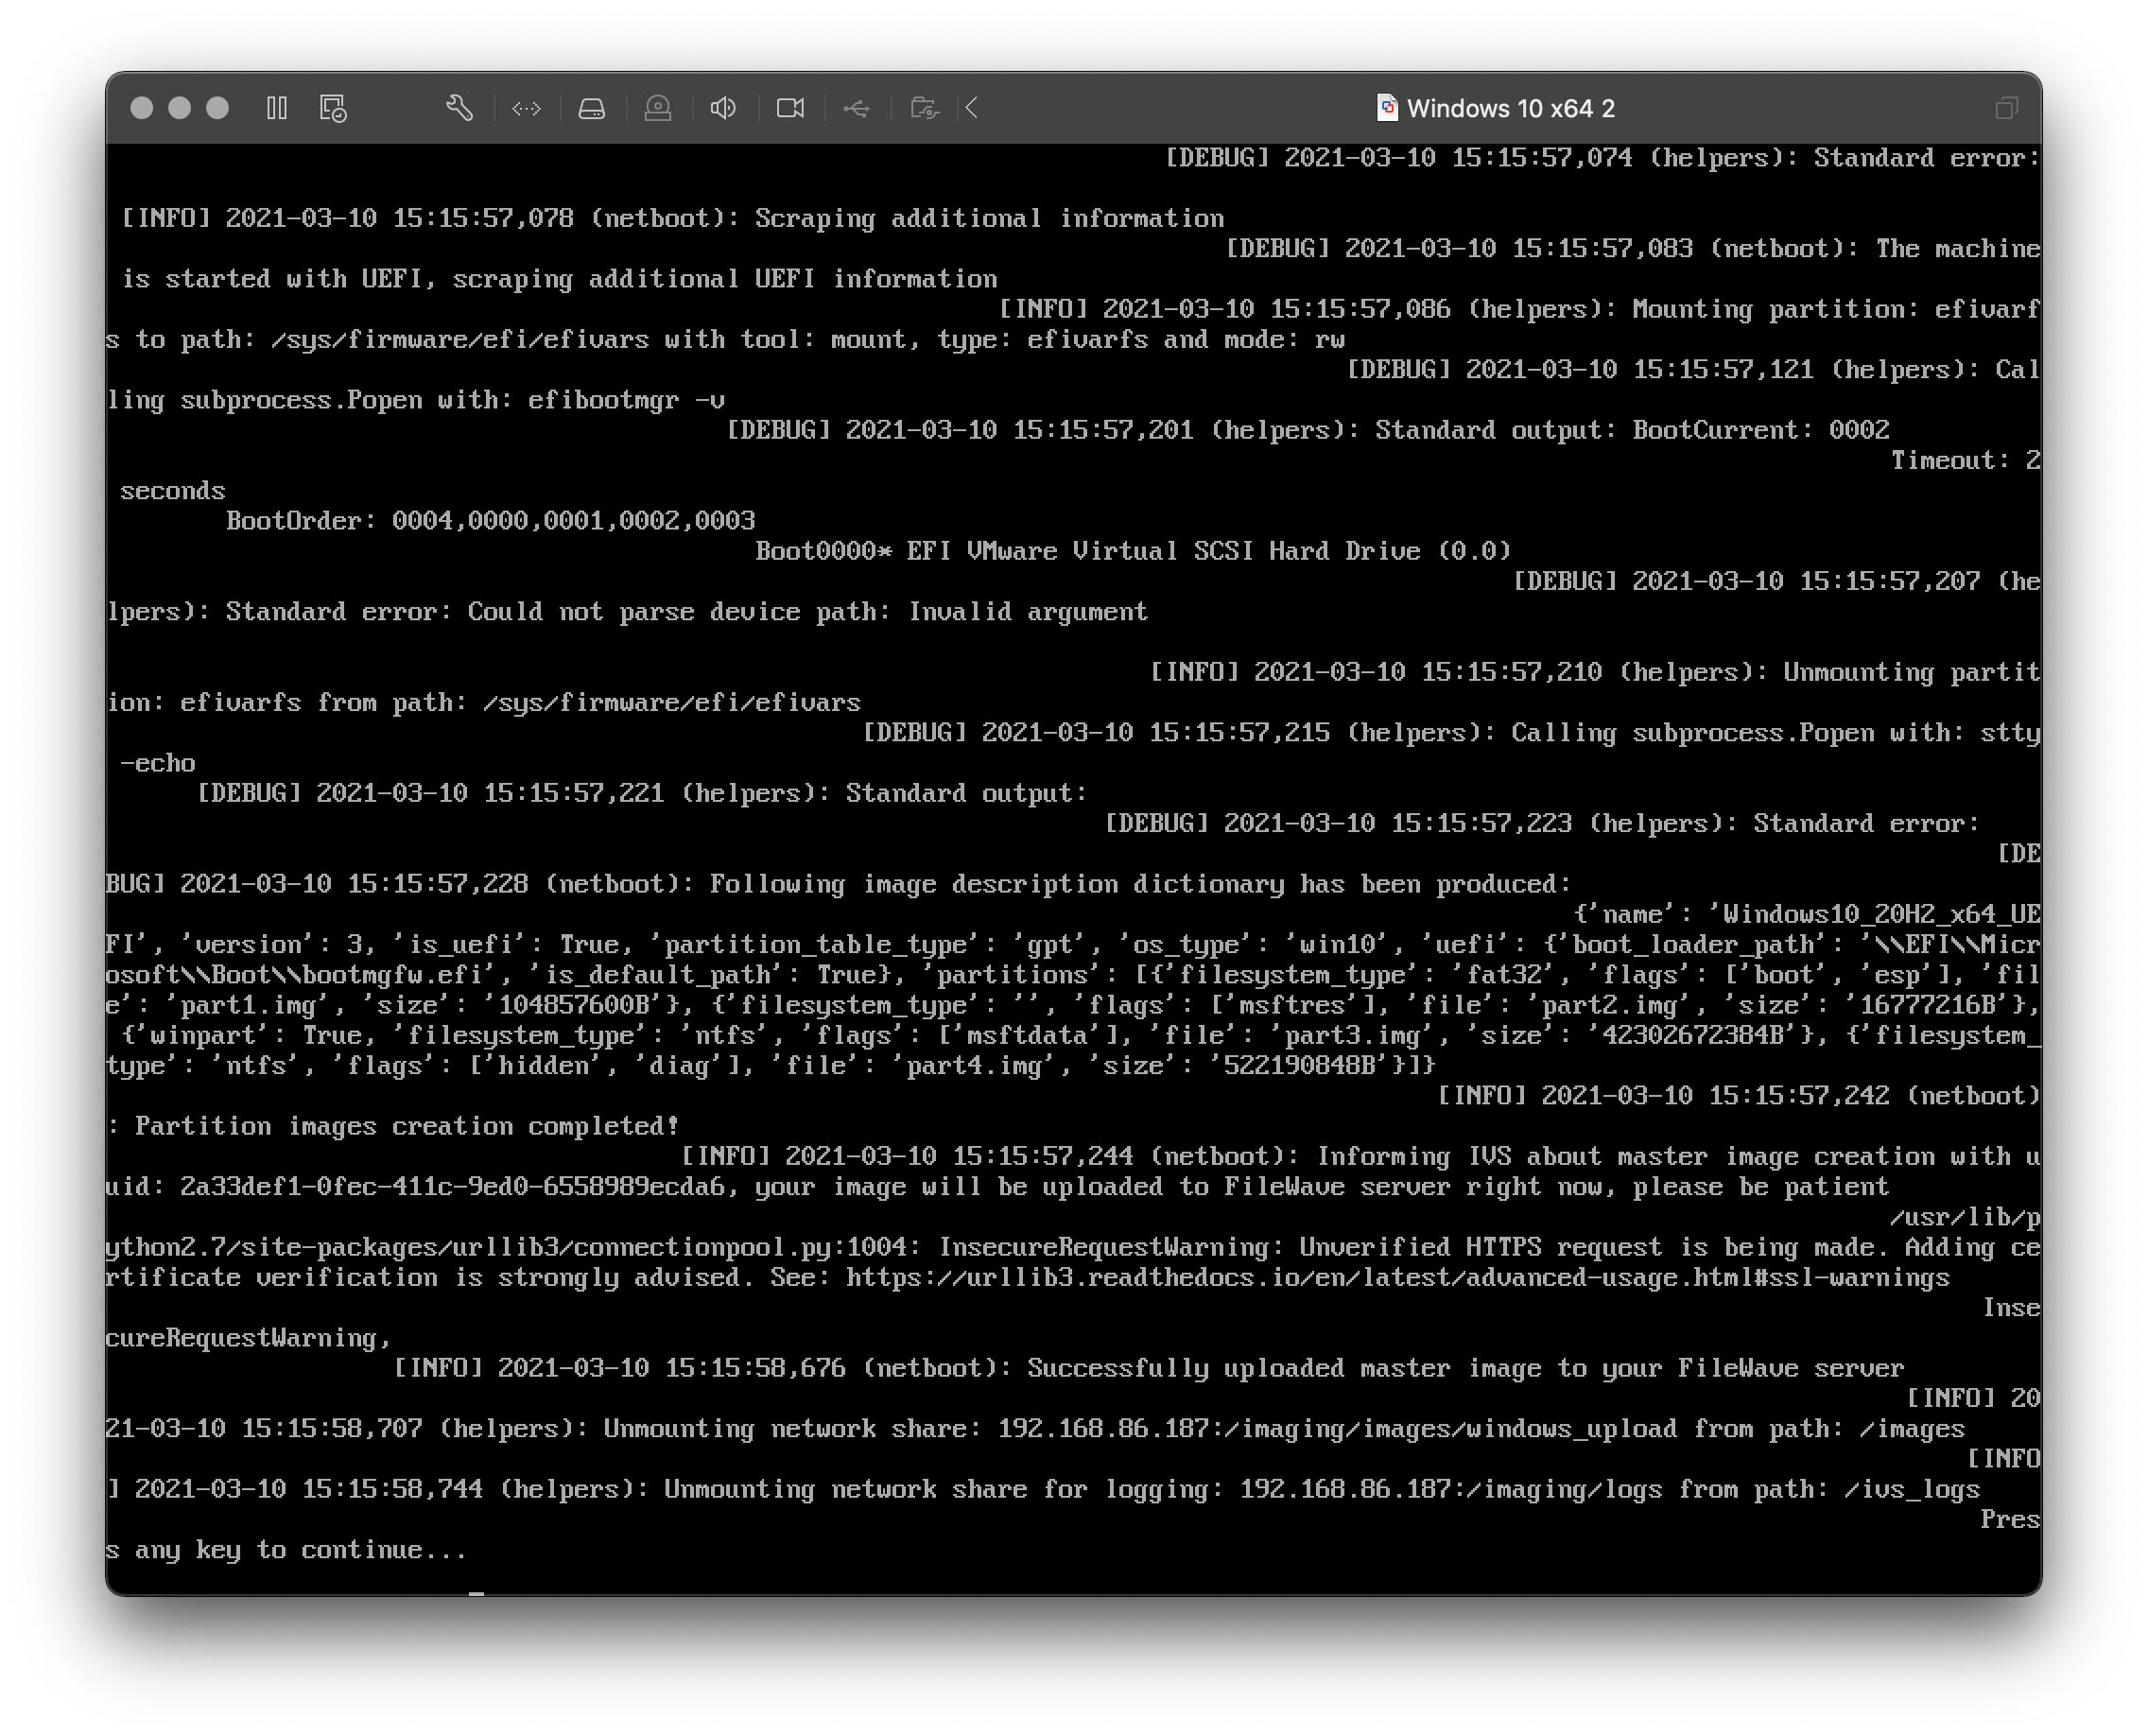
- After the capture, you will see a black screen with white text.
- Please be patient as the Master Image is being uploaded to the FileWave Server for permanent storage.
- "Press any key to continue" and shutdown the build machine.
- You should see your newly captured image in the FileWave Admin.
- If you do not see the image, please contact your FileWave SE and do not attempt to recapture image or boot the build machine.
|
1
|
2
|
|
3
|
4
|
|
5
|
6
|
|
7
|
|

Troubleshooting
If you receive the error “Filenames are invalid for imaging” when associating a placeholder with your Master Image, the issue is typically related to the placeholder’s name.
To resolve this:
-
Rename the placeholder to remove special characters, symbols, and spaces.
-
Ensure the placeholder’s client name is 15 characters or fewer, as Windows imaging enforces this limit.
After renaming, try the association again.
Post Imaging Content
If you run into an issue regarding BitLocker activation, please refer to:
No comments to display
No comments to display