
Importing a FileWave Appliance into Scale Computing (OVA → QCOW2)
Overview
This article explains how to deploy a FileWave Server appliance (OVA) on a Scale Computing HyperCore cluster.
Scale does not natively support VMware/VirtualBox OVA imports. To run the FileWave appliance, you must:
-
Extract the OVA
-
Convert the virtual disk
-
Create a VM manually
-
Attach the converted disk
This guide provides step-by-step instructions for macOS and Windows.
Prerequisites
- Scale HyperCore cluster access
- At least twice the OVA size in free working space for extraction and conversion
- A planned static IP address and fully qualified domain name (FQDN) for the FileWave Server
- macOS conversion host: Terminal, Homebrew, and QEMU
- Windows conversion host: QEMU CLI or StarWind V2V Converter
Step 1: Download the Appliance
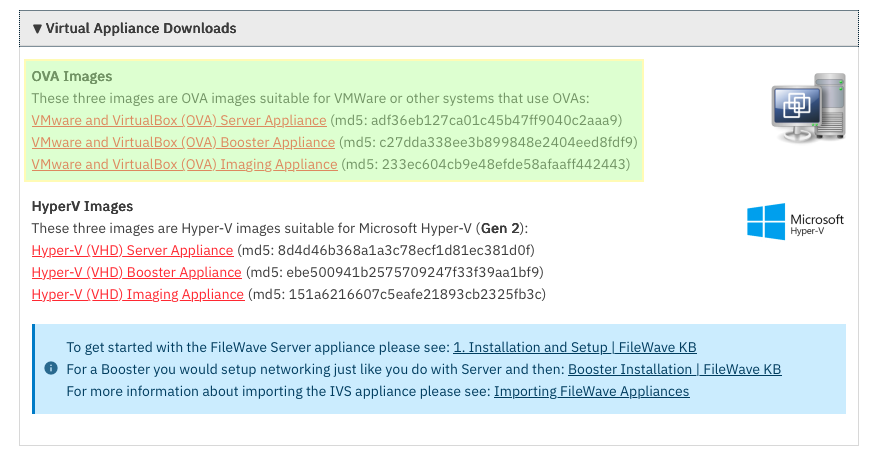
Step 2: Extract the OVA
The OVA is a tar archive.
macOS / Linux
#Make a directory for the .ova files to be extracted to
mkdir ~/Downloads/fw-ova/
cd ~/Downloads/fw-ova/
#Extract the files
#If the file wasn't saved to your Downloads, change the directory
tar -xvf ../FileWave_Server_Debian_*.ova
Windows
-
Right-click → Extract (7-Zip or WinRAR)
Expected output:
FileWave_Server_Debian.ovf
FileWave_Server_Debian.mf
FileWave_Server_Debian-disk-0.vmdk
FileWave_Server_Debian-disk-1.nvram
👉 Only the .vmdk file is required.
Step 3: Convert VMDK → QCOW2
Scale works best with QCOW2 disks.
macOS
Install QEMU:
brew install qemuConvert:
cd ~/Downloads/fw-ova/
qemu-img convert -p -f vmdk -O qcow2 FileWave_Server_Debian-disk-0.vmdk FileWave_Server.qcow2
Windows (QEMU CLI)
qemu-img.exe convert -p -f vmdk -O qcow2 FileWave_Server_Debian-disk-0.vmdk FileWave_Server.qcow2Windows (GUI Option)
Using StarWind V2V Converter:
-
Open StarWind V2V
-
Select VMDK
-
Output format: QCOW2
-
Complete wizard
Step 4: Create a VM in Scale
Create a new VM manually.
Required Settings
| Setting | Value |
|---|---|
| Firmware | BIOS (Legacy) |
| CPU | 8 vCPU minimum |
| RAM | 16 GB minimum |
| NIC | Intel E1000 |
⚠️ Critical:
-
Do NOT use UEFI
-
Do NOT attach disk yet (or remove placeholder disk)
Step 5: Upload & Attach Disk

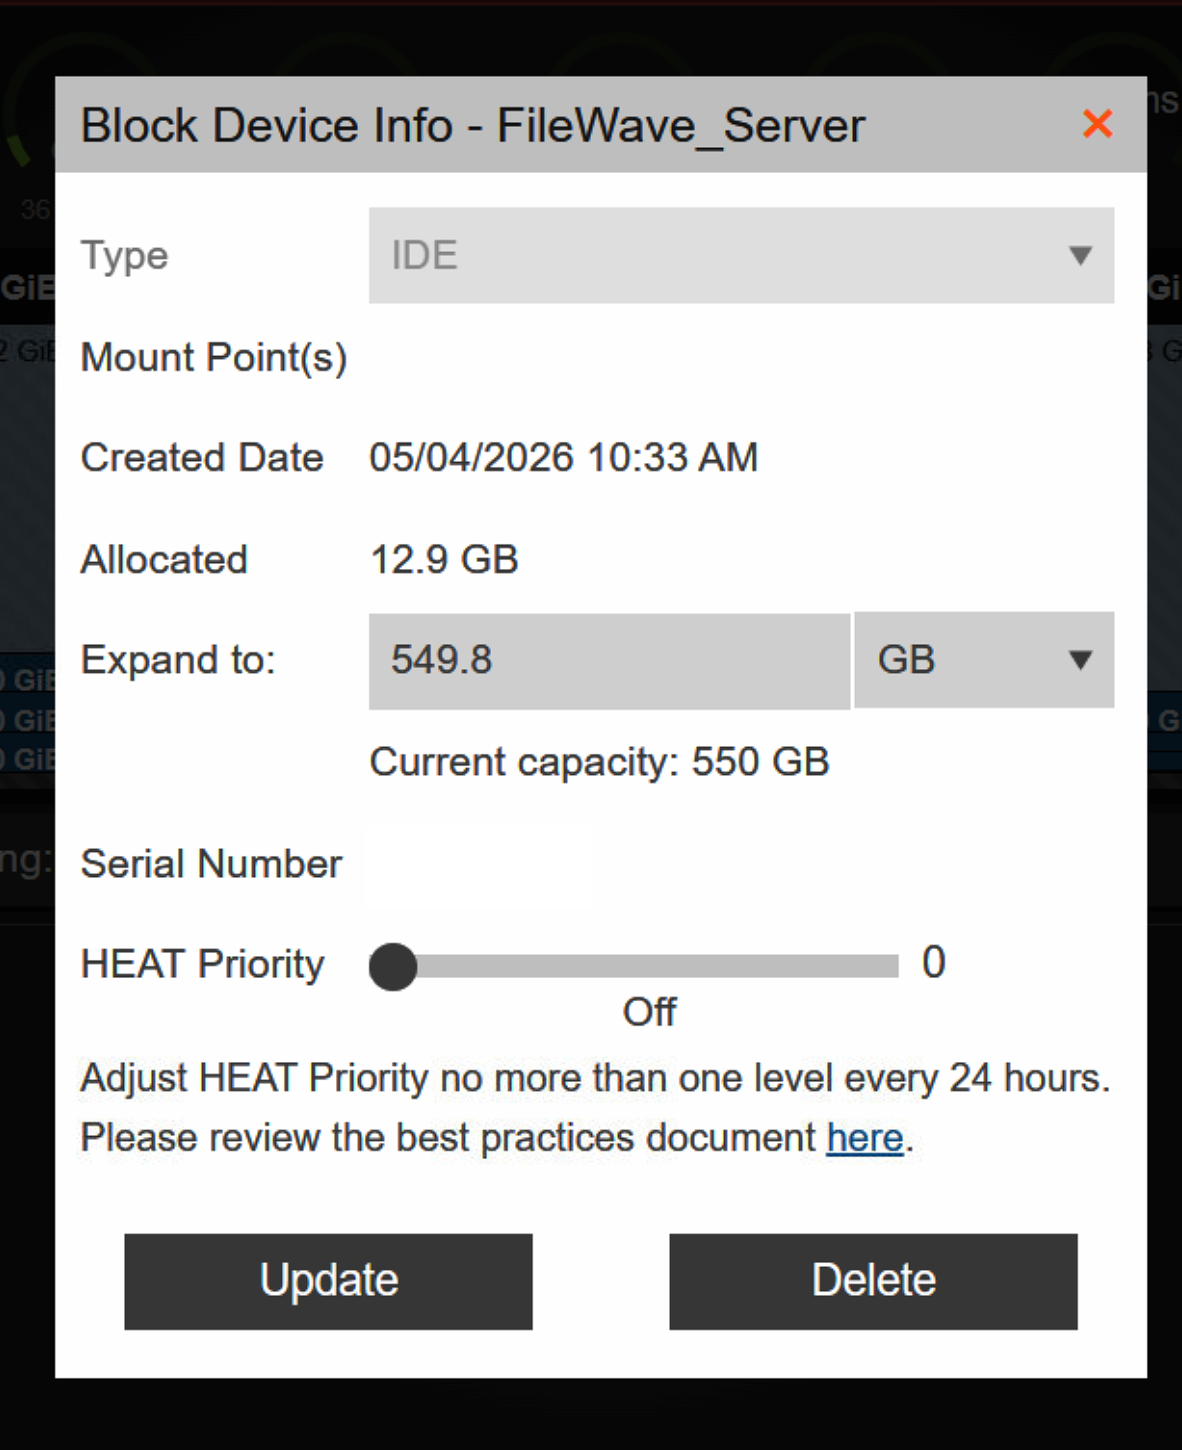
Disk Configuration
Disk Type: IDE
Disk Slot: 0
Bootable: Yes
Boot Order
IDE Disk (slot 0) → First
Step 6: Boot the Appliance
Start the VM.
Expected result:
-
Debian boots
-
FileWave login prompt appears
Default Credentials
Username: fwadmin
Password: filewave
At the first login, immediately replace the default password when prompted and store the new password securely. See Setting the Password on First Login to FileWave Appliances (15.5+).
Troubleshooting
❌ No Bootable Device
-
VM must be BIOS
-
Disk must be IDE
-
Boot order must point to the disk
❌ Kernel Panic / Root FS Missing
-
Disk conversion issue
-
Retry conversion
-
Ensure the correct VMDK is used
Why This Works (Important)
The FileWave appliance is built for VMware:
Disk Controller: LSI Logic SCSI
NIC: VMXNET3
Firmware: BIOS
Scale uses different virtual hardware:
Disk: IDE / VirtIO
NIC: E1000 / VirtIO
Because Scale does not support VMware’s SCSI or VMXNET3 directly:
-
The disk must be converted
-
The VM must be recreated with compatible hardware
-
IDE is used for maximum boot compatibility
Optimization (Optional)
After successful boot:
-
Test switching disk to VirtIO
-
Test switching NIC to VirtIO
⚠️ Only do this after confirming a stable boot
Summary
-
Download OVA
-
Extract files
-
Convert VMDK → QCOW2
-
Create BIOS VM
-
Attach the disk as IDE
-
Boot
Support
If you encounter issues, please contact FileWave Support or your Professional Services representative.
No comments to display
No comments to display