Setting the Primary Color, Name and Logo in Kiosk/App Portal (15.3+)
What
This article provides step-by-step instructions for configuring the new Kiosk2 and App Portal introduced in FileWave 15.3.0, including how to set a primary color, name, and logo for the App Portal / Kiosk on FileWave v15.3.0+.
When/Why
For brand consistency, options exist (depending on device type) for configuring:
- Colour
- Name
- Logo that appears in macOS/Windows menu bar/system tray
- Logo that appears in macOS/Windows Kiosk application
When referring to a custom logo, the expected image should be: 112 x 96, 8-bit/color RGBA, non-interlaced
Some changes are server side. If hosted, please contact Technical Support for assistance.
How
iOS & iPadOS
Devices of this nature use the App Portal. As of FileWave 15.3, the App Portal IPA is automatically delivered to devices and will automatically update.
Customisation Options:
- Logo (Default to FileWave Logo if no custom logo set)
- Colour
Logo Customisation
If you are a Hosted Customer then you will need Technical Support to assist with these changes for now.
Direct editing of the IPA is not feasible. As such, the logo needs to be hosted from the FileWave Server. The chosen image needs to be placed in the following location:
/usr/local/filewave/django/static/kiosk2/images/
For the IPA to utilise this image, edit the the following file:
/usr/local/filewave/django/filewave/settings_custom.py
The line may be added to the bottom of the custom settings file and needs to include the FQDN of the FileWave Server, along with the named image in the format:
KIOSK_LOGO_URL = 'https://[fully_qualified_domain_name]/filewave/static/kiosk2/images/[file name]'
For example, imagine those details are:
- image.svg
- demo.filewave.ch
The line added will then appear as:
KIOSK_LOGO_URL = 'https://demo.filewave.ch/filewave/static/kiosk2/images/image.svg'
Supported file formats are:
- SVG
- JPEG
- PNG
- GIF
- Animated GIF
- WebP
- Animated WebP
- BMP
- WBMP
Customise Colour
Colour may be customised by editing the same custom settings file. The colour should be presented in hex of either 6 or 8 characters. The line to add (again this may be added to the bottom of the custom settings file), should be of the format:
KIOSK_PRIMARY_COLOR = '[hex colour]'
For example:
KIOSK_PRIMARY_COLOR = '#e580ff'or
KIOSK_PRIMARY_COLOR = '#FF0000CC'The FileWave Server Service should be restarted after modification of the custom settings python file.
macOS
macOS access the Kiosk by way of the Menu Bar
Customisation Options:
- Logo (Default to FileWave Logo if no custom logo set) - Note that this logo is the one seen in the app. To customize the one in the menu bar you must look at Local macOS Logo below.
- Colour
- Kiosk App Name
All 3 items can be specified through a single file:
macOS:
/usr/local/sbin/FileWave.app/Contents/MacOS/FileWave\ Kiosk.app/Contents/custom/settings.json
The contents should appear similar to:
{
   "logo_url": "https://my.company/logo.svg",
   "primary_color": "#0465DA",
   "kiosk_app_name": "My Kiosk"
}
Defined as:
| Key Name | Key Value | Default |
| logo_url | URL path to hosted custom image | FileWave Logo |
| primary_color | Colour in hex format, e.g. #RRGGBB | #0465DA |
| kiosk_app_name | Text Name of opened Kiosk Window | FileWave Kiosk |
It may be necessary to reboot the computer before changes take effect; particularly if customisation of the older Kiosk was removed at the same time that the new Kiosk and customisation is added.
If the custom icon is added as per the instructions for i(Pad)OS devices, the same URL may be used in the above settings.
Local macOS Logo
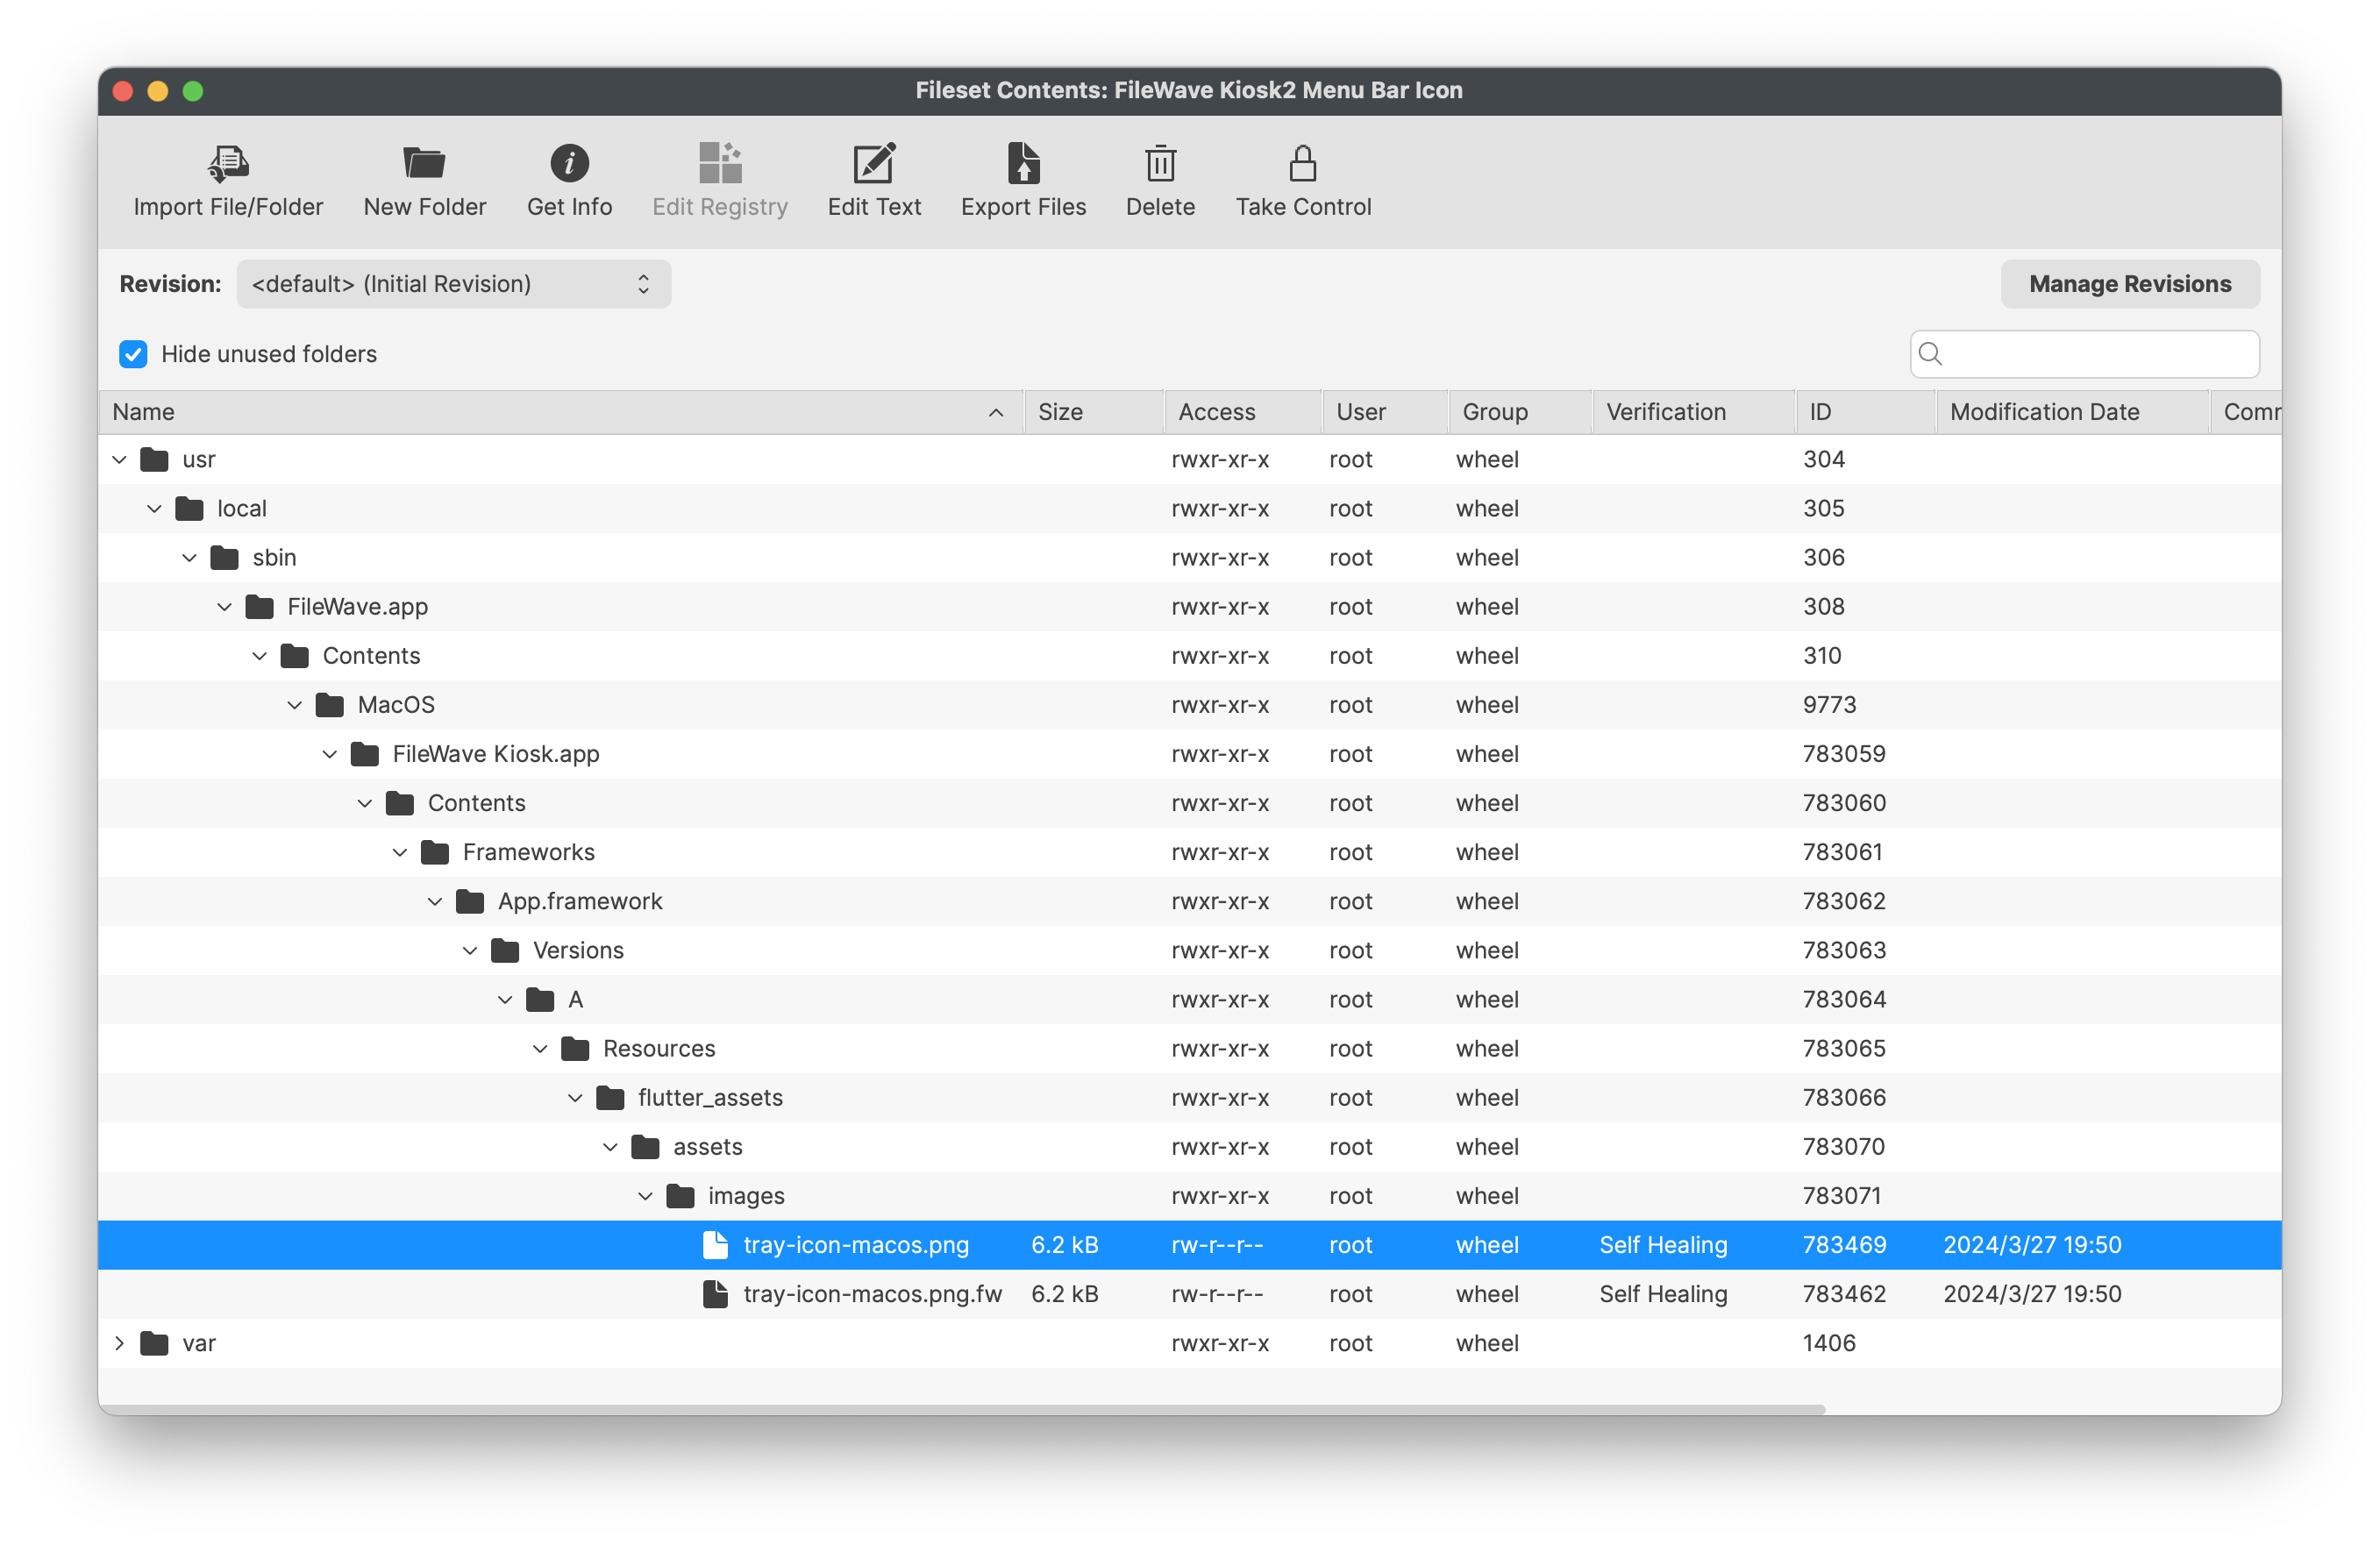
The above method requires a logo to be hosted. However, it may be desirable to provide a local logo instead. The following methods provide a pre-configured Fileset to achieve this. The logo in this case is the icon in the menu bar only.
FileWave Kiosk2 Menu Bar Icon.fileset.zip
The Fileset needs to be edited prior to deployment. Out of the two files shown, the chosen custom image should be named to match the first png: 'tray-icon-macos.png'. Leave the other file in place.
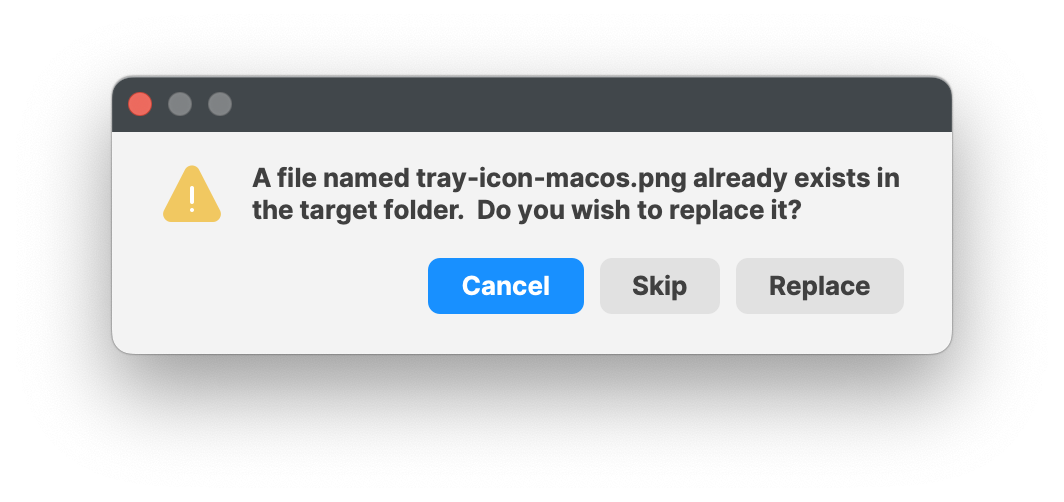
Dragging the custom icon over the shown file should prompt a message as below. Select Replace.
Associate with a test device, and once happy with the look, you can broaden the association.
The Fileset is designed to:
- Restart the Kiosk after activation, automatically ensuring the user is immediately presented with the new logo
- On de-activation, the '
tray-icon-macos.png.fw' file will be copied to replace the custom logo (resetting the default) and again restarting the Kiosk for immediate change.
The new image will not show unit the FileWave Client is restarted.
Windows
Windows access the Kiosk by way of a System Tray item
Customisation Options:
- Logo (Default to FileWave Logo if no custom logo set)
- Colour
- Kiosk App Name
All 3 items can be specified through a single file:
Windows:
C:\Program Files (x86)\FileWave\kiosk\custom\settings.json
The contents should appear similar to:
{
   "logo_url": "https://my.company/logo.svg",
   "primary_color": "#0465DA",
   "kiosk_app_name": "My Kiosk"
}
Defined as:
| Key Name | Key Value | Default |
| logo_url | URL path to hosted custom image | FileWave Logo |
| primary_color | Colour in hex format, e.g. #RRGGBB | #0465DA |
| kiosk_app_name | Text Name of opened Kiosk Window | FileWave Kiosk |
It may be necessary to reboot the computer before changes take effect; particularly if customisation of the older Kiosk was removed at the same time that the new Kiosk and customisation is added.
If the custom icon is added as per the instructions for i(Pad)OS devices, the same URL may be used in the above settings.
Local Windows Logo
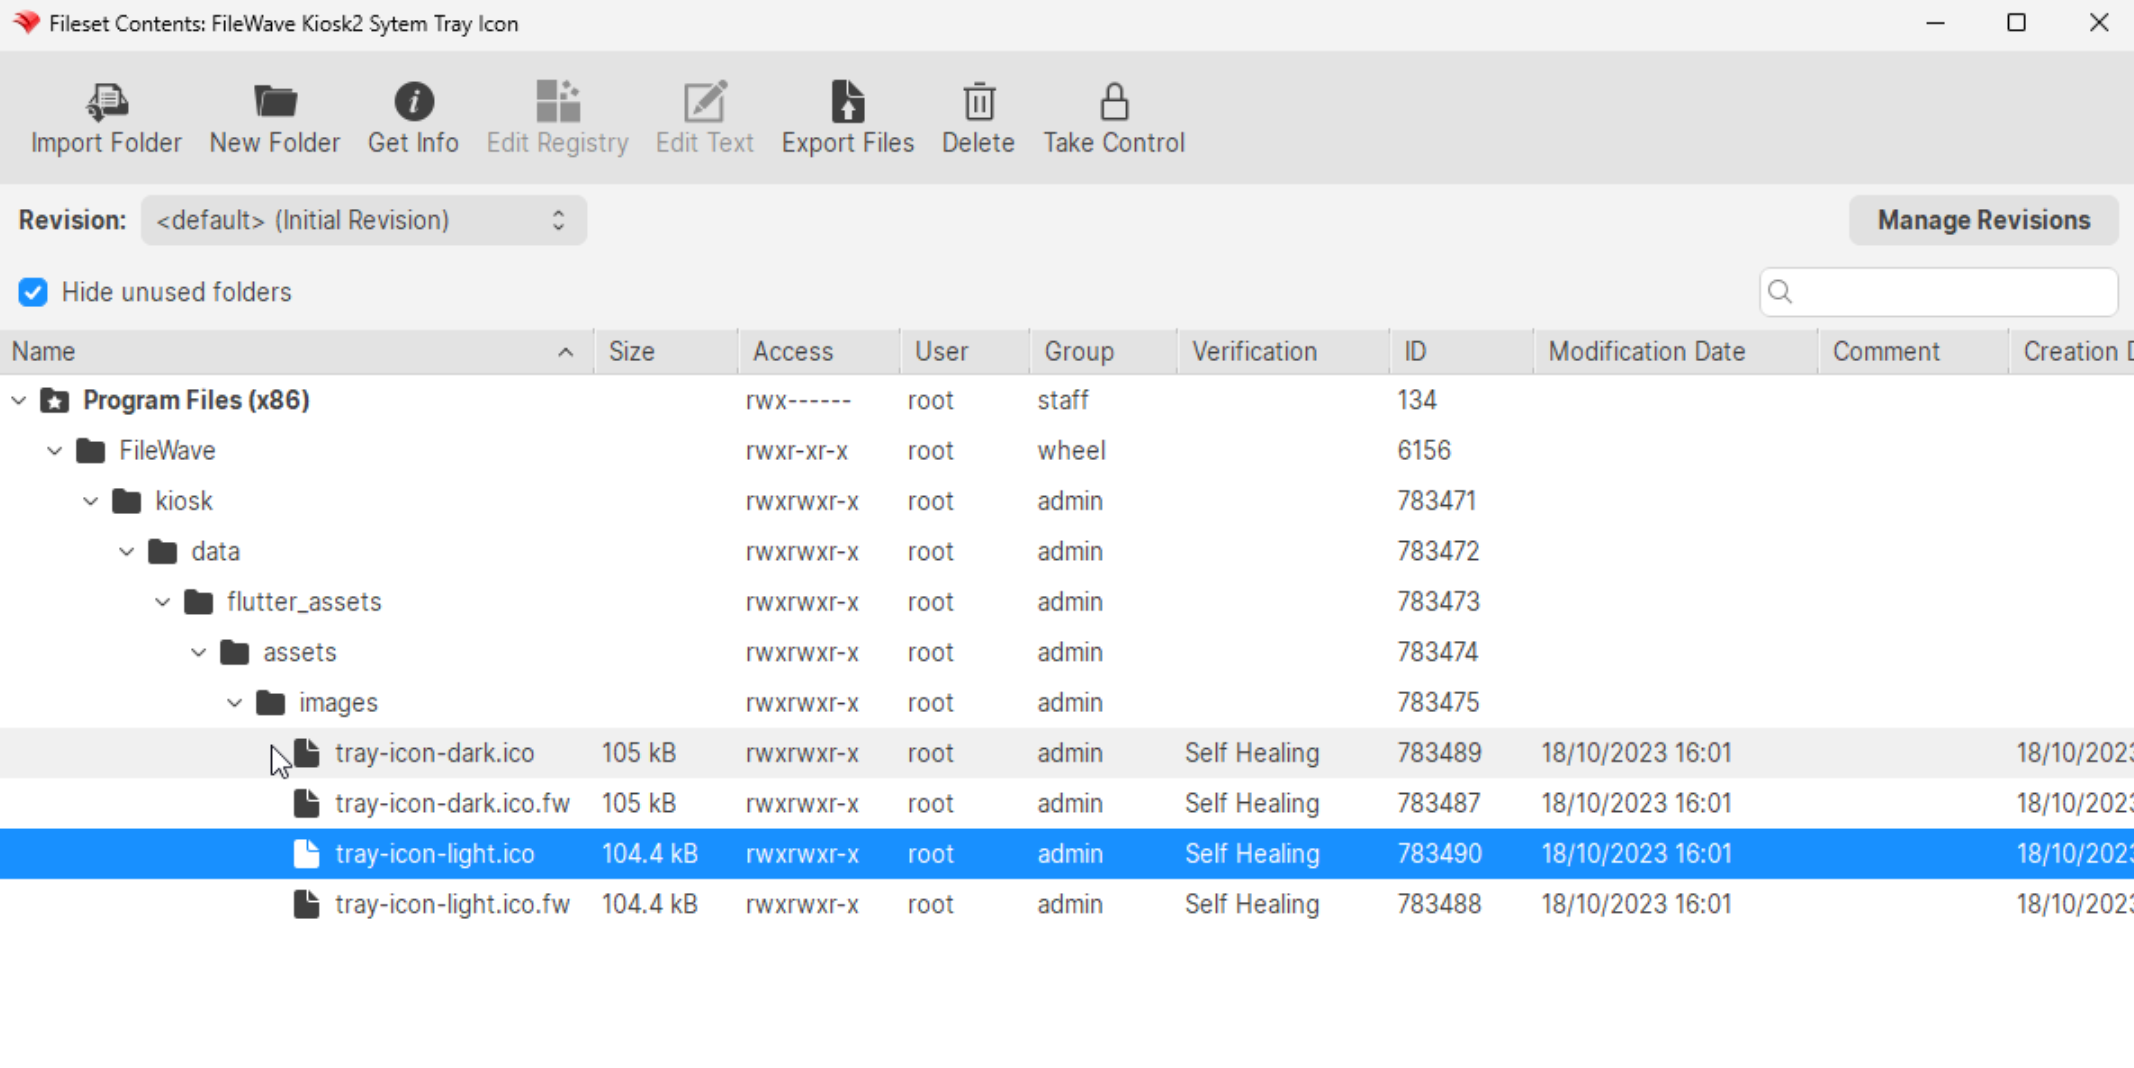
The above method requires a logo to be hosted. However, it may be desirable to provide a local logo instead. The following methods provide a pre-configured Fileset to achieve this. The logo in this case is the icon in the System Tray only.
FileWave Kiosk2 Sytem Tray Icon.fileset.zip
The Fileset needs to be edited prior to deployment. Out of the four files shown, the chosen custom icon should be named to match the two icon files: 'tray-icon-dark.ico' and 'tray-icon-light.ico'. Leave the other two files in place.
Unlike the other images, the Windows System Tray is using '.ico' files. These need to be of equal size, e.g. 256x256, 128x128, etc.
Consider exporting the current 'ico' files, editing them with the chosen logo and then upload, if unsure how to create '.ico' files.
Dragging the custom icon over the shown files should prompt a message as below. Select Replace.
Associate with a test device and once happy broaden the association.
The new image will not show unit the FileWave Client is restarted.


