
Windows Enrollment
Enroll one Windows Client and check its inventory
Install the custom FileWave Client MSI on one test computer, admit it to the intended Server if approval is required, then confirm that the Client is communicating and reporting inventory. After these checks, continue to your first deployment.
This is the native FileWave Client path in FileWave Central. It does not enroll Windows in MDM. To enroll Windows in MDM using Microsoft Entra ID, start with the separate Windows MDM prerequisites. That workflow can install the native Client through MDM after its package and integration are configured, but it has its own enrollment checks. You do not need Entra ID, LDAP, GPO, Boosters, or IVS imaging for the manual MSI exercise here.
1. Check the package and test scope
Use Windows Client Pre-Requisites to prepare the custom MSI for your intended Server. Server 16.4.0 and later builds it in Central; earlier Servers use the external builder. The complete version-specific steps are on that page.
Before installing, confirm:
A test group does not make a shared Server private. If you cannot establish what the computer would receive, stop and ask the environment owner before installing or approving it.
2. Install the Client on the test computer
- Transfer the prepared MSI to the test computer using an approved method. If the download is a ZIP, extract it first. Check that you have the intended custom MSI, not an unconfigured Client installer or an Upgrade Fileset.
- Open the MSI on that computer and complete the installation with authorized local administrator permission. Follow the installer's prompts and retain any error details. If it fails, resolve that failure before proceeding.
- Keep the computer awake and connected to the network that can reach its FileWave Server. Allow the Client to check in. If the installer requires a restart, save work and arrange the restart before completing verification.
Completing the installer, or seeing the fwcld process running, does not prove the Client reached the correct Server. Check that in Central next.
3. Find and approve the intended Client
First search Clients for the test computer. If your environment already added it automatically, do not add it again. Confirm its identity and assignments, then continue to the inventory checks below. You do not need to turn on automatic admission for this exercise.
If the computer is waiting for manual approval:
- Connect FileWave Central to the intended Server and select New Client in the toolbar.
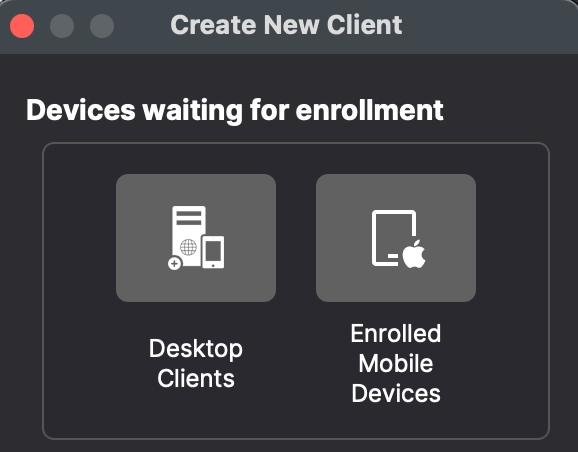
- Select Desktop Clients. Enrolled Mobile Devices is the MDM route, not the queue for this standard Windows Client MSI installation.
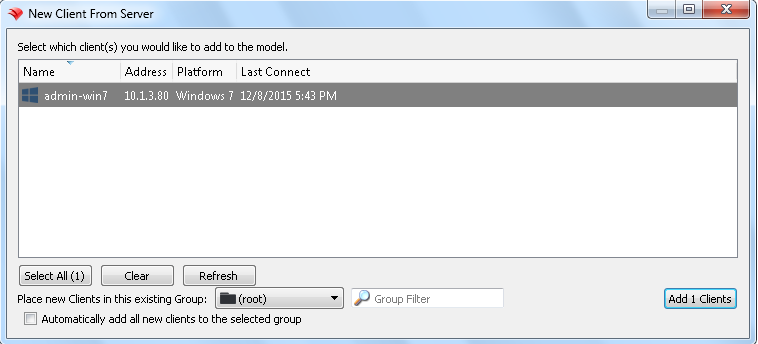
- Find the test computer. Check its name, platform, address, and recent connection information against the device you installed. An IP address alone is not a reliable identifier, especially behind NAT. If the identity is unclear or Central reports a conflict, stop rather than replacing another record.
- Select only that computer. If choosing an existing group, use the group whose assignments you reviewed before installation. Do not use Select All or enable automatic addition to admit this one device.
- Select Add Clients. Central opens the Clients view.
The image below shows the Desktop Clients and Enrolled Mobile Devices choices, not a completed enrollment.
4. Commit manual admission with Update Model
Adding a Client changes the model. After Add Clients, commit that change before expecting the Client to receive assigned Filesets or settings.
Review the device and group you added, any assignments that will apply, and other administrators' pending changes before selecting Update Model. A Model Update can commit their pending work too. Coordinate with them if anything is unfinished or unexpected.
Select Update Model in the toolbar. The Update Server Model dialog asks for confirmation; it does not show a pending-change list. Choose Update Model to commit, or Cancel if you are not ready. Confirm that the server model number changes. You can commit one change or a reviewed batch, but a new model number proves only that the Server committed the model, not that the computer completed its work.
If the device was already admitted, do not repeat admission or perform a Model Update just to read inventory. Commit only actual pending model changes that you and the other administrators have reviewed. For the explanation and confirmation-dialog example, see How FileWave turns your changes into device work.
5. Inspect the first device inventory
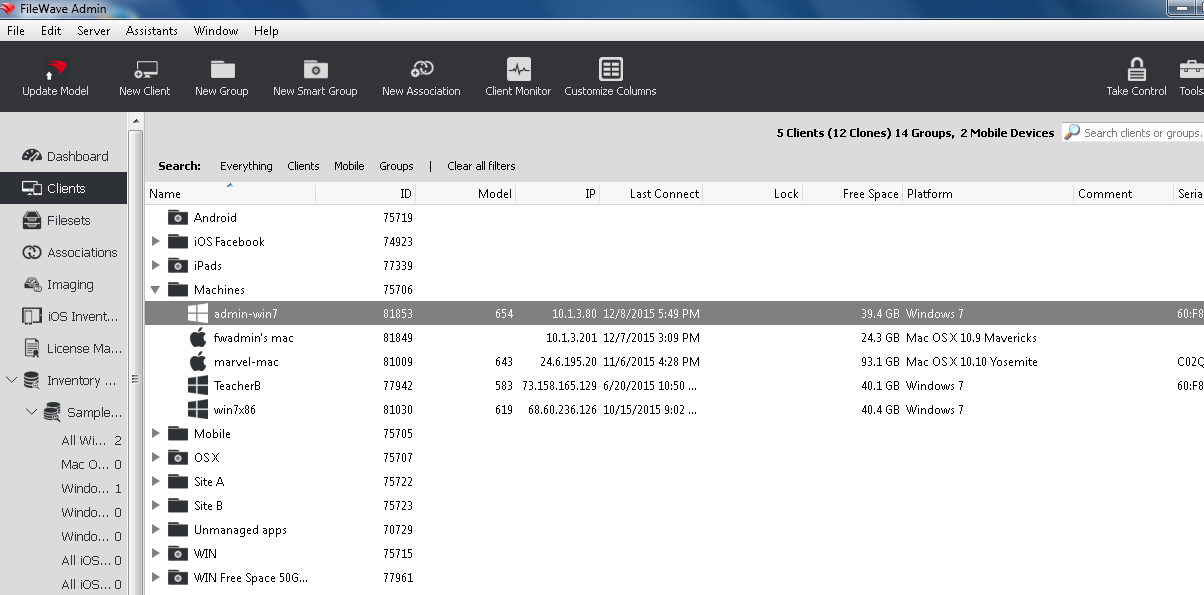
Keep this check read-only. In Clients, select the known test computer and use Customize Columns if needed to see ID, Platform, Last Connect, and Free Space. Then open Tools > Client Info… > Device Details to inspect its reported information.
Check the following against the test computer:
| Check | What it tells you |
|---|---|
| Name and identity | You are inspecting the intended computer. Compare an additional reported identifier, such as its serial number, where available. Record the FileWave ID for later tests. |
| Platform and Client version | The OS matches the computer, and the native FileWave Client reports the version you installed. Client version does not identify the version of Central or Server. |
| Last Connect | The desktop Client has communicated with the Server recently. This is not the timestamp of its full inventory report. |
| Inventory Last Connected | The inventory timestamp tells you how recently hardware, software, and other inventory data were submitted. It can differ from Last Connect. |
| Hardware and software | Compare reported details, such as free space and the name and version of a known installed application, with those on the device. Missing or old inventory needs investigation; it is not proof that the device lacks the application. |
Last Connect vs. Last Connected explains the two timestamps. To save a view of the test device's data for later, use Inventory Reports.
Do not select Verify or Refresh Inventory (Verify) merely to view data. Verify can also enforce the current manifest, including installation, removal, or self-healing work. Read the current details first and review assignments before requesting any device action.
If the device or inventory is missing
- Confirm that Central is connected to the intended Server. Clear search filters, then check both Clients and New Client > Desktop Clients before reinstalling.
- Recheck the package's Server address and the computer's DNS, network access, and certificate trust with the environment owner. Do not disable certificate checks or replace the Client with an unrelated MSI.
- Check whether installation failed, a restart is pending, approval is still needed, or an enrollment conflict requires the administrator's review.
- If Last Connect is recent but inventory is old, investigate inventory reporting separately. Repeated Model Updates do not refresh inventory. FileWave Client Status Check provides a local diagnostic when you need to inspect the Client's current work.
Continue to the first deployment
Proceed when the intended Client is admitted, its recent communication and initial inventory match the test computer, and you have reviewed its assignments. Follow Fileset Creation and Deployment to prepare one harmless Windows item, target this individual device, publish the change, and verify the endpoint result.
That lesson uses Client Info > Filesets Status and a separate device-side check. A reported Active Fileset or Success script result is useful FileWave evidence, not an independent application-health check.
Optional: automatic admission and larger enrollment
Keep manual selection for this first test. Automatic Enrollment Permissions explains who can change admission automation. Read Conflict Resolution before enabling automatic conflict handling: some choices replace or remove existing records. Return to the optional GPO section only after this one-device path succeeds. Use a deployment script that your Windows/AD administrator has reviewed and tested for the intended package and devices.
Older interface examples
The images below show an older admission dialog and Clients list. The Windows 7 devices, old connection dates, (root) destination, and Associations toolbar are historical examples, not current platform support, target recommendations, or evidence that a device is online now. The button wording may include the selected client count. Use the current steps above and review your actual device and group.
No comments to display
No comments to display