
Fileset Creation and Deployment
Plan, publish, and verify your first deployment
A Fileset is the content you prepare. A Deployment connects that content to the devices that should receive it, along with installation options. Update Model commits pending model changes; it does not prove that the device has completed them. If those terms are new, read How FileWave turns your changes into device work before continuing.
Use this page as a walkthrough or review checklist for your first deployment in FileWave Central 16.4.x. The platform lessons also contain complete first exercises. Choose one route below so you do not create or publish the same Deployment twice. If you use Anywhere, refer to Create Deployment for its controls.
This exercise uses Deployments, not legacy Fileset Associations. You do not need to create or convert Associations before this exercise.
Choose your route through the exercise
- Starting here: complete the Before you start section below, use your platform lesson to prepare one item, then return to step 2 here before creating or publishing its Deployment.
- Already following a platform exercise: finish its single prepare–deploy–verify sequence. Use this page as a checklist, not another Deployment procedure.
- Already published that platform exercise: skip steps 1–3 here and go straight to verification and cleanup. Do not recreate the Fileset, add another assignment, or update the model again merely to follow this page.
Before you start
- Use one enrolled, approved test device that is online and communicating through the management method needed for the content. Windows/macOS Client delivery and Apple/Android management have different prerequisites and different ways to check delivery status.
- Choose a harmless test item with a known installation and cleanup method. Avoid security/network restrictions, scripts that change unknown state, OS upgrades, and imaging as your first test.
- Check whether another administrator has unfinished changes. A Model Update can commit their pending work too, even if your Deployment targets only one device.
Before the first device change: use Inventory Reports to review the intended device’s identity, operating-system details, and how current the data is. Record this baseline so you can compare it with the result. Read existing data; do not use Verify/Refresh Inventory (Verify) as a screen refresh, because it can process pending device work. If you already changed the device, record that a pre-change baseline was not captured rather than recreating the exercise.
1. Prepare one item for your platform
If you chose the Starting here route, use the matching platform lesson to prepare one item, then return here before creating or publishing its Deployment. Choose just one packaging method for this exercise. If you prefer to finish the platform’s end-to-end exercise, use the verification and cleanup sections here afterward without repeating the assignment.
| Platform | Start with | Verify before targeting |
|---|---|---|
| Windows | Windows software: one approved MSI installer or a harmless file-level item | Correct content, architecture and installer behavior; no unexpected restart or user prompt. |
| macOS | macOS software and profiles: one approved native package or harmless file-level item | Correct destination/installer behavior and a supported removal method. |
| iOS/iPadOS | Software and profiles: one approved Apps and Books app | Required integration and assignable license are ready for the test device. Avoid a network-changing profile as the first exercise. |
| Android | Android apps and policies: one approved managed app or benign policy | The device's Android Enterprise mode and the content's requirements match. |
ChromeOS uses a different integration path. Follow Chromebook preparation and Chromebook enrollment, then use Inventory Reports to review existing inventory. A matched Google/FileWave device record and read-only inventory review are a complete ChromeOS result; no application installation is required. Do not create a desktop installer Fileset or follow steps 2–3 below on a Chromebook.
If you prepared a Fileset, give it a recognizable test name. If Central reports an upload-validation problem, stop before deploying: correct the incomplete upload and inspect the contents using Advanced Fileset Editing.
2. Create a Deployment for one test device
- Open Deployments in FileWave Central and create a Deployment.
- Give it a clear name, such as Evaluation: one test device.
- Use the + beside Clients to include the intended device. Start with the individual device, not an entire platform group. Review the resulting target count and identity.
- Use the + beside Filesets to include the one test Fileset. Review the included content as carefully as the device target.
- Expand Options. Choose Direct Installation for this first delivery exercise. Leave optional scheduling unset unless timing is the specific feature you are evaluating. For Apps and Books content, confirm the appropriate license-distribution choice and available licenses.
- Select OK to save.
In the 16.4.x editor, included targets and Filesets appear side by side. The complete control reference and current editor images are in Deployments in FileWave Central. That reference also explains exclusions, Kiosk Self-Service, and optional download/activation timing.
3. Review and update the model
Before choosing Update Model, review what you are about to publish: the intended content, the exact target device, the installation option, and any other pending administrator changes. Coordinate with the other administrators if anything is unfinished or unexpected.
Click Update Model in the toolbar. In the Update Server Model confirmation dialog, choose Update Model to commit, or Cancel if you are not ready. The dialog does not list pending changes, so complete your review before opening it. After confirming the update, check that the server model number changes in Central.
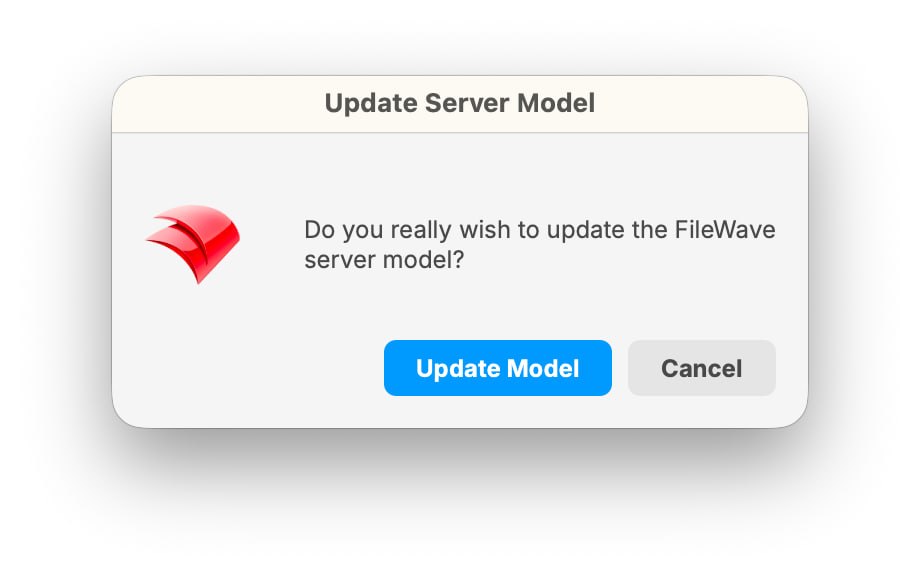
Central asks you to confirm the Model Update. This dialog does not display a list of pending changes.
Checkpoint: the new model number means the server committed a new model. It does not mean your test device has downloaded or installed the item. An offline device must reconnect before it can receive work.
4. Verify the result on the device
For a Windows or macOS Client Fileset, open the intended device’s Client Info > Filesets Status and inspect the test Fileset. Use Fileset Status Meanings when a status needs explanation. For Apple MDM or Android content, follow the platform lesson’s app, policy, and command/status checks. Do not assume that desktop Client status information applies.
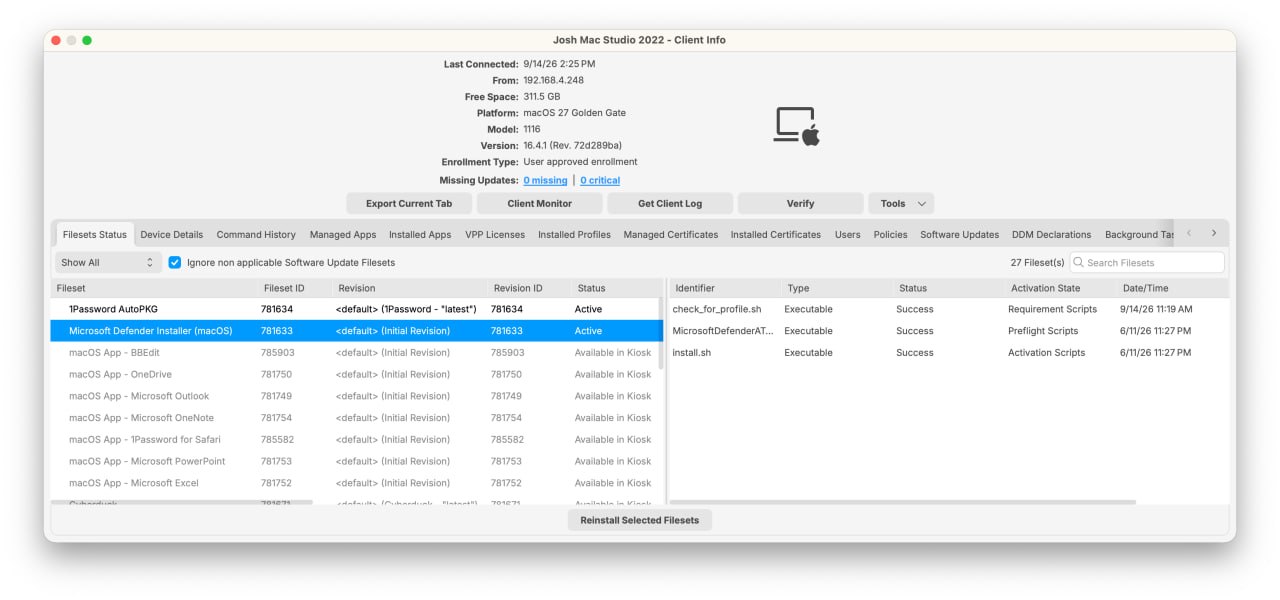
The screenshot shows Microsoft Defender Installer (macOS) as Active. The displayed requirement, preflight, and activation script entries report Success. This illustrates status interpretation, not a recommended first test package.
Read the evidence: Active is the selected Fileset’s reported state, and Success records the displayed script results. Check their timestamps when testing a new change; the entries can come from earlier runs. Other rows marked Available in Kiosk show items offered for self-service; they do not prove that the user installed them. For an installer workflow, also confirm the application on the device; this view is not a separate application-health check.
For your chosen deployment item, check the applicable result on the device:
- Application: the intended version is installed and opens as expected.
- File-level item: the intended file exists at the documented destination with the expected contents.
- Profile or policy: it is present and the intended benign setting is effective. For Apple MDM, inspect the underlying command/status when necessary; do not substitute desktop Client evidence for MDM delivery.
- Kiosk, in a later self-service test: availability in Kiosk is not the same as the user installing the item.
Do not treat every “Completed” reporting category as successful installation. An installation may have been skipped or may have unmet requirements. Read the specific status and confirm the device outcome.
If the result is not there
Check in this order before recreating the Fileset or repeatedly updating the model:
- Target: is this exact device included, and is it excluded by any applicable rule?
- Commit: was the Deployment saved and the pending model change committed?
- Connection: is the device online and communicating through the required management connection?
- Conditions: are timing, platform requirements, installer conditions, and licenses satisfied?
- Evidence: what do Fileset Status and the platform-specific command/install results actually say?
For Windows/macOS Client troubleshooting, FileWave Client Status Check can help. For reporting across several test devices later, use Report on Fileset Deployment Status.
Finish the test safely
Record the Fileset, Deployment, test device, server model number, observed result, and anything that needed troubleshooting. Follow the validated cleanup procedure for your chosen content, then check the test device again to confirm the cleanup result.
Removing a Deployment or deleting a Fileset is not a universal undo for third-party installers, scripts, profiles, or every change made by an application. Read Uninstalling Filesets Safely and confirm the removal behavior before testing cleanup.
A deployment test is complete when you can explain what you prepared, what you published, and how you verified the device result and any cleanup. The ChromeOS exercise is complete when you have matched the Google/FileWave device record and reviewed its existing inventory. Compare the outcome with your earlier Inventory Reports baseline, record untested requirements, and discuss the next approved goal with your FileWave contact. Do not repeat a completed platform exercise just to satisfy this checklist.
Optional next evaluations
In the current Deployment editor, Options offers Direct Installation or Kiosk Self-Service. Optional timing controls include Start downloading at, Activate files at, Make files inactive at, and Delete files at. Use only the controls supported by your chosen content and installed FileWave version. Self-service availability is not proof of installation, and scheduled inactivation or deletion is not a universal application rollback.
- Self-service and scheduling: use the current Deployment options and Kiosk documentation.
- Windows imaging: prepare IVS, capture an image, then deploy it. This is a separate test that can destroy data. Use only approved, expendable devices.
- OS updates: follow Manage OS Software Updates with its own pilot, restart, and verification plan.
No comments to display
No comments to display