Self-Signed SSL Certificates Going Forward
Using a self-signed certificate is not the recommended option and needs to be given a second thought before implementation. Having a certificate trusted by a Global Certificate Authority (CA) is not only the most recommended and most secure option but also becoming more of a requirement for a lot of processes in the tech world.
Having a certificate trusted from a CA will also make sure all of your FileWave communication is as secure and user experience as simplified as possible. If you’re FileWave server is going to be managing Chromebooks then a root trusted certificate is required, where as managing iOS devices were self-signed certs can work, you will have to manually trust the certificate during OTA enrollment for the device to communicate with FileWave.
Of course there are some use cases where a self-signed certificate makes sense such as a test or evaluation server.
FileWave Clients
When using a self-signed certificate your client devices will need this certificate to trust for proper and secure communication with FileWave.
Initial Install
If the FileWave Client has never been installed on your macOS or Windows devices then you will need to create a custom PKG/MSI. This custom package will need to be filled out with your server address, booster info, and other important data to make sure your clients connect successfully to the FileWave Server. One of those options is Server Certificate, you will need to upload your self-signed certificate into this option so that your new client devices will be trusted by the FileWave server.

How do you get the self-signed certificate to upload?
To get the self-signed certificate that needs to be uploaded just follow the steps below:
- Log into the FileWave Admin
- Go to FileWave Admin → Preferences
- While in the General Tab find the SSL Certificate Management pane
- Finally click the Get Current Certificate button, this will download the current SSL certificate you have in FileWave

iOS devices will enroll normally during DEP but, during OTA enrollment the FileWave certificate will need to be trusted manually. Please refer to the KB article linked here for more information.
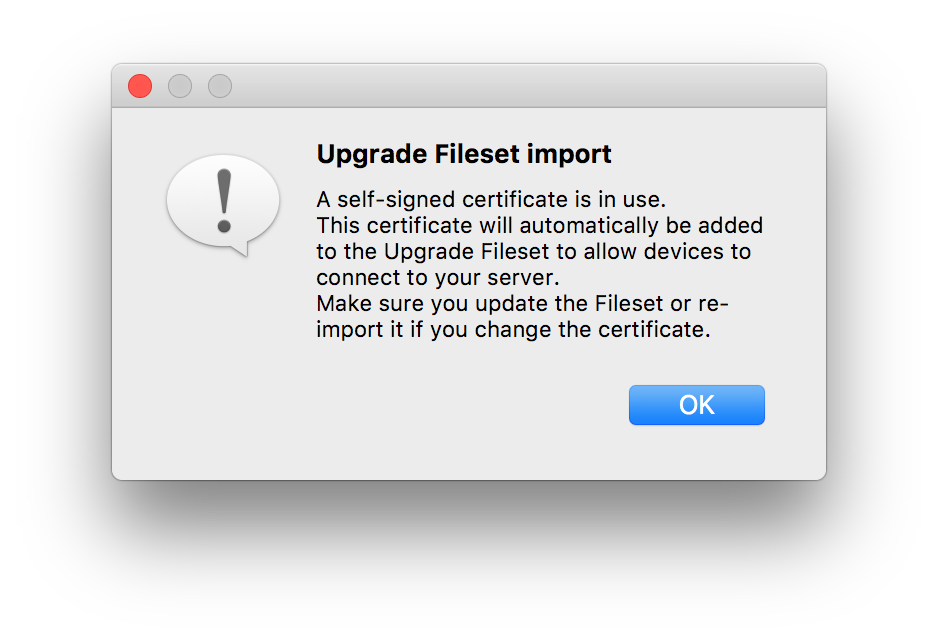
Upgrade
All macOS and Windows clients on FW version 12.9.1 and below will still communicate with the FileWave server, but once upgraded to version 13 the self-signed certificate will need to be pushed to the devices. This will be done automatically when you upload the FileWave version 13 upgrade Fileset into the Filesets section the FileWave Admin.
iOS devices will not need anything pushed out, when the FileWave server is updated. But keep in mind during OTA enrollment the FileWave certificate will need to be trusted manually. Please refer to the KB article linked here for more information.
If you need to renew your self-signed certificate please refer the KB article linked here for those steps.
FileWave Admin
If using a self-signed certificate the FileWave Admin won’t be able to verify the identity of the server. When you log into the Admin you will be prompted that the server doesn’t trust the certificate and you have the option to continue with the connection being untrusted or you can add the certificate to your trust store then connect. Also when you connect via the Web Console you will be warned that the connection is not private.

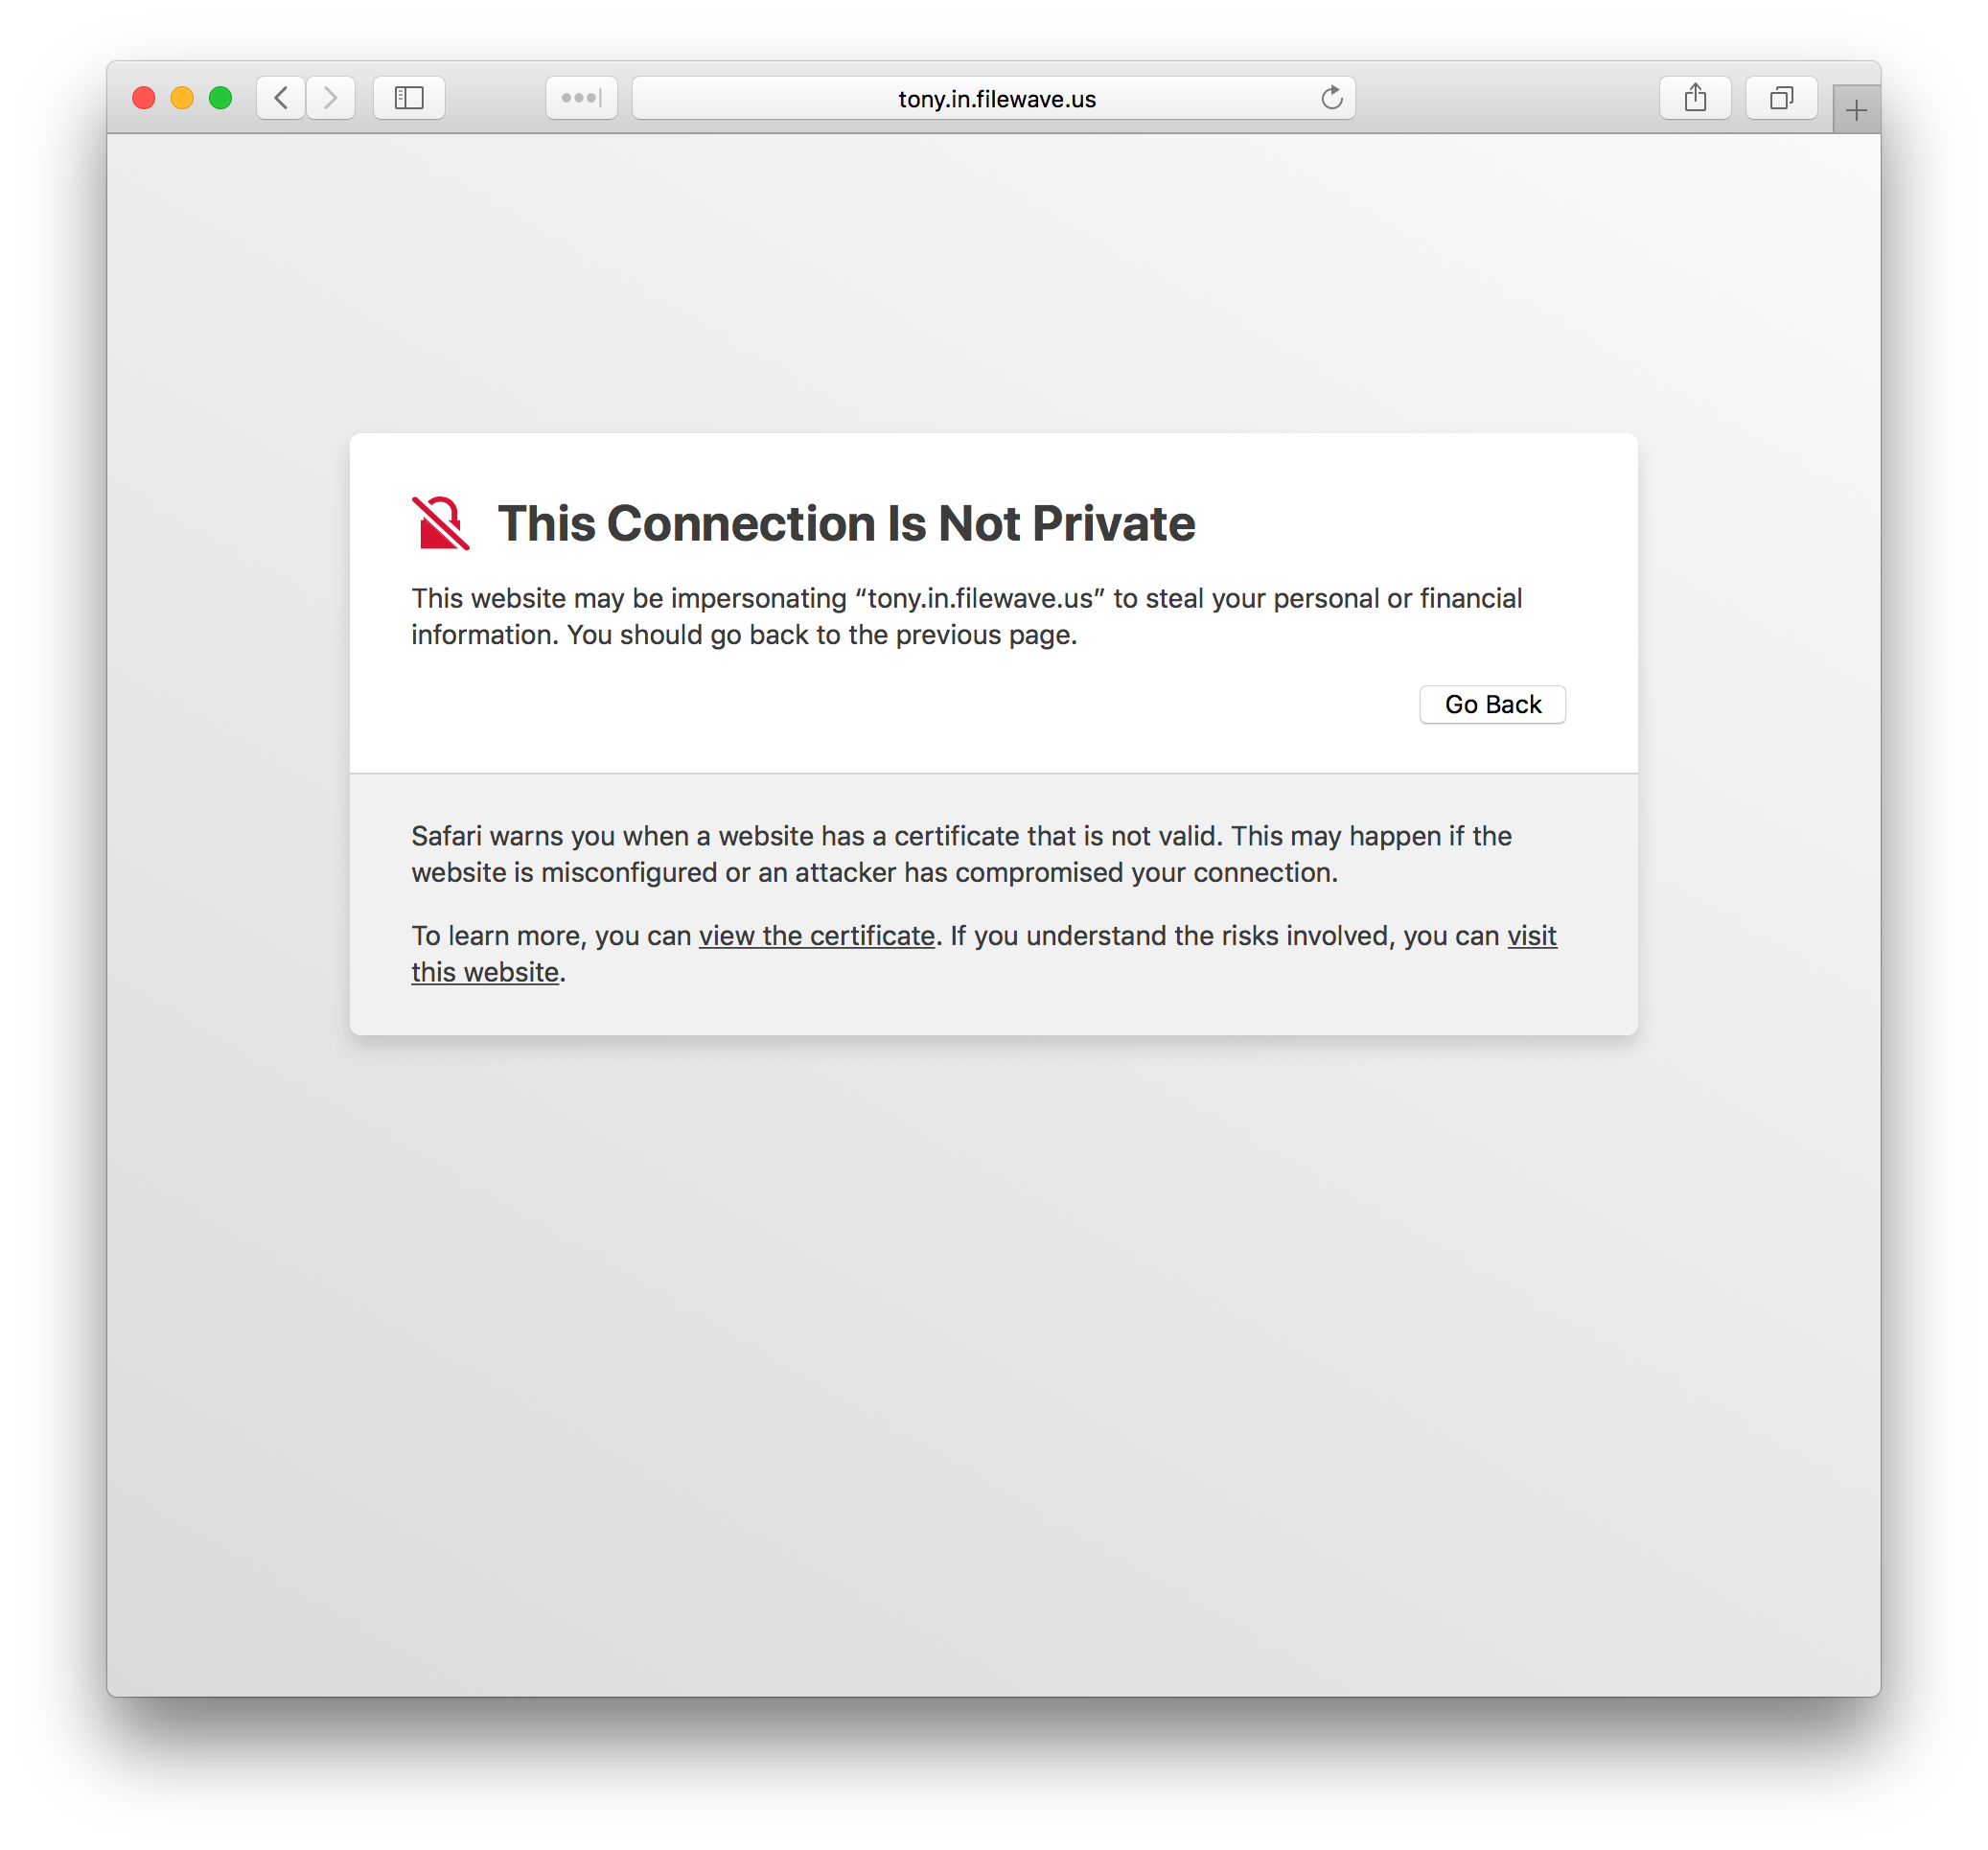
On macOS, certificates manually added to trust store require explicit "Trust for SSL" permission.


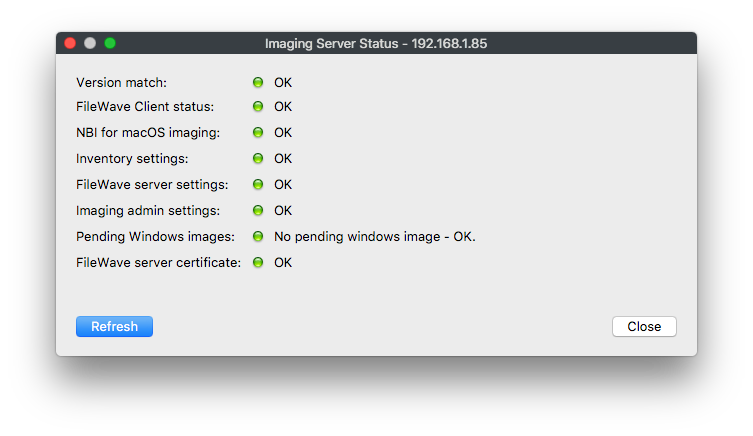
Imaging Virtual Server
When using self-signed certificates the FileWave server will automatically transfer the certificate to a newly created IVS, but existing imaging servers will need to be pushed the certificate.
- Log into the FileWave Admin
- Go to FileWave Admin → Preferences → Imaging
- Select an imaging server then the Upload Certificate button at the bottom right of the pane

This will send the SSL certificate to the IVS, you have to do this for any existing IVS you have attached to your FileWave server. You can check the status of the IVS to see whether or not the certificate is uploaded, by selecting the IVS and clicking the Status… button.
No comments to display
No comments to display