
macOS Software and Profiles
Deliver one harmless file to one Mac
This page contains the complete one-device exercise. Fileset Creation and Deployment explains the shared workflow and editor; if you complete the exercise here, do not create a second Deployment there.
For a first result, deliver a uniquely named, non-sensitive PDF to the Desktop on one approved test Mac. Use a file such as FileWave-Evaluation-Readme.pdf containing only a sentence identifying it as test content. Do not package a user's existing document. This exercise needs the native FileWave Client; Apple MDM is a separate connection used for supported profiles and Apple-managed app workflows.
Your result is a PDF at the intended destination that you can open on the Mac. A saved Fileset, model number, or Fileset status alone is not enough.
Before you start
For a Mac not yet enrolled, complete the Mac branch of Apple Manual Enrollment or ADE Enrollment. For an already managed test Mac, verify its existing enrollment and Client configuration rather than enrolling it again. Match the test Mac's identity, native Client version, and recent communication in Central. If the Mac is MDM-only, prepare and verify the native Client before attempting file-level delivery. Review the chosen release's requirements rather than using this page as an OS support list.
Confirm the Mac has no file with your test filename at the destination. Use an approved lab Mac whose user Desktops may receive this test file. The All Users > Desktop destination affects user Desktops on the selected Mac; it does not mean only the logged-in user's Desktop. The device target must still be exactly one Mac.
Review inherited groups and existing Deployments. Adding a new Fileset to an already deployed Fileset group can unintentionally deploy it beyond the test Mac. Keep this Fileset in an unassigned evaluation group. Agree on removal before deployment.
Privileged execution is the default for installers and scripts. On macOS, FileWave can run them as root. The first PDF exercise deliberately has no installer, script, restart, network change, account change, or security payload. A later PKG/app evaluation needs a trusted source, compatibility and disk-space checks, restart review, and a vendor-appropriate uninstall plan.
1. Create and inspect the Fileset
- In Central Filesets, select New Desktop Fileset > Empty and give it an evaluation name.
- Open the Fileset's Fileset Contents. If necessary, clear Hide unused folders to reveal destinations. Navigate to Users > All Users > Desktop, and add only your uniquely named test PDF there.
- Select the PDF and open Get Info > Verification. Explicitly choose Download If Missing for this exercise: verification restores the file if it is missing but does not replace an edited copy. Removal of this file-level Deployment removes the file, so it must not become a user's working document.
- Review initial-overwrite options and the exact destination. Do not rely on a default to protect an existing same-named file; use a collision-free test name. Review Fileset properties for unexpected scripts, restart settings, or additional content.
- Select Apply and close the editors. Wait for upload to finish. A Modified marker means pending work needs review and publication, not that the Mac already received the file.
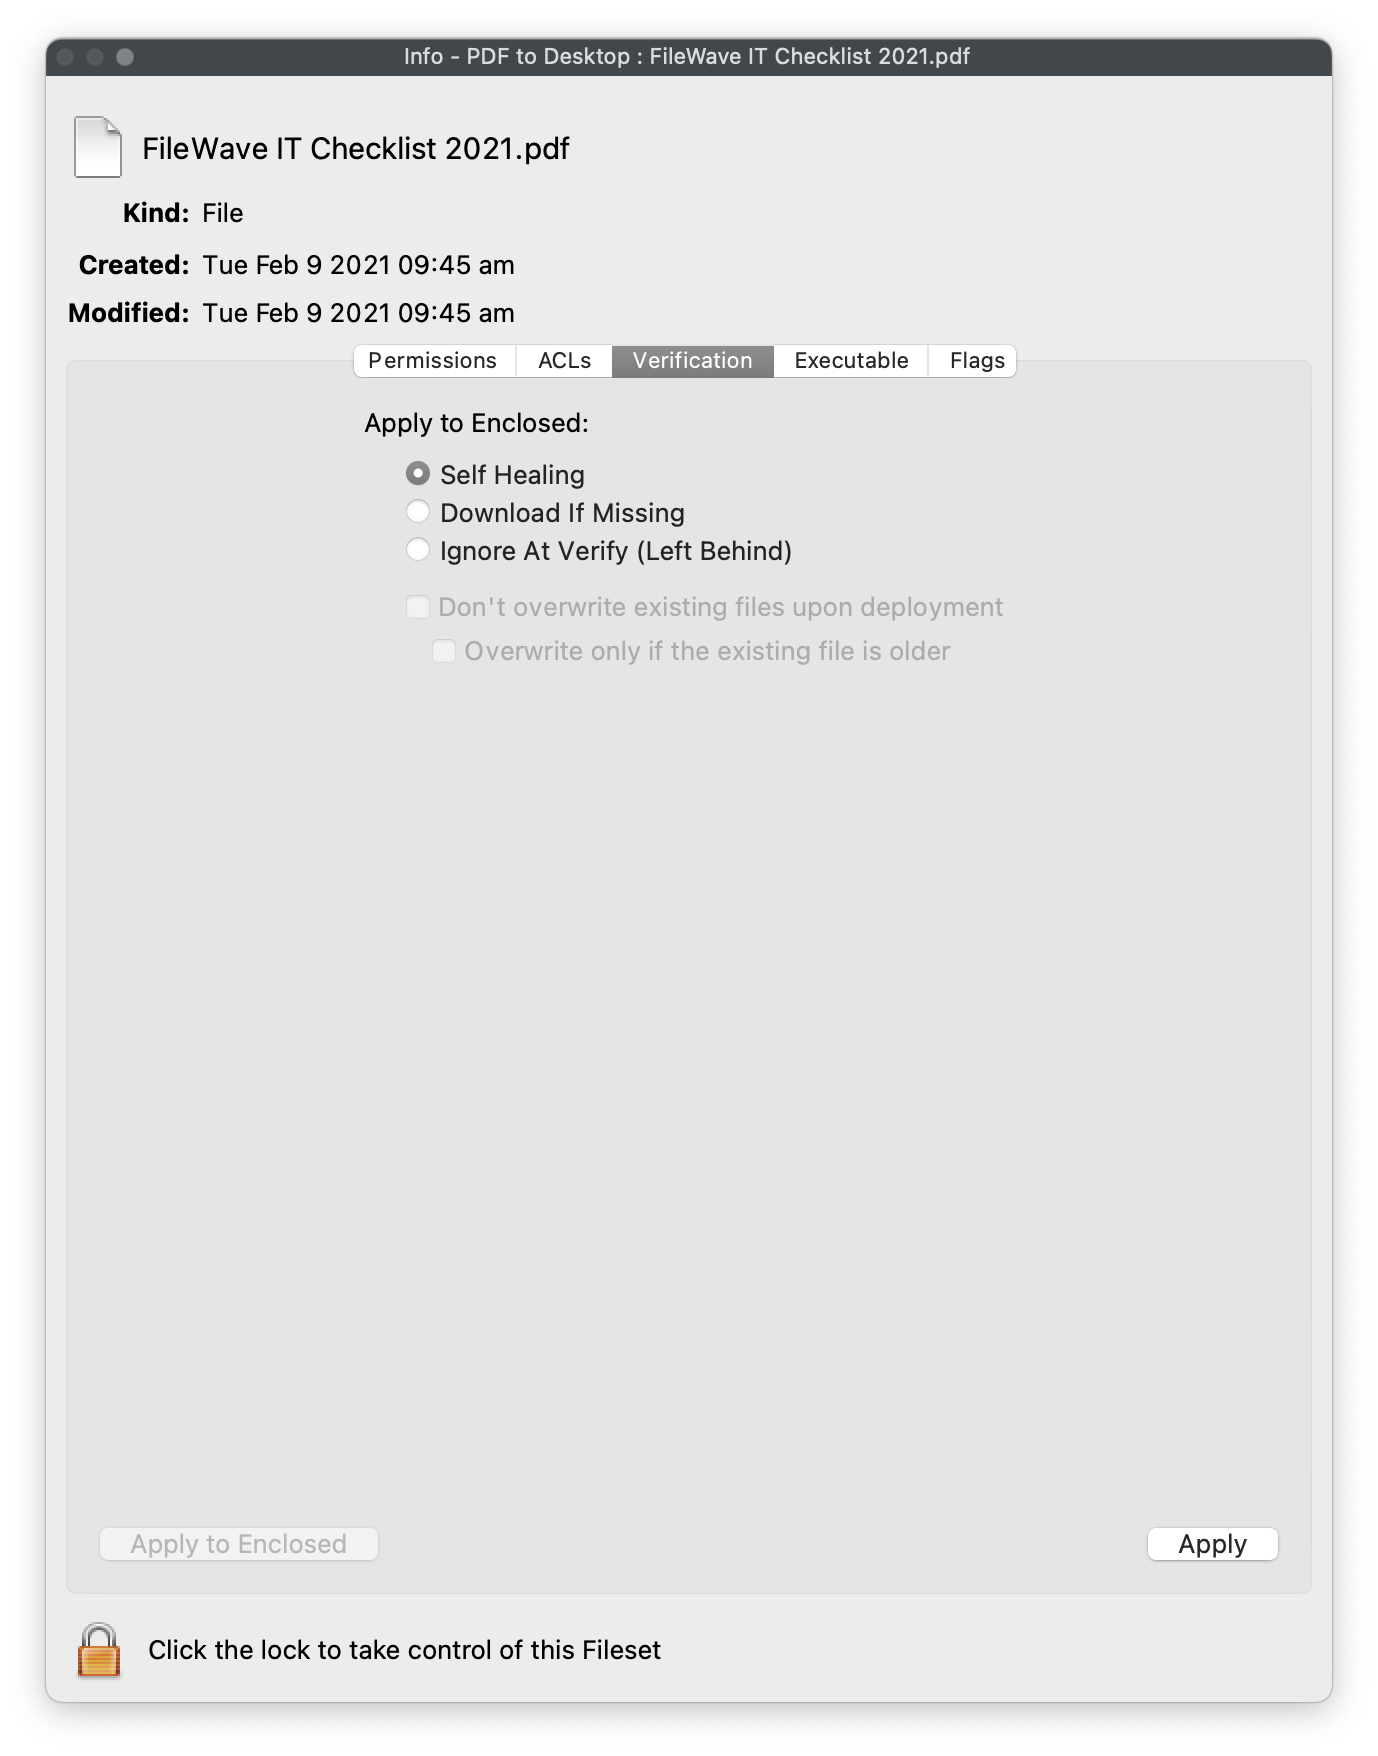
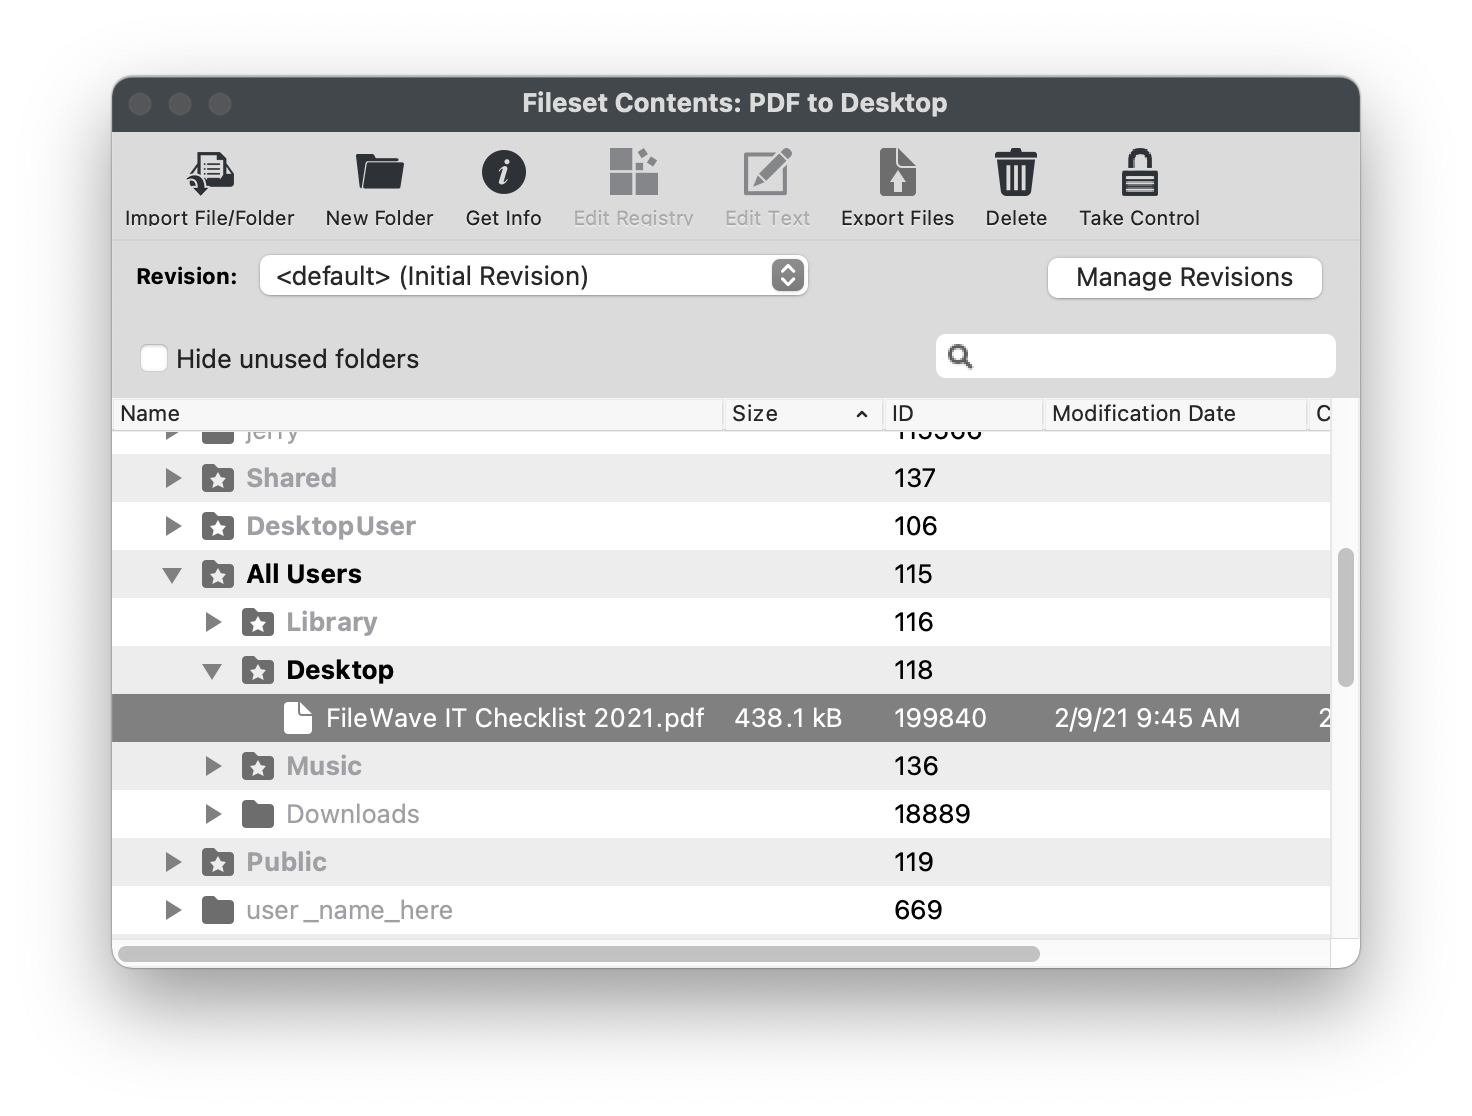
These screenshots show an earlier interface. Follow the steps above to set the PDF's verification behavior and destination; use your approved settings rather than the pictured values.
2. Target and publish the test
In Deployments, create a named evaluation Deployment containing only this Fileset and only the verified Mac (or a group verified to contain just that Mac). Use + beside Clients for the Mac and + beside Filesets for the test PDF Fileset. Review the resulting count and identity, exclusions, and content. Expand Options, choose Direct Installation, and leave optional scheduling unset for this test. Select OK to save. The shared editor is explained in Fileset Creation and Deployment. Keep Kiosk self-service out of this first test.
3. Verify at Central and at the Mac
Open the test Mac’s Filesets Status tab and locate this Fileset. Read its status and any error; compare communication timestamps with your publication time. Active is FileWave’s recorded state. Confirm the actual file separately on the Mac.
At the Mac, confirm the uniquely named PDF appears on the intended Desktop and open it. Check its contents match the test document. Record the device identity, file path, observation time, and relevant Fileset status. A recent Client Last Connect is not the same event as inventory Last Connected. Do not press Verify as a passive refresh: it can process installation, removal, and repair work from the Client's manifest.
If the file is missing: check the exact target, Deployment activation, completed upload and Model Update, native Client connection, destination, permissions, and actual error. Wait for an offline Mac to reconnect before drawing conclusions. Do not switch to a fleet-wide group or deploy a privileged troubleshooting script to make the first exercise succeed.
4. Remove the test without removing user work
Confirm the file is still disposable, then remove the test Deployment from this Mac. Review and commit the resulting model change with the other administrators, wait for Client processing, and check that the PDF disappears from the intended destination. Keep a record if cleanup is pending because the Mac is offline. Do not delete shared Filesets or uninstall the Client just to remove one test file.
Download If Missing and Self-Healing file-level content is removed when its Deployment is removed; Ignore at Verify (Left Behind) content remains. Those file rules are not a universal PKG uninstall mechanism. PKG installers have no built-in uninstaller, and apps/scripts can create other data not represented in the Fileset. Review Fileset verification and safe removal before using either on real content.
Choose the next content type deliberately
| Need | Route and important limit |
|---|---|
| Vendor installer outside the App Store | Import a trusted PKG using New Desktop Fileset > MSI / PKG or drag it into Filesets. Native-installer contents do not gain file-level Self-Healing. Verify the actual installed app/version and launch, and provide a tested uninstall route. |
| App Store app | Prepare Apple MDM and Apps and Books, then review token/license and app-management settings. The native Client alone is not the Apple licensing/enrollment setup. |
| Files or a self-contained app bundle | Inspect the destination and per-file verification behavior. An app dragged from a DMG may need moving to Applications inside the Fileset; do not assume its source path was appropriate. |
| Apple configuration settings | Use a supported MDM profile payload. Test one approved payload, review defaults and removal consequences, and verify the installed profile plus effective setting. Do not start with network or security restrictions. |
| Customized installation captured from a machine | Fileset Magic is an advanced capture workflow. Use a clean disposable capture Mac/VM and a separate test restore, not your daily workstation. Review captured data for secrets, licensing, and unrelated background changes. |
Self-updating app caveat: Self-Healing may restore packaged files over an app's own updates. Download If Missing may be appropriate when the vendor's updater owns changes, but it still removes managed files when the Deployment is removed. Review both update and uninstall behavior before applying it to an app.
After completing this file exercise, choose another content type only if it addresses your chosen goal. The sections below explain the differences in preparation, verification, and removal; you do not need to complete every packaging route.
After recording the result and cleanup, continue to Inventory Reports to review what FileWave has learned about the test device.
Create a Profile Fileset for a Mac
Apple MDM enrollment and a supported payload are required for this route. Use one approved payload per test, review all defaults, and plan removal before deployment—especially for network and security settings.
- In Central Filesets, select New Desktop Fileset > Profile.
- Name the profile under General and review its other settings.
- Select a macOS-compatible payload, choose Configure, and enter the approved values.
- Save the profile. Review the resulting Fileset and its one-device Deployment, then coordinate Update Model.
- On the Mac, check the installed profile and the actual setting. Before removal, confirm that the profile is not required for network access or another dependency.
Parameterized Profiles can insert values such as %custom_field.asset_tag%. Populate that field for the test Mac and check the resolved value. %custom_field% alone is not a complete field token. Updating inventory data does not itself revise a profile already installed on the Mac.
Import a trusted PKG
Use a vendor PKG when its installer is the supported way to install the software. Review its source, architecture, supported OS, storage, privileges, restart requirements, and uninstall method first. A PKG Fileset does not apply file-level Self-Healing to the installed application's contents.
- In Filesets, drag in the approved PKG, or select New Desktop Fileset > MSI / PKG and choose it.
- Wait for upload to complete. Central shows upload progress in the bottom bar; red text during upload is not a completed installation.
- Inspect the Fileset properties and contents. Its Modified marker identifies pending changes.
- Create and review a one-Mac Deployment, save it, and coordinate Update Model.
- Check the installed app and version on the Mac and open it. Test the vendor-appropriate uninstall route on the lab Mac before using the package more widely. Removing the Deployment is not a universal PKG uninstaller.
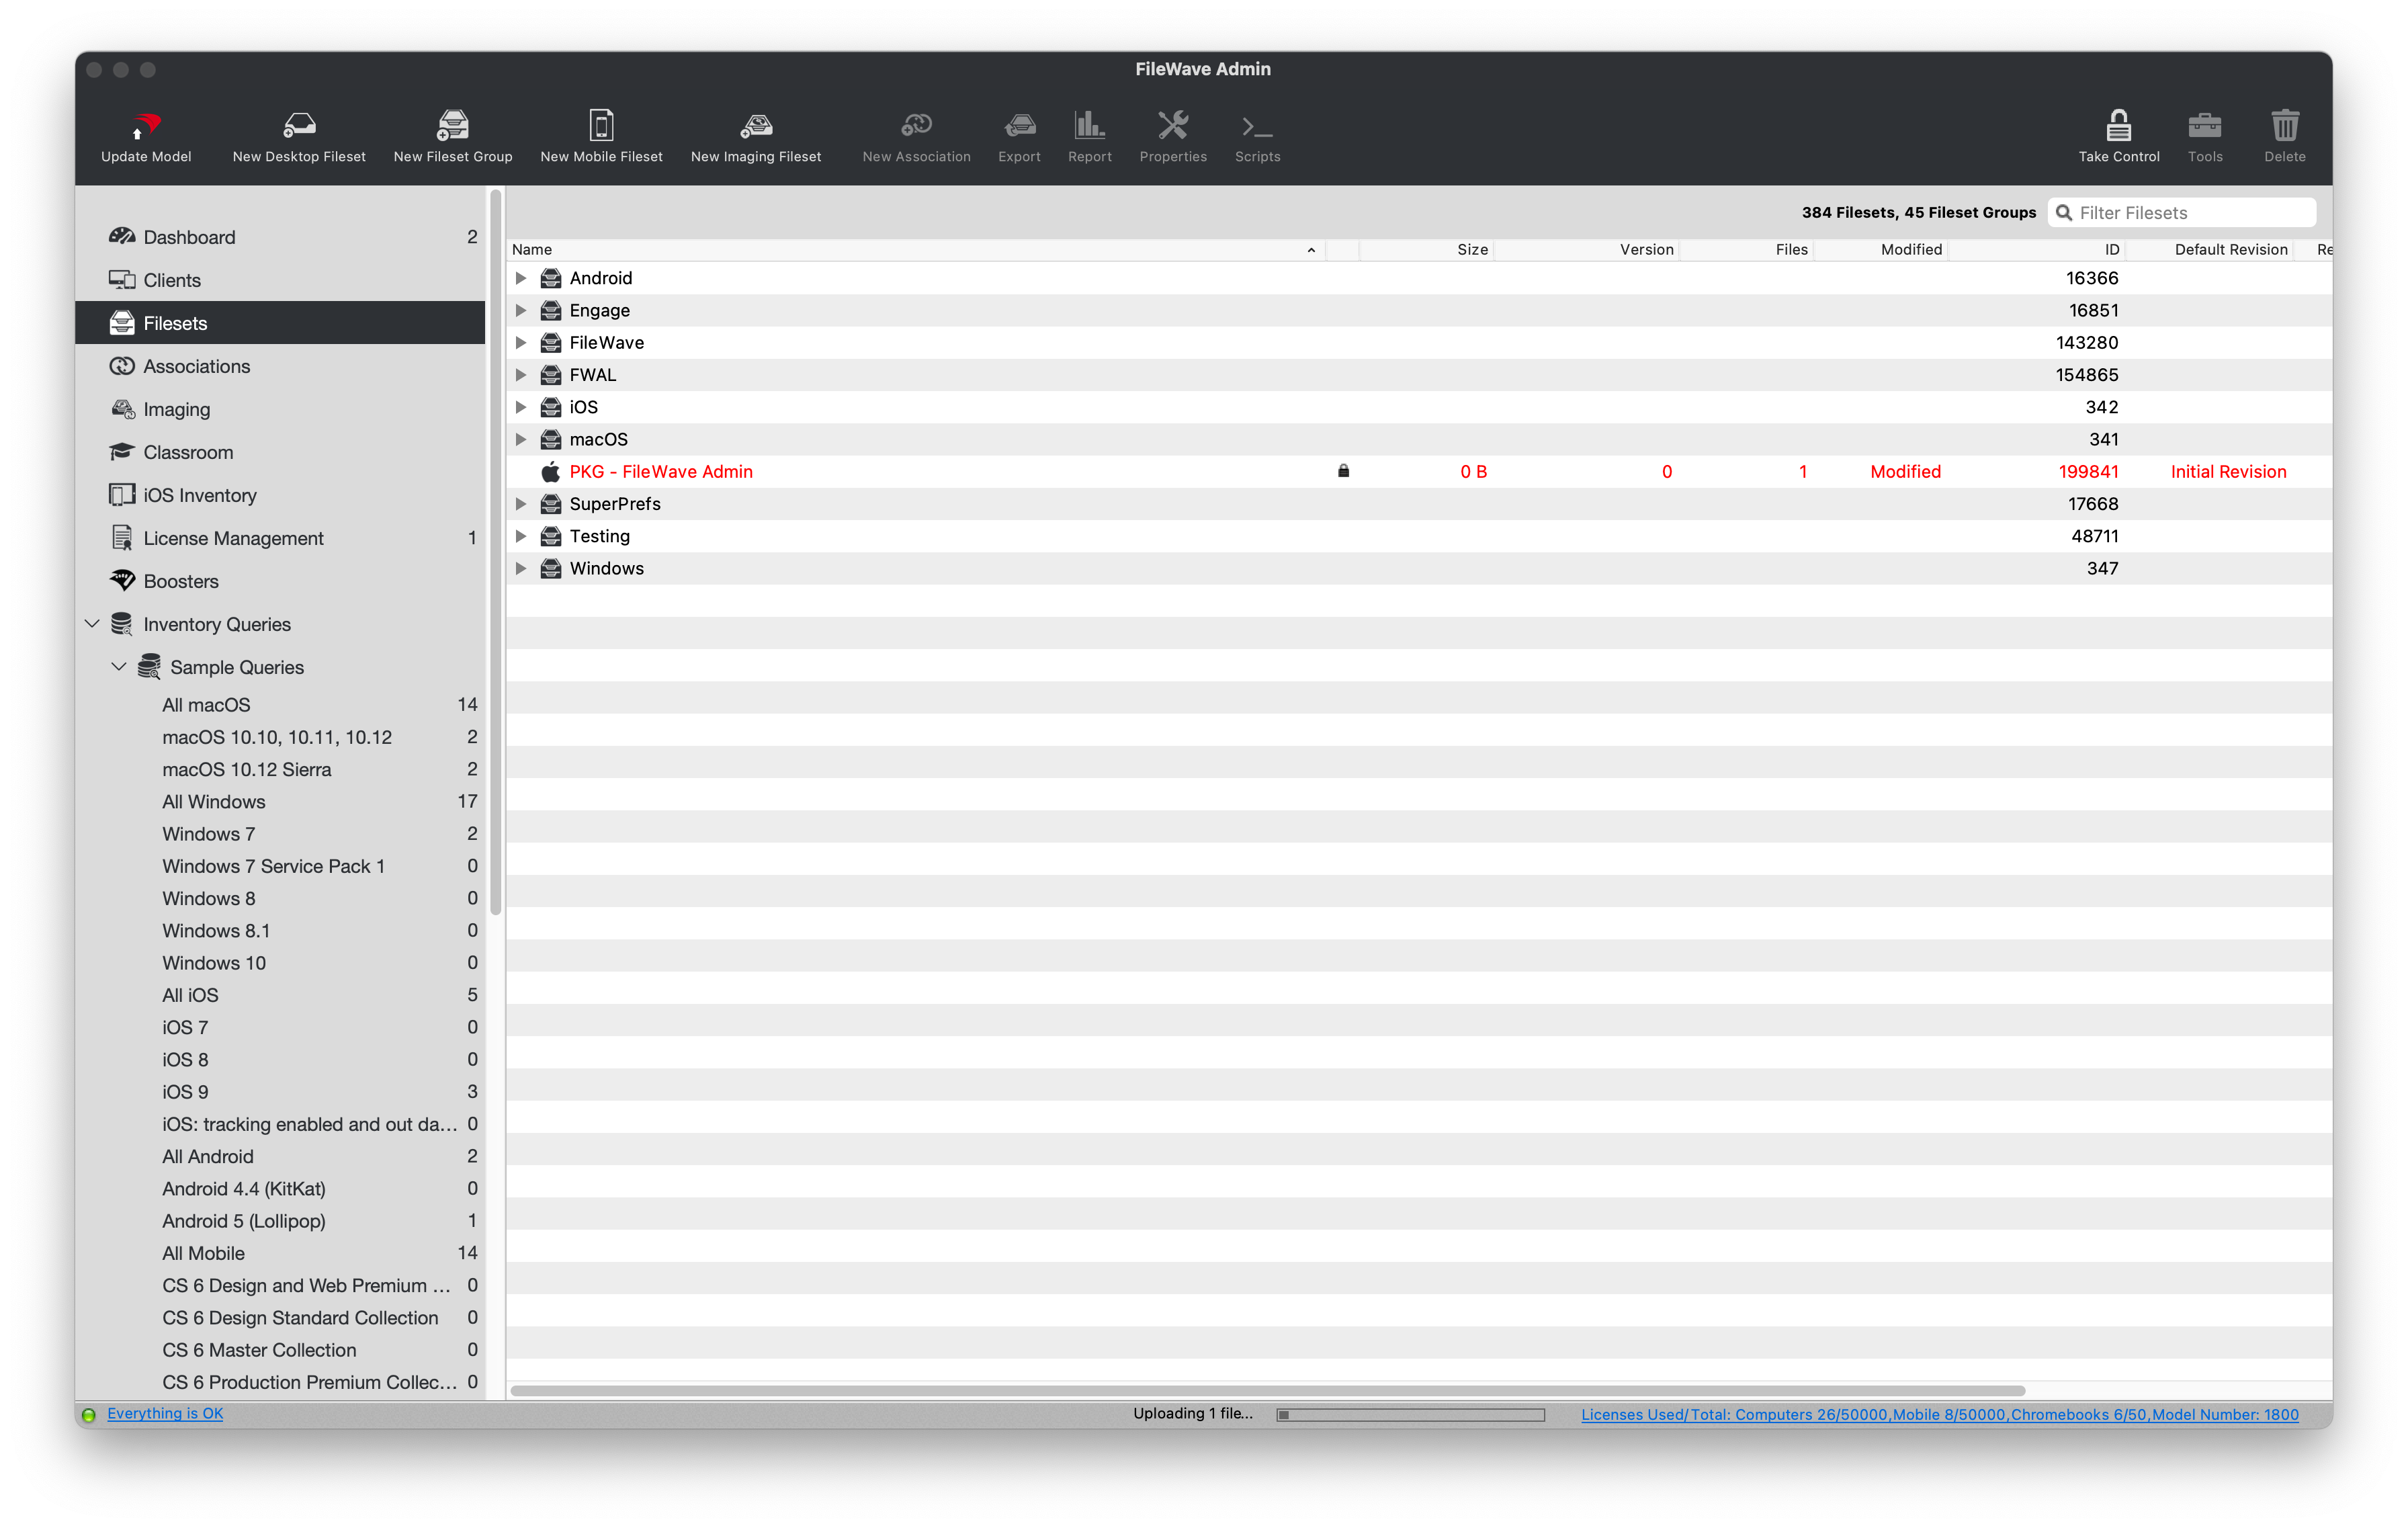
This screenshot shows an earlier interface. Follow the PKG steps above and use the settings approved for your package rather than the pictured values.
Use Apps and Books for Mac App Store software
Complete the Apps and Books section of Apple prerequisites and verify the Mac's Apple MDM enrollment. Select the correct macOS app, owning token, and available license. Inspect the app Fileset's management and update settings, create a reviewed one-Mac Deployment, and verify that the app installs and opens. Native Client check-in alone does not establish the Apple licensing and MDM requirements.
For separate allocations, duplicate the app Fileset and set Reserve a maximum of in each instance. For example, one token's 10 Slack licenses could be allocated as 5 for Development and 5 for QA. Set the limit on both Filesets, check actual availability, and use reviewed Deployments for the intended targets. Group changes can expand scope, and a license reservation is not installation evidence. Do not use a production allocation for the first test.
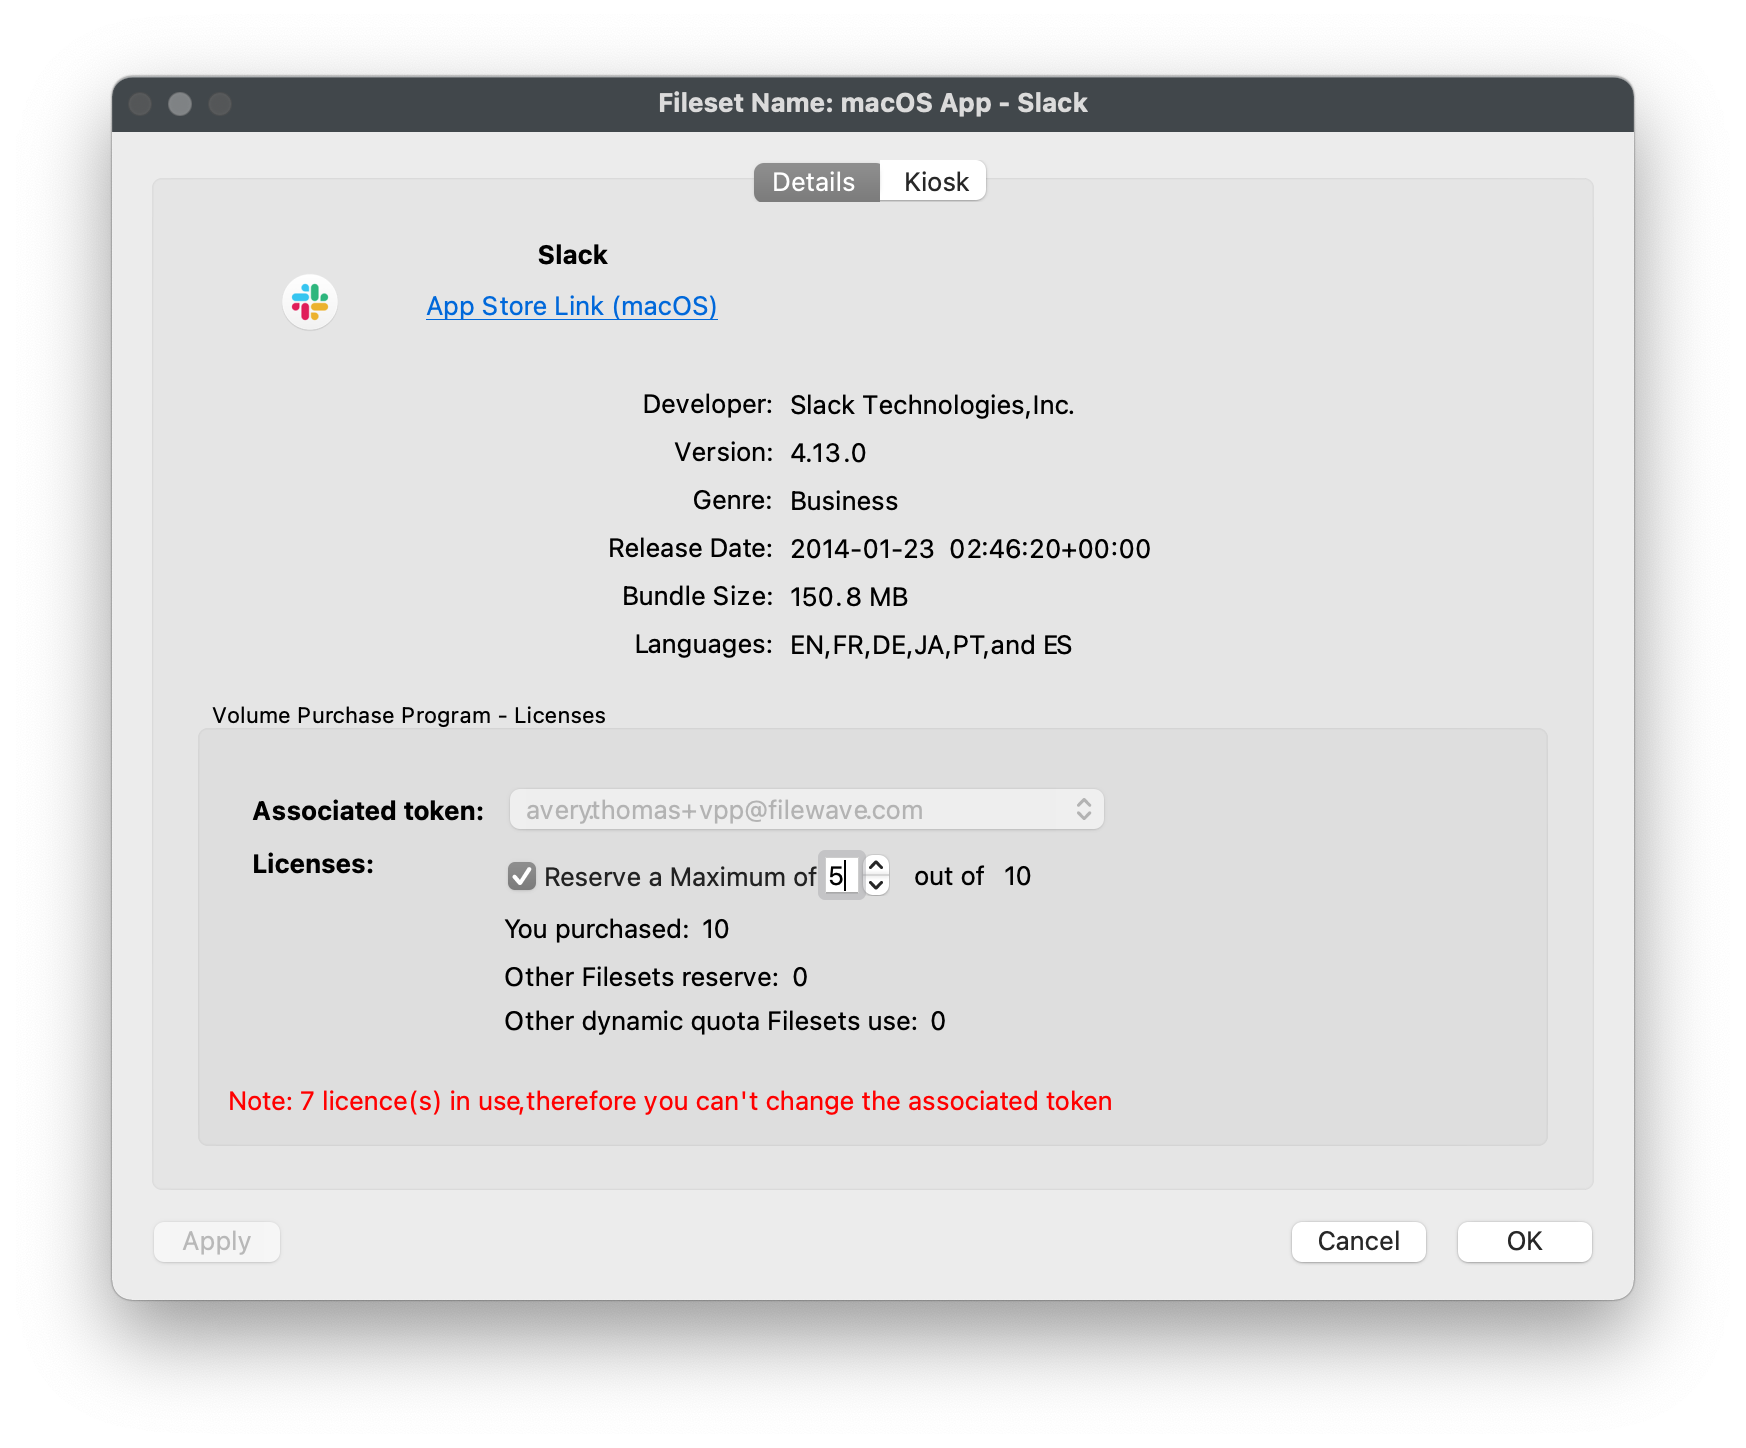
This screenshot shows an earlier interface. Set reservations for your approved allocation and available licenses rather than copying the pictured values.
Choose file verification and removal behavior
Configure verification per file through Get Info > Verification, or through Fileset-wide properties. Consider both repair and removal behavior when choosing a setting.
| Verification choice | When verification runs | When the file-level Deployment is removed |
|---|---|---|
| Self-Healing | Restores the packaged file if it is missing or changed | Removes the managed file |
| Download If Missing | Restores a missing file; leaves an edited copy unchanged | Removes the managed file |
| Ignore at Verify (Left Behind) | Does not restore or replace the delivered file | Leaves the delivered file on the Mac |
These are file-level rules, not promises about a third-party installer's output or user data. Review the configured verification schedule for your Client release. A manual Verify can process other pending manifest work; it is not a passive refresh.
Initial delivery has separate overwrite controls, including Don't overwrite existing files upon deployment and Overwrite only if the existing file is older. For the test PDF, confirm that no file at the destination has the same name before deployment to avoid replacing a user's existing document. For other content, inspect these controls before deployment; see Fileset verification.
Deliver a self-contained app bundle
A self-contained .app can be delivered at file level, including an app supplied inside a DMG. Do not assume every application is self-contained; use the vendor installer when it provides required components or setup.
- Select New Desktop Fileset > App / Folder and choose the approved
.app. - Open Fileset Contents and inspect its destination. If the source app was in the administrator Mac's Applications folder, FileWave places it there; an app from a DMG or another location may need moving to Applications inside the Fileset.
- Review Properties and per-file verification. A self-updating app can conflict with Self-Healing if FileWave restores the packaged version over the vendor's update. Download If Missing may suit that design, but still removes the managed files when the Deployment is removed.
- Review the one-Mac Deployment, save, and coordinate Update Model. Open the deployed app and verify its version and required components.
- Use the agreed removal procedure and inspect any data or files the app created outside the Fileset. File-level removal does not guarantee all app-generated data is removed.
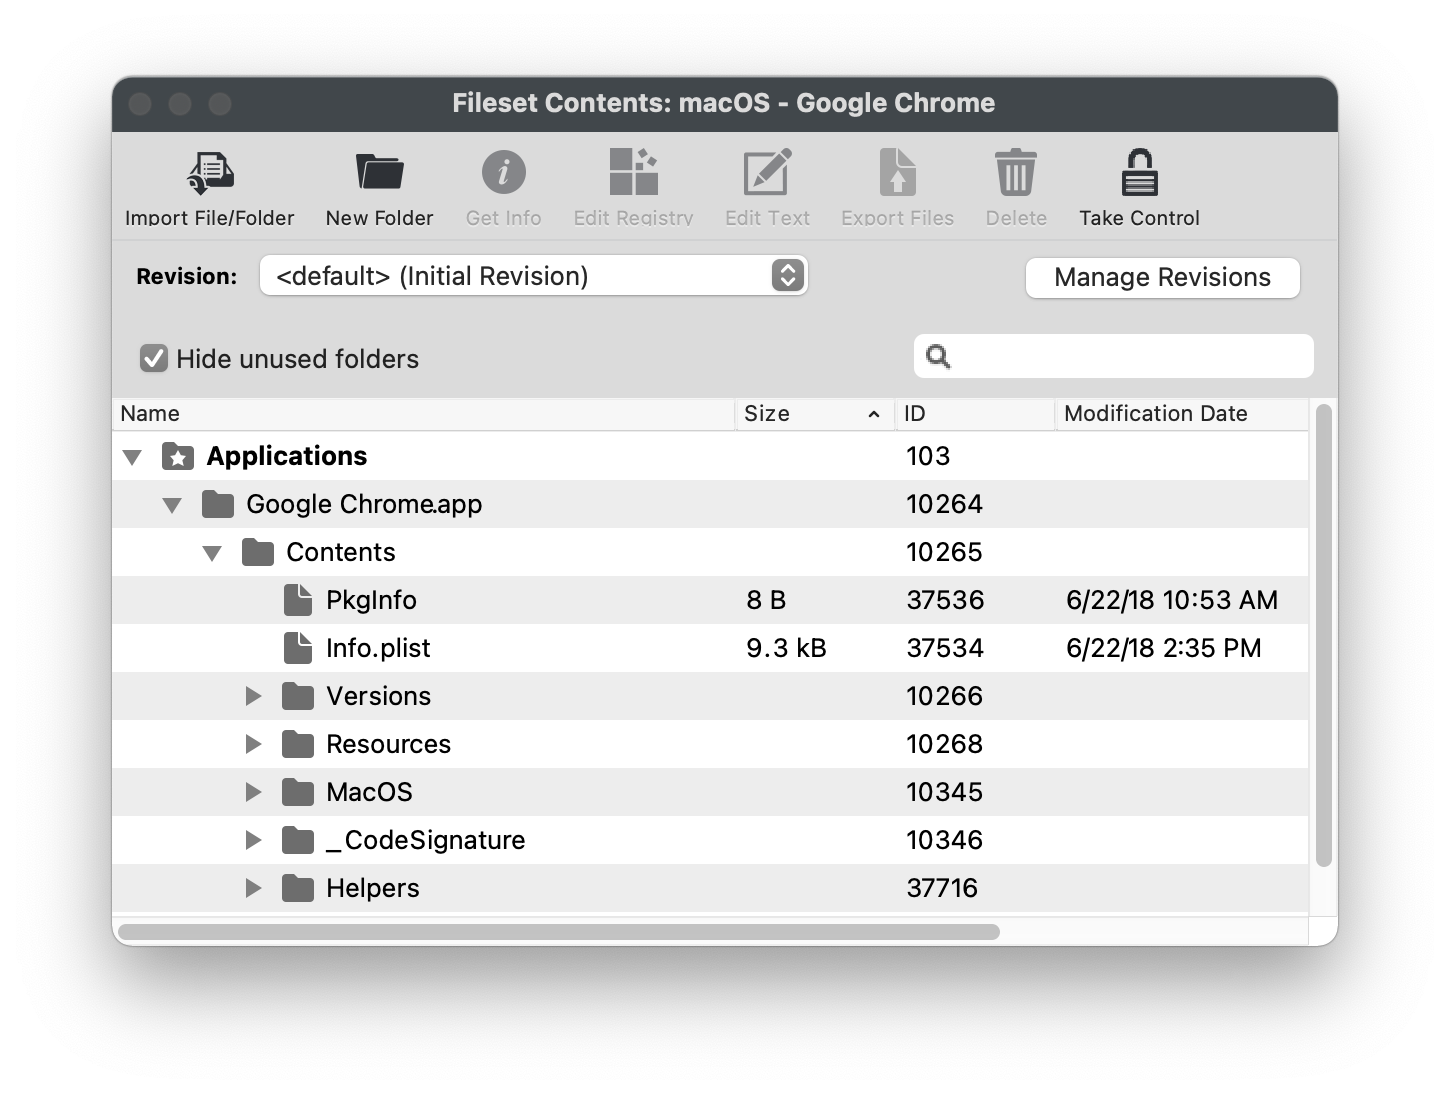
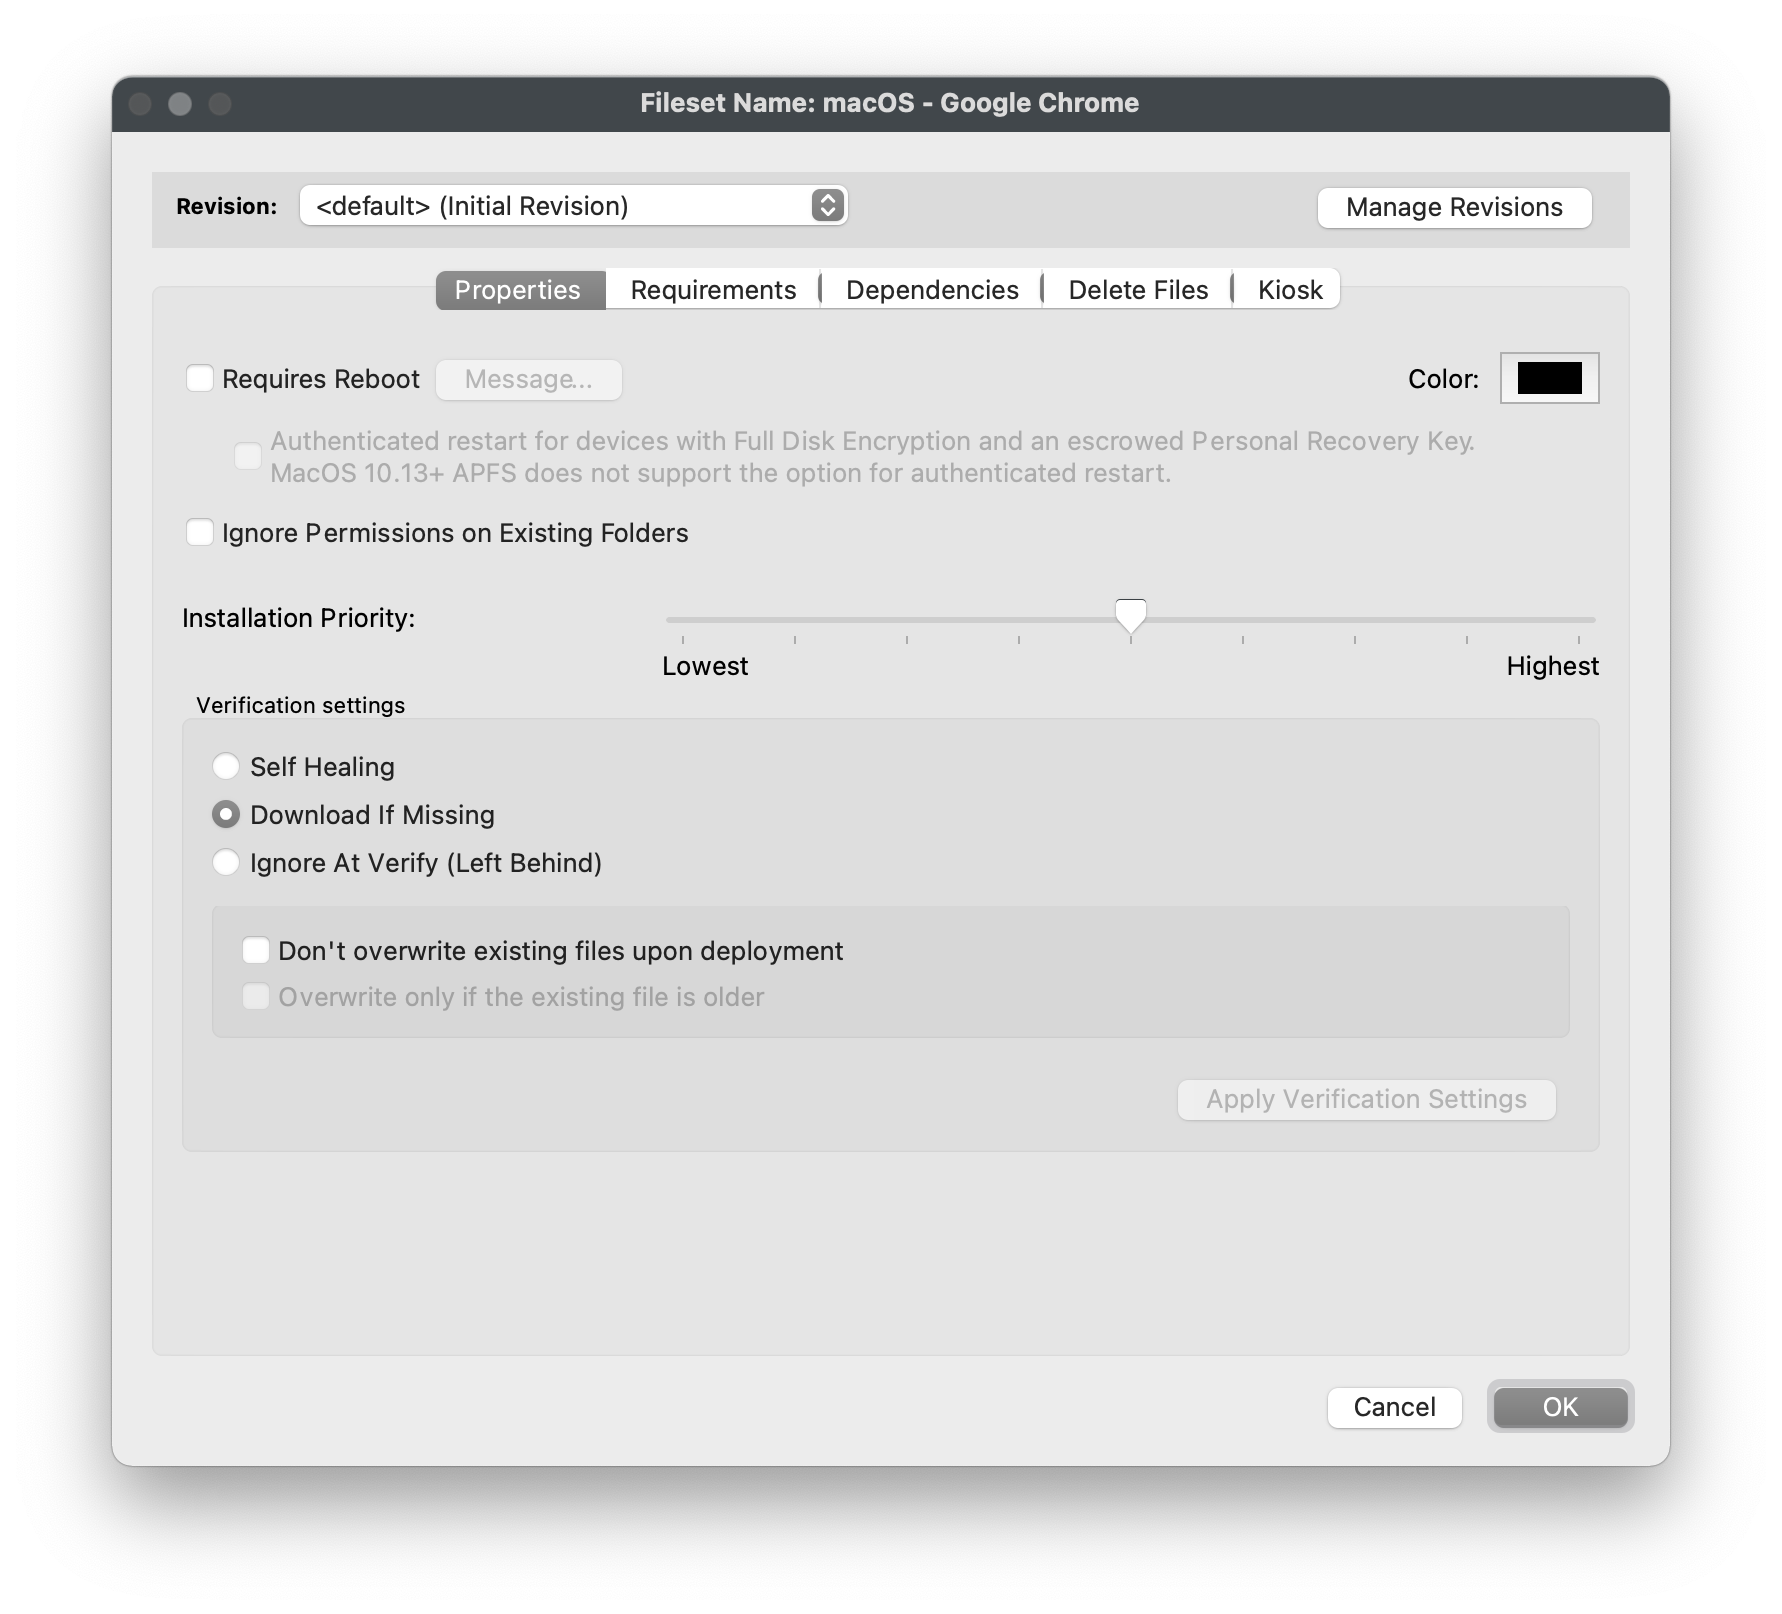
These screenshots show an earlier interface. Follow the steps above to review the destination and verification settings for your app rather than copying the pictured values.
When an application needs installation capture
Fileset Magic compares snapshots of a build machine to capture an installation and its customizations. It can help when a vendor installer cannot express the required preferences, updates, or other setup, but capture is a separate advanced evaluation—not a step in the PDF exercise.
Before starting, confirm the capture procedure supported by your installed release and Mac configuration with FileWave Technical Support if you are an existing customer, or with your assigned FileWave representative if you are evaluating FileWave. Use a clean disposable capture Mac or VM and a separate approved test Mac. Minimize unrelated background activity; review every captured difference and exclude credentials, private keys, personal files, and machine-bound licensing. Save only the content needed by the application, and verify the resulting Fileset's contents before any Deployment.
Success requires a clean test deployment, a working application with the intended customizations, and a removal/recovery plan. A completed snapshot or upload does not prove those outcomes. If you cannot establish a supported capture procedure or distinguish application changes from unrelated system activity, stop and use a vendor-supported installer or seek FileWave assistance.
No comments to display
No comments to display