
Importing FileWave VHD (Hyper-V)
An older Hyper-V host may not recognize the configuration file supplied with a newer FileWave virtual appliance. The VHDX can still be used: create a virtual machine manually and attach the existing disk instead of importing the unrecognized definition.
The procedure below recreates the FileWave IVS virtual machine around its existing VHDX. Configure the replacement IVS with 4 virtual CPUs and 8 GB of RAM.
IVS - 4 CPUs, 8 GB RAM
Create the Hyper-V virtual machine
Use these steps to add the FileWave IVS disk to Hyper-V:
- Copy the .vhdx file for the desired FileWave server component to the same folder where the VHDs for all your other VMs reside. Rename it as desired so you know which FileWave component it's for, e.g. FileWave_IVS.vhdx.
- Go to Action > New > Virtual Machine.
- Select "Generation 1" or "Generation 2" for the firmware type, depending on which you downloaded.
- Assign 8192 MB for Startup memory and check "Use Dynamic Memory" for this virtual machine.
- Connect the NIC to an external virtual switch where the server can pick up an IP address on your LAN.
- Pick "Use an existing virtual hard disk" and browse to the .vhdx file for your VM.
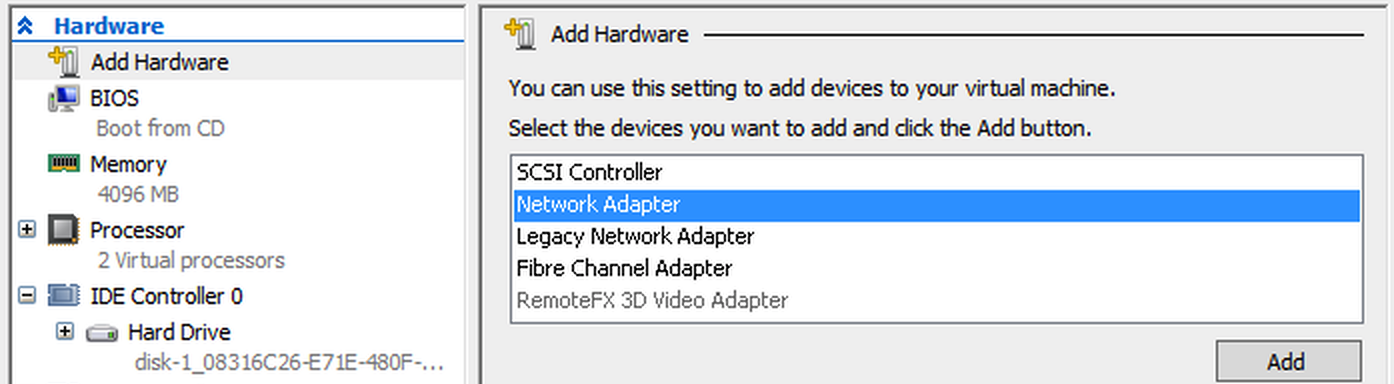
Note that the IVS has two virtual NICs although only one of them will pick up an IP address. There's already one present by default so you'll have to edit the settings for the VM and add a second one by picking Add Hardware at the top of the Hardware section on the left-hand pane. Choose Network Adapter on the right and click the Add button.
Connect this second adapter to your virtual switch and click the Apply button.
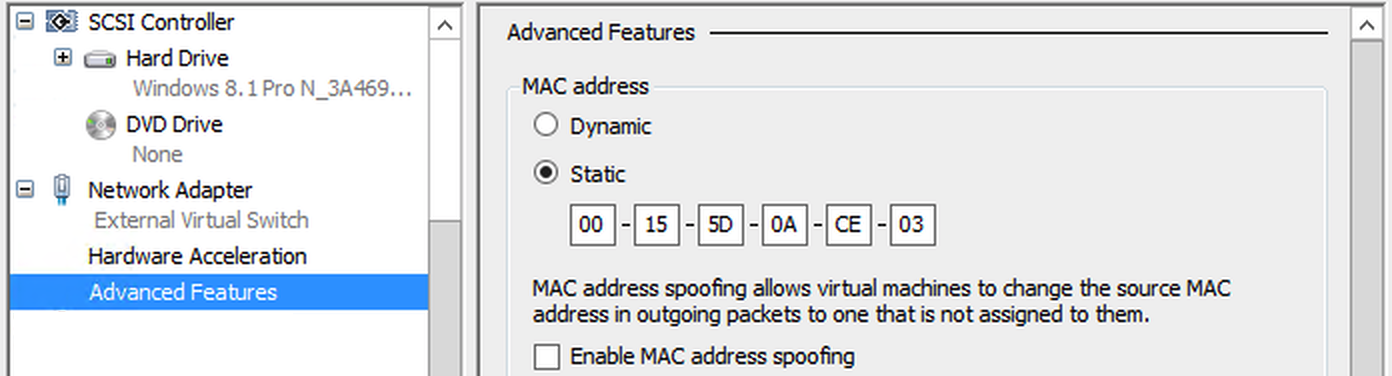
All FileWave server components should have a static IP rather than a dynamic one. You can either assign them a static IP outside of your DHCP pool or set a client reservation for them so they get the same IP address from the DHCP pool every time. For client reservations, you'll need to configure the virtual NICs with static MAC addresses since the MAC address is needed to set the client reservation. In the Advanced Features section for each virtual NIC change the MAC address to Static.
After the IVS starts, complete Changing the IP Address of your IVS (Static). For appliances using the 15.5-and-later first-login workflow, also complete Setting the Password on First Login to FileWave Appliances (15.5+).
No comments to display
No comments to display