
Self-Managed FileWave Server: Name and Certificate Planning
For a self-managed (on-premises) FileWave Server, choose the server name and certificate before enrolling devices. Clients and MDM-enrolled devices use this identity to connect, so changing it later can require certificate, DNS, and enrollment remediation.
Hosted FileWave customers: FileWave manages the hosted server configuration. Contact FileWave Technical Support before changing the hosted server name or certificate.
Server Name
The FileWave Server name should be a fully qualified domain name (FQDN). Prefer a name that could also work externally later, even if the first deployment is internal only. Choosing the right name up front gives you room to publish services or change network layout later without touching every enrolled device.
Separately, confirm that the same FQDN resolves to a reachable Server address from each network your managed devices use. If devices will connect from outside your network, follow Allow External Devices to Connect to the FileWave Server and Boosters with your network administrator. A successful lookup on the Server alone does not verify device connectivity.
Certificates
The server certificate must include the chosen server name as a Subject Alternative Name (SAN). See the certificate articles for the current certificate workflow:
https://kb.filewave.com/books/certificates
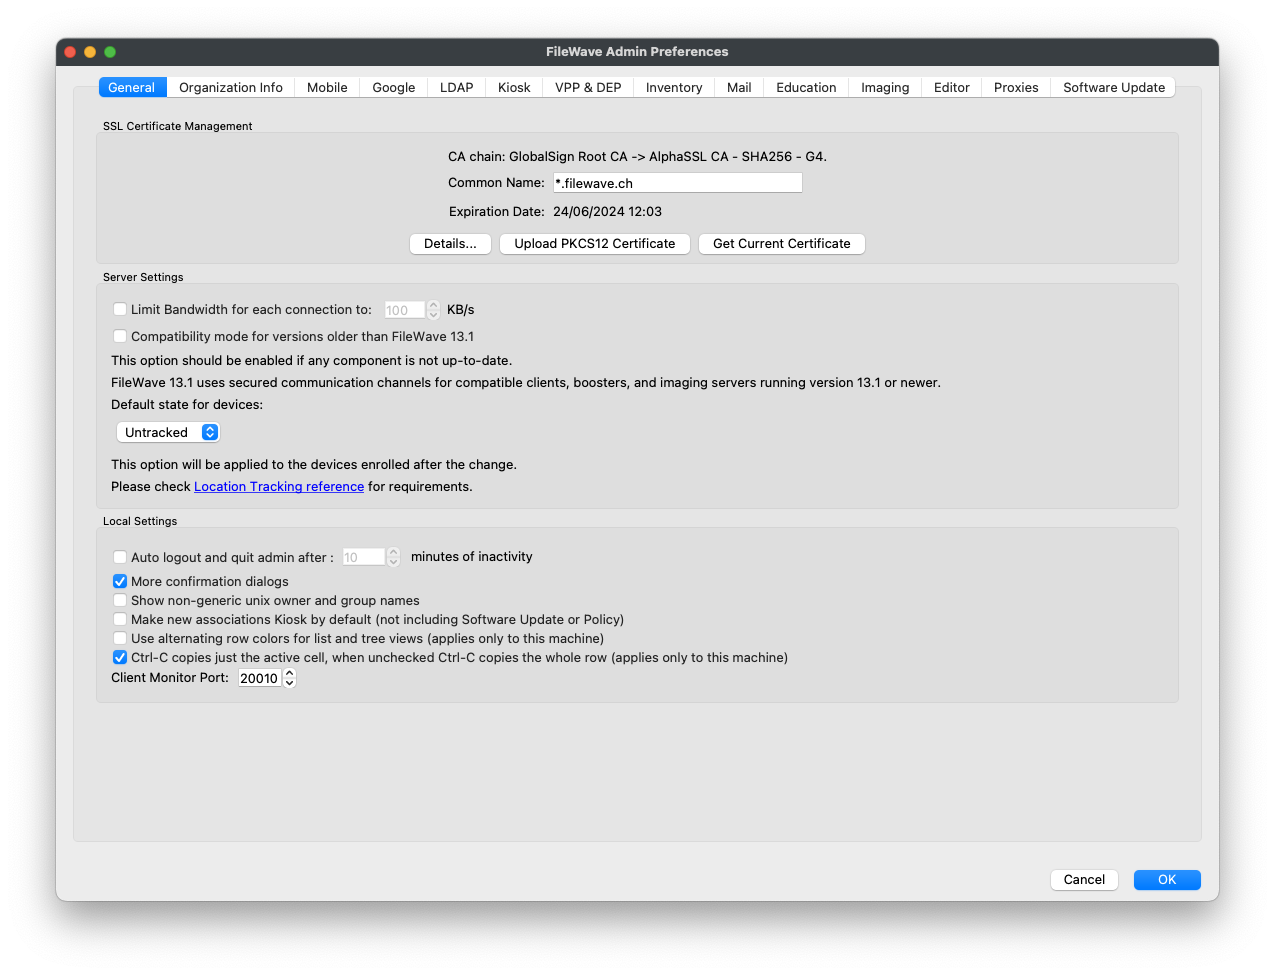
After you obtain the PKCS #12 certificate file (.p12), upload it through the FileWave Central/FileWave Admin preferences.
Configure the MDM server name
Enter the same FQDN on the Mobile tab. For example, for a server called demo.filewave.ch:

Server Command Line Configuration
After configuring the certificate and server name in FileWave Central/FileWave Admin, confirm that the FileWave Server can resolve its own FQDN locally. The following command-line changes apply only to self-managed servers.
Hosts File
These loopback entries belong only on the FileWave Server. They do not create DNS records for managed devices; copying them to a client would make that client resolve the name to itself. Keep the existing hosts entries that your server needs rather than replacing the whole file with this example. Edit the server's hosts file so the FileWave Server name resolves to the local server. Starting with this simple hosts file:
127.0.0.1       localhost
::1             localhost
Using the example server name demo.filewave.ch, either of these approaches is acceptable:
127.0.0.1       localhost demo.filewave.ch
::1             localhost demo.filewave.ch
or:
127.0.0.1       localhost
127.0.0.1       demo.filewave.ch
::1             localhost
::1             demo.filewave.ch
The entries can be space-separated on the same line or split onto separate lines. The goal is that a lookup for the FileWave Server FQDN from the server returns the local host.
Apache Conf File
This is only required if the server's local hostname does not match the FileWave Server name.
Edit the following file:
/usr/local/filewave/apache/conf/httpd_custom.conf
Add the following ServerName entry:
ServerName demo.filewave.chRestart Server Process
Arrange a maintenance window before restarting: this interrupts FileWave Server services, not just your administration session. Restart the FileWave Server after the change from an account authorized to use sudo:
sudo fwcontrol server restartAfter the restart, reconnect to the Server and confirm that a managed test device can check in using the intended FQDN. For externally managed devices, repeat the connection check from an external network. Verify the configured certificate name and trust as well as connectivity before enrolling more devices.
No comments to display
No comments to display