
Configure Microsoft Entra ID as a FileWave IdP
What
To use Microsoft Entra ID for FileWave authentication, register an application in Microsoft Entra and configure FileWave with that application's identifiers, redirect URLs, client secret, and required Microsoft Graph permissions.
When/Why
Use this configuration for Microsoft Entra ID authentication during Apple device enrollment, administrator login to FileWave Anywhere, or administrator login to FileWave Central.
How
The connection is based on a Microsoft Entra ID application registration. Complete the following parts in order:
Part 1: Sign in to the Microsoft Entra admin center
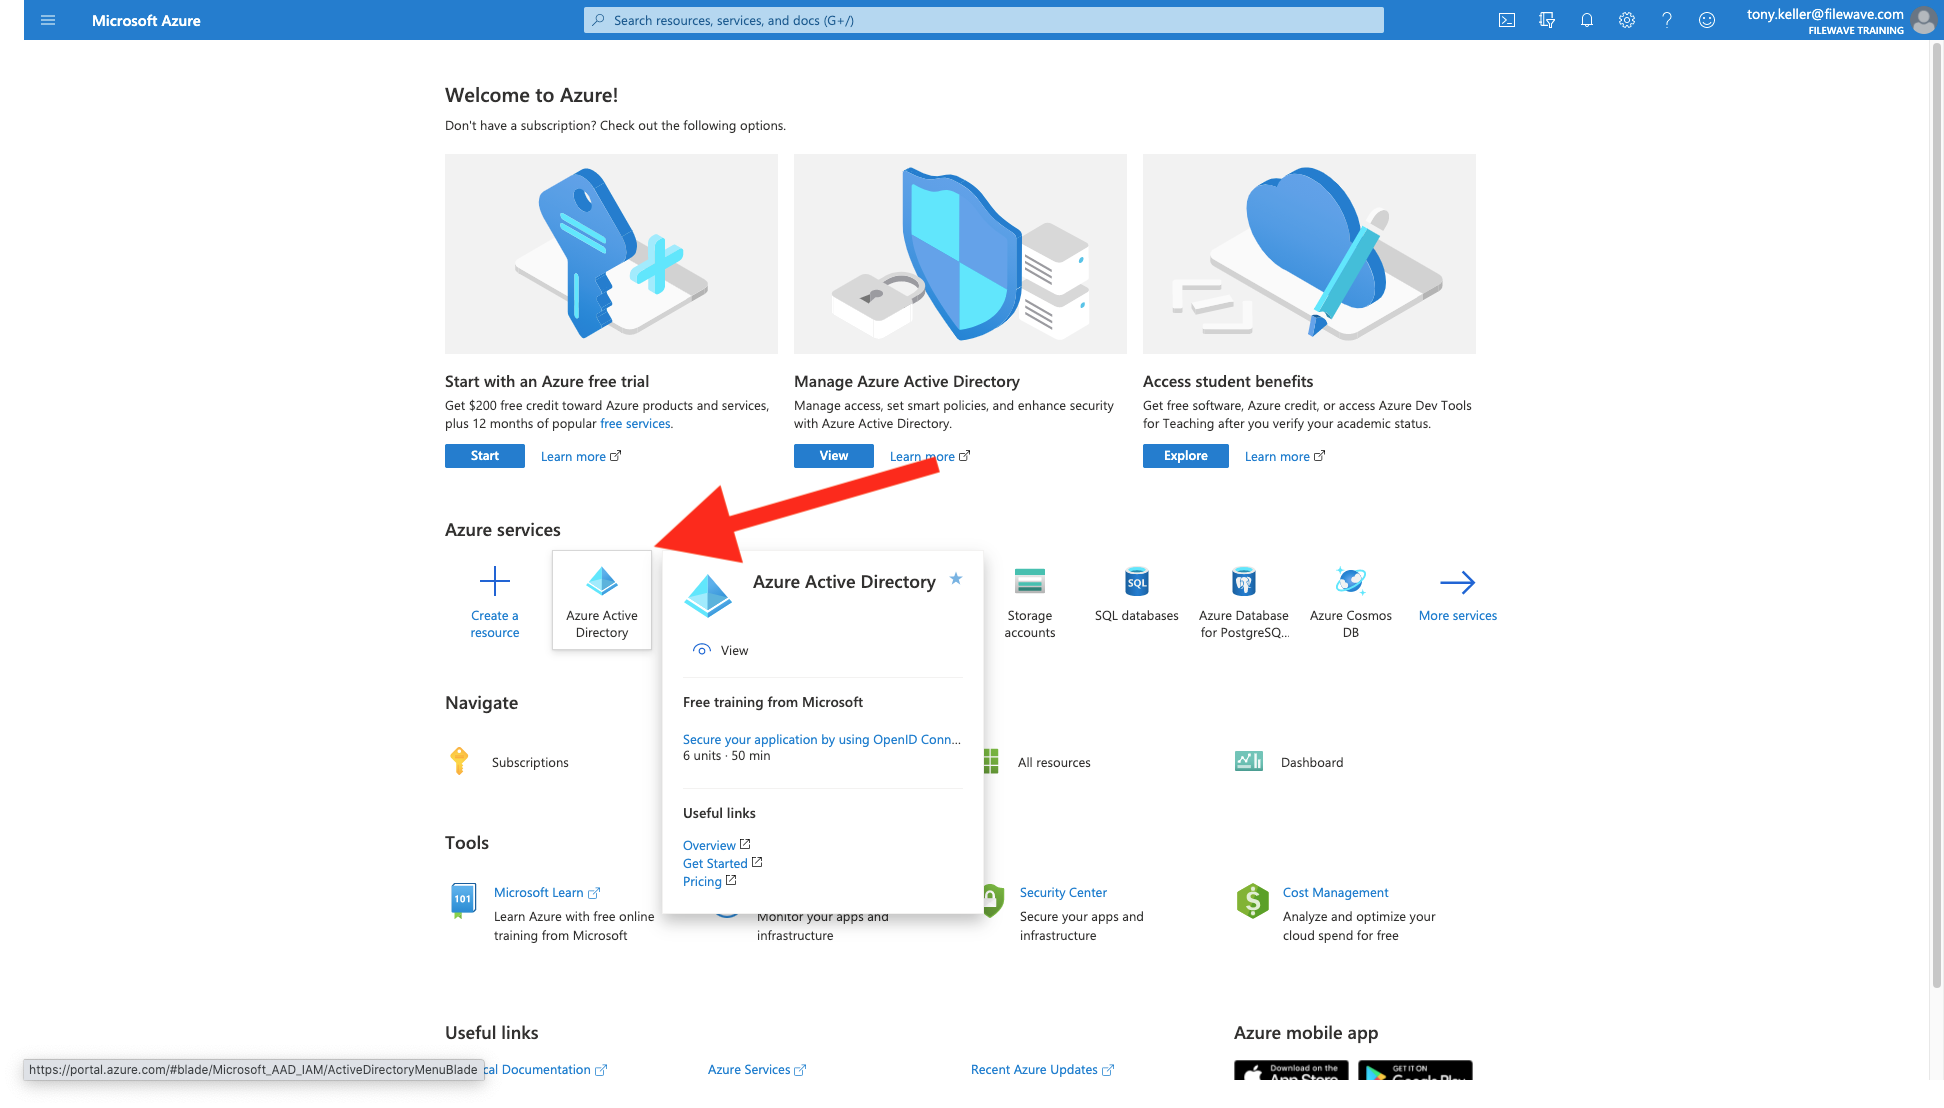
First, we'll login to Microsoft Entra ID at portal.azure.com with an administrator's account and click on Microsoft Entra ID as shown:
And make note of the domain info shown below:
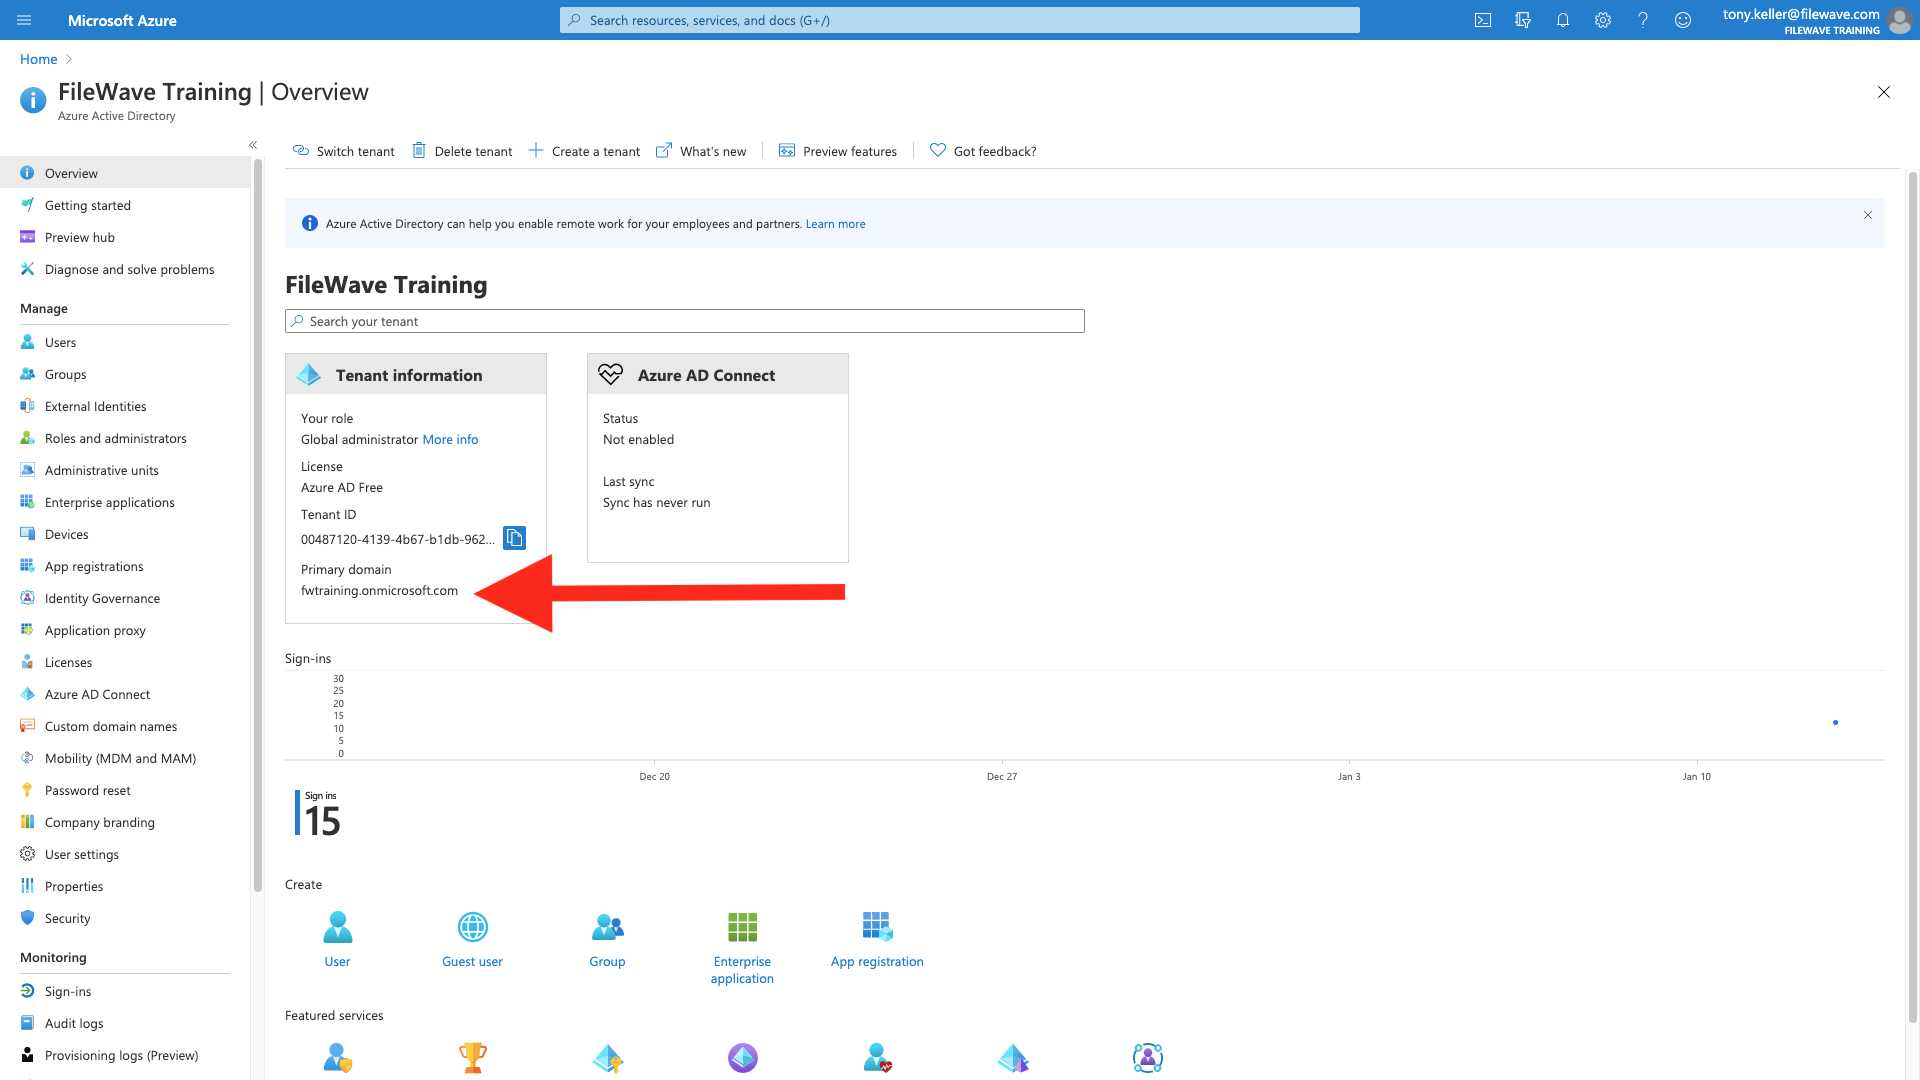
Record the tenant and application values in your organization's approved secure credential store. You will need them when configuring FileWave, and secret values are not fully visible again after they are saved.
Part 2: Create an App
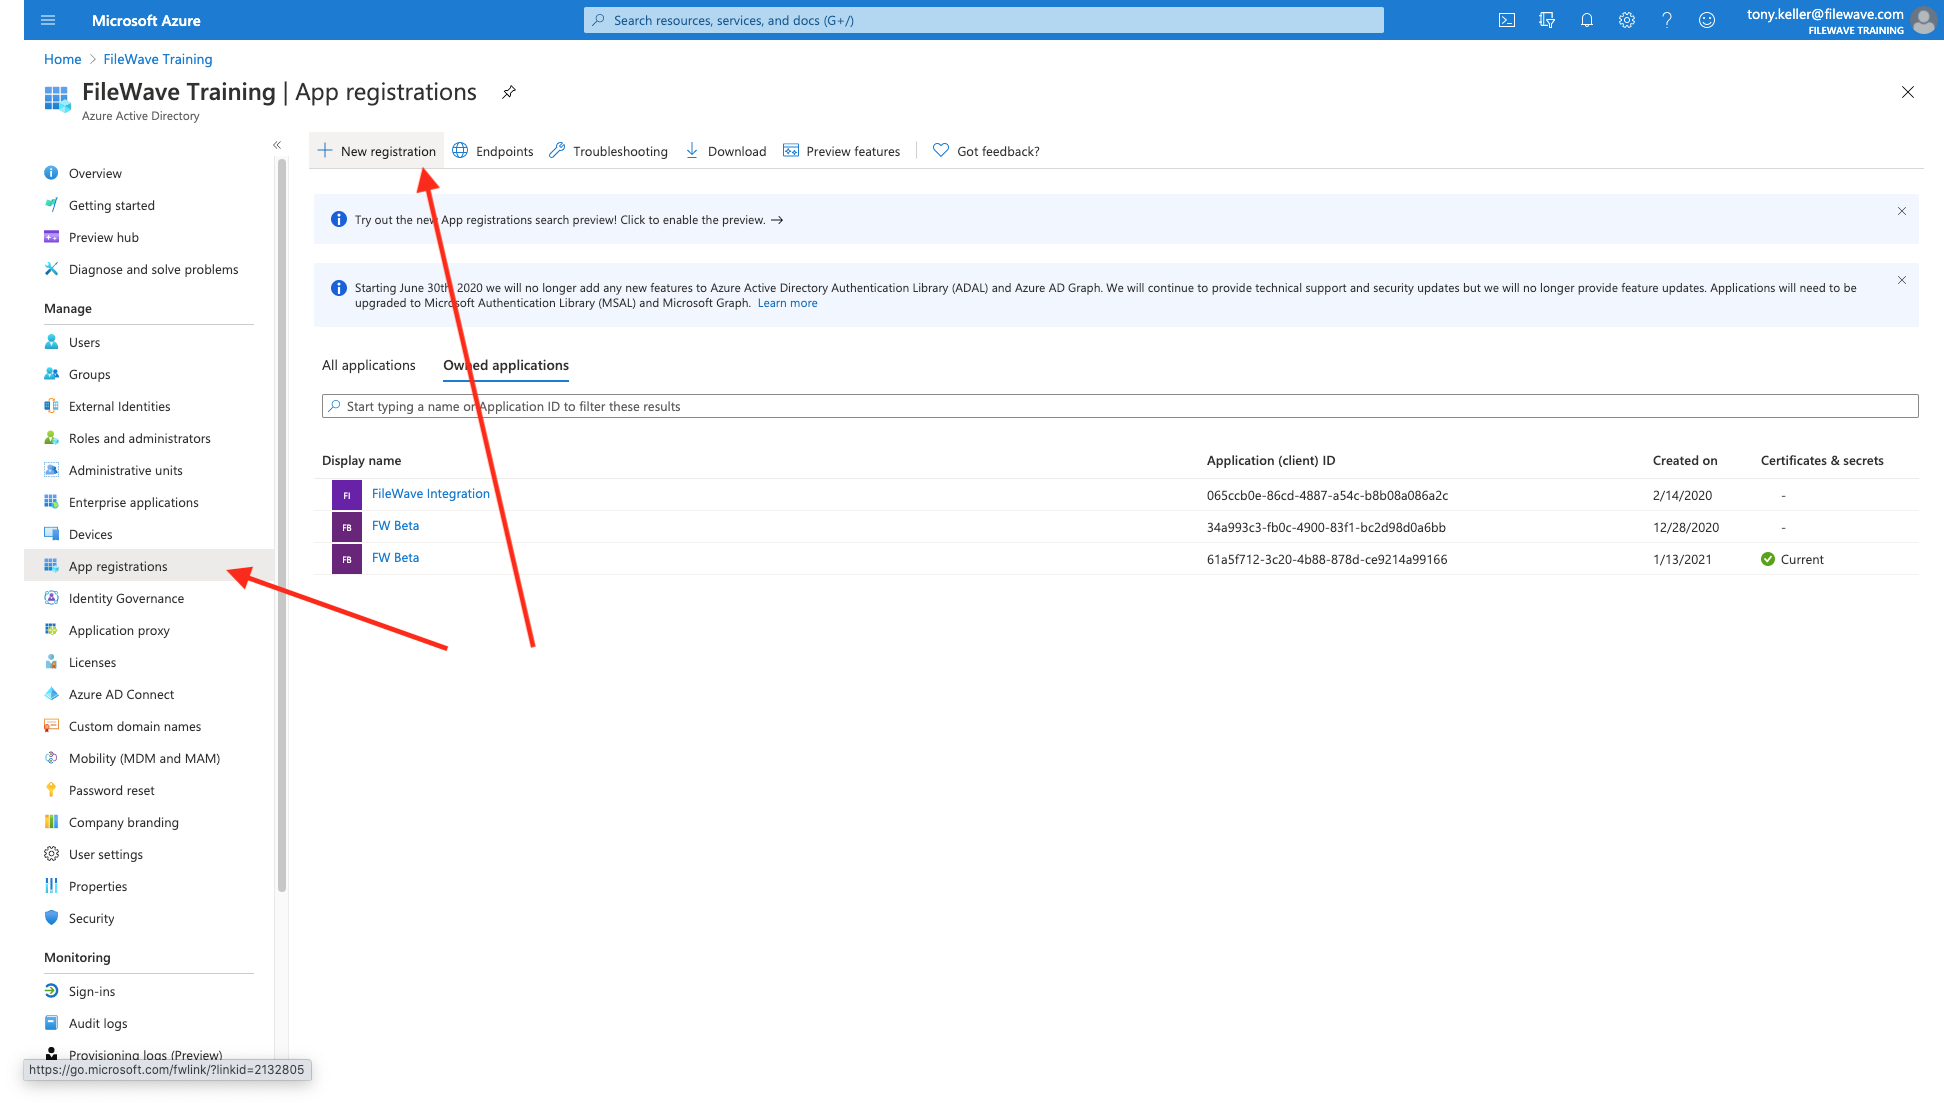
Open App registrations, select New registration, and create the application that FileWave will use:
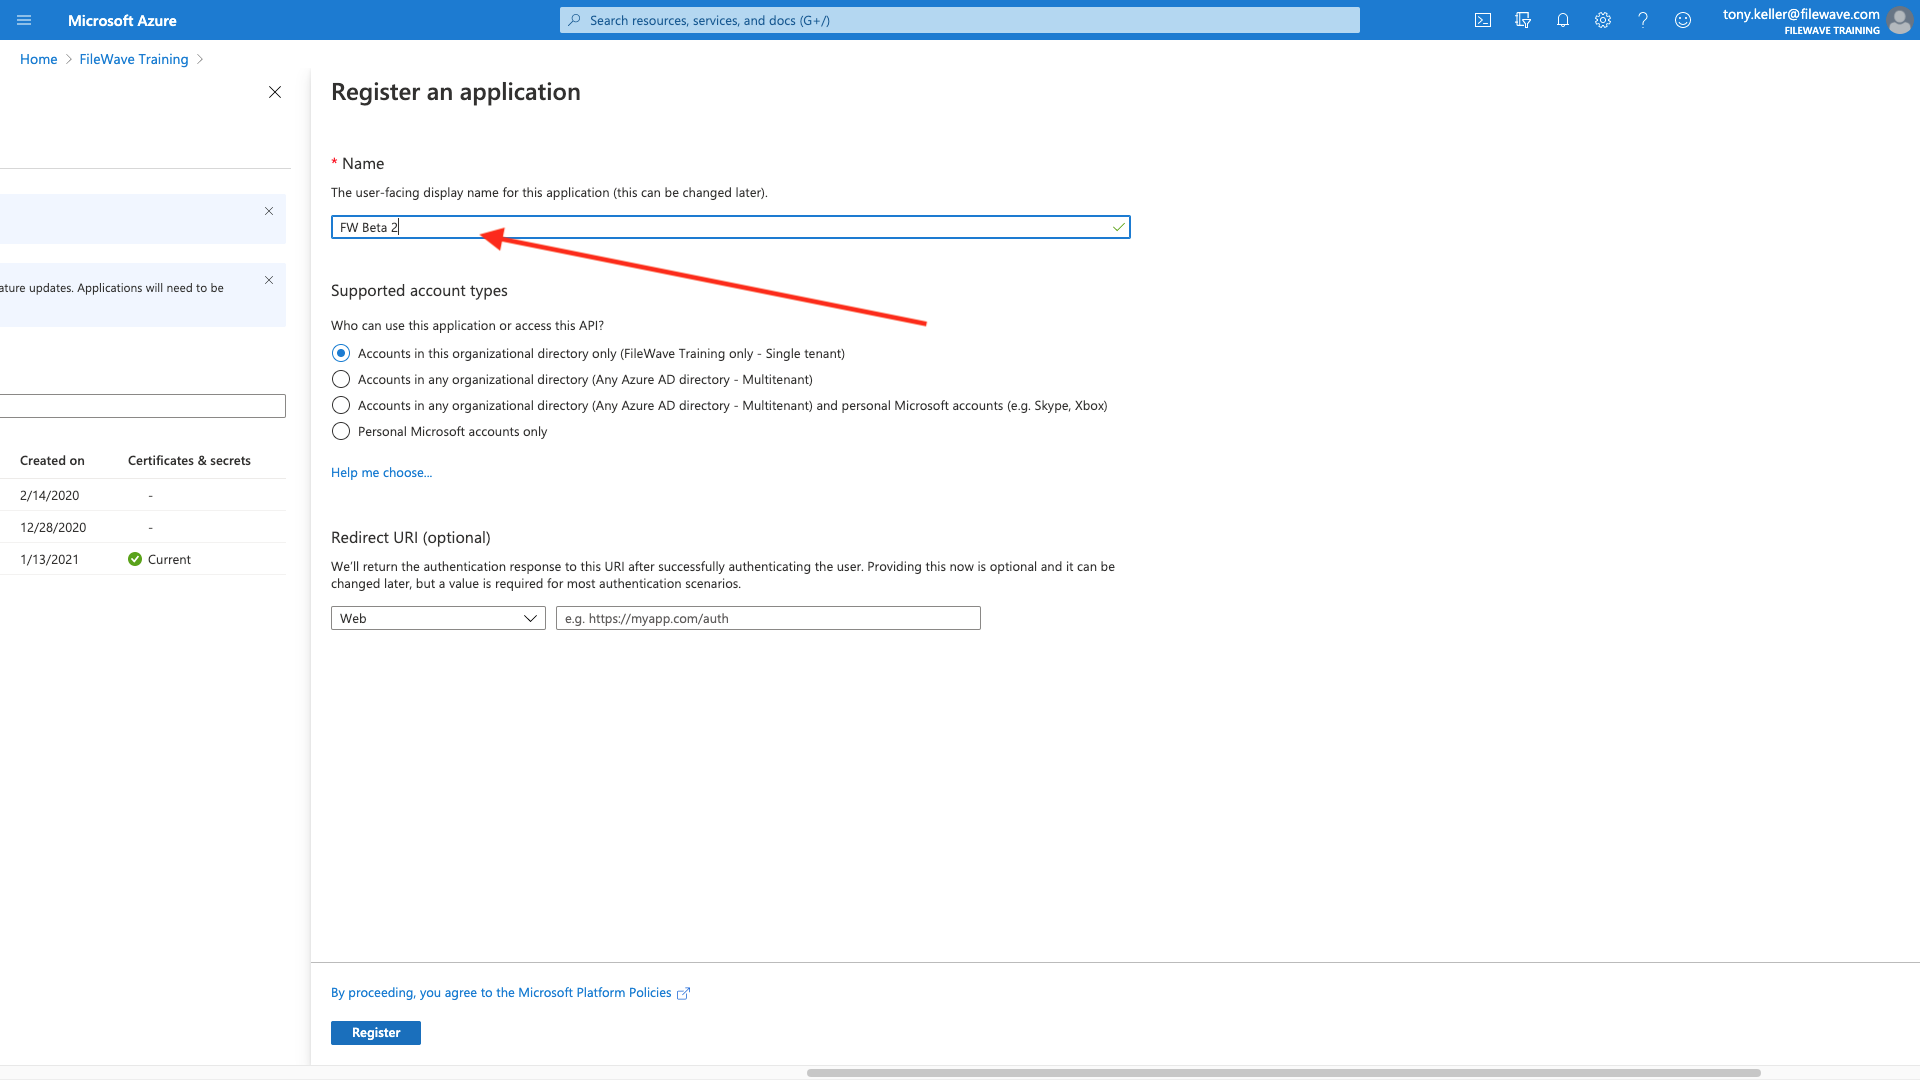
Specify a name for your app that is meaningful to you, and Register the app (we'll set the login URIs later).
Part 3: Add a Platform and URI Addresses
Within the app configuration, we'll choose Authentication, then Add a Platform, of type Web:
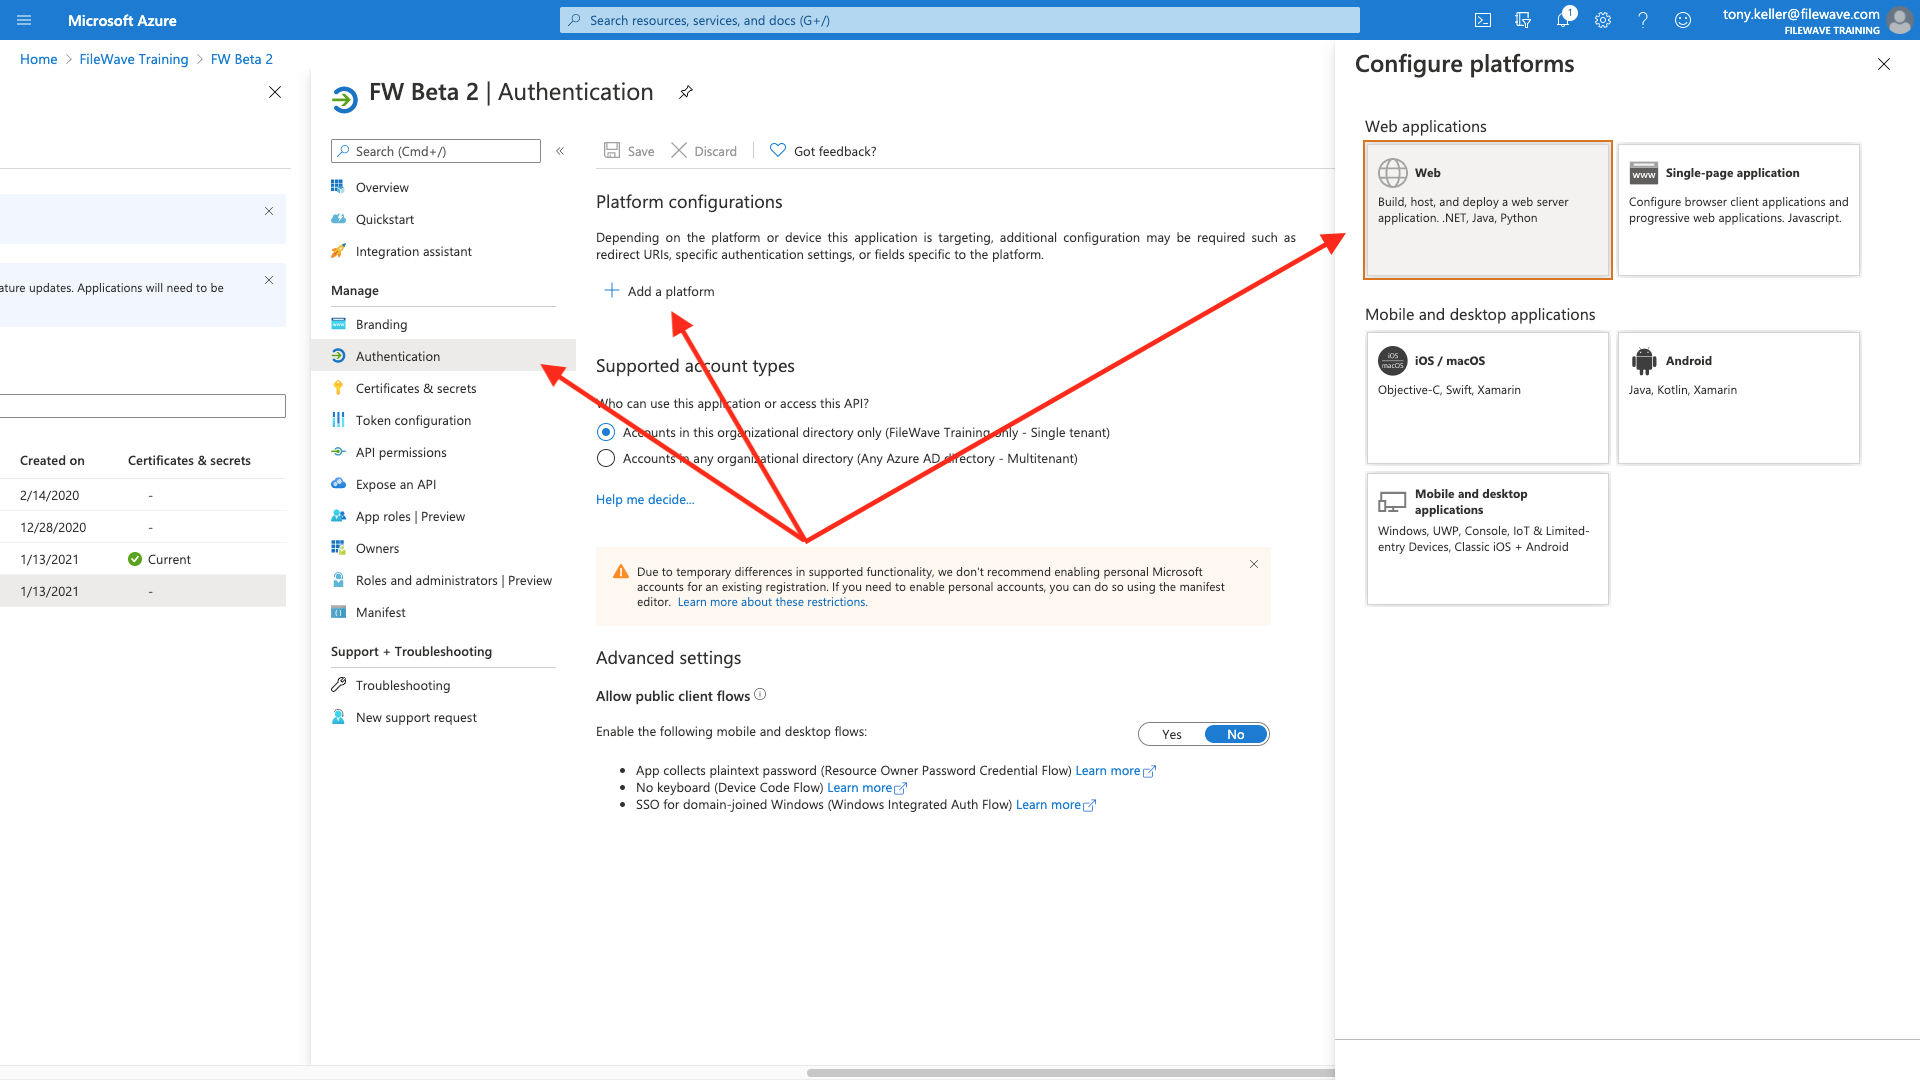
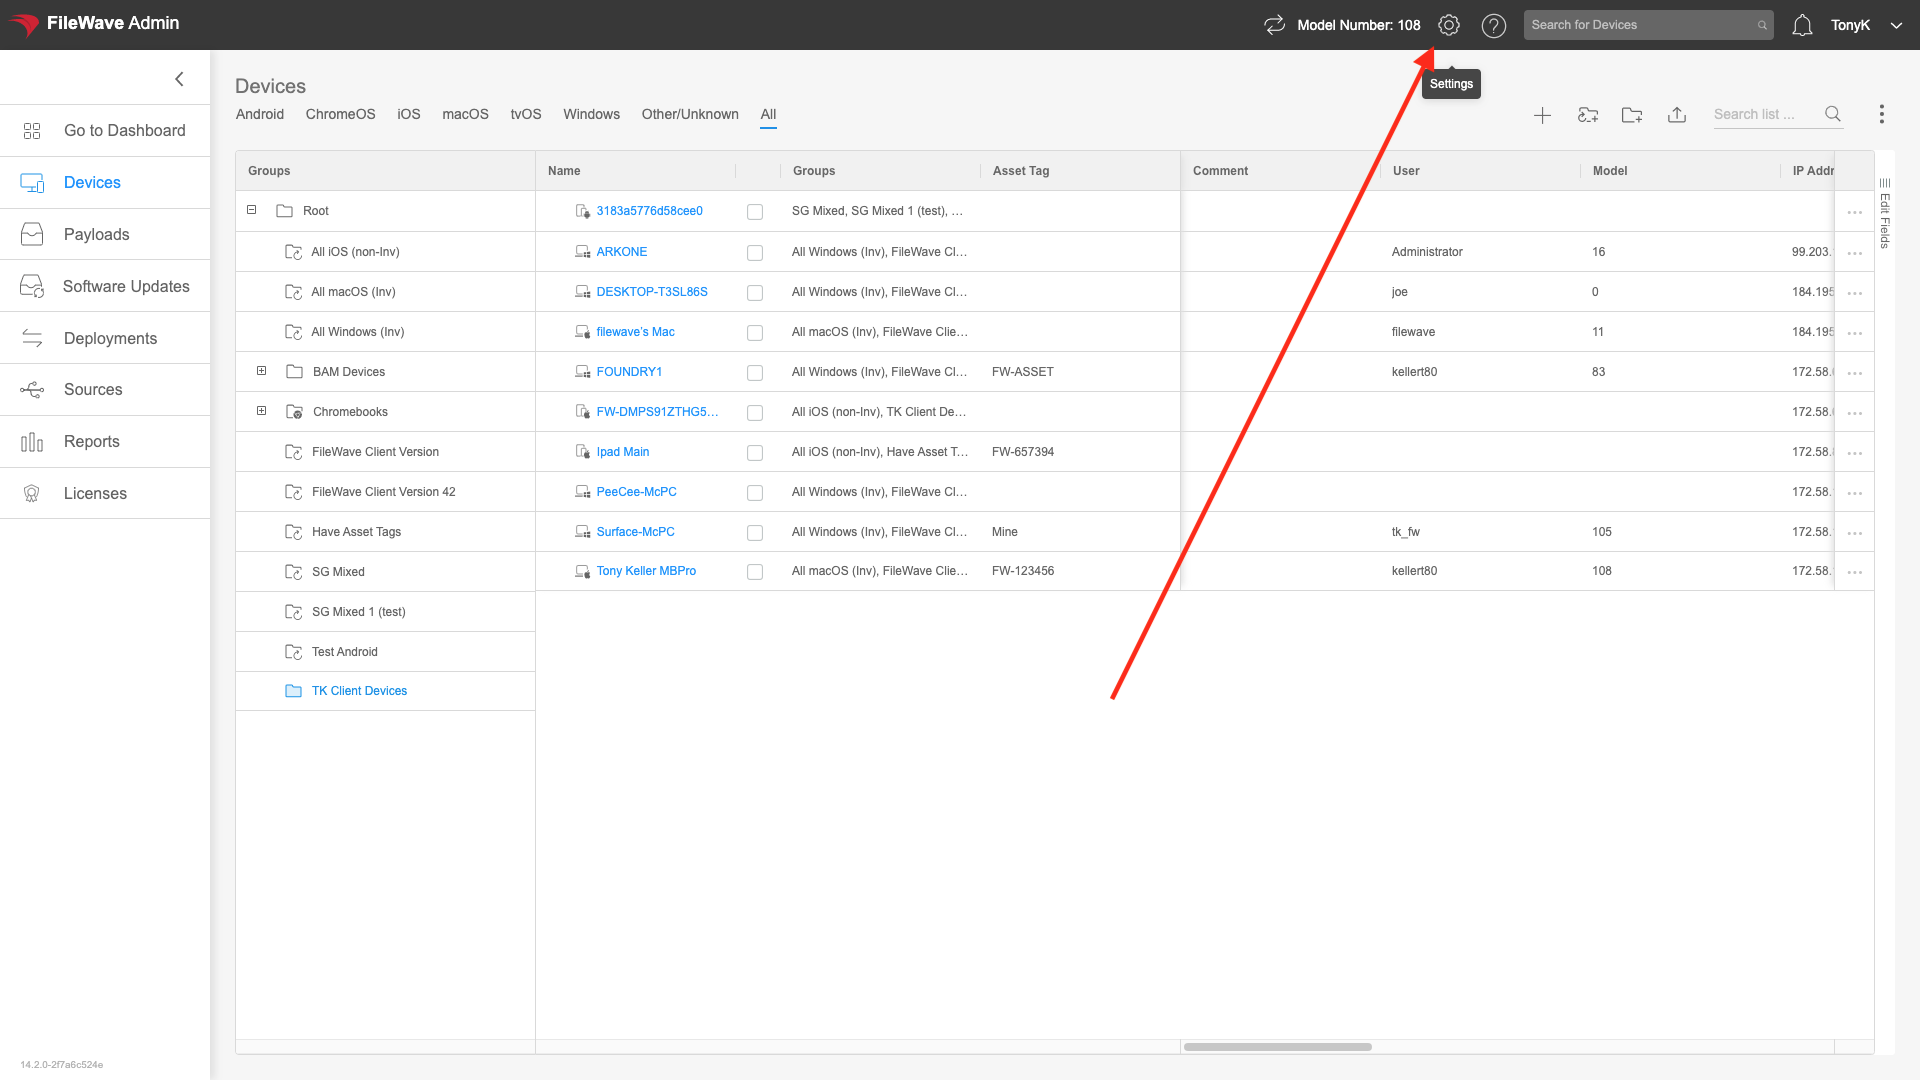
For the Web platform configuration, copy the redirect URLs supplied by FileWave Anywhere. Open Settings, add a Microsoft Entra ID identity provider, and select Get URLs:
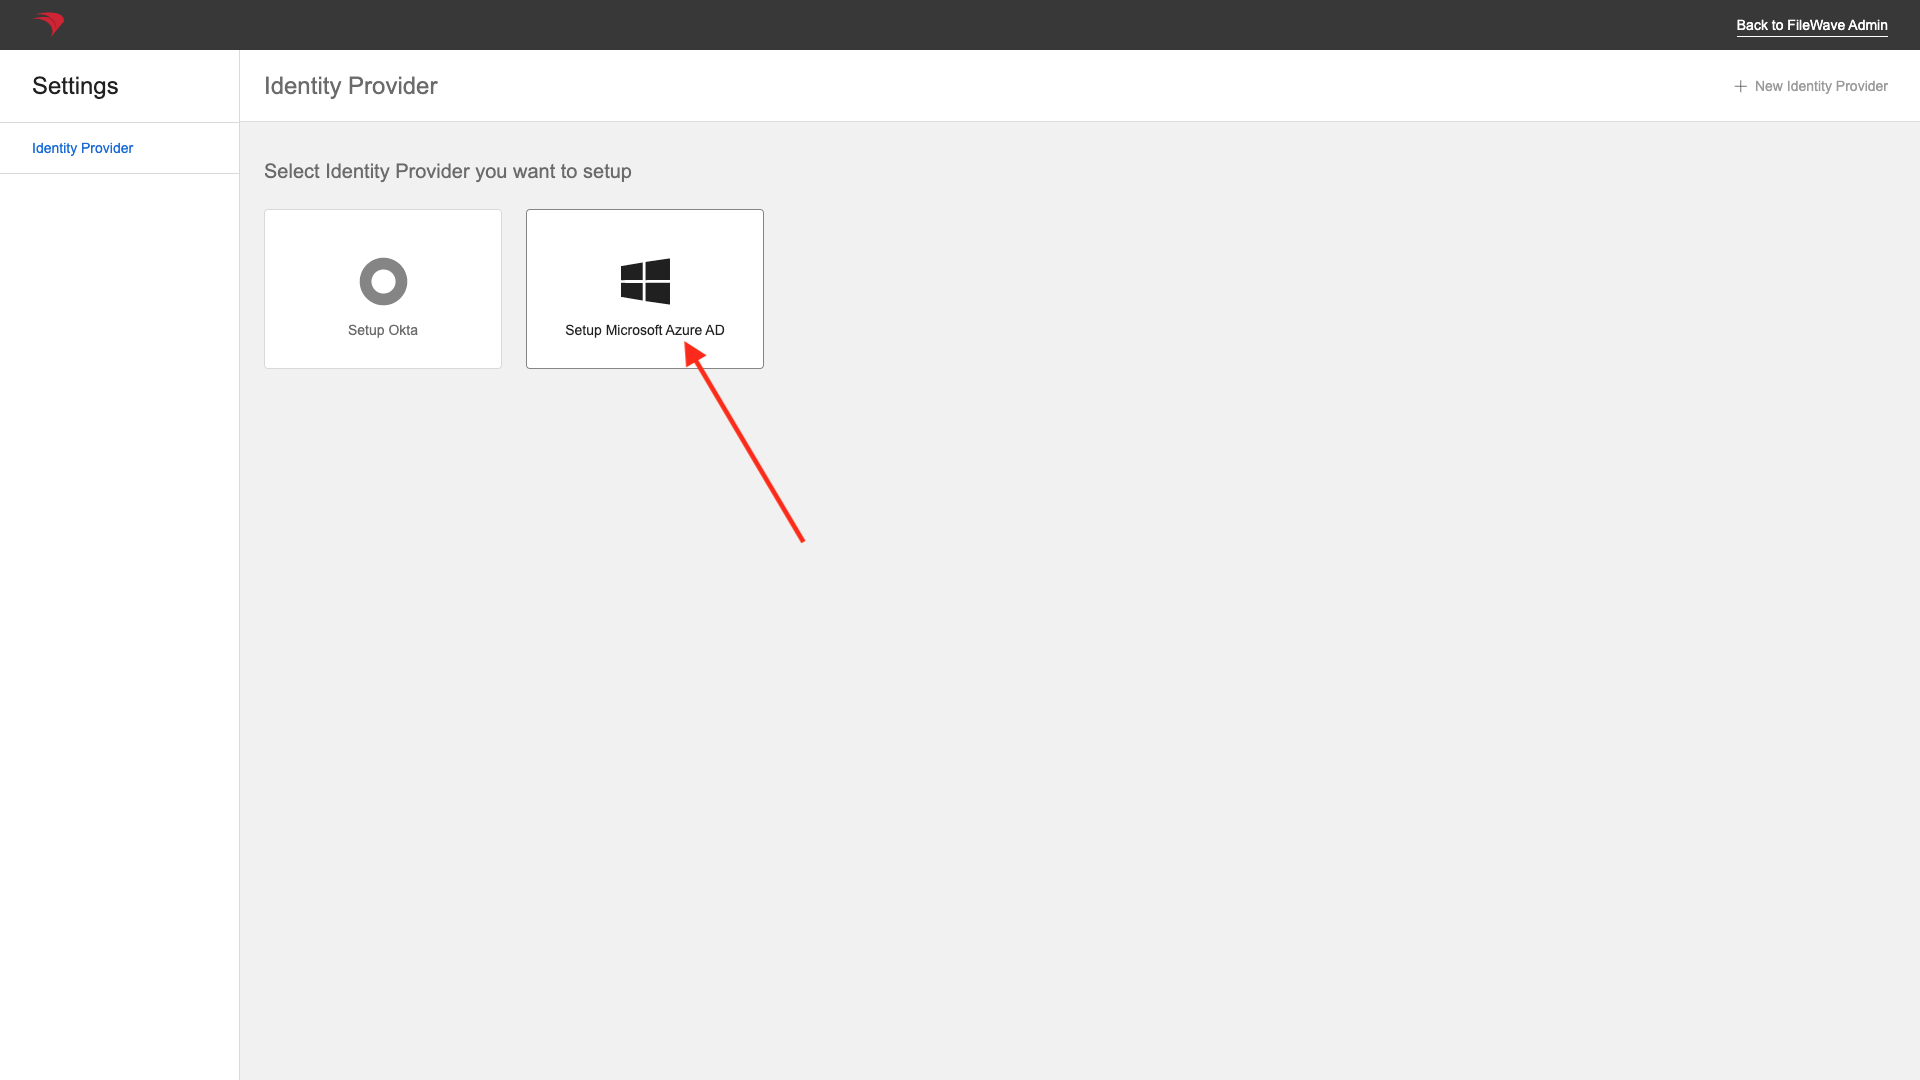
Then choose an Microsoft Entra ID IDP Provider
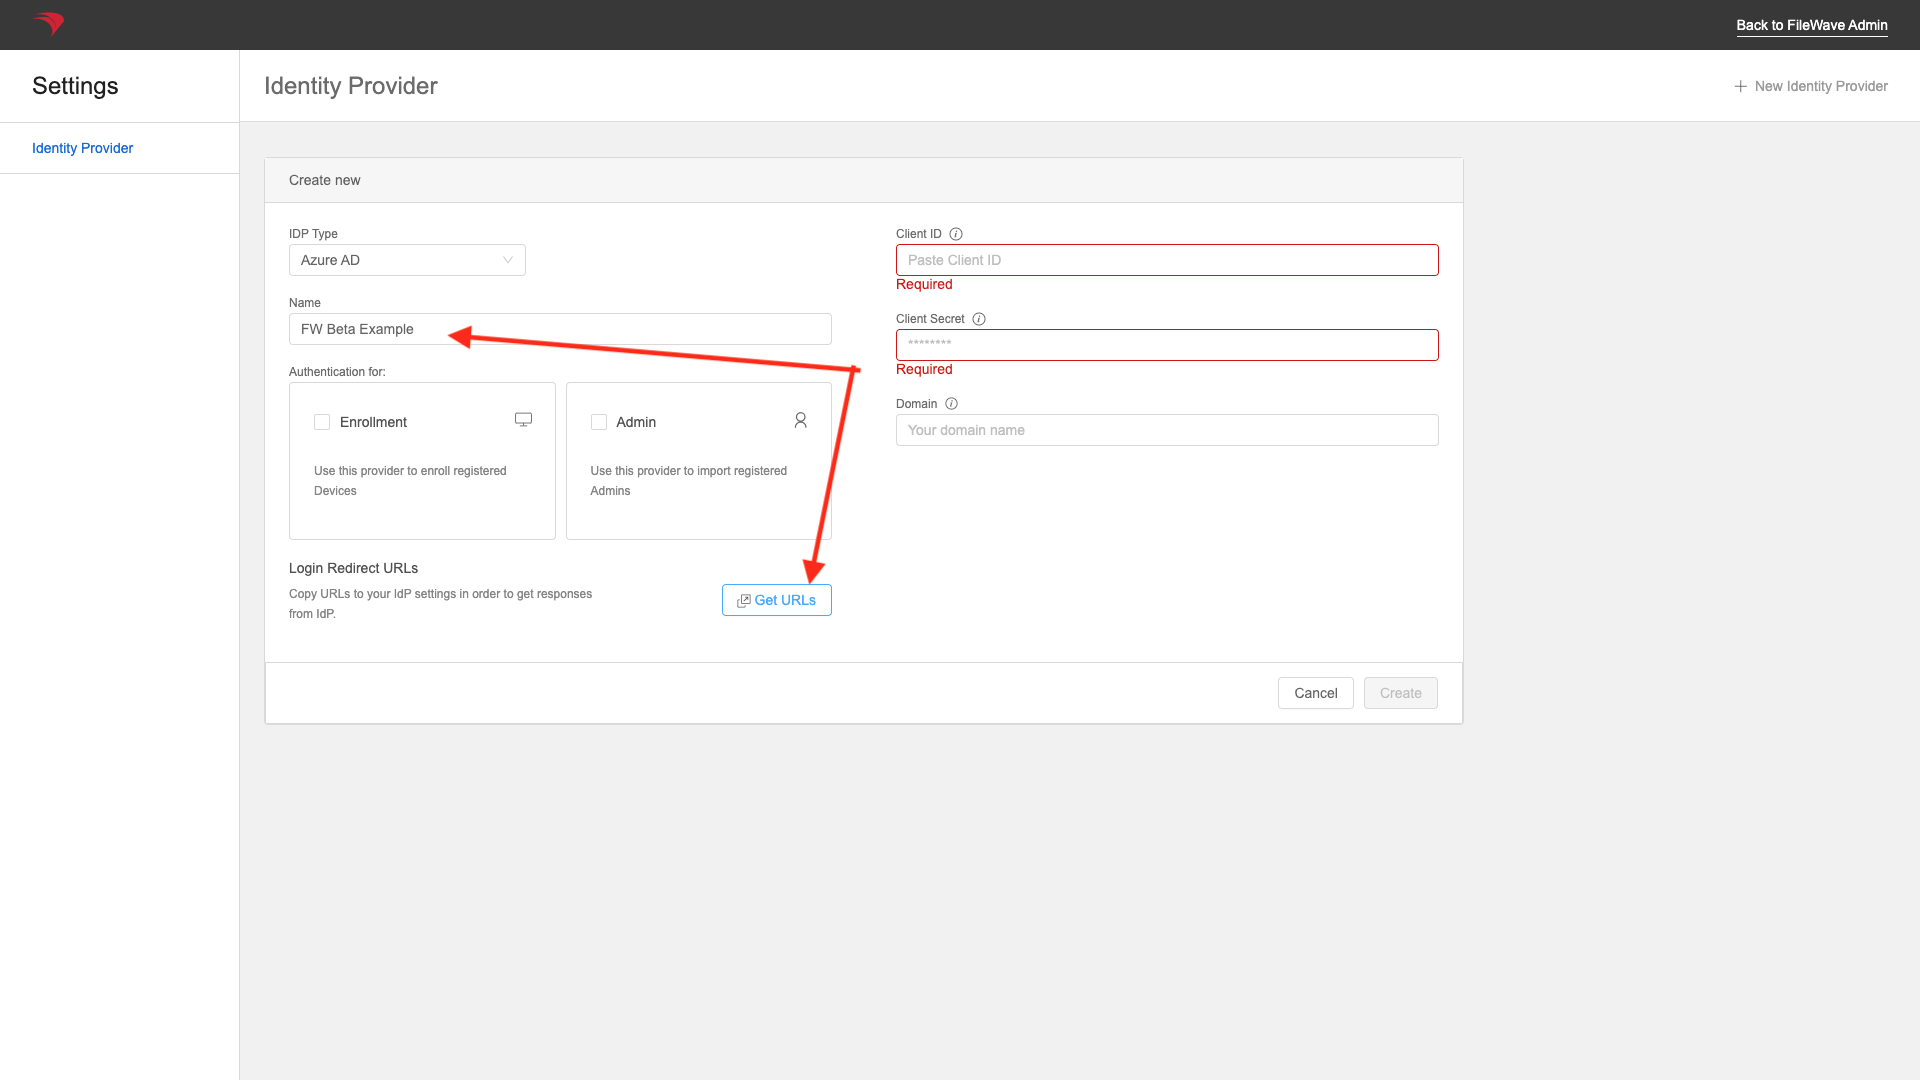
You can add a name now (or later), but you'll get the URLs from the "Get URLs" button:
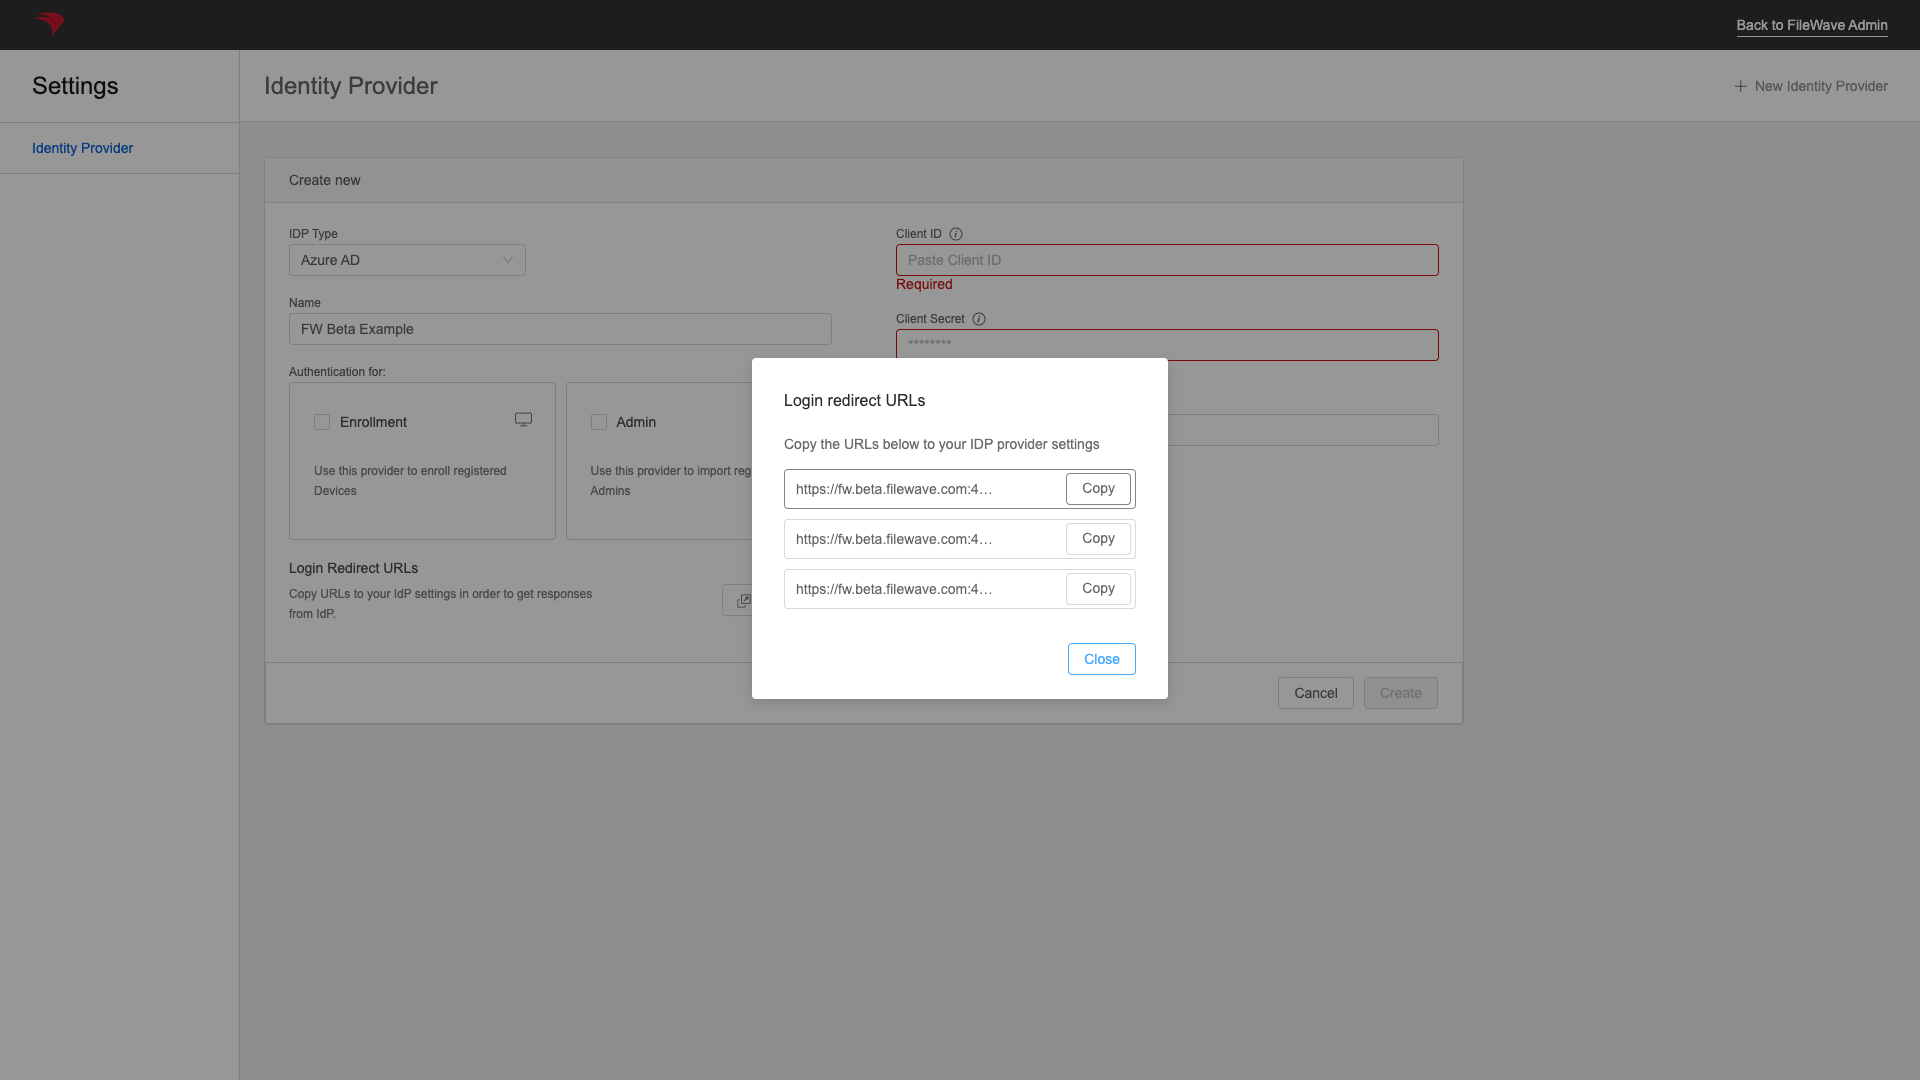
So now we'll enter one of the redirects, and click configure:
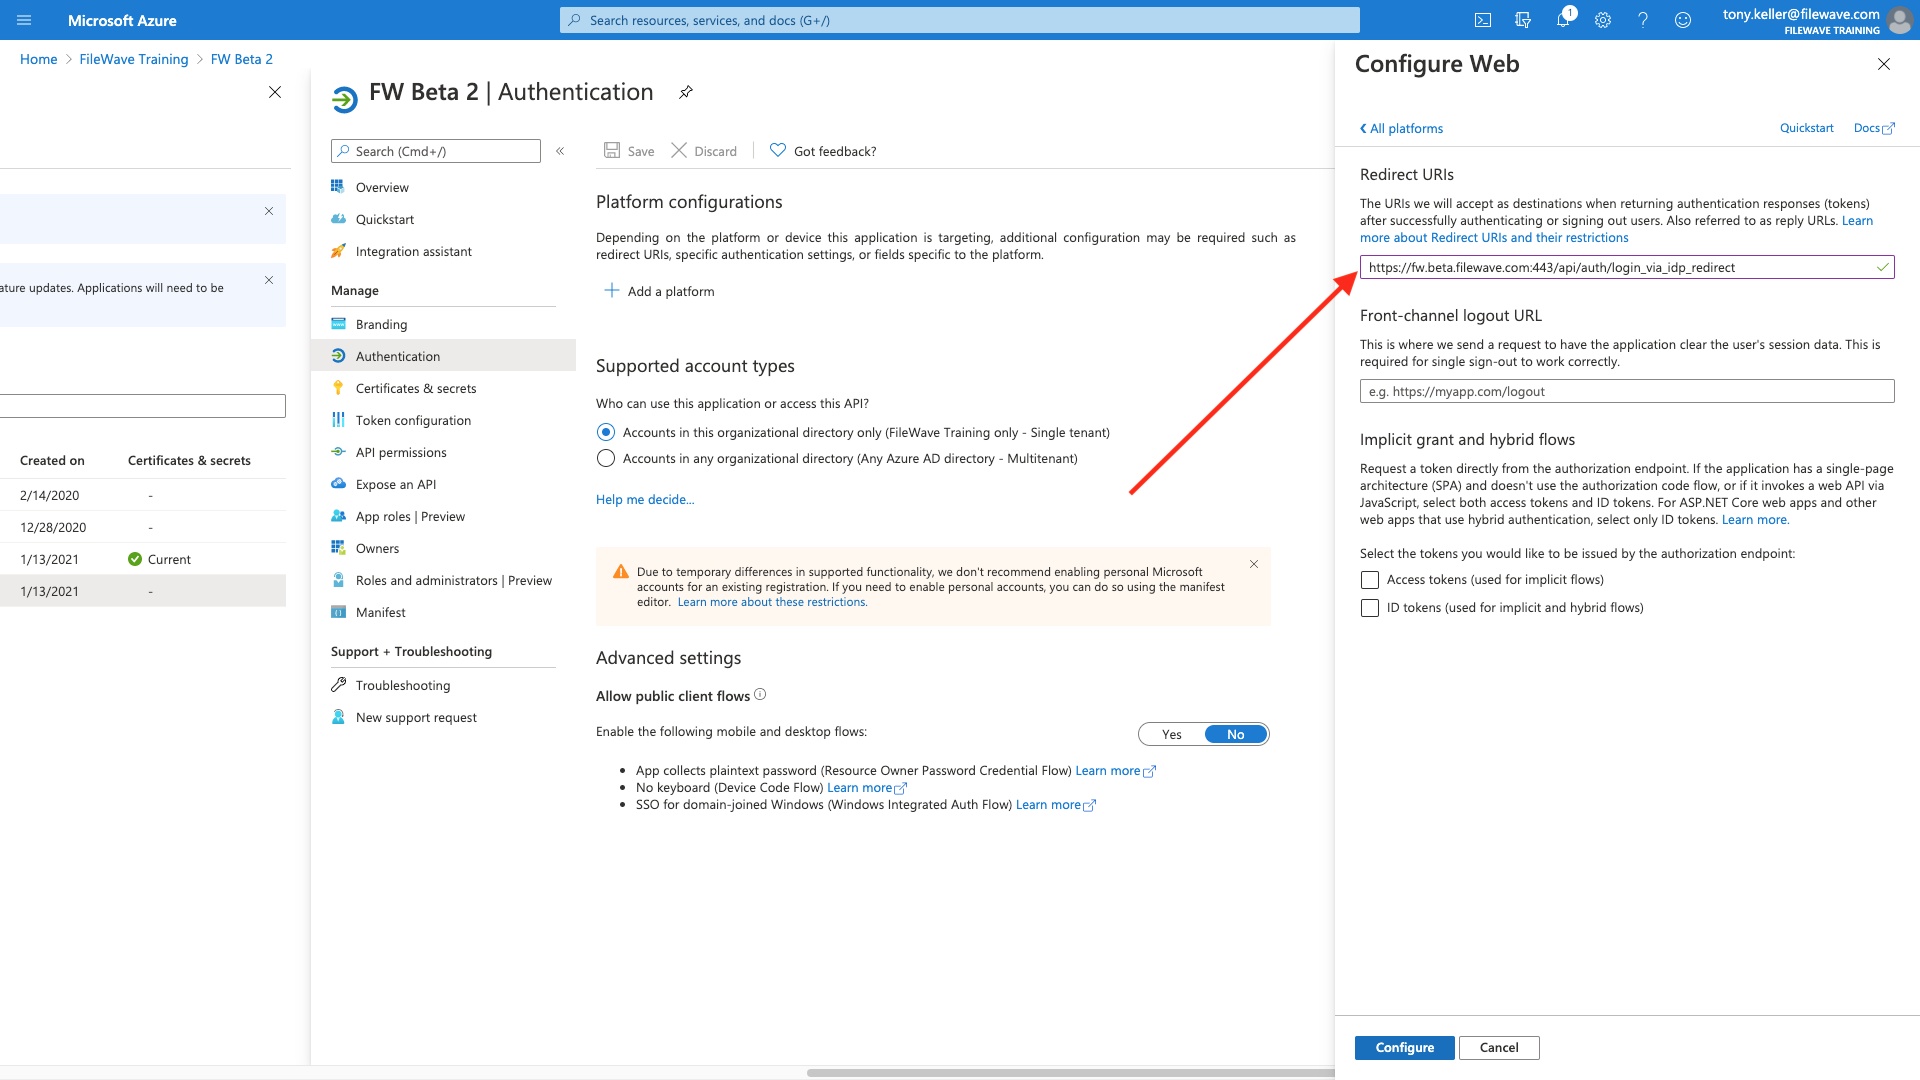
And then add the other two from here:
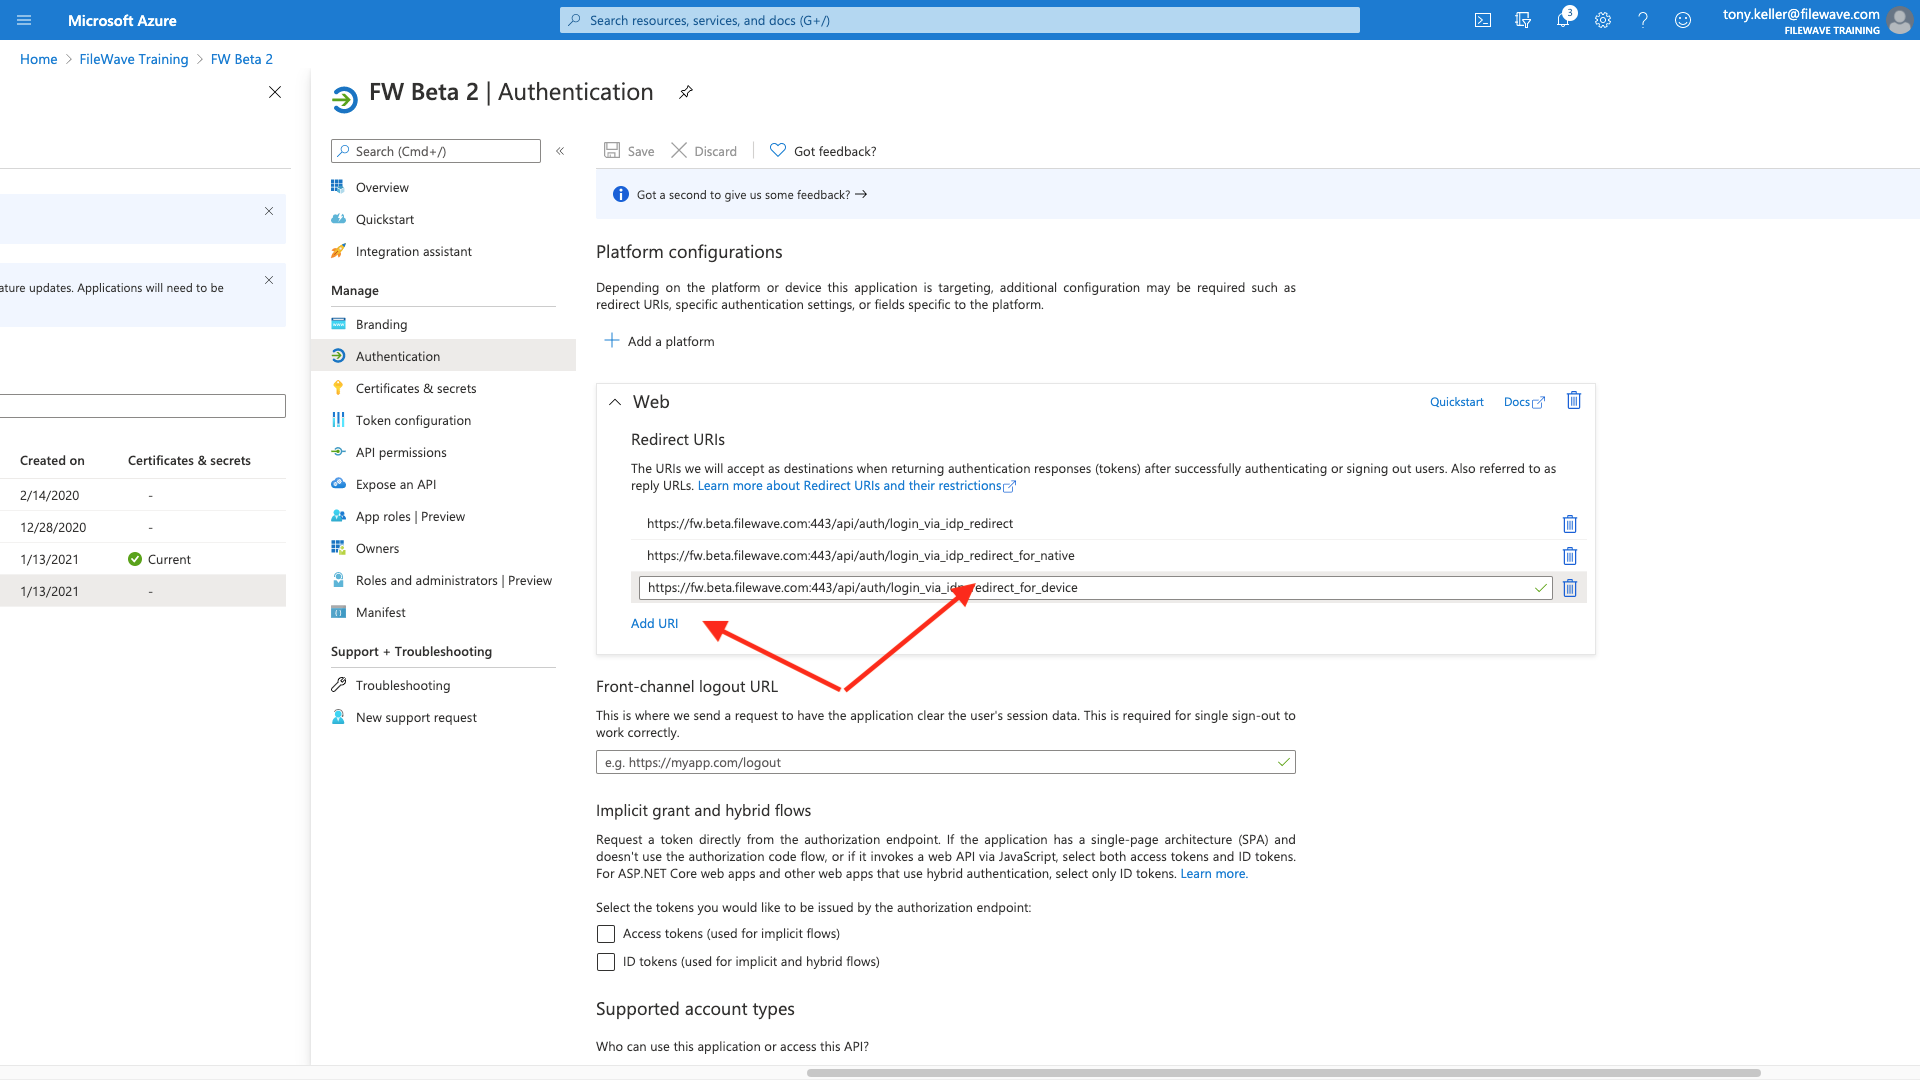
Make sure to hit Save at the top after you have entered all three.
Part 4: Create a Client Secret
Open Certificates & secrets and select New client secret. FileWave uses this secret to authenticate to the application.
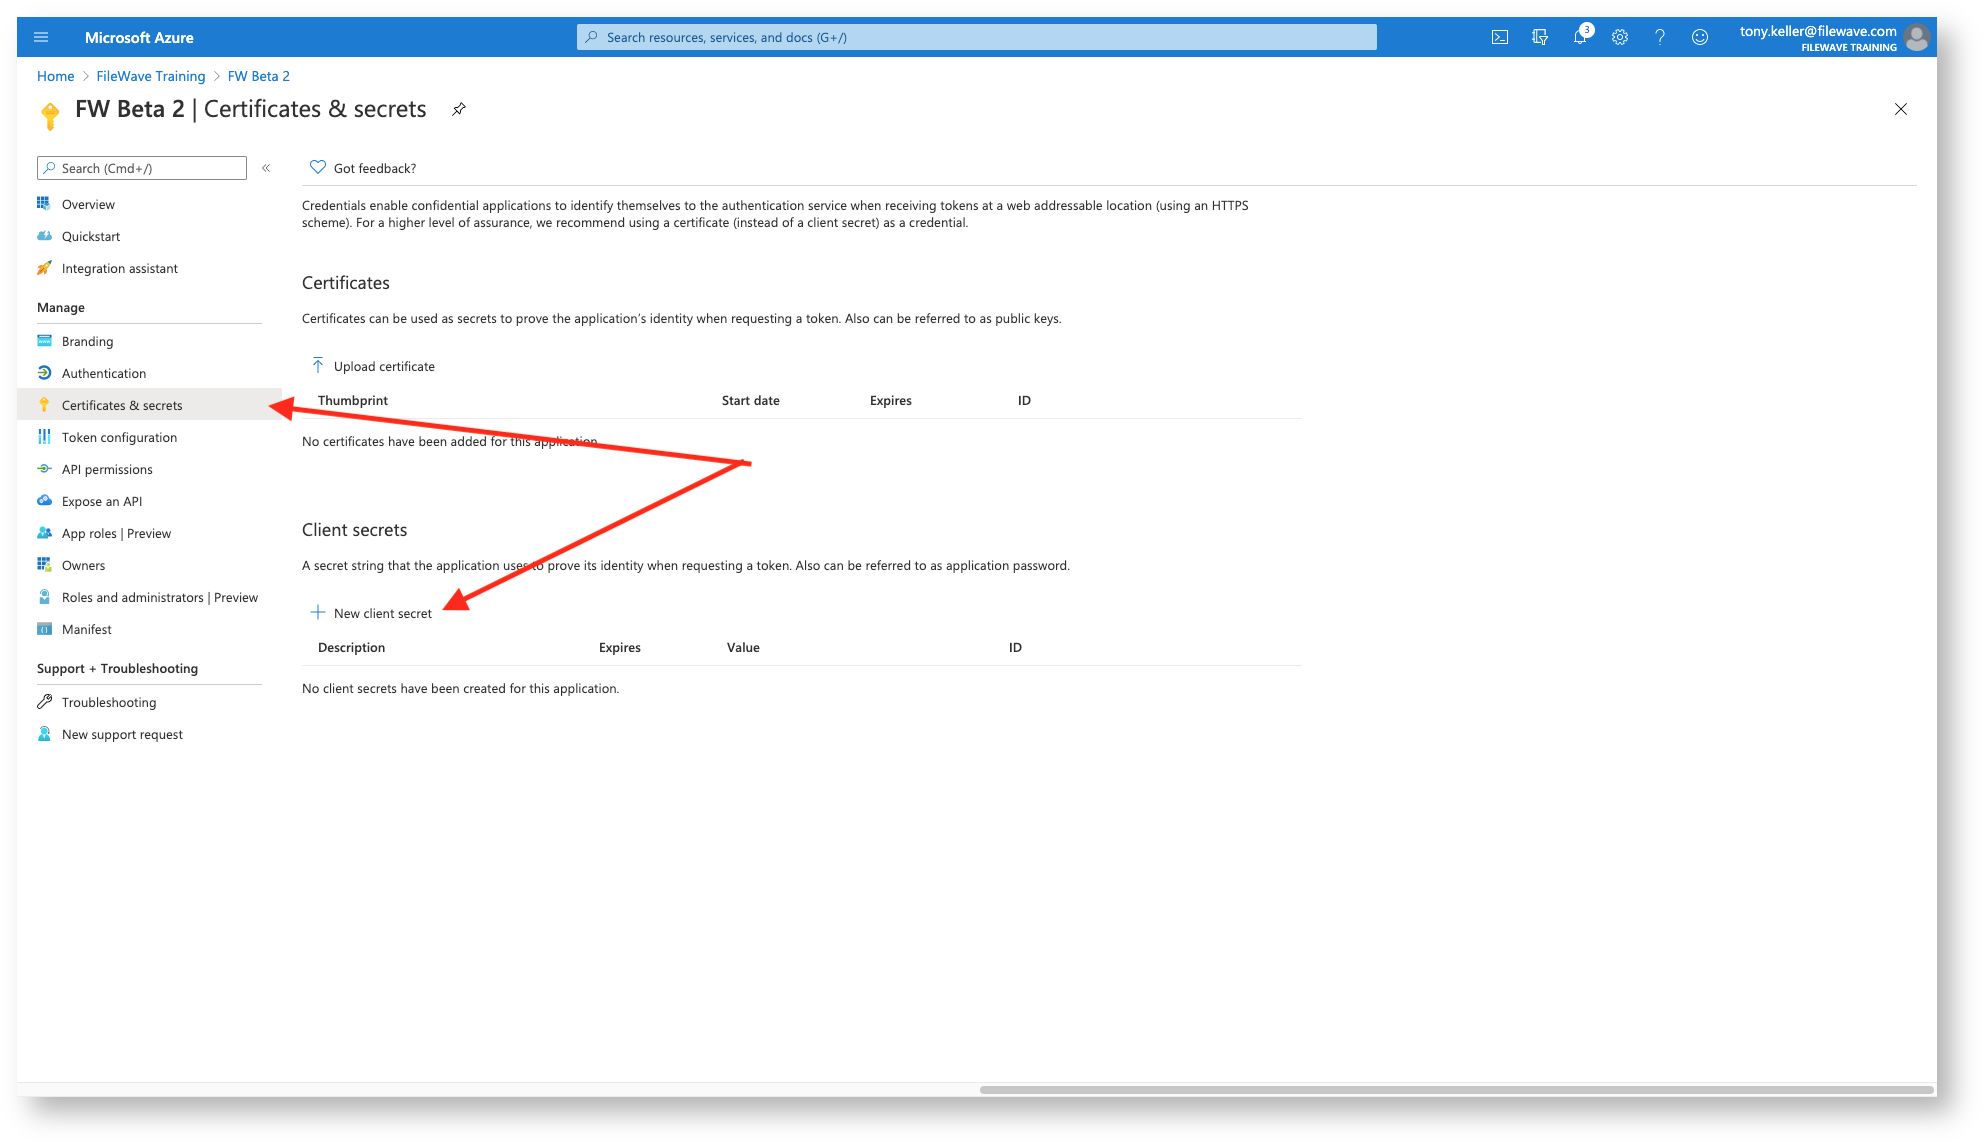
Then we give it a descriptive name:
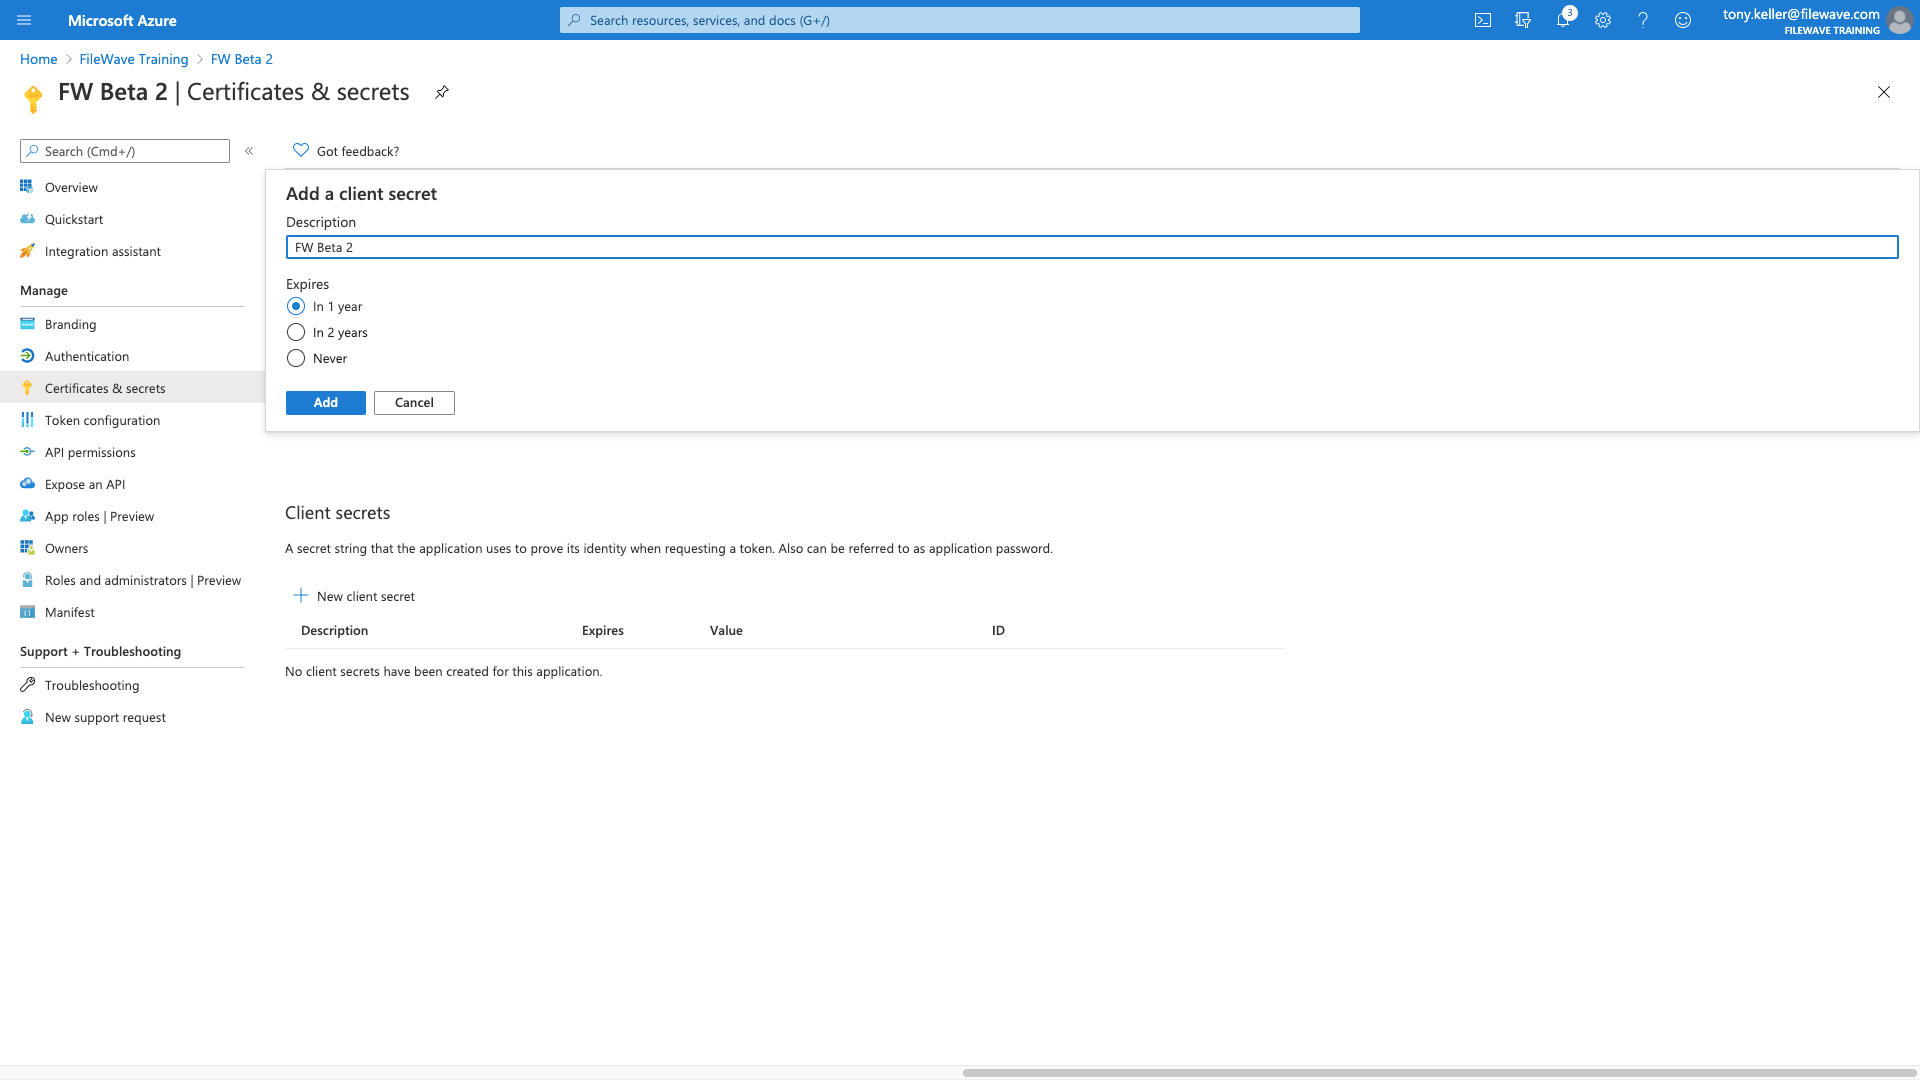
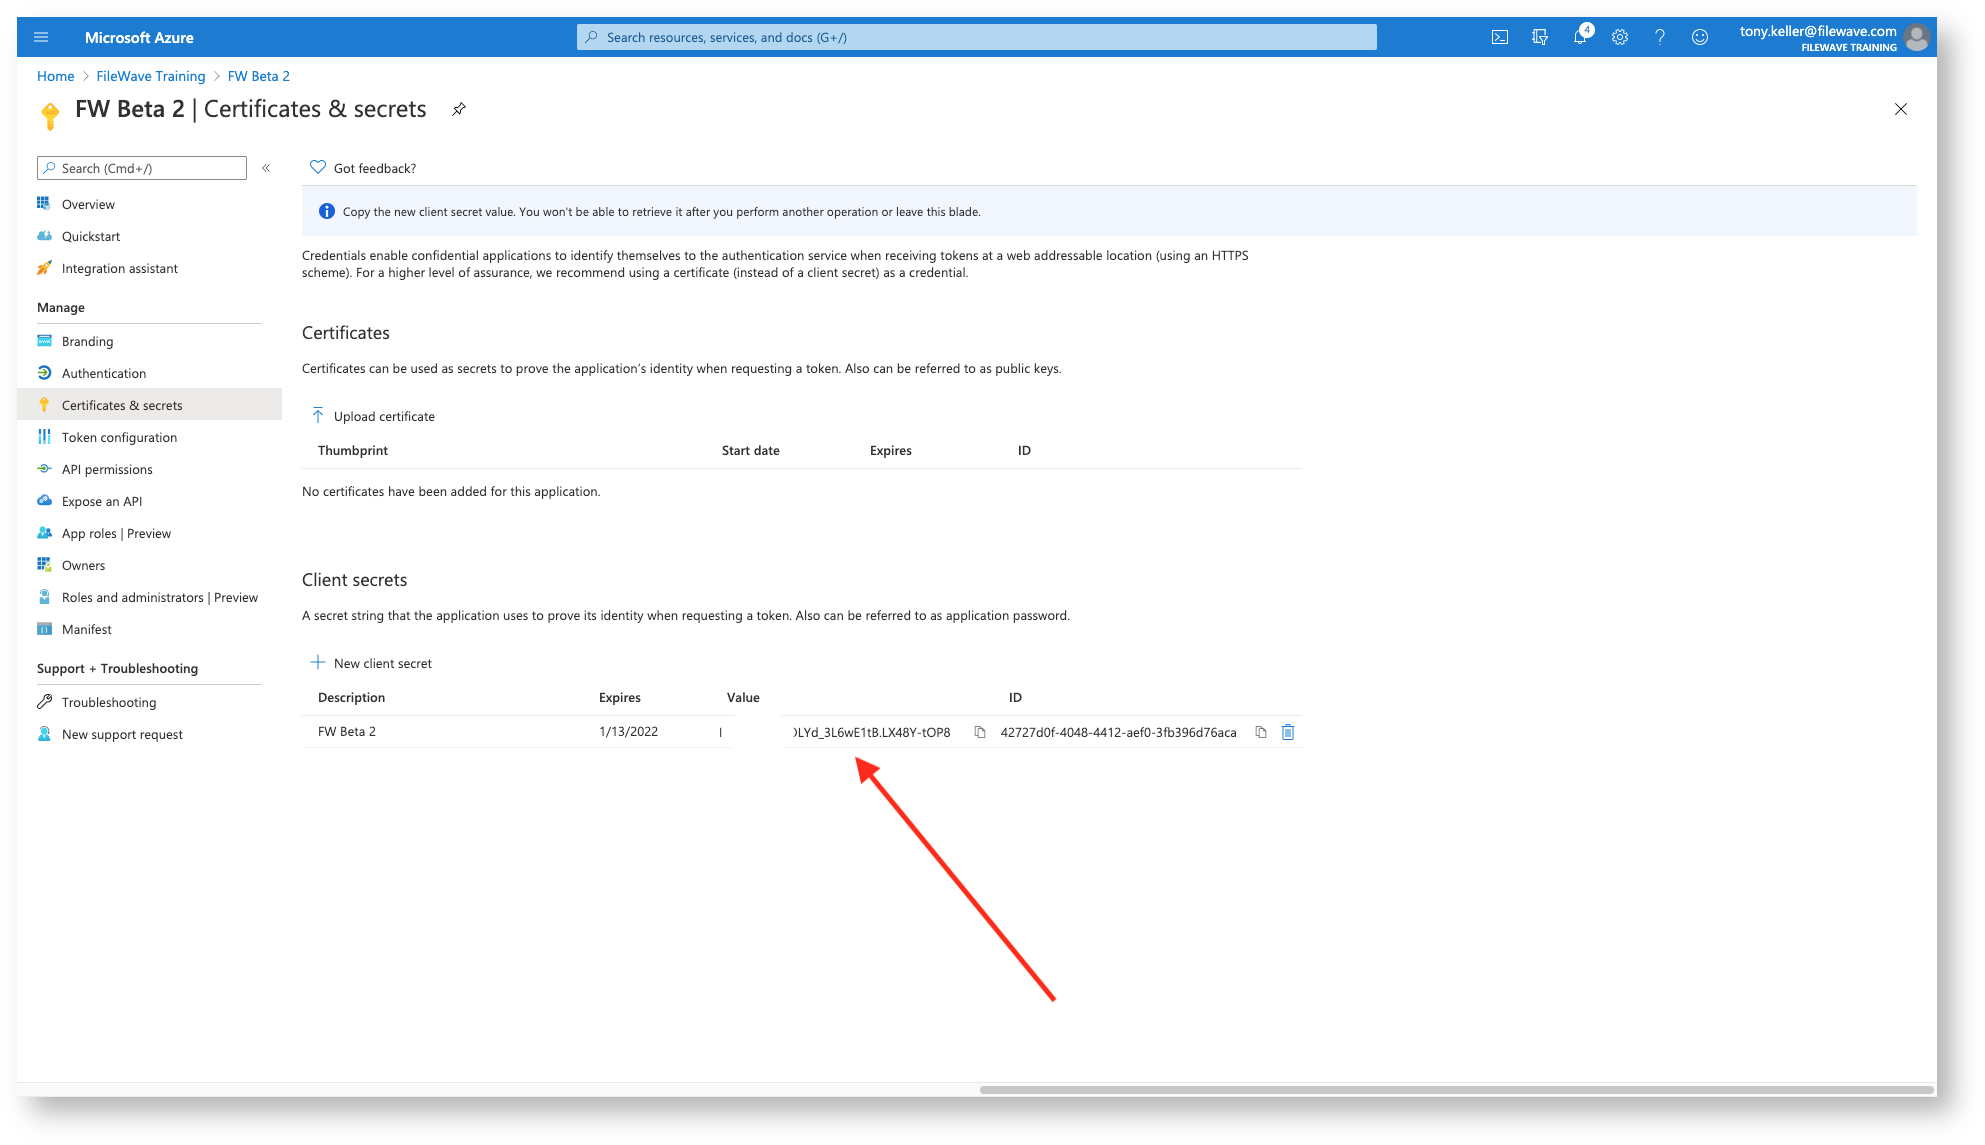
And then we'll want to get a copy of the Client Secret, and this is the ONLY time you can copy it. The one we need is under the 'Value' column.
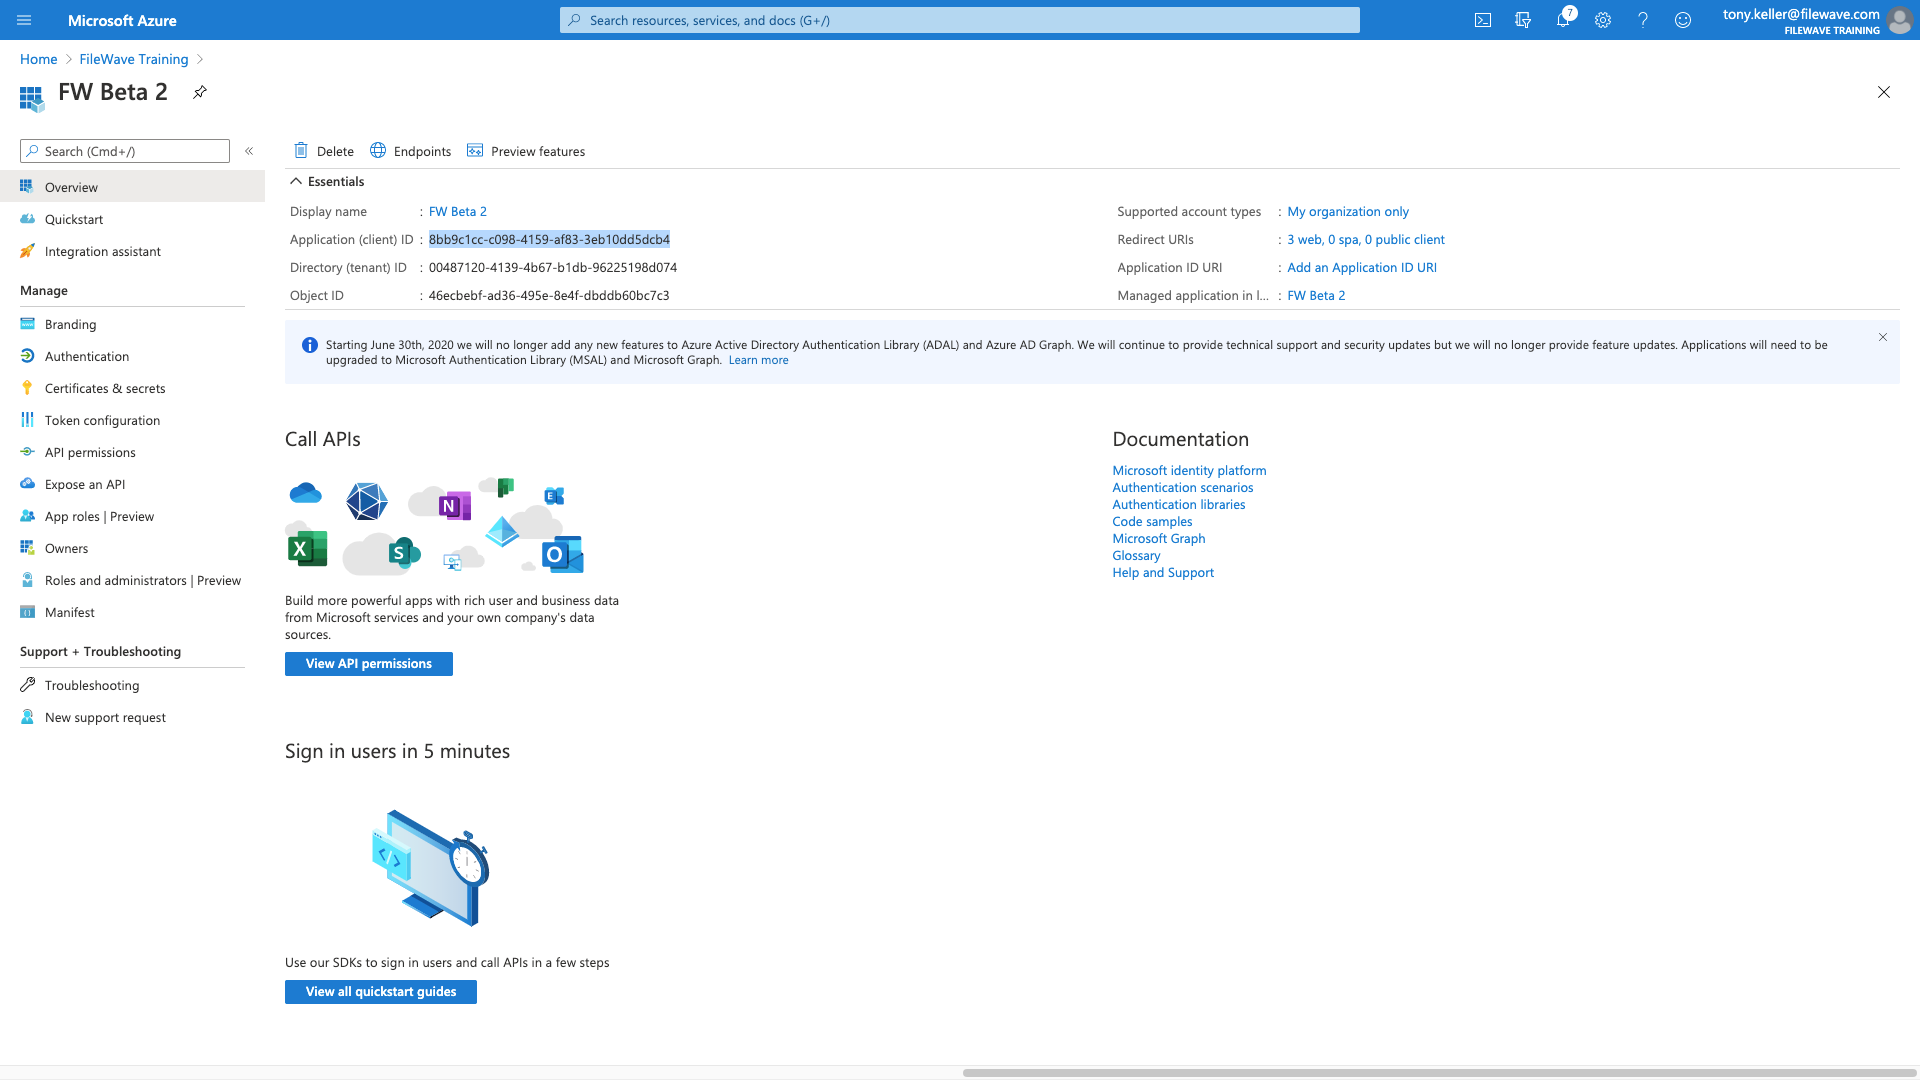
Copy the Client ID from the application's Overview page:
Each of the relevant values then gets copied into the FileWave config below:
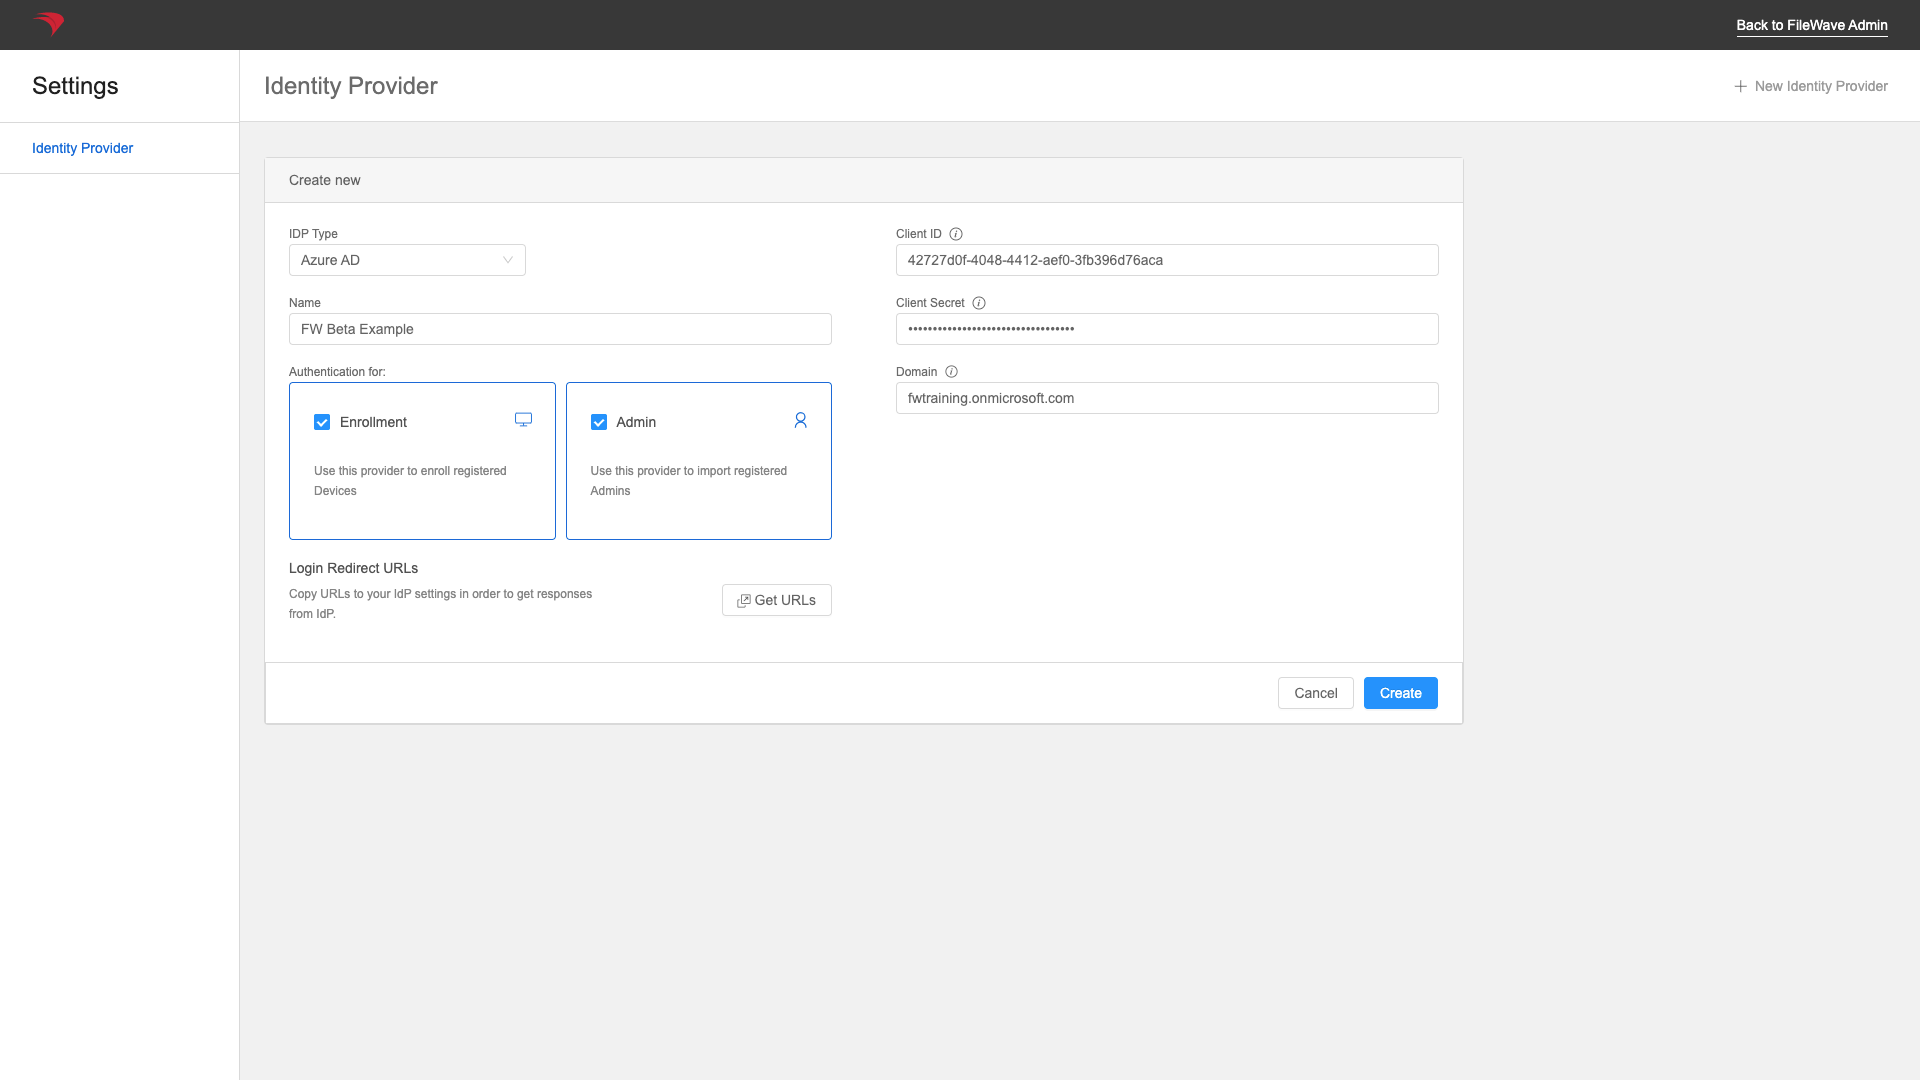
Enable Admin to allow Microsoft Entra ID administrator login to FileWave. Enable Enrollment to use it for Apple device enrollment authentication. Multiple identity providers can be enabled for administrator login, but only one can be selected for device enrollment.
Part 5: App Permissions
Now we have to give our app permissions to read the directory so that it can pull group information into FileWave for browsing and rights assignment.
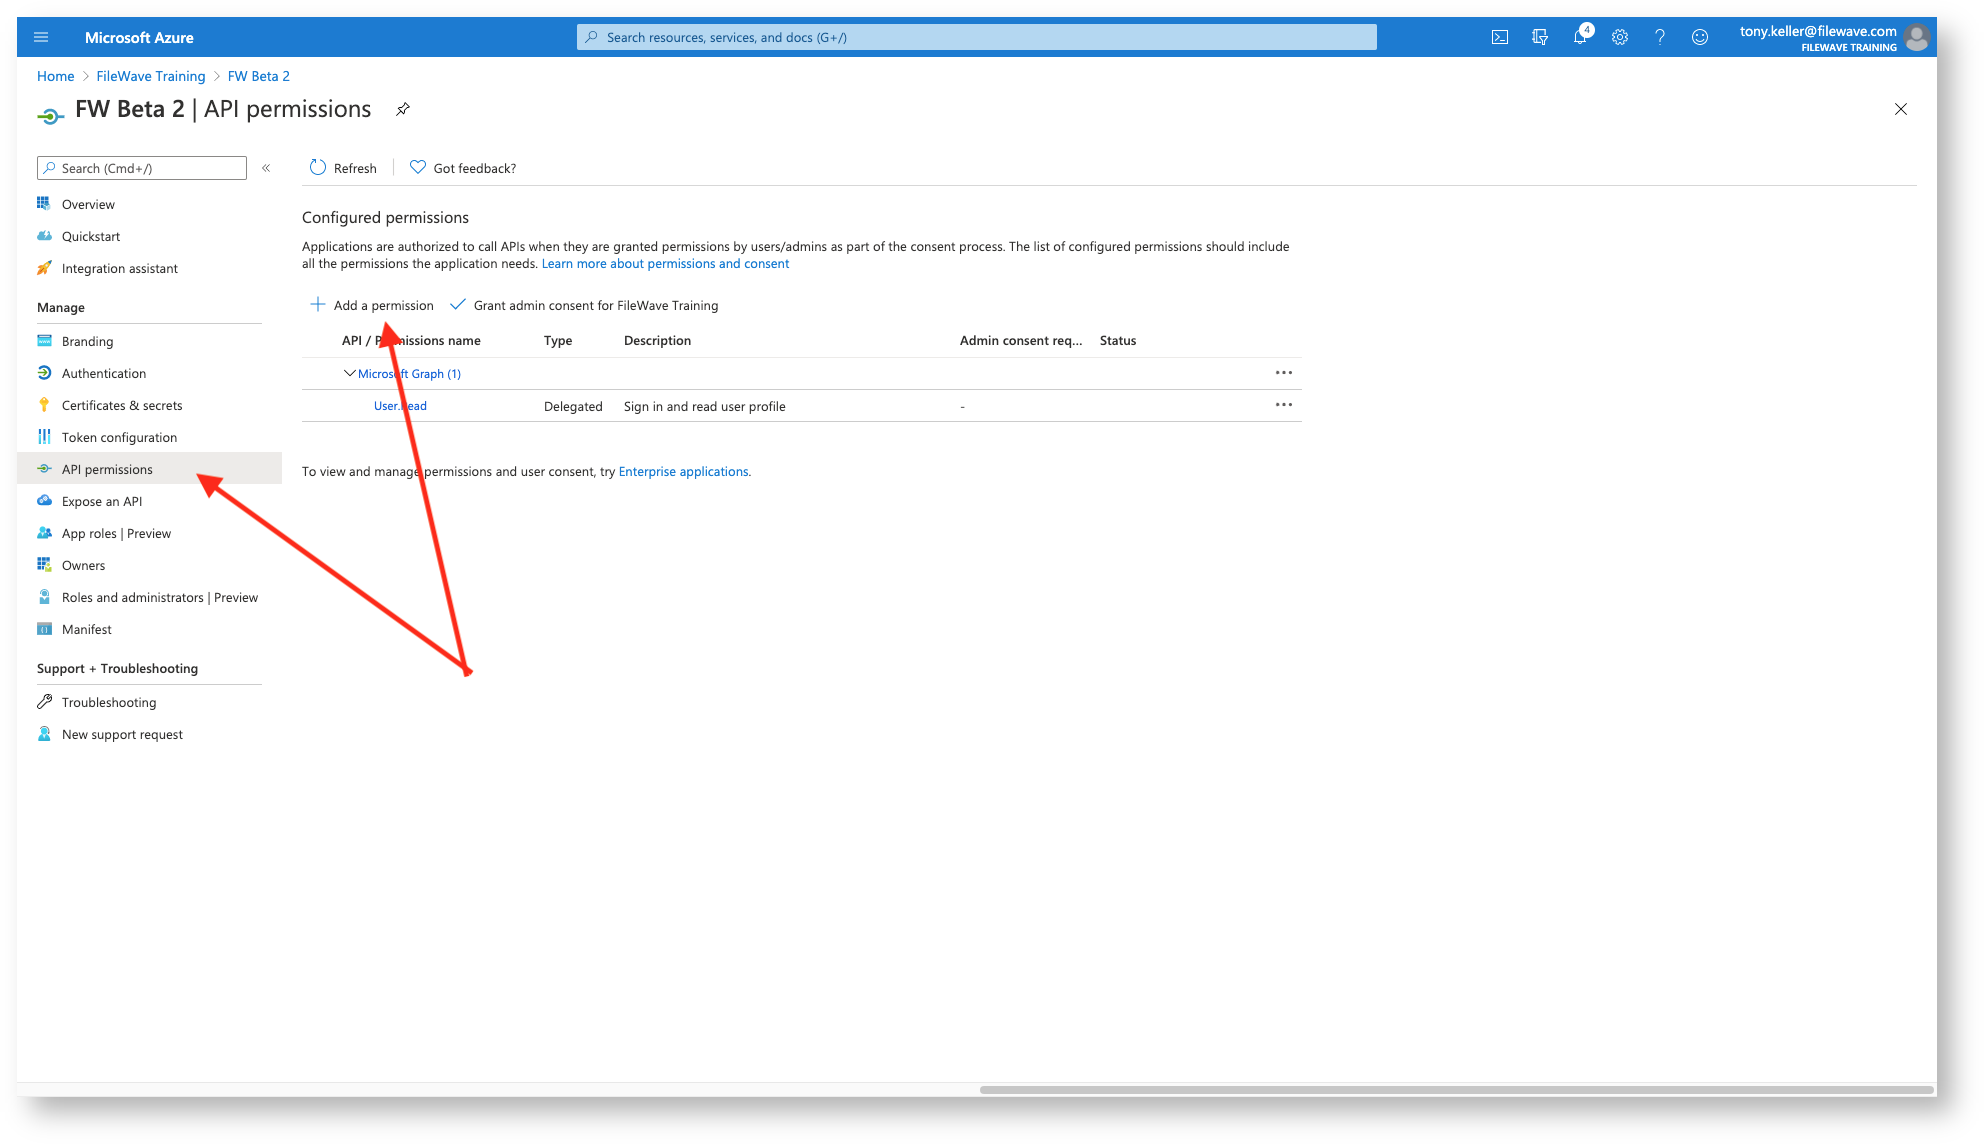
So, we'll go to the App Permissions section and start Adding Permissions
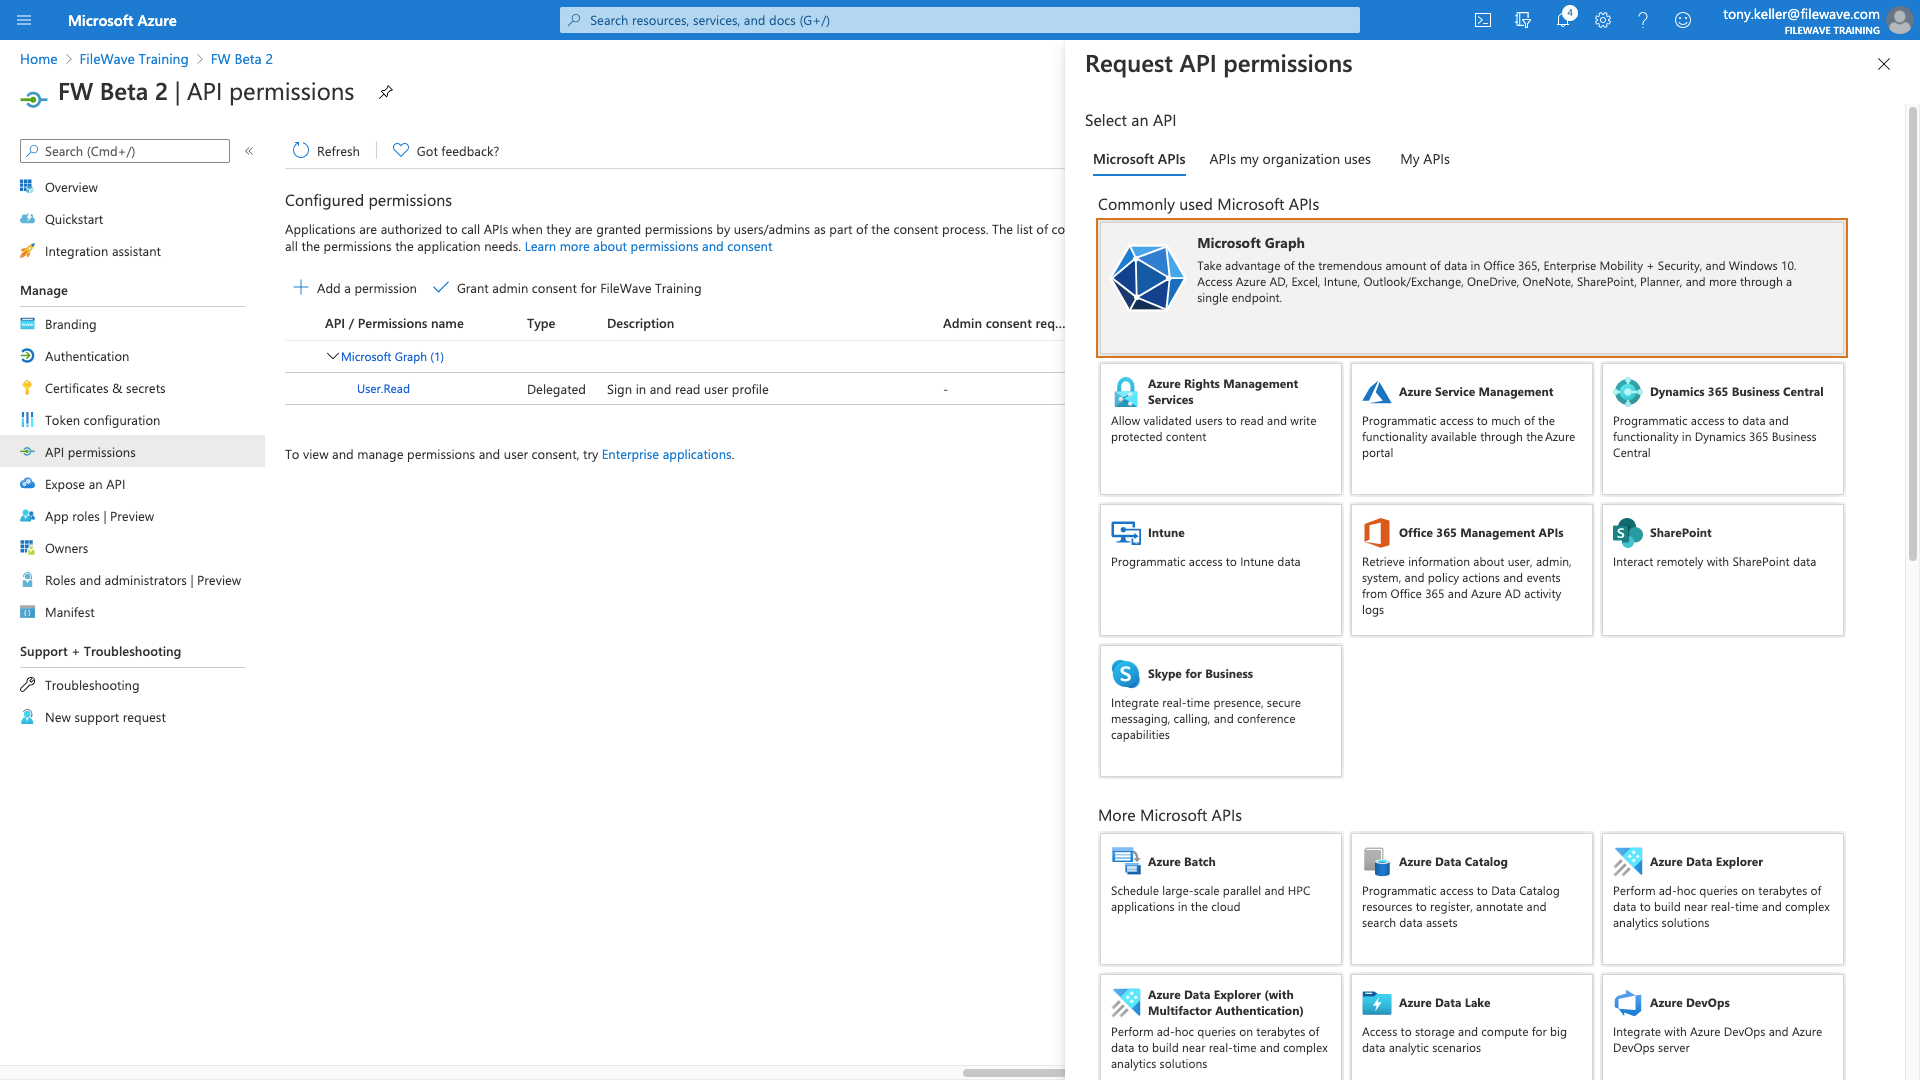
Our permissions are going to be for Microsoft Graph
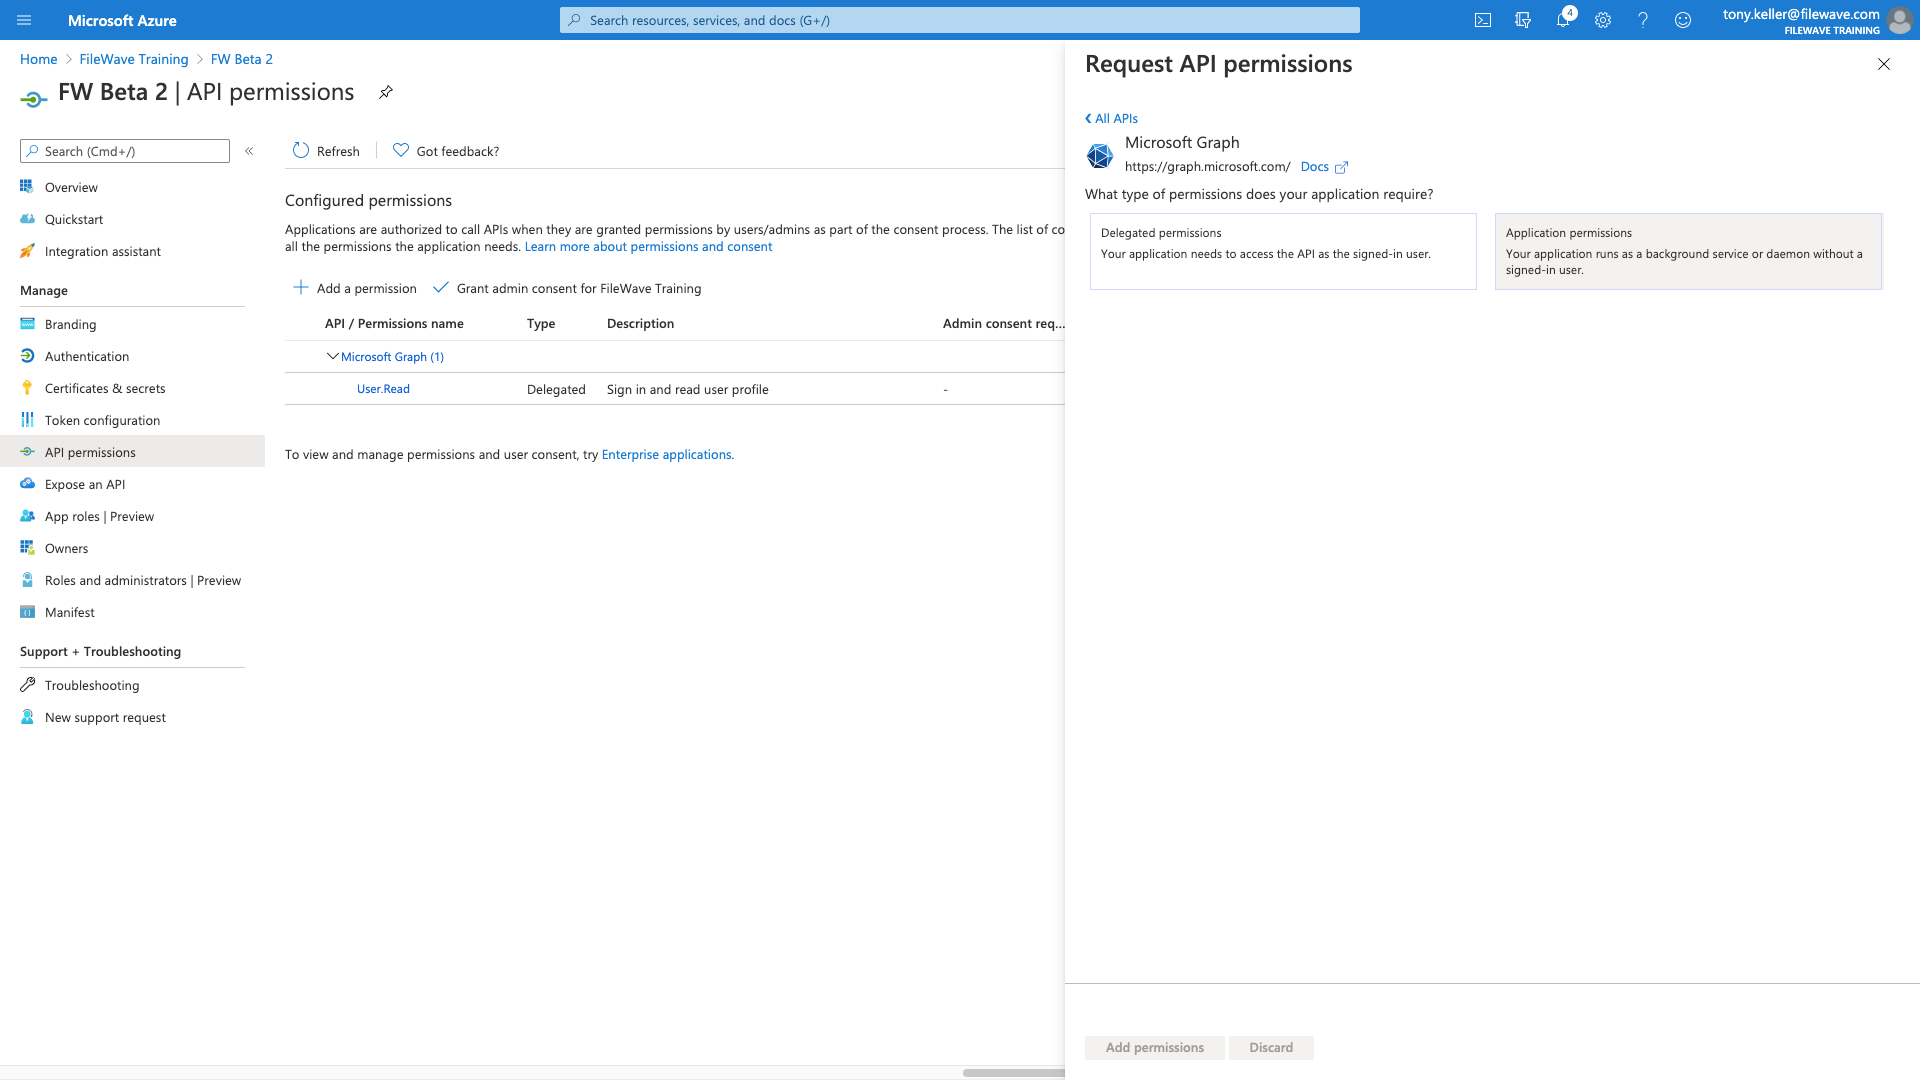
We'll start with an application permission:
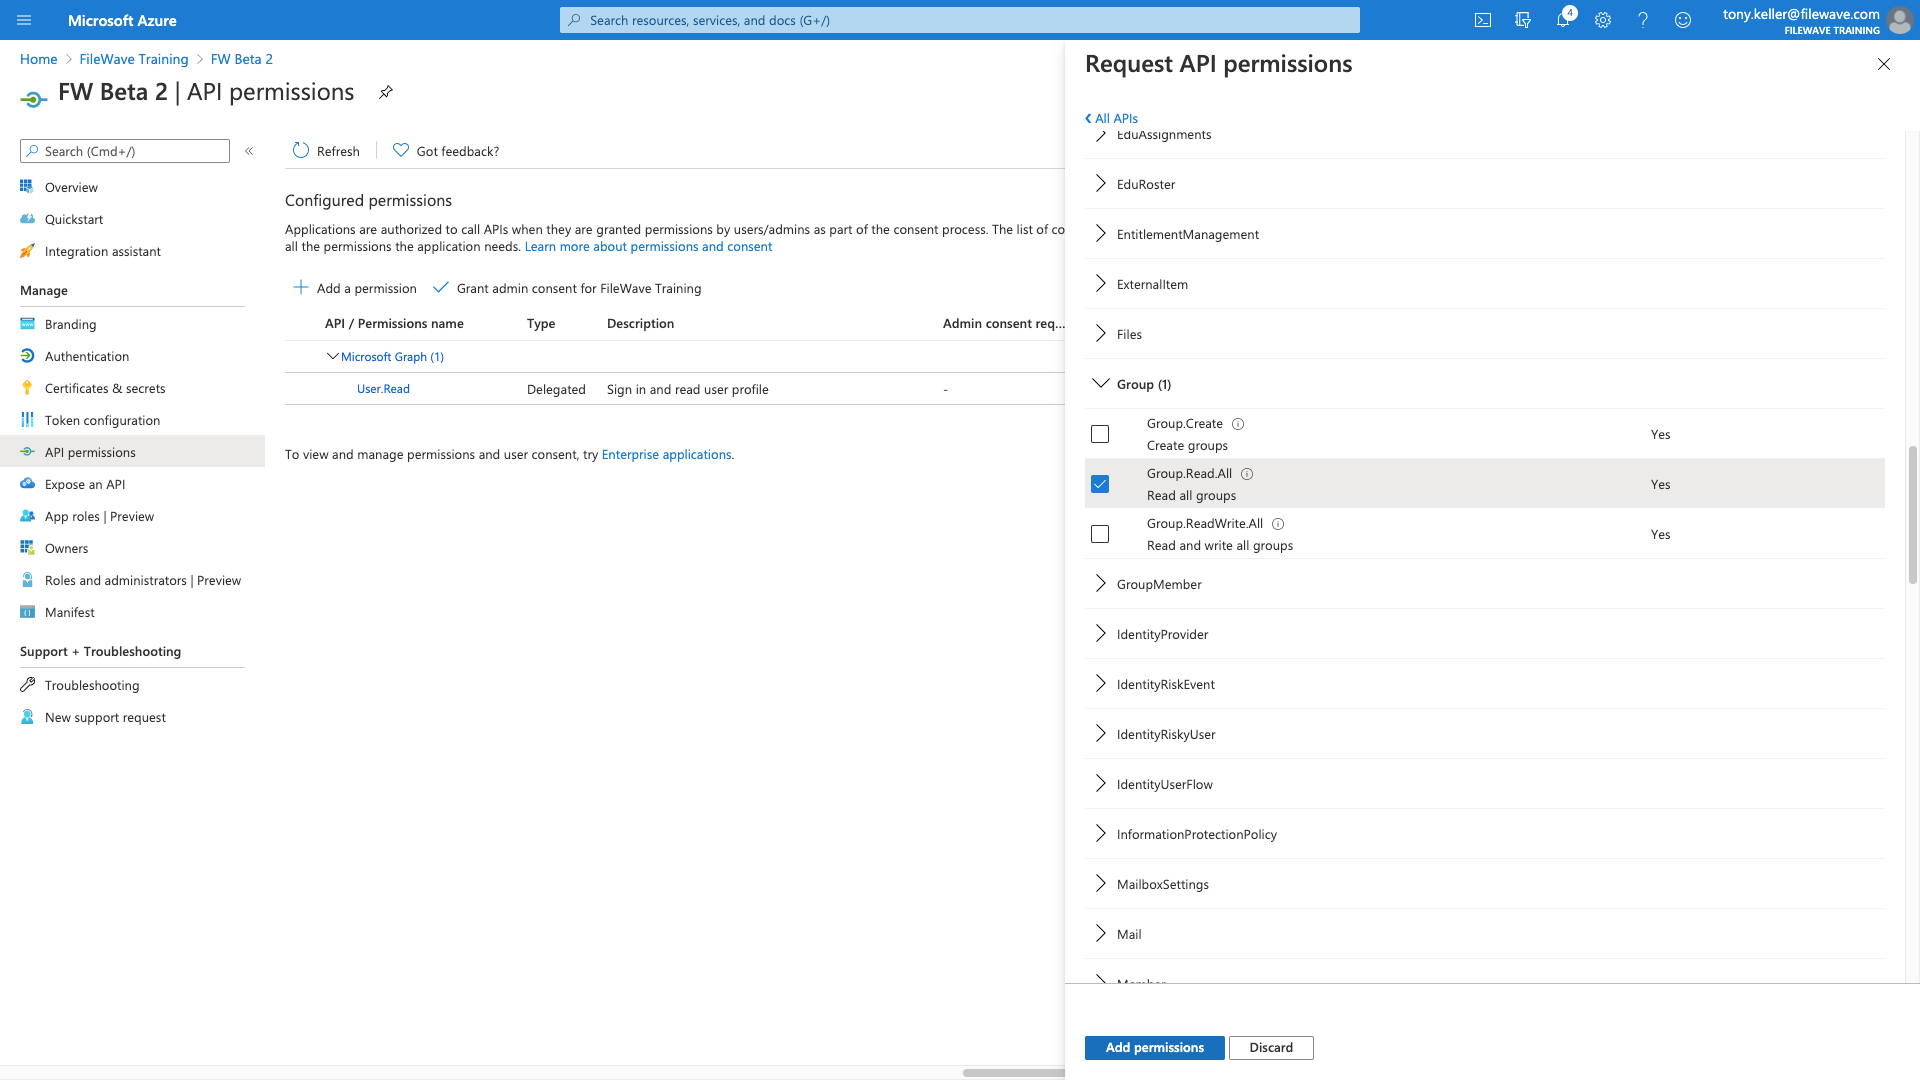
For Group Read All AND User Read All (not shown, but you can pick two at once):
Then we'll add more permissions, but "delegated permissions" for open id and profile as shown:
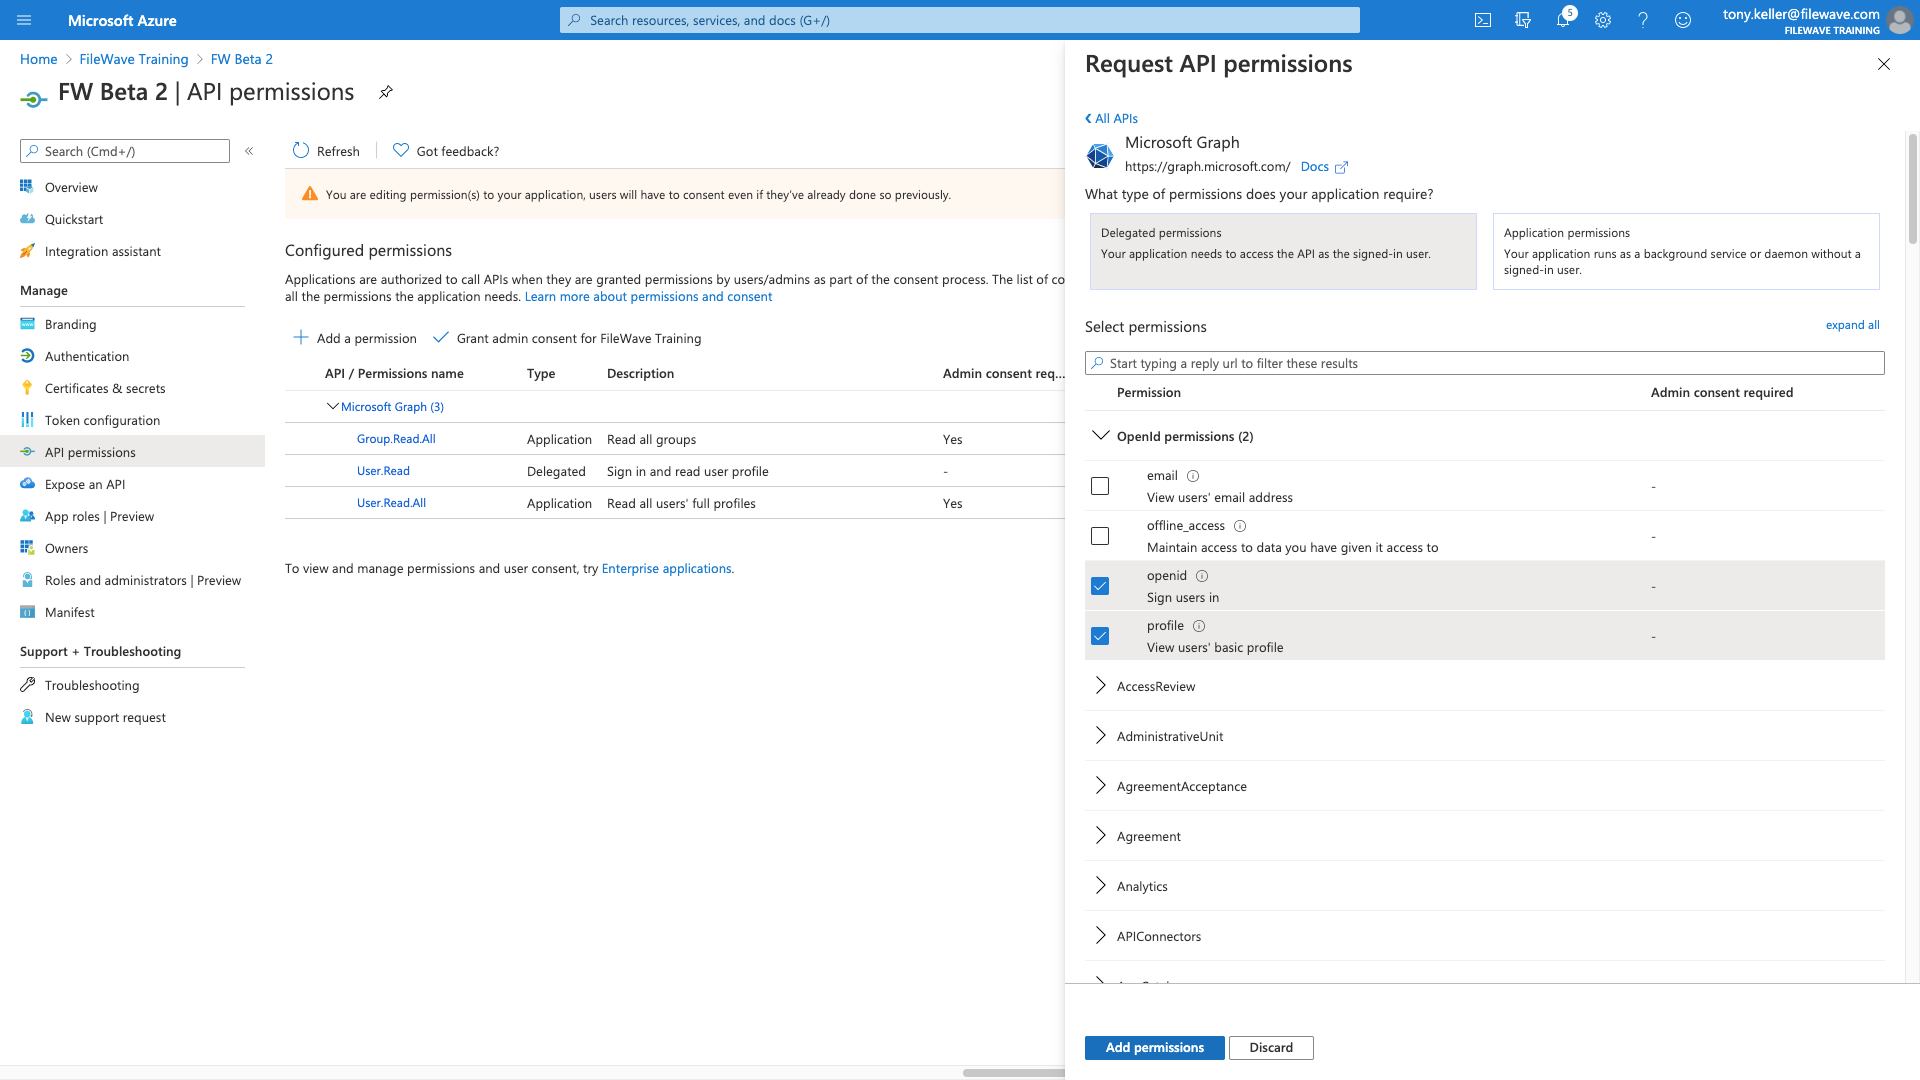
Our permissions then should look like this when we have them all
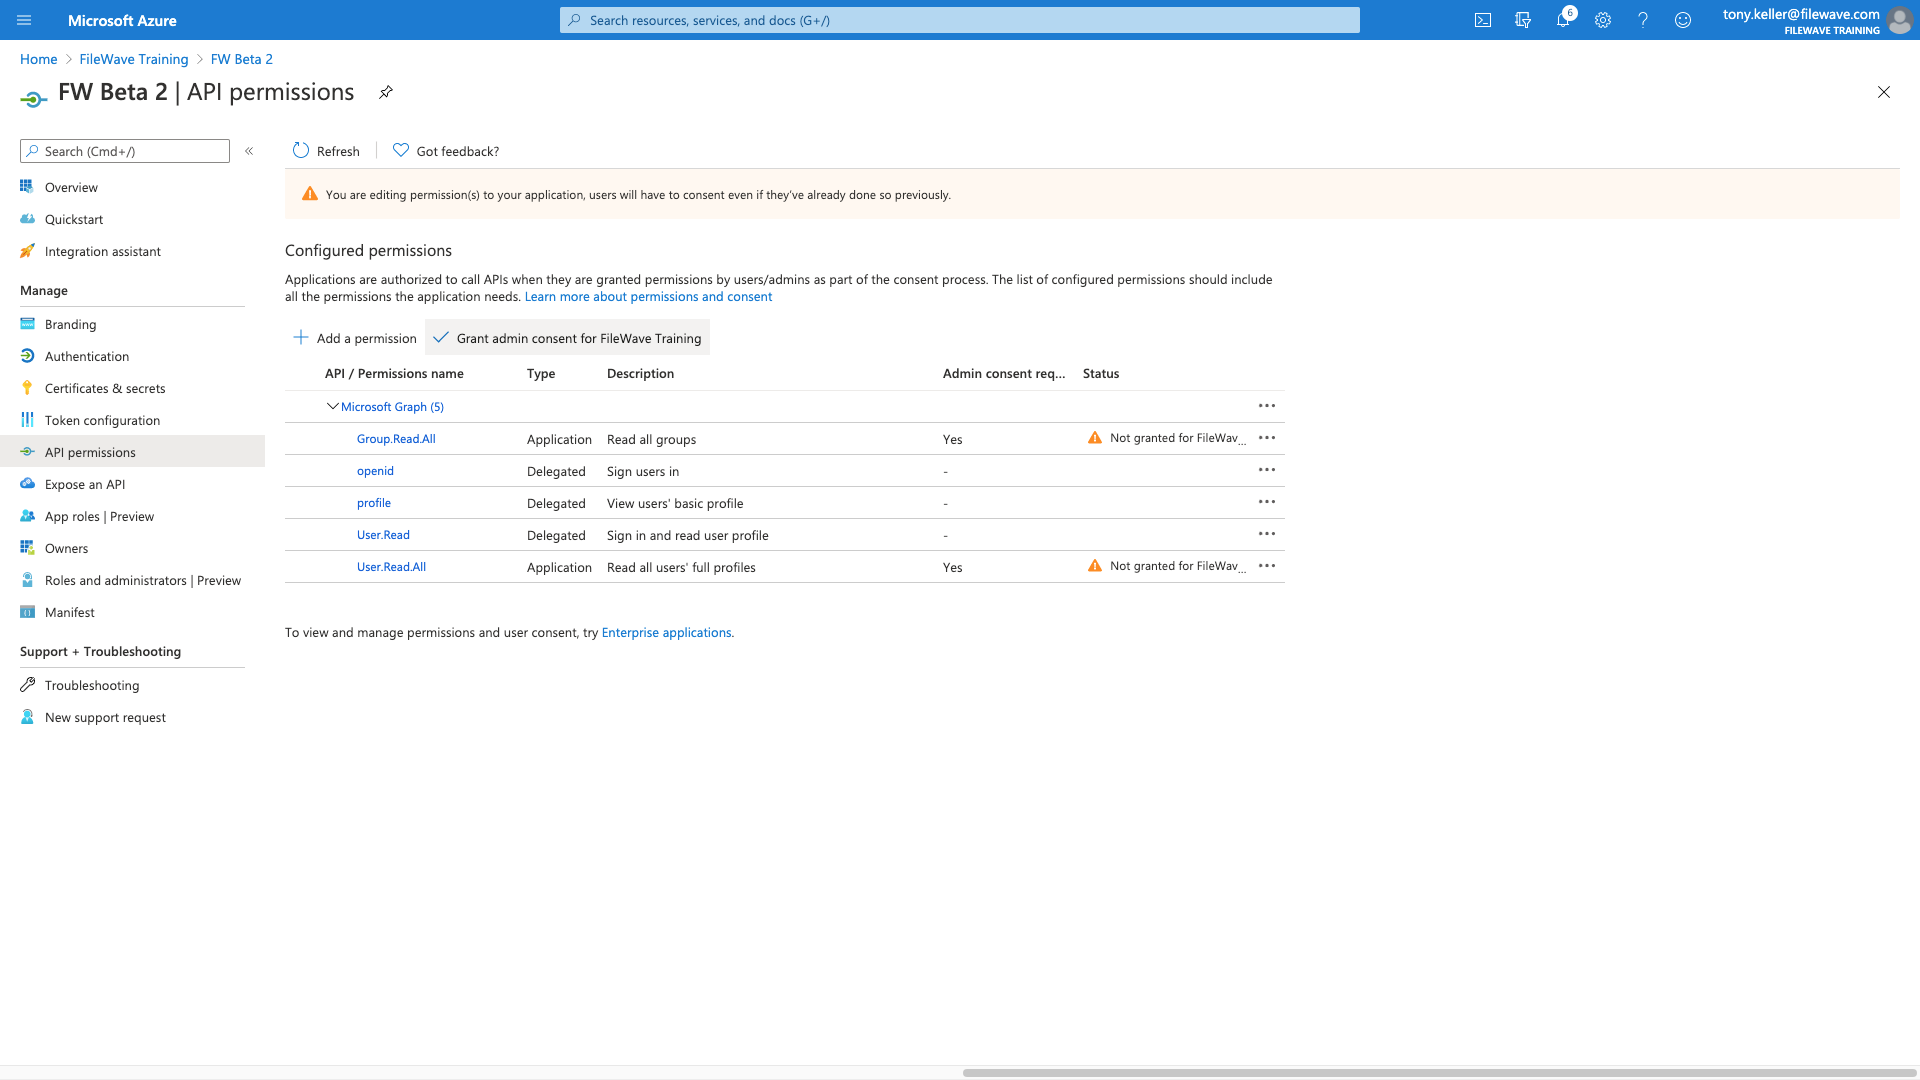
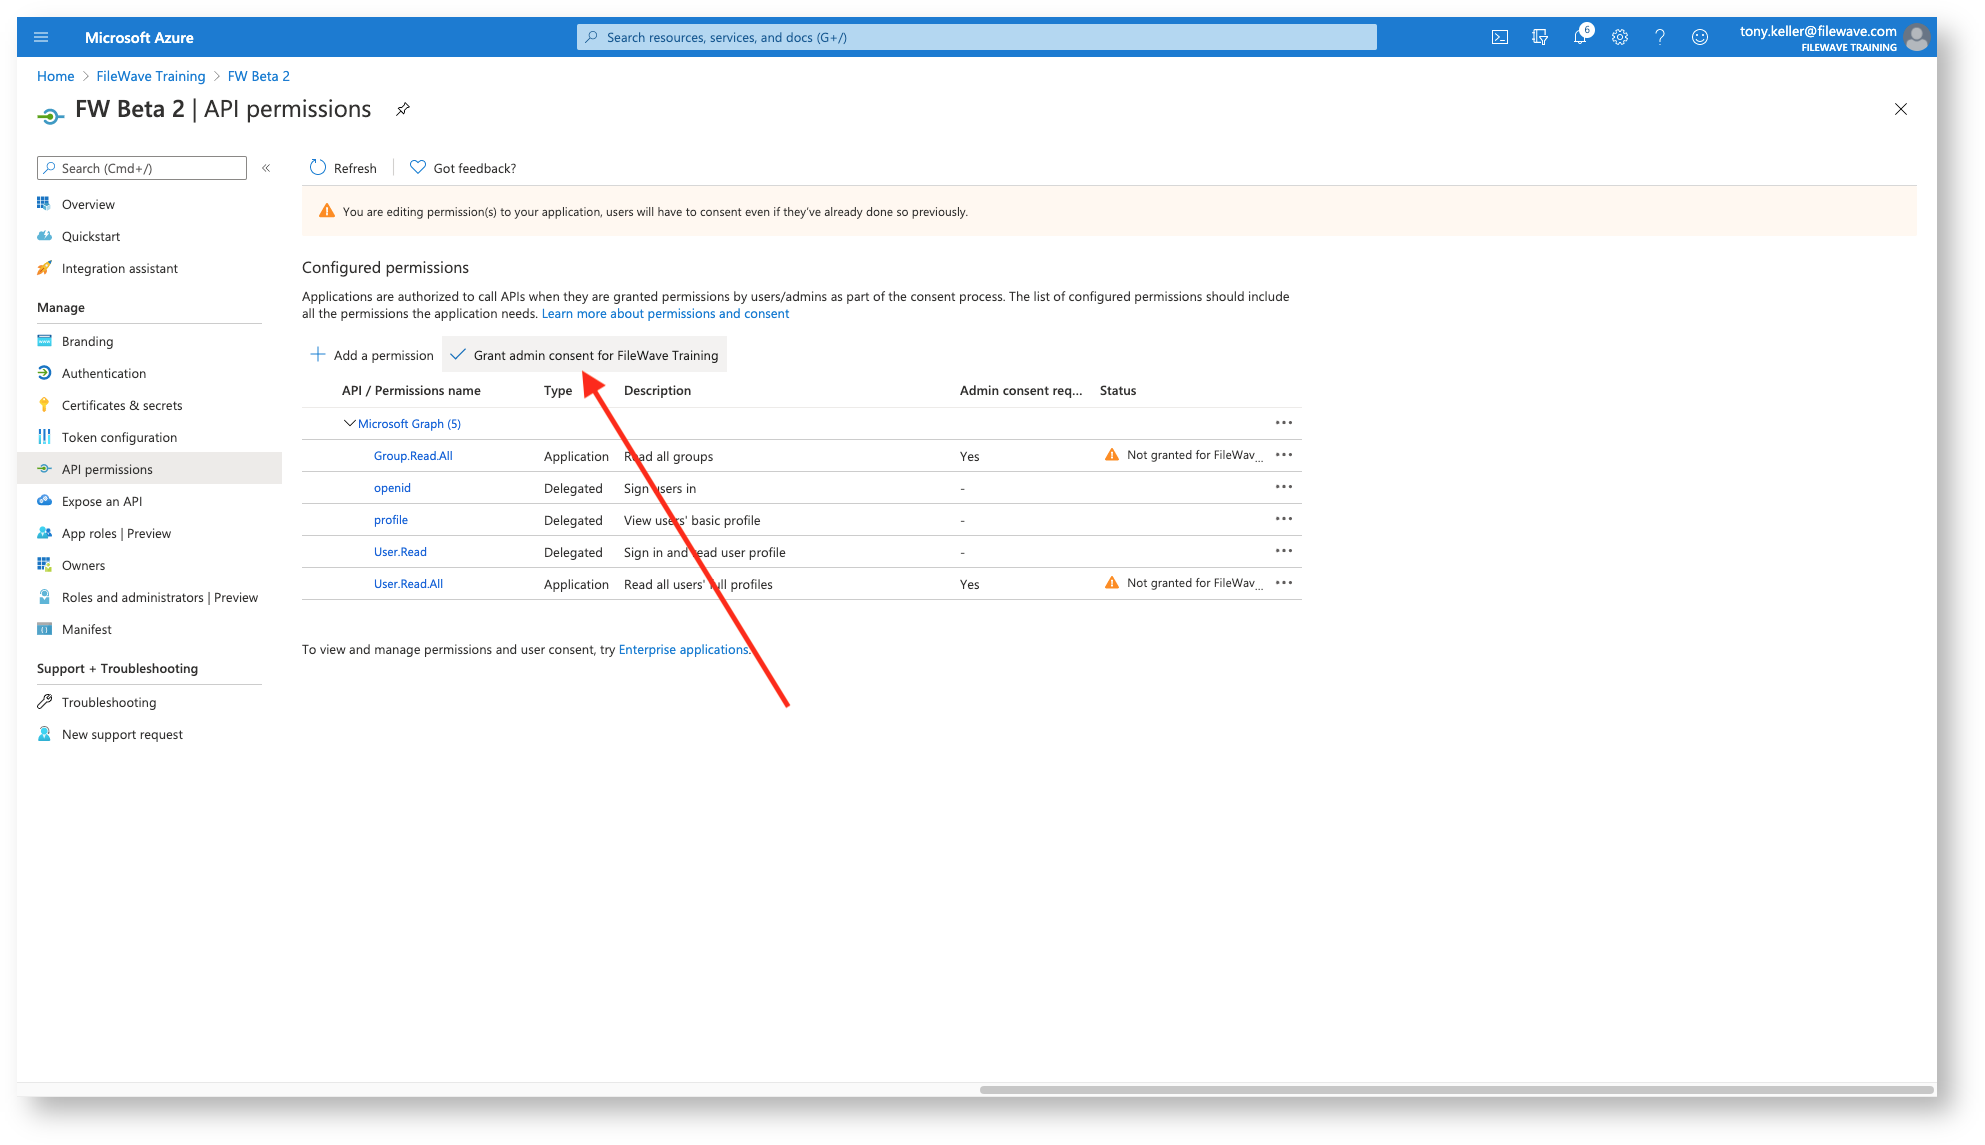
And then we just need to click Grant Consent to finish with the permissions
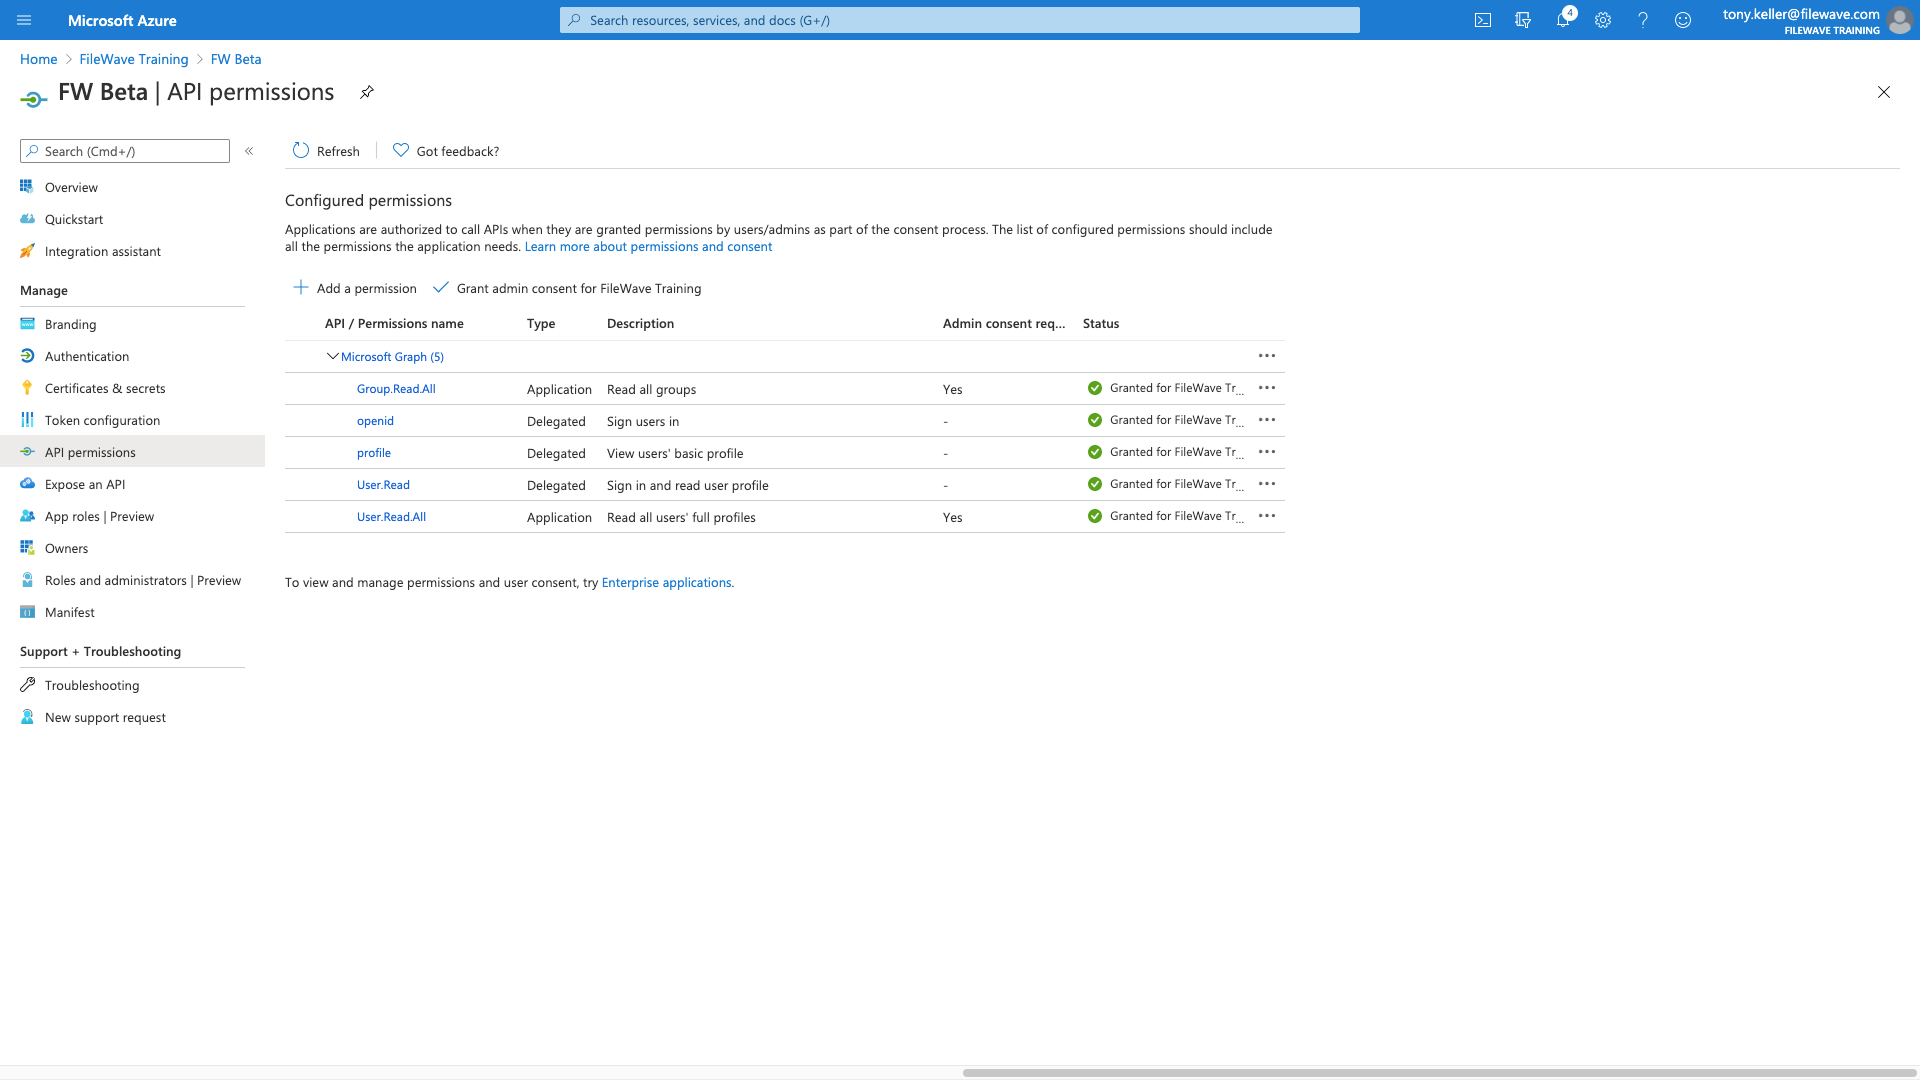
When they show as green, we are all done!
Part 6: App Registration Renewal
Microsoft Entra client secrets expire at the end of their configured lifetime, which is limited to 24 months. Plan the renewal before expiration so FileWave authentication is not interrupted.
The application registration shows when a client secret has expired:
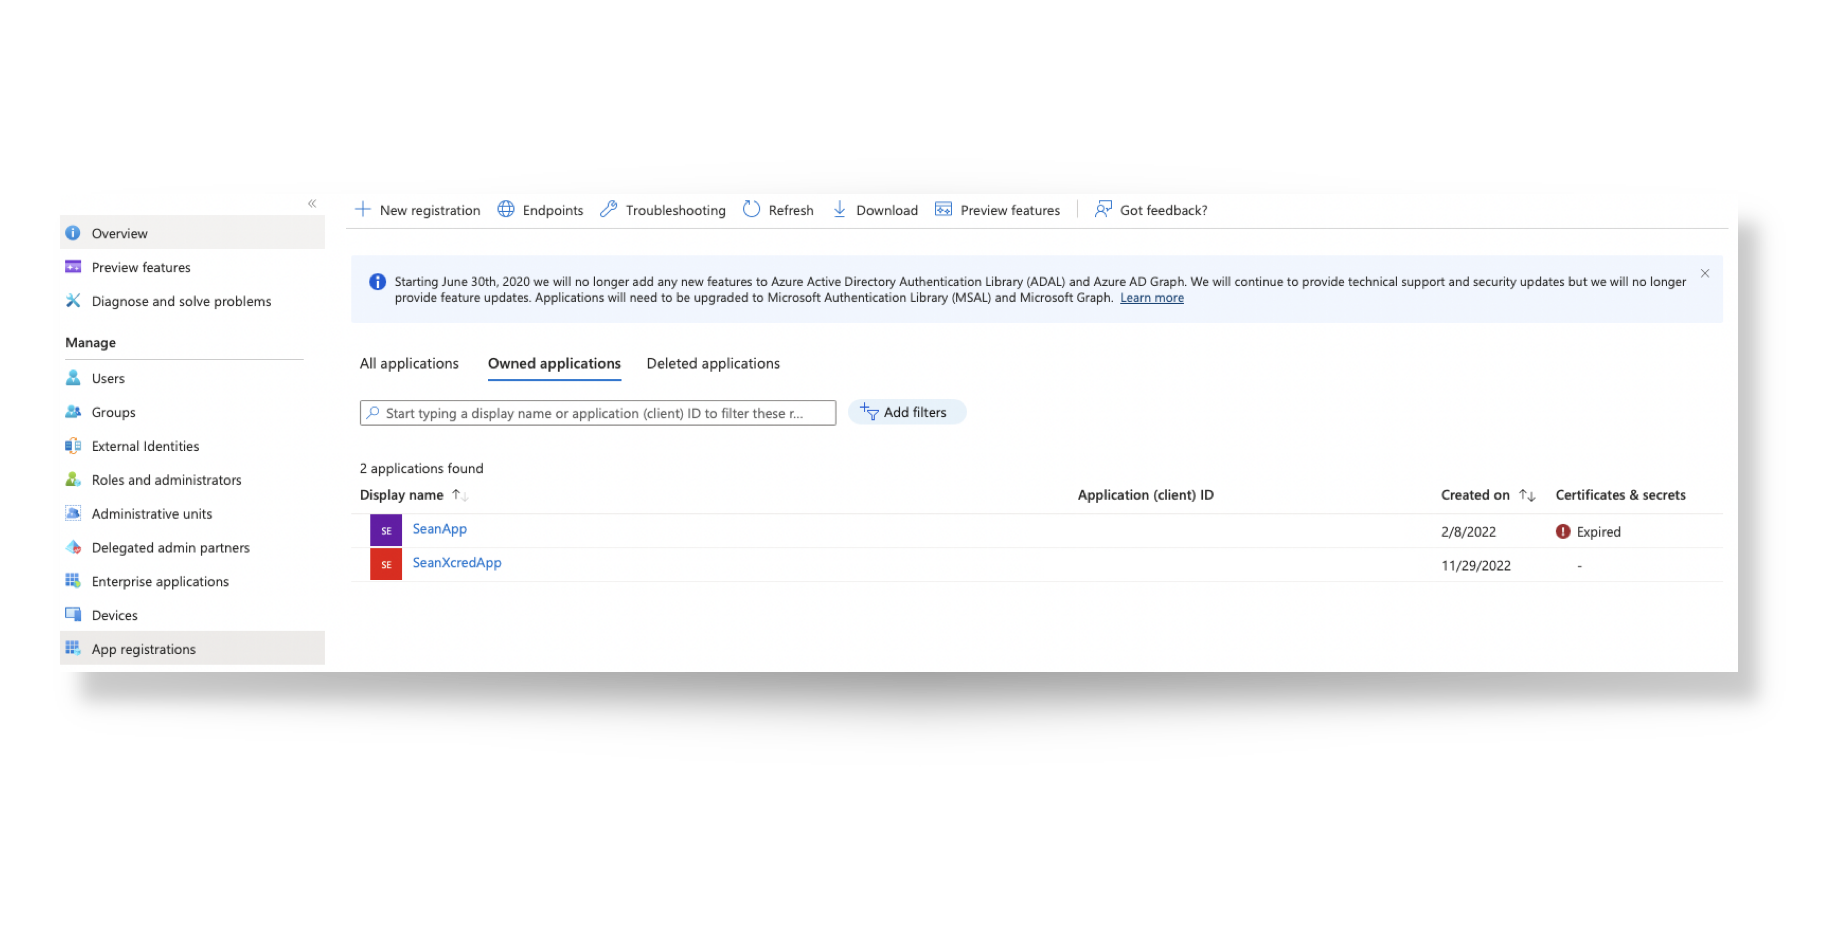
For renewal, click on the Display Name of the App, followed by 'Create a new one ->'
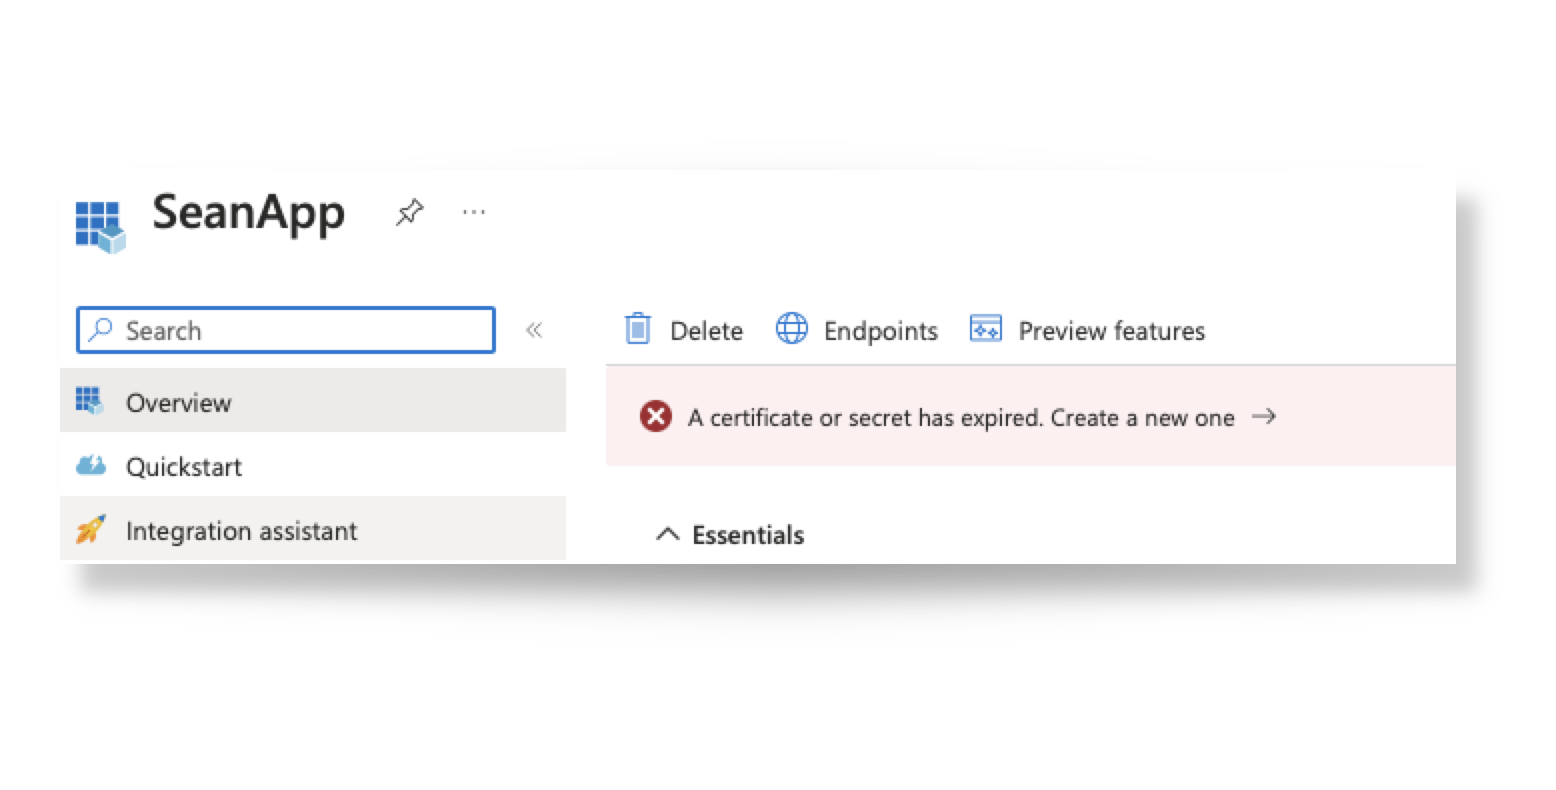
Then generate a 'New client secret' similar to part 4 of this KB.
- Add a description
- Copy the secret from the 'Value' column, not the 'Secret ID'. Be sure to copy it just after creating your new secret, otherwise it will appear obfuscated the next time you attempt to view it.
After creating the replacement secret, update the existing identity provider in FileWave Anywhere:
- Open Settings in FileWave Anywhere.
- Select Edit for the Microsoft Entra ID identity provider.
- Paste the new secret value and select Save.
After FileWave authentication succeeds with the replacement, delete the expired client secret from the Microsoft Entra application.
No comments to display
No comments to display