IdP Setup: Microsoft Entra ID (Azure)
What
Before we can use AzureAD for authentication from FileWave, we must create a new application in the Azure Portal and give FileWave access to it. The whole purpose of this configuration is to give FileWave permissions to talk to your Microsoft Entra ID environment.
When/Why
This configuration is required if you want to use AzureAD for authentication during device enrollment or during login to the FileWave Web and Native administrator consoles.
How
The configuration for access is all driven through an Microsoft Entra ID application, so we need to start with:
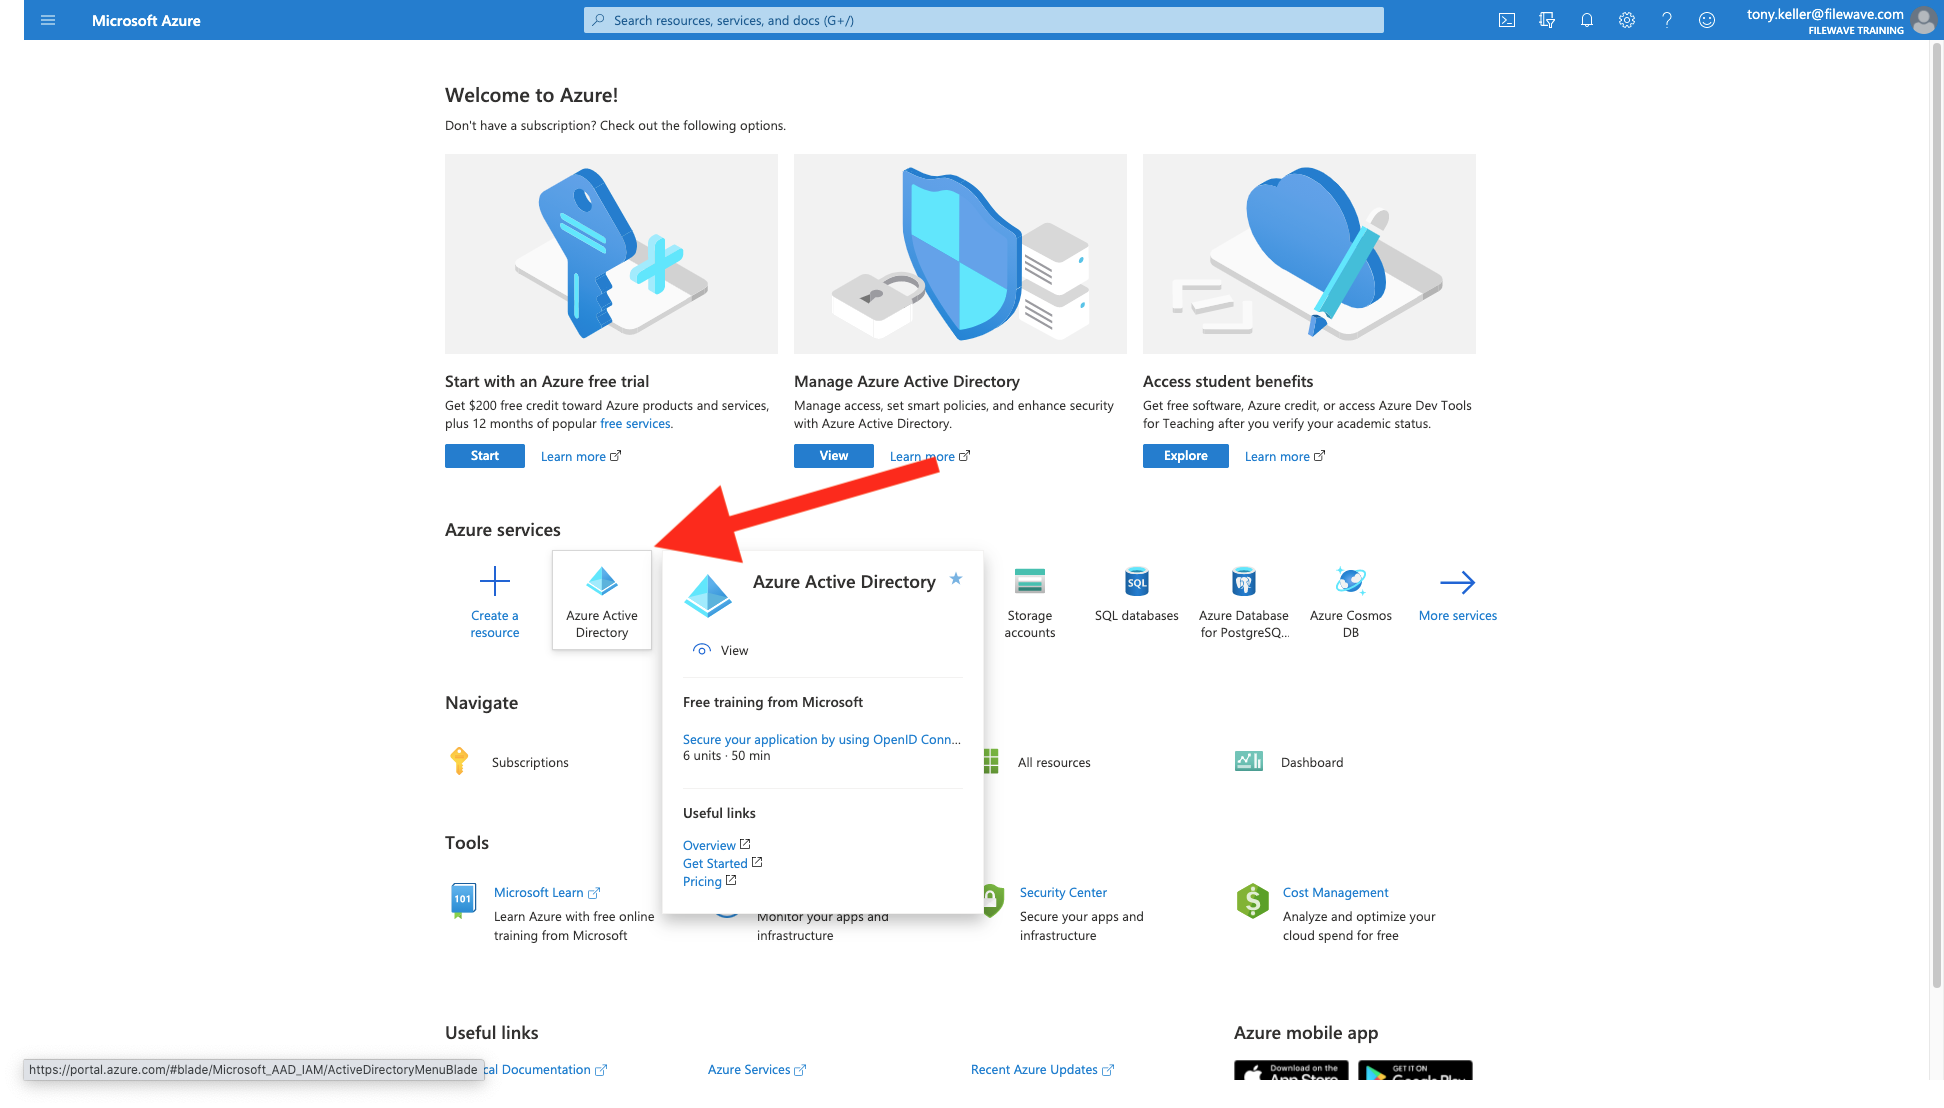
Part 1: Login to Microsoft Entra ID Portal
First, we'll login to Microsoft Entra ID at portal.azure.com with an administrator's account and click on Microsoft Entra ID as shown:
And make note of the domain info shown below:
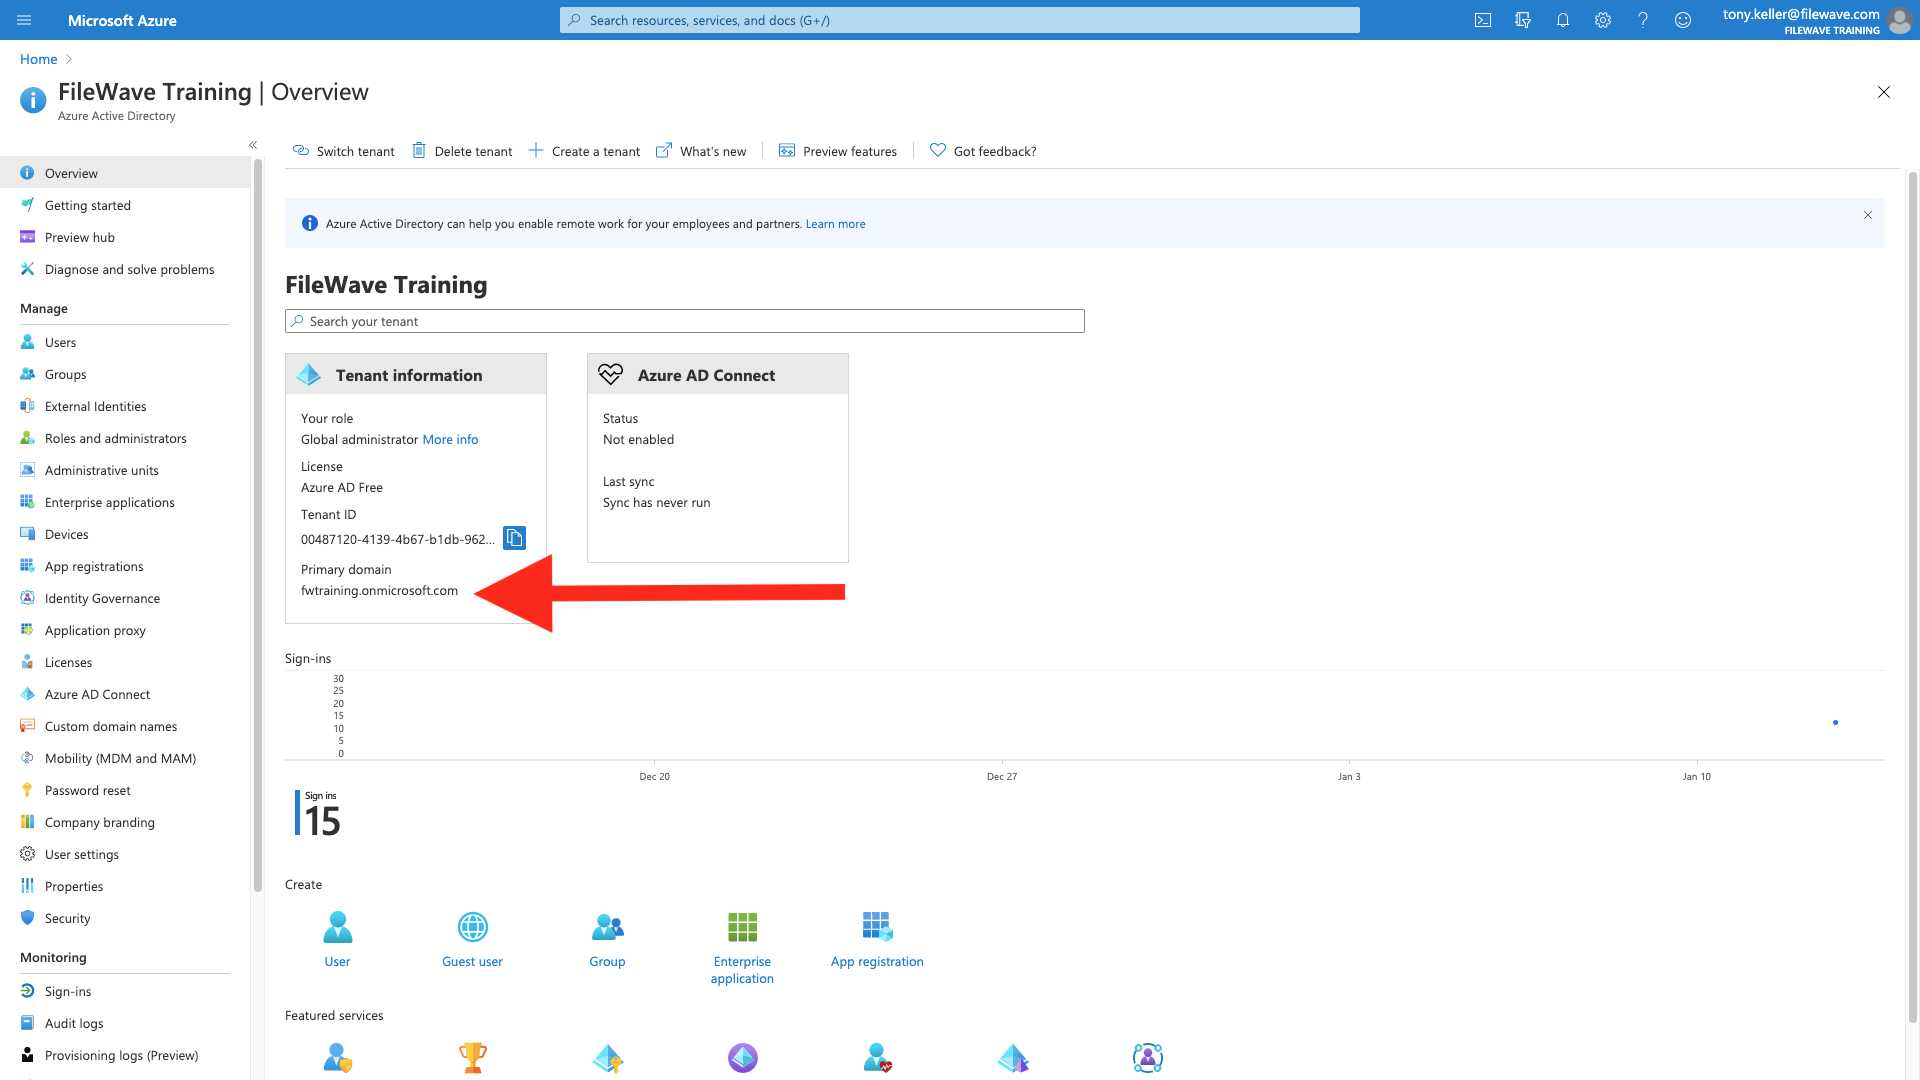
It is a good idea to take all of these elements and label/paste them into a document you store securely. Although we'll use them to configure FileWave, you can't access many of them from FileWave once they are stored.
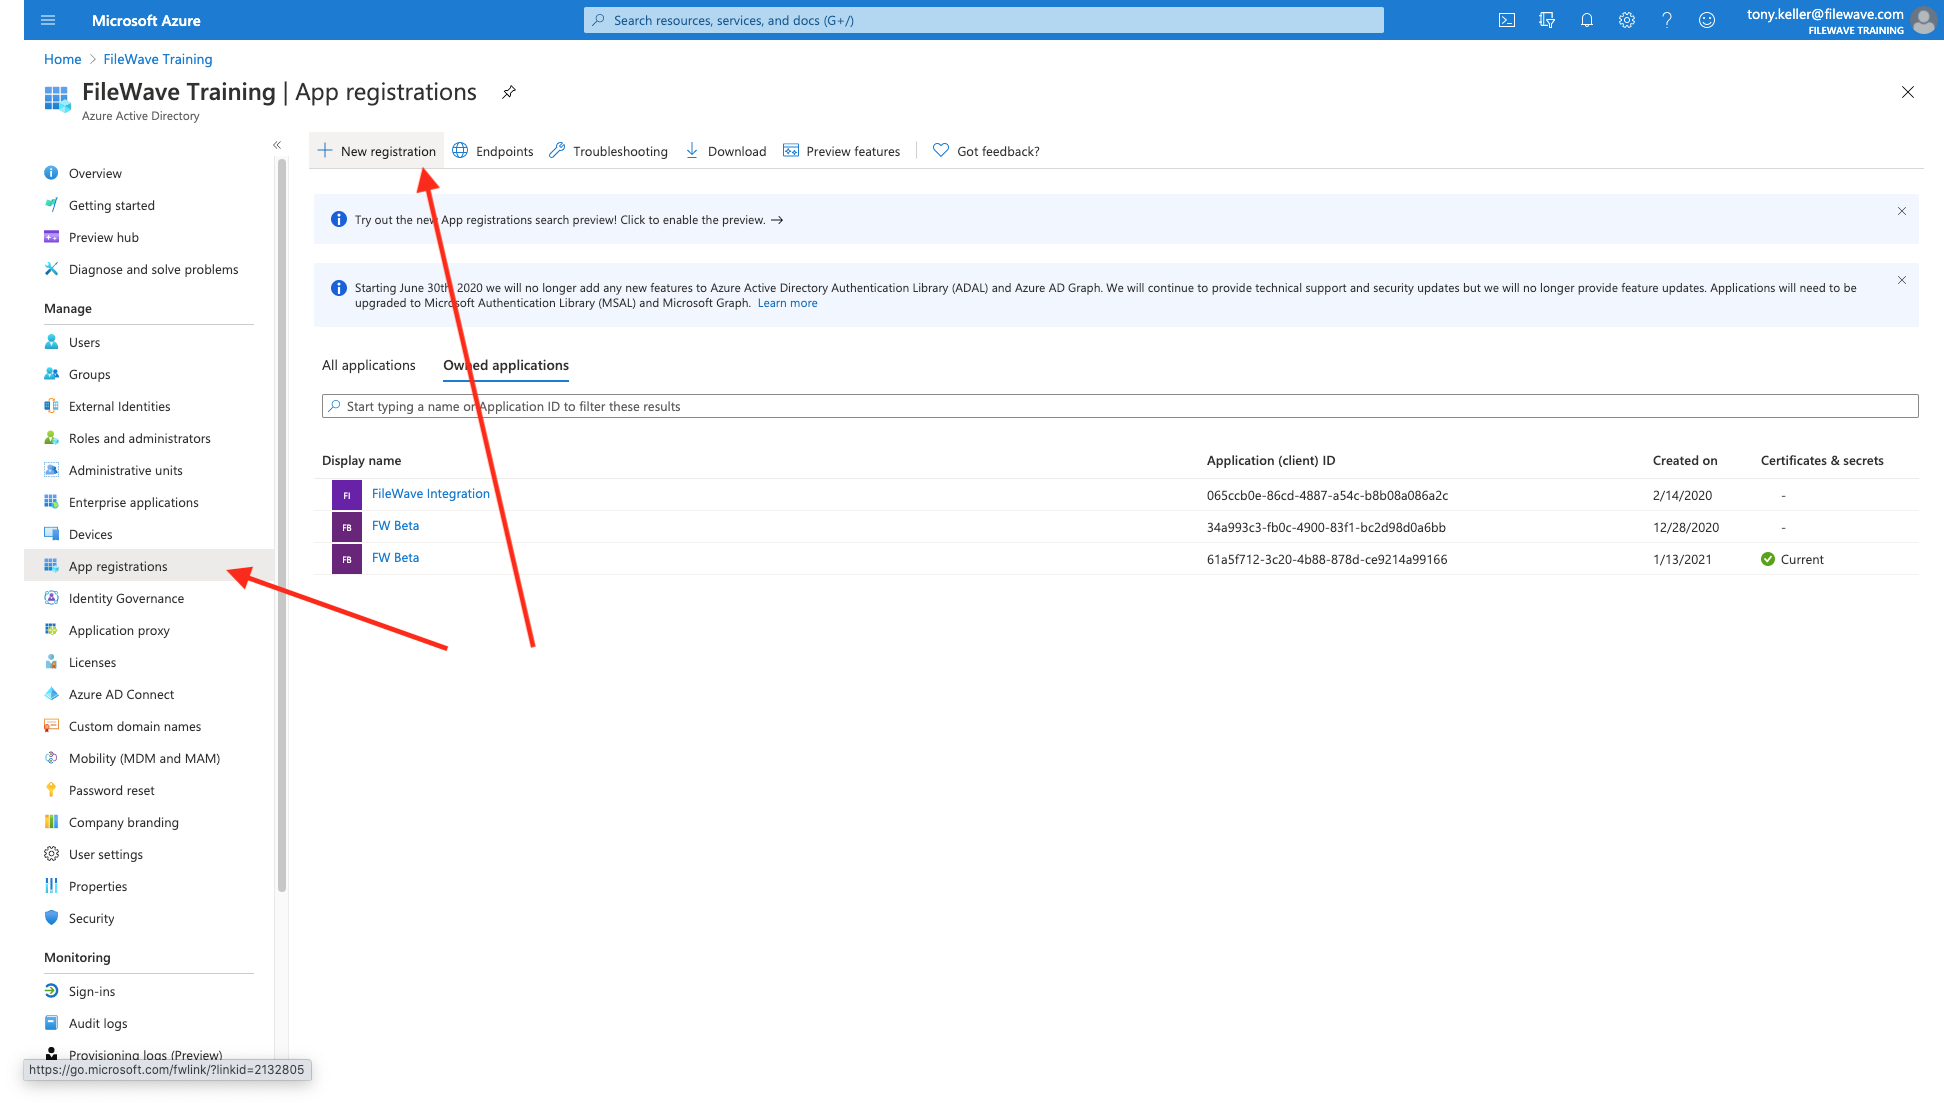
Part 2: Create an App
Now we have to create an app for FileWave to talk to, and assign some right to it. First go to the app registrations menu, then click "new registration":
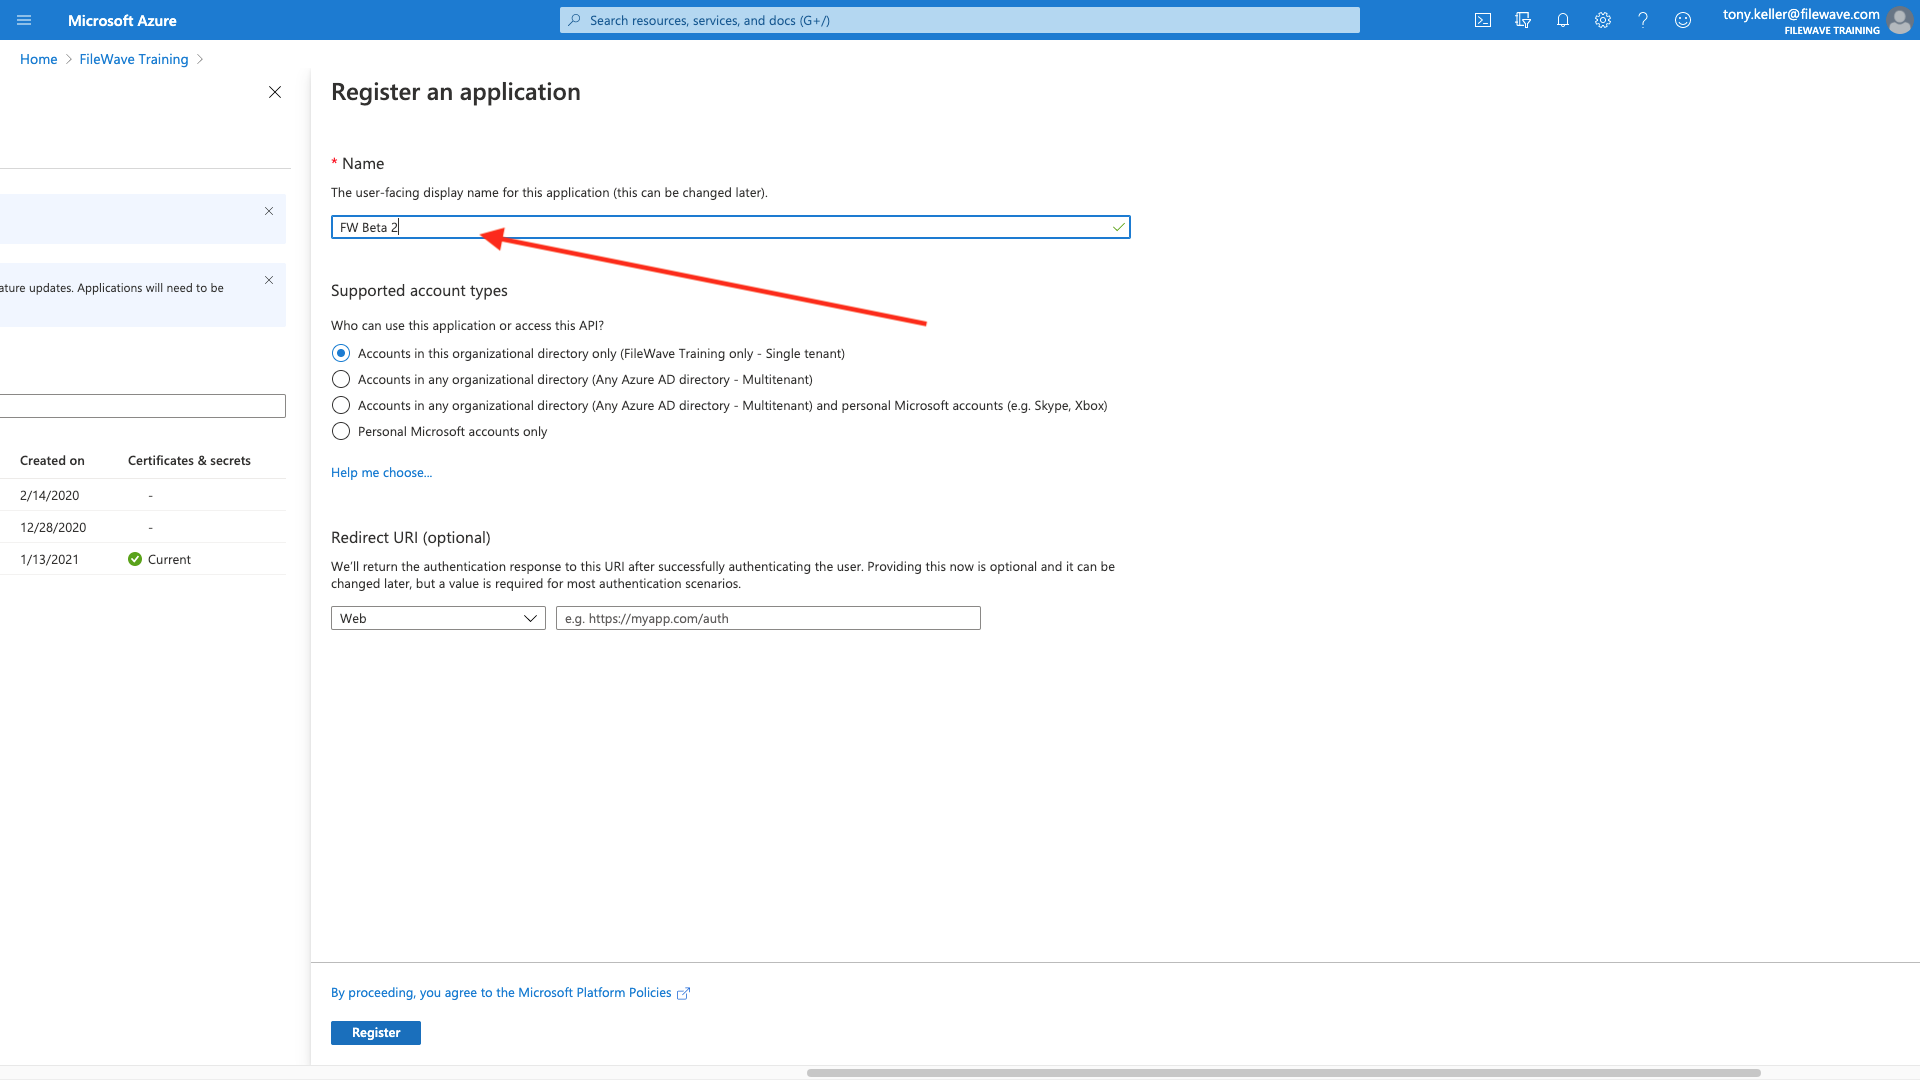
Specify a name for your app that is meaningful to you, and Register the app (we'll set the login URIs later).
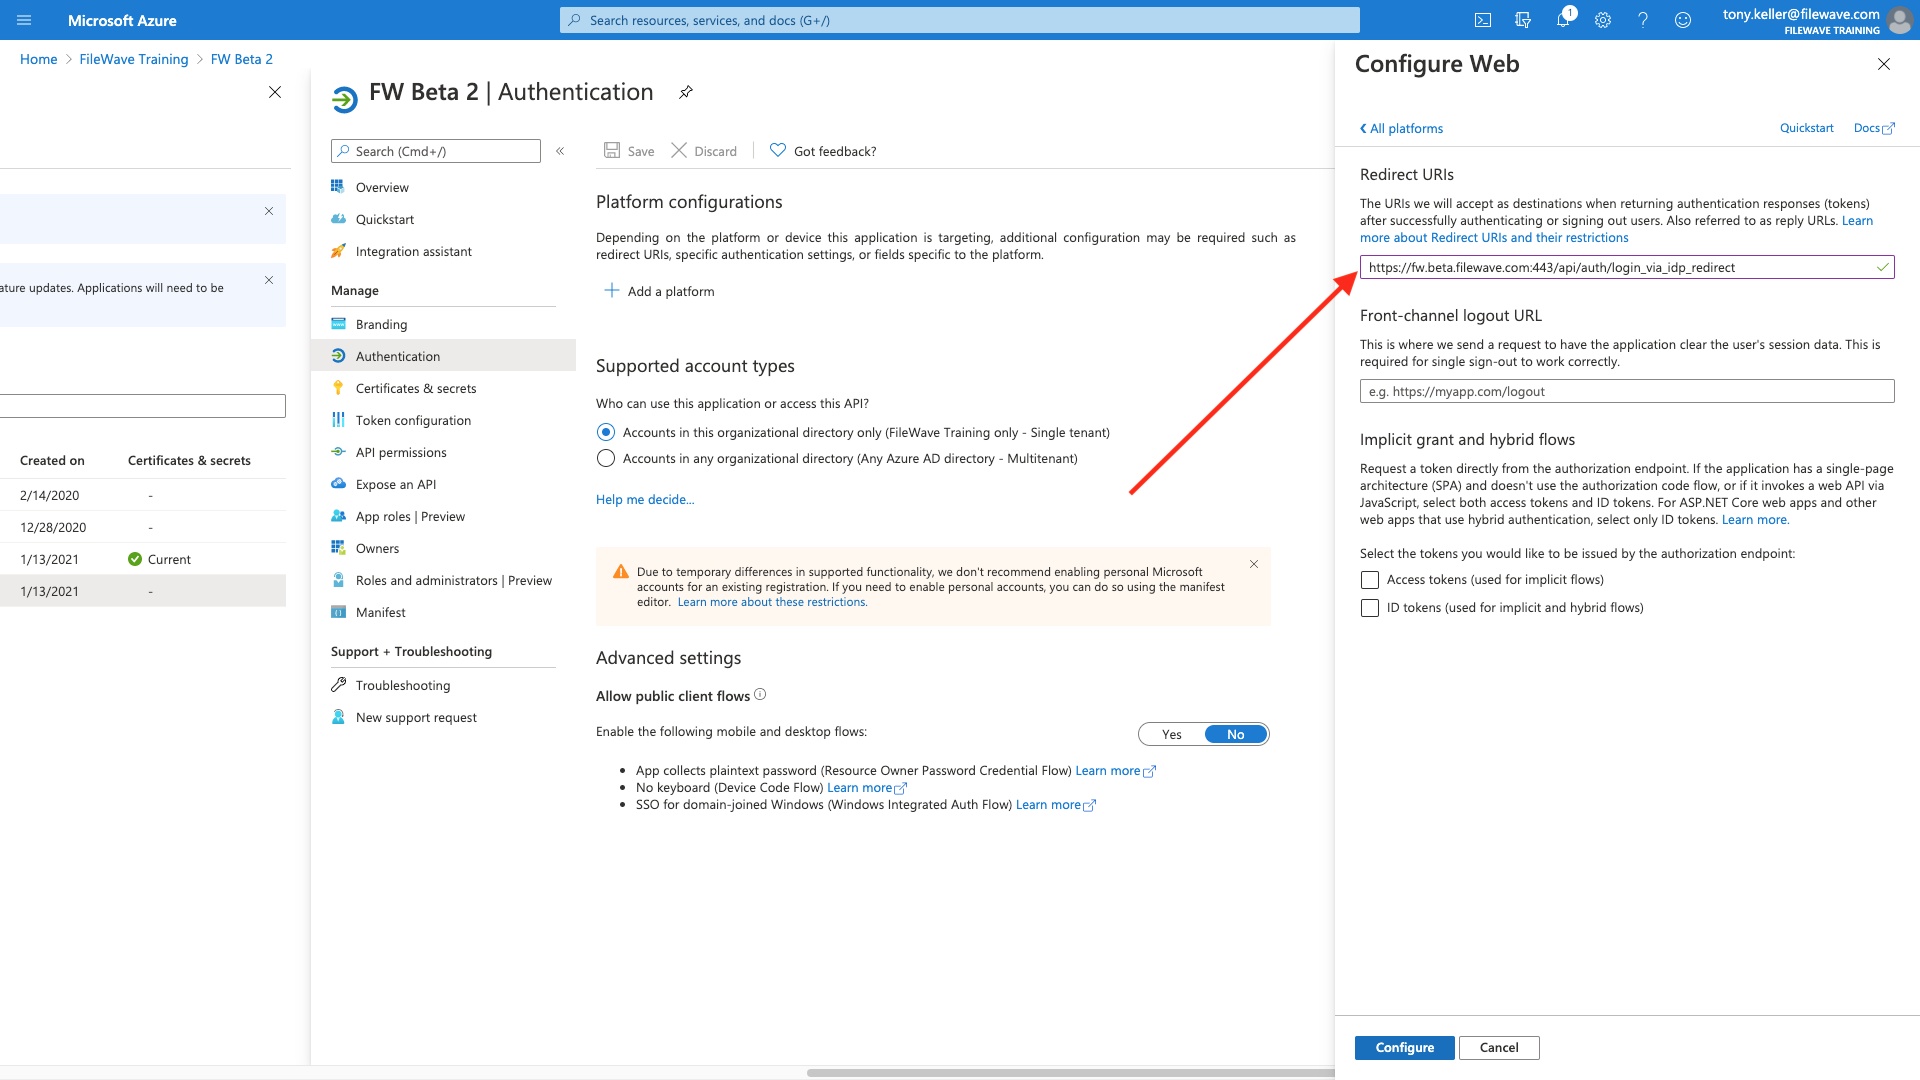
Part 3: Add a Platform and URI Addresses
Within the app configuration, we'll choose Authentication, then Add a Platform, of type Web:
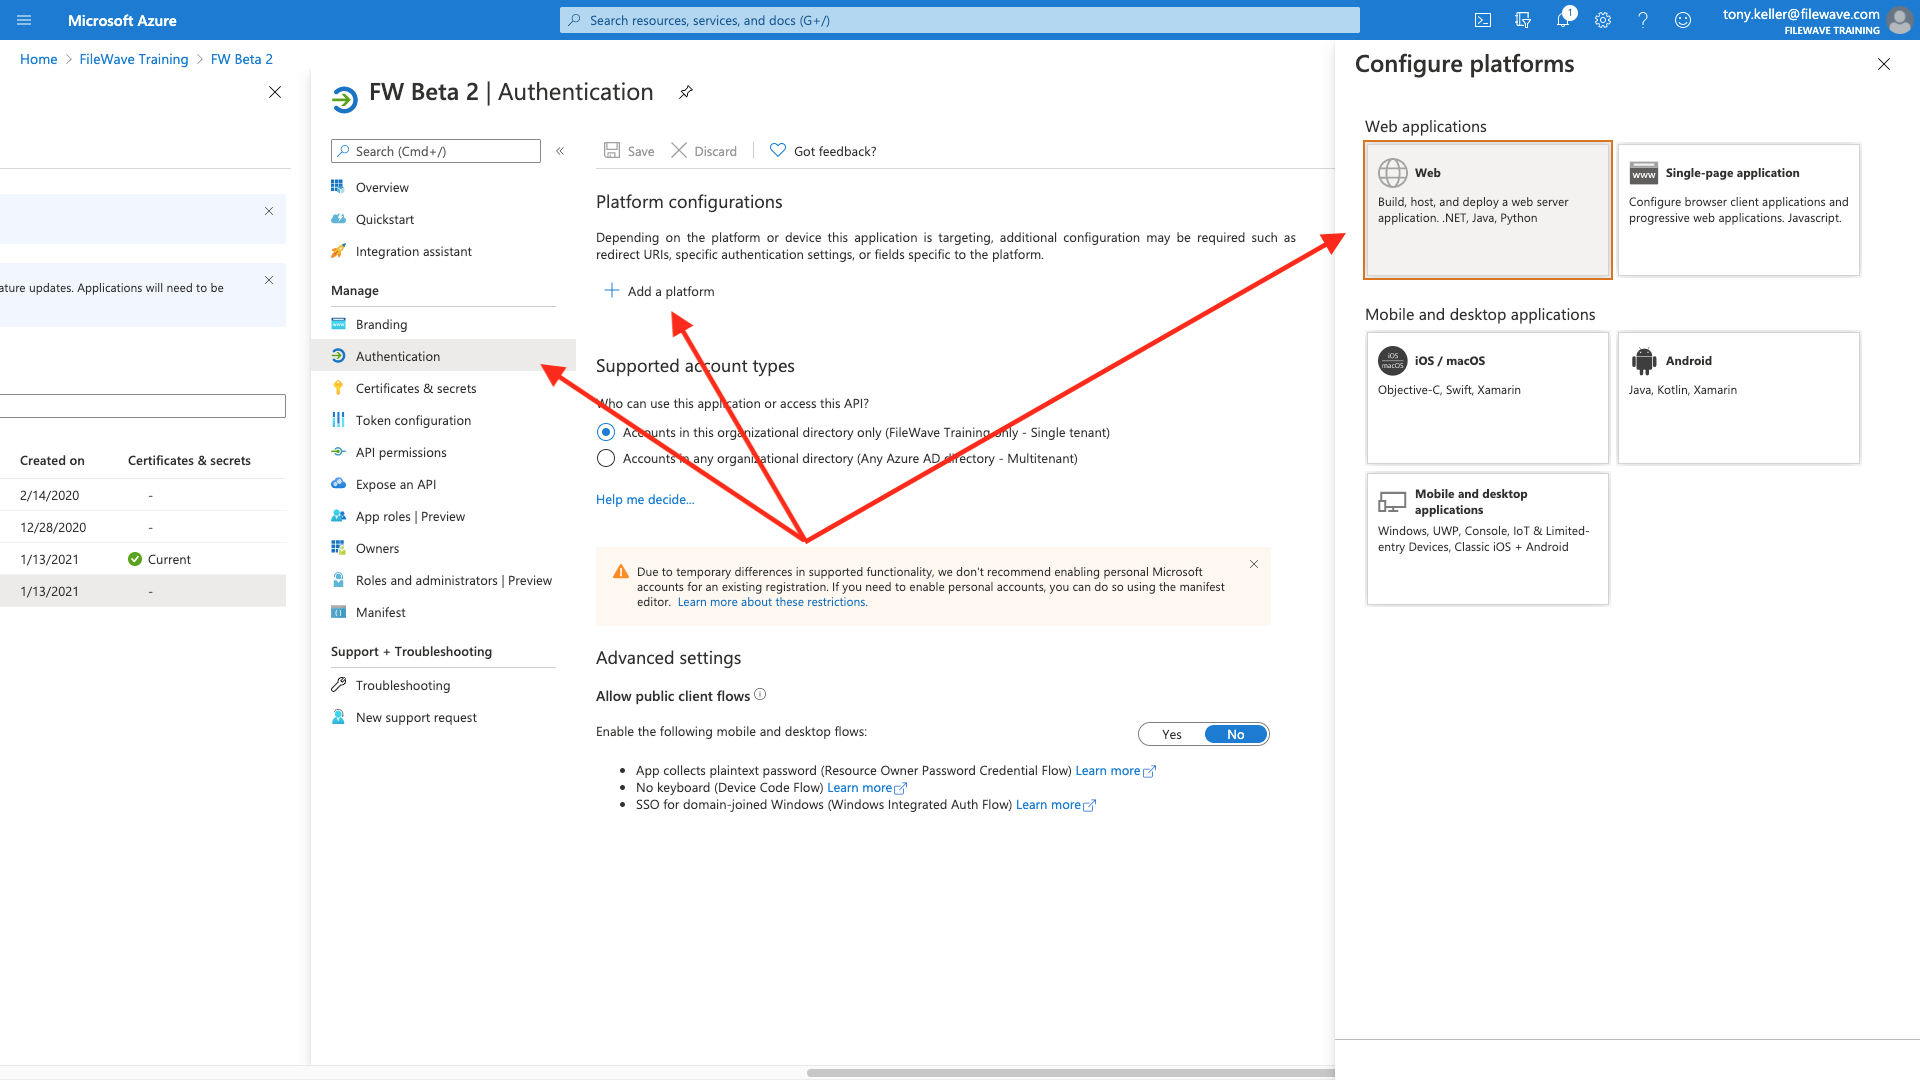
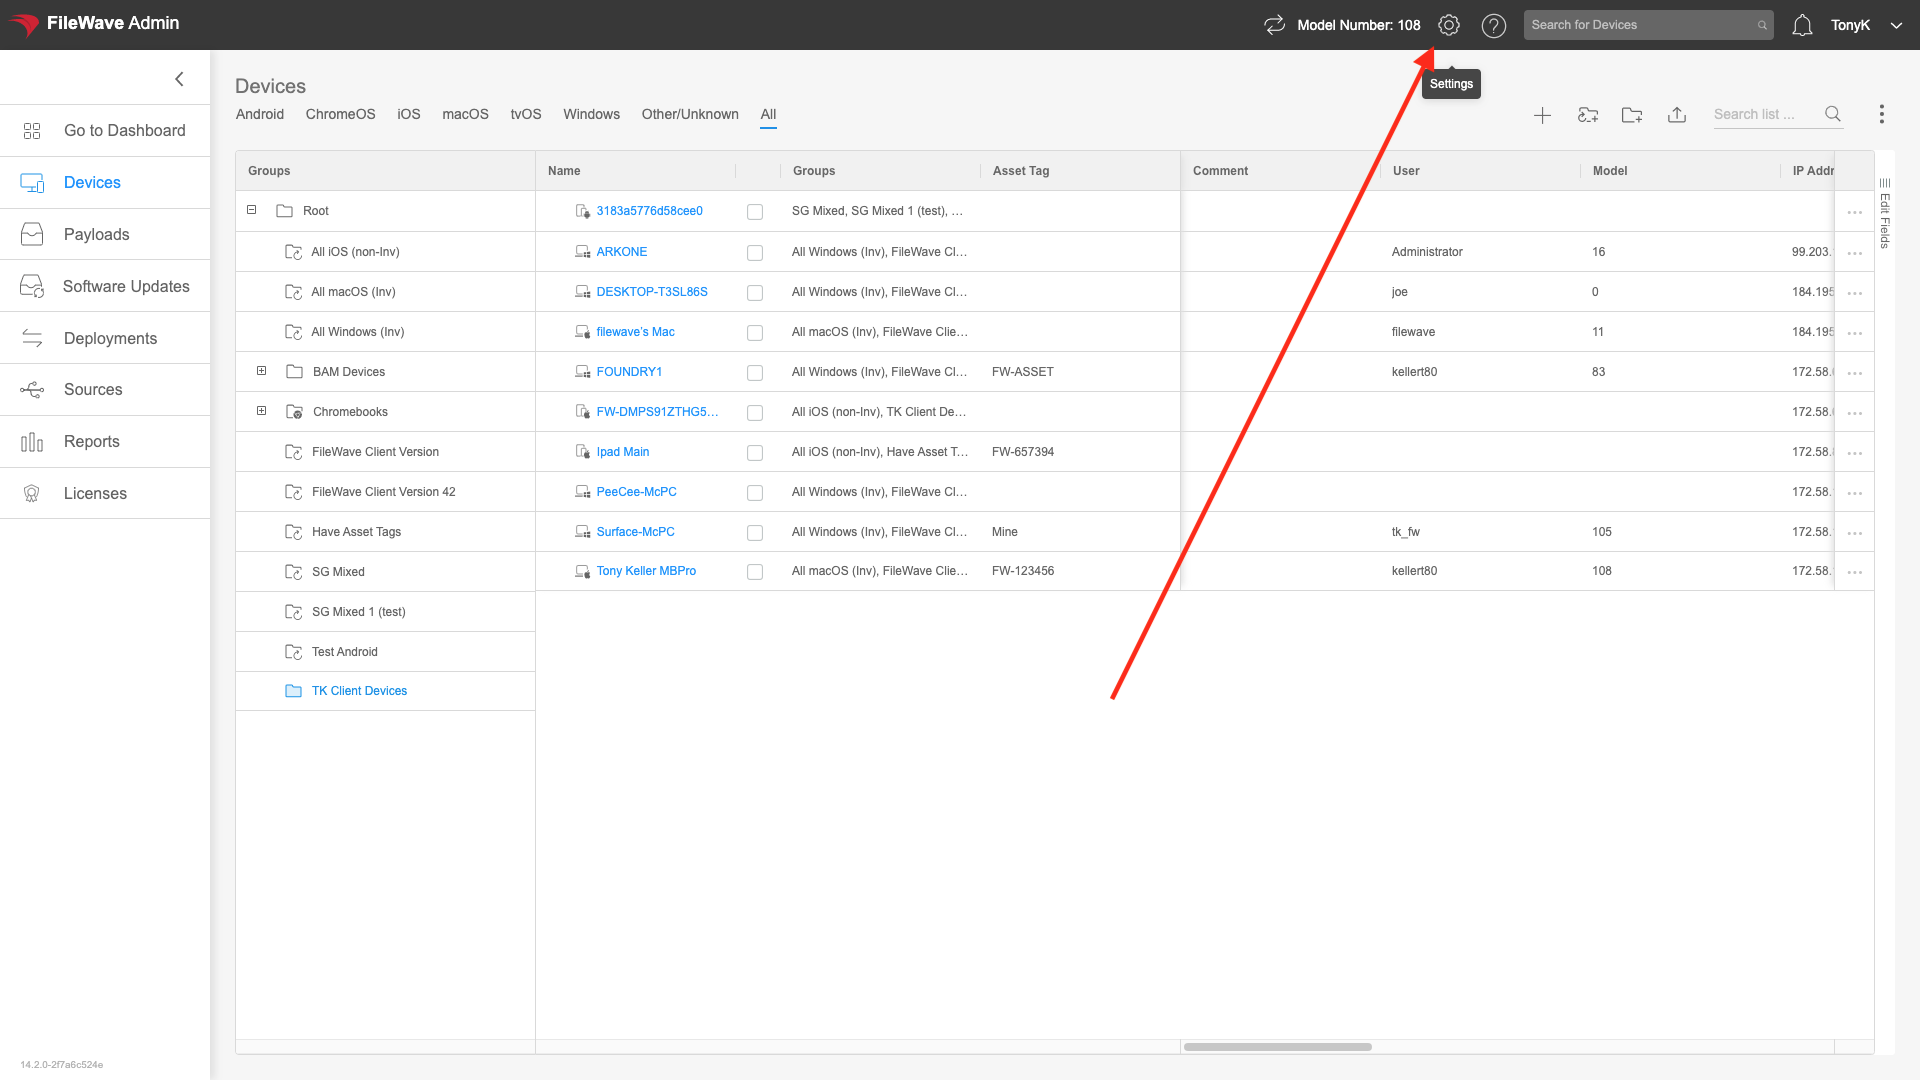
And for the web configuration, we'll need to copy some address from your FileWave server. You'll get them from the WebAdmin, Settings:, New AzureAD IDP, and then Get URLs as shown
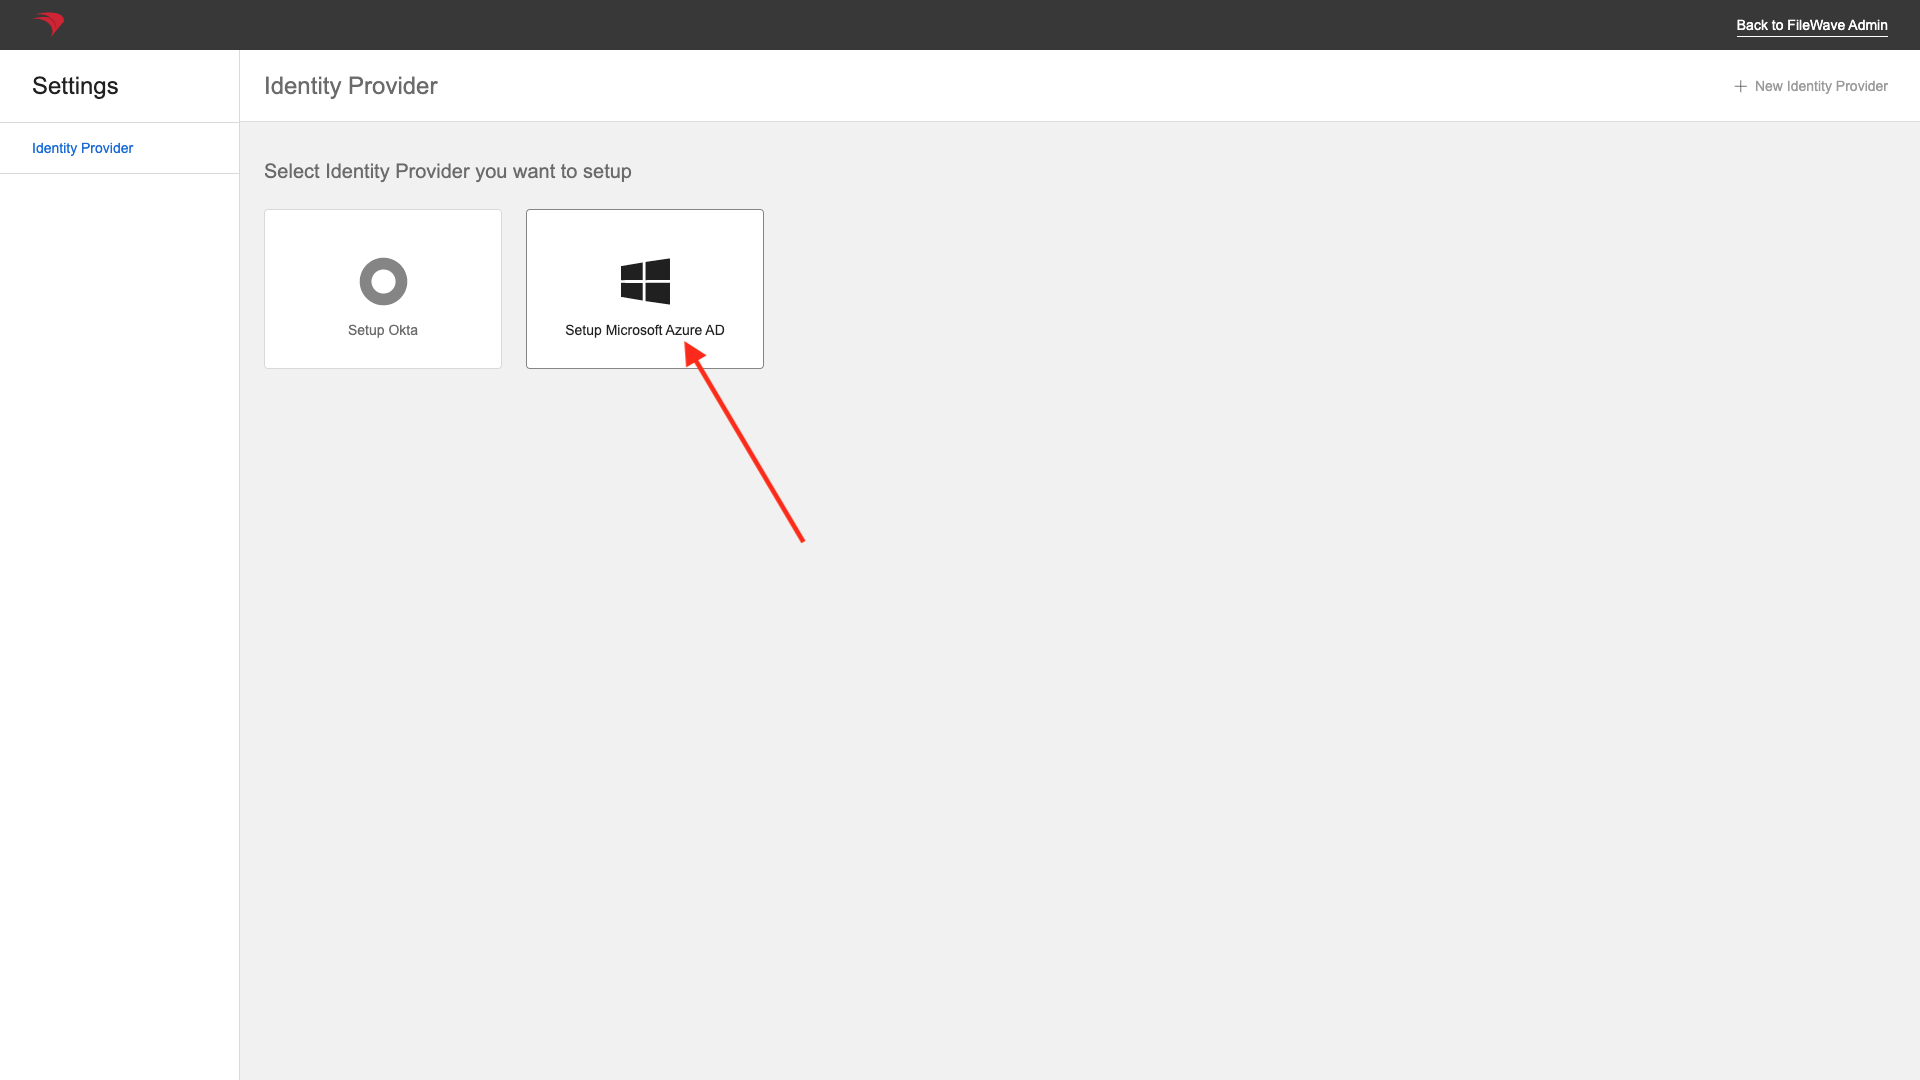
Then choose an Microsoft Entra ID IDP Provider
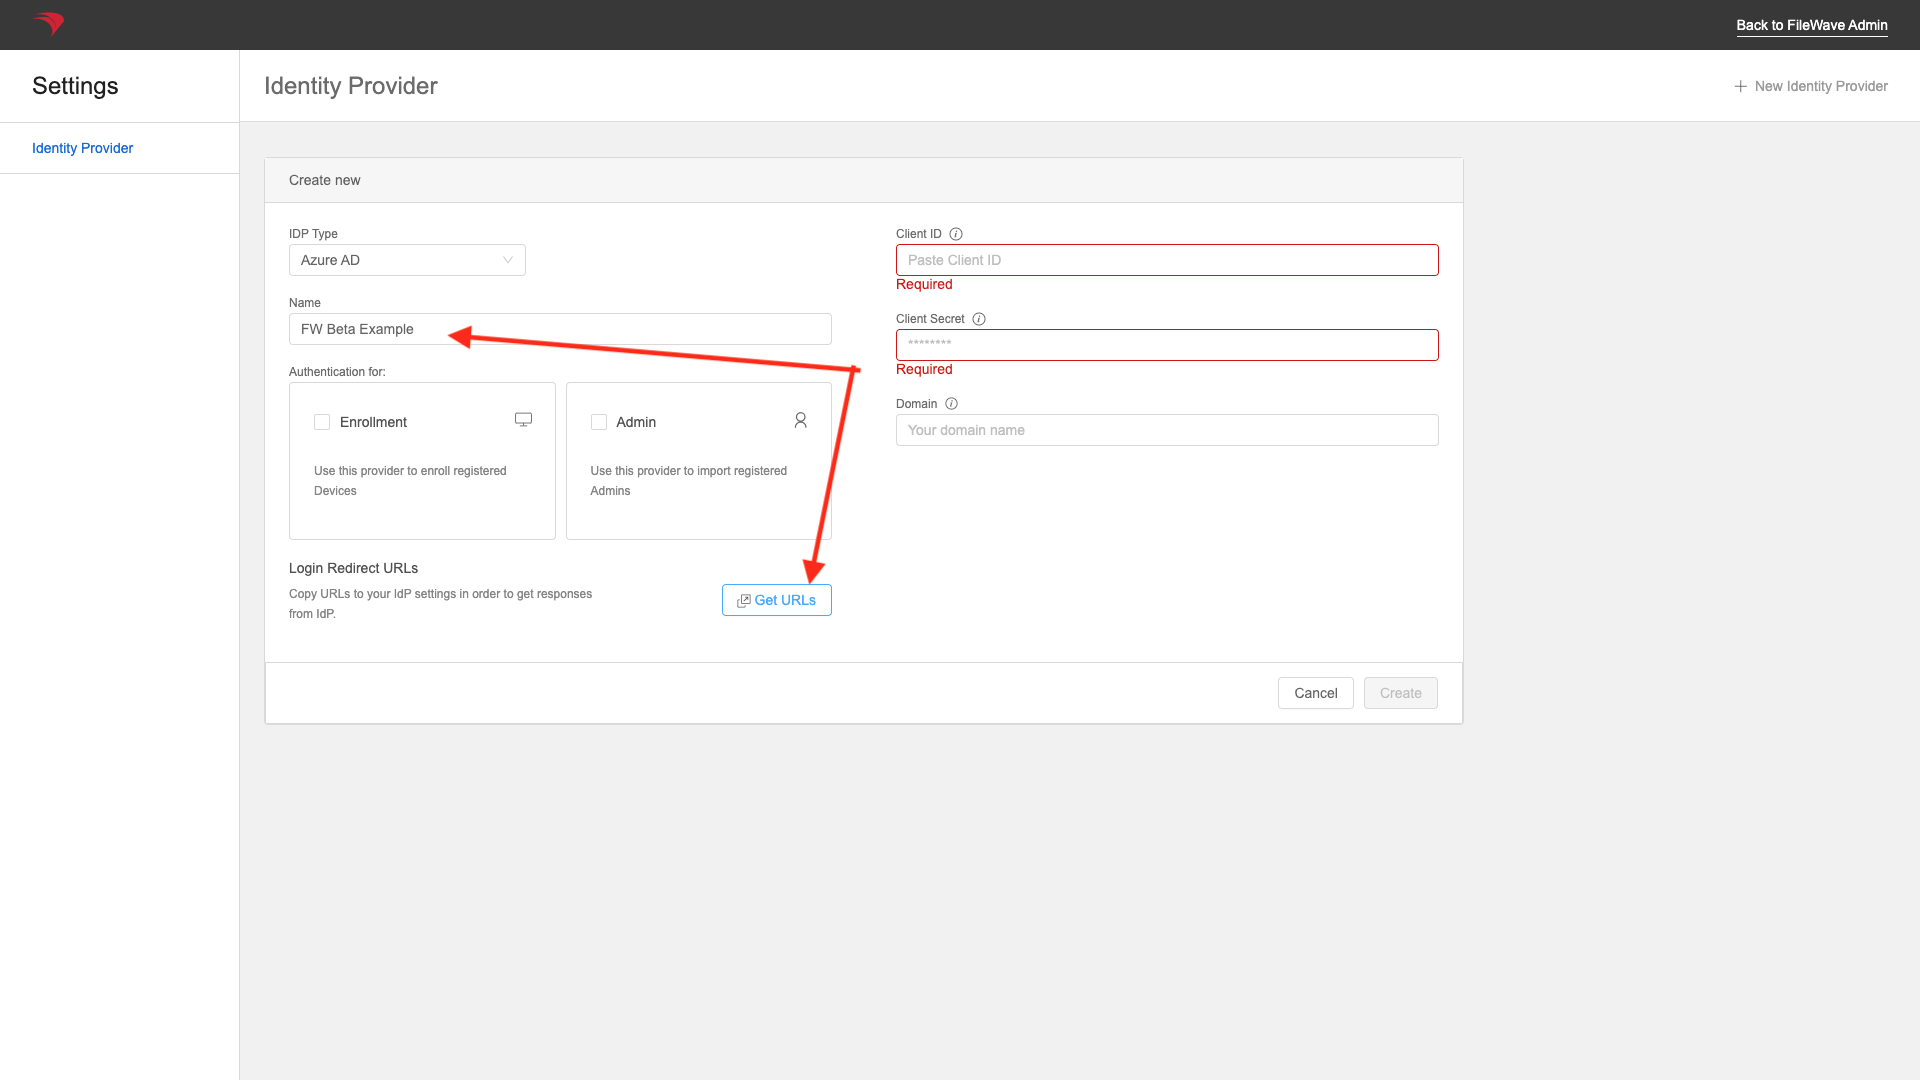
You can add a name now (or later), but you'll get the URLs from the "Get URLs" button:
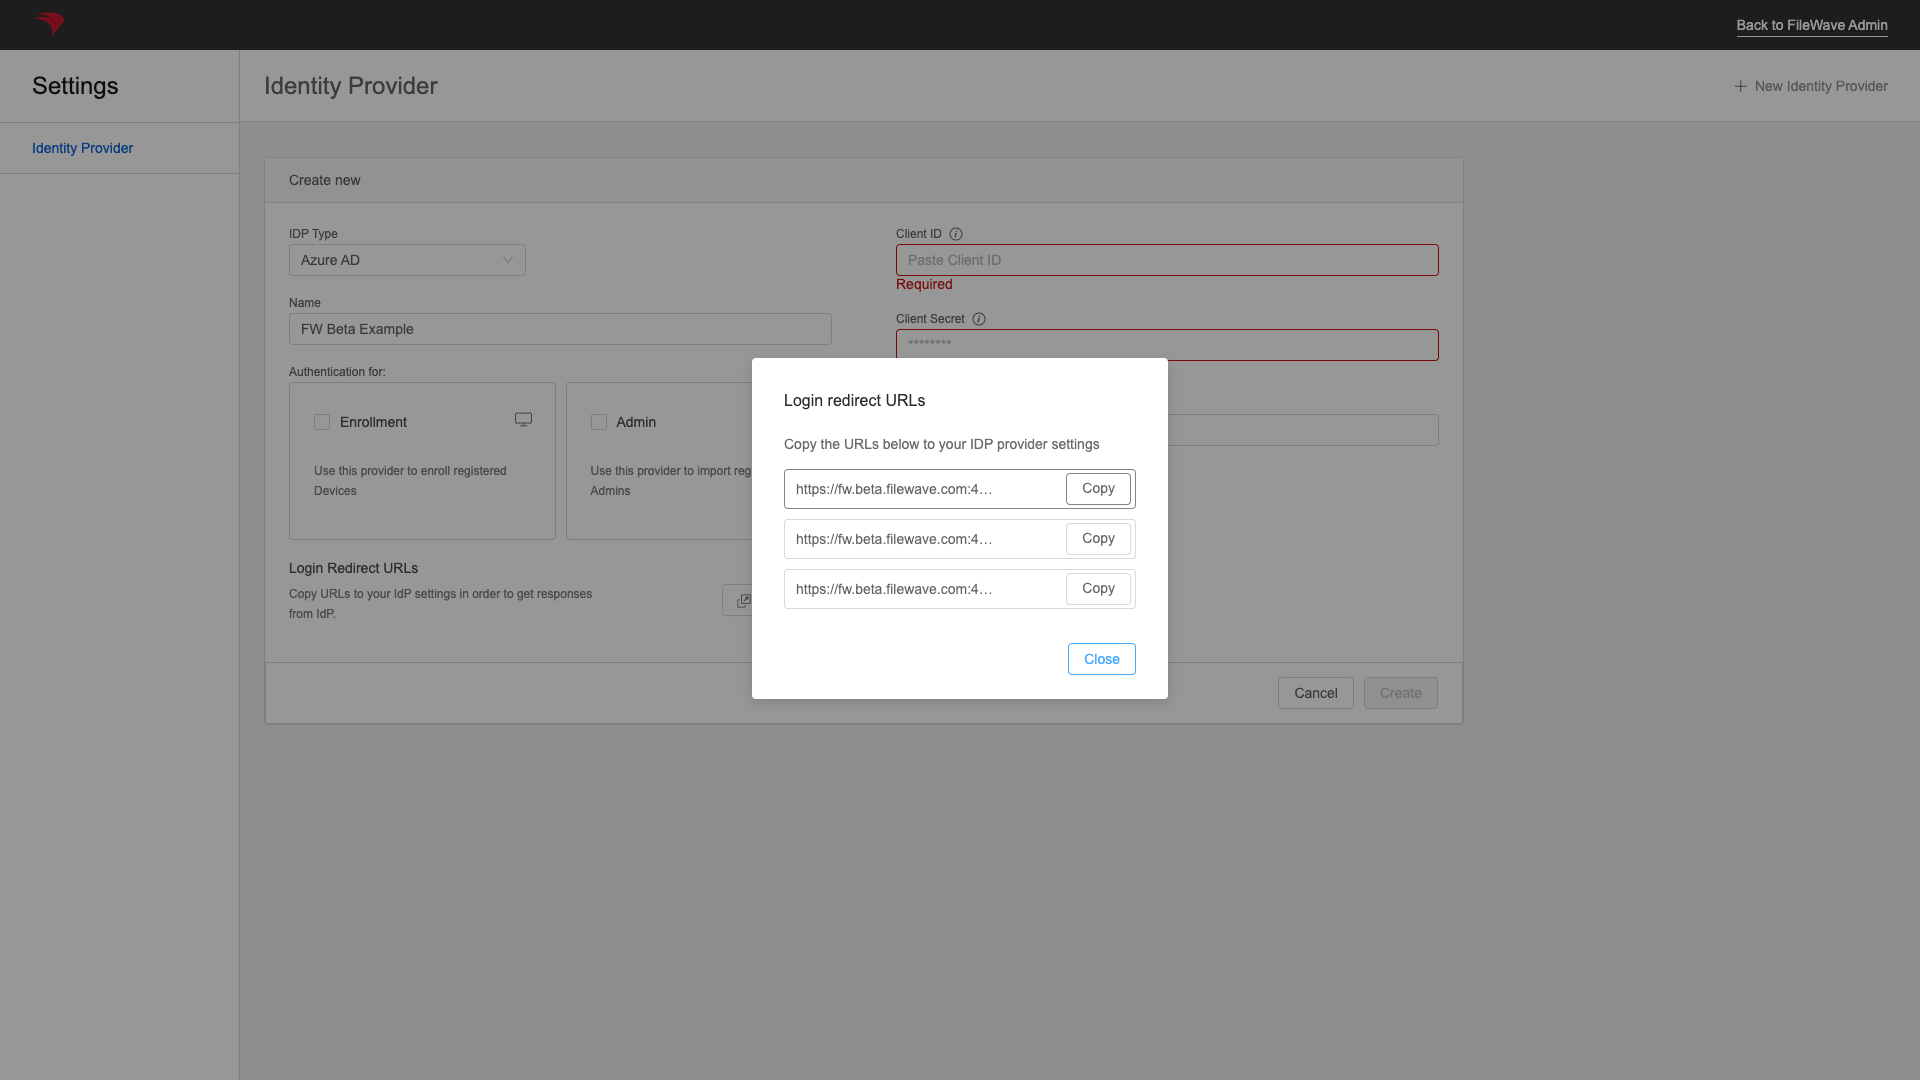
So now we'll enter one of the redirects, and click configure:
And then add the other two from here:

Make sure to hit Save at the top after you have entered all three.
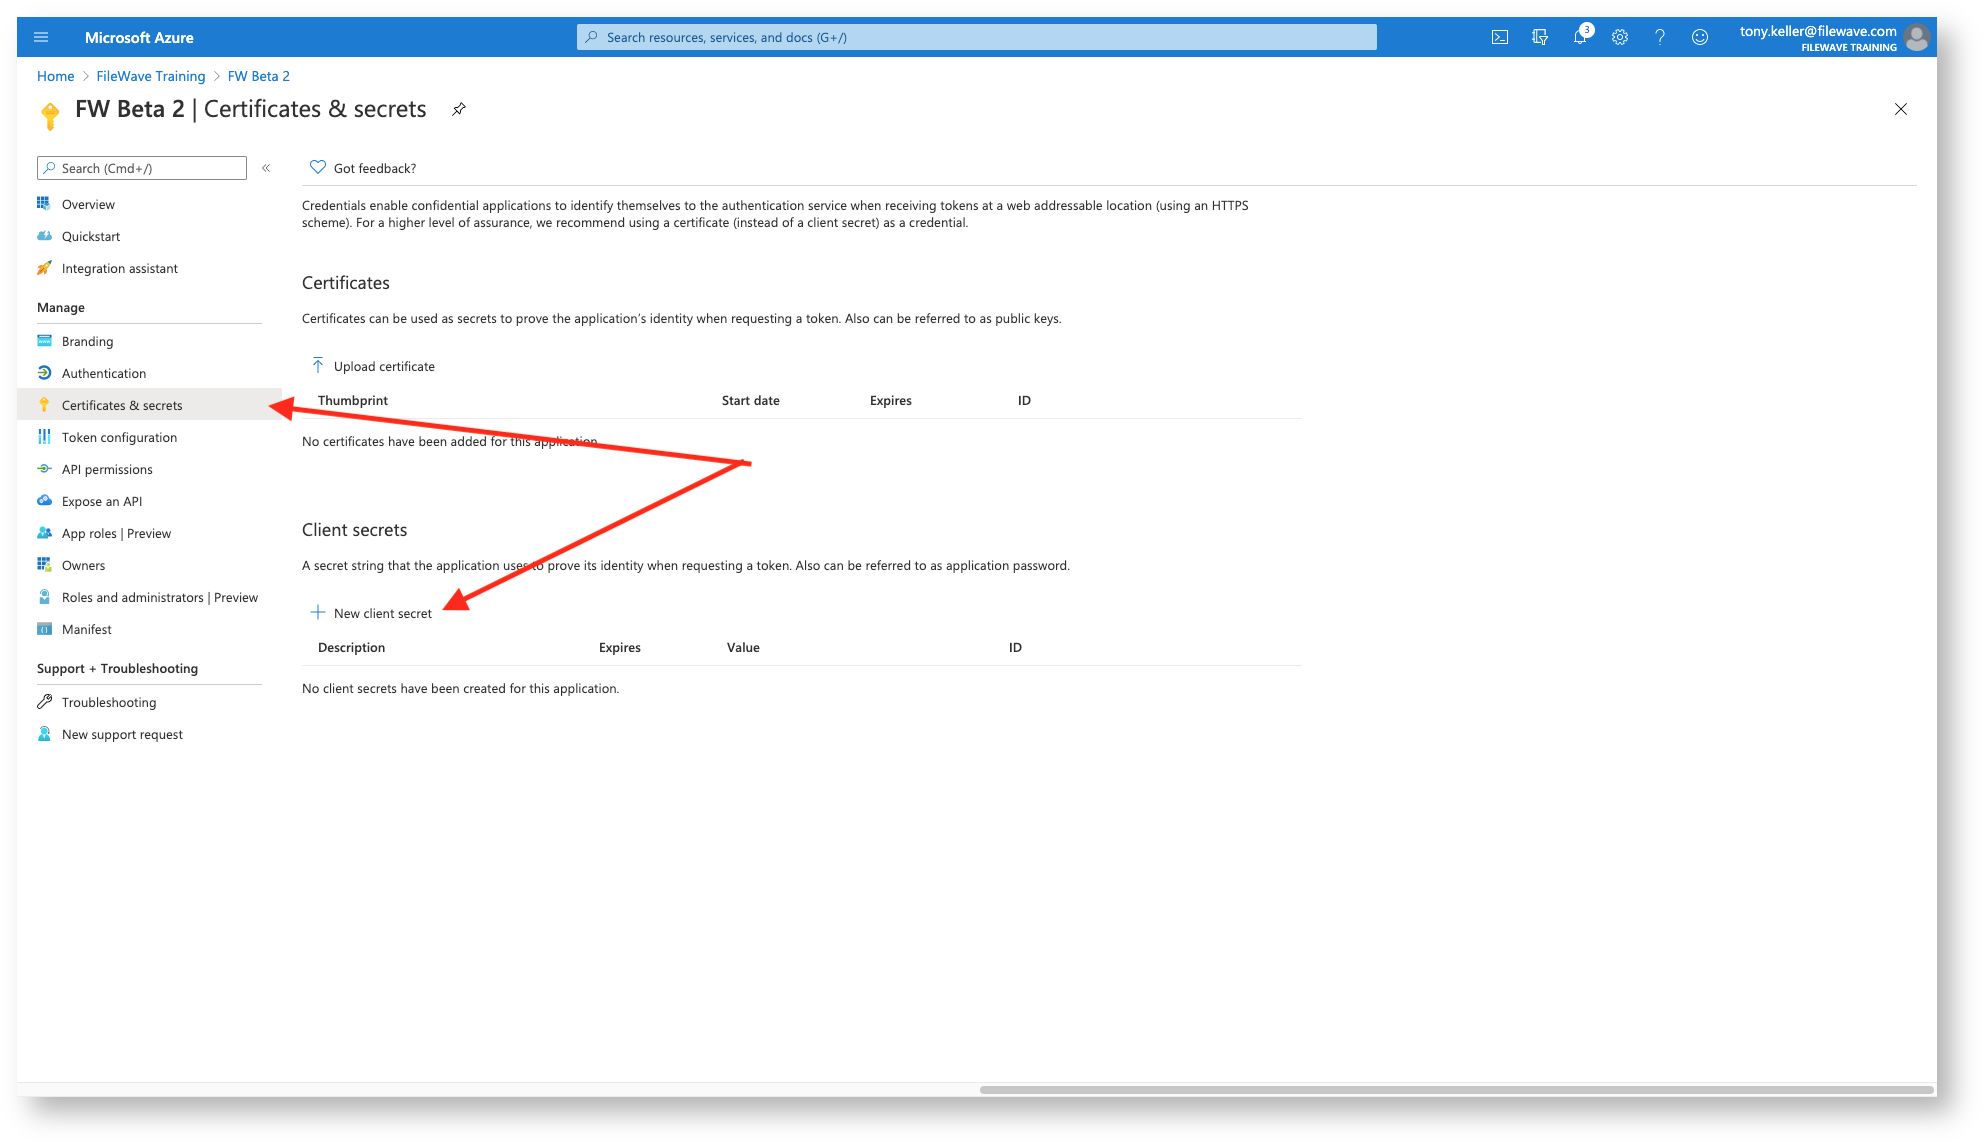
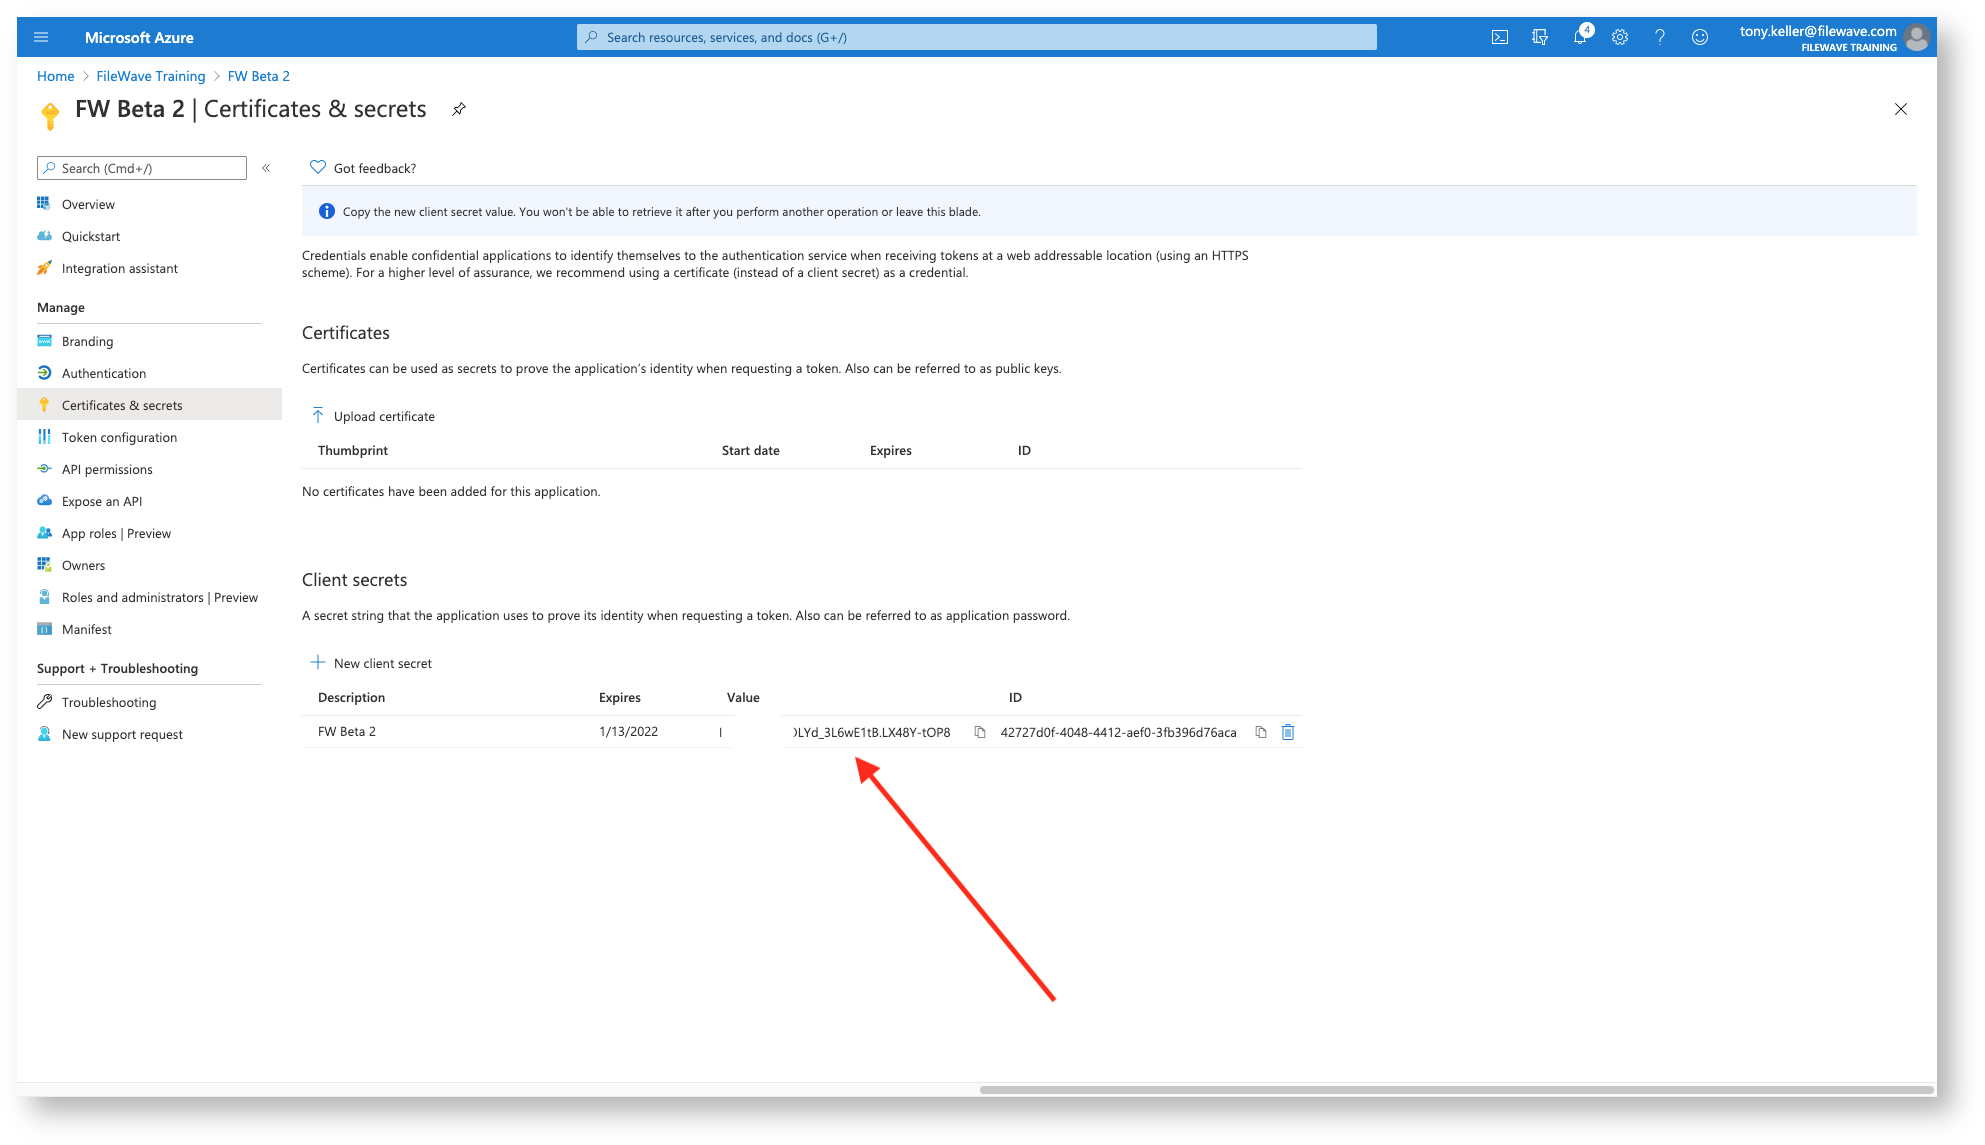
Part 4: Cert & Secrets
Now we are going to go to Certificates & Secrets to provide a way for FileWave to authentication to our new application. Click on New client secret
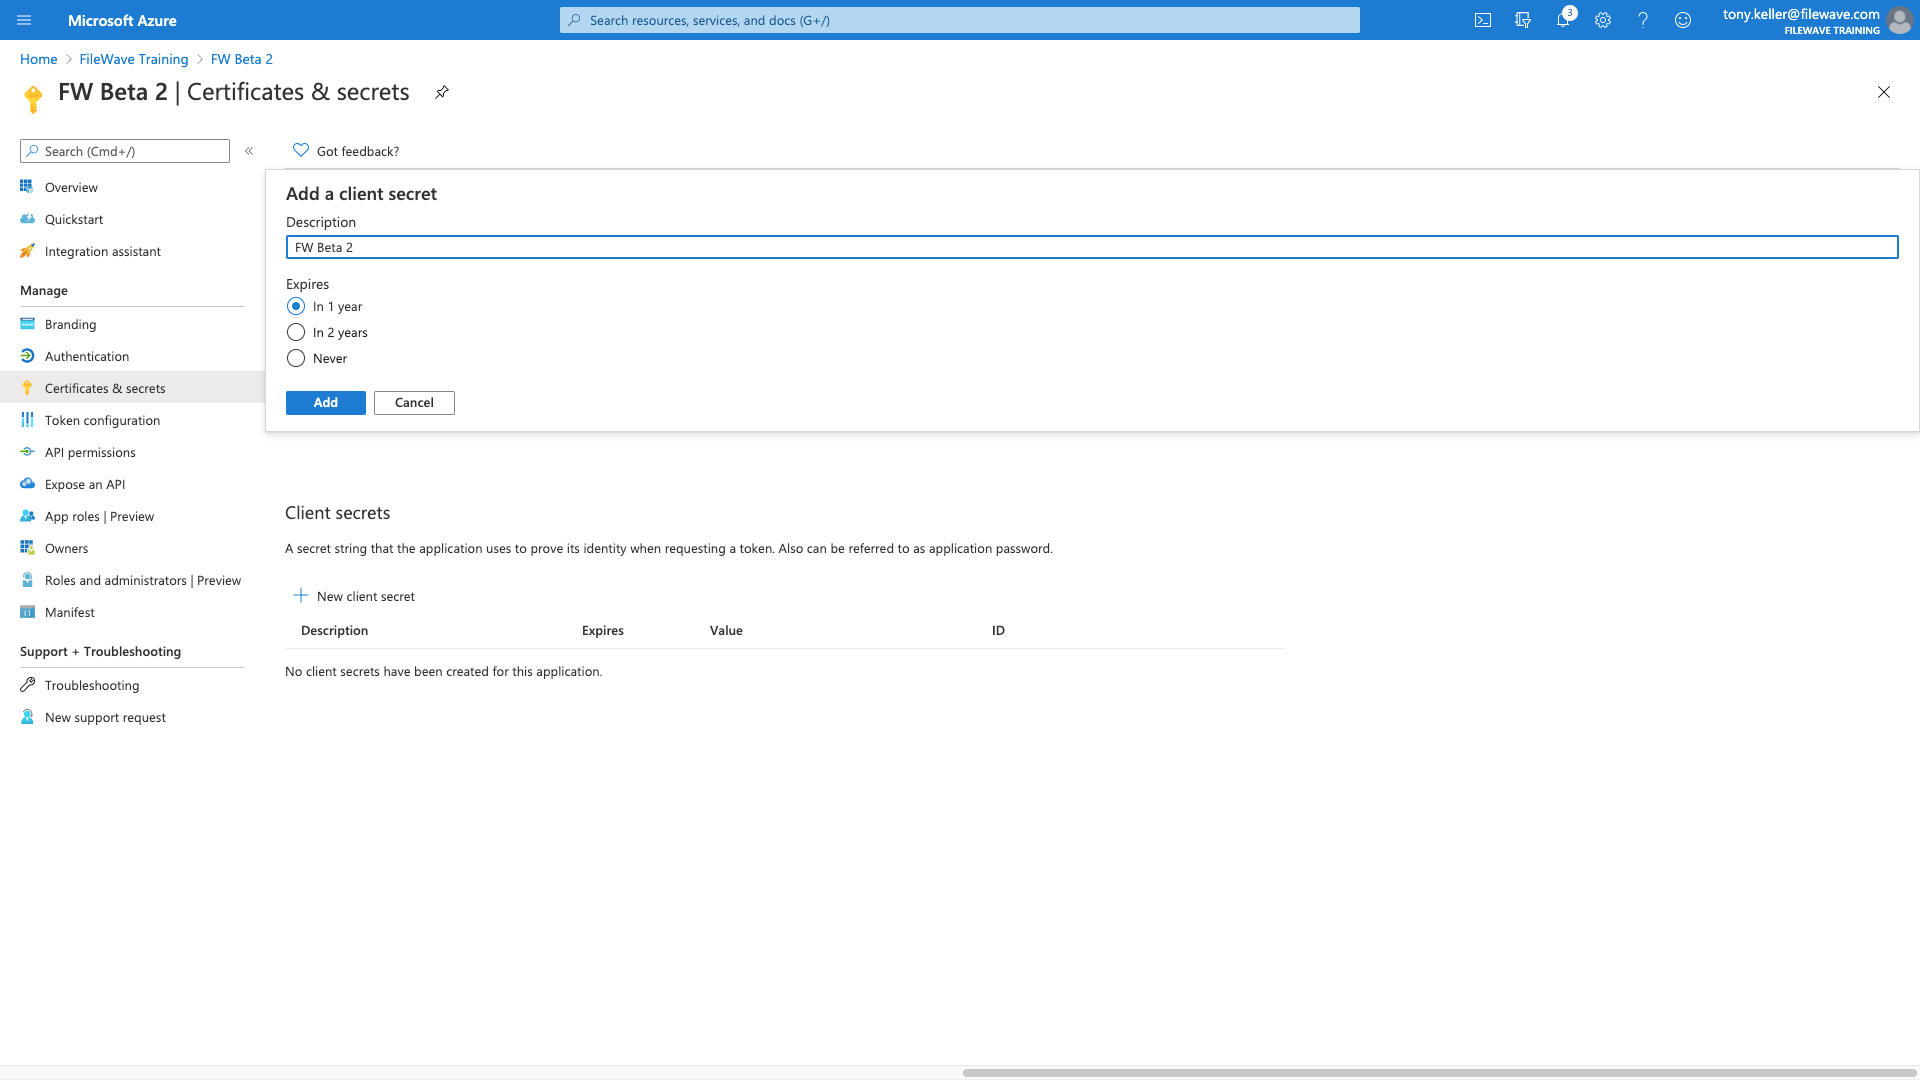
Then we give it a descriptive name:
And then we'll want to get a copy of the Client Secret, and this is the ONLY time you can copy it. The one we need is under the 'Value' column.
Lastly, we get the The Client ID, you get from the overview page:
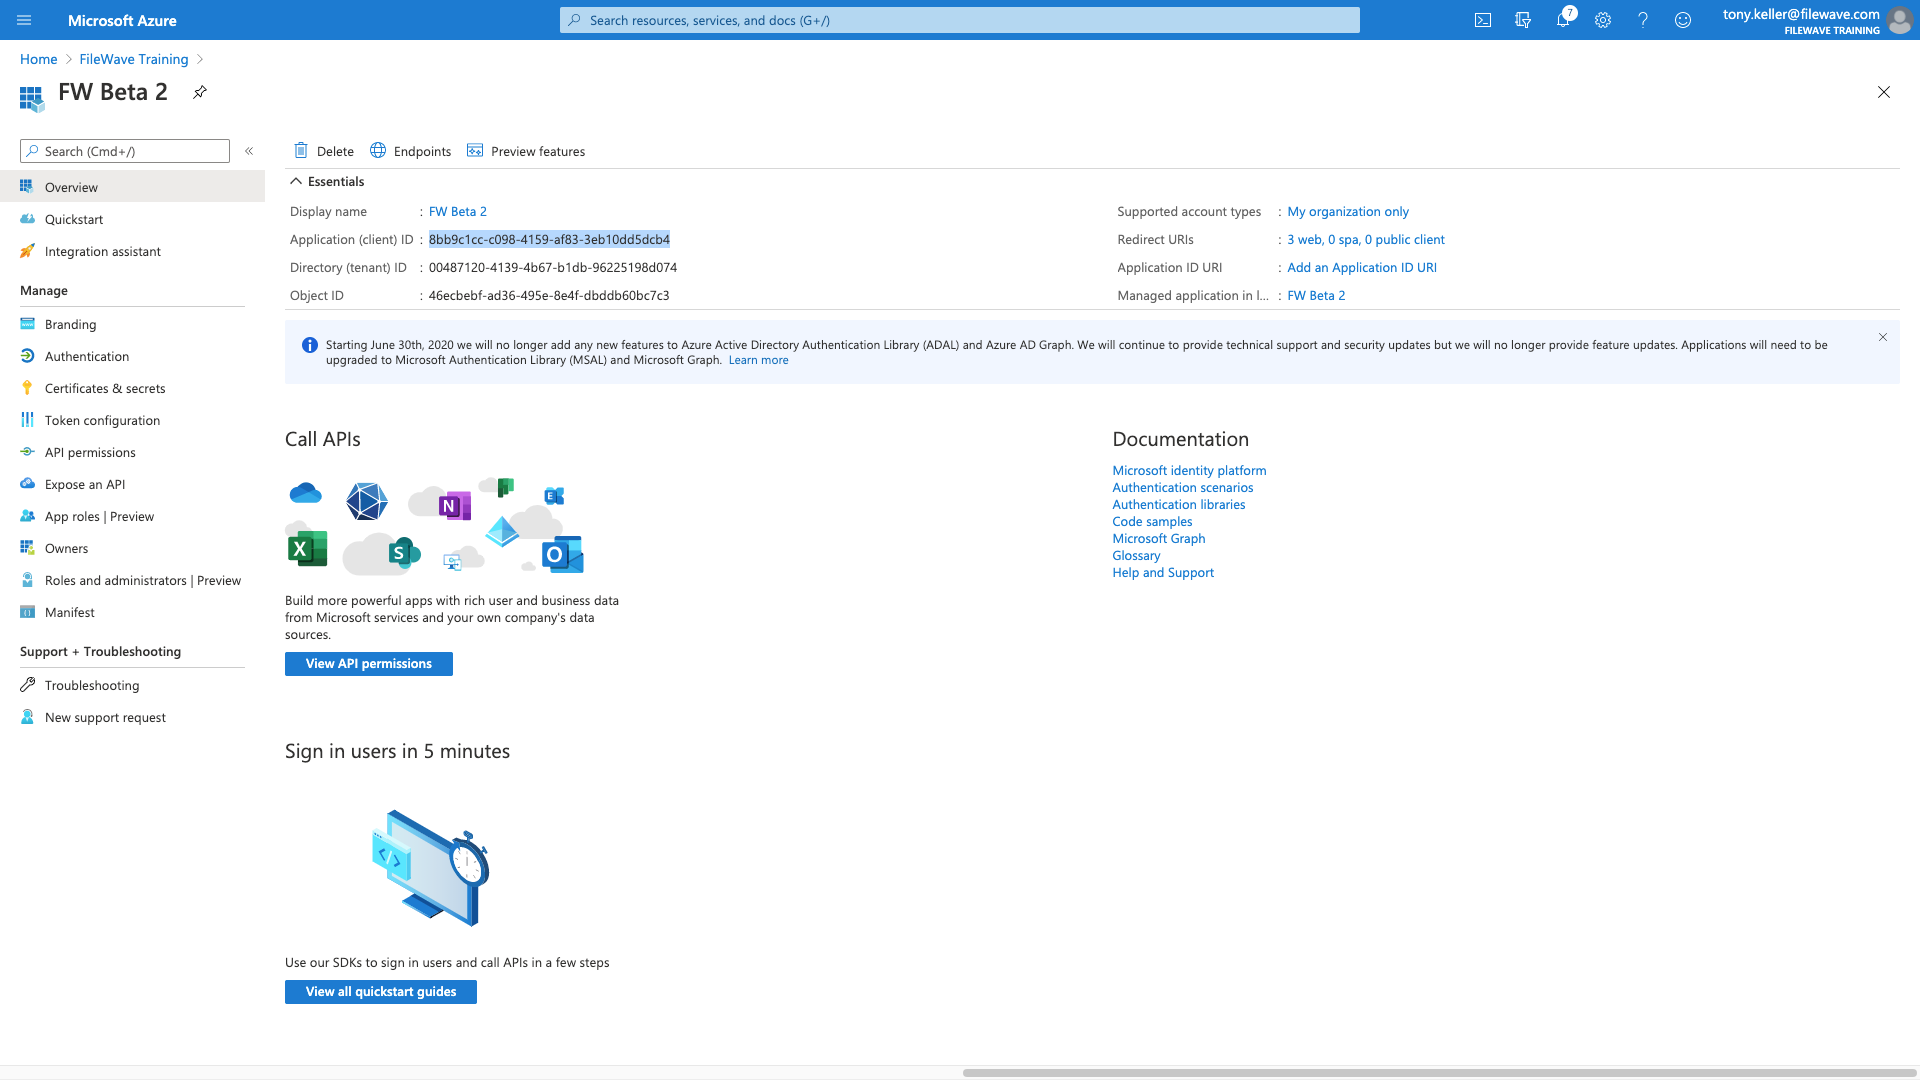
Each of the relevant values then gets copied into the FileWave config below:
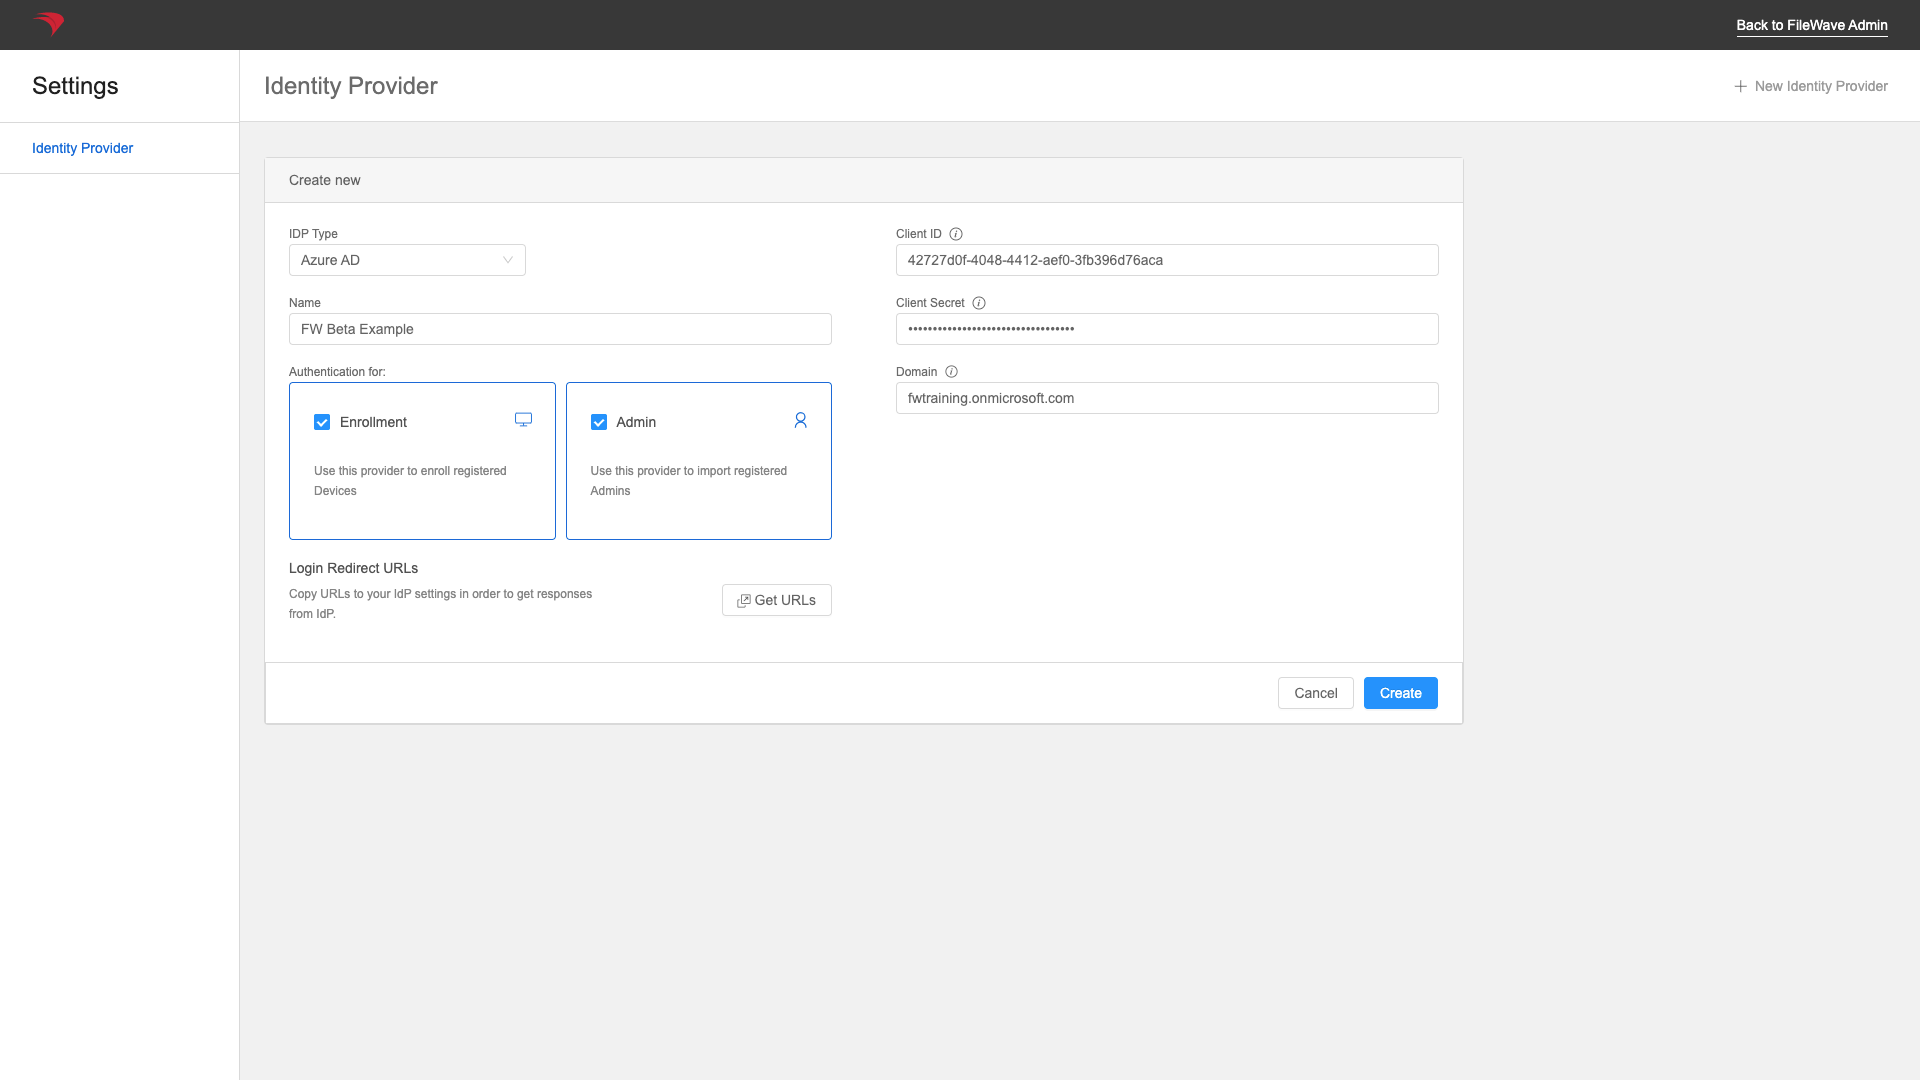
You'll check the checkbox for "Admin" if you want to be able to use AzureAD for login to the FileWave admin with AzureAD, and "Enrollment" if you want to use it for Apple device enrollment authentication. Note that multiple IDPs can be used for admin login, but only one for device enrollment.
Part 5: App Permissions
Now we have to give our app permissions to read the directory so that it can pull group information into FileWave for browsing and rights assignment.
So, we'll go to the App Permissions section and start Adding Permissions
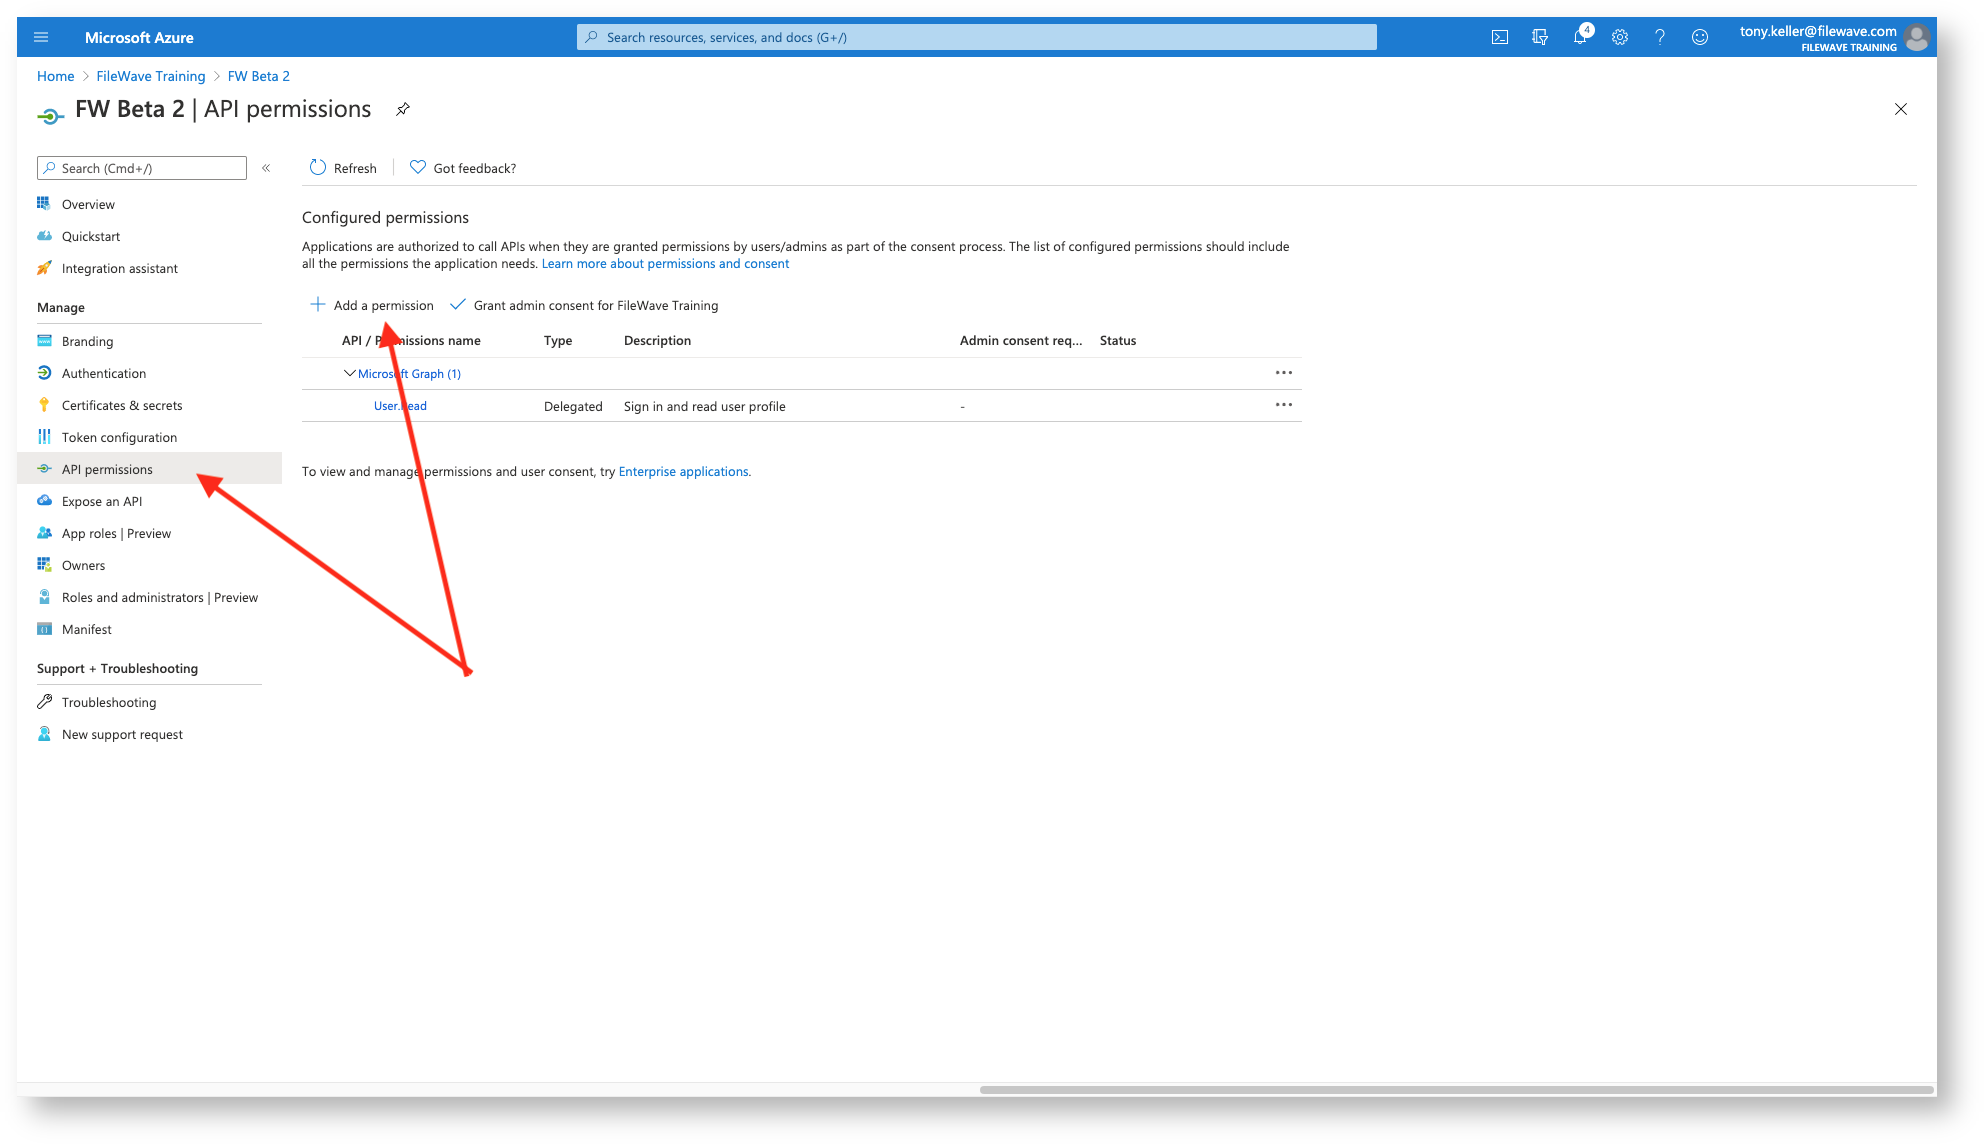
Our permissions are going to be for Microsoft Graph

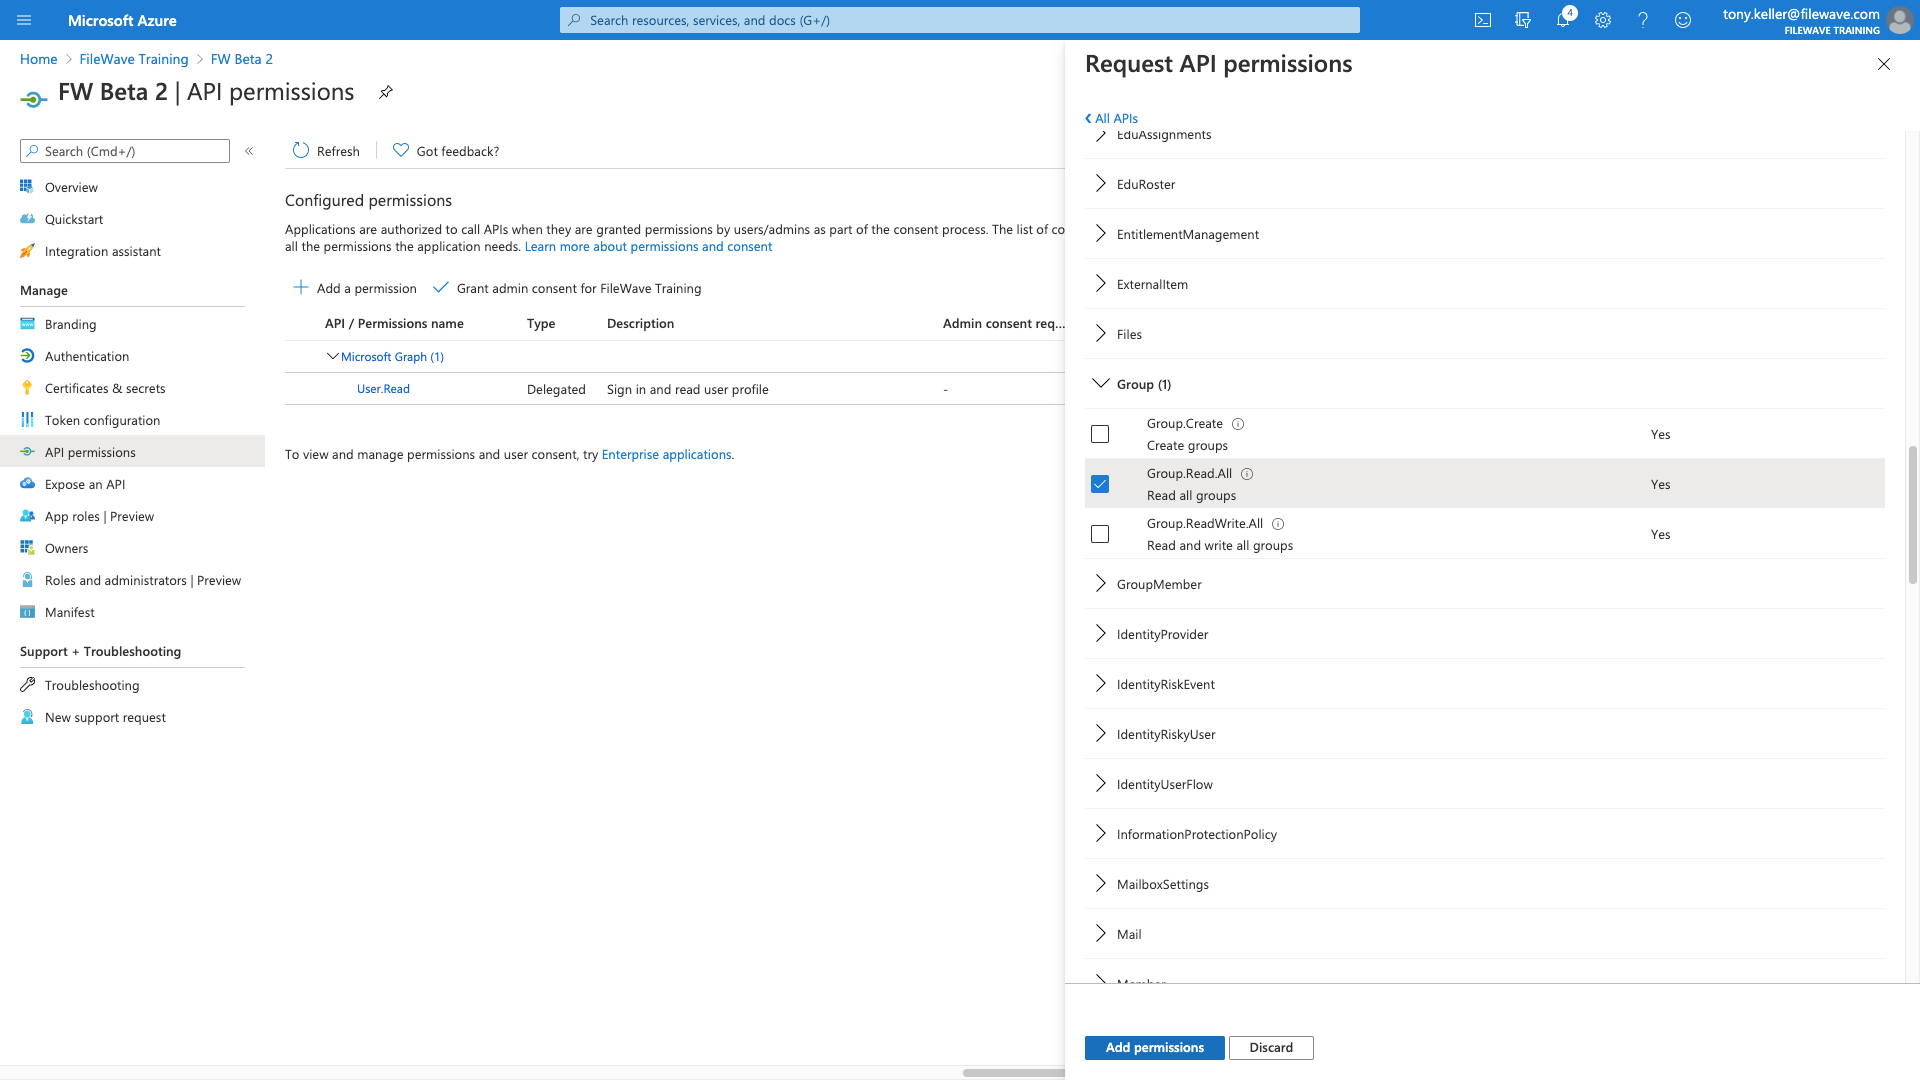
We'll start with an application permission:

For Group Read All AND User Read All (not shown, but you can pick two at once):
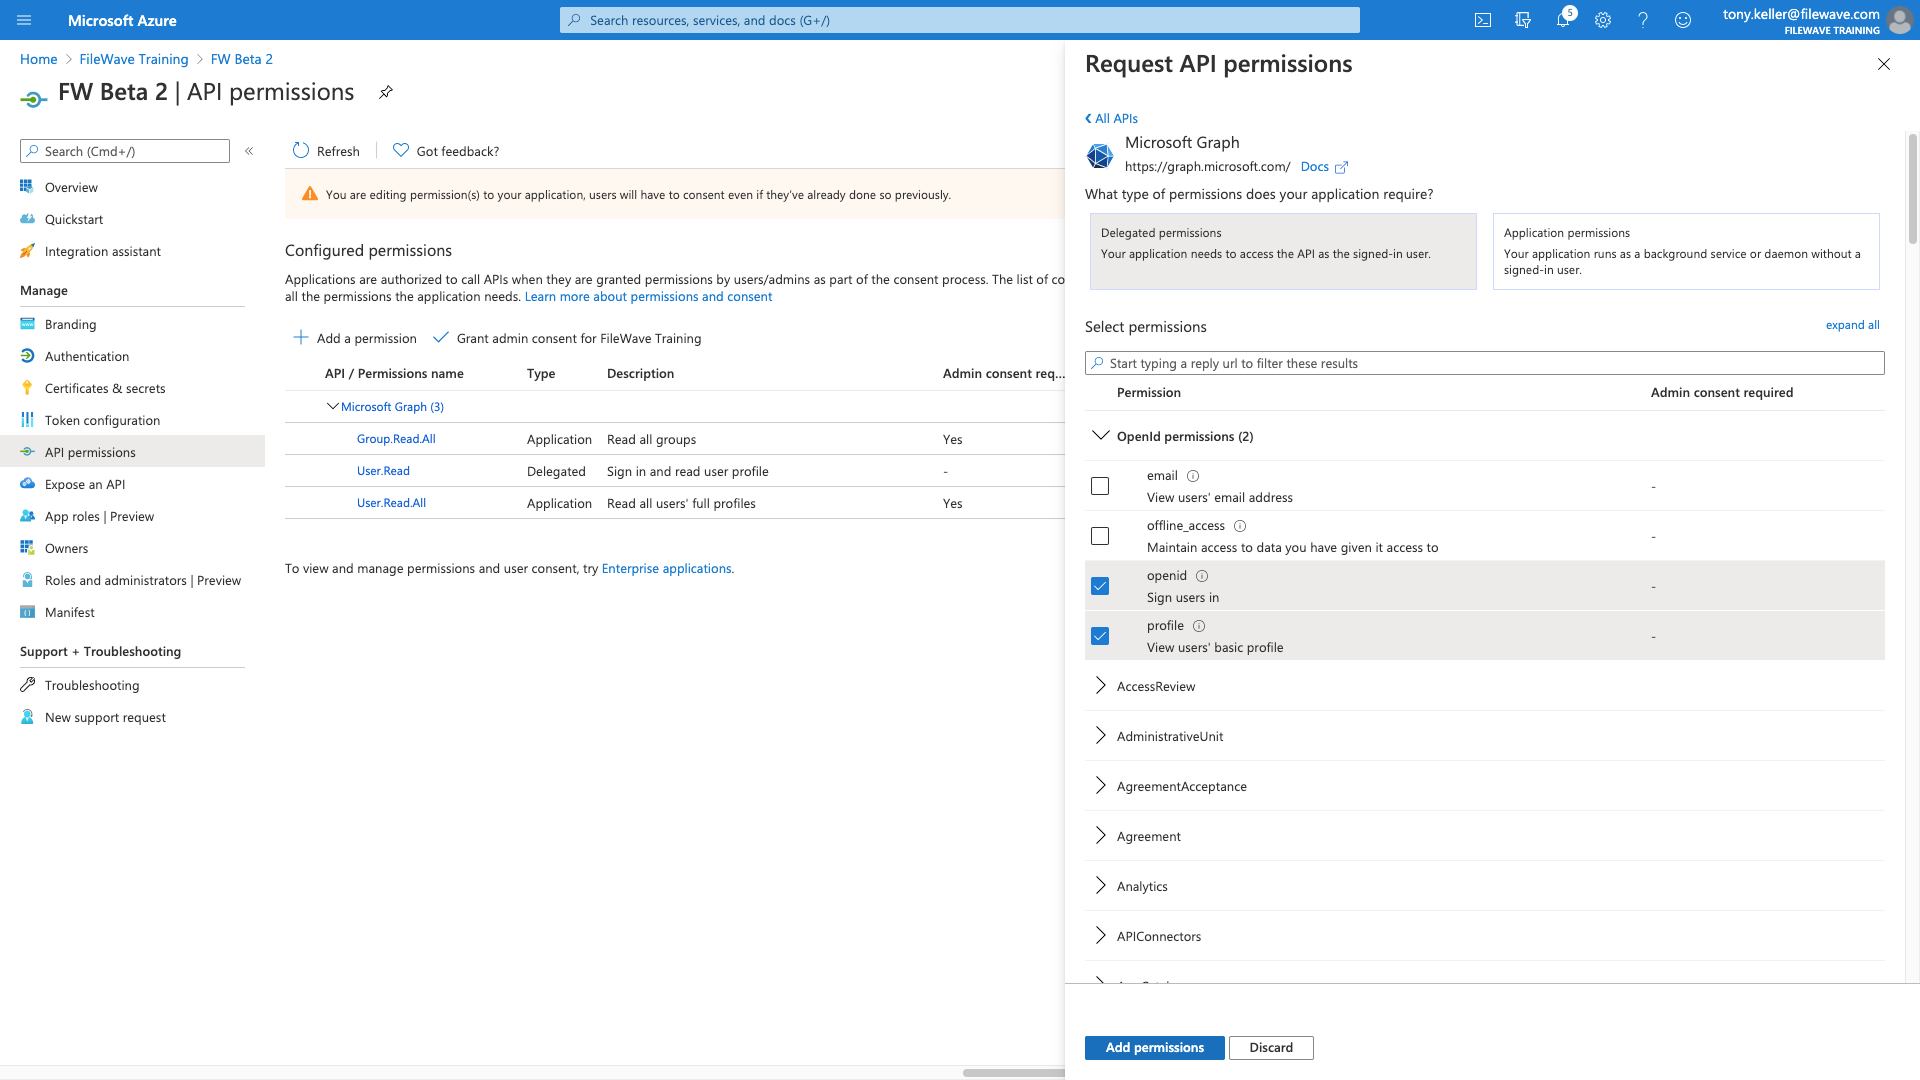
Then we'll add more permissions, but "delegated permissions" for open id and profile as shown:
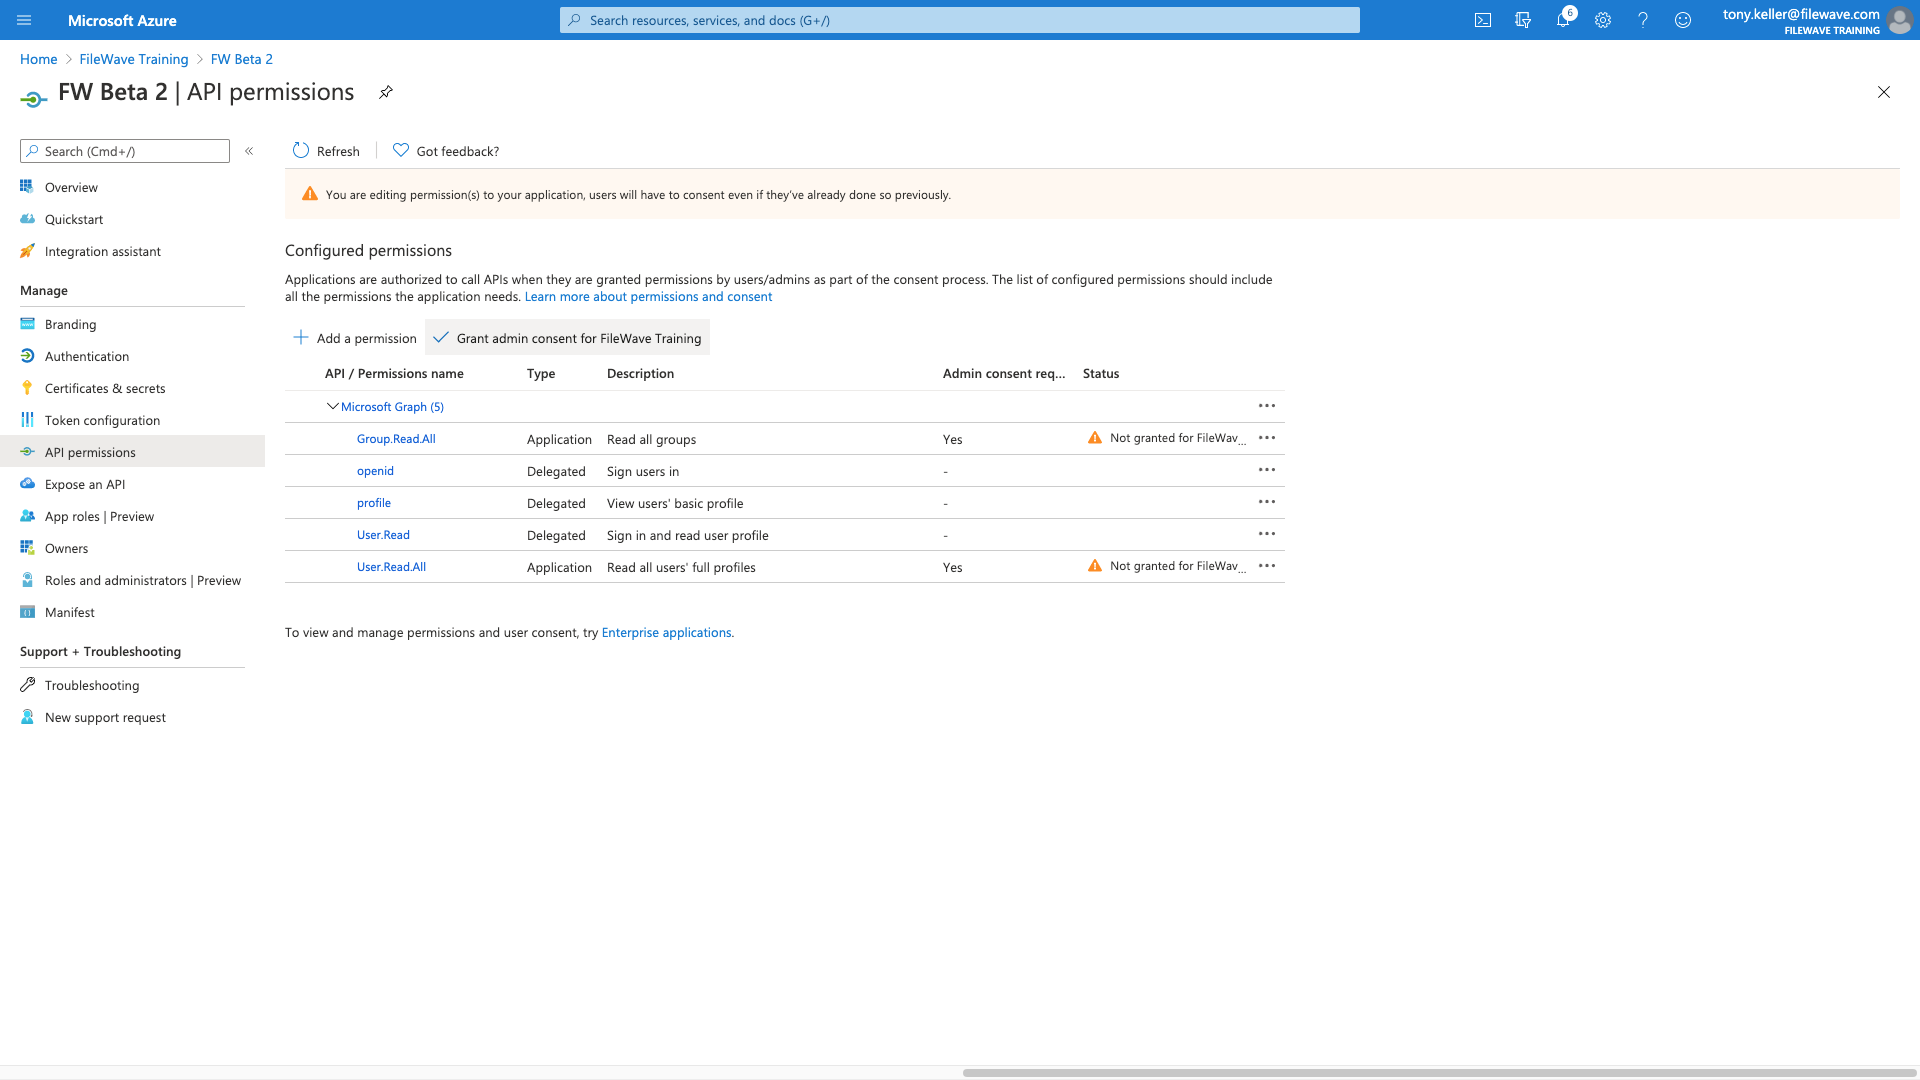
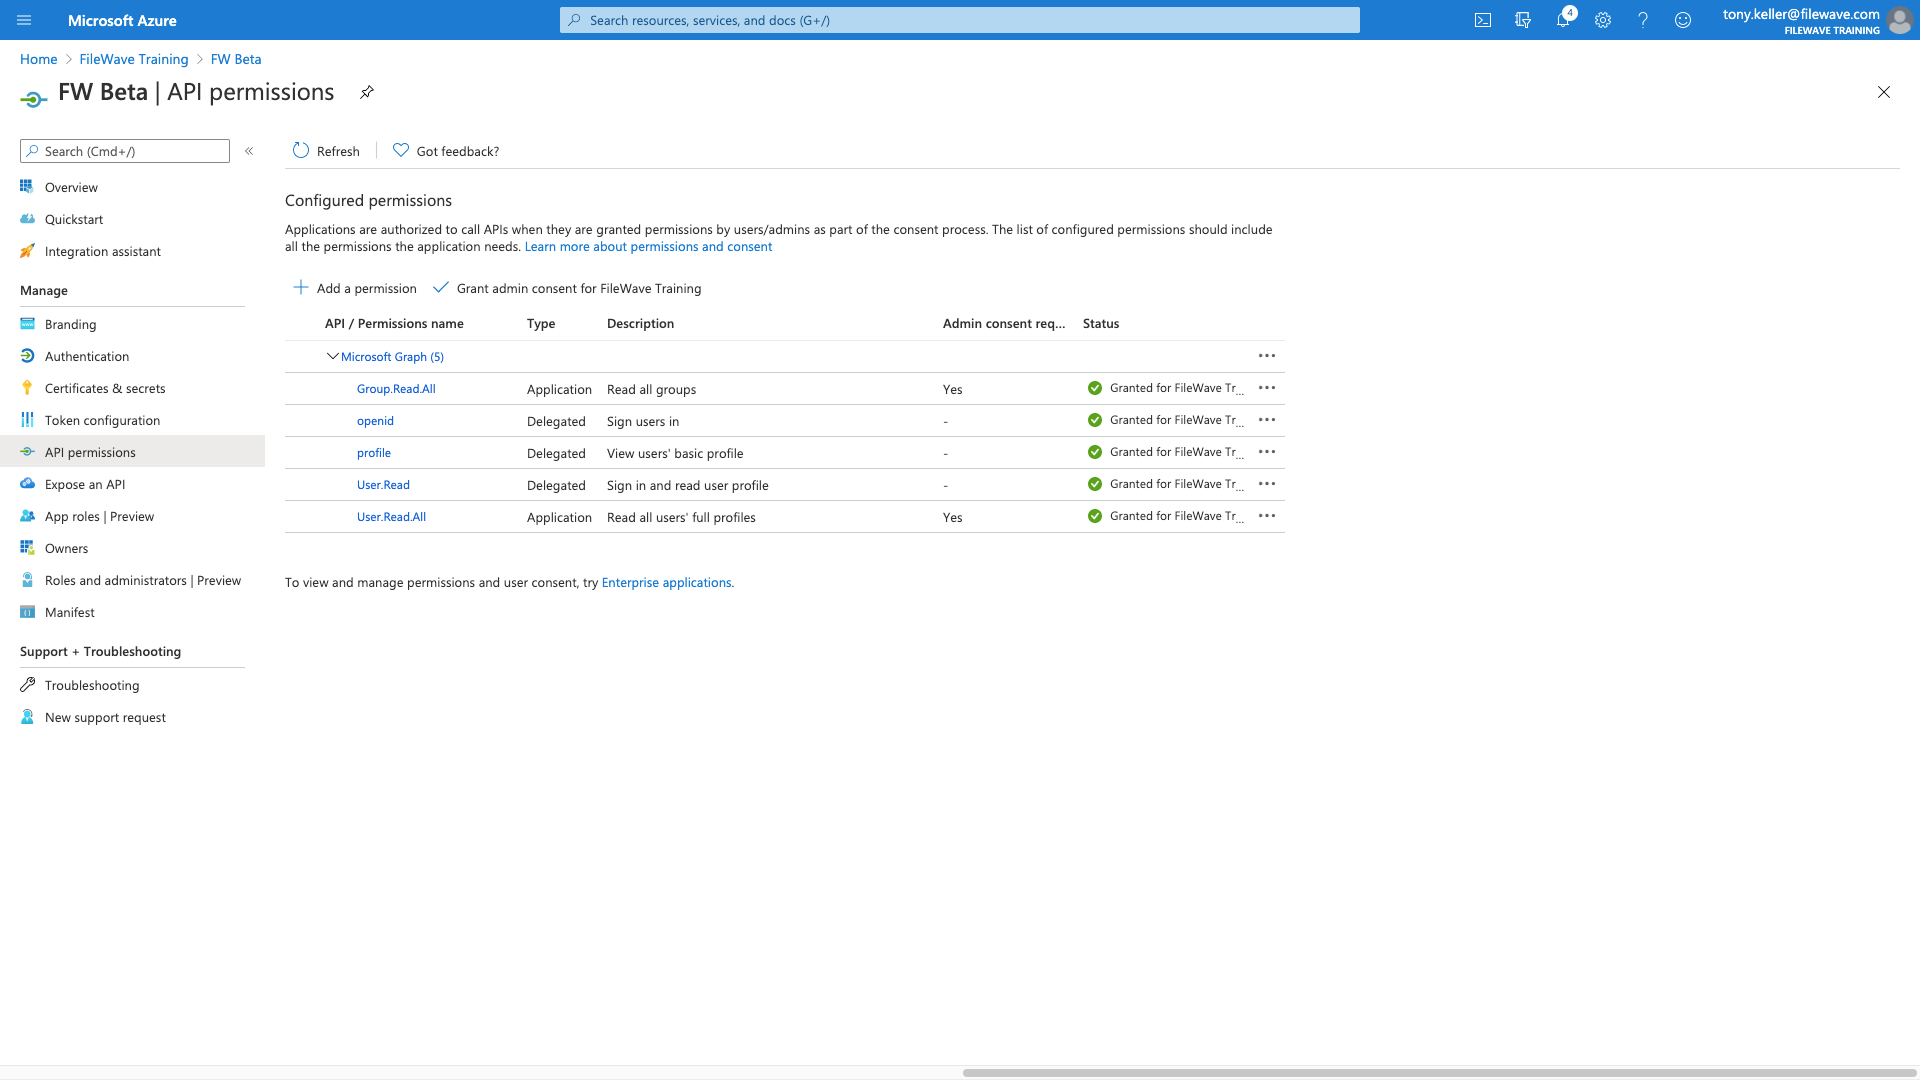
Our permissions then should look like this when we have them all
And then we just need to click Grant Consent to finish with the permissions
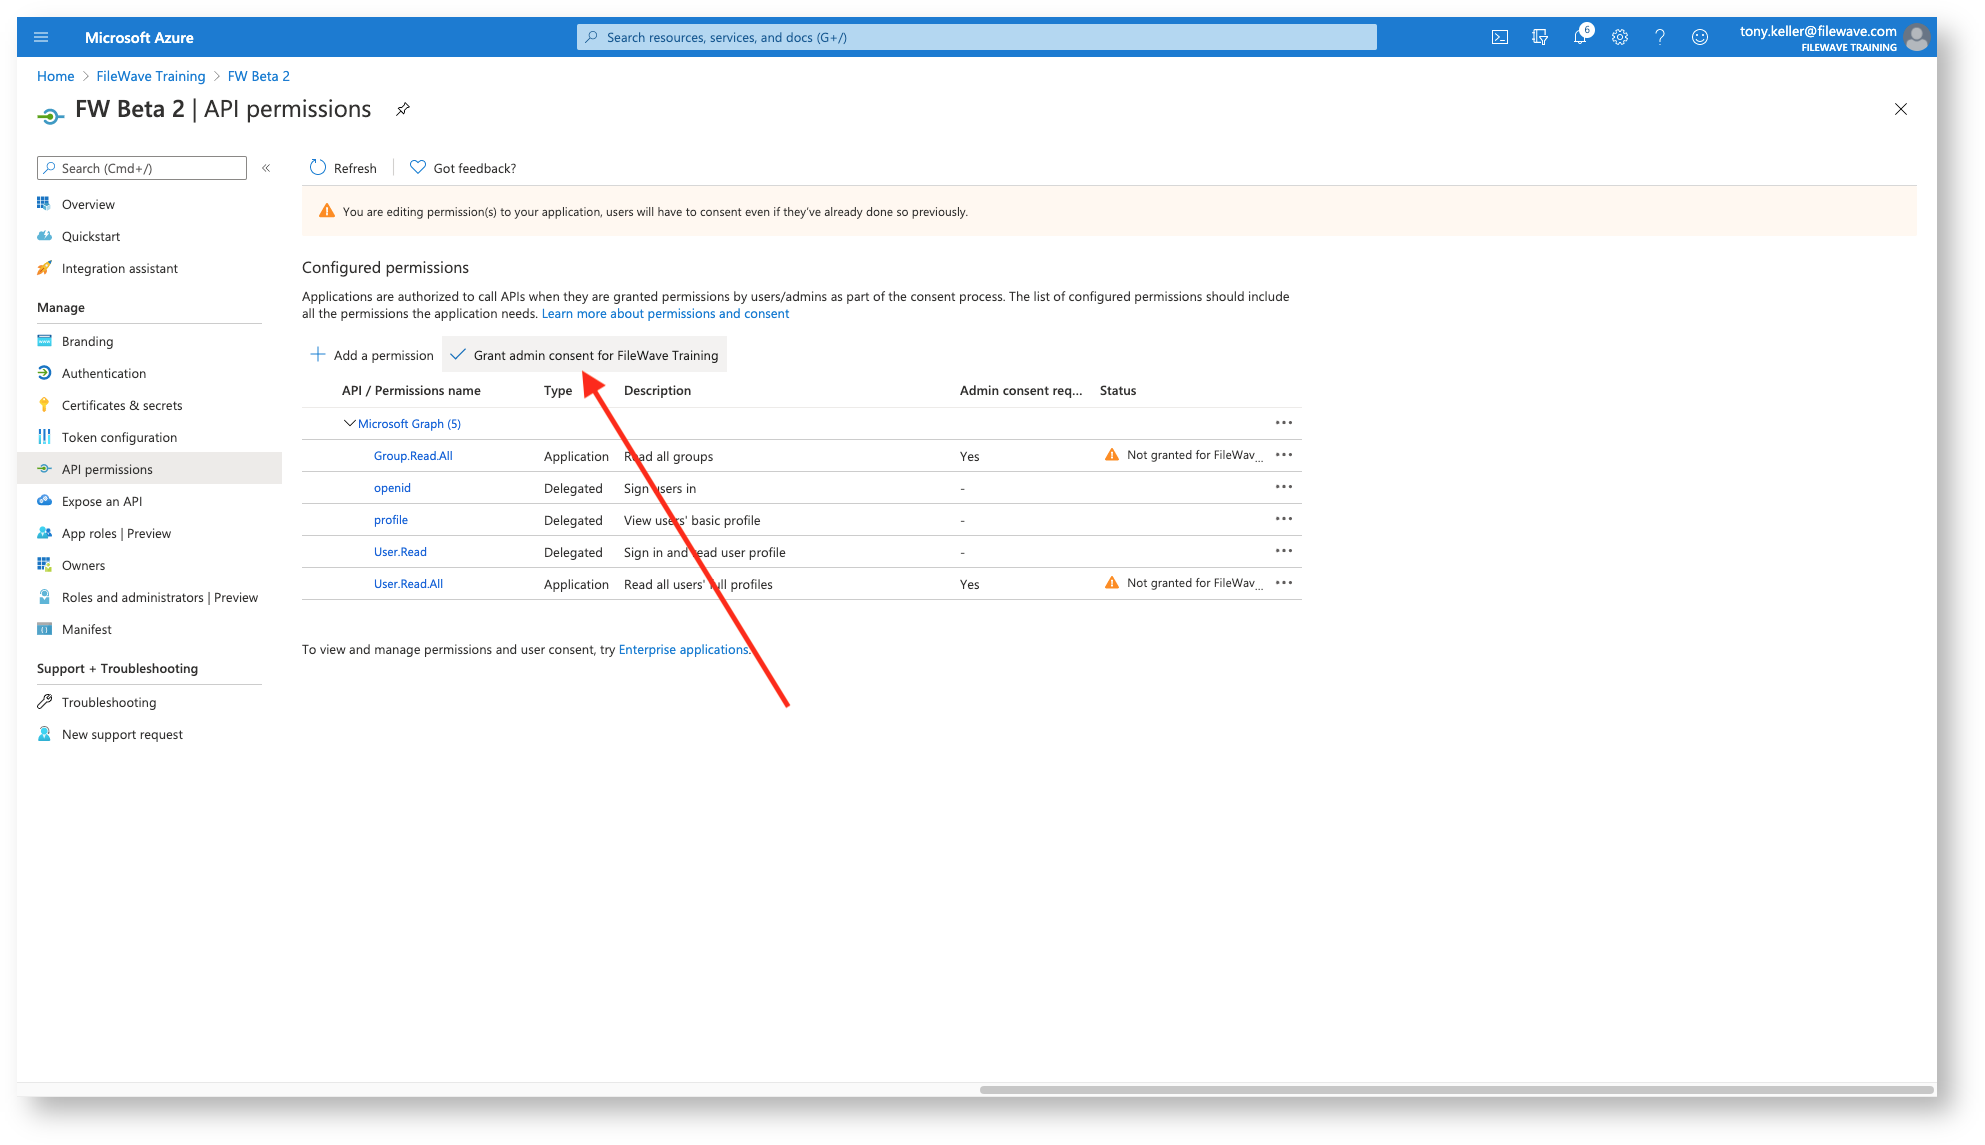
When they show as green, we are all done!
Part 6: App Registration Renewal
At some point the Certificate of the App will expire and a new certificate should be generated. The maximum you can set before expiry is 2 years.
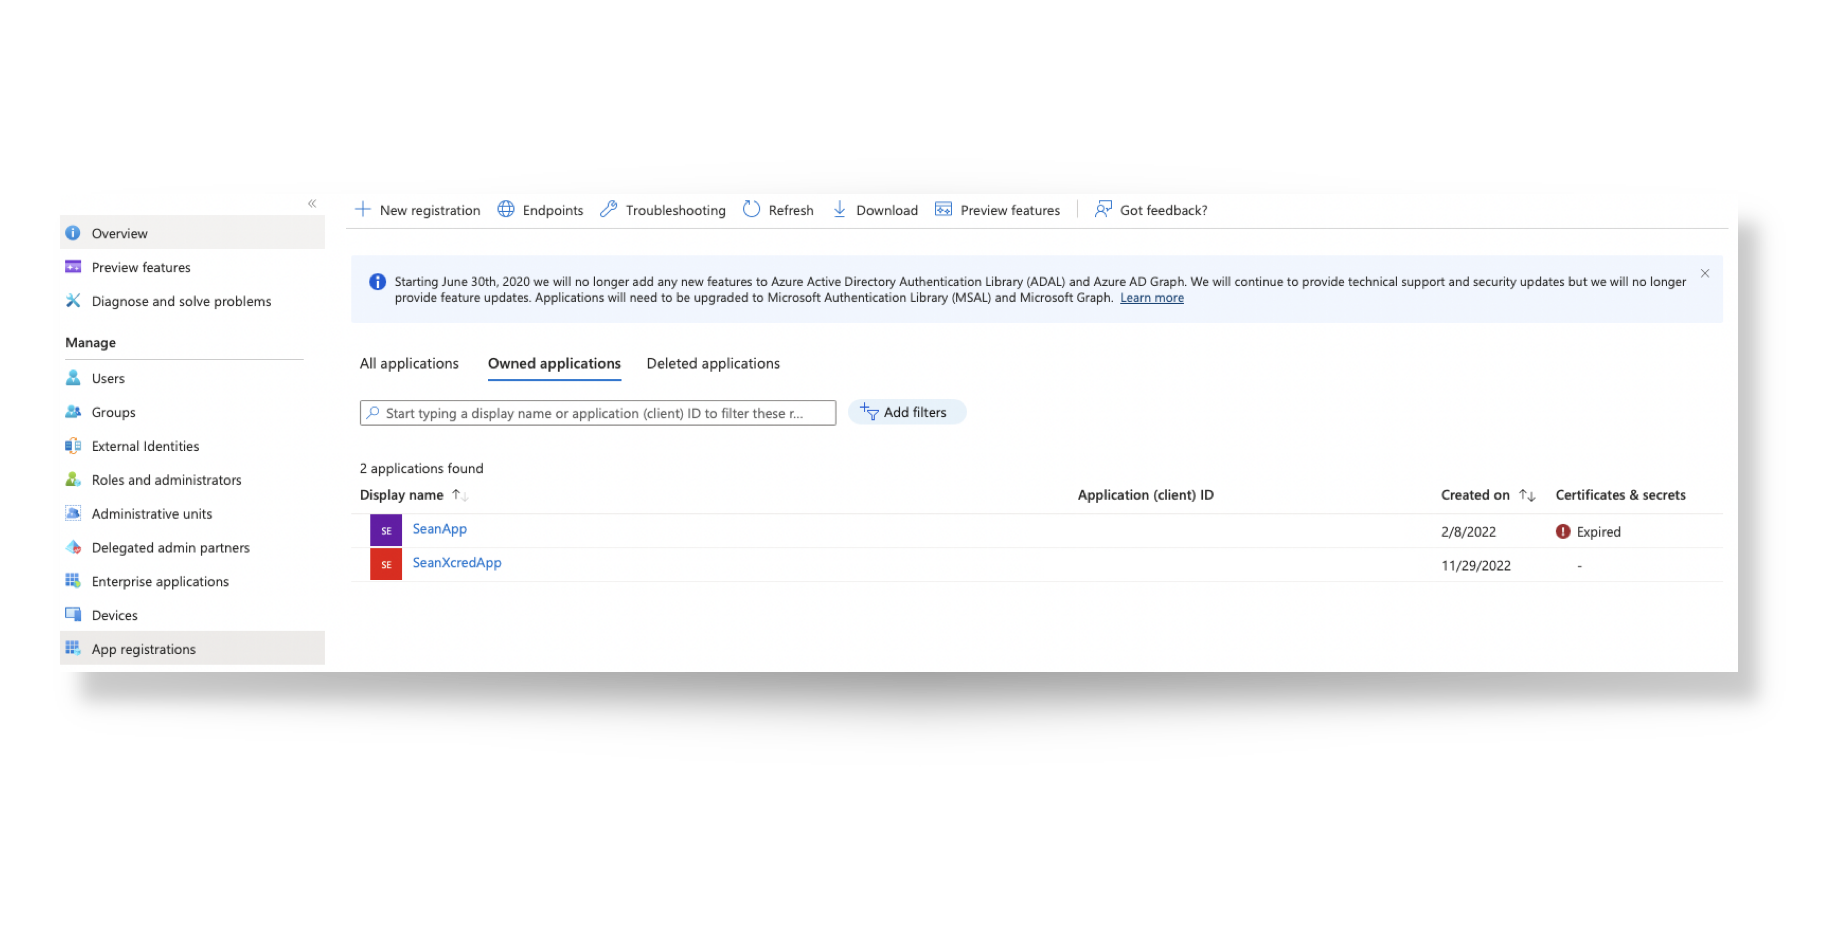
From the App Registration view, expired certificates may be observed
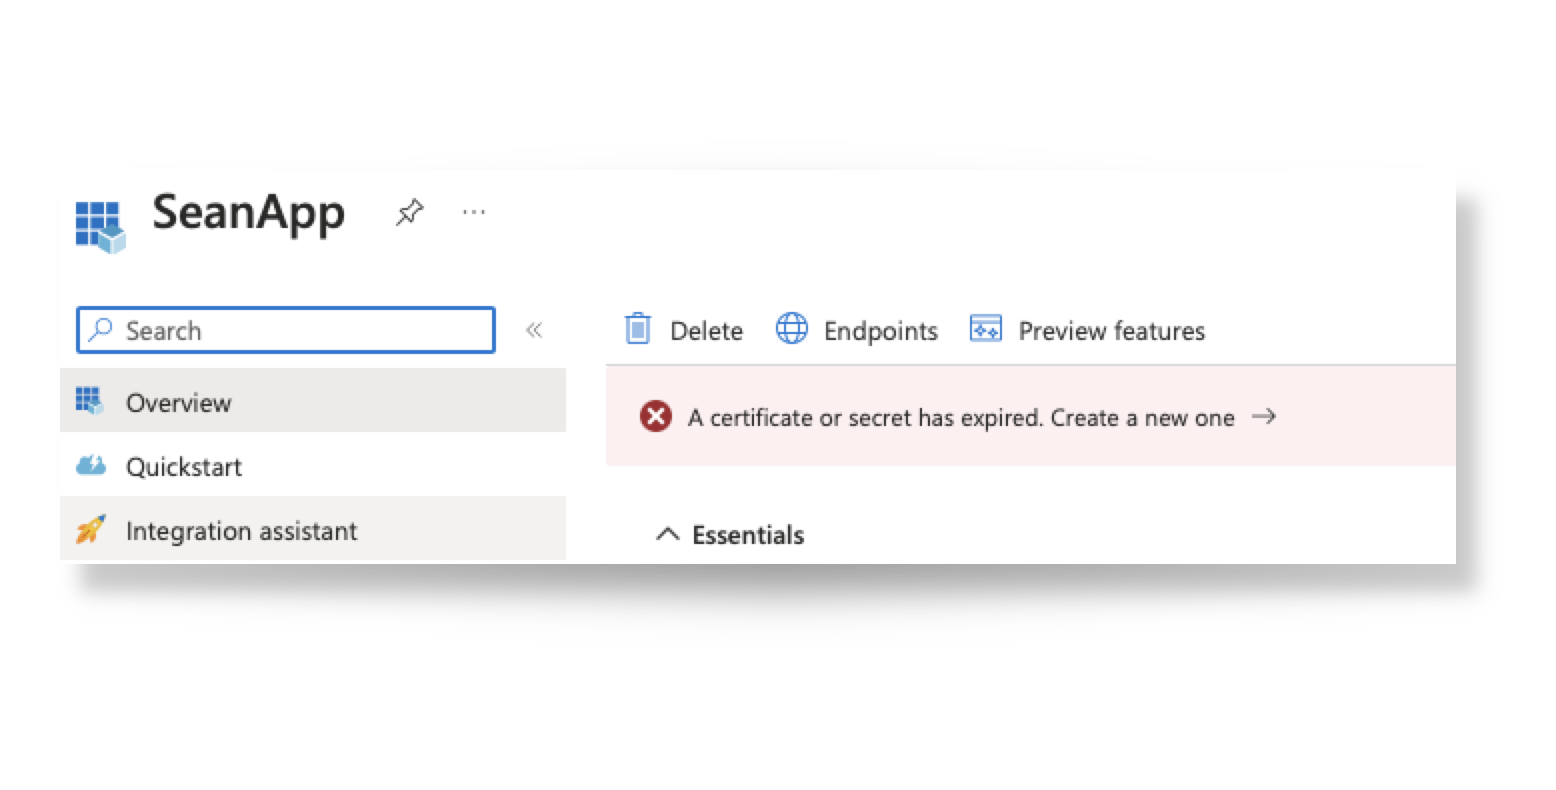
For renewal, click on the Display Name of the App, followed by 'Create a new one ->'
Then generate a 'New client secret' similar to part 4 of this KB.
- Add a description
- Copy the secret from the 'Value' column, not the 'Secret ID'. Be sure to copy it just after creating your new secret, otherwise it will appear obfuscated the next time you attempt to view it.
This time though, you will only need to ddit the current IdP in FileWave Anywhere:
- Open Settings in the FileWave Admin
- Choose Edit from the selected IdP
- Paste in the new secret value and 'Save'
The old, expired certificate may be deleted from within the Azure portal.
No comments to display
No comments to display