Installomator - The one installer script to rule them all (macOS PKG)
Description
This article delves into the application of Installomator, a shell script, in combination with FileWave for the maintenance of macOS applications. Installomator supports the downloading and installation of over 450 different applications, operating directly from the vendor's public URLs. This approach is compared with the use of AutoPkg, a tool that provides more stringent control over versioning, testing, and release management.
Installomator can be a valuable tool when deploying the latest publicly available version of an application is the goal. It verifies the authenticity and validity of each download, though it's not a fully automated solution. For certain applications like Chrome, Zoom, and Microsoft Office, their update processes may be better managed via a config profile. Additionally, attention may be needed for built-in auto update prompts of other apps.
A key characteristic of Installomator is its handling of versioning. Instead of installing only when the downloaded version is newer, Installomator initiates installation if the version numbers differ. This is due to the complexities in determining which version number is higher. For instance, if Installomator downloads version 4 after a vendor has released version 5 due to a URL change, it will attempt to install version 4 because the version numbers differ.
Ingredients
-
FW Admin
-
swiftDialog - Deploying swiftDialog via FileWave (macOS PKG)
- Installomator - Releases · Installomator/Installomator (github.com)
Directions
Deploying Installomator on all your Macs
Installomator operates by taking a 'label' parameter representing the application to be installed. It generally only installs an application if the latest version is newer than the installed version, though exceptions exist, emphasizing the importance of thorough testing. It's deployed via a single FileWave Fileset, with numerous configuration options to improve user experience and system stability. These include user notifications upon completion, the closing of the app prior to installation, prompts before closing the app, and the ability to re-launch the app post-update if it was initially open. Installomator does not interact with App Store applications except to replace them with non-App Store versions if desired. See Configuration Options further down for how to customize the operation of the script.
Installing Installomator
- Download the PKG for SwiftDialog and install the PKG as a FileSet.
- Before deploying the swiftDialog Fileset broadly, review its Fileset requirements and make sure current macOS versions used in your environment are included. If the requirements are too restrictive, update them or remove the restriction before association.
- Download the PKG for Installomator from Releases · Installomator/Installomator (github.com) install the PKG as a FileSet. This will place the script file to
/usr/local/Installomator/Installomator.sh
PKG Filesets are easy to make. You can start by dragging and dropping the PKG on the Filesets window in FileWave Central or use our example here: PKG - Installomator.fileset.zip
Identifying an App to install
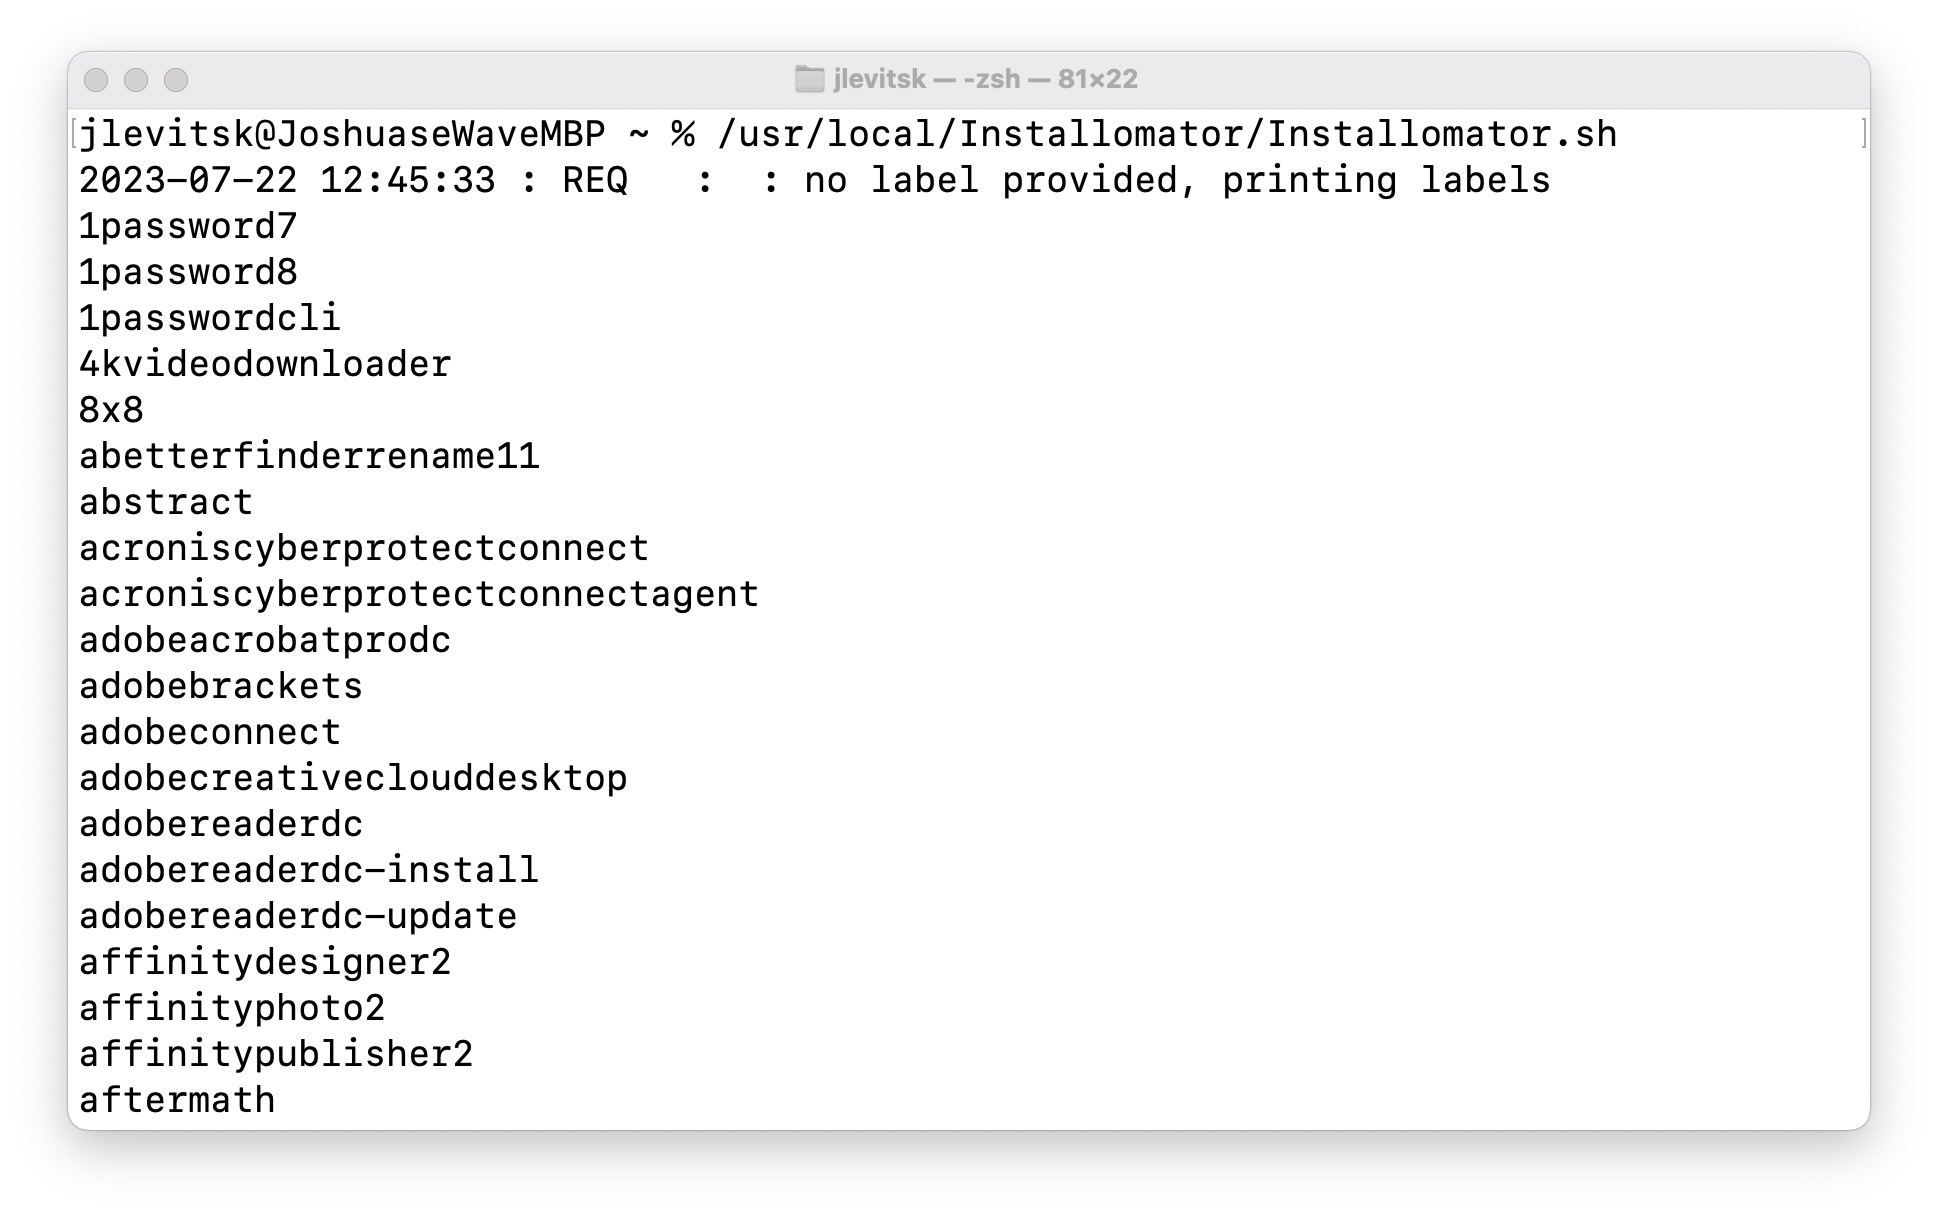
Run Installomator by itself in Terminal and get the full list of apps it can install:
/usr/local/Installomator/Installomator.shThis is the output of that command:
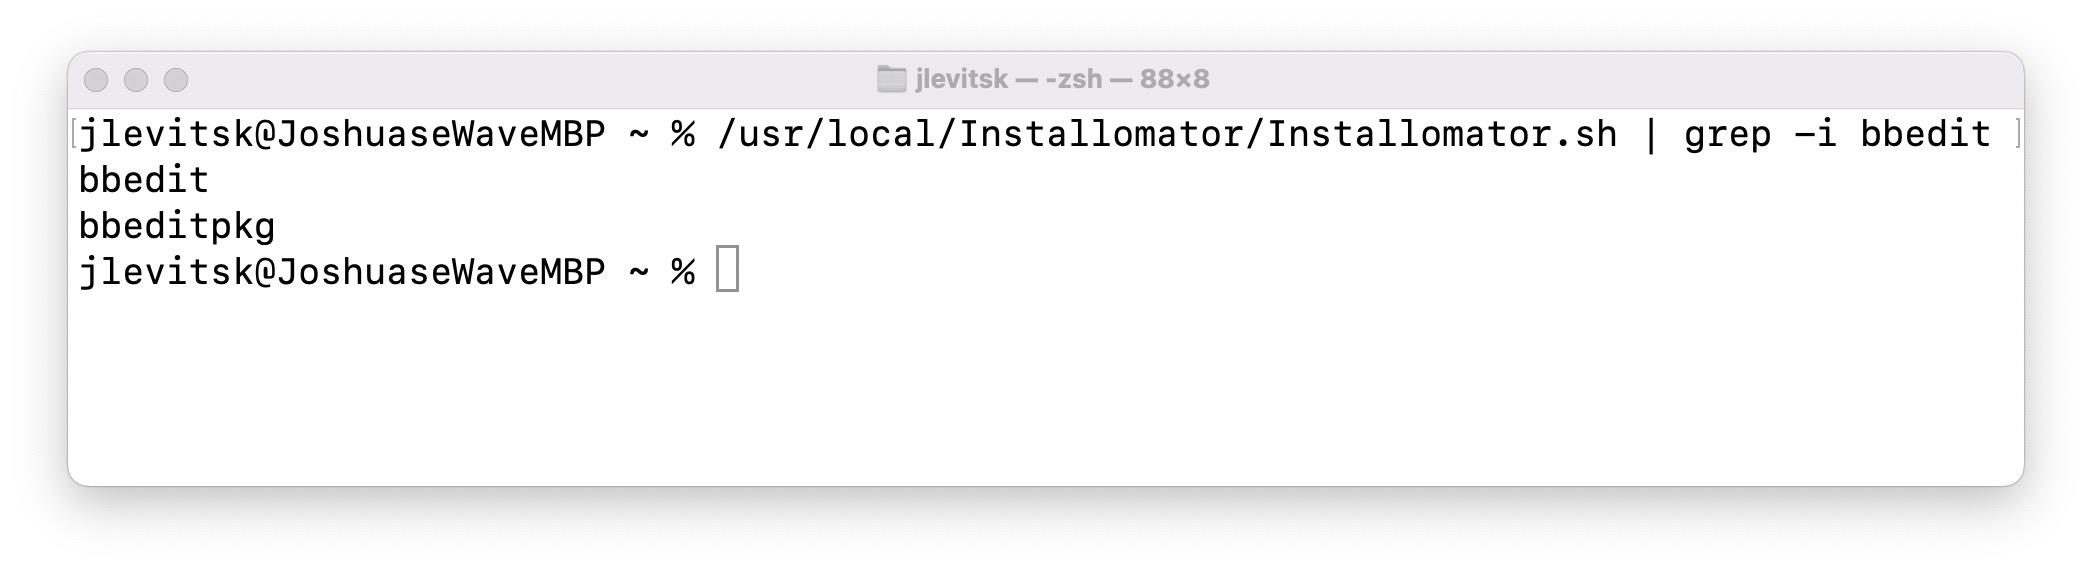
Or run Installomator in Terminal with grep to filter the results:
/usr/local/Installomator/Installomator.sh | grep -i bbeditThis is the output of that command:
Installing an App
At this point you have installed both swiftDialog and Installomator. For the next steps here is an example BBEdit - Installomator.fileset.zip to look at while you follow along.
The BBEdit example is a very simple Fileset containing 3 scripts, and that's all.
|
The scripts are fairly simple and listed below: check_installomator.shinstall.sh
verify.shIn our example both |
|
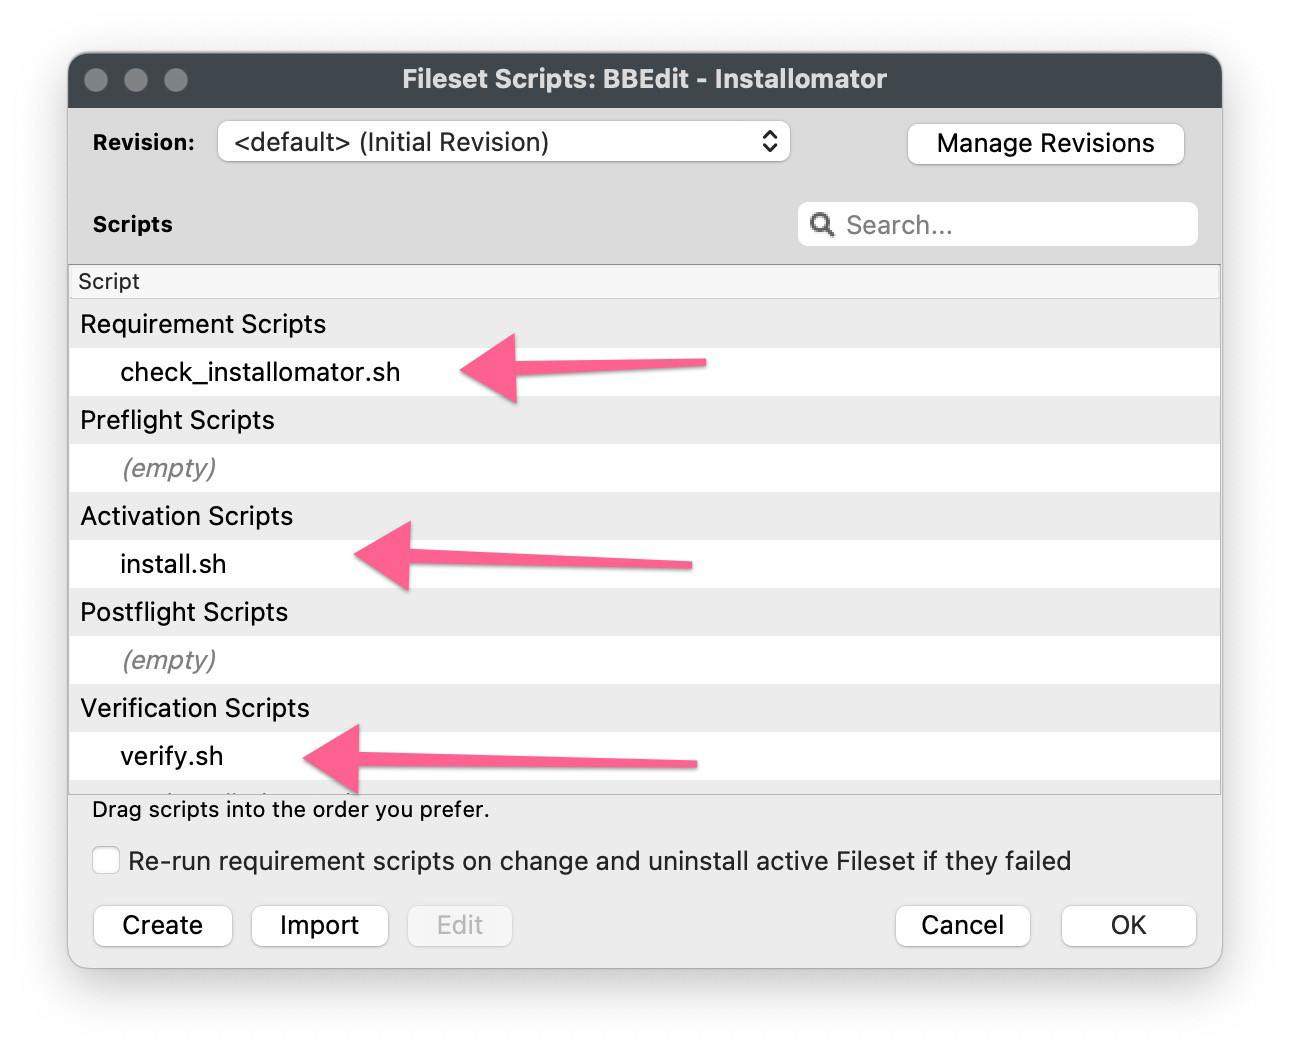
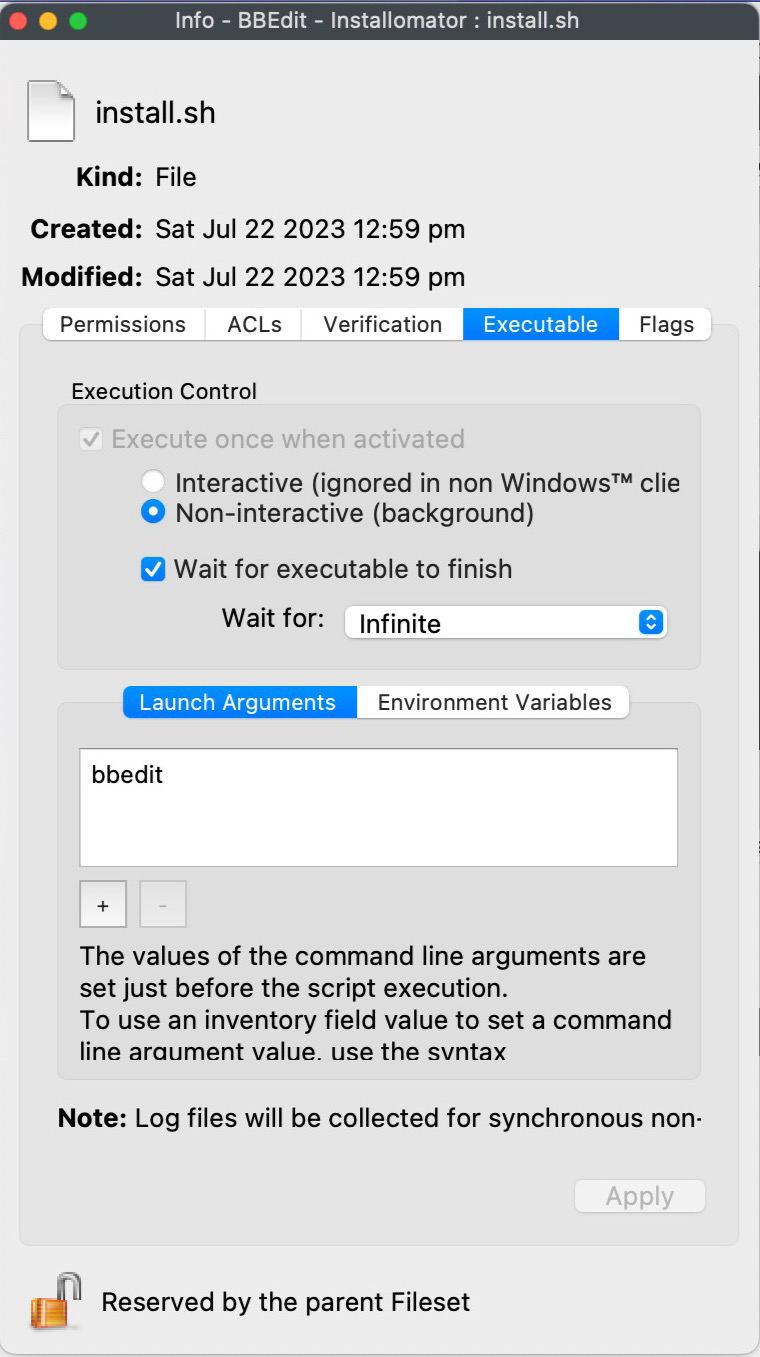
So now you may be wondering about where "bbedit" is since that label is the label we want to use? Highlight the BBEdit Fileset in your admin console and click the Scripts button in the toolbar. Now right click on install.sh and pick Properties. The dialog will look like the one here. You'll want to change bbedit to whatever app you want this to install. Do the same exact thing for verify.sh.
Configuration Options
In our example, we pass the LOGO parameter to the script. This action assigns a FileWave logo to the script, derived from the FileWave Kiosk icon file located on a device with FileWave installed. You can also pass additional parameters to further refine Installomator's behavior. This is covered in greater detail at the following link: Configuration and Variables · Installomator/Installomator Wiki (github.com) One setting you may want to change is NOTIFY=success to be NOTIFY=all if you are using Kiosk to allow someone to install apps.
What it looks like
To install an app this way you simply Associate the swiftDialog Fileset, Installomator Fileset, and BBEdit - Installomator.fileset.zip Filesets and you should see it install.
Be careful as some apps/labels may install even if the app is already on the latest version
Depending on what dialogs you have enabled you may show status messages like the below. We recommend not editing the Installomator script itself but rather pass the options as parameters in your Filesets.


You should now be able to deploy anything that Installomator supports. Just remember that this tool is designed to always keep things up to date which can be a good or bad thing for you depending on your use case.
Troubleshooting
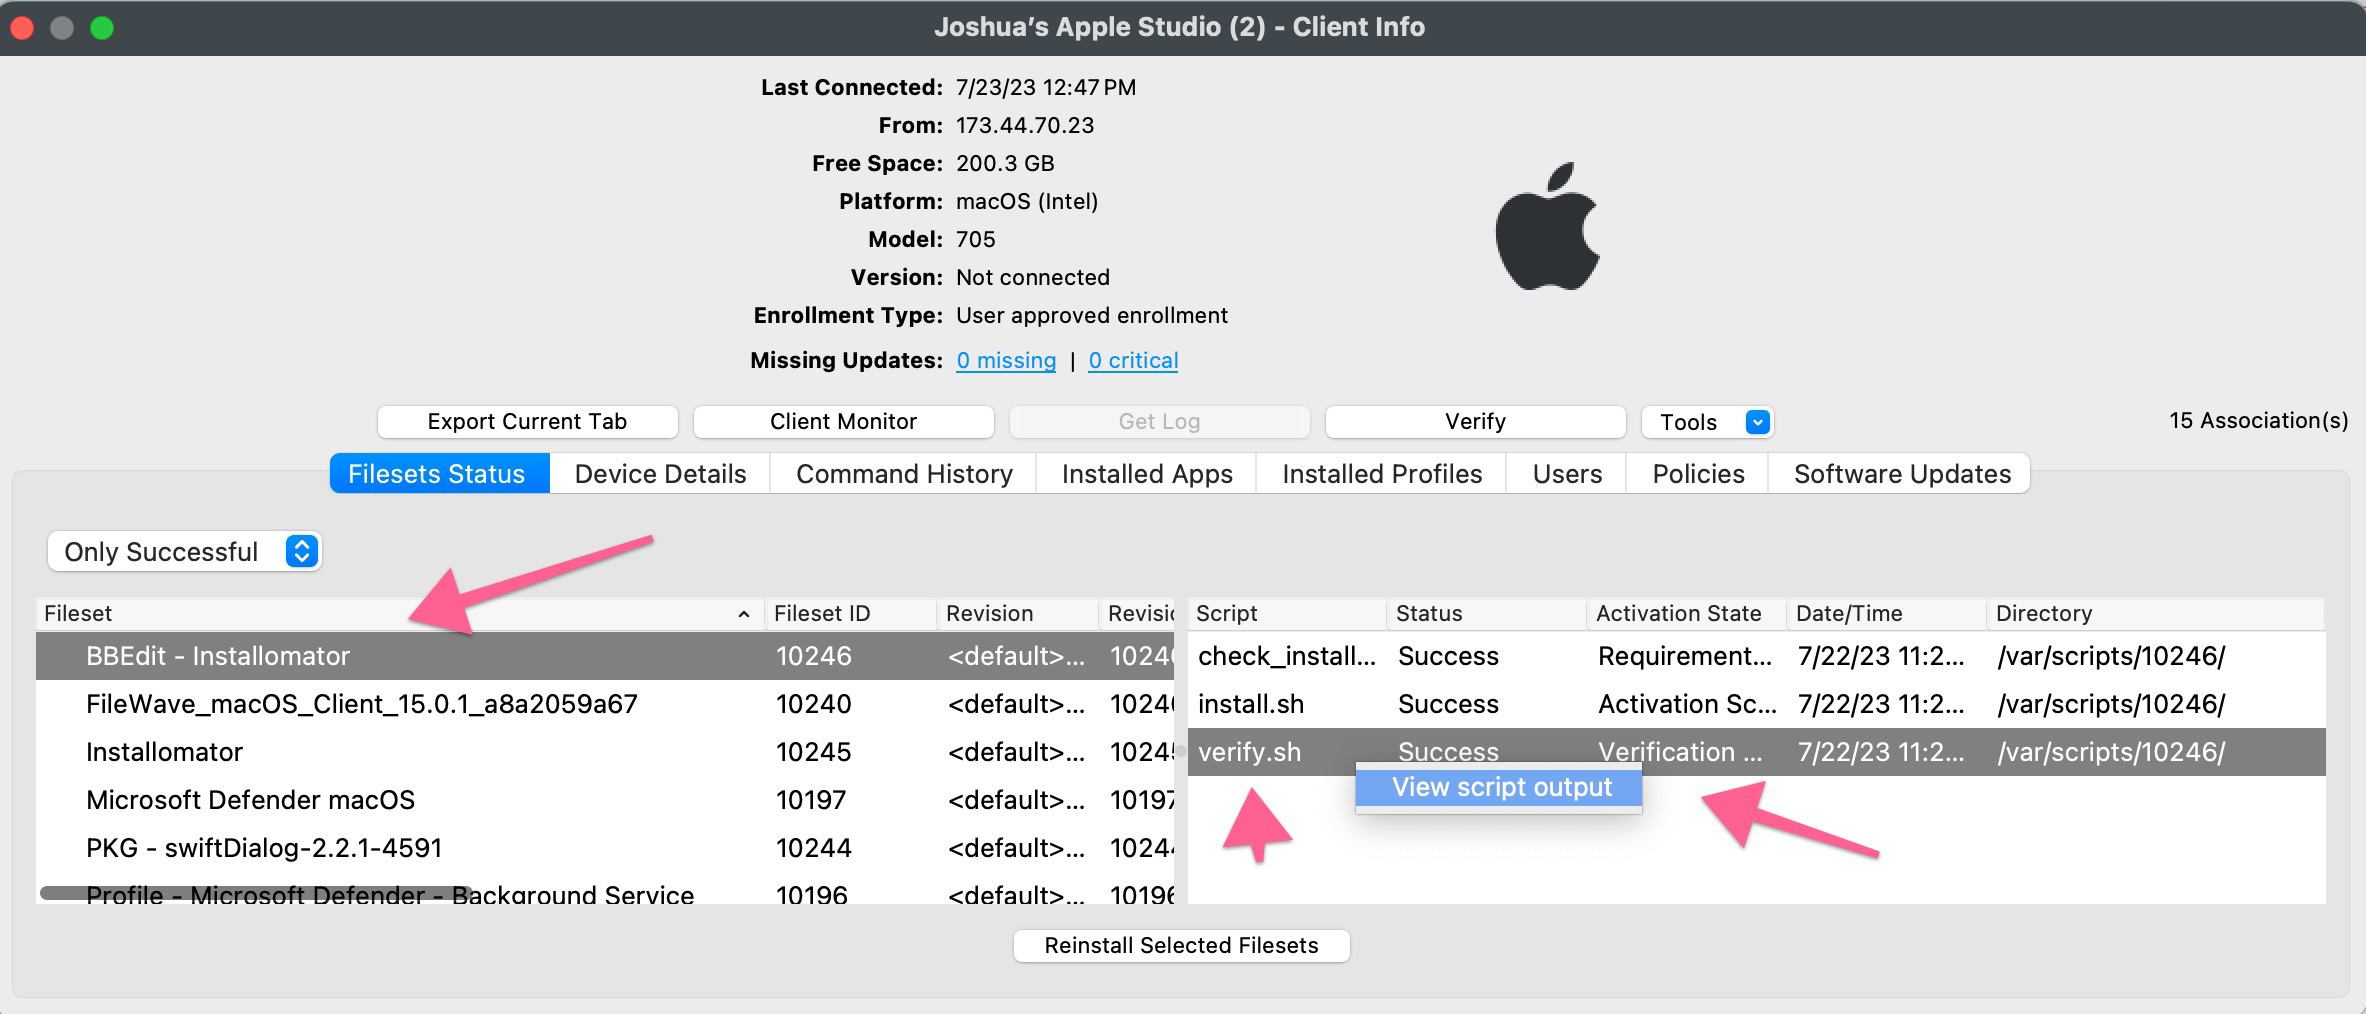
You will be able to see what the Fileset is doing by leveraging the Fileset logs. All 3 of the scripts will log to /var/log/fwcld/<fileset_id>where <fileset_id> is the same as the ID you see in FileWave for the Fileset.

You may also be able to use FileWave Central to right click on the log and view it, but the log on the machine when testing is most simple and will exist 100% of the time.
Related Links
- Installomator GitHub - Installomator official GitHub page
- Deploying swiftDialog via FileWave (macOS PKG)
- AutoPkgr with FileWave - Information on the AutoPkg tool
- Training Day 2022 Presentation - Using_Installomator_to_support_3rd_party_apps_-_Mac.pdf
Digging Deeper
The choice between Installomator and AutoPkg ultimately hinges on your administrative preferences and needs. Installomator, with its ability to streamline the download and installation of different versions of applications, serves as a viable option when the goal is to deploy the latest publicly available versions. However, it requires careful management, especially considering its approach to version comparison and updates. On the other hand, AutoPkg presents a viable alternative for those seeking a more tightly controlled release process, offering thorough testing, versioning, and release management.
No comments to display
Be aware that the Swift Dialog fileset has OS requirement, which doesn't include macOS Sonoma. It can of course be included, but it just isn't like that right away.
In reply to #1
Hi Peter. I was looking at https://github.com/swiftDialog/swiftDialog/releases and the only mention I saw of Sonoma was on 2.5.0 where they have it as an example OS. Was it just that Swift Dialog has to be a certain version?
Hi Josh. It is in the Swift dialog fileset downloaded from https://kb.filewave.com/books/software-deployment-recipes-macos/page/swiftdialog-deployment-macos-pkg (referenced above as Download the PKG for SwiftDialog and install the PKG as a FileSet.) In the properties, the requirements is set to be everything but sonoma. When I discovered that it was the reason, it wasn't a problem to just add sonoma (or remove requirements completely) - it is just that it took me some time to spot the issue :)
No comments to display