Lightspeed Smart Agent Deployment (macOS v2.3.1+ using Certificate Manager)
Description
Need to deploy the latest version of Lightspeed Smart Agent version 2.3.1 along with your configurations. FileWave has got you covered in this step-by-step guide to creating the required Filesets to deploy to your macOS devices. Be sure that you have access to your administrative account in Lightspeed Filter app.
This KB article involves using the new Lightspeed Certificate Manager method. If using the version below v2.3.1 please review KB article here: Lightspeed Smart Agent Deployment (macOS 2023)
The new method involves using LightSpeed Certificate Manager. Certificate Manager leverages a cloud-based system to generate and monitor certificates and expiration, automatically pushing new certificate files to devices in the background (without disruption!) to ensure they always are current. In addition, Lightspeed is also leveraging root certificates for the trusting process, meaning that instead of repeatedly needing to re-trust the certificates every time they update - you now only need to trust the first time.
Note: You must use the MacOS Filter Agent 2.3.1+ to use Certificate Manager
Ingredients
-
FileWave Central
-
Lightspeed Relay Filter Agent PKG installer (version 2.3.1)
-
Lightspeed Root Certificate
- Supplied Fileset and Profile
Web Content Filter - A bug (FW-12629) exists which prevents the Filter Order being set.
Download Lightspeed Relay Filter Agent for macOS
-
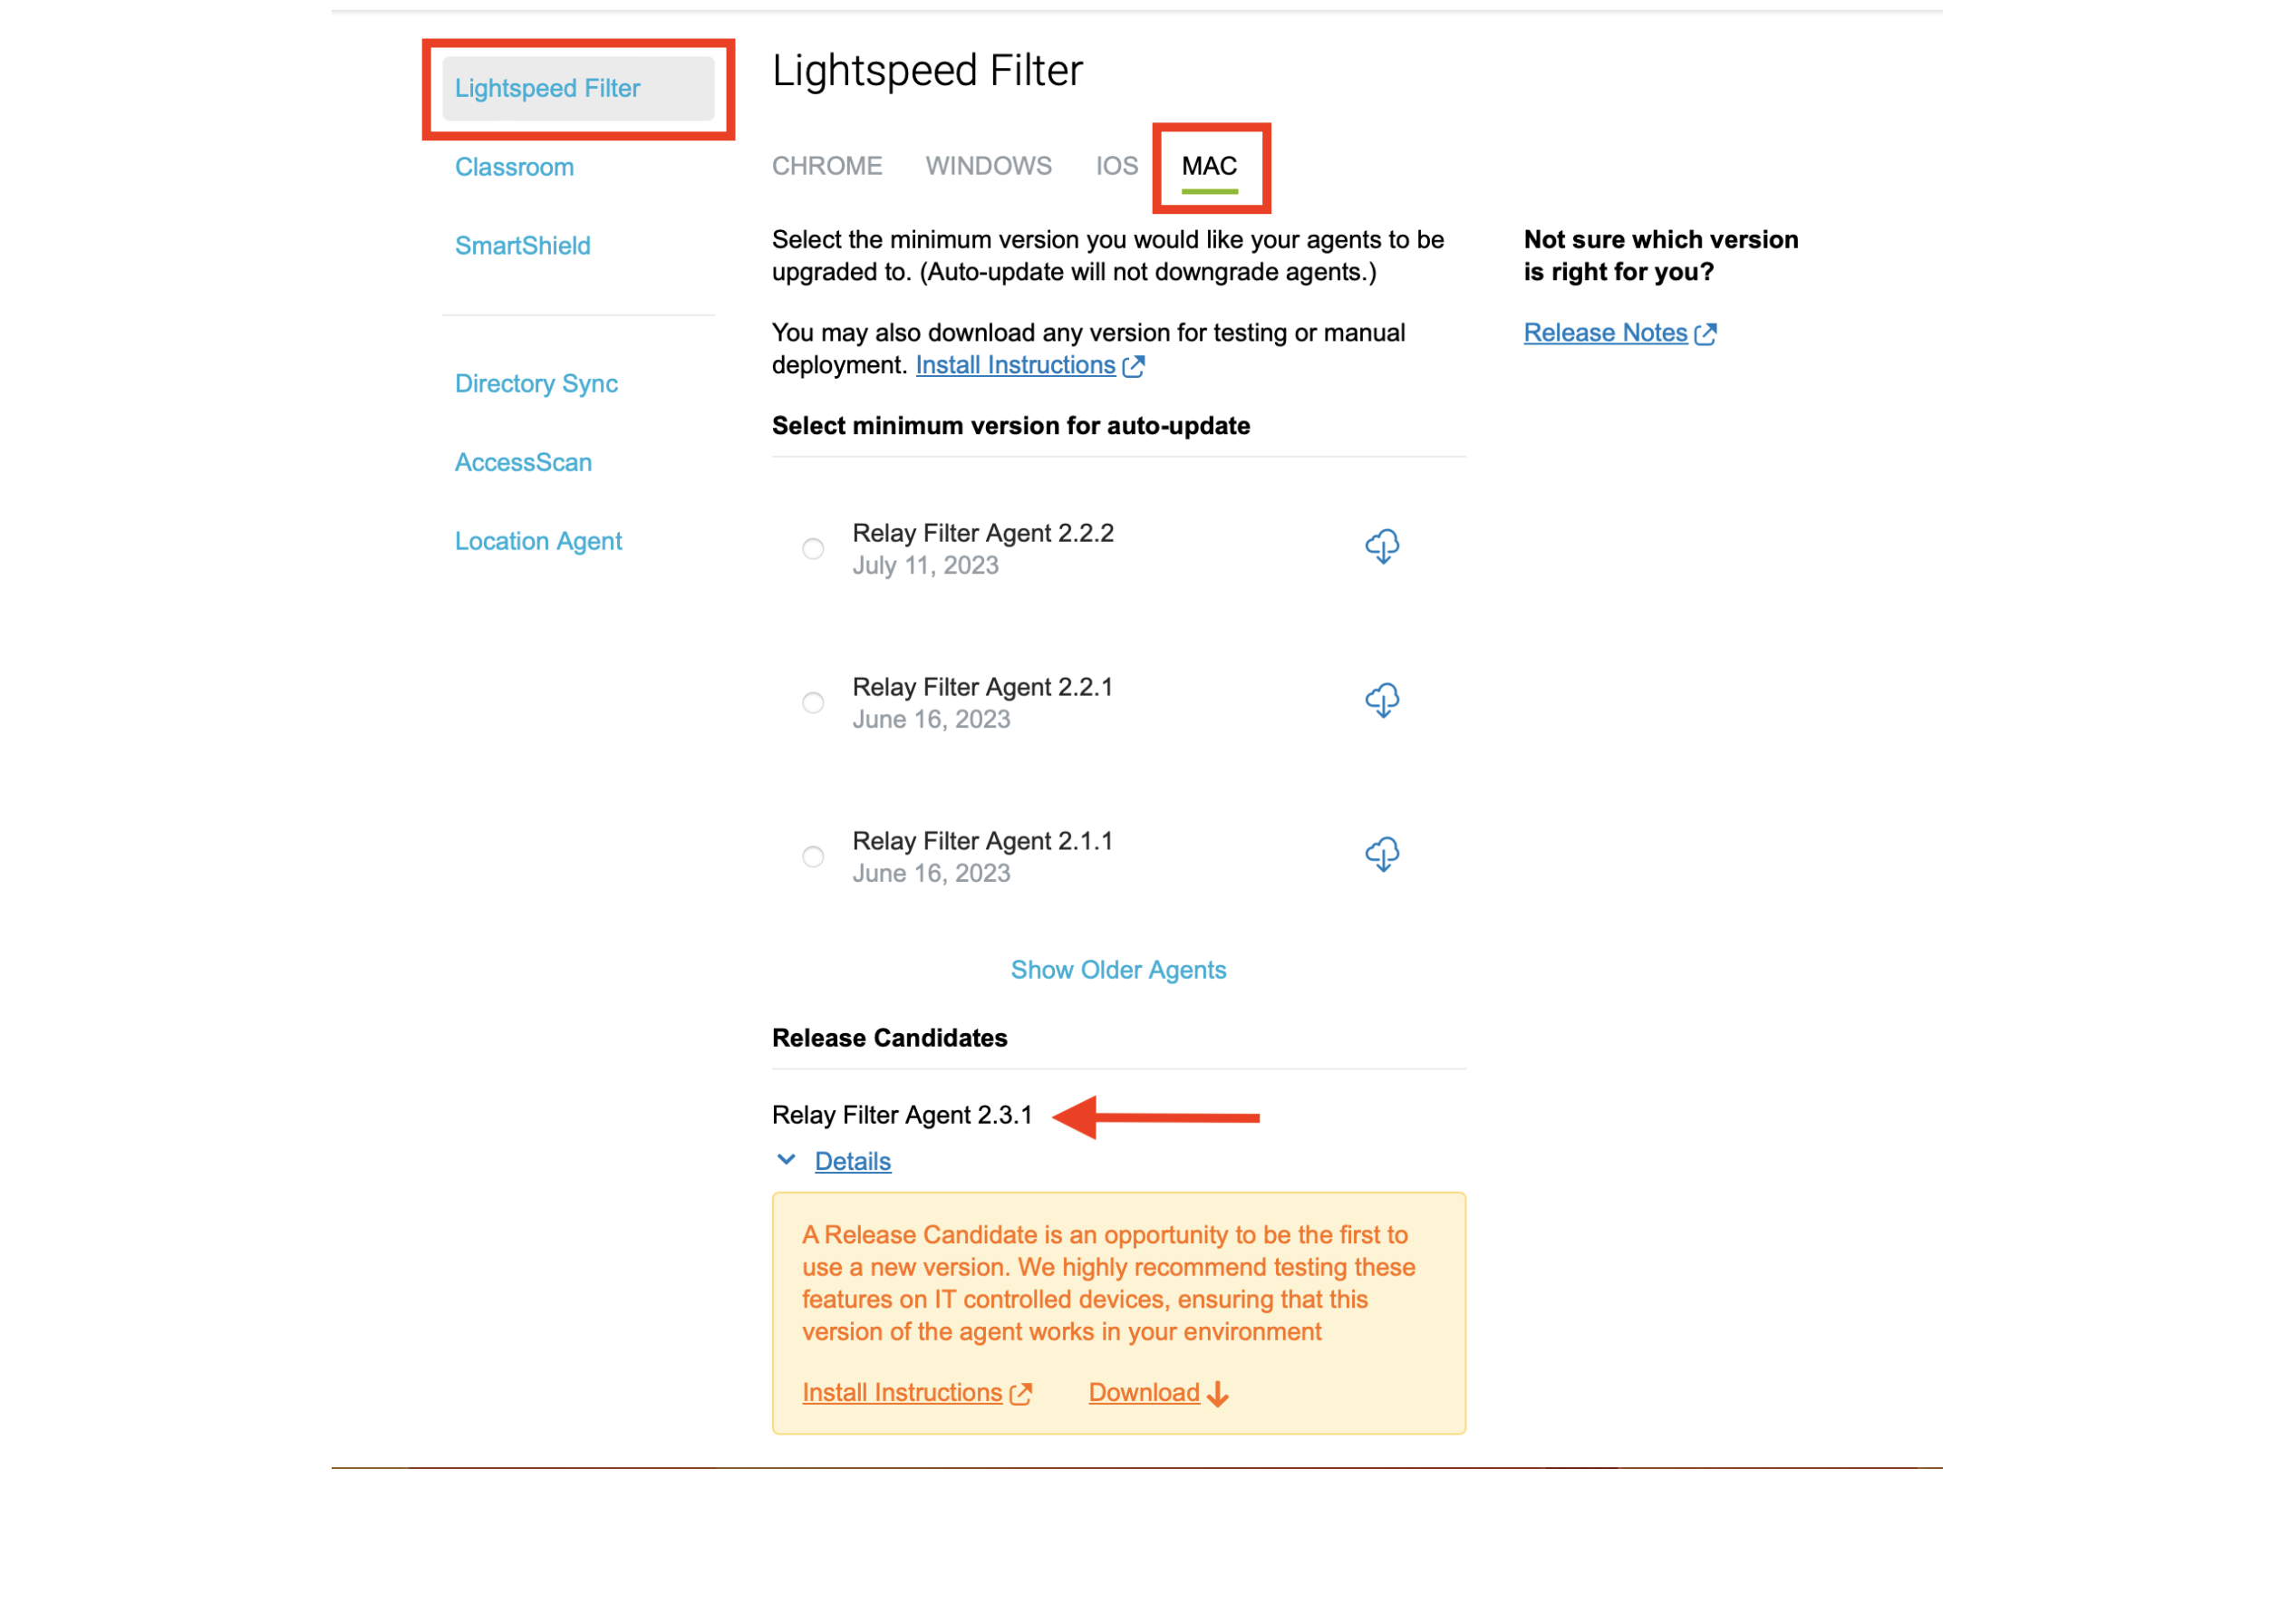
Login to your Lightspeed Filter account
-
Navigate to Settings > Software
-
Choose Lightspeed Filter
-
Select the Mac tab
-
Select the version of the Relay Filter Agent by clicking on the download icon
-
Place the downloaded Relay Filter Agent PKG into your Downloads Folder
-
Generating the Certificate using Certificate Manager
Lightspeed has noted the importance of order of operations; until you have downloaded and trusted the certificate AND installed the agent on your devices, then you may proceed to complete the two Acknowledgement boxes in the macOS Certificate Confirmation step.
Filesets
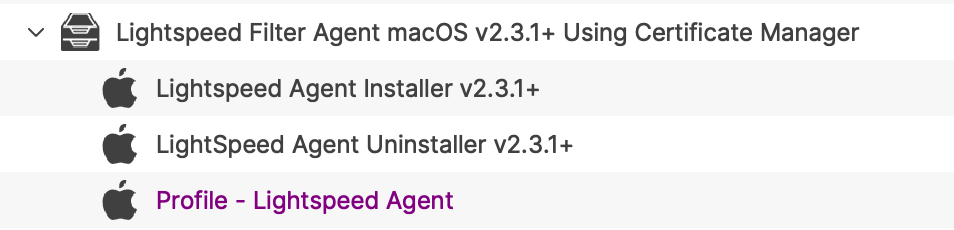
Fileset Group
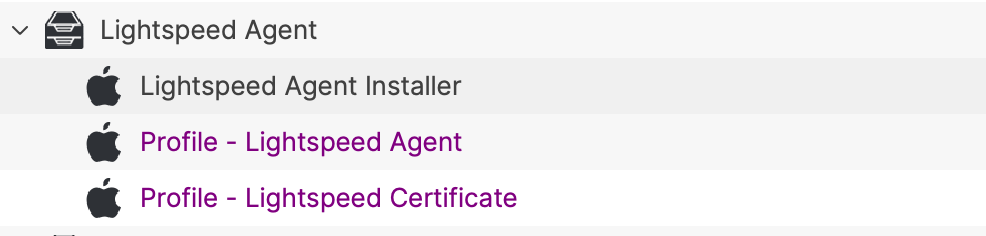
Create a Fileset Group to hold the Filesets to be included. At the end it will look something like the below image.
Configuration Profiles
Network Settings
The profile contains 2 payloads: System Extension Policy and Web Content Filter.
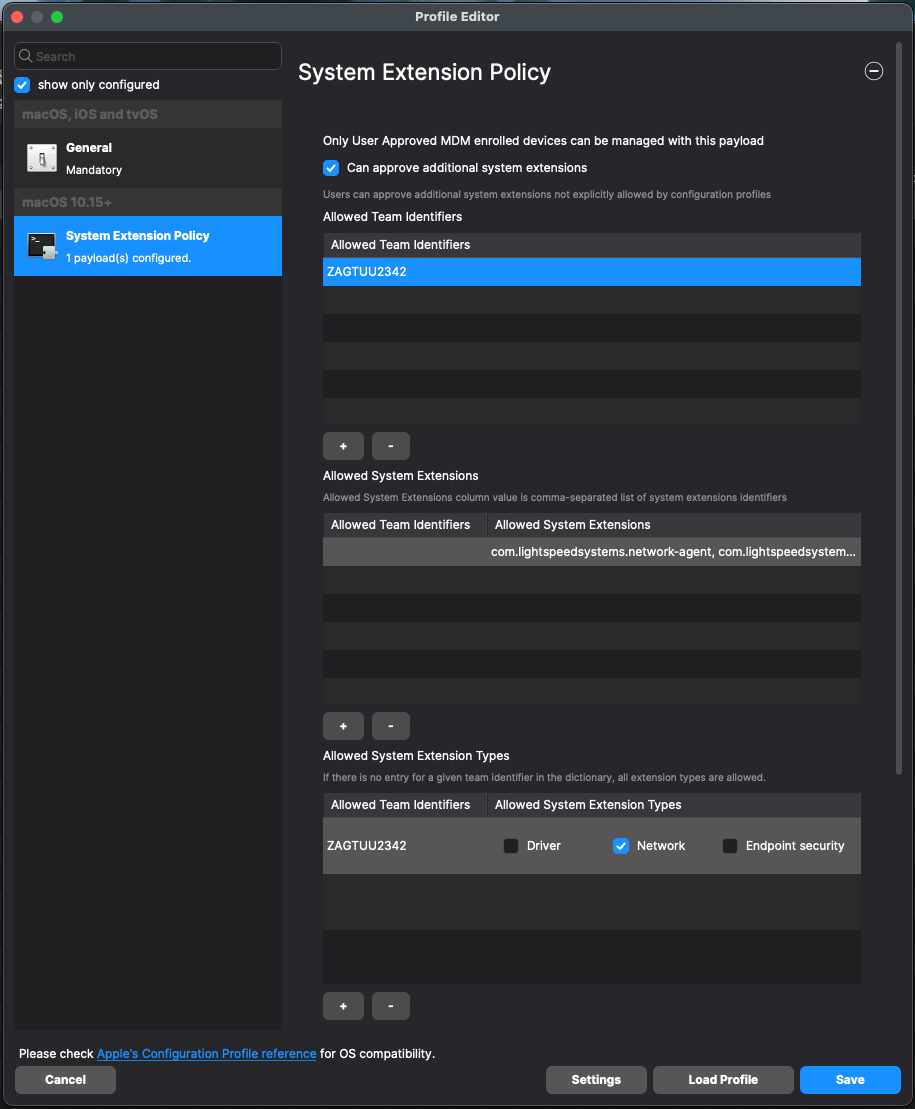
System Extension Policy
-
Click + to add Allowed Team Identifiers:
Team Identifier: ZAGTUU2342 -
Click + to add Allowed System Extensions:
1st Allowed System Extensions: com.lightspeedsystems.network-agent
Enter add 2nd Allowed System Extensions with a comma after the 1st Allowed System Extensions
2nd Allowed System Extensions: com.lightspeedsystems.network-agent.network-extension
-
Click + to add Allowed System Extension Types and check box for Network:
Team Identifier: ZAGTUU2342
Web Content Filter
-
Filter Name: Lightspeed Agent
-
Identifier: com.lightspeedsystems.network-agent
-
Filter Order: Firewall (currently unable to be set as of FileWave 15.3.1)
-
Socket Filter Bundle Identifier: com.lightspeedsystems.network-agent.network-extension
-
Socket Filter Designated Requirement: anchor apple generic and identifier "com.lightspeedsystems.network-agent.network-extension" and (certificate leaf[field.1.2.840.113635.100.6.1.9] /* exists / or certificate 1[field.1.2.840.113635.100.6.2.6] / exists / and certificate leaf[field.1.2.840.113635.100.6.1.13] / exists */ and certificate leaf[subject.OU] = ZAGTUU2342)
- Username/Password: Sometimes the Username and Password fields are ‘included” automatically. Do not include them.


Web Content Filter - A bug (FW-12629) exists which prevents the Filter Order being set.
Certificate Payload
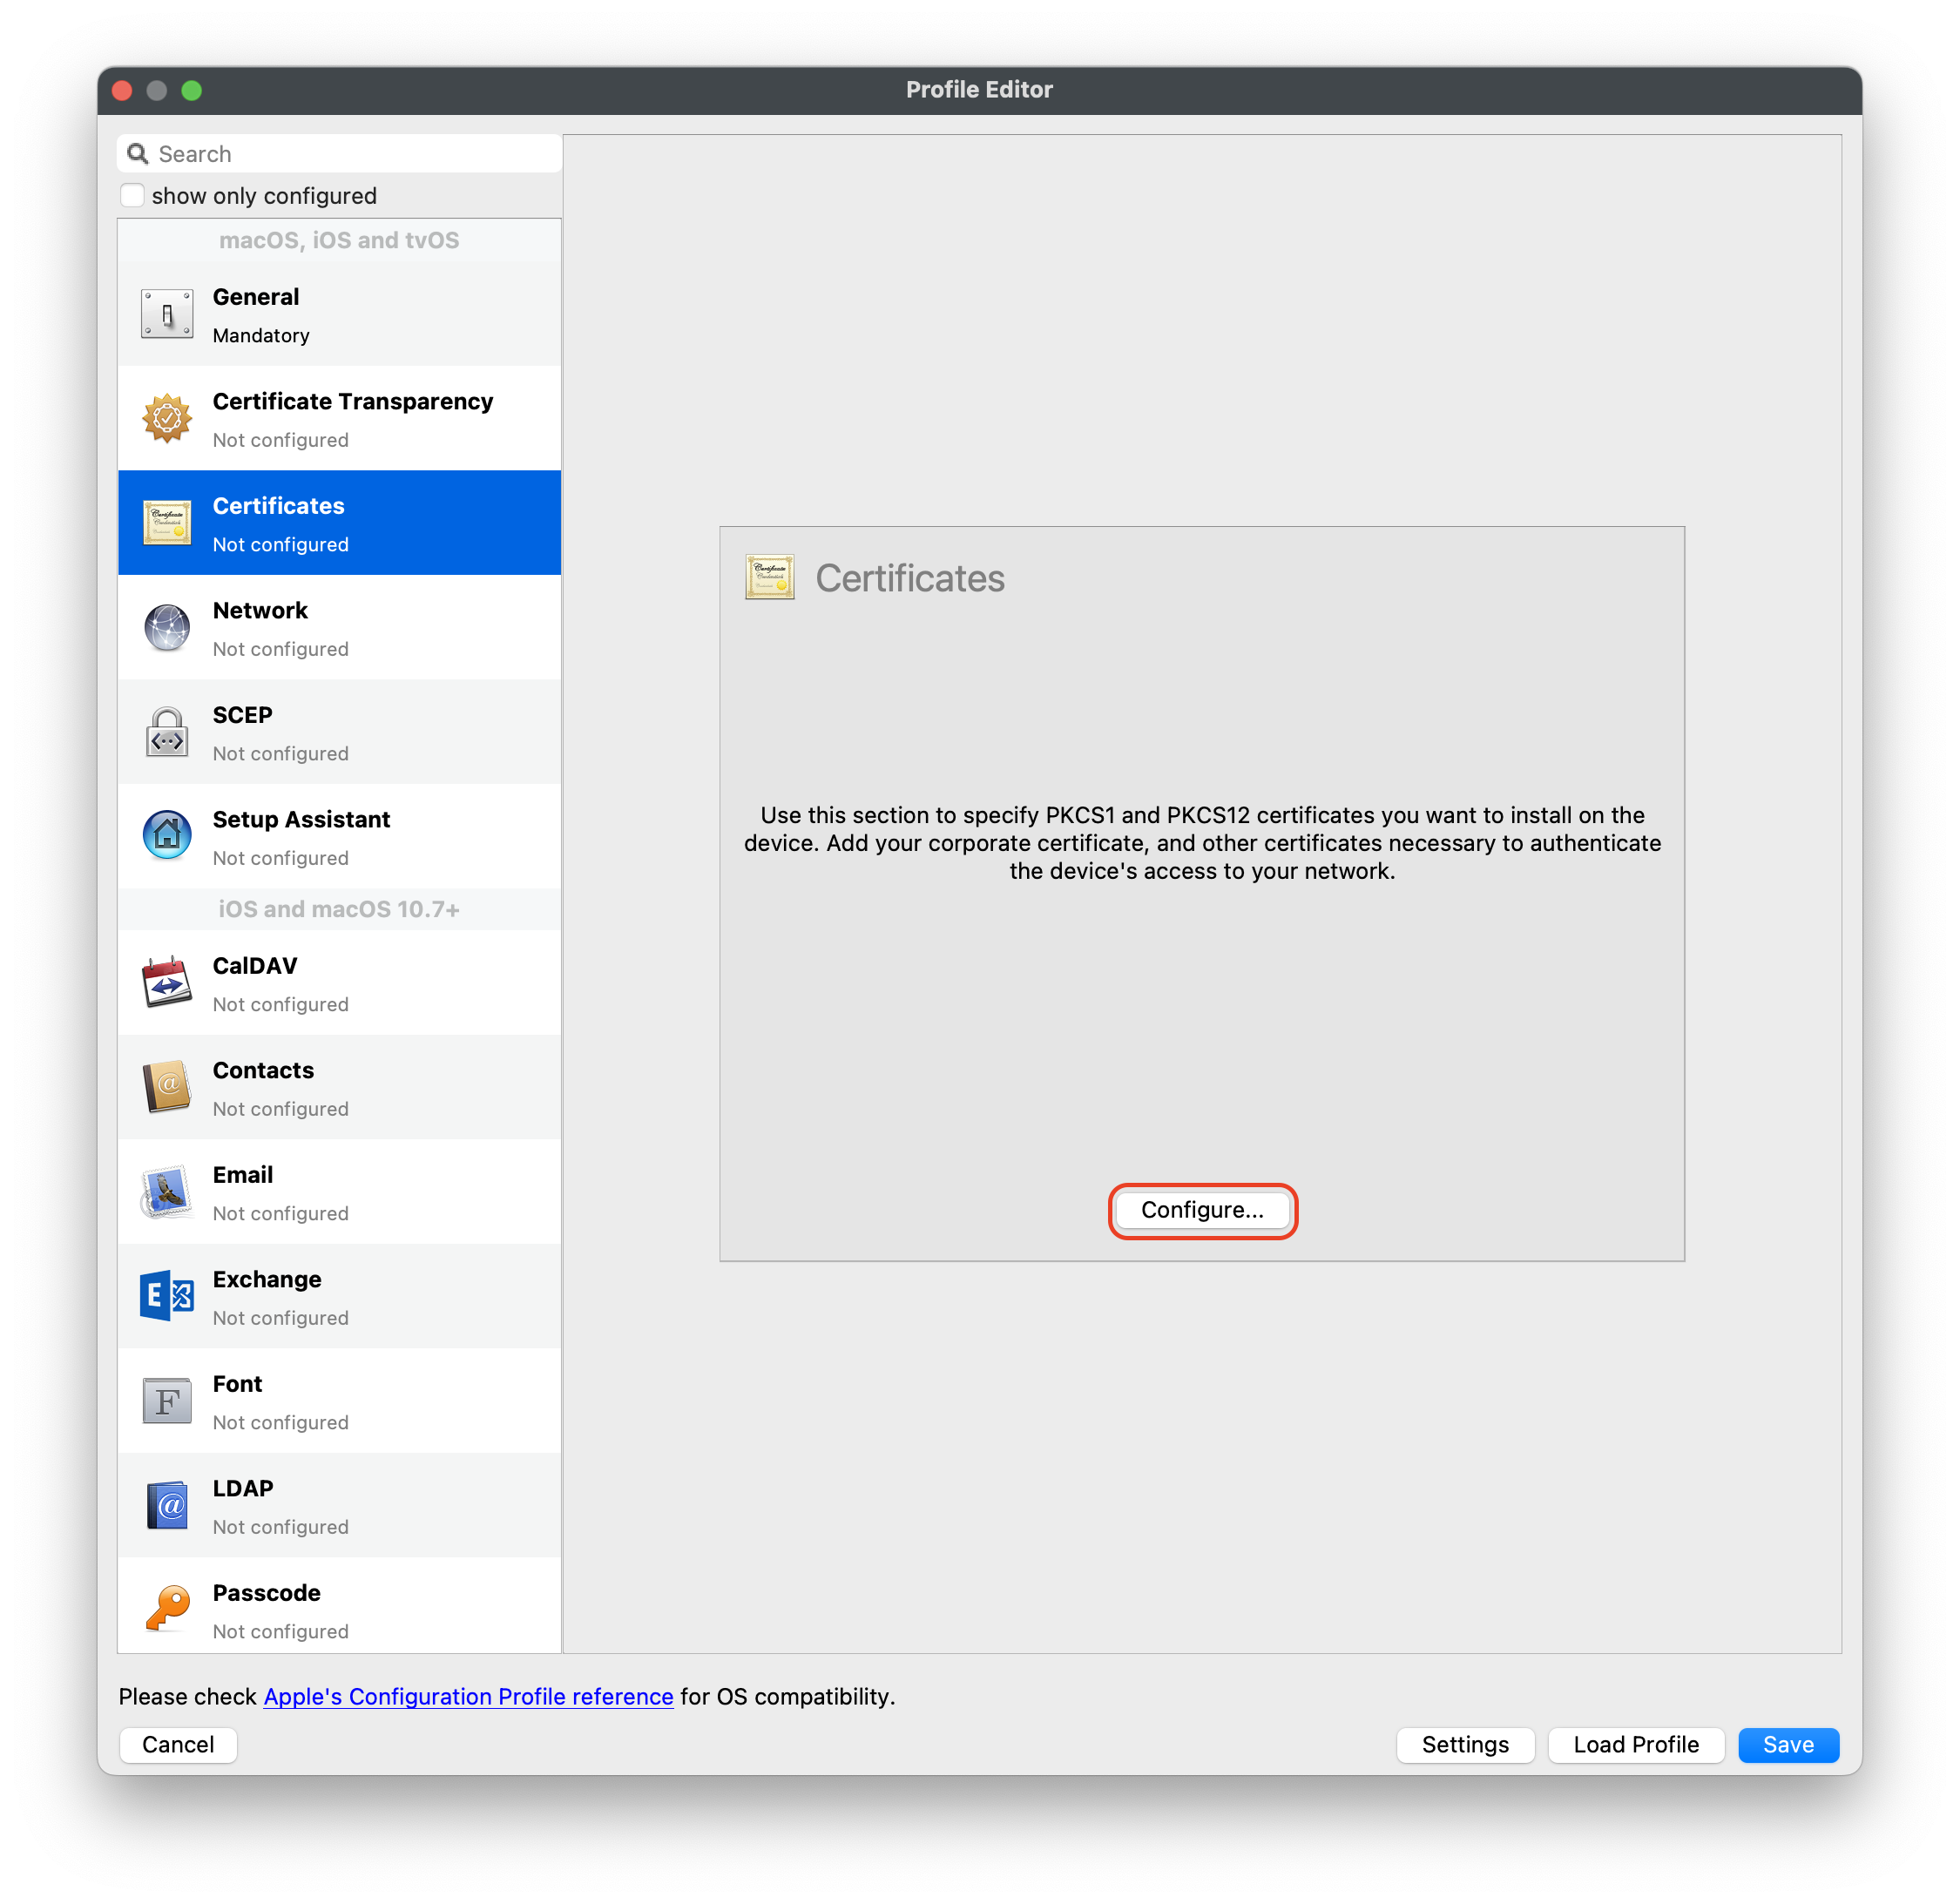
- Create a new Profile within the Fileset Group folder
- Select Certificates and Configure
- Upload the above generated certificate into this Profile
Lightspeed Agent Installer
The provided Fileset includes a script to instal the above downloaded PKG file.
Lightspeed Agent Installer v2.3.1+.fileset.zip
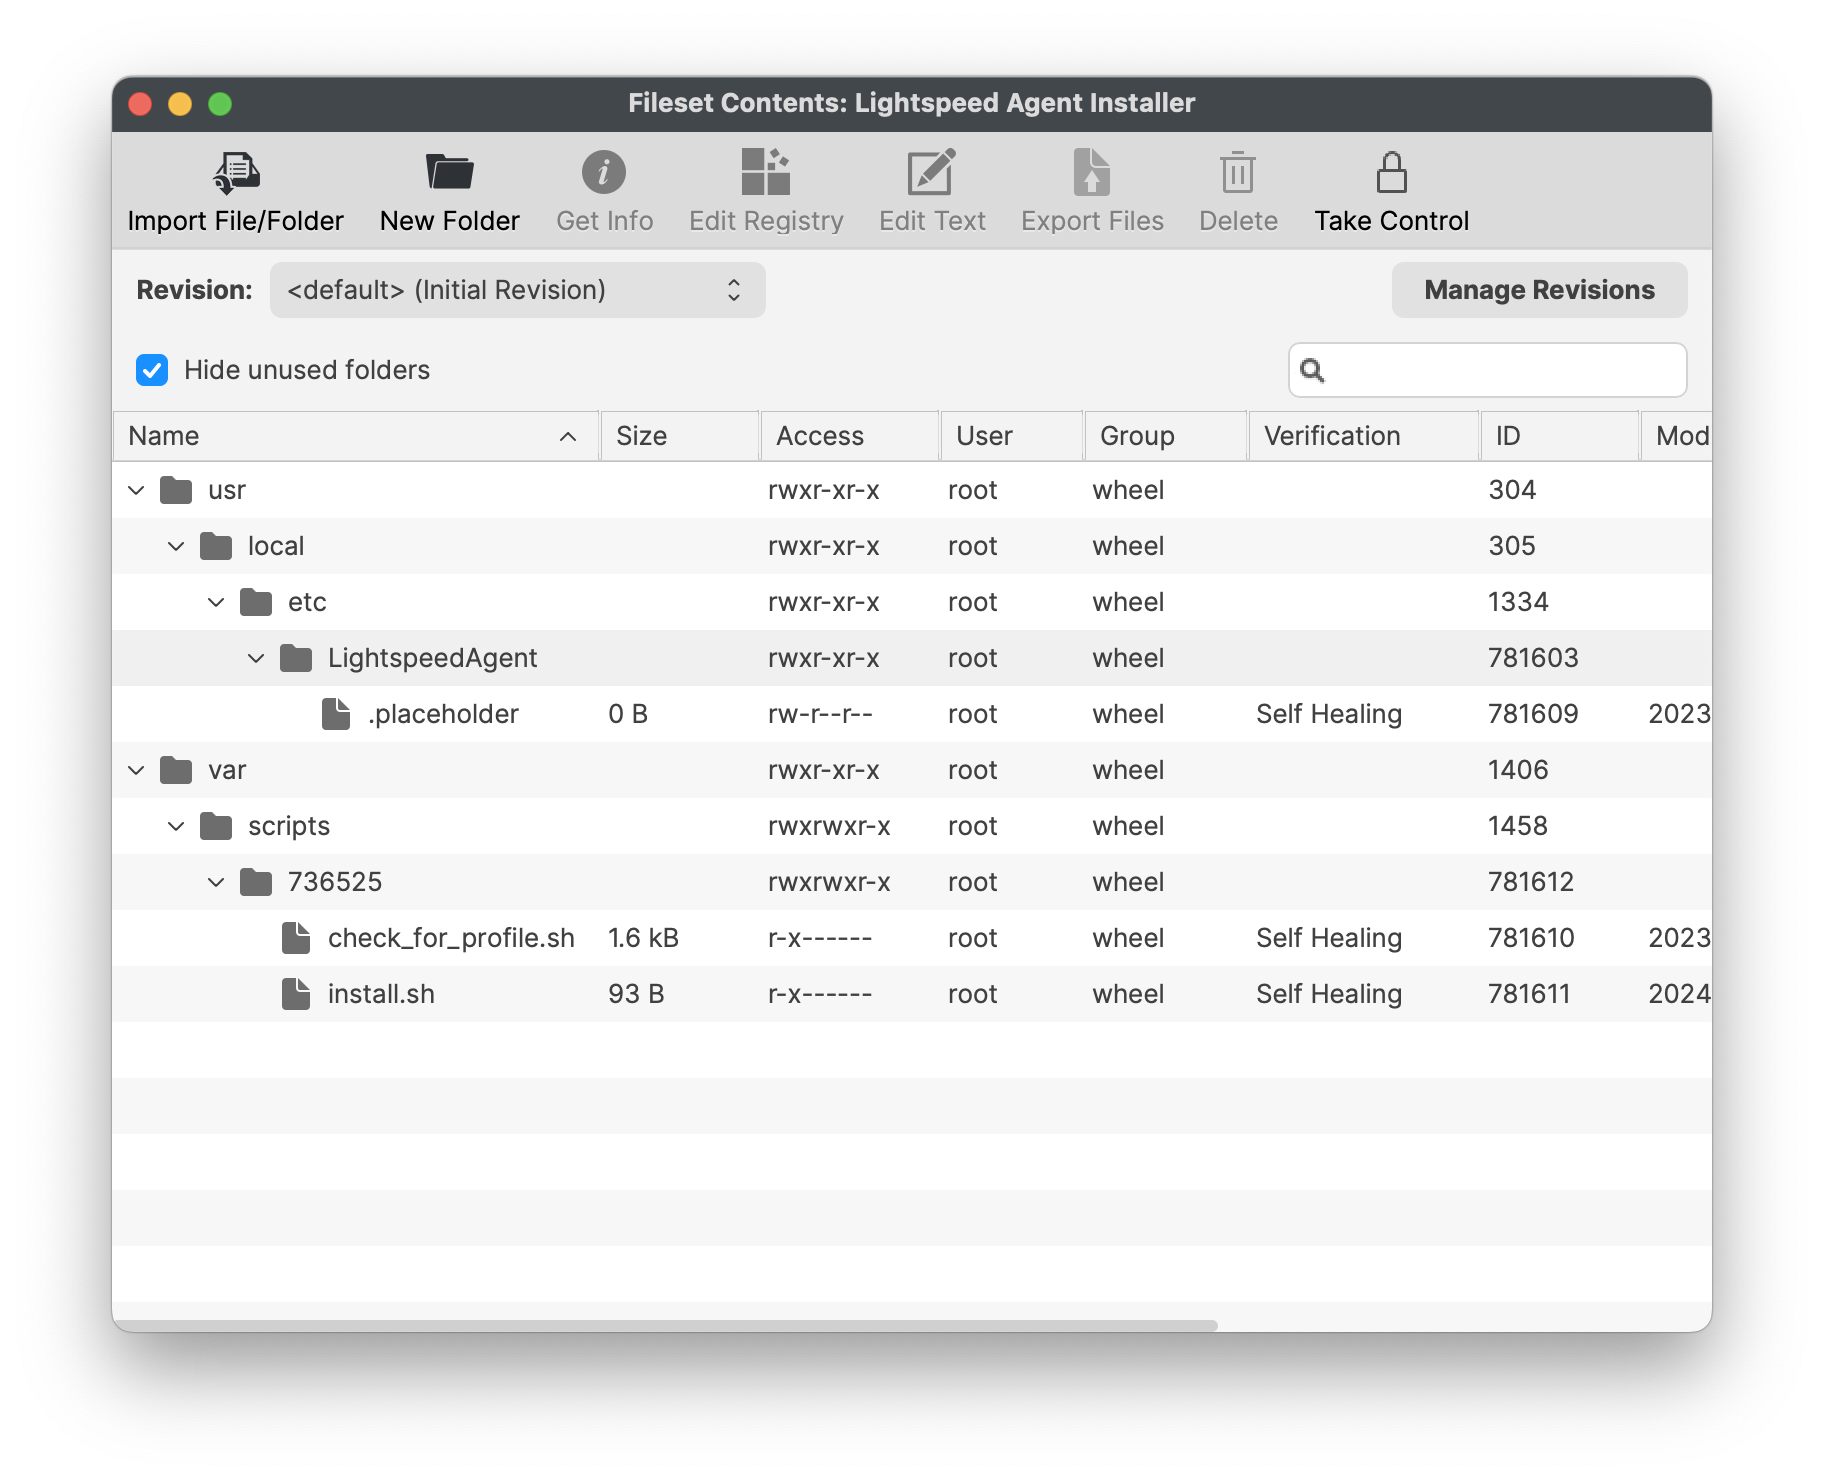
The name of the PKG is important. The installation script is expecting a file called SmartAgent.pkg. Rename if required.
The check_for_profile.sh script ensures the Profile is installed before the PKG. This script relies upon the Profile ID of the supplied Profile.
The Fileset has a Reboot setting configured to allow the Filter Network Content applied.
Assignment
Assign the Fileset Group, either as a Deployment or an Association with one or more test devices. Once satisfied, consider assigning to all required devices.
Once that you have installed the agent and trusted the root certificate on your devices, go back to your Lightspeed Account and navigate to Settings > Certificates. Check the two acknowledgement boxes and click Save.
Requirement Script to check your Profile Identifier
The Fileset Script is designed to check for the presence of Profiles prior to installing the PKG. The provided Profile ID is already of consideration, however the newly generated Certificate Profile cannot be, since the ID cannot be known in advance. Both Profiles should instal at the same time, it is therefore arguably not required to be included in this consideration. However, for completeness, the Generated ID of the Certificate Profile could also be added.
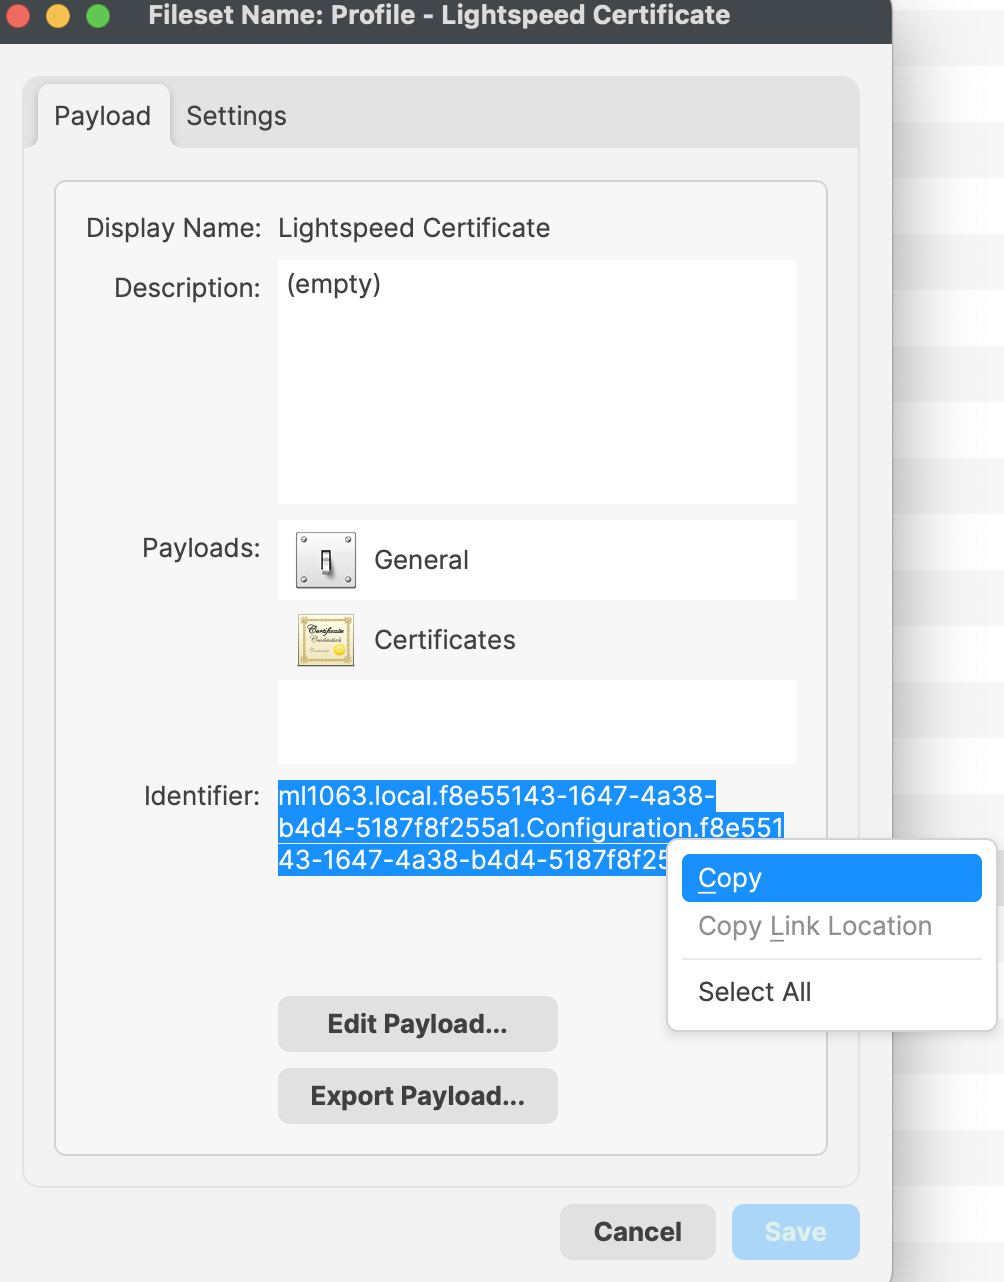
Bundle ID
First, the Bundle ID of the newly created Profile needs to be copied.
- Open the Certificate Profile
- Highlight the Bundle ID and choose to copy
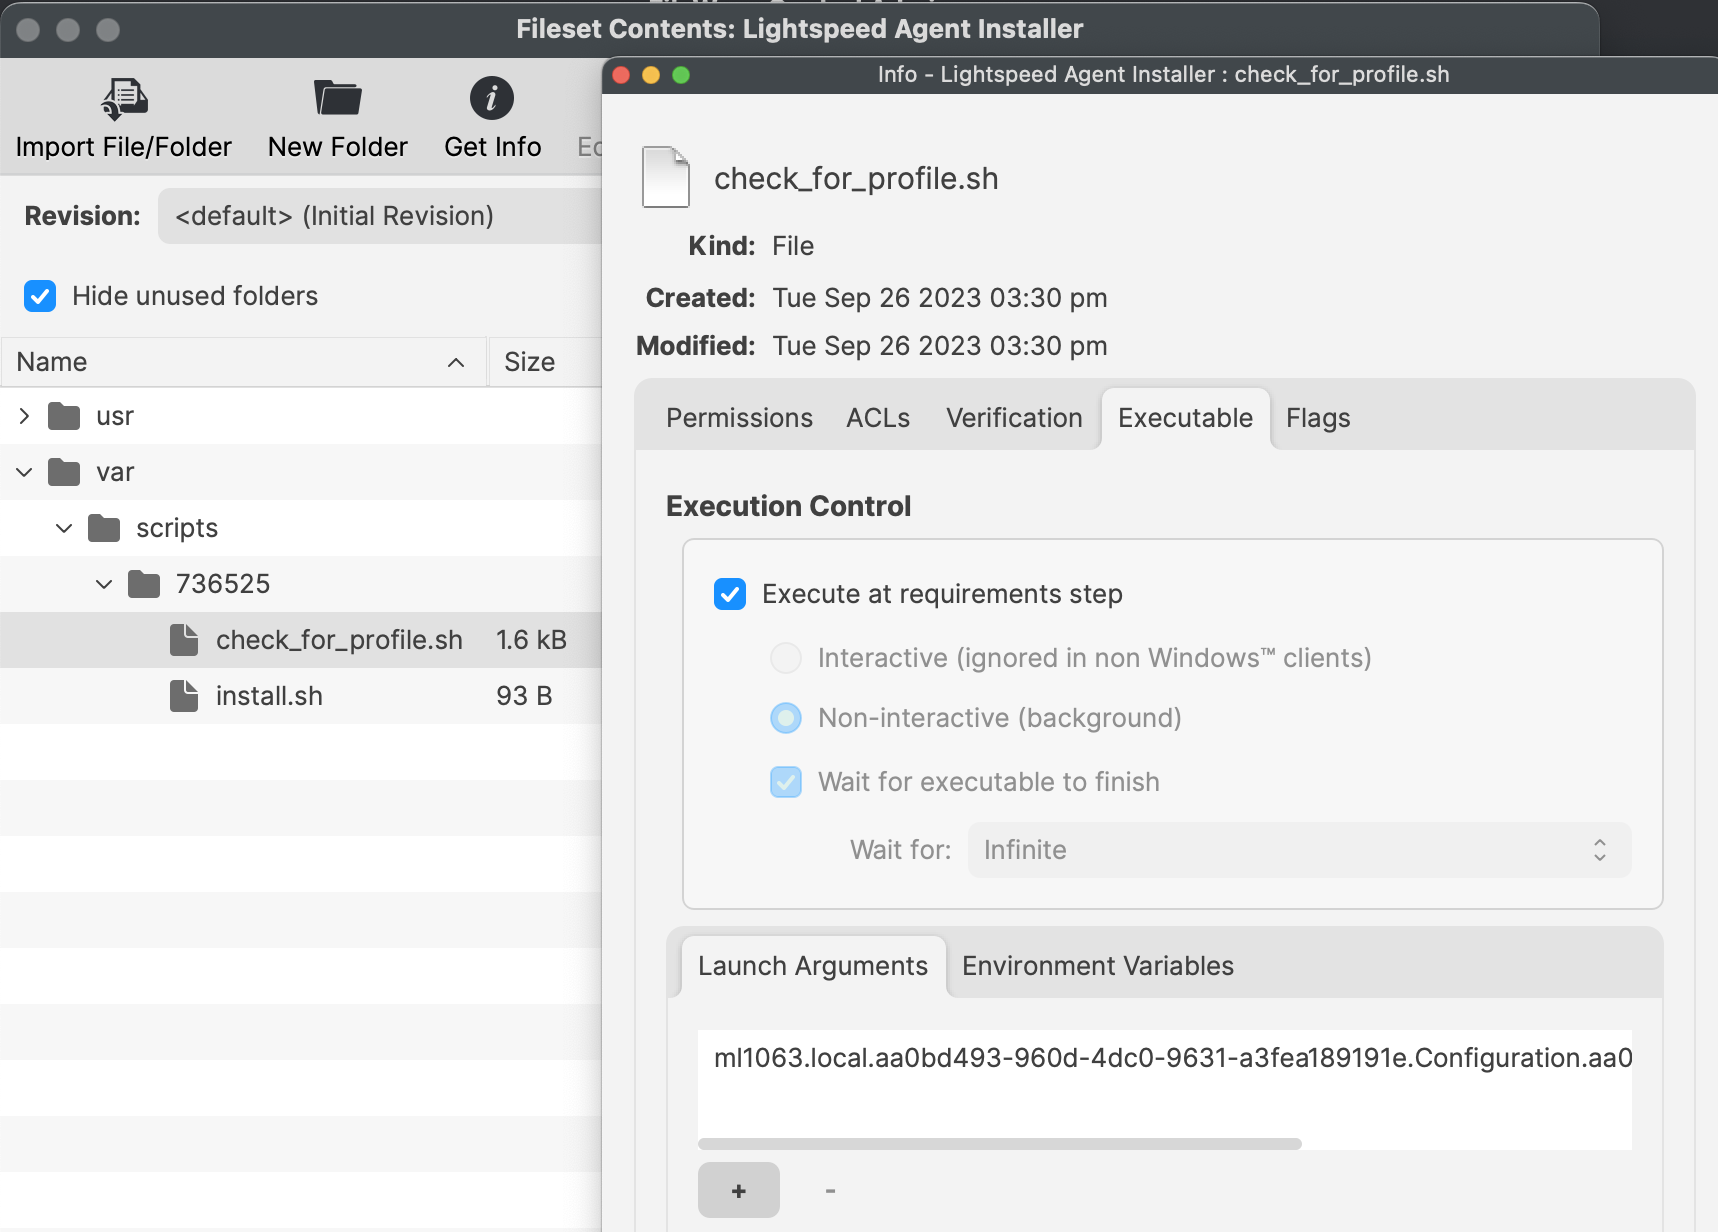
Script Info
- Open the Lightspeed Agent Installer Fileset
- Select the 'check_for_profile.sh' and choose Get Info
- Select the Executable tab
- Add a Launch Argument and paste or replace the current Launch Arguments with your copied Bundle ID
Uninstall Fileset
The Fileset to uninstall Lightspeed Smart Agent v2.3.1+ from of your macOS devices. Included in the Fileset is a script that will execute and remove the LS Smart Agent. Please note this script only removes the Smart Agent, it does not remove the LS certificate or log files from the agent.
LightSpeed Agent Uninstaller v2.3.1+.fileset.zip
You may download and import into FileWave. You may then create a Fileset Group and include the LightSpeed Agent Uninstaller.
Related Content
Needing to deploy Lightspeed for iOS devices? Review the KB article here: Lightspeed Smart Filter Deployment (iOS 2023).
Needing to deploy Lightspeed for non-Certificate Manager? Review the KB article here: Lightspeed Smart Filter Deployment (macOS 2023)
No comments to display
No comments to display