SentinelOne Deployment (macOS)
Description
SentinelOne is a cybersecurity company that specializes in endpoint security and threat intelligence. They provide a platform for autonomous endpoint protection that uses AI and machine learning to prevent, detect, and respond to a wide range of security threats, including malware, ransomware, and other cyberattacks.
This recipe will guide on how to setup and deploy to your macOS devices.
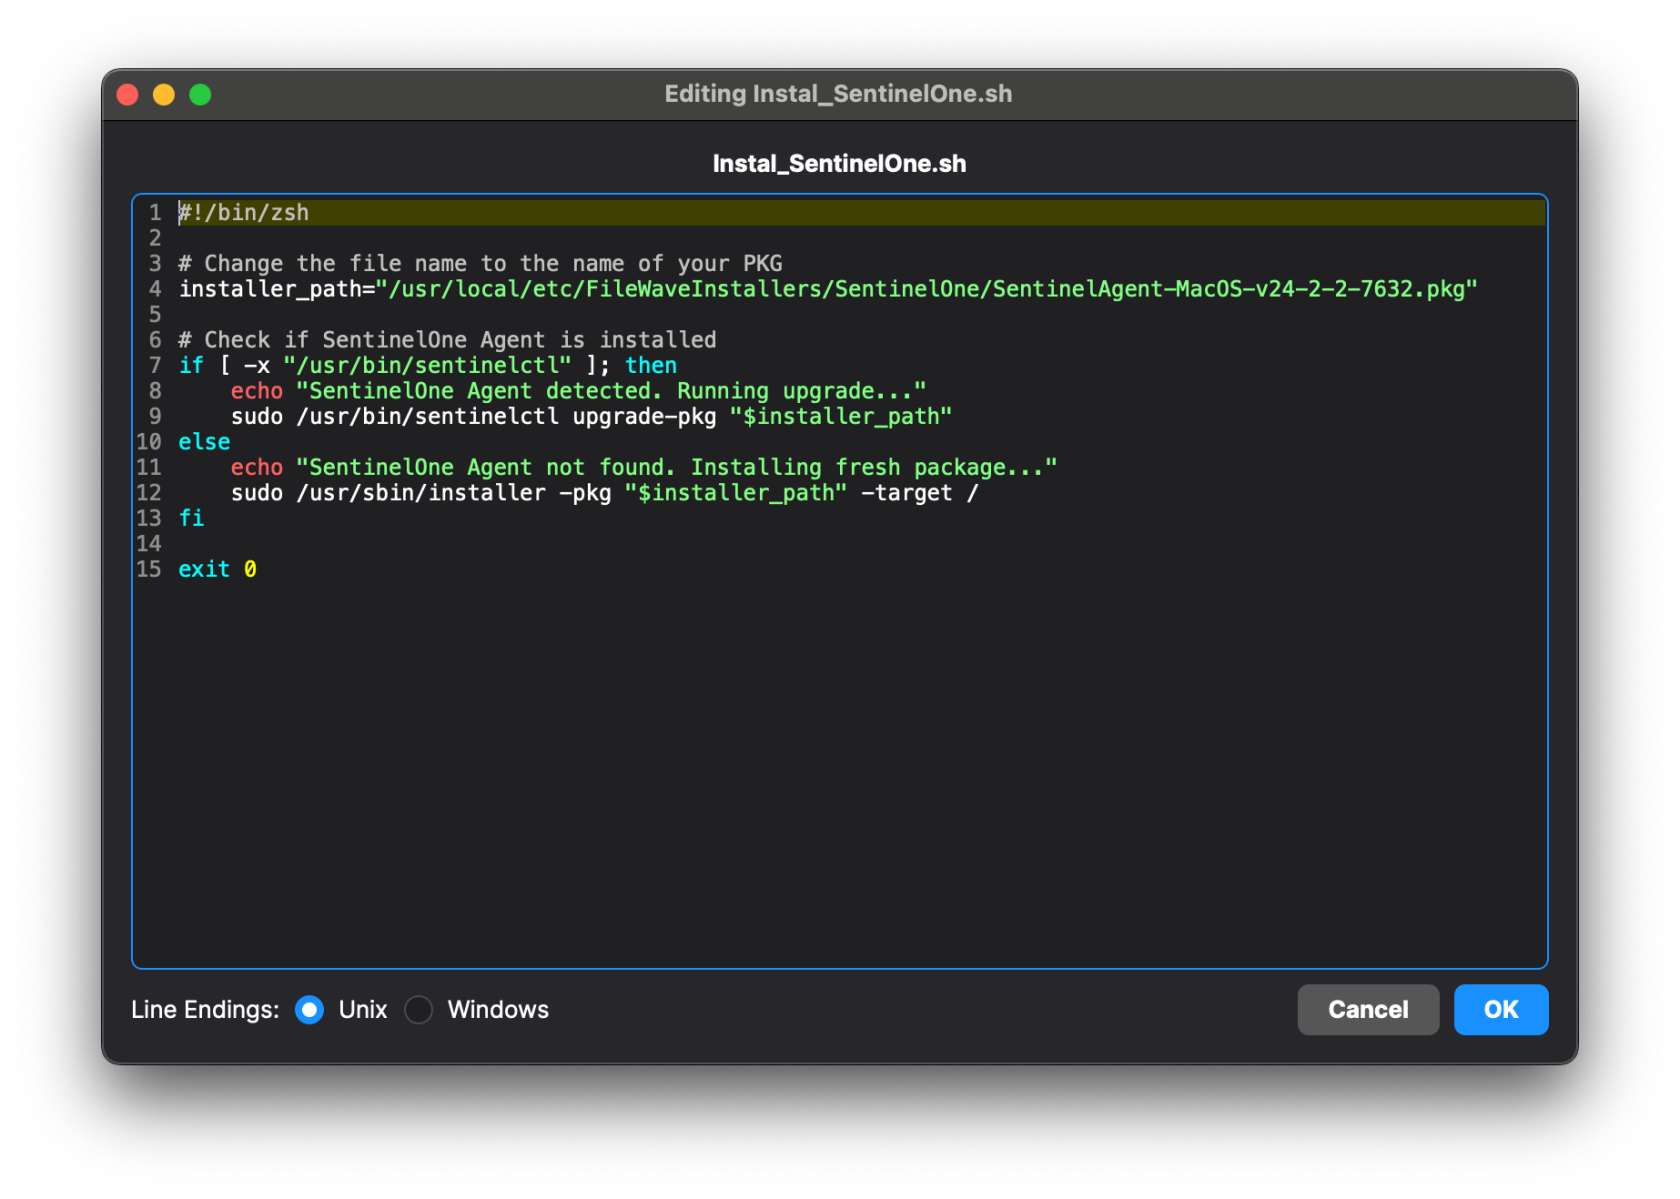
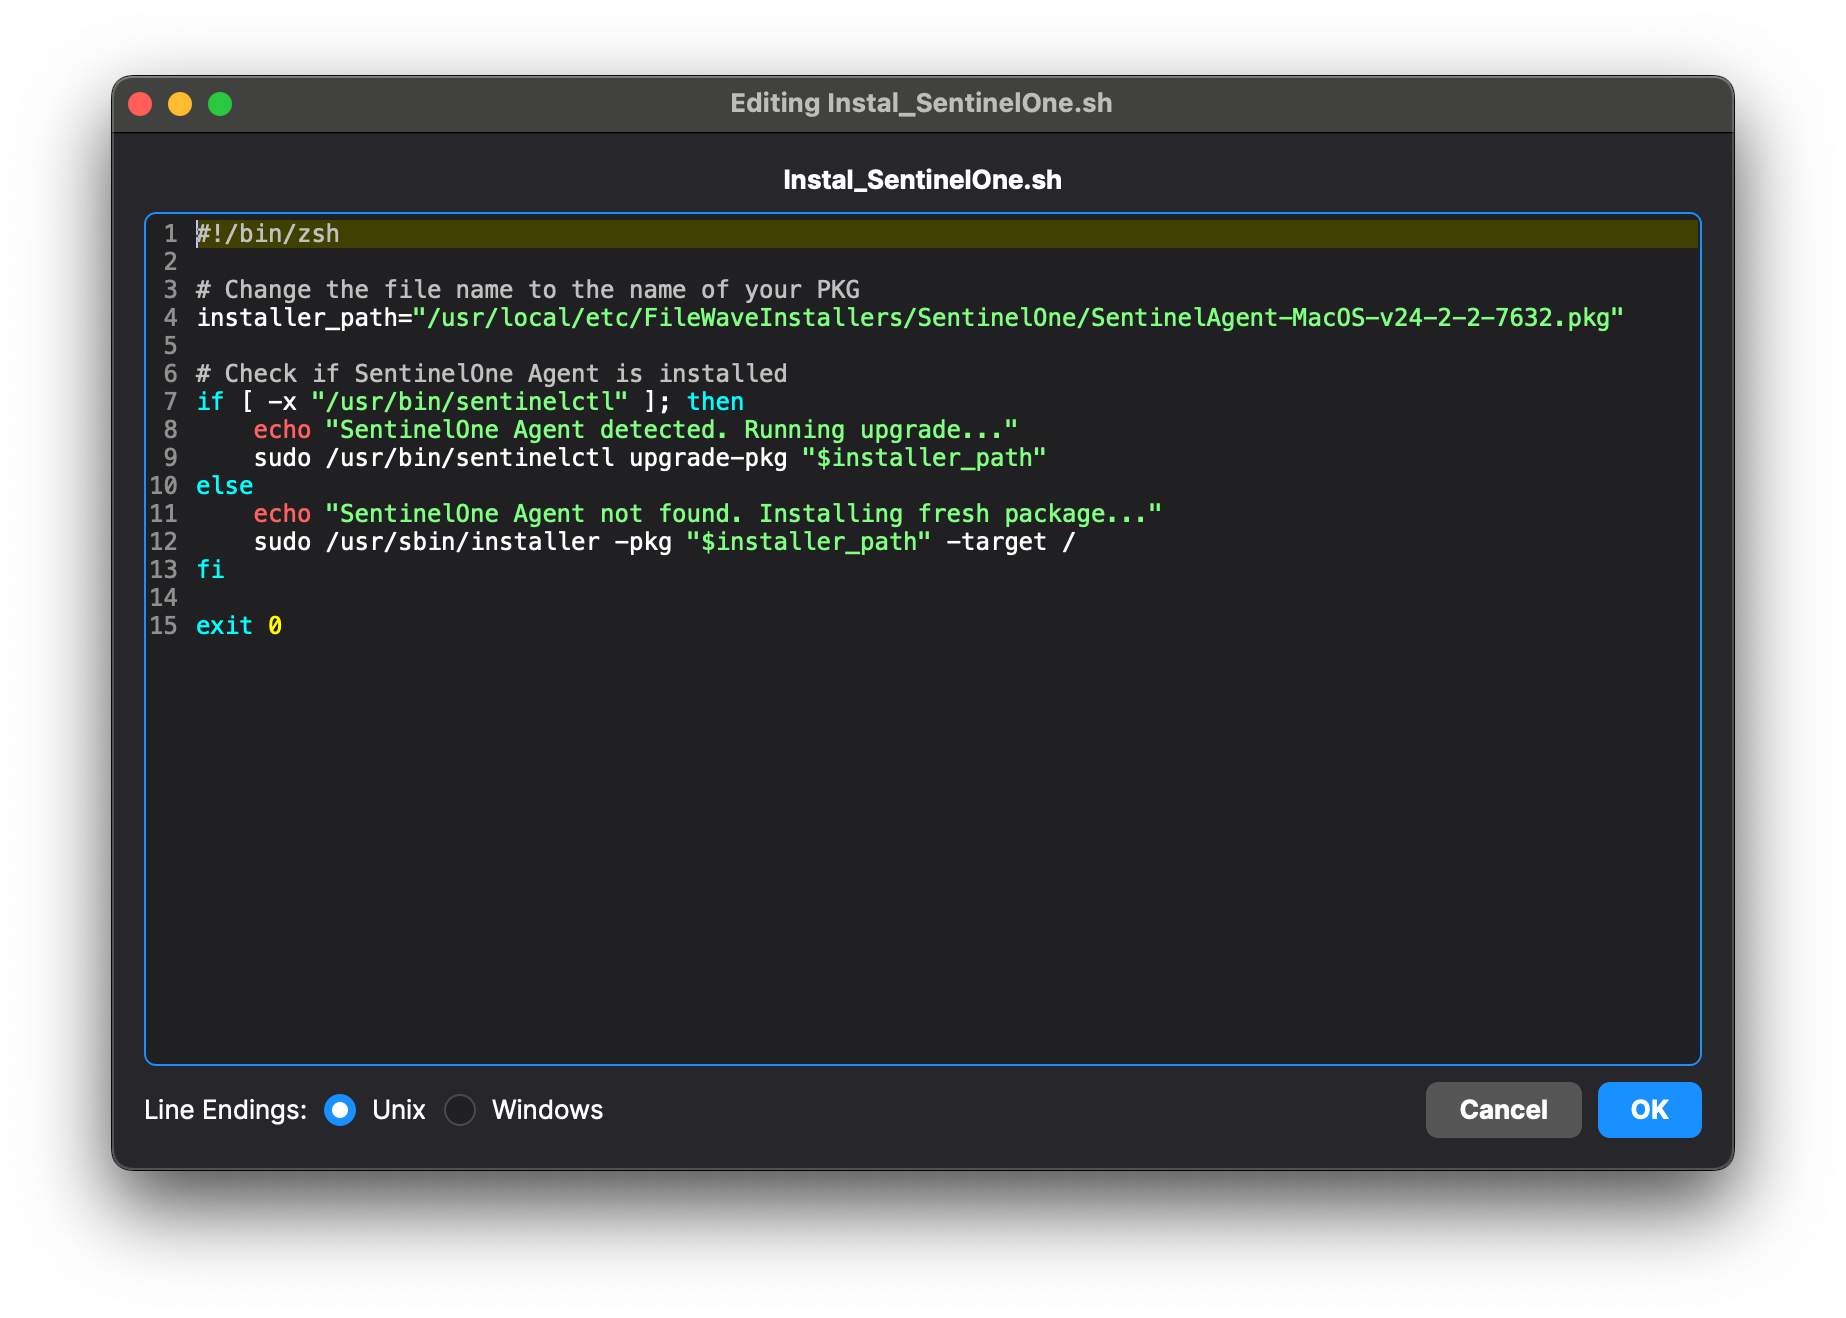
Upgrading SentinelOne on macOS Clients is not done the same way as it's initial deployment. We have edited the Installation script to identify if the client already has SentinelOne installed and run the following command to upgrade instead of going the normal install route: sentinelctl upgrade-pkg PKG_pathname
To deploy the upgraded SentinelOne Client to devices, simply create a new revision, upload the new PKG to the Fileset, and change the file name references in the install script.
Ingredients
-
FileWave Central
- SentinelOne PKG installer
- SentinelOne Group/Site Token
Directions
Editing the Fileset:
sentinelctl upgrade-pkg PKG_pathname- Download and import the SentinelOne Fileset into FileWave Central (we'll handle the Profiles later)
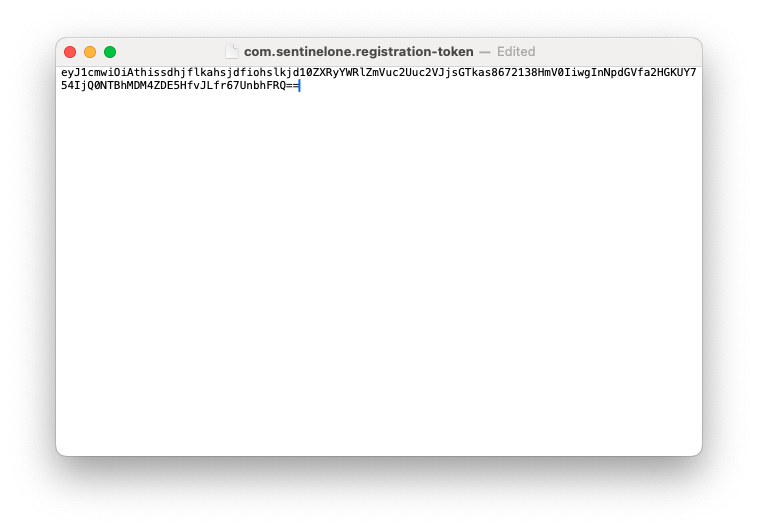
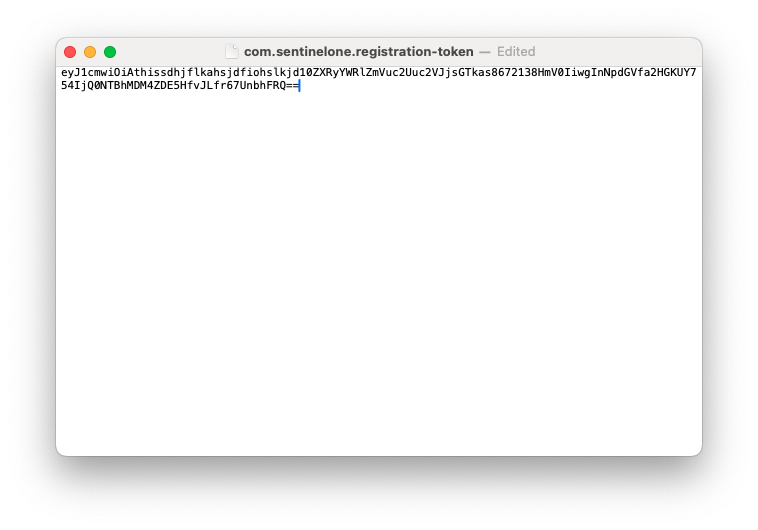
- In a text editor, create a plain text file named com.sentinelone.registration-token that contains only your Site/Group Token
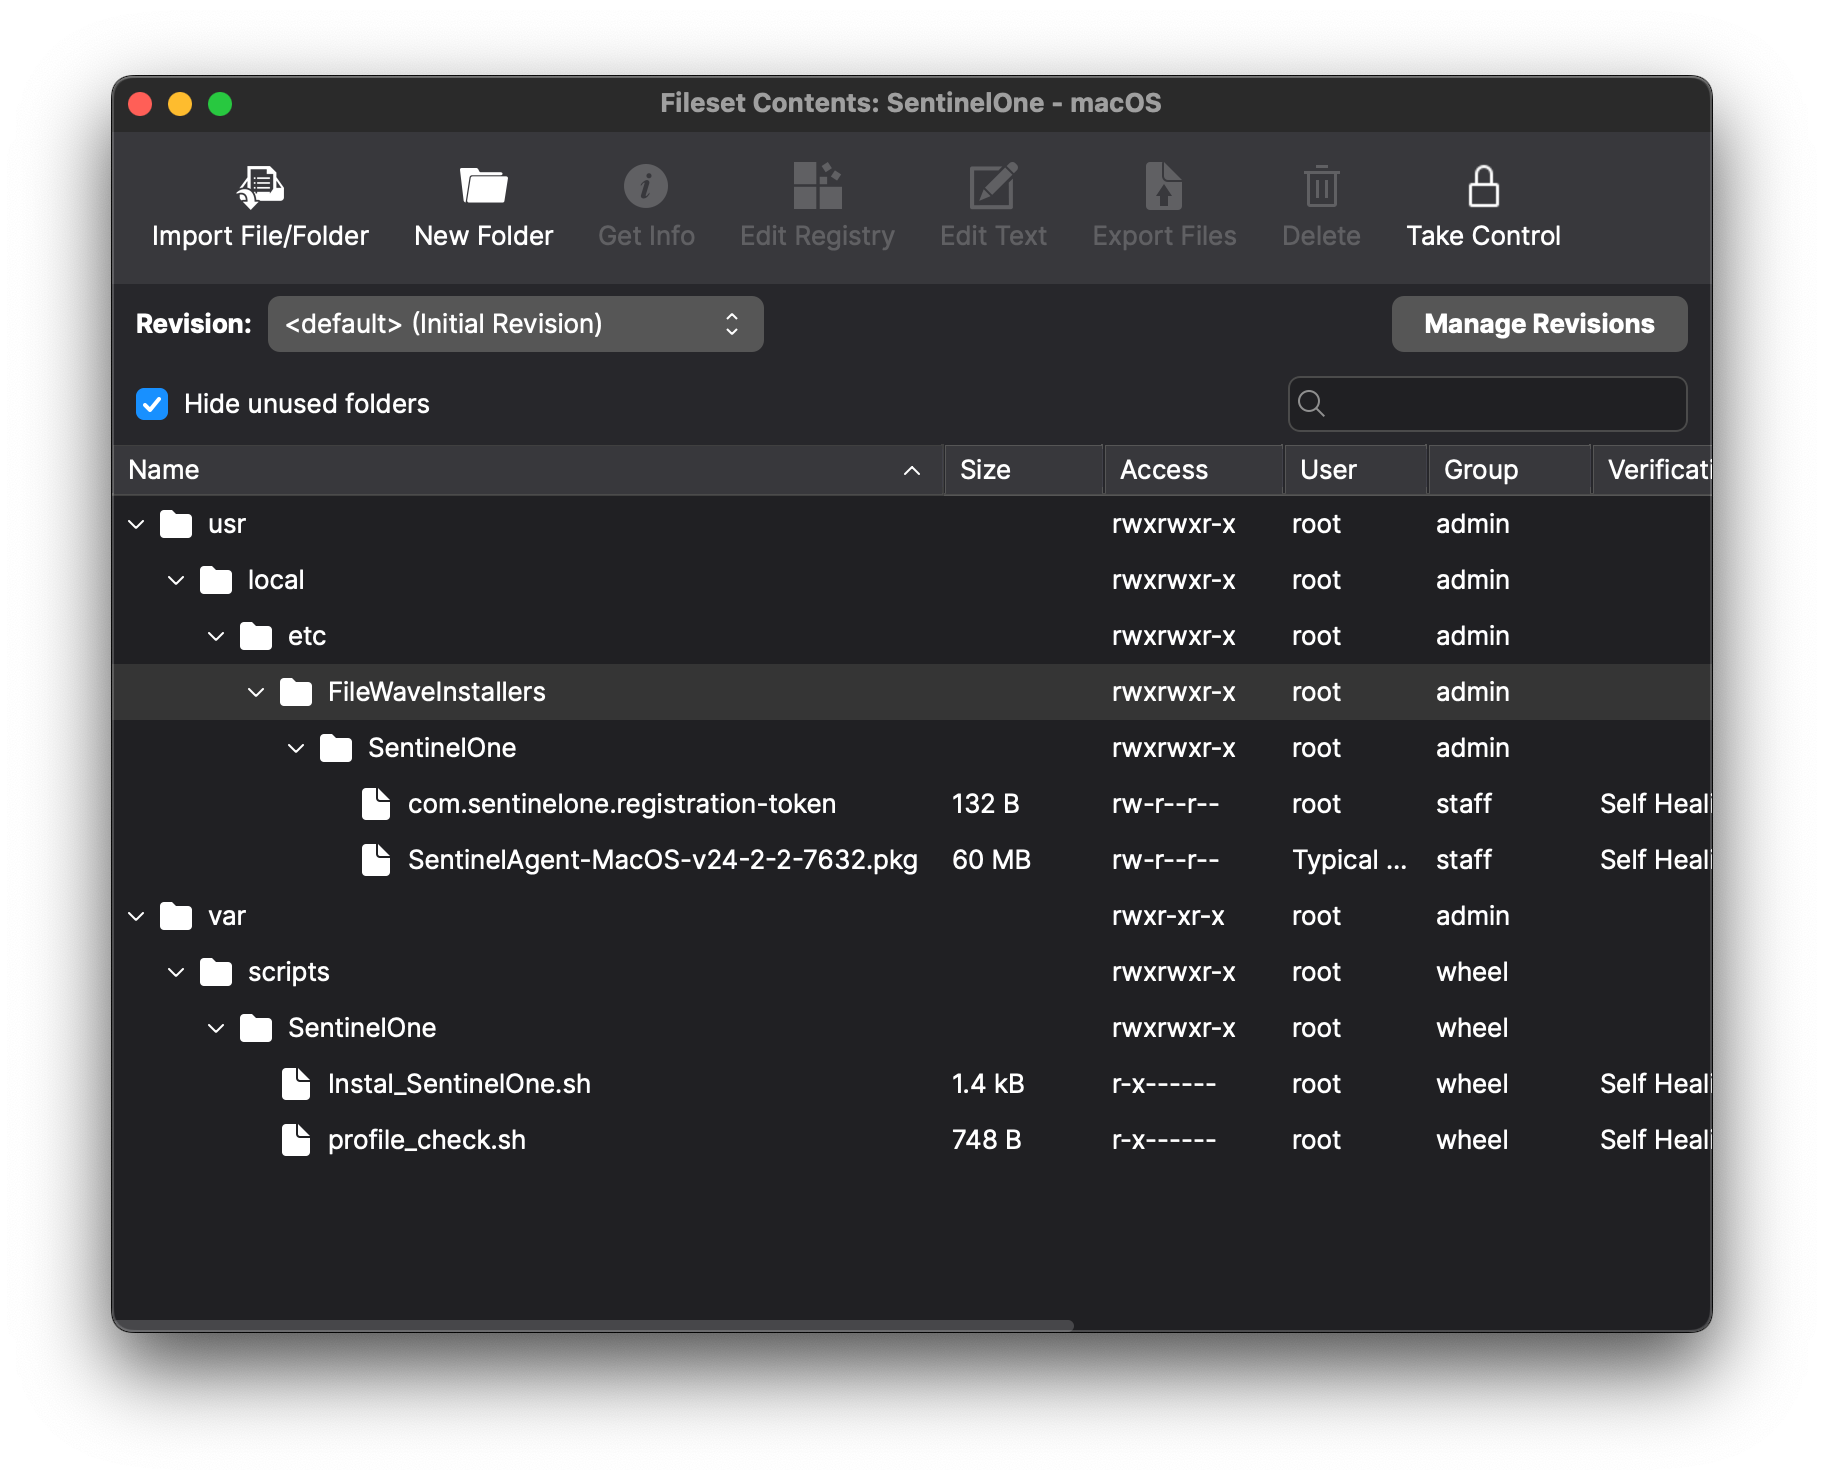
- Open the imported Fileset and replace the files under /usr/local/etc/FileWaveInstallers/SentinelOne with your registration token file and SentinelOne PKG.
Make sure the token file ownership is set to root:staff. You can change the ownership by selecting the file > Get Info > Ownership
The "com.sentinelone.registration-token" plaintext file must also be extension-less in the fileset and will not work if the file has a .txt extension at the end of the file name. If your filename ends in a ".txt" this can be removed/edited by right-clicking on the file in the fileset > "Rename".
Before: After: 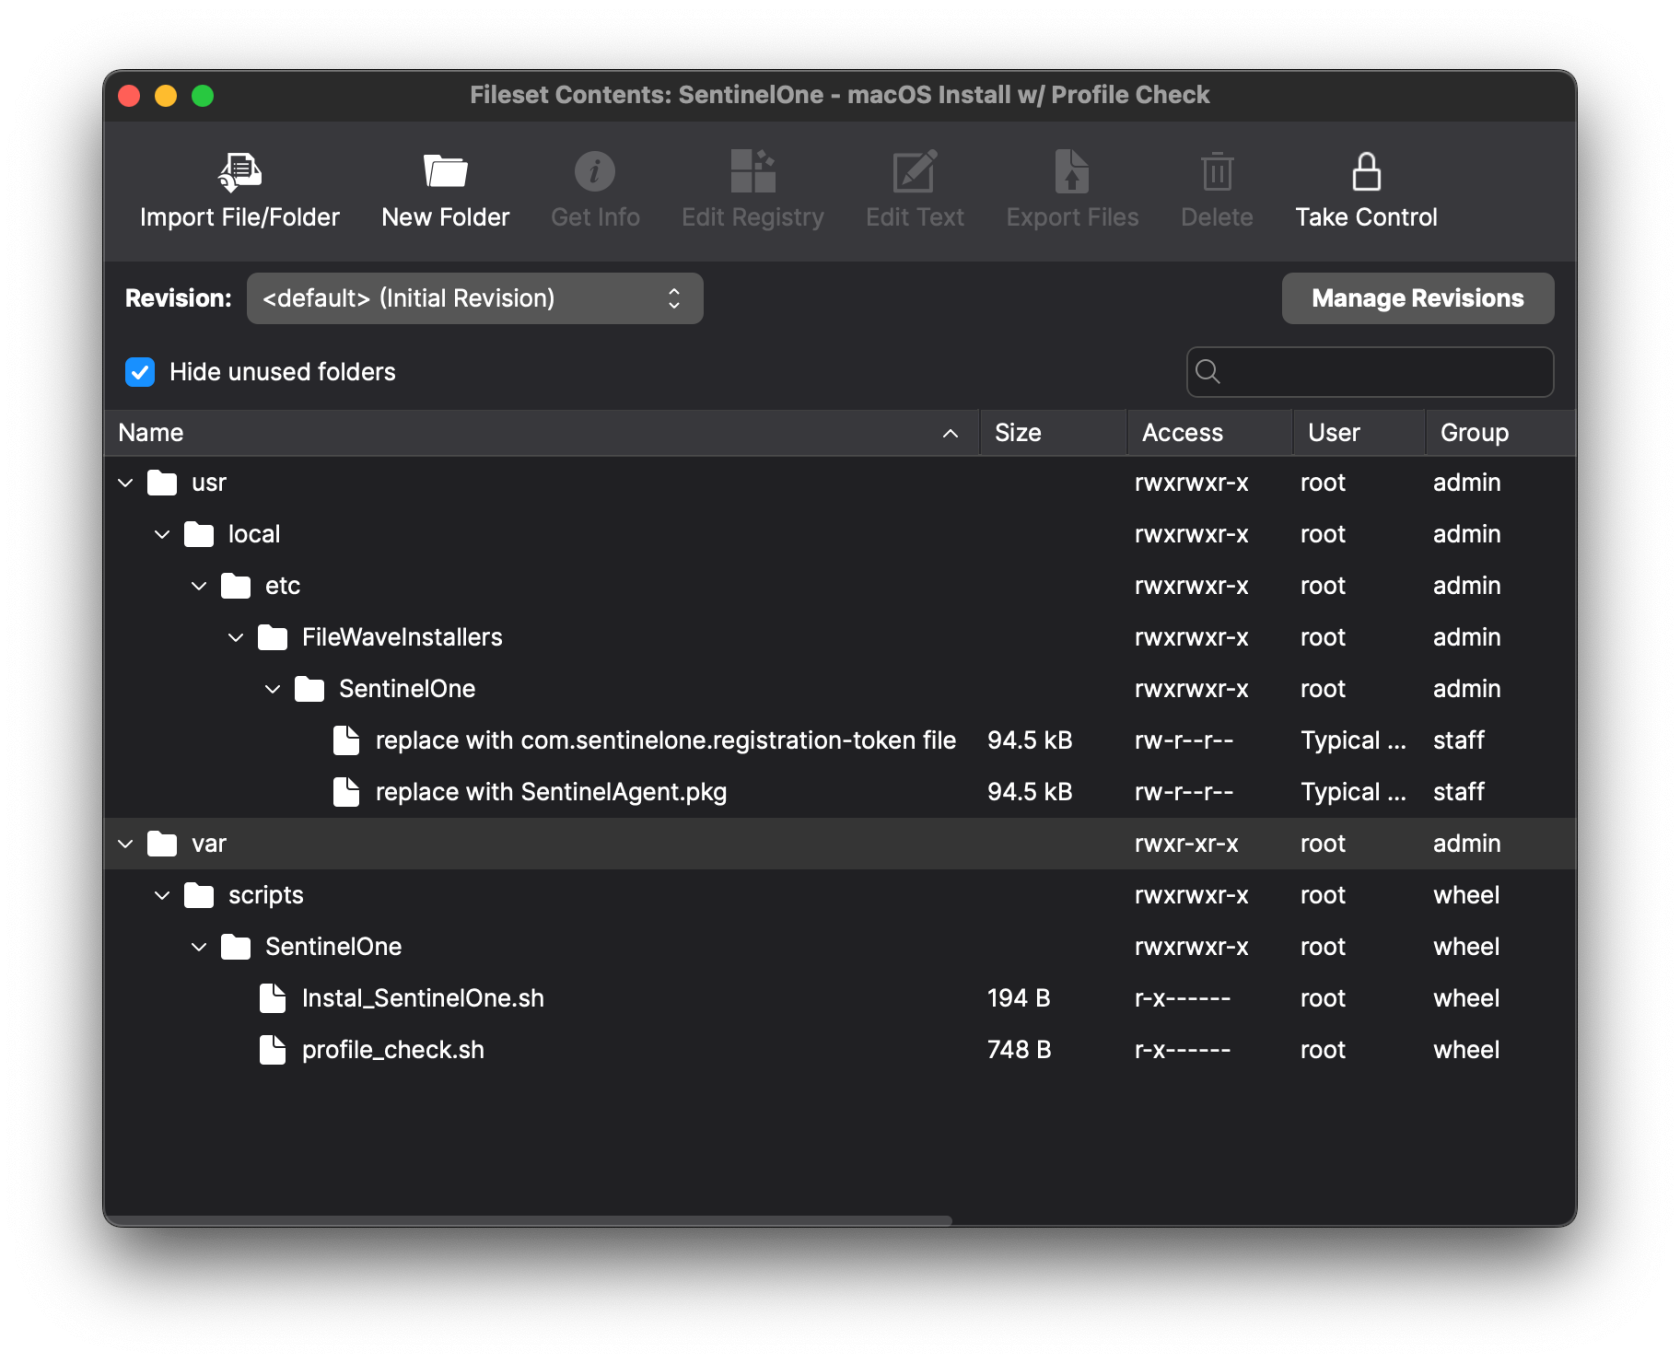
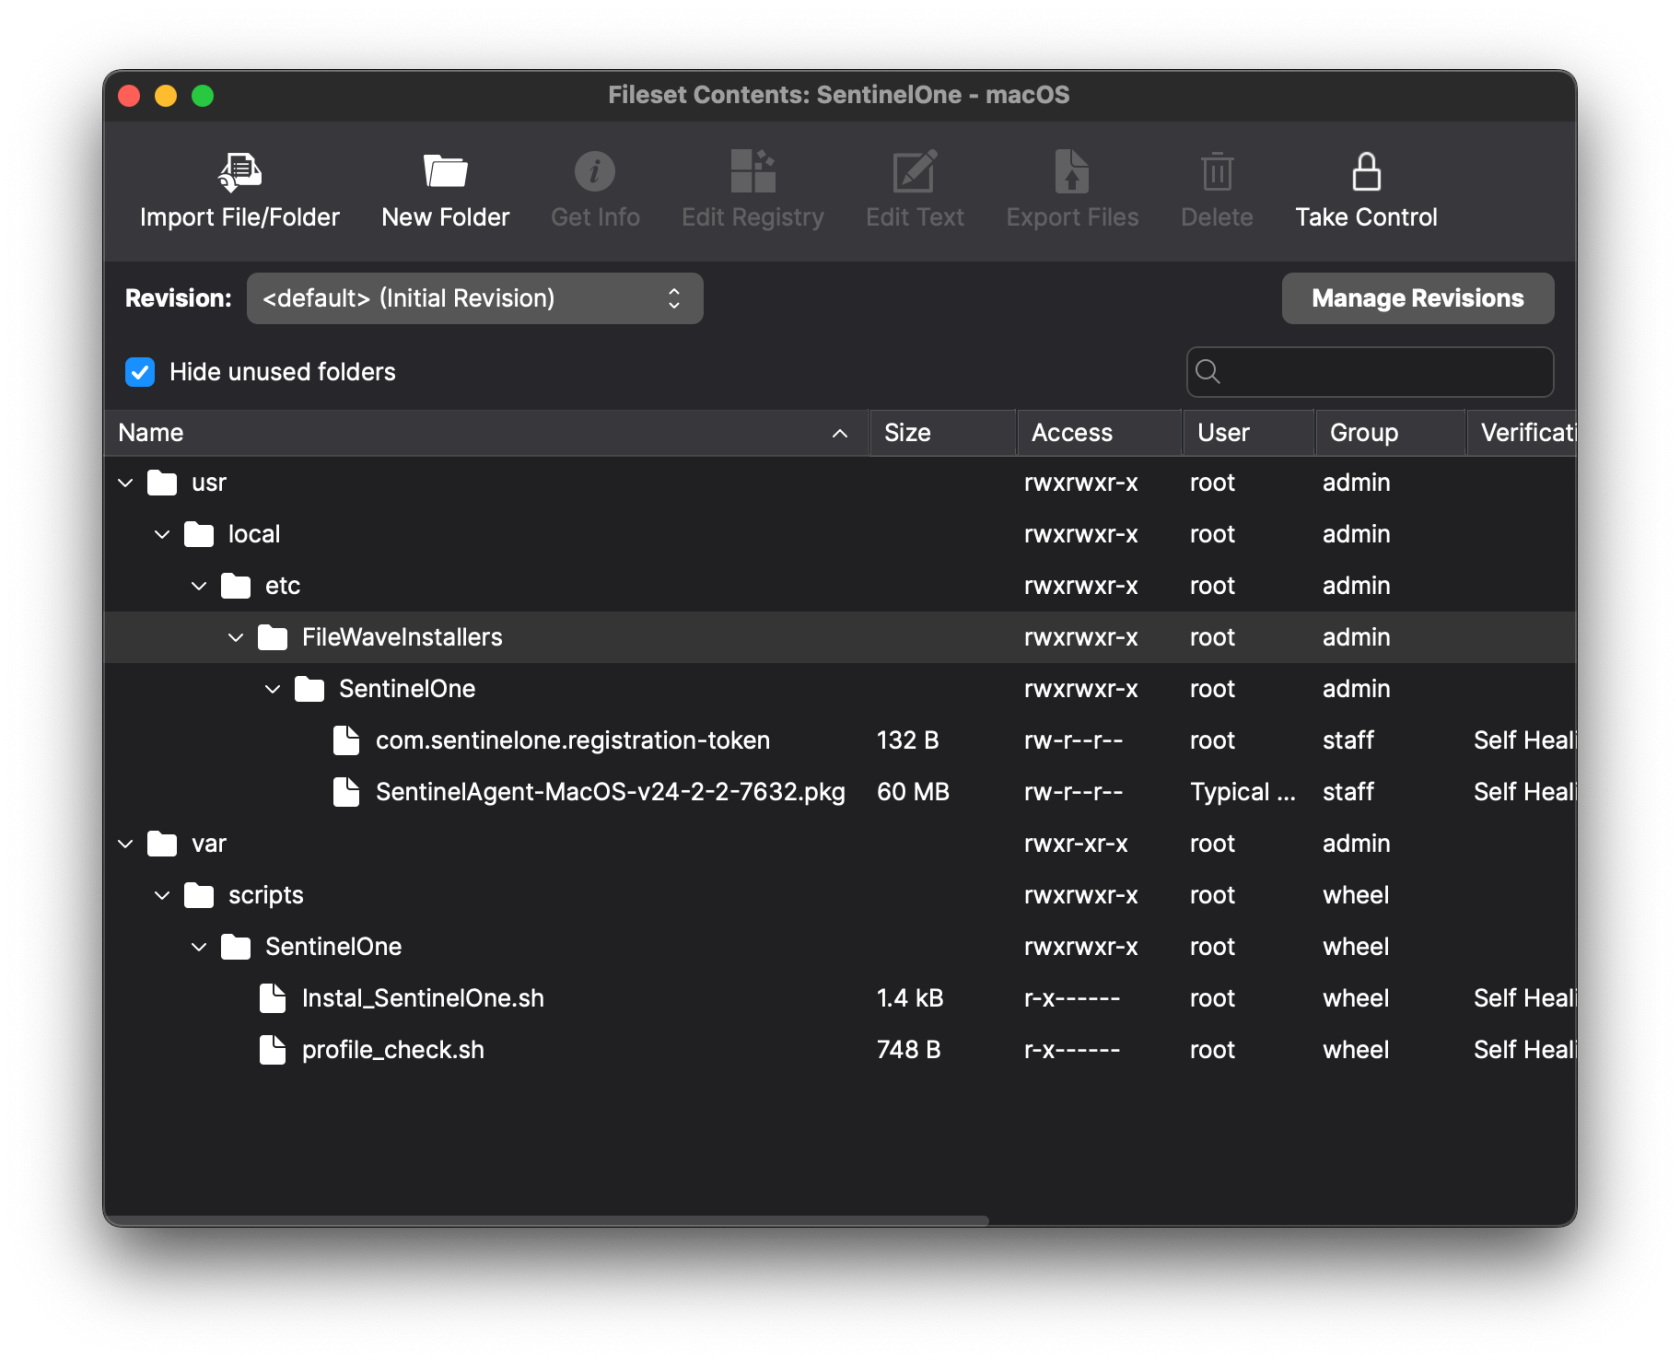
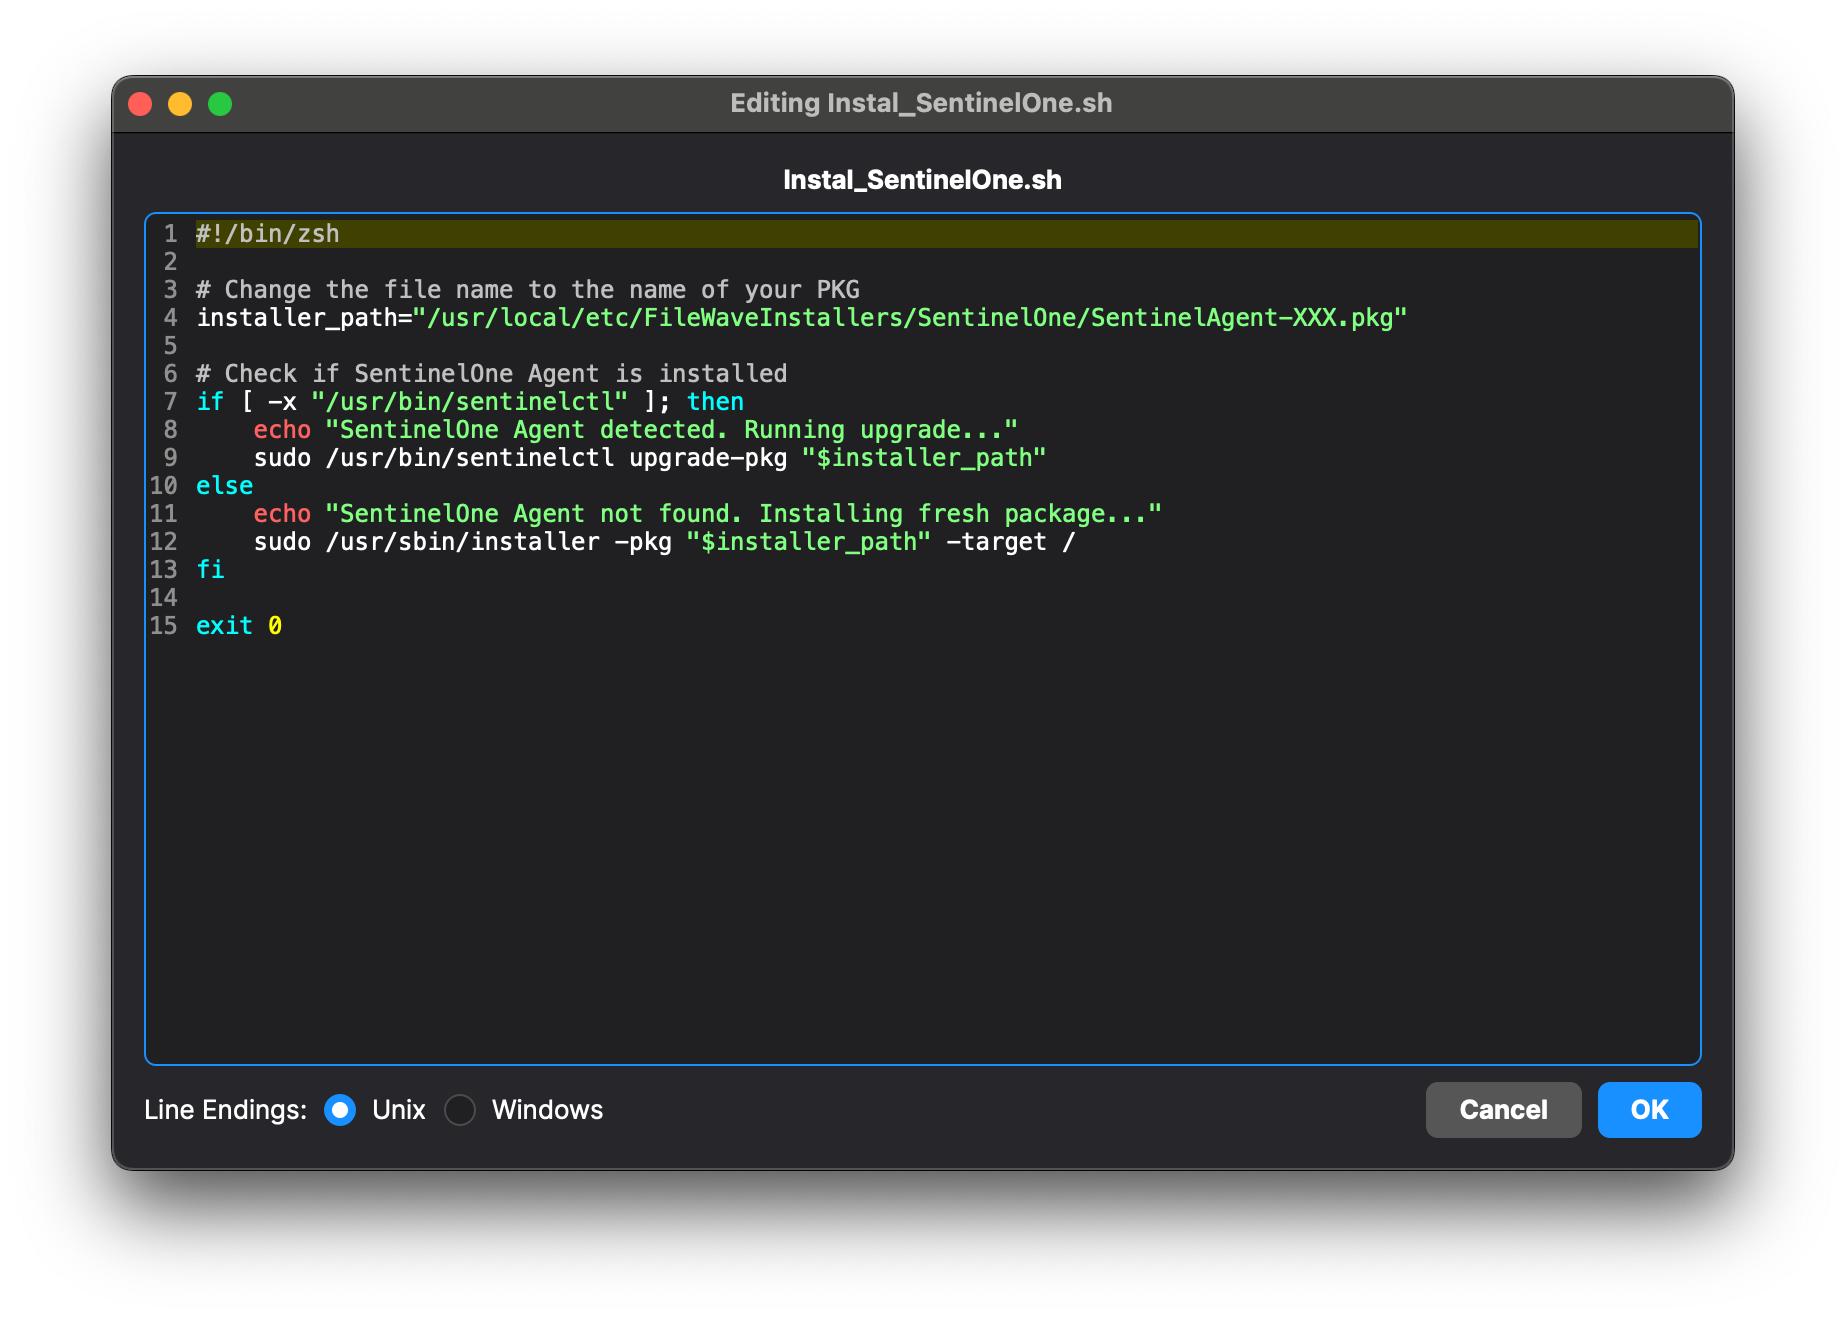
Now we need to edit the install script so it points to the uploaded installer. - In Admin, select the SentinelOne Fileset and then select 'Scripts' in the toolbar.
- Edit the Activation Script 'Instal_SentinelOne.sh'. You will need to change the name of the PKG to what you have uploaded. Click OK to save.
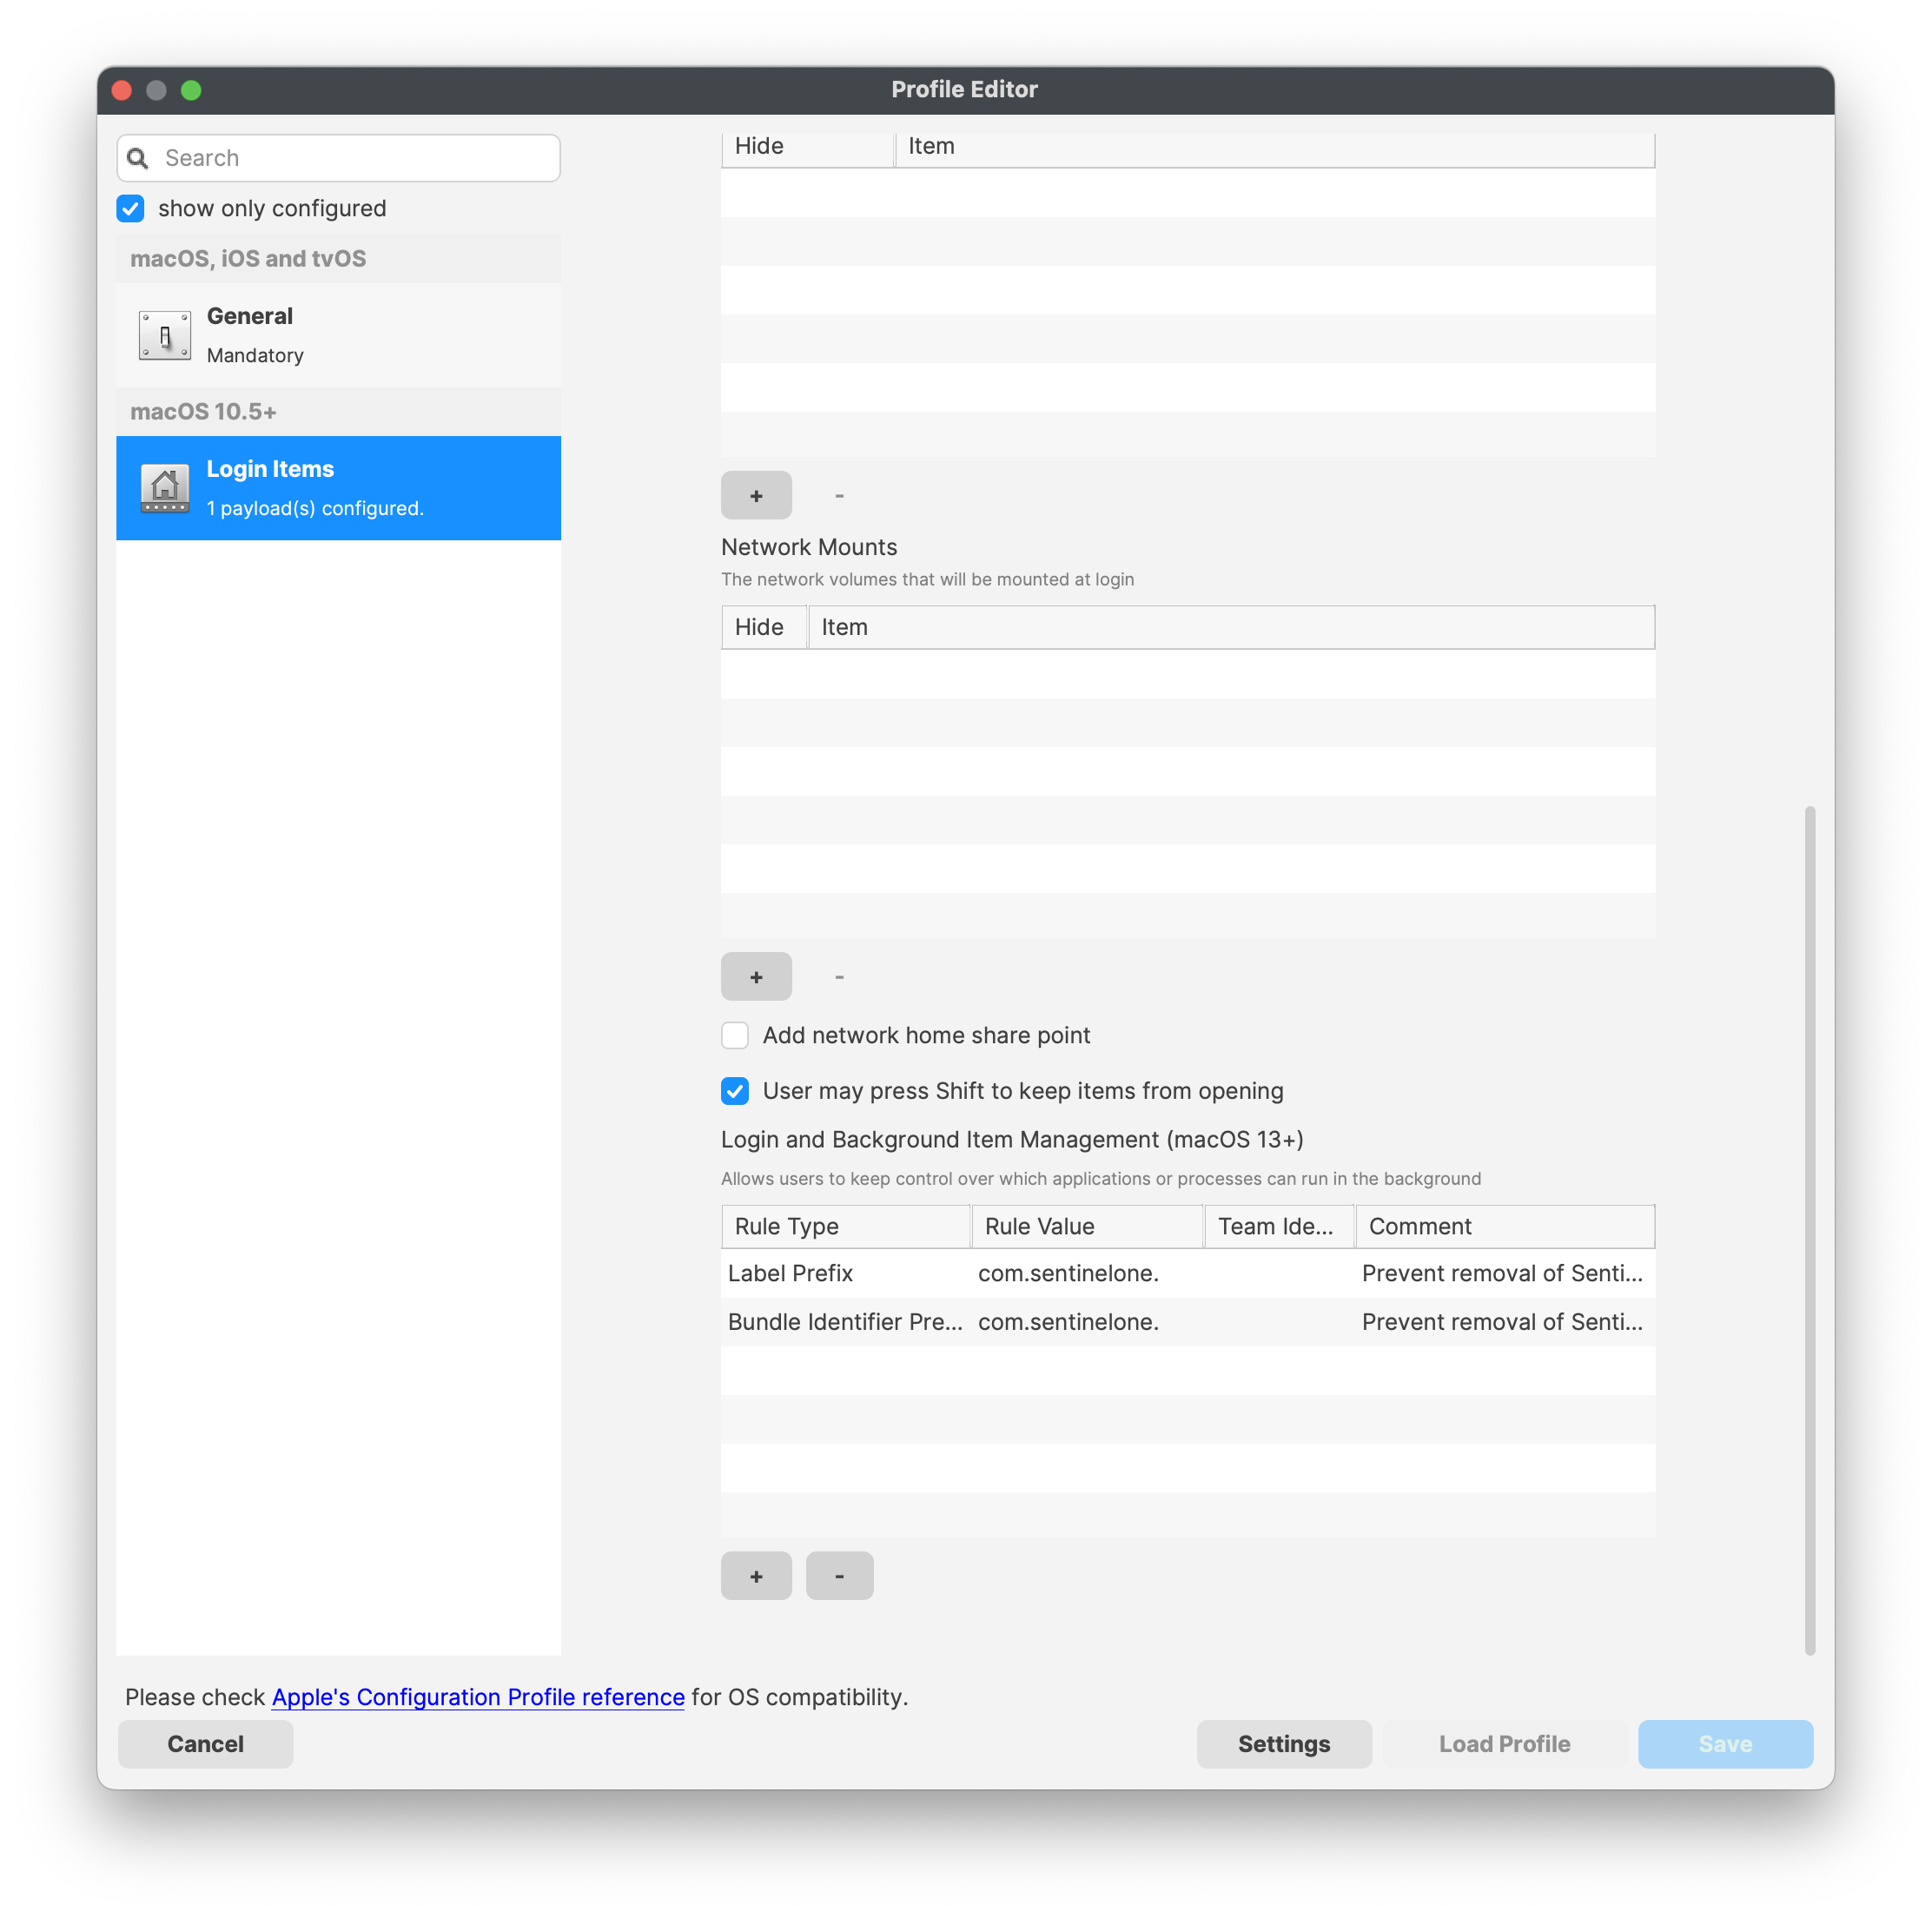
Now we need to import the four Profiles to allow the installer the access and permissions it needsBefore: After: Your installer's name will be different 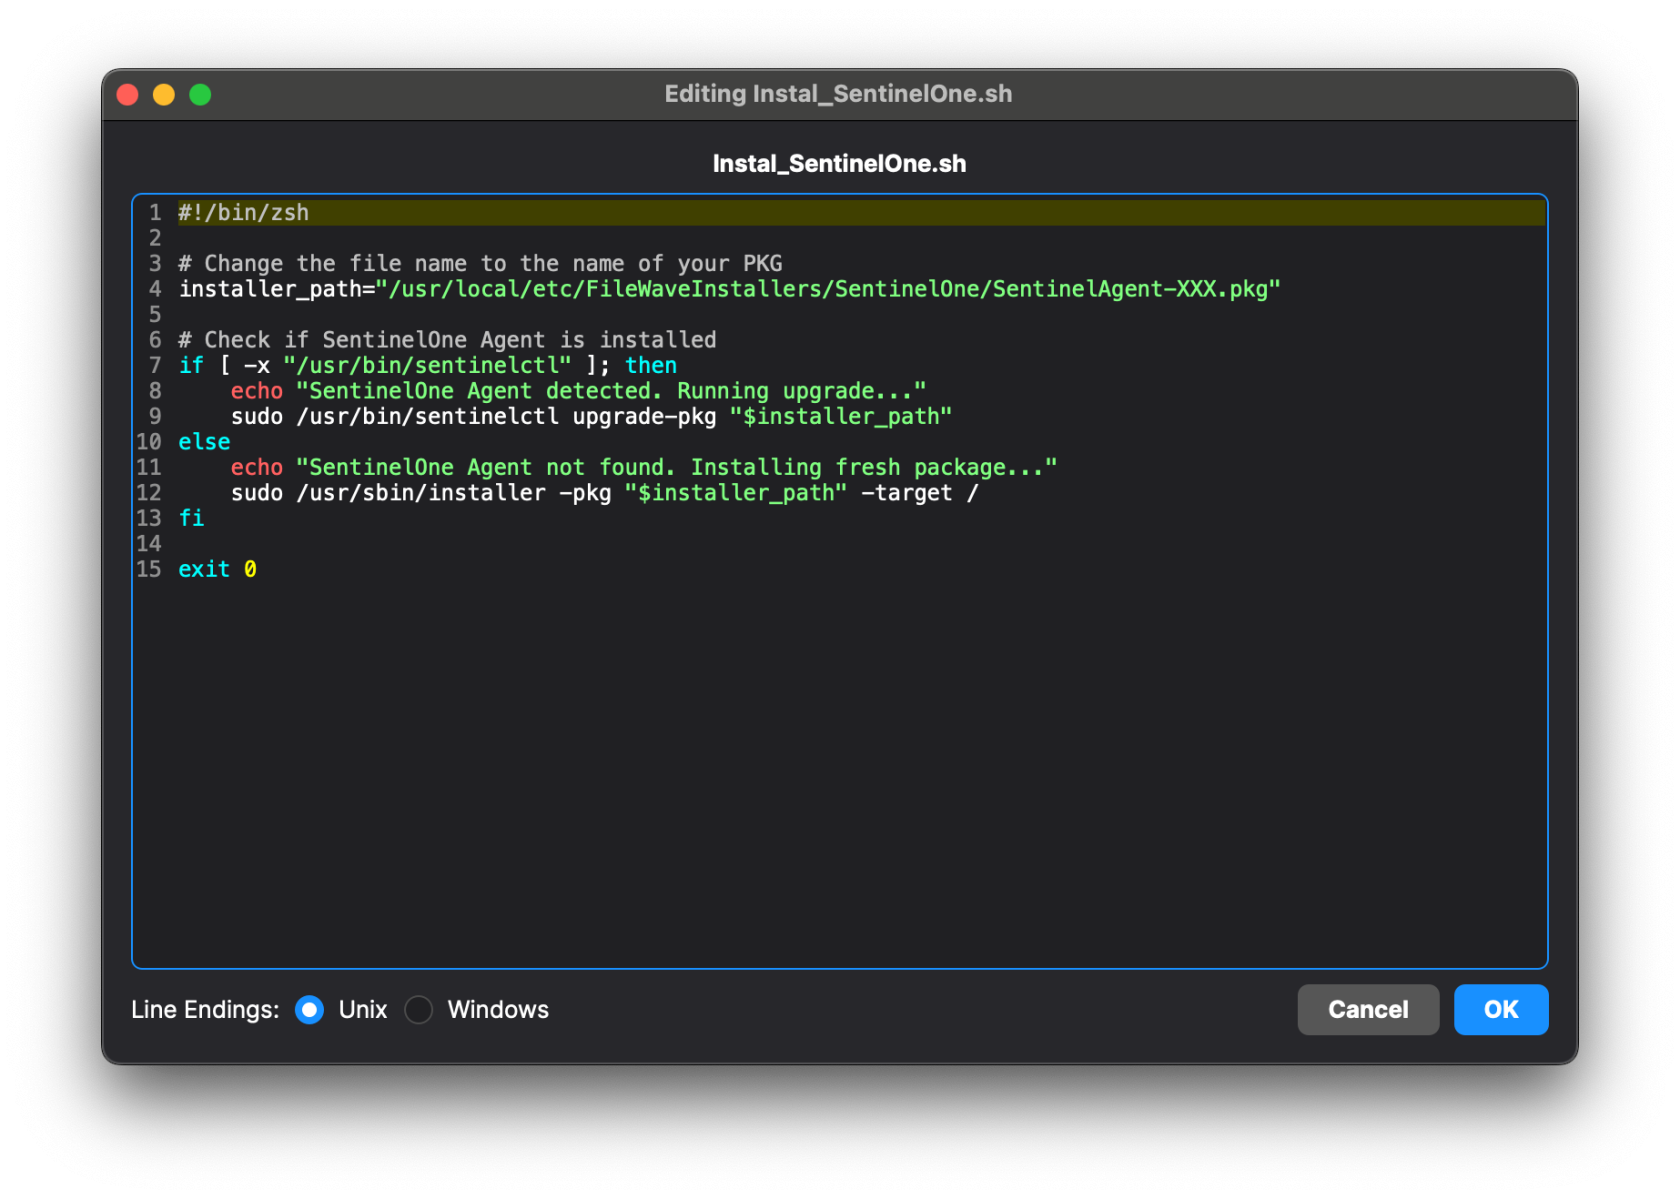
-
Import the Profiles that were downloaded with the Fileset. To do so, just drag and drop the Profiles into FileWave Central.
Video: Importing ProfilesProfile Metadata shown below

We're all set! Now create a Deployment with the Fileset and four Profiles.
The Fileset contains a script that will only allow the Installation once all four Profiles have been installed. It is normal to see a Fileset failure the first try. It will keep trying until profiles have installed.
The check_profile script logs each attempt and why it either failed or succeeded. You can see this log by right-clicking on the script in Client Info>Fileset Status. Select the Fileset in the list and the script status will show on the right. Right-click to see script output.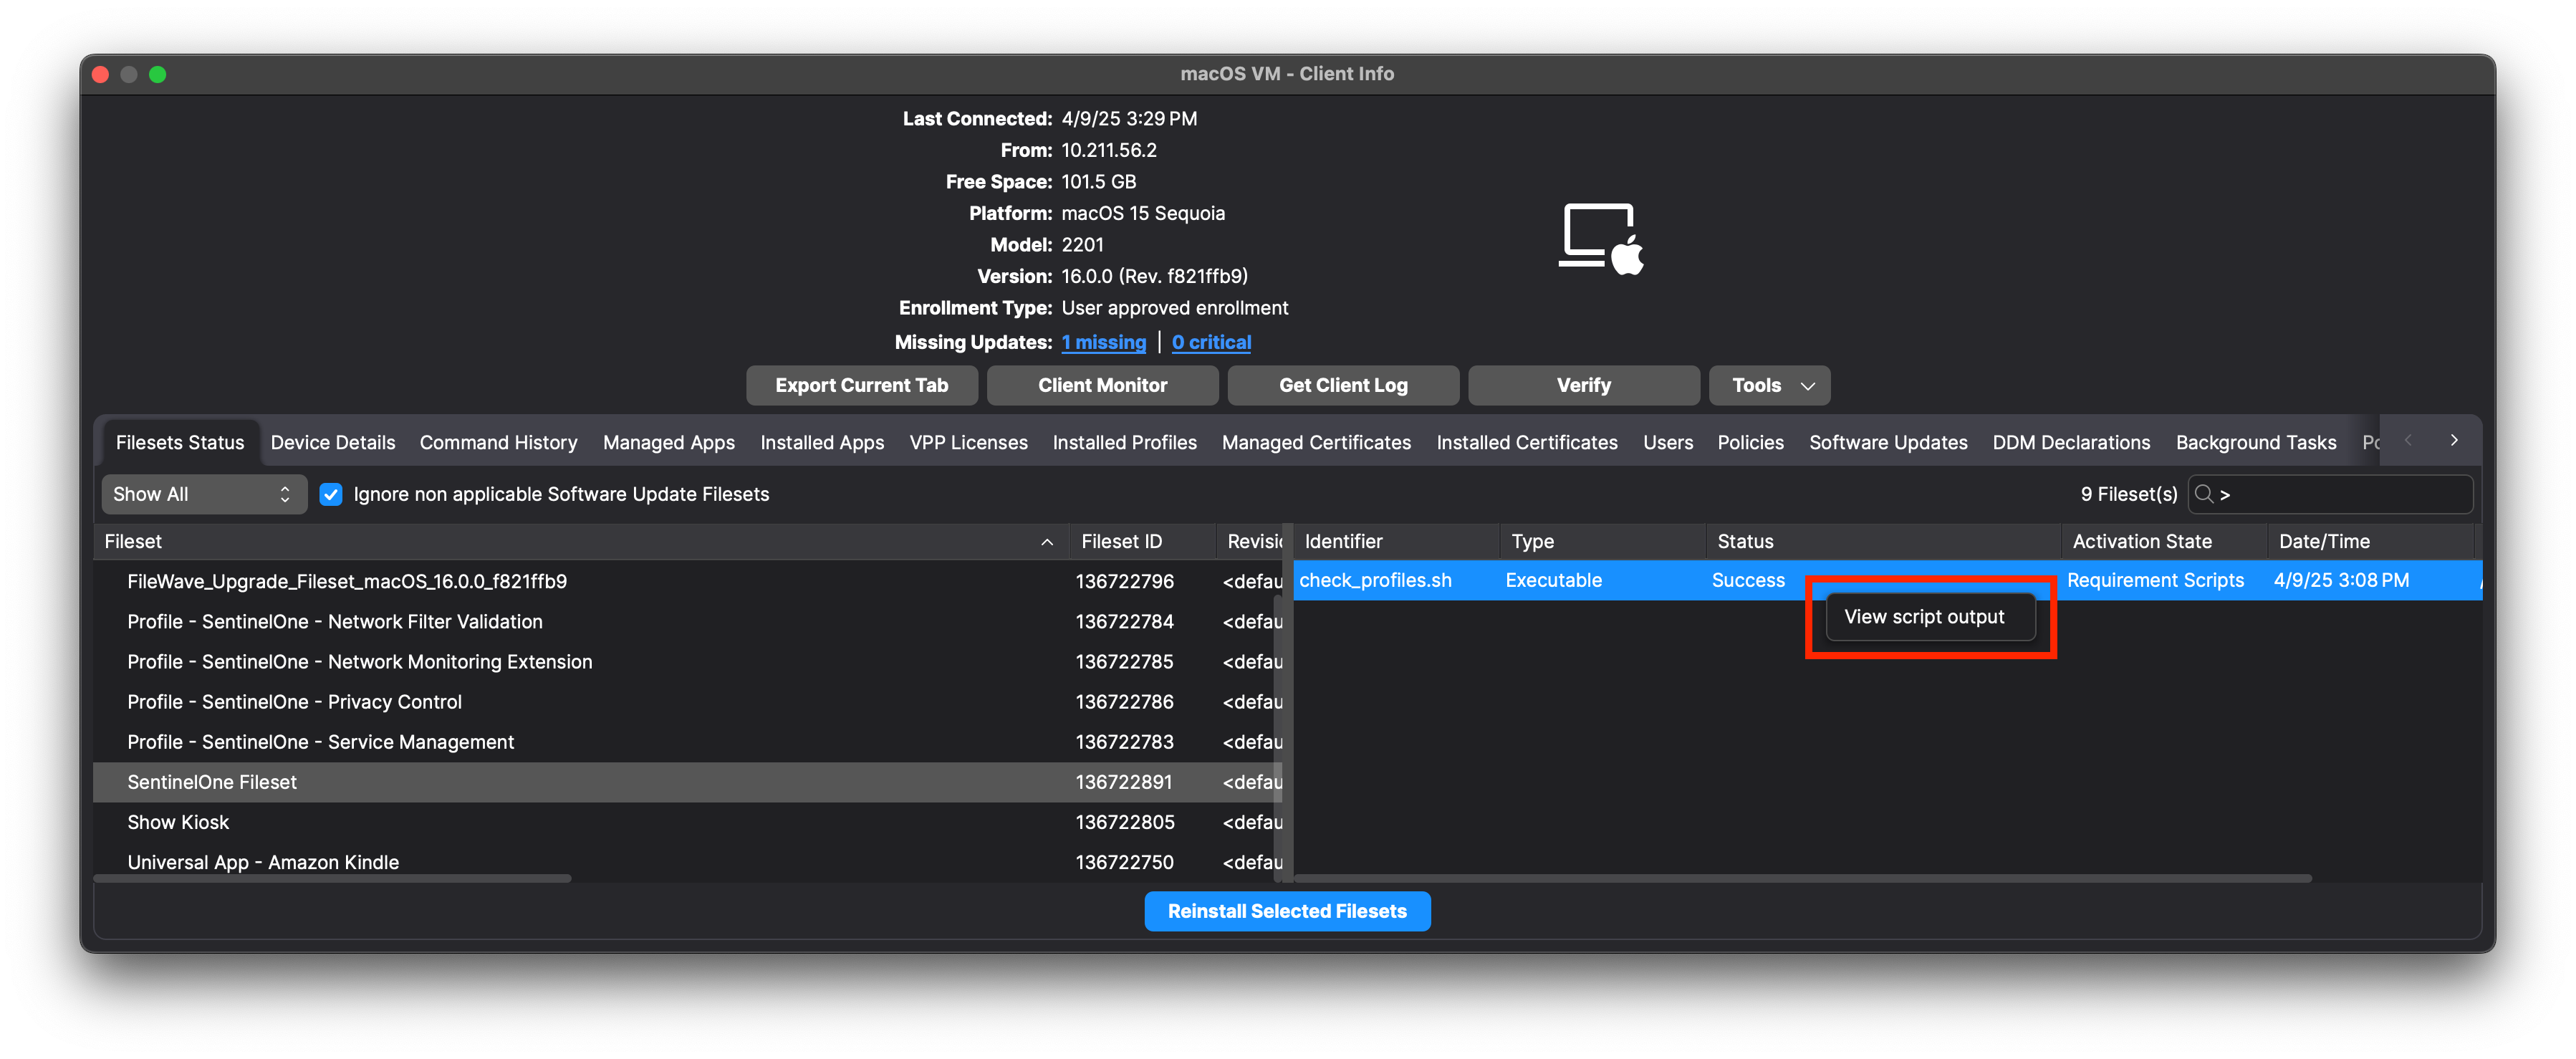
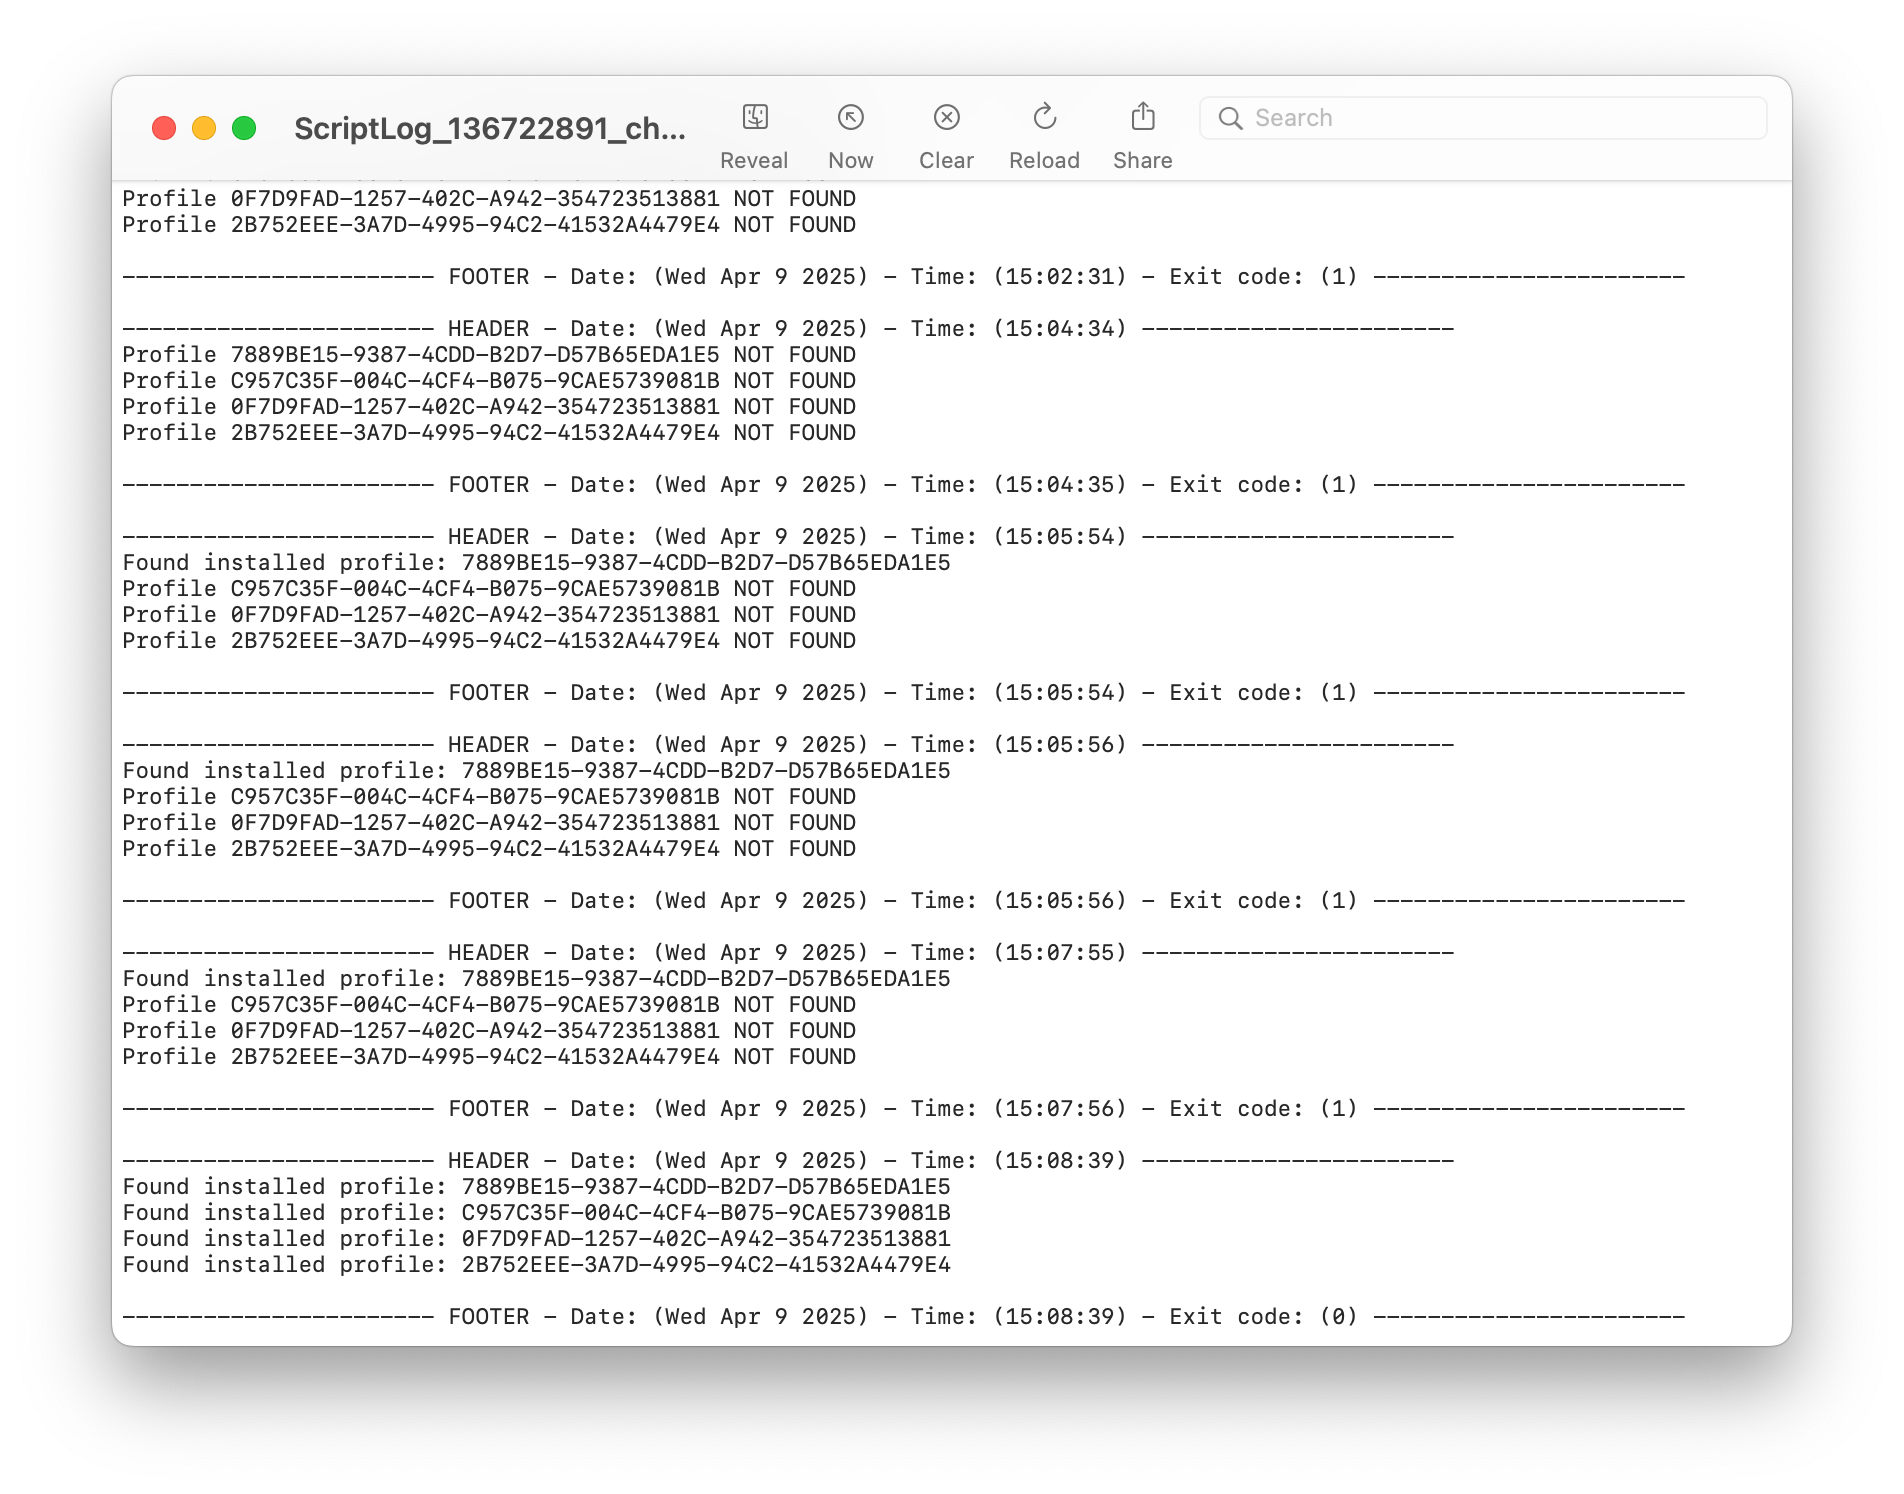
You'll notice that the script exited successfully (exit 0) once all the Profiles were found. The profiles are identified by their Profile ID. You can find this by double-clicking on the Profile in the Filesets view.
Profile Metadata
Service Management Profile
Service Management Profile
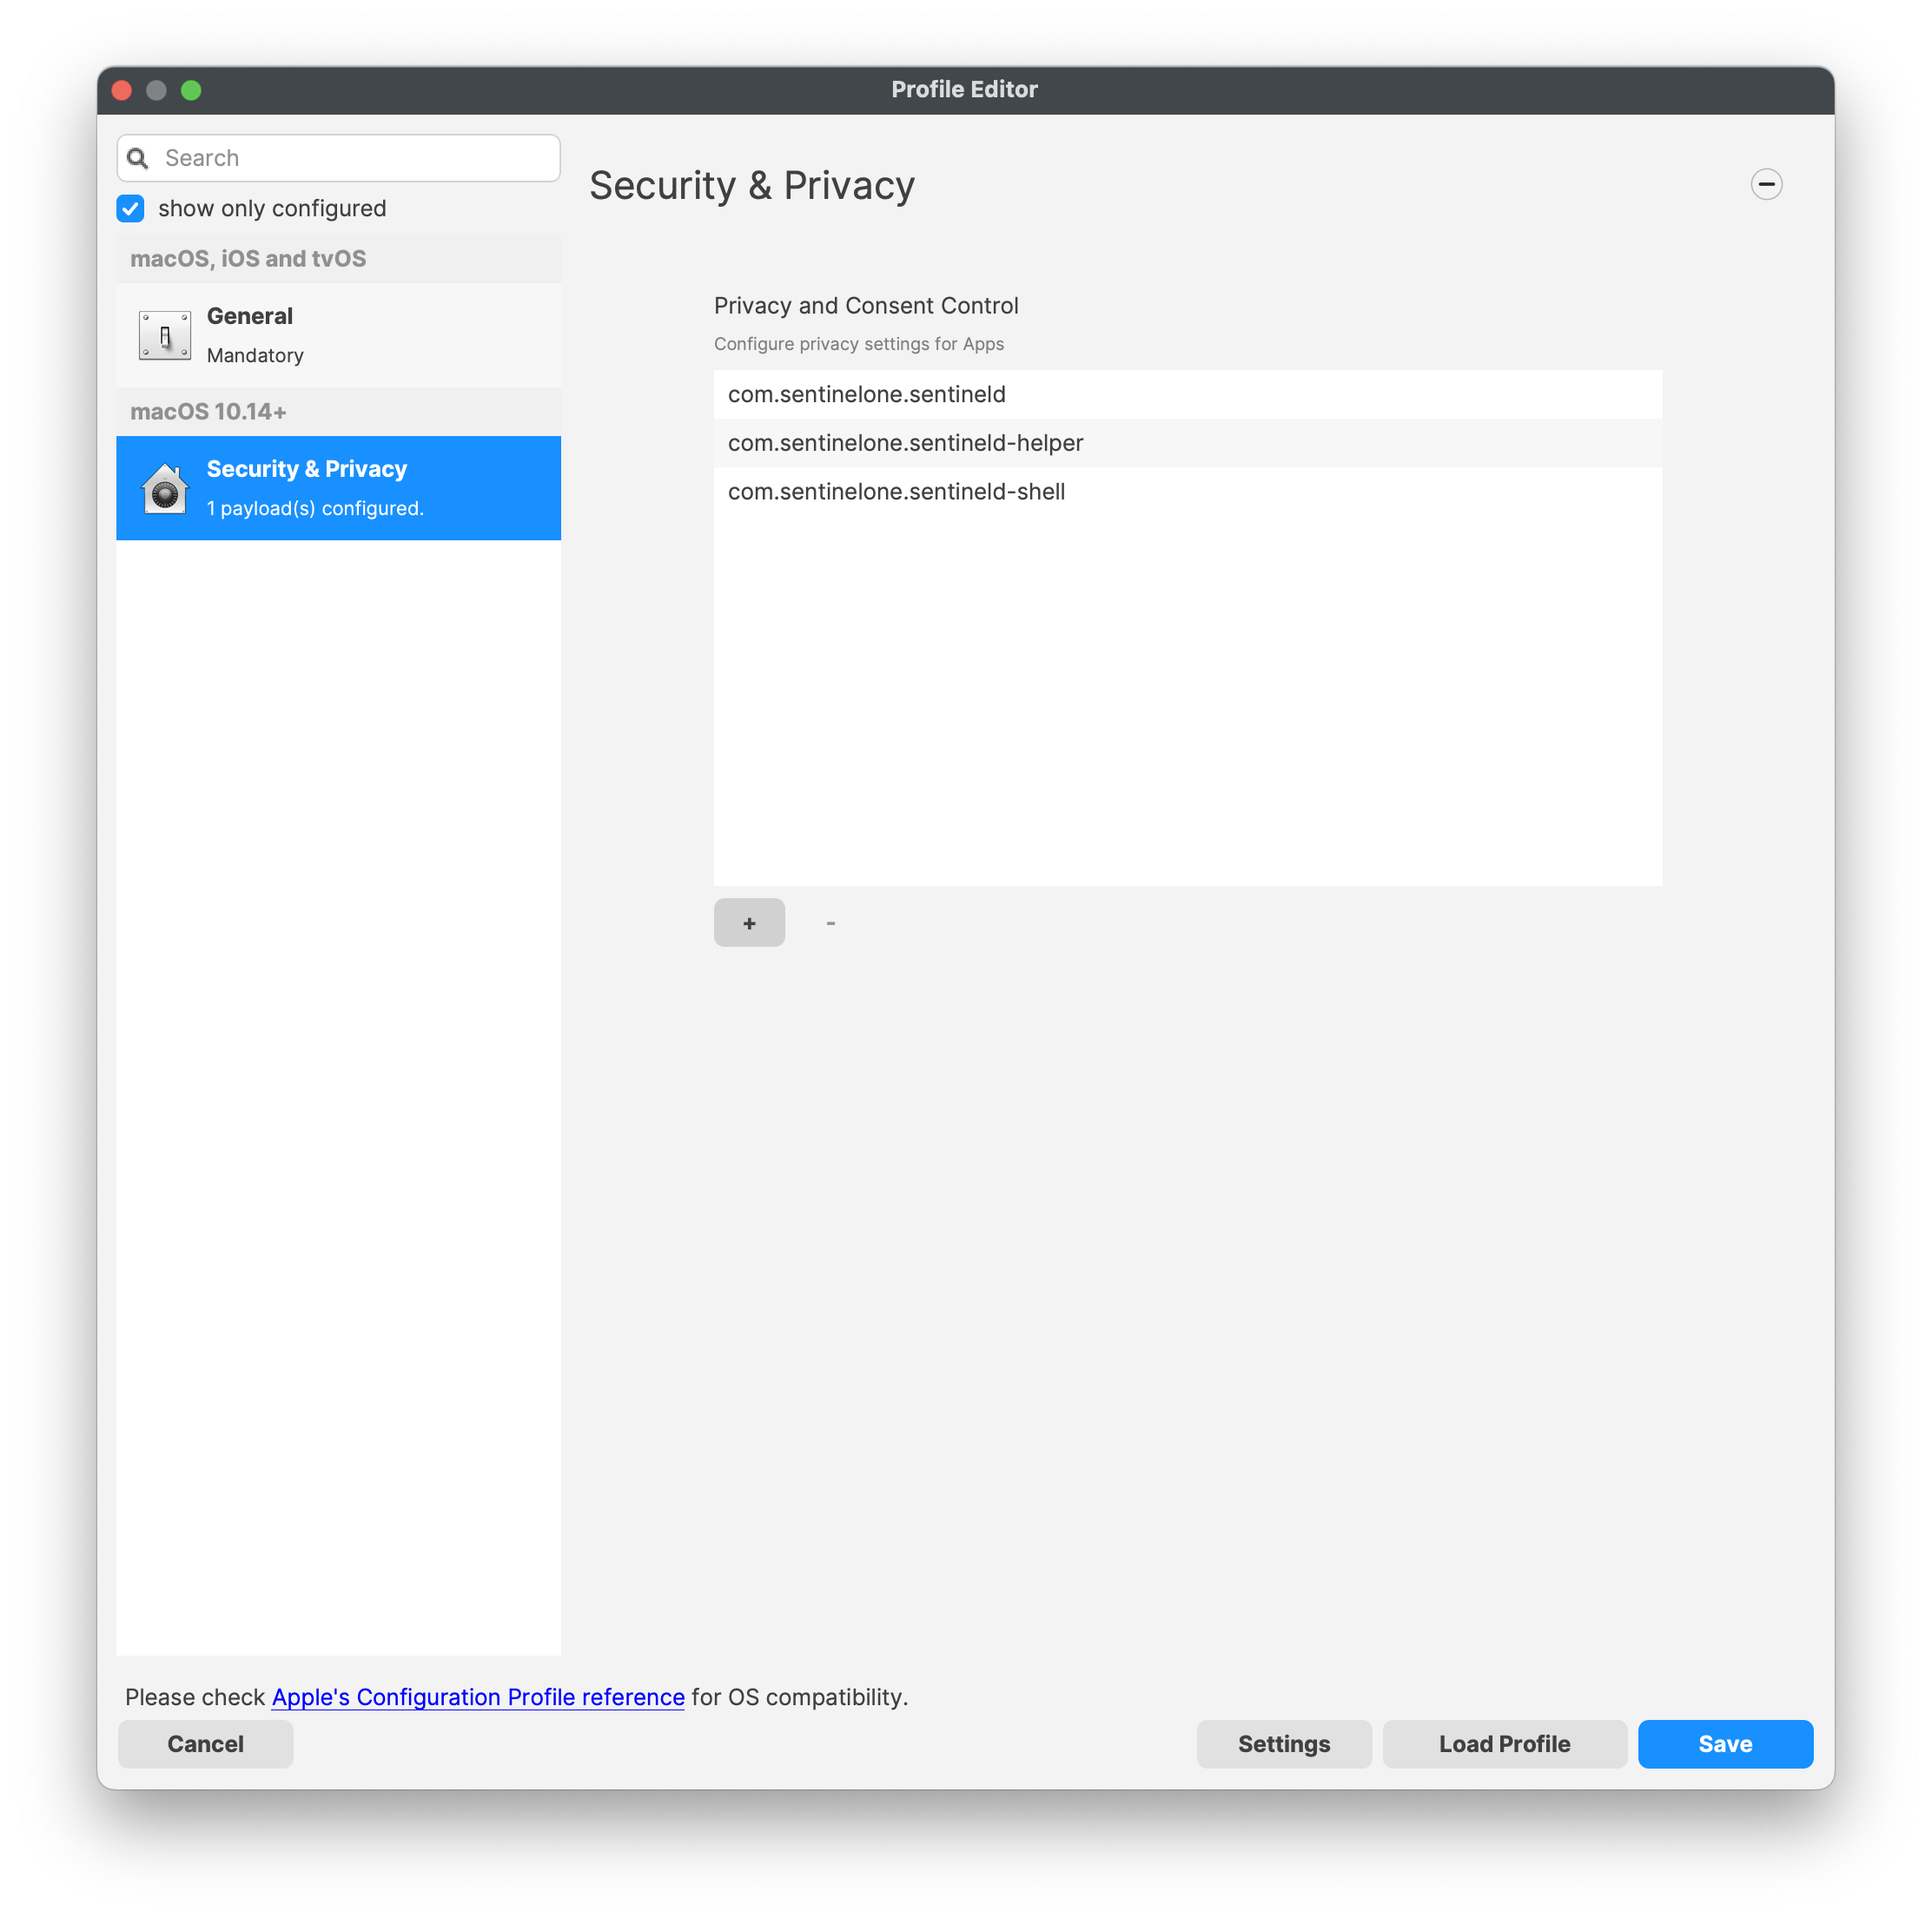
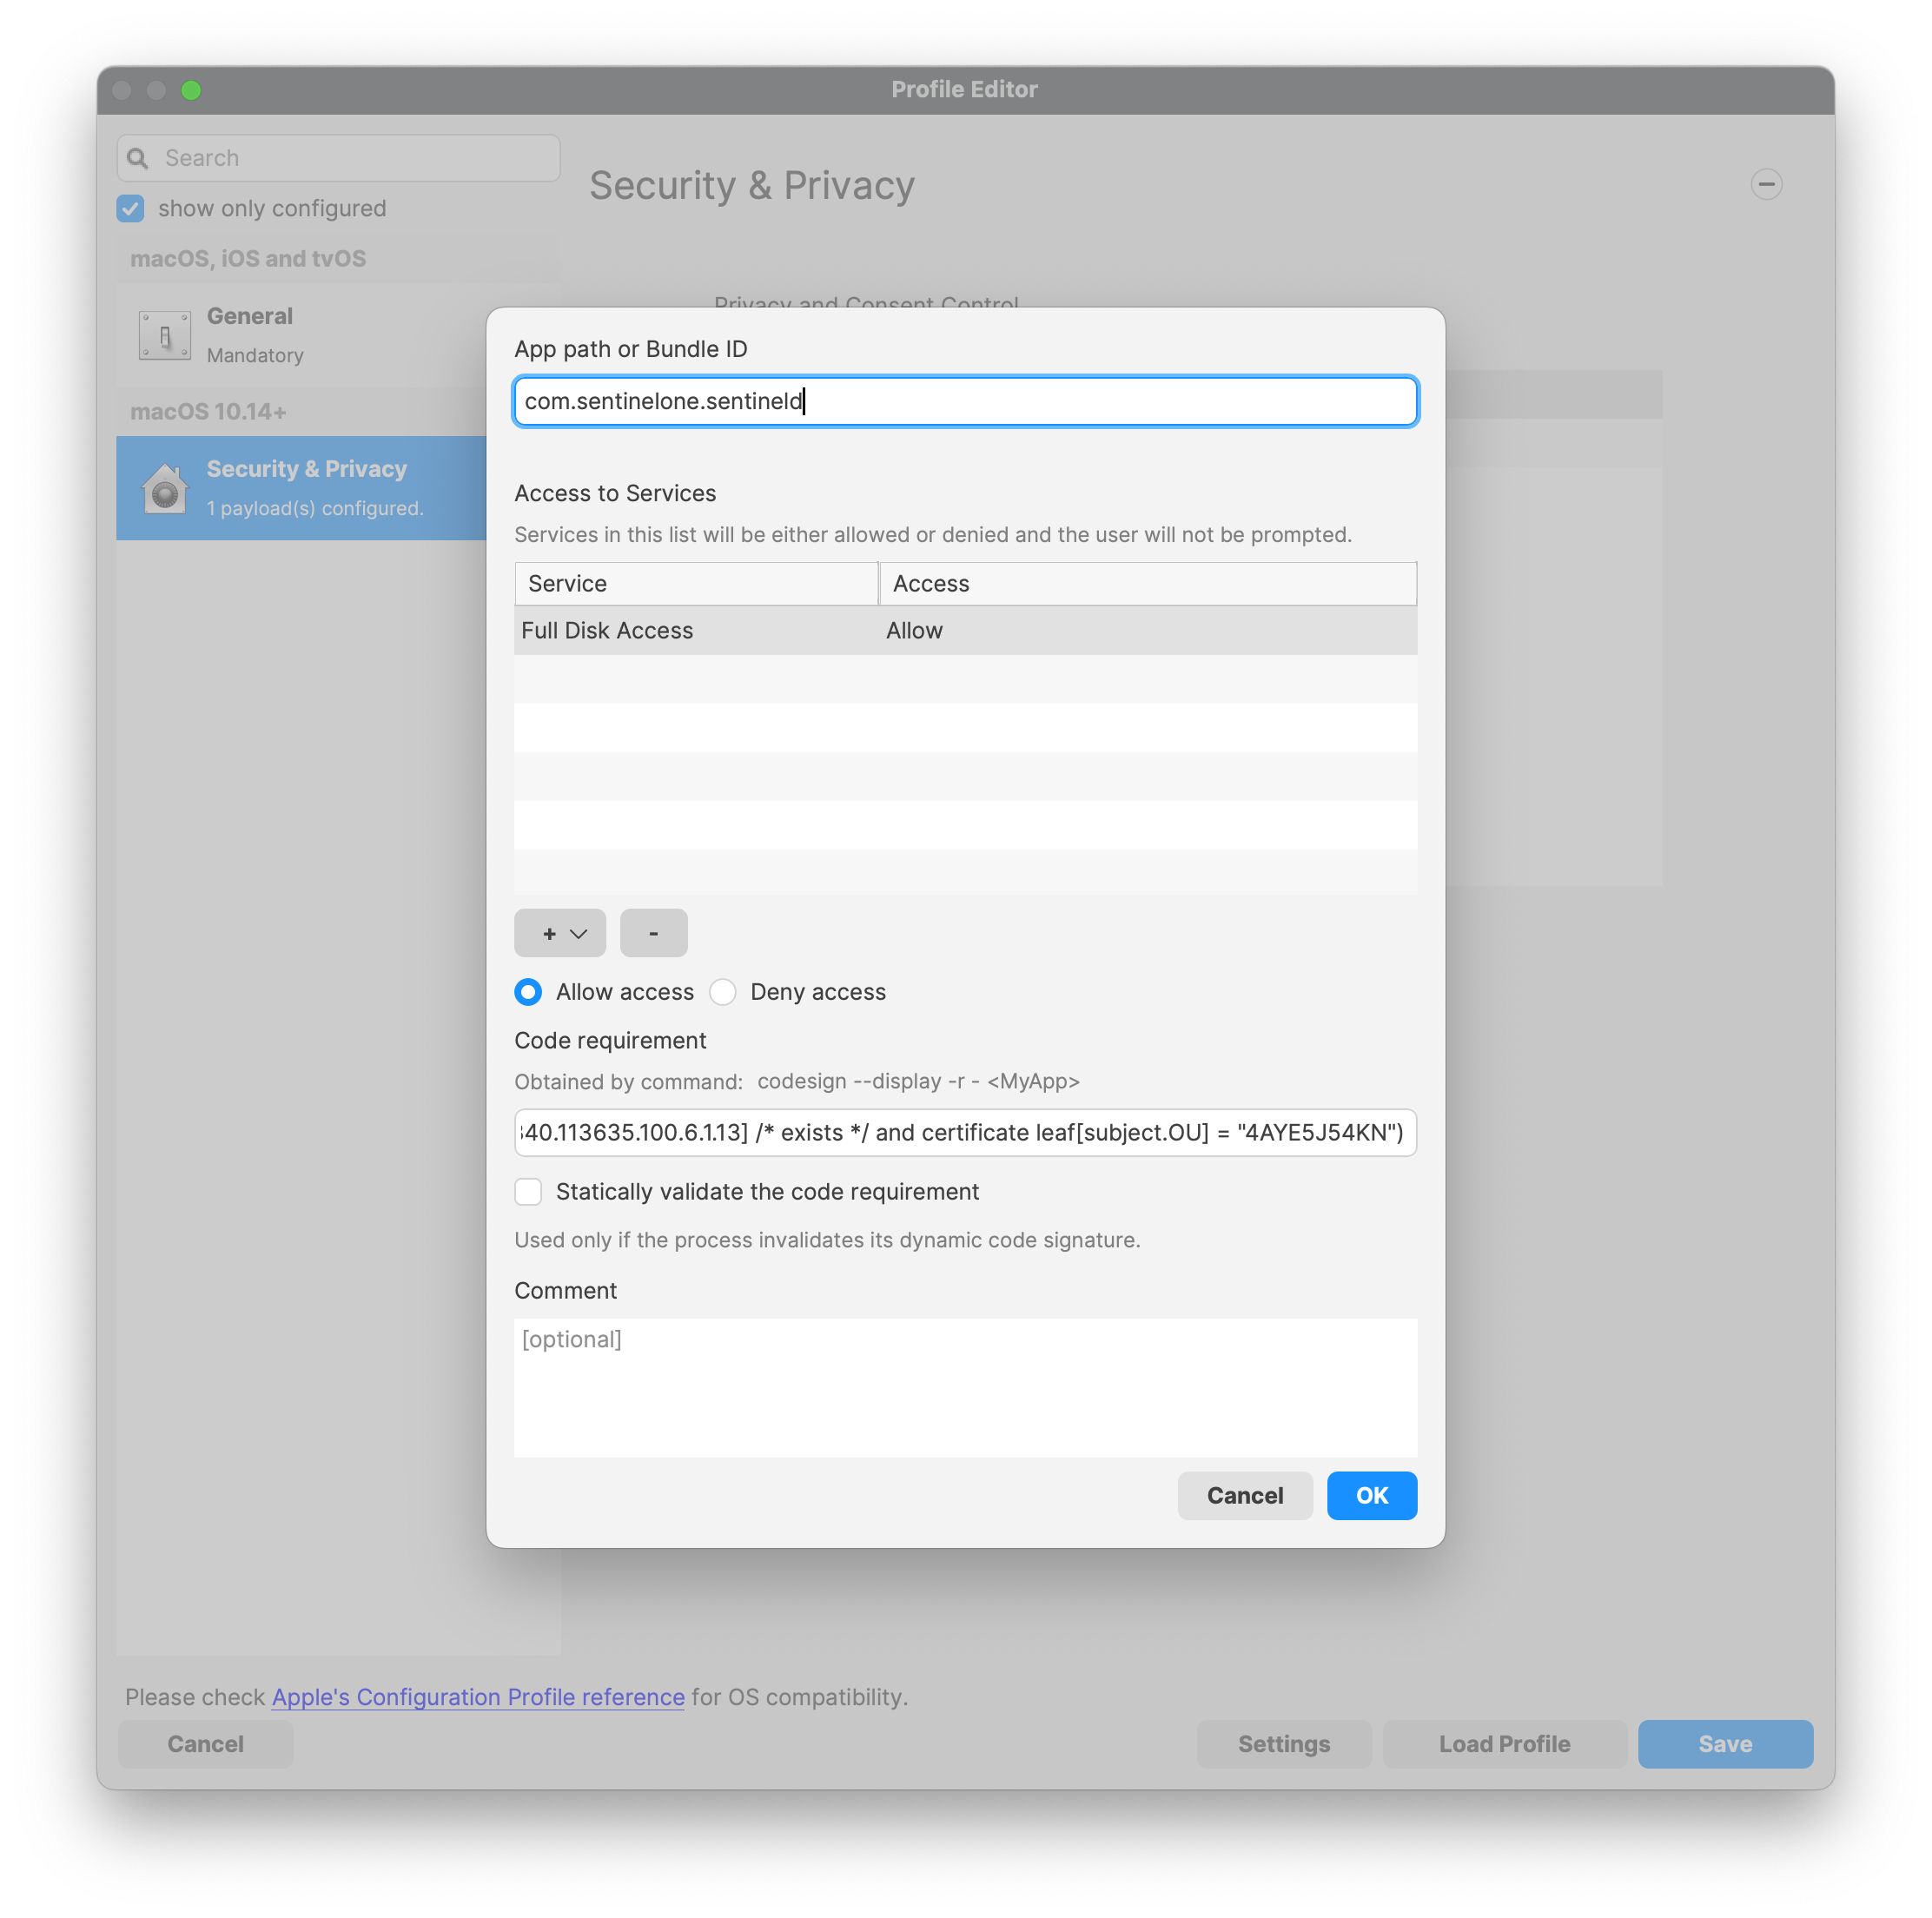
Privacy Control Configuration Profile
TCC Profile
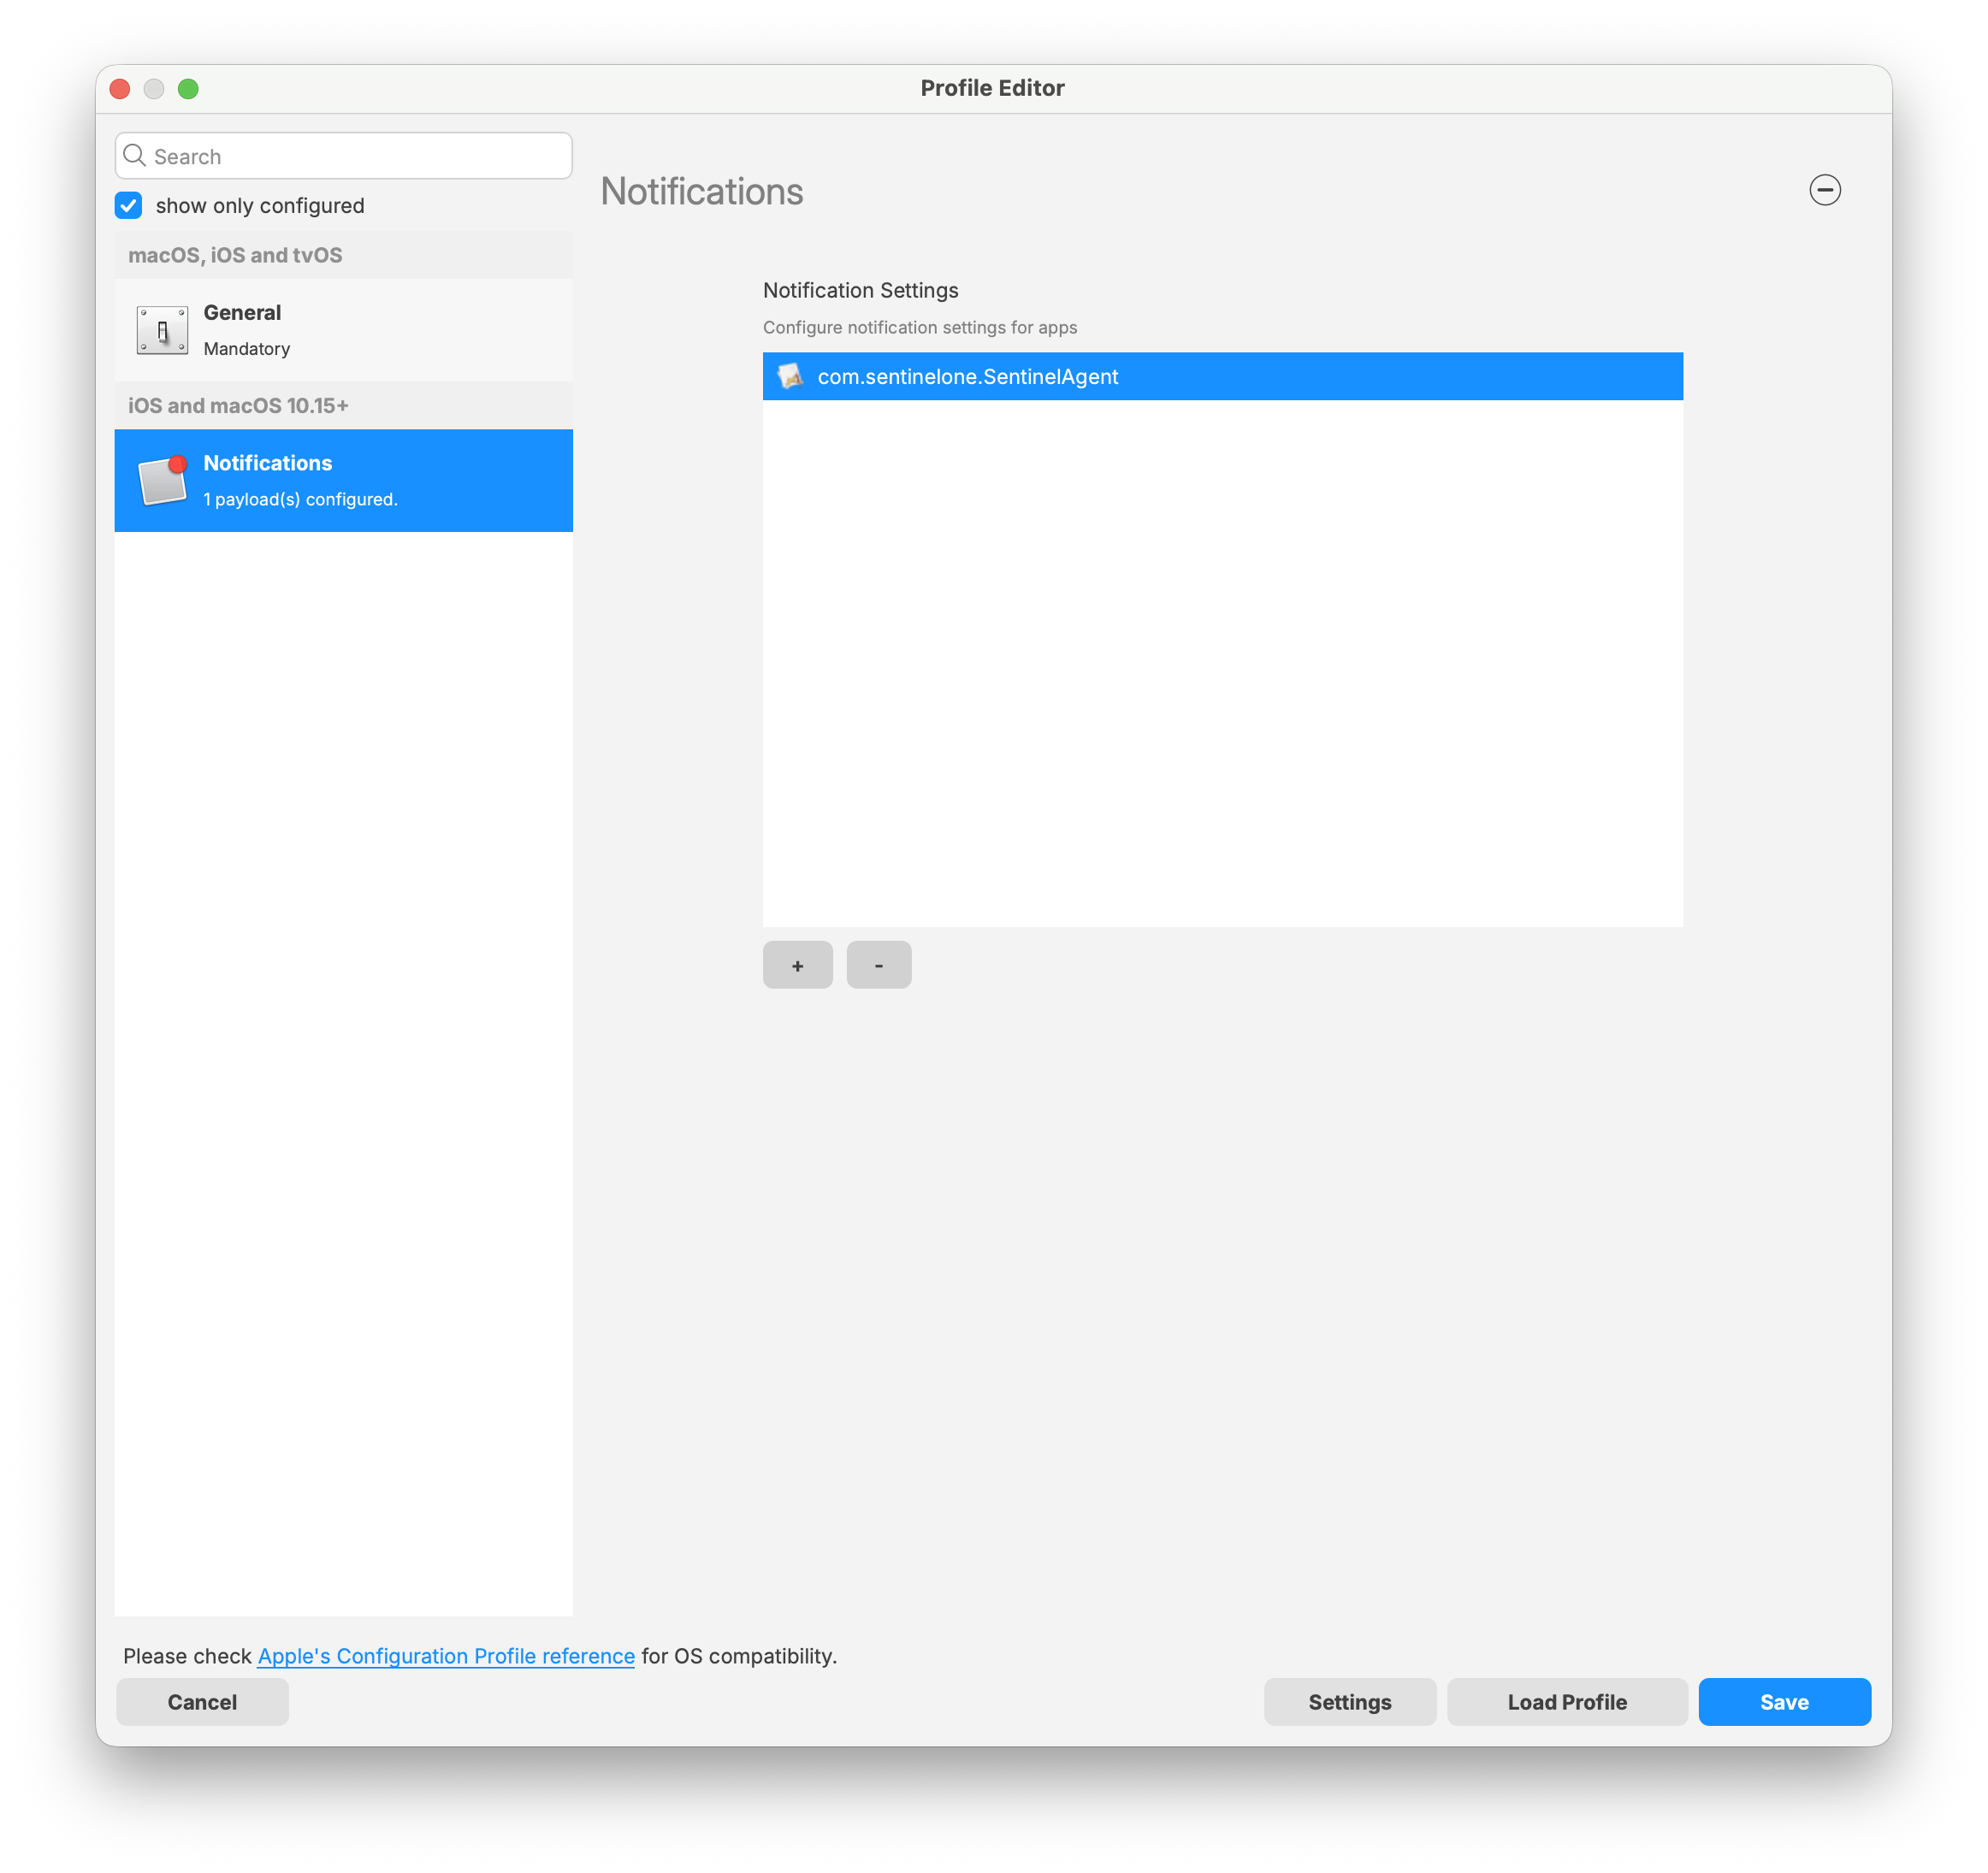
Notifications
Bundle Identifier: com.sentinelone.SentinelAgent
Notifications Settings
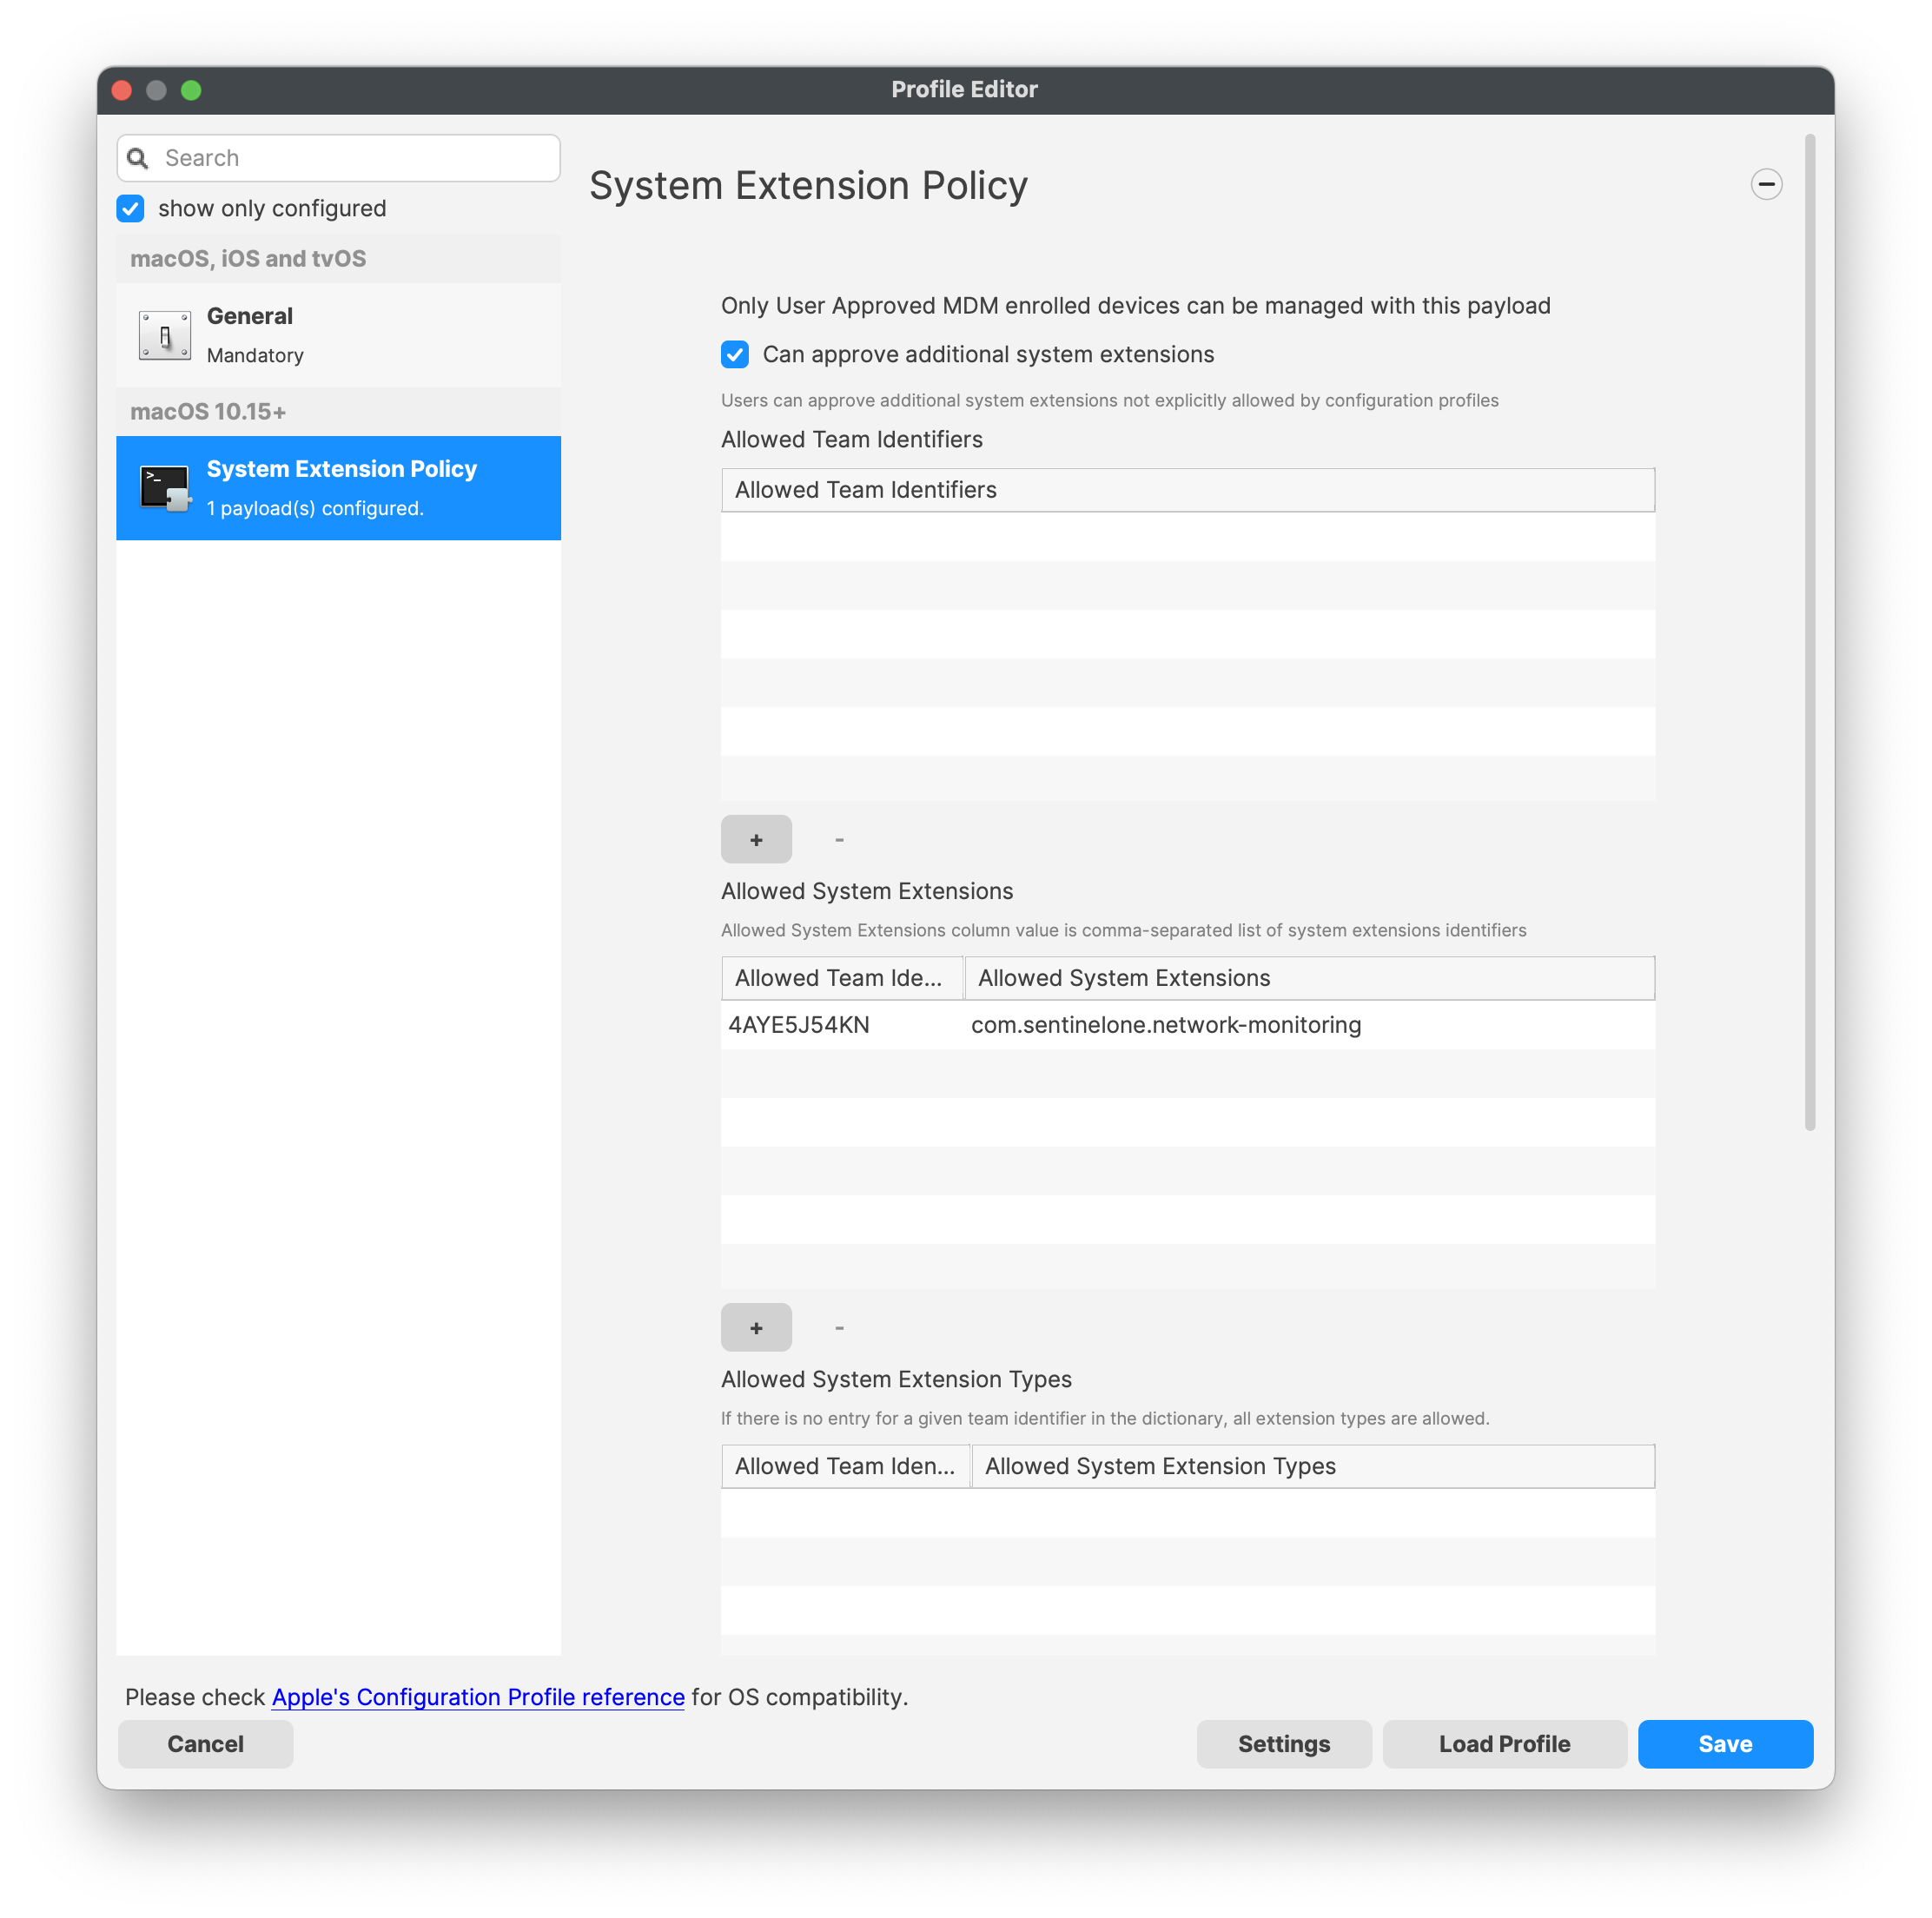
Network System Extension Profile
Team Identifier: 4AYE5J54KN
Allowed System Extensions: com.sentinelone.network-monitoring
System Extension Profile
Web Content Filter Profile
Network Filter Profile

No comments to display
In macOS 26, there's also a Notification toggle that needs turned on. Can this be edited/updated to include that profile, as well?
In reply to #1
I have updated with bundle identifier for the notifications setting, along with the profile in the zip.
No comments to display